1
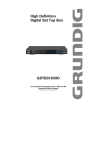
User’s Manual
20.1”
Waterproof
TFT
LCD
TV outdoor LCD TV
NKLT201WPDH
NKLT201WPDH7
Part No Safety Instructions
Contents
Safety Instructions
General Safety Precautions
Front & Rear Panel
Accessory
Remote Control Unit
Basic Remote Control Operation
Connecting to Watch TV,VCR or DVD
Changing the INPUT SELECT standard
PICTURE SELECTION
Changing the Picture Standard
Adjusting the Picture Settings
SOUND SELECTION
Changing the Sound Standard
Adjusting the Sound settings
Selecting the Sound mode(depending on TV mond)
Adjusting the Volume/Switching the Sound off Temporarily
SETUP SELECTION
Setup Settings(Search Setup)
Setup Settings(Channel Edit)
Setup Settings(System Setup)
TIME SELECTION
Time Setting
FUNCTION SELECTION
Function Setting
Teletext
Important note-in Connection with jacks
Appendix A: Troubleshooting
Appendix B: Specification
4
5-6
7
8
9
10-11
12-13
14
CAUTION
RISK OF ELECTRIC SHOCK
DO NOT OPEN
CAUTION : TO REDUCE THE RISK OF ELECTRIC SHOCK DO NOT
REMOVE COVER (OR BACK)
NO USER$SERVICEABLE PARTS INSIDE REFER SERVICING TO
QUALIFIED SERVICE PERSONNEL
15
15
16
16
17
17
18
20
22
23
24
25
26
27
28
General safety precautions
General safety precautions
Thank you for purchasing our product.
Before using it, please read this user's manual carefully and apply it correctly and safely.
Please keep this manual close to you so you can refer to it anytime after reading it.
Also, for the transportation of the product, please attach this manual without fail.
Please observe the notes below.
14. Do not install it at the unstable location such as on the bouncing prop or tilted place.
It may be tipped over as it loses balance or damaged as it is fallen down.
15.
Do not install it at the place with poisonous gas.
It may cause the fire.
16.
Do not install it at the location with continuous vibration.
It may be tipped over as it loses balance or damaged as it is fallen down.
17.
Do not install it at the place on the strong magnetic field or current field.
It may cause fire, electric shock or break down.
This equipment may be observed deterioration of the picture by electromagnetic radiation in electromagnetic environment.
18.
Fasten the wheel of the product or shelf with wheels when installing this product.
If it moves or is tipped over, it may be damaged.
19.
Do not leave it in the car under the burning sun for a long time.
The high temperature may distort the cabinet or the parts inside may be broken down or heated.
If you use this product in this condition, it may cause the fire, electric shock or breakdown due to the short circuit or
poor insulation.
1.
Use at the rated power voltage.
Use of non-rated voltage may cause fire, electric shock and breakdown.
2.
Do not open the cabinet and external cover.
The high voltage inside of this product may cause the electric shock.
3.
Do not remodel or disassemble this product.
Remodeling or disassembling in wrong method may cause fire, electric shock or breakdown.
4.
Do not insert or drop any foreign substance such as metals or flammable object inside from the air hole.
It may cause fire, electric shock or breakdown.
If any foreign substance is inserted inside of this product, turn off the power, pull the plug out of the socket
and contact the sales department. Do not use the product with the foreign substance in.
5.
Never touch the antenna lie or power plug if it stars to thunder.
It may cause the electric shock.
20.
Do not place any fire source such as candlelight close to this product or place it on this product.
If it is tipped over or fallen down, it may cause damage or fire.
6.
If any impact is applied, the parts inside of the product may be fallen out or broken to be the cause of fire, electric shock or breakdown.
21.
Do not place heavy objects on this product.
It may be tipped over as it loses balance or damaged as it is fallen down.
7.
Clean the dust on the power plug periodically.
The dusty power plug may cause the poor insulation due to the moisture to be the reason of fire.
22.
8.
Do not destroy, process, make closer to heating device, bend or twist forcibly, place any heavy object on nor
bind the power cord or power plug. If it is used in the broken condition, it may cause fire or electric shock.
Do not transport it with the power cord or the connection cable connected.
If you move this product with the power cord or the connection cable connected, the damaged power cord, connection cable or connection terminal may cause the fire, the electric shock or breakdown.
23.
9.
Do not touch the power plug with wet hands.
If you pull in or out the power plug with wet hands, it may cause electric shocks.
Pull the power cord out while holding the plug portion.
If you pull the power cord out by force, the cord may the fire or the electric shock.
24.
Do not climb on this product.
If you climb on it, it may damage or hurt it.
25.
2 persons or more shall transport the device, which is heavier than 18 kg.
If you drop or tip over the device, it may damage it.
The weight is indicated on the user's manual.
12. In case of malfunction, turn off the power switch immediately and pull out the power plug.
If this product is used in the abnormal condition such as damage to it, foreign substance inside of the product, generation of joints, smelling, smoking, overheating and non production of signal, it may cause fire, electric shock or breakdown.
Turn off the power switch immediately, pull the power plug out of the socket and contact to the sales store..
26.
Use the attached power cord and connection cable, or those, which are indicated on the user's manual.
If you do not use the designated power cord and connection cable, it may cause the electric shock or breakdown.
27.
Turn off the power switch when connecting the power cord or connection cable.
If you not turn off when connecting it, it may cause the electric shock or breakdown.
13 . Leave space 10 cm or more from the wall for the installation of the device.
Do not install it close to the wall nor block the ventilation of the air.
Insufficient ventilation or accumulated heat inside of the product may cause the fire.
28.
Do not use any chemical such as the paint thinner or benzine to clean the cabinet.
It may scratch the surface or disappear the indication to cause wrong operation, whch can be the reason for disorder.
29.
Clean the cabinet with 5~6 time diluted neutral detergent water on smooth cloth as stirring to remove the contamination.
After that, clean it with dry cloth to remove any stain.
10. Put the power plug in firmly.
Putting the plug incompletely may cause the electric shock or fire by the generation of heat.
11. Do not use any non-rated power socket with numerous devices jointed on one power socket or cable device.
The wire of non-designated capacity may cause the fire due to the generation of heat.
'
(
Accessory
Front & Rear Panel
Standard
Front
※ Connect a set of power cables between
White cable on the +12V signal, and
Black Cable on the GND signal.
Option
❶
1. Remocon senser (Red : Stand by, Green : Power on)
DC Power Supply
Rear
!
Wall mount
Lift
Stand
Power Sources-This product should be operated only from the type of power source
indicated on the marking label. If you are not sure of the type of power supply to
your car, consult your product dealer.
You must insert or replace the batteries in the remote controller when you:
Purchase the set.
Find that the remote controller is no longer operating correctly.
2
1
1. DC 12V
To input DC power from power outlet.
2. AV IN/SPK OUT
Video signals from a device, TV sound out.
3. COMPONENT
Video signals from a device with component outputs
4. ANTENNA JACK
Connect to an antenna or a cable TV system.
Use only Lithium Battery.
You open the battery lid
with coin.
!
*
3
• Wipe the battery dry cloth and set properly confirming ends(+,-).
• Use finger sacks or non-metallic tweezers.
• Keep the battery in a dark, cool and dry place.
• Do not throw the battery into fire, not recharge.
You can use your remote controller within a distance of 7-10m and an angle of 30
degrees from the left and right sides of the remote controller receptor of your monitor.
)
Remote Control Unit
POWER button (Turns the TV On and Off)
VIDEO button (Select AV1 signal)
SOURCE button (Select input source)
Q-VIEW Button (Quick view for previous channel)
F.CH Button (Add channel to Fav List)
A/D Button
CH.LIST Button
EPG Button (User can check about present channel, next
program list and information by selecting the EPG key)
Numeric Buttons (Direct Channel select.)
MENU Button (It displays all the functions that user can control)
TV/RADIO Button
+] Button
VOLUME Down[--] / UP[+
▲) / Down(▼
▼) Button
CH UP(▲
ENTER Button (Press to select the on-screen menu item)
MUTE Button (Press to temporarily cut of the sound)
INFO Button
EXIT Button
Still Button
M/S button (Sound Selection)
SLEEP Button
CCD/TXT button (Teletext display)
P.STD Button
S.STD Button
PC button (Not available)
SIZE Button (Not available)
LIFT Button
Basic Remote Control Operation
CH.LIST Button
User can add the wanted channel to favorite lists during watching TV.
•Press the CH.LIST key of remote control.
•You can select the Favorite list1 or 2,3,4 of wanting to add by using the CH▲▼ key
•You can add present channel at selected list by pressing ENT key.
(It is also possible at Channel Edit menu. Refer to the Channel Edit paragraph)
TV/RADIO Button
•If radio channel is provided, you can take radio channel after select RADIO mode by
pressing TV/RADIO key.
•It will press the TV/RADIO key of the remocon and it will be able to change with
RADIO mode, press TV/RADIO key one more time with TV mode again and it is changed.
Volume up(+) / down (-) Button
1)It adjusts the volume level of sound.
2) It is used to choose a specified mode in the main MENU by pressing VOL(+) button.
3) It controls the increase or decrease of each mode you selected.
Channel up (▲) / down (▼) Button
1) It is used to select the channel you want to watch on either upward or downward direction.
2) It makes the cursor to move while in main MENU.
INFO Button
Check the current program information, screen status, multi sound status and time.
EXIT Button
When you are satisfied with the settings, Press the EXIT Button repeatedly to return to
normal viewing.
Basic Remote Control Operation
Sleep Button
OFF → 10 → 30 → 60 → 90 → 120 → 150 → 180
The television is automatically turned off after an elapse of the set sleep time.
1) The set time ranges from 10 to 180 minutes, which is repeated in sequence each time
you press.
2) If you'd like to check the remaining SLEEP TIME after OSD disappears, press DISPLAY button.
Connecting to watch TV, VCR or DVD
Connecting the Aerial or Cable Television Network
To view television channels directly, a signal must be received by the set from one of following
sources:
An outdoor aerial
An indoor aerial (not recommendable)
A cable television network
P.STD Button
By pressing the P.STD button, sequentially select one of the 4 pre-sets picture standard.
•Standard : Select this mode to watch TV at standard state.
•Dynamic : Select this mode to watch in a room with bright illumination.
•Mild
: Select this mode when the room is dark or to lessen eye fatigue.
•User : Select this mode to view the picture to your set picture state preference.
S.STD Button
Whenever this button is pressed, the mode will be changed as follows.
STANDARD
MUSIC
MOVIE
SPEECH USER
1. In the first three cases, connect the aerial or network input cable to the 75 ohm coaxial socket
on the rear of the TFT LCD TV.
2. Press the TV button on the remote control.
LIFT (▲) / (■)/ (▼) Button
1) Press the ▲ button when you to move up lift.
2) Press the ■ button when you to move stop lift.
3) Press the ▼ button when you to move down lift.
Connecting the VCR, DVD or Other external devices
1. Connect video and audio cable according to the shape and color or the video / audio cable.
When an external devices is in MONO, the audio connection cable can be connected to
either the left and S.MODE / MTS should be set MONO.
2. For optimal visual image, use COMPONENT connector instead of video connector.
Connecting to watch TV, VCR or DVD
Changing the INPUT SELECT Standard
You can select the type of INPUT which best corresponds to your viewing requirements.
The following picture effects are available the order given:
Connecting a DVD Player (Connecting to Y, Pb, Pr)
1. Connect a set of audio cables between the component AUDIO IN jacks on the TFT
LCD TV and the AUDIO OUT jacks on the DVD Player.
2. Connect video cables between the Y, Pb and Pr inputs on the TFT LCD TV and Y, Pb
and Pr outputs on the DVD Player.
(Note : For an explanation of Component video, see your DVD Player's Owner's
manual.)
TV, AV1, AV2, COMPONENT
1. Press the SOURCE button.
Result : The INPUT SELECT menu is displayed.
2. Press the CH[▼] button.
3. Select to satisfy your preference by pressing the
VOL[ + ] or VOL [ - ] button.
4. When you have been finished, press the MENU
button repeatedly to return to normal viewing.
Changing the Picture standard
Changing the Sound Standard
You can select the type of picture which best corresponds to your viewing requirements.
The following picture effects are available the order given:
You can select the type of special sound effect to be used when watching a given broadcast.
The following sound effects are available in the order given:
STANDARD, DYNAMIC, MILD, USER
STANDARD, MUSIC, MOVIE, SPEECH, USER
1. Press the MENU button.
Result : The “PICTURE” menu is displayed.
2. Press the VOL[ + ] or VOL [ - ] button.
Result : The "Picture Mode" menu is activated.
3. Select to satisfy your preference by pressing the
VOL [ + ] or VOL[ - ] button.
4. When you have been finished, press the MENU
button repeatedly to return to normal viewing.
1. Press the menu button.
Result : The "PICTURE" menu is displayed.
2. Press the CH[▼] or CH[▲] button to select
"SOUND"
3. Press the VOL[ + ] or VOL [ - ] button.
Result : The "Sound Mode" menu is activated.
4. Press the VOL[ + ] or VOL [ - ] button.
5. Select to satisfy your preference by pressing the
VOL[ + ] or VOL[ - ] button.
6. When you have been finished, press the MENU
button repeatedly to return to normal viewing.
The sound settings can be adjusted to suit your personal preference:
Adjusting the Picture settings
Adjusting the Sound settings
Your TV have several setting which allow you to control
picture quality:
CONTRAST, BRIGHTNESS, COLOR,
SHARPNESS
1. Press the MENU button.
Result : The “PICTURE” menu is displayed.
2. Press the VOL[ + ] or VOL [ - ]button.
Result : The "Picture Mode" menu is activated.
3. Use the CH[▼] or CH[▲]button to select
setting menu.
4. Press the VOL[ + ] or VOL [ - ] button.
Result : The “Contrast” menu is displayed.
Result : The “Brightness” menu is displayed.
Result : The “Color” menu is displayed.
Result : The “Sharpness” menu is displayed.
5. Adjust to satisfy your preference by pressing the
VOL[ + ] or VOL[ - ] button.
6. Press the MENU button twice to exit and save the
changes.
'
Bass, Treble, Balance
1. Press the menu button.
Result : The "PICTURE" menu is displayed.
2. Press the CH[▼] or CH[▲] button to select "SOUND"
3. Press the VOL[ + ] or VOL [ - ] button.
Result : The "Sound Mode" menu is activated.
4. Press the CH[▼] button.
5. Press the VOL[ + ] or VOL [ - ] button.
Result : The “Bass” menu is displayed.
Result : The “Treble” menu is displayed.
Result : The “Balance” menu is displayed.
6. Adjust to satisfy your preference by pressing the
VOL[ + ] or VOL[ - ] button.
7. Press the MENU button twice to exit and save the
changes.
(
Selecting the Sound Mode(depending on TV mode)
The "M/S" button displays/controls the processing and output of the audio signal.
When power is switched ON, the mode is automatically preset to either "Dual" or "Stereo"
depending on the current transmission.
● If the receiving conditions deteriorate, listening will be easier if the mode is set to the "Mono"
position using the M/S button.
● If the stereo signal is weak (or if intermittent Stereo-Mono) and automatic switching occurs,
then switch to the "Mono" mode.
● When receiving mono sound in the AV mode, connect to the "L" input jack on the panels. If
the mono sound comes out only from the left speaker, then press the M/S button.
Setup Setting
You can scan the frequency ranges available on your
television in your country and store all the channels found
automatically.
The channels are stored in the order in which they
appear in the frequency bands. It is possible that the
automatically allocated numbers may not correspond to
those by which you wish to identify the channels.
If this is the case, you can then sort them manually.
Search Setup
It is used for channel search.
Adjusting the Volume/Switching the Sound Off Temporarily
You can adjust the volume by pressing the VOL[ + ] or
VOL[ - ] button on the remote control.
You can switch the sound off temporarily by pressing
the MUTE button on the remote control, for example
you may wish to answer the telephone.
1. Press the VOL[ + ] button to increase the volume.
(cursor moves to the right)
2. Press the VOL[ - ] button to decrease the volume.
(cursor moves to the left)
3. Press the MUTE button.
Result : The sound is switched off and
"
Mute On" is displayed.
4. When you wish to turn the sound back on at the
same volume as before, press the MUTE button
again (or either of the volume buttons).
*
Start Search
:
System
:
Auto Search
:
Manual Search 1 :
It starts channel search.
Select ATV Auto Search Mode
Auto Search the ON/OFF
It selects channel the DTV
Manual Search.
Manual Search 2 : It starts the ATV Manual Search.
There are two methods of Automatic Tuning and
Manual Tuning how to tune.
Automatic Tuning
•You should display the Main Menu, pressing the
menu key of remote control.
•You should select the Search Setup menu of the
Main Menu, pressing the CH▲▼ key.
•You should enter to the Search Setup menu,
pressing the ENT key.
•After selection the Start Search menu using the
CH▲▼ key, Channel search begin as pressing
the ENT key.
(System : Pal/Secam Auto search: On, Manual Search 1: All)
)
Setup Setting
Manual Search 1
Manual Tuning
•You should display the Main Menu, pressing the
Menu key of remote control.
•You should select the Search Setup menu of the
Main Menu, pressing the CH▲▼ key.
•You should enter to the Search Setup menu,
pressing the ENT key.
•You should select the Auto Search, pressing the
CH▲▼ key. (Default: ON)
•You should OFF to Auto Search, pressing the
Vol◀▶ key.
•You should select the Manual Search1, pressing
the CH▲▼ key. (Default: ALL)
•Desired TV channels can be selected by using
VOL◀▶ key or direct channel number key on
the remote control.
•After selection the Start Search menu using the
CH▲▼ key, Manual Tuning begin as pressing
the ENT key.
Setup Setting
Channel Edit
You can create four favorite list at this menu and
it is available to redefining the channel or
deleting the channel and locking the channel
of each list (All list, favorite list 1, 2, 3, 4).
You can set as the ENT key after selecting
the wanted function by using the CH▲▼,
Vol◀▶key.
All TV list
Fav List 1
Fav List 2
Fav List 3
Fav List 4
: It displays whole channel lists.
: It displays channel lists of the favorite list 1.
: It displays channel lists of the favorite list 2.
: It displays channel lists of the favorite list 3.
: It displays channel lists of the favorite list 4.
•Favorite List Name Edit :
It will use the Vol◀▶ from the Fav List 1,2,3,4 and it will be
able to enter with the Favorite List Name Edit.
The user wants it will be able to edit the Favorite List Name with
the name.
Setup Setting
•Sort: If you press INFO key, channels are sorted in
alphabetical. If you want to return, press Display
key one more time. Sorted information is not stored.
•Lock channels: It is available to lock or unlock
the resired channel. You can lock the channel by
pressing ENT key after select the channel. And the
check mark will be shown on the locked channel.
It should be input the password to relase the
locked channel.
•Favorite channels: User can make four favorite lists
which is composed of the most wanted channel. Each
list is able to have one hundred channels up to.
If you want to compose each favorite list 1, 2, 3, 4 you
can add by pressing the ENT key after selecting to
add the channel by using the CH▲▼ Vol◀▶ key.
Added channel is displayed as a check mark.
•Delete channels: If you want to delete some
channel, you can delete by pressing the ENT Key
after selecting the channel. If you want to return the
deleted channel, you should do channel search again.
•Channel Name Edit: The user wants it will be able to
edit with the name. When it selects channel which it
wants edit it will enter in Channel Name edit mode and
the user will be able to change a name with option.
•Channel Number Edit: The user wants it will
be able to edit with the Channel Number. It
enters into Channel Name Edit menus and
when it inputs a number key 4, it will be able
to use Channel Number Edit and again it
presses number key 4 and it goes back with
Channel Name Edit .
Setup Setting
System setup
•Change Password: You can change to the wanted password. The first default is“0000”. If you
don’t know the password, your right may be
restricted about several functions.
•Time Zone: If service provider offer GMT
(Greenwich Mean Time), user can set the time as
selecting just located region of themselves.
•Summer Time: You can select the summer time’
s ON/OFF for GMT by using the Vol+,- key.
•Factory Setting: To enter this menu, you should
input the password.
Factory Default: This is the function of returning to
the early state from the factory.
Delete all Lists: You can delete all the searched
channel lists.
Program Transfer: If user wants to copy present
perfect program of DTV to other DTV, user should
use this function.
(It needs exclusive program)
Channel Data Transfer: If user wants to copy present DTV’s channel list data to other DTV, user
should use this function.
(It needs exclusive program)
•TV Screen Format : You can select the Screen
Size among three options like letter box,
combined, pan scan.
•System Version: It shows about present version
information of the Software and firmware.
TIME Setting
1. Press the MENU button.
2. Press the CH[▼] or CH[▲] button to select "TIME".
3. Press the VOL[ + ] or VOL [ - ] button.
Result: The "Clock" menu is displayed.
4. Press CH[▼] or CH[▲] button to setting time.
Press the VOL[ + ] or VOL [ - ] button.
5. Repeat step 4 for "On Time" setting and
"Off Time" setting.
6. Press the CH[▼] or CH[▲] button to
select "Sleep Timer”
7. Press the VOL[ + ] or VOL [ - ] button.
Result: The "Sleep Timer" menu is displayed.
8. Press the CH[▼] or CH[▲] button to select “On Volume”.
Result: About clock setting menu is completed
Function Setting
Language Setting
1 Press the Menu button.
2. Press the CH[▼] or CH[▲] buttons
to select “FUNCTION”
3. Press the VOL[ + ] or VOL [ - ] button.
4. Result : The "OSD LANGUAGE" menu is
displayed.
5. Press the VOL[ + ] or VOL[ - ] button to
select which you want language.
→ English → Français → Deutsch →
← Português ← Español ← Italiano ←
E-SAVER
Automatic Power Off Function
Turned off automatically after ' minutes
in the absence of picture signal
1.
2.
3.
4.
Press the Menu button.
Press the CH[▼] or CH[▲] buttons to select "FUNCTION"
Press the VOL[ + ] or VOL[ - ] button to select "E-Saver” .
It will able to select want signal by using the VOL[ + ] or VOL[ - ] buttons.
AUTO OFF
If no signal the television will automatically turnd off after the 15 minute.
1. Press the MENU button.
2. Press the [▼] or [▲] button to select "FUNCTION” and press the [◀] or [▶] button.
Result : The "LANGUAGE” menu is active.
3. Press the [▼] or [▲] button to select "AUTO OFF".
4. You can select the desired action.
Teletext
Important note-in Connetion with jacks
Teletext is an information system that displays text on your TV screen. Using the teletext
control buttons you can view pages of information that are listed in the teletext index.
The TV menus are not available while viewing teletext pages.
Enter Text Mode
Make sure that the TV programme that you are watching transmits a teletext signal.
Press the CCD/TXT button to display the text page.
Exit Text Mode
Press the CCD/TXT button again. The text will disappear and the TV will return to the
programme you were watching.
Selecting a Page
Find the number of the page in the index and enter it using the numeric buttons. Teletext
pages comprise three numerics and all three have to be entered. The number of the
page will appear in the top left corner of the page.
The page counter will search for your page and display it once it is found.
Page Search While Watching TV
Some pages can take time to load. While waiting you can view the TV picture by mixing the text and picture.
Enter the page number.
Press the Red, Green, Yellow, Blue key to move to specific page.
'
< Be sure to screw up the connectors with indicated torque>
DISCLAIMER
Nanov Waterproof LCD TV/Monitor is intended for use in moist humid and
wet environmental conditions The brightness has been increased to make the
unit viewable outdoors during the day With the high brightness it can also
serve as a source of light at night in dark outdoor surroundings or the swimming
pool area However the unit should not be kept or used under direct sunlight as
it may cause overheating of the liquid in the LCD panel The device is not
designed to be used in hot areas where there could be overheating The operat$
ing temperature of the Device is $ centigrade to @' centigrade If the unit
begins to blacken due to exposure to direct sunlight we recommend letting the
unit cool down The unit will resume normal operation once it cools down This
devise in not intended to for use underwater The IP(* underwater models
must be installed by pre$approved professionals who use the instructions from
the installation manual received from the factory including instructions on how
to seal the connectors The company does not offer warranty on any opened
device which has water damage on model NKLTWP
(
APPENDIX A: Troubleshooting
APPENDIX B : Specification
If you have a problem setting up or using your LCD TV, you may be able to solve it yourself.
Before contacting customer service, try the suggested actions that are appropriate to your problem.
What you see...
Suggested Actions
Screen is blank and
power indicator is off
●
"NO SIGNAL” message
●
The image is too light or too dark
●
Adjust the Brightness and Contrast.
Vertical bars appear to flicker,
jitter or shimmer on the image
●
●
Adjust the Frequency function.
Auto Tracking will clear it automatically.
Horizontal bars appear to flicker, jitter or shimmer on the image.
●
Panel
Ensure that the power cord is firmly
connected and the LCD TV is on.
Ensure that the signal cable is firmly connected to the
PC or video sources.
● Ensure that the PC or ideo sources are turned on.
In/Out
TV Signal
Adjust the phase function and then adjust the clock
function.
● Auto tracking will clear it automatically.
Screen is blank
●
Image is not stable and
may appear to vibrate
●
●
Image is not centered on the screen.
●
●
The monitor is using its power management system.
● Move the computer's mouse or press a key on the
keyboard.
Problem
Auto tracking will clear it automatically
Check that the display resolution and frequency from
your PC or video board is an available mode for your
monitor.
On your computer check:
Control Panel, Display, Settings
System
Others
20.1" TFT Color LCD
408.0mm x 306.0mm
16.7 million
0.6375 x 0.6375 x RGB mm
640 x 480
Video
Composite Input
DVD (Y,Pb,Pr)Input
Audio
RF Out
Antenna
Color System
Sound System
Stereo Type
Text
s75 ohm Coaxial cable
PAL/SECAM
B/G, D/K, I, L
NICAM, A2
Teletext
Tuner
Tuning Range:VHF
UHF
Transmission
Channel Bandwidth
VHF/UHF
174MHz ~ 230MHz
470MHz ~ 862MHz
DVB-T (Terrestrial)
7,8 MHz
Certifications
Power Consumption
Screen Control
Weight
Remote Controller
Dimension
CE
DC 12V, 95W
On Screen Display Menu
Net : 6.8Kg
Yes
499(W) X 409.5(H) X 66.5(D)mm
Auto tracking will set the best position automatically
Adjust the horizontal and vertical position.
Suggested Actions
●
Sound level is too low
●
Sound is too high pitched or
too low pitched
●
*
SPECIFICATION
Panel Type
Display Area
Display Color
Pixel Pitch
Recommended Resolution
Check the volume level.
If the volume is still too low after turning the control to
its maximum, check the volume control on the
computer sound card or software program.
Adjust the equalizer to appropriate level.
)