1
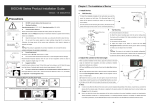
iFace Series Installation Guide
Version:1.2.1
Date:Oct. 2010
About this Guide
This guide provides actual installation instructions only. For information
regarding user instructions, please refer to “iFace Series User Manual”.
iFace Series Installation Guide
Content
1 System Configuration........................................................................1
1.1. Notice about installing..............................................................1
1.2. Installation Environment ..........................................................3
1.3 View of operation panel.............................................................4
2 The illustration of system construction ...........................................6
2.1 The illustration of system construction......................................6
2.2 The sketch map of communication ............................................7
3 Installation...........................................................................................8
3.1. Installation Steps.......................................................................8
3.2 Conect with other devices..........................................................9
3.2.1 Door sensor connection ........................................... 11
3.2.2 Exit-button connection.............................................. 11
3.2.3 Time Ring connection ...............................................12
3.2.4 Door lock connection ................................................13
3.2.5 Ethernet connection..................................................17
3.2.6 RS232 connection.....................................................18
3.2.7 RS485 connection.....................................................19
3.2.8 Wiegand Output Connection ...................................20
3.2.9 Power Connection.....................................................21
3.3 Fix the device...........................................................................22
4 Check after Installation ...................................................................23
5. Others...............................................................................................24
5.1 Reset ........................................................................................24
5.2 Anti-dismantle button ..............................................................25
5.3 U flash disk using ....................................................................25
5.4 Reserve Battery........................................................................26
I
iFace Series Installation Guide
1 System Configuration
1.1. Notice about installing
This product a mass-produced product. It strictly follows to the
criteria of manufacture and inspection of China, U.S.A, and EU.
This file contains important information. It is better for you to read
it carefully prior to use. If you ignore it, the incorrect installation
may cause the unit damage. Although we could do our best to
offer you service, the neglect to the file could cause unwanted cost
for you.
1. Before installation, please make sure the power is cut off,
because
it is very dangerous if the power is on. The
short-circuit of power cable may cause the core parts damage.
2. All exposed part of connection wire end can not be exceeded
5mm to prevent the bared wire accidental connection which
leads to machine break down. And also suggest using different
colour cable to connect.
3. In the place where the static is strong or in winter, please
connect the grounding firstly, in order to prevent the instant
mass static damage the machine.
4. Connect power supply with device in the last for the wiring
connection. If you find any unusual thing occur, please firstly
cut off the power, then go to examine. Keep in mind: wiring
operation under power on will lead to machine sudden damage;
we are not liable for damages and trouble due to such
1
iFace Series Installation Guide
operation.
5. After installation finish, when go to test the exit-door button,
please keep a personal in the outside, because sometimes the
accidental issue can bring on you are not able to go outside.
6. Our equipment offer an automatically function, please after the
installing finish. Run the auto-test function to confirm the installation
finish .
7. We recommend using above the 12V/3A direct-current supply
for access control device, electricity lock better to powered by
12VDC, and no more than 1.5 A electric current At this time,
the electric current of supply should be above1A than lock
power. If the parameter of lock power surpasses this scope,
please connect technical personnel. If the power had not met
above requests, it possibly causes to be unable normally to
drive the electricity lock, even damage the device.
8. Before device to be connected please read and always follow
"Quick connect Guide" closely. Because the wrong wiring will
cause the core block and sensor to burn out, insult in device to
break down, at this cause we are not liable for any damages
and trouble.
9. If the space between power adapters and device is too long,
please do not use the twisted-pair or other type ferrules for the
power wire. When the power wire is choused, you should
consider attenuation of voltage which has passed long distance
transfer.
10. Please use specialized RS485 cable and the RS232/485
converter with power to hookup the network, the bus structure
apply to connect with each device. When a long cable is used
to transfer signal, it is need to connect a matching resistance to
2
iFace Series Installation Guide
receiver, and its value is 120Ώ.
For other matters not covered in detail herein, please refer to the User
Manual, Software Instructions, and appendixes related to this
equipment.
1.2. Installation Environment
Recommended location:
Install the iFace indoors at least 10
feet (3m) away from windows, and
6.5 feet (2m) away from light
fixtures. Preferable light intensity
should range between 0-800 LUX.
1200+ Lux
10Lux
0-800Lux
NOT Recommended locations:
Direct sunlight
Outdoors
Direct sunlight
thru window
3
Indirect sunlight
thru window
Too close to
light fixtures
iFace Series Installation Guide
1.3 View of operation panel
Front view
LED light
TFT touch screen
Fingerprint Sensor
Baseline
Integrated
RF
Card
Module Read Section
Touch Keypad
Camera
Side view
Power key
Reset key
USB
4
iFace Series Installation Guide
Back view
Battery slot
Power
TCP/IP
USB
connection terminal
Loudspeaker
5
iFace Series Installation Guide
2 The illustration of system construction
2.1 The illustration of system construction
6
iFace Series Installation Guide
2.2 The sketch map of communication
1 Fingerprint machine directly connects with PC through RS232 or
TCP/IP.
TCP/IP or RS232
PC
2 Fingerprint machine connects with PC through RS485 network.
RS485
PC
RS485 Switch
…
RS232
3 Fingerprint machine connects with PC through TCP/IP network.
Switch
TCP/IP
…
TCP/IP
PC
TCP/IP
7
iFace Series Installation Guide
3 Installation
3.1. Installation Steps
1. Affix the paper template to the wall and drill holes within the
three marked circles on the paper template.
We recommend affixing the template about four (4) feet (1.2m)
above the ground, assuming the average height of your users is
5-6 feet tall(1.5m-1.85m).
2.Now affix the mounting plate on the wall by drilling three (3)
screws into the three (3) circles marked on the paper template.
3. After installing the back cover, ensure it will be stable, solid and
non-loosening.
8
iFace Series Installation Guide
3.2 Conect with other devices
Caution: Do not to connect peripheral equipment before the
power of the device is cut down, otherwise it is possible to
damage the device badly.
Please follow instruction to connect peripheral equipment。
①
②
③
④
⑤
⑥
⑦
⑧
⑨
Door sensor connection (Sensor, GND)
Exit-button connection ( Button ,GND)
Alarm connection ( NC2,COM2,NO2)
Door lock connection ( NC1,COM1,NO1)
Ethernet connection ( RJ45-1, RJ45-2, RJ45-3,RJ45-6)
RS232 connection ( 232T,232R,GND)
RS485 connection ( 485A,485B)
Wiegand output connection ( WD0,WD1,GND)
Power connection ( +12V,GND)
Power
9
TCP/IP
USB
iFace Series Installation Guide
The definition of terminal connection :
From left to right
1
NO2
2
COM2
3
NC2
4
Sensor
5
GND
6
Button
7
NO1
8
COM1
9
NC1
10
485-
11
485+
12
GND
Connect to Cable Bell
Tie up
together
Connect to Door sensor
For Door sensor and release
button
Tie up
together
Connect to Release button
Connect to Lock
RS485 communication
Connect to RS232 and Wiegand
GND
13
TXD
14
RXD
15
WD0
16
WD1
17
SGND
Connect to screen wire
18
GND
Connect to Power GND
19
+12V
Connect to Power +12v
RS232 communication
Wiegand out communication
10
Tie up
together
Tie up
together
Tie up
together
Tie up
together
Tie up
together
iFace Series Installation Guide
3.2.1 Door sensor connection
The door sensor is used to detect the door open-close state ,
terminal can monitor if the door has been unauthorized open
through the door sensor, at this time it can output a alarm signal,
moreover, terminal can trigger prompt warning if the door is not
close tightly.
3.2.2 Exit-button connection
The exit-button is installed for in-door operation. When the switch
of the button is close, the door will open. The distance is
approximately 1400mm from ground to exit-button bottom. Make
sure that the exit-button position is to align correct, upright and the
connection is accurate and reliable. (Unused exposed end of
cable should be cut off, and use insulating tape to wrap it.)Pay
attention to electromagnetic disturbance. (For example: The light
switch, the computer and so on)
Door Sensor
Button
Power Supply
11
iFace Series Installation Guide
3.2.3 Time Ring connection
Connect the electrical bell to the fingerprint machine, when arrive
the appoint time, the fingerprint machine will send signal to trigger
relay。The terminal supports both Normal-Open bells and
Normal-Close bells at the same time.
①Normal-Open bells
iFace
Bell
Power supply
②Normal-Close bells
Bell
iFace
Power supply
12
iFace Series Installation Guide
3.2.4 Door lock connection
The way of installing door lock depends on the type of lock and
local condition. Internal resistor which comes from long distance
transfer should be taken into consideration when selecting the
cable of electric power. The door lock should be installed reliable
and stable .Ensure the wiring is correct. For the strike lock and
electromagnetic lock, you should pay attention to positive and
negative terminal connection. The unused bare end of wire should
be cut off and use insulating tape to wrap it. The delay time of
strike lock is adjustable according to different conditions.
z When the Access Control System connected with Electric lock,
to prevent the self-inductance EMF to affect the access control
system, you need to parallel one FR107 diode (do not reverse the
polarity) . Please use the equipped diode in the package.
Select electric lock :it is better to use strike lock for the two
–direction opening glass door (both open to inside or outside
direction ) ,for the single opening wood door in company internal ,
we recommend to use magnetic lock, the magnetic lock also be
called as electric magnetic lock,. The magnetic lock is more
reliable than the strike lock, but the strike lock is much safer than
the magnetic lock. In the small living community, it is better to use
strike lock and magnetic force lock. The electric control lock gives
out higher noise; the electric control lock is commonly used to
building communication. Now there is a soundless electric control
lock which is able to be applied. Please pay attention, the lock is
made of iron and easy rust, so you must beware of not exposing it
13
iFace Series Installation Guide
to water or harsh condition, there are some other electric locks
available, we don’t recommend you to use them.
Connect with electric lock
The Normal-Open lock is open when the power is on. The
Normal-Close lock is closed when power is on. The machine
supports both of the two kinds of locks at the same time. The way
of lock connection changes with the type of lock. For NO lock, the
NO terminal will be used; for NC lock, the NC terminal will be
used.
This access control machine is powered by DC12V and work
current 400mA. If the lock work electric power is DC12V and the
work current is less than 1000mA, the fingerprint machine and
lock are able to be powered by one adapter together, please
refer to table 1, 2.
In the following three cases, we recommend that fingerprint
machine and lock are powered separately.
1)The working voltage of the lock is DC12V, but the current
difference of the fingerprint machine and the lock doesn’t exceed
1A.
2) The lock voltage is not DC12V.
3) The distance between lock and fingerprint machine is too
far.
14
iFace Series Installation Guide
NC LOCK
DC12V
Picture1 Power by one supply
NO LOCK
DC12V
Picture2 power by one supply
15
iFace Series Installation Guide
Lock Power
DC12V
NC LOCK
Picture 3 The terminal and lock powered by independent adapters
NO LOCK
DC12V
Lock Power
Picture 4 The terminal and lock powered by independent adapters
Note: Please use the diode FR107 delivered with the equipment
as the diode indicated in the figure above. Be careful not to
reverse its polarity.
16
iFace Series Installation Guide
3.2.5 Ethernet connection
The background PC software can communicate with device via
TCP/IP communication method to exchange data and remotely
manage.
The terminal provide two ways connect Ethernet.
1) The terminal connect with PC through cross cable。
IP:192.168.1.101
Mask:255.255.255.0
IP:192.168.1.100
Sub Mask:255.255.255.0
PC
iFace
2)The terminal connect with PC through network and HUB to
create a local network。
PC
Switch
17
iFace Series Installation Guide
3.2.6 RS232 connection
The background software can communicate with the equipment to
upload and download records by the RS232 communication
means.
Terminal connection definition
PC Serial Port
iFace
RXD
TXD
TXD
RXD
GND
GND
iFace
PC Serial Port
Note:Don’t upload or download facial module through RS232,
because the large data will effect the transfer speed.
18
iFace Series Installation Guide
3.2.7 RS485 connection
When the RS485 is used for networking, the bus network
architecture must be used for wiring. Any RS485 communication
line consists of a group of twisted pairs, and signal is transferred
with the help of the voltage difference between two
communication lines. However, differential interference will arise
between the two signal lines when signal is being transferred. To
eliminate differential interference, add a bias resistor (terminal
matching resistor) to the circuit. It is unnecessary to add any
terminal resistor in general, except that the RS485 communication
distance is over 100 meters. In this case, terminal matching
resistors must be added to the terminal devices at both the start
and end of the RS485 bus.
Terminal connection definition
Terminal
Function
485+
RS-485 communication +
485-
RS-485 communication -
Note:Don’t upload or download facial module through RS485
because the large data will effect the transfer speed.
RS485
RS485 Switch
PC 机
…
RS232
面部机
19
面部机
iFace Series Installation Guide
3.2.8 Wiegand Output Connection
The equipment provides standard Wiegand26 output, which can
be connected to most of the current access controller, in the same
way as connecting an IC reader or a password keyboard.
Generally, it is preferable to limit the length of any connection line
to an access controller within 90 meters. (A Wiegan signal
extender can be used for a longer transmission distance or a
place with strong interference.)
Note:
1)The distance between device and access controller or card reader
shouldn’t be over 90 meters (If a longer distance is needed or there is
interference in using environment, please use Wiegand signal de lay.).
2) To ensure the stability of the Wiegand signal, the device must share the
GND with controller or Wiegand reader.
3) If the distance of Wiegand output or 485 communication is over 90 meters,
in order to reduce the interference caused by the long distance, it is
suggested to use the cable with shield and connect the shield cable to the
SGND terminal.
20
iFace Series Installation Guide
3.2.9 Power Connection
The device’s working voltage is DC12V,,with working current
500mA, standby current 50mA has provided two ways to connect
power, please select one referring to the actual.
1.Terminal connection, Make sure the connection as the
Diagram (Don’t connect the poles in reverse.).
2.Slot connection: Insert the plug of DC12V adapter into the
power slot directly.
Power Slot
DC 12V
Slot connection
Terminal connection
21
iFace Series Installation Guide
3.3 Fix the device
1. Ensure to plug all the patch correctly?
2. Hang the iFace on the mounting plate (top side first). Please
see figure ①.
3. Then secure the iFace to the mounting plate with a screw from
below. Please see figure ②.
4. After installing the back cover, ensure it will be stable, solid and
non-loosening.
①
②
22
iFace Series Installation Guide
4 Check after Installation
Upon completion of installation of the whole system, check
whether the installation is correct before power-on. Check whether
the lock drive and other devices can work normally. For more
information, please see the User Manual and Software
Instructions.
1)
Upon power-on, the indicator begins to blank in green.
2)
Enter Menu -> Auto Check.
3)
Enter Menu -> User Management -> Add User -> Register
Face to register a face template. Test the access controller
and its lock through face verification.
4)
Delete the registered face template if there is no problem.
23
iFace Series Installation Guide
5. Others
5.1 Reset
Due to operation error or other accidence, which leads the
machine not to work, you can restart machine through reset key。
① take a small tool which diameter is no more than 2mm。
② find reset mark of “res” on the left small hole on the bottom of
device, see following figure。
③Use the tool plug into the hole refer to the picture on right , then
plug out. The machine is able to restar。
Reset
24
iFace Series Installation Guide
5.2 Anti-dismantle button
Anti-dismantle button is on middle of device, whose function is
realized by back-cover pressing the anti-dismantle button. When
the device is being dismantled, it will send a alarm signal through
the terminal.
Anti-dismantle button
5.3 U
flash disk using
① there is a mini-port of USB, please see figure circle on the left。
② USB can be used to upload and download data by U disk,。
25
iFace Series Installation Guide
USB Port
5.4 Reserve Battery
Work principle
Before use, make sure the reserve battery is installed properly.
Whenever use power supply or reserve battery, you need press
power key to turn on the terminal. In normal state, When the
power cut down, the reserve battery will switch into discharge
state to power on the terminal, In power off state, when the
power cut down, the reserve battery will not switch into discharge
state to power on .If you want to power on the terminal , you need
press power key to turn on the terminal.
26
iFace Series Installation Guide
Battery slot
Power key
Technical parameter:
Charge time
Less than 4 H
Discharge
time
More then 5.5 H
Working
environment
0℃~50℃
Relative
humidity
10%~90%
Storing
environment
Please store the battery when the discharge
capacity is full.,and the environment is 20℃±5℃。
Cycle age
Cycle times of charge and discharge≥300 times
Notice:
There is a danger of battery exploding, leak, fever, fire, break, if
you don’t read the notice carefully.
Do Not use it over 50℃;
Do Not inverse polarity connection;
Do Not put the battery into water or let it to get wet;
Do Not use and store battery near heat-generating
machine ( such as fire or heater);
27
iFace Series Installation Guide
Do Not throw batteries into fire or hot battery;
Do Not use wire or other metal short the positive and
negative terminal.
28