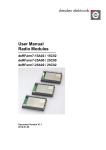
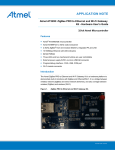
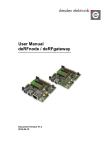
Download DevelopmentKit ZigBee 2-4 GHz
Transcript
User Manual deRFdevelopmentKit ZigBee 2.4 GHz for evaluation of radio modules and the ZigBee PRO stack Document version V1.0 2013-02-28 User Manual Version 1.0 2013-02-28 deRFdevelopmentKit ZigBee 2.4 GHz Contents 1. Overview ......................................................................................................................... 4 2. Glossary .......................................................................................................................... 6 3. Features .......................................................................................................................... 7 4. Hardware description ....................................................................................................... 9 4.1. deRFmega128 radio modules ................................................................................ 9 4.2. deRFnode boards ................................................................................................. 10 4.2.1. Connecting the radio module to the deRFnode board ............................... 11 4.3. deRFusb-23E00 JTAG radio stick ........................................................................ 12 4.4. deRFextract Tool .................................................................................................. 13 4.5. SAM-ICE adapter ................................................................................................. 14 4.6. Accessories .......................................................................................................... 15 4.6.1. Cables .................................................................................................... 15 4.6.2. CD content ................................................................................................ 15 5. Preparing and running the WSN Demo application ........................................................ 16 5.1. Installation and startup procedures ....................................................................... 16 5.1.1. Java and BitCloud WSN Demo application installation .............................. 16 5.1.2. Connecting the WSN Demo coordinator.................................................... 17 5.1.3. USB driver installation ............................................................................... 18 5.2. WSN Demo application ........................................................................................ 20 5.2.1. Overview WSN Monitor ............................................................................. 21 5.2.2. Node timeouts ........................................................................................... 23 5.2.3. Connecting WSN Monitor to the WSN Demo Coordinator ......................... 24 5.2.4. Network startup ......................................................................................... 25 5.2.5. Monitoring WSN Demo application activity ................................................ 27 5.2.6. Identifying nodes ....................................................................................... 27 5.2.7. Sensor data visualization .......................................................................... 27 6. Developing custom network applications and programming .......................................... 28 6.1. Software packages ............................................................................................... 28 6.1.1. Native examples ....................................................................................... 28 6.1.2. MAC-based examples ............................................................................... 31 6.1.3. BitCloud-based examples ......................................................................... 34 6.2. Development tools ................................................................................................ 39 6.2.1. AVR development ..................................................................................... 40 6.2.2. ARM development..................................................................................... 51 7. Analyzer ........................................................................................................................ 62 7.1. Perytons Analyzer ................................................................................................ 62 7.2. BitCatcher ............................................................................................................ 64 8. Revision notes ............................................................................................................... 65 9. References .................................................................................................................... 65 www.dresden-elektronik.de Page 2 of 66 User Manual Version 1.0 2013-02-28 deRFdevelopmentKit ZigBee 2.4 GHz Document history Date 2013-02-28 Version 1.0 www.dresden-elektronik.de Description Initial version Page 3 of 66 User Manual Version 1.0 2013-02-28 deRFdevelopmentKit ZigBee 2.4 GHz 1. Overview This document is intended for engineers and software developers evaluating and operating sensor networks designed in compliance to ZigBee® specifications and the IEEE 802.15.4™ standard. The deRFdevelopmentKit ZigBee 2.4 GHz serves as a development environment for quick and easy start-up, development and evaluation of ZigBee sensor networks. The kit contains a complete development environment for a wireless sensor network based on ZigBee. If you require more than the three nodes of the kit, you can order additional deRFnodes and deRFmodules to connect as many sensors or actuators as your setup requires. The kit provides all the software you need to evaluate and develop nodes that operate within a ZigBee PRO network. The kit CD contains an extensive software package with many example applications that cover the typical IEEE 802.15.4 features from simple point-to-point connections to network applications with routing and beacons. Documentation, data sheets and manuals of the particular hard- and software components are also included on the kit CD. The three nodes of the kit are delivered as coordinator, router and end device preprogrammed with the WSN Demo application of Atmel's BitCloud® Software Development Kit (SDK). The Java based GUI allows to monitor all sensors of each node, the radio signal strength (RSSI) and the network topology. With the deCONZ GUI a powerful ZigBee commissioning tool is also part of the kit. This free version is limited to support 5 nodes only. It has no limitation in functionality. deCONZ provides support for monitoring, reporting, control and commissioning of any ZigBee sensor network. Included in the deRFdevelopmentKit is an analyzer stick (USB radio stick) with a 30-day trial license of Perytons network and protocol analyzer software (full version). With Perytons analyzer tool low level data transport and network structures can be observed. The different protocol modules allow the graphical representation of the packet content for each layer of a wireless radio stack up to the ZigBee ZCL clusters. The ZigBee specifications are published and maintained by the ZigBee Alliance and not part of this manual. A great number of implementations of this specification exist from different manufactures. One implementation - the BitCloud Stack published by Atmel - will be discussed in detail in this document. Figure 1: Structure of a ZigBee mesh network (source: [1]) www.dresden-elektronik.de ZigBee coordinator ZigBee router ZigBee end device information flow Page 4 of 66 User Manual Version 1.0 2013-02-28 deRFdevelopmentKit ZigBee 2.4 GHz The BitCloud stack provides the network functions for mesh networking, reliable data transport, low power operation and many of the ZigBee Cluster Library clusters. Any node using those clusters can operate manufacturer independent and can be fully controlled by the deCONZ application. deRFtraining – Workshop Smart Wireless Solutions For an introduction into wireless network communications dresden elektronik offers one-day workshops for ZigBee and 6LoWPAN. The ZigBee workshop is based on the DevelopmentKit ZigBee 2.4 GHz. The theoretical parts in the morning cover all important aspects of IEEE 802.15.4 and ZigBee including security. In the practical part, participants will setup their first ZigBee network, setup the development environment and change the node firmware to support a temperature, brightness and an acceleration sensor. At the end the participant’s first sensor implementation is tested using the deCONZ tool. www.dresden-elektronik.de Page 5 of 66 User Manual Version 1.0 2013-02-28 deRFdevelopmentKit ZigBee 2.4 GHz 2. Glossary Term Description 6LoWPAN IPv6 over Low-power Wireless Personal Area Networks API Application Programming Interface BitCloud SDK Atmel’s Software Development Kit for ZigBee BSP Board Support Package for BitCloud SDK Coordinator FFD device which routes packets and can integrate new nodes into the network. FTDI Future Technology Devices International, a Scottish privately traded semiconductor device company GNU GNU General Public License GUI Graphical User Interface Hop Stopover on a route as well as the way from one network node to the next HTTP Hypertext Transfer Protocol IDE Integrated Development Environment IEEE 802.15.4 Standard, applicable to low-rate Wireless Personal Area Networks (WPAN) IPv6 Internet protocol version 6, version of the Internet Protocol (IP) intended to succeed IPv4 which is the protocol currently used to direct almost all internet traffic. LQI Link Quality Indicator MAC Medium Access Control layer OSI Open Systems Interconnection (OSI) model, a prescription of characterizing and standardizing the functions of a communications system in terms of abstraction layers PAL Platform Abstraction Layer PHY OSI model layer 1: The physical layer defines electrical and physical specifications for devices. It defines the relationship between a device and a transmission medium including the layout of all hardware components. Router A device that forwards data packets between wireless nodes SDK Software Development Kit RSSI Received Signal Strength Indicator WPAN Wireless Personal Area Network WSN Wireless Sensor Network ZigBee Low-cost, low-power wireless mesh network standard developed by the ZigBee Alliance www.dresden-elektronik.de Page 6 of 66 User Manual Version 1.0 2013-02-28 deRFdevelopmentKit ZigBee 2.4 GHz 3. Features The following figure gives an overview of the parts contained in the deRFdevelopmentKit ZigBee 2.4 GHz. Figure 2: ZigBee development kit content www.dresden-elektronik.de Page 7 of 66 User Manual Version 1.0 2013-02-28 deRFdevelopmentKit ZigBee 2.4 GHz The kit consists of: 3 x radio module deRFmega128-22A00 with markers on their bottom side: 1x white, 1x green, 1x orange 3 x development board deRFnode-2TNP2 1 x USB analyzer stick Perytons deRFusb-23E00 JTAG, 2.4 GHz 1 x deRFextract Tool 1 x SAM-ICE adapter 1 x Kit CD (with extensive software package and documentation) 3 x USB cable, each with standard A and B plug Features: Development environment for ZigBee applications Designed for frequency range of 2.4 GHz Support for user-specific sensors, the connection of own sensors/nodes is possible Kit CD with many software examples, documentation and necessary drivers Analyzing tool for IEEE 802.15.4 / ZigBee and ZigBee profiles Example applications for ZigBee PRO Freely programmable USB radio stick www.dresden-elektronik.de Page 8 of 66 User Manual Version 1.0 2013-02-28 deRFdevelopmentKit ZigBee 2.4 GHz 4. Hardware description 4.1. deRFmega128 radio modules The pluggable compact radio module deRFmega128-22A00 includes Atmel’s single-chip ATmega128RFA1 microcontroller, which combines an 8-bit AVR microcontroller with a 2.4 GHz transceiver. The radio module’s two 23 pin male connectors allow full access to all functions of the Atmega128RFA1. With the chip ceramic antenna distances of more than 200 m can be reached for line of sight conditions. The integrated transceiver uses 128-bit AES encryption. A serial 1-Mbit-EEPROM offers high memory capacity e.g. for a firmware update over-the-air. Figure 3: deRFmega128-22A00 top view The radio modules are labeled each with a marker on the bottom side: 1x white, 1x orange, 1x yellow; the colors stand for coordinator, router and end device functionality. Thus the different devices can be identified at the bottom side by their color: Connecting the radio module to the deRFnode-2TNP2 is described in Section 4.2.1. For technical data and detailed information please refer to [2] and [3]. www.dresden-elektronik.de Page 9 of 66 User Manual Version 1.0 2013-02-28 4.2. deRFdevelopmentKit ZigBee 2.4 GHz deRFnode boards The deRFnode-2TNP2 is a demonstration and application platform for the AVR and ARM based dresden elektronik radio modules. It supports AVR and ARM programming and communication over Serial and USB interface. LEDs 1 … 3, top-down Flash Acceleration sensor Temperature sensor Supervisor Ambient light sensor Adjustable LDO Button 1 Button 2 USB serial, assembled on Node AVR Power supply jumper Figure 4: deRFnode-2TNP2 – board features The deRFnode platform is equipped with several onboard features such as three different sensors (temperature, ambient light and acceleration), two user defined buttons and three LEDs, USB interface for AVR, a supply voltage supervisor and an expansion header for additional connections and own sensors/actuators. Before powering up the deRFnode always check or set the correct jumper position (JP2); in Figure 4 the jumper is set to ‘USB powered’. In Figure 5 the JP2 header power supply options are shown. battery powered 1 JP2 1 JP2 external power supply 1 JP2 without jumper Figure 5: Power supply jumper setting options on deRFnode board For more information please refer to [4] and [5]. www.dresden-elektronik.de Page 10 of 66 User Manual Version 1.0 2013-02-28 4.2.1. deRFdevelopmentKit ZigBee 2.4 GHz Connecting the radio module to the deRFnode board The three deRFmega128-22A00 radio modules have to be attached to the three deRFnode boards. Required parts: 3 x deRFmega128-22A00 3 x deRfnode-2TNP2 Attach the radio modules - topside down - carefully to the deRFnode boards. Double-check that the chip ceramic antenna points to the outside of the node board. Figure 6: deRFnode with mounted radio module To remove a radio module from the deRFnode board, use the deRFextract tool, see Section 4.4. www.dresden-elektronik.de Page 11 of 66 User Manual Version 1.0 2013-02-28 4.3. deRFdevelopmentKit ZigBee 2.4 GHz deRFusb-23E00 JTAG radio stick Included in the development kit is a freely programmable USB radio stick with JTAG interface and preprogrammed analyzer firmware for the Perytons Network Analyzer. For more details about this Network Analyzer software please refer to Section 6.2.2 and Section 7. The deRFusb-23E00 JTAG contains a Cortex-M3 microcontroller with 256 kBytes highspeed flash and a 2.4 GHz ISM-band transceiver. With the integrated chip antenna distances of more than 200 m can be achieved for line of sight conditions. The radio stick is equipped at its rear side with a 10-pin connector for development purposes (JTAG and Debug) and three LEDs for status indication. The radio stick is labeled with a blue marker on the top side; the color stands for the Perytons analyzer functionality. USB plug type A 2.4 GHz chip ceramic antenna RF shielding Figure 7: Top view deRFusb-23E00 JTAG three status LEDs 10-pin connector for JTAG and debug Figure 8: Bottom view deRFusb-23E00 JTAG Alternatively the USB radio stick can be reprogrammed with own software and used for any other application, e.g. turned into a ZigBee network coordinator or into the gateway for deCONZ. More information and technical background you can find in [6], [7] and [8]. www.dresden-elektronik.de Page 12 of 66 User Manual Version 1.0 2013-02-28 4.4. deRFdevelopmentKit ZigBee 2.4 GHz deRFextract Tool The transparent lever part helps to remove a plugged in deRFmega128 radio module from the deRFnode board. Figure 9: Using deRFextract Tool Notes: To remove a plugged in radio module, please handle the deRFnode board, the deRFextract Tool and also the radio module with the utmost care. Do not tilt; do not bend the pins of the radio module! www.dresden-elektronik.de Page 13 of 66 User Manual Version 1.0 2013-02-28 4.5. deRFdevelopmentKit ZigBee 2.4 GHz SAM-ICE adapter The SAM-ICE adapter enables programming and debugging of the deRFusb-23E00 JTAG radio stick. It is required to connect the deRFusb-23E00 JTAG stick to the SAM-ICE programmer via JTAG interface. RS232 connector RS232 transceiver 20-pin connector 6-pin connector 10-pin connector Figures 10: SAM-ICE adapter components and attached to deRFusb-23E00 JTAG stick For more information please refer to [9]. www.dresden-elektronik.de Page 14 of 66 User Manual Version 1.0 2013-02-28 4.6. deRFdevelopmentKit ZigBee 2.4 GHz Accessories 4.6.1. Cables Three USB cables, each with a standard A and B plug are included. Though not required in a typical application (router might be mains powered and end device powered by batteries), the USB connection is very helpful during development, providing (USB) power to the board and allow communication with the application e.g. for debugging. 4.6.2. CD content An overview of the CD content structured in four root directories is given below. Name Description 3rdParty Contains different tools and applications from third party vendors, necessary for proper working. Doc Contains comprehensive documentation files such as: data sheets for products of dresden elektronik and Atmel Corporation, measurement reports and certification grants, product overview (dresden elektronik wireless products), schematic files, manuals and documentation of the wireless modules. Driver Contains necessary USB drivers. Packages Contains software packages for ZigBee, BitCloud, deRFnative examples, MAC layer, Perytons analyzer and deCONZ tool. Table 1: Development Kit CD structure www.dresden-elektronik.de Page 15 of 66 User Manual Version 1.0 2013-02-28 deRFdevelopmentKit ZigBee 2.4 GHz 5. Preparing and running the WSN Demo application In the following two sections preparations to run the WSN Demo application are described. Furthermore installation and startup procedures are explained and the features of the WSN Demo application are described more detailed. 5.1. Installation and startup procedures Connecting the radio module to the deRFnode is described in Section 4.2.1. The nodes of the kit are preprogrammed with the firmware of BitCloud WSNDemo. As mentioned in Section 4.1 the different devices can be identified by their color: white for coordinator, orange for router and yellow for the end device. The PC application for the WSN Demo requires Java to be installed. 5.1.1. Java and BitCloud WSN Demo application installation Java installation: As the WSN Demo application is based on Java some Java Runtime Environment must be installed on your PC or Laptop. You can easily check if and what Java Runtime Environment is installed on your machine. Check at first if the Java Runtime Environment is already installed: Open the console 'Command Prompt': Start | Execute | cmd Enter: java -version If Java is installed the Runtime Environment displays the version information as shown in the figure below: Figure 11: Java installation If Java is not or not correctly installed an info like 'unknown or wrong command' or 'command could not be found' will be prompted. www.dresden-elektronik.de Page 16 of 66 User Manual Version 1.0 2013-02-28 deRFdevelopmentKit ZigBee 2.4 GHz To install Java, use the following exe files either from CD or the internet: \3rdParty\Java\jre-6u25-windows-i586-s.exe (for 32-bit operating system) \3rdParty\Java\jre-6u25-windows-x64.exe (for 64-bit operating system) Start the setup and follow the given instructions. Note: To check your PC’s operating system version click on the Windows Start icon: Control Panel | System and Security | System (Windows 7 Editions) BitCloud WSN Demo application installation: The BitCloud WSN Demo application is provided with a setup for Windows. You can execute the setup directly from the CD. To access it please change to: \Packages\Bitcloud\WSNMonitorSetup_2.2.1.66.exe Execute the setup and follow the given instructions. 5.1.2. Connecting the WSN Demo coordinator At first the coordinator (white marker) has to be connected to the PC via USB cable. Power supply jumper for USB powered coordinator Figure 12: deRFnode with mounted deRFmega128 module as coordinator Note: Check the correct jumper position, here 'USB powered', see Section 4.2. www.dresden-elektronik.de Page 17 of 66 User Manual Version 1.0 2013-02-28 5.1.3. deRFdevelopmentKit ZigBee 2.4 GHz USB driver installation If you connect the deRFnode-2TNP2 for the first time to the PC or if you change the USB port, you are requested to install the required USB device drivers. Windows asks you if it should connect to Windows Update to find a suitable driver. Select 'No, not this time' and continue with 'Next >': Driver installation under Windows XP Figure 13: Installation wizard (1) The next step is to manually choose the directory where the driver files are located. To do so, please select 'Install from a list or specific location (Advanced)': Figure 14: Installation wizard (2) www.dresden-elektronik.de Page 18 of 66 User Manual Version 1.0 2013-02-28 deRFdevelopmentKit ZigBee 2.4 GHz All necessary files can be found in the '\Driver' directory on the delivered CD. Attention: Do not get confused, if the installation procedure starts twice. This is necessary since both drivers for generic USB access and drivers for a virtual COM port have to be installed. Driver installation under Windows 7 Editions Connect the deRFnode to the PC; Windows 7 will not install a driver for it and mark the device with an exclamation mark in the ‘Device Manager’. You have to choose the driver manually. To do so, please open: Control Panel | System and Security | Device Manager Figure 15: Installation on Windows 7 Editions All necessary files can be found in the '\Driver' directory on the delivered CD. www.dresden-elektronik.de Page 19 of 66 User Manual Version 1.0 2013-02-28 5.2. deRFdevelopmentKit ZigBee 2.4 GHz WSN Demo application In this section an overview of the WSN Monitor as part of the WSN Demo is given. Further necessary procedures to prepare the WSN Demo application and options are described and important features of the WSN Monitor are outlined. The WSN Demo application consists of the embedded which supports functions for coordinator, router, and visualization application WSN Monitor which runs on communicate based on ZigBee PRO but use a vendor message payload. firmware WSN Demo application, end device as well as the GUI a PC. The WSN Demo nodes specific cluster with a proprietary The BitCloud SDK includes the WSN Monitor PC application in binary format, and the WSN Demo application as binary format and source code. The source code for the WSN Demo application can be modified and extended, making it possible to develop WSN applications for a variety of application scenarios. For more information please refer to Section 6. The nodes flashed with the WSN Demo form a ZigBee PRO sensor network. End device, router, and coordinator can read the sensor data from onboard light and temperature sensors, and forward the collected data to the WSN Monitor for visualization. An end device follows a duty cycle (i.e., the microcontroller and radio transceiver are put to sleep periodically) and wake up to transmit data to the coordinator. Using the serial connection, the coordinator transmits the received packets, along with its own sensor data to the WSN Monitor. These transmitted values are displayed on WSN Monitor views as temperature, light, and battery level measurements. The WSN Monitor also visualizes the network topology by drawing a tree of nodes that have joined the network. For each of the nodes, parameters like node address, node sensor information and link quality data are displayed. RSSI indicates a link’s current condition and is measured in dBm. LQI is a numeric parameter defined within the range of 0 to 255; it is used to measure the link quality. Larger values mean a better link, while values close to zero indicate a poor connection. In the WSN Demo, the number of routers and end devices is limited only by the network parameter settings. www.dresden-elektronik.de Page 20 of 66 User Manual Version 1.0 2013-02-28 5.2.1. deRFdevelopmentKit ZigBee 2.4 GHz Overview WSN Monitor The WSN Monitor is the PC counterpart to the WSN Demo application, and can be used to display ZigBee network topology and other information about a wireless sensor network. A typical WSN Monitor screen is shown in Figure 16. It contains topology, sensor data and node data views as well as application toolbars. Serial port settings (Connect) Specific parameters for the selected node Sensor data view List of connected nodes Topology view Show additional data on the topology view End device, coordinator (selected node) and router Figure 16: WSN monitor (on the PC) The topology view displays the network topology in real time, which helps the user monitor the formation and dynamic changes in the network while nodes join, send data, or leave the network. The network topology is constructed on the basis of next-hop information for each of the nodes, and each link is also tipped with RSSI and LQI values. Each of the nodes displayed is depicted by an icon, with the node’s address or name below and sensor readings to the right of the icon, if required by settings. The sensor data view displays data coming from onboard sensors of the selected node. It is presented in graph and table form. Other parameters can be observed for each node in table form. The node data view includes a sensor selection combo-box; it can be used to switch between sensor types. By default in the topology view, nodes are labeled with their short addresses. However, another title can be assigned to any desired node by a double click. If 'Cancel' is pressed in the opened window, the node’s title is set back to the short address. www.dresden-elektronik.de Page 21 of 66 User Manual Version 1.0 2013-02-28 deRFdevelopmentKit ZigBee 2.4 GHz The visualized network features and parameters are arranged spread to several views on the WSN Monitor window. Figure 17: WSN Monitor window top features Left hand side in the WSN Monitor window the following views can be found: Figure 18: Node data for the selected node Figure 19: Sensor data view (containing the 'Temperature' and the 'Light' tab) Figure 20: List of connected nodes www.dresden-elektronik.de Page 22 of 66 User Manual Version 1.0 2013-02-28 deRFdevelopmentKit ZigBee 2.4 GHz Right hand side on the topology view the graphical presentation of the nodes in the network is visualized. Each node is marked with its role (C coordinator, R router or end device) and short address. ! " " ! ! # # Router Short address End device, selected node Coordinator Figure 21: Topology view 5.2.2. Node timeouts The ‘Window | Preferences’ menu of WSN Monitor contains a number of parameters used to control application behavior. Timeouts are used to tune visualization of coordinator, routers, and end devices as the nodes disappear from the network each time a connection is lost, power is down, or a reset has occurred. A node timeout corresponds to the time the WSN Monitor waits for a packet from a particular node before assuming that the node is no longer part of the network. Note that this value does not correspond to the frequency with which data are transmitted by each type of device. To get smooth topology visualization, setting timeouts to 20 seconds is recommended for coordinator and router, and 30 seconds is recommended for an end device. Assuming a default application configuration, these timeouts cover three periods between sending a packet, and so at least three packets would need to be lost before a node is removed from the WSN Monitor topology view. www.dresden-elektronik.de Page 23 of 66 User Manual Version 1.0 2013-02-28 deRFdevelopmentKit ZigBee 2.4 GHz Figure 22: WSN Monitor preferences menu 5.2.3. Connecting WSN Monitor to the WSN Demo Coordinator To monitor the network a connection from the WSN Monitor to the WSN Demo coordinator must be established. For deRFnode boards this is done via USB. The driver installation is described in Section 5.1.2. Follow these steps to connect the WSN Monitor to the correct COM port: Open the WSN Monitor. Click on the ‘Connect’ icon (Serial port settings) in the WSN Monitor, see Figure 16 and Figure 23. Select the COM port in the list that corresponds to the just connected deRFnode (usually the last COM port in the list) and click ‘OK’, see Figure 23. To find out the COM port of your deRFnode: Click the Windows Start icon | Control Panel | System and Security | Device Manager | Connections. Here the deRFnode (COMxx) with an automatically assigned number for the COM port is shown (Windows 7 Editions). www.dresden-elektronik.de Page 24 of 66 User Manual Version 1.0 2013-02-28 deRFdevelopmentKit ZigBee 2.4 GHz Figure 23: Establish connection to WSN Demo coordinator In case of successful connection the coordinator appears after a few seconds. Figure 24: Connected to WSN Demo coordinator 5.2.4. Network startup The coordinator organizes the wireless network automatically. Upon starting, each node informs the network of its role. When the coordinator is powered on, it switches to an active state even though no child node is present. This indicates that the coordinator is ready and that child nodes can join the network with the coordinator’s extended PAN ID which is recognized by all routers. www.dresden-elektronik.de Page 25 of 66 User Manual Version 1.0 2013-02-28 deRFdevelopmentKit ZigBee 2.4 GHz Starting up router and end device Insert always three batteries in the battery box of router (orange marker) and end device (yellow marker). Get the jumper in the right position, here 'battery powered', see Section 4.2. Figure 25: Jumper position Watching the LEDs you can get information about the connection to the coordinator. Note that the end device may sleep and be in a switched off state for some seconds, see Table 2. The upper LED shown in Figure 4 is blinking after connection, and is permanently switched on after configuration procedure. After a short time all devices are connected and appear in the WSN Monitor. Figure 26: Connected WSN Demo devices www.dresden-elektronik.de Page 26 of 66 User Manual Version 1.0 2013-02-28 5.2.5. deRFdevelopmentKit ZigBee 2.4 GHz Monitoring WSN Demo application activity Network activity can be monitored in two ways: Observing the red LEDs on the development boards, as described in Table 2, also refer to Figure 4. Monitoring the network topology through WSN Monitor installed on a PC, see Section 5.2.1. Node state LED D1 LED D2 LED D3 Searching for network Blinking OFF OFF Joined to network ON + receiving data Blinking + sending data to UART (coordinator only) Sleeping (end device only) Blinking OFF OFF OFF Table 2: LED indication for deRFnode boards used in WSN Demo 5.2.6. Identifying nodes When a user clicks a node in the topology view a button that can be used to identify the node appears under the node’s icon. When the user clicks this button WSN Monitor sends a command, which is delivered to the coordinator through the serial connection and wirelessly to the target node. The target node, receiving the command, blinks with its LED for several seconds. 5.2.7. Sensor data visualization Each board sends temperature/light/battery sensor readings to the coordinator, which in turn sends it to the PC. WSN Monitor displays the readings from onboard sensors within the tabs of the data view and next to a node icon inside in the topology view if the corresponding option is selected in the node/link parameters from the quick settings toolbar. The user can select any node in the topology view to monitor the node’s activity and see the node data in one of three different forms: Text table Chart The onboard sensor’s data displayed next to each node in the topology view. These values are also tipped with arrows indicating whether the value increased or decreased in relation to the previous sample. A given node is selected when it is clicked on and a dashed frame is visible around it. The same values are shown on the sensor data view, enabling the user to observe how the values change over a period of time. The sensor data view includes a sensor selection combo-box. Use the button on the sensor control toolbar to display the desired types of sensor data. www.dresden-elektronik.de Page 27 of 66 User Manual Version 1.0 2013-02-28 deRFdevelopmentKit ZigBee 2.4 GHz 6. Developing custom network applications and programming In this section an introduction about the available native AVR examples and MAC-based examples is given and it is explained how to develop custom applications using Atmel’s BitCloud ZigBee SDK. Furthermore it is described how to connect additional sensors, add more nodes and develop or evaluate the network functionality within ZigBee PRO. Afterwards instructions for compiling, debugging and flashing firmware of AVR-based microcontrollers are given and the use and options of the deRFusb-23E00 JTAG analyzer is described. 6.1. Software packages In the following sections application examples are described which have been developed by dresden elektronik. The examples described in the first two sections belong to the categories of deRFnative and MAC-based examples. In Section 6.1.3 it is described how prototyping, developing, and debugging custom applications on top of the Atmel BitCloud application programming interface works. This section demonstrates ZigBee technology running wireless sensor networks. 6.1.1. Native examples The provided native examples demonstrate how to evaluate the deRFnode board features such as the available sensors, buttons and LEDs, see Figure 4. The native examples are running locally; radio transmission is not involved. However, a suitable IDE, a development tool chain and a programmer are required. Example IDEs, tool chains and programmers are described in Section 6.2.1 for AVR and Section 6.2.2 for ARM boards. Native application examples Each of these applications demonstrates a special feature of a certain piece of hardware of dresden elektronik radio modules and related baseboards. Basically all examples behave identically on the different deRFnodes/deRFgateways and other platforms. However, not all examples are available for each platform and module family. The examples may be compiled standalone, which means they do not require any stack installation. To keep the application code simple and easy to understand some examples use additional source code library modules e.g. from the AT91Lib for ARM or a TWI library for sensor access. In this case, the source code is included in the native examples package. An overview of the available applications of deRFnative examples is given below: deRFnative_Button Platform: AVR, ARM7 This example shows how to change the LED status if a button is pressed. deRFnative_I2C_EEPROM Platform: AVR The example code simply writes and reads a test pattern to/from the serial EEPROM available on deRFmega128 radio modules. As this EEPROM is only available on the deRFmega128 modules for evaluation, this example is not available for OEM modules, ARM7 modules and USB radio sticks. www.dresden-elektronik.de Page 28 of 66 User Manual Version 1.0 2013-02-28 deRFdevelopmentKit ZigBee 2.4 GHz deRFnative_I2C_Sensors Platform: AVR, ARM7 The application demonstrates the native access to the temperature, light and acceleration sensors available on the deRFnode platform. It reads out the actual values from each sensor and restarts if a button is pressed. deRFnative_LED Platform: AVR, ARM7, SAM3 This example changes the LED status cyclically by a timer. deRFnative_LowPower Platform: AVR, ARM7 This application requires a deRFnode. It demonstrates how the device may be switched between high power consumption and sleep mode. Initially the device polls the sensors in a given interval. If the button is pressed the device enters sleep mode. If the button is pressed again the device wakes up and continues reading the sensors. deRFnative_MotionDetection_Blink Platform: AVR, ARM7 This application uses the acceleration sensor of the deRFnode or deRFgateway. This example turns the device into something like an alarm trigger. Once activated, the LED starts to blink if the board is moved. This alert must be reset manually. deRFnative_MotionDetection_Trace Platform: AVR, ARM7 This application uses the acceleration sensor of the deRFnode or deRFgateway in a motion tracking way. It configures the motion detection threshold of the acceleration and uses the interrupt to read the sensor and print trace messages as long the board is moved. deRFnative_SPI_Flash Platform: AVR, ARM7 This application uses the on-board serial flash of a deRFnode or deRFgateway. At application start, the flash is erased. Than a random pattern is written to it and read back. Finally both read and written data are compared. deRFnative_SRAM Platform: AVR This example only works with a Sensor Terminal Board and shows the access to the 32 KB external SRAM of the STB. It supports RCBs only. deRFnative_Temp Platform: AVR This application demonstrates the native access to the temperature sensor either on MCU or platform. It supports RCBs, the Sensor Terminal Board and deRFmega128 radio modules where it reads out the value from temperature sensor and prints the result to terminal. Button presses restart the procedure. If you want use the temperature sensor which is provides on deRFnode or deRFgateway platform, please see example application 'deRFnative_I2C_Sensors'. deRFnative_USB Platform: AVR, ARM7, SAM3 The native example demonstrates the USB access. Each byte which has been read from the USB channel is sent back with a prefix. For deRFmega128 modules, USB works in conjunction with an FTDI chip. This is provided on either the Sensor Terminal Board or the deRFnode board for AVR. For deRFarm7 boards the native USB interface is used. This requires a deRFnode board for ARM or a deRFgateway. For the deRFsam3 boards the native USB interface is used too. www.dresden-elektronik.de Page 29 of 66 User Manual Version 1.0 2013-02-28 deRFdevelopmentKit ZigBee 2.4 GHz For further descriptions details please refer to the documentation on the delivered CD: Figure 27: deRFgettingStarted Use the 'Main Page' tab: deRFdevelopment | Modules | Application Examples | Native Examples - select the desired platform and then click on the example. Or use the 'Modules' tab by clicking on it; then click on the example you want to know details about. Installation To install the examples, please run the self-extracting archive deRFnativeExamples_vx_xx.exe from the delivered CD, directory Packages\deRFnativeExamples, and specify any directory of your choice where you wish the files be extracted to. Figure 28: self-extractor running All examples are already pre-compiled. So you may directly proceed with flashing them into your target. www.dresden-elektronik.de Page 30 of 66 User Manual Version 1.0 2013-02-28 deRFdevelopmentKit ZigBee 2.4 GHz To select a pre-compiled binary first chose your application, than your target platform and within the target platform directory open the 'GCC\bin' sub-directory. Here you will find the according binary either in .HEX-format for AVR (or in .BIN format for ARM). For flashing the firmware to your device, please refer to Section 6.2. 6.1.2. MAC-based examples Working with the MAC-based examples requires the availability of the IEEE 802.15.4 MAC Software Package, a suitable IDE, a tool chain and a programmer. Please refer to Section 6.2.1 and Section 6.2.2 for examples. The MAC examples are based on the IEEE 802.15.4 MAC Software Package provided by Atmel Corporation. The MAC layer simplifies the programming procedure by providing all the required HF functions and a lot of example applications for the different features of the Atmel radio transceivers. The deRFmacAddon extends Atmel’s MAC Software package with the deRFnode board features and additional example applications. Overview IEEE 802.15.4 MAC The IEEE 802.15.4 standard defines the protocol and compatible interconnection for data communication devices using low data rate, low power and low complexity, short-range radio frequency (RF) transmissions in a wireless personal area network (WPAN). Atmel developed the MAC stack software for different target platforms (microcontroller and board) and RF transceivers based on a new architecture. This allows easy portability across various platforms and transceivers, and configurability to improve resource usage. IEEE 802.15.4 MAC Software Package features: Allows a highly flexible firmware configuration to adapt to the application requirements Supports different microcontrollers and platforms/boards Supports different IEEE 802.15.4 based transceivers and single chips Allows easy and quick platform porting Provides project files for two supported IDEs (IAR Embedded Workbench®, Atmel AVR Studio® / WinAVR) Supports star networks and peer-to-peer communication Supports non-beacon and beacon-enabled networks The IEEE 802.15.4 MAC Software Package used comes with the complete source code. The license conditions only limit its usage to a combination with any Atmel radio hardware. MAC-based application examples This kind of examples is to be used in combination with the IEEE 802.15.4 MAC stack. They involve different modules provided by the stack like the Platform Abstraction Layer (PAL). You can find these examples under <MAC-root-directory>\Applications in the respective subdirectory of the highest used stack layer. www.dresden-elektronik.de Page 31 of 66 User Manual Version 1.0 2013-02-28 deRFdevelopmentKit ZigBee 2.4 GHz BSP_Poll_All_Sensors Highest stack layer: BSP This example shows how to use the Board Support Package for deRFnode and deRFgateway development boards. It accesses all sensors (temperature, ambient light and acceleration) and prints the read values to a serial link. deRFsimple_Button Highest stack layer: PAL This application toggles LED_0 and LED_1 every time a button is pressed by using PAL layer resources. deRFsimple_USB Highest stack layer: PAL This code shows how to read and write bytes from/to USB interface. To test it, simple open any terminal program on the virtual COM port that is assigned to your Sensor Terminal Board or deRFnode or deRFgateway (baud rate 115 kbit, 8 data bits, no parity, 1 stop bit). The application waits for an arbitrary character to be sent. If the application receives this character the actual temperature is read and the value sent over the USB interface to the terminal program. With ATmega128RFA1 modules the internal temperature sensor is used and with RCBs the temperature sensor from the Sensor Terminal Board is selected. LowPower_Sensor Highest stack layer: TINY_TAL This application demonstrates how to power down the deRFnode platform and therefore enable battery powered operation. Cyclically it wakes, determines its current operating conditions (battery voltage, environment temperature, luminosity, acceleration) and transmits these over the air. As receiver an USB dongle is used to decode and print the received messages. Wireless_UART_2 Highest stack layer: TINY_TAL The example implements an alternate Wireless UART, based on the TINY_TAL Example 'Wireless_UART'. It uses a timer to improve over-the-air-performance through sending data block-wise instead of transmitting frames upon every single byte received over the serial connection. For more details please refer to the documentation on the delivered CD, see Figure 27. MAC stack setup and installation Due to many changes in the MAC stack internal APIs from one version to another; the deRFmacAddon is always made for a specific MAC stack. Be careful to match MAC stack and deRFmacAddon versions. Mixing different versions can lead to none functional dresden elektronik examples as well as none functional stack examples. The MAC stack that matches the deRFmacAddon is provided on the development kit CD in the directory ‘\Packages\MAC’ It is also strongly recommended to read the file IMPORTANT_README_FIRST.txt in the root of the Software Package! deRFmacAddon The deRFmacAddon is a software product developed by dresden elektronik. So only dresden elektronik is responsible for it. If you run into any trouble please write to [email protected]. www.dresden-elektronik.de Page 32 of 66 User Manual Version 1.0 2013-02-28 deRFdevelopmentKit ZigBee 2.4 GHz The deRFmacAddon package adds hardware support for dresden elektronik platforms to the MAC software package. It also adds some application examples. Which examples have been added and how they are to be used is described here. Installation The MAC based examples from Atmel are installed during MAC stack setup. You can get the IEEE 802.15.4 MAC stack software from the Atmel homepage (http://www.atmel.com/tools/IEEE802_15_4MAC.aspx) or from the delivered CD (directory: Packages\MAC). The CD always contains the MAC stack version matching the deRFmacAddon. Beware of getting a newer version from the Atmel homepage with more advanced features which might be incompatible with the deRFmacAddon. While running the installer please choose a top-level-directory as installation directory e.g. C:\Mac as otherwise the path length may cause trouble. This installation location is referred to as <MAC-root-directory> from now on. Note: Always execute the MAC stack setup first. Note: Choose a directory with a short name e.g. C:\MAC. After the MAC Software Package installation, you can proceed with the installation of the deRFmacAddon. The addon is also provided on the delivered CD under ‘Packages\MAC’. To install the deRFmacAddon, run the installer deRFmacAddon_for_Atmel_MAC_vx_x_x_Win32_Vx_xx.exe and choose the directory where you have installed the MAC software package before. Figure 29: Self-extractor Confirm overwriting and/or replacing files Note: Always install the deRFmacAddon into the same directory as the MAC stack. www.dresden-elektronik.de Page 33 of 66 User Manual Version 1.0 2013-02-28 deRFdevelopmentKit ZigBee 2.4 GHz Note: The ‘Confirm File Replace’ dialog is a good indicator that you have chosen the right directory. Figure 30: Confirm file replace All examples come already pre-compiled. So you may directly proceed with flashing them into your target. Having chosen an application, proceed with your target platform and go deeper to the respective 'GCC\bin' sub-directory. Here you will find the respective binary either in .HEXformat for AVR (or in .BIN format for ARM). For flashing the firmware to your device, please refer to Section 6.2. If you like to modify the examples we recommend reading the Eclipse Integration of the MAC Section 6.2.2.5. 6.1.3. BitCloud-based examples To develop custom applications with more comprehensive features like mesh networking using the BitCloud ZigBee SDK is recommended. As with all software examples a suitable IDE, a development tool chain and a programmer are required. Example IDEs, tool chains and programmers are described in Section 6.2.1 for AVR and Section 6.2.2 for ARM boards. 6.1.3.1. Overview BitCloud SDK The BitCloud ZigBee SDK Software Package is provided by Atmel Corporation. It is a fullfeatured ZigBee PRO stack supporting reliable, scalable, secure wireless applications running on Atmel wireless platforms. The design software is completely standard compliant and certified for the ZigBee PRO platforms. www.dresden-elektronik.de Page 34 of 66 User Manual Version 1.0 2013-02-28 deRFdevelopmentKit ZigBee 2.4 GHz The SDK provides a complete software and documentation toolkit for prototyping, developing, and debugging custom applications on top of the BitCloud application programming interface. After a short registration the package is available from the Atmel BitCloud SDK download site http://www.atmel.com/tools/BITCLOUD-ZIGBEEPRO.aspx. Please check that you download the correct package for your platform. The currently supported version of BitCloud SDK for MegaRF is rev. 1.14.0. If the addon version provided on the Development Kit CD is older than the latest Atmel BitCloud SDK version please contact [email protected] and request the newest BitCloud SDK addon. Installation of deRFmega platform BitCloud SDK After downloading the zip-archive BitCloud_MEGARF_1_14_0.zip from the above link, extract it to your hard drive. While running the installer please choose a directory without spaces as installation directory e.g. C:\Bitcloud as otherwise the compilation will lead into trouble. This installation location is referred to as <BitCloud-root-directory> from now on. BitCloud SDK Addon The deRFBitCloudAddon provides a Board Support Package (BSP) and BitCloud SDK examples for deRFmega128 modules. Run the installer deRFBitCloudAddon_1_14_0_MEGARF_V1_01.exe from the CD directory ‘\Packages\Bitcloud’ to install the dresden elektronik specific extensions. If asked for a destination directory, please chose the same location where you unpacked the BitCloud SDK in the previous step. Click extract and confirm to replace existing files. www.dresden-elektronik.de Page 35 of 66 User Manual Version 1.0 2013-02-28 deRFdevelopmentKit ZigBee 2.4 GHz Note: Always install the deRFBitCloudAddon into the same directory as the MAC stack. Note: The ‘Confirm File Replace’ dialog is a good indicator that you have chosen the right directory. Board Support Package If developing your own applications you may take advantage of the BitCloud SDK Addon which provides the Board Support Package (BSP) for your selected platform. The BSP includes a complete set of drivers for managing standard peripherals (sensors, LEDs and buttons) with a common board independent interface. This section contains references to the locations in the BitCloud Stack Documentation [10] where further information about the related API can be found. If the interface is configurable the respective options are documented in the related subsection. Note: The first line of the following subsections always points to the documentation of the related header file which is reachable under \BitCloud Stack Documentation\Reference Lists\File List. This documentation will be installed together with the BitCloud ZigBee SDK Software Package. Buttons \BitCloud Stack Documentation\buttons.h Each board has two buttons available which are accessible through bit 0 (button 1) and bit 1 (button 2) by the related BSP button functions. LEDs \BitCloud Stack Documentation\leds.h Each board has 3 LEDs which are accessible through their ID: LED_FIRST, LED_SECOND and LED_THIRD by the related BSP led functions. Temperature sensor \BitCloud Stack Documentation\sensors.h The TMP102 is a low power digital temperature sensor capable of readings temperatures to a resolution of 0.0625°C and can operate in a range from -40°C to +125°C. In the default configuration the sensor does a single shot measurement and goes back to low power mode. The signed integral part of the measurement is returned as °C in the callback passed to BSP_ReadTemperatureData(). The callback data format can be changed to a raw format by adding -DTMP102_OUTPUT_RAW to the define section in the application makefile. TMP102_OUTPUT_RAW Then the defined plain 16-bit TMP102 format will be passed to the callback. Please refer to the TMP102 sensor datasheet for more information about this format. www.dresden-elektronik.de Page 36 of 66 User Manual Version 1.0 2013-02-28 deRFdevelopmentKit ZigBee 2.4 GHz Ambient light sensor \BitCloud Stack Documentation\sensors.h The ISL29020 is a low power light sensor capable to measure from 0.015 lux to 64,000 lux. In the default configuration the sensor does a single shot measurement and goes back to low power mode. The measured value is returned as lux in the callback passed to BSP_ReadLightData(). It's possible to change the sensor lux range and integration time by defining the following two symbols in the define section of the application makefile. ISL29020_MODE_FSR defines the lux range. ISL29020_MODE_FSR_1K 0.015 lux to 1,000 lux ISL29020_MODE_FSR_4K 0.06 lux to 4,000 lux ISL29020_MODE_FSR_16K 0.24 lux to 16,000 lux (default) ISL29020_MODE_FSR_64K 0.96 lux to 64,000 lux ISL29020_MODE_INT defines the internal integration time and therefore the resolution. Be aware that higher values drastically increase measurement time. ISL29020_MODE_INT_4BIT_ADC ISL29020_MODE_INT_8BIT_ADC ISL29020_MODE_INT_12BIT_ADC (default) ISL29020_MODE_INT_16BIT_ADC Acceleration sensor The BMA150 acceleration sensor is currently not supported by the BSP support package. 6.1.3.2. API overview The BitCloud internal architecture [10] follows IEEE 802.15.4 and the ZigBee convention for splitting the networking stack into layers. Besides the core stack containing the protocol implementation, the BitCloud stack contains additional layers implementing shared services (for example, task manager, configuration manager, and power manager) and hardware abstractions (for example, hardware abstraction layer (HAL) and board support package (BSP)). The APIs contributed by these layers are outside the scope of core stack functionality. These essential additions to the BitCloud API significantly reduce application complexity and simplify the development effort. www.dresden-elektronik.de Page 37 of 66 User Manual Version 1.0 2013-02-28 deRFdevelopmentKit ZigBee 2.4 GHz Figure 31: BitCloud block diagram, source Atmel Core stack The topmost layer of the core stack, APS, provides the highest level of networking-related APIs visible to an application. ZDO provides a set of fully compliant ZigBee Device Object APIs, which enable main network management functionality (for example, start, reset, formation, join). ZDO also implements ZigBee Device Profile commands, including Device Discovery and Service Discovery. Task, power and configuration manager There are three service 'planes', including task manager, configuration manager, and power manager. These services are available to the user application, and may also be utilized by lower stack layers. The task manager is the stack component which mediates the use of the MCU among internal stack components and user application. The task manager utilizes a proprietary, priority, queue-based algorithm specifically tuned for a multilayer stack environment and the demands of time-critical network protocols. Power management routines are responsible for gracefully shutting down all stack components, saving the system state when preparing to sleep, and restoring system state when waking up. The configuration manager is used by the internal stack components and the user application to provide a common way to store and retrieve network parameters like the extended PAN ID and channel mask. HAL and BSP The hardware abstraction layer (HAL) includes a complete set of APIs for using on-module hardware resources (for example, EEPROM, sleep and watchdog timers) as well as the reference drivers for rapid design-in and smooth integration with a range of external peripherals (for example, IRQ, TWI, SPI, UART, 1-Wire®), where the hardware interface is supported by the platform. The board support package (BSP) includes a complete set of drivers for managing standard peripherals placed on different development boards. www.dresden-elektronik.de Page 38 of 66 User Manual Version 1.0 2013-02-28 deRFdevelopmentKit ZigBee 2.4 GHz Building the WSN Demo application The WSNDemo application is built with AVR-Studio. To start, open the AVR-Studio project file <BitCloud–root-directory>\Applications\WSNDemo\wsndemoapp.aps. BitCloud has many parameters to configure the stack. At first it is only necessary to adjust the unique ID of the node and its device type. To do so open the file configuration.h in the editor and adjust the following definitions: CS_UID to the MAC address of the node which can be found on the small label at the radio module. APP_DEVICE_TYPE choose between DEV_TYPE_COORDINATOR, DEV_TYPE_ROUTER or DEV_TYPE_ENDDEVICE. To build the application, choose 'Build/Rebuild All' in the main menu of AVR-Studio. To download the application to the target device, please refer to Section 6.2.1.6 . 6.2. Development tools A development tool chain consists of: An integrated development environment (for example Atmel AVR Studio® or Eclipse), where sample applications may be modified, compiled, and debugged, a corresponding compiler tool chain (for example AVRGCC or YAGARTO), which provides everything necessary to compile application source code into binary images, and a programming device (for example, JTAG), which may be used to program and debug the application on a target platform. Atmel AVR Studio 4 can be used to develop and debug applications for AVR-based platforms. In AVR Studio, each application has corresponding project files identified by the .aps extension. A project file contains the necessary information about build configuration. The Eclipse IDE can be used to develop and debug applications for almost any processor type. Due to Eclipse not being able to debug AVR processors using Atmel programmers dresden elektronik recommends the Eclipse IDE mainly for ARM based developments that is for the deRFarm7, deRFsam3 modules and deRFusb sticks. However, AVR developments can be carried out in Eclipse too but always need to be programmed using either a command line tool like avrdude or the already mentioned AVR Studio. For more details and how to work with the Eclipse IDE please refer to Section 6.2.2.5. www.dresden-elektronik.de Page 39 of 66 User Manual Version 1.0 2013-02-28 6.2.1. deRFdevelopmentKit ZigBee 2.4 GHz AVR development AVR development is often carried out in Atmel’s AVR Studio or the newer Atmel Studio. Both IDEs support AVR programmers and debuggers from Atmel and represent a full development environment for AVRs. However, AVR Studio 4 requires the installation of some AVR tool chain for compilation. dresden elektronik recommends the WinAVR tool chain. The newer Atmel Studio already includes the compiler and debugger for AVRs and can therefore be used as single installation development environment. For features and supported programmers please refer to Atmel’s homepage. Developing for different module types e.g. AVR and ARM switching the development environment can be cumbersome; dresden elektronik again recommends the Eclipse IDE for those situations despite the AVR debugging limitation. To get a deeper insight into the programming options for AVR and ARM devices, the required tools and processes please refer to [7]. 6.2.1.1. Setup IDE The AVR Studio is a free IDE from Atmel Corporation. To install it, follow these steps: 1. Run the AvrStudio419Setup.exe from the delivered CD (\3rdParty\Atmel) or download the latest version of AVR Studio 4 from the Atmel homepage (http://www.atmel.com/tools/studioarchive.aspx?tab=overview). Note: The newer Atmel Studio versions 5, 6 and above are not supported by dresden elektronik. Optionally the Eclipse IDE may be used in parallel or instead. Besides many other features, it supports syntax highlighting and tracking the calling hierarchy of functions/procedures which the AVR Studio 4 does not. 1. Download the Eclipse IDE for C/C++ Developers at www.eclipse.org/downloads. It comes as a ZIP archive. 2. Extract it to a directory of your choice. An installation is not required. www.dresden-elektronik.de Page 40 of 66 User Manual Version 1.0 2013-02-28 6.2.1.2. deRFdevelopmentKit ZigBee 2.4 GHz Tool chain setup for AVR-based MCUs This section describes the tool chain setup for AVR-based MCUs required for compiling and debugging. The different dresden elektronik products use the following MCUs: ATmega1281 (RCBs) ATmega2561 (RCBs) ATmega128RFA1 (RCB 6.3, deRFmega128 modules) To install the WinAVR GNU compiler (version 2010/01/10) please start the installer from the delivered CD (3rdParty\WinAVR). This provides the GNU compiler collection tool chain (GCC version 4.3.3) as well as any other required utilities like make or rm (remove, by UNIX). 6.2.1.3. Suggested programmers for AVR-based microcontrollers dresden elektronik suggests to use one of the following programmer devices: Figure 32: AVR JTAGICE mkII Figure 33: AVR Dragon Notes: 1. Even if there are many other programmers on the market, they are not listed above since they are unsupported. 2. JTAG Programmers for ARM devices cannot be used to program AVR devices and vice versa. 3. A programmer is not contained in any development kit. It has to be purchased separately. www.dresden-elektronik.de Page 41 of 66 User Manual Version 1.0 2013-02-28 deRFdevelopmentKit ZigBee 2.4 GHz Figure 34: Pinout for 10pin AVR JTAG header 6.2.1.4. Connecting the target To program a device, the programmer must be connected to the respective JTAG header and the target needs to be powered. On the different dresden elektronik products, several JTAG programming headers are available: 10-pin AVR-JTAG header, 10-pin AVR-JTAG mini header (pin-compatible), Note: Not all boards (e.g. RCBs, deRFmodules) have a JTAG header. In those cases an additional board may be required for providing this header (e.g. Sensor Terminal Board, deRFnode, deRFbreakout Board). Figure 35: AVR JTAGICE mkII connected to deRFmega128 plugged onto a deRFnode Note: The blue cable is not required for programming. It connects to a dresden elektronik USB level shifter stick to a PC for serial debug output. Although not required, a trace (debug output) connection is largely helpful for any embedded development. www.dresden-elektronik.de Page 42 of 66 User Manual Version 1.0 2013-02-28 6.2.1.5. deRFdevelopmentKit ZigBee 2.4 GHz Open a project in AVR Studio To open a project with AVR Studio, the according *.aps file has to be opened. This can be done by simply double-clicking on it. The following pictures show the AVR Studio views for the different steps using the WSN demo application as an example. The project files are shown in the project explorer and a build process can be started from the ‘Build’ menu of the AVR Studio - choose ‘Build | Rebuild All’. Figure 36: Rebuilding the project 6.2.1.6. Downloading the application In the next step the device and AVR-Studio have to be prepared for downloading and debugging. The AVR-Studio has to be told the kind of programmer and AVR device: Figure 37: Preparing the connection to the AVR programmer www.dresden-elektronik.de Page 43 of 66 User Manual Version 1.0 2013-02-28 deRFdevelopmentKit ZigBee 2.4 GHz Figure 38: Choosing programmer and kind of connection Figure 39: Choosing device and programming method (JTAG) www.dresden-elektronik.de Page 44 of 66 User Manual Version 1.0 2013-02-28 deRFdevelopmentKit ZigBee 2.4 GHz Under the 'Input Hex File' field you can choose the program file for the device. Figure 40: Choose programming file Note: If programming fails, ensure device and programmer are powered as well as device drivers have been installed properly. Also check if the JTAG connector is connected in the right direction. Subsequently some important so called 'fuses' of the AVR device have to be set. The fuses are configuration options and determine the way the AVR is generating its CPU clock, getting its program memory contents and so on. The fuse settings can differ for each application, so please refer to the applicationReadme.txt for the correct fuse settings. Attention: Do not experiment with the fuses as you might destroy important information on the target (e.g. erase the EEPROM content by disabling the EESAVE fuse) or even lock yourself out from any further programming actions (e.g. disabling the JTAGEN fuse). The fuse settings in the following picture are only applicable for the BitCloud WSN Demo application. www.dresden-elektronik.de Page 45 of 66 User Manual Version 1.0 2013-02-28 deRFdevelopmentKit ZigBee 2.4 GHz Figure 41: Important settings on Fuses tab Chose all necessary fuses in the window and press the button 'Program' to set the fuses in the AVR device. After the fuses are programmed, verification is recommended. This can be done automatically by checking the ‘Verify after programming’ option. If activated (as in Figure 41) the 'reading fuses .. 0xE2, 0x91, 0xFE .. OK!' informs of the successfully programmed fuses. If you do not intend to debug you application the programming is finished and you application will start each time you power up the device. If you need to debug you application, the programming step can be omitted, since the AVR Studio can do this – and by default does – as the first part of the debugging session. 6.2.1.7. Debugging the application The selection of the programmer and target device is usually only necessary once. To do this, follow the pictures below: www.dresden-elektronik.de Page 46 of 66 User Manual Version 1.0 2013-02-28 deRFdevelopmentKit ZigBee 2.4 GHz Figure 42: Preparing JTAG programming and debugging Figure 43: Choosing device and debugging platform Please make sure that you have selected the ‘Open platform options next time debug mode is entered’ option before pressing ‘Finish’. Otherwise the dialog as described in Figure 45 and Figure 46 will not appear and you might lose important information while programming the device. www.dresden-elektronik.de Page 47 of 66 User Manual Version 1.0 2013-02-28 deRFdevelopmentKit ZigBee 2.4 GHz Once device, platform and programming options are chosen you can start another debug session by simply selecting the Debug | Start Debugging menu entry. Figure 44: Start debugging Set the AVR CPU speed in the Connection tab: Figure 45: Important JTAG programmer settings: AVR CPU speed www.dresden-elektronik.de Page 48 of 66 User Manual Version 1.0 2013-02-28 deRFdevelopmentKit ZigBee 2.4 GHz Then set the 'Preserve EEPROM contents' on the Debug tab: Figure 46: Important JTAG programmer settings: Preserve EEPROM contents Figure 47 shows the appearance of AVR Studio at the beginning of a debug session with the target halted at the program entry main. Figure 47: AVR Studio debug stop at application entry To run the application either use ‘Go’ or single step through the different code functions. www.dresden-elektronik.de Page 49 of 66 User Manual Version 1.0 2013-02-28 6.2.1.8. deRFdevelopmentKit ZigBee 2.4 GHz Basic Troubleshooting In case of any operational problem with your setup, please check the following: 1. Check the power first, and make sure that all of your equipment is properly connected. 2. Verify that the PC conforms to the minimum system requirements. 3. Verify that the PC USB or UART interface is working and that the correct drivers are installed. 4. Check that you have set up the hardware according to specific kit instructions. 5. Make sure you have programmed the right images and set the correct fuse values. Resetting the node may be required. www.dresden-elektronik.de Page 50 of 66 User Manual Version 1.0 2013-02-28 6.2.2. deRFdevelopmentKit ZigBee 2.4 GHz ARM development Developing custom applications and debugging them requires an appropriate IDE. The Eclipse IDE is recommended. Further on compiler and supplementary tools are needed. Finally an appropriate programmer has to be chosen. How to work with the Eclipse IDE together with more information about the other prerequisites is described in the following sections. 6.2.2.1. Setup IDE The Eclipse IDE setup is quite simple and involves the following steps: 1. Download the Eclipse IDE for C/C++ Developers at www.eclipse.org/downloads. It comes as a ZIP archive. 2. Simply extract it to a directory of your desire. An installation is not required. Debug Plugin Debugging is an optional feature. If required and when working with the Eclipse IDE, it is recommended to install the Zylin plugin. 1. Change to the eclipse extract path, start eclipse.exe by double-clicking. 2. Go to the 'Help' Menu, select 'Install New Software ... '. 3. Click the 'Add' button, enter the URL http://www.zylin.com/zylincdt in the location field, assign a name and confirm the dialog with 'OK'. 4. In the parent window, enable the checkbox for 'Zylin Embedded CDT', continue with a click to 'Next'. After a dependency check the download will start. 5. Wait until the download completes, then accept the license conditions and confirm the security warning. 6. Wait until the installer completes. 7. Confirm to restart the IDE for applying changes. The second step is to install an application which interfaces the Eclipse IDE with the debugger/programmer. In this case, it is required to download and to install the Segger Tools. Flash Tool Uploading the firmware to the target requires additional software. When using the SAM-ICE programmer as suggested, SAM-BA is required. The latest version can be downloaded without registration here. Afterwards start the installer and follow the given instructions. www.dresden-elektronik.de Page 51 of 66 User Manual Version 1.0 2013-02-28 6.2.2.2. deRFdevelopmentKit ZigBee 2.4 GHz Tool chain setup for ARM-based MCUs The following section describes how the tool chain has to be set up that is required for (re-)compiling and debugging firmware for the following microcontrollers. ARM7S ARM7X Cortex M3 ('SAM3') Due to licensing issues it is not possible to redistribute all needed tools on the current CD. Missing components must be downloaded directly from their producer. Compiler/Supplementary Tools To set up the arm-none-eabi based YAGARTO GNU ARM tool chain (version 2011/03/28); please start the installer directly from the delivered CD. It can be found in the directory ’3rdParty\Yagarto’. The tool chain consists of the following parts: Binutils-2.20.1 Newlib-1.19.0 GCC-4.6.0 GDB-7.2 It is also recommended to install the YAGARTO Tools. This installer is also available on the delivered CD in the directory ‘3rdParty\Yagarto’. The YAGARTO tools provide typical UNIX-like commands such as make, sh, touch, uname and more. 6.2.2.3. Suggested programmer for ARM-based microcontrollers dresden elektronik suggests to use the following programmer device: Figure 48: Atmel SAM-ICE The proposed device enables programming of firmware files as well as debugging applications. www.dresden-elektronik.de Page 52 of 66 User Manual Version 1.0 2013-02-28 deRFdevelopmentKit ZigBee 2.4 GHz Notes: 1. Even if there are many other programmers on the market, they are not listed above since they are unsupported. 2. JTAG Programmers for ARM devices may not be used to program AVR devices and vice versa. 3. A programmer is not contained in any development kit. It has to be purchased separately. 4. For programming deRFusb radio dongles, a SAM-ICE adapter may additionally be required. 5. Some SAM3-based deRFusb radio dongles do NOT have a JTAG connector soldered. In this case, JTAG programming/debugging requires the connector to be soldered manually. Pure firmware programming may be done over the USB interface. Figure 49: Pinout for 20pin ARM JTAG header 6.2.2.4. Connecting the target To program a device, the programmer must be connected to the respective JTAG header and the target needs to be powered. On the different dresden elektronik products, several JTAG programming headers are available: 10-pin combined JTAG/Debug header, 20-pin ARM-JTAG header Note: Not all boards (e.g. deRFmodules) have a JTAG header. In those cases an additional board may be required for providing this header (e.g. deRFnode, deRFgateway, deRFbreakout board). www.dresden-elektronik.de Page 53 of 66 User Manual Version 1.0 2013-02-28 deRFdevelopmentKit ZigBee 2.4 GHz Figure 50: SAM-ICE connected with deRFarm7 plugged onto a deRFgateway Note: The blue cable is not required for programming. It connects to a dresden elektronik USB level shifter stick to a PC for serial debug output. Although not required, a trace (debug output) connection is largely helpful for any embedded development. to PC SAM-ICE programmer to PC SAM-ICE adapter USB radio stick Figure 51: USB radio stick with SAM-ICE adapter and programmer More technical background is given in [7]; it describes in detail how to change the firmware on SAM3S based USB sticks from dresden elektronik. www.dresden-elektronik.de Page 54 of 66 User Manual Version 1.0 2013-02-28 6.2.2.5. deRFdevelopmentKit ZigBee 2.4 GHz Importing a project into Eclipse Setting up the Eclipse IDE is described in Section 6.2.2.1. Setting up the tool chain for ARMbased MCUs is described in Section 6.2.2.2. This section describes how to import a package such as the MAC stack into the Eclipse workspace. This import requires the following steps: 1. Choose a workspace. 2. Create a new project. 3. Import the MAC stack into the workspace. 4. Create build rules. 5. Compile the application. In the next parts of this section each step is described in more detail. After unpacking the Eclipse IDE and starting it for the first time a workspace location has to be chosen. If you check the ‘Use this as the default and do not ask again’ option this dialog will not appear again but you still can switch workspaces via the Eclipse menu commands. Open the Eclipse IDE. Choose a workspace directory. Figure 52: Workspace Launcher To create a new project either use the File menu or right click into the Project Explorer ‘New Project | C Project’and chose in the following dialog ‘Makefile Project | Empty Project | -Other Toolchain – ‘. Create a new project. www.dresden-elektronik.de Page 55 of 66 User Manual Version 1.0 2013-02-28 deRFdevelopmentKit ZigBee 2.4 GHz Figure 53: New C project Assign any project name such as 'MAC_Stack'. Check 'Use default location' to create the new directory in your previously chosen workspace. Choose 'Makefile Project' as Project type. Select '-- Other Toolchain --'. Click 'Finish' to create the empty project. Figure 54: configuration as described above www.dresden-elektronik.de Page 56 of 66 User Manual Version 1.0 2013-02-28 deRFdevelopmentKit ZigBee 2.4 GHz Import the Atmel MAC stack by clicking 'File | Import'. Figure 55: Import files into the project Choose 'File System' as import source. Figure 56: Choose the import source for the files www.dresden-elektronik.de Page 57 of 66 User Manual Version 1.0 2013-02-28 deRFdevelopmentKit ZigBee 2.4 GHz In the 'Next' dialogue click on 'Browse...'. Select the path to the MAC stack <MAC-root-directory>. Press Finish to import the source files to your local workspace. Figure 57: Select the folder that contains the source files you want to import www.dresden-elektronik.de Page 58 of 66 User Manual Version 1.0 2013-02-28 deRFdevelopmentKit ZigBee 2.4 GHz In the next step the actual binary will be built. Create a new make target by switching to the 'Make Target' view (which is on the right hand side of the Eclipse view). Browse to the application you want to build for example the ‘Simple Sensor Network’ which can be found for ARM under Applications | MAC_Examples | Basic_Sensor_Network | AT86RF231_AT91SAM7X512_deRFarm7_25X00_deRFgateway_1XXX2 Browse to the folder 'GCC' (there is the Makefiles located). Figure 58: Switch to 'Make Target' View and locate your application Right click on 'GCC' folder and select 'New...'. Within new dialog type "all" to field 'Target name'. Repeat previous step with Target name ‘clean’. www.dresden-elektronik.de Page 59 of 66 User Manual Version 1.0 2013-02-28 deRFdevelopmentKit ZigBee 2.4 GHz Figure 59: Target name 'all' and 'clean' Double-click on 'all' to build the project. During the build process you can see in the console which projects are being compiled and linked and how large they are. Figure 60: Finished ARM build process www.dresden-elektronik.de Page 60 of 66 User Manual Version 1.0 2013-02-28 deRFdevelopmentKit ZigBee 2.4 GHz The build process is the same either for ARM and AVR processors. The 'make' program is doing all the build magic; you just need a properly installed AVR and/or ARM tool chain. To build another application just locate to the corresponding 'GCC' folder, generate 'all' and 'clean' target and double-click 'all'. The 'clean' target deletes the binaries and objects generated. With the build successfully done you are now ready for downloading the application to your target. www.dresden-elektronik.de Page 61 of 66 User Manual Version 1.0 2013-02-28 7. deRFdevelopmentKit ZigBee 2.4 GHz Analyzer The analyzer variants of the deRFusb-23E00 or deRFusb-13E00USB radio sticks are optimally matched for Perytons professional network and protocol analysis software or Luxoft’s free Bitcatcher. 7.1. Perytons Analyzer The USB radio stick in the dresden elektronik development kit ZigBee 2.4 GHz is already programmed with a firmware for the Perytons analyzer. To get the free 30-day trial it is necessary to click onto Perytons website; http://www.perytons.com/downloads Here it is required to enter the contact information (email address, name, phone number and organization) and press 'SUBMIT'. A link to the download will then be sent to your email address. With the valid 30-day trial license you can monitor network structures as well as observe data flows and runtime performance in detail without additional effort. Especially during the development phase this protocol analysis software will serve as an essential and valuable tool. Compared to other analyzer tools the dresden elektronik USB radio stick facilitates synchronous sniffing of all 16 channels. The analyzer is operating with an accuracy of 1 µs. Time view Network view Statistics chart Packets can be added per drag & drop Message view (functional analysis) Message tree view (detailed analysis) Hex packet data Figure 61: GUI analyzer overview www.dresden-elektronik.de Page 62 of 66 User Manual Version 1.0 2013-02-28 deRFdevelopmentKit ZigBee 2.4 GHz The analyzer software of Perytons supports a number of standard protocols such as for example ZigBee, ZigBee RF4CE, 6LoWPAN/ZigBeeIP, IEEE 802.15.4 MAC or proprietary protocols. For more information about the analyzer GUI please refer to the Perytons™ Protocol Analyzer Overview [11]. All three Perytons software versions are supported for the IEEE 802.15.4 radio range: Version Peryton-S Peryton-D Peryton-M Description Single-channel analyzer Like S with antenna diversity Multi-channel analyzer Number of required USB sticks 1 2 Channels + 1 Start the Perytons Analyzer via the Start menu ‘Perytons | Perytons’. Figure 62: Starting the analyzer In the appearing capture dialog choose the ‘dresden elektronik 2.4GHz’ as dongle type. Then do the following steps: 1. Select the channel. 2. Set up the protocol (e.g. ZigBee Pro). 3. Start the session by pressing ‘Start (Real-Time)’. www.dresden-elektronik.de Page 63 of 66 User Manual Version 1.0 2013-02-28 deRFdevelopmentKit ZigBee 2.4 GHz Perytons evaluation version 4.0 includes: The Perytons-M4 Analyzer - Evaluation version 4.0 (50Mbyte) for IEEE 802.15.4 - 2006, ZigBee Home Automation (HA), ZigBee Commercial Building Automation (CBA), ZigBee Smart Energy (SE), ZigBee Telecom Application (TA), ZigBee Health Care (HC), ZigBee RF4CE (GDP, ZRC, ZID, Z3D), ZigBee Light Link (ZLL), ZigBee Retail (ZRS), ZigBee IP and 6LoWPAN. Support of a variety of off-the-shelf Hardware vendors for 2.4 GHz and sub-GHz capture. Sample capture files. Help files and User Manual. A free 30-days license. 7.2. BitCatcher Alternatively available for network and protocol analysis are the deRFusb23E00 and deRFusb13E00 USB radio sticks. These analyzer variants are optimally matched for Luxoft´s easy-to-use network and protocol analysis software 'BitCatcher'. BitCatcher allows for monitoring complex network structures as well as observe data flows and runtime performance in detail. The analyzer sticks are appropriate for the sub and 2.4 GHz frequency range as a single-channel sniffer; the software operates with an accuracy of 1 µs. The BitCatcher comes with the preloaded wireless protocol descriptions for IEEE 802.15.4 MAC, ZigBee PRO, ZigBee Smart Energy, and ZigBee Light Link and proprietary applications. The BitCatcher network analyzer software package is available for free download at www.luxoft.com/bitcatcher. BitCatcher runs on both Windows and Linux operating systems, supports multiple 802.15.4 frequency bands, and features auto key-type detection for easy management of security keys. Drivers are included in the package. www.dresden-elektronik.de Page 64 of 66 User Manual Version 1.0 2013-02-28 deRFdevelopmentKit ZigBee 2.4 GHz 8. Revision notes Up to now for the individual components of the deRFdevelopmentKit technical problems, malfunctions or any other critical issues are not known. Concerning software packages and applications, also possible restrictions, comments or hints are given within this document. 9. [1] References ZigBee Alliance http://www.zigbee.org/Specifications/ZigBee/NetworkTopology.aspx [2] Datasheet: Radio modules deRFmega128-22A00|22C00 [3] User Manual: Radio Modules: deRFmega128-22A0x-22C0x-BHB-en.pdf [4] Datasheet: deRFnode-2TNP2.pdf [5] User Manual: deRFnode_deRFgateway-BHB-en.pdf [6] Datasheet: deRFusb-23E00_JTAG.pdf [7] User Manual: deRFsoftware_Programming_Manual-BHB-en.pdf [8] User Manual: USB Radio Sticks: deRFusb-BHB-en.pdf [9] Atmel AVR2033: SAM-ICE Adapter - Hardware User Manual [10] Atmel AVR2052: Atmel BitCloud Quick Start Guide [11] Perytons™ Protocol Analyzer Overview http://www.perytons.com/files/PerytonsAnalyzerOverview.pdf www.dresden-elektronik.de Page 65 of 66 User Manual Version 1.0 2013-02-28 deRFdevelopmentKit ZigBee 2.4 GHz dresden elektronik ingenieurtechnik gmbh Enno-Heidebroek-Straße 12 01237 Dresden GERMANY Phone +49 351 - 31850 0 Fax +49 351 - 31850 10 Email [email protected] Trademarks and acknowledgements IEEE 802.15.4™ is a trademark of the Institute of Electrical and Electronics Engineers (IEEE). ZigBee is a registered trademark of the ZigBee Alliance. Atmel Atmel logo and combinations thereof, AVR™, ARM™ and BitCloud trademarks or trademarks of Atmel Corporation or its subsidiaries. Perytons™ is a trademark of the Perytons Ltd. Windows and others are registered trademarks or trademarks of Microsoft Corporation in U.S. and or other countries. ® ® ® are registered ® All trademarks are registered by their respective owners in certain countries only. Other brands and their products are trademarks or registered trademarks of their respective holders and should be noted as such. Disclaimer This note is provided as-is and is subject to change without notice. Except to the extent prohibited by law, dresden elektronik ingenieurtechnik gmbh makes no express or implied warranty of any kind with regard to this guide, and specifically disclaims the implied warranties and conditions of merchantability and fitness for a particular purpose. dresden elektronik ingenieurtechnik gmbh shall not be liable for any errors or incidental or consequential damage in connection with the furnishing, performance or use of this guide. No part of this publication may be reproduced, stored in a retrieval system, or transmitted in any form or any means electronic or mechanical, including photocopying and recording, for any purpose other than the purchaser’s personal use, without the written permission of dresden elektronik ingenieurtechnik gmbh. Copyright © 2013 dresden elektronik ingenieurtechnik gmbh. All rights reserved. www.dresden-elektronik.de Page 66 of 66


