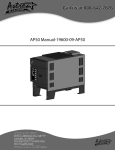
1
Guide to Operation
Satellite XT R Version
Including Options:
Extractive Module XT
Pyrolyzer Module XT
Table of Contents
Section 1 1.1..............
1.2...............
1.2.1 ............
1.2.2 ............
1.2.3 ............
1.2.4 ............
1.3...............
1.3.1 ............
1.3.2 ............
1.3.3 ............
1.4...............
1.4.1 ............
1.4.2 ............
1.5...............
Basic Operation
Page
Principle of Operation .................................................................................1-1
Operating States ....................................................................................... 1-1
Monitoring Mode ........................................................................................1-1
Maintenance Mode .....................................................................................1-2
Warning Condition ......................................................................................1-2
Diagnostics .................................................................................................1-2
Menu structure............................................................................................1-2
Maintenance Menu .....................................................................................1-2
Calibration Menu.........................................................................................1-2
Configuration Menu ....................................................................................1-2
Operational Elements .................................................................................1-3
Keypad Functions.......................................................................................1-3
Graphic Display ..........................................................................................1-3
Technical Specifications .............................................................................1-4
Section 2 2.1...............
2.2...............
2.3...............
2.3.1 ............
2.3.2 ............
2.4...............
2.5...............
Installation and Start-up
General Guidelines.....................................................................................2-1
Standard Mounting .....................................................................................2-1
Duct Mounting.............................................................................................2-3
Connecting the Sensor Extension to the Instrument ..................................2-3
Mounting the Sensor Extension to the Duct ...............................................2-4
Wiring..........................................................................................................2-5
Initial Start-Up .............................................................................................2-7
Section 3 3.1...............
3.2...............
3.3...............
3.4...............
3.5...............
Main Menu
The Main Menu Screens.............................................................................3-1
Main Menu - Monitoring..............................................................................3-2
Main Menu - Maintenance ..........................................................................3-3
Main Menu - Calibration..............................................................................3-4
Main Menu - Configuration .........................................................................3-5
Section 4
4.1...............
4.2...............
4.3...............
4.4...............
4.5...............
4.6...............
4.7...............
Mantenimiento
Sensor Service ...........................................................................................4-3
Alarm Reset................................................................................................4-4
Alarm/Warn Test......................................................................................... 4-4
Device Infos ................................................................................................4-5
Sensor Infos................................................................................................4-6
Reset Device ..............................................................................................4-8
Service........................................................................................................4-8
Section 5 Calibration
5.1..............
Gas Calibration ...........................................................................................5-2
5.1.1 ............ Zero Adjust .................................................................................................5-2
5.1.2 ............ Span Adjust ................................................................................................5-3
5.2............... Manual K-Factor .........................................................................................5-4
Satellite XT R Version
toc-1
Table of Contents
Section 6 Configuration
Page
6.1............... Alarm Settings ............................................................................................6-3
6.1.1 ............ Alarm 1 .......................................................................................................6-4
6.1.2 ............ Alarm 2 .......................................................................................................6-7
6.2...............Language....................................................................................................6-8
6.3............... Date Format................................................................................................6-8
6.4............... Auto Selftest .............................................................................................. 6-9
6.5...............Security........................................................................................................6-9
6.6............... Password................................................................................................... 6-10
6.7............... Location .....................................................................................................6-10
6.8............... New Sensor Type ...................................................................................... 6-11
6.9............... Gas Name.................................................................................................. 6-11
6.10............. Relays........................................................................................................6-12
Section 7 7.1...............
7.1.1 ............
7.1.2 ............
Troubleshooting
Warning and Fault Messages......................................................................7-1
Warnings......................................................................................................7-1
Faults ..........................................................................................................7-2
Section 8 8.1...............
8.2...............
Reference Information
Sensor Order Information ...........................................................................8-1
Spares and Accessories............................................................................. 8-3
Section 9 9.1...............
9.2...............
9.3...............
9.4...............
9.5...............
9.6...............
9.7...............
9.8...............
Extractive Module XT - Option
Principle of Operation .................................................................................9-1
General Instructions....................................................................................9-1
Safety Instructions ......................................................................................9-1
Instrument Design.......................................................................................9-2
Mounting.....................................................................................................9-4
Tubing Connections....................................................................................9-4
Sensor Replacement ..................................................................................9-5
Technical Specifications .............................................................................9-6
Section 10 10.1.............
10.2.............
10.3.............
10.4.............
10.5.............
10.6.............
10.7.............
10.8.............
10.9.............
Pyrolyzer Module XT - Option
Principle of Operation ............................................................................... 10-1
General Instructions................................................................................... 10-1
Safety Instructions .....................................................................................10-1
Instrument Design...................................................................................... 10-2
Mounting....................................................................................................10-3
Tubing Connections................................................................................... 10-4
Data Link.................................................................................................... 10-4
Power Connection ..................................................................................... 10-4
Technical specifications............................................................................. 10-5
Satellite XT R Version
toc-2
Basic Operation - Section 1
This section provides a basic understanding of the instrument and its operation.
1.1 Principle of Operation
The Satellite XT R Version is a generic gas monitoring instrument for the detection of a wide
range ofhazardous gases. Power is supplied by a local 12 to 24 VDC power supply.
Target gas and measuring range depend on the type of sensor chosen. The sensor comes with
the specific data in its internal data memory.
The Satellite XT R Version provides 3 single-pole single-throw relays for activation of external
alarm devices. If the gas concentration exceeds the alarm levels, the instrument will activate
the appropriate alarm relay and display an according message. A relay will also be activated in
case of an instrument fault.
1.2
Operating States
There are four different operating states for the Satellite XT, Monitoring Mode, Maintenance
Mode, Warning Condition, and Diagnostics. Depending on the selected operating state, the
green status LED is either on, off, or flashing.
1.2.1 Monitoring Mode
The Monitoring Mode is the instrument’s standard operating mode. In the Monitoring Mode,
the instrument continuously monitors for hazardous gas concentrations and checks for alarm
levels and instrument faults.
The instrument’s self-diagnostics provides on-line preventive maintenance information identifying electronics or sensor problems, e.g. a sensor selftest is performed every 24 hours.
The green LED located above the <set> key is on.
The settings for Alarm Level 1 and Alarm Level 2 are automatically loaded when installing the
sensor. Standard settings are 1x and 2x TLV (Threshold Limit Value) for the target gas. The
Alarm Setup function in the Configuration Menu allows the user to change the alarm levels
according to their specific requirements.
Whenever the concentration of the target gas exceeds the factory or user programmed alarm
levels, the instrument will document this concentration alarm condition on its LCD Display and
trigger the associated alarm relays.
1.2.1.1 Reset Alarms Function
Ex factory, Alarm 1 and Alarm 2 are preprogrammed “enabled” and “latching”. In the event of a
concentration alarm, the alarm indication with latching alarms will continue until the alarm is
manually acknowledged by pressing the <set> key. Alarm Reset is not possible, if the alarm
condition is still present.
1.2.1.2 Exiting the Monitoring Mode
Exiting the Monitoring Mode and entering the Maintenance Mode may be password protected.
To prevent the instrument from manipulations by unauthorized personnel, it is recommended to
enable this function (see Configuration Menu / Security Function).
- Password enabled:
Press the <esc> key to exit the Monitoring Mode and enter the password. The screen to enter
the password is shown for one minute. During this period the Monitoring Mode remains active
in the background. When the correct password has been entered, the instrument is in the
Maintenance Mode, it is not monitoring, and the green LED is off.
- Password disabled:
Press the <esc> key to exit the Monitoring Mode. The instrument is now in the Maintenance
Mode, the instrument is not monitoring, and the green LED is off.
Satellite XT R Version
1-1
Basic Operation - Section 1
1.2.2
Maintenance Mode
The Maintenance Mode indicates a complete absence of monitoring capability. The green status
LED is off. Depending on the configuration the fault relay will be activated.
1.2.3
Warning Condition
A warning condition indicates that the instrument requires some attention, but the instrument is still
able to monitor and operate as programmed.
The following will occur when the instrument detects a warning condition:
- the green status LED is flashing
- depending on the configuration the fault relay will be activated.
1.2.3.1 Reset Warning Condition
Press the <set> key to acknowledge and reset a Warning Condition.
Refer to Section 7, Troubleshooting for specific warnings.
1.2.4Diagnostics
Instrument faults refer to a problem which prevents the instrument from operating properly and
interferes with the ability to monitor or document concentration alarms.
If the instrument has detected an instrument fault, the fault relay is activated. The green status LED
is off. The LCD display is flashing while indicating the specific fault message.
The instrument lists specific instrument responses to instrument faults. For information on the
various fault messages and instructions on how to correct a fault condition, please refer to
Section 7, Troubleshooting.
1.3
Menu structure
Besides the Monitoring Mode, there is also menu operation for the Satellite XT. Menu operation
comprises three groups of functions, maintenance, calibration, and configuration. A password
(if enabled) must be entered to exit the Monitoring Mode and to obtain access to the Main Menu.
1.3.1
Maintenance Menu
This function covers the realtime service procedures required for a regular maintenance of the
instrument (e.g. sensor replacement).
1.3.2
Calibration Menu
Use the calibration function to dynamically calibrate the instrument with a known concentration of
the target gas or manually by entering a new correction K-Factor.
1.3.3
Configuration Menu
Use this function to configure the Satellite XT and to program instrument and monitoring
parameters to suit individual requirements.
! Note:
If the instrument was in the Monitoring Mode when last powered down,
it will automatically return to the Monitoring Mode when power is restored.
Satellite XT R Version
1-2
Basic Operation - Section 1
1.4
Operational Elements
Located at the front of the instrument is the
graphic display, the keypad consisting of six
keys, and above the Set Key the green status
LED.
1.4.1
o
o
o
Keypad Functions
Escape Key <esc>
Set Key <set>
4 Cursor Keys marked with an arrow,
<up>, <down>, <left>, <right>.
In the Maintenance, Calibration, and Configuration Menu, these keys provide the following functions:
To move forwards and backwards in the menus, use the cursor keys <down> and <up>. Select a
function by pressing the <set> key.
To enter text or figures, use the cursor keys <left> and <right> to reach the desired cursor position.
Use the cursor keys <up> and <down> to select the letter, figure, or sign you wish to enter. Bring the
cursor to the next position, select the next letter, figure, or sign. After entering the complete text, use
the <set> key to confirm the changes. If you do not want to save the changes, abort by pressing the
<esc> key.
1.4.2
Graphic Display
Line 1
Line 2
Line 3
Depending on the operating mode the structure of the graphic display is different. Three
basic versions are illustrated and explained below. A detailed description is given in the
according sections.
Display Structure for Monitoring Mode
Line 1 offers the possibility to enter a user specific description, e.g. monitoring location
(max. 13 spaces; the name of the instrument is entered here when delivered).
Line 2 shows the name of the gas monitored.
Line 3 indicates the actual gas concentration and the concentration unit. Gas name and
concentration unit are data stored in the memory of the sensor installed.
Display Structure for Menu
Line 1
Línea
1
Line 2
Línea
2
MENU
MA I N T E N A N C E
se l ec t :
2
o f
4
Line 3
Línea
3
MA I N T ENANCE
S E N S OR S E R V I C E
se l ec t :
1
o f
7
Line 1 shows the actual position in the menu. In the left example the actual position is
Main Menu, in the right example it is the Sub-Menu Maintenance.
Line 2 shows one of the selection possibilities.
Line 3 shows the number of the selection possibility presently displayed and indicates also
the total of selection possibilities available in this menu.
Satellite XT R Version
1-3
Basic Operation - Section 1
1.5
Technical Specifications
Power Requirements
voltage
12 - 24 VDC (18 VDC minimum when using the Extractive Module)
consumption
Max. 1.4 W
Wiring
power
2-wire shielded cable 2x0.5 mm2 / 20.4 AWG
(approx. 2 m delivered with instrument)
relay contacts
6-wire shielded cable 6x0.25 mm2 / 23 AWG
(approx. 3 m delivered with instrument)
Relay Outputs
contacts
3 x SPST (single-pole single-throw)
max. ratings
250 VAC / 30 VDC, 2 A
Graphic Display
122 x 32 dots with backlight
Status LED
Green
Keypad
6 touch-sensitive membrane function keys
Physical Dimensions
size
145 x 95 x 50 mm (L x W x H)
5.7” x 3.7” x 2.0” (L x W x H)
weight
620 grams
22 ounces
Mounting
special mounting plate
(delivered with instrument)
Housing Protection Class
IP 52 option: IP 65
EMC Directive 2004/108/EC
EN 50270
Operating Conditions
temperature
-20 °C ... +40 °C
-4 °F ... +104 °F
pressure
700 ... 1300 hPa
humidity
20 ... 90 % r.h.
Part Number
Satellite XT R
9602-0505
Satellite XT R, IP 65 9612-0505
Satellite XT R Version
1-4
Installation and Start-Up - Section 2
This section explains installation and initial start-up procedures.
2.1
General Guidelines
Installation and Start-Up - Section 2
Please consider the aspects indicated below before locating the instrument.
This
explains
installation
and initial
start-up
procedures.
Thesection
property
of the target
gas (lighter
or heavier
than
air) must be considered. The
instrument should be mounted as close to the monitoring location as possible and should
be easily accessible for operation and maintenance. For narrow monitoring locations or
2.1 General Guidelines
duct mounting a sensor extension with a standard length of 2m (6 feet) is available as an
option.
Please consider the aspects indicated below before locating the instrument.
optimum
position
toheavier
mountthan
the air)
instrument
is in an upright position on a flat surface.
The propertyThe
of the
target gas
(lighter or
must be considered.
The instrument
should
be mounted
as close
the monitoring
location asensure
possiblethat
and the
should
be easily
If the
instrument
is used
for to
ambient
air monitoring,
sensor
is facing accessible for
operation
and
maintenance.
For
narrow
monitoring
locations
or
duct
mounting
a
downwards. For personal monitoring applications the instrument shouldsensor
be mounted at
extension with a standard length of 2m (6 feet) is available as an option.
head level.
The optimum position to mount the instrument is in an upright position on a flat surface. If the instrument
monitoring,
ensure
that the sensor
is facing the
downwards.
For personal
monitoring
is used for ambient
Ensureairthat
the area
immediately
surrounding
instrument
is free from
objects that
applications the instrument should be mounted at head level.
might hinder free flow of air. The instrument should be installed away from any possible
area
immediately
surrounding
the instrument
is free
from
objects
might hinder
free rain and
Ensure that the
liquid
sources,
extreme
dust and
dirt sources
and
should
bethat
protected
against
instrument
be installed
away
from any possible
extreme
dust andapplications.
flow of air. The
sunlight.
An should
instrument
version
protection
class IPliquid
65 issources,
available
for outdoor
dirt sources and should be protected against rain and sunlight. An instrument version protection class
for outdoor applications.
IP 65 is available
A junction
box is recommended to connect the instrument to external control systems.
is recommended
the instrument
to external control systems. A distance of 2 m
A junction box
A distance
of 2 mto(6connect
feet) must
not be exceeded.
(6 feet) must not be exceeded.
Regarding the
Regarding
the power
requirements
and operating
conditions,
please follow
thein
power requirements
and
operating conditions,
please follow
the specifications
indicated
Specifications,
for wiring
instructions
refer to Section
2, Wiring. for wiring instructions refer
Section 1, Technical
specifications
indicated
in Section
1, Technical
Specifications,
The sensorsto
Section
2, Wiring.
should
be stored
in a cool, dry place when not in use.
The sensors should be stored in a cool, dry place when not in use.
2.2 2.2
Standard Standard
MountingMounting
The instrument is designed for DIN–rail mounting. The mounting rail standard shipped with each
The instrument is designed for DIN–rail mounting. The mounting rail standard shipped with
instrument is used for wall mounting. Mount the DIN–rail to a wall and fasten the instrument with the
each instrument
is used
sensor downwards
and the display
facingfor
thewall
front.mounting. Mount the DIN–rail to a wall and fasten the
instrument with the sensor downwards and the display facing the front.
Attach the wires to the junction box according to the wiring diagram provided in the course of this
section.
Attach the wires to the junction box according to the wiring diagram provided in the course
of this section.
7,5
35,0
90,0
Mounting rail standard (P/N 9602.0050.10.03)
Mounting rail standard (P/N 9602.0050.10.03)
Satellite XT R Version
Satellite XT R Version
2-1
2-1
Installation and Start-Up - Section 2
For applications where wall mounting is not possible, an L-shaped mounting plate with DIN–rail is
available as an option.
Optional L-shaped mounting plate with DIN–rail (P/N 9602.0051.10.02)
! Note:
Do not apply power until system is ready for start-up!
Satellite XT R Version
2-2
Installation and Start-Up - Section 2
2.3
Duct Mounting
Observe the guidelines for installation of the instrument. For assembly and installation of
the sensor extension see the schematics below and overleaf.
2.3.1
Connecting the Sensor Extension to the Instrument
1. Connect the Socket (A) to the plug in the sensor compartment located at the bottom of
the Satellite XT. The groove of the Socket must face to the front.
2. Screw in the Internal Cap (B) and fasten it hand-tight.
3. Insert the Sensor Housing (C) with the nose of the Bayonet Catch facing to the front.
Lock the Bayonet Catch with a quarter-turn right.
A
1
B
2
A Socket with Groove
C
3
B Internal Cap
C Sensor Housing with Bayonet Catch
D Extension Cable to the Sensor
D
Satellite XT R Version
2-3
Installation and Start-Up - Section 2
2.3.2
Mounting the Sensor Extension to the Duct
Duct
Duct
5,2cm
*) Duct Mounting Saddle Assembly various types
available, see spare parts list, Section 8,
Reference Information
0,4cm
0,4cm
3,3cm
1
M
ille
d
N
ut
0.
40
tM
.0
0
ou
Si
nt
lic
in
g
on
Sa
Se
dd
al
le
in
g
*)
2,6cm
4.
00
.0
uc
99
02
D
99
02
.0
40
.0
08
2,6cm
Satellite XT
Sensor
Sensor Extension
Duct
Satellite XT
Satellite XT R Version
2-4
Installation and Start-Up - Section 2
2.4Wiring
There are two permanently attached cables extending
from the bottom of the instrument, a 2-wire shielded
cable with a length of 2 meters and a 6wire shielded cable with a length of 3 meters.
The 2-wire shielded cable is required to power the
instrument. The open end of the cable should be
terminated in a junction box.
The 6-wire shielded cable provides a pair of
connections for each of the 3 internal relays for
activation of visual or audible external alarm devices.
Power Supply Connections
P+
White
Power +
P–
Brown
Power -
S
Shield
cable shield
Relay Contacts
1
White
Alarm 1 Relay
1
Brown
Alarm 1 Relay
2
Green
Alarm 2 Relay
2
Yellow
Alarm 2 Relay
3
Grey
Fault Relay
3
Pink
Fault Relay
S
Shield
Cable shield
Note:
All wiring for the Satellite XT and its related equipment must be in compliance with any local
electrical and fire codes. The Satellite XT wiring must be kept away from any high power lines.
All shielding for the wiring must be connected together and grounded at only one point in the
system.
Satellite XT R Version
2-5
Installation and Start-Up - Section 2
Satellite XT R
Junction Box
6-wire shielded cable
3 m provided with instrument
2-wire shielded cable
2 m provided with instrument
Junction Box
230 / 115 VAC
Power Supply
24 VDC
2-wire shielded cable
2-wire shielded cable
to additional control devices
Wiring Diagram Satellite XT R - Basic Configuration
Satellite XT R Version
2-6
Installation and Start-Up - Section 2
2.5
Initial Start-Up
When wiring is completed, a sensor must be assigned to each instrument. Every sensor is
gas calibrated and these sensor specific calibration parameters are stored in its integrated
data memory. Make sure to use only sensors designed for use with the Satellite XT.
Ex factory the instruments are shipped either unconfigured or already preconfigured
according to the customer’s specifications.
If the instruments are preconfigured, a certain sensor, which can be identified by its serial
number printed on the packaging and the sensor label, is assigned and documented to
one particular instrument. These data are stated in the test certificate provided with the
shipment.
Switch on power supply. If no sensor is fitted, the display of the instrument shows the
below message.
- - - - FAUL T - - - NO S E N S OR !
For applications without sensor extension open the bayonet catch of the sensor housing
located on bottom of the instrument with a quarter-turn left and remove the sensor housing.
For applications with sensor extension hold the plastic fitting at the duct side with two fingers
and unscrew the metal fitting.
Take the assigned sensor out of the packaging. Remove shorting strap or wire link placed in
the sensor plug before inserting it into the instrument. Not all sensors will feature this strap or
link.
Caution: Failure to remove the shorting strap or wire link may result in damage to
the Satellite.
For applications without sensor extension insert the sensor into the instrument’s sensor
compartment with the arrow printed on the sensor label facing upwards and to the front. Fit
sensor housing by fastening the bayonet catch with a quarter-turn right.
For applications with sensor extension insert the sensor into the socket inside the metal
fitting, properly aligning notch, groove, and arrow printed on the sensor label.
A sensor warm-up is performed and the graphic display shows the according screen until the
displayed value is zero.
This does not apply for oxygen sensors. The warm-up time required depends on the type of
sensor installed. The instrument is in the Maintenance Mode and the green LED is off.
As soon as the displayed value reads zero, the instrument automatically switches to the
Monitoring Mode. The graphic display shows the according screen, the green status LED
is on, the instrument is monitoring.
! Note:
If the instrument does not perform as described above and a fault message is
shown, please refer to Section 7, Troubleshooting.
! Instruments with OXYGEN sensors:
Span Adjustment must be performed prior to start-up. It is recommended to repeat
Span Adjustment every 4 to 6 weeks. For details refer to Section 5, Calibration.
Satellite XT R Version
2-7
Installation and Start-Up - Section 2
Satellite XT R Version
2-8
Main Menu - Section 3
This section explains the different monitoring conditions and the Sub-Menus available
under the Main Menu.
3.1
The Main Menu Screens
When the <esc> key is pressed, the instrument will leave the Monitoring Mode and go
to the Main Menu. The instrument is now in the Maintenance Mode and the green LED
is off.
Press the cursor keys <up> or <down> to move forwards and backwards in the Main
Menu.
Press the <set> key to select a Sub-Menu. Press the <esc> key to go back to the Main
Menu.
To return to the Monitoring Mode, go to the menu ‘MONITORING’ and press <set> to
select. The display shows the monitoring screen again and the illuminated green LED
indicates, that the instrument is in the Monitoring Mode.
MENU
MON I T OR I NG
se l ec t :
1
Monitoring Mode
of
4
MENU
MA I N T E N A N C E
se l ec t :
2
Sub-Menus
of
4
MENU
C A L I B R A T I ON
se l ec t :
3
Sub-Menus
of
4
MENU
CON F I GU R A T I ON
se l ec t :
Satellite XT R Version
4
of
Sub-Menus
4
3-1
Main Menu - Section 3
Main Menu - Monitoring
The instrument is in the operating mode
Maintenance and the green LED is off.
Press the cursor keys <up> or <down> to move
forwards and backwards in the Main Menu.
Press the <set> key to enter the Monitoring Mode.
<Normal Condition>
This screen and the illuminated green LED indicate
that the instrument is in the Monitoring Mode and is
operating properly.
<Alarm 1 Condition>
This screen shows that Alarm Level 1 has
been exceeded and that there is an actual gas
concentration of 0.07 ppm AsH3.
(f.i. Alarm 1 set at 0.05 ppm AsH3)
<Alarm 2 Condition>
This screen shows that Alarm Level 2 has been
exceeded and that there is an actual gas concentration
of 0.12 ppm AsH3.
(f.i. Alarm 2 set at 0.10 ppm AsH3)
Satellite XT R Version
3-2
Main Menu - Section 3
Main Menu - Maintenance
The instrument is in the Maintenance Mode and the
green LED is off.
Press the cursor keys <up> or <down> to move
forwards and backwards in the Main Menu.
To select a Sub-Menu, press the <set> key to enter.
MENU
MA I N T E N A N C E
se l ec t :
2
of
4
Sub-Menus - Maintenance
Sensor Service
screen 1 of 7
MA I N T ENANCE
S E N S OR S E R V I C E
se l ec t :
1
of
7
Alarm Reset
screen 2 of 7
MA I N T ENANCE
A L A RM R E S E T
se l ec t :
2
of
7
MA I N T ENANCE
A L A RM / WA R N T E S T
se l ec t :
3
of
7
Device Infos
screen 4 of 7
MA I N T ENANCE
DEV I CE I NFOS
se l ec t :
4
of
7
Sensor Infos
screen 5 of 7
MA I N T ENANCE
S E N S OR I N F O S
se l ec t :
5
of
7
Reset Device
screen 6 of 7
MA I N T ENANCE
RESET DEV I CE
se l ec t :
6
of
7
Service
screen 7 of 7
MA I N T ENANCE
SERV I CE
se l ec t :
Satellite XT R Version
Alarm/Warn Test
screen 3 of 7
7
of
7
3-3
Main Menu - Section 3
Main Menu - Calibration
The instrument is in the Maintenance Mode and
the green LED is off. Press the cursor keys <up> or
<down> to move forwards and backwards in the Main
Menu.
To select a Sub-Menu, press the <set> key to enter.
MENU
C A L I B R A T I ON
se l ec t :
3
of
4
Sub menus - Calibration
Gas Calibration
screen 1 of 2
CA L I BRA T I ON
G A S C A L I B R A T I ON
se l ec t :
1
of
2
CA L I BRA T I ON
MA N U A L K - F A C T OR
se l ec t :
Satellite XT R Version
2
of
Manual K-Factor
screen 2 of 2
2
3-4
Main Menu - Section 3
Main Menu - Configuration
The instrument is in the Maintenance Mode and the
green LED is off.
Press the cursor keys <up> or <down> to move
forwards and backwards in the Main Menu.
To select a Sub-Menu, press the <set> key to enter.
MENU
CON F I GU R A T I ON
se l ec t :
4
of
4
Sub Menus - Configuration
CON F I GURA T I ON
A L A RM S E T T I NG S
se l ec t :
1
of
10
Language
screen 2 of 10
CON F I GURA T I ON
L A NGU A G E
se l ec t :
2
of
10
Date Format
screen 3 of 10
CON F I GURA T I ON
D A T E F ORMA T
se l ec t :
3
of
10
Auto Selftest
screen 4 of 10
CON F I GURA T I ON
AUTO SE L F TEST
se l ec t :
4
of
10
se l ec t :
5
of
10
Password
screen 6 of 10
CON F I GURA T I ON
P A S SWOR D
se l ec t :
6
! This function is not available with instruments
using oxygen sensors.
Security
screen 5 of 10
CON F I GURA T I ON
SECUR I T Y
Alarm Settings
screen 1 of 10
of
10
continued
Continued
Satellite XT R Version
3-5
Main Menu - Section 3
Main Menu - Configuration
continued
Continued
Sub menus - Configuration
Location
screen 7 of 10
CON F I GURA T I ON
L OC A T I ON
se l ec t :
7
of
10
CON F I GURA T I ON
N EW S E N S OR T Y P E
se l ec t :
8
of
10
Gas Name
screen 9 of 10
CON F I GURA T I ON
G A S N AME
se l ec t :
9
of
10
Relays
screen 10 of 10
CON F I GURA T I ON
RE L AYS
se l ec t :
Satellite XT R Version
10
New Sensor Type
screen 8 of 10
of
10
3-6
Maintenance - Section 4
This section explains routine maintenance procedures including
sensor replacement and specific information on sensor and instrument.
Main Menu - Maintenance
The instrument is in the Maintenance Mode and the
green LED is off. Actuate the cursor keys <up> or
<down> to move forwards and backwards in the Main
Menu. To select a submenu, actuate the <set> key to
enter.
MENU
MA I N T E N A N C E
se l ec t :
2
of
4
Sub menus - Maintenance
Sensor Service
screen 1 of 7
MA I N T ENANCE
S E N S OR S E R V I C E
se l ec t :
1
of
7
Alarm Reset
screen 2 of 7
MA I N T ENANCE
A L A RM R E S E T
se l ec t :
2
of
7
MA I N T ENANCE
A L A RM / WA R N T E S T
se l ec t :
3
of
7
MA I N T ENANCE
DEV I CE I NFOS
se l ec t :
4
Device Infos
screen 4 of 7
of
7
Sensor Infos
screen 5 of 7
MA I N T ENANCE
S E N S OR I N F O S
se l ec t :
5
Alarm / Warn Test
screen 3 of 7
of
7
Continued
continued
Satellite XT R Version
4-1
Maintenance - Section 4
Main Menu - Maintenance
continued
Continued
Submenus - Maintenance
Reset Device
screen 6 of 7
MA I N T ENANCE
RESET DEV I CE
se l ec t :
6
of
7
Service
screen 7 of 7
MA I N T ENANCE
SERV I CE
se l ec t :
Satellite XT R Version
7
of
7
4-2
Mantenimiento - Sección 4
Sensor Service
To perform a sensor replacement with a new sensor,
which must have the same part number; see section
8 for Sensor Information. Use the <set> key to enter
and follow the dialogue displayed at the bottom line
of the screen. When the instrument has finished the
sensor service procedure, it will automatically enter
the Monitoring Mode.
Remove Sensor
Remove the sensor presently installed and actuate the
<set> key to proceed.
Replacement
Insert the new sensor and actuate the <set> key to
continue.
Load New Data ?
If you want the data of the new sensor to be loaded,
confirm this by actuating the <set> key.
Loading Data !
The new data are now loaded from the sensor into the
instrument’s internal memory.
<Sensor Warm-Up Condition>
A sensor warm-up is performed and this screen is
shown until the displayed value is zero.
This does not apply for oxygen sensors.
The warm-up time required depends on the type of
sensor.
<Normal Monitoring Condition>
The instrument will automatically switch to the
Monitoring Mode when the sensor service procedure
is finished.
Satellite XT R Version
4-3
Maintenance - Section 4
Alarm Reset
Alarm Reset allows the user to reset the alarm
indication of latched alarms. Use the <set> key to
enter and follow the dialogue displayed at the bottom
of the screen. Actuate the <esc> key to exit.
MA I N T ENANCE
A L A RM R E S E T
se l ec t :
2
of
7
Alarms Off ?
Actuate the <set> key to cofirm the reset of alarm
indication with latching alarm. For non-latching alarms,
alarm indication will be reset automatically.
A L A RM R E S E T
A L A RMS O F F ?
<se t >
to
con f i rm
Alarm/Warn Test
Used to verify the alarm function of any associated
external device by simulating an Alarm 1, Alarm 2, and
warning condition. Use the <set> key to select or use
the cursor keys <up> and <down> to continue in the
menu.
MA I N T ENANCE
A L A RM / WA R N T E S T
se l ec t :
3
of
7
Set Alarm 1 ?
Allows the user to simulate an Alarm 1 condition.
Actuate the <set> key to enter.
A L A RM / WA R N T E S T
S E T A L A RM 1 ?
se l ec t :
SET
1
A L A RM 1
of
3
?
The Alam 1 Relay is activated.
Use the <esc> key to exit.
A l a rm 1 se t !
<es c>
t o ex i t
!
Set Alarm 2 ?
Allows the user to simulate an Alarm 2 condition.
Actuate the<set> key to enter.
A L A RM / WA R N T E S T
S E T A L A RM 2 ?
se l ec t :
SET
A L A RM 2
2
of
?
A l a rm 2 se t !
<es c>
t o ex i t
Alarm 1 set !
3
The Alam 2 Relay is activated.
Use the <esc> key to exit.
Alarm 2 set !
!
continued
Continuación
Satellite XT R Version
4-4
Maintenance - Section 4
continued
Continued
Set Warning ?
Allows the user to simulate a warning condition.
Actuate the <set> key to enter.
A L A RM / WA R N T E S T
S E T WA R N I NG ?
se l ec t :
3
of
3
Warning set !
The Fault Relay is activated, depending on the
configuration. Use the <esc> key to exit.
S E T WA R N I N G ?
Wa r n i n g s e t !
<es c>
t o ex i t
!
Device Infos
Used to obtain instrument specific information, i.e.
software version and ID number. In general these
informations are required for service purposes.
Actuate the <set> key to select and move with the
cursor keys <up> and <down>. Actuate the <esc>
key to exit.
MA I N T ENANCE
DEV I CE I NFOS
se l ec t :
DEV I CE
4
of
7
SW : S X T _ X x . x x
DEV I CE
<Actual Software Version>
The version of the software presently installed is
shown.
I NFOS
s h ow i n g :
1
of
2
I NFOS
ID: 000123456789
s h ow i n g :
2
of
Alarm/Warn Test
<Specific Identification Number>
The instrument’s specific ID identification number is
shown.
2
! Note:
Whenever a new sensor is installed, the K-factor
will automatically revert to the default value 1.00.
Any individual settings must be entered again;
refer to section 5, Calibration.
Satellite XT R Version
4-5
Maintenance - Section 4
Sensor Infos
Provides specific information about the sensor
presently installed, i.e. part number, serial number,
date of first calibration, sensitivity, and revision number.
These data are stored in the sensor’s memory. Actuate
the <set> key to select or use the cursor keys <up>
and <down> to continue in the menu.
MA I N T ENANCE
S E N S OR I N F O S
se l ec t :
5
S ENSOR
of
7
Part number
Actuate the <set> key to display the part number of the
sensor presently installed.
I NFOS
P A R T N UMB E R
se l ec t :
1
of
5
<Actual Sensor Part Number>
Use this information to order replacement sensors.
Additional order information is provided in Section 8,
Sensor Order Information. Actuate <esc> to leave.
P A R T N UMB E R
9602 - 6000
<es c>
t o ex i t
S ENSOR
!
S E R I A L N UMB E R
se l ec t :
SER I A L
<es c>
Serial Number
Actuate the <set> key to display the serial number of
the sensor presently installed.
I NFOS
2
of
5
<Actual Sensor Serial Number>
This information may be required for service purposes.
Actuate the <esc> key to leave.
N UMB E R
31
t o ex i t
S ENSOR
!
I NFOS
1 s t C A L I B R A T I ON
se l ec t :
1s t
3
of
CA L I BRA T I ON
27 . 09 . 2006
<es c>
t o ex i t
!
First Calibration
Use the <set> key to display the date when the
installed sensor was calibrated for the first time.
5
<Date of First Calibration>
This information may be required for service purposes
and to check the age of the sensor. Actuate <esc> to
leave.
continued
Continued
Satellite XT R Version
4-6
Maintenance - Section 4
Sensor Infos
continued
Continued
S ENSOR
Sensitivity
Use the <set> key to display the sensor sensitivity
determined during the first calibration.
I NFOS
SENS I T I V I TY
se l ec t :
4
of
5
<Actual Sensitivity>
This information may be required for service purposes.
Actuate the <esc> key to leave.
SENS I T I V I TY
<es c>
1 2 3 n A / p pm
t o ex i t
S ENSOR
!
I NFOS
R E V I S I ON N UMB E R
se l ec t :
5
of
R E V I S I ON N UMB E R
0
<es c>
t o ex i t
Satellite XT R Version
Revision Number
Use the <set> key to display the revision number of the
gas related information stored in the sensor’s memory..
5
<Actual Revision Number>
This information may be required for service purposes.
Actuate the <esc> key to leave.
!
4-7
Maintenance - Section 4
Reset Device
Offers the possibility to perform a “warm start” of the
instrument.
Actuate the <set> key to select.
Are You Sure ?
This screen is to confirm that a software reset should
be performed. Actuate the <set> key to confirm or use
the <esc> key to exit.
<Sensor Warm-Up Condition>
A sensor warm-up is performed and this screen is
shown until the displayed value is zero, except for
Oxygen sensors.
The warm-up time depends on the type of sensor.
<Normal Monitoring Condition>
The instrument will automatically switch to the
Monitoring Mode when the sensor service procedure
is finished.
Service
This submenu is used exclusively by trained Service
Personnel.
The functions are password protected.
Satellite XT R Version
4-8
Calibration - Section 5
This section describes calibration procedures for the Satellite XT.
Calibration can be performed either automatically using a dynamic gas calibration
or manually by entering a calculated correction factor called K-factor.
Main Menu - Calibration
The instrument is in the Maintenance Mode and the
green LED is off. Actuate the cursor keys <up> or
<down> to move forwards and backwards in the Main
Menu. To select a submenu, actuate the <set> key to
enter.
MENU
C A L I B R A T I ON
se l ec t :
3
of
4
Sub menus - Calibration
CA L I BRA T I ON
G A S C A L I B R A T I ON
se l ec t :
1
of
2
CA L I BRA T I ON
MA N U A L K - F A C T OR
se l ec t :
2
of
Gas Calibration
screen 1 of 2
Manual K-Factor
screen 2 of 2
2
!Note:
If a high degree of accuracy in monitoring is required, monthly calibration with calibration gas
of a known concentration is recommended.
When performing a dynamic calibration, a new correction factor (K-factor) is calculated
automatically. The actual value can be displayed in the submenu Manual K-Factor.
Use appropriate safety precautions when handling toxic or corrosive gases and properly
vent, if possible.
! Instruments with OXYGEN sensors:
Span Adjustment must be performed prior to start-up. It is recommended to repeat Span
Adjustment every 4 to 6 weeks. For details refer to Section 5, Calibration.
Satellite XT R Version
5-1
Calibration - Section 5
Gas Calibration
The gas calibration submenu is used for dynamic
calibration. For zero adjustment use clean or synthetic
air free from measuring gas or any other interfering
gases. The sensor must be warmed-up before
calibration. For span adjustment it is recommended
to use test gas of a known concentration at or slightly
above the TLV for the target gas.
Always keep to the correct sequence, first perform
zero adjustment, then Span Adjustment.
CA L I BRA T I ON
G A S C A L I B R A T I ON
se l ec t :
1
of
2
GA S CA L I BRA T I ON
Z E RO A D J U S T
se l ec t :
1
of
Apply Air !
Apply clean or synthetic air to the sensor and actuate
the <set> key to continue.
Z ERO AD J US T
APPLY A I R !
use
c l ean a i r
!
Z ERO AD J US T
0 . 0 1 p pm
Va l u e
s t ab l e ?
Z ERO AD J US T
0 . 0 0 p pm
Va l u e o . k .
<se t >
to
<Actual Zero Point>
Allow the zero reading to stabilize. If the reading is
already zero, zero adjustment is not necessary. Actuate
the <esc> key to exit. If the reading is not zero, actuate
the <set> key to re-adjust the zero point and to continue
the procedure.
<Re-adjusted Zero Point>
The reading is zero. Actuate the <set> key to proceed.
?
Z ERO AD J US T
SAVE ?
2
Zero Adjust
Zero adjustment applies for all sensors except oxygen
sensors.
Use the <set> key to enter and follow the dialogue
displayed.
Save ?
Actuate the <set> key to save the new zero point and
store it in the unit’s internal memory.
con f i r m
Continued
continued
Satellite XT R Version
5-2
Calibration - Section 5
Gas Calibration (Calibración de gas)
continued
Continued
GA S CA L I BRA T I ON
SPAN AD J UST
se l ec t :
2
of
2
<Actual Calibration Gas>
The instrument shows which calibration gas is required for
the actual sensor type.
SPAN AD J UST
AsH3
i s
ca l i b r a t i on gas
!
SPAN AD J UST
0 . 0 5 p pm
en t e r
concen t r a t i on
SPAN AD J UST
APP L Y GAS !
use
ca l i b r a t i on gas !
SPAN AD J UST
0 . 0 4 p pm
Va l u e
s t ab l e ?
SPAN AD J UST
0 . 0 5 p pm
Va l u e o . k .
<se t >
to
<Actual Span Value>
Allow the reading to stabilize. If the reading matches the
concentration of the calibration gas, span adjustment is
not necessary. Actuate the <esc> key to exit. If the reading
does not match the concentration of the calibration gas,
actuate the <set> key to re-adjust the span value and to
continue the procedure.
<Re-adjusted Span Value>
The reading matches the concentration of the calibration
gas. Actuate the <set> key to proceed.
con f i r m
R EMO V E G A S !
saved
Satellite XT R Version
Apply Gas !
Place the calibration cap over the sensor and start the
calibration gas flow (18 l/h or 300 ccm/min). Actuate the
<set> key to continue.
Save ?
Actuate the <set> key to save the new span value and
store it in the unit’s internal memory.
SPAN AD J UST
Va l u e
<Actual Concentration for Calibration>
The recommended concentration for span adjustment
is displayed. Default value is TLV concentration for the
target gas. When using calibration gas of a different
concentration, change the value accordingly. After the new
value has been entered, actuate the <set> key to continue.
?
SPAN AD J UST
SAVE ?
Span Adjust
Span adjustment applies for all sensors, including oxygen
sensors. Use the <set> key to enter and follow the
dialogue displayed.
Remove Gas !
Stop the calibration gas flow. Remove gas and calibration
cap. Allow several minutes for the sensor to clear.
!
5-3
Calibration - Section 5
CA L I BRA T I ON
MA N U A L K - F A C T OR
se l ec t :
MANUA L
1. 00
2
of
2
K - F AC TOR
p l ease en t e r
!
Manual K-Factor
This submenu is used to manually calibrate the
instrument by entering a new K-factor. This factor is
a multiplication or correction value used to calibrate
the response of the instrument to a specific gas
concentration. The factory default K-Factor for all
gases is 1.00. Use the <set> key to enter. The
instrument will display the actual Kfactor.
< Actual K-Factor>
Use the cursor keys <left> or <right> to reach the
desired position. Use the cursor keys <up> and
<down> to select the figures you wish to enter. The
K-factor must be in the range of 0.20 and 5.00.
After a new value has been entered, actuate the <set>
key to confirm or <esc> to exit.
! Note:
Individual settings for the manual K-factor will automatically revert to the default value 1.00,
whenever the sensor is replaced by a new sensor.
Satellite XT R Version
5-4
Configuration - Section 6
This section describes the instrument’s default configuration
and procedures how to adapt it to individual requirements.
Main Menu - Configuration
The instrument is in the Maintenance Mode and the
green LED is off.
Press the cursor keys <up> or <down> to move forwards and backwards in the Main Menu.
To select a Sub-Menu, press the <set> key to enter.
MENU
CON F I GU R A T I ON
se l ec t :
4
o f
4
Sub menus - Configuration
CON F I GURA T I ON
A L A RM S E T T I NG S
se l ec t :
1
o f
13
Language
screen 2 of 10
CON F I GURA T I ON
L A NGU A G E
se l ec t :
2
o f
13
Date Format
screen 3 of 10
CON F I GURA T I ON
D A T E F ORMA T
se l ec t :
3
o f
13
Auto Selftest
screen 4 of 10
CON F I GURA T I ON
AUTO SE L F TEST
se l ec t :
4
o f
13
Security
screen 5 of 10
CON F I GURA T I ON
SECUR I T Y
se l ec t :
5
Alarm Settings
screen 1 of 10
o f
13
o f
13
CON F I GURA T I ON
P A S SWOR D
se l ec t :
6
Continued
continued
Satellite XT R Version
6-1
Configuration - Section 6
Main Menu - Configuration
continued
Continued
Sub menus - Configuration
Password
screen 6 of 10
CON F I GURA T I ON
P A S SWOR D
se l ec t :
6
of
10
Location (Ubicación)
screen 7 of 10
CON F I GURA T I ON
L OC A T I ON
se l ec t :
7
of
10
CON F I GURA T I ON
N EW S E N S OR T Y P E
se l ec t :
8
of
10
Gas Name
screen 9 of 10
CON F I GURA T I ON
G A S N AME
se l ec t :
9
of
10
Relays
screen 10 of 10
CON F I GURA T I ON
RE L AYS
se l ec t :
10
New Sensor Type
screen 8 of 10
of
10
! Note:
Individual settings for alarm levels and gas name will automatically revert to the factory
programmed settings, whenever a new sensor type with a part number different from the part
number of the sensor used before is installed.
Satellite XT R Version
6-2
Configuration - Section 6
CON F I GURA T I ON
Alarm Settings
Allows the user to enter or change various settings for
Alarm 1 and Alarm 2 activation.
Use the <set> key to enter.
A L A RM S E T T I NG S
se l ec t :
1
of
10
A L A RM S E T T I NG S
A L A RM 1
se l ec t :
1
of
2
A L A RM S E T T I NG S
A L A RM 2
se l ec t :
Satellite XT R Version
2
of
2
Alarm 1
For Alarm 1 settings, use the <set> key to enter or
continue in the menu with the cursor keys <up> or
<down>.
Alarm 2
For Alarm 2 settings, use the <set> key to enter or
continue in the menu with the cursor keys <up> or
<down>.
6-3
Configuration - Section 6
Alarm 1
Allows the user to configure all parameters for Alarm 1
(lower alarm level) activation.
A L A RM S E T T I NG S
A L A RM 1
se l ec t :
1
of
2
Alarm 1 state
Used to enable / disable the Alarm 1 activation.
A L A RM 1
A L A RM 1 S T A T E
se l ec t :
1
of
4
Alarm 1 Level
Used to set individual alarm levels for Alarm 1
activation.
A L A RM 1
A L A RM 1 L E V E L
se l ec t :
2
of
4
A L A RM 1
A L A RM 1 T R I GG E R
se l ec t :
3
of
4
A L A RM 1
A L A RM 1 L A T C H
se l ec t :
Satellite XT R Version
4
of
Alarm 1 Trigger
Used to define the trigger condition for Alarm 1
activation.
4
Alarm 1 Latch
Used to define the Alarm 1 activation to be latching or
non-latching.
6-4
Configuration - Section 6
Alarm 1 State
Used to enable / disable the Alarm 1 activation. Default
setting is enabled. Use the <set> key to enter.
The instrument will show the actual setting.
A L A RM 1
A L A RM 1 S T A T E
se l ec t :
A L A RM 1
1
of
STATE
D I SAB L ED
se l ec t :
A L A RM 1
4
1
of
Enabled
Allows the user to turn on the Alarm 1 activation. Press
the cursor keys <up> or <down> to change. Press the
<set> key to confirm or <esc> to exit.
STATE
ENAB L ED
se l ec t :
2
of
A L A RM 1
A L A RM 1 L E V E L
se l ec t :
A L A RM 1
2
of
LEVEL
0 . 0 5 p pm
p l ease en t e r
Satellite XT R Version
2
Disabled
Allows the user to turn off the Alarm 1 activation. Press
the cursor keys <up> or <down> to change. Press the
<set> key to confirm or <esc> to exit.
!
4
2
Alarm 1 Level
Used to set individual alarm levels for Alarm 1
activation. Default setting is 1 x TLV (Threshold Limit
Value) for the target gas. Press the <set> key to enter
and show the actual setting.
<Actual Alarm 1 Level>
To change the value, use the cursor keys <left> or
<right> to reach the desired position. Use the cursor
keys <up> and <down> to select the figures you wish to
enter. After the new value has been entered, press the
<set> key to confirm or <esc> to exit.
6-5
Configuration - Section 6
Alarm 1 Trigger
Used to define the trigger condition for Alarm 1
activation. Default setting is Greater Than. Use the
<set> key to enter. The instrument will show the actual
setting.
A L A RM 1
A L A RM 1 T R I GG E R
se l ec t :
3
of
A L A RM 1
T R I GG E R
se l ec t :
1
A L A RM 1
T R I GG E R
se l ec t :
2
4
GR E A T E R T H A N
L ESS THAN
of
of
2
2
se l ec t :
A L A RM 1
4
of
se l ec t :
A L A RM 1
Satellite XT R Version
When enabled, alarm reset must be done manually.
Non-latching alarms will be reset automatically, upon
correction of the alarm condition.
2
Disabled
Defines the Alarm 1 activation to be non-latching. Press
the cursor keys <up> or <down> to change. Press the
<set> key to confirm or <esc> to exit.
1
of
2
Enabled
Defines the Alarm 1 activation to be latching.
Press the cursor keys <up> or <down> to change.
Press the <set> key to confirm or <esc> to exit.
L A TCH
ENAB L ED
se l ec t :
4
L A TCH
D I SAB L ED
2
Less Than
Defines that an Alarm 1 condition will be indicated when
the actual gas concentration falls below the preset level
for Alarm 1.
Press the cursor keys <up> or <down> to change.
Press the <set> key to confirm or <esc> to exit..
Alarm 1 Latch
Used to define the Alarm 1 activation to be latching or
non-latching. Default setting is enabled. Use the <set>
key to enter. The instrument will show the actual setting.
A L A RM 1
A L A RM 1 L A T C H
Greater Than
Defines that an Alarm 1 condition will be indicated when
the actual gas concentration exceeds the preset level
for Alarm 1.
Press the cursor keys <up> or <down> to change.
Press the <set> key to confirm or <esc> to exit..
of
6-6
Configuration - Section 6
Alarm 2
Allows the user to configure all parameters for Alarm 2
(upper alarm level) activation.
For all subsequent Alarm 2 settings, please follow the
procedures described in the corresponding section for
Alarm 1 settings.
A L A RM S E T T I NG S
A L A RM 2
se l ec t :
2
of
2
Alarm 2 State
Used to enable / disable the Alarm 2 activation.
A L A RM 2
A L A RM 2 S T A T E
se l ec t :
1
of
4
Alarm 2 Level
Used to set individual alarm levels for Alarm 2
activation.
A L A RM 2
A L A RM 2 L E V E L
se l ec t :
2
of
4
A L A RM 2
A L A RM 2 T R I GG E R
se l ec t :
3
of
4
Alarm 2 Latch
Used to define the Alarm 2 activation to be latching or
non-latching.
A L A RM 2
A L A RM 2 L A T C H
se l ec t :
Satellite XT R Version
4
of
Alarm 2 Trigger
Used to define the trigger condition for Alarm 2
activation.
4
6-7
Configuration - Section 6
Language
Used to select the desired language for menu
operation. Default setting is English.
Use the <set> key to enter. The instrument will display
the actual language.
CON F I GURA T I ON
L A NGU A G E
se l ec t :
2
of
10
German
Press the cursor keys <up> or <down> to change.
Press the <set> key to confirm or <esc> to exit.
L ANGUAGE
G E RMA N
se l ec t :
1
of
2
English
Press the cursor keys <up> or <down> to change.
Press the <set> key to confirm or <esc> to exit.
L ANGUAGE
E NG L I S H
se l ec t :
2
of
2
Date Format
Used to define the format how to display the date
(only used in the Sub-Menu Sensor Infos, Date of First
Calibration). Default setting is International.
Use the <set> key to enter. The actual date format is
displayed.
CON F I GURA T I ON
D A T E F ORMA T
se l ec t :
DATE
3
of
10
F ORMA T
I N T E R N A T I ON A L
se l ec t :
DATE
USA
1
of
2
F ORMA T
se l ec t :
Satellite XT R Version
2
of
2
International
International date format is DD.MM.YYYY. Press the
cursor keys <up> or <down> to change. Press the
<set> key to confirm or <esc> to exit.
USA date format is MM-DD-YYYY
Press the cursor keys <up> or <down> to change.
Press the <set> key to confirm or <esc> to exit.
USA
6-8
Configuration - Section 6
Auto Selftest
The instrument’s self-diagnostics provides an on-line
preventive sensor selftest performed automatically
every 24 hours, which may be enabled or disabled.
Default setting is enabled.
Use the <set> key to enter. The display will show the
actual setting.
!The Auto Selftest function is not applicable for
Oxygen sensors.
CON F I GURA T I ON
AUTO SE L F TEST
se l ec t :
4
of
10
AUTO SE L F TEST
D I SAB L ED
se l ec t :
1
of
2
AUTO SE L F TEST
ENAB L ED
se l ec t :
2
of
2
SECUR I T Y
5
of
10
SECUR I T Y
P A S SWOR D ON
se l ec t :
1
of
2
SECUR I T Y
P A S SWOR D O F F
se l ec t :
Satellite XT R Version
2
of
Enabled
Allows the user to turn on the Auto Selftest.
Press the cursor keys <up> or <down> to change.
Press the <set> key to confirm or <esc> to exit.
Security
Exiting the Monitoring Mode and entering the
Maintenance Mode, may be password protected, to
prevent the instrument from manipulations
by unauthorized personnel.
Ex factory the password protection is disabled.
Use the <set> key to enter. The instruments shows the
actual setting.
CON F I GURA T I ON
se l ec t :
Disabled
Allows the user to turn off the Auto Selftest.
Press the cursor keys <up> or <down> to change.
Press the <set> key to confirm or <esc> to exit.
2
Password On
Allows the user to enable the password protection.
Press the cursor keys <up> or <down> to change.
Press the <set> key to confirm or <esc> to exit.
Password Off
Allows the user to disable the password protection.
Press the cursor keys <up> or <down> to change.
Press the <set> key to confirm or <esc> to exit..
6-9
Configuration - Section 6
CON F I GURA T I ON
P A S SWOR D
se l ec t :
6
of
10
<Actual Password>
To change the password, use the cursor keys <left> or
<right> to reach the desired position. Use the cursor
keys <up> and <down> to select the figures you wish to
enter. After the new password has been entered, press
the <set> key to confirm or <esc> to exit.
P A S S WO R D
000
p l ease en t e r
!
CON F I GURA T I ON
L OC A T I ON
se l ec t :
7
of
10
L OCA T I ON
Ga s Ca b i n e t
p l ease en t e r
Satellite XT R Version
!
Password
Allows the user to enter or change the password.
Ex factory the password is <000>.
Use the <set> key to enter. The instrument will display
the actual password.
Location
Allows the user to enter a desciption defining the
monitoring point. Ex factory it reads <Satellite XT>. Up to
13 alphanumeric characters can be entered.
Use the <set> key to enter. The instrument will display
the actual location.
<Actual Location>
Use the cursor keys <left> or <right> to reach the desired
position. Use the cursor keys <up> and <down> to select
the characters you wish to enter. When the new location
has been entered completely, press the <set> key to
confirm or <esc> to exit.
6-10
Configuration - Section 6
CON F I GURA T I ON
N EW S E N S OR T Y P E
se l ec t :
8
of
10
N EW S E N S O R T Y P E
R EMO V E S E N S OR
< s e t > wh e n
N EW S E N S OR
i nse r t
L O A D N EW D A T A ?
to
Load New Data ?
If you want the data of the new sensor to be loaded,
confirm this by pressing the <set> key.
!
N EW S E N S O R T Y P E
<se t >
Remove Sensor
Remove the sensor presently installed and press the
<set> key to proceed.
r eady
N EW S E N S O R T Y P E
p l ease
New Sensor Type
Allows the user to configure the instrument for a new
sensor type with a part number, which is different from
the one presently used. See Section 8 for Sensor
Information.
Press the <set> key to enter and follow the dialogue
displayed.
con f i rm
Loading Data !
The instrument is now loading the new data from the
sensor into the unit’s internal memory.
N EW S E N S O R T Y P E
L O A D I NG D A T A !
p l e a s e wa i t
!
CON F I GURA T I ON
G A S N AME
se l ec t :
9
of
10
GA S NAME
AsH3
p l ease en t e r
Satellite XT R Version
!
Gas Name
Allows the user to enter a different gas name than the
one stored in the sensor’s data memory.
Up to 7 alpha-numeric characters can be entered.
Use the <set> key to enter. The instrument will display
the actual gas name.
<Actual Gas Name>
Use the cursor keys <left> or <right> to reach
the desired position. Use the cursor keys <up>
and <down> to select the characters you wish to
enter. When the new gas name has been entered
completely, press the <set> key to confirm or
<esc> to exit.
6-11
Configuration - Section 6
Relays
Allows the user to enter or change various settings for
the internal relay contacts for Alarm 1, Alarm 2, and
Fault.
Use the <set> key to enter.
CON F I GURA T I ON
RE L AYS
se l ec t :
10
of
10
RE L AYS
RE L AY STATE
se l ec t :
1
of
3
RE L AYS
A L A RM D E L A Y
se l ec t :
2
of
3
RE L AYS
F A U L T T R I GG E R
se l ec t :
Satellite XT R Version
3
of
3
Relay State
Used to individually define the relays to be either
deenergized (normally open contact) or energized
(normally closed contact).
Use the <set> key to enter or continue in the menu with
the cursor keys <up> or <down>.
Alarm Delay
Used to set a delay for the relay activation in case of
concentration alarms.
Use the <set> key to enter or continue in the menu with
the cursor keys <up> or <down>.
Fault Trigger
Used to define the trigger conditions for activation of
the Fault Relay.
Use the <set> key to enter or continue in the menu
with the cursor keys <up> or <down>.
6-12
Configuration - Section 6
Relay State
Used to individually define the Alarm 1, Alarm 2, and
Fault Relay to be either deenergized (normally open
contact) or energized (normally closed contact).
Ex factory the relays are deenergized (normally open
contacts).
Use the <set> key to enter.
RE L AYS
RE L AY STATE
se l ec t :
1
of
3
RE L AY STATE
A L A RM 1 R E L A Y
se l ec t :
1
of
Allows to set the Alarm 1 Relay state.
3
RE L AY STATE
A L A RM 2 R E L A Y
se l ec t :
2
of
Allows to set the Alarm 2 Relay state.
se l ec t :
3
Allows to set the Fault Relay state.
of
A L A RM 1 R E L A Y
A L A RM 1
1
of
Alarm 1 Relay
Allows the user to set the Alarm 1 Relay state.
Use the <set> key to enter.
The instrument will show the actual setting.
3
RE L AY
D E E N E RG I Z E D / NO
se l ec t :
A L A RM 1
1
of
Satellite XT R Version
2
RE L AY
E N E RG I Z E D / N C
se l ec t :
2
of
Fault Relay
3
RE L AY STATE
se l ec t :
Alarm 2 Relay
3
RE L AY STATE
FAUL T RE L AY
Alarm 1 Relay
2
Deenergized / NO
Defines the Alarm 1 Relay to be deenergized
(normally open contact).
Press the cursor keys <up> or <down> to change.
Press the <set> key to confirm or <esc> to exit.
Energized / NC
Defines the Alarm 1 Relay to be energized (normally
closed contact).
Press the cursor keys <up> or <down> to change.
Press the <set> key to confirm or <esc> to exit.
6-13
Configuration - Section 6
Alarm 2 Relay
Allows the user to set the Alarm 2 Relay state.
Use the <set> key to enter.
The instrument will show the actual setting.
RE L AY STATE
A L A RM 2 R E L A Y
se l ec t :
A L A RM 2
2
of
3
RE L AY
D E E N E RG I Z E D / NO
se l ec t :
A L A RM 2
1
of
2
RE L AY
E N E RG I Z E D / N C
se l ec t :
2
of
2
RE L AY STATE
FAUL T RE L AY
se l ec t :
3
of
FAUL T RE L AY
se l ec t :
1
of
2
FAUL T RE L AY
E N E RG I Z E D / N C
se l ec t :
Satellite XT R Version
2
of
Energized / NC
Defines the Alarm 2 Relay to be energized (normally
closed contact).
Press the cursor keys <up> or <down> to change.
Press the <set> key to confirm or <esc> to exit.
Allows the user to set the Fault Relay state.
Use the <set> key to enter.
The instrument will show the actual setting.
3
D E E N E RG I Z E D / NO
Deenergized / NO
Defines the Alarm 2 Relay to be deenergized (normally
open contact).
Press the cursor keys <up> or <down> to change.
Press the <set> key to confirm or <esc> to exit.
2
Fault Relay
Deenergized / NO
Defines the Fault Relay to be deenergized (normally
open contact).
Press the cursor keys <up> or <down> to change.
Press the <set> key to confirm or <esc> to exit.
Energized / NC
Defines the Fault Relay to be energized (normally closed
contact).
Press the cursor keys <up> or <down> to change.
Press the <set> key to confirm or <esc> to exit.
6-14
Configuration - Section 6
Alarm Delay
Used to define an alarm delay for concentration alarms.
Minimum value is 0, maximum setting is 99.9 seconds.
Default setting is 3.0 seconds.
Press the <set> key to enter and show the actual setting.
RE L AYS
A L A RM D E L A Y
se l ec t :
2
of
3
<Actual Alarm Delay>
To change the value, use the cursor keys <left> or
<right> to reach the desired position.
Use the cursor keys <up> and <down> to select the
figures you wish to enter.
After the new value has been entered, press the <set>
key to confirm or <esc> to exit.
A L A RM D E L A Y
3.0 sec .
p l ease en t e r
!
3
Fault Trigger
Allows the user to define, which fault conditions will
activate the Fault Relay. Ex factory the setting is Fault
Only. Use the <set> key to enter.
The instrument will show the actual setting.
of
Fault Only
Used to configure the Fault Relay to be activated in case
of a fault condition only.
Press the cursor keys <up> or <down> to change.
Press the <set> key to confirm or <esc> to exit.
RE L AYS
F A U L T T R I GG E R
se l ec t :
FAUL T
3
of
T R I GG E R
F A U L T ON L Y
se l ec t :
FAUL T
1
T R I GG E R
F A U L T +WA R N I NG
se l ec t :
FAUL T
2
se l ec t :
ALL
4
3
of
4
T R I GG E R
se l ec t :
Satellite XT R Version
of
T R I GG E R
F A U L T + MA I N T
FAUL T
4
4
of
4
Fault + Warning
Used to configure the Fault Relay to be activated in case
of a fault or warning condition only.
Press the cursor keys <up> or <down> to change.
Press the <set> key to confirm or <esc> to exit.
Fault + Maintenance
Used to configure the Fault Relay to be activated in case
of a fault or maintenance condition only.
Press the cursor keys <up> or <down> to change.
Press the <set> key to confirm or <esc> to exit.
All
Used to configure the Fault Relay to be activated in case
of a fault, warning, or maintenance condition.
Press the cursor keys <up> or <down> to change.
Press the <set> key to confirm or <esc> to exit.
6-15
Configuration - Section 6
Satellite XT R Version
6-16
Troubleshooting - Section 7
This section will help to determine the source of a fault or
warning condition and will provide a corrective action.
7.1
Warning and Fault Messages
There are two general indications, warnings and faults, which require different attention.
If a fault or warning message does not appear in this section or if further assistance is
required, contact your MST Service Department.
7.1.1Warnings
A warning condition indicates that the instrument requires some attention, but the
instrument is still able to monitor and operate as programmed.
The following will occur when the instrument detects a warning condition:
- the green status LED is flashing
- depending on the configuration, the fault relay will be activated
Press the <set> key to acknowledge and reset a Warning Condition.
Low Zero !
This message indicates that the zero point of the sensor is out
of the optimum range.
To correct this problem, check the zero adjustment and
recalibrate, if necessary.
Check Sensor !
This message indicates that the sensor sensitivity does not
comply with the specifications.
The sensor must soon be replaced.
Whilst most sensors will work for another 2-6 weeks, there
are circumstances that may cause an earlier failure of the
sensor cell. Honeywell therefore suggests that customers with
more critical needs carry out the replacement of the sensor
cell within 3 days (72 hours) of receiving the “check sensor”
message.
To receive this message, the function Auto Selftest must be
enabled; refer to Section 6, Configuration.
! This function is not available for instruments with
oxygen sensor.
Satellite XT R Version
7-1
Troubleshooting - Section 7
7.1.2Faults
Instrument faults refer to a problem which prevents the instrument from operating properly
and interferes with the ability to monitor or document concentration alarms.
If the instrument has detected an instrument fault, the green status LED is off and the fault
relay is activated. The LCD display is flashing while indicating the specific fault message.
- - - - FAUL T - - - A D C NO T R E A D Y !
- - - - FAUL T - - - NO S E N S OR !
- - - - FAUL T - - - WR ON G S E N S OR !
- - - - FAUL T - - - R E P L A C E S E N S OR !
Fault - ADC Not Ready !
This indicates that there is a problem with the internal
electronics. The AD Converter has failed.
Switch power supply for this unit off and on again. If the
instrument still shows this message, switch off power supply
for this unit and contact MST for further instructions.
Fault - No Sensor !
This message indicates that no sensor is inserted or that
a sensor type not suitable for the Satellite XT is used. To
eliminate the problem, insert the correct sensor.
Fault - Wrong Sensor !
This message indicates that the sensor installed is not the
sensor assigned to this particular instrument.
To correct the problem, insert the sensor assigned and
documented to this instrument. The data are stated in the test
certificate provided with the shipment.
Fault - Replace Sensor !
This message indicates that the sensor presently installed is
depleted (the warning CHECK SENSOR ! has been ignored).
To correct the problem, replace the old sensor immediately.
! This function is not available for instruments with
oxygen sensor.
Satellite XT R Version
7-2
Troubleshooting - Section 7
- - - - FAUL T - - - EXTRACT I VE !
Fault - Extractive !
Only for instruments with Extractive Module.
This message indicates that there is a problem with the
Extractive Module. Check power supply, sample tubing,
sample tubing connections, and sample line filter. Perform
any corrective action required.
If the message is still shown, please contact our service
department for further instructions.
- - - - FAUL T - - - P Y RO L Y Z E R !
Fault - Pyrolyzer !
Only for instruments with Pyrolyzer Module.
This message indicates that there is a problem with the
Pyrolyzer Module.
Please contact our service department for further instructions.
Satellite XT R Version
7-3
Troubleshooting - Section 7
Satellite XT R Version
7-4
Reference Information - Section 8
8.1
Sensor Order Information
Substance / Sensor
AsH3
Arsine (3 El.)
Part No.
sensor
9602-6001
Nominal
Range
0 ... 1.00
Unit
ppm
Note
Dust Filter
allowed
yes
AsH3
Arsine (2 El.)
9602-6004
0 ...
1.00
ppm
1)
AsH3
Arsine (2 El.)
9602-6002
0 ...
10.0
ppm
1)
B2H6
Diborane
9602-6202
0 ...
1.00
ppm
yes
Br2
Bromine
9602-6800
0 ...
5.00
ppm
No
yes
yes
C4F6
Hexafluorobutadiene
9602-9732
0 ...
50.0
ppm
3)
no data
C5F8
Octafluorocyclopentene
9602-9730
0 ...
20.0
ppm
3)
no data
3)
no data
CH3F
Methyl Fluoride
9602-9720
0 ...
0.500
% vol.
Cl2
Chlorine
9602-5300
0 ...
5.00
ppm
yes
ClF3
Chlorine Trifluoride
9602-7410
0 ...
1.00
ppm
No
ClO2
Chlorine Dioxide
9602-7400
0 ...
1.00
ppm
No
CO
Carbon Monoxide
9602-5400
0 ...
500
ppm
yes
COCl2
Phosgene
9602-6600
0 ...
1.00
ppm
yes
DCE 1,2 Di-chloro-ethylene 1,2
9602-9600
0 ...
1000
ppm
C2H4O
Ethylene Oxide
9602-8000
0 ...
20.0
ppm
3)
no data
no data
F2
Fluorine
9602-6400
0 ...
5.00
ppm
No
F2
Fluorine
9602-6401
0 ...
30
ppm
No
GeH4
Germane
9602-6902
0 ...
5.0
ppm
yes
H2
Hydrogen (1%)
9602-5100
0 ...
1.000
% vol.
H2
Hydrogen (4 %)
9602-5101
0 ...
4.00
% vol.
H2S
Hydrogen Sulfide
9602-5200
0 ...
100
ppm
H2S
Hydrogen Sulfide (org.)
9602-5201
0 ...
30.0
ppm
yes
2)
yes
1)
yes
yes
H2Se
Hydrogen Selenide
9602-5601
0 ...
5.00
ppm
HBr
Hydrogen Bromide
9602-7000
0 ...
30.0
ppm
No
No
HCl
Hydrogen Chloride
9602-5800
0 ...
30.0
ppm
No
HCN
Hydrogen Cyanide
9602-5700
0 ...
30.0
ppm
No
HF
Hydrogen Fluoride
9602-6500
0 ...
10.0
ppm
No
HMDS
Hexamethyldisilazane
9602-6714
0 ...
500
ppm
yes
HMDS
Hexamethyldisilazane
9602-6715
0 ...
0.500
% vol.
yes
N2H4
Hydrazine
9602-7600
0 ...
1.00
ppm
NF3
Nitrogen Trifluoride
9602-9700
0 ...
50.0
ppm
NH3
Ammonia (100 ppm)
9602-6704
0 ...
100
ppm
NH3
Ammonia (1000 ppm)
9602-6705
0 ...
1000
ppm
yes
3)
no data
No
2)
No
NO
Nitric Oxide
9602-7200
0 ...
250
ppm
yes
NO2
Nitrogen Dioxide
9602-7300
0 ...
25.0
ppm
yes
O2
Oxygen
9602-5500
0 ...
25.0
% vol.
yes
O3
Ozone
9602-7100
0 ...
1.00
ppm
No
O3
Ozone
9602-7101
0 ...
1.00


Satellite XT R Version
continued overleaf
ppm
1)


No

8-1
Reference Information - Section 8
Substance / Sensor
PH3
Phosphine (3 El.)
Part No.
sensor
9602-6102
PH3
Phosphine (2 El.)
9602-6100
0 ...
1.00
ppm
1)
Sí
SF6
Sulfur Hexafluoride
9602-9710
0 ...
0.500
% vol.
3)
Sin datos
SiH4
Silane
9602-6301
0 ...
50.0
ppm
SO2
Sulfur Dioxide
9602-5900
0 ...
25.0
ppm
Sí
TEOS
Tetraethyl Orthosilicate
9602-7500
0 ...
100
ppm
No
TMB
Trimethyl borate
9602-7510
0 ...
500
ppm
No
TMP
Trimethyl phosphite
9602-7800
0 ...
30.0
ppm
Sí


Nominal
Range
0 ... 1.00
Unit
Note
ppm
Notas: 1) Special application
Dust Filter
allowed
Sí
Sí


2) Special range


3) Pyrolyzer Module required for detection


Further gases and ranges on request
Satellite XT R Version
8-2
Reference Information - Section 8
8.2
Spares and Accessories
Part Number
Description


9602.0050.10.03
Mounting Rail Standard
9602.0050.10.02
Mounting Plate DIN-Rail, Option
9602.0051.10.02
Mounting Plate L-shaped with DIN-Rail, Option
9602.0090.00.01
Sensor Extension, 2 meters
9602.0091.00.01
Sensor Extension, 3 meters
9602.0092.00.01
Sensor Extension, 1 meter
9602.0095.40.00
Calibration Cap
9902-4000
Duct Mounting Saddle Assy, 4 inches
9902-4010
Duct Mounting Saddle Assy, 6 inches
9902-4020
Duct Mounting Saddle Assy, 8 inches
9902-4030
Duct Mounting Saddle Assy, 10 inches
9902-4040
Duct Mounting Saddle Assy, 12 inches
9902-4100
Duct Mounting Saddle Assy, 1,5 inches
9902-4110
Duct Mounting Saddle Assy, 2 inches
9902-4120
Duct Mounting Saddle Assy, 2,5 inches
9902-4130
Duct Mounting Saddle Assy, 3 inches
9902-4200
Duct Mounting Saddle (Assy), flat
Satellite XT R Version
8-3
Extractive Module XT - Section 9
9.1
Principle of Operation
The Extractive Module XT is an add-on module for use in combination with the
Satellite XT. It enables for keeping hazardous, difficult to reach, or otherwise inaccessible areas under continuous surveillance. It is capable of sampling areas up to 50 m away. Power is supplied via the Satellite XT. Status information is provided by the Satellite XT that provides the digital interface as well.
The module contains a diagnosis for electronics and pump. The correct gas flow is factory
set and saved in the instrument. If there is a problem with the Extractive Module XT, the
display of the Satellite XT shows the fault message FAULT EXTRACTIVE. For information
on fault messages and instructions on how to correct a fault condition, please refer to
Section 7, Troubleshooting.
9.2
General Instructions
Listed hereafter several aspects that should be reflected when locating monitoring point
and instrument. When placing the sampling point , the property (lighter or heavier than air) of the target gas must be considered. The instrument should be mounted as close to the
monitoring location as possible to minimize sample transport time. The area immediately
surrounding the sample inlet at the monitoring point must be free from objects that might
hinder free flow of air. The instrument should be installed away from any possible liquid
sources, extreme dust and dirt sources and should be protected against rain and sunlight.
The sample line should be run as direct as possible to improve transport time. Avoid
running the sample line through areas of great temperature extremes. The sample outlet
must be connected to an exhaust line and must be properly vented. Both, sample and
exhaust tubing must not be crimped or placed in an area where weight could collapse the
tubing.
Dust may be a result of construction as well as manufacturing activities. If unusual
quantities of dust are expected at the monitoring location, an appropriate filter for the sample line must be installed. The use of a dust filter depends on the target gas, refer to
the table Sensor Order Information in Section 8, Reference Information, or contact our
service department.
As excess amounts of dirt in the filters will reduce the sample flow and will thus affect con
centration readings of the instrument, make sure to regularly change sample line filters (every 1 to 6 months, depending on the ambient conditions). For order information refer to
Section 8, Reference Information, Spares and Accessories.
Moisture may occur as rain entering a line at an outdoor sampling location or as
condensation from outdoor-to-indoor temperature fluctuations. In case of unusual
quantities of moisture, appropriate steps must be taken to protect the instrument; consult
us for respective assistance.
9.3
Safety Instructions
Never use compressed air to clean the tubing while it is connected to the instrument.
Use isopropanol and a soft cloth to clean the housing. Do not use any aggressive
detergents.
! Note:
To extend an existing Satellite XT to an extractive system, please contact our service
department. This modification makes it necessary to open the housing of the Satellite XT,
which is only allowed for authorized persons.
Satellite XT R Version
9-1
Extractive Module XT - Section 9
9.4
Instrument Design
Front View showing Extractive Module XT connected to Satellite XT.
A
B
A Exhaust Line - Outlet
B Sensor Holder
esc
MST Extractive
Satellite XT R Version
MST Satellite XT
set
9-2
Extractive Module XT - Section 9
Side View (left)
A Exhaust Line - Outlet
B Sensor Holder
C Sample Line - Gas Inlet
Side View (right)
B Sensor Holder
D Sensor Connection to Satellite XT
E Connection Extractive Module XT and Satellite XT
B
C
B
D
A
E
D
C
A
Top View (only Extractive Module XT)
A Exhaust Line - Outlet
B Sensor Holder
C Sample Line - Gas Inlet
D Sensor Connection to Satellite XT
Satellite XT R Version
Gas
Inlet
Outlet
B
9-3
Extractive Module XT - Section 9
9.5Mounting
The Extractive Module XT is prepared for DIN-rail mounting. An appropriate mounting rail
is delivered with the instrument, which allows mounting the Extractive Module XT and the
Satellite XT side by side.
Mount this rail to a wall with the appropriate fasteners and slide both modules onto it.
Plug in male and female connector of Satellite XT and Extractive Module XT.
1
esc
MST Extractive
MST Satellite XT
set
Module Connections
Module Connections


  sample tubing.


sample tubing.


  sensor connection between Extractive Module
  XT and Satellite XT.
sensor connection between Extractive Module XT and

Data link
Satellite
XT.and power supply.


Data link and power supply.

9.6
Tubing Connections
Tubing material is PTFE or PFA with an outer diameter of 1/4” and an inner diameter of
3/16”. Length and inner diameter of the sample line will affect the response time. Length of
the sample lines should be kept as short as possible. With a sample line ID of 3/16”
(4.7 mm) and a length of 10 m, the delay in response does not exceed 30 seconds.
Exhaust Line Outlet
The fitting for connection of the exhaust line outlet is located on top of the instrument and
marked “Outlet”. Since hazardous gas concentrations may still be present at the exhaust
line outlet, it is recommended to connect the exhaust line to an exhaust duct.
Sample Line Inlet
The fitting for connecting the sample line inlet is located on top of the housing and marked
“Gas Inlet”. Improper installation of the sample inlet tube may result in dilution or even
complete loss of the sample.
Note: If the pump is operated at the maximum sample line distance of 50 m, the
maximum exhaust line length is 25 m to avoid flow failure due to back pressure in
the pump.
Note:
Do not apply power until the system is ready for start-up.
Satellite XT R Version
9-4
Extractive Module XT - Section 9
9.7
Sensor Replacement
This procedure is used to replace a depleted sensor by a fresh sensor. The replacement sensor must
have the same part number as the installed sensor. Press the <esc> key on the Satellite XT keypad
and enter the password to exit the Monitoring Mode. The green status LED of the Satellite XT is off,
the instrument is not monitoring. A maintenance message is transmitted to the communication
network.
Go to the Maintenance Menu and press the <set> key to enter.
Go to the submenu Sensor Service and press the <set> key to enter.
Follow the dialogue displayed at the bottom line of the screen - Figure 1.
Figure 1
<REMOVE SENSOR>
Unscrew the gland nut (F) to remove the
sensor holder (B) from the flow adapter of
the Extractive Module XT - Figure 2.
Remove the installed sensor (G) Figure 3.
Press the <set> key to continue.
Unpack the replacement sensor and
.
remove shorting
device from the sensor
plug, where necessary.
MA I N T ENANCE
S E N S OR S E R V I C E
se l ec t :
1
o f
7
S ENSOR S ERV I CE
R EMO V E S E N S OR
<se t >
when
r eady
S ENSOR S ERV I CE
R E P L A C EME N T
p l ease
i nse r t
!
S ENSOR S ERV I CE
L O A D N EW D A T A ?
<se t >
t o
con f i rm
S ENSOR S ERV I CE
L O A D I NG D A T A !
p l ease
wa i t
S E N S OR
!
W A RM - U P !
1 . 23
p pm
Sa t e l l i t e XT
AsH3
0 . 00
p pm
<REPLACEMENT>
Insert the new sensor (G) into the socket
inside the sensor holder, aligning nose of
the socket, groove of the sensor, and the
arrow printed on the sensor label Figure 4.
Insert the sensor holder (B) with the
replacement sensor installed into the
flow adapter of the instrument and fasten
the gland nut (F) - Figure 5.
Press the <set> key to continue.
B
Figure 2
F
Figure 3
F
Figure 4
F
G
<LOAD NEW DATA ?>
If you want the data of the new
. sensor to
be loaded, confirm this message by
pressing the <set> key.
<LOADING DATA !>
The instrument is now loading the new
data from the sensor into the unit’s
internal memory.
<SENSOR WARM-UP>
A sensor warm-up is performed and the
display of the Satellite XT shows the
according message, until the displayed
value is zero. The warm-up time required
depends on the type of sensor.
After the sensor warm-up, the instrument
will automatically switch to the Monitoring
Mode.
The Sensor Service procedure is also
described in Section 4, Maintenance.
Figure 5
G
B
F
Satellite XT R Version
9-5
Extractive Module XT - Section 9
9.8
Technical Specifications
Power Requirements
  voltage
  consumption
power is provided by the Satellite XT,
power supply range 18 - 24 VDC

max. 2.4 W


Physical Dimensions


  size
78 x 95,5 x 50 mm
(W x H x D)

3,1" x 3,8" x 2,0"
(W x H x D)
  weight
500 g


17.6 oz

Housing Protection Class
IP 30


RFI / EMC
EN 50270


Operating Conditions

  sample tubing
OD 1/4” ID 3/16” PTFE or PFA
  response time
< 30 sec. with a tubing length of 10m
  temperature
0 °C ... +40 °C


+32 °F ... +104 °F

  pressure
700 ... 1300 hPа

  humidity
20 ... 90 % r.h.
-150mbar
Maximum negative pressure
(at pump)
Maximum sample line length
Recommended sample
line length


50 m (see note in section 9.6)
10 m


Part Number


version for toxic/corrosive gases
(except C5F8 and SF6)
20404-0200
version for combustible gases
20404-0250
version for C5F8 and SF6
20404-0300
Warning:
Extractive Module 20404-0200 must only be used with Pyrolyzer
Modules 20408-0110, 20408-0112, 20408-0116 and 20408-0122.
Extractive Module 20404-0300 must only be used with Pyrolyzer
Modules 20408-0114 and 20408-0120.
Satellite XT R Version
9-6
Pyrolyzer Module XT - Section 10
10.1
Principle of Operation
The Pyrolyzer Module XT is an add-on module for monitoring gases requiring pyrolytic sample
preparation for detectability. It requires both, a Satellite XT and an Extractive Module XT.
The connected Satellite XT displays the module’s status of operation and provides the digital
interface.
Each instrument is only configured for monitoring the substance specified on the identification
label. The instrument is delivered with a certain sensor installed. Reference for assignment of
instrument and sensor is the serial number. These data are also documented in the Certificate
of Quality Control provided with the shipment. Instrument and sensor have been gas calibrated
and these specific calibration parameters are stored in the integrated data memory of sensor
and instrument.
Make sure to use only sensors for the substance specified on the module’s identification label.
Use only sensors designed for use with the Pyrolyzer Module XT.
The Pyrolyzer Module XT is powered by a wide range power supply. The module contains
a diagnosis for electronics and filament. The filament voltage is factory set and saved in the
instrument. If there is a problem with the Pyrolyzer Module XT, the display of the Satellite XT
reads FAULT PYROLYZER. Information on fault messages and instructions on how to correct
a fault condition, are provided in Section 7, Troubleshooting.
10.2
General Instructions
Listed hereafter are several aspects that should be reflected when locating monitoring point
and instrument. When placing the sampling point , the property (lighter or heavier than air)
of the target gas must be considered. The instrument should be mounted as close to the
monitoring location as possible to minimize sample transport time. The area immediately
surrounding the sample inlet at the monitoring point must be free from objects that might
hinder free flow of air. The instrument should be installed away from any possible liquid
sources, extreme dust and dirt sources and should be protected against rain and sunlight.
The instrument must be mounted in an upright position. The ventilation apertures on top
and rear of the the housing must not be covered. The instrument must be easily accessable
for operation and there must be sufficient space above the instrument to allow sensor
replacement or to open the housing for maintenance purposes.
The sample line should be run as direct as possible to improve transport time. Avoid running
the sample line through areas of great temperature extremes. The sample outlet must be
connected to an exhaust line and must be properly vented. Both, sample and exhaust tubing
must not be crimped or placed in an area where weight could collapse the tubing.
10.3
Safety Instructions
Always disconnect the Pyrolyzer Module XT from mains power before you open the housing.
The vents on top and rear of the instrument must not be covered. Do not enter any tapered or
sharp items into the vents.
Use isopropanol and a soft cloth to clean the housing. Do not use any aggressive detergents.
Never use compressed air to clean the tubing when connected to the instrument. This will
destroy the internal pressure switch.
WARNING: The Pyrolyzer Module XT will not respond to the target gas in conditions of
less than 20 % r.h. Observe the specified operating conditions for humidity.
Satellite XT R Version
10-1
Pyrolyzer Module XT - Section 10
10.4
Instrument Design
The Pyrolyzer Module XT can only be operated in combination with the Satellite XT and the
Extractive Module XT. All three modules are prepared for DIN-rail assembly.
Figure 1: Side view of the Pyrolyzer
Module only.
F
Figure 2:Front view of the complete assembly
Pyrolyzer Module, Extractive Module, and Satellite XT.
G
H
M
J
esc
MST Extractive
L
MST Satellite XT
set
K
Figure 3: Top View of the complete assembly
G
Pyrolyzer Module XT
Inlet
Gas
Outlet
Gas
Inlet
Outlet
B Sensor Holder
F Sample Line - Inlet
B
Extractive Module XT
Satellite XT
G Vent
H Sample Line - connection to Extractive Module XT
J DIN-rail
K Data Link - Pyrolyzer Module XT to Extractive Module XT
L Power Fitting
M Adapter for DIN-rail
Satellite XT R Version
10-2
Pyrolyzer Module XT - Section 10
10.5Mounting
The Pyrolyzer Module XT is prepared for DIN-rail assembly. An appropriate mounting rail is
delivered with the instrument. Mount this rail to a flat surface with the appropriate
fasteners.
When the rail is mounted, follow the steps below:
1. Slide the Pyrolyzer Module XT onto the rail mounted to the wall, see Figure 4.
Figure 4
1
Figure 4
1
2. Slide the Extractive Module XT onto the rail at the front of the Pyrolyzer Module XT, see
Figure 5.
3. Slide the Satellite XT onto the rail at the front of the Pyrolyzer Module XT, as illustrated in
Figure 5.
4. Plug in male and female connector of Satellite XT and Extractive Module XT.
See also Section 9, Extractive Module XT Installation.
Figure 5
Figure 5
4
2
2
MST Extractive
MST Extractive
Satellite XT R Version
4
3
3
esc
set
MSTescSatellite XT
MST Satellite XT
set
10-3
Pyrolyzer Module XT - Section 10
10.6
Tubing Connections
Tubing material is PTFE or PFA with an outer diameter of 1/4” and an inner diameter of 3/16”.
Length and inner diameter of the sample line will affect the response time. Length of the
sample lines should be kept as short as possible. With a sample line ID of 3/16” (4.7 mm) and
a length of 10 m, the delay in response does not exceed 30 seconds.
Moisture may occur either as rain entering a line at an outdoor sampling location or as
condensation from outdoor-to-indoor temperature fluctuations. In case of unusual quantities of
moisture, appropriate steps must be taken to protect the instrument; consult us for respective
assistance.
Sample Line Inlet
The fitting for connecting the sample line inlet is located on top of the housing and marked
“Inlet”. Improper installation of the sample inlet tube may result in dilution or even complete
loss of sample.
Sample Line Filter
Dust may be a result of construction as well as manufacturing activities. If unusual quantities
of dust are expected at the monitoring location, an appropriate filter for the sample line must
be installed. The use of a dust filter depends on the target gas, refer to the table Sensor Order
Information in Section 8, Reference Information, or contact our service department. As excess
amounts of dirt in the filters will reduce the sample flow and will thus affect concentration
readings of the instrument, make sure to regularly change sample line filters (every 1 to 6
months, depending on the ambient conditions). For order information refer to Section 8,
Reference Information, Spares and Accessories.
Module Connections


sample tubing.


Module
Connections
sensor connection between Extractive

Module
XT and Satellite XT.
sample
tubing.


data link connecting Pyrolyzer Module
sensor
between
Extractive

XT connection
and Extractive
Module
XT / Satellite
Module
XT. XT and Satellite XT.
linkLink
connecting Pyrolyzer Module XT
10.7 data
Data
and
Extractive
Module
XT green)
/ Satellite
XT.
Plug the cable
(pictured
from
the
bottom plate of the Pyrolyzer Module
into the connector in the bottom of the
Extractive Module XT.
10.8
Power Connection
Use a standard power cable (obey any
local regulations) and bring it through the
power cable fitting into the module. Open
the module from the top and connect
90 ... 240 VAC
Satellite XT R Version
10-4
Pyrolyzer Module XT - Section 10
Inlet
Outlet
Inlet
Outlet
Extractive Modul XT
Satellite XT
Pyrolyzer XT with bypass for C5F8
When the Pyrolyzer is used with C5F8, the flow needs to be adjusted at the outlet of the Extractive
Module XT to 0.5 l/min or 30 l/h.
30 l/h
0,5 l/min
Flowmeter
Satellite XT R Version
On the underside of the Extractive Module XT is the interconnection to the Pyrolyzer Module XT, and
next to it, two small holes which gives access to two pushbuttons. The left hand button will increase the
flow, and the right hand button will decrease it.
The adjustment is required as the internal flow resistance is different to the other types of the Pyrolyzer
Module XT and this resistance would damage the Extractive Module XT.
10-5
Pyrolyzer Module XT - Section 10
10.9
Technical Specifications
Power requirements

  Voltage
90 ... 240 VAC
  Consumption
approx. 22 W / 2.13 A


Physical dimensions

  Size:
223 х 97 х 100 mm (W х H х D)

8,8" x 3,8" x 3,9" (W х H х D)
  Weight:
1800 g

4 lbs


Housing Protection Class
IP 30


RFI / EMC
EN 50270

EN 61010-1


Operating Conditions

  Sample tubing
OD 1/4” ID 3/16”
  Response time
  Temperature
< 30 sec. with a tubing length of
10m
0 °C ... +40 °C

+32 °F ... +104 °F
  Pressure
700 ... 1300 hPа
  Humidity
20 ... 90 % r.h.
Note: For applications where the humidity is less than 20 % r.h.,
consider using the MST Sample Conditioning System - Humidifier,
part number 20408-4010.
Minimum Oxygen content of sample
3 %v/v


Part Numbers

  Pyrolyzer Module XT NF3
20408-0110
  Pyrolyzer Module XT 1,2-DCE
20408-0112
  Pyrolyzer Module XT SF6
20408-0114
  Pyrolyzer Module XT CH3F
20408-0116
  Pyrolyzer Module XT C5F8
20408-0120
  Pyrolyzer Module XT C4F6
20408-0122
Warning:
Pyrolyzer Modules 20408-0110, 20408-0112, 20408-0116 and 20408-0122
must only be used with Extractive Module 20404-0200.
Pyrolyzer Modules 20408-0114 and 20408-0120 must only be used with
Extractive Module 20404-0300.
Satellite XT R Version
10-6
Find out more
www.honeywellanalytics.com
Contact Honeywell Analytics:
Europe, Middle East, Africa, India
Life Safety Distribution AG
Javastrasse 2
8604 Hegnau
Switzerland
Tel: +41 (0)44 943 4300
Fax: +41 (0)44 943 4398
India Tel: +91 124 4752700
[email protected]
Americas
Honeywell Analytics Inc.
405 Barclay Blvd.
Lincolnshire, IL 60069
USA
Tel: +1 847 955 8200
Toll free: +1 800 538 0363
Fax: +1 847 955 8210
[email protected]
Technical Services
EMEAI: [email protected]
US:
[email protected]
AP:
[email protected]
www.honeywell.com
Please Note:
While every effort has been made to ensure
accuracy in this publication, no responsibility
can be accepted for errors or omissions.
Data may change, as well as legislation, and you
are strongly advised to obtain copies of the most
recently issued regulations, standards, and
guidelines.This publication is not intended to form
the basis of a contract.
Issue 4 08/2013
H_MAN0860_EMEAI
2401M3007 ECO A03534
© 2013 Honeywell Analytics
12496
Asia Pacific
Honeywell Analytics Asia Pacific
#701 Kolon Science Valley (1)
43 Digital-Ro 34-Gil, Guro-Gu
Seoul 152-729
Korea
Tel: +82 (0)2 6909 0300
Fax: +82 (0)2 2025 0388
[email protected]