1
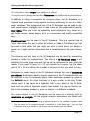
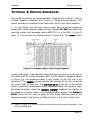
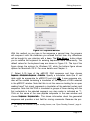
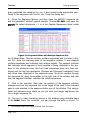
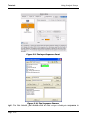
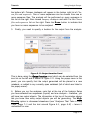
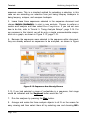
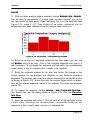
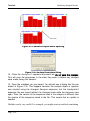
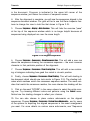
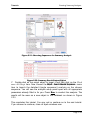
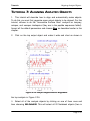
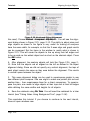
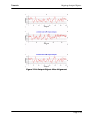
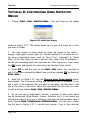
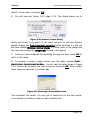
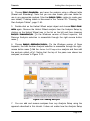
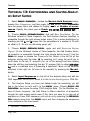
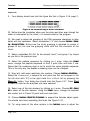
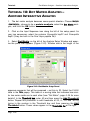
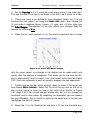
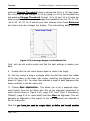
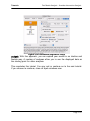
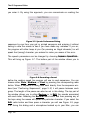
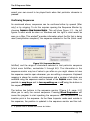
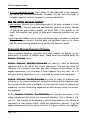
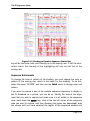
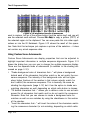
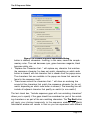
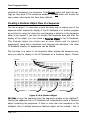
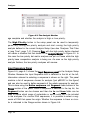
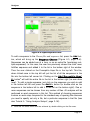
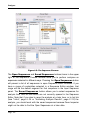
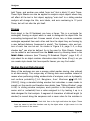
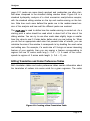
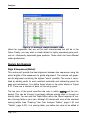
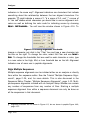
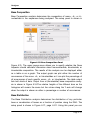
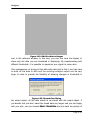
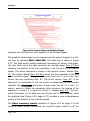
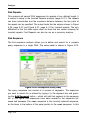
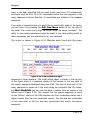
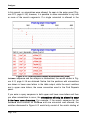
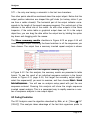
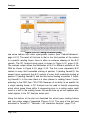
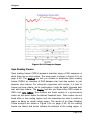
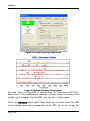
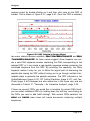
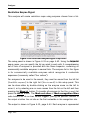
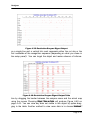
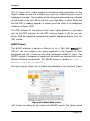
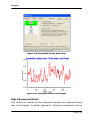
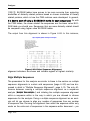
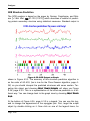
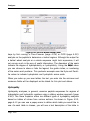
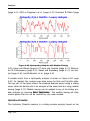
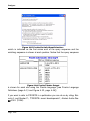
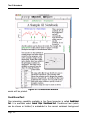
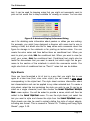
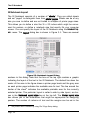
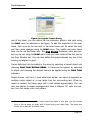
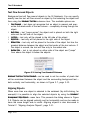
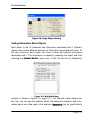
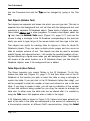
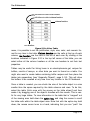
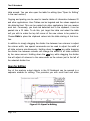
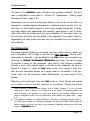
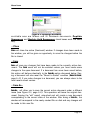
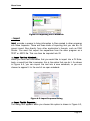
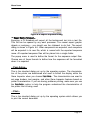
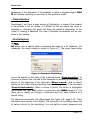
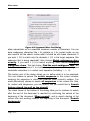
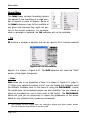
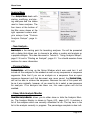
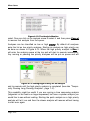
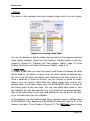
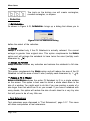
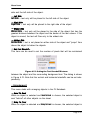
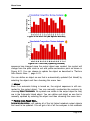
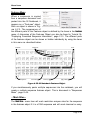
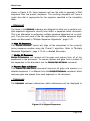
Tutorials
Multiple Sequence Alignments
in the document. Progress is indicated in the upper left corner of the
sequence window, just above the column of sequence names.
4. After the alignment is complete, you will see the sequences aligned in the
sequence document window. Our goal will be to use the Gene Inspector features to change the view to look like that shown in Figure 2.18.
5. Choose Sequence > Display > Hide Overview. This will hide the overview “pane”
at the top of the sequence window which is no longer helpful because all
sequences being displayed are now the same length.
Figure 2.18: Aligned Sequences
6. Choose Sequence > Consensus > Show Consensus Row. This will add a new row
above the sequences showing the consensus sequence – the most common
character in that particular position of the alignment.
7. Choose Sequence > Consensus > Show Scoring Row. This will add a row containing a histogram indicating how good the match is at each position.
8. Finally, choose Sequence > Consensus > Show Shading. This will add shading to
the document which should now look similar to Figure 2.18. The shading indicates which residues match the consensus sequence residue. The more residues that match the consensus residue, the more intense the shading will be.
9. Click on the word “SCORE” in the name column to select the entire scoring row. Try choosing different colors and patterns using the Format menu.
Notice how the shading changes to reflect your choices.
10. You can also choose to place custom adornments on the aligned
sequences. Choose Sequence > Consensus > Custom Score Adornments... and try some
of the options for depicting the aligned sequences in the exact arrangement
you want. For more details on custom score adornments, see “Sequence
Page 2-25