1
PlantVisorPRO
Software Development Kit
User manual
LEGGI E CONSERVA
QUESTE ISTRUZIONI
READ AND SAVE
THESE INSTRUCTIONS
Contents
SDK – Software Development Kit
1.
Introduction ............................................................................................................................................... 5
1.1 Database ........................................................................................................................................... 5
1.2 Server ................................................................................................................................................. 5
1.3 Client .................................................................................................................................................. 5
2.
Approach ..................................................................................................................................................... 6
3.
Installation .................................................................................................................................................. 7
4.
API .................................................................................................................................................................. 9
4.1 CurrVar .............................................................................................................................................. 9
4.2 CurrAlarm .......................................................................................................................................10
4.3 CurrUnit ..........................................................................................................................................11
4.4 CurrNode........................................................................................................................................12
4.5 CurrUser .........................................................................................................................................12
4.6 Sfera .................................................................................................................................................12
5.
JAVASCRIPT ..............................................................................................................................................13
6.
CSS...............................................................................................................................................................14
7.
XSL STYLE SHEETS FOR ALARMS ....................................................................................................15
8.
COMPLETE EXAMPLE ...........................................................................................................................17
9.
DEVICE DETAIL FOLDER .....................................................................................................................26
10.
RELATIONSHIP BETWEEN FILES AND MAPS ........................................................................28
10.1 GROUPS .........................................................................................................................................28
10.2 ALARMS/EVENTS .........................................................................................................................28
10.3 REPORTS.........................................................................................................................................28
10.4 CONFIGURATION .......................................................................................................................29
10.5 SCHEDULER ..................................................................................................................................30
10.6 MAPS ................................................................................................................................................30
SDK – external XML queries – guide to the functions
1.
Introduction to the function ..............................................................................................................33
2.
XML Queries ............................................................................................................................................33
2.1 Query mode..................................................................................................................................33
2.2 Format of the packets ...............................................................................................................34
2.3 Query for retrieving the list of devices ...............................................................................35
2.4 Query for retrieving the list of parameters .......................................................................37
2.5 Query for setting the parameters in the field ..................................................................39
2.6 Query on the status of the site ..............................................................................................40
2.7 Query for retrieving alarms from the field .......................................................................41
Software Development Kit
SDK – Software development kit
1. Introduction
The purpose of this document is to provide complete documents to the end users and thus allow them to be able to work independently
during the customisation of PlantVisorPRO.
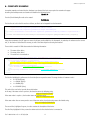
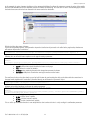
PlantVisorPRO is an application based on 3-level framework.
These 3 levels are divided into:
the Data component, which resides in the Database;
the Business component, which resides on the Server;
the Presentation component, which resides on the PC that accesses the application.
Client
Server
Client
Client
1.1
Database
Database
The database, which contains all the configuration, historical and log data, is implemented using the PostegreSQL 8.1 system.
Standard SQL language is used to retrieve the information.
1.2
Server
The server, where all the business logic is implemented, is fully developed in JAVA and runs on Apache Tomcat 5.0. The server is the
bridge between the graphic representation of the data (client) and the data itself (database). To make the exchange of the data with the
client more secure, HTTPS communication is used to create an encrypted channel with authentication by certificate.
1.3
Client
The client is the application that allows the end user to log in, configure and manage the site. Currently the PlantVisorPRO graphic
interface is compatible with Internet Explorer version >= 6.1.
Cod. +030220766 rel. 1.2 del 31/01/08
5
Software Development Kit
2. Approach
SDK for PlantVisorPRO has been conceived following the same philosophy by which Enhanced users created the custom pages on the
Supervisor.
The Enhanced scripting language has been replaced by the JAVA programming language, and the pages on the graphic display are not
simple HTML templates but rather JSP documents (Java Server Pages).
The two main advantages of this new technology are:
1.
For the creation of new pages, as the JAVA language is very widely used by developers, it is much easier to find people who
know it and know how to use most of its functions;
2.
The introduction of JSP brings greater flexibility and development potential.
The syntax of the statements is similar to the CAREL proprietary script. All the statements must start and end with the following characters:
<% …………….. %>
The following is a simple example of the declaration of an integer variable:
<% int i = 0; %>
For complete details on the language and the creation of JSP files, the official SUN documents are available at the following address:
http://java.sun.com/j2ee/tutorial/1_3-fcs/doc/JSPIntro.html
Cod. +030220766 rel. 1.2 del 31/01/08
6
Software Development Kit
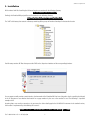
3. Installation
All the various html files describing the Enhanced version are contained in the following directory:
C:\PlantVisor\ServerComponents\html.
Similarly, the PlantVisorPRO project files are all contained in the following directory:
C:\Carel\PlantVisorPRO\engine\webapps\PlantVisorPRO\.
The “APP” subdirectory then contains a directory containing all the groups of functions developed in the standard version.
Each directory contains JSP files that represent the TABS on the Supervisor interface and the corresponding functions.
If a user wants to totally rewrite a certain function, the framework of the PlantVisorPRO has been designed to check a specific physical path
in the PC filesystem to see whether that function has a page rewritten by the user or the standard is sued. The following is a practical
example of this.
Assuming that a user needs to customise, as in most cases, the device detail page for the IO MODULE instrument. In the standard version,
this function is implemented by the following JSP resource :
C:\Carel\PlantVisorPRO\engine\webapps\PlantVisorPRO\app\dtlview\ SubTab1.jsp
Cod. +030220766 rel. 1.2 del 31/01/08
7
Software Development Kit
The framework, before starting a transaction, checks the filesystem to see whether there is a custom version for the resource it is about to
load. In the example, this must be located in:
C:\Carel\PlantVisorPRO\engine\webapps\PlantVisorPRO\custom\dtlview\ io_module\ SubTab1.jsp.
If the SubTab1.jsp file exists, the Supervisor loads the file found rather than the version in the standard path. In this way, the user can
overwrite any function, without the risk of deleting the basic functions and without having to worry about making backup copies.
The new JSP files created by the user must be implemented by:
•
Standard scripting language for JSP ;
•
API (Application Programming Interface) provided in the PlantVisorPRO SDK.
These APIs feature functions to user independent and flexible when programming the pages.
References to objects and attributes have been based on the Enhanced version, so as to ensure a certain familiarity when porting the
applications.
Cod. +030220766 rel. 1.2 del 31/01/08
8
Software Development Kit
4. API
4.1
CurrVar
The CURRVAR object represents the variable that is currently selected by its CODE.
METHODS
int getId();
Returns the unique identifier used by the database for the current variable.
String getValue();
Returns the value from the field for that specific variable.
String getRefreshableValue();
Returns the value from the field for that specific variable and makes it refreshable.
String getDescription();
Returns the description corresponding to the current variable.
String getMUnit();
Returns the unit of measure corresponding to the current variable.
String getDescr1();
Returns the short description corresponding to the current variable.
String getDescr2();
Returns the long description corresponding to the current variable.
int getType();
Returns the type of the current variable:
• 1 -> Digital;
• 2 -> Analogue;
• 3 -> Integer;
• 4 -> Alarm;
boolean getBAnd(int mask);
Performs an AND between the value of the variable and a screen represented by the MASK parameter. Returns TRUE if the value that is
the object of the AND is equal to screen. Otherwise FALSE.
String getCode();
Returns the unique name of the variable.
String getSetField();
Returns the HTML string that represents the text field to be entered on the page, together with the suitable references for sending the
server the correct parameter setting information.
String postName();
Returns the program code to be used for the ‘id’ and ‘name’ attributes of the text field used for setting the parameter, if the text fields
used on the page need to be customised.
String getRefreshableAssint(String decod);
Starting from the decod parameter, a string made up of values separated by ‘;’, returns the value of the string with the index
corresponding to the current value of the variable.
String getRefreshableAssint(String decod, String off);
Starting from the decod parameter, a string made up of values separated by ‘;’, returns the value of the string with the index
corresponding to the current value of the variable. If there is no correspondence, the value ‘off’ is returned.
Cod. +030220766 rel. 1.2 del 31/01/08
9
Software Development Kit
4.2
CurrAlarm
The CURRALARM object represents the active alarm on the current device.
METHODS
int getIdalr();
Returns the unique ID in the database relating to the active alarm.
String getDesc();
Returns the description corresponding to the active alarm.
String getDate();
Returns the date and time the alarm was activated.
String getAckuser();
Returns the username of the user who acknowledged the alarm (ack), otherwise returns an empty string
String getAcktime();
Returns the date the alarm was acknowledged (ack), otherwise returns an empty string.
String getResetuser();
Returns the username of the user who reset the alarm, otherwise returns an empty string.
String getResettime();
Returns the date the alarm was reset, otherwise returns an empty string.
String getPriority();
Returns the priority of the alarm. The following values are possible:
• Highest
• High
• Medium
• Low
Cod. +030220766 rel. 1.2 del 31/01/08
10
Software Development Kit
4.3
CurrUnit
The CURRUNIT object represents the current device. On the device detail page, it is the framework that points to the unit selected by the
user.
METHODS
int getId();
Returns the unique ID in the database relating to the current unit.
String getDescription();
Returns the description of the device.
String getLine();
Returns the line the device belongs to.
int getStatus();
Returns an integer representing the status of the device:
• 0 -> OFFLINE (gray)
• 1 -> ONLINE (green)
• 2 -> ALARM (red)
• 3 -> DISABLED (blue)
String getImage();
Returns the path relating to the default image assigned to the device.
CurrVar getVariable(String vCode);
Returns a reference to the CurrVar object. This object represents the variable requested by the user with the input parameter: “vCode”.
boolean loadAlarms();
Loads the alarms corresponding to the device. If at least one alarm is active, returns TRUE, otherwise FALSE.
int getAlarmNumber();
Returns the number of active alarms on the device, including those that have been:
• ACK;
• RESET;
by the user.
CurrAlarm getAlarmAt(int idx);
Returns the reference to the alarm, with the input index “idx”.
String getRefreshableStatusAssint(String decod);
Starting from the decod parameter, a string made up of values separated by ‘;’, returns the value of the decod string according to the
following indices, corresponding to different states:
• 0: offline
• 1: online ok
• 2: online with alarm
• 3: disabled
String getRefreshableStatusAssint(String decod, String off);
Starting from the decod parameter, a string made up of values separated by ‘;’, returns the value of the decod string according to the
following indices, corresponding to different states:
• 0: offline
• 1: online ok
• 2: online with alarm
• 3: disabled
If the status cannot be recovered, the string ‘off’ is returned.
Cod. +030220766 rel. 1.2 del 31/01/08
11
Software Development Kit
4.4
CurrNode
The CURRNODE object represents the current site with all its devices configured.
METHODS
int getLenght();
Returns the total number of devices configured on the site.
CurrUnit getCurrUnitAt(int idx);
Returns the reference to the unit, with the input index “idx”.
4.5
CurrUser
The CURRUSER object represents the connected user. This object includes the rights that the user has for writing certain parameters. These
parameters are divided into:
•
Manufacturer parameters;
•
Service parameters;
METHODS
boolean haveServicesRight();
Returns TRUE if the user has the right to write the parameters marked as SERVICE, otherwise FALSE.
boolean haveManufacturerRight();
Returns TRUE if the user has the right to write the parameters marked as MANUFACTURER, otherwise FALSE.
boolean HaveRight(int r);
The input integer is as follows:
• 1 -> Rights on the service parameters;
• 2 -> Rights on the manufacturer parameters;
Returns TRUE, for example, when the input is 1 and the user has rights on the service parameters.
4.6
Sfera
The Sfera object makes the following functions available to the developer:
String assint(float value, String decod, String off);
The ASSINT function reflects the same function offered by the Enhanced scripting language.
The first parameter in the function represents the value of the variable (integer or digital).
The second parameter represents the string to be displayed based on the value of the first parameter.
The third parameter represents the string to be displayed to the user if offline.
Example:
Sfera.assint(CurrUnit.getVariable("DI1").getValue(), "<img src='images/led/L0.gif'>;<img src='images/led/L1.gif'>", "***" );
Based on the value of the variable DI1, the function returns the first image if equal to 0, the second image if equal to 1. If, on the other
hand, the value of the variable is not available because the device is OFFLINE, the function returns the third parameter (“***”).
String format(float value,String pattern);
Returns the input value of the first parameter formatted based on the input pattern of the second parameter.
String assint(String value, String decod, String off);
The function performs the same operation and provides the same results as the previous one, however the input variable is a string,
rather than a float value. The value is previously converted to check that it is numeric and then processed.
String format(String value, String pattern);
In this case too, the function is identical to the previous one, however receives a string input rather than a numeric value.
Cod. +030220766 rel. 1.2 del 31/01/08
12
Software Development Kit
5. JAVASCRIPT
The PlantVisorPRO pages, once processed and executed, are converted from JSP files to HTML documents.
The Javascript language is fundamental for the management of the events on the client.
The framework provides the user functions that have already been implemented so as to simplify navigation on the page.
Currently the following functions are implemented:
PVPK_goToDetail(idDevice);
The user can access the device detail page identified by the input parameter: idDevice.
PVPK_goToMoreVars(sDescription);
The user can access the page with the complete list of all the read-only variables of the device. This can only be used on the device detail
page, as elsewhere it would not have any sense. The sDescription parameter represents the string that the user wants to display in the top
navigation menu.
PVPK_ActiveRefresh(iTimeSecond);
The user refreshes the variables, based on the input period in seconds.
PVPK_addButtons();
The user displays the buttons for refreshing and setting the parameters.
PVPK_setData(obj)
The user can use this function to send a request to the server for setting parameters. The obj parameter contains the reference to the
object that has originated the request (which must be in a form). Using the object, the framework retrieves the form containing the data
and sends the correct request to the server.
As well as these functions, to the user is provided with a file, in the following path:
C:\Carel\PlantVisorPRO\engine\webapps\PlantVisorPRO\scripts\custom\custom.js
Users can enter their management functions inside this file.
As well as any new functions, a number of callback functions have been implemented.
PVP_OnLoad
/*
* This function allows the user
* to have a callback once the page has been loaded.
* Parameters:
* - sFolder: Directory of the map;
* - sResource: Name of the JSP file called;
* - sDevice: Name of the device directory;
*
[Present only if device in detail]
*/
function PVP_OnLoad(sFolder,sResource,sDevice)
PVP_goToDetail
The function incorporates the framework function presented previously that allows the user to further customise the behaviour and the
operations carried out by the function
/*
* This function allows the user
* to access to the device detail page.
* Parameters:
* - idDevice: Id of the device. Retrieved by CurrUnit.getId();
*/
function PVP_goToDetail(idDevice)
{
PVPK_goToDetail(idDevice);
}
Cod. +030220766 rel. 1.2 del 31/01/08
13
Software Development Kit
PVP_goToVariables
The function incorporates the framework function presented previously that allows the user to further customise the behaviour and the
operations carried out by the function
/*
* This function allows the user
* read-only access to the variables page.
* Parameters:
* - sDescription: Description provided to the user in the NAVMENU
*/
function PVP_goToVariables(sDescription)
{
if(!sDescription)
sDescription = "";
PVPK_goToMoreVars(sDescription);
}
PVP_OnLoad
The function incorporates the framework function presented previously that allows the user to further customise the behaviour and the
operations carried out by the function. It can be seen how the standard version of the function has already configured the variables to be
refreshed every 2 seconds and has activated the display of the buttons for refreshing and setting the parameters.
/*
* This function allows the user
* to have a callback once the page has been filled.
* Parameters:
* - sFolder: Directory of the map;
* - sResource: Name of the JSP file called;
* - sDevice: Name of the device directory;
*
[Present only if device in detail]
*/
function PVP_OnLoad(sFolder,sResource,sDevice)
{
PVPK_ActiveRefresh(2);
PVPK_addButtons();
}
PVP_setData
The function incorporates the framework function presented previously that allows the user to further customise the behaviour and the
operations carried out by the function, for example with prior checks on the data entered before being sent to the server..
/*
* This function allows the user
* to perform operations on the values of the parameters to be modified
* before and after being sent to the server, entering javascript code
* before and/or after the call to the framework function.
* Parameters:
* - obj: object that triggered the call, typically
*
a confirm button on the page
*/
function PVP_setData(obj)
{
PVPK_setData(obj);
}
6. CSS
If the user wishes to customise the pages using cascading style sheets outside of the JSP code, the framework provides 2 files.
•
•
customIE.css;
customFF.css
These two files are loaded independently, also based on the type of browser being used.
The first for Internet Explorer, the second for Firefox.
Cod. +030220766 rel. 1.2 del 31/01/08
14
Software Development Kit
7. XSL STYLE SHEETS FOR ALARMS
To allow the user to customise the alarms, while at the same time maintaining all the refresh functions, the concept of style sheet has
been introduced.
These files contain the logic for formatting the data contained in the XML packets sent by the server and at the same time are extremely
easy to customise.
The XSL style sheet must be located in the same directory as the custom page, and named as follows:
stylesheet.xsl.
The skeleton of the sheet is as shown below, and already contains a sufficiently explicative example, with various options:
<?xml version="1.0" encoding="ISO-8859-1"?>
<xsl:stylesheet version="1.0" xmlns:xsl="http://www.w3.org/1999/XSL/Transform">
<xsl:template match="/">
<table width="100%" align="center" border="1">
<thead style="font-size: x-small">
<tr>
<th width="12%">Data ora</th>
<th width="*">Descrizione</th>
<th width="5%">Priorità</th>
<th width="10%">Ack user</th>
<th width="12%">Ack time</th>
<th width="10%">Reset user</th>
<th width="12%">Reset time</th>
</tr>
</thead>
<tbody style="font-size: xx-small;background:red;">
<xsl:for-each select="response/alarms/alr">
<tr>
<td>
<xsl:choose>
<xsl:when test="datetime != ''">
<xsl:value-of select="datetime"/>
</xsl:when>
<xsl:otherwise>
<div align="center">---</div>
</xsl:otherwise>
</xsl:choose>
</td>
<td>
<xsl:choose>
<xsl:when test="description != ''">
<xsl:value-of select="description"/>
</xsl:when>
<xsl:otherwise>
<div align="center">---</div>
</xsl:otherwise>
</xsl:choose>
</td>
<td>
<xsl:choose>
<xsl:when test="priority != ''">
<xsl:value-of select="priority"/>
</xsl:when>
<xsl:otherwise>
<div align="center">---</div>
</xsl:otherwise>
</xsl:choose>
</td>
<td>
<xsl:choose>
<xsl:when test="ackuser != ''">
<xsl:value-of select="ackuser"/>
</xsl:when>
<xsl:otherwise>
<div align="center">---</div>
</xsl:otherwise>
</xsl:choose>
</td>
<td>
<xsl:choose>
<xsl:when test="acktime != ''">
<xsl:value-of select="acktime"/>
Cod. +030220766 rel. 1.2 del 31/01/08
15
Software Development Kit
</xsl:when>
<xsl:otherwise>
<div align="center">---</div>
</xsl:otherwise>
</xsl:choose>
</td>
<td>
<xsl:choose>
<xsl:when test="resetuser != ''">
<xsl:value-of select="resetuser"/>
</xsl:when>
<xsl:otherwise>
<div align="center">---</div>
</xsl:otherwise>
</xsl:choose>
</td>
<td>
<xsl:choose>
<xsl:when test="resettime != ''">
<xsl:value-of select="resettime"/>
</xsl:when>
<xsl:otherwise>
<div align="center">---</div>
</xsl:otherwise>
</xsl:choose>
</td>
</tr>
</xsl:for-each>
</tbody>
</table>
</xsl:template>
</xsl:stylesheet>
The customisable HTML TAGS can be easily recognised, with the most suitable style and format.
The page is in fact completely formatted by the static HTML part and does not interface in any way with the management of the XML part.
The XSL tags, using the cycle construction:
<xsl:for-each …>
allow all the alarm data to be read from the XML packet and then entered into the cells of the table.
To improve the result, a conditional choice construction has also been used
<xsl:choose …>
which guarantees that the cells are filled with data even if some of the values are missing.
Cod. +030220766 rel. 1.2 del 31/01/08
16
Software Development Kit
8. COMPLETE EXAMPLE
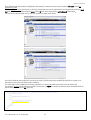
A complete example can better help the developer to understand the basic steps required to customise the pages.
Assuming the developer wants to customise the detail for the following device:
Module IO.
First of all, the following file needs to be created:
SubTab1.jsp
The first lines of code in the file must be as follows, to allow it to be integrated into the framework:
<%@ page language="java"
import="com.carel.supervisor.presentation.sdk.util.Sfera"
import="com.carel.supervisor.presentation.helper.ServletHelper"
%>
<jsp:useBean id="CurrUnit" class="com.carel.supervisor.presentation.sdk.obj.CurrUnit" scope="session"/>
<%
CurrUnit.setCurrentSession(ServletHelper.retrieveSession(request.getRequestedSessionId(),request));
%>
Using these statements, the JSP page can access the objects made available by the framework; in particular, the reference to the current
unit, i.e. the device is loaded into the memory, as well as the Sfera object for accessing the functions.
Then a table is created in HTML that contains the following information:
•
•
•
The status of the device;
The name of the device;
The serial line it is connected to.
<table border="0" width="100%" height="100%" cellpadding="1" cellspacing="1">
<tr>
<td valign="top" width="5%" align="center">
<%=Sfera.assint(CurrUnit.getStatus(),"<img src='images/led/L0.gif'>;
<img src='images/led/L1.gif'>”, “<img src='images/led/default.gif'>”)%>
</td>
<td valign="top" width="*" align="left">
<font size="4"><b><%=CurrUnit.getDescription()%></b></font>
</td>
<td valign="top" width="20%" align="right"><b><%=CurrUnit.getLine()%></b></td>
</tr>
</table>
The first line highlighted in yellow uses the CurrUnit object to request the status. The range of values is between 0 and 3.
• 0 -> OFFLINE (gray)
• 1 -> ONLINE (green)
• 2 -> ALARM (red)
• 3 -> DISABLED (blue)
This value is the used as the input for the assint function.
In this way, if the status value is equal to 0, the function returns the following string:
<img src='images/led/L0.gif'>.
If the status value is equal to 1, the function returns the following string:
<img src='images/led/L1.gif'>
If the status value does not corresponds to one of these two values, then the function returns the default string:
<img src='images/led/default.gif'>.
The second line, highlighted in green, is used to retrieve the description of the device.
The third line, highlighted in blue, returns the references for the line that the device is connected to.
Cod. +030220766 rel. 1.2 del 31/01/08
17
Software Development Kit
The resulting page will be as follows:
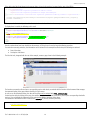
The above page can then be added with the default image of the device and a table with the three high and low probe temperature
thresholds. The end result is as follows:
Cod. +030220766 rel. 1.2 del 31/01/08
18
Software Development Kit
The code for programming the page illustrated above is as shown below.
The lines of code of special interest have been highlighted for easier identification and are then described afterwards.
<%@ page language="java"
import="com.carel.supervisor.presentation.sdk.util.Sfera"
import="com.carel.supervisor.presentation.helper.ServletHelper"
%>
<jsp:useBean id="CurrUnit" class="com.carel.supervisor.presentation.sdk.obj.CurrUnit" scope="session"/>
<%
CurrUnit.setCurrentSession(ServletHelper.retrieveSession(request.getRequestedSessionId(),request));
%>
<table border="0" width="100%" height="100%" cellpadding="1" cellspacing="1">
<tr height="5%">
<td valign="top">
<table border="0" width="100%" height="100%" cellpadding="1" cellspacing="1">
<tr>
<td valign="top" width="5%" align="center">
<%=Sfera.assint(CurrUnit.getStatus(),"<img src='images/led/L0.gif'>;<img
src='images/led/L1.gif'>")%>
</td>
<td valign="top" width="*" align="left">
<font size="4"><b><%=CurrUnit.getDescription()%></b></font>
</td>
<td valign="top" width="20%" align="right"><b><%=CurrUnit.getLine()%></b>
</td>
</tr>
</table>
</td>
</tr>
<tr height="*">
<td valign="top">
<table border="0" width="100%" height="100%" cellpadding="1" cellspacing="1">
<tr height="*">
<td width="20%" valign="top"><img src="<%=CurrUnit.getImage()%>" border="1"
style="width:150px;height:160px;"></td>
<td width="*" valign="top">
<table border="0" width="100%" cellpadding="1" cellspacing="1">
<tr>
<td colspan="3" style="background-color:#7788EE;"><font color="white"><b>Main
parameters</b></font></td>
</tr>
<tr>
<td width="15%" align="center" style="background-color:#eff1fe;">
<%=CurrUnit.getVariable("H1").getValue()%> <%=CurrUnit.getVariable("H1").getMUnit()%>
</td>
<td width="10%" align="center" style="backgroundcolor:#eff1fe;"><%=CurrUnit.getVariable("H1").getDescr1()%></td>
<td width="*" style="backgroundcolor:#eff1fe;"><%=CurrUnit.getVariable("H1").getDescription()%></td>
</tr>
<tr>
<td width="15%" align="center" style="background-color:#eff1fe;">
<%=CurrUnit.getVariable("L1").getValue()%> <%=CurrUnit.getVariable("L1").getMUnit()%>
</td>
<td width="10%" align="center" style="backgroundcolor:#eff1fe;"><%=CurrUnit.getVariable("L1").getDescr1()%></td>
<td width="*" style="backgroundcolor:#eff1fe;"><%=CurrUnit.getVariable("L1").getDescription()%></td>
</tr>
</table>
</td>
</tr>
</table>
</td>
</tr>
</table>
The first line, highlighted in yellow, allows the user to retrieve the complete path of the default image corresponding to the specific model
of device.
The second line, highlighted in green, groups together two statements: The retrieval of the value of variable H1 and its corresponding unit
of measure.
If the unit is offline and the values are not available, the framework returns 3 asterisks (“***”).
The third line, highlighted in blue, displays the short description of the variable.
The fourth line, highlighted in purple, displays the description of the variable.
We will now look at the device details, the table with the list of active alarms.
Cod. +030220766 rel. 1.2 del 31/01/08
19
Software Development Kit
To be able to load the list of alarms for the current device, a line of code needs to be entered at the start of the JSP file:
<%@ page language="java"
import="com.carel.supervisor.presentation.sdk.util.Sfera"
import="com.carel.supervisor.presentation.helper.ServletHelper"
%>
<jsp:useBean id="CurrUnit" class="com.carel.supervisor.presentation.sdk.obj.CurrUnit" scope="session"/>
<%
CurrUnit.setCurrentSession(ServletHelper.retrieveSession(request.getRequestedSessionId(),request));
CurrUnit.loadAlarms();
%>
This requests the CurrUnit object to load the list of active alarms for the device into the memory.
To display these in a table, the following code is used:
<table border="0" width="100%" cellpadding="1" cellspacing="1">
<tr>
<td colspan="2" style="background-color:#FF0000;"><font color="white"><b>Device alarms</b></font></td>
</tr>
<%for(int i=0; i<CurrUnit.getAlarmNumber(); i++) {%>
<tr>
<td width="25%" style="background-color:#eff1fe;"><%=CurrUnit.getAlarmAt(i).getDate()%></td>
<td width="*" style="background-color:#eff1fe;"><%=CurrUnit.getAlarmAt(i).getDesc()%></td>
</tr>
<%}%>
</table>
Once the active alarms have been loaded into the memory, a FOR cycle can be used to loop the following procedure.
For each alarm currently pointed to, the information can be retrieved. In the example described above, the following are retrieved:
• Date of the alarm;
• Description of the alarm.
The block of code, integrated with the rest of the example, creates a page shown in the following example:
The functions presented until now have a corresponding version with refresh, associated with the function of the framework that manages
the automatic update of the page without reloading it in the browser.
In order to use the following function, the data refresh ability must be activated with PVPK_ActiveRefresh().
Continuing then with the creation of the page, the variables already entered in static mode will be joined by the corresponding refreshable
versions, so as to highlight the differences and in particular the effective refreshing of the values.
The activation of the refresh function is added to the custom.js file, already described previously:
function PVP_OnLoad(sFolder,sResource,sDevice)
{
PVPK_ActiveRefresh(2);
}
Cod. +030220766 rel. 1.2 del 31/01/08
20
Software Development Kit
Highlighted in yellow is the statement that activated the refresh every 2 seconds (that is, the minimum time to ensure the server is not
overloaded with refresh requests).
The first step is to add the status LED with refresh to the page:
<table border="0" width="100%" height="100%" cellpadding="1" cellspacing="1">
<tr>
<td valign="middle" width="5%" align="center">
<%=Sfera.assint(CurrUnit.getStatus(),
"<img src='images/led/L0.gif'>;<img src='images/led/L1.gif'>;<img
src='images/led/L2.gif'>;<img src='images/led/L3.gif'>")
%>
</td>
<td valign="middle" width="5%" align="center" style="border:1px solid black;">
<%=CurrUnit.getRefreshableStatusAssint("<img src='images/led/L0.gif'>;<img
src='images/led/L1.gif'>;<img src='images/led/L2.gif'>;<img src='images/led/L3.gif'>")
%>
<br/>
<span style="font-size: xx-small;">Refreshable</span>
</td>
<td valign="middle" width="*" align="left">
<font size="4"><b><%=CurrUnit.getDescription()%></b></font>
</td>
<td valign="middle" width="5%" align="right">
<b><%=CurrUnit.getLine()%></b>
</td>
</tr>
</table>
As described previously with this call, the device status LED is added, mapping the different colours of the object with the values returned
for the status. The result, which is refreshed by the framework, is as follows:
Now the “refreshable” status has been added to the standard non-refreshable status and provides an instant picture (save for the refresh
time) of the status of the device. Obviously, the 2 states are completely independent, and therefore on a real custom page only one of the
2 will be used, according to requirements.
In addition, on the top right is the refresh button, used to manually refresh the page. The display of the button is activated by the special
PVPK_addButtons() function.
Similarly, the variables can be added with refresh, and are always updated automatically by the framework. An example of adding
variables with refresh is shown below:
<table border="0" width="100%" cellpadding="1" cellspacing="1" style="border: 1px solid black;">
<tr>
<td colspan="3" style="background-color:#7788EE;">
<font color="white"><b>Main parameters (refreshable)</b></font>
</td>
</tr>
<tr>
<td width="10%" align="center" style="background-color:#eff1fe;font-size: x-small;">
<NOBR><%=CurrUnit.getVariable("H3").getRefreshableValue()%>
<%=CurrUnit.getVariable("S3").getMUnit()%></NOBR>
</td>
<td width="10%" align="center" style="background-color:#eff1fe;font-size: xsmall;"><%=CurrUnit.getVariable("H3").getDescr1()%></td>
<td width="*" style="background-color:#eff1fe;font-size: xsmall;"><%=CurrUnit.getVariable("H3").getDescription()%></td>
</tr>
</table>
Cod. +030220766 rel. 1.2 del 31/01/08
21
Software Development Kit
In this example, the point of greatest significance is the statement highlighted in yellow: this statement requests the value of the variable
from the SDK framework and in the meantime records the variable for refreshing. The result can be seen in the following figure, where
the device that returns online has been detected in the areas recorded as refreshable.
SDK also includes other types of buttons.
For the correct operation of these, the command to import the UserSession object needs to be added to the page header, therefore we
will create an object called “sessionUser”
<%@ page import="com.carel.supervisor.presentation.session.UserSession" %>
<% UserSession sessionUser=ServletHelper.retrieveSession(request.getRequestedSessionId(),request); %>
Following this, we will add a button anywhere on the page for setting a parameter.
public String getSimpleButton(int pageId, String value, String srcImage, String shortDesc)
Esempio:
<%=CurrUnit.getVariable("OK_RST_AL").getSimpleButton(100,"1","images/button/reset.png","Alarm reset")%>
The function uses the following parameters:
• pageId: number that uniquely identifies the button on the page.
• value: value to be set for the variable.
• srcimage: string containing the path of the image that represents the button.
• shortDescr: tooltip that is shown when running the mouse over the button.
The next lines of code, on the other hand, are used to build a button for synchronising the clock on the device with the current time. In
the page header, together with “sessionUser” (described above), we will create the “syncronow” object.
<% String syncronow = sessionUser.getPropertyAndRemove("syncronow"); %>
<input type='hidden' id='dosyncro' value="<%=syncronow%>" />
A button can be added anywhere on the page for setting a parameter.
public String getSyncTimeButton(int id_hh,int id_mm,int id_ack)
Esempio:
<%=CurrUnit.getSyncTimeButton(CurrUnit.getVariable("LHOUR").getId(), CurrUnit.getVariable("LMINUTE").getId(),
CurrUnit.getVariable("SET_CLOCK").getId())%>
The function uses the following parameters:
• id_hh: id of the “hours” variable.
• id_mm: id of the “minutes” variable.
• id_ack: id of the “confirm time” variable.
The use of the synchronisation function is now strictly linked to devices where the time is set by sending the confirmation parameter.
Cod. +030220766 rel. 1.2 del 31/01/08
22
Software Development Kit
The result is shown in the following figure:
Continuing the illustration of the SDK function, the example below shows how to include refreshable variables on the page associated
with images:
<table border="0" width="100%" cellpadding="1" cellspacing="1" style="border: 1px solid black;">
<tr>
<td colspan="3" style="background-color:#7788EE;"><font color="white"><b>Main parameters (refreshable
img)</b></font></td>
</tr>
<tr>
<td width="10%" align="center" style="backgroundcolor:#eff1fe;"><%=CurrUnit.getVariable("DI1").getRefreshableAssint("<img src='images/led/L0.gif'>;<img
src='images/led/L1.gif'>")%> </td>
<td width="10%" align="center" style="backgroundcolor:#eff1fe;"><%=CurrUnit.getVariable("DI1").getDescr1()%></td>
<td width="*" style="background-color:#eff1fe;"><%=CurrUnit.getVariable("DI1").getDescription()%></td>
</tr>
<tr>
<td width="10%" align="center" style="backgroundcolor:#eff1fe;"><%=CurrUnit.getVariable("DI2").getRefreshableAssint("<img src='images/led/L0.gif'>;<img
src='images/led/L1.gif'>")%> </td>
<td width="10%" align="center" style="backgroundcolor:#eff1fe;"><%=CurrUnit.getVariable("DI2").getDescr1()%></td>
<td width="*" style="background-color:#eff1fe;"><%=CurrUnit.getVariable("DI2").getDescription()%></td>
</tr>
<tr>
<td width="10%" align="center" style="backgroundcolor:#eff1fe;"><%=CurrUnit.getVariable("DI5").getRefreshableAssint("<img src='images/led/PVE.gif'>;<img
src='images/led/PVP.gif'>")%> </td>
<td width="10%" align="center" style="backgroundcolor:#eff1fe;"><%=CurrUnit.getVariable("DI5").getDescr1()%></td>
<td width="*" style="background-color:#eff1fe;"><%=CurrUnit.getVariable("DI5").getDescription()%></td>
</tr>
<tr>
<td width="10%" align="center" style="backgroundcolor:#eff1fe;"><%=CurrUnit.getVariable("DI6").getRefreshableAssint("<img src='images/led/L0.gif'>;<img
src='images/led/L1.gif'>")%> </td>
<td width="10%" align="center" style="backgroundcolor:#eff1fe;"><%=CurrUnit.getVariable("DI6").getDescr1()%></td>
<td width="*" style="background-color:#eff1fe;"><%=CurrUnit.getVariable("DI6").getDescription()%></td>
</tr>
</table>
Based on the values available for the variable in question (only digital or integer), the corresponding value is obtained, which in the most
typical case is an image encapsulated in the corresponding HTML tag.
Cod. +030220766 rel. 1.2 del 31/01/08
23
Software Development Kit
The example highlights different situations:
• Yellow: classic example of using a LED to represent the on-off status of a digital variable
• Green: example of using images as desired to represent the different states. For integer variables, a different image can be used
for each possible value of the variable.
• Blue: the values can be duplicated: different displays can be used in different areas and if necessary with different presentations
for the same variable, all transparently to the framework.
The result on the custom page is shown in the following figure:
Further options are provided by the possibility to set the parameters in the fields in 2 different ways:
• Complete field: the framework generates all the code required to achieve a text field related to the parameter in question, for
setting the value
• Name only: with this option, the user can customise the text field as desired, modifying the layout and/or adding checks on the
data entered. The SDK function will set the correct ID and name of the text field to link it to the variable.
<form id="formSettableVars" name="formSettableVars">
<table border="0" width="100%" cellpadding="1" cellspacing="1" style="border: 1px solid black;"
<tr>
<td width="10%" align="center" style="background-color:#eff1fe;font:x-small;">
<%=CurrUnit.getVariable("BUZZ_OUTPUT").getRefreshableAssint("<img src='images/led/L0.gif'>;<img
src='images/led/L1.gif'>","***")%>
</td>
<td width="10%" align="center" style="background-color:#eff1fe;font:x-small;">
<%=CurrUnit.getVariable("BUZZ_OUTPUT").getSetField()%>
</td>
<td width="10%" align="center" style="background-color:#eff1fe;font:x-small;">
<%=CurrUnit.getVariable("BUZZ_OUTPUT").getDescr1()%>
</td>
<td width="*" style="background-color:#eff1fe;font:x-small;">
<%=CurrUnit.getVariable("BUZZ_OUTPUT").getDescription()%>
<SPAN style="border:1px solid black;font-size:xx-small;">tutto input</SPAN>
</td>
</tr>
<tr>
<td width="10%" align="center" style="background-color:#eff1fe;font:x-small;">
<%=CurrUnit.getVariable("L2").getRefreshableValue()%>
</td>
<td width="10%" align="center" style="background-color:#eff1fe;font:x-small;">
<input type="text" name="<%=CurrUnit.getVariable("L2").getPostName()%>"
id="<%=CurrUnit.getVariable("L2").getPostName()%>" style="width:95%;" value="">
</td>
<td width="10%" align="center" style="background-color:#eff1fe;font:x-small;">
<%=CurrUnit.getVariable("L2").getDescr1()%>
</td>
<td width="*" style="background-color:#eff1fe;font:x-small;">
<%=CurrUnit.getVariable("L2").getDescription()%>
<SPAN style="border:1px solid black;font-size:xx-small;">solo name</SPAN>
</td>
</tr></table></form>
Cod. +030220766 rel. 1.2 del 31/01/08
24
Software Development Kit
The 2 different methods presented are highlighted in the example; the statement used to create the default “all-in-one” text field is
highlighted in yellow.
The lines highlighted in blue show how to use the more customisable version of the statement: the user independently creates the input
text field, with the only link being setting the name and the id to the value returned by the getPostName() SDK function.
The result of the setting operation can be seen in the sequence of images shown below:
Also note the button at the top right that is used to set the values in the field after having completed the textfields on the page, as an
alternative to pressing the send button inside of a text field.
The custom page is then completed by the display of the alarms in real-time refreshable mode (save for the set refresh time).
As regards the jsp page, the only statement required is the inclusion of a <DIV> as a marker for where the refresh framework will fill the
table of alarms generated by the XSL style sheet.
<TR>
<TD colspan="2" align="center" valign="top" style="font-weight: bold;">
<table width="100%">
<tr>
<th>Refreshable alarms</th>
</tr>
<TR>
<TD colspan="2" valign="top">
<DIV id="alarms"></DIV>
</TD>
</TR>
</table>
</TD>
</TR>
Cod. +030220766 rel. 1.2 del 31/01/08
25
Software Development Kit
Highlighted in yellow is the line containing the div where framework will enter the result of the XSLT conversion, according to the example
provided previously. The result of this operation can be seen in the following figure:
9. DEVICE DETAIL FOLDER
As regards the device detail, the association between DEVICE and FOLDER where the corresponding JSP files are located is described in
the following table.
Device description
Folder
pCO air handling unit (FLSTDMAHUA) (>= version 1.8)
pCO air conditioning unit (EPSTDECZUB)
Rack controller v1.8 (FLSTDmFC0A)
pCO Rack controller 1/3 compr. (EPSTD*FC2A)
E-drofan 1.8 version
E-drofan 1.8 version
Energy2
EVD300 Expansion valve driver
EVD400 - Retail Universal
pCO Universal stage controller (EPSTDIIU0A)
IR32 V W Z Universal 2 NTC probes
IR Mpx
IR32 M S Y X C for refrigeration
IR 33 - C
MasterCase
MasterCase2
MasterCella Split
MasterCella (MTC)
I/O Module
Modular chiller-HP 1-8 comp. (EPSTDMMCHA)
Modular chiller-HP with driver (FLSTDMMCDE)
Plug-In
PowerSplit
pCO Roof-top 1/2 compressors (EPSTDMRT0A)
Roof-top 1/2 compressors on pCO1 (FLSTDMRT0E)
Modular Chiller-HP screw compr. (MSCA) - Machine type 0
Cella stagionatura (EPSTDICS00)
Shelter on pCO1-2 medium (*MSHE)
Standard Air-conditioners on pCO1/2 (FLSTDMCZ0E)
uAC
uChiller
uChiller2 - digital outputs 0
uChiller compact
uRack (MRK)
Wireless probe
Cod. +030220766 rel. 1.2 del 31/01/08
ahu_pco_v18
Cdz_pco
CFP_1_8
Cfp_ncp
Conv485
edrofan
Energy
EVD300
EVD400
Insgrd
ir32un_t
irmpx
ir_32
ir_33_C_v2
MasterCase
MasterCase2
MasterCellaSplit
mcella
mio
Mod_ch
mod_ch_18
plugin
PowerSplit
Rtop_pco
Rtop_pCO1_v1_0
Screw_Compressor
Seasoning_room
shelter_medium
std_air_cond
uAC
uChiller
uChiller2
uChiller_cmp
uRack
WLProbe
26
Software Development Kit
E-drofan 2.0 version
Service E3 HS10
Service E3 HS5
IR32 V W Z Universal 1 pressure probe
IR32 V W Z Universal 1 humidity probe
IR 33 - F
IR 33 - M
IR 33 - S
IR 33 - Y
MasterCella (MD33)
Modular chiller-HP 1-4 comp. (MC0E) - type 0 - master
Modular chiller-HP 1-4 comp. (MC0E) - type 0 - slave
Modular chiller-HP 1-4 comp. (MC0E) - type 1 - master
Modular chiller-HP 1-4 comp. (MC0E) - type 1 - slave
Modular chiller-HP 1-4 comp. (MC0E) - type 2
Modular chiller-HP 1-4 comp. (MC0E) - type 3
Modular chiller-HP 1-4 comp. (MC0E) - type 4
Modular chiller-HP 1-4 comp. (MC0E) - type 5
Power compact - C v.2
Power compact - F v.2
Power compact - H v.2
Power compact - M v.2
Power compact - S v.2
Power compact - Y v.2
Roof-top 1/2 compressors on pCO2 (FLSTDMRT0E)
Roof-top 1/2 compressors on pCOc (FLSTDMRT0E)
Roof-top 1/2 compressors on pCOxs (FLSTDMRT0E)
Modular Chiller-HP screw compr. on pCO1/2/c (*MSDE) - type 5
Modular Chiller-HP screw compr. on pCO1/2/c (*MSDE) - type 5
Modular Chiller-HP screw compr. on pCO1/2/c (*MSDE) - type 5
Modular Chiller-HP screw compr. on pCO1/2/c (*MSDE) - type 5
Modular Chiller-HP screw compr. on pCO1/2/c (*MSDE) - type 5
Modular Chiller-HP screw compr. on pCO1/2/c (*MSDE) - type 5
Modular Chiller-HP screw compr. (MSCA) - Machine type 1
Modular Chiller-HP screw compr. (MSCA) - Machine type 2
Modular Chiller-HP screw compr. (MSCA) - Machine type 3
Modular Chiller-HP screw compr. (MSCA) - Machine type 4
Modular Chiller-HP screw compr. (MSCA) - Machine type 5
Shelter on pCO1-2 small (*MSHE)
Shelter on pCOxs (*MSHE)
Standard Air-conditioners on pCOxs (FLSTDMCZ0E)
uChiller2 - digital outputs 1
uChiller2 - digital outputs 2
uChiller2 - digital outputs 3
uChiller2 - digital outputs 4
uChiller2 - digital outputs 5
Power analyser
OEM kit KUE
humiFog for AHU/duct
humiFog for Ambient
humiSteam
gaSteam
heaterSteam
Cod. +030220766 rel. 1.2 del 31/01/08
edrofan_20
EVD300_HS_x10
EVD300_HS_x5
ir32un_ap
ir32un_hu
ir_33_F_v2
ir_33_M_v2
ir_33_S_v2
ir_33_Y_v2
mcella_v1
mod_ch_14_0m
mod_ch_14_0s
mod_ch_14_1m
mod_ch_14_1s
mod_ch_14_2
mod_ch_14_3
mod_ch_14_4
mod_ch_14_5
pwrCompact_C_v2
pwrCompact_F_v2
pwrCompact_H_v2
pwrCompact_M_v2
pwrCompact_S_v2
pwrCompact_Y_v2
Rtop_pCO2_v1_0
Rtop_pCOc_v1_0
Rtop_pCOxs_v1_0
Screw_Cmp0_pCO2
Screw_Cmp1_pCO2
Screw_Cmp2_pCO2
Screw_Cmp3_pCO2
Screw_Cmp4_pCO2
Screw_Cmp5_pCO2
Screw_Compressor1
Screw_Compressor2
Screw_Compressor3
Screw_Compressor4
Screw_Compressor5
shelter_small
shelter_xs
std_air_cond_pCOxs
uChiller2_1
uChiller2_2
uChiller2_3
uChiller2_4
uChiller2_5
pwr_an
cp
humifog1_1
humifog1_2
humisteam
gasteam
heatersteam
27
Software Development Kit
10.
RELATIONSHIP BETWEEN FILES AND MAPS
The menu on the left is divided into six macro-groups.
Each of these correspond to certain number of sections, each associated with a directory accessible via the following path:
C:\swdept_prj\plantvisorpro\developments\applications\websupervisor\WebRoot\app\NAME
The directory contains the files that correspond to the pages available for each section.
Below is the list of the macro-groups, divided by section, indicating the corresponding directory and the list of JSP files.
10.1 GROUPS
Overall view of the devices with the corresponding settings.
Global
•
•
•
•
•
•
grpview
Main subtab1.jsp
Parameters subtab2.jsp
Alarms subtab3.jsp
HACCP graph subtab4.jsp
Log graph subtab5.jsp
Conf Graph subtab6.jsp
10.2 ALARMS/EVENTS
Macro-group for managing, viewing and looking up alarms and events.
Alarms
•
•
Events
•
alrglb
Active alarms
Reset alarms
evnview
Events
subtab1.jsp
Relays management
•
subtab1.jsp
subtab2.jsp
relaymgr
Reset relay
subtab1.jsp
Search
alrevnsearch
•
•
Alarms search
Events search
subtab1.jsp
subtab2.jsp
10.3 REPORTS
Macro-group for managing the print-outs and saving the alarms and reports.
Periodic print configuration
•
•
HACCP subtab1.jsp
Log subtab2.jsp
Print online
•
•
report
HACCP subtab1.jsp
Log subtab2.jsp
Reports archive
•
Archive
Alarms archive
•
reportconf
Archive
hsreport
subtab1.jsp
hsprint
subtab1.jsp
Cod. +030220766 rel. 1.2 del 31/01/08
28
Software Development Kit
10.4 CONFIGURATION
Macro-group for managing the site and the logical configuration of the variables, devices, groups and areas.
Site configuration
•
•
•
•
siteview
Site subtab1.jsp
New line subtab2.jsp
Alarms safety subtab3.jsp
Copy config. subtab4.jsp
Logical configuration
•
devloglist
Logical devices
subtab1.jsp
Logical device creation
•
•
Logical devices subtab1.jsp
Logical variables subtab2.jsp
Logical groups
•
•
groupview
Groups list
New group
Logical areas
•
•
logicdevice
subtab1.jsp
subtab2.jsp
areaview
Areas list
New area
subtab1.jsp
subtab2.sp
User configuration setldap
• Users subtab1.jsp
• Profiles subtab2.jsp
System pages mgr
• Information subtab1.jsp
• System subtab2.jsp
• IDE subtab3.jsp
• Support subtab4.jsp
• guardianPRO subtab5.jsp
• Notifications subtab6.jsp
• Plugins subtab7.jsp
PLUGINS
•
plugin
Plugins
subtab1.jsp
Cod. +030220766 rel. 1.2 del 31/01/08
29
Software Development Kit
10.5 SCHEDULER
Macro-group for creating and managing alarms and events, and the consequent actions with any I/O operations.
Alarms and event management alrsched
• Rules subtab1.jsp
• Alarm conditions subtab2.jsp
• Event conditions subtab3.jsp
• Time bands subtab4.jsp
• Actions subtab5.jsp
Scheduled activities management actsched
• Rules subtab1.jsp
• Time bands subtab2.jsp
• Actions subtab3.jsp
I/O configuration setio
• Fax subtab1.jsp
• SMS subtab2.jsp
• E-mail subtab3.jsp
• RAS subtab4.jsp
• Window subtab5.jsp
• Relay subtab6.jsp
I/O test page testio
• Test I/O subtab1.jsp
Data transfer datatransfer
• Data transfer subtab2.jsp
10.6 MAPS
Macro-group for displaying the devices and the maps created by IDE - LayoutEditor
Devices
•
Map list
•
deviceview
Devices
subtab1.jsp
mstrmaps
Link maps
subtab2.jsp
Cod. +030220766 rel. 1.2 del 31/01/08
30
Software Development Kit
11.
Custom and logical devices
The SDK functions are used to make custom pages even for custom devices created with PlantVisorPRO IDE and for logical devices
created in the PlantVisorPRO environment.
The creation of the custom pages using the SDK commands is essentially the same for these types of devices.
The additional operations are slightly different for the custom devices created with IDE and for the virtual devices, and are described
below.
11.1 IDE custom devices
When a new device created with PlantVisorPRO IDE is added, the system creates a new directory under
C:\Carel\PlantVisorPRO\engine\webapps\PlantVisorPRO\custom\dtlview
This new directory will have the same name as the XML file for the IDE created device, and even if it is not obligatory it is good practice to
name the file based on the code of the device.
The system will use this directory as the reference for the device added, regardless of any other updates.
Example
IDE device
Code: D01
File: device01.xml
Importing the device will create the new directory:
C:\Carel\PlantVisorPRO\engine\webapps\PlantVisorPRO\custom\dtlview\device01
All the files developed in SDK corresponding to the new device will thus be saved in this path.
11.2 Logical devices
The pages created with the logical devices should be located in the following directory:
C:\Carel\PlantVisorPRO\engine\webapps\PlantVisorPRO\custom\dtlview\devicelogic
These must be composed using the logical codes found in the logical device configuration page as references:
In the figure, the ID code of the instrument identifies the custom page inside the file name, as follows
<Device code>_Subtab1.jsp
Example:
2952_Subtab1.jsp
Cod. +030220766 rel. 1.2 del 31/01/08
31
Software Development Kit
On the other hand, to get the codes of the variables and access the corresponding values, the page with the list of descriptions is used:
Using the identifiers in square brackets as the code allows access to the logical variable data to make up the pages.
Example:
CurrUnit.getVariable("191568").getDescr1()
Cod. +030220766 rel. 1.2 del 31/01/08
32
Software Development Kit
SDK – Software development kit
1. Introduction to the function
The XML query function is used to access useful information deriving from the field controlled by PlantVisorPRO so as to manage an
alternative or complementary external presentation to the one offered by the supervisor.
This function can be used to send, via a packet in standard XML format, a series of requests to the PlantVisorPRO server engine, getting as
a response a similar XML packet containing, depending on the type of request sent, data concerning the devices, the parameters
associated with a certain device, and alarms.
The response packets can be broken down and analysed so as to be bale to present the data made available by the PlantVisorPRO engine
in the most useful way outside of the supervisor web pages.
The following sections of the document will describe the different types of queries available and their use, with details that allow the user
to utilise the queries to get the data to be presented in substantially the same way as proposed for presentation by the supervisor.
2. XML Queries
The XML External Query function offers various types of query to retrieve different data from the field controlled by PlantVisorPRO.
This section will first present the query mode, and then analyse the types of query in detail, presenting all the elements that allow the user
to exploit the functions provided.
2.1
Query mode
The query mode involves sending a normal http request in secure mode, that is, on port 443 and using https.
The XML query packet is normal standard XML text. An XML query, suitably prepared based on the required type of request, must be
forwarded with a https POST request to the following address:
https://<PlantVisorPRO PC IP>/PlanVisorPRO/servlet/MasterXML
The request can reach the server either by sending a form, or for example as an AJAX POST request, or alternatively in any other mode that
involves a request of this type and that can subsequently read the response.
An example in Javascript of sending the XML Query and managing the subsequent response using the callback function is shown in the
following code:
function sendrequest()
{
if(window.XMLHttpRequest)
xmlCommReq = new XMLHttpRequest();
else if (window.ActiveXObject)
xmlCommReq = new ActiveXObject("Microsoft.XMLHTTP");
if(xmlCommReq != null)
{
try
{
xmlCommReq.open("POST",
"https://<PlantVisorPRO PC IP>/PlantVisorPRO
/servlet/MasterXML",true);
xmlCommReq.onreadystatechange = callbackFunction;
xmlCommReq.send(document.getElementById("input").value);
}
catch(e)
{
alert("err");
}
}
}
function callbackFunction()
{
if(xmlCommReq.readyState==4)
{
Cod. +030220766 rel. 1.2 del 31/01/08
33
Software Development Kit
if(xmlCommReq.status==200)
{
try
{
xmlResponse = xmlCommReq.responseXML;
txtResponse = xmlCommReq.responseText;
// --- gestione risposta
xmlResponse = null;
}
catch(e)
{
alert("err");
}
}
}
}
2.2
Format of the packets
The XML query packets have the following general format:
Query
1 occurrence
1 occurrence
n occurrences
n occurrences
<requests>
<login userName="user" password="pwd" />
<request type="type" ... >
<element …/>
</request>
</requests>
The packet must be contained within the <requests> tags, which in turn should contain the access credentials between <login> tags.
A single XML Query can be used to send multiple requests, each enclosed in the <request> tags and with one or more <element> tags,
according to the type of request being sent.
Response from the server
1 occurrence
n occurrences
n occurrences
<responses>
<response type="type">
< - - results - - />
</response>
</responses>
The <responses> tags contain one <response> occurrence for each <request> sent to the server.
These in turn contain the results corresponding to the request forwarded.
Cod. +030220766 rel. 1.2 del 31/01/08
34
Software Development Kit
2.3
Query for retrieving the list of devices
This query requests the list of devices configured on the PlantVisorPRO site from the PlantVisorPRO engine.
The XML query packet indicates the list of the devices that needs to be retrieved, while the response packet contains all the information
defining a device.
2.3.1
XML query packet
The XML query packet will have the following format:
<requests>
<login userName="user" password="password" />
<request type="devicesList" language="language_code" >
<element iddevices="id_devices" />
</request>
</requests>
The terms in bold are to be replaced with suitable values, as follows:
User: PlantVisorPRO user name
Password: PlantVisorPRO user password
Language_code: this is a string of characters in XX_xx format, that is, 2 letters in upper case and 2 in lower case separated
by an underscore. The groups of 2 letters represent the user language code: for Italian the string will be IT_it. Similarly for
the other languages, the code will be made up of 2 letters in upper case, the underscore and then the language code in
lower case. This is the standard format that also allows for special dialects, if these are made available in PlantVisorPRO.
Id_devices: this field is used to indicate which devices the data is required for. The following values are possible:
o -1: all the devices on the site will be returned
o List of integers separated by commas ( , ): the data corresponding to the devices whose identifier is included in
the list supplied will be returned; if the identifier does not exist, it will be ignored.
The following example shows a possible XML query packet:
<requests>
<login userName="admin" password="admin" />
<request type="devicesList" language="IT_it" >
<element iddevices="212,312" />
</request>
</requests>
2.3.2
XML response packet
The XML response packet to this query will have the following format:
<responses>
<response type="devicesList">
<device
idDevice="id_device"
name="description"
status="status"
idline="id_line"
address="address"
code="code"
isenabled="enabled"
comport="com_port"
baudrate="speed"
typeprotocol="protocol" / >
</response>
</responses>
Cod. +030220766 rel. 1.2 del 31/01/08
35
Software Development Kit
The values in bold are set on the server side of the query, as follows:
Id_device: unique identifier of the device
Description: description of the device in the set language
Status: integer value that indicates the status of the device. The following values are possible:
o 0: device not connected
o 1: device online
o 2: device with alarm
o 3: device disabled by the supervisor
Id_line: unique identifier of the line used by the device
Address: serial address that the device is connected to
Code: code of the device (also indicated on the supervisor as the ID); numeric code made up of the progressive number
of the line configured in PlantVisorPRO followed by the decimal point and 3 digits that indicate the device serial line
number
Enabled: TRUE or FALSE, indicates whether the device is enabled
Com_port: code of the COM port that the device is connected to
Baud rate: device communication speed in baud
Protocol: type of protocol; the following values are currently available in PlantVisorPRO
o CAREL
o MODBUS
The following example shows a possible XML response packet:
<responses>
<response type="devicesList">
<device
idDevice="212"
name="IR 33 DIN - C - 1"
status="2"
idline="112"
address="1"
code="2.001"
isenabled="TRUE "
comport="COM4"
baudrate="19200"
typeprotocol="CAREL"
/>
<device
idDevice="312"
name="Anticondensate controller - GAV"
status="3"
idline="212"
address="1"
code="3.001"
isenabled="FALSE"
comport="COM20"
baudrate="19200"
typeprotocol="MODBUS"
/>
</response>
</responses>
Cod. +030220766 rel. 1.2 del 31/01/08
36
Software Development Kit
2.4
Query for retrieving the list of parameters
This query requires the list of parameters corresponding to a certain device from the PlantVisorPRO engine.
The XML query packet indicates the list of the devices in question and if necessary the category of parameters to be retrieved, and in
return receives, in the XML response packet, the list of parameters representing the result of the query.
2.4.1
XML query packet
The XML query packet will have the following format:
<requests>
<login userName="user" password="password" />
<request type="parametersList" language="language_code" >
<element idDevice="id_device" idsVariable="id_variables" />
</request>
</requests>
The terms in bold are to be replaced with suitable values, as follows:
User: PlantVisorPRO user name
Password: PlantVisorPRO user password
Language_code: this is a string of characters in XX_xx format, that is, 2 letters in upper case and 2 in lower case separated
by an underscore. The groups of 2 letters represent the user language code: for Italian the string will be IT_it. Similarly for
the other languages, the code will be made up of 2 letters in upper case, the underscore and then the language code in
lower case. This is the standard format that also allows for special dialects, if these are made available in PlantVisorPRO.
Id_device: unique identifier of the device in question
Id_variables: this field is used to differentiate the query by selecting different categories of parameters according to the
value assigned:
o List of unique numeric variable identifiers, separated by commas: the query will be performed so as to only return
the information relating to the requested parameters, and ignoring any inexistent variable identifiers.
o Value -1: returns the list of all the parameters for the device in question.
o Value -2: returns the list of t parameters set in the probes area on the device detail page.
o Value -3: returns the list of parameters set as the main parameter for the device, that is, those visible in the 2 tables
on the device detail page, for the read-only and read-write variables respectively.
o Value -4: returns the list of parameters set in the status area of the device detail. Obviously these variables will all be
digital, as a status is on or off by definition.
The following example shows a possible XML query packet:
<requests>
<login userName="admin" password="admin" />
<request type="parametersList" language="IT_it" >
<element idDevice="212" idsVariable="800" />
</request>
</requests>
2.4.2
XML response packet
The XML response packet to this query will have the following format:
<responses>
<response type="parametersList">
<device name="device_name" iddevice="id_device" >
<variable
name="variable_description"
value="value"
type="type_variable"
idvar="id_variable"
islogic="islogic"
priority="priority"
readwrite="read/write"
minvalue="minimum_value"
maxvalue="maximum_value"
shortdescr="short_description"
longdescr="long_description"
/>
</device>
</response>
</responses>
Cod. +030220766 rel. 1.2 del 31/01/08
37
Software Development Kit
The values in bold are set on the server side of the query, as follows:
Device_name: text description of the device queried
Iddevice: unique identifier of the device queried
Variable_description: text description of the parameter
Type_variable: integer value that describes the type of parameter value. The following values are possible:
1. digital value (0 or 1)
2. analogue value (number with decimal)
3. integer value (number without decimal)
Id_variable: unique identifier of the parameter
Islogic: TRUE or FALSE, indicates whether the parameter is logical, that is, calculated by the supervisor as the result of
combining other parameters, or alternatively physical, that is, belonging to the device and read in the field
Priority: progressive integer that indicates the order of presentation in the device detail in PlantVisorPRO
Read/write: numeric value that indicates whether the parameter is read-only or read/write:
o Value =1: the parameter is read-only, not modifiable by the user
o Value •1: the parameter is read/write
Minimum_value: minimum value possible for the parameter
Maximum_value: maximum value possible for the parameter
Short_description: short text description of the parameter. This is essentially the parameter code, as shown on the
instrument
Long_description: long text description of the parameter. This may contain details on the meaning of the parameter, as
well as information on the meaning of the values that can be set.
The following example shows a possible XML response packet:
<responses>
<response type="parametersList">
<device name="IR 33 DIN - C - 1" iddevice="212" >
<variable
name="Status of compressor relay"
value="1.0"
type="1"
idvar="800"
islogic="FALSE"
priority="5"
readwrite="1"
minvalue="0"
maxvalue="1"
shortdescr="rl.cmp"
longdescr=""
/>
</device>
</response>
</responses>
Cod. +030220766 rel. 1.2 del 31/01/08
38
Software Development Kit
2.5
Query for setting the parameters in the field
This query requests the PlantVisorPRO engine to set the value of the parameters in the field.
The XML query indicates the unique identifier of the parameter to be set and the corresponding value.
The response to this type of query involves information on the outcome of the operation.
2.5.1
XML query packet
The XML query packet will have the following format:
<requests>
<login userName="user" password="password" />
<request type="setParameters” waittime=” wait_time”>
<element idVariable="id_variable" value="value" />
</request>
</requests>
The terms in bold are to be replaced with suitable values, as follows:
User: PlantVisorPRO user name.
Password: PlantVisorPRO user password.
Waittime: waiting time for setting the parameters, in milliseconds. After this maximum time, the parameter is signalled as
not having been set, however the parameter may still be set correctly in the next instant.
Id_variable: unique identifier of the parameter to be set.
Value: value to be set for the parameter.
The following example shows a possible XML query packet:
<requests>
<login userName="admin" password="admin" />
<request type="setParameters" waittime="5000" >
<element idVariable="643" value="1" />
</request>
</requests>
2.5.2
XML response packet
The XML response packet to this query will have the following format:
<responses>
<response type="setParameters">
<variable id="id_variable" state="status" />
</response>
</responses>
The values in bold are set on the server side of the query, as follows:
Id_variable: unique ID of the variable
Status: outcome of the write operation; the following values are possible
o ok: parameter set correctly
o waittime: numeric value of the waittime sent with the request. This means that after having waited the set
number of milliseconds, the parameter has still not been modified. This is not an error code but rather a timeout
indication. The parameter may still be set to the new value in the next instant
o error: indicates a error in setting the parameter.
If an internal error occurs on the server, an error packet is returned, with the following format:
<responses>
<response type="setParameters">
<error />
</response>
</responses>
The following example shows a possible XML response packet:
<responses>
<response type="setParameters">
<variable id="643" state="ok" />
</response>
</responses>
Cod. +030220766 rel. 1.2 del 31/01/08
39
Software Development Kit
2.6
Query on the status of the site
This query requests the status of the site from the PlantVisorPRO engine, that is, whether or not there are alarms.
2.6.1
XML query packet
The XML query packet will have the following format:
<requests>
<login userName="user" password="password" />
<request type="siteStatus" >
</request>
</requests>
The terms in bold are to be replaced with suitable values, as follows:
User: PlantVisorPRO user name
Password: PlantVisorPRO user password
The following example shows a possible XML query packet:
<requests>
<login userName="admin" password="admin" />
<request type="siteStatus">
</request>
</requests>
2.6.2
XML response packet
The XML response packet to this query will have the following format:
<responses>
<response type="siteStatus">
<site id="1" status="site_status" />
</response>
</responses>
The XML response only provides the situation of the queried site:
Site_status: numeric value that represents the status of the site, with 2 possible values
o 1: site OK
o 2: site with alarms
The following example shows a possible XML response packet:
<responses>
<response type="siteStatus">
<site id="1" status="1" />
</response>
</responses>
Cod. +030220766 rel. 1.2 del 31/01/08
40
Software Development Kit
2.7
Query for retrieving alarms from the field
This query requests the list of alarms from the PlantVisorPRO engine. The XML query may indicate the device/devices required, the
maximum length of the list retrieved and the starting point.
2.7.1
XML query packet
The XML query packet will have the following format:
<requests>
<login userName="user" password="password" />
<request type="alarmList" language="language_code" >
<element
idDevice="id_device"
start="start_list"
length="length_list"
/>
</request>
</requests>
The terms in bold are to be replaced with suitable values, as follows:
User: PlantVisorPRO user name
Password: PlantVisorPRO user password
Language_code: this is a string of characters in XX_xx format, that is, 2 letters in upper case and 2 in lower case separated
by an underscore. The groups of 2 letters represent the user language code: for Italian the string will be IT_it. Similarly for
the other languages, the code will be made up of 2 letters in upper case, the underscore and then the language code in
lower case. This is the standard format that also allows for special dialects, if these are made available in PlantVisorPRO
Id_device: unique identifier of the device in question. This attribute can be ignored in the XML query packet, thus
retrieving all the alarms from the site.
Id_variables: this field is used to differentiate the query, selecting different categories of parameters according to the value
assigned:
Start_list: numeric value that is used to skip the first n alarms in the list.
Length_list: used to specify the number of alarms to be retrieved.
The following example shows a possible XML query packet:
<requests>
<login userName="admin" password="admin" />
<request type="alarmList" language="IT_it" >
<element start="0" length="10"/>
</request>
</requests>
2.7.2
XML response packet
The XML response packet to this query will have the following format:
<responses>
<response type="alarmList">
<alarm
name="alarm_description"
starttime="time_start"
endtime="time_end"
ackuser="user_acknowledge"
acktime="time_acknowledge"
deluser="user_cancel"
deltime=" time_cancel "
resetuser="user_reset"
resettime="time_reset"
iddevice="id_device"
devicedescription="device_description "
idalarm="id_alarm"
idvariable="id_variable"
priority="priority"
islogic="logic"
/>
</response>
</responses>
Cod. +030220766 rel. 1.2 del 31/01/08
41
Software Development Kit
The values in bold are set on the server side of the query, as follows:
Alarm_description: text description of the alarm
Time_start: instant the alarm started
Time_end: instant the alarm ended, null if still active
User_acknowledge: user who acknowledged the alarm
Time_acknowledge: instant the alarm was acknowledged
User_cancel: user who cancelled the alarm
Time_cancel: instant the alarm was cancelled
User_reset: user who reset the alarm
Time_reset: instant the alarm was reset
Id_device: identifier of the device with the alarm
Device_description: text description of the device with the alarm
Id_alarm: identifier of the alarm
Id_variable: identifier of the alarm variable
Priority: indicates the priority of the alarm, and have 4 different values, according to the language used, which in English
are:
o Highest
o High
o Medium
o Low
Logic: string value, TRUE or FALSE, that indicates whether or not the alarm is logical.
If some of the fields are not available, for example, the alarm end time or the users and times of the various operations, this will be
given null values.
The following example shows a possible XML response packet:
<responses>
<response type="alarmList">
<alarm
name="No connection"
starttime="2007-06-15 16:17:44.234"
endtime=""
ackuser=""
acktime=""
deluser=""
deltime=""
resetuser=""
resettime=""
iddevice="212"
devicedescription="IR 33 DIN - C - 1"
idalarm="3017"
idvariable="739"
priority="HIghest"
islogic="FALSE"
/>
</response>
</responses>
Cod. +030220766 rel. 1.2 del 31/01/08
42
“SDK” +030220766 - rel. 1.2 – 31/01/08
CAREL S.p.A.
Via dell’Industria, 11 - 35020 Brugine - Padova (Italy)
Tel. (+39) 049.9716611 Fax (+39) 049.9716600
http://www.carel.com - e-mail: [email protected]