1
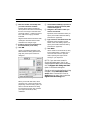
Audio Reference Manual
for Vision and Studio Vision Pro
Version 4.5
Opcode Systems, Inc.
365 East Middlefield Road
Mountain View, CA 94043
Opcode Part Number: 110-0208-07
Copyright ©1999 Opcode Systems, Inc. All rights reserved. This document may not, in whole or
part, be copied, photocopied, reproduced, translated or converted to any electronic or machine
readable form without the prior consent of Opcode Systems, Inc.
OPCODE SYSTEMS, INC. MAKES NO WARRANTIES, EXPRESS OR IMPLIED,
INCLUDING WITHOUT LIMITATION THE
IMPLIED WARRANTIES OF MERCHANTABILITY AND FITNESS FOR A
PARTICULAR PURPOSE, REGARDING THIS
SOFTWARE. OPCODE DOES NOT WARRANT, GUARANTEE OR MAKE ANY
REPRESENTATIONS REGARDING THE
USE OR THE RESULTS OF THE USE OF
THIS SOFTWARE IN TERMS OF ITS CORRECTNESS, ACCURACY, RELIABILITY,
CURRENTNESS OR OTHERWISE. THE
ENTIRE RISK AS TO THE RESULTS AND
PERFORMANCE OF THIS SOFTWARE IS
ASSUMED BY YOU. THE EXCLUSION OF
IMPLIED WARRANTIES IS NOT PERMITTED BY SOME STATES. THE ABOVE
EXCLUSION MAY NOT APPLY TO YOU.
IN NO EVENT WILL OPCODE, ITS DIRECTORS, OFFICERS, EMPLOYEES OR
AGENTS BE LIABLE TO YOU FOR ANY
CONSEQUENTIAL, INCIDENTAL OR INDIRECT DAMAGES (INCLUDING DAMAGES
FOR LOSS OF BUSINESS PROFITS, BUSINESS INTERRUPTION, LOSS OF BUSINESS
INFORMATION, AND THE LIKE) ARISING
OUT OF THE USE OR INABILITY TO USE
THIS SOFTWARE EVEN IF OPCODE HAS
BEEN ADVISED OF THE POSSIBILITY OF
SUCH DAMAGES. BECAUSE SOME
STATES DO NOT ALLOW THE EXCLUSION
OR LIMITATION OF LIABILITY FOR CONSEQUENTIAL OR INCIDENTAL DAMAGES,
THE ABOVE LIMITATIONS MAY NOT
APPLY TO YOU.
ACKNOWLEDGMENTS
Program by
Dave Oppenheim
Ray Spears
Dan Timis
Aron Nelson
David Willenbrink
Andy Wolpert
Doug Wyatt
Daniel Steinberg
Dave Scoggin
Larry Gerndt
Tom Padula
Harvey Thornburg
Special thanks to Muscle Fish
Quality Assurance
Mike Rogers
James Livingston
Darin Marshall
Product Management
Jonnie Gillham
Documentation
Gregory A. Simpson
Timothy Self
Greg Thomas
Boris Popkoff
Angela Hill
Manual Design
Gregory A. Simpson
Technical Editing
Dan Timis
Greg Thomas
Table of Contents
TABLE OF CONTENTS
PART ONE: Introduction to Digital Audio 1
CHAPTER 1:
Introduction
3
Using Your Vision Manuals .................................................................3
Versions of Vision .................................................................................3
Introduction to Digital Audio ...............................................................3
About the Audio Reference Manual ....................................................4
CHAPTER 2:
Basic Terminology
7
Outputs, Voices, and Audio Instruments............................................7
Audio Files and Audio Events..............................................................7
A Picture’s Worth..................................................................................8
PART TWO: Acadia 11
CHAPTER 3:
Acadia: Hardware Setup
13
The Acadia Audio System ..................................................................13
System Requirements.........................................................................14
Set Vision to the Acadia Audio System .............................................14
Hardware Setup...................................................................................14
The Session Sample Rate ...................................................................18
Active in Background .........................................................................19
CHAPTER 4:
Acadia: Record Monitor Window
21
Opening the Record Monitor Window..............................................21
Opcode Manual Template
i
Table of Contents
Anatomy of the Record Monitor Window........................................ 22
Using 24 Bits....................................................................................... 24
CHAPTER 5:
Acadia: Recording Audio
25
Recording: Power User Overview .................................................... 25
Recording: Step-By-Step .................................................................... 26
Designate a Record File ............................................................. 26
Disabling a Record File .............................................................. 27
Set Record Levels........................................................................ 27
Assign an Audio Instrument ...................................................... 29
Record a Track ............................................................................ 29
Advanced Recording Techniques..................................................... 31
Stereo Recording......................................................................... 31
Recording Multiple Takes.......................................................... 33
Recording Audio While Monitoring Existing Audio Events .. 33
CHAPTER 6:
Acadia: Audio Instruments & Routings Window
35
Setting the Number of Audio Instruments ...................................... 36
Voice Allocation and Audio Playback............................................... 37
Columns in the Audio Instruments & Routings Window............... 37
Saving Instrument Setups.................................................................. 44
CHAPTER 7:
Acadia: Audio Channels in Consoles
45
Audio in Consoles .............................................................................. 45
Assigning Plug-Ins ............................................................................. 47
Assigning EQ ...................................................................................... 53
Phase ................................................................................................... 55
Audio Sends ........................................................................................ 56
Clipping LEDs .................................................................................... 60
Console Outputs................................................................................. 60
Clearing Consoles .............................................................................. 62
ii
Opcode Systems, Inc.
Table of Contents
CHAPTER 8:
Acadia: Plug-In Edit Window
63
Plug-In Edit Window...........................................................................63
Saving and Recalling Plug-In Programs and Banks ........................65
CHAPTER 9:
Acadia: EQ Window
69
Editing EQ Settings ............................................................................69
EQ Panel ..............................................................................................71
Saving and Recalling EQ Settings .....................................................72
CHAPTER 10:
Acadia: Bussing, Routing, & Bouncing to Disk
75
Using Busses and Sends ....................................................................75
Routing to Shared Plug-Ins (Creating Effects Sends)..............75
Creating a Submix .......................................................................76
Signal Routing and Monitoring .........................................................78
Virtual Consoles...........................................................................78
Recording from Audio Instruments, Busses, and Outputs.............79
CHAPTER 11:
Acadia: Optimizing for Digital Audio
83
Number of Audio Tracks....................................................................83
The Performance Window .................................................................83
The Buffer Size Dialog .......................................................................87
Audio Preferences...............................................................................88
PART THREE: Digidesign DAE: 95
CHAPTER 12:
DAE: Hardware Setup
97
About DAE...........................................................................................97
System Requirements.........................................................................97
Pro Tools 24 Mix and Mix PLus........................................................98
Pro Tools 24.........................................................................................98
Opcode Manual Template
iii
Table of Contents
Pro Tools III (NuBus & PCI) ............................................................ 98
Session 8/Project ............................................................................... 98
Audiomedia II/III ............................................................................... 99
Set Vision to DAE Mode.................................................................... 99
Allocating RAM to the Digital Audio RAM Buffer .......................... 99
Hardware Setup ................................................................................ 101
Set a Session Sample Rate and size ................................................ 105
Checking Disk Allocation................................................................ 106
CHAPTER 13:
DAE: Record Monitor Window
109
Chapter Organization....................................................................... 109
Opening the Record Monitor Window........................................... 109
Anatomy of the Record Monitor Window...................................... 110
Hardware Specific Variations.......................................................... 112
CHAPTER 14:
DAE: Recording Audio
115
Power User Overview ...................................................................... 115
Recording: Step-by-Step................................................................... 116
Designate a Record File ........................................................... 116
Set Record Levels...................................................................... 118
Assign an Audio Instrument .................................................... 119
Record a Track .......................................................................... 120
Advanced Recording Techniques................................................... 121
Stereo Recording....................................................................... 122
Recording Multiple Takes........................................................ 123
Recording Audio While Monitoring Existing Audio Events 124
Other Recording Actions................................................................. 126
Recording Audio from Other Points in the TDM Chain .............. 127
Punching in on-the-fly with “QuickPunch”.................................... 127
Setting the Buffer Size ..................................................................... 130
CHAPTER 15:
DAE: Audio Instruments
131
Opening The Audio Instruments Window..................................... 131
Setting tHe Number of Audio Instruments ................................... 132
Naming Audio Instruments............................................................. 133
iv
Opcode Systems, Inc.
Table of Contents
Setting Audio Instrument Colors.....................................................134
Muting or Soloing an Audio Instrument.........................................135
Voice Column ....................................................................................136
Voice Allocation Modes.............................................................136
Stereo/Poly Column .........................................................................138
Output Assignment ...........................................................................142
Sends and Plug-Ins Columns ...........................................................145
The Audio Instruments Menu .........................................................146
TDM Systems.............................................................................146
Saving Instrument Setups ................................................................146
CHAPTER 16:
TDM Bussing, Routing & Plug-Ins
147
Who Should Read This Chapter? ....................................................147
Console use with TDM Equipped systems ....................................147
Creating a Console with TDM Plug-Ins..........................................148
Assigning TDM Plug-Ins..................................................................150
Mono and Stereo TDM Plug-Ins .....................................................151
Plug-In Edit Window.........................................................................153
Bypassing Plug-Ins............................................................................155
Audio Outputs ...................................................................................155
Audio Sends .......................................................................................158
Creating Groups—Real- World Example........................................163
SampleCell Support...........................................................................165
Signal Routing and Monitoring .......................................................166
Recording from Alternate Sources in the TDM Chain..................169
CHAPTER 17:
DAE: Audio Preferences
173
Maximum Fader Position.................................................................173
Smooth Audio Controllers................................................................174
Import Multiple Files... .....................................................................174
Opcode Manual Template
v
Table of Contents
PART FOUR: Basic Audio Editing & Playback 175
CHAPTER 18:
Working with Audio Events
177
Audio Events in Different Windows ............................................... 177
Viewing Audio Events as Waveforms ............................................ 179
Zooming In................................................................................. 179
Zero Crossings .......................................................................... 180
Waveform Display Options ...................................................... 182
Waveform Height Options ....................................................... 182
Individual Canceling of Waveform Builds ..................................... 183
Audio Event Names ......................................................................... 183
Selecting Audio Events .................................................................... 184
Changing Audio Event Start Times................................................ 190
Changing Audio................................................................................ 191
Changing Audio Event Lengths...................................................... 194
Cutting, Copying, and Pasting Audio Events ................................ 197
CHAPTER 19:
Basic Digital Audio Playback
199
What to Read in this Chapter .......................................................... 199
Audio Playback with Dynamic Allocation...................................... 199
Audio Playback with Fixed Voice Allocation................................. 202
CHAPTER 20:
Import/Export Cornucopia
205
Who Should Read This Chapter?.................................................... 205
Importing Audio ............................................................................... 207
Import Shortcuts .............................................................................. 212
Other Import Options ...................................................................... 212
Export Options ................................................................................. 221
Anatomy of the Audio Format Dialog Box .................................... 228
vi
Opcode Systems, Inc.
Table of Contents
PART FIVE: Advanced Audio Techniques 235
CHAPTER 21:
Advanced Recording Techniques
237
Who Should Read This Chapter? ....................................................237
Designating Separate Files for Different Takes.............................237
Other Recording Actions..................................................................238
Audio Recording Preferences ..........................................................240
CHAPTER 22:
Auditioning Audio
245
Who Should Read This Chapter? ....................................................245
Auditioning Individual Audio Instruments .....................................245
Auditioning Individual Audio Events ..............................................247
Breaking Up Audio Events .......................................................247
Muting Audio Events.................................................................248
CHAPTER 23:
Adjusting Volume and Pan
253
Who Should Read This Chapter? ....................................................253
The Difference Between Velocity and Volume ..............................253
panning audio instruments ..............................................................254
Setting an Individual Audio Event Level (Velocity).......................254
Creating Volume and Pan Levels For Audio Instruments ............254
Creating Faders to Control Volume and Pan .................................257
Smoothing Volume and Pan Changes ............................................261
CHAPTER 24:
Automation
263
Who Should Read This Chapter? ....................................................263
How Automation Events Work ........................................................263
Recording Automation Events .........................................................264
Viewing and Inserting Automation Events.....................................265
Changes in the Way Vision Handles Faders ..................................271
Copy Faders and Audio Channels ...................................................272
Types of Automation Events ............................................................275
Opcode Manual Template
vii
Table of Contents
CHAPTER 25:
File Management
283
Who Should Read This Chapter?.................................................... 283
Audio Files ........................................................................................ 283
Overview of the File Management Dialog Box ............................. 283
Viewing Audio File Information...................................................... 284
playing audio files............................................................................. 286
Organizing Audio Files .................................................................... 286
CHAPTER 26:
Sample Rate Conversion and Deinterleaving
301
Who Should Read This Chapter?.................................................... 301
About Sample Rate Conversion ...................................................... 301
About Sample Size Conversion ....................................................... 302
About Deinterleaving ....................................................................... 303
Converting Sample Rates/Sizes and Deinterleaving.................... 303
The Conversion Overview Dialog Box........................................... 304
CHAPTER 27:
Strip Silence and Slice Audio
307
Who Should Read This Chapter?.................................................... 307
Strip Silence ...................................................................................... 307
Slice Audio ........................................................................................ 307
Gating Audio with Strip Silence ...................................................... 308
Auto-Separating with Slice Audio ................................................... 309
Strip Silence vs. Slice Audio ............................................................ 310
Strip Silence Dialog Box.................................................................. 311
Attack Time Example....................................................................... 314
Use Zero Crossings.......................................................................... 314
CHAPTER 28:
Mixing Digital Audio (Bouncing)
315
Who Should Read This Chapter?.................................................... 316
Direct Audio Mixing ........................................................................ 316
Mixing in Acadia (“Bounce to Disk”)............................................. 316
Mixing in DAE.................................................................................. 319
viii
Opcode Systems, Inc.
Table of Contents
Capturing a Mix ................................................................................320
The Mixed Audio on Your Hard Disk.............................................322
Mixing “Silence”................................................................................322
CHAPTER 29:
Synchronizing Audio Playback
325
Who Should Read This Chapter? ....................................................325
Sync Modes .......................................................................................325
Acadia: Syncing Audio to SMPTE ...................................................326
DAE: Syncing Audio to SMPTE ......................................................327
CHAPTER 30:
ReWire
329
Who Should Read This Chapter? ....................................................329
About ReWire ....................................................................................329
Configuring your System for ReWire..............................................330
Example 1: Using Vision with ReBirth ...........................................331
Example 2: Using Vision with Retro AS-1.......................................333
Additional ReWire Notes..................................................................335
CHAPTER 31:
Audio Scrubbing
337
Who Should Read This Chapter? ....................................................337
Audio Scrubbing in the Graphic Window.......................................337
Audio Scrubbing in the Track Overview Area ...............................339
PART SIX: Menus 341
CHAPTER 32:
The Audio Menu
343
Retain..................................................................................................343
Separate..............................................................................................344
Strip Silence/Slice Audio .................................................................346
Get Event Info....................................................................................347
Edit Event Soundfile .........................................................................348
Opcode Manual Template
ix
Table of Contents
Link Events ....................................................................................... 350
Unlink Events ................................................................................... 350
File Management ............................................................................. 350
Conversion Overview....................................................................... 351
Buffer Size......................................................................................... 351
Sample Rate/Size ............................................................................. 352
Hardware Setup ................................................................................ 352
Audio System .................................................................................... 353
Waveform Height ............................................................................. 353
Waveform Display ............................................................................ 354
Show Audio Event Names ............................................................... 355
Mix Audio on Capture...................................................................... 356
Active in Background....................................................................... 356
Audio Preferences ............................................................................ 356
CHAPTER 33:
DSP Menu: Mix, Normalize, Reverse, Invert Phase, and
Convert Sample Rate357
Mix..................................................................................................... 358
Normalize.......................................................................................... 358
Reverse .............................................................................................. 359
Invert Phase ...................................................................................... 361
Convert Sample Rate........................................................................ 362
CHAPTER 34:
DSP Menu: EQ and
Fade/Crossfade365
EQ ...................................................................................................... 366
Fade/Crossfade................................................................................ 369
Creating Fade-Ins and Fade-Outs............................................ 370
Creating Crossfades.................................................................. 374
CHAPTER 35:
DSP Menu: Pitch Shift, Formant Shift, Time Scale, and
Adjust Audio Tempo379
Pitch Shift.......................................................................................... 380
Formant Shift .................................................................................... 383
x
Opcode Systems, Inc.
Table of Contents
Time Scale..........................................................................................386
Adjust Audio Tempo™ ......................................................................389
CHAPTER 36:
DSP Menu: Audio-to-MIDI™ and MIDI-to-Audio™ 395
Who Should Read This Chapter? ....................................................395
Audio-to-MIDI™ ................................................................................396
How Vision Converts Audio Data to MIDI Data.....................396
Audio-To-MIDI™ Uses ..............................................................396
Using the Audio-to-MIDI™ Command.....................................397
The Basic Audio-to-MIDI Dialog Box......................................398
The Expanded Audio-to-MIDI Dialog Box..............................400
Creating Custom Audio Templates..........................................405
Re-Analyze Audio .......................................................................406
MIDI-to-Audio™ ................................................................................406
The MIDI-to-Audio Dialog Box ................................................407
Using the MIDI-to-Audio™ Command.....................................408
Using the “Process Note Until” Options .................................415
CHAPTER 37:
DSP Menu: Premiere Plug-Ins and DSP Preferences
419
Premiere Plug-Ins .............................................................................420
DSP Preferences ...............................................................................423
PART SEVEN: Index 431
Opcode Manual Template
xi
Table of Contents
xii
Opcode Systems, Inc.
Introduction to Digital Audio
1
2
3
4
5
6
7
Vision & Studio Vision Pro — Audio Reference Manual
1
PART 1: Introduction to Digital Audio
2
Opcode Systems, Inc.
CHAPTER 1:
Introduction
Vision is recording and sequencing software that combines MIDI sequencing
with direct-to-disk digital audio
sequencing.
VERSIONS OF VISION
Vision comes in two models:
•
USING YOUR VISION MANUALS
Vision ships with two manuals:
•
•
MIDI Reference Manual: This
manual provides detailed information
about MIDI sequencing and all other
non-audio aspects of Vision. You
should be familiar with many of the
concepts presented in this manual
before learning audio sequencing.
Audio Reference Manual: This
manual, which you’re now reading,
provides detailed information about
audio sequencing. You should have a
fundamental understanding of Vision
and MIDI sequencing before reading
this manual.
IMPORTANT: The MIDI and Audio Reference Manuals are identical for both Vision
and Studio Vision Pro. For the sake of consistency, however, both manuals refer to the
discussed application as “Vision” (except, of
course, when referring to topics and features specific to Studio Vision).
•
Vision—This version supports audio
recording and playback using ASIOcompatible audio hardware (including Apple’s Sound Manager
hardware) and Digidesign’s Audiomedia II/III on any Power Macintosh
with built-in 16 bit sound capabilities.
Studio Vision Pro—This version
adds support for other Digidesign
audio hardware (including support
for TDM).
Also, the Audio-to-MIDI and MIDI-toAudio DSP commands are only
included with Studio Vision Pro. See
Chapter 36: DSP Menu: Audio-toMIDI™ and MIDI-to-Audio™ for
details.
INTRODUCTION TO DIGITAL
AUDIO
You can record both MIDI data and digital audio into Vision, listen to all data
simultaneously, and edit it using many
flexible editing procedures. Most MIDI
sequencing techniques apply equally to
audio.
Vision & Studio Vision Pro — Audio Reference Manual
3
PART 1: Introduction to Digital Audio
Vision performs many audio recording,
editing, and playback functions,
including:
•
•
•
•
•
•
4
Multitrack audio recording;
Multitrack audio playback—either
alone, in conjunction with internal
MIDI tracks, or synchronized to an
external timing source;
Visual display of audio—all audio
events are displayed visually for easy
editing;
Random-access audio editing—cut,
copy, and paste audio between tracks
or between different start times. For
example you can record a single vocal
chorus, then copy and paste it into all
other chorus regions;
Audio mixing—you can create virtual
audio mixes along with your MIDI
mixes, or you can “bounce” numerous audio tracks to disk to create a
new, digitally perfect audio track;
Signal processing (DSP)—you can
add many studio quality effects and
other processing functions including
Adobe Premiere compatible audio
plug-ins.
ABOUT THE AUDIO REFERENCE
MANUAL
This manual assumes you’re familiar with
basic Macintosh operations, Vision’s windows and MIDI sequencing techniques,
and OMS.
Navigating this Manual
Good news! This manual isn’t as thick as
it appears. The Audio Reference Manual
is divided into seven parts, not all of which
need to be read by all users. Specifically:
•
•
PART 1: Introduction
All Vision users should read these
chapters. They introduce you to basic
audio features & terminology.
PART 2: Acadia: Configuration &
Recording
Read this only if you’re using Vision
with Acadia, Vision’s ASIO-compatible system. If you’re working with
your computer’s built-in Sound Manager hardware, this is the option
you’ll probably be using. This section
teaches you how to configure Vision
Opcode Systems, Inc.
CHAPTER 1: Introduction
•
•
•
•
•
and record audio using Acadia. You
do not need to read this part if you’re
using Digidesign hardware in DAE
mode.
PART 3: Digidesign DAE: Configuration & Recording
Read this only if you’re using Vision
with Digidesign digital audio hardware in DAE mode; it teaches you
how to configure Vision and record
audio using Digidesign’s DAE audio
system. You do not need to read this
part if you’re using Acadia.
PART 4: Basic Audio Editing &
Playback
All Vision users should read this part.
It teaches you how to perform basic
audio editing and playback.
PART 5: Advanced Audio
Techniques
All Vision users should read this part,
though not all chapters apply to all
users. It teaches you advanced methods for editing, mixing, and
organizing audio.
PART 6: Menus
All Vision users should read this part.
It discusses items in the Audio and
DSP menus.
PART 7: Index
Manual Conventions
The Vision manuals use a number of conventions that make it easier to discuss and
understand the program.
Mouse Actions
The following terms are used to describe
various mouse actions:
•
•
•
•
•
•
Click: When the manual instructs
you to click, position the mouse
where you’re told and press once on
the mouse button, then immediately
release it.
Double-click: When the manual
instructs you to double-click, position
the mouse where you’re told and rapidly press and release the mouse
button twice.
Press and hold: When the manual
instructs you to press and hold, position the mouse where you’re told,
press the mouse button and hold it
down until instructed to release it.
Release: When the manual instructs
you to release, let up on the mouse
button (which you were probably
holding down because of an earlier
press and hold instruction).
Drag: When the manual instructs you
to drag, position the mouse where
you’re told, then press the mouse
button and hold it down as you move
the mouse.
Move: When the manual instructs
you to move the mouse, simply move
it to another location on the screen
without pressing its button.
Vision & Studio Vision Pro — Audio Reference Manual
5
PART 1: Introduction to Digital Audio
Choose vs. Select
The words “choose” and “select” are often
interchangeable in conversational
english. In this manual, however, there is
a distinction between the two terms.
•
•
Select: When the manual tells you to
select something, it stays selected.
This is the case with menu options
that turn something on/off.
Choose: When the manual tells you
to choose something, a one-time
action is performed. This is the case
with most commands; they perform
their chosen action only once.
Menu Items
This manual uses a shorthand technique
to invoke various menu items. For
instance, this manual might say:
“Select Audio>Waveform
Display>Fast.”
What this means in plain English is
“select the Fast option from the Audio
menu’s Waveform Display submenu.”
Although the shorthand technique results
in sub-standard grammar, it’s easier to
read and decipher than a complete sentence because it displays the menu’s
hierarchical structure plainly and simply.
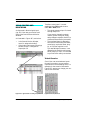
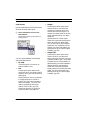
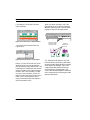
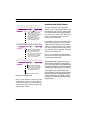
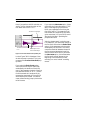
Figure 1.1: Shorthand Invocation of Menu Items
6
Opcode Systems, Inc.
CHAPTER 2:
Basic Terminology
OUTPUTS, VOICES, AND AUDIO
INSTRUMENTS
MIDI Instruments
Different audio hardware has different
playback capabilities. Your audio hardware determines:
•
•
the number of physical audio inputs
and outputs
the maximum number of audio voices
that can play at one time
Frequently, there are more internal
voices available than physical outputs. For
example, your hardware may have only
two audio outputs, but it may be able to
play up to eight simultaneous audio
voices. Obviously, Vision needs some way
to route voices to specific outputs. Vision
handles such routing with Audio Instruments. Vision can use up to 128 Audio
Instruments, which control voicing and
output assignments.
Audio Instruments are similar to MIDI
Instruments, which map groups of MIDI
events to a specific MIDI device and channel. Audio Instruments and MIDI
Instruments appear in the same place in
Vision windows.
Audio Instruments
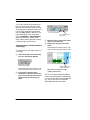
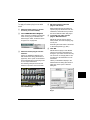
Figure 2.1: Audio Instruments and MIDI Instruments
in the Tracks Window
AUDIO FILES AND AUDIO
EVENTS
Every time you record audio, Vision
stores it in a designated audio file (sometimes called a record file or a sound file).
When Vision plays digital audio, it “reads”
the data directly from the audio file and
sends it to your audio hardware. Since the
actual digital audio is in the audio files,
Vision contains only pointers to the audio
files. These pointers tell the audio system
which portion of the audio file you want to
play. Each portion of digital audio referenced by Vision is called an audio event.
Vision & Studio Vision Pro — Audio Reference Manual
7
PART 1: Introduction to Digital Audio
Audio File
Audio Events
Audio Events
Event 1
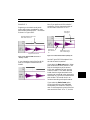
Figure 2.2: Audio events in the Graphic Window
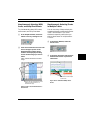
Vision can display audio events graphically as shown in Figure 2.2. Each audio
event is a graphic representation of the
actual audio waveform.
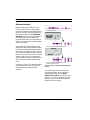
A PICTURE’S WORTH...
This section graphically describes the
relationship between audio files, audio
events, Audio Instruments, voices, and
outputs.
An Audio File contains the actual digital
audio data used by Vision.
Event 2
Figure 2.3: Audio events point to audio files
Each audio event is assigned to an Audio
Instrument. Vision can use up to 128
Audio Instruments (although this example shows only three of them).
Audio Events
Audio
Instruments
Audio-1
Audio-2
Event 1
Audio-3
Vision files contain “pointers” to audio
files. These “pointers” are called audio
events. Vision can contain any number of
audio events.
8
Event 2
Figure 2.4: Audio Event 1 is assigned to Audio
Instrument 1; Audio Event 2 is assigned to Audio
Instrument 3
Opcode Systems, Inc.
CHAPTER 2: Basic Terminology
Each Audio Instrument is assigned to a
hardware output. Your audio hardware
determines the number of outputs.
Optimizing for Digital Audio for more
information.
Vision assigns playback voices
to Audio Instruments
Figure 2.5: Audio Instrument 1 is assigned to
Output #1; Audio Instrument 3 is assigned to
Output #2
In addition, Vision assigns a playback
voice to each Audio Instrument.
NOTE: In DAE mode, your audio hardware determines the number of available
voices (the number of audio events that can
play simultaneously). In Acadia mode, the
number of available voices is dependent on
many factors, including your computer’s
speed and RAM. See Chapter 11: Acadia:
Figure 2.6: Audio Instrument 1 uses Voice #4 for
playback; Audio Instrument 3 uses Voice #1 for
playback
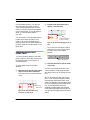
The relationship between audio files,
audio events, Audio Instruments, Outputs, and Voices is shown below.
Vision & Studio Vision Pro — Audio Reference Manual
9
PART 1: Introduction to Digital Audio
10
Opcode Systems, Inc.
1
Acadia
2
3
4
5
6
7
Vision & Studio Vision Pro — Audio Reference Manual
11
PART 5: Basic Audio Editing & Playback
12
Opcode Systems, Inc.
CHAPTER 3:
Acadia: Hardware Setup
This chapter discusses how to configure
your audio hardware for use with the
Acadia audio system. For other related
information on taking advantage of your
hardware, see Chapter 11: Acadia: Optimizing for Digital Audio.
THE ACADIA AUDIO SYSTEM
Figure 3.1: Audio Systems
The Acadia audio system provides
advanced processing and routing capabilities for ASIO-compatible audio hardware.
These capabilities include:
•
•
•
•
4 automatable bands of real-time EQ
per audio channel;
4 automatable VST plug-ins per audio
channel;
4 sends per audio channel, routeable
to outputs or busses;
16 nameable audio busses for submixes and routings.
When using the Acadia audio system,
Vision uses the ASIO driver specification
(developed originally by Steinberg Softund Hardware GmbH) for inputting and
outputting digital audio.
Included with Vision are Opcode ASIO
drivers for Sound Manager (taking advantage of the built-in sound capabilities of
your PowerMac), and Digidesign’s
DirectIO (supporting the Audiomedia III
and other Digidesign PCI audio cards).
There are ASIO drivers available for a
number of Macintosh audio cards such as
the Korg 1212 I/O and the Sonorus
STUDI/O. For the availability of these
and other ASIO drivers, contact the
manufacturer.
NOTE: Vision looks for ASIO drivers in a
folder called “ASIO Drivers.” This folder
must reside in the same folder as the Vision
application.
Vision & Studio Vision Pro — Audio Reference Manual
13
PART 3: The Acadia Audio System
SYSTEM REQUIREMENTS
To run Vision with the Acadia audio system, you must meet the following
computer requirements:
•
•
A PowerMac (603 or faster recommended) with Level 2 cache.
ASIO-compatible digital audio card
recommended but not required.
Consult the QuickStart card included
with your package for information on
RAM and System software
requirements.
A “fast” and defragmented hard disk.
The faster your hard disk, the more
simultaneous voices Vision can play.
For optimum performance, Opcode
recommends using a SCSI hard disk
driver that supports asynchronous
disk I/O.
You will achieve improved audio performance if you frequently
defragment your hard disk. Opcode
strongly encourages you to use
defragmentation software before
recording audio.
SET VISION TO THE ACADIA
AUDIO SYSTEM
To use Vision with your ASIO-compatible
hardware, select Audio>Audio System>Acadia to place a check mark next
to the option.
Figure 3.2: Selecting the Acadia audio system
HARDWARE SETUP
Before you can record and play digital
audio, you must tell Vision which ASIO
driver you’re using.
When selecting the Acadia audio system
for the first time, the default ASIO driver
is Opcode’s “Sound Manager” driver.
For the very latest system requirements
and recommendations, check the Opcode
Web site:
http://www.opcode.com
14
Opcode Systems, Inc.
CHAPTER 3: Acadia: Hardware Setup
To specify a different ASIO driver:
햲 Choose Audio>Hardware Setup.
The Hardware Setup dialog opens.
Figure 3.3: Hardware Setup dialog for the
Acadia audio system
햳 From the Device pop-up, select the
appropriate ASIO driver for your
audio hardware.
About the Hardware Setup Dialog
Box
As shown in Figure 3.3, the Hardware
Setup dialog box contains numerous elements for configuring your audio
hardware. Using this dialog, you can
choose your ASIO driver, set the hardware sample rate, and specify a digital
clock source. In addition, you can click
the Open Control Panel button to configure additional hardware-specific settings.
Sample Rate
From this pop-up menu, choose the
desired hardware sample rate, which
determines the rate at which audio is
recorded and played.
Session sample rates of up to 96 kHz are
supported for the Acadia audio system
(and DAE). Check the manufacturer’s
documentation for your audio hardware
to see if it supports this rate.
If youÕre using your PowerMacÕs built-in
sound capabilities, choose the Sound
Manager driver.
If using compatible Digidesign hardware,
choose Digidesign DirectIO.
If your ASIO driver is not listed in the
Device pop-up, make sure the driver is in
the ÒASIO DriversÓ folder, which must
reside in the same folder as the Vision
application.
NOTE: The sample rate in the Hardware
Setup dialog can also be specified in the
Sample Rate/Size dialog (as discussed on
page 18). Changing it in either location
updates it in the other.
Clock Source
In most cases, as when recording from an
analog input, you will leave the Clock
Source pop-up set to “Internal.”
Vision & Studio Vision Pro — Audio Reference Manual
15
PART 3: The Acadia Audio System
If, however, you are recording from a digital source (like a DAT machine or digital
multitrack), you’ll want to switch this popup to the appropriate digital setting. For
details, consult the manufacturer’s documentation for your hardware.
•
Sound Manager
•
If using the Sound Manager driver, click
the Open Control Panel button in the
Hardware Setup dialog to access additional sound input options, see Figure 3.4.
•
The Gain faders (left and right)
boost the input signal. Hold down the
Shift or Option key to adjust both
faders at the same time.
Use the accompanying L and R input
LEDs to monitor for an optimum
input signal.
Check Play through to echo the
input source to your computer’s
output.
You’ll usually want this is option disabled when using Vision, which has
it’s own “Thru” option in the Record
Monitor.
Check Automatic gain control for
input levels to be adjusted automatically when recording (recommended
when using Apple’s PlainTalk
microphone).
Digidesign Audio Cards
If using the Digidesign DirectIO driver,
click the Open Control Panel button to
access the Digidesign Hardware Setup
dialog, as seen in Figure 3.5.
Figure 3.4: Sound Manager Input Options
In the Sound Manager Input Options dialog, configure the following:
•
16
The Input pop-up determines the
input source (microphone, internal
CD, etc.) for recorded material.
Opcode Systems, Inc.
CHAPTER 3: Acadia: Hardware Setup
For details on configuring your audio
card, consult the Digidesign
documentation.
NOTE: In order to use the Digidesign
Direct IO driver, you must have version 3.4
or later of the DigiSystem INIT installed.
Other ASIO Hardware
Other ASIO-compatible hardware, such
as the Korg 1212 I/O, may provide the
bulk of its configuration controls in a separate application or control panel (not
directly accessed from Vision). For
details, consult the manufacturer’s
documentation.
Figure 3.5: Digidesign Hardware Setup for
Audiomedia III
Click the Other Options button to configure various input and output options
specific to your Digidesign audio card.
NOTE: In order to use your ASIO-compatible audio card, its driver must be in the
“ASIO Drivers” folder, and this folder must
reside in the same folder as the Vision
application.
Figure 3.6: Other Options for Audiomedia III
If using an Audiomedia III, for instance,
the “other options” include settings for
Input and Output Gains, and the type of
S/PDIF I/O you will use.
Vision & Studio Vision Pro — Audio Reference Manual
17
PART 3: The Acadia Audio System
THE SESSION SAMPLE RATE
The session sample rate is the sample rate
that Vision uses to record and play back
audio.
The term “sample rate” refers to the
number of audio samples that comprise
1 second worth of audio. Higher sample
rates produce better audio fidelity, but
use more disk space (because there are
more sample points per second). You can
save disk space by using lower sample
rates, but this degrades the audio fidelity.
The session sample rate is the sample
rate that is common to all audio files referenced by the sequences in a Vision file. If
you attempt to import an audio file whose
rate does not match the session sample
rate, you will be prompted to convert the
file.
When using the Acadia audio system, the
session sample rate should always be the
same as the hardware sample rate (as
specified in the Hardware Setup dialog).
Changing the Sample Rate pop-up in the
Hardware Setup dialog automatically
changes Vision’s session sample rate.
When using the Acadia audio system, the
session sample rate must always match
the rate used by your audio files. If you
therefore switch the session sample rate,
you will be prompted to convert any existing audio files to the new rate—otherwise
they will not play back at the correct pitch
and tempo.
18
To set Vision’s session sample rate:
햲 Choose Audio>Sample Rate/Size.
Vision opens the Sample Rate/Size
dialog.
Figure 3.7: Set Session Sample Rate/Size
dialog box
햳 From the Session Sample Rate
pop-up menu, select the desired
session sample rate.
This pop-up menu lists the sample rates
supported by your audio hardware and
its associated ASIO driver.
햴 Click the OK button.
The session sample rate is changed
(along with the rate specified in the
Hardware Setup dialog). If necessary,
you are prompted to convert existing
audio files to the new rate.
NOTE: Attempting to play audio files with
sample rates that differ from the session
sample rate results in their original pitch
and tempo being altered.
Opcode Systems, Inc.
CHAPTER 3: Acadia: Hardware Setup
ACTIVE IN BACKGROUND
If you want Vision’s playback of MIDI and
audio to continue uninterrupted when it is
not the current application, make sure
that “Run MIDI in the Background” is
checked in the OMS MIDI Setup dialog.
When Vision is stopped, and no longer
the current application, audio processing
of inputs will continue as long as
Audio>Active in Background is
checked.
Vision & Studio Vision Pro — Audio Reference Manual
19
PART 3: The Acadia Audio System
20
Opcode Systems, Inc.
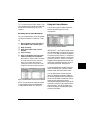
CHAPTER 4:
Acadia: Record Monitor Window
Use the Record Monitor Window to control such recording operations as:
•
•
•
•
record-enabling an input
record level monitoring
file and option selection
Audio Instrument selection
Read this chapter to learn what’s in the
Record Monitor Window. You’ll apply this
knowledge when you learn how to actually record audio in Chapter 5: Acadia:
Recording Audio.
OPENING THE RECORD
MONITOR WINDOW
To open the Record Monitor Window:
햲 Choose Windows>Record
Monitor.
Vision opens a Record Monitor Window
similar to the one shown on page 22.
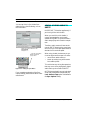
TIP: You can also open the Record Monitor
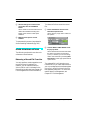
Window directly from the Control Bar by
clicking the Record Indicator button ( ).
NOTE: The appearance of the Record Monitor Window changes slightly depending on
the type of hardware specified in the Hardware Setup dialog. Please see
Chapter 3: Acadia: Hardware Setup for
details on configuring your audio
hardware.
Vision & Studio Vision Pro — Audio Reference Manual
21
PART 3: The Acadia Audio System
�
�
쐋
쐅
�
�
쐉
�
�
쐈
�
�
씈
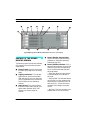
Typical Record Monitor Window with two input lines
ANATOMY OF THE RECORD
MONITOR WINDOW
The following items discuss each element
in the Record Monitor Window shown on
page 22.
쐃
Record Monitor menu: Contains the
pop-up menu item for Audio Record
Preferences. See
Chapter 21: Advanced Recording Techniques in your Audio Reference
Manual for details.
쐇 Record Enable Indicators: Click a
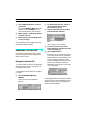
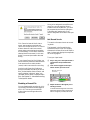
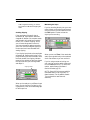
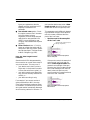
Record Enable Indicator to enable
recording from the specified record
source. The Record Enable Indicator
has three states:
—Solid Red: When an input line is
record-enabled, this indicator is solid
red.
—Flashing Red: The indicator flashes
22
red if Vision is in play mode and has
the possibility of recording (such as
with punch-in)—it then turns solid
red when Vision begins to actually
record.
—No Color: The input line is not
enabled and will not record audio.
쐋 Record Source: Choose from this
pop-up menu the record source from
which you will record. Record
sources include hardware inputs and
outputs, busses, and Audio
Instruments.
When “Link Pairs” is checked, input
and output pairs are available from
this pop-up—otherwise, hardware
inputs and outputs are listed as mono
sources.
쐏 Record Levels: Use these LEDs to
monitor the audio level from the specified record source.
Opcode Systems, Inc.
CHAPTER 4: Acadia: Record Monitor Window
쐄
쐂
쐆
쐊
쐎
쐅
Clipping Indicators: This indicator
lights when an audio level reaches
0 dB and stays lit until you reset it by
clicking anywhere within the Record
Level indicator for the offending
channel.
Record File pop-up: Press and hold
this icon to open a pop-up menu of
record file options. These options let
you enable a new record file, append
new audio to an existing file, or close
an existing record file.
Record File: This column displays
the name of the files to which audio
data is recorded.
Available Recording Time: This
column displays the amount of
recording time available (based on
the amount of free disk space and
other recording parameters).
Audio Instruments: Use this pop-up
menu to assign an Audio Instrument
for each record source (or linked
pair). Use Audio Instruments to
group related audio events, to associate controller data with specific
events, and to associate audio events
with particular outputs.
Thru: Use this pop-up menu to select
one of three audio thru options:
On: Select On if the signal you’re
recording is patched directly into
your computer without first going
through a mixing console. When the
On option is selected, Vision sends
the audio signal arriving at the input
directly to the output of an audio
channel so that you can hear the
signal you’re recording.
Off: Select Off if you’re using a
mixing console to route audio signals
to and from your audio interface.
When the Off option is selected,
Vision does not send the audio input
signal directly thru to the output.
Auto: Select this option if you want
Vision to make “intelligent” thruing
decisions based on recording/playback modes. Specifically:
• Vision turns Thru On during idle
times.
• Vision turns Thru Off during
playback.
• Vision turns Thru On only for the
input lines that are recordenabled while recording, which
allows you to hear what you are
recording as you record it.
NOTE: Some ASIO drivers may
exhibit a noticeable latency in thruing
audio. If at all possible, disable Thru
and monitor record sources externally.
쐈 Auto Compact: Choose this option
to automatically compact audio
during recording. Compacting frees
disk space by throwing out audio data
that is not referenced by the current
Vision file (such as data from discarded “takes”).
쐉 Link Pairs: Choose this option to
link two input lines together to create
a single stereo audio event. In addition, the input pair is assigned to a
single Audio Instrument.
씈 Sample Size: Use this pop-up menu
to specify the sample bit depth for the
record file. Choices for the Acadia
audio system include 16 or 24 bits.
See Using 24 Bits (pg. 24) for details.
Vision & Studio Vision Pro — Audio Reference Manual
23
PART 3: The Acadia Audio System
Variations in the Record Monitor
Window
The number of input lines that appear in
the Record Monitor Window depends on
your particular audio hardware. If you are
using a Korg 1212, for instance, you will
see 12 input lines, as shown in Figure 4.1.
USING 24 BITS
If your digital audio hardware supports 20
or 24 bits, set the Sample Size pop-up in
the Record Monitor to 24 bits. This will
let you take full advantage of your hardware’s capabilities.
The Acadia audio system can import and
play 8, 16 or 24 bit audio files—these formats can even be used at the same time.
Figure 4.1: Record Monitor Window for Korg 1212
If you have a 20 bit sound card and record
24 bit files, the resolution is maintained
(though the extra 4 bits are ignored) and
will be present during playback. 24 bit
audio files are no larger than 20 bit files
and therefore don’t take any more disk
space.
Generally, the number of input lines
appearing in the Record Monitor Window
corresponds to the number of hardware
inputs your audio interface has.
NOTE: Even if your audio hardware supports 20 or 24 bits on input, the extra
resolution is only communicated to Vision
if it is supported in the ASIO driver.
Contact the manufacturer for information
on the supported sample sizes for your
audio hardware and its associated ASIO
driver.
24
Opcode Systems, Inc.
CHAPTER 5:
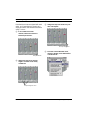
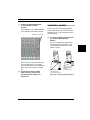
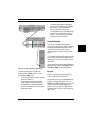
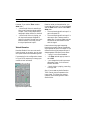
Acadia: Recording Audio
This chapter discusses how to record digital audio using the Acadia Audio System.
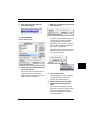
햴 For the record file, enter a name,
For more details on recording, please see
Chapter 21: Advanced Recording
Techniques.
햵 Send an audio signal to your digital
For details on importing audio, please see
Chapter 20: Import/Export Cornucopia.
RECORDING: POWER USER
OVERVIEW
Following are the basic steps required to
record a mono audio file from a hardware
input:
햲 Choose Windows>Record
Monitor.
Vision opens the Record Monitor
Window.
With the Record Monitor Window active:
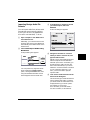
햲 For the desired input line, specify a
mono hardware input from the
Record Source pop-up.
햳 Record-enable the input line by
clicking its Record Enable Indicator.
Vision produces a standard Save As
dialog box.
folder destination, and file type (AIFF
or Sound Designer II).
audio interface (or to the sound input
jack of your Macintosh) and watch the
on-screen LEDs to set an optimal
input level.
햶 Enable any other desired options.
Options include audio thruing, auto compacting, and designating the sample size
in bits.
햷 Assign a mono Audio Instrument to
the audio youÕre about to record.
햸 Leave the Record Monitor Window
open, then go to the Tracks Window.
The Record Monitor Window must be
open in order to record audio.
With the Tracks Window active:
햲 Record-enable a track.
햳 In the Control Bar, select the desired
record mode.
If you are about to record an audio
event, the Record Mode display contains
a small digital audio icon.
햴 In the Control Bar, either set a
Countoff or select Wait for Note.
Vision & Studio Vision Pro — Audio Reference Manual
25
PART 3: The Acadia Audio System
햵 Click the Record button in VisionÕs
Control Bar.
If you chose Wait for Note, either play
a MIDI note, click the Play button, or
press the Spacebar to start recording.
햳 For the desired input line, specify a
mono hardware input from the
Record Source pop-up.
햴 Record-enable the input by clicking
its Record Enable Indicator.
햶 Begin playing or singing the material
you wish to record.
햷 When finished, click the Stop button
to stop recording.
The remainder of this chapter discusses
the previous steps in detail.
Vision opens a Save As dialog.
햵 For the record file, enter a name,
RECORDING: STEP-BY-STEP
The following sections discuss in detail
how to set up and record a single, mono
audio track in Vision.
Designate a Record File
To record audio, you must first designate
where to store it on your hard disk. This
is called the record file.
folder destination, and file type (AIFF
or Sound Designer II).
햶 Click the Save button.
The name of your record file is displayed
in the ÒRecord FileÓ column, the Record
Enable Indicator is lit (indicating recording on that input is enabled), and the
amount of available recording time is displayed in the ÒAvailableÓ column (as
determined by the amount of free space
on your hard disk).
To designate a record file for a monophonic input:
햲 Choose Windows>Record
Monitor.
Vision opens the Record Monitor
Window.
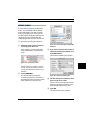
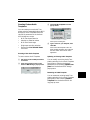
If the selected Audio Instrument is stereo
(and Link Pairs is not checked) when you
enable an input, Vision will prompt you
will the following dialog.
Figure 5.1: Typical Record Monitor Window
26
Opcode Systems, Inc.
CHAPTER 5: Acadia: Recording Audio
Once you’ve assigned a record file to an
input line, you can toggle its Record
Enable on and off as desired—you won’t
be prompted by the Save As dialog box.
That dialog box appears only if you
haven’t assigned a record file to the input
line.
Set Record Levels
Click Cancel to leave all Audio Instruments’ stereo status untouched and
return to the Record Monitor. Click Don’t
Make to leave all Audio Instruments’
stereo status untouched and proceed to
the Save dialog. Click Make to make the
selected Audio Instrument (in this case,
Audio 2) mono and proceed to the save
dialog.
If you choose Cancel or Don’t Make, you
should manually make the selected Audio
Instrument mono or select another
(mono) Audio Instrument for recording.
Use the Audio Recording Preference
dialog to automate the naming of record
files, set their default folder location, and
specify whether individual “takes” are
recorded into the same or separate audio
files. See Chapter 21: Advanced Recording
Techniques for details.
Disabling a Record File
You can disable audio recording by clicking the Record Enable Indicator again to
turn it off. This lets you record MIDI
tracks without recording audio at the
same time.
This section discusses how to set recording levels.
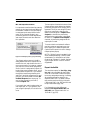
The bargraph in the Record Monitor
Window functions like an LED display.
Whenever the Record Monitor Window is
open, its bargraph displays the amplitude
for incoming signals.
To set your input levels:
햲 Play or sing into a microphone thatÕs
connected to the specified audio
input.
햳 Look at the bargraph for the input
whose volume you wish to set.
Bargraph shows input
record level
햴 Adjust the level of the signal youÕre
sending to Vision.
To obtain the best signal-to-noise ratio,
adjust the signal so that its peak amplitude is as high as possible, but below
Vision & Studio Vision Pro — Audio Reference Manual
27
PART 3: The Acadia Audio System
0 dB. In digital recording, you cannot
record above 0 dB without clipping the
audio.
Avoiding Clipping
If the amplitude of the audio signal
exceeds 0 dB, the waveform becomes
chopped off and flat (like a square wave),
and the audio will sound buzzy and distorted. This is called “clipping,” which
you will most always want to avoid. If
you’re accustomed to analog recording,
you’ll soon notice that digital clipping is
harsher and much less tolerable than
analog clipping.
If you clip the input level so the amplitude
exceeds 0 dB, the Record Monitor’s Clipping Indicator lights at that moment. After
the level recedes, the clipping indicator
remains lit to remind you that you clipped
the input level and you should go back
and adjust it.
Clipping Indicator
Monitoring the Input
If you’re recording directly into your computer without running the signal through
a mixing console, you will need to turn on
the Thru option in order to hear the
signal you’re recording.
When you turn on Thru, Vision sends the
audio input signal directly to the selected
Audio Instrument so you can monitor it.
If you’re using an external mixing console, use it to route the audio signals and
turn the Thru option off. For more information, see Anatomy of the Record
Monitor Window (pg. 22).
NOTE: Some ASIO drivers may exhibit a
noticeable latency in thruing audio. In
these instances, if at all possible, disable
Thru and monitor record sources
externally.
When you’re ready to try a different input
level, you can clear the clip light by clicking anywhere in the record level bargraph
for that input line.
28
Opcode Systems, Inc.
CHAPTER 5: Acadia: Recording Audio
Assign an Audio Instrument
Vision initially assigns each record file to
one of your Audio Instruments. Audio
Instruments are discussed in
Chapter 6: Acadia: Audio Instruments &
Routings Window. For now, you need only
know that Vision uses Audio Instruments
to determine audio output assignments.
For this reason, it’s convenient to select
an Audio Instrument when you first
record a file. This lets you:
•
•
Audition files after you record them.
Monitor a recording as you make it (if
you use the Record Monitor Window’s Thru option).
햳 While still holding the mouse button,
drag the cursor over the desired
Audio Instrument to select it
(highlighting it).
Since we are not recording from a stereo
record source (Link Pairs is not
checked), make sure you specify a mono
Audio Instrument.
햴 Release the mouse button.
Vision will assign the recorded audio to
the selected Audio Instrument.
You can change Audio Instrument assignments any time in the future.
To learn how to assign outputs to an
Audio Instrument, see Output Assignments (pg. 42).
To assign a record file to a specific Audio
Instrument:
햲 Press and hold the mouse in the
Instruments column for the desired
input line.
Vision opens a pop-up menu of Audio
Instruments. Each instrumentÕs mono/
stereo status is indicated in parenthesis.
Since this recording is from a mono
source, choose a mono audio
instrument.
Record a Track
Now that you’ve set a record level and
designated a record file into which you
will record the audio, you’re ready to
record a track.
TEMPO TIP: If you have any MIDI data
recorded, make sure you’re happy with the
sequence’s tempo. Although you can change
the audio’s playback tempo with the
DSP>Adjust Audio Tempo™ command,
it’s always easier to “do it right the first
time” rather than “fixing it in the mix.”
Vision & Studio Vision Pro — Audio Reference Manual
29
PART 3: The Acadia Audio System
To record an audio track:
햲 Leave the Record Monitor Window
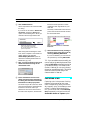
If Vision is properly configured to record
audio, then the Record Mode display
contains a small digital audio icon.
open.
The Record Monitor Window must be
open in order to record audio.
햳 In the Tracks Window, click the ÒRÓ
column to record-enable a track (just
as you do when you record MIDI).
Digital audio icon indicates that
you will be recording audio events
햶 In the Control Bar, either set a
Countoff or select Wait for Note.
햷 Click the Record button in VisionÕs
Control Bar.
If you chose Wait for Note, either play
a MIDI note, click the Play button, or
press the Spacebar to start recording.
햸 Begin playing or singing the material
햴 If desired, enter a new track name.
햵 Select the desired record mode from
the Record Mode pop-up menu in the
Control Bar.
Record modes are discussed in your
MIDI Reference Manual.
you wish to record.
Vision records the audio along with any
MIDI you perform.
햹 When finished, click the Stop button
to stop recording.
The recorded audio is stored in the current record file (or files) listed in the
Record Monitor Window. Remember, if
you want to record into another file, you
need to first designate it as the record file.
If you have the Graphic Window open
you’ll see a graphic representation of your
waveform appear below the Piano Roll.
Record-enabled tracks can always
record MIDI data, but to record audio the
Record Monitor Window must be open
and one or more input lines must be
record-enabled.
30
Figure 5.2: Waveform Displayed
Opcode Systems, Inc.
CHAPTER 5: Acadia: Recording Audio
The appearance of the waveform is determined by the Audio>Waveform Display
submenu. Specifically:
•
•
•
Off: This display option completely
disables the waveform display. When
you select this option, Vision displays
waveforms as a straight line and
wastes no time calculating their
appearance.
Fast: This display option allows
Vision to redraw waveform displays
quickly because it draws them at a
low resolution. This may be desirable
when you’re recording or playing
back audio, but the lower resolution
is not as good for detailed audio
editing.
High Resolution: This display
option allows Vision to display the
actual texture of waveforms. This is
desirable when you’re editing and
need to clearly see all peaks and valleys, but it takes the longest amount
of time to recalculate and draw.
ADVANCED RECORDING
TECHNIQUES
The following sections discuss other
audio recording techniques for Vision.
Stereo Recording
This section discusses how to set up
Vision to record stereo audio events using
the Acadia audio system.
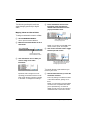
To record a stereo track:
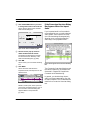
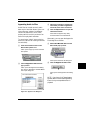
햲 In the Record Monitor Window, click
the Link Pairs option to check it.
Vision automatically switches the mono
hardware inputs to a stereo input pair
(see Figure 5.3).
For more information, see
Chapter 30: The Audio Menu in your
Audio Reference Manual.
NOTE: Remember, if you want to turn
audio recording off so Vision records only
MIDI, disable the Record Enable Indicator
in the Record Monitor Window, or simply
close the window. You can see if audio
recording is enabled by looking for the little
digital audio waveform in the Record Mode
pop-up.
Figure 5.3: Link Pairs enabled
햳 In the Record Source pop-up, make
sure you have the desired input pair
selected.
Figure 5.4: Choosing a hardware input pair
Vision & Studio Vision Pro — Audio Reference Manual
31
PART 3: The Acadia Audio System
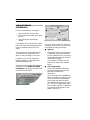
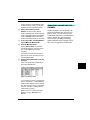
햴 In the Instrument pop-up, select a
stereo Audio Instrument.
To make an Audio Instrument Òstereo,Ó
place a checkmark in the Stereo column
of the Audio Instruments & Routings
Window (see Figure 5.5).
Figure 5.5: Making an Audio Instrument
“stereo”
햵 Record-enable the linked input pair
by clicking one of the Record Enable
Indicators.
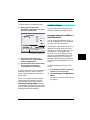
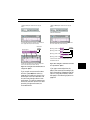
Click Cancel to leave all Audio Instruments’ stereo status untouched and
return to the Record Monitor. Click Don’t
Make to leave all Audio Instruments’
stereo status untouched and proceed to
the Save dialog. Click Make to make the
selected Audio Instrument (in this case,
Audio 1) stereo and proceed to the save
dialog.
If you choose Cancel or Don’t Make, you
should manually make the selected Audio
Instrument stereo or select another (stereo) Audio Instrument for recording.
When you record in stereo, both channels
appear in the Graphic Window as a single
audio event, but with unique left (on top)
and right (on bottom) waveforms.
When prompted, enter names for the
record files for both the left and right
channels.
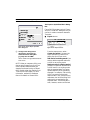
If the selected Audio Instrument is not
stereo and Link Pairs is checked when
you enable an input pair, Vision will
prompt you will the following dialog.
32
Opcode Systems, Inc.
CHAPTER 5: Acadia: Recording Audio
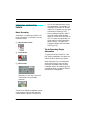
Recording Multiple Takes
It’s common to record a particular performance numerous times. Each
performance is called a take. By recording numerous takes, you can later choose
the best performance or, perhaps, assemble a new performance from the various
takes.
There are two different techniques for
storing multiple takes:
•
•
You can record all audio takes into a
single record file.
This method keeps all audio information together in one place, making it
easy to find and back up audio
performances.
You can record each audio take into a
separate record file.
This method keeps different takes in
different files so, if you lose or
damage a file, you lose only one take
and not all of them.
Recording Audio While
Monitoring Existing Audio Events
You can record new audio files while monitoring existing ones. For example, you
might want to record a backup vocal while
listening to your lead vocal.
To do so, simply record into a new track,
assigned to a different Audio Instrument
while the other audio tracks play.
When using the Acadia audio system,
each Audio Instrument can play one audio
event at a time. This means that the
number of Audio Instruments you’ve
specified determines the theoretical
number of tracks (audio events) that can
concurrently play. See Setting the Number
of Audio Instruments (pg. 36) for details.
The method you choose affects only how
audio is stored on your hard disk—it does
not affect playback. Each method can be
automated using the Audio Recording
Preferences dialog. See
Chapter 21: Advanced Recording Techniques in your Audio Reference Manual
for more details on recording multiple
takes.
You can save disk space by using Undo
after an unsatisfactory take—when you
do so, Vision erases the previously
recorded take.
Vision & Studio Vision Pro — Audio Reference Manual
33
PART 3: The Acadia Audio System
34
Opcode Systems, Inc.
CHAPTER 6:
Acadia: Audio Instruments &
Routings Window
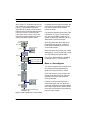
This chapter discusses the items contained in the Audio Instruments &
Routings Window. To open this window,
choose Windows>Audio Instruments.
•
•
•
•
Figure 6.1: Audio Instruments & Routings WIndow
TIP: If a track contains only audio data,
you can open the Audio Instruments &
Routings Window directly from either the
List or Graphic Window by clicking the
Instruments button ( ).
As can be seen in Figure 6.1, the Audio
Instruments & Routings Window contains sections for the following items:
Audio Instruments are assigned to
audio events (residing in tracks), and
determine how the events are
outputted.
Inputs correspond to the physical
inputs of your audio hardware. Inputs
appear as input sources in the Console Window and record sources in
the Record Monitor.
Outputs correspond to the physical
outputs of your audio hardware. Outputs are assigned as destinations for
Audio Instruments, Audio Sends, busses, and even hardware inputs.
Outputs can also be used as input
sources in the Console Window or
record sources in the Record
Monitor.
The Acadia audio system supports a
maximum of 24 hardware outputs.
Busses (up to 16) act as mono or
stereo destinations for groups of console channels (via sends), they can
also be assigned as outputs. Busses
are useful for creating auxiliary sends
to shared plug-ins, submixes, and
master faders.
Any of these items (which we will often
refer to as audio channels) can act as
input sources in the Console Window or
Record Monitor.
Vision & Studio Vision Pro — Audio Reference Manual
35
PART 3: The Acadia Audio System
Each of the four sections in the Audio
Instruments & Routings Window can be
closed or opened by clicking the appropriate open/close triangle, see Figure 6.2.
SETTING THE NUMBER OF
AUDIO INSTRUMENTS
NOTE: This section applies to all Vision
and Studio Vision users but is most applicable to TDM and Acadia users.
Vision can use as many Audio Instruments as your memory and CPU
resources allow, up to a maximum of 128.
Vision initially defaults to 16 Audio Instruments, but you can request a greater
number if you like. Vision stores the
requested number of Audio Instruments
in both its Setup file and in each Vision
file.
Figure 6.2: Busses section, opened and closed
Vision offers a great amount of flexibility
in routing and processing audio. While
the following sections in this chapter
explain the various controls in the Audio
Instruments & Routings Window,
Chapter 7: Acadia: Audio Channels in
Consoles explains how to assign plug-ins,
sends, and EQs. In addition,
Chapter 10: Acadia: Bussing, Routing, &
Bouncing to Disk explores some realworld examples for bussing, routing, and
recording audio channels.
36
When using the Acadia audio system, the
number of Audio Instruments you specify
determines the number of possible audio
events that can sound at any one time,
and the amount of RAM used for audio
buffers.
IMPORTANT: The number of Audio
Instruments you specify determines only the
theoretical number of possible audio events
that can play back simultaneously.
There are many other factors that affect the
actual number of simultaneous audio
tracks you can expect Vision to play. These
include: the speed of your CPU; the speed of
your hard disk (and the speed of its IDE/
SCSI connection); the number of EQ bands
in use; and the number and type of VST
plug-ins employed. For more information,
see “Chapter 11: Acadia: Optimizing for
Digital Audio.”
Opcode Systems, Inc.
CHAPTER 6: Acadia: Audio Instruments & Routings Window
To select the desired number of Audio
Instruments:
햲 Press and hold the mouse on
the menu in the Audio
Instruments & Routings
Window.
햳 Move the cursor over the
Number of Instruments item.
Vision produces a pop-up menu from
which you can select the desired number
of Audio Instruments.
Figure 6.3: Selecting the number of Audio
Instruments
햴 Highlight the desired number of
Audio Instruments, then release
the mouse button.
To specify a number of Audio Instruments not listed in the submenu, choose
the Other option. From the dialog that
appears, you can specify any number of
Audio Instruments (up to 128).
VOICE ALLOCATION AND
AUDIO PLAYBACK
When using the Acadia audio system,
Vision uses “fixed” voice allocation for
digital audio playback. This means that
each Audio Instrument can play just one
audio event at a time.
For instance, if Audio-1 is playing an audio
event and a second audio event is encountered (also assigned to Audio-1, either in
the same track or in another), the second
event will interrupt the first event.
Therefore, if you want overlapping audio
events to be played concurrently, they
must be assigned to different Audio
Instruments—which can reside in the
same or separate tracks.
COLUMNS IN THE AUDIO
INSTRUMENTS & ROUTINGS
WINDOW
The following sections discuss each
column in the Audio Instruments & Routings Window. Please note that not all
columns apply to all four sections (Audio
Instruments, inputs, outputs, and busses).
The configuration of the Audio Instruments & Routings Window is saved with
each Vision file, and can be saved with the
Vision Setup file.
Vision & Studio Vision Pro — Audio Reference Manual
37
PART 3: The Acadia Audio System
Name
Color
This column displays the name for each
Audio Instrument, input, output, and bus.
Custom names can be typed in for each
item—for instance, “vocals” for an Audio
Instrument or “Master L-R” for a bus.
Like MIDI Instruments, each Audio
Instrument can have its own color, which
is used for displaying track data. To
change an Audio Instrument’s assigned
color:
To rename an Audio Instrument, input,
output, or bus:
햲 Choose Windows>Audio
햲 Click in the Name column for the
desired audio channel.
Instruments.
Vision opens the Audio Instruments &
Routings Window.
햳 Press and hold the mouse in the
Color column (located
immediately to the right of the
Audio InstrumentÕs name).
Vision opens a color selection pop-up
menu.
The name becomes highlighted.
햳 Type in the new name and then
type Return.
Press and hold the mouse
on a color to open a color
selection pop-up menu.
Changes to the names are automatically
updated in other windows, dialogs, and
pop-up menus.
To return a name to its default, highlight
the desired name and type the Delete key.
Figure 6.4: Setting an Audio Instrument’s
color
38
Opcode Systems, Inc.
CHAPTER 6: Acadia: Audio Instruments & Routings Window
햴 Highlight the desired color from
the pop-up menu and release
the mouse button.
You can change the colors available in the
color selection pop-up menu. To do so:
햲 Choose Setups>Colors.
Vision opens a dialog box containing all
defined colors.
햳 Click the color you wish to
change.
Vision opens a standard Macintosh color
picker dialog box.
햴 Pick a new color and click the
OK button.
햵 Change other colors as desired,
then click the OK button to
close the Colors dialog box.
You can reset any modified colors to
Opcode’s default colors. To do so:
햲 Choose Windows>Instruments.
Vision opens the MIDI Instruments
Window.
햳 Choose Initialize Colors from the
Instruments Window menu.
Vision resets its colors to their default
values.
Enabling Inputs and Outputs
Inputs and outputs are unique in that they
have an option for being enabled and disabled from the Audio Instruments &
Routings Window. To enable an input or
output place a checkmark next to it in the
Name column.
Figure 6.5: Enabling/disabling inputs
By default, only the first two of your hardware inputs are enabled. To enable more,
simply place a checkmark next to the
desired items. All hardware outputs are
enabled by default.
To disable an input or output, click on a
checkmark to remove it. Disabled items
are unavailable (grayed out) in the popups in the Record Monitor and Console
Windows.
Inputs and outputs are always enabled or
disabled in pairs. For instance, placing a
checkmark next to “Input 1” also automatically places a checkmark next to
“Input 2.”
NOTE: Enabled inputs and outputs consume valuable CPU resources. Therefore, to
preserve CPU resources, disable any inputs
and outputs not in use.
IMPORTANT: Enabling a digital input
may change the Clock Source in the Hardware Setup dialog from “Analog” to
“Digital.” If you wish to record from only
your analog inputs, make sure all digital
inputs are disabled.
Vision & Studio Vision Pro — Audio Reference Manual
39
PART 3: The Acadia Audio System
Mutes and Solos
These columns let you mute and solo the
items in the Audio Instruments & Routings Window. Muting and soloing occurs
across MIDI and Audio Instruments,
hardware inputs and outputs, and busses.
If you therefore solo a hardware input,
playback of MIDI and Audio Instruments
will be muted, along with busses.
Buttons for mute and solo also appear for
audio channels in the Console Window,
and for Audio Instruments in the Graphic
Window. Clicking a Mute or Solo button
in any location echoes it to the others.
When anything is soloed, the Global Solo
Indicator button appears in the Control
Bar, which is helpful if you’ve forgotten
about a clicked Solo button and suddenly
realize that nothing is playing back.
NOTE: Hardware outputs cannot be soloed
and therefore do not have a Solo column.
To mute or solo an Audio Instrument,
input, output, or bus:
햲 Click the Mute or Solo column
next to the desired audio
channel.
This places an ÒMÓ or ÒSÓ in the column
to indicate whether the audio channel is
muted or soloed.
Click Global Solo Indicator
to find soloed Instruments and channels.
Click the Global Solo Indicator button to
automatically open the window with the
soloed Instrument or audio channel.
For information about the differences
between muting or soloing tracks and
muting or soloing instruments, please see
your MIDI Reference Manual.
Soloing Busses
Soloing occurs across MIDI and Audio
Instruments, inputs, and busses. Soloing
an audio channel mutes all unsoloed
Audio and MIDI Instruments (and inputs
and busses).
햳 Click again to disable an audio
Soloing an audio bus automatically results
in all pre sends routed to that bus being
heard (post sends are muted). Previously,
it was required that each of the routed
console channels be soloed as well.
channelÕs mute or solo.
40
Opcode Systems, Inc.
CHAPTER 6: Acadia: Audio Instruments & Routings Window
Stereo
The Stereo column determines whether
an Audio Instrument, hardware input or
output, or bus is stereo or mono. To make
an audio channel “stereo,” place a check
mark in the column for that channel.
Clicking in the Stereo column works a
little differently for inputs and outputs (as
opposed to Audio Instruments and
busses).
In order to play back stereo audio events,
they must be assigned to a stereo Audio
Instrument.
Click in Stereo column to turn
mono input pairs into a
single stereo input pair.
Place a checkmark in the
Stereo column to make an
Audio Instrument ÒstereoÓ
Figure 6.6: Stereo Audio Instrument
Figure 6.7: Stereo input pair
Whether a channel is mono or stereo also
determines how it can be used as an input
source in a console channel, or as a
record source in the Record Monitor. For
instance, stereo Audio Instruments can
only stereo plug-ins, and should be
assigned to stereo outputs; also, if you’re
routing stereo audio channels to a bus,
make sure it is a stereo bus; and, if you’re
attempting to record with Link Pairs
checked, you’ll need to record from a
stereo source (Audio Instrument, input or
output, or bus) to a stereo Audio
Instrument.
Hardware inputs and outputs can appear
in the Audio Instruments & Routings
Window as either mono or stereo pairs.
For instance, if your audio interface has
just two outputs (1-2), they can act as individual mono outputs, or they can act as an
output pair—not both. Therefore, placing
a checkmark in the stereo column for
Output 1 or Output 2 turns them into an
output pair (“Output 1-2”), and, in the process, makes them unavailable as mono
outputs.
Vision & Studio Vision Pro — Audio Reference Manual
41
PART 3: The Acadia Audio System
Stereo Interleaved Files
The Acadia audio system now supports
importing and playing stereo interleaved
files. Once a stereo Audio Instrument
encounters an interleaved file, it will play
it as a stereo audio event. If, however, that
same Audio Instrument encounters a
stereo linked event later in the same
sequence, only one channel of the linked
event will be played. The important thing
to remember is that stereo events
assigned to the same Audio Instrument
should be of the same type: either stereo
interleaved or stereo linked.
A pop-up menu of Outputs appears.
햳 Highlight the appropriate output type
(Bus, single Output, or Output Pair),
then select from the submenu the
desired destination.
Output Assignments
Use the Output column to assign an
output for Audio Instruments, hardware
inputs, and busses. This lets you easily
monitor any of these audio channels without using the Console Window or Record
Monitor.
To assign an output for an audio channel:
햲 Click in the Output column for the
desired audio channel.
The items appearing in the Output pop-up
correspond directly to your hardware outputs and busses. If you have renamed any
of these items, it is reflected in the Output
pop-up.
Interestingly enough, busses can be
assigned to either outputs, or to other
busses (you can send submixes to a
master mix, for instance). You cannot,
however, route an individual bus to itself,
or assign a bus if the routing will result in
a loop. Clicking in the Output column for
Bus 1, for instance, reveals that “Bus 1” is
unavailable.
The Output column’s pop-up menu is
duplicated in the Console Window for
each audio channel. Changing an output
assignment in the Audio Instruments &
Routings Window automatically updates it
in the Console Window, and vice versa.
42
Opcode Systems, Inc.
CHAPTER 6: Acadia: Audio Instruments & Routings Window
NOTE: The Input and Output sections in
the Audio Instruments & Routings Window
only displays items as either mono or
stereo—not both. And, only these displayed
items show up as sources in the Instrument
Selector pop-up for console channels in the
Console Window.
However, all outputs, mono and stereo
pairs, are available in the Output column
pop-up (and in the Output Selector pop-up
for console channels).
IMPORTANT: Bus outputs must be
assigned to an actual hardware output
before any of the audio channels routed to
them will be heard.
Since it is possible for audio channels to
be removed from a Console Window without clearing their sends, plug-ins, and EQ
settings, these columns can be used to
monitor these assignments—regardless
of the state of the Console Windows.
And, if the Performance Window (see
page 83 for a description) indicates you
are low on CPU resources, you can use
the Audio Instruments & Routings
Window for a global overview of where
those resources are being used.
NOTE: Since Audio Sends are not available for outputs in the Console Window, the
Sends column is grayed out for outputs in
the Audio Instruments & Routings
Window.
Sends, Plug-Ins, and EQs
These columns let you monitor the
number of assigned sends, plug-ins, and
EQ bands for Audio Instruments, inputs,
outputs, and busses. The individual fields
for each column are for display purposes
only, you cannot click in them to make
changes—they indicate the processing
and routing resources assigned in all of
four Console Windows.
Clearing Routings
Figure 6.9: Reset All Routings command
From the menu in the Audio Instruments
& Routings Window, choose Reset All
Routings to:
•
Figure 6.8: Viewing Sends, Plug-Ins, and EQs
In Figure 6.8, for instance, Audio-1 is
routed to one send, is assigned to two
plug-ins, and has no of EQ bands enabled.
•
•
•
Clear all plug-in and send
assignments;
Reset and disable all EQ settings;
Reset all output assignments for
Audio Instruments to their default
first two outputs.
Set all output assignments for inputs
and busses to “none”;
Vision & Studio Vision Pro — Audio Reference Manual
43
PART 3: The Acadia Audio System
You can, of course, manually remove plugin and send assignments and disable EQs
in the Console Window. In addition, you
can choose Clear Console from the
menu in the Console Window to clear
everything in that console, including plugins, sends, and EQ settings.
SAVING INSTRUMENT SETUPS
The configuration of the Audio Instruments & Routings Window is saved with
each Vision file, along with MIDI
Instruments.
You may also save this information in the
Vision Setup file by using the File>Save
as Setup command. See your MIDI Reference Manual for more information
about the Vision Setup file.
44
Opcode Systems, Inc.
CHAPTER 7:
Acadia: Audio Channels in
Consoles
AUDIO IN CONSOLES
Before reading this chapter, you should
be familiar with Visions’s Console Windows. If you haven’t done so, please read
Chapter 38: The Console Windows in your
MIDI Reference Manual.
4 Sends, routeable to
outputs or busses
In addition to controls for volume, pan,
mute, and solo, Console Windows provide
additional processing and routing capabilities for audio channels. These include:
•
•
•
•
•
4 Plug-Ins, routeable
to VST-compatible plug-ins
4 Plug-In inserts assignable to
VST-compatible plug-ins;
EQ with up to 4 independent bands,
along with Phase control;
4 Sends routeable to either hardware outputs, or to any of 16 busses;
16 Busses for creating submixes
and master faders, and for routing to
shared plug-ins.
Outputs assignable to hardware outputs or any of 16 busses.
Figure 7.1 illustrates a console channel
with most of its processing and routing
capabilities displayed. These individual
components (sends, plug-ins, EQs, and
outputs) will each be discussed in detail
later in this chapter. For now, it’s important to grasp the basic signal flow for an
audio channel within a console.
Phase toggle
4 discrete bands of EQ
Volume, pan, mute, and solo
Output assignment (to hardware
output or bus)
Input source (Audio Instrument,
input, output, or bus)
Figure 7.1: Console channel for audio
Vision & Studio Vision Pro — Audio Reference Manual
45
PART 3: The Acadia Audio System
While Figure 7.1 illustrates an actual console channel as it might appear in Vision,
Figure 7.2 illustrates the theoretical
signal flow for an audio console channel.
Notice that the signal flow begins with an
input source (which can be an Audio
Instrument, input, output, or bus) and
ends with an output assignment (which
can be a hardware output or a bus).
Input
Source
Mute, Solo
Phase
Audio Send, Pre
In between the source and the output, the
signal can be processed by plug-ins and
EQ, and the signal can be routed to
busses via sends.
Pay particular attention to the order of the
components in Figure 7.2. While mute,
solo, and volume affect signals sent to
busses via sends (pre and post), pan only
affects what is sent to the output.
While EQs affect the signal after being
processed by the plug-ins, a channel’s
Phase mode (enabled in the EQ Area)
occurs before sends.
Sends to busses can be pre or post, taking
advantage of, or ignoring the plug-in modules, EQ settings, and volume fader.
Plug-Ins
LEGEND
main audio signal path
Plug-ins are always applied in ascending
numerical order (1, 2, 3, and then 4).
audio send signal path
Mono vs. Stereo Signals
EQs
The various components in an audio channel interact differently depending on
whether the signal is mono or stereo.
Volume
Fader
Audio Send, Post
Pan
Fader
Output Assignment
Audio Instruments, inputs, outputs, and
busses can be either mono or stereo as
specified in the Audio Instruments &
Routings Window.
However, routing a mono source to a
stereo destination, and vice versa, has
important ramifications for what happens
to the audio signal. When relevant, these
points will be discussed in the remaining
sections of this chapter.
Figure 7.2: Audio signal flow in a console channel
46
Opcode Systems, Inc.
CHAPTER 7: Acadia: Audio Channels in Consoles
ASSIGNING PLUG-INS
The Acadia audio system supports VSTcompatible plug-ins. These plug-ins offer
real-time processing of audio in Vision.
Vision ships with a large number of useful
plug-ins developed by Opcode. These
plug-ins are installed into a folder called
“VSTPlugins,” which must reside in the
same folder as the Vision application.
TIP: For easy access to any of the sixteen Console Windows, use the
Commands Window to assign a key
equivalent to open them.
햳 From the Console Window
menu, choose Build Console
From>Audio Instruments.
Each of your Audio Instruments is automatically assigned to a console channel.
If you have other VST plug-ins you’d like
to use with Vision, just drag a copy of
them (or an alias) into the VSTPlugins
folder.
Up to four plug-ins can be used for each
audio channel—the output of each plug-in
connecting to the next (in series).
NOTE: Although you can assign up to four
plug-ins for each console channel, you probably shouldn’t do this for every channel.
This can take up a lot of CPU resources and
limit the number of tracks you can successfully play in Vision. For more details, see
“Chapter 11: Acadia: Optimizing for
Digital Audio.”
Following is an example of how to assign
plug-ins in the Console Window. For
details on using the Plug-In Edit Window
to edit, store, and recall plug-in programs,
please see Chapter 8: Acadia: Plug-In Edit
Window.
NOTE: You could manually assign individual channels to only those Audio
Instruments used in your sequence, but
this method provides a quick way to
create a single console that controls all
of your Audio Instruments.
햴 From the Console Window menu,
press and hold the mouse on the
Plug-Ins item.
Vision produces a submenu of plug-in
choices.
To assign a plug-in to an audio console
channel:
햲 Choose Windows>Consoles>
Console 1.
The Console Window opens.
Vision & Studio Vision Pro — Audio Reference Manual
47
PART 3: The Acadia Audio System
햵 From the submenu, highlight the
desired number of plug-ins and
release the mouse.
햷 While still holding the mouse button,
move the cursor over the desired
plug-in to highlight it.
Vision adds a Plug-In area to each audio
channel in the console.
Plug-In area
햸 Release the mouse button.
Vision assigns the selected plug-in to the
console channelÕs Audio Instrument.
Figure 7.3: Console Window, 2 plug-ins
displayed
햶 For the desired console channel, click
on the Plug-In Selector pop-up.
The Audio Instrument in this
channel uses the ÒV-EchoÓ
plug-in.
A list of installed plug-ins is displayed.
48
Opcode Systems, Inc.
CHAPTER 7: Acadia: Audio Channels in Consoles
Removing Plug-Ins
To remove a plug-in, simply set the
plug-in selector pop-up to none.
If automation data for a plug-in exists and
the plug-in is removed from a Console
(the plug-in selector pop-up is set to
none), a warning dialog will appear.
Clicking Cancel will leave the plug-in in
the Console. Clicking OK will remove the
plug-in and all automation data assigned
to it.
Rearranging Plug-Ins by Vertical
Dragging
It is now possible to re-order plug-ins by
dragging them vertically. To do so:
햲 Click and hold in the Plug-In Type
area of the plug-in you wish to move.
햳 Drag to the plug-inÕs desired location.
In this example weÕre moving the third
plug-in so that it will be first.
Vision & Studio Vision Pro — Audio Reference Manual
49
PART 3: The Acadia Audio System
햴 Release the mouse.
The plug-ins are rearranged.
Anatomy of the Plug-In Area
� Plug-In Edit button
� Plug-In Type
� Bypass button
� Plug-In Selector pop-up
Figure 7.4: Plug-In area
The Plug-In area, once enabled, consists
of the following items:
NOTE: It is not possible to drag plug-ins to
incompatible locations. For example, you
cannot drag a mono plug-in to occur after a
stereo plug-in or a mono in/stereo out plugin. For more information about mono and
stereo plug-ins, see page 51.
쐃
Plug-In Edit button: Click this
button to open the Plug-In Edit Window, where you can edit, store, and
recall plug-in programs.
When a plug-in is vertically dragged, its
automation data remains intact. However,
if you attempt to re-order plug-ins by reassigning (choosing a different plug-in), all
automation data for the selected plugin(s) will be lost.
Figure 7.5: Plug-In Edit Window
The Plug-In Edit button also displays
the console channel’s plug-in
number (1-4).
For a complete explanation of the
components in the Plug-In Edit Window, please see Chapter 8: Acadia:
Plug-In Edit Window.
50
Opcode Systems, Inc.
CHAPTER 7: Acadia: Audio Channels in Consoles
쐇
Plug-In Selector pop-up: Choose a
plug-in from this pop-up menu to
assign it to the console channel, or
choose “no plug-in” to remove the
current one.
Only those plug-ins that will work for
the selected audio channel and slot
are displayed in the Plug-In Selector
pop-up.
쐋 Plug-In Type: Indicates whether the
plug-in’s input and output are mono
or stereo—which, in turn, determines
the type of plug-in that can be used
(see Mono and Stereo Plug-Ins
(pg. 51)).
Mono and Stereo Plug-Ins
There are basically three types of
plug-ins:
•
•
mono in/mono out
mono in/stereo out
stereo in/stereo out
When there is no plug-in assigned,
the indicator is grayed out.
쐏 Bypass button: Click this button to
bypass the associated plug-in. Any of
the four plug-ins for a console channel can be independently “bypassed”
by clicking its Bypass button.
The Bypass button is duplicated in
the Plug-In Edit Window. Changing it
in either location updates the other.
•
mono in/mono out
These plug-ins can only be assigned
to a mono Audio Instrument (or
mono input, output, or bus), and their
output can only be connected to
another “mono in” plug-in.
mono in/stereo out
These plug-ins can only be assigned
to a mono Audio Instrument (or
mono input, output, or bus), and their
output is generally connected to a
“stereo in” plug-in.
Vision can, however, use this plug-in
type as a mono in/mono out plug-in
by only outputting its left channel.
When viewing mono in/stereo out
plug-ins in the Plug-In Selector popup, a duplicate of each plug-in
(labeled as “mono”) is displayed in
the left column of the menu.
stereo in/stereo out
These plug-ins can only be assigned
to a stereo Audio Instrument (or
stereo input, output, or bus), and
their output can only be connected to
another “stereo in” plug-in.
Some VST plug-ins can be used in just one
mode. Still others can be used in two
modes—mono in/stereo out or stereo in/
stereo out.
Vision & Studio Vision Pro — Audio Reference Manual
51
PART 3: The Acadia Audio System
Some manufactures, on the other hand,
provide two different versions of their
plug-ins for connecting to either mono or
stereo. Usually, these plug-ins are named
accordingly (for instance, “DeNoiserM”
and “DeNoiserS”).
Using Stereo Plug-Ins
When assigning plug-ins to a stereo Audio
Instrument, only stereo plug-ins appear in
the Plug-In Selector pop-up.
Vision represents plug-in routings graphically in the Console Window, as shown in
Figure 7.6.
Audio Instr: MONO
Plug-In: NONE
Audio Instr: MONO
Plug-In: MONO
Audio Instr: MONO
Plug-In: MONO IN/STEREO OUT
Figure 7.7: Stereo plug-ins
Using Mono Plug-Ins
Audio Instr: STEREO or MONO
(See NOTE 1)
Plug-In: STEREO
Audio Instr: STEREO or
MONO (See NOTE 1)
Plug-In: NONE
When assigning plug-ins to a mono Audio
Instrument, mono in/mono out and
mono in/stereo out plug-ins are available
in separate columns from the Plug-In
Selector pop-up.
Figure 7.6: Graphic indication of stereo status
NOTE: A mono Audio Instrument can
have stereo plug-in inputs if the plug-in
above it contains a mono in/stereo out
plug-in. For more information, see “Using
Mono Plug-Ins (pg. 52).”
Figure 7.8: Two types of “mono in” plug-ins
52
Opcode Systems, Inc.
CHAPTER 7: Acadia: Audio Channels in Consoles
If you select a mono in/mono out
plug-in, it processes the mono input signal
and outputs a mono signal.
NOTE: Vision lets you use mono in/stereo
out plug-ins as mono in/mono out
plug-ins—thereby preserving a mono signal. These plug-ins are displayed in the left
side of the Plug-In Selector pop-up and are
labeled “mono,” see Figure 7.8.
Keep in mind that these are not true “mono
out” plug-ins and only the left channel is
routed.
If you select a mono in/stereo out
plug-in, it processes the mono input signal
and outputs a stereo signal, which means
that:
•
•
Since the plug-in’s output is stereo,
any plug-in placed after it in the chain
can only be a stereo plug-in.
In order to hear the stereo signal, you
must send that signal to an output
pair.
ASSIGNING EQ
The Acadia audio system lets you assign
up to 4 bands of EQ for each audio channel. The four bands (connected in series)
can each be independently set to EQ
types of Low Cut, Low Shelf, Parametric,
High Shelf, or High Cut.
To enable display of the EQ area for your
audio channels in the Console Window:
햲 Choose Windows>Consoles>
Console 1.
The Console Window opens.
햳 From the Console Window menu,
choose Build Console
From>Audio Instruments.
Each of your Audio Instruments is automatically assigned to a console channel.
A mono-in/stereo-out plug-in...
...can only be followed
by a stereo plug-in
NOTE: You could manually assign individual channels to only those Audio
Instruments used in your sequence, but
this method provides a quick way to
create a single console that controls all
of your Audio Instruments.
Vision & Studio Vision Pro — Audio Reference Manual
53
PART 3: The Acadia Audio System
햴 From the Console Window menu,
choose EQs>Gain Faders.
Anatomy of the EQ Area
� EQ Edit button
� EQ toggle
� Phase toggle
� Gain faders
� EQ Type
Figure 7.10: EQ area in the Console Window
The EQ area, once enabled, includes the
following items:
Vision adds an EQ area with Gain faders
to each audio channel in the console.
EQ area
쐃
EQ Edit button: Click this button to
open the EQ Window, where you can
disable and enable individual EQ
bands, specify the EQ type for each
band, and view the EQ curve.
Figure 7.9: EQ area with Gain faders
To enable a channelÕs EQ, click the On
button in the EQ area. Then move the
ÒminiÓ Gain faders to audition different
EQ settings.
NOTE: You can also display the EQ area
without the Gain faders by choosing
EQs>Basic. To hide the EQ area in the
Console Window, choose EQs>Hidden.
54
Figure 7.11: EQ Window
For a complete explanation of the
components in the EQ Window,
please see Chapter 9: Acadia: EQ
Window.
Opcode Systems, Inc.
CHAPTER 7: Acadia: Audio Channels in Consoles
쐇
EQ Toggle button: Turns on and off
the EQ for the audio channel.
The EQ toggle is duplicated in the
EQ Window, changing it in either
location updates the other. The EQ
Window also has independent toggles
for each EQ band.
쐋 Phase Toggle button: When clicked,
this button inverts the “phase” for the
audio channel. For an explanation,
please see Phase (pg. 55).
쐏 Gain faders: These faders adjust the
Gain for each of the four EQ bands.
Gain faders are only displayed if the
EQ band is enabled and set to Low
Shelf, Parametric, or High Shelf. Gain
faders are not available if an EQ band
is set to either Low Cut or High Cut.
The Gain faders are also displayed in
the EQ Window. Changing the Gain
value in either location, updates the
other.
쐄 EQ Type: These graphics indicate
the type of EQ used for each band,
which include...
PHASE
Pressing the Phase button in the EQ area
of a console channel inverts the phase for
the assigned audio channel. This 180
degree shift makes positive signals negative, and negative signals positive. The
phase switch is used to prevent signal
cancellation that occurs when two signals
are out of phase with each other.
In general, if your mix seems “weaker”
when you play a particular audio channel,
that audio is probably out of phase with
the rest of your mix—try inverting its
phase to “strengthen” it in the mix.
IMPORTANT: Within the signal flow of an
audio channel, Phase occurs before sends
(both pre and post). Phase is not available
for console channels assigned to hardware
outputs.
NOTE: You can permanently affect the
phase of an audio file with the Invert
Phase command in the DSP menu. For
details, see Chapter 31: DSP Menu in your
Audio Reference manual.
To invert the phase for an audio channel:
햲 Open a Console Window and assign
A band’s EQ type can only be
changed from the EQ Window.
the desired audio channel to a
console channel.
Vision & Studio Vision Pro — Audio Reference Manual
55
PART 3: The Acadia Audio System
햳 From the Console Window menu
choose, EQs>Gain Faders.
AUDIO SENDS
The EQ area is added to the audio channels in the Console Window.
Each console channel supports up to four
Audio Sends. These work very much like
an effects send on a regular mixing console. Destinations for sends can be
hardware outputs or any of 16 busses.
EQ area (with Phase toggle)
Some possible uses for sends include:
•
•
•
•
햴 In the EQ area, for the desired
channel, click the Phase button so
itÕs highlighted.
Route Audio Instruments to a hardware output for external processing;
Route groups of Audio Instruments to
a bus for sub and master mixes;
Route groups of Audio Instruments to
a bus for sharing plug-ins;
Route Audio Instruments to busses to
record a mix of the group.
Displaying Audio Sends
To display Audio Sends for audio channels in the Console Window:
햲 From the Console WindowÕs menu,
press and hold the mouse on the
Audio Sends item.
Figure 7.12: Phase inverted
Vision produces a submenu of send
options.
Vision inverts the phase for the audio
channel.
Audition the mix to see if the problem
has been fixed. If desired, click the
Phase toggle again to return the channel
to normal.
56
Opcode Systems, Inc.
CHAPTER 7: Acadia: Audio Channels in Consoles
햳 From the submenu, select the number
of Audio Sends you want to display
per channel.
Anatomy of the Send Area
쐃
쐋
쐇
Figure 7.13: Anatomy of the Send area
Vision adds a Send area to each audio
channel in the console.
The Send area, once enabled, contains the
following items:
쐃
Send Selector pop-up
Pre/Post Fader button
쐋 Send Level
쐇
NOTE: The Pre/Post Fader button and
Send Level numerical are disabled and
invisible until you specify a send destination using the Send Selector pop-up. This
provides a visual way to quickly locate
active channel sends on a busy mixing
console.
Two new, undeÞned
Audio Sends per
channel
The following sections discuss each of the
Audio Send parameters in detail.
Vision & Studio Vision Pro — Audio Reference Manual
57
PART 3: The Acadia Audio System
Send Selector
•
Use the Send Selector to tell Vision where
to send the audio signal:
햲 Press and hold the mouse on the
Send Selector.
Vision opens a pop-up menu of routing
options.
•
You can choose between the following
audio send destinations:
•
•
58
No send
The audio signal is not sent to an
external output or bus.
Bus
Choose “Bus” to open a submenu of
16 busses.
Sending audio to a bus is a great way
to create submixes (see page 76) or
to share a single plug-in with numerous audio channels (see page 75).
Audio channels sent to busses will
not be routed until the bus output is
assigned to an actual hardware
output.
Busses can be mono or stereo as
specified in the Audio Instruments &
Routings Window. For more information, see Mono & Stereo Busses
(pg. 59).
Output
Choose “Output” to open a submenu
of monophonic outputs for your digital audio hardware.
The available outputs is determined
by your audio hardware, and whether
they are enabled in the Audio Instruments & Routings Window.
Sending audio to a mono output
allows you to use external signal processing to modify the audio signal.
Output Pair
Choose “Output Pair” to open a submenu of stereo output pairs for your
digital audio hardware.
The available output pairs is determined by your audio hardware, and
whether they are enabled in the
Audio Instruments & Routings
Window.
Sending audio to a stereo output
allows you to use external stereo
signal processors to modify the audio
signal.
Opcode Systems, Inc.
CHAPTER 7: Acadia: Audio Channels in Consoles
Pre/Post Fader Button
Send Level
Click this button to toggle the Audio Send
between two states: pre fader and post
fader.
Use this numerical to set the level of the
audio signal sent to the destination specified in the Send Selector.
The button always displays the Audio
Send’s current state—clicking it changes
both the state and the label of the button.
Specifically:
Values range between 0 and 127, where:
•
•
Pre Fader
When the button looks like this,
Vision sends the audio signal to the
selected destination before it passes
through the channel’s plug-in modules, EQ settings, and volume fader.
The send signal is, however, affected
by the velocity of audio events, and by
the status of the channel’s Phase
mode.
Post Fader
When the button looks like this,
Vision sends the audio signal to the
selected destination after it passes
through the channel’s plug-in modules, EQ settings, and volume fader.
IMPORTANT: Regardless of whether pre or
post is used, the channel’s pan fader (if
active) has no effect on the Audio Send.
For an illustration of the signal flow for
pre and post sends, see Figure 7.2 on
page 46.
•
•
0 = no audio signal is sent to the send
destination.
127 = 100% of the audio signal level is
sent to the send destination.
To adjust the Send Level, click in the field
and type in a new value, or click and drag
with the mouse.
Mono & Stereo Busses
Busses can be mono or stereo as specified in the Audio Instruments & Routings
Window. This means that if you have a
stereo Audio Instrument and want it sent
to a bus, you should make sure that the
destination is a stereo bus.
You can, however, mix and match stereo
and mono signals when routing to busses.
In doing so, the following rules apply:
•
•
When sending a stereo console channel to a mono bus, the signal is
summed.
When sending a mono console channel to a stereo bus, the signal is sent
to both the left and right channels of
the bus.
Vision & Studio Vision Pro — Audio Reference Manual
59
PART 3: The Acadia Audio System
In addition, the following rules apply for
busses when used as record sources:
•
•
When recording from a stereo bus,
without Link Pairs enabled, to a mono
Audio Instrument, only the left signal
is recorded.
When recording from a mono bus,
with Link Pairs enabled, to a stereo
Audio Instrument, the mono signal is
recorded to the left channel with the
right channel being silent.
CLIPPING LEDS
When using the Acadia audio system,
console channels assigned to Audio
Instruments, hardware inputs, and busses
never clip. This is because Acadia uses
floating point in its computations, and
with floating point there is practically no
limit to the dynamic range for these audio
signals. Boost them as much as you
want—either with plug-ins, EQ, or with
the Maximum Fader Position setting—
and the console channel won’t clip with
the red Clipping LED.
However, the assigned hardware outputs
for your audio channels can clip if their
level reaches 0 dB. It is therefore very
important to always assign your hardware
outputs to console channels so you can
monitor their Clipping LEDs. If one of
these red LEDs does light, simply turn
down the volume fader for that output’s
console channel.
60
CONSOLE OUTPUTS
Audio console channels have an Output
Selector pop-up specifying the channel’s
output assignment.
This pop-up is duplicated in the Output
column of the Audio Instruments & Routings Window. Changing an audio
channel’s output assignment in either
window updates it in the other.
For information on using the Output
column in the Audio Instruments & Routings Window, see Output Assignments
(pg. 42).
To assign an output to an audio channel in
the Console Window:
햲 For the desired audio channel, press
and hold the mouse on the Output
Selector pop-up.
Vision produces a submenu of Output
routing options.
Press and hold mouse on
Output selector...
... to produce a submenu of output
routing options.
Opcode Systems, Inc.
CHAPTER 7: Acadia: Audio Channels in Consoles
햳 From the submenu, select an output
assignment for the audio channel.
For information about the various output
options, see Output Assignments
(pg. 61).
NOTE: Audio outputs are only provided for
audio console channels—not those assigned
to MIDI Instruments.
Output Assignments
The items in the Output pop-up include:
•
•
•
•
No output: Select this option to disable the output assignment for the
channel.
Bus: Select one of sixteen internal
busses. By outputting numerous
channels to the same bus, you can
create a submix (or “group”)—controlling all grouped channels with one
fader and a shared collection of sends
and plug-ins.
Audio channels assigned to busses
will not be heard until the bus output
is assigned to an actual hardware
output.
Output: Select a single, mono output
from this submenu. The number of
outputs is determined by your audio
hardware.
Output Pair: Select a pair of audio
outputs from this submenu. If your
audio signal is mono, use the pan
fader to position the signal within the
stereo field. See Outputs and Panning
(pg. 62).
If you have entered custom names for any
of your outputs or busses (from the Audio
Instruments & Routings Window), they
are reflected in the Output pop-up.
The Output and Output Pair routings
are hardware-based. They let you route
audio signals to devices that are external
to your computer (such as signal processors, mixers, or power amps).
The Bus routings are software-based outputs. They let you route audio signals to
other software-based components within
your computer (such as plug-ins and
other console channels).
To preserve the stereo signal for stereo
audio channels, you must assign their outputs to a stereo bus or stereo hardware
output.
As when routing signals to busses via
sends, the following rules apply:
•
•
When outputting a stereo console
channel to a mono bus or output, the
signal is summed.
When outputting a mono console
channel to a stereo bus or output, the
signal is sent to both the left and right
channels.
Vision & Studio Vision Pro — Audio Reference Manual
61
PART 3: The Acadia Audio System
Outputs and Panning
When Master Instrument is checked in
the Console Window’s menu, the vertical
and horizontal faders are hard-wired to
volume and pan, and always assigned to
the same Instrument. However, with
regards to audio console channels, the
pan (horizontal) fader is only displayed if:
•
CLEARING CONSOLES
To return a console to its default state
with Instrument Selectors set to “none,”
choose Clear Console from the Console
Window menu.
A mono audio channel’s output is
assigned to an output pair or stereo
bus.
Use the pan fader to position the mono
signal in the stereo field.
NOTE: The pan fader is not available if the
source for the audio console channel is stereo, or if a mono signal is assigned to a
mono output.
Console channels with stereo input
sources (Audio Instruments, inputs, outputs, or busses), are not affected by pan
data (controller #10).
Figure 7.14: Clear Console dialog
This dialog also gives you a checkbox
option for clearing plug-ins, sends, and
EQs that were assigned in that Console
Window. If this option is checked, all automation data for any assigned plug-ins will
be cleared as well.
When you uncheck Master Instrument,
pan faders are always visible since, in this
mode, pan faders can control any Instrument and any type of controller data (not
just controller #10).
62
Opcode Systems, Inc.
CHAPTER 8:
Acadia: Plug-In Edit Window
PLUG-IN EDIT WINDOW
This chapter discusses the components
found in the Plug-In Edit Window, which
is used to display and edit plug-in parameters, and store and recall plug-in
programs. For details on assigning VST
plug-ins from the Console Window, please
see Assigning Plug-Ins (pg. 47).
햲 Click the Plug-In Edit button
that contains the desired plugin number.
Vision opens an Edit Window for the
selected plug-in.
To open an Edit Window for a VST plug-in
from the Console Window:
Figure 8.1: Typical Plug-In Edit Window
You can have multiple Plug-In Edit Windows open at the same time. If an existing
Plug-In Edit Window is open, Option-click
a plug-in number from the Console
Window to display that plug-in in the current Plug-In Edit Window—this helps you
cut down on the proliferation of open
windows.
Vision & Studio Vision Pro — Audio Reference Manual
63
PART 3: The Acadia Audio System
The title bar of each Plug-In Edit Window
is based on the name of the plug-in and
the audio channel it affects. For instance,
the name of the window in Figure 8.1 is
“opFLANGE for Audio-1,” which means
that window is displaying the plug-in
opFLANGE for Audio Instrument
Audio-1.
In addition to the plug-in’s display of
parameters, Vision adds some additional
controls at the top (as shown in
Figure 8.3) or bottom of the window.
쐎
You can leave Plug-In Edit Windows open
while Vision plays, auditioning different
plug-in presets and tweaking plug-in
parameters as necessary. You can even
switch the plug-in type during playback.
Some VST plug-ins, commonly referred to
as “faceless” plug-ins, display and edit
their parameters with basic sliders (see
Figure 8.1), while others have more elaborate graphic controls for their
parameters (see Figure 8.2).
쐃 쐇
쐏 쐄 쐂 쐆
쐋
쐊
쐅
Figure 8.3: Plug-In Edit Window
Specifically:
쐃
Figure 8.2: Opcode’s Vinyl plug-in
64
Plug-In Selector: Choose a plug-in
from this pop-up menu to assign it to
the console channel, or choose “no
plug-in” to remove the current one.
This pop-up menu, which is duplicated in the Console Window,
displays your installed VST plug-ins.
Only those plug-ins that will work for
the selected audio channel and slot
are displayed in the Plug-In Selector
pop-up. For instance, if using a stereo
Audio Instrument, only stereo plugins are available (see page 51 for
details).
쐇 Template: These two pop-ups let you
store and recall programs and program banks. See Saving and Recalling
Plug-In Programs and Banks (pg. 65)
for more information.
Opcode Systems, Inc.
CHAPTER 8: Acadia: Plug-In Edit Window
쐋
쐏
쐄
쐂
쐆
쐊
Program: This pop-up menu chooses
from the current bank of programs
for the plug-in. See Saving and Recalling Plug-In Programs and Banks
(pg. 65) for more information.
Channel: Specifies the audio channel
(Audio Instrument, hardware input or
output, or bus) being processed by
the plug-in.
Slot: Displays the plug-in number
(1-4) and stereo mode for the plug-in.
Mute: Mutes the Audio Instrument
that the plug-in is assigned to.
Solo: Solos the Audio Instrument that
the plug-in is assigned to.
Flip button: Click this button to flip
the display of the Plug-In Edit
Window—placing the plug-in controls
either on the top or the bottom of the
window.
Some third-party VST plug-ins may
not display properly in one position or
the other. In these cases, use the flip
button.
쐎 Bypass button: Click this button to
bypass the plug-in. Other plug-ins
within that console channel are not
affected—each has its own Bypass
button.
The Bypass button is duplicated in
the Plug-In area of the Console Window. Clicking it in either location
updates it in the other.
쐅 Plug-In parameters: This area displays the parameters for the assigned
plug-in. For a description of each
parameter, see the manufacturer’s
documentation.
To get a finer range of values for
“faceless” plug-in parameters, hold
down the Option key while adjusting
its sliders.
SAVING AND RECALLING
PLUG-IN PROGRAMS AND
BANKS
In Vision, any changes made to plug-in
parameters can be saved and recalled as
program templates.
Figure 8.4: Plug-In controls at bottom of
window
Vision’s plug-in controls are displayed
at the top of the Plug-In Edit Window
by default. To display them at the bottom, simply click the flip button.
Groups of programs can be saved and
recalled as bank templates. The actual
number of programs contained within a
bank varies from plug-in to plug-in.
Program and bank templates are stored in
the Vision Effects Templates file, which
must reside in the same folder as the
Vision application.
Vision & Studio Vision Pro — Audio Reference Manual
65
PART 3: The Acadia Audio System
Template Pop-up
Program Pop-up
Click on Program pop-up
to select from a list of
programs in the current
bank.
Figure 8.5: Template pop-up
Both programs (at top of menu) and
banks (at bottom of menu) are recalled
from the Template pop-up menu.
•
•
Recalling a bank template replaces all
of the programs in the Program popup.
Recalling a program template
replaces the currently selected program location (for the current bank).
Figure 8.6: Program pop-up
Individual programs, within the current
bank, are selected from the Program
pop-up. Doing so recalls the stored
plug-in parameters for that program.
When a bank template is chosen, its name
is displayed in this pop-up.
Click in Program field
to rename the current program.
Figure 8.7: Program field
To rename the currently selected program, simply click in the Program field
and type in the new name. The newly
named program can then be saved as an
individual program template, or as part of
the current bank template. See the following section, Template Functions Pop-up
(pg. 67), for details.
66
Opcode Systems, Inc.
CHAPTER 8: Acadia: Plug-In Edit Window
Template Functions Pop-up
•
The Template Functions pop-up contains
commands for saving, importing, exporting, copying and pasting templates for
programs and banks.
•
•
•
•
Figure 8.8: Template Functions pop-up
Following is a description of each of the
commands in the Template Functions
pop-up:
•
•
Save Program: Saves the current
parameter settings as a program template, using the current program
name.
If the program already exists as a
template, this command overwrites it
with the current (displayed) set of
plug-in parameters.
Save Program As: Saves the current
parameter settings to a new program
template.
With this command you are
prompted to name the new program
template.
•
•
•
•
Delete Program Template: Deletes
the currently selected program
template.
Copy Program: Copies the current
set of plug-in parameters to the Clipboard, which is handy for pasting
programs between banks, or to
another program location within the
same bank—or to another plug-in slot
or console channel using the same
plug-in.
Paste Program: Pastes the program
from the Clipboard to the current program location for the current bank.
Import Program: Imports individual plug-in programs saved in other
VST-compatible applications.
Save Bank: Saves the current bank
of programs as a bank template.
If the bank already exists as a template, this command overwrites it
with the current set of programs.
Save Bank As: Saves the current
bank of programs as a new bank
template.
With this command you are
prompted to name the new bank
template.
Delete Bank Template: Deletes the
current program bank template.
Copy Bank: Copies the current bank
of programs to the Clipboard for pasting to another Plug-In Edit Window.
Paste Bank: Pastes the bank of programs from the Clipboard into the
current Plug-In Edit Window.
Vision & Studio Vision Pro — Audio Reference Manual
67
PART 3: The Acadia Audio System
•
•
•
68
Import Bank: Imports program
banks saved in other VST-compatible
applications.
This command does not automatically save the imported bank as a
Vision bank template. To do so,
choose “Save Bank.”
Save Bank as Default: Saves the
current bank of programs as default
for the plug-in.
Each time the plug-in is later
assigned to an audio channel, this
bank of programs is automatically
made current.
Load Templates From: Loads all
program and bank templates for this
plug-in from a Vision Effects Templates
file that is not current. The loaded
templates are merged with the current set.
Opcode Systems, Inc.
CHAPTER 9:
Acadia: EQ Window
EDITING EQ SETTINGS
This chapter discusses the components
found in the EQ Window, where you can
disable and enable individual EQ bands,
specify the EQ type for each band, and
view the EQ curve.
To open an audio channel’s EQ Window
from the Console Window:
햲 Click the small EQ Edit button
for the desired console channel.
For details on displaying EQs for audio
channels in the Console Window, please
see Assigning EQ (pg. 53).
Vision opens an EQ Window for the console channel.
Figure 9.1: EQ Window
Vision & Studio Vision Pro — Audio Reference Manual
69
PART 3: The Acadia Audio System
You can have multiple EQ Windows open
at the same time. Option-click another
EQ Edit button from the Console Window
to display that channel’s EQ settings in
the current EQ Window—this helps you
cut down on the proliferation of open
windows.
Following is a description of the components in the EQ Window:
쐃
The title bar of each EQ Window displays
the name of the assigned audio channel.
For instance, the name of the window in
Figure 9.2 is “EQ for Audio-1.”
You can leave EQ Windows open while
Vision plays, auditioning different EQ
templates and tweaking EQ parameters as
desired.
�� �
쐏
쐇
쐋
쐄쐂
쐆
쐊
쐏
쐄
쐂
쐆
Figure 9.2: EQ Window
70
쐊
EQ toggle (main): Click on this
button to turn the EQ on and off for
the displayed audio channel. This
toggle button is duplicated in the EQ
area of the Console Window.
In addition to the main EQ toggle,
each of the four EQ bands have their
own toggle. In order for an individual
EQ band to be heard, both its toggle
and the main toggle must be on.
Template Functions pop-up: Use
this pop-up menu to save, copy, and
paste EQ settings (see page 73 for
details).
Template pop-up: Use this pop-up
menu to select from your list of saved
EQ templates (see page 72 for
details).
Channel: Specifies the audio channel
(Audio Instrument, hardware input or
output, or bus) being processed by
the EQ.
Mute: Mutes the Audio Instrument
that the EQ is assigned to.
Solo: Solos the Audio Instrument that
the EQ is assigned to.
EQ Panel (1-4): Determines the EQ
type and parameter settings for each
EQ band, and whether the band is on
or off. For a complete explanation,
see EQ Panel (pg. 71).
EQ Curve: Displays the frequency
response for all four bands of EQ for
the assigned audio channel.
Frequency is plotted on the x (horizontal) axis and amplitude on the y
(vertical) axis.
Opcode Systems, Inc.
CHAPTER 9: Acadia: EQ Window
EQ PANEL
EQ Toggle
EQ Type pop-up
EQ Parameters
Figure 9.3: EQ Panel, toggled On with Parametric
•
The EQ Window has four panels displaying the settings for each EQ band. Any of
the four EQ bands can be turned on or off
independently of the others with their EQ
toggle.
IMPORTANT: Make sure to turn off any
unused EQ bands. This preserves valuable
CPU resources, which means you’ll be able
to get more simultaneous audio tracks and
use more plug-ins and sends.
NOTE: Turning off an EQ band in the EQ
Window removes that band’s Gain fader
from the EQ Area of the Console Window
for that audio channel.
The EQ Type pop-up determines the type
of EQ used for the band, which, in turn,
determines the available EQ parameters.
Following is a description of each EQ
type, along with its accompanying
parameters:
•
Low Cut uses a high pass filter,
which eliminates frequencies below
the specified cutoff frequency.
•
This EQ type has just one fader
(labeled Frequency) controlling the
cutoff frequency, below which frequencies are removed.
When using Low Cut, there is no
accompanying Gain fader displayed
in the EQ area of the Console
Window.
Low Shelf boosts or reduces all frequencies below the specified cutoff
frequency.
The Frequency fader for this EQ type
determines the cutoff frequency,
below which all frequencies are attenuated with the Gain fader.
When using Low Shelf, the Gain fader
is also displayed in the EQ area of the
Console Window.
Parametric (sometimes referred to
as “Peak”) boosts or reduces a certain
range of frequencies.
The Frequency fader specifies the
center frequency and the Width fader
determines the range of surrounding
frequencies (bandwidth) affected—
both of which are attenuated by the
Gain fader.
When using Parametric, the Gain
fader is also displayed in the EQ area
of the Console Window.
Vision & Studio Vision Pro — Audio Reference Manual
71
PART 3: The Acadia Audio System
•
•
High Shelf boosts or reduces all frequencies above the specified cutoff
frequency.
The Frequency fader for this EQ type
determines the cutoff frequency,
above which all frequencies are attenuated with the Gain fader.
High Cut uses a low pass filter,
which eliminates frequencies above
the specified cutoff frequency.
This EQ type has just one fader
(labeled Frequency) controlling the
cutoff frequency, above which frequencies are removed.
When using High Cut, there is no
accompanying Gain fader displayed
in the EQ area of the Console
Window.
SAVING AND RECALLING EQ
SETTINGS
In Vision, any configuration of EQ settings can be saved and recalled as a
template. This lets you save your favorite
EQ settings for a wide range of applications (male vocals, 6-string guitar, kick
drum, etc.). EQ settings can also be
copied and pasted between audio
channels.
72
IMPORTANT: An audio channel’s Phase
status (on or off) is not saved as part of an
EQ template.
EQ templates (along with plug-in programs and banks) are stored in the
Vision Effects Templates file, which must
reside in the same folder as the Vision
application.
Template Pop-up
Click on Template pop-up
to select from a list of
EQ templates.
Figure 9.4: EQ Template pop-up
EQ templates are recalled from the Template pop-up in the EQ Window, see
Figure 9.4.
Simply click on the pop-up and choose
from the list of EQ templates stored in the
Vision Effects Templates file. Choosing a
template automatically reconfigures the
EQ Window for the displayed audio
channel.
Opcode Systems, Inc.
CHAPTER 9: Acadia: EQ Window
Template Functions Pop-up
•
The Template Functions pop-up contains
commands for saving, copying, and pasting EQ settings.
•
•
•
Figure 9.5: Template Functions pop-up for EQ
Following is a description of the commands found in the EQ Template
Functions pop-up:
•
•
•
Load From: Loads a set of EQ templates from a Vision Effects Templates
file that is not current. The loaded
templates are merged with the current set.
Copy Settings: Copies the current
EQ settings to the Clipboard, which is
handy for pasting EQ settings to
another audio channel.
Paste Settings: Pastes the EQ settings from the Clipboard to the
current EQ Window for the displayed
audio channel.
Save as Default: Saves as default the
current EQ settings. Then, each time
a new file is created in Vision, audio
channels will use those settings by
default.
Save Settings: Saves the current EQ
settings as a template.
If the template already exists, this
command overwrites it with the currently displayed EQ settings.
Save Settings As: Saves the current
EQ settings to a new template.
With this command you are
prompted to enter a name for the new
EQ template.
Delete Template: Deletes the currently selected EQ template.
Vision & Studio Vision Pro — Audio Reference Manual
73
PART 3: The Acadia Audio System
74
Opcode Systems, Inc.
CHAPTER 10: Acadia: Bussing, Routing, &
Bouncing to Disk
USING BUSSES AND SENDS
The following sections illustrate some
uses for busses and sends with the Acadia
audio system.
Routing to Shared Plug-Ins
(Creating Effects Sends)
This example illustrates how to configure
a Console Window with two sends routed
to two shared VST plug-ins (see
Figure 10.1).
햲 In the Audio Instruments &
Routings Window, set two of
your busses to stereo and name
them as ÒEffect 1Ó and ÒEffect
2.Ó
햳 Open a Console Window and
assign the desired Audio
Instruments to console
channels.
You can automatically assign the Audio
Instruments in use by your sequences by
choosing Build Console From>
Audio Instruments in Use in the
Console Window menu.
햴 Assign the busses Effect 1 and
Effect 2 to their own console
channel.
Make sure these console channels are
assigned to an output pair so you can
hear them in stereo.
햵 From the Console Window
menu, choose Audio
Sends>2 Sends.
Figure 10.1: Audio Instruments routed to shared
plug-ins
This particular scenario conserves CPU
resources by allowing audio channels to
share plug-ins. While this example uses
just two sends, you could use up to four
per channel.
Vision adds two Send areas for each
audio channel in the console.
햶 For the Audio Instrument
channels, assign Audio Send 1
to the Effect 1 bus, and assign
Audio Send 2 to the Effect 2
bus.
Vision & Studio Vision Pro — Audio Reference Manual
75
PART 3: The Acadia Audio System
햷 From the Console Window
menu, choose Plug-Ins>1 PlugIn.
Vision adds one Plug-In area for each
audio channel in the console.
햸 Assign a plug-in to the console
channels assigned to Effect 1
and Effect 2.
Creating a Submix
You can use busses and sends to create
submixes or “groups” within Vision. For
example, assume you’ve recorded three
backup singers—each on a different
Audio Instrument (Macella, Maida, and
Marion).
햲 In one of VisionÕs consoles,
assign three console channels
to the three backup singers.
Each bus assigned
to a separate, single
plug-in
Use the volume faders in these three
channels to mix the singers so that their
voices blend together nicely.
Relative volumes set
햹 Adjust the Send levels for each
Audio Instrument.
If you want a channelÕs signal to be sent
to the busses without being processed
by its EQ, or its own plug-ins, set the
Pre/Post button Pre.
Since weÕll be using a stereo bus, you
can also use the pan faders for each
channel to adjust the stereo field of the
mix.
Once you are satisfied with the balance of
the three voices, you’ll want that “mix” to
work as a single unit within the context of
the entire song. To do so:
Figure 10.2: Setting an Audio Send to Pre
76
Opcode Systems, Inc.
CHAPTER 10: Acadia: Bussing, Routing, & Bouncing to Disk
햳 Assign a bus to an undefined
console channel.
In order to preserve the pan information
for the individual audio tracks, make sure
the bus youÕre using is set to ÒstereoÓ in
the Audio Instruments & Routings
Window.
햴 Assign the outputs of all three
햶 From the Console Window
menu, enable display of some
plug-ins, and the EQ Gain
faders.
햷 Assign any desired plug-ins to
the bus channel; enable the
channelÕs EQ and adjust the EQ
gain faders as needed.
singersÕ channels to the newly
created bus.
Plug-in assignment
EQ enabled
Outputs assigned to a bus
햵 Assign the output of the bus to
your main L-R outputs.
Notice that by processing all three singers as a single group, youÕre saving
valuable CPU resources by affecting all
three singers with a single set of
plug-ins.
햸 Use the bus channelÕs volume
fader to mix the volume of the
processed backup singers into
the final mix.
Bus output assignment
Vision & Studio Vision Pro — Audio Reference Manual
77
PART 3: The Acadia Audio System
SIGNAL ROUTING AND
MONITORING
As discussed in Monitoring the Input
(pg. 28), Vision lets you monitor hardware inputs from the Record Monitor
Window.
Therefore, when Input 1 is recordenabled and the Thru mode is set to
either On or Auto, then:
•
As illustrated in Figure 10.3, notice that:
•
•
In the Record Monitor Window,
Input 1 is assigned to Audio-5.
In the Audio Instruments & Routings
Window, Audio-5 is assigned to
Output pair 5-6.
•
The signal present at Input 1 is heard
through Output 5-6.
If you want to change the outputs
used to monitor the signal, simply
assign different outputs to Audio-5 (or
choose a different Audio Instrument).
The monitored signal is affected by
the console’s volume and pan faders,
as well as by any Audio Sends, plugins, or EQs that might be in use.
The recorded signal, however, is not
affected by the console’s volume, pan,
sends, plug-ins, or EQs—it’s recorded
to your hard disk exactly as received.
Virtual Consoles
Since Vision can route hardware inputs
through its consoles, you can monitor
inputs without record-enabling them. For
example, for the scenario illustrated in
Figure 10.3, assume you change your console to look as follows:
Figure 10.3: Typical audio recording setup
78
Figure 10.4: Sample console
Opcode Systems, Inc.
CHAPTER 10: Acadia: Bussing, Routing, & Bouncing to Disk
Based on what you learned earlier, you
know that when Input 1 is record-enabled
and the Thru mode is set to either On or
Auto, then:
•
•
The monitored signal from Input 1 is
sent to Output 5-6.
The monitored signal from Input 1 is
also sent to Bus 1 where reverb is
added. Bus 1’s volume fader controls
the amount of reverb that’s mixed
with the signal.
Here’s where things get interesting.
Notice that console channel 3 sends the
signal present at Input 1 to Output 8. This
means that the signal present at Input 1
always appears at Output 8, even when...
•
•
•
•
...Input 1 is not record-enabled.
...the Thru selector pop-up menu is
set to Off.
...you change the Audio Instrument
assigned to Input 1 in the Record
Monitor Window.
...Vision is playing, recording, or
simply idle.
Also, if you use any Audio Sends or plugins, they too operate on the input signal.
This gives you a way to create a “virtual
mixing board” within Vision.
As discussed in Output Assignments
(pg. 42), you can assign outputs to audio
channels from either the Audio Instruments & Routings Window or a Console
Window.
NOTE: Some ASIO drivers may exhibit a
noticeable latency in thruing audio. In
these cases, if at all possible, disable Thru
and monitor record sources externally.
RECORDING FROM AUDIO
INSTRUMENTS, BUSSES, AND
OUTPUTS
You can choose practically any place in
the audio signal path as a recording
source. This allows you to record digitally
and “bounce to disk” without having to
patch a single cable. With the Acadia
audio system, Vision allows recording
from hardware inputs and outputs, Audio
Instruments, and busses. For instance,
you can:
•
•
•
Record a master mix of all your tracks
with effects and EQ. To do this, route
all channels to a single stereo bus and
record from it.
Bounce groups of tracks, with or
without effects, to a bus for recording
a submix.
“Print the effects” from a track.
Record from the output of an Audio
Instrument to record its audio events
along with any assigned plug-ins and
EQ.
Before reading this section you should be
familiar with all recording techniques as
discussed in Chapter 5: Acadia: Recording Audio, and all the bussing concepts
described previously in this chapter.
In general to record from any place in the
signal path:
햲 Configure your console with
plug-ins, sends, EQs, and
busses.
햳 In the Record Monitor Window,
specify the record source from
Vision & Studio Vision Pro — Audio Reference Manual
79
PART 3: The Acadia Audio System
the Record Source pop-up
menu.
To record from a mono Audio Instrument:
햲 Make sure Linked Pairs is
unchecked in the Record
Monitor.
Linked Pairs checkbox
햴 Set up the Audio Instrument
destination and then record.
For general recording information, consult Recording: Step-By-Step (pg. 26).
햳 Select the desired (mono) Audio
Instrument from the Record
Source pop-up.
What follows are specific instructions for
each type of record source for recording.
Recording from Inputs
Recording from hardware inputs is the
most common way you will record in
Vision. The signal coming into one or a
pair of the inputs from your audio interface is recorded to a hard disk track and
assigned to an Audio Instrument. When
recording from an input, no effects or
volume fader information is recorded. A
description of recording from inputs is
found in Recording: Step-By-Step (pg. 26).
햴 Make sure that you are
recording to an unused (mono)
Audio Instrument.
햵 Record as you would any audio
track.
When recording from a mono Audio
Instrument, and a series of mono-tomono plug-ins, the signal goes to the
volume fader, then is recorded in mono.
Recording from Audio
Instruments
You may want to record your effects and
volume information directly to a new
Audio Instrument in real time. This is
done by recording from an Audio Instrument assigned to existing audio tracks.
80
Opcode Systems, Inc.
CHAPTER 10: Acadia: Bussing, Routing, & Bouncing to Disk
To record from a stereo Audio Instrument, or if you have a mono Audio
Instrument using mono-to-stereo plug-ins:
햲 Check Linked Pairs in the
Record Monitor.
Recording from Busses
You may want to record a master mix, or
submix, from the output of a bus that has
several plug-ins on it. In this case you
would select a bus as your record source
in the Record Monitor. Recording from
busses is similar to recording from Audio
Instruments as previously described. You
cannot record from a bus if its output is
not assigned to a hardware output.
To record a submix:
햳 Select the desired (stereo)
Audio Instrument from the
Record Source pop-up.
햲 In a Console Window, assign the
output of each audio channel in
your mix to a stereo bus.
This can even include hardware inputs
and even other busses.
햴 Make sure that you are
recording to an unused (stereo)
Audio Instrument.
햵 Record as you would any audio
track.
When you record from Audio Instruments and busses, your volume fader
movements affect the volume of the
recording (the actual amplitude of the
recorded signal). Any plug-ins EQs that
are assigned to those Instruments are
also recorded. Vision records the signal
from Audio Instruments and busses post
volume fader but pre pan fader (unlike
hardware inputs). Any real-time changes
you make to plug-ins are also recorded. In
all cases, you cannot record from an
Audio Instrument if its output is not
assigned to a hardware output.
Then assign the output of that bus to a
hardware output pair. This channel will
act as your ÒsubmasterÓ fader.
햳 Assign any desired plug-ins and
EQs to your console channels
(including the submix bus),
햴 Check Linked Pairs in the
Record Monitor Window.
Vision & Studio Vision Pro — Audio Reference Manual
81
PART 3: The Acadia Audio System
햵 From the Record Source pop-up
in the Record Monitor, select
the ÒsubmasterÓ bus.
햶 Record to an unused (stereo)
Audio Instrument as you would
normally record any audio rack.
All audio and effects with fader movements for all bussed Instruments are
recorded.
While recording, move any of the volume
and pan faders for dynamic, real-time
changes in your mix.
NOTE: In order for pan automation to be
recorded, you must assign the output of a
mono Audio Instrument to a stereo bus.
Then specify the stereo bus as the record
source in the Record Monitor Window.
IMPORTANT: When recording from a
stereo bus, you must check Link Pairs in the
Record Monitor Window.
There really is no advantage to recording
from busses as opposed to outputs—
either can be assigned to console channels with their own plug-ins and EQs.
However, it is very common for most
users to start off by assigning the outputs
of Audio Instruments to hardware outputs. In these cases, if you don’t want to
go to the trouble of reassigning everything to a bus, simply use the assigned
(hardware) output as a record source.
Busses are more important with regards
to grouping Audio Instruments for submixes. For instance, you could have a set
of drum channels routed to Bus-1, and a
set of vocal channels routed to Bus-2—
each acting as a submix fader. Then
assign the output of these busses to either
another bus (Master) or a hardware
output pair.
When recording from a mono bus, you
should uncheck Link Pairs in the Record
Monitor Window.
Recording from Outputs
The example covered in Recording from
Busses (pg. 81) illustrates assigning Audio
Instruments to a single bus, and then subsequently using that bus as a record
source.
However, you could just as easily have
assigned the Audio Instruments to the
same (hardware) output pair, which could
then act as the record source.
82
Opcode Systems, Inc.
CHAPTER 11: Acadia: Optimizing for
Digital Audio
NUMBER OF AUDIO TRACKS
The number of simultaneous audio tracks
you can play varies from system to system. In general, you’ll get more tracks if
you have a fast CPU and hard disk and
lots of RAM. However, the more sends,
plug-ins, and EQ bands you use, the fewer
tracks you’ll get.
To open the Performance Window, click
the Performance Window button in the
Control Bar, see Figure 11.1
So how many tracks can you expect? Well,
this could be anywhere from 4 to 64
tracks—some users may get less, others
may get more.
As you will soon see in the following sections on The Performance Window
(pg. 83) and The Buffer Size Dialog
(pg. 87), there are many factors that can
affect the number of possible audio
tracks.
THE PERFORMANCE WINDOW
Vision’s Performance Window, which is
only available when using the Acadia
audio system, lets you monitor your
resources for CPU, hard disk, and RAM.
Figure 11.1: Performance Window
The bars in the Performance Window
indicate the status of the resources for
each item. The larger a bar grows, the
fewer the resources there are available.
The numbers in the right margin indicate
the percentage of resources used.
If you run out of CPU or disk resources,
the corresponding alert light becomes lit
indicating an audio performance error
(the window automatically opens if not
already open). Performance errors generally interrupt audio playback for an
instant, and in some instances stop it
entirely. Encountering a performance
error while recording, will interrupt
recording.
Vision & Studio Vision Pro — Audio Reference Manual
83
PART 3: The Acadia Audio System
CPU Resources
The yellow CPU bar in the Performance
Window indicates the percentage of processing resources in use by Vision. If you
are running low on CPU resources, there
are a number of things you should keep in
mind.
First off, make sure you are using a
PowerMac with Level 2 cache. With older
PowerMacs, this option was an actual
card; more recent PowerMacs usually
have this option” built in” to the
motherboard
If you are using lots of plug-ins and EQs
(you can check this in the Audio Instruments & Routings Window), try using the
effects more economically. For instance,
instead of assigning up to 4 plug-ins for
each console channel, try bussing groups
of console channels to shared plug-ins
(see Chapter 10: Acadia: Bussing, Routing, & Bouncing to Disk). And, although it
is tempting to use lots of EQ bands for
your audio channels, see if you can get by
with one or two bands per channel—or
even try disabling EQ on some channels
(this might just improve your mix).
One very effective way to preserve
resources is to “bounce” audio channels
to disk. If you have plug-ins and EQs on
your channels and are happy with the
mix, simply record the output of these
Audio Instruments (or groups of Audio
Instruments via busses). Once the audio
is recorded with the effects, there is no
need to process these channels further
(you should, however, probably keep a
backup of the original unprocessed audio
files). For details on bouncing audio channels to disk, see Recording from Audio
Instruments, Busses, and Outputs (pg. 79).
Following are just a few more things you
can try to free up more CPU resources:
•
•
•
•
•
•
84
Cut down on the number of control
panels and extensions that are
enabled—these can eat up memory
and CPU resources. Use the Extensions Manager control panel to create
a “lean” start-up configuration for use
with Vision.
If using a PowerBook, disable
(uncheck) the option for “Allow processor cycling.”
Reduce the number of colors you are
displaying in the Finder (Vision only
uses 256 colors). Do this from the
Monitors & Sound control panel.
Make sure you aren’t running any
other programs in the background
while using Vision.
In OMS Setup, make sure QuickTime
Musical Instruments are disabled.
In Vision, close unnecessary
windows.
Opcode Systems, Inc.
CHAPTER 11: Acadia: Optimizing for Digital Audio
•
•
•
In Vision, uncheck Detailed Track
Overview in the Tracks Window
menu.
In Vision, set Audio>Waveform Display to either “Fast” or “Off.”
In Vision, disable any unused hardware inputs and outputs in the Audio
Instruments & Routings Window.
Graphics Card
While most Macs have built-in RGB ports,
you can achieve better screen resolution
and faster screen redraws by using an
internal graphics card with dedicated
video RAM.
Disk Resources
The green Disk bar in the Performance
Window indicates the percentage of disk
resources in use by Vision. There are a
number of factors that affect disk
resources.
Most importantly, make sure you have a
“fast” or “wide” SCSI hard disk. When
shopping for a hard disk, always look for
drives with the fastest speeds for the following parameters:
•
•
•
•
Average Seek Time
Average Access Time
Rotation Speed
Sustained Data Transfer Rate
Your hard disk should have an “asynchronous” driver. In addition, avoid hard disks
that use automatic “thermal calibration.”
If unsure, consult with your computer
dealer.
When purchasing a hard disk, get the
largest you can. Digital audio can take up
a lot of space (for each minute of stereo
audio at 44.1 kHz, you will use 10 MB of
disk space). It’s also smart to have an
external hard disk dedicated solely for
your Vision files and audio files, with
another hard disk reserved for your
system software and applications.
When your disk resources become low,
check the following:
•
•
If your hard disk becomes defragmented, as is often the case with
writing and deleting large amounts of
files, use “defragmenting” software to
make your disk more efficient (in
some cases, it may even be necessary
to reformat).
You can ease the burden of disk
access for digital audio by adjusting
Vision’s Buffer Size dialog (see
page 87 for details).
Make sure your computer has lots of
memory—64 MB or more is not
unreasonable. The more memory you
have, the more you can allocate for
digital audio buffers.
NOTE: Some manufacturers sell hard disks
designed specifically for audio and video
applications. These hard disks are commonly referred to as “AV” disks.
Vision & Studio Vision Pro — Audio Reference Manual
85
PART 3: The Acadia Audio System
•
Avoid trying to play lots of small
audio events across many tracks, this
makes disk access much less
efficient.
If a track has lots of audio events and
you are happy with the way it sounds,
use the DSP>Mix command to write
a single, contiguous audio event.
In addition, use Vision’s File Management
Window to consolidate audio files and
delete unused audio files. And, as always,
make sure to regularly back up your data.
RAM Resources
The blue RAM bar in the Performance
Window indicates the percentage of
Vision’s allocated memory that is in use.
Vision’s available RAM determines the
number of notes and audio events that
can be recorded, and how Vision allocates
memory for the digital audio’s Buffer Size
(see page 87).
To find out the number of available notes
(events), click on the RAM bar for a popup menu.
SCSI Interfaces
For optimum disk performance, use a
“fast” or “wide” SCSI hard disk connected
directly to a dedicated SCSI controller
card installed inside your computer.
Figure 11.2: Performance Window, Memory pop-up
Using a separate SCSI bus for audio (as
opposed to using your Mac’s internal
hard disk, or connecting to its built-in
SCSI port) is an excellent way to optimize
system performance.
The “Largest free block” shows the largest contiguous amount of available
memory. If the “Total free space” is substantially larger than the “Largest free
block,” you may have fragmented memory. You can sometimes correct this by
quitting and re-launching Vision.
To increase the available memory for
Vision, Get Info on the application from
the Finder and increase the “Preferred
Size.” This must be done while Vision is
not launched.
IMPORTANT: Before allocating more
memory to Vision, make sure your computer has enough installed RAM. See your
Macintosh operating manuals for more
information.
86
Opcode Systems, Inc.
CHAPTER 11: Acadia: Optimizing for Digital Audio
THE BUFFER SIZE DIALOG
File Buffers
There are two pop-ups that determine the
size and number of file buffers.
The File Buffer Size pop-up determines
the buffer size (256k, 512k, 768k,
or1024k) used for each Audio Instrument
channel. When using larger buffer sizes,
your Macintosh will store more digital
audio in RAM and will not need to access
your hard disk as often.
Figure 11.3: Buffer Size dialog
In addition to the RAM required to run
the Vision application, the Acadia audio
system also needs to set aside memory
for use as a RAM buffer. This buffer is
used to store digital audio temporarily
before recording it to your hard disk, or
before playing it.
IMPORTANT: Don’t confuse the digital
audio buffers with the Vision’s application
RAM. The audio buffers determine the
amount of RAM dedicated to temporarily
storing digital audio—the application size
determines the amount of memory dedicated to Vision.
When you configure the Buffer Size dialog,
Vision attempts to use your System RAM for
the digital audio buffers, but if you ask for
more RAM than is available, it will use the
RAM allocated to Vision.
The File Buffers pop-up determines the
number of file buffers (2, 3, or 4) used for
each Audio Instrument channel. Again,
the more file buffers you use, the less frequently the disk is accessed.
If you are running out of CPU or disk
resources, as determined by the Performance Window (see page 83), try
increasing the File Buffer Size. If after
reaching a buffer size of 1024k you are
still encountering performance errors, try
then increasing the number of File
Buffers.
Still other users may find that they get
better results with a smaller Buffer Size
and more File Buffers. In these cases, you
might start out with a a Buffer Size of
256k and gradually increase the number
of File Buffers until an optimum performance level is achieved.
You may even have to experiment with
changing the number of File Buffers for
each of the File Buffer sizes until you find
the combination that works best for you.
Vision & Studio Vision Pro — Audio Reference Manual
87
PART 3: The Acadia Audio System
Increasing either the File Buffers or the
File Buffer Size is likely to increase the
number of simultaneous audio tracks you
can play, as well as the number of
plug-ins, sends, and EQ bands you can
use. As a result, however, you may notice
that it takes longer to start and stop playing digital audio. This is because your
Macintosh needs to fill the buffer with
digital audio from your hard disk.
The amount of RAM required for the file
buffers (displayed as Memory
Required) is determined by the File
Buffer Size, File Buffers, and the number
of specified Audio Instruments. The
amount of Memory Available in your
system is also displayed. In general,
Memory Required should never be
higher than the Memory Available (this
can lead to performance errors). To
reduce the amount of memory required,
reduce the size or number of File Buffers.
Process Ahead
When Process Ahead is checked, general processing of audio for Vision is
more efficient, thereby allowing you to
use more audio tracks, sends, plug-ins
and EQ bands without encountering performance errors.
However, when Process Ahead is
checked, Vision is less efficient in other
ways. The latency for “thruing” of audio is
more evident; using mute, solo, and
faders in Console Windows is less responsive; and initial playback of audio takes a
little longer after clicking the Play button.
88
For general recording and editing, you
will probably want to disable Process
Ahead. However, when you are ready to
do your final mix down, you should
enable Process Ahead.
AUDIO PREFERENCES
Use the Audio Preferences dialog to set
various record and playback options for
the Acadia audio system. To open the
Audio Preferences dialog, choose
Audio>Audio Preferences.
쐃
쐇
쐋
쐏
쐄
Figure 11.4: Audio Preferences for the Acadia
audio system
The components in the Audio Preference
dialog include the following:
쐃
Maximum Fader Position
Smooth Audio Controllers
쐋 Dither Outputs
쐏 Process While Stopped
쐇
Opcode Systems, Inc.
CHAPTER 11: Acadia: Optimizing for Digital Audio
쐄
Play and Record Offsets
All settings in the Audio Preferences
dialog are saved in your Vision Prefs file.
In addition, the settings for Maximum
Fader Position, Smooth Audio Controllers, and Dither Outputs are saved with
each Vision file.
If the Maximum Fader Position is then
changed to +18 dB (and the fader’s value
is not changed), you will see this:
Maximum Fader Position
Numeric value
Figure 11.5: Audio Preferences, Maximum Fader
Position settings
Use the Maximum Fader Position pop-up
to boost output volumes by up to 18 dB.
Adjusting the Maximum Fader Position
does not recalibrate volume events automatically, but it does allow you to
recalibrate them manually if you wish.
If a Console channel is assigned to audio
volume, the Maximum Fader Position is
set to +6 dB, and the fader value is 0 dB,
the channel will look like this:
Notice that while the visual position of the
fader is different, the fader’s numeric
value (in dB) is the same. If you press
play now, the mix will sound exactly as it
did before the Maximum Fader Position
was adjusted. However, you now have the
headroom to boost audio volumes an
extra 12 dB (the difference between 6 dB
and 18 db).
NOTE: When boosting audio signals, you
should assign your outputs to console channels and monitor their LEDs. If any
clipping occurs, make the necessary adjustments for the channels routed to these
outputs.
In extreme cases where you are dealing
with very low amplitudes, you should use
the DSP>Normalize command on individual audio files as needed (for details,
see Chapter 31: DSP Menu in your Audio
Reference Manual).
Vision & Studio Vision Pro — Audio Reference Manual
89
PART 3: The Acadia Audio System
Setting the Maximum Fader Position to
0 dB doesn’t offer any extra “head room”
for boosting audio signals with low
amplitudes.
When to Set the Maximum Fader
Position
In general, it’s best to set the Maximum
Fader Position at the beginning of a session and retain that setting throughout
the session. The Maximum Fader Position is saved with each Vision file, so it
will be set accordingly each time you
open a different file.
There may be times when working with a
Vision file that you’ll notice that your
audio files were recorded too low. In
these cases you can go to the Audio Preferences dialog and set the Maximum
Fader Position to +12 dB or +18 dB.This
will allow the headroom boost your audio
output volumes to the desired levels.
Whenever launching Vision, or opening a
new file, audio volumes are automatically
set to 0 dB—and, the visual fader position
will vary depending on your Maximum
Fader Position setting. The Maximum
Fader Position is set to +6 dB by default.
Smooth Audio Controllers
Figure 11.6: Audio Preferences, Smooth Audio
Controllers
The Smooth Audio Controllers section
lets you smooth out rapid changes in
volume and pan for audio, thereby eliminating unwanted clicks and pops.
The Fade duration value sets the length
of the smoothing ramp used when
encountering abrupt changes in volume
and pan. You can manually enter a value
between 0-200 msecs, or you can click on
one of the four preset buttons, which
include None (0), Sharp (50), Medium
(100), or Smooth (200).
For instance, Figure 11.7 displays an
audio signal with abrupt changes in
amplitude:
78
64
66
100 ms
68
100 ms 50 ms
Sharp Changes is amplitude
can cause unwanted clicks and pops
Figure 11.7: Abrupt amplitude changes for original
audio envelope.
90
Opcode Systems, Inc.
CHAPTER 11: Acadia: Optimizing for Digital Audio
If we set the Fade Duration to 100 ms by
clicking the “Medium” button, Vision will
automatically smooth the signal within
100 ms of the amplitude change.
Smoothing ramps created by a
Fade duration of 100 ms
78
64
66
68
Figure 11.8: Smoother amplitude changes after
applying Smooth Audio Controllers
Dither Outputs
Figure 11.9: Audio Preferences, Dither Outputs
Once audio has been recorded or
imported into Vision, it is processed and
routed using floating-point calculations,
which is more flexible and precise than
using 16 or 24 bits.
Process While Stopped
Figure 11.10: Process while stopped, Audio
Preferences dialog
When Process while stopped is
unchecked, Vision will not route or process audio when playback is stopped. One
exception to this rule is when an input
line is record-enabled in the Record Monitor Window.
If you are using an older Power Macintosh, you can turn off this option to speed
up general computer performance. In
doing so, however, you will not be able to
monitor hardware inputs (by using Thru
in the Record Monitor) whenever Vision
is stopped. In addition, any processing on
audio tracks will cease immediately at the
end of a sequence, resulting in reverb
tails and delay echoes being cut off. To
get around this, simply change the length
of the sequence accordingly.
However, when the audio is output, or
“bounced to disk,” it is first converted to
either 16 or 24 bits (depending on your
ASIO driver). In doing so, some amount
of digital quantizing occurs, which can
lead to unwanted digital artifacts in the
audio signal (noticeable as a certain
“grainy” quality when fading a sound out).
When you click Dither Outputs, a very
small amount of random noise is added to
the signal in order to mask the digital
quantizing, resulting in cleaner fades.
Vision & Studio Vision Pro — Audio Reference Manual
91
PART 3: The Acadia Audio System
Play and Record Offsets
Record Offset
Figure 11.11: Audio Preferences, Play and Record
Offsets
Use the Record Offset to “shift” audio
recording time relative to the sequence’s
MIDI recording time. The shift is
expressed as a number of audio samples,
and can be either positive or negative.
The Play and Record Offsets are used to
improve the synchronization of audio and
MIDI.
•
The following sections discuss the purpose of these two controls, their default
values, why you might need to modify
them, and how to do so.
•
Play Offset
NOTE: In general, you can set Record
Offset values as big (positive) as you want.
However, there is a limit to the amount of
negative offset that you can set.
Use the Play Offset to “shift” audio playback time relative to the sequence’s MIDI
playback time. The shift is expressed as a
number of audio samples, and can be
either positive or negative.
•
•
92
Positive numbers make Vision start
processing audio playback before its
designated start time. This is desirable because your computer requires
a certain amount of processing time
to play the audio. By adding a positive
offset equal to the time required to
process the audio, your MIDI and
audio tracks sound synchronized.
Negative numbers make Vision start
processing audio playback after its
designated start time.
Positive numbers make Vision start
recording audio before its designated
start time (shifting recorded material
to the left in the Graphic Window).
Negative numbers make Vision start
recording audio playback after its
designated start time (shifting
recorded material to the right in the
Graphic Window).
Default Offset Values
Offset values for all ASIO hardware
default to “0.” The next section discusses
how to determine optimum offset values
for your audio hardware.
Opcode Systems, Inc.
CHAPTER 11: Acadia: Optimizing for Digital Audio
Modifying the Offset Values
To determine an optimum Record Offset
for your audio hardware:
햲 Make sure VisionÕs session sample
햷 Combine the MIDI track and audio
track into a single track and then view
its contents in the List Window.
Make sure Absolute SMPTE is
checked in the List Window menu.
rate is set to 44.1, and the SMPTE
frame rate is 30 ND. In addition, set
the sequenceÕs tempo to 120.
햳 In the Audio Preferences dialog, set
both the Record and Play Offsets to
0.
햴 Step record four quarter notes into a
MIDI track and set the track to loop for
one measure. In addition, set the
sequence length to infinity.
device into your audio interface and
record four measures of audio.
Make note of the difference in SMPTE
bits between the MIDI events (hihat
note) and audio events (record offset
audio). In the above example, the distance between the first two events is 55
bits. If this number varies throughout the
recorded measures, try to find an average value.
Assign this material to Audio-1 and
name the record file Òrecord offset.Ó
NOTE: There are 80 bits to a single
SMPTE frame.
Make sure to use a sound with a sharp
attack and quick release, like a hihat.
햵 Route the audio output of your MIDI
햶 Highlight the recorded audio event
and choose Audio>Strip Silence.
Configure the Strip Silence dialog with
the following values and click OK.
햸 Use the following formula to calculate
an appropriate record offset value (in
samples). ÒNÓ is the number of
SMPTE bits arrived at in the previous
step.
record offset = 44100 * N / 2400
If we use 55 (bits) for N, your optimum
record offset would be around 1011
samples.
Figure 11.12: Strip Silence dialog
Make sure the Attack and Release
times are both set to 0 msecs.
Vision & Studio Vision Pro — Audio Reference Manual
93
PART 3: The Acadia Audio System
After entering the Record Offset in the
Audio Preferences dialog, as determined
by the previous procedure, you are ready
to determine an optimum Play Offset for
your audio hardware:
햲 Route the output of your audio
hardware back into one of its inputs.
햳 Record a copy of the Òrecord offsetÓ
file from the previous steps.
Assign this material to Audio-2 and
name the record file Òplay offset.Ó
햴 As done previously, perform Strip
Silence on the newly recorded file.
햵 Combine the newly recorded Òplay
offsetÓ track with the previous track
containing the MIDI notes and Òrecord
offsetÓ audio events.
햶 View the contents of the combined
햷 Use the following formula to calculate
an appropriate play offset value (in
samples). ÒNÓ is the number of
SMPTE bits arrived at in the previous
step.
play offset = 44100 * N / 2400
If we use 30 (bits) for N, your optimum
play offset would be around 551
samples.
NOTE: Some users may find after recording with an accurate Record Offset that a
Play Offset is not needed.
NOTE: If you intend to do most of your
audio work at 48k, you can perform the
previous examples with that rate. Just make
sure to use a value of “48000” (instead of
44100) in the equation at the end of each
procedure.
track in the List Window.
Again, make sure Absolute SMPTE is
checked in the List Window menu.
Make note of the difference in SMPTE
bits between the audio events for
Audio-1 (record offset audio) and
Audio-2 (play offset audio). In the above
example, the distance between the first
two events is 30 bits. If this number
varies throughout the recorded measures, try to find an average value.
(Remember, there are 80 bits to a
SMPTE frame.)
94
Opcode Systems, Inc.
1
2
Digidesign DAE:
Configuration & Recording
3
4
5
6
7
Vision & Studio Vision Pro — Audio Reference Manual
95
PART 4: Digidesign DAE: Configuration & Recording
96
Opcode Systems, Inc.
CHAPTER 12: DAE: Hardware Setup
Read this chapter to learn how to set up
Vision to work with your Digidesign audio
hardware (including Pro Tools, Pro Tools
Project, Session 8, Sound Tools II, and
Audiomedia II/III).
ABOUT DAE
Digidesign hardware uses DAE software
to control it. DAE stands for Digidesign
Audio Engine. DAE was created by
Digidesign and provides a method for
playing and recording multiple tracks of
digital audio using Digidesign hardware.
Vision controls DAE, and DAE, in turn,
controls the audio hardware.
Using DAE is automatic and transparent.
But it is important to realize that it is
there, running “behind the scenes” to
control the digital audio signals.
SYSTEM REQUIREMENTS
To run Vision with your Digidesign hardware, you must meet the following
additional system requirements:
•
•
SOME MACINTOSH MODELS ARE
INCOMPATIBLE: The Digidesign Audio
Engine does not work with some sound
card/Macintosh model combinations. For
details, please see the compatibility chart
included with your Digidesign
documentation.
When you install Vision, DAE is automatically installed in your System Folder.
Whenever you launch Vision, the DAE
application will automatically launch.
Whenever you quit Vision, DAE will also
quit unless it’s being used by some other
application.
•
•
A compatible Macintosh (see the
DAE compatibility chart from
Digidesign).
Consult your QuickStart guide for
RAM and System requirements.
DAE-compatible digital audio hardware (such as Pro Tools, Pro Tools
Project, Session 8, Sound Tools II, or
Audiomedia II/III).
A hard disk that’s fast enough to
record and play back digital audio
and is reasonably defragmented
(defragmenting software is
encouraged).
For more than four tracks with
Pro Tools I & II, you’ll also need the
A/ROSE extension (provided).
Vision & Studio Vision Pro — Audio Reference Manual
97
PART 4: Digidesign DAE: Configuration & Recording
PRO TOOLS 24 MIX AND MIX
PLUS
SESSION 8/PROJECT
Studio Vision Pro supports the Pro Tools
24 Mix and 24 Mix Plus systems. To use
this hardware with Studio Vision Pro, you
must have:
Session 8 and Pro Tools Project cards are
identical. They appear as “Pro Tools
Project” with all the capabilities listed in
Using Pro Tools Project with Studio Vision
(pg. 98).
•
•
Studio Vision Pro supports Pro Tools
Project (both PCI and NuBus versions).
DAE 3.4 or later
DSI 3.4 or later
PRO TOOLS 24
Studio Vision Pro supports the 24 bit
Macintosh PCI version of Pro Tools. To
use a Pro Tools 24 system with Studio
Vision Pro, you must have:
•
•
DAE 3.1 or later
DSI 3.1 or later
To use the PCI version of Pro Tools
Project, you must have:
•
•
DAE 3.0 or later
DSI 3.0 or later
To use the NuBus versions of Pro Tools
Project, you must use:
•
•
DAE 2.95
DSI 2.95
PRO TOOLS III (NUBUS & PCI)
Using Pro Tools Project with
Studio Vision
Studio Vision Pro supports the
Macintosh PCI and Nubus versions of Pro
Tools.
Pro Tools Project supports the following
Studio Vision features:
To use the PCI version of Pro Tools III/
24, you must have:
•
•
DAE 3.0 or later
DSI 3.0 or later
To use the NuBus versions of Pro Tools
III , you must use:
•
•
98
DAE 2.95 or later
DSI 2.95 or later
•
•
Scrubbing;
Sample accurate volume and pan
events.
Anomalies to consider:
•
Audio Instrument assignments must
belong to either group 1-4 or
group 5-8. For example, you could
have an Audio Instrument assigned to
outputs 1, 2, and 4, but you cannot
have a 1 and 5 assignment.
Opcode Systems, Inc.
CHAPTER 12: DAE: Hardware Setup
AUDIOMEDIA II/III
Vision supports the Macintosh NuBus
and PCI version of Audiomedia.
To use the PCI version of Audiomedia III,
you must have:
•
•
DAE 3.0 or later
DSI 3.0 or later
To use the NuBus version of
Audiomedia II, you must use:
•
•
DAE 2.95 or later
DSI 2.95 or later
buffer. DAE uses the RAM buffer to store
digital audio temporarily before sending it
to your hard disk, or before playing it.
IMPORTANT: Don’t confuse the RAM
buffer with the application RAM size. The
RAM buffer determines the amount of RAM
dedicated to temporarily storing digital
audio—the application size determines the
amount of memory dedicated to Vision.
NOTE: Because Vision addresses Digidesign’s DAE software, some of these
illustrations and instructions may change
as DAE and DSI update. Please reference
your Digidesign documentation for the
latest information about setting up your
hardware and software.
SET VISION TO DAE MODE
To use Vision with DAE, select
Audio>Audio System>DAE to place a
check mark next to the option.
Figure 12.1: Selecting the DAE Audio System
ALLOCATING RAM TO THE
DIGITAL AUDIO RAM BUFFER
PRO TOOLS III/Project: Owners of these
systems can skip this section since Vision
uses a special RAM buffer included on the
digital audio card.
In addition to the RAM required to run
the Vision application, you’ll need to set
aside more memory for use as a RAM
Vision & Studio Vision Pro — Audio Reference Manual
99
PART 4: Digidesign DAE: Configuration & Recording
Setting the RAM Buffer
Determining the Best RAM Buffer Size
To allocate RAM to the RAM buffer:
PRO TOOLS III/Project: Owners of these
systems can skip this section since Vision
uses a special RAM buffer included on the
digital audio card.
햲 In Vision, choose Audio>Buffer
Size.
Vision opens the Buffer Size dialog box.
As you can see in Figure 12.2, there are
five different RAM Buffer sizes available.
If you have a slow hard disk, you should
set the buffer size to the largest amount
your system will allow. If you have a fast
hard disk, you may want to use a smaller
buffer.
When the RAM buffer is small, your Macintosh will need to access the hard disk
frequently. If you do not have a fast hard
disk, this may cause problems. The solution is to increase the RAM buffer size.
Figure 12.2: Buffer Size Dialog Box for DAE
PRO TOOLS III/Project: These systems
use RAM thatÕs on the audio card, rather
than Macintosh RAM. Therefore, all
choices say 4000K, the amount of RAM
included with these systems.
햳 Select the largest RAM size that is
appropriate for your system.
See Determining the Best RAM Buffer
Size (pg. 100) to help you choose which
setting is most appropriate.
햴 Click the OK button.
The selected amount of RAM is set
aside for use as a digital audio RAM
buffer.
100
When the RAM buffer is large, your Macintosh will store more digital audio in
RAM, and will not need to access your
hard disk as often. However, you may
notice that it takes longer to start and stop
playing digital audio. This is because your
Macintosh needs to fill the buffer with
digital audio from your hard disk. If you
have a large RAM buffer, this will take
longer.
In general, you should set the RAM buffer
to the largest size your system allows. If
you notice a time drag, then try a smaller
setting. If you get errors such as “Hard
Disk Too Slow” or fragmented audio,
increase the buffer size.
Opcode Systems, Inc.
CHAPTER 12: DAE: Hardware Setup
HARDWARE SETUP
NOTE: In general Opcode recommends
that you consult your Digidesign manual
for specifics on setting up DAE and Digidesign hardware. The setup instructions and
dialog boxes are identical to those used in
all DAE compatible applications.
Before you can record and play digital
audio, you must tell DAE which digital
audio hardware you’re using. To do so:
햲 Choose Audio>Hardware Setup.
The Hardware Setup dialog box opens.
The appearance of the dialog box
changes depending on your particular
audio hardware, and your version of
DAE.
Figure 12.4: DAE Hardware Setup for
Session 8
As seen in Figure 12.3 and Figure 12.4,
the Hardware Setup dialog box contains a
number of options for using your DAE
hardware. Each of these is discussed in
the following sections.
NOTE: Depending on your particular
hardware, some of the following options
may not be available. See your Digidesign
documentation for details.
Card Type
This option is relevant only if you have
more than one type of digital audio card
installed. It lets you select the type of card
you wish to use.
Figure 12.3: DAE Hardware Setup for
Pro Tools 24
If your Macintosh contains more than one
type of DAE-supported digital audio card,
there will be more than one available
choice. Use the radio buttons or pop-up
menu to tell DAE which audio card you
wish to use. You can use only one type of
audio card at a time.
Vision & Studio Vision Pro — Audio Reference Manual
101
PART 4: Digidesign DAE: Configuration & Recording
Pro Tools III Specifics
If you own Pro Tools III, the Select Card
Type option will contain the following two
choices.
Figure 12.5: Card Types available for Pro Tools III
•
•
Session 8—If you select this option,
your hardware acts like a standard
Session 8 system, and you will not
have access to TDM plug-ins.
Disk I/O—If you select this option,
your hardware acts like a fully configured Pro Tools III system, complete
with TDM support.
Pro Tools I & II Specifics
In the rare case that you have only one
Pro Tools audio card and a System Accelerator, you should still check the System
Accelerator check box because you’ll get
much better performance due to the
System Accelerator’s dedicated SCSI port
(though you will be able to record and
play only from the disk connected to that
SCSI port).
When using multiple Pro Tools cards,
you’ll see a Card to Use pop-up menu
displaying the slot number for each card.
Figure 12.7: Card to Use pop-up for Multiple
Pro Tools cards
•
If you’re using a System Accelerator card,
it’s represented in this section of the
dialog box by a check box. If you have
installed multiple Pro Tools cards, you’ll
need to check the System Accelerator
check box if you want to record or play
more than four tracks of simultaneous
audio.
•
Figure 12.6: Card Types available for Pro Tools I or
Pro Tools II and a System Accelerator
102
If you have multiple Pro Tools cards
and no System Accelerator (or if the
System Accelerator option is
unchecked in the Select Card Type
area), use this pop-up menu to select
which Pro Tools card you’ll use with
Vision. You cannot record and play
back more than four tracks of audio
unless you have the System Accelerator card and have enabled that option.
If you have multiple Pro Tools cards,
a System Accelerator, and have
checked the System Accelerator
option in the Select Card Type area,
this pop-up menu will let you either
select between cards, or select multiple cards. Selecting multiple cards
increases the number of simultaneous channels supported by Vision.
Opcode Systems, Inc.
CHAPTER 12: DAE: Hardware Setup
Interface
888 I/O Interface Specifics
This pop-up menu determines which type
of audio interface you are using.
If you have an 888 I/O Interface, click the
Other Options button to open an Input
Select dialog box.
Sample Rate
Use this pop-up menu to specify the hardware sample rate.
Sync Mode
Figure 12.8: 888 I/O Interface Options
From this pop-up menu, select Digital if
you’re syncing to a digital audio tape deck
or other digital master clock source; otherwise, leave this setting on Internal.
Use this dialog box to choose whether
you want each 888 I/O input pair to use
analog or digital inputs.
882 Studio Specifics
Digital Format
Use the Digital Format pop-up menu to
select either AES/EBU or S/PDIF,
depending on which digital format you’re
recording.
If you have an 882 Studio Interface, click
the Other Options button to open a Routing dialog box for the 882 Studio.
Channel 1-2 Input
This pop-up menu specifies whether the
inputs into Channels 1 & 2 are Analog or
Digital.
Other Options
The Other Options button opens a dialog
for configuring your audio interface.
Figure 12.9: 882 Studio Routing Dialog Box
Vision & Studio Vision Pro — Audio Reference Manual
103
PART 4: Digidesign DAE: Configuration & Recording
This dialog works similarly to the Route
Window for Pro Tools Project, which is
discussed in your Digidesign documentation. The only exceptions are as follows:
•
Also, the Routing dialog box in Vision
lets you assign up to four inserts to a
single input. The Route Window for
Pro Tools Project supports only one
insert per input.
Insert Differences
Unlike the Pro Tools Project’s Route
Window, you cannot drag an insert to
an input. To assign an insert to an
input in Vision:
햲 Click the desired insert number (at
Figure 12.10: Multiple Inserts Assigned to
an Input
the top of the dialog box) to select it.
•
햳 Click a square to the right of an input
to assign the selected insert.
Headphone Differences
If you select Monitor, you will hear
those Audio Instruments assigned to
Outputs 1 & 2 in the Audio Instruments Window. You will not hear any
other Audio Instruments. Audio
Instruments are discussed in
Chapter 15: DAE: Audio Instruments.
If you select Cue, you will hear those
Audio Instruments assigned to Outputs 3 & 4 in the Audio Instruments
Window. You will not hear any other
Audio Instruments.
NOTE: The 882 Studio is only supported in
“External Mix Mode.” Consult the 882
Studio manual for information regarding
Internal and External Mix modes.
104
Opcode Systems, Inc.
CHAPTER 12: DAE: Hardware Setup
SET A SESSION SAMPLE RATE
AND SIZE
Next, you need to set a session sample
rate. The session sample rate is the
sample rate Vision uses to record and play
audio.
The term “sample rate” refers to the
number of audio samples that comprise
1 second worth of audio. Higher session
sample rates produce better audio fidelity,
but use more disk space (because there
are more sample points per second). You
can save disk space by using a low sample
rate, but this degrades the audio fidelity.
sample rates of up to 96 kHz are supported for DAE (and Acadia). See
your hardware manual to learn which
sample rates it supports.
To get the best audio quality, you should
record all of your sound files at the same
rate as your hardware sample rate. When
you do this, the sample rates of your files
will always match the hardware sample
rate, and sample rate conversion will not
be necessary. Sample rate conversion is
discussed in Chapter 26: Sample Rate
Conversion and Deinterleaving.
To set a session sample rate:
햲 Choose Audio>Sample Rate/Size.
Hardware Sample Rate Vs.
Session Sample Rate
Vision opens the Set Session Sample
Rate/Size dialog box.
It’s important to recognize that there is a
difference between the hardware sample
rate as discussed in Hardware Setup
(pg. 101), and the session sample rate.
Specifically:
The Hardware Sample Rate is the
sample rate that your hardware uses to
play back audio files. Your audio hardware works at only one of a few preset
sample rates. Most professional systems
work at either 44100 Hz (CD-quality) or
48000 Hz.
•
The Session Sample Rate is the
sample rate that is common to all
audio files referenced by a sequence.
All audio events in a Vision file must
have the same sample rate. Session
Figure 12.11: Set Session Sample Rate/Size
Dialog Box
햳 From the Session Sample Rate
pop-up menu, select the desired
session sample rate.
The hardware sample rate is indicated
by a small Macintosh icon to its left. The
other sample rates (if any) represent any
unique sample rates of audio files referenced by the sequence file.
Vision & Studio Vision Pro — Audio Reference Manual
105
PART 4: Digidesign DAE: Configuration & Recording
햴 If you wish to change the hardware
햳 From the Sample Size pop-up,
sample rate, click the Hardware
Setup button.
select a sample size.
The sample size for most Digidesign
hardware is 16 bits. If using ProTools 24,
you can set this to 24 bits. All files must
be at the session sample size for
playback.
Vision opens the Hardware Setup dialog
box. Use it to set a new hardware
sample rate as discussed in Hardware
Setup (pg. 101).
You can, if desired, set a session sample
rate other than one of the ones listed in
the pop-up menu. To do so, choose
“Other” from the pop-up menu; Vision
opens the Set Other Rate dialog box.
Automatic Sample Rate Setting
for Existing Sequences
When you open an existing Vision file,
Vision will automatically set both the
session sample rate and the hardware
sample rate if both of the following conditions are met:
•
Figure 12.12: Set Other Rate Dialog Box
NOTE: DAE requires that the Session
Sample Rate be greater than half, and less
than 1.5 times as large as the Hardware
Sample Rate.
To set a session sample size:
•
All audio files referenced by the
sequence have the same sample rate;
AND
This sample rate matches one of the
available hardware sample rates.
If both of these conditions are met, Vision
automatically sets the session sample rate
and hardware sample rate to match the
sample rate of the audio files.
햲 Choose Audio>Sample Rate/Size.
Vision opens the Set Session Sample
Rate/Size dialog box.
CHECKING DISK ALLOCATION
The following DAE users will need to use
a program called Checking Disk
Allocation:
•
•
•
Figure 12.13: Set Session Sample Rate/Size
dialog box
106
Pro Tools III/24
Session 8/Project
System Accelerator (Pro Tools I & II
with more than four voices)
Opcode Systems, Inc.
CHAPTER 12: DAE: Hardware Setup
If you installed Vision correctly, the
Checking Disk Allocation program is
automatically installed in the Startup
Items folder in your System Folder.
When you record digital audio with one of
these systems, Vision automatically allocates one or more files that fill the entire
hard disk. If the application crashes while
recording, you’re stuck with files that take
up your entire hard drive! You could just
throw them away, but if they contain data
that you want to save, you’re in trouble.
This is where the Checking Disk Allocation program comes in. When you restart
your computer, Checking Disk Allocation
runs (since it’s in the Startup Items
folder) and takes a look at the last
recorded audio files. If they fill the entire
disk, Checking Disk Allocation will truncate the unused portions for you, saving
only the audio data referenced by your
sequence.
If Checking Disk Allocation doesn’t truncate the files automatically, you can drag
them on top of its icon to invoke the operation manually.
Vision & Studio Vision Pro — Audio Reference Manual
107
PART 4: Digidesign DAE: Configuration & Recording
108
Opcode Systems, Inc.
CHAPTER 13: DAE: Record Monitor Window
Use the Record Monitor Window to control such recording operations as:
•
•
•
•
•
•
•
Make sure to read any supplements
(either printed or on-line) to learn about
any additional Digidesign hardware
support.
record enabling
level monitoring
input source selection
file and option selection
Audio Instrument selection
Read this chapter to learn what’s in the
Record Monitor Window. You’ll apply this
knowledge when you learn how to actually record audio in Chapter 14: DAE:
Recording Audio.
Sound Tools II
Audiomedia II/III
OPENING THE RECORD
MONITOR WINDOW
To open the Record Monitor Window:
햲 Choose Windows>Record
Monitor.
CHAPTER ORGANIZATION
The appearance of the Record Monitor
Window changes slightly depending on
the type of audio hardware you use.
At the time of this manual’s publication,
Vision supports the following Digidesign
hardware:
•
•
•
•
Vision opens a Record Monitor Window
similar to the one shown on page 110.
NOTE: Your Record Monitor Window
may appear different depending on the
type of Digidesign hardware you use.
TIP: You can also open the Record Monitor
Window directly from the Control Bar by
clicking the Record Indicator button ( ).
Pro Tools III/24
Pro Tools II
Pro Tools I
Session 8/Project
Vision & Studio Vision Pro — Audio Reference Manual
109
PART 4: Digidesign DAE: Configuration & Recording
쐏
쐋
쐃
쐇
�
�
�
�
�
쐅
쐈
쐉
씈
Typical Digidesign Record Monitor Window (this one for Pro Tools Project)
ANATOMY OF THE RECORD
MONITOR WINDOW
The following items discuss each element
of the generic Record Monitor Window
shown above.
쐃
Record Levels: Use this area to view
the audio input level when recording
audio.
쐇 Clipping Indicators: This indicator
lights when an audio level exceeds
0 dB and stays lit until you reset it by
clicking anywhere within the Record
Level indicator for the offending
channel.
쐋 Input Source: This column shows
the name of each audio input for your
digital audio interface. With TDM
systems, you have a pop-up of
choices.
110
쐏
Record Monitor Pop-up Menu:
Use this to select Audio Recording
preferences. See Audio Recording
Preferences (pg. 240)
쐄 Record Enable Indicators: Click a
Record Enable Indicator to record the
audio arriving at the corresponding
input. The Record Enable Indicator
has three states:
—Solid Red: When an input channel
is record-enabled, this indicator is
solid red.
—Flashing Red: The indicator flashes
red if Vision is in play mode and has
the possibility of recording (such as
with punch-in)—it then turns solid
red when Vision begins to actually
record.
—No Color: The input channel is not
enabled and will not record audio.
Opcode Systems, Inc.
CHAPTER 13: DAE: Record Monitor Window
쐂
쐆
쐊
쐎
쐅
Record File Options: Press and
hold this icon to open a pop-up menu
of record file options. These options
let you create new record files,
append to existing files, or close a
record file.
Record Files: This column shows
the name of the file to which audio
data is recorded.
Available Recording Time: This
column displays the amount of
recording time available (based on
the amount of free disk space and
other recording parameters).
Audio Instruments: Use this
column to select an Audio Instrument
for each channel (or linked pair). Use
Audio Instruments to group related
audio events, to associate controller
data with specific events, to assign
playback voices so that multiple audio
events can play simultaneously, and
to associate audio events with particular outputs.
Thru: Use this pop-up menu to select
one of three audio thru options:
On: Select On if the signal you’re
recording is patched directly into
your audio hardware without first
going through a mixing console.
When the On option is selected,
Vision sends the audio signal arriving
at the input directly to the output of
an audio channel so that you can hear
the signal you’re recording.
Off: Select Off if you’re using a
mixing console to route audio signals
to and from your audio interface.
When the Off option is selected,
Vision does not send the audio input
signal directly thru to the output.
Auto: Select this option if you want
Vision to make “intelligent” thruing
decisions based on recording/playback modes. Specifically:
• Vision turns Thru On during idle
times.
• Vision turns Thru Off during
playback.
• During recording, Vision turns
Thru On only for the input channels that are record enabled. This
lets you hear what you’re recording while you record it.
쐈 QuickPunch: Choose this option to
enable on-the-fly punching in and out
(available only to Studio Vision Pro
owners with TDM-equipped
hardware). See Punching in on-the-fly
with “QuickPunch” (pg. 127) for
details.
쐉 Auto Compact: Choose this option
to automatically compact audio
during recording. Compacting frees
disk space by throwing out audio data
that is not referenced by the current
sequence file (such as data from discarded “takes”).
씈 Link Pairs: Choose this option to
link two channels together into a
single stereo audio event.
Vision & Studio Vision Pro — Audio Reference Manual
111
PART 4: Digidesign DAE: Configuration & Recording
HARDWARE SPECIFIC
VARIATIONS
Pro Tools I and Pro Tools II
The following sections discuss the Record
Monitor Window for each type of Digidesign hardware supported by Vision.
Pro Tools III/24
Figure 13.2: Typical Record Monitor Window for
Pro Tools I & II
The Record Monitor Window used by a
basic Pro Tools I and Pro Tools II system
is similar to the window discussed in
Anatomy of the Record Monitor Window
(pg. 110), except:
•
Figure 13.1: Typical Record Monitor Window for
Pro Tools III
The Record Monitor Window used by a
basic Pro Tools III and Pro Tools 24 systems is similar to the window discussed in
Anatomy of the Record Monitor Window
(pg. 110), but has the following operational difference:
•
112
You must enable an input before you
can monitor its record level. You can
choose from a pop-up menu of hardware inputs, Audio Instruments,
Sample Cell TDM (if installed), and
Busses.
Studio Vision, when used with Pro
Tools III and 24, will not display input
levels for any disabled audio inputs.
There are only four inputs because
the basic Pro Tools I and Pro Tools II
systems are capable of recording only
four simultaneous channels of digital
audio.
Pro Tools I or II with 8 or More Channels
The Record Monitor Window for multiple
Pro Tools cards (when used with the
System Accelerator card) is similar to the
4-channel window, except it contains
more rows for the additional input
channels.
Opcode Systems, Inc.
CHAPTER 13: DAE: Record Monitor Window
Sound Tools II
Figure 13.5: Typical Record Monitor Window for
Sound Tools II
Figure 13.3: Typical Record Monitor Window for a
16 Channel Pro Tools I or Pro Tools II System
For example, if you have 2 Pro Tools
cards, you’ll see 8 input channels; 3 cards
will result in 12 input channels; and 4
cards yields 16 input channels.
Session 8/Project
The Record Monitor Window used by
Sound Tools II is similar to the window
discussed in Anatomy of the Record Monitor Window (pg. 110), except:
•
There are only four inputs because
the Sound Tools II systems are capable of recording only four
simultaneous channels of digital
audio.
Audiomedia II/III
Figure 13.6: Typical Record Monitor Window for
Audiomedia II & III
Figure 13.4: Typical Record Monitor Window for
Session 8/Project
The Record Monitor Window used by a
Session 8/Project system is identical to
the window discussed in Anatomy of the
Record Monitor Window (pg. 110).
The Record Monitor Window used by
Audiomedia II and III is similar to the
window discussed in Anatomy of the
Record Monitor Window (pg. 110), with
the following exceptions:
•
There are only two inputs because
the Audiomedia systems are capable
of recording only two simultaneous
channels of digital audio.
Vision & Studio Vision Pro — Audio Reference Manual
113
PART 4: Digidesign DAE: Configuration & Recording
•
114
There is an additional Level
numerical.
Since the Audiomedia card has no
knobs for adjusting input levels, you
can use this numerical to adjust the
input volume within a range of 0-7.
Opcode Systems, Inc.
CHAPTER 14: DAE: Recording Audio
This chapter discusses how to record digital audio with Vision. You should already
be familiar with the Record Monitor Window, discussed in the previous chapter.
To import audio for use with DAE see
Importing Audio with DAE (pg. 209).
When you have finished this Chapter, you
may want to look at Chapter 21: Advanced
Recording Techniques for more details pertaining to recording.
햴 Play or sing into your digital audio
interface and watch the on-screen
LEDs to set an optimal input level.
PRO TOOLS III/24: You cannot set
record levels until youÕve record-enabled
an input.
햵 Enable any other desired options.
Options include audio thruing, linking
files, and auto compacting.
햶 Assign a default Audio Instrument to
POWER USER OVERVIEW
The following are the steps required to
record audio:
햲 Choose Windows>Record
the audio youÕre about to record.
햷 Leave the Record Monitor Window
open, then go to the Tracks Window.
IMPORTANT: The Record Monitor
Window must be open in order to record
audio.
Monitor.
Vision opens the Record Monitor
Window.
With the Record Monitor Window active:
햲 Record-enable an input channel.
Vision produces a standard Save As
dialog box.
햳 Use the dialog box to create a new
record file for the audio.
With the Tracks Window active:
햲 Record-enable a track.
햳 In the Control Bar, select the desired
record mode.
If you are about to record an audio
event, the Record Mode display contains
a small digital audio icon.
햴 In the Control Bar, either set a
Countoff or select Wait for Note.
Vision & Studio Vision Pro — Audio Reference Manual
115
PART 4: Digidesign DAE: Configuration & Recording
햵 Click the Record button in VisionÕs
Vision opens a Record Monitor Window.
Control bar.
If you chose Wait for Note, either play
a MIDI note, click the Play button, or
press the Spacebar to start recording.
햶 Play or sing into your digital audio
interface.
햷 Click the Stop button when you want
to stop recording.
The remainder of this chapter discusses
these steps in detail.
Figure 14.1: Record Monitor Window for
Session 8/Project
햳 Click the Record Enable Indicator
next to the appropriate input channel.
RECORDING: STEP-BY-STEP
The following sections discuss how to
setup and record a single audio track in
Vision.
Vision opens a standard Macintosh Save
As dialog box.
Designate a Record File
To record audio, you must first designate
where to store it on your hard disk. This
is called the record file.
To designate a record file for a monophonic input:
햲 Choose Windows>Record
햴 Type a name for your new record file
in the Save As dialog box, or use the
name Vision suggests.
PRO TOOLS III/24, PRO TOOLS
PROJECT, SESSION 8, SYSTEM
ACCELERATOR: Be sure to select a
hard drive thatÕs connected directly to
your audio card, not to your MacÕs SCSI
port.
Monitor.
햵 Click the Save button.
The name of your record file is displayed
in the ÒRecord FileÓ column, the Record
Enable Indicator is lit (indicating recording on that input is enabled), and the
amount of available recording time is dis-
116
Opcode Systems, Inc.
CHAPTER 14: DAE: Recording Audio
played in the ÒAvailableÓ column (as
determined by the amount of free space
on your hard disk).
In the future, anything you record on this
input will automatically be recorded into
this record file using the Sound
Designer II format.
If you choose Cancel or Don’t Make, you
should manually make the selected Audio
Instrument mono or select another
(mono) Audio Instrument for recording.
Disabling a Record File
You can disable audio recording by clicking the Record Enable Indicator again to
turn it off. This is convenient if you decide
to record some MIDI tracks, and don’t
want to record audio at the same time.
If the selected Audio Instrument is stereo
(and Link Pairs is not checked) when you
enable an input, Vision will prompt you
will the following dialog.
Once you’ve assigned a record file to an
input channel, you can toggle its Record
Enable on and off as desired—you won’t
be prompted by the Save As dialog box.
That dialog box appears only if you
haven’t assigned a record file to the input
channel.
Click Cancel to leave all Audio Instruments’ stereo status untouched and
return to the Record Monitor. Click Don’t
Make to leave all Audio Instruments’
stereo status untouched and proceed to
the Save dialog. Click Make to make the
selected Audio Instrument (in this case,
Audio 2) mono and proceed to the save
dialog.
Vision & Studio Vision Pro — Audio Reference Manual
117
PART 4: Digidesign DAE: Configuration & Recording
Set Record Levels
Avoid Clipping
The bargraph in the Record Monitor
Window functions like an LED display—it
displays the amplitude of an incoming
signal.
If the amplitude of the audio signal
exceeds 0 dB, the waveform becomes
chopped off and flat (like a square wave),
and the audio will sound buzzy and distorted. This is called “clipping,” which you
will most always want to avoid. If you’re
accustomed to analog recording, you’ll
soon notice that digital clipping is harsher
and much less tolerable than analog
clipping.
PRO TOOLS III/24: An input must be recordenabled before it can display an incoming
signal.
To set your input levels:
햲 Play or sing into your digital audio
interface.
햳 Look at the bargraph for the input
whose volume you wish to set.
If you clip the volume so the amplitude
exceeds 0 dB, the Record Monitor’s clipping indicator lights at that moment. After
the level recedes, the clipping indicator
remains lit to remind you that you clipped
the input level and you should go back
and adjust it.
Clipping Indicator
햴 Adjust the level of the signal youÕre
sending to Vision.
To obtain the best signal-to-noise ratio,
adjust the signal so that its peak amplitude is as high as possible, but below
0 dB. In digital recording, you cannot
record above 0 dB without clipping the
audio.
When you’re ready to try a different input
level, you can clear the clip light by clicking anywhere in the record level
indicator.
Generally, youÕll adjust the input level on
your mixing console.
AUDIOMEDIA: If youÕre using an Audiomedia
card, the Record Monitor Window has an
additional input level control that you can use
to set input levels.
118
Opcode Systems, Inc.
CHAPTER 14: DAE: Recording Audio
Monitor the Input
If you’re recording directly into your
audio hardware without running the
signal through a mixing console, you will
need to turn on the Thru option in order
to hear the signal you’re recording.
For now, you need only know that Vision
uses Audio Instruments to determine
which output to route recorded audio to.
This makes it easy to audition files after
you record them.
To assign a record file to a specific Audio
Instrument:
햲 Press and hold the mouse in the
desired inputÕs Instruments column.
Vision opens a pop-up menu of Audio
Instruments.
When you turn on the Thru option, Vision
sends the audio input signal directly to
the selected Audio Instrument.
The audio input will be routed to the
output assigned to that Audio Instrument
in the Audio Instruments Window as discussed in Chapter 15: DAE: Audio
Instruments.
If you’re using a mixing console, use it to
route the audio signals and turn the Thru
option off.
For more information about the various
Thru options, see Anatomy of the Record
Monitor Window (pg. 110).
Assign an Audio Instrument
Vision initially assigns each record file to
one of its Audio Instruments. Audio
Instruments are discussed in
Chapter 15: DAE: Audio Instruments.
햳 While still holding the mouse button,
drag the cursor over the desired
Audio Instrument to select it
(highlighting it).
In this example, recording is from a
mono source. Therefore, youÕll want to
select a mono instrument. For more
information about mono and stereo
instruments, see Stereo Audio Channels (pg. 139).
햴 Release the mouse button.
Vision will assign the audio event that
you record to the selected Audio
Instrument.
You can change Audio Instrument assignments any time in the future.
Vision & Studio Vision Pro — Audio Reference Manual
119
PART 4: Digidesign DAE: Configuration & Recording
To learn how to assign outputs to an
Audio Instrument, see Output Assignment
(pg. 142).
Record a Track
햵 Select the desired record mode from
the Record Mode pop-up menu (in the
Control Bar).
Record modes are discussed in your
MIDI Reference Manual.
Now that you’ve set a record level and
designated one or more files into which
you want to record the audio, you’re ready
to record a track.
TEMPO TIP: If you have any MIDI data
recorded, make sure you’re happy with the
sequence’s tempo. Although you can change
the audio’s playback tempo using the
DSP>Adjust Audio Tempo™ command,
it’s always easier to “do it right the first
time” rather than “fixing it in the mix.”
To record an audio track:
햲 Leave the Record Monitor Window
Record-enabled tracks can always
record MIDI data, but to record audio,
the Record Monitor Window must be
open and one or more audio inputs must
be record-enabled.
If Vision is properly configured to record
audio data, then the Record Mode display contains a small digital audio icon.
open.
The Record Monitor Window must be
open in order to record audio into Vision.
햳 In the Tracks Window, click the ÒRÓ
column to record-enable a track (just
as you do when you record MIDI).
Digital audio icon indicates that
you will be recording audio events
햶 In the Control Bar, either set a
Countoff or select Wait for Note.
햷 Click the Record button in VisionÕs
Control bar.
햸 If you chose Wait for Note, either
play a MIDI note, click the Play button,
or press the Spacebar to start
recording.
햴 If desired, type a new track name.
120
Opcode Systems, Inc.
CHAPTER 14: DAE: Recording Audio
햹 Play or sing into your digital audio
input device. Vision will also record
any MIDI you perform.
햺 Click the Stop button when you want
to stop recording.
The audio you record is stored in the current record file (or files) listed in the
Record Monitor Window. Remember, if
you want to record into another file, you
need to first designate it as the record file.
If you have the Graphic Window open
you’ll see a graphic representation of your
waveform appear below the Piano Roll.
Figure 14.2: Waveform Displayed
The appearance of the waveform is determined by the Audio>Waveform Display
submenu. Specifically:
•
•
Off: This display option completely
disables the waveform display. When
you select this option, Vision displays
waveforms as a straight line and
wastes no time calculating their
appearance.
Fast: This display option allows
Vision to redraw waveform displays
quickly because it draws them at a
low resolution. This may be desirable
•
when you’re recording or playing
back audio, but the lower resolution
is not as good for detailed audio
editing.
High Resolution: This display
option allows Vision to display the
actual texture of waveforms. This is
desirable when you’re editing and
need to clearly see all peaks and valleys, but it takes the longest amount
of time to recalculate and draw.
See Waveform Display (pg. 354) for more
information.
NOTE: Remember, if you want to turn
audio recording off so you can record only
MIDI, disable the Record Enable Indicator
in the Record Monitor Window or simply
close the window. You can see if audio
recording is enabled by looking for the little
digital audio waveform in the Record Mode
display.
ADVANCED RECORDING
TECHNIQUES
The following sections discuss other
audio recording techniques for Vision.
Please see Chapter 21: Advanced Recording Techniques for more details and
techniques involving recording.
Vision & Studio Vision Pro — Audio Reference Manual
121
PART 4: Digidesign DAE: Configuration & Recording
Stereo Recording
To record a stereo track:
햲 In the Record Monitor Window, click
the Link Pairs option to check it.
In order to create a stereo event with
DAE, Vision must create two mono audio
files and link them together into one
event. This new audio event is called a
Òstereo linked event.Ó Any future editing
affects both halves of the linked event
simultaneously.
햳 Enable two linked input channels by
clicking their Record Enable
Indicators.
The Record Monitor Window indicates
linked pairs by connecting them with a
straight line.
Linked Pairs are indicated
with a connecting line
Click Cancel to leave all Audio Instruments’ stereo status untouched and
return to the Record Monitor. Click Don’t
Make to leave all Audio Instruments’
stereo status untouched and proceed to
the Save dialog. Click Make to make the
selected Audio Instrument (in this case,
Audio 1) stereo and proceed to the save
dialog.
If you choose Cancel or Don’t Make, you
should manually make the selected Audio
Instrument stereo or select another (stereo) Audio Instrument for recording.
When you record linked pairs, they
appear in the Graphic Window as a single
audio event, but with unique left and right
waveforms.
Checking the Link Pairs option causes
two audio inputs to share a single
Audio Instrument
If the selected Audio Instrument is not
stereo (and Link Pairs is checked) when
you enable an input pair, Vision will
prompt you will the following dialog.
122
Figure 14.3: Linked Pairs Audio Event, as it
appears in the Graphic Window
Opcode Systems, Inc.
CHAPTER 14: DAE: Recording Audio
If you later decide to unlink events that
you recorded with the Link Pairs option
enabled, you can do so by selecting them
and choosing Audio>Unlink Events.
For more information, see Unlink Events
(pg. 350).
You can record as many simultaneous
tracks as your hardware allows. For
example, if you have a four track recording system, you can record up to four
mono tracks simultaneously, or two
stereo tracks (equalling four channels).
Each simultaneously recorded input must
have its own record file. In addition, you
should assign a different Audio Instruments to each input or linked input pair as
discussed in Assign an Audio Instrument
(pg. 119).
When recording with Link Pairs checked
you should use stereo audio instruments.
Figure 14.4: Choosing a stereo instrument
For more information about mono and
stereo instruments, see Stereo Audio
Channels (pg. 139).
Recording Multiple Takes
It’s common to record a particular performance numerous times. Each
performance is called a take. By recording
numerous takes, you can later choose the
best performance or, perhaps, assemble a
new performance from the various takes.
There are a two different techniques for
storing multiple takes:
•
•
You can record all audio takes into a
single record file.
This method keeps all audio information together in one place, making it
easy to find and backup audio
performances.
You can record each audio take into a
separate record file.
This method keeps different takes in
different files so, if you lose or
damage a file, you lose only one take
and not all of them.
The method you choose affects only how
audio is stored on your hard disk—it does
not affect playback. Each method can be
automated using the Audio Recording
Preferences dialog. See
Chapter 21: Advanced Recording Techniques for more details on recording
multiple takes.
NOTE: For all DAE users with hard disk
volumes greater than 2GB, Opcode recommends using a separate file for each take—
rather than appending.
Vision & Studio Vision Pro — Audio Reference Manual
123
PART 4: Digidesign DAE: Configuration & Recording
If you are recording successive takes into
one file, you can save disk space by using
Undo after an unsatisfactory take—when
you do so, Vision records over the previously recorded take.
Recording Audio While
Monitoring Existing Audio Events
To record audio while monitoring existing
audio events, simply record into a new
track while the other audio tracks play.
Because of dynamic voice allocation, you
will always be able to hear the audio
you’re recording as well as any existing
audio tracks.
Fixed Voice Allocation Method
This section discusses how to record new
audio files while monitoring existing
ones. For example, you might want to
record a backup vocal while listening to
your lead vocal.
This section applies only to those who use
Vision in fixed voice allocation mode.
Fixed voice allocation, as discussed in
Voice Allocation Modes (pg. 136), is the
default mode used by:
Before you can fully understand this section, you need to have a thorough
understanding of Audio Instruments.
Therefore, Opcode recommends that you
skip this section for now and return to it
AFTER you read Chapter 15: DAE: Audio
Instruments.
•
•
Dynamic Voice Allocation Method
This section applies only to those who use
Vision in dynamic voice allocation mode.
Dynamic voice allocation, as discussed in
Voice Allocation Modes (pg. 136), is the
default mode used by:
•
•
•
124
Pro Tools I & II
Sound Tools II
Audiomedia II/III
Pro Tools III/24/Mix/Mix Plus
Session 8/Project
If you own one of these systems, or if you
use other Digidesign hardware in fixed
voice allocation mode, you must plan how
to assign the available audio voices. If
multiple audio events use the same voice
number, then only one of them can play at
a time. For this reason, it’s important to
always know how you’re allocating your
voices.
Voices get assigned in two places:
•
•
Audio Instruments Window—you
manually assign a voice to each Audio
Instrument in the Voice column.
Record Monitor Window—when
you record audio, Vision automatically assigns an input to the voice of
the same number. For example,
Input 1 always uses voice 1, Input 6
always uses voice 6, etc.
Opcode Systems, Inc.
CHAPTER 14: DAE: Recording Audio
Any voice that Vision uses for recording is
not available for playback. For example, if
you record audio on Input 1, it will use
Voice 1 and you will NOT be able to hear
any existing audio events that are
assigned to an Audio Instrument that uses
playback Voice 1.
Audio Instruments
Follow through this example to learn how
to record new audio events while monitoring existing ones:
햲 Enable an input in the Record Monitor
Window and assign it to an Audio
Instrument.
For this example, assume youÕve
enabled Input 2 and assigned it to Audio
Instrument 3.
Audio Events
Figure 14.5: Existing Audio Events assigned
to Audio Instruments 1 & 2 as shown in this
Graphic Window
햴 Open the Audio Instruments Window
to view the voice assignments.
The Audio Instruments Window is discussed completely in Chapter 15: DAE:
Audio Instruments.
햳 Look to see which Audio Instruments
are used by the existing audio events.
In this example, Audio-1 is assigned to
Voice 1 and Audio-2 is assigned to
Voice 2.
Voice assignments
For this example, assume your audio
events are assigned to Audio
Instruments 1 & 2.
If you were to record now, you would
only hear your live audio and the audio
events assigned to Audio Instrument 1.
ThatÕs because Audio Instrument 2 is
Vision & Studio Vision Pro — Audio Reference Manual
125
PART 4: Digidesign DAE: Configuration & Recording
assigned to Voice 2, which is being used
by the live audio (since the live audio is
routed to Input 2).
If you want to hear all the existing Audio
Events and the live audio...
햵 Change Audio Instrument 2Õs voice
assignment to a voice other than
Voice 1 or Voice 2.
In this example, weÕve changed Audio-2
to use Voice 6.
to playback the sequence, Vision may
warn you that these audio, volume, or pan
events are too dense.
Vision uses the Smooth Audio Controllers in the Audio Preferences dialog box
to automatically “thin out” any overly
dense data streams.
Specifically:
햲 Choose Audio>Audio Preferences.
Vision opens the Audio Preferences
dialog box.
햳 Select the desired amount of
smoothing. For a description of each
option, see below:
Now when you record on Input 2, youÕll
hear THAT audio PLUS the existing
audio assigned to Audio
Instruments 1 & 2.
OTHER RECORDING ACTIONS
The following sections discuss other miscellaneous record features.
Automatically Thinning Volume
and Pan Data
None: No audio smoothing is applied
and no data thinning occurs.
Sharp: Only minimal smoothing and
data thinning occurs.
Medium: An average amount of smoothing and data thinning occurs.
Smooth: A great deal of smoothing and
data thinning occurs.
You may wish to try the different presets
until your audio file starts to play, then
manually “fine tune” the smoothing controls to your taste.
NOTE: This information applies to all
DAE users.
In some instances, if you record numerous real-time volume and pan events and
apply them to Audio Instruments, then try
126
Opcode Systems, Inc.
CHAPTER 14: DAE: Recording Audio
RECORDING AUDIO FROM
OTHER POINTS IN THE TDM
CHAIN
NOTE: This information applies only to
users with TDM systems.
You can choose practically any place in
the TDM chain for recording. Some of the
uses for this are:
•
•
•
•
Recording a master mix with all TDM
effects in real time for a “bounce to
disk” mix. To do this, route all channels to a single bus and record from
it.
Record the output of Sample Cell
directly as audio into Vision.
“Print the effects” from a track. You
can record from the output of an
Audio Instrument to record its TDM
insert effects.
Create multiple submixes from busses. For example you could use
Opcode’s fusion:VOCODE TDM and
record the vocoded signal in real
time.
For more information see Recording from
Alternate Sources in the TDM Chain
(pg. 169)
PUNCHING IN ON-THE-FLY
WITH “QUICKPUNCH”
TDM users can now record audio by
punching in on-the-fly. In fact, you can
even punch in and out multiple times
without stopping and restarting playback.
To use this new capability, enable the
QuickPunch checkbox in the Record
Monitor Window, see Figure 14.6.
Figure 14.6: Record Monitor Window (DAE),
QuickPunch enabled
When using QuickPunch, each recordenabled input line uses one voice for playback and a second voice for recording.
Voices are available for QuickPunch only
if they are not assigned to an Audio
Instrument.
For instance, if you want to use QuickPunch with two mono input channels, it
will require 2 free voices. And, if your
audio hardware supports 16 voices and
Studio Vision has assigned each voice to
an Audio Instrument, you must reassign
the voices for two of the Instruments so
that the required voices are made available (i.e. reassign Audio-15 to voice 1 and
Audio-16 to voice 2, thereby freeing up
voices 15 and 16)—or you could simply
Vision & Studio Vision Pro — Audio Reference Manual
127
PART 4: Digidesign DAE: Configuration & Recording
reduce the number of Audio Instruments
by two (choose Number of Instruments>Other... from the menu in the
Audio Instruments & Routings Window,
see Figure 14.7).
햶 For the desired input line, specify a
mono hardware input from the
Record Source pop-up. Then recordenable the input by clicking its
Record Enable Indicator.
When prompted, enter a name and
folder destination for the record file.
햷 Assign the desired mono Audio
Figure 14.7: Changing the number of Audio
Instruments
The following procedure illustrates using
QuickPunch (with a single mono input) to
punch in on a track with existing material:
Instrument to the record-enabled
input line (use the same Instrument
assigned to the track that is recordenabled).
햸 In the Record MonitorÕs Thru pop-up,
select Auto.
햲 Record-enable the track you want to
punch in on.
햳 Enable punch mode by clicking the
Punch toggle in the Control Bar.
햹 Enable QuickPunch by clicking its
checkbox in the Record Monitor
Window.
Leave the Punch In point set to 1¥1¥0
and the Punch Out point set to infinity.
햴 In the Control BarÕs Record Mode
pop-up, select Replace.
햵 Open the Record Monitor Window by
clicking the Record Indicator button
( ) in the Control Bar.
128
If prompted with a message indicating
that QuickPunch is unavailable, go to the
Audio Instruments Window and free up
the necessary number of audio voices
(corresponding to the number of inputs
record-enabled). For instance, if your
audio hardware has 16 voices and each
Opcode Systems, Inc.
CHAPTER 14: DAE: Recording Audio
of your Audio Instruments is assigned to
a different voice (1-16), simply reassign
Audio-16 to voice 1.
Figure 14.8: Changing the voice assignment for an
Audio Instrument
Once the required number of audio
voices are available, try enabling QuickPunch again by clicking its checkbox in
the Record Monitor Window.
햺 Click the Play button in the Control
Bar, or press the Spacebar.
Vision begins playing from the Punch In
point, with the existing track material
being heard. The ÒAvailableÓ fields in the
Record Monitor Window begin counting
down.
햻 When the desired location is reached
where you want to punch in, press the
Tab key or click the Control BarÕs
Record button.
QuickPunch Record Files
When QuickPunch is enabled, audio
recording begins each time play mode is
entered. If punch mode is never actually
entered after playback is initiated, the
record files are discarded. If punch mode
is entered, however, the length of the
record files will encompass the duration
of the playback. Obviously, this can result
in large portions of files accumulating on
your hard disk that won’t necessarily
point to actual audio events in your tracks.
The upside to this is that the punched
regions can be extended after recording
(since the data resides in the record file).
So if you punch in too late or punch out
too early, you can correct it later by
simply resizing the recorded audio events
with the Trim cursor.
To free up hard disk space, Compact your
punch files from the File Management
Window. And, in general, make sure to
disable QuickPunch if you don’t intend to
do any on-the-fly punches.
Vision begins recording audio. The existing track material is muted and the
record source material becomes audible.
햽 When you wish to punch out, press
the Tab key or click the Record
button.
Vision stops recording audio but continues playing. The existing track material
is again heard and the record source
material becomes muted.
햾 Repeat the previous two steps as
desired for each region you wish to
punch in on. When finished, click the
Stop button in the Control Bar.
Vision & Studio Vision Pro — Audio Reference Manual
129
PART 4: Digidesign DAE: Configuration & Recording
SETTING THE BUFFER SIZE
It is no longer possible to change DAE’s
buffer size from Studio Vision if you have
TDM plug-ins assigned. If you try to do
this you will get an error message indicating “there is another application using
DAE.”
You can, however, change the buffer size
from the DAE application. Simply switch
to DAE (you can even leave Studio Vision
open while doing this) and choose
File>Set Playback Buffer Size.
130
Opcode Systems, Inc.
CHAPTER 15: DAE: Audio Instruments
This chapter discusses Audio Instruments (as defined in Chapter 2: Basic
Terminology). In it, you’ll learn:
•
•
•
•
•
•
•
How to assign the number of Audio
Instruments;
How to name Audio Instruments;
How to set Audio Instrument colors;
How to mute and/or solo Audio
Instruments;
How to assign voices, if necessary;
How to use poly mode with an Audio
Instrument, if necessary;
How to assign Audio Instruments to
hardware outputs.
OPENING THE AUDIO
INSTRUMENTS WINDOW
To open the Audio Instruments Window:
Figure 15.1: Typical Audio Instruments Window
for Digidesign Session 8/Project
햲 Choose Windows>Audio
Instruments.
Vision opens the Audio Instruments
Window.
TIP: If a track contains only audio
data, you can open the Audio Instruments Window directly from the List or
Graphic Window or Control Bar by
clicking the Instruments icon ( ).
Vision & Studio Vision Pro — Audio Reference Manual
131
PART 4: Digidesign DAE: Configuration & Recording
Your Audio Instruments Window may
look different depending on which DAE
hardware you’re using. For example:
•
•
•
•
You may have fewer (or more) outputs, depending on your digital audio
interface.
Your Voice column may display the
word “any” rather than numbers.
You may have a Poly column in place
of the Stereo column.
You may have more Instruments if
you have chosen more.
Each of the sections in the Audio Instruments & Routings Window can be closed
or opened by clicking the appropriate
open/close triangle, see Figure 15.2.
All of these differences are explained in
the course of this chapter.
The Audio Instruments Window for TDM
users now displays Audio Instruments,
hardware inputs, hardware outputs, busses, and even SampleCell channels. Any
of these items can be independently
muted, soloed, renamed, and defined as
stereo. In addition, there are now columns for monitoring the number of
assigned sends and plug-ins for each
audio channel
Figure 15.2: Inputs, Outputs, and Busses pop-ups
SETTING THE NUMBER OF
AUDIO INSTRUMENTS
NOTE: This discussion applies to all Vision
and Studio Vision Pro users but is most
applicable to high-end TDM users.
Vision can contain up to 128 Audio Instruments, providing advanced support for
high-end digital audio systems.
Vision initially defaults to 16 Audio Instruments, but you can request a greater
number, if you desire. Vision stores the
requested number of Audio Instruments
in both its Setup file and in each Vision
file.
132
Opcode Systems, Inc.
CHAPTER 15: DAE: Audio Instruments
IMPORTANT: The total number of simultaneous audio voices that Vision can play is
determined by your audio hardware—not
the number of Audio Instruments.
To select the desired number of Audio
Instruments:
햲 Press and hold the mouse on
NAMING AUDIO INSTRUMENTS
You can name Audio Instruments (for
instance “vocals” or “bass”) to easily identify them in a sequence. To do so:
햲 Click the name of the Audio
Instrument you wish to change.
the Audio Instruments Window
menu.
햳 Move the cursor over the
Number of Instruments option.
Vision produces a pop-up menu from
which you can select the desired number
of Audio Instruments.It is now possible to
specify any number of Audio Instruments
(up to 128) by choosing Number of
Instruments>Other from the menu
in the Audio Instruments Window.
햳 Type a new name for the Audio
Instrument.
Use the Audio Instruments Window to
name up to 64 Audio Instruments, which
will appear in any other windows or
dialog boxes that contain Instrument
menus.
Figure 15.3: Selecting the number of Audio
Instruments
햴 Select the desired number of
Audio Instruments, then release
the mouse button.
Vision & Studio Vision Pro — Audio Reference Manual
133
PART 4: Digidesign DAE: Configuration & Recording
Naming Busses, Inputs, and
Outputs
In addition to Audio Instruments, custom
names can be typed in for each item in the
Audio Instruments and Routings
Window—for instance, “vocals” for an
Audio Instrument or “Stereo Send 1” for a
bus.
SETTING AUDIO INSTRUMENT
COLORS
If you have a Macintosh with a color monitor, you can display different Audio
Instruments in different colors. To do so:
햲 Choose Windows>Audio
Instruments.
Vision opens the Audio Instruments
Window.
햳 Press and hold the mouse in the
Figure 15.4: Renaming a bus
To rename an Audio Instrument, input or
output, SampleCell channel, or bus, click
in the Name column for the desired item,
type in the new name, and then type
Return. Changes to the names are automatically updated in other windows,
dialogs, and pop-up menus.
Color column (located
immediately to the right of the
Audio InstrumentÕs name).
Vision opens a color selection pop-up
menu.
NOTE: You will not see a Color column if
you have a black & white monitor.
햴 Select the desired color from
the pop-up menu.
To return a name to its default, highlight
the desired name and type the Delete key.
Since inputs, outputs, and SampleCell
channels can be defined as stereo pairs,
or as individual mono channels, different
names can be given for either instance.
For instance, your first two hardware
inputs could be named either “Stereo
Input” as a stereo pair, or “Input 1” and
“Input 2” for individual mono channels.
NOTE: Custom names for inputs, outputs,
and busses are stored in the “Studio Vision
Prefs” file, which is written to the Preferences folder inside your System Folder.
Custom names for busses are also stored in
Vision files and the Vision Setup file, as
they may differ from project to project.
134
Press and hold the mouse
on a color to open a color
selection pop-up menu.
Figure 15.5: Setting an Audio Instrument’s
Color
Opcode Systems, Inc.
CHAPTER 15: DAE: Audio Instruments
You can change the colors available in the
color selection pop-up menu. To do so:
햲 Choose Setups>Colors.
Vision opens a dialog box containing all
defined colors.
햳 Click the color you wish to
change.
Vision opens a standard Macintosh color
picker dialog box.
햴 Pick a new color and click the
OK button.
햵 Change other colors as desired,
then click the OK button to
close the Colors dialog box.
MUTING OR SOLOING AN
AUDIO INSTRUMENT
To mute or solo an Audio Instrument:
햲 Click the Mute or Solo column
next to the desired Audio
Instrument.
This places an ÒMÓ or ÒSÓ in the column
to indicate whether the Audio Instrument
is muted or soloed.
Soloing occurs across all Instruments,
both MIDI Instruments and Audio Instruments. Soloing an Audio Instrument
mutes all unsoloed Audio and MIDI
Instruments.
You can reset any modified colors to
Opcode’s default colors. To do so:
햲 Choose Windows>Instruments.
Vision opens the MIDI Instruments
Window.
햳 Choose Initialize Colors from the
Instruments Window menu.
Vision resets its colors to their default
values.
햳 Click again to disable an Audio
InstrumentÕs mute or solo.
For information about the differences
between muting or soloing tracks and
muting or soloing instruments, please see
your MIDI Reference Manual.
Vision & Studio Vision Pro — Audio Reference Manual
135
PART 4: Digidesign DAE: Configuration & Recording
VOICE COLUMN
The function of the Voice column
changes depending on which voice allocation mode Vision uses. Before learning
about this column, you need to understand Vision’s voice allocation modes.
Voice Allocation Modes
Vision can play as many simultaneous
audio events as your hardware has voices
(up to a maximum of 16). For example, if
you have a 4 voice system, Vision can play
4 different audio events simultaneously.
Vision supports two types of voice allocation (dynamic and fixed), which you can
select from the Audio Instruments
Window menu.
Figure 15.6: Audio Instruments Window Menu
PRO TOOLS III: Dynamic Allocation is not
available with Pro Tools III/24 or any other
TDM-equipped hardware.
The following sections discuss the differences between the two voice allocation
schemes.
136
Dynamic Voice Allocation
When you use dynamic voice allocation
mode, Vision automatically “steals” voices
from other Audio Instruments as needed.
This mode is particularly useful when
your hardware supports only a limited
number of simultaneous playback voices.
PRO TOOLS III: You cannot use dynamic
voice allocation with Pro Tools III or any other
TDM-based audio system. This is because
TDM plug-ins are Òhard-wiredÓ to specific
voices. If Audio Instrument voice assignments were to change, the plug-ins affecting
that Audio Instrument would also change,
resulting in undesirable sonic changes.
Fixed Voice Allocation
When you use fixed voice allocation
mode, Vision always uses an assigned
voice to play each Audio Instrument. You
assign voices to Audio Instruments in the
Voice column. This is the best mode to
use with Session 8 or any other audio
system with a lot of playback voices. It’s
also the only mode available for
Pro Tools III or TDM-equipped systems.
NOTE: If you assign the same playback
voice to two or more Audio Instruments,
they will “steal” that voice from one another
as needed.
IMPORTANT: Whenever Vision uses fixed
voice allocation, you MUST use the
Session 8/Pro Tools III recording method
as discussed in Fixed Voice Allocation
Method (pg. 124).
Opcode Systems, Inc.
CHAPTER 15: DAE: Audio Instruments
Default Voice Allocations
Using the Voice Column
Vision defaults to the following voice allocation modes:
The Voice column behaves differently
depending on whether you use dynamic
or fixed voice allocation. Specifically:
•
•
•
•
•
Pro Tools III/24—fixed
Dynamic voice allocation is not available with Pro Tools III.
Session 8/Project—fixed
Dynamic voice allocation is an available option, though you may hear
audio “bleed” between outputs due to
the Session 8’s internal architecture.
Opcode strongly recommends keeping Session 8 in fixed voice allocation
mode.
Pro Tools I & II—dynamic
If you use an entry-level, 4-voice version of Pro Tools, you’ll find it most
convenient to allow Vision to operate
in dynamic mode. However, if you
have 8 or more voices, you might
prefer using fixed voice allocation—
this will give you more control over
your voice assignments.
Sound Tools II—dynamic
Most users will find it easiest to let
Vision dynamically allocate the four
voices in this audio system.
Audiomedia—dynamic
Most users will find it easiest to let
Vision dynamically allocate the four
voices in this audio system.
•
•
Dynamic Allocation: If you use
dynamic voice allocation, then any
voice can be used to play any Audio
Instrument. This fact is reflected by
the word “any” in the Voice column.
You cannot change the voice assignment in dynamic allocation mode.
Fixed Allocation: If you use fixed
voice allocation, then you can use the
Voice column to assign any voice to
any Audio Instrument. This is
described in Assigning Voices in Fixed
Allocation Mode (pg. 137).
Assigning Voices in Fixed Allocation
Mode
To assign a playback voice to an Audio
Instrument:
햲 Make certain Vision is in Fixed
Allocation mode (as seen in the
Audio Instruments Window popup menu).
햳 Press and hold the mouse in the
Voice column next to the
desired Audio Instrument.
Vision & Studio Vision Pro — Audio Reference Manual
137
PART 4: Digidesign DAE: Configuration & Recording
Vision opens a pop-up menu listing all
possible playback voices.
Using The Poly Column
Use the Poly column to enable or disable
poly mode for each Audio Instrument.
With poly mode enabled, an Audio Instrument can play multiple audio events
simultaneously (provided the audio
events are on separate tracks).
햴 Select the desired playback
voice, and release the mouse
button.
NOTE: If an Audio Instruments is set to
stereo mode, you will only be able to assign
voices in pairs. For information, see the
next section.
STEREO/POLY COLUMN
To fully comprehend poly mode, you
should have an understanding of such
basic terminology as “audio events” and
“voices.” See Chapter 2: Basic Terminology for more information.
The following sections describe poly
mode in greater detail.
Poly Mode On
If an Audio Instrument’s Poly column is
checked, then poly mode is enabled for
that Audio Instrument.
The name and function of this column
changes depending on whether Vision
uses fixed or dynamic voice allocation.
Voice allocation modes are defined in
Voice Allocation Modes (pg. 136).
Specifically:
With poly mode enabled, an Audio Instrument can play as many simultaneous
audio events as your audio hardware
allows:
•
Supported By Your Audio Hardware
•
138
Dynamic Allocation: If you use
dynamic voice allocation, this column
is labelled “Poly” and works as
described in Using The Poly Column
(pg. 138).
Fixed Allocation: If you use fixed
voice allocation, this column is
labelled “Stereo” and works as
described in Using the Stereo Column
(pg. 139).
Max Number Of Audio Events = Number Of Voices
For example, if you have a four-voice
system (such as Digidesign’s Sound
Tools II) and you check the Poly column
for Audio Instrument 1, then Audio
Instrument 1 can play up to four audio
events simultaneously (provided they are
on separate tracks).
Opcode Systems, Inc.
CHAPTER 15: DAE: Audio Instruments
Poly Mode Off
Stereo Busses
If an Audio Instrument’s Poly column is
not checked, the poly mode is disabled for
that Audio Instrument.
TDM busses can now be specified as “stereo” in the Audio Instruments & Routings
Window. Whether a bus is stereo determines how audio channels are routed to
it, and how the bus is recorded.
With poly mode disabled, an Audio Instrument can play only a single audio event,
no matter how many audio events are
assigned to the Audio Instrument.
Figure 15.7: Making a bus “stereo”
Using the Stereo Column
Stereo Audio Channels
The Stereo column determines whether
an Audio Instrument, hardware input or
output, or bus is stereo or mono. To make
an audio channel “stereo,” place a check
mark in the column for that channel.
In order to play back stereo audio events,
they must be assigned to a stereo Audio
Instrument. Whether a channel is mono
or stereo also determines how it can be
used as an input source in a console channel, or as a record source in the Record
Monitor. For instance, stereo Audio
Instruments can only use stereo plug-ins,
and should be assigned to stereo outputs;
also, if you’re routing stereo audio channels to a bus, make sure it is a stereo bus;
and, if you’re attempting to record with
Link Pairs checked, you’ll need to record
from a stereo source (Audio Instrument,
output, or bus) to a stereo Audio
Instrument.
For instance, if you have a stereo Audio
Instrument and want it sent to a bus, you
should make sure that the destination is a
stereo bus.
You can, however, mix and match stereo
and mono signals when routing to busses.
In doing so, the following rules apply:
•
•
When sending a stereo console channel to a mono bus, only the left
channel is sent.
When sending a mono console channel to a stereo bus, the signal is sent
to both the left and right channels of
the bus.
You cannot, however, mix and match
stereo and mono signals when recording.
If you attempt to record from a stereo bus
to a mono Audio Instrument, or from a
mono bus to a stereo Audio Instrument,
you will be prompted to make the necessary changes.
Vision & Studio Vision Pro — Audio Reference Manual
139
PART 4: Digidesign DAE: Configuration & Recording
Stereo Inputs and Outputs
Clicking in the Stereo column works a
little differently for inputs and outputs,
and SampleCell channels (as opposed to
Audio Instruments and busses).
Click in the Stereo column
to turn mono Outputs into
a stereo Output pair
Click the Stereo column in an Audio
Instrument row to make that Audio
Instrument stereo.
Stereo Audio Instruments require two
voices for playback (one for each channel). Vision pairs voices sequentially. That
is, it pairs Voice 1 with Voice 2; Voice 3
with Voice 4, and so on.
The Stereo column functions differently
depending on which Digidesign hardware
you own:
•
•
Figure 15.8: Stereo output pair
Hardware inputs and outputs can appear
in the Audio Instruments & Routings
Window as either mono or stereo pairs.
For instance, if your audio interface has
just two outputs (1-2), they can act as individual mono outputs, or they can act as an
output pair. The Stereo column determines how inputs and outputs can be
used as input sources for console channels in the Console Window.
Regardless of the state of the Stereo column, inputs are always available as
individual mono inputs and stereo input
pairs in the Record Monitor’s Source popup; and outputs are always available as
individual mono outputs and stereo
output pairs in the Output pop-up for console channels.
If Vision is set to fixed allocation mode,
the Audio Instruments Window contains a
Stereo column.
140
Pro Tools III/24—see Stereo Voicing—Pro Tools III/24 Only (pg. 141).
All other DAE hardware—see
Stereo Voicing—Except Pro Tools III/
24 (pg. 140).
Stereo Voicing—Except Pro Tools III/24
NOTE: This section applies to all Digidesign hardware except Pro Tools III/24.
These users should read Stereo Voicing—
Pro Tools III/24 Only (pg. 141) instead of
this section.
Click the Stereo column for an Audio
Instrument to make that Audio Instrument stereo. Assume, for example, that
your Audio Instruments Window looks
like Figure 15.9.
Figure 15.9: Sample Audio Instrument Window
Opcode Systems, Inc.
CHAPTER 15: DAE: Audio Instruments
햲 Click the Stereo column next to
any Audio Instrument you want
to use for stereo playback.
Vision places a check mark in the Stereo
column and changes the Voice column
to show that stereo Audio Instruments
use 2 voices.
To change the voice pair used by a stereo
Audio Instrument:
햲 Press and hold the mouse in the
Voice column next to one of the
stereo Audio Instruments.
Vision opens a pop-up menu listing all
possible voice pairs.
Stereo Voicing—Pro Tools III/24 Only
Assume, for example, that your Audio
Instruments Window looks like
Figure 15.10.
Figure 15.10: Sample Audio Instrument Window
햲 In Figure 15.10, notice the voice
assignments.
Specifically, Voice 4 is assigned to Audio
Instrument 1; Voice 8 to Audio
Instrument 2; and so on.
햳 Click the Stereo column next to any
Audio Instrument you want to use for
stereo playback.
In this example, click in the Stereo
column for Audio Instrument 1.
햳 Select the desired voice pair,
and release the mouse button.
햴 Notice that Vision also enables
stereo mode for Audio Instrument 3.
Reason: Audio Instrument 3 uses
Voice 3, which is part of a stereo pair.
(Recall that Vision groups stereo voices
sequentially: 1&2, 3&4, 5&6, and so on).
햵 Also notice that the Voice column
changes to show that Audio
Vision & Studio Vision Pro — Audio Reference Manual
141
PART 4: Digidesign DAE: Configuration & Recording
Instruments 1 & 3 now use a pair of
voices for stereo playback.
To change the voice pair used by a stereo
Audio Instrument:
햲 Press and hold the mouse in the
Voice column next to one of the
stereo Audio Instruments.
OUTPUT ASSIGNMENT
The Audio Instruments Window has an
Output column for each physical audio
output on your digital audio interface.
For example, Sound Tools II has four
audio outputs. The Session 8 has eight
audio outputs as shown in Figure 15.1 on
page 131.
To assign Audio Instruments to outputs:
햲 Choose Windows>Audio
Instruments.
Vision opens the Audio Instruments
Window.
Vision opens a pop-up menu listing all
possible playback voices.
햳 Enable or disable outputs for each
Audio Instrument by clicking the
desired output dots.
A disabled output has an empty Output
dot. An enabled output has a highlighted
dot (green on a color monitor).
There are a number of methods for
enabling/disabling outputs:
•
햳 Select the desired voice pair,
Click an output dot to turn that output
on and off.
and release the mouse button.
NOTE: If you turn off stereo mode for an
Audio Instrument, Vision will automatically turn stereo mode off for any other
Audio Instruments to which one of those
voices is assigned.
142
Opcode Systems, Inc.
CHAPTER 15: DAE: Audio Instruments
•
Click the line between a pair of output
dots to turn both outputs on and off.
Typical Output Assignments
You should assign Audio Instruments
only to the outputs where you want to
hear them.
Hardware Specific Variations
•
Click an output number at the top of
the column to turn on or off all outputs of that number.
The following sections discuss specific
output routing requirements for different
types of audio hardware.
Pro Tools III/24/Mix/Mix Plus
•
Click the line between a pair of output
numbers at the top of the column to
turn on or off all like-numbered
output pairs.
Pro Tools III and Pro Tools 24 have an
immense amount of flexibility in how the
audio can be routed. For this chapter we
will only examine physical outputs. However there are many more options. Please
read Chapter 16: TDM Bussing, Routing &
Plug-Ins for a complete rundown of all
bussing and routing.
Figure 15.11 shows a typical Audio Instruments Window for Pro Tools III.
Figure 15.11: Typical Pro Tools III Audio
Instruments Window
Vision & Studio Vision Pro — Audio Reference Manual
143
PART 4: Digidesign DAE: Configuration & Recording
Only one stereo output pair can be
enabled for each Audio Instrument. Also,
since each Audio Instrument is assigned
to a specific voice, any other Audio Instruments that use that voice must have the
same output assignments.
•
Session 8/Project
Figure 15.12 shows a typical Audio Instruments Window for Session 8.
•
Figure 15.12: Typical Session 8 Audio Instruments
Window
For each Audio Instrument, the outputs
must either be all left, all right, or all stereo. Specifically:
•
144
If you assign an Audio Instrument to
an odd numbered output, then all
other output assignments for that
Audio Instrument must also be
assigned to odd outputs.
For example, look at Figure 15.12.
Since Audio-1 is already assigned to
Outputs 1 and 3 (odd numbers), additional assignments can only be to
Outputs 5 and/or 7. In this example,
you cannot assign Audio-1 to Outputs
2, 4, 6, or 8 without disabling
Outputs 1 and 3.
If you assign an Audio Instrument to
an even numbered output, then all
other output assignments for that
Audio Instrument must be assigned
to even outputs.
For example, look at Figure 15.12.
Since Audio-2 is already assigned to
Outputs 2 and 4 (even numbers),
additional assignments can only be to
Outputs 6 and 8. In this example, you
cannot assign Audio-2 to Outputs 1, 3,
5, or 7 without disabling
Outputs 2 and 4.
If you assign an Audio Instrument to
a stereo pair, then all other output
assignments for that Audio Instrument must be assigned to stereo
pairs.
For example, look at Figure 15.12.
Since Audio-3 is already assigned to
stereo pair 5 & 6, additional assignments can only be to stereo pairs
1 & 2, 3 & 4, or 7 & 8. In this example, you cannot assign Audio-3 to
individual left or right outputs without
disabling stereo pair 5 & 6.
If you’ve added TDM support to your
Session 8, you essentially have a
Pro Tools III system. For more information, see Pro Tools III/24/Mix/Mix Plus
(pg. 143).
Opcode Systems, Inc.
CHAPTER 15: DAE: Audio Instruments
Pro Tools I & Pro Tools II
If you’re using multiple Pro Tools cards
and a System Accelerator card, you will
see outputs displayed in groups of four
(each group represents a 4-channel
Pro Tools system).
If you have an 8-track Pro Tools system,
an Audio Instrument can only be assigned
to outputs that are in the same group of
four. For example, if Audio-1 is assigned
to Output 1, it can also be assigned to
Output 2, Output 3, and Output 4. It
cannot be assigned to Outputs 5
through 8.
If you have a 12-track or 16-track
Pro Tools system, then an Audio Instrument can only be assigned to outputs that
are part of the same pair. For example, If
Audio-1 is assigned to Output 5, it can also
be assigned to Output 6; it cannot be
assigned to any other output without disabling Output 5.
If, in an 8+ track system, you enable an
output for an Audio Instrument that’s currently assigned to a different output
grouping, Vision will automatically disable any output assignments in that
original grouping.
SENDS AND PLUG-INS
COLUMNS
These columns let you monitor the
number of assigned sends and plug-ins
for Audio Instruments, inputs, outputs,
and busses. The individual fields for each
column are for display purposes only, you
cannot click in them to make changes—
they indicate the processing and routing
resources assigned in all of four Console
Windows.
Figure 15.13: Viewing Sends and Plug-Ins
In Figure 15.13, for instance, Audio-1 is
routed to one send and is assigned to two
plug-ins. Audio-2, on the other hand, is
assigned to no sends and no plug-ins.
Since it is possible for audio channels to
be removed from a Console Window without clearing their sends and plug-ins,
these columns can be used to monitor
these assignments—regardless of the
state of the Console Windows.
Vision & Studio Vision Pro — Audio Reference Manual
145
PART 4: Digidesign DAE: Configuration & Recording
THE AUDIO INSTRUMENTS
MENU
From the menu in the Audio Instruments
& Routings Window, choose Reset All
Routings to:
The Audio Instruments Window contains
a small pop-up menu with two options:
•
•
•
•
Dynamic Allocation
Fixed Allocation
•
Use this pop-up menu to change the
default voice assignment method for your
DAE hardware.
IMPORTANT: Changing voice allocation
methods greatly alters Vision’s recording
and playback functions. Make sure you
understand the difference between the two
options before changing the default.
NOTE: Some Digidesign hardware does
not support both voice allocation methods.
Clear all plug-in and send
assignments;
Reset all output assignments for
Audio Instruments to their default
state;
Set all output assignments for inputs
and busses to “none.”
You can, of course, manually remove plugin and send assignments in the Console
Window. In addition, you can choose
Clear Console from the menu in the
Console Window to clear everything in
that console, including plug-ins and
sends.
SAVING INSTRUMENT SETUPS
Audio Instrument assignments are saved
in each Vision file, along with MIDI
Instruments. You may also save Audio
Instruments in the Vision Setup file by
using the File>Save as Setup command.
See your MIDI Reference Manual for
more information about the Setup file.
TDM Systems
Clearing Routings
Figure 15.14: Reset All Routings command
146
Opcode Systems, Inc.
CHAPTER 16: TDM Bussing, Routing &
Plug-Ins
WHO SHOULD READ THIS
CHAPTER?
CONSOLE USE WITH TDM
EQUIPPED SYSTEMS
This chapter applies only to those who
use DAE and own a TDM-equipped system, such as Digidesign’s Pro Tools III,
Pro Tools 24, or Pro Tools 24 Mix/Mix
Plus.
Use the Console Window to route audio
to busses, outputs, and TDM plug-ins.
Specifically, this chapter discusses the
following:
Studio Vision gives TDM users complete
routing access to all of their internal TDM
plug-ins, external signal processors, and
SampleCell cards. This chapter discusses
using the TDM bus in Studio Vision.
•
•
Before reading this chapter, you should
be familiar with material in Part 5: Basic
Audio Editing & Playback and Part 6:
Advanced Audio Techniques.
NOTE: TDM plug-ins from Opcode,
Digidesign, and other developers are discussed in the documentation included with
the plug-ins.
•
Mono and Stereo TDM support
Studio Vision can use all three types
of TDM modules: mono, stereo, and
mono-in/stereo-out. See Mono and
Stereo TDM Plug-Ins (pg. 151).
Output routing in consoles
You can route Audio Instruments to
hardware outputs (or audio busses)
either from the Audio Instruments
Window or directly from the Console
Window. See Audio Outputs
(pg. 155).
Audio Send modules
Each Console channel supports up to
four separate sends (mono or stereo
depending on the type of Audio
Instrument). See Audio Sends
(pg. 158).
Vision & Studio Vision Pro — Audio Reference Manual
147
PART 4: Digidesign DAE: Configuration & Recording
•
•
•
16 audio busses
Studio Vision contains 16 internal
audio busses for TDM users. These
busses can be used either as Audio
Instrument outputs, as discussed in
Audio Outputs (pg. 155), or as Audio
Send destinations, as discussed in
Audio Sends (pg. 158).
SampleCell support
If you own a TDM-based SampleCell
card, you can route its outputs into
the console, processing and mixing
SampleCell the same as any other
Audio Instrument in Studio Vision.
See SampleCell Support (pg. 165).
Console support for hardware
inputs
TDM-users can route hardware
inputs into a console, providing two
distinct advantages: 1) you can patch
external signal processors into a console, and 2) you can use Studio
Vision’s consoles as a virtual mixing
console.
NOTE: A general discussion of Vision’s
Console Windows is contained in your
MIDI Reference Manual.
CREATING A CONSOLE WITH
TDM PLUG-INS
Use one of Studio Vision’s Console Windows to access TDM plug-ins. To do so:
햲 Press and hold the mouse over the
Windows>Console command.
Studio Vision produces a submenu of
console choices.
Figure 16.1: Console Submenu
햳 Select one of the sixteen consoles
from the submenu.
Studio Vision opens that Console
Window.
Figure 16.2: Typical Console Window
148
Opcode Systems, Inc.
CHAPTER 16: TDM Bussing, Routing & Plug-Ins
햴 From the Console Window menu,
choose Build Console From>
Audio Instruments.
Studio Vision assigns each of your Audio
Instruments to a corresponding console
channel.
Studio Vision produces a submenu of
TDM choices.
햶 From the submenu, select the number
of plug-ins you want to access per
channel.
Studio Vision adds a plug-in area to
each console channel.
Plug-in area
TDM Plug-In
Selectors
햵 From the Console Window menu,
press and hold the mouse on the
Plug-Ins command.
Figure 16.3: Console Window with 2 Plug-Ins
shown for each Console Channel
Vision & Studio Vision Pro — Audio Reference Manual
149
PART 4: Digidesign DAE: Configuration & Recording
ASSIGNING TDM PLUG-INS
Use Studio Vision’s consoles to assign
TDM plug-ins to specific Audio Instruments. To do so:
pop-up menu
showing all of
your installed
TDM plug-ins
햲 Press and hold the mouse on the
Plug-in Selector pop-up menu.
Studio Vision opens a pop-up menu of
your installed TDM plug-ins.
햴 Release the mouse button.
Studio Vision assigns the selected TDM
plug-in to the Audio Instrument displayed
in that console channel.
햳 While still holding the mouse button,
move the cursor over the desired
plug-in to select it.
150
The Audio Instrument represented
in this channel uses the ÒShort
DelayÓ TDM plug-in.
Opcode Systems, Inc.
CHAPTER 16: TDM Bussing, Routing & Plug-Ins
MONO AND STEREO TDM
PLUG-INS
Studio Vision supports the following TDM
routing options:
•
•
•
Using Stereo TDM Plug-Ins
Assume you've created a stereo Audio
Instrument voicing (as set in the Audio
Instruments Window).
mono in/mono out
mono in/stereo out
stereo in/stereo out
Studio Vision represents these routings
graphically in the Console Window, as
shown in Figure 16.4.
Audio Instr: MONO
Plug-In: NONE
Audio Instruments are STEREO, as indicated by
the checkmark and the dual Voice assignment
Since you’re using stereo Audio Instruments, you can access ONLY stereo TDM
plug-ins from the Console Window:
Audio Instr: MONO
Plug-In: MONO
Audio Instr: MONO
Plug-In: MONO IN/STEREO
OUT
Audio Instr: STEREO or
MONO (See NOTE 1)
Plug-In: STEREO
Audio Instr: STEREO or
MONO (See NOTE 1)
Plug-In: NONE
Figure 16.4: Graphic Indication of Stereo Status
NOTE 1: A mono Audio Instrument will
have stereo plug-in inputs if the TDM plugin above it contains a mono in/stereo out
plug-in. For more information, see “Using
Mono TDM Plug-Ins (pg. 152).”
Notice that the plug-in area in the Console
Window now indicates that the Audio
Instruments are stereo.
Vision & Studio Vision Pro — Audio Reference Manual
151
PART 4: Digidesign DAE: Configuration & Recording
Using Mono TDM Plug-Ins
Assume you’ve assigned a single, mono
voice to an Audio Instrument (as set in
the Audio Instruments Window).
If you select a mono TDM plug-in, it processes the mono input signal and outputs
a mono signal.
If you select a mono in/stereo out TDM
plug-in, it processes the mono input signal
and outputs a stereo signal. This results in
three important points:
•
Audio Instruments are MONO, as indicated by the lack
of a checkmark and the single Voice assignment
As shown in Figure 16.5, you can access
two types of TDM plug-ins from the Console Window:
•
•
mono in/mono out
mono in/stereo out
•
•
In order to hear the stereo signal, you
must send that signal to an output
pair.
The digital audio is now a stereo signal, yet Studio Vision continues to use
only one voice—the “extra” voice is
provided by your TDM plug-in using
resources from the DSP Farm.
Since the plug-in’s output is stereo,
any plug-in placed after it in the chain
can only be a stereo TDM plug-in.
A mono-in/stereo-out
plug-in...
...can only be followed
by a stereo plug-in
Figure 16.5: Two Types of Mono-In Plug-Ins
152
Opcode Systems, Inc.
CHAPTER 16: TDM Bussing, Routing & Plug-Ins
PLUG-IN EDIT WINDOW
Opening the Plug-In Edit Window
You can now have multiple Plug-In Edit
Windows open at the same time. Clicking
a plug-in edit button for each console
channel opens a new, distinct Plug-In Edit
Window.
Plug-In Controls
The Plug-In Edit Window for TDM plugins now has a different set of controls at
the top of the window, each of which is
described below.
�
�
�
�
쐂
�
Figure 16.6: Plug-In Edit Window (TDM)
쐃
If an existing Plug-In Edit Window is
open, you can Option-click a plug-in
number from the Console Window to display that plug-in in the current Plug-In
Edit Window—which helps you cut down
on the proliferation of open windows.
Title Bar Name
The title bar of each Plug-In Edit Window
is based on the name of the plug-in and
the audio channel it affects. For instance,
the name of the window in Figure 16.6 is
“TC|CHORUS for Audio-1,” which means
that window is displaying the plug-in
TC|CHORUS for Audio Instrument
Audio-1.
Plug-In Selector: Choose a plug-in
from this pop-up menu to assign it to
the console channel, or choose “no
plug-in” to remove the current one.
This pop-up menu, which is duplicated in the Console Window,
displays your installed TDM plug-ins.
Changing a plug-in assignment is not
possible during playback.
Only those plug-ins that will work for
the selected audio channel and slot
are displayed in the Plug-In Selector
pop-up. For instance, if using a stereo
Audio Instrument, only stereo plugins are available.
쐇 Channel: Specifies the audio channel
(Audio Instrument, hardware input or
output, or bus) being processed by
the plug-in.
쐋 Slot: Displays the plug-in number
(1-4) and stereo mode for the plug-in.
쐏 Templates: These two pop-ups let
you store and recall plug-in parameter
settings. See Plug-In Templates
(pg. 154) for more information.
Vision & Studio Vision Pro — Audio Reference Manual
153
PART 4: Digidesign DAE: Configuration & Recording
쐄
Bypass button: Click this button to
bypass the plug-in. Other plug-ins
within that console channel are not
affected—each has its own Bypass
button.
The Bypass button is duplicated in
the Plug-In area of the Console Window. Clicking it in either location
updates it in the other.
쐂 Mute and Solo buttons: Click one
of these buttons to mute or solo the
audio instrument that the plug-in is
assigned to, respectively.
NOTE: Selecting a plug-in template
replaces the current plug-in settings. If
desired, you can save the current settings by
choosing Save Settings As from the Template Functions pop-up. For details, see the
rest of this section.
The Template Functions pop-up contains commands for saving, importing,
exporting, copying, and pasting templates
for plug-in parameter settings.
Plug-In Templates
Parameter settings for TDM plug-ins are
recalled from the Template pop-up in the
Plug-In Edit Window.
Figure 16.8: Template Functions pop-up
Following is a description of each of the
commands in the Template Functions
pop-up:
•
Figure 16.7: Plug-In Template pop-up
Simply click on the pop-up and choose
from the list of plug-in templates stored in
the Vision Effects Templates file (which
must reside in the same folder as the
Vision application). Choosing a template
automatically reconfigures the Plug-In
Edit Window for the displayed audio
channel.
154
•
Save Settings: Saves the current
parameter settings as a plug-in template, using the current template
name.
If the name already exists as a template, this command overwrites it
with the current (displayed) set of
plug-in parameters.
Save Settings As: Saves the current
parameter settings to a new plug-in
template.
With this command you are
prompted to name the new template.
Opcode Systems, Inc.
CHAPTER 16: TDM Bussing, Routing & Plug-Ins
•
•
•
•
•
•
•
Delete Template: Deletes the currently selected plug-in template.
Copy Settings: Copies the current
set of plug-in parameters to the Clipboard, which is handy for pasting
programs to another plug-in slot or
console channel using the same plugin.
Paste Settings: Pastes the parameter
settings from the Clipboard to the
current Plug-In Edit Window for the
displayed audio channel.
Save as Default: Saves the current
parameter settings as default for the
plug-in.
Each time the plug-in is later
assigned to an audio channel, these
settings are automatically made
current.
Import Settings: Opens individual
plug-in programs saved in other
TDM-compatible applications (like
Pro Tools).
Export Settings: Saves the current
parameter settings as a plug-in program that can be opened in other
TDM-compatible applications (like
Pro Tools).
Load Templates From: Loads all
plug-in templates for this plug-in from
a Vision Effects Templates file that is
not current. The loaded templates are
merged with the current set.
BYPASSING PLUG-INS
You can bypass any plug-in from within
the Console Window. To do so:
햲 Click the B button for the TDM
Insert you wish to bypass.
ÒBÓ stands for Òbypass.Ó
Figure 16.9: Bypassing a TDM Plug-In
Studio Vision bypasses the TDM plug-in,
removing it from the digital audio signal
chain.
NOTE: This is the same as opening a plugin’s Edit Window and clicking it’s Bypass
button.
AUDIO OUTPUTS
Studio Vision works with up to 64 hardware inputs and outputs, providing
support for large Digidesign TDM
systems.
In addition, TDM users can use either the
Console Window or the Audio Instruments Window to assign outputs to Audio
Instruments.
Vision & Studio Vision Pro — Audio Reference Manual
155
PART 4: Digidesign DAE: Configuration & Recording
Assigning Audio Outputs in a
Console Window
Assigning Audio Outputs in the
Audio Instruments Window
To assign an output to an Audio Instrument in a Console Window:
The Outputs column in the Audio Instruments Window for TDM users is different
from others. It contains a selector pop-up
menu for assigning outputs. TDM users
can route outputs to several places.
햲 For an Audio Instrument channel,
press and hold the mouse on the
Output selector.
Studio Vision produces a submenu of
Output routing options.
Press and hold mouse on
Output selector...
... to produce a submenu of output
routing options.
Figure 16.10: Audio Instruments Window with
Outputs pop-up
To assign an output to an Audio Instrument in the Audio Instruments Window:
햲 Press and hold the mouse in the
햳 From the submenu, select an output
destination for the Audio Instrument.
For more information about the various
output options, see Output Routing
Options (pg. 157).
Outputs column for an Audio
Instrument.
Studio Vision produces a submenu of
Output routing options.
NOTE: Audio outputs are not provided for
MIDI Instrument channels or non-TDM
Audio Instrument channels.
156
Opcode Systems, Inc.
CHAPTER 16: TDM Bussing, Routing & Plug-Ins
햳 From the submenu, select an output
destination for the Audio Instrument.
For more information about the various
output options, see Output Routing
Options (pg. 157).
RESET SHORTCUT: You can quickly set
all Audio Instruments to the same output if
you press and hold the mouse on the word
“Outputs” at the top of the Outputs
column.
Output Routing Options
TDM users can select one of four output
routings for each Audio Instrument:
•
•
1. Press and hold mouse here
2. Select an output from
the pop-up menu
•
•
3. All Audio Instruments are
set to the selected output
Figure 16.11: Setting all Audio Instruments to the
Same Output
No output: Select this option to disable all audio outputs.
Bus: Select one of sixteen internal
busses. By sending numerous channels to the same bus, you can create a
submix (or “group”)—controlling all
grouped channels with one fader and
a single collection of Audio Sends or
TDM Inserts.
Output: Select a single, mono output
from this submenu. The number of
outputs is determined by your audio
hardware.
Output Pair: Select a pair of audio
outputs from this submenu. If you’re
audio signal is mono, use the pan
fader to position the signal within the
stereo field. See Output Routings and
Panning (pg. 158).
The Output and Output Pair routings
are hardware-based. They let you route
audio signals to devices that are external
to your computer (such as signal processors, mixers, or power amps).
The Bus routings are software-based outputs. They let you route audio signals to
other software-based components within
your computer (such as TDM plug-ins
and other console channels).
NOTE: Whenever you route a channel’s
output to a bus, that bus will always be stereo, regardless of whether the routed audio
signal is mono or stereo. If the audio signal
is mono, its pan control will determine the
Vision & Studio Vision Pro — Audio Reference Manual
157
PART 4: Digidesign DAE: Configuration & Recording
L-R placement of the audio signal within
the resulting bus. If you want to create a
mono bus, use an Audio Send, as described
in “Audio Sends (pg. 158).”
Output Routings and Panning
If you check the Master Instrument
option in the Console Window’s menu,
then the pan fader appears in an audio
channel only if you send a mono audio
signal to either:
•
•
an output pair, or
a stereo bus.
In this situation, use the pan fader to position the mono signal in the stereo field.
Obviously, there is no need for a pan
fader if:
•
•
you send a mono audio signal to a
single output, or
you send a stereo audio signal to an
output pair.
AUDIO SENDS
Each console channel supports up to four
Audio Sends. These work very much like
an effects send on a regular mixing console—you can send audio signals to
either:
•
•
external signal processors, or
internal audio busses.
NOTE: Audio Sends work only with TDMbased digital audio. Bussing is not available for other audio systems or for MIDI
Instruments.
Displaying Audio Sends
To display Audio Sends:
햲 From the Console WindowÕs
menu, press and hold the mouse
on the Audio Sends command.
Studio Vision produces a submenu of
Send options.
NOTE: Mono Audio Instruments can
become stereo if you use a mono-in/stereo-out TDM plug-in to process the audio
signal. For more information, see Using
Mono TDM Plug-Ins (pg. 152).
If you uncheck the Master Instrument
option in the Console Window’s menu,
then “pan” faders will always be visible
since, in this mode, pan faders can control
any Instrument and any type of MIDI data
(not just pan).
158
Opcode Systems, Inc.
CHAPTER 16: TDM Bussing, Routing & Plug-Ins
햳 From the submenu, select the number
of Audio Sends you want to access
per channel.
Anatomy of the Send Area
쐃
쐇
쐋
Figure 16.12: Anatomy of the Send Area
Studio Vision adds a Send area to each
audio-related console channel.
As you can see in Figure 16.12, there are
three main elements in the Audio Send
area:
쐃
Send Selector
쐇 Pre/Post Fader button
쐋 Send Level
NOTE: The Pre/Post Fader button and
Send Level numerical are disabled and
invisible until you select a send destination
using the Send Selector. This provides a
visual way to quickly locate active channel
sends on a busy mixing console.
Two new, undeÞned
Audio Sends per
channel
The following sections discuss each of the
Audio Send parameters in detail.
Vision & Studio Vision Pro — Audio Reference Manual
159
PART 4: Digidesign DAE: Configuration & Recording
Send Selector
•
Use the Send Selector to tell Studio Vision
where to send the audio signal:
햲 Press and hold the mouse on the
Send Selector.
Studio Vision opens a pop-up menu of
routing options.
•
You can choose between the following
audio send destinations:
•
•
160
No send
The audio signal is not sent to an
external output or bus.
Bus
Choosing this option opens a submenu from which you select one of 16
busses to which you want to send the
audio signal.
Sending audio to a bus is a great way
to create submixes or to share a
single TDM plug-in with numerous
Audio Instruments. For more information, see Sending Audio to an
Internal TDM Plug-In (pg. 162).
Busses can be mono or stereo. For
more information, see page 139.
Output
Choosing this option opens a submenu from which you select the
monophonic output to which you
want to send the audio signal. The
number of outputs shown in the submenu is determined by your audio
hardware.
Sending audio to a mono output
allows you to use external signal processor to modify the audio signal.
You can then return the processed
signal back into a different console
channel. For more information, see
Sending Audio to an External Signal
Processor (pg. 162).
Output Pair
Choosing this option opens a submenu from which you select the
stereo output pair to which you want
to send the audio signal. The number
of outputs shown in the submenu is
determined by your audio hardware.
Sending audio to a stereo output
allows you to use external stereo
signal processors to modify the audio
signal. For more information, see
Sending Audio to an External Signal
Processor (pg. 162).
Opcode Systems, Inc.
CHAPTER 16: TDM Bussing, Routing & Plug-Ins
Pre/Post Fader Button
Click this button to toggle the Audio Send
between two states: pre fader and post
fader.
The button always displays the Send’s
current state—clicking it changes both
the state and the label of the button.
Specifically:
•
•
Pre Fader
When the button looks like this,
Studio Vision sends the audio signal
to the selected destination before it
passes through anything else in the
channel. This means the signal that
you send is not affected by the channel’s TDM Inserts, volume, or pan
faders. The volume level is, however,
still affected by the audio event’s
note-on velocity.
Post Fader
When the button looks like this,
Studio Vision sends the audio signal
to the selected destination after it
passes through any of the channel’s
TDM Inserts and the volume fader.
The channel’s pan fader (if active) has
no effect on the Audio Send.
Figure 16.13: Typical Console Channel Strip
Figure 16.14 illustrates the actual audio
signal flow through the console channel
shown in Figure 16.13.
LEGEND
main audio signal path
audio send signal path
For example, Figure 16.13 shows a typical
console channel with a TDM plug-in and
two Audio Sends (one pre fader, one post
fader).
Figure 16.14: Actual Audio Signal Flow of
Figure 16.13
Vision & Studio Vision Pro — Audio Reference Manual
161
PART 4: Digidesign DAE: Configuration & Recording
Send Level
Use this numerical to set the level of
audio signal to send to the destination
shown in the Send Selector.
Values range between 0 and 127, where:
•
•
0 = no audio signal is sent to the send
destination.
127 = 100% of the audio signal level is
sent to the send destination.
Sending Audio to an External
Signal Processor
Use a Send to route one or more Audio
Instruments to a hardware output, which
is connected to a signal processor in your
recording studio. Bring the processed
signal back into the console on another
channel that’s fed from the signal processor’s output.
As shown in Figure 16.15, this works
exactly like an effects send on a regular
mixing console.
Outs: 7
8
Digital I/O
Hardware
Ins: 7
8
Outs: L
R
FX Processor
Ins: L
R
Figure 16.15: Sending Audio to an External Signal
Processor
Sending Audio to an Internal TDM
Plug-In
Use an Audio Send to route numerous
Audio Instruments to a single bus. Then
use the TDM Inserts on that bus to process all the Audio Instruments
simultaneously.
This minimizes the strain on your TDM
resources since multiple Audio Instruments can share a single TDM plug-in.
162
Opcode Systems, Inc.
CHAPTER 16: TDM Bussing, Routing & Plug-Ins
For example, Figure 16.16 shows a console in which Audio-1, Audio-2, and
Audio-3 are all sent to “Bus 1,” which has
a single TDM plug-in assigned to it. As a
result, all three Audio Instruments are
processed by that same TDM plug-in.
CREATING GROUPS—REALWORLD EXAMPLE
Busses let you create submixes or
“groups” within Studio Vision. For example, assume you recorded three backup
singers—each on a different Audio
Instrument.
햲 In one of Studio VisionÕs consoles,
assign three console channels to the
three backup singers.
Figure 16.16: Sharing a TDM Plug-In
Additionally, in the figure above, the
Show Masking Tape option (under the
Console Window menu) has been
enabled, and names have been added to
the Console strips.
햳 Use the volume faders in these three
channels to mix the singers so that
their voices blend together nicely.
Relative volumes set
For details about Show Masking Tape,
please see the Console Window chapter of
your MIDI Reference Manual.
Vision & Studio Vision Pro — Audio Reference Manual
163
PART 4: Digidesign DAE: Configuration & Recording
Now that the voices sound good with each
other, you’ll want that mix to work as a
single unit within the context of the entire
song. To do so:
햶 Assign the output of the bus to your
main L-R outputs.
햴 In an undefined console
channel, select a bus from the
bottom Input selector.
bus output assignment
햷 From the Console Window menu,
Newly created bus
choose to display some TDM Inserts
or Audio Sends.
햵 Assign the outputs of all three
singersÕ channels to the newly
created bus.
Outputs assigned to a bus
164
Opcode Systems, Inc.
CHAPTER 16: TDM Bussing, Routing & Plug-Ins
햸 Assign any desired TDM Inserts
or Audio Sends to the bus
channel.
In this example, some TDM equalization
and a TDM reverb is added to the bus.
TDM plug-in assignments
SAMPLECELL SUPPORT
TDM users with a TDM-equipped SampleCell card can now use Studio Vision’s
consoles to mix, route, and process SampleCell outputs.
햲 In a Console Window press and hold
the mouse on the Instrument
Selector.
If you have a Digidesign SampleCell II
card plugged into the TDM bus, youÕll
see two SampleCell submenus at the
bottom of the list.
Notice that by processing all three singers as a single group, youÕre saving
valuable TDM resources by affecting all
three singers with a single set of plugins.
Routing a mono
SampleCell output
into a Console channel
햹 Use the bus channelÕs volume
fader to mix the volume of the
processed backup singers into
the final mix.
Routing a stereo
SampleCell output
pair into a
Console channel
Figure 16.17: SampleCell Instrument Options
Vision & Studio Vision Pro — Audio Reference Manual
165
PART 4: Digidesign DAE: Configuration & Recording
햳 Select either a mono output from the
SC II submenu, or a stereo output
from the SC II Pair submenu.
The console channel now uses the SampleCell as its input.
can use the Audio Instruments & Routings Window to mute and solo SampleCell
audio channels, route to TDM outputs or
busses, and monitor the number of
assigned sends and plug-ins.
Figure 16.18: TDM audio channels for SampleCell
You can use all of Studio VisionÕs standard bussing, TDM Inserts, pan, and
volume events to create a virtual mix that
includes any or all of your SampleCell
outputs.
SampleCell TDM in the Audio
Instruments window
TDM audio channels for SampleCell now
appear in the Audio Instruments & Routings Window. This means your
SampleCell channels can be renamed,
and set to mono or stereo. In addition, you
166
SIGNAL ROUTING AND
MONITORING
Studio Vision monitors your input using
whichever voice number and output is
assigned to the selected input’s Audio
Instrument.
For example, look at Figure 16.19. Notice
that:
•
•
In the Record Monitor Window,
Input 1 is assigned to Audio-5.
In the Audio Instruments Window,
Voice 5 is assigned to Audio-5, which
in turn, is assigned to Output pair 5-6.
Opcode Systems, Inc.
CHAPTER 16: TDM Bussing, Routing & Plug-Ins
•
•
The monitored signal is affected by
the console’s volume and pan faders,
as well as by any Audio Sends or
TDM Inserts that it might use.
The recorded signal is not affected by
the console’s volume, pan, sends, or
inserts—it’s recorded to your hard
disk exactly as it’s received.
Voice Allocation
If an input is record-enabled, Studio
Vision looks to see which voice is used by
the Audio Instrument assigned to that
input. It then reserves that voice for
recording and/or monitoring the input
signal.
This means that if an audio event uses an
Audio Instrument that’s assigned to the
reserved voice, you will not hear it while
recording.
Figure 16.19: Typical Audio Recording Setup
Therefore, when Input 1 is recordenabled and the Thru mode is set to
either On or Auto, then:
•
•
The signal present at Input 1 is heard
through Output 5-6.
If you want to change the outputs
used to monitor the signal, simply
assign different outputs to Audio-5.
Voice 5 is used to monitor the signal
present at Input 1.
Voice allocation works slightly differently
depending on whether the Thru mode is
On, Off, or Auto, as described below.
Example
Look at Figure 16.19. Notice that both
Audio-5 and Audio-6 use Voice 5.
As long as Input 1 is record-enabled and
Audio-5 is assigned to Input 1 then, if
Thru mode is On or Off, you will not hear
any audio events that are assigned to
either Audio-5 or Audio-6, regardless of
whether Studio Vision is recording, playing, or idle.
Vision & Studio Vision Pro — Audio Reference Manual
167
PART 4: Digidesign DAE: Configuration & Recording
However, if you set the Thru mode to
Auto, then...
•
•
...when Studio Vision is recording or
idle, you will hear the signal present
at Input 1, but not any audio events
assigned to either Audio-5 or Audio-6.
...when Studio Vision is playing, you
will hear audio events assigned to
Audio-5 or Audio-6 (though not simultaneous events, of course), but not
the signal present at Input 1.
Virtual Consoles
Now that Studio Vision can route audio
inputs through its consoles, you can monitor inputs without record-enabling them.
For example, for the configuration shown
in Figure 16.19, assume you change your
console to look as follows:
Based on what you learned earlier, you
know that when Input 1 is record-enabled
and the Thru mode is set to either On or
Auto, then:
•
•
The monitored signal from Input 1 is
sent to Outputs 5-6.
The monitored signal from Input 1 is
also sent to Bus 1 where reverb is
added. Bus 1’s volume fader controls
the amount of reverb that’s mixed
with the signal.
Here’s where things get interesting.
Notice that console channel 3 sends the
signal present at Input 1 to Output 8. This
means that the signal present at Input 1
always appears at Output 8, even when...
•
•
•
•
...Input 1 is not record-enabled.
...the Thru selector pop-up menu is
set to Off.
...you change the Audio Instrument
assigned to Input 1 in the Record
Monitor Window.
...Studio Vision is playing, recording,
or simply idle.
Also, if you create any Audio Sends or
TDM Inserts, they too operate on the
input signal. This gives you a way to
create a “virtual mixing board” within
Studio Vision.
Figure 16.20: Sample Console
168
Opcode Systems, Inc.
CHAPTER 16: TDM Bussing, Routing & Plug-Ins
RECORDING FROM ALTERNATE
SOURCES IN THE TDM CHAIN
You can choose practically any place in
the TDM chain as recording source. This
allows you to record digitally across the
TDM bus without having to patch a single
cable. Using a TDM system, Studio Vision
allows recording from physical inputs,
SampleCell TDM, Audio Instruments, or
busses. Some of the uses for this are:
•
•
•
•
Recording a master mix with all TDM
effects in real time for a “bounce to
disk” mix. To do this, route all channels to a single bus and record from
it.
Record the output of SampleCell
directly as audio into Studio Vision.
“Print the effects” from a track. You
can record from the output of an
Audio Instrument to record its TDM
Insert effects.
Create multiple submixes from busses. For example you could use
Opcode’s fusion:VOCODE TDM and
record the vocoded signal in real
time.
Before reading this you should be familiar
with all recording techniques as discussed in Chapter 14: DAE: Recording
Audio, and all the bussing concepts
described previously in this chapter.
In general, to record from an alternate
place in the TDM chain:
햲 Configure your console with inserts,
buses, SampleCell, etc.
햳 In the Record Monitor Window, select
the input source from the Input popup menu.
햴 Set up the Audio Instrument
destination and record.
For general recording information with
DAE, consult Recording: Step-by-Step
(pg. 116).
What follows are specific instructions for
each type of input source for recording.
Recording from Hardware Inputs
Recording from hardware inputs is the
most common way you will record in
Studio Vision. The signal coming into one
or a pair of the inputs from your audio
interface is recorded to a hard disk track
(Audio Instrument). When recording
from an input, no effects or volume fader
information is recorded. A description of
recording from inputs is found in Recording: Step-by-Step (pg. 116)
Vision & Studio Vision Pro — Audio Reference Manual
169
PART 4: Digidesign DAE: Configuration & Recording
Recording from SampleCell TDM
Recording from a TDM equipped SampleCell is similar to using hardware inputs.
Use this to record a digital audio version
of your MIDI performance on a SampleCell card. Studio Vision records directly
through the TDM bus, completely in the
“digital domain.” As is true with hardware
inputs, Studio Vision records directly
from the source and does not record any
inserts (plug-ins).
To record a SampleCell performance
directly, choose a SampleCell output in
the Input pop-up of the Record Monitor. If
you have linked pairs unchecked, individual inputs will be available. If you have
linked pairs enabled, you will see only
SampleCell pairs in the Input pop-up. No
effects or panning information are
recorded. To record that information you
can either record your SampleCell tracks
into Audio Instrument tracks or bus them
and record from busses. Discussion of
those techniques follows.
Recording from Audio
Instruments and Busses
To record from the output of a mono
Audio Instrument:
햲 Uncheck Linked Pairs in the Record
Monitor Window.
Linked Pairs Checkbox
햳 Select the mono Audio Instrument as
the record source from the Input popup.
햴 Make sure that you are recording to
an unused Audio Instrument.
햵 Record as you would any audio track.
When recording from a mono Instrument, and a series of mono-to-mono
plug-ins, the signal goes to the volume
fader, then is recorded mono.
You may want to record your effects and
volume information directly to a new
Instrument in real time. To do that you
can record from an Audio Instrument.
170
Opcode Systems, Inc.
CHAPTER 16: TDM Bussing, Routing & Plug-Ins
To record from a stereo Audio Instrument, or if you have a mono Audio
Instrument with a mono-to-stereo plug-in:
햲 Check Linked Pairs in the Record
Monitor Window.
햳 Select a stereo Instrument as the
record source from the Input pop-up.
More on Recording from Busses
You may want to record a master mix,
submix, or from the output of a bus that
has several TDM effects on it. In this case
you would select a bus as your record
source in the Record Monitor. Recording
from busses is similar to recording from
Audio Instruments as described above.
You cannot record from a bus if the signal
doesn't also go to a physical output.
To record a submix:
햲 In a Console, assign the main outputs
of the Instruments in the mix to a bus.
This can include hardware inputs as
well, which can also be bussed to a bus.
햴 Make sure that you are recording to
an unused Audio Instrument.
햵 Record as you would any audio track.
The pan fader has no effect because by
the time the signal reaches the volume
fader it is already stereo.
When you record from Audio Instruments
and busses, your volume fader movements affect the volume of the recording
(the actual amplitude of signal). Any plugins that are assigned to those Instruments
will also be recorded. Studio Vision
records the signal from Audio Instruments and busses post volume fader but
pre pan fader (unlike hardware inputs and
SampleCell TDM). Any real-time changes
you make to plug-ins will also be
recorded. In all cases, you cannot record
from an Audio Instrument if the signal
doesn't also go to a physical output.
햳 Assign the output of that bus to an
output pair.
This will become your ÒsubmasterÓ fader.
햴 Assign any TDM effects to your
Instruments and main output bus
햵 Check Linked Pairs in the Record
Monitor Window.
햶 Enable recording on a stereo pair.
Vision & Studio Vision Pro — Audio Reference Manual
171
PART 4: Digidesign DAE: Configuration & Recording
햷 Select the ÒsubmasterÓ bus as your
record source from the Input pop-up.
In this example, it is Bus 1.
햸 Record to an unused Audio
Instrument as you would normally
record any track.
All audio and effects with fader movements for all bussed Instruments are
recorded.
To record pan on a single instrument:
햲 Send the main outputs of the Audio
Instrument to a bus.
The bus becomes stereo. (Remember
you cannot record pan or pan automation from an Audio Instrument.) Make
sure no other instruments are sent to this
bus.
햳 Record from the bus.
When you move the Audio Instrument's
pan fader left and right, the effect is
recorded.
A couple of potentially confusing situations and their causes:
•
•
172
Audio-1 is mono, but it has a mono-tostereo plug-in assigned. You try to
record with Linked Pairs unchecked
and Studio Vision tells you that you
can’t. In this case you will need to
record the Audio Instrument to a
linked pair or disable the mono-tostereo plug-in.
Audio-1 is mono and its main output
is set to Bus 1. You try to record from
Bus 1 with Linked Pairs unchecked.
As a result, Studio Vision gives an
error message of, “since Audio-1 is
mono, so Bus 1 should also be mono.”
•
Remember that when the main output
goes to a bus, it goes post pan fader
and the bus becomes stereo. If you
assign a send to Bus 1 instead, the
bus will be mono and you can record
it as a mono track.
Audio-1 is mono and its Send is
assigned to Bus-1 and is set to Pre.
Audio-1 also has a mono-to-stereo
plug-in. If there were no plug-ins or
only mono-to-mono plug-ins, Bus-1
would be mono. However, the bus is
stereo because of the mono-to-stereo
plug-in.
For more information on TDM bussing
and determining when one is stereo or
mono, see Audio Sends (pg. 158).
TIP: To determine if a bus is stereo, enable
a few TDM plug-ins (from the Console popup menu) and the gray arrows will tell you.
See Mono and Stereo TDM Plug-Ins
(pg. 151).
TIP: If you want to record from a bus using
complex routing, first start by setting up
everything in the consoles with the record
channels disabled. Enable the record channels last. As long as the channels are not
record-enabled you can have the “wrong”
input (the pop-up on the left) or the wrong
destination (the Audio Instrument pop-up
on the right) and no error messages will be
displayed.
Opcode Systems, Inc.
CHAPTER 17: DAE: Audio Preferences
Use the Audio Preferences dialog box to
set various record/playback options for
the Digidesign hardware.
NOTE: The Audio Preferences dialog box
may look slightly different depending on
your audio hardware. These differences will
be noted throughout this chapter.
To open the Audio Preferences dialog
box, choose Audio>Audio Preferences.
Figure 17.1: Audio Preferences Dialog Box for
DAE
As seen in Figure 17.1, there are many
elements to the Audio Preferences dialog
box. These are discussed in the following
sections.
MAXIMUM FADER POSITION
DAE allows you to boost output volumes
by 6 dB if desired. If your audio files were
recorded at a very low amplitude, you can
set this value to +6 dB and then increase
the position of your volume faders to maximum; this will give all your audio files a
+6 dB volume boost.
The problem with boosting the output of
all your audio files is that any audio events
that contain signals close to the maximum
amplitude will get boosted to the point of
distortion. Therefore, you should probably use the +6 dB boost only as a
temporary solution to low audio volumes.
The best way to achieve the loudest possible volume without distortion is to use the
DSP>Normalize option, as discussed in
Normalize (pg. 358). Then, if you want
playback to be at a lower volume, use
either a lower velocity value for an event,
or use audio volume events to adjust volume. For more information about setting
audio event volumes, see
Chapter 23: Adjusting Volume and Pan.
To obtain the best audio quality, you
should leave the Maximum Fader Position setting at 0 dB and record your audio
as high as possible without clipping.
Vision & Studio Vision Pro — Audio Reference Manual
173
PART 4: Digidesign DAE: Configuration & Recording
SMOOTH AUDIO CONTROLLERS
SESSION 8: Smooth Audio Controllers are
not available with Session 8 and, therefore,
do not appear in the Audio Preferences
dialog box.
Sudden changes in volume and pan can
produce unwanted noise, such as clicks,
pops, or “zips.” This dialog box gives you
a set of parameters to smooth out rapid
changes in volume or pan, therefore eliminating these unwanted noises.
The Fade duration is the amount of time
the smoothing “ramp” will be generated
during fast amplitude changes or pans.
Fade durations can be set between 0 and
200 ms.
The None, Sharp, Medium, and
Smooth buttons each provide default
volume and pan fade times.
In the example below, consider an audio
signal that changes amplitude abruptly:
78
64
66
100 ms
Smoothing ramps created by a
Fade duration of 100 ms
78
64
66
68
Figure 17.3: Smoother Amplitude Changes After
Applying Smooth Audio Controllers
IMPORT MULTIPLE FILES...
This option determines how audio files
are placed when multiple files are
imported.
When end-to-end onto one track is chosen, multiple files imported at the same
time will be placed end-to-end on the
selected track.
68
100 ms 50 ms
Sharp Changes is amplitude
can cause unwanted clicks and pops
Figure 17.2: Abrupt Amplitude Changes of Original
Audio Envelope.
174
If we set the Fade Duration to 100 ms by
clicking the Medium button, Vision will
automatically smooth the signal within
100 ms of the amplitude change.
When onto multiple empty tracks is
chosen, multiple files imported at the
same time will be placed onto separate
empty tracks (with one event per track).
For more information about importing
audio, see Chapter 20: Import/Export
Cornucopia.
Opcode Systems, Inc.
1
2
4
3
Basic Audio Editing &
Playback
4
5
6
7
Vision & Studio Vision Pro — Audio Reference Manual
175
PART 5: Basic Audio Editing & Playback
176
Opcode Systems, Inc.
CHAPTER 18: Working with Audio Events
Every time you record digital audio,
Vision creates an audio event. This chapter discusses how to view, select, and
move audio events.
NOTE: Audio events are defined in
Chapter 2: Basic Terminology.
Graphic Window
Audio events are displayed as waveforms
in the Graphic Window (between the
Piano Roll and the Strip Chart).
Figure 18.1 shows a typical Graphic
Window and the audio information contained within it.
AUDIO EVENTS IN DIFFERENT
WINDOWS
You can select audio events for editing
either in:
•
•
•
the Graphic Window (in the area
between the Piano Roll and the Strip
Chart)
the Tracks Window’s Track Overview
area
the List Window
Events you select in one window are automatically selected in the other, and each
window updates to display changes after
editing.
쐃
쐋
쐇
Figure 18.1: Typical Audio Graphic Window with
Multiple Audio Events & Instruments
Labeled in the Graphic Window are:
쐃
Audio Instruments
Audio Events
쐋 Audio Event Names
쐇
Vision & Studio Vision Pro — Audio Reference Manual
177
PART 5: Basic Audio Editing & Playback
Tracks Window
List Window
Audio events are displayed as waveforms
in the Track Overview area of the Tracks
Window. Figure 18.2 shows a typical
Tracks Window and the audio information
contained within it.
Audio events are displayed in a chronological list (along with MIDI and text
events) in Vision’s List Window.
Figure 18.3 shows a typical List Window
and the audio information contained
within it.
�
쐃
쐇
Figure 18.2: Typical Tracks Window with Audio
Tracks
Labeled in the Tracks Window are:
쐃
Audio Instruments
쐇 Audio Events
If a track contains multiple Audio Instruments, the Track Overview area shows
Audio Instruments with overlapping times
as though they were a single Audio
Instrument. For more information, see
Tracks Window Selection (pg. 185).
178
쐇
쐃
쐋
쐏
Figure 18.3: The List Window Displaying Audio
Events
Labeled in the List Window are:
쐃
쐇
쐋
쐏
쐄
Audio Instruments
Audio Events
Audio Event Names
Audio Event Velocities
Audio Event Mutes
Opcode Systems, Inc.
CHAPTER 18: Working with Audio Events
VIEWING AUDIO EVENTS AS
WAVEFORMS
In the Graphic Window and Tracks Window, Vision displays each audio event as a
waveform.
Figure 18.6: Audio Event from Figure 18.4 after
Dividing into 3 Separate Events
Zooming In
Figure 18.4: Waveform Audio Event
Sound can be visually interpreted by placing its data on a graph as a waveform. The
vertical axis represents amplitude and the
horizontal axis represents time.
Figure 18.5 shows a waveform zoomed in
to show two cycles of a simple sine wave.
Figure 18.5: Simple Waveform (Sine Wave)
You can separate audio event waveforms
into sections so that you can manipulate
ranges of sound. For instance, if you
recorded someone speaking you could
rearrange the words in any order, cutting
and pasting sections of the waveform.
When editing a waveform, it is often
useful to zoom in as far as possible to see
a specific portion of the audio event.
Vision’s Tracks and Graphic windows are
both bar/beat/unit based (rather than
sample-based), and you cannot zoom in to
more than one unit per pixel. (There are
480 units in one quarter note.)
Audio density changes with tempo. If
you’re editing an audio event in a
sequence whose tempo is set to 60 bpm,
raising the tempo of the sequence to
240 bpm will allow you to zoom in four
times as far (in relation to the audio). This
happens because a faster tempo results in
fewer samples per bar/beat/unit, which
means fewer samples per pixel. The samples appear to be more “spread out” on
the screen when you zoom in.
If you find yourself in a situation where
you can’t zoom in as far as you’d like, try
temporarily increasing the tempo of the
sequence. The maximum tempo is
500 bpm, and resolution is quite high at
this tempo. After editing, return the
tempo to its original setting.
Ranges you separate during edit operations become new audio events with new
begin times and durations.
Vision & Studio Vision Pro — Audio Reference Manual
179
PART 5: Basic Audio Editing & Playback
Zero Crossings
Editing with Zero Crossings
When you edit audio events, you will
probably want your edit points to begin
and end in low amplitude levels of the
waveform. Edit points that occur in amplitude levels higher than zero can produce
audible clicks and pops on playback; the
higher the amplitude, the more likely it is
that there will be clicks.
Vision also automatically puts all edit
points at zero crossings. For example,
when you select a portion of an audio
event and use the Audio>Separate command, the beginning and end of the
separated region will always be at zero
crossings. Although edits in the Graphic
window always happen at exact bar/beat/
unit boundaries, that is only what you see.
The audio that you hear will play from a
zero crossing.
Vision attempts to avoid unwanted clicks
by automatically playing from the closest
point where the waveform crosses the
zero amplitude level (called the zero
crossing). No matter what type of waveform you’re working with, the distance
between zero crossings is short enough
that when Vision plays from the closest
zero crossing, the change is not
noticeable.
Suppose you zoom in as far as you can
and make a cut in the middle of an audio
region. You try to edit at a zero crossing
but you are bound by bar/beat/units.
Your edit may look like this:
Edit
point
Zero
Crossing
Figure 18.7: Vision Moves the Playback Point to
the Closest Zero Crossing
A transition that sharp would result in a
loud pop. A pop or click is caused by a
sharp transition in a waveform, and the
transition pictured above is about as sharp
as possible.
The good news is that Vision automatically avoids this problematic situation.
Although the Graphic window is constrained to these bar/beat/unit
boundaries, Acadia and DAE work at the
sample level. When Vision triggers an
audio event in Acadia or DAE, the timing
180
Opcode Systems, Inc.
CHAPTER 18: Working with Audio Events
is expressed in samples, not bars/beats/
units. Because of this capability, Vision
will tell Acadia or DAE to play the sound
starting at the next zero crossing. This is
the result:
If you edit it at its peak you get this:
Figure 18.8: Edit at a peak
What you
see
That is a very sharp transition, and it will
produce a very loud pop. It you edit at the
zero crossing you get this:
What you
hear
Figure 18.9: Edit at a zero crossing
The DSP>Mix and Export Audio Mix
processes also work at the sample level,
and will ignore the first samples until they
reach the first zero crossing.
That is less sharp, but the waveform still
rises up suddenly. That will still produce
an audible pop, although it will be softer
than the one in Figure 18.8. So, even
though Vision automatically uses zerocrossings, you may still hear a pop or
click at the beginning of an audio event.
Pops and Clicks
Editing at zero crossings dramatically
reduces the pop at the beginning of a
sound, but it cannot completely eliminate
it. A pop is caused by a sharp transition in
a waveform. Imagine a waveform like this:
The only failproof way to get rid of such a
pop is to do a fade in. For details, see Creating Fade-Ins and Fade-Outs (pg. 370).
NOTE: Use a sample editing program such
as Peak or Sound Designer II if you want to
edit actual wave data. If you own Peak or
Sound Designer II, you can open it directly
from Vision by choosing Audio>Edit
Event SoundFile. For more information,
see Edit Event Soundfile (pg. 348).
Vision & Studio Vision Pro — Audio Reference Manual
181
PART 5: Basic Audio Editing & Playback
Waveform Display Options
Waveform Height Options
Vision gives you three display choices for
waveforms. These choices are available in
the Audio>Waveform Display
submenu.
Vision gives you the ability to auto size
waveforms and grow or shrink them.
These choices are available in the
Audio>Waveform Height submenu.
Figure 18.10: Waveform Display Options
Figure 18.11: Waveform Display Options
The three waveform display options are:
•
•
•
Fast, which allows Vision to redraw
waveforms fairly quickly, a useful feature during recording sessions.
High Resolution, which—if you are
zoomed in enough—displays waveforms in greater detail than Fast
mode, showing clearly the peaks and
valleys of the waveform, a useful feature during editing procedures.
Off, which displays a waveform as a
rectangular bar. This takes Vision virtually no time to draw and is useful if
you want to work extremely quickly
and viewing the waveform is not a
concern.
For details about each of these display
options, see Waveform Display (pg. 354).
182
The three waveform height options are:
•
•
•
Automatic, which directs Vision to
draw waveforms to the height that
Vision thinks best fit based on how
many Audio Instruments are
showing.
Grow, which increases the vertical
height of a waveform.
Shrink, which reduces the vertical
height of a waveform.
For details about each of these display
options, see Waveform Height (pg. 353).
Tip: you can assign key equivalents to the
Grow and Shrink commands in the Commands Window. See the MID Reference
Manual description of key commands for
more detail.
Opcode Systems, Inc.
CHAPTER 18: Working with Audio Events
INDIVIDUAL CANCELING OF
WAVEFORM BUILDS
AUDIO EVENT NAMES
Cancelling a waveform build affects only
that waveform.
Viewing Audio Event Names
Cancelling a waveform build affects only that
waveform, as shown here
If the Audio>Display Names option is
enabled, audio event names are displayed
in the lower left corner of the event in the
Graphic Window. This option does not
affect audio event names in the List
Window (where names are always displayed and can be edited) or the Tracks
Window (where the waveform is too small
to contain any text).
Cancelled Waveform
Figure 18.12: Individual Cancelling of Waveform
Builds
If you cancel a waveform build and later
decide that you want to see it:
Audio>Display Names enabled
햲 Choose Audio>File Management.
햳 In the File Management Window,
select the audio file for which you
wish to view the waveform.
햴 From the File Management Window
Menu, choose Rebuild Waveform.
Audio>Display Names disabled
Figure 18.13: Displaying Audio Event Names in a
Graphic Window
Figure 18.14: Audio Event Name Displayed in a
List Window
Vision & Studio Vision Pro — Audio Reference Manual
183
PART 5: Basic Audio Editing & Playback
Renaming Audio Events
SELECTING AUDIO EVENTS
Audio event names initially default to the
name of the associated audio file or
region. However, you can rename audio
events for easier identification.
Selecting Entire Audio Events
When you’re working in a List Window,
simply click the audio event name in the
list and type a new name.
•
•
•
When you’re working in the Graphic Window, you name audio events in the Audio
Event Info dialog box. To do so:
You can select entire audio events in:
the Graphic Window
the List Window
the Tracks Window (Track Overview
area)
The following sections discuss the
method used for each window.
햲 Click an audio event to select it.
The waveform becomes hollow.
햳 Choose Audio>Get Event Info.
Vision opens the Audio Event Info dialog
box.
Graphic Window Selection
To select an entire audio event in a
Graphic Window:
햲 Move the cursor into the top third of
the waveform (the upper select
region).
Figure 18.15: Audio Event Info Dialog Box
Alternately, if Display Event Names is
enabled, you can open the Audio Event
Info dialog box by positioning the cursor
over the audio event name (it becomes a
question mark) and clicking.
햴 Click in the Name field and type a
new name for the audio event.
The rest of this dialog box displays information about the particular audio event.
Upper Select Region
Figure 18.16: The Upper Select Region is the
Top Third of the Audio Event’s Waveform
If your cursor is positioned in the center
of this select region, it will become a Vertical Move cursor; if your cursor is in the
left of the select region, it will become a
Horizontal Move cursor; if itÕs in the right,
햵 Click the OK button
Vision renames the audio event.
184
Opcode Systems, Inc.
CHAPTER 18: Working with Audio Events
it will become a Right Trim cursor (discussed in Changing Audio Event
Lengths (pg. 194)).
Horizontal Move Cursor
Tracks Window Selection
To select an entire audio event in a Tracks
Window:
햲 In the Tracks Window, select the
Arrow cursor.
Vertical Move Cursor
햳 In the Track Overview, click the
desired audio event to select it.
Right Trim Cursor
Figure 18.17: The Three Editing Cursors
햳 Click the mouse.
The entire waveform becomes hollow to
indicate itÕs selected.
Selected audio event
Figure 18.18: Selected Audio Event in
Graphic Window
List Window Selection
To select an entire audio event in the List
Window, simply click its selector dot.
Figure 18.20: Selected Audio Event in Tracks
Window
If the Track contains more than one
Audio Instrument, selecting an audio
event in the Track Overview area actually
selects all audio events that occur within
the same range of time.
Selected audio event
Figure 18.19: Selected Audio Event in List
Window
Vision & Studio Vision Pro — Audio Reference Manual
185
PART 5: Basic Audio Editing & Playback
For example, if the Graphic Window
looks as follows:
Figure 18.21: Audio Events in Graphic Window
...then the Tracks Window looks like
Figure 18.22:
Figure 18.22: Audio Events in Tracks Window
Notice, in Figure 18.22, that the Tracks
Window shows only one phrase even
though there are many audio events. This
is because the Three Audio Instruments’
events overlap in time, creating a single
phrase in the Tracks Window. To help
clue you into this situation, Vision displays the multi Instrument audio track in
black in the Tracks Window (unlike
single Instrument tracks that display in
each Instrument’s color).
186
When you select a phrase in the Track
Overview area, you’re actually selecting
all audio events that the Tracks Window
displays as part of that single phrase.
Selecting a single
phrase in a multiInstrument track...
...selects all
events in that
time range.
TIP: Selecting audio events in the Track
Overview area is particularly useful when
you want to apply the same edit to multiple
audio events. For example, if your track
contains both lead vocals and harmony
vocals, selecting a single phrase in the
Track Overview area selects all vocals that
occur at the same time, allowing you to edit
them simultaneously.
Opcode Systems, Inc.
CHAPTER 18: Working with Audio Events
Selecting all Audio Events
Assigned to the Same Audio
Instrument
To select all audio events that are
assigned to the same Audio Instrument:
햲 Move the cursor into the left margin
of the Graphic Window so it becomes
a horizontal I-beam.
Horizontal I-beam Cursor
Selecting Portions of Audio
Events
You can select portions of audio events to
edit.
Selecting a Portion of a Single Audio
Event
To select a portion of a single audio event:
햲 Select the Marquee tool by clicking its
icon in the Graphic Window.
햳 Move the cursor into the lower two
햳 Click to select all the audio events
assigned to that Audio Instrument.
thirds of the waveform (the lower
select region).
햴 Drag over the range you want to
select.
All audio events assigned to Audio
Instrument 1 are selected
Selected Region
Figure 18.23: Click in left margin to select all
Audio Events assigned to a single Audio
Instrument
Figure 18.24: Selected Portion of a Single
Audio Event
TIP: To select audio events on multiple
Audio Instruments, drag the I-beam
cursor across them.
Vision & Studio Vision Pro — Audio Reference Manual
187
PART 5: Basic Audio Editing & Playback
You’ll notice that when you select a portion of an audio event, the entire event
becomes hollow and the range you drag
across becomes highlighted (as shown in
Figure 18.24. Some editing commands
(such as Copy, Cut, etc.) affect only the
highlighted range. Other commands
(such as Quantize or Set Instrument)
operate on the entire (hollow) audio
event. Various editing operations are discussed throughout this manual.
Selecting Portions of All Audio Events in
a Time Range
To select portions of all audio events in a
time range:
Cursor Quantize Button
Cursor Quantize Value
pop-up Menu
햴 Move the cursor into the lower select
region of an audio event.
햵 Drag across the range you want to
select.
Notice that Vision selects portions of all
audio events in the specified time range.
햲 Select the I-beam cursor by clicking
its icon in the Graphic Window.
The I-beam selects audio events on all
Audio Instrument in the selected track.
햳 If you wish to constrain cursor
movement to a specific metric value,
turn on Cursor Quantize and select a
quantize amount from the pop-up
menu.
188
Selected Region spans
all Audio Instruments
Figure 18.25: Selecting a time range
spanning all Audio Events
NOTE: Audio events assigned to different
Audio Instruments appear in different rows
in a Graphic Window. See Changing Audio
(pg. 191) to learn how to move audio
events between Audio Instruments.
Opcode Systems, Inc.
CHAPTER 18: Working with Audio Events
Simultaneously Selecting MIDI,
Audio, and Strip Chart Events
Simultaneously Selecting Events
in Multiple Tracks
To simultaneously select MIDI notes,
audio events, and Strip Chart data:
You can use many of the previously discussed techniques to select audio events
in the Tracks Window. The Tracks
Window is especially useful when you
wish to select events in multiple tracks.
To do so:
햲 In the Graphic Window, select the
I-Beam cursor by clicking its icon.
햲 In the Tracks Window, select the
Arrow cursor.
햳 Press and hold the mouse in the ruler
area in the upper portion of the
Graphic Window (where the bar
numbers are displayed) and drag
across the time range you want to
select.
Vision selects all events in the time
range.
햳 In the Track Overview, Shift-click the
desired audio events or phrases to
select them.
Shift-click to select multiple
audio events
Drag in the ruler area (at the top of the
window) to select all events in a
selected time range.
Figure 18.27: Shift-Click Multiple Audio
Events
Figure 18.26: Select All Information in a
Vertical Path
Vision & Studio Vision Pro — Audio Reference Manual
189
PART 5: Basic Audio Editing & Playback
As discussed previously, if a track contains multiple Instruments, then the
Track Overview area merges all Instruments in a common time range together
into a single phrase. This is discussed in
detail in Tracks Window Selection
(pg. 185).
You can use the Tracks Window and the
I-beam tool to select all events (of all
types) in all tracks in a specified time
range, and you can use the Marquee tool
to select ranges of multiple events in multiple tracks.
햳 Drag the event horizontally (left or
right) to a new start time.
audio event dragged to
an earlier start time
Figure 18.29: Event After Dragging Earlier in
Time
As you drag, the new start time will be
displayed in the Cursor Display field in
the upper section of the Graphic
Window.
CHANGING AUDIO EVENT
START TIMES
You can move audio events to new start
times using the List Window numerical or
by dragging events in the Graphic or
Tracks Windows.
To move audio events in a Graphic
Window:
햲 Move the cursor into the upper select
region in the left side of the event.
The cursor turns into a Horizontal Move
cursor.
Horizontal
Move Cursor
Figure 18.28: Horizontal Move Cursor
Positioned over Audio Event
190
Cursor Display Field
햴 Play back the track to hear the result
of your edit.
You can use a similar technique in the
Tracks Window. Simply drag an event
with the Arrow cursor to change its start
time.
NOTE: As with MIDI data, you can constrain cursor movement to specific metric
amounts by quantizing the cursor movements. For example, if you wanted to move
an audio event exactly three measures earlier, you would quantize the cursor
movement to whole notes, then drag the
audio event three measures to the left. You
can also use the Nudge command to move
events.
Opcode Systems, Inc.
CHAPTER 18: Working with Audio Events
To change the start time of audio events
in the List Window, click the event’s start
time (bar, beat, unit, or SMPTE) and use
the numerical to scroll the values up or
down (or type in the desired location).
Graphic Window
To assign a different Audio Instrument to
an audio event:
햲 Move the cursor into the center of an
audio eventÕs upper select region.
The cursor becomes a Vertical Move
cursor.
Change the start time numerical to change
the starting time of an audio event in the List Window.
Vertical Move Cursor
Figure 18.31: Vertical Move Cursor
Positioned over Audio Event
햳 Drag the event up or down to the
Figure 18.30: Changing Audio Event Start Times in
the List Window
desired Audio Instrument.
audio event dragged to
a new Audio Instrument
CHANGING AUDIO
Instrument Assignments
If a track contains multiple Audio Instruments, you can move audio events
between them. The method you use
depends on which edit window you
prefer.
Figure 18.32: Event After Moving to Another
Instrument
Vision & Studio Vision Pro — Audio Reference Manual
191
PART 5: Basic Audio Editing & Playback
If a track contains only a single Audio
Instrument, use the Do>Set Instrument
command as described below:
햵 Select a new Audio Instrument from
the pop-up menu.
햲 Click the audio event that you want to
move to another Audio Instrument.
햶 Click the Set button.
Click an audio event to select it
햳 Choose Do>Set Instrument.
Notice that assigning an audio event to a
different Audio Instrument creates a new
Audio Instrument in the Graphic Window
(if it didnÕt already exist).
Vision opens the Set Instrument dialog
box.
New Audio Instrument
햴 Press and hold the mouse on the
audio event assigned to new Instrument
name of the Audio Instrument.
Vision opens a pop-up menu of Instrument choices.
192
Opcode Systems, Inc.
CHAPTER 18: Working with Audio Events
List Window
Tracks Window
When you have more than one Audio
Instrument assigned to a track, the List
Window displays a new column—the
Audio Instruments column. Use this
column to assign Audio Instruments to
different audio events.
If a track only uses one Audio Instrument
and you want to change that Audio Instrument, you can do this from the Tracks
Window:
햲 Press and hold the mouse on an
Audio Instrument name in the List
Window.
Vision opens a pop-up menu of Audio
Instruments.
햳 From the pop-up menu, select the
햲 Press and hold the mouse on the
Audio Instrument name.
Vision opens a pop-up menu listing all
Audio Instruments.
햳 From the pop-up menu, choose the
Audio Instrument you wish to use for
all audio events in that track.
Audio Instrument that you want to
use.
Press and hold mouse here...
... to open an Audio Instruments
pop-up menu.
Vision & Studio Vision Pro — Audio Reference Manual
193
PART 5: Basic Audio Editing & Playback
When you have more than one Audio
Instrument assigned to a track, the
Tracks Window Instrument column
“Multi”. You can remap all audio events
assigned to one Audio Instrument to a different Audio Instrument. To do so:
햴 Press and hold the mouse on the
name of the Instrument you wish to
reassign.
Vision opens a pop-up menu of Instrument choices.
햲 Press and hold the mouse in the
Instrument column for the desired
track.
Vision opens a pop-up list of Instruments
used by that track. This list also contains
a Remap Instruments command.
햵 Select a new Instrument assignment
from the pop-up menu.
CHANGING AUDIO EVENT
LENGTHS
햳 Select Remap Instruments from
the pop-up menu.
Vision opens the Remap Instruments
dialog box. This dialog box lists all
Instruments currently in use by the
Track.
Audio Events and Track Length
If the beginning of an audio event falls
within the track length, but any portion of
it falls beyond the end of the track, that
portion will not be played by Vision. If the
track loops, then the portion of the audio
event that’s past the end of the sequence
will play.
If you check the Sustain audio across
segments options in the Settings Window, an audio event that’s played from a
sequence event will continue to play after
its parent sequence has ended. See your
194
Opcode Systems, Inc.
CHAPTER 18: Working with Audio Events
MIDI Reference Manual for more information about the Sustain audio across
segments option.
Trimming
In order to always hear the entire event,
you need to manually adjust the track
length to accommodate its end point, just
like you need to adjust the track length to
accommodate MIDI note events that
extend beyond the end of the track. Use a
track length numerical in any window to
change a track length.
햲 Move the cursor into the upper or
To trim the right edge of an audio event:
lower right corner of the audio event.
The cursor turns into a Right Trim
Cursor.
Trimming or Lengthening Audio
Events
You can trim or lengthen audio events by
simply dragging inward from the side you
want to trim or outward from the side you
want to lengthen.
Right Trim Cursor
햳 Drag the mouse to the left.
Vision trims off the ending of the audio
event.
The remainder of the audio event you
trim, or the increased portion of the event
you lengthen, remains at the event’s original location in time relative to other audio
events and MIDI data in the track.
You cannot lengthen audio events beyond
their original lengths (as determined by
recording, mixing, or importing). For
example, if the original audio event was
two bars long, trimmed audio events that
derive from that original event cannot be
lengthened beyond two bars.
Event ending trimmed
after dragging to the left
HINT: If you have recorded multiple takes
into a single audio file and you wish to
extend an event beyond the limits of the
original take, simply import the entire
audio file into Vision.
Vision & Studio Vision Pro — Audio Reference Manual
195
PART 5: Basic Audio Editing & Playback
To trim the left edge of an audio event:
Lengthening
햲 Move the cursor into the lower left
To lengthen an audio event:
corner of the audio event.
The cursor turns into a Left Trim Cursor.
햲 Move the cursor over the lower right
corner of the audio event.
Left Trim Cursor
햳 Drag the mouse to the right.
햳 Drag outward from the event to
lengthen it.
Vision trims off the beginning of the
audio event.
Event ending lengthened after
dragging it to the right
Event beginning trimmed
after dragging to the right
196
Opcode Systems, Inc.
CHAPTER 18: Working with Audio Events
CUTTING, COPYING, AND
PASTING AUDIO EVENTS
You can cut, copy, and paste audio events
(or portions of events) in much the same
way as MIDI data.
For example, the easiest way to duplicate
an audio event is to Option-drag it to a different time or a different Audio
Instrument—this creates an exact duplicate of the audio event, while leaving the
original event untouched.
For more information about the various
copy and paste procedures, see your
MIDI Reference Manual.
Vision & Studio Vision Pro — Audio Reference Manual
197
PART 5: Basic Audio Editing & Playback
198
Opcode Systems, Inc.
CHAPTER 19: Basic Digital Audio Playback
This chapter discusses how to play back
digital audio from within Vision.
Generally, when you click Vision’s play
button, all MIDI Instruments and Audio
Instruments play back in unison. There
are, however, a couple of points to consider when you play digital audio.
WHAT TO READ IN THIS
CHAPTER
If Vision is using dynamic voice allocation,
read Audio Playback with Dynamic Allocation (pg. 199). Dynamic voice allocation is
the default mode for:
•
•
•
•
Acadia
Audiomedia
Sound Tools II
Pro Tools I & II
If Vision is using fixed voice allocation,
read Audio Playback with Fixed Voice Allocation (pg. 202). Fixed voice allocation is
the default mode for:
•
•
AUDIO PLAYBACK WITH
DYNAMIC ALLOCATION
If Vision uses dynamic voice allocation (as
set in the Audio Instruments Menu in the
Audio Instruments Window), audio
events will play back as discussed in this
section.
PRO TOOLS III/24/Mix/Mix Plus, SESSION
8/Project: if youÕre using one of these Digidesign products, skip ahead to Audio Playback
with Fixed Voice Allocation (pg. 202).
Voice Allocation and Audio
Events
If multiple audio events overlap in the
same track and are assigned to the same
Audio Instrument, playback defaults to
the audio event with the later start time.
For example:
Digidesign Session 8/Project
Digidesign Pro Tools III/24/Mix/
Mix Plus
Vision & Studio Vision Pro — Audio Reference Manual
199
PART 5: Basic Audio Editing & Playback
햲 Assume you have two overlapping
audio events in a track (as shown in
Figure 19.1).
Figure 19.1: Overlapping Audio Events in a
Track
햳 Click VisionÕs Play button.
Vision plays the first audio event beginning at measure 2¥1, but abruptly stops
playing that event and starts playing the
second audio event when the Counter
reaches 2¥3¥240.
This audio event
will play...
If you want Vision to play multiple audio
events simultaneously, use one of the
techniques discussed in Playing Multiple
Audio Events Simultaneously (pg. 200).
Viewing Overlapped Events
If an audio event is partially hidden
behind another audio event, you can view
it by clicking it.
Figure 19.3: Viewing the Overlapped Event
...until this overlapping
audio event silences it
and plays instead.
Figure 19.2: The Event with the later start
time has playback precedence when multiple
audio events on the same Audio Instrument
overlap in the same track
The reason for this is that Vision automatically and dynamically assigns a single
playback voice to each Audio Instrument
in a track.
200
NOTE: This situation occurs only if you
have overlapping audio events assigned to
the same Audio Instrument in the same
track. If the same two overlapping audio
events are in separate tracks, they will both
play back unless you disable Poly mode.
Poly Mode for DAE is discussed in Using
The Poly Column (pg. 138).
Playing Multiple Audio Events
Simultaneously
There are a couple of different ways to
make Vision play simultaneous audio
events:
Opcode Systems, Inc.
CHAPTER 19: Basic Digital Audio Playback
•
•
Assign each overlapping audio event
in a track to a different Audio
Instrument.
Place overlapping audio events in separate tracks.
The following sections detail each of
these methods.
Audio Events on Separate Audio
Instruments
As discussed previously, if multiple audio
events share the same track, Audio
Instrument, and time range, Vision can
play only one of the audio events at a time.
NOTE: Your audio hardware determines
the maximum number of voices—and,
therefore, the maximum number of audio
events that can play simultaneously.
Audio Events in Separate Tracks
As discussed previously, if multiple audio
events share the same track, Audio
Instrument, and time range, Vision can
play only one of the audio events at a time.
Another way to make Vision play multiple
audio events simultaneously is to assign
them to different Tracks.
Even though these audio events are
assigned to the same Audio Instrument,
theyÕre on different tracksÑmeaning
theyÕll play back simultaneously
One way to make Vision play multiple
audio events simultaneously is to assign
them to different Audio Instruments (as
discussed in Changing Audio (pg. 191)).
Even though these audio events overlap in
time, they will both play simultaneously since
theyÕre assigned to separate Audio Instruments
Figure 19.5: Audio Events in Different Tracks (as
shown in the Tracks Window)
As always, your audio hardware determines the maximum number of voices—
and, therefore, the maximum number of
audio events that can play simultaneously.
Figure 19.4: Audio Events in the same track, but
on different Audio Instruments (as shown in the
Graphic Window)
Vision & Studio Vision Pro — Audio Reference Manual
201
PART 5: Basic Audio Editing & Playback
AUDIO PLAYBACK WITH FIXED
VOICE ALLOCATION
If Vision uses fixed voice allocation (as set
in the Audio Instruments Menu in the
Audio Instruments Window), audio
events will play back as discussed in this
section.
NOTE: If you’re using Vision with a
Digidesign Audiomedia II or III, Sound
Tools II, or Pro Tools I or II, read Audio
Playback with Dynamic Allocation
(pg. 199) instead of this section.
Voice Allocation and Audio
Events
If multiple audio events are assigned to
the same Audio Instrument and overlap in
a region of time, then playback defaults to
the audio event with the later start time.
For example:
햲 Assume you have two overlapping
햳 Click VisionÕs Play button.
Vision plays the first audio event beginning at measure 2¥1, but abruptly stops
playing that event and starts playing the
second audio event when the Counter
reaches 2¥3¥240.
This audio event
will play...
...until this overlapping
audio event silences it
and plays instead.
Figure 19.7: The event with the later start
time has playback precedence when multiple
audio events on the same Audio Instrument
overlap
The reason for this is that, in fixed voice
allocation mode, you can assign only one
playback voice to an Audio Instrument
(unless it’s a linked, stereo event).
audio events assigned to the same
Audio Instrument (as shown in
Figure 19.6).
Figure 19.6: Overlapping Audio Events
202
Opcode Systems, Inc.
CHAPTER 19: Basic Digital Audio Playback
This situation occurs across tracks. For
example, look at Figure 19.8.
audio events on separate tracks...
Viewing Overlapped Events in the Same
Track
If an audio event is partially hidden
behind another audio event, you can view
it by clicking it.
... but assigned to the same
Audio Instrument
Figure 19.8: Overlapping audio events use the
same Audio Instrument on different tracks
Notice that the sequence contains two
audio events on separate tracks but
assigned to the same Audio Instrument.
In this example, the audio event in
Track 1 plays for the first two bars, but
stops abruptly at the beginning of Bar 3,
when the audio event on Track 2 begins
to play instead.
IMPORTANT TIP: This is an important
point to remember for troubleshooting. If
you’re looking at a Graphic Window and
you hear one audio event “step” on another,
yet you don’t see any overlapping events—
it’s probably because the offending audio
event is in a different track.
Figure 19.9: Viewing the Overlapped Event
Playing Multiple Audio Events
Simultaneously
If you want Vision to play multiple, simultaneous audio events, you must:
•
•
Assign each overlapping audio event
to a different Audio Instrument.
Use the Audio Instruments Window
to assign a a different voice to each
Audio Instrument.
If you want Vision to play multiple audio
events simultaneously, see Playing Multiple Audio Events Simultaneously
(pg. 203).
Vision & Studio Vision Pro — Audio Reference Manual
203
PART 5: Basic Audio Editing & Playback
204
Opcode Systems, Inc.
CHAPTER 20: Import/Export Cornucopia
Vision offers a plethora of import, export,
mixing, and saving options for both MIDI
and audio.
This chapter begins with an overview of
these options, and concludes with
detailed discussions about how to import
or export numerous types of MIDI and
audio files.
File Menu—Import/Export
Commands
Import/export commands are all contained in a central location under the File
menu.
WHO SHOULD READ THIS
CHAPTER?
This chapter applies to all of the audio
systems supported by Vision.
Centrally located collection
of Import and Export options
Figure 20.1: File Menu
Vision & Studio Vision Pro — Audio Reference Manual
205
PART 5: Basic Audio Editing & Playback
The following list provides a brief overview of the File menu’s import/export
commands:
•
•
Export as QuickTime Movie
This command has two main
functions:
1) exporting MIDI as a QuickTime
movie.
2) exporting audio as a QuickTime
movie.
Both of these operations are discussed in Exporting Audio and/or
MIDI as a QuickTime Movie
(pg. 221).
Import Audio
The Import Audio command operates differently depending on which
audio hardware you use. See Importing Audio with Acadia or MIDI Only
(pg. 207) or Importing Audio with
DAE (pg. 209), depending on which
audio system you use.
•
•
•
Import Audio Using QuickTime
This command has numerous
functions:
1) importing audio tracks from a
QuickTime movie. See Importing
Audio from a QuickTime Movie
(pg. 213).
2) importing audio directly from a
standard audio CD. See Importing
Audio from a Standard Red Book
Audio CD (pg. 217).
3) importing various industry-standard audio formats that are not native
to Vision (such as .au and .wav). See
Importing Foreign Audio File Formats
(pg. 219).
Export Audio Mix
Use it to create stand-alone audio files
for multimedia or web applications.
See Exporting an Audio Mix
(pg. 223).
Export Audio Events
Use it to export each selected audio
event into its own audio file. This is
particularly useful for creating sounds
or loops for triggering with a sampler.
See Exporting Individual Audio
Events (pg. 225).
Additionally, you can import MIDI data
from a QuickTime movie, as discussed in
Importing MIDI from a QuickTime Movie
(pg. 212).
206
Opcode Systems, Inc.
CHAPTER 20: Import/Export Cornucopia
Following is a description of the different
components in the Import Audio dialog:
IMPORTING AUDIO
Vision uses two techniques to import
audio directly, depending on which audio
hardware you are using. Both are
described below. Audio imported with the
import audio command can be directly
played and manipulated.
쐃
쐇
Importing Audio with Acadia or
MIDI Only
Import Audio Dialog
Acadia’s new Import Audio dialog lets you
select and import multiple files. File formats that can be auditioned and imported
from the dialog include AIFF and Sound
Designer II. To import one or more audio
files, place your cursor at the desired
measure location for the desired track,
then choose File>Import Audio.
쐋
쐏
�
�
�
쐄
File List: Displays the available files
for the current directory. To place an
audio file in the Import List simply
double-click it, or highlight the
desired file and click the Add button.
File Info: Displays for the selected
file its File Path, File Type, and File
Length. Information is only displayed
in this area when an AIFF or Sound
Designer II file is highlighted.
Files in either the File List (top) or
Import List (bottom) can be selected
for info.
Import List: Displays the list of
audio files that will be imported when
the Done button is clicked.
Add/Open: When labeled as Open,
this button opens the highlighted
folder or volume (in the File List).
When labeled as Add, this button
adds the highlighted file to the
Import List.
If you hold down the Option key and
click Add, the highlighted file is
imported and the dialog automatically
closed.
Add All: Adds all audio files in the
current folder to the Import List.
�
�
�
쐅
�
�
�
Figure 20.2: Import Audio dialog for the Acadia
audio system
Vision & Studio Vision Pro — Audio Reference Manual
207
PART 5: Basic Audio Editing & Playback
쐂
쐆
쐊
쐎
쐅
•
•
208
Play/Stop: Click this button to play
the highlighted file. While the file
plays the button becomes a Stop button. Click Stop to stop playback of the
file; otherwise, it will play in its
entirety.
Files in either the File List (top) or
Import List (bottom) can be selected
and auditioned with the Play button.
Only files that match the current Session Sample Rate can be auditioned.
Auditioned files play through the first
(enabled) output pair of your audio
hardware. If any plug-ins are assigned
to these outputs, they’ll affect the
playback for the auditioned files.
Remove: Removes the highlighted
file from the Import List.
Done: Imports the audio files displayed in the Import List and closes
the dialog. To trigger the Done
button without using the mouse, hold
down the Option key and type Return
or Enter.
Cancel: Closes the Import Audio
dialog without importing any files.
Import multiple files: This pop-up
determines where and how the specified audio files are imported.
Choose “end to end onto one track” to
place the files one after another onto
a single track, assigned to a single
Audio Instrument.
Choose “onto multiple empty tracks”
to place the files on separate tracks,
each at the same measure location. In
this case, each imported file is
assigned to a different Audio
Instrument.
Importing Audio in MIDI Only
The new Import Audio dialog just discussed is available when the specified
audio system is Acadia or MIDI Only.
When using MIDI Only, however, files
cannot be auditioned.
Importing Stereo Linked Files
When importing linked stereo files, it is
not necessary to import both the left and
right files. Simply import one, and both
will be imported as a single stereo audio
event.
For this to happen, both files must reside
in the same folder, they must be the same
length and audio format, and they must
have identical names with appropriate L/
R extensions (for instance, vocals L and
vocals R, or vocals.L and vocals.R).
Stereo Audio Events and Audio
Instruments
When importing stereo audio events from
either linked stereo files or stereo interleaved files, the next available stereo
Audio Instrument (not in use) is assigned.
If none are available, the next available
mono Audio Instrument is assigned.
Importing Audio from CD-ROMs
When importing audio files from CDROMs you are prompted to save the
imported files to a folder on your hard
disk. This allows the files to be destructively edited, if desired, and it allows their
waveforms to be displayed.
Opcode Systems, Inc.
CHAPTER 20: Import/Export Cornucopia
Importing Audio with DAE
햳 Choose Audio>Import Audio.
Vision opens the Import Audio dialog
box. This is the standard Digidesign
Import Audio dialog box found in all
DAE-compatible applications.
If you use DAE, you can import audio files
stored in any of the following file formats:
•
•
•
•
Sound Designer
Sound Designer II
AIFF
Dyaxis
쐃
쐃
Vision can play and manipulate these files
directly without having to convert them
first. You can import audio recorded at
any sample rate. Eight bit files cannot be
imported with DAE. If you want to work
with 8 bit files, use Vision with Acadia.
쐇
쐋
set an Edit In Point.
Alternately, you could click in the Track
Overview area of the Tracks Window to
automatically set an Edit In Point for the
desired track.
쐏
Figure 20.3: Import Audio Dialog Box for DAE
To import audio:
햲 Open a Graphic or List Window and
쐃
About the DAE Import Audio
Dialog Box
As shown in Figure 20.3, the Import
Audio dialog box contains many elements. Specifically:
쐃
File and Item lists
쐇 Action buttons
쐋 Sound File information
쐏 Audio preview controls
Each of these items is discussed in the following sections.
Vision & Studio Vision Pro — Audio Reference Manual
209
PART 5: Basic Audio Editing & Playback
File and Item Lists
•
The Import Audio dialog contains three
scrolling lists:
•
•
•
Left list: This is a standard list of folders and files on your hard disk. Use
this to find the audio files on your
hard disk.
Middle list: This list shows the items
available for import in the selected
file.
Right list: This list shows the items
that will be imported when you click
the Done button.
NOTE: Vision does not recognize Sound
Designer II cross fade settings.
Action Buttons
•
•
Done button: Click this button to
import all items in the right list into
the current Vision document. You can
import several sound files, regions, or
playlists at the same time, from several different sources.
Add button: Click this button to move
the selected item in the middle list to
the right list, making it ready to
import.
Remove button: Click this button to
remove the selected item from the
right list.
Sound File Information
This area contains information about the
currently selected item in any of the lists.
Click the pop-up menu to view the location of the item on your hard disk.
Use the action buttons to navigate your
hard disk and select items to import into
your Vision document.
There are six action buttons:
•
•
•
210
Eject button: Click this button to
eject a floppy disk or other removable
media.
Desktop button: Click this button to
move the first scrolling list to the
desktop level.
Cancel button: Click this button to
cancel the import operation; no audio
will be imported.
Opcode Systems, Inc.
CHAPTER 20: Import/Export Cornucopia
Audio Preview Controls
Use these controls to listen to an item in
either the middle or right list.
The timer will show the time while playing. You can skip to any location in an
audio file by clicking along the length of
the counter. If you click toward the right
of the counter, you’ll skip to the end of the
song. If you click toward the left of the
counter, you’ll skip to the beginning of the
song. If you click toward the middle of the
counter, you’ll skip to the middle of the
song. This is helpful when you are previewing a long file. For more information,
see the hint in Appending Audio to Files
(pg. 239).
Import Multiple Files (DAE Audio
Preferences)
DAE users can specify how multiple files
are imported. The Import multiple files
pop-up in the Audio Preferences dialog
(under the Audio menu) determines
whether the files are imported onto a
single track or multiple tracks.
Figure 20.4: Audio Preferences for DAE
Choose “end to end onto one track” to
place the files one after another onto a
single track, assigned to a single Audio
Instrument.
Choose “onto multiple empty tracks” to
place the files on separate tracks, each at
the same measure location. In this case,
each imported file is assigned to a different Audio Instrument.
Vision & Studio Vision Pro — Audio Reference Manual
211
PART 5: Basic Audio Editing & Playback
IMPORT SHORTCUTS
OTHER IMPORT OPTIONS
Graphic Window
The following sections discuss all the
other import options available in Vision.
You can easily import files by clicking
with the Pencil tool anywhere in the
Graphic Window’s Audio Pane at the location where you want to enter the file. This
will open the Import Audio dialog box.
Importing MIDI from a QuickTime
Movie
List Window
In a List Window, there’s an additional
way to open the Import Audio dialog box:
You can import MIDI data contained in a
QuickTime movie directly into a new
Vision sequence. To do so:
햲 Select File>Open.
An Open dialog box appears.
햲 Set an input edit point in the List
Window.
햳 Press and hold the Insert Events
button.
Vision opens a pop-up menu.
햳 Locate the QuickTime file you wish to
open, select it, and click Open.
햴 Select Audio Event from the pop-up
menu.
Vision opens the Import Audio dialog
box.
What happens next depends on what
type of data is contained in the QuickTime movie. Specifically:
1) If the movie contains only MIDI data,
then Vision imports the MIDI into a new
sequence.
2) If the movie contains both MIDI and
audio, Vision will import both the MIDI
and audio into a new sequence (after
first asking your to define an audio file
format for the imported audio).
212
Opcode Systems, Inc.
CHAPTER 20: Import/Export Cornucopia
3) If the movie contains BOTH Video
AND audio (and/or MIDI), youÕll see an
alert box asking you what, exactly, you
want to do with the QuickTime file.
Import causes Vision to import the
movieÕs MIDI and audio tracks into
Vision tracks.
NOTE: As of QuickTime version 2.5, there
is no way to import tempo track information from a QuickTime movie. Although
the file will play back at the correct speed,
that speed is not indicated properly within
Vision’s Tempo track (which always displays 60 bps). If you wish to perform
extensive editing on MIDI data that’s been
imported from a QuickTime movie, you
may want to establish a tempo track using
Vision’s Reclock command described in
your MIDI Reference Manual.
View causes Vision to open the movie in
the QuickTime Movie Window. The MIDI
data is not imported into Vision, but will
play back using the standard QuickTime
elements contained in the QuickTime
Movie Window.
Importing Audio from a
QuickTime Movie
Import & View causes Vision to import
the MIDI as described above, plus it
opens the movie into the QuickTime
Movie Window.
•
햴 Since this tutorial is concerned with
importing MIDI data from QuickTime
movies, click Import.
Vision imports the MIDI data, creating a
new sequence, and places each MIDI
channel on a different track. It will also
import audio (after asking you to define
an audio file format) if audio data is contained in the QuickTime file.
There are two ways to import audio from
a standard QuickTime 2.5 (or later)
movie:
•
You can import audio into a specific
track by using the File>Import
Audio Using Quicktime command.
You can import audio into a new
sequence by using the File>Open
command.
In both cases QuickTime audio and music
files are not directly accessed. Unlike the
Import Audio command, Import Audio
Using QuickTime must extract and convert the files into a format that Vision can
manipulate and write them to your hard
drive.
Vision & Studio Vision Pro — Audio Reference Manual
213
PART 5: Basic Audio Editing & Playback
Importing QuickTime Audio into a Track
To import QuickTime audio into a track
from a standard QuickTime 2.5 (or later)
file:
햲 Open a Graphic or List Window and
set an Edit In Point.
Alternately, you could click in the Track
Overview area of the Tracks Window to
automatically set an Edit In Point for the
desired track.
햳 Choose File>Import Audio Using
QuickTime.
An Open dialog box appears.
Figure 20.5: Save As Dialog Box for Imported
Audio
햵 Navigate to the folder or volume in
which you want to save the file, and
type the desired name.
NOTE: If your movie contains video, you
can see its poster frame in the Preview
area by 1) checking the Show Preview
option, then 2) clicking the Create
button.
햴 Locate the QuickTime file you wish to
open, select it, and click Open.
If the file contains audio data, Vision
opens a Save As dialog box.
214
NOTE: If youÕre using digital audio hardware that requires its own dedicated
hard disk (such as Pro Tools III/IV), you
should import the audio onto the disk
thatÕs connected directly to your audio
hardwareÑnot the disk thatÕs connected
to your computerÕs SCSI port. If you
donÕt, you wonÕt be able to play the
imported audio.
햶 Look at the Format information at the
bottom of the dialog box.
This shows the type of audio file that the
import operation will create. In general,
you should create an audio file that can
be played back by your audio system.
For example, if youÕre using
Pro Tools III/IV, you should create a
44.1 kHz or 48 kHz, 16 bit audio file.
Opcode Systems, Inc.
CHAPTER 20: Import/Export Cornucopia
햷 Click the Format button if you need
to change the format of the audio file.
Vision opens a subset of the standard
Audio Format dialog box.
Importing QuickTime Audio Into a
Sequence
To import QuickTime audio into a new
sequence from a standard QuickTime 2.5
(or later) file:
햲 Choose File>Open.
An Open dialog box appears.
Figure 20.6: Audio Format Dialog Box
햸 Use the various pop-up menus to
define the desired audio format.
The Audio Format dialog box parameters are discussed in Anatomy of the
Audio Format Dialog Box (pg. 228).
햹 Click OK.
Vision returns you to the Save As dialog
box.
햺 Click Save.
Vision saves the audio file in the
requested format, and imports it into the
selected track.
햳 Locate the QuickTime file you wish to
open, select it, and click Open.
What happens next depends on what
type of data is contained in the QuickTime movie. Specifically:
1) If the movie contains only audio data,
go to step 햵.
2) If the movie contains both MIDI and
audio, Vision will import both the MIDI
and audio into a new sequence (after
first asking your to define an audio file
format for the imported audio). Go to
step 햵.
NOTE: If, at this point, Vision opens the
Conversion Overview dialog box, see ÒIf
the Conversion Overview Dialog Box
Appears When You Import Audio
(pg. 220).Ó
Vision & Studio Vision Pro — Audio Reference Manual
215
PART 5: Basic Audio Editing & Playback
3) If the movie contains BOTH Video
AND audio (and/or MIDI), youÕll see an
alert box asking you what, exactly, you
want to do with the QuickTime file.
Import causes Vision to import the
movieÕs MIDI and/or audio tracks into
Vision tracks.
View causes Vision to open the movie in
the QuickTime Movie Window. The
audio data is not imported into Vision,
but will play back using the standard
QuickTime elements contained in the
QuickTime Movie Window.
Import & View causes Vision to import
the audio as described above, plus it
opens the movie into the QuickTime
Movie Window.
햴 Since this tutorial is concerned with
importing audio data from QuickTime
movies, click Import.
햵 Vision opens a Save As dialog box.
Figure 20.7: Save As Dialog Box for Imported
Audio
햶 Navigate to the folder or volume in
which you want to save the file, and
type the desired name.
NOTE: If youÕre using digital audio hardware that requires its own dedicated
hard disk (such as Pro Tools III/IV), you
should import the audio onto the disk
thatÕs connected directly to your audio
hardwareÑnot the disk thatÕs connected
to your computerÕs SCSI port. If you
donÕt, you wonÕt be able to play the
imported audio.
햷 Look at the Format information at the
bottom of the dialog box.
This shows the type of audio file that the
import operation will create. In general,
you should create an audio file that can
be played back by your audio system.
For example, if youÕre using
Pro Tools III/IV, you should create a
44.1 kHz or 48 kHz, 16 bit audio file.
216
Opcode Systems, Inc.
CHAPTER 20: Import/Export Cornucopia
햸 Click the Format button if you need
to change the format of the audio file.
Vision opens a subset of the standard
Audio Format dialog box.
Importing Audio from a Standard
Red Book Audio CD
You can import audio from standard red
book audio CDs. This is particularly
useful for importing samples from third
party audio sample CDs.
햲 Open a Graphic or List Window and
set an Edit In Point.
Alternately, you could click in the Track
Overview area of the Tracks Window to
automatically set an Edit In Point for the
desired track.
Figure 20.8: Audio Format Dialog Box
햹 Use the various pop-up menus to
define the desired audio format.
The Audio Format dialog box parameters are discussed in Anatomy of the
Audio Format Dialog Box (pg. 228).
햳 In Vision, select the track into which
you wish to import the audio and
open its Graphic or List Window.
햴 Choose File>Import Audio Using
QuickTime.
An Import dialog box appears.
햺 Click OK.
Vision returns you to the Save As dialog
box.
햻 Click Save.
Vision saves the audio file in the
requested format, creates a new
sequence, and imports each imported
audio file into its own track within that
sequence.
If the imported QuickTime file contained
MIDI data, it too would be placed in the
new sequence, with each MIDI channel
assigned to its own track.
햵 In the dialog box, navigate to the CD,
select the track number you wish to
import, and click Convert.
A Save As dialog box appears.
NOTE: If, at this point, Vision opens the
Conversion Overview dialog box, see ÒIf
the Conversion Overview Dialog Box
Appears When You Import Audio
(pg. 220).Ó
Vision & Studio Vision Pro — Audio Reference Manual
217
PART 5: Basic Audio Editing & Playback
햶 Navigate to the folder or volume in
which you want to save the file, and
type the desired name.
NOTE: If youÕre using digital audio hardware that requires its own dedicated
hard disk (such as Pro Tools III/IV), you
should import the audio onto the disk
thatÕs connected directly to your audio
hardwareÑnot the disk thatÕs connected
to your computerÕs SCSI port. If you
donÕt, you wonÕt be able to play the
imported audio.
햷 Click the Options button.
The Audio CD Import Options dialog box
appears.
Use the radio buttons to determine
whether the imported file should be
Mono or Stereo, and the bit-depth Size.
NOTE: Choose 16 bit to maintain CDquality audio or, if youÕre using high-end
Digidesign products, to maintain compatibility with your audio hardware.
You can import a portion of the audio
track by setting Start and End points in
the Audio Selection region (or by dragging the end-point handles on the time
line below these fields).
You can preview the selected audio by
clicking the Play button.
햹 Click OK to exit the Audio CD Import
Options dialog box.
Using QuickTime, Vision imports the
audio from the CD.
NOTE: The Progress dialog box tells you
that Vision is importing a MOVIE
because QuickTime is being used as the
import mechanism.
Vision imports the audio as an AIFF file
(using the audio format established in
the Audio CD Import Options dialog
box), and places it in your selected track.
Figure 20.9: Audio CD Import Options Dialog
Box
햸 Configure the dialog box as desired.
Use the Rate pop-up menu to select the
desired sample rate of the imported file.
To maintain CD-quality audio, use
44.1 kHz.
218
NOTE: If, at this point, Vision opens the
Conversion Overview dialog box, see ÒIf
the Conversion Overview Dialog Box
Appears When You Import Audio
(pg. 220).Ó
Opcode Systems, Inc.
CHAPTER 20: Import/Export Cornucopia
Importing Foreign Audio File
Formats
You can import audio from various audio
formats that are not normally native to
Vision (such as Sun’s .au standard and
Microsoft’s .wav standard). To do so:
햴 In the dialog box, navigate to the file
you wish to import, then click
Convert.
A Save As dialog box appears.
햲 Open a Graphic or List Window and
set an Edit In Point.
Alternately, you could click in the Track
Overview area of the Tracks Window to
automatically set an Edit In Point for the
desired track.
햳 Choose File>Import Audio Using
QuickTime.
An Import dialog box appears.
햵 Navigate to the folder or volume in
which you want to save the file, and
type the desired name.
You can preview any supported audio
file by checking the Show Preview
option, clicking the Create button, then
using the standard QuickTime control
bar that appears in the Preview area.
NOTE: If youÕre using digital audio hardware that requires its own dedicated
hard disk (such as Pro Tools III/IV), you
should import the audio onto the disk
thatÕs connected directly to your audio
hardwareÑnot the disk thatÕs connected
to your computerÕs SCSI port. If you
donÕt, you wonÕt be able to play the
imported audio.
햶 Look at the Format information at the
bottom of the dialog box.
This shows the type of audio file that the
import operation will create. In general,
you should create an audio file that can
be played back by your audio system.
For example, if youÕre using
Pro Tools III/IV, you should create a
44.1 kHz or 48 kHz, 16 bit audio file.
Vision & Studio Vision Pro — Audio Reference Manual
219
PART 5: Basic Audio Editing & Playback
햷 Click the Format button if you need
to change the format of the audio file.
Vision opens a subset of the standard
Audio Format dialog box.
If the Conversion Overview Dialog
Box Appears When You Import
Audio
If you imported audio in a format that’s
not supported by your currently selected
audio system, Vision opens the Conversion Overview dialog box automatically,
allowing you to convert the offending
audio file(s) into a playable format.
Figure 20.10: Audio Format Dialog Box
햸 Use the various pop-up menus to
define the desired audio format.
The Audio Format dialog box parameters are discussed in Anatomy of the
Audio Format Dialog Box (pg. 228).
햹 Click OK.
Vision returns you to the Save As dialog
box.
햺 Click Save.
Vision saves the audio file in the
requested format, and imports it into the
selected track.
Figure 20.11: Typical Conversion Overview Dialog
Box
The Conversion Overview dialog box and
the various reasons for its existence are
discussed in Chapter 26: Sample Rate
Conversion and Deinterleaving.
In general, you should always import
audio in a format supported by your digital audio hardware. This will alleviate the
need for the Conversion Overview dialog
box.
NOTE: If, at this point, Vision opens the
Conversion Overview dialog box, see ÒIf
the Conversion Overview Dialog Box
Appears When You Import Audio
(pg. 220).Ó
220
Opcode Systems, Inc.
CHAPTER 20: Import/Export Cornucopia
To import audio in a supported format:
햲 Always glance at the format
information at the bottom of an audio
fileÕs Save As dialog box.
EXPORT OPTIONS
The following sections discuss all of the
audio export options available in Vision.
Exporting Audio and/or MIDI as a
QuickTime Movie
You can export selected audio, MIDI, or
both as a standard QuickTime movie file
for web or CD-ROM distribution.
Audio format information
in a typical Save As dialog box
햳 If the format shown there is not
supported by your audio hardware,
click the Format button.
햴 Use the resulting Audio Format dialog
box to specify a format thatÕs
compatible with your hardware.
In you’re importing audio from a standard
Red Book audio CD, use the Audio CD
Import Options dialog box to specify an
audio format.
NOTE: If you need to convert the sample
rates of some files, PowerMac users will
achieve higher quality results using the
DSP>Convert Sample Rate command.
Users of 680x0 computers may also use the
DSP command, but processing times will be
extremely long on these machines.
IMPORTANT: Although QuickTime is an
excellent final output medium for music
distribution, it is not an ideal MIDI interchange format. This is because, as of
QuickTime 2.5, MIDI tempo track information can not be extracted from a MIDI
sequence saved in QuickTime format. If
you need to share MIDI files for collaboration, use the industry-standard MIDI File
format.
To export a sequence as a QuickTime
movie:
햲 In the Sequences Window, select the
sequence you wish to export.
햳 Choose File>Export as QuickTime
Movie.
The ÒExport as QuickTime MovieÓ dialog
box appears.
Vision & Studio Vision Pro — Audio Reference Manual
221
PART 5: Basic Audio Editing & Playback
The Export as QuickTime Movie Dialog
Box
쐃
쐏
쐄
쐂
쐆
쐊
쐇
쐋
Figure 20.12: Typical Export QuickTime
Movie Dialog Box
햴 Configure the dialog box as
discussed in The Export as
QuickTime Movie Dialog Box
(pg. 222), then click OK.
Vision creates a single, flattened QuickTime movie.
NOTE: When you compose a MIDI score
that you plan to export as a QuickTime
movie, Opcode recommends that you
always score the movie using a General
MIDI Module rather than Apple’s QuickTime Musical Instruments. For more
information, see the MIDI Reference
Manual for details on General MIDI.
222
Figure 20.12 illustrates a typical “Export
as QuickTime Movie” dialog box. As you
can see, it contains numerous elements.
These are:
쐃
Export selector
Figure 20.13: Export Selector
From the pop-up menu, select...
Create new movie if you want the
export operation to create a completely new QuickTime movie.
Add tracks to existing movie if you
want to add the exported audio and/
or MIDI to an existing movie.
Replace tracks in existing movie if
you want to replace all the audio and/
or MIDI tracks in an existing movie
with the exported data. This option
replaces data only of the type being
exported. For example, if an existing
QuickTime movie contains both
audio and MIDI, but you export only
audio data, then all the existing file’s
audio tracks are replaced by the
exported audio. The existing MIDI
track, however, remains untouched.
Opcode Systems, Inc.
CHAPTER 20: Import/Export Cornucopia
쐇
Export MIDI option
Uncheck this option if you wish to
exclude MIDI data from the export
operation.
Check this option to export all MIDI
data in the selected sequence to a
QuickTime movie’s “Music Track.”
When you export MIDI data, your
QuickTime file contains a single new
Music Track. Internally, that track
contains separate MIDI channels for
each channel you exported.
쐋 Export Audio option
Uncheck this option if you wish to
exclude digital audio data from the
export operation.
Check this option to mix and export
all the audio events in the selected
track(s) to a QuickTime movie’s
“Sound Track.”
When you export audio, all the
selected audio events are mixed into
a single QuickTime Sound Track.
The export process also applies the
effects of any selected audio volume
and pan events. This means that all
the nuances that you built into your
sequence is captured when you
export audio to a QuickTime movie.
The following elements all affect the
exporting of audio data only. Since these
features are a subset of those included in
the Audio Format dialog box, they are
described in depth in Anatomy of the
Audio Format Dialog Box (pg. 228):
쐏
쐄
쐂
쐆
쐊
Compression selector
See Compression (pg. 229).
Sample rate selector
See Sample Rate (pg. 229).
Sample size selector
See Sample Size (pg. 230).
Channels selector
See Channels (pg. 231).
Normalize selector
See Normalize (pg. 232).
Exporting an Audio Mix
You can mix numerous audio events
together and export them as a single
audio file using many industry-standard
audio formats.
This is accomplished with the File>
Export Audio Mix command.
If you select a region of time to export
(rather than Shift-clicking individual
audio events), then the Export Audio
Mix command incorporates the effect of
any volume or pan events that fall within
the selected time range. This is an ideal
way to create final, mixed audio files for
web distribution, CD-ROM games, etc.
Vision & Studio Vision Pro — Audio Reference Manual
223
PART 5: Basic Audio Editing & Playback
To export an audio mix:
햲 Select a region of time over which
you want to mix the audio events into
a new file.
In this example, we dragged across a
12-bar region in the Graphic WindowÕs
rulerÑselecting three audio events and
a fade-in/fade-out volume curve.
햴 Use the dialog box to define the
format of the new files you wish to
create.
The Audio Format dialog box is discussed in depth in Anatomy of the Audio
Format Dialog Box (pg. 228).
햵 Click the Audio Format dialogÕs OK
button.
Vision opens a Save As dialog box.
햳 Choose File>Export Audio Mix.
Vision opens the Audio Format dialog
box.
햶 Use the dialog box to name the file
and navigate to the folder or volume
in which you wish to save it.
The bottom of the dialog box shows the
format of the file youÕre about to save. If
you want to change the file format, click
the Format button to re-open the Audio
Format dialog box.
햷 Click the Save button.
Vision mixes all selected audio events
and volume and pan events to create a
new audio file.
Additional Options in Acadia
The Export Audio Mix command contains
an additional “Use EQs, plug-ins, etc.”
option in Acadia mode.
224
Opcode Systems, Inc.
CHAPTER 20: Import/Export Cornucopia
•
When this option is checked, all EQs,
plug-ins, and bussing applied to the audio
signal (including all selected automation
data) will be included in the mixed file.
The popup menu to the right of this
option determines which outputs will be
included in the mix and any processing
assigned to those outputs will be
included.
These options are identical to the ones
presented when using the DSP>Mix command. For detailed information, see
Mixing in Acadia (“Bounce to Disk”)
(pg. 316).
“Export Audio Mix” vs. “DSP>Mix”
Although Vision’s Export Audio Mix
command and the DSP>Mix command
may seem similar at first, they are actually
quite different. Specifically:
•
Mix creates a file only in formats that
Vision, itself, can play. It is meant as
an interim step in creating a sequence
because it replaces your sequence’s
original audio events with the newly
mixed event. For details, see
Chapter 28: Mixing Digital Audio
(Bouncing).
Export Audio Mix is capable of creating file formats that Vision cannot
play directly. It is meant to create a
final audio mix for distribution (via
web, CD, or any other media). It does
not replace any existing files in your
current sequence.
Exporting Individual Audio Events
You can select individual audio events and
export each of them as a separate, individual audio file. This has numerous uses,
including:
•
•
Creating files for a sampler.
You can import a track from an audio
CD, separate it into different audio
events, and save each of those events
to its own file. Then, in a dedicated
sample editing program you can send
those files to an external sampler.
Creating audio for the web, CD-ROM,
QuickTime, etc.
You can create sequences that contain short audio segments (dialog,
sound effects, and so on), then select
any one of those segments to export
as an audio file for use in web pages,
CD ROM games, QuickTime movies,
etc.
Vision & Studio Vision Pro — Audio Reference Manual
225
PART 5: Basic Audio Editing & Playback
To export individual audio events:
햲 Select one or more audio events.
햵 Click the Audio Format dialogÕs OK
button.
Vision opens a Save As dialog box.
In this example, we selected the 1st, 3rd,
and 4th audio events.
햳 Choose File>Export Audio Events.
Vision opens the Audio Format dialog
box.
햶 Use the dialog box to navigate to the
folder in which you wish to save the
new audio files.
The bottom of the dialog box shows the
format of the file(s) youÕre about to save.
If you want to change the file format,
click the Format button to re-open the
Audio Format dialog box.
햷 Click the Select Òfolder nameÓ
button.
햴 Use the dialog box to define the
format of the new files you wish to
create.
The Audio Format dialog box is discussed in depth in Anatomy of the Audio
Format Dialog Box (pg. 228).
226
Vision saves each of the audio events as
its own audio file in the selected folder.
In this example, we selected three audio
events, so the procedure results in the
creation of three new audio files.
Opcode Systems, Inc.
CHAPTER 20: Import/Export Cornucopia
Example—Creating Files for a Sampler
Many third-party audio sampling CDs
contain multiple samples in a single track.
For example, a single track might contain
numerous different, but related, drum
loops.
You can use the Export Audio Events
command in conjunction with other
Vision commands to assemble individual
digital versions of each drum loop.
햲 Import a track from the audio
sampling CD.
This operation was discussed in Importing Audio from a Standard Red Book
Audio CD (pg. 217).
햳 Use VisionÕs Audio>Strip Silence
command to separate the file into
individual audio events.
This is discussed in Chapter 27: Strip
Silence and Slice Audio.
You can use these files in numerous ways.
For example:
•
•
•
“Export Audio Events” vs. “Export Audio
Mix”
Although Vision’s Export Audio Events
command and Export Audio Mix command may seem similar at first, they are
actually quite different. Specifically:
•
햴 Select the individual audio events
created as a result of the Strip
Silence operation.
If you wish, you can use the List Window
to assign a unique name to each of the
newly created audio events.
햵 Choose File>Export Audio Events
to create a separate audio file for
each drum loop.
Your hard disk now contains a separate
digital audio file for each individual drum
loop captured from your audio CD.
You can use a sample editing program to send them to an external
sampler.
You can import them into Vision and
sequence them as is.
If you own Studio Vision Pro, you can
use its DSP menu to time stretch or
pitch-shift the samples to “fit” your
sequence’s tempo or pitch.
•
Export Audio Mix mixes all your
selected audio events together and
creates a single new audio file. Its
main purpose is to create a “final
audio mix” of a song (or part of a
song) for distribution.
Export Audio Events creates a new,
separate audio file for each selected
audio event. Its main uses are to 1)
create separate files for samplers, or
2) create short musical snippets or
sound effects for web pages, games,
etc.
Vision & Studio Vision Pro — Audio Reference Manual
227
PART 5: Basic Audio Editing & Playback
ANATOMY OF THE AUDIO
FORMAT DIALOG BOX
File Format
You can export audio in any of the following file formats:
Variations of the Audio Format dialog box
are used by many of Vision’s Export and
Save As operations.
•
•
Figure 20.14: Audio Format Dialog Box
The following sections discuss, in detail,
all the various elements in a generic
Audio Format dialog box. Not all options
appear in all Audio Format dialog boxes.
•
•
AIFF: Audio Interchange File Format. This popular format is supported
by both the Macintosh and Windows
platforms.
Sound Designer II: This is Digidesign’s standard audio file format used
by most of its various audio systems.
It’s also a fairly common format for
professional-level sample editing or
file exchange.
WAVE: This is a standard (.wav)
audio format used by the Windows
platform.
Sun .au: This is a standard format
used by both the Sun and NeXT platforms, and is also a popular internet
distribution format.
NOTE: Vision remembers two different sets
of Audio Format parameters—Mix formats and Export formats. This is because,
in practice, your exported files will generally be in a different file format than your
work-in-progress (Mix) files. Exported files
will usually use some audio format suitable
for general distribution, as required by
QuickTime, the internet, CD-ROM, etc.
Mixed files will usually use a format
required by the audio hardware employed
in its development.
228
Opcode Systems, Inc.
CHAPTER 20: Import/Export Cornucopia
Compression
•
You can export audio using any of the following compression types:
µ-law 2:1: This is a non-linear, 8 bit
encoding method that yields a greater
dynamic range than standard linear
8-bit encoding. It was originally developed for telephony applications, but
yields passable results on music files.
NOTE: Depending on your version of
QuickTime, you may have other available
conversion formats. Check your QuickTime
documentation for details.
Audio compression can seriously affect
the file’s fidelity. In general, you should
use audio compression only when absolutely necessary. With that caveat in
mind, you can use Vision to export compressed AIFF audio files using any of
these standard QuickTime compression
CODECs:
•
•
•
•
None: Select this option to export
uncompressed audio.
MACE 3:1: MACE stands for Macintosh Audio Compression and
Expansion. This version creates an
8-bit file with a maximum upper frequency response of 11 kHz, barely
acceptable for music reproduction.
MACE 6:1: This version creates an
8-bit file with a maximum upper frequency response of 5.5 kHz,
acceptable only for speech files.
IMA 4:1: IMA stands for Interactive
Multimedia Association. Use it to
compress CD-quality (16 bit) files
with a 4:1 compression ratio. In general, it produces a much higher
fidelity file than MACE.
Sample Rate
You can export audio using any of the following standard sample rates:
•
5,564: This rate is one-fourth the
22.255 kHz sampling rate of old Macintosh computers. It is very low
fidelity and should be used only for
speech and only if file size must be
absolutely minimized.
Vision & Studio Vision Pro — Audio Reference Manual
229
PART 5: Basic Audio Editing & Playback
•
•
•
•
•
•
•
•
230
7,418: This rate is one-third the
22.255 kHz sampling rate of old Macintosh computers. It produces a low
fidelity file that, in general, is useful
only for speech.
8,000: This rate is one-fourth the
standard 32 kHz broadcast rate. It
produces a low fidelity file that, in
general, is useful only for speech.
11,025: This rate is one-fourth the
standard 44.1 kHz CD sampling rate.
It produces a file suitable for very lowfidelity music playback or higherfidelity speech.
11,127: This rate is one-half the
22.255 kHz sampling rate of old Macintosh computers. It produces a file
suitable for very low-fidelity music
playback or high-fidelity speech.
16,000: This rate is one-half the
standard 32 kHz broadcast rate. It
produces a file suitable for low-tomedium fidelity music playback.
22,050: This rate is one-half the
standard 44.1 kHz CD sampling rate.
It produces a file suitable for mediumfidelity music playback.
22,255: This is the sampling rate
used by older Macintosh computers
(most machines now work at
44.1 kHz). It produces a file suitable
for medium-fidelity music playback.
32,000: This is the standard rate
used in broadcast.
•
•
44,100: This is the standard sampling rate used by audio CD players.
48,000: This is the sampling rate
used by consumer DAT (Digital
Audio Tape) machines.
In addition to all these options, you can
type any rate (standard or non-standard)
into the Sample rate field.
NOTE: Generally, you should use multiples
of the Macintosh sample rate (22.255 kHz)
if your finished product is to be played only
on Macintosh computers. Otherwise, you
should use sample rates that are multiples
of the 44.1 kHz CD sampling rate.
Sample Size
You can export audio at any of these bit
depths:
•
8 bits: Produces smaller files, but at
a greatly reduced resolution. 8-bit
files are generally noisy and “grainy”
sounding.
Opcode Systems, Inc.
CHAPTER 20: Import/Export Cornucopia
•
•
•
•
8 bits dithered: Also produces an
8 bit file, but if your original audio file
is 16 bit and you export it as an 8 bit
dithered file, Vision dithers the file
producing somewhat “cleaner”
sounding audio.
TERMINOLOGY: “Dithering” is a process in which a tiny amount of random
noise is added to the signal to reduce
the very audible and undesirable distortion that results whenever digital audio
is re-quantized (such as when a file is
reduced from 16 bits to 8 bits).
16 bits: Produces clean CD-quality
files that occupy more disk space
than 8-bit files.
16 bits dithered: Also produces a 16
bit file, but if your original file is 24 bit
and you export it with this option,
Vision dithers the file. If you use this
option in conjunction with the
DSP>Mix, or the File>Export Audio
Mix commands, Vision will use a
higher bit resolution in its internal
calculations and will dither the final
result before saving it as 16 bit.
24 bits: Produces very high quality
results if you are exporting 24 bit files
or if you are mixing 16 bit or 24 bit
files. Currently, only users of Pro
Tools 24 systems will be able to audition these files.
Channels
You can export audio in any of the following mono/stereo configurations:
•
•
•
Mono: Creates a single channel,
mono audio file.
Stereo - 2 mono files: Creates two
separate, but linked, mono files for
stereo playback with some audio
hardware.
Specifically, Digidesign’s DAE-based
systems require that stereo files be of
this format.
Stereo - 1 interleaved file: Creates
a single, interleaved stereo file for
stereo playback with some audio
hardware.
Specifically, Apple’s Sound Manager
can play files of this format (meaning
QuickTime supports it), as can
Digidesign’s Sound Designer II
program.
Vision & Studio Vision Pro — Audio Reference Manual
231
PART 5: Basic Audio Editing & Playback
If the Audio Format dialog box opens as
the result of using the File>Export
Audio Events command, the Channels
selector works a bit differently.
Specifically:
•
•
If you selected only a single audio
event, the Channels selector works
as described above except that 1) if
the event is mono, the stereo options
are disabled, and 2) if the event is stereo, the mono option is disabled.
If you select multiple audio events,
the Channels selector looks as
follows:
Since your selected audio events
might all use different channel formats, these options give you the
ability to save all the audio events in
the same channel format. The following matrix shows the results of
applying each option to each type of
audio event.
OPTIONS
ORIGINAL
EVENT
No Change
Deinterleave
Interleave
Mono
1 mono file
1 mono file
1 mono file
Linked
2 mono files
2 mono files
1 stereo file
Interleaved
1 stereo file
2 mono files
1 stereo file
Normalize
This pop-up menu replaces (and expands
upon) the old Audio>Normalize on Mix
option in previous versions of Vision.
•
•
Off: Vision does not adjust the gain of
the exported, mixed, or saved audio
file.
This is a good choice if the file you’re
creating needs to be further mixed
with other audio files and you want to
maintain its volume relative to other
files in the sequence.
Important: If you turn off normalization, then it’s possible to create a file
with clipped audio. This could happen
if, for example, you mixed two drum
tracks—both of which had audio peaks
that occurred simultaneously.
On: Vision automatically changes the
overall gain of the exported, mixed,
or saved audio file so that its maximum amplitude is 0 dB. This yields a
file with maximum volume and no
induced clipping.
This is a good choice if the file you’re
creating is meant as a final master for
distribution (such as files created
with Vision’s File>Export Audio
Mix command).
Figure 20.15: Export Audio Events Channel
Matrix
232
Opcode Systems, Inc.
CHAPTER 20: Import/Export Cornucopia
•
Prevent Clipping: Vision adjusts the
overall gain of the exported, mixed,
or saved audio file only if that file
would contain clipped audio.
This is a good choice for all the same
reasons that Off is a good choice.
However, it gives you the added security of knowing that you will not
produce a clipped audio file.
If Vision is forced to reduce the overall gain of a file to avoid clipping, it
will alert you before processing the
file.
“Bypass this dialog next time” Option
By default, the Audio Format dialog box
appears whenever you export an audio
mix. You can, however, bypass this dialog
box and go straight to the standard
Save As dialog box by clicking the
Bypass this dialog next time option.
If Bypass this dialog next time is
checked, then choosing an Export command always opens a standard Save As
dialog box.
This lets you know that you may need
to make volume adjustments in your
sequence to compensate for the
volume reduction of the new audio
file.
“Output file size” Display
The Output file size display always
shows the estimated amount of disk space
that the requested file type will occupy.
The bottom of the Save As dialog box lists
all your current audio format settings. If
you need to change them, simply click the
Format button to open the Audio Format
dialog box.
This display is very useful when you need
to optimize a file to fit within a certain
amount of disk space (such as for web or
CD game development).
Vision & Studio Vision Pro — Audio Reference Manual
233
PART 5: Basic Audio Editing & Playback
234
Opcode Systems, Inc.
1
2
3
4
Advanced Audio Techniques
5
6
7
Vision & Studio Vision Pro — Audio Reference Manual
235
PART 6: Advanced Audio Techniques
236
Opcode Systems, Inc.
CHAPTER 21: Advanced Recording Techniques
This chapter expands on the basic recording information discussed previously in
Parts 2-4. It explains recording multiple
“takes” of audio and also offers tips on
managing those files.
The following sections discuss how to
best manage files while recording.
WHO SHOULD READ THIS
CHAPTER?
There are two methods of creating multiple record files: automatic and manual. It
helps to understand what Vision is doing
before using the Audio Recording Preferences to automate the process. To
designate a new file for each take
manually:
햲 Press and hold the mouse on the
Record File options icon in the
Record Monitor Window.
Vision opens a pop-up menu of Record
File options.
This chapter applies to all of the audio
systems supported by Vision.
DESIGNATING SEPARATE FILES
FOR DIFFERENT TAKES
If you want to store each take in a separate file, then you need to designate a new
record file every time you record a take.
햳 Choose New Record File from the
pop-up menu.
Vision opens a standard Save As dialog
box.
TIP: If you are using large hard drives
(over 2 GB), you will have the best results
by designating a new file for each take.
Vision & Studio Vision Pro — Audio Reference Manual
237
PART 6: Advanced Audio Techniques
햴 Use the dialog box to name a new
record file, then click the Save
button.
Vision creates a new record file and calculates the available recording time
based on the amount of disk space
available.
To release a file from use as the record
file:
햲 Press and hold the mouse on the
Record File options icon.
Vision opens a pop-up menu of Record
File options.
햵 Make sure the input is recordenabled.
To automate this process jump ahead to
Audio Recording Preferences (pg. 240)
햳 Choose Close Ò<file name>Ó from
OTHER RECORDING ACTIONS
The following sections discuss other miscellaneous record features.
Releasing a Record File From Use
You can’t perform certain operations on a
record file when it’s enabled. For
instance, you can’t delete a file from
Vision’s file list until it’s released in the
Record Monitor Window (see Chapter 25:
File Management for more information).
238
the pop-up menu.
Vision releases the record file and shows
the name of the inputÕs record file as
Ò(none).Ó If desired, you can now designate a new record file by selecting New
Record File from the pop-up Record File
options menu.
The released file is still stored on your
hard disk and, if you have audio events in
your current sequence that reference data
in the file, it will still be listed in the File
Management dialog box. For more information about file management, see
Chapter 25: File Management.
Opcode Systems, Inc.
CHAPTER 21: Advanced Recording Techniques
Appending Audio to Files
Audio files can contain as much audio
data as your hard disk allows. Vision contains numerous “pointers” to different
sections of audio within a file. These
pointers tell Vision which portions of an
audio file to play back and when.
To record more “takes” into an existing
audio file (rather than creating a new one
for each take):
햲 Press and hold the mouse on the
햴 Using the scrolling list, find the file
onto which you want to append the
new audio, then click it to select it.
햵 Click the Import button to open the
selected record file.
Vision will now append any newly
recorded audio to the selected file.
Alternately, you can open the Append to
File dialog box as follows:
햲 Select New Record File from the
Record File pop-up menu.
Record File options icon.
Vision opens a pop-up menu of Record
File options.
Vision opens the Save As dialog box.
햳 Choose Append to File from the
햳 Click the Append to File button.
pop-up menu.
Vision opens the Append to File dialog
box, which is basically a standard Macintosh Open dialog box.
Vision opens the Append to File dialog
box.
NOTE: If you have a DAE based system,
Opcode does not recommend appending
files as it may cause problems later in
playback.
Figure 21.1: Append to File Dialog Box
Vision & Studio Vision Pro — Audio Reference Manual
239
PART 6: Advanced Audio Techniques
AUDIO RECORDING
PREFERENCES
For each record take you can specify:
•
•
•
How the files are written to disk.
Where the files are saved, and in what
format.
How the files are automatically
named.
For example, you can tell Vision to save a
new file for each take and designate how
it will be named and where it will be
saved.
These settings can even be different for
each input of your digital audio hardware—or they can apply to “all inputs.”
In addition, you can also make these
selections globally, or save them with
individual sequence files.
To open the Audio Recording Preferences
dialog box, choose Audio Recording
Preferences from the pop-up menu in the
Record Monitor Window.
240
쐃
쐇
쐋
쐏
�
Figure 21.2: Audio Recording Preferences Dialog
As you can see in Figure 21.2, there are
numerous elements in the Audio Recording Preference dialog. Specifically:
쐃
Apply to
The settings in the Audio Recording
Preferences dialog can be different
for each hardware input. This pop-up
menu determines the input to which
the settings will apply.
If you choose “All Inputs,” the settings will be used for all hardware
inputs.
쐇 File Saving Option
If you record multiple audio takes,
this option determines how Vision
saves the recorded file(s).
Specifically:
If you record with the “Save All new
takes in a single file” preference, then
Vision writes all the recorded data
into a single new audio file and all
new audio events point to this single
file. This option creates fewer audio
files, but each audio file is referenced
by numerous audio events, as illustrated in Figure 21.3.
Opcode Systems, Inc.
CHAPTER 21: Advanced Recording Techniques
1. With the All option selected in the pop-up
menu...
1. With the Each option selected in the pop-up
menu...
2. Record several takes in the same track.
2. Record several takes.
3. All recorded events are written to the hard drive
as a single audio Þle (as shown below).
3. Each recorded event is written to the hard drive
as its own audio Þle (as shown below).
Hard Drive
My Song_Audio-1-001
My Song-001
Hard Drive
My Song_Audio-1-002
My Song_Audio-1-003
My Song_Audio-1-004
4. And each new audio event references its own
individual audio Þle.
4. And each new audio event references a portion
of this new audio Þle (as shown above).
Figure 21.3: Using the “Save All new takes in
a single file” Option
If you record numerous audio takes
with the “Save each new take in a
separate file” preference, then Vision
writes each of the recorded take into
its own file and assigns them a new
audio event. This option creates more
audio files, but each audio file is referenced by a single audio event, as
illustrated below:
Figure 21.4: Using the “Save Each new event
in a separate file” Option
If you type a name other than the
default, that name will be used only for
the first recording. Subsequent files will
return to using the automatic names
discussed in Auto Naming Options on
page 242.
Vision & Studio Vision Pro — Audio Reference Manual
241
PART 6: Advanced Audio Techniques
쐋
Default Folder
This button opens a standard Save As
dialog box, in which you specify the
default file format and the default
folder in which all recorded files (of
the specified type) are stored.
쐏
Auto-Naming Options
Use these two pop-up menus to specify exactly how you want record
operation to automatically name the
new files that it creates.
You can specify both a default prefix
and a default suffix. Vision combines
(or concatenates) the prefix, suffix
and adds a sequential number to
create the file name. To specify the
prefix, select it from the left-most popup menu, as shown below.
You can select to save all files in
either AIFF or Sound Designer II
format.
When you’ve navigated to the desired
folder, click the Select “folder
name” button to make it the default -its name will appear under the
Default Folder button in the Audio
Recording Preferences dialog box.
To specify a default suffix, select it
from the right-most pop-up menu, as
shown below.
Name of current default folder
242
Opcode Systems, Inc.
CHAPTER 21: Advanced Recording Techniques
You can enter a custom prefix and/or
suffix by selecting the Custom option
from either pop-up menu.
The area below the pop-up menus
always shows an example of how your
default file names will appear.
Example of how file names will appear
쐄
Save with sequence files
Check this option if you want each
Vision file to remember its own Audio
Recording Preference. This lets you
set completely different sets of preferences for different files, keeping your
hard disk and separate recording
projects more organized.
If this option is unchecked, all
sequence files will use your most
recent preference selections.
Auto Compacting a File
Compacting is a process that frees disk
space. It retains the audio data that’s used
in the current sequence, and throws away
audio that the current sequence doesn’t
use. This frees up disk space for future
recordings.
If you check the Auto Compact option in
the Record Monitor Window, Vision compacts the current record file, if necessary,
at the end of each record take. It’s the
same as if you opened the File Management dialog box and used its Compact
command as discussed in Compact
(pg. 286).
If you compact your record file, and
you’ve named your sequence file, compacting will re-save your sequence file.
This ensures that the files remain consistent. Therefore, don’t compact if you don’t
want your sequence file saved—saving
the file means you cannot revert later.
Keep in mind that you can always undo
recording, even after your record file has
been compacted unless you use the Clear
Clip and Undo command discussed in
Clear Clip and Undo (pg. 299).
Vision & Studio Vision Pro — Audio Reference Manual
243
PART 6: Advanced Audio Techniques
Save the Sequence
Save your sequence file when you’re done
recording. To do so:
햲 Choose File>Save.
Vision saves the file.
If you havenÕt yet named the sequence
file, Vision opens a standard Macintosh
Save As dialog box. Use the dialog box
to name and save the sequence file.
If you can’t locate the file and still want to
open the sequence, click Cancel. All data
except that file will open in the sequence.
TIP for Acadia users: If there is more than
one audio file missing and you wish to
avoid locating all of them, hold down the
Option key when you click Cancel in the
first dialog box.
Vision saves all your audio events with the
current sequence file. The next time you
open the sequence file, Vision will locate
the audio files referenced by that
sequence file, and will alert you if any are
missing.
Locating Missing Audio Files
In many cases, if you change the name of
an audio file or move it into a different
folder, Vision’s aliasing system will still
find and recognize the file. However, in
some cases, Vision may not be able to
locate the audio data necessary to play
back the sequence. When you attempt to
open a sequence that references such a
file, a dialog box will prompt you to locate
the missing file. This dialog box is the
same as the Import dialog box, discussed
in Importing Audio (pg. 207)).
NOTE: You can audition files from this
dialog box to make sure you are selecting
the correct one. Just select the file by clicking on it and click the Play button.
244
Opcode Systems, Inc.
CHAPTER 22: Auditioning Audio
This chapter discusses how to use Vision
to audition multiple “takes” of audio. Basically, there are two ways to audition
“takes”:
•
•
Audition individual audio events.
Audition individual Audio
Instruments.
The following sections discuss how to
audition audio using these two methods.
The following method discusses how to
audition multiple takes by assigning each
take to a separate Audio Instruments.
햲 Assign each recorded ÒtakeÓ to a
different Audio Instrument in the
same track.
In this example, three different takes are
assigned to three different Audio
Instruments.
WHO SHOULD READ THIS
CHAPTER?
This chapter applies to all of the audio
systems supported by Vision.
AUDITIONING INDIVIDUAL
AUDIO INSTRUMENTS
NOTE: This method works best for auditioning large sections of continuous audio
(such as an entire verse or chorus). If you
wish to separate a take into smaller audio
events (such as individual words or
phrases), use the audio event auditioning
method discussed in Auditioning Individual Audio Events (pg. 247).
Figure 22.1: Assign multiple takes to
different Audio Instruments
햳 Use the Mute (M) or Solo (S) buttons
for each Audio Instrument to find the
takes you want.
Auditioning with the Mute or Solo buttons
is discussed further in Auditioning with
the Mute Buttons (pg. 246) and Auditioning with the Solo Buttons (pg. 246).
Vision & Studio Vision Pro — Audio Reference Manual
245
PART 6: Advanced Audio Techniques
햴 Once youÕve identified the best take,
you can get rid of the remaining takes
by selecting the unwanted Audio
Instruments and typing the Delete
key.
Selecting Audio Instruments is discussed in Selecting all Audio Events
Assigned to the Same Audio Instrument
(pg. 187).
Auditioning with the Mute
Buttons
To audition an audio take in context with
other tracks (either audio or MIDI), click
the Mute button for all Audio Instruments
except the one you want to audition.
IMPORTANT: Muting an Audio Instrument in the Graphic Window affects all
audio events assigned to that Audio Instrument for the entire sequence file (even those
in other tracks).
Auditioning with the Solo Buttons
To audition an audio take without hearing
any other concurrent tracks (either audio
or MIDI), click the Solo button for the
Audio Instrument you wish to audition.
In the following example, Vision plays
back only Audio-2 since it is soloed.
This Audio Instrument is
soloed (as indicated by
the highlighted S button):
In the following example, Vision plays
back any audio events assigned to Audio-2
as well as any audio or MIDI data contained in other tracks.
These Audio Instrument are
muted (as indicated
by the highlighted M
button):
The audio events assigned to
Audio Instruments 1 & 3 do not
play because Audio-2 is soloed.
Only audio events assigned to Audio-2
will play back (since itÕs the only Audio
Instrument that isnÕt muted)
246
IMPORTANT: Soloing an Audio Instrument in the Graphic Window affects all
Instruments (MIDI and audio) playing
back for the entire sequence.
Opcode Systems, Inc.
CHAPTER 22: Auditioning Audio
Auditioning with the Audio
Instruments Window
The Mute and Solo buttons in the Graphic
Window are duplicates of the Mute and
Solo columns in the Audio Instruments
Window.
AUDITIONING INDIVIDUAL
AUDIO EVENTS
NOTE: This method works best for small
sections of audio (such as individual words
or phrases). If you wish to audition large
sections of continuous audio (such as an
entire verse or chorus), use the Audio
Instrument auditioning method discussed
in Auditioning Individual Audio Instruments (pg. 245).
The following sections discuss how to
audition multiple audio events in a track.
Breaking Up Audio Events
Generally, when you record audio, you
record long sections (such as an entire
verse or chorus). When you do this,
Vision creates a single audio event and
assigns it to an Audio Instrument.
Often, you can break these events into
shorter “phrases” (such as individual
lines in a verse). By doing this, you can
select the best parts of multiple takes to
assemble an entirely new take.
If you wish, you can use the Audio Instruments Window to mute and solo Audio
Instruments. For more information about
the Audio Instruments Window, see one
of the following chapters:
•
•
Acadia: See Chapter 6: Acadia: Audio
Instruments & Routings Window.
DAE: See Chapter 15: DAE: Audio
Instruments.
Vision & Studio Vision Pro — Audio Reference Manual
247
PART 6: Advanced Audio Techniques
Vision offers a couple of ways to break
large audio events into smaller events.
You can:
•
•
Use the Audio>Strip Silence/Slice
Audio command to automatically
eliminate “silent” audio passages
and/or auto-separate into smaller
regions. This is discussed in
Chapter 27: Strip Silence and Slice
Audio.
Use the Audio>Separate command
to manually separate audio events
into multiple events. This is discussed
in Separate (pg. 344).
햲 Separate each take into smaller audio
events.
In this example, each original take is
assigned to a single Audio Instrument
and is broken into multiple audio events
using one of the techniques discussed in
Breaking Up Audio Events (pg. 247).
Muting Audio Events
Once you’ve broken your audio events
into smaller phrases, you can audition
them individually. To do so:
Each take is broken into
individual ÒphrasesÓ
햳 Select the audio events you wish to
mute by Shift-clicking them.
Selected audio events appear ÒhollowÓ.
All Audio events except for
these three are selected
248
Opcode Systems, Inc.
CHAPTER 22: Auditioning Audio
햴 Select Do>Mute>Mute Seq &
Unmuting Audio Events
Audio events.
Vision mutes the selected audio events.
Muted audio events appear Ògrayed outÓ
in Vision
To unmute audio events:
햲 Select one or more currently muted
audio events.
In this example, we select two audio
events that are currently muted (as seen
in Figure 22.2).
Selected audio events
Figure 22.2: Muted Audio Events
Muted audio events will not play back
when you play a sequence. In the example shown in Figure 22.2, only ÒLine 1
TAKE 1,Ó ÒLine 2 TAKE 3,Ó and ÒLine 3
TAKE 2Ó will play.
햳 Select Do>Mute>Unmute Seq &
Audio Events.
Vision unmutes the selected audio
events.
Previously muted audio events
are now unmuted
Figure 22.3: Unmuted Events
Vision & Studio Vision Pro — Audio Reference Manual
249
PART 6: Advanced Audio Techniques
Muting Audio Events in the List Window
To mute audio events in the List Window:
햲 Click the Mute button located next to
each audio event in the List Window.
Follow through the next example to see
how to use the Toggle Mutes command.
햲 Create the ÒAÓ set of audio events by
muting all those events you donÕt
want to hear.
This technique was discussed in Muting
Audio Events (pg. 248).
Muted Events
To unmute, click the Mute button again to
toggle its state.
Comparing Audio Events
Often, you’ll want to make A-B comparisons between audio events (or sets of
audio events). To do this, use the
Do>Mute Events>Toggle Mutes command, which performs the following
actions:
•
•
250
It unmutes any selected events that
are currently muted.
It mutes any selected events that are
currently unmuted.
Unmuted Events
Figure 22.4: Audio Event Set “A”
햳 Play the sequence and listen to your
ÒAÓ set of audio events.
햴 Select both the audio events you wish
to unmute and the ones you wish to
mute.
Opcode Systems, Inc.
CHAPTER 22: Auditioning Audio
In this example, all audio events were
selected.
Assembling a New Take
Once you’ve selected the audio events
you want to use, you can assemble them
into a new “take.” To do so:
햲 Select the audio events you want to
keep by Shift-clicking them in the
Graphic Window.
If you want, you can audition all the
selected audio events by choosing
Do>Play Selection. Vision plays only
the selected events.
햵 Select Do>Mute>Toggle Mutes.
Select the audio events
you wish to keep
Vision mutes the ÒAÓ set of audio events
and unmutes the ÒBÓ set.
Figure 22.5: Audio Event Set “B”
햶 Play the sequence and listen to your
햳 Copy the selected audio events to a
new track using standard copy/paste
techniques.
ÒBÓ set of audio events.
Figure 22.6: “Good” audio events pasted into
a new track
Vision & Studio Vision Pro — Audio Reference Manual
251
PART 6: Advanced Audio Techniques
햴 Move all audio events to the same
Audio Instrument by dragging them in
the Graphic Window.
Figure 22.7: New track after assigning all
audio events to the same Audio Instrument
햵 Delete the original track containing all
your audio events.
IMPORTANT: DonÕt do this if the track
contains other audio events or MIDI
events you wish to keep!
252
Opcode Systems, Inc.
CHAPTER 23: Adjusting Volume and Pan
You can adjust the volume and pan settings for audio in many different ways.
You can:
•
•
•
Use the List Window to insert volume
or pan controller events at specified
times, or
Use the Strip Chart to draw controller
events over time, or
Use either the Console or Faders
Windows to record automation for
audio volume and pan.
This chapter begins with a discussion of
velocity, volume, and pan. It then teaches
you each of the different methods for controlling audio volume and panning.
WHO SHOULD READ THIS
CHAPTER?
This chapter applies to all of the audio
systems supported by Vision.
For details about the information discussed in this chapter, please see
Chapter 24: Automation.
THE DIFFERENCE BETWEEN
VELOCITY AND VOLUME
You can assign audio volume events to
Audio Instruments. Audio volume events
affect every audio event that’s assigned to
the same Audio Instrument.
You can also adjust the velocity values for
audio events. Changing the velocity value
affects only the audio event to which it’s
assigned—it does not affect any other
audio events, even if they’re assigned to
the same Audio Instrument.
Because of this distinction, velocity (for
audio events) and volume events have different uses. Specifically:
•
•
Use velocity to set static output levels
for each audio event.
Use audio volume events to create
dynamic volume changes for entire
Audio Instruments.
For example, assume you have a track of
multiple drum kit audio events, all
assigned to the same Audio Instrument.
Set a velocity for each drum audio event
to create the accenting you want. Then,
use the Audio Instrument’s volume events
as an overall volume control for the entire
drum set.
Vision & Studio Vision Pro — Audio Reference Manual
253
PART 6: Advanced Audio Techniques
PANNING AUDIO
INSTRUMENTS
The panning events discussed in this
chapter refer to mono audio instruments
which are assigned to stereo outputs.
Stereo audio instruments, or mono audio
instruments which are assigned to mono
outputs, cannot be panned. This is
reflected in two ways:
•
•
Pan events assigned to stereo Audio
Instruments (or mono audio instruments assigned to mono outputs) are
ignored.
Stereo Audio Instruments (or mono
audio instruments assigned to mono
outputs) in Consoles do not have Pan
faders.
SETTING AN INDIVIDUAL AUDIO
EVENT LEVEL (VELOCITY)
To adjust the relative volumes of individual audio events:
햲 Open a List Window for the desired
track.
햳 Drag each audio eventÕs velocity
numerical to the desired value.
NOTE: You can also adjust audio event
velocities in the Tracks and Graphic windows’ Strip Chart using the same procedure
that you’d use to adjust MIDI note
velocities.
CREATING VOLUME AND PAN
LEVELS FOR AUDIO
INSTRUMENTS
To adjust the overall volume and pan of
multiple, related audio events:
햲 Assign the related audio events to the
same Audio Instrument.
햳 Create audio volume events and
audio pan events on that Audio
Instrument.
All audio events assigned to that Audio
Instrument will be affected by adjustments to the volume and pan controllers.
You can create audio volume and pan
events in either the List Window or the
Strip Chart, as discussed in the following
sections.
SESSION 8/Project: These systems do not
process volume and pan data as efficiently as
other DAE hardwareÑtherefore, volume and
pan changes may occur at slightly different
(probably inaudible) times each time you play
a sequence file.
Figure 23.1: Individual Audio Event Velocity
in the List Window
254
Opcode Systems, Inc.
CHAPTER 23: Adjusting Volume and Pan
Using the List Window
To insert audio volume or pan events in
the List Window:
햵 From the pop-up menu, select either
ÒAudio VolumeÓ or ÒAudio PanÓ from
the Automation submenu.
햲 Open a List Window for the desired
track.
햳 Use the Edit In Point numerical to set
the start time of the controller event.
Enter controller event time
here
Alternately, you could click the selector
dot of an existing event if you want the
controller to be entered at the same start
point.
햴 Press and hold the mouse on the
Insert Event pop-up menu icon.
If this track contains multiple Instruments
and itÕs the first controller event youÕve
entered into it, youÕll see a Set Instrument dialog box asking you to assign it
to an Instrument. If this is the case,
select an Instrument from the dialog box
and click the OK button.
Vision opens a pop-up menu of event
types.
If you already have a controller in your
track, the new controller event will automatically be set to the Instrument that
controller is set to.
Newly inserted
controller event
Vision & Studio Vision Pro — Audio Reference Manual
255
PART 6: Advanced Audio Techniques
Changing Automation Event Instrument
Assignments
If, after inserting an automation event,
you wish to change its Instrument assignment, simply press and hold the mouse in
the event’s Instrument column and select
a new Instrument from the pop-up menu.
Using the Strip Chart
You can enter automation events in the
Graphic or Track Windows’ Strip Chart by
using the Pencil tool to draw information
that changes over time and affects multiple events. To do so:
햲 Open a Graphic or Tracks window for
the desired track.
햳 Open a Strip Chart showing either
volume or pan.
Press here to open a pop-up menu of
other Instruments
Changing Automation Event Values
After inserting an automation event, you
can adjust its value by dragging the
numerical, which is to the right of the
event name.
Drag to change controller value
Audio volumes are displayed from-¥ to
the Maximum Fader Position setting.
(Acadia users, see page 89; DAE users,
see page 173.)
Audio pan events are displayed from
<100.00 to 100.00>. Pan is displayed
with pan center at zero, pan left below
zero, and pan right above zero. The farther you draw data from pan center the
farther left or right youÕll pan the
Instrument.
IMPORTANT: To avoid overflow problems, draw volume and pan controllers
with a low density settingÑas low as
possible without hearing individual steps.
For details about setting controller density in the Strip Chart, see your MIDI
Reference Manual.
햴 Click the Pencil icon in the lower left
of the Strip Chart to turn the cursor
into the Pencil tool.
256
Opcode Systems, Inc.
CHAPTER 23: Adjusting Volume and Pan
햵 Choose an operation type from the
pop-up menu in the lower left of the
Strip Chart.
is the case, select an Instrument from the
dialog box and click the OK button.
Thereafter when you draw data it will
automatically get set to the Instrument
initially named.
For more information on using the Strip
Chart, consult the MIDI Reference
Manual.
햶 Choose audio volume or audio pan
from the strip chart contents pop-up.
If you want to change the Instrument, you
can use the List Window’s Instrument
pop-up menu (as discussed in Changing
Automation Event Instrument Assignments
(pg. 256)), or you can select the event in
the Strip Chart or List Window and
choose Do>Set Instrument.
The automation data you draw is also displayed in the List Window.
햷 Drag through the Strip Chart to draw
automation events that change over
time.
CREATING FADERS TO
CONTROL VOLUME AND PAN
You can control an Audio Instrument’s
volume and pan in real time by assigning
faders to control them.
You can do this using either the Console
or Faders Windows.
Figure 23.2: Draw Controller Events
If this track contains multiple Instruments
and it’s the first automation event you’ve
entered into it, you’ll see a Set Instrument
dialog box asking you to assign the new
controller events to an Instrument. If this
Vision & Studio Vision Pro — Audio Reference Manual
257
PART 6: Advanced Audio Techniques
Using the Console Windows
The example that follows shows how to
automatically create a console specifically
for Audio Instruments.
햴 From the Console Window Menu,
choose Build Console From>
Audio Instruments.
NOTE: You can automatically create consoles that control only the Instruments used
in your sequence, or you can create consoles
manually.
To automatically create a console specifically for Audio Instruments:
햲 Press and hold the mouse over the
Windows>Console command.
Vision produces a submenu of console
choices.
Vision creates a console with a volume
and pan fader for each of the Audio
Instruments (residing in your Audio
Instruments Window).
Figure 23.3: Console Submenu
햳 Select one of the sixteen consoles
from the submenu.
Vision opens that Console Window.
햵 Drag any volume fader up or down.
Vision changes the volume for all audio
events assigned to that Audio
Instrument.
햶 Similarly, drag any pan fader left or
right.
Vision changes the panning of any audio
event assigned to that Audio Instrument.
Figure 23.4: Typical Console Window
258
Opcode Systems, Inc.
CHAPTER 23: Adjusting Volume and Pan
TIP: You don’t have to DRAG faders. If you
click anywhere in the length of a fader, the
thumb will automatically jump to that
location.
Using the Faders Window
You can also use the Faders Window to
control volume and pan for Audio
Instruments.
Recording Console Fader Movements
You can create dynamic mixes by recording fader movements in real time. To do
so:
햲 Record-enable a track, then select a
Record Mode and Countoff option.
햳 Begin recording.
햴 Drag some faders in the Console
Window.
햵 Stop recording.
햶 Open a List Window and notice that
Vision recorded your movements.
Movements to volume faders are written
as (audio) Volume events, and movements to pan faders are written as
(audio) Pan events. Each event is also
assigned to the appropriate instrument.
Figure 23.6: Typical Faders Window
IMPORTANT: The Faders window numericals always display a range of values from
0 to 127. This does not directly correspond
to values for audio volume (-¥ to the Maximum Fader Position setting) or audio pan
(-100.00 to 100.00). The 0 to 127 scale is
mapped onto the appropriate scale for the
automation type when recording, and correct values are written into the track.
To see the appropriate range of values for
audio volume and pan, use the Consoles
window rather than the Fader window.
Figure 23.5: Automation events in the List window
NOTE: Any automation events you record
in the Console Window are displayed in
List Windows as shown in Figure 23.5.
You can adjust audio volume and pan
levels by dragging the graphic faders or
by controlling them with a remote device.
Vision records fader movements as automation events assigned to specific
Instruments and automation types (MIDI
controllers, velocity scale, audio volume,
and audio pan). Your MIDI Reference
Manual contains a complete description
of how to use faders.
Vision & Studio Vision Pro — Audio Reference Manual
259
PART 6: Advanced Audio Techniques
The following sections discuss those
areas that apply specifically to digital
audio.
햵 Press and hold the mouse on the
Instrument name and select the
desired Audio Instrument from the
pop-up Instrument menu.
Mapping Volume and Pan to Faders
To assign an automation event to a fader:
햲 Choose Windows>Faders.
Vision opens the Faders Window.
Select the desired Instrument
from the pop-up menu
햳 Make sure the Fader Window is set to
Send mode.
NOTE: You can also choose MIDI instruments, busses, inputs, and outputs.
햶 Click on the controller name to toggle
between pan and volume.
Click to toggle between
Send and Receive modes
햴 Click the selector dot of a fader you
want to assign to an Audio
Instrument.
Click to toggle between two choices:
1. assigning the fader to Volume, or
2. assigning the fader to Pan
To record volume or pan events as you
listen to your track:
By default, Vision assigns the correspondingly numbered Instrument to the
fader. It also assigns a Volume controller
to the fader. To change these settings...
햲 Record-enable the track you want the
automation events in.
Do this by clicking in the Record column
of the Tracks Window, placing an ÒRÓ
there.
NOTE: You may want to record the fader
movement onto a separate track while
youÕre experimentingÑitÕs easier to
delete your edit, and you can mute and
unmute the track to see how it sounds.
260
Opcode Systems, Inc.
CHAPTER 23: Adjusting Volume and Pan
ItÕs also useful to record different mixes
on different tracks, since you can later
compare and choose between them.
햳 Set the desired Record mode.
Replace will wipe out any existing
events (including audio events and note
events) and replace them with the fader
events. Overdub merges automation
events with existing events on the track.
햴 In the Control Bar, set a Countoff or
choose Wait for Note mode.
SMOOTHING VOLUME AND PAN
CHANGES
Sudden changes in volume and pan can
produce unwanted noise, such as clicks,
pops, or “zips.” You can use the Audio
Preferences dialog box to set parameters
that will smooth out rapid changes in
volume or pan, therefore eliminating
these unwanted noises. See page 174 for
DAE users or page 90 for Acadia users.
햵 Click the Record button.
If using Wait for Note, youÕll have to
click the Start button, press the Spacebar, or play a MIDI note to begin
recording.
YouÕll hear previously recorded tracks
play back as youÕre recording onto the
record-enabled track.
햶 Drag the appropriate fader to the left
and right.
Vision records all fader movements in
the record-enabled track.
Figure 23.7: Moving a Fader
If youÕre altering volume, the range from
0 to 127 represents -¥ to the Maximum
Fader Position setting. If youÕre altering
pan, the range from 0 to 127 represents
pan from -100.00 to +100.00, with 64
representing 0 (center).
NOTE: For more on using the Faders
Window, see your MIDI Reference
Manual.
Vision & Studio Vision Pro — Audio Reference Manual
261
PART 6: Advanced Audio Techniques
262
Opcode Systems, Inc.
CHAPTER 24: Automation
This chapter discusses Vision’s automation capabilities. In this chapter you will
learn about:
•
•
•
•
•
how automation events work;
recording automation events;
viewing and inserting automation
events;
using the Copy Faders command;
types of automation events.
WHO SHOULD READ THIS
CHAPTER?
Everything in this chapter applies to
Acadia users.
The Mutes and Solos, Audio Volume, and
Audio Pan sections apply to DAE users. In
addition, the Send Levels and Plug-In
Bypass sections apply to Studio Vision
Pro owners with TDM hardware.
HOW AUTOMATION EVENTS
WORK
If you’re familiar with the way Vision has
treated MIDI controller data and fader
events in the past, then automation events
should seem familiar. In fact, controller
events themselves are automation events,
and the handling of the new types of automation events is modeled after the
handling of controller events in previous
versions of Vision.
When Vision sends MIDI controller data
to a MIDI instrument, the parameters of
that instrument are being “automated”.
When Vision sends any of the new types
of automation events to an Audio Instrument, send, plug-in, or EQ, it is
automating those parameters.
This chapter also contains some information about MIDI events, which apply to all
audio systems.
Vision & Studio Vision Pro — Audio Reference Manual
263
RECORDING AUTOMATION
EVENTS
Basic Recording
Automation is recorded just as MIDI controller information is recorded. There are
three basic steps.
햲 Record enable a track.
햳 Press Record.
•
•
You can now automate many, many
more parameters. For example, EQ
and plug-in parameters can be automated. For a complete list, see Types
of Automation Events (pg. 275).
Moving a fader assigned to a MIDI
controller used to generate fader
events (in versions of Vision prior to
4.5). This action now generates controller events (or other automation
events) directly. For details, see
Changes in the Way Vision Handles
Faders (pg. 271).
Tip for Recording Plug-In
Automation
To get a finer range of values for “faceless” plug-in parameters, hold down the
Option key while adjusting its sliders.
햴 Move a fader.
When the option key is not held down,
moving the mouse by one pixel also
moves the parameter slider one pixel.
Parameter sliders (for faceless plug-ins)
are 88 pixels wide, so there are 88 possible values for the parameter.
Alternately, you can drag or type in the
numeric field of an automatable
parameter.
The two main differences between recording automation data now and recording
controller data in previous versions are:
264
Opcode Systems, Inc.
CHAPTER 24: Automation
VIEWING AND INSERTING
AUTOMATION EVENTS
Figure 24.1: Strip Chart contents menu
When the option key is held down,
moving the mouse ten pixels moves
parameter slider one pixel. This increases
the number of available values for the
parameter to 880.
Figure 24.2: List window Insert menu
Figure 24.3: Automation-type submenus
The Strip Chart contents menu and the
List window Insert menu both include the
submenus shown in Figure 24.3. All of the
types of automation discussed in this
chapter are in these menus.
Of course, you can type any number
within the parameter’s range into its
numeric field.
Vision & Studio Vision Pro — Audio Reference Manual
265
The Plug-in Parameter submenu appears
only if there are plug-ins assigned in the
current sequence file. You must assign a
plug-in (in a Console) before you can
insert or view automation events for that
plug-in. For information about how to
assign plug-ins, please see Assigning PlugIns (pg. 47).
Figure 24.4: MIDI submenu
Automation Events in the List
Window
For information about automation events
in the List Window, see your MIDI Reference Manual.
Automation Events in the Strip
Chart
Figure 24.5: Automation submenu
For more information about automation
events in the Strip Chart, see your MIDI
Reference Manual.
Tracks and Pulse Window Strip Charts
Figure 24.6: EQ Band Parameter submenu
In the Tracks and Pulse windows, the
Strip chart intelligently allows you to
insert only appropriate automation events.
For example, if you're inserting plug-in
parameter events, at least one instrument
in a selected track must have that plug-in
assigned to it in order to get a pencil.
Figure 24.7: Plug-in Parameter submenu
266
Opcode Systems, Inc.
CHAPTER 24: Automation
If your Console looks like this:
Selected Track
Strip Chart contents
Figure 24.9: Plugin 1 Bypass on a MIDI track
The pencil tool is not displayed when a
MIDI track is selected and an audio automation parameter is displayed.
Figure 24.8: Console setup
...and your Tracks window looks like this:
Figure 24.10: MIDI controller on a MIDI track
The pencil tool is displayed when a MIDI
track is selected and a MIDI controller is
displayed.
...you’ll have the following results.
Figure 24.11: Plug-in parameter on an audio
channel with no plug-in assigned
As shown in Figure 24.8 on page 267,
there is no plug-in assigned to Bus 1 (the
selected track’s instrument). So, the
Vision & Studio Vision Pro — Audio Reference Manual
267
pencil tool is not displayed when Track 3
is selected and a plug-in parameter is
chosen in the Strip Chart.
Figure 24.12: Plug-in parameter on an audio
channel with a plug-in assigned
In Figure 24.13 and Figure 24.14, two
tracks are selected: one MIDI track, and
one audio track (assigned to Audio 1,
which does have opCHORUS assigned).
The pencil tool does appear in the Strip
Chart.
However, when you draw information into
the Strip Chart in this type of scenario,
information is only inserted on the appropriate instrument. In this example, plug-in
parameter events are inserted only on
Audio 1.
As shown in Figure 24.8 on page 267,
there is a plug-in assigned to the selected
track’s instrument (Audio 1). So, the
pencil tool is displayed when Track 1 is
selected and a plug-in parameter is
chosen in the Strip Chart.
When more than one track is selected and
the Strip Chart contents displays a value
that is only appropriate for one (or more)
of the instruments on the selected tracks,
the pencil tool is displayed.
Figure 24.14: Drawing Plug-In Parameter events
with multiple instruments selected
Graphic window Strip Chart
The Strip Chart in the Graphic window
works slightly differently.
In the Graphic Window, the Strip chart
will always show a pencil. If you attempt
to insert an event that is inappropriate for
the selected track, or if the track is multi
and more than one of the instruments in
Figure 24.13: Strip Chart with multiple
instruments selected
268
Opcode Systems, Inc.
CHAPTER 24: Automation
the track would be appropriate, a dialog
will appear asking you which instrument
you’d like the events to be inserted on.
This dialog will display only appropriate
instruments.
Strip Chart contents
After inserting events assigned to
Audio-1, the track becomes a multi track.
Track is now ÒmultiÓ
Selected trackÕs instrument
Figure 24.15: Graphic window Strip Chart with
inappropriate contents
In the above case, the track’s instrument
does not have the specified plug-in
assigned to it. As soon as you draw in the
Strip Chart, the following dialog appears.
For more information about viewing and
inserting events in the Strip Chart, see
your MIDI Reference Manual.
Notes about Audio Volume
The Maximum Fader Position setting
(see page 89 for Acadia users, page 173
for DAE users) determines the uppermost value of an audio volume fader in the
Console window.
It also determines the uppermost value
for audio volume displayed in the Strip
Chart.
Figure 24.16: Set Insert Instrument window
The only instrument available in the popup is Audio-1, because it is the only instrument with opCHORUS assigned to it (as
shown in Figure 24.8 on page 267).
NOTE: If a MIDI controller had been
selected in the Strip Chart Contents pop-up,
the instrument pop-up in Figure 24.16
would have shown all MIDI Instruments.
Vision & Studio Vision Pro — Audio Reference Manual
269
For example, when the Maximum Fader
Position is set to +6 dB and Audio Volume
is selected in the Strip Chart Contents
pop-up, the Strip Chart looks like this.
If you lower the Maximum Fader Position
during a session, visual settings in the
Consoles, Faders window, and Strip Chart
may appear misleading as a result. However, the audio volume events themselves
will not be affected, and audio will sound
as it did before the change. The List
window always displays numeric values
accurately, so audio volume events in the
List window will appear as they did before
the Maximum Fader Position was
adjusted.
The range is from -¥ to +6 dB. A horizontal line is also drawn (for your reference)
at 0 dB.
Audio Volume and Pan in the Faders
Window
However, regardless of the Maximum
Fader Position setting, Audio Volume
events in the List window can always have
values up to +24 dB in Acadia mode or
+6 dB in DAE mode. Values above the
current Maximum Fader Position setting
can never be recorded; they can only be
inserted in the List window.
The Maximum Fader Position setting
should be made at the beginning of your
session and left at that setting for the
duration of the session.
The Maximum Fader Position setting
does not directly affect audio volume
events or the perceived volume of any
audio events. Instead, it allows you to
manually adjust audio volume more flexibly. This setting can be considered
“cosmetic”, because it affects only the
appearance of the Consoles, Faders window, and Strip Chart.
270
As in previous versions of Vision, audio
volume and pan can be displayed in the
Faders window and controlled by its
sliders.
Audio pan now has a range of -100.00 to
100.00, and audio volume now has a range
of -¥ to the Maximum Fader Position (as
set in the Audio Preferences dialog box).
However, displayed numeric values in the
Faders window are still 0-127.
These values are mapped to the appropriate range of values for the selected
parameter. In the case of audio pan, 0 corresponds to -100.00 (left) and 127
corresponds to 100.00 (right). For audio
volume, 0 corresponds to -¥ and 127 corresponds to the Maximum Fader
Position.
If you wish to see the correct numeric
values for these parameters, use the Consoles rather than the Faders window.
Opcode Systems, Inc.
CHAPTER 24: Automation
CHANGES IN THE WAY VISION
HANDLES FADERS
Removal of “Fader Events”
In previous versions of Vision, faders
were a type of interface between you and
your MIDI controller data.
A fader set up like this...
Visual and Audible Effect
In most cases, the visual and audible
effects of recorded fader movements will
not change. In fact, faders themselves
have become much more flexible. For
example:
햲 Open the Faders window and assign
the first fader to control pan for an
instrument.
This example uses JD-800-1.
...used to generate an event like this
(in the List Window).
Figure 24.17: The old way
Faders still act as an interface, but now
they generate data directly. Instead of creating a fader event assigned to another
parameter (such as a controller), faders
now create automation events.
햳 Record enable a track.
햴 Press the Record button.
A fader set up like this...
햵 Click on the fader and drag it back
and forth to record pan information.
...will now generate an event like this
(in the List Window).
Figure 24.18: The new way
In short, we’ve “eliminated the middleman” by completely removing “fader
events”.
Vision & Studio Vision Pro — Audio Reference Manual
271
햶 Press the Stop button and open the
List window.
You can see the pan events in the List
window.
You could also assign a Console channel
to JD-800-1 and the pan fader in that console would move in unison as well.
Although this example uses a MIDI
instrument, the same principles apply
when dealing with audio instruments.
See your MIDI Reference Manual for
more details.
Notice that these are not fader events
assigned to pan; they are pan events.
햷 Press Play
Watch the first fader move just as you
recorded it.
햸 Disable the first fader by clicking on
its selector dot.
햹 Enable a different fader and set it to
JD-800-1 Pan.
햺 Press Play.
Now the new fader moves to the
recorded pan events.
272
COPY FADERS AND AUDIO
CHANNELS
The Copy Faders command is an excellent way to create a “fader snapshot” to
put at the beginning of your sequence.
Inserting an initial setting for each fader is
very important, but it is often overlooked.
For example, you might use volume
faders to create a “fade out” at the end of a
song, with each instrument’s volume setting ending at 0. The first time the
sequence is played, it sounds correct.
After the sequence ends, you press play
again, but can’t hear anything. If you let
the sequence play long enough, you’ll
hear only the fade out.
This happens because, at the end of the
song, each instrument receives a volume
setting of 0. If there’s no volume data at
the beginning of the sequence, the instrument doesn’t know to change its volume
until the first volume event of the fade out.
Creating a set of initial volume settings (a
“snapshot” of the Console and Faders
windows) will alleviate this problem.
Opcode Systems, Inc.
CHAPTER 24: Automation
Of course, the same principles apply to
mutes and solos, send levels, pan, EQ
parameters, plug-in parameters, etc.
Example 2: Solo, Phase Invert,
and a Send
For basic information about Copy Faders, see your MIDI Reference Manual.
Copy Faders now includes many more
parameters than it used to. Following are
some scenarios. These figures include
Console strips and the events that appear
in the List window after using Copy
Faders.
Example 1: Basic Console Strip
No send here; no send level event.
Figure 24.20: Copy Faders Example 2
No plug-in here; no plug-in parameter events.
In example 2, phase invert and solo have
been turned on, and a send has been
assigned. Note that the List Window displays “Send 1 Level” regardless of the
destination of the Send (it doesn’t say
“Send to Bus 1 Level”).
Figure 24.19: Copy Faders Example 1
Phase Invert, EQ Enable, Mute, Solo, Volume, and Pan will always be copied for
each audio channel, regardless of any
other parameters.
Since there are no sends or plug-ins
assigned, no events are written for those
options.
Vision & Studio Vision Pro — Audio Reference Manual
273
Example 3: EQ Enabled
However, the sub-parameters of disabled
parameters can still be recorded and
inserted (in the List window or Strip
Chart).
Example 4: A Plug-In
The Copy Faders command does not
copy plug-in parameter settings when a
Console (or the Faders window) is active.
Figure 24.21: Copy Faders Example 3
In example 3, EQ Enable has been set to
On. As a result, Vision checks the On/Off
status of each of the 4 EQ bands.
The first band is turned On, so Vision
includes the settings for each of its parameters when the faders are copied.
Each of the remaining bands is turned
Off, so Vision does not check the settings
for any of their parameters.
Figure 24.22: Copy Faders with a Console window
active
As you can see, the plug-in’s bypass status
is copied. Plug-in bypass is not considered
a plug-in parameter. None of the plug-in
parameters (Dry/Wet, Filter, etc.) have
been copied.
In general, if a parameter is set to Off,
none of its sub-parameters will be copied.
274
Opcode Systems, Inc.
CHAPTER 24: Automation
If you wish to copy a plug-in’s parameter
settings, make the plug-in edit window
active before choosing Copy Faders. This
will copy only plug-in parameter data.
Copy Faders and “Faced” Plug-Ins
When used with the plug-in edit window
of a faced plug-in active, Copy Faders
includes values for all 1024 of the plug-in’s
parameters. Of course, you can delete the
values for any parameters that are not
actually in use by the specified plug-in.
Parameters that are not in use usually
have values of 0. See page 281 for more
information about faced plug-ins.
TYPES OF AUTOMATION
EVENTS
There are several types of events that can
be automated. They include:
Figure 24.23: Copy Faders with a Plug-In Edit
window active
If a plug-in (with automation data
assigned to it) is removed from a Console,
a warning dialog will appear.
Clicking Cancel will leave the plug-in in
the Console. Clicking OK will remove the
plug-in and all automation data assigned
to it.
•
•
•
•
•
•
•
•
•
•
•
Audio volume;
Audio pan;
Mute and solo;
Send levels;
Plug-in bypasses;
Phase invert;
EQ enable;
EQ band parameters;
Plug-in parameters;
MIDI controller data;
other continuous MIDI events,
including velocity scale, pitch bend,
aftertouch, and poly aftertouch.
Unless otherwise noted, these events can
be assigned to Audio Instruments, Busses, Inputs, or Outputs, referred to as
audio channels.
Vision & Studio Vision Pro — Audio Reference Manual
275
Automation
The Automation submenu contains the
following types of events:
•
276
Audio Volume
Audio Volume events effect the playback volume level of Audio
Instruments, Busses, Inputs, and
Outputs.
Audio volume events can have values
ranging from -¥ to +24 dB. However,
since the Maximum Fader Position
setting defines the maximum value
that can be displayed in the Consoles
(or the Faders window), audio channels in Consoles can only have values
ranging from -¥ to the Maximum
Fader Position setting. The Maximum Fader Position can be 0, +6,
+12, or +18 dB. This setting is defined
under Audio>Audio Preferences.
For information about Maximum
•
Fader Position in Acadia mode, see
page 89. For information about Maximum Fader Position in DAE mode,
see page 173.
In previous versions of Vision, audio
volume events had the same 0 to 127
range that MIDI volume events have.
When files created in previous versions of Vision are opened into
version 4.5 (or later), their audio
volume events (or fader events
assigned to volume for an audio
instrument) are remapped to take
advantage of the new range of audio
volume values.
Audio Pan
Audio pan events effect the placement
of audio events in the stereo field (left
to right).
Audio pan events can have values
ranging from -100.000 to 100.000.
These events work just like MIDI pan
events, but can be much more specific and are assigned to audio
instruments.
MIDI events have pan values from -64
to 63 (which adds up to a total of 128
possible settings, just like all other
MIDI controllers). In previous versions of Vision, audio pan events had
the same values. When files created
Opcode Systems, Inc.
CHAPTER 24: Automation
•
in previous versions are opened into
Vision 4.5 (or later), audio pan data
will be remapped to take advantage of
the full -100 to +100 range.
In addition to the increased sensitivity, having audio pan displayed with
this range makes it easy to distinguish at a glance whether you’re
dealing with audio or MIDI pan data.
Audio pan events are displayed with
two decimal points in the Consoles
window and with three decimal points
in the List window.
Mute and Solo
Mute and Solo events control the on/
off status of the chosen Instrument’s
Mute and Solo settings.
Unlike most of the other commands
in this menu, Mute and Solo can
affect Audio or MIDI Instruments.
Keep in mind that these events affect
Instruments rather than tracks.
For more information about the similarities and differences between
tracks and instruments when muting
and soloing, please see your MIDI
Reference Manual.
•
Send Levels
•
Send level events control the level of
audio sent to a specific send. Sends
are addressed by number, so even if
you change the output of a send, the
automation data will remain.
Send level events can have values
ranging from -¥ to +24 dB.
Plug-In Bypass
Plug-in bypass events control the
status of the chosen plug-in’s bypass
button.
These events can have values of Off
or On. When set to off, the plug-in’s
bypass button is out, and the plug-in
effects the audio that passes through
it. When set to on, the plug-in bypass
button is in, and the plug-in is
bypassed (and does not effect the
audio).
For more information about bypassing plug-ins, see page 51.
Vision & Studio Vision Pro — Audio Reference Manual
277
•
•
Phase Invert
Phase Invert events control the status
of the chosen audio channel’s phase
invert button.
These events can have Off or On values. When set to off, the audio
channel’s phase invert button is out.
When set to on, the audio channel’s
phase invert button is in.
For information about the function of
the phase invert button, see Phase
(pg. 55).
EQ Enable
EQ Enable events control the On/
Off status of the selected audio channel’s EQ, so their values can be On or
Off. When set to On, the audio channel’s EQ toggle button is in. When set
to Off, the audio channel’s EQ toggle
button is out.
EQ Band Parameters
Each of the five EQ band parameters can
be applied to each of the four EQ bands
discretely. The types of EQ band parameters are:
•
•
•
EQ Enable events control this button
•
EQ Band (1 and 2) Enable events control
these buttons
EQ Enable Off events override EQ
Band Enable events. In order for an
individual EQ band to be heard, both
its toggle and the main toggle must
be on. However, writing an EQ
Enable Off event does not actually
write EQ Band Enable Off events
for the EQ bands; it simply overrides
the current setting for each band.
278
Frequency
Controls the frequency of the specified EQ band. Values can range from
20.00 Hz to 20000.00 Hz.
Gain
Controls the gain of the specified EQ
band. Values can range from 18.00 dB to +18.00 dB.
Width
Controls the width of the specified
EQ band. Values can range from 0 to
4.00 octaves.
Type
Allows you to change the EQ type for
the specified band. Clicking on the
EQ Type setting opens a pop-up
menu with all five EQ types.
For an explanation of the various EQ
types, see page 71.
Opcode Systems, Inc.
CHAPTER 24: Automation
•
Enable
Enables and disables the chosen EQ
band. EQ Band Enable events can
have values of Off and On.
Each of these EQ Band Parameters can
be written for any EQ Band, regardless of
the band’s type. However, it is important
to recognize that not all parameters can
actually effect each EQ type. EQ types can
be effected as follows:
Low and High Cut
Parametric
The Parametric EQ type can be effected
by all parameter types. In the EQ Edit
Window, parametric EQ bands have all
three possible sliders.
NOTE: All EQ bands, regardless of their
type, can be effected by EQ Band Type, EQ
Band Enable, and EQ Band Frequency
events.
Plug-In Parameters
Low Cut and High Cut cannot be
effected by the Gain or Width parameters. In the EQ Edit Window, bands
assigned to either of these types do not
have Gain or Width sliders.
The Plug-in Parameter submenu lists
all plug-ins that are assigned (to any audio
channel) in the sequence. For example:
If the Console looks like this...
Low and High Shelf
...then the Plug-in Parameter
submenu looks like this.
Low Shelf and High Shelf cannot be
effected by the Width parameter. In the
EQ Edit Window, bands assigned to
either of these types do not have a Width
slider.
Figure 24.24: Source of Plug-in Parameter
submenu
Vision & Studio Vision Pro — Audio Reference Manual
279
After you select a plug-in in the List
window or Strip Chart, another pop-up
menu appears to the right. This menu displays the selected plug-in’s parameters.
For example, if you select opECHO, you
might see the following (in the List
window):
“Dry/Wet” is the default parameter
because it is the first parameter of the
selected plug-in. Clicking on “Dry/Wet”
will produce a pop-up menu that contains
the selected plug-in’s parameters.
If you open the opECHO plug-in edit window, you will see that the parameters
listed in the pop-up menu correspond to
the parameters of the opECHO plug-in.
Plug-in
parameters
Figure 24.27: opECHO plug-in edit window
Vision can automate up to 1024 parameters per VST plug-in.
Figure 24.25: Plug-in parameter event in the List
Window
Figure 24.26: Plug-in parameters in the Strip Chart
280
Moving (and Copying) Plug-In
Automation Data Between Sequences
Plug-in automation data can be copied
from one Vision file to another as long as
the specified plug-in is in both files. Plugin automation data can also be copied to a
new file if. the specified plug-in is in your
Vision Setup file. To include a plug-in in
your Vision Setup file, simply assign the
plug-in to the appropriate audio channel
(in a Console) and choose File>Save as
Setup. For more information about the
Vision Setup file, see your MIDI Reference
Manual.
Opcode Systems, Inc.
CHAPTER 24: Automation
Plug-In Parameter Values
All plug-in parameters, regardless of their
ranges in the plug-in edit window, will
have values between 0.0000 and 100.0000
in the List window. The plug-in parameter’s range of possible values in the plugin edit window is mapped onto this scale.
When the plug-in parameter automation
events are played back, they are mapped
back to the appropriate range of values in
the plug-in edit window.
For example, the opECHO Feedback
parameter can have values ranging from
0.000000 to 1.000000. A value of 0.696067
in the opECHO edit window corresponds
to a value of 69.6067 in the List window.
This system can be confusing for parameters with other value ranges. For
example, the opECHO Rhythm parameter
uses a note size as its setting. If you
record a value of 5/16, the list window displays 55.6818. During playback, this is
mapped correctly back to the original 5/
16 value, but the value is hard to understand in the List window. In this case, it’s
probably best to either record your data
real-time or draw it in the Strip Chart
rather than inserting events in the List
window.
Plug-In Parameter Names
Figure 24.28 shows the plug-in edit
window for opRING, which is a “faceless”
plug-in. Faceless plug-ins have very
simple user interfaces. The names of
parameters for faceless plug-ins are
shown in the List Window and the Strip
Chart.
Figure 24.28: opRING plug-in edit window
Figure 24.29 shows the plug-in edit
window for fusion: VINYL, a “faced” plugin. Faced plug-ins have much visually customized user interfaces.
Figure 24.29: Fusion: VINYL plug-in edit window
Names of parameters for faced plug-ins
are not shown in the List Window or Strip
Chart. Instead, parameters for these plugins are referred to by number. All available parameters, from 1 to 1024, are
accessible.
Vision & Studio Vision Pro — Audio Reference Manual
281
In addition, the Copy Faders command
includes values for all 1024 parameters of
any faced plug-ins. Of course, you can
delete the values for any parameters that
are not actually in use by the specified
plug-in. Parameters that are not in use
usually have values of 0.
#1 applies to the first plug-in assigned to
Audio-1 and opALIGN #2 applies to the
third plug-in assigned to Audio-1.
OpECHO is used once on each of the two
audio channels, so the two separate
instantiations are not given different
names.
Using the Same Plug-In Multiple Times
A single plug-in can be used more than
once (in the same sequence file). Its
appearance in the Plug-in Parameter submenu varies depending on how it is used.
MIDI
If the Console looks like this...
...then the Plug-in Parameter
submenu looks like this.
Figure 24.30: Source of Plug-in Parameter
submenu
Both the opALIGN and opECHO plug-ins
are used twice in this configuration.
MIDI Controller Data
All 128 MIDI Controllers can be automated, just as they could in previous
versions of Vision. MIDI Controllers, like
other automation parameters, are usually
controlled using the Faders or Console
window.
For more information about MIDI Controllers, see your MIDI Reference Manual.
Other MIDI Events
OpALIGN is used twice in the same audio
channel, so its two separate instantiations
are given two different names: opALIGN
#1 and opALIGN #2. OpALIGN #1 refers
to the lowest-numbered “slot” where
opALIGN is used. In this case, opALIGN
282
Velocity scale, pitch bend, aftertouch, and
poly aftertouch can also be automated.
For more information about these events,
see your MIDI Reference Manual.
Opcode Systems, Inc.
CHAPTER 25: File Management
WHO SHOULD READ THIS
CHAPTER?
This chapter applies to all of the audio
systems supported by Vision.
AUDIO FILES
You can see which audio files are used by
the current Vision file, information about
those audio files, and how much of the
audio file is actually used by the sequence
file.
All of this information is available in the
File Management dialog box. To open
this dialog box, choose Audio>File
Management.
Audio files contain data stored as a series
of samples (numbers) that create a digital
representation of an audio waveform.
Figure 25.1: Audio Files as they Appear in the
Finder
In most instances, you will not use all the
audio you initially record. This may be
because you have eliminated certain
“takes,” or because you have deleted portions of some audio events (such as with
the Audio>Strip Silence command).
Even though you have deleted the pointers to the unwanted digital audio, the
actual audio remains on your hard disk.
Figure 25.2: Typical File Management Dialog Box
OVERVIEW OF THE FILE
MANAGEMENT DIALOG BOX
The File Management dialog box contains
information about each audio file used by
the active Vision file. Since each file may
use a unique group of audio files, the File
Management dialog box displays only the
audio files relating to the active Vision file.
Vision & Studio Vision Pro — Audio Reference Manual
283
PART 6: Advanced Audio Techniques
In addition, the File Management dialog
box allows you to see how much of an
audio file is unused by the Vision file and,
if desired, delete the unused data from
your disk by compacting the file.
It’s up to you to keep track of audio files
you’ve recorded to your hard disk that are
no longer referenced by any other Vision
files—Vision does not display these files,
even though they are actually on your
hard disk. Vision displays audio files in
the File Management dialog box only for
the active Vision file. Several of the
options in the File Management menu are
designed to help you keep track of your
audio files.
Much information and many options are
available in the File Management dialog
box. The following sections discuss all the
features and functions of that dialog box.
The Bar Display
The long rectangular bar displays graphically how audio data is used in each
particular audio file. Areas where the
audio waveform is black indicate areas of
the audio file that are used by the active
Vision file. Areas where the audio waveform is grey indicate unused data. The
more “pockets” of unused data you see in
a file, the more likely it is that you may
want to compact or consolidate it (as discussed in Organizing Audio Files
(pg. 286)).
File Column
This column displays the name of each
audio file referenced by the active Vision
file.
Viewing the file path
VIEWING AUDIO FILE
INFORMATION
The File Management dialog box contains
a line entry for each audio file referenced
by the active Vision file.
Column Headings
Audio Files
284
To see the entire file path of an audio file,
hold down the Command key and click on
the file. You can command- click anywhere on the waveform or the file name.
Bar Display
Opcode Systems, Inc.
CHAPTER 25: File Management
Events Column
This column shows the number of audio
events in the active Vision file that “point”
to audio data within each audio file. This
includes events on the Clipboard and in
the Undo buffer—therefore, if you have
cut some audio or undone an edit operation, you may want to clear it from this
column by using the Clear Clip and
Undo command (as discussed in Clear
Clip and Undo (pg. 299)).
NOTE: This column shows data that’s
unused by the active sequence file. Audio
data that is unused in one sequence file
may still be used in another sequence file.
It’s up to you to remember which audio files
are shared by different sequence files.
Type Column
This column tells you the audio file’s
format and what possible program the file
originated in. There are four file types
that Vision can read:
Size Column
•
This column shows (in megabytes) the
total amount of data in the audio file,
which includes both used and unused
data.
•
Unused Column
This column shows (in megabytes) the
amount of data in the audio file that is not
referenced by any audio event in the
active Vision file.
When you first record audio you’ll see
that the audio waveform is completely
black, which means all data in the file is
being used.
If you edit your recording—stripping
silence, cutting, or clearing audio
events—portions of data in the audio file
will no longer be used since the Vision file
no longer contains audio events pointing
to them.
•
•
SD II: Sound Designer II file format
used by Sound Designer II and by
Vision when recording with DAE.
AIFF: Audio Interchange File Format
used by Audioshop, Vision and many
other programs.
SD I: Sound Designer file format
used by the original version of Sound
Designer.
MSND: This format was used by the
MacMix program for the Dyaxis.
Sample Rate Column
This column shows the sample rate
(in Hz) for each audio file.
Channels Column
This column tells you whether the respective audio file is mono or interleaved
stereo. Linked stereo files (such as those
recorded when using Vision with DAE)
appear as two mono files. Interleaved
stereo files appear as a single stereo file.
Vision & Studio Vision Pro — Audio Reference Manual
285
PART 6: Advanced Audio Techniques
Bits Column
This column shows the sample size (in
bits) for each audio file. This setting is
often referred to as “bit depth.”
PLAYING AUDIO FILES
ORGANIZING AUDIO FILES
There are a number of commands available from the File Management menu. To
access them, press and hold the small,
downward pointing triangle in the dialog
box’s title bar.
NOTE: This feature is only available in
Acadia mode. DAE does not support playback in the File Management window.
Audio files can now be played directly
from the File Management window. To
play an audio file in the File Management
window:
햲 Select the file you wish to play (by
Figure 25.3: File Management Menu
clicking on it).
햳 Click the Play button.
Listen to the audio file. A small vertical
line follows playback in the audio
waveform.
햴 When you are finished, click the Stop
button.
You can also make playback skip to a different point in the audio file by clicking
where you’d like playback to continue.
286
Compact
Compact throws away audio data that is
not referenced by any audio events in the
active Vision file. The remaining audio file
data that the Vision file is using moves
together to save disk space.
Keep in mind that Vision has no way of
knowing if hard disk data is being used by
a Vision file that is not currently open.
When you decide to compact an audio file,
make sure you don’t have another Vision
file sharing data in the audio file because
that Vision file’s audio may be deleted or
changed.
Opcode Systems, Inc.
CHAPTER 25: File Management
Before using this command, you should
use the Clear Clip and Undo command
so that you see an accurate display in the
File Management dialog box. See Clear
Clip and Undo (pg. 299).
IMPORTANT: Compacting is a destructive
operation and cannot be undone—that is,
you cannot recover your original data once
you use this command.
To compact a file:
햲 Select the file by clicking its selector
dot in the File Management dialog
box.
You can compact multiple files by Shiftclicking their selector dots.
햳 Choose Compact from the File
Management menu.
For each selected file, youÕll be warned
that compacting cannot be undone.
햴 Click Compact & Save to continue.
If the file has been previously saved it
will be resaved.
햵 Notice the amount of unused space is
now zero and the waveform is entirely
black.
The unused data is no longer on your
hard disk.
Consolidate
Consolidate copies audio data from one
or more audio files referenced by the
active Vision file and places them
together into a single audio file. The original files remain untouched, and the new
file contains only data actually used by the
active Vision file. The consolidated data is
placed side by side in the new file; this
command does not mix audio events.
All events in the active Vision file that referenced the files you consolidated will
now point only to the data in the new file.
When you consolidate files, you’ll see the
new file displayed in the File Management dialog box; the waveform display
will be completely black, showing that all
data in the audio file is in use by the active
Vision file. You will also see the original
files displayed, but the waveform display
will be completely grayed out, indicating
that no data in those files is being referenced by the active Vision file.
Vision compacts the file by removing the
unused data, then rebuilds the waveform. The more data that is being
compacted, the longer the compact will
take.
Vision & Studio Vision Pro — Audio Reference Manual
287
PART 6: Advanced Audio Techniques
Consolidating files is useful in a couple of
cases:
•
•
You’ve finished editing a song and,
for simplicity, you want one Vision file
that references one consolidated
audio file.
Your song uses audio files that are
also referenced by other Vision files
and you want to create an audio file
used only by the active Vision file.
Once you have a consolidated file, you
can delete the original files to clear up
disk space (if they don’t contain any data
needed by other Vision files).
After consolidating, you may want to use
the Remove From List command so that
the File Management window displays
only the new, consolidated file (see
Remove from List (pg. 299)).
햴 Choose Consolidate from the File
Management menu.
Vision opens a standard Save As dialog
box. Since consolidating files creates a
new audio file, you must name it and
save it before Vision can create the data
for the new file.
햵 Name and Save the new Audio File.
Vision creates a single consolidated
audio file.
Label
Label allows you to apply one of the
Finder’s labels to the file. If a single file is
selected when you choose the Label command, the following dialog box appears.
쐃
IMPORTANT: Vision cannot consolidate
files with different sample rates and it
cannot consolidate interleaved stereo files
with mono files.
쐇
쐋
To consolidate files:
햲 Select a file by clicking its selector
dot in the File Management dialog
box.
햳 Shift-click on the selector dots of
additional files to select or deselect
them.
288
Figure 25.4: Label dialog box with a single file
selected
쐃
File name: The name of the file is
displayed here. This information is
read-only; the file’s name cannot be
changed in this window. For information about renaming audio files from
the File Management window, see
Rename (pg. 295).
Opcode Systems, Inc.
CHAPTER 25: File Management
쐇
Label: The file’s current label is displayed here. Click on the label popup
to see the your options:
If more than one file is selected when the
Label command is chosen, the dialog box
looks like this.
쐃
쐇
쐋
쐏
Figure 25.5: Label Pop-up
The options in the Label popup echo
the Finder’s Label options. Choosing
a Label here will label the file in the
Finder.
쐋 Comments: The file’s current comments are displayed in this field. You
can also type here to add comments
to the file in the Finder’s Get Info
window.
Figure 25.6: Label dialog box with more than one
file selected
쐃
If the file doesn’t already have a
label: If the file does not yet have a
label in the Finder, it will be given the
label assigned here. This pop-up is
the same as the one shown in
Figure 25.5.
Vision & Studio Vision Pro — Audio Reference Manual
289
PART 6: Advanced Audio Techniques
쐇
If the file already has a label:
Example: Labeling Files
Imagine you have a folder that has many
audio files and three Vision documents,
each referring to several of the audio files.
Some audio files are used by one, two, or
three sequence files, and some are not
used. No files have labels or comments,
and you need a way to easily distinguish
which audio files are used by which
sequences.
If the file already has a label, its label
will either experience no change or
be changed to the label selected in
this pop-up (as specified).
쐋 Replace/Append:
햲 Open the first sequence file.
햳 Go to the File Management window
and choose ÒSelect AllÓ from the popup menu.
햴 Choose ÒLabelÓ from the pop-up
menu.
Make the following settings.
This pop-up refers to the file’s comments. Selecting Replace will delete
the old comments for all selected files
and replace them with the comments
typed in this window. Append will
add the comments typed in this
window to the comments already
associated with the file.
쐏 Comments: Type in this field to add
comments to the file in the Finder.
How these comments are treated is
affected by the Replace/Append
setting.
It can become very difficult to keep track
of audio files that are used in multiple
sequences. The following example shows
how to use the Label command to help
keep track of your files.
290
햵 Click OK.
Now all the files used by the first
sequence are orange in the finder.
햶 Open the second sequence file.
Opcode Systems, Inc.
CHAPTER 25: File Management
햷 Repeat steps 2-4 with the following
settings.
the files used only by the third sequence
are blue. All files used by more than one
sequence are red.
햺 In the Finder, select a red file and
choose File>Get Info.
You might see the following.
Now the files used only by the first
sequence are orange, the files used only
by the second sequence are brown, and
the files used by both sequences are
red.
햸 Open the third sequence file.
햹 Repeat steps 2-4 with the third
sequence file, making the following
settings
.
The Comments field tells you exactly
which sequences use the file.
In addition, if a file is not used in any
sequence, it will appear with no label.
Copy to Folder
Copy to Folder puts a copy of the
selected audio file(s) into the specified
folder. Like the Copy command in the
Finder, Copy to Folder leaves the original files untouched.
The Copy to Folder command can be
used to easily “round up” all of the files
used in a sequence and put them in one
folder.
If one file is selected, you will see the
following.
Now the files used only by the first
sequence are orange, the files used only
by the second sequence are brown, and
Vision & Studio Vision Pro — Audio Reference Manual
291
PART 6: Advanced Audio Techniques
For the first file, the dialog looks like this.
Figure 25.7: Copy to Folder dialog box
Provided that there is enough space on
the selected volume and there are no files
with the same name in the destination
folder, the selected files will be copied.
You will then see a dialog prompting you
to replace all audio event references to
the original file with references to the new
file.
Clicking Replace will change the
sequence’s audio event references so that
they point to the new (copied) file. Clicking Cancel will leave them untouched.
The process is slightly different if you
select more than one file. First you will be
prompted with the dialog box shown in
Figure 25.7. Then Vision asks you
whether or not you want to replace event
references for each of the files you copied
(individually).
292
Click Replace to change the sequence’s
references to that (single) audio file so
that they point to the new (copied) file.
Click Replace All to change the references to all selected audio files so that
they point to the new (copied) files. Click
Cancel to leave references to that (single) audio file untouched. Click Cancel
All to leave all references untouched.
If you respond with Cancel or Replace,
the references for that file are adjusted
(or not adjusted) as you specified. A similar dialog box, referring to the next file on
the list, appears.
Figure 25.8: Copy to Folder dialog box
Click Replace to change the sequence’s
references to that (single) audio file so
that they point to the new (copied) file.
Click Replace Remaining to change the
references to all remaining selected audio
files so that they point to the new (copied)
Opcode Systems, Inc.
CHAPTER 25: File Management
files. Click Cancel to leave references to
that (single) audio file untouched. Click
Cancel Remaining to leave all references to remaining selected files
untouched.
NOTE: Once you respond to the dialog box
for a specific file, that file’s references are
updated immediately. The file will not be
affected by choosing Replace Remaining
or Cancel Remaining in subsequent dialogs. Replace Remaining or Cancel
Remaining affect only the currently listed
audio file and all files that have not yet
been referred to specifically.
Figure 25.9: File Management window before
using Copy to Folder
Each file will show the dialog box in
Figure 25.8 until you reach the last
selected file in the list. At that point the
dialog box looks like this.
Figure 25.10: File Management window after
using Copy to Folder
Click Cancel to leave references to the
audio file untouched.Click Replace to
change the sequence’s references to the
audio file so that they point to the new
(copied) file.
The number of files has doubled because
the window includes the original files and
the newly copied files. In most cases, this
is undesirable from an organizational
standpoint.
Tip for Using Copy to Folder
After using the Copy to Folder command, your File Management window will
contain twice the number of audio files it
did before using the command.
Vision & Studio Vision Pro — Audio Reference Manual
293
PART 6: Advanced Audio Techniques
You can easily “clean up” the File Management window by choosing Select
Unused followed by Remove from List
(both in the File Management window
menu).
Choose Select Unused, and any audio
files which are not referenced by the
current sequence file are selected.
Move to Folder
Move to Folder moves the selected
audio file(s) into the specified folder.
Unlike Copy to Folder, Move to Folder
does affect the original files.
Move to Folder automatically updates all
references to the audio file so that they
point to the file in its new location.
After selecting one or more audio files
and choosing Move to Folder, the following dialog box appears.
Figure 25.11: After choosing Select Unused
Choose Remove from List, and those files
are removed from the File Management
window.
If all the selected files and the destination
folder are on the same volume, the files
are moved to the selected folder.
Figure 25.12: After choosing Remove from List
You cannot move files across volumes.
This is a function of the Macintosh operating system. If you select a folder on a
different volume when using Move to
Folder, you will be prompted with the following dialog.
For more information about Select
Unused, see page 299. For more information about Remove from List, see
page 299.
294
Opcode Systems, Inc.
CHAPTER 25: File Management
Rename
The Rename command changes the
name(s) of the selected audio file(s) in
the Finder, as well as in the File
Management window.
Click Cancel to abandon the procedure.
Click OK to copy the file(s) to the
selected folder. After the copy procedure
is complete, you will be prompted to
replace references to the original file with
references to the new file. See Copy to
Folder (pg. 291) for details.
The name of the file(s) will be changed,
but files remain in the same folder. All references in the sequence are updated to
refer to the file’s new name.
If only one file is selected when you
choose Rename, you will see the following dialog box.
After using Copy to Folder or Move to
Folder, you may want to command-click
on the file name to see the entire file path
(for verification). See page 284 for details.
Type the new name for the file. The name
is updated in the File Management
window (as shown in Figure 25.13). The
name of the file is also updated in the
Finder.
Figure 25.13: “Flashy Loop” in File Management
Vision & Studio Vision Pro — Audio Reference Manual
295
PART 6: Advanced Audio Techniques
If you select more than one file before
choosing Rename, you will see the
following.
Click OK to update the name of the file in
both the Finder and the File Management
window and proceed to the next file.
NOTE: Remember, once you respond to the
dialog box for a specific file, that file’s name
is updated immediately. The file will not be
affected by choosing Cancel Remaining in
subsequent dialogs. Cancel Remaining
affects only the currently listed audio file
and all files that have not yet been referred
to specifically.
The file’s new name can be typed into this
dialog box.
Click Cancel All to leave the names of all
selected files untouched. Click Cancel to
leave the name of the current file (the file
named in the dialog box) untouched, but
proceed to the next file for renaming.
Click OK to update the name of the file in
both the Finder and the File Management
window and proceed to the next file.
If you click Cancel or OK, you will see this
dialog box.
All files will show the dialog box in
Figure 25.14 until you reach the last
selected file in the list. At that point the
dialog box looks like this.
Figure 25.14: Rename dialog box
Click Cancel to leave the name of the current file untouched. Click OK to update
the name of the file in both the Finder and
the File Management window.
Click Cancel Remaining to leave the
names of this file and all remaining
selected files untouched. Click Cancel to
leave the name of the current file (the file
named in the dialog box) untouched, but
proceed to the next file for renaming.
296
Figure 25.15: File names updated in the File
Management window
Opcode Systems, Inc.
CHAPTER 25: File Management
Delete
Delete does affect hard disk data, deleting
the actual audio file, and it cannot be
undone. Before the file is deleted you’ll be
warned that audio events in the active
Vision file are referencing data in that
audio file, and they’ll be deleted from the
sequences if you delete the file.
햴 From the pop-up menu, select the
desired sample rate.
If you need to change your hardware
sample rate, click the Hardware Setup
button to open the hardware setup dialog
box.
햵 Click the Convert button.
Vision opens a dialog box asking if you
really want to perform the sample rate
conversion.
Sample Rate Convert
If some of your audio files have sample
rates that are different than the session
sample rate, you can use the Sample Rate
Convert command to convert their sample
rates to the session sample rate. Sample
Rate conversion creates a new audio file
on your hard disk. Sample rate conversion and theory is discussed in more
detail in Chapter 26: Sample Rate Conversion and Deinterleaving.
To convert a file’s sample rate:
햲 Select an audio file by clicking its
selector dot in the File Management
dialog box.
햳 Choose Sample Rate Convert from
햶 Click the Convert button.
If you have an audio file that you share
between multiple Vision files, you need
only convert it once. Any time you open
a Vision file that still references the old,
unconverted audio file, you can click the
Find converted button to tell Vision
where to find the audio file that you converted previously.
햷 Vision opens a standard Save As
dialog box.
the File Management menu.
Vision opens the Sample Rate Conversion dialog box.
Vision & Studio Vision Pro — Audio Reference Manual
297
PART 6: Advanced Audio Techniques
햸 Use the dialog box to name and save
the new file youÕre about to create.
Since the active Vision file will now point
to the newly created audio file, Vision will
ask if you want to delete the original
audio file from your hard disk.
IMPORTANT NOTE: If you export audio
from Vision to another program, edit it,
then import the audio back into Vision you
may have to use the Rebuild Waveform
command so that Vision can display the
waveform accurately.
Find File
햹 Click the DonÕt Delete button if you
want to save your original file, or click
the Delete button if you donÕt need
the original file any longer.
Deinterleave
Choose this command to deinterleave the
selected audio file. DAE does not support
playback of interleaved files, so you may
find it necessary to deinterleave any files
that were imported from Sound Designer
II or recorded in stereo with other
applications.
Normally, if you rename an audio file or
move it to a new location, Vision is smart
enough to find it. But if an audio file gets
lost for some reason, choose Find File to
display a dialog box asking you to locate
the missing audio file.
Once you locate a lost audio file, you must
save the Vision file to update its pointer to
the audio file’s new name or location.
If you cancel the Find File dialog box, the
Vision file won’t update its pointer to the
audio file and you’ll be asked to find it
each time you open the sequence file.
In previous versions of Vision Find File
was called Where Is.
Deinterleaving will convert the file into
two linked mono files.
Rebuild Waveform
Rebuild Waveform rebuilds the waveform summary for an audio file. Vision
stores the waveform summary in RAM
and uses it to display waveforms quickly
without reading the actual data from the
hard disk.
298
Opcode Systems, Inc.
CHAPTER 25: File Management
Remove from List
Remove from List removes the name of
an audio file from the File Management
list, and also removes any audio events
from the active Vision file that reference
the file. It does not affect hard disk
storage.
rate files and only use some of them in the
sequence. After choosing Select
Unused, you may want to use the Delete
or Remove From List command to organize the File Management Window.
Select All
Select All selects all the files listed in the
File Management dialog box.
Clear Clip and Undo
This is useful if, for example, you dislike a
particular take used by multiple tracks in
your sequence; instead of opening all the
tracks and deleting the audio events, you
could just remove the file from the list.
Remove from List is also useful if you
consolidated a file into a new file and the
original—now unused—file is still listed
in the File Management list. Since your
Vision file is no longer referencing data in
it, you might want to remove it from the
list.
Remove from List is not undoable.
Clear Clip and Undo clears everything
stored in the Macintosh Clipboard and
the Undo buffer.
Although you can see in the File Management dialog box how much of your hard
disk data is being used in a sequence, the
display also takes into account audio
events that are stored on the Clipboard or
in the Undo buffer. It regards data in
either of these two holding areas as still
being used by the Vision file. If you want
to see an accurate, current display in the
File Management dialog box you should
clear the Clipboard and the Undo Buffer.
You shouldn’t perform this operation if
you have any information in the Clipboard
or the Undo Buffer that you still want.
Select Unused
Select Unused selects all files listed in
the File Management dialog box that are
not referenced by the current sequence
file. This command is particularly useful if
you have recorded several “takes” in sepa-
Vision & Studio Vision Pro — Audio Reference Manual
299
PART 6: Advanced Audio Techniques
300
Opcode Systems, Inc.
CHAPTER 26: Sample Rate Conversion and
Deinterleaving
WHO SHOULD READ THIS
CHAPTER?
ABOUT SAMPLE RATE
CONVERSION
This chapter applies to all of the audio
systems supported by Vision, but not all
users may find reason to perform these
tasks.
The sample rate of an audio file is the
number of samples that make up 1 second
worth of audio. Higher sample rates produce better audio quality, but use more
disk space (because there are more
sample points per second). Sample Size
refers to the number of bits used to represent the dynamic range. In most musical
uses this is 16 bits. You can save disk
space by using a low sample rate or bit
depth, but this degrades the sound quality. Some audio hardware requires a
specific sample rate and size. Refer to
your audio hardware documentation for
details.
You may sometimes find it necessary to
either convert the sample rates of existing
digital audio files or deinterleave them.
There are a couple reasons for this:
•
•
•
•
If you used an earlier version of
Studio Vision, you may need to convert audio files created it under a
different audio playback mechanism.
You are importing audio files that
have different sample rates than the
audio files already referenced by your
Vision file.
You may want to convert from DAT
sample rates (48 kHz) to CD rate
(44.1 kHz).
You may have applications that
require different sample rates such as
multimedia use, Web use, creating
files for CD mastering, etc.
In Vision, all audio events in the sequence
must use the same sample rate. This
sample rate is called the session sample
rate.
Vision & Studio Vision Pro — Audio Reference Manual
301
PART 6: Advanced Audio Techniques
Hardware Sample Rate vs.
Session Sample Rate
Before you can understand sample rate
conversion, you must be aware of the differences between the hardware sample
rate and the session sample rate.
Specifically:
•
•
Hardware Sample Rate: Most professional hardware will play audio at
one of only a few standard sample
rates, such as 44100 Hz (CD quality)
or 48000 Hz. (See your hardware
manual to learn which sample rates it
supports). You can see what rate your
hardware is set to by looking in
Vision’s Audio>Hardware Setup
dialog box.
Session Sample Rate: Vision
requires that all of your audio files
have the same sample rate, which is
called the session sample rate. This
rate generally should be the same as
the hardware sample rate or you may
hear fluctuations in pitch or quality.
Conversion Processes
Vision supports a non real-time Off-line
conversion. Off-line conversion occurs
when you ask Vision to convert a particular audio file from one sample rate to
another.
302
About Off-line Conversion
Vision offers two methods of performing
sample rate conversion:
•
•
DSP>Convert Sample Rate is the
highest quality means of converting
the sample rate. However, it is relatively slow compared to other means.
See Convert Sample Rate (pg. 362)for
details on using this method.
Audio>Conversion Overview is the
fastest way to convert files. It is used
to open the Conversion Overview
dialog box. For more information, see
the following sections.
Performing an off-line conversion will
create a new audio file on your hard disk.
You can then choose to delete the old version of the file.
ABOUT SAMPLE SIZE
CONVERSION
If you are using Pro Tools 24, you can
choose between files with sample sizes of
16 or 24 bit. However, all files have to be
the same sample size. You can use the
Conversion Overview dialog to convert all
files to the same sample size.
Users of other hardware systems should
always use 16 bit files.
Opcode Systems, Inc.
CHAPTER 26: Sample Rate Conversion and Deinterleaving
ABOUT DEINTERLEAVING
Vision, when used with DAE, does not
play back interleaved stereo files. If you
have interleaved stereo audio files you
wish to use with this version of Vision
(and DAE), you must deinterleave them.
This process turns your single interleaved
stereo file into two linked mono files. It
does not change the sound quality.
Deinterleaving creates two files, each half
the size of the original file.
You don’t need to deinterleave files if
you’re working with Acadia.
CONVERTING SAMPLE RATES/
SIZES AND DEINTERLEAVING
If you need to convert audio files, follow
these steps:
햲 Open the desired Vision file that
references the audio files you wish to
convert.
If you open a Vision file with references
to audio files that need conversion, the
Conversion Overview dialog opens automatically. If the Conversion Overview
dialog doesnÕt open, then the Vision file
does not reference audio files that need
conversion.
Figure 26.1: Conversion Overview Dialog Box
햳 Choose the target sample rate from
the Session Sample Rate pop-up
Set the session sample rate to the same
value as the hardware sample rate.
햴 If necessary, convert the target
sample size from the Sample Size
pop-up.
This 24 bit option should only be
selected for Pro Tools 24 users (all other
users should always use 16 bits).
햵 Click Convert All.
The files will be converted according to
the Sample Rate/Size and Deinterleave
settings in the file list. For more information on the Conversion Overview dialog
box, see The Conversion Overview
Dialog Box (pg. 304).
햶 You will be asked to confirm the
conversion of each audio file.
You will see a dialog box for each file
you wish to deinterleave or whoÕs
sample rate or sample size you wish to
convert.
Vision & Studio Vision Pro — Audio Reference Manual
303
PART 6: Advanced Audio Techniques
햷 Click the Convert or Deinterleave
buttons in each fileÕs dialog box.
Vision opens a standard Save As dialog
box.
햸 Save the converted file.
You perform file conversions by using the
Conversion Overview dialog box. This
dialog appears whenever you:
•
If you are converting a sample rate, the
new sample rate will automatically be
added as a suffix.
•
If you are converting a sample size, the
new sample size is used as a suffix.
•
If you are deinterleaving a file, you will
need to save two new files: Left and
Right. The ÒLÓ and ÒRÓ will automatically
be added as a suffix to the new file
names.
•
•
햹 After conversion, Vision will ask you
if you want to delete the old file.
햺 If you choose to Delete the file, you
Open a Vision file that uses audio files
with different sample rates (as could
be created in versions of
Studio Vision prior to 2.0).
Import an audio file that is not using
the current Sample Size.
Open a Vision file that uses interleaved stereo audio files and DAE.
Attempt to import an interleaved
stereo audio file using DAE.
Choose Audio>Conversion
Overview.
The File List
will be asked one more time, then the
old file will be deleted from your hard
disk.
THE CONVERSION OVERVIEW
DIALOG BOX
Figure 26.3: File List Columns, Conversion
Overview
All audio files that are referenced by the
current Vision file appear in a scrolling list
in this dialog box. The four columns display the following information for each
audio file:
•
•
•
•
file name
sample rate in Hz
sample size in bits
whether the file is stereo or mono
Figure 26.2: Anatomy of the Conversion Overview
Dialog Box
304
Opcode Systems, Inc.
CHAPTER 26: Sample Rate Conversion and Deinterleaving
You can sort the list by any of these
parameters by clicking on the parameter
name. Clicking the word Filename will
sort the list by filename. Clicking SR (Hz)
will sort the list by sample rate, clicking
SS (Bits) will sort the list by sample size,
and clicking the word Chans will sort the
list into stereo and mono files. The
column being sorted is underlined (in
Figure 26.3, the Filename is underlined).
You can select a file in this list by clicking
it, or by typing the first letter of the
filename.
Audio files that require conversion will
have checks next to their names. You can
also see which type of conversion they
require—a check in the SR (Hz) column
means that the file must be converted to
the Session Sample Rate. A check in the
Chans column means the file must be
deinterleaved.
Session Sample Rate & Size
Pop-ups
If you change the values in these pop-ups,
the audio files may require different conversions, indicated by the check marks in
the list (see The File List (pg. 304)).
If you’re using DAE, the current hardware
sample rate is marked by a Macintosh
icon in the pop-up menu. Generally, you
should choose this setting.
You can, if desired, set a session sample
rate other than one of the ones listed in
the pop-up menu. To do so, choose Other
from the pop-up menu; Vision opens the
Set Other Rate Dialog box.
Figure 26.4: Set Other Rate Dialog Box
Button Descriptions
The following sections discuss each
button in the conversion overview dialog
box.
Hardware Setup Button
The Session Sample Rate and Sample Size
pop-up menus display the current session
sample rate and size. You can change the
session sample rate and size by choosing
a new value from each pop-up menu. The
pop-up menus contain other sample rates
and depths supported by your particular
audio hardware, as well as any unique
sample rates referenced by the Vision file.
Click this button to open the Hardware
Setup dialog box, where you can change
the hardware sample rate. Clicking this
button is the same as choosing
Audio>Hardware Setup.
Vision & Studio Vision Pro — Audio Reference Manual
305
PART 6: Advanced Audio Techniques
Done Button
Clicking the Done button will cause the
Conversion Overview dialog box to disappear. Any conversions you made prior to
clicking the Done button are kept, but
any unconverted files remain
unconverted.
Convert and Convert All Buttons
If the Conversion Overview dialog box
has appeared because you have tried to
open a file that requires conversion, the
Convert button will appear, and the Convert All button will appear next to it.
If there are no files that require conversion and you have called the Conversion
Overview dialog box manually, only the
Done button will be in this area.
Clicking Convert will cause the currently
selected audio file to be converted. Clicking Convert All will cause all the audio
files that require conversion to be converted, one at a time.
306
Opcode Systems, Inc.
CHAPTER 27: Strip Silence and Slice Audio
WHO SHOULD READ THIS
CHAPTER?
This chapter applies to all of the audio
systems supported by Vision.
STRIP SILENCE
SLICE AUDIO
Vision can automatically separate digital
audio into useful regions using the Slice
Audio command. When Vision “separates” audio, it breaks a long audio file
into several small events based on the criteria in the Strip Silence dialog box. This
is useful for several reasons:
Vision can automatically gate digital audio
using the Audio>Strip Silence command. When Vision “gates” audio, it
removes all audio in a selected range that
falls below a specified amplitude threshold (which also results in several short
audio events). This is useful for several
reasons, including:
•
•
•
•
You can remove unwanted noise that
occurs below the lowest threshold of
recorded audio (for example, analog
tape hiss).
It’s a fast way to clear silent passages
from your audio events.
If you wish, you can permanently remove
any gated data from the audio file by compacting the audio file. This conserves disk
space. For more information, see Compact
(pg. 286).
•
You can easily copy and paste small
sections of audio (such as a particular
drum sound, or an oft-repeated vocal
line).
You can quantize individual events
(such as separate drum hits in a
recorded drum track) to be used as
samples.
If you’re syncing to tape and are playing back digital audio using only the
session sample rate, breaking audio
into smaller events means there is
less likelihood of digital audio drifting
“out of sync” with audio on tape.
To auto-separate, select Slice Audio in the
Slice Audio/Strip Silence pop-up menu.
To gate audio, select Strip Silence in the
Slice Audio/Strip Silence pop-up menu.
Vision & Studio Vision Pro — Audio Reference Manual
307
PART 6: Advanced Audio Techniques
GATING AUDIO WITH STRIP
SILENCE
In digital recording, as in analog recording, some noise is always present. Usually
it’s too slight to hear, but sometimes it’s
apparent during silent passages.
To remove silent passages, first determine what amplitude level recorded audio
lies above, then define that level as the
silence threshold. Anything beneath the
threshold will be defined as silence.
When you click Strip Silence, all audio
that’s below the threshold, and which
lasts for a specified period, will be cleared.
You might also want to raise the silence
threshold slightly to remove low amplitude noise that you can hear along with
recorded audio. The higher you raise the
silence threshold, though, the more
recorded audio will get removed.
To gate audio using Strip Silence:
햲 Make sure either ÒFastÓ or ÒHigh
ResolutionÓ is checked in the
Audio>Waveform Display
submenu.
The Strip Silence procedure will not
function if the waveform display is turned
off.
308
햳 Select the desired event(s) or range of
events you wish to affect.
In this example, weÕve selected a single,
long audio event.
햴 Choose Audio>Strip Silence/Slice
Audio.
Vision opens the Strip Silence dialog
box.
Figure 27.1: Strip Silence Dialog Box
햵 Set the desired Strip Silence
parameters.
Make sure that Strip Silence is selected
in the pop-up menu.
The Strip Silence dialog box is discussed
in detail in Strip Silence Dialog Box
(pg. 311).
Opcode Systems, Inc.
CHAPTER 27: Strip Silence and Slice Audio
햶 Click the Strip Silence button.
Vision removes all audio that stays
below the chosen threshold for as long
or longer than the chosen duration.
햲 Make sure either ÒFastÓ or ÒHigh
ResolutionÓ is checked in the
Audio>Waveform Display
submenu.
The Slice Audio procedure will not function if the waveform display is turned off.
햳 Select the desired event(s) or range of
events you wish to affect.
Figure 27.2: Audio After Performing a Strip
Silence
햷 Audition the gated audio.
If youÕre not happy with the results,
choose Edit>Undo Strip Silence and
use a different set of Strip Silence
parameters.
Like other edit operations, the Strip
Silence command is non-destructive. The
silence data remains on your hard disk
unless you use the Compact command.
In this example, weÕve selected a vocal
part. WeÕll split this part into individual
words.
Figure 27.3: Audio before slicing
햴 Choose Audio>Strip Silence/Slice
Audio.
Vision opens the Strip Silence dialog
box.
AUTO-SEPARATING WITH SLICE
AUDIO
The Slice Audio command can be used to
separate one long audio event into several
short events (based on the silence in the
audio file).
Figure 27.4: Strip Silence Dialog Box
To slice audio, first determine what amplitude level should trigger the beginning of
an event. Then, determine how long the
amplitude must stay below this level for a
new event to be generated. Finally, determine the desired attack time for the new
events.
To auto-separate an audio event:
햵 Set the desired Slice Audio
parameters.
Make sure that Slice Audio is selected in
the pop-up menu.
The Strip Silence dialog box is discussed
in detail in Strip Silence Dialog Box
(pg. 311).
Vision & Studio Vision Pro — Audio Reference Manual
309
PART 6: Advanced Audio Techniques
햶 Click the Slice Audio button.
Vision ÒslicesÓ the audio into several
small pieces.
STRIP SILENCE VS. SLICE
AUDIO
Try making some settings in the Strip
Silence dialog box and applying them to
an audio file with Strip Silence selected in
the pop-up menu.
Figure 27.5: Audio after slicing
햷 Audition the audio ÒslicesÓ.
To audition an individual slice, first select
the slice you want to hear.
Then choose Edit>Unde Strip Silence and
select Slice Audio in the Strip Silence popup menu. Don’t change any other
settings; click Slice Audio.
You should see results like these:
Starting with one long event like this...
Then, press option-spacebar (Œ+ú)
to hear your selection.
If youÕre not happy with the results,
choose Edit>Undo Slice Audio and use
a different set of Slice Audio parameters.
When the audio signal goes above the
threshold, Vision begins a new event. As
soon as “silence” (as defined in the Strip
Silence dialog box) is recognized, Vision
waits for the next point when the audio’s
volume goes above the threshold. At that
point, the first event ends and another
event begins.
IMPORTANT NOTE: Slice Audio will
strip any silence at the beginning of the
selected audio away. Compare Figure 27.3
on page 309 and Figure 27.5 on page 310
to see an example.
310
...gives this result if Strip Silence is chosen...
...or this result if Slice Audio is chosen.
Figure 27.6: Using Strip Silence and Slice Audio
As you can see, slicing audio results in the
same beginning points for events, but
each event continues until the beginning
of the following event. When stripping
silence, each audio event ends as soon as
its volume falls below the silence
threshold.
Opcode Systems, Inc.
CHAPTER 27: Strip Silence and Slice Audio
STRIP SILENCE DIALOG BOX
When you select one or more audio
events and choose Audio>Strip Silence/
Slice Audio, Vision opens the Strip
Silence dialog box.
When using Slice Audio, values close to
0 dB or -96 dB will generate few events. In
most cases, values between -40 dB and
-20 dB will generate many short events.
As shown in Figure 27.8, when you
change the Silence Threshold, Vision
illustrates it graphically in the audio waveform display.
1. A Silence Threshold of -12 dB is indicated
graphically by the horizontal lines in the
Graphic WindowÕs waveform display.
Figure 27.7: Strip Silence Dialog Box
As can be seen in Figure 27.7, the Strip
Silence dialog box contains many elements. These are discussed in the
following sections.
Silence Threshold
Use the Silence Threshold numerical to
set the “noise floor” for the Strip Silence/
Slice Audio operation (in decibels). You
can set this number between -96 dB and 0
dB.
When using Strip Silence, values close to
-96 dB will strip away very little if any
audio, since even the slightest amount of
noise will be above the noise floor. Values
close to 0 dB will strip away nearly all of
the audio. Generally, a value between
-40 dB and -20 dB is appropriate for most
applications.
2. Audio that stays in this region for at
least the amount of time specified by the
Minimum Duration parameter will be silenced.
Figure 27.8: Graphic Feedback of Threshold Level
As an experiment, enter a different value
in the Silence Threshold numerical and
preview the effect in the Graphic Window’s waveform display. Feel free to
experiment with different thresholds.
Once you gate or auto-separate audio with
the Strip Silence/Slice Audio command, you can audition it—if you’re not
happy with the results, undo the command and try a different Threshold Level.
Vision & Studio Vision Pro — Audio Reference Manual
311
PART 6: Advanced Audio Techniques
Minimum Duration
Besides setting a threshold level, you
must also tell Vision how long a signal
must remain below that threshold before
stripping it away or allowing the generation of a new event. Use the Minimum
Duration numerical to set the amount of
time the signal must stay below the
threshold level before it’s recognized as
silence. You can set this number between
10ms and 1,000ms.
When working with Strip Silence, long
settings will strip areas between phrases,
but not the brief pauses between words or
drum beats (for example). Short settings
will strip areas between words or even syllables. Of course Slice Audio will not strip
away the silence, but it will generate a
similar number of events. Values around
100 milliseconds make a good starting
point.
As shown in Figure 27.9, setting a smaller
duration results in more (but shorter)
audio events than setting a longer
duration.
312
1. Original audio event
2. Stripping with 1/2 sec minimum duration
3. Stripping with 1/10 sec minimum duration
(all other parameters equal)
Figure 27.9: Effect of Different Minimum Duration
Settings
Feel free to experiment with different
minimum durations. Once you gate or
auto-separate audio with the Strip
Silence/Slice Audio command, you can
audition it—if you’re not happy with the
results, undo the command and try a different Minimum Duration.
Opcode Systems, Inc.
CHAPTER 27: Strip Silence and Slice Audio
Attack Time
Release Time
Use the Attack Time numerical to set the
amount of time it takes for the audio
signal immediately following a stripped
section to regain its full volume. Allowable
values are between 0 ms and 1,000 ms (1
second). The length of the attack time
you choose will depend on the sonic characteristics of your audio file (for example,
you would probably want to use a short
value with a drum track due to the short
attack most percussion sounds have).
Use the Release Time numerical to set
the amount of time it takes for the audio
signal immediately preceding a stripped
section to fade out. As with the Attack
Time numerical, setting a release time
can often sound more natural than an
instantaneous change in volume. The
length of the release time you choose will
depend on the sonic characteristics of
your audio file. Allowable values are
between 0 ms and 1,000 ms (1 second).
Setting an attack time can make the aftereffects of strip silencing sound more natural. In a similar way, it can make audio
slices sound more natural when played
individually (not in the context of the
surrounding slices).
Feel free to experiment with different
release times. Once you gate audio with
the Strip Silence command, you can
audition it—if you’re not happy with the
results, undo the Strip Silence command
and try using a different Release Time.
For an example of how to use the Release
Time parameter, see Attack Time Example (pg. 314).
With both Strip Silence and Slice
Audio, Attack Time determines when
each event will begin. The Attack Time
(in milliseconds) is subtracted from the
moment that the audio signal crosses the
Silence Threshold to set the beginning
point of the event. With a longer Attack
Time, the separation will occur long
before the audio signal crosses the
threshold.
Feel free to experiment with different
attack times. Once you gate or auto-separate audio with the Strip Silence/Slice
Audio command, you can audition it—if
you’re not happy with the results, undo
the command and try a different Attack
Time. For an example of how to use the
Attack Time parameter, see Attack Time
Example (pg. 314).
Release Time is not available (grayed
out) when working with Slice Audio.
Slice Audio is much like as Strip
Silence with an infinite release time.
When silence is detected, the current
event continues all the way to the beginning of the next event or to the end of the
original event (the event selected before
choosing Strip Silence/Slice Audio).
Vision & Studio Vision Pro — Audio Reference Manual
313
PART 6: Advanced Audio Techniques
ATTACK TIME EXAMPLE
In following example, we’ve used Strip
Silence with a Silence Threshold of -20 dB
and Minimum Duration of 100 ms.
This portion of the
signal is below the
silence threshold but
shorter than the
minimum silence. It
will not be stripped.
This portion of the
signal is below the
silence threshold and
longer than the
minimum silence. It
will be stripped.
We can correct this problem by using a
Release Time of 100 ms and an Attack
Time of 20 ms. With these settings, the
events from the Strip Silence command
will have more gradual attack and release
times (see Figure 27.11).
An extra 100 ms was
left at the end of
this event
An extra 20 ms was
left at the beginning
of this event
Natural sounding cut-offs
due to Attack and Release settings
These portions of the signal are above
the silence threshold. They will not be stripped.
After stripping the silence, we are left with
two separate audio events, as show in
Figure 27.10.
Abrupt cut-offs due to Strip Silence
Figure 27.10: Strip Silence Events
As seen in Figure 27.10, the first audio
event cuts off too early and the second
audio event starts too abruptly.
314
Figure 27.11: Strip Silence Events
Setting Attack (and Release) times can
result in more natural-sounding events
when you use the Strip Silence and
Slice Audio commands.
USE ZERO CROSSINGS
The Use Zero Crossings option, available
in earlier versions of Vision, no longer
exists. Vision always uses zero crossings
with all applicable audio commands.
Automatically using zero crossings conveniently avoids pops and clicks at the
beginnings and ends of audio events.
Opcode Systems, Inc.
CHAPTER 28: Mixing Digital Audio (Bouncing)
If you’re familiar with mixing down or
bouncing tracks in analog recording,
you’ll be familiar with the basic idea of
Vision’s mix procedures.
The first two of these methods, which mix
the selected audio data together into a
new composite file, are discussed in depth
in this chapter.
Vision offers several methods of mixing
audio:
“Export Audio Mix” vs. “DSP>Mix”
•
•
•
•
Direct Audio Mixing: Use the
DSP>Mix command to mix together
multiple audio events into a single file
on a single Audio Instrument. In
Acadia mode, you can even include
EQs, plug-ins, bussing, etc.
Capturing a Mix: Check the
Audio>Mix Audio on Capture
option and use the Edit>Capture
commands to mix together all audio
and MIDI events into a single track or
sequence.
Mixing using TDM bussing (for
Pro Tools owners only): By recording
from a bus, you can mix all your audio
and print TDM effects in real time to
a single audio track or pair. For
details see Recording Audio from
Other Points in the TDM Chain
(pg. 127).
Exporting individual audio events
or mixes: Use any of the options discussed in Chapter 20: Import/Export
Cornucopia.
Although Vision’s DSP>Mix command
and Export Audio Mix may seem similar
at first, they are actually quite different.
Specifically:
•
•
Mix, discussed in this chapter, creates a file only in formats that Vision,
itself, can play. It is meant as an
interim step in creating a sequence
because it replaces your sequence’s
original audio events with the newly
mixed event.
Export Audio Mix is capable of creating file formats that Vision cannot
play directly. It is meant to create a
final audio mix for distribution (via
web, CD, or any other media). It does
not replace any existing files in your
current sequence. For details, see
Chapter 20: Import/Export
Cornucopia.
Vision & Studio Vision Pro — Audio Reference Manual
315
PART 6: Advanced Audio Techniques
WHO SHOULD READ THIS
CHAPTER?
This chapter applies to all of the audio
systems supported by Vision.
DIRECT AUDIO MIXING
Direct audio mixing is the process of
mixing together digital audio from anywhere within a sequence without actually
playing it—Vision examines the selected
audio files and calculates a new, mixed
file. Direct audio mixing is performed by
the DSP>Mix command. This command
mixes together selected audio events and
their velocity settings. Also, if you select
volume and pan controllers assigned to
Audio Instruments, they will be integrated into the new mixed audio file.
NOTE: If you mix to a mono file, Vision
ignores all pan events.
The Mix command lets you mix the
following:
•
•
•
•
•
audio from multiple tracks
audio on multiple Instruments within
tracks
entire audio events
sections of audio events
volume and pan
The Mix command mixes down stereo or
mono audio events into the current track
and they become a single mono or stereo
audio event assigned to one Audio
Instrument.
The Mix command can mix a mixture of
events. Each event can be a different
format—any combination of 8, 16, and 24
bit, as well as any combination of mono,
interleaved, or linked. Mix ignores differing sample rates however, and all events
are mixed as if they had the same sample
rate.
MIXING IN ACADIA (“BOUNCE
TO DISK”)
It’s possible to perform a “bounce to disk”
with Vision’s Mix command in Acadia
mode, taking full advantage of any
assigned plug-ins, EQs, and sends. Use
this command to perform non real-time
mixes of your tracks with processing; or
use it to bounce a track’s audio along with
its assigned EQs and plug-ins—thereby
preserving valuable CPU resources.
To “bounce to disk” a track’s audio data
with its assigned processing:
햲 In the Console Window, assign plugins and EQs to the Audio Instrument
you will mix.
There is virtually no limit to the amount of
audio that you can mix or the number of
tracks from which you can choose audio
to mix. You are limited only by the available space on your hard disk.
316
Opcode Systems, Inc.
CHAPTER 28: Mixing Digital Audio (Bouncing)
햳 In the Track Overview, select the
desired audio region.
햴 Choose DSP>Mix.
The Mix dialog opens.
햶 Make sure to check the option for Use
EQs, plug-ins, etc.
In addition, from the Output options popup, make sure to enable the desired
output destination for the mix, and
whether the mix occurs pre or post-outputs. See Mix and Output Destinations
(pg. 318) for an explanation.
When this option is checked, all selected
automation data for EQs, plug-ins, etc. is
also included in the mix.
햵 Specify a name and folder destination
for the new audio file.
If necessary, click the Format button to
specify the file format, sample size,
whether the file is mixed as stereo, and
whether the file is normalized.
햷 Click the Save button.
The new audio file (or files) is written to
your hard disk and the new audio
replaces the original track data.
햸 When prompted, select the Audio
Instrument that will play the new
audio.
If you use the same Audio Instrument,
make sure to remove or bypass the previously assigned plug-ins and EQs,
since theyÕve already been ÒprintedÓ to
the new audio data.
Vision & Studio Vision Pro — Audio Reference Manual
317
PART 6: Advanced Audio Techniques
Mix and Output Destinations
It’s important to realize that all processing
present in the signal chain may affect the
mixed data. In addition to EQs and plugins assigned to the actual Audio Instrument (in the Console Window), any
processing present on send destinations
and output channels can also affect the
Mix operation.
The two options listed at the bottom of the
Output options menu determine whether
processing assigned to the output pairs is
bypassed. Since you can assign EQs and
plug-ins to output pairs, they too can
affect the mixed signal. If Capture PreOutputs is checked, the processing
assigned to the output pairs is bypassed
for the mix. If Capture Post-Outputs is
checked, all processing assigned to the
output pairs is used.
To ensure that the mixed audio reflects
precisely what you are hearing on playback, specify All Enabled Outputs and
Capture Post-Outputs in the Mix dialog’s
Output options pop-up.
Figure 27.12: Output options pop-up, Mix dialog
The Output options pop-up in the Mix
dialog determines which outputs will be
used for the mix, and whether the mix is
pre or post-outputs. For instance, suppose
you wish to mix some audio assigned to
Audio-1, which is assigned to Outputs 1-2,
but also has a send routed to Bus-1, which
is assigned to Outputs 3-4. If you wanted
the signal mixed through both Audio-1
and Bus-1 (and their respective EQs and
plug-ins), you would need to choose All
Enabled Outputs from the pop-up. To
use just the processing on Audio-1,
choose Outputs 1-2.
If your particular audio hardware has just
one output pair, or if you generally use
just a single output pair, this is less of an
issue.
318
NOTE: If Dither Outputs is enabled in the
Audio Preferences dialog, it too will affect
mixed events. For information on Dither
Outputs, see “Chapter 11: Acadia: Optimizing for Digital Audio” in the 4.1 Manual
Supplement.
Export Audio Mix
The checkbox option for Use EQs, plugins, etc. is also available for the Export
Audio Mix command. Enable this option
to use any assigned processing (including
all selected automation data) for the
exported audio mix. For details, see the
two previous sections Mixing in Acadia
(“Bounce to Disk”) (pg. 316) and Mix and
Output Destinations (pg. 318).
For information on the differences
between File>Export Audio Mix and
DSP>Mix, see “Export Audio Mix” vs.
“DSP>Mix” (pg. 315).
Opcode Systems, Inc.
CHAPTER 28: Mixing Digital Audio (Bouncing)
MIXING IN DAE
If you’re mixing anything except entire
tracks, you’ll probably find the easiest
way to select audio is by placing everything in the same track—then you can
use the Graphic Window to see the time
ranges of all Audio Instruments and
simply drag across what you want to mix.
To mix audio in the Graphic Window:
햲 Select the audio events (or sections
of events) youÕd like to mix.
In this example, you will mix all audio
events that fall within a specified time
range.
Figure 28.2: Save As Dialog Box for DSP>Mix
Command
햴 If you want to store the mixed audio in
a different format than indicated, click
the Format button.
The Audio Format dialog box appears.
Figure 28.1: Select Audio to Mix
IMPORTANT: If you want to include
volume and pan information in the mix,
you must include those events in your
selection.
햳 Choose DSP>Mix.
The Save As dialog box appears.
As shown in Figure 28.2, the bottom of
the dialog box shows the format in which
Vision will save the new audio file.
Figure 28.3: Audio Format Dialog Box
햵 Use this dialog box to tell Vision what
type of audio file to create.
This is a subset of the full Audio Format
dialog box described in Anatomy of the
Audio Format Dialog Box (pg. 228)
햶 Click OK.
The Save As dialog box reappears
Vision & Studio Vision Pro — Audio Reference Manual
319
PART 6: Advanced Audio Techniques
햷 Click the Save button.
Vision computes the mix of the wavedata
itÕs mixing.
If you chose to mix audio to Stereo-two
mono files, clicking the Save button
opens a second dialog box in which you
name and save the right channel file.
NOTE: The number of seconds
refers to the length of the audio
file, not the amount of time required
by the mix operation.
After mixing and normalizing the waveform, Vision computes a new waveform
display based on the selected
Audio>Display Waveform option as
discussed in Viewing Audio Events as
Waveforms (pg. 179).
햸 Next, youÕll be prompted to choose an
Audio Instrument to assign to the
mixed audio event.
햹 Press and hold the mouse on the
Audio Instrument name displayed in
the dialog box and select a new Audio
Instrument from the pop-up menu.
As shown in Figure 28.4, the new, mixed
event is assigned to the specified Audio
Instrument. The audio events you
selected for the mix are removed from
the track in the sequence, but the audio
320
files those events pointed to remain
unaltered in their original files on your
hard disk.
The newly created audio event will now
point to the new audio file that contains
the mixed audio data.
Figure 28.4: Mixed Event on a New Audio
Instrument
햺 Select the mixed event by clicking in
its select region, then play it back by
choosing Do>Play Selection.
If youÕre not satisfied, you can undo the
mix operation by choosing Edit>Undo.
TIP: If you recorded an event too softly, you
can normalize it by selecting the event, then
choosing DSP>Mix and enable Normalize
in the formats dialog. This creates a new
file that, if desired, you can use in place of
the one you recorded originally. The old file
remains on the hard disk and you can
choose to delete it if desired.
CAPTURING A MIX
Capturing a mix is the process of mixing
together entire sequences into a new
track or sequence by having Vision actually internally “play” all the data you want
mixed. To capture digital audio in the
mix, you must use one of the Edit>Capture commands in conjunction with the
Audio>Mix Audio on Capture option.
Opcode Systems, Inc.
CHAPTER 28: Mixing Digital Audio (Bouncing)
Unlike the Mix command, capturing will
mix all audio and MIDI data into a new
track or sequence. Capturing is a process
that redefines your sequence as a serial
stream of events. It “plays” data from your
original sequence into a destination
sequence or track and reinterprets the
timing of data in real time so that data is
stored as a chronological stream of
events. Capturing is discussed in detail in
your MIDI Reference Manual.
To mix audio using the Capture
command:
You can either capture a sequence to a
track (using Edit>Capture Seq->Track)
or you can capture a sequence to another
sequence (using Edit>Capture
Seq->Seq). If you capture to a track, a
single stereo or mono audio event will go
into that track, along with any other nonaudio events. If you capture to a
sequence, the single audio event is placed
in the first track and any other MIDI or
text events are placed in other tracks (one
MIDI Instrument to a track).
햳 Choose Edit>Copy.
햲 Select a sequence by clicking its
selector dot in the Sequences
Window.
Alternately, if you want to capture only
certain tracks or events, simply select
one or more tracks in the Tracks Window, or select individual audio and
controller events in a Graphic or List
Window.
Vision copies your selection to the
Clipboard.
햴 Select a destination for the captured
audio (either a track or a sequence).
햵 Make sure Audio>Mix Audio on
Capture is checked.
햶 Choose either
Edit>Capture Seq->Seq or
Edit>Capture Seq->Track.
The Save As dialog box appears.
Mixing with the Capture
Command
IMPORTANT: When you mix digital audio
by capturing, make sure you have appropriate automation (specifically, volume and
pan) events at the very beginning of your
sequence. Otherwise, your Audio Instruments will use the volume and pan values
most recently sent to them.
At this point, Vision works with the Mix
command according to your audio system. If you’re using Acadia, see page 317.
If you’re using DAE, see page 319.
Vision & Studio Vision Pro — Audio Reference Manual
321
PART 6: Advanced Audio Techniques
THE MIXED AUDIO ON YOUR
HARD DISK
Mixing audio always copies the original,
selected audio into a new mixed audio file
on your hard disk. The original audio files
chosen for the mix remain untouched on
your hard disk and, if you used the Mix
command (not Capture), Vision removes
the original audio events from your
sequence. After doing a mix, you might
want to remove the original files from the
File Management Window’s list, or delete
them as discussed in Compact (pg. 286).
Original Audio Events
Mix Range
(grey area)
When you mix the audio events shown in
the mix range, Vision creates a single
audio event equal in length to the
length of the mix range.
This may result in the mixed audio event
containing ÒsilenceÓ as part of the data file.
In this case, ÒsilenceÓ exists as a series of
zeros on the hard disk that actually
occupy hard disk space.
MIXING “SILENCE”
The blank regions that exist between
audio events contain no audio data and,
therefore, require no disk space (as
shown in Figure 28.5).
NOTE: Notice that audio was normalized
during this mix operation. ThatÕs because
the Normalize pop-up was set to ÒOnÓ
in the Audio Format dialog
Figure 28.6: Blank Area Mixed As “Silent” Data
Getting Rid of Mixed Silence
Audio Events
Blank Regions
(silent, since there is
no digital audio)
Figure 28.5: Blank Regions
When you mix a range of audio, Vision
creates “silent” digital audio for the blank
regions that exist between audio events.
This can result in a mixed audio file that’s
larger than the combined length of the
original audio files (as shown in
Figure 28.6).
322
Normally, you’ll want to remove significant areas of “silent” audio data since it
occupies hard disk space unnecessarily.
You can delete the silent areas manually,
or you can use the Audio>Strip Silence
command to remove them automatically
(as discussed in Chapter 27: Strip Silence
and Slice Audio). Once you delete the
silent regions, you can compact the file as
discussed in Compact (pg. 286) to regain
the space on your hard disk.
Opcode Systems, Inc.
CHAPTER 28: Mixing Digital Audio (Bouncing)
Using Mixed Silence
There are times when you might need to
create and use “silent” audio data. Silent
data is often necessary when you want to
create Vision audio files that are compatible with other programs, such as Sound
Designer. When exporting audio files into
a program other than Vision, you need to
add silent data between audio events in
order to maintain the timing relationship
between them.
If you’re using the Mix command or the
Capture command, you may mix silence
into the sound file as shown in Figure 28.6
on page 322.
Vision & Studio Vision Pro — Audio Reference Manual
323
PART 6: Advanced Audio Techniques
324
Opcode Systems, Inc.
CHAPTER 29: Synchronizing Audio Playback
WHO SHOULD READ THIS
CHAPTER?
While most modern digital multitracks
(such as the Alesis ADAT) can deliver a
relatively stable source of SMPTE time
code, many other tape sources (analog
multitracks and video decks) do not.
SMPTE time code that fluctuates in speed
will likely cause drift between digital
audio (playing in Vision) and material
playing back from the tape source.
SYNC MODES
As discussed in the MIDI Reference Manual, Vision offers four sync modes:
•
•
This chapter discusses ways to address
the drift that occurs when syncing digital
audio to material on tape.
It applies to all of the audio systems supported by Vision, but is separated into
different sections depending on the type
of audio system you use. Specifically:
•
•
Acadia Users: Read Sync Modes
(pg. 325), then skip to Acadia: Syncing Audio to SMPTE (pg. 326).
DAE Users: Read Sync Modes
(pg. 325), then skip to DAE: Syncing
Audio to SMPTE (pg. 327).
•
•
Internal Clock: Use this to sync
MIDI and/or digital audio to the Macintosh’s internal clock. Internal
Clock does not sync to SMPTE.
External Beat Clock: Use this to
sync MIDI only (not audio) to an
external clock source that sends 24
pulses per quarter note. Beat clocks
are tempo dependent; they are not
real time. External Beat Clock is
used primarily for syncing to a drum
machine, sequencer, or another software application.
MIDI Time Code: Use this to sync
MIDI and digital audio to an external
SMPTE clock source (such as an
audio tape, a video deck, or a
synchronizer).
MTC/Machine Control: Use this to
control a MMC compatible devices
from Vision. For detailed instructions
on MMC configuration, please see
your MIDI Reference Manual.
Vision & Studio Vision Pro — Audio Reference Manual
325
PART 6: Advanced Audio Techniques
You can set Vision’s Sync Mode from
either the Sync Options dialog, or from
the Control Bar.
ACADIA: SYNCING AUDIO TO
SMPTE
IMPORTANT: This section applies only if
you’re using Vision with Acadia.
When you use Vision with Acadia, it
cannot compensate for varying tape
speeds during SMPTE synchronization—
audio always plays at the session sample
rate.
Select sync options either from the
Sync Options
dialog box, or...
... from the Control BarÕs
Master Sync Mode
pop-up menu.
Therefore, audio events will start at the
correct SMPTE times but the sound may
drift out of sync if the tape speed starts to
deviate from its nominal speed.
When using Acadia, the best way to synchronize digital audio to tape is to either:
•
•
Figure 29.1: Setting the Sync Modes
For a complete explanation of the Sync
Options dialog, please see the MIDI Reference Manual.
326
record short audio events, or
break up existing long audio events
into smaller pieces.
This minimizes any timing discrepancies
that may occur when playing back digital
audio that’s synchronized via SMPTE.
NOTE: Because Acadia can only play back
audio files at the session sample rate, the
Lock Audio to Tape option is disabled in
the Sync Options dialog.
Opcode Systems, Inc.
CHAPTER 29: Synchronizing Audio Playback
DAE: SYNCING AUDIO TO
SMPTE
IMPORTANT: This section applies only if
you’re using Vision with DAE.
There are two methods you can use to
sync digital audio to tape:
•
•
Hardware Sync
This is the most expensive option, but
is the only way to achieve tight sync
with minimal audio distortion. For
hardware sync, you’ll need a sync
converter box like Opcode’s
Studio 64 XTC, or a Blackburst
generator.
Lock Audio to Tape
This option uses DAE’s on-the-fly
sample rate conversion (in software)
to adjust audio playback to compensate for the fluctuations in the
SMPTE speed. Unfortunately, this
option can introduce audible distortion and pitch fluctuations of the
audio signal.
The following sections discuss each of
these synchronization methods in detail.
Hardware Sync
By far the best way to sync audio to tape is
with hardware synchronization. Unfortunately, it’s much more expensive, but it’s
completely accurate and high-quality.
This scenario works by adjusting digital
audio playback via hardware. A synchronization box (like Opcode’s
Studio 64 XTC) is connected to your
Digidesign audio interface and sends it a
“SuperClock” signal.
The sync box reads the SMPTE source
and adjusts the SuperClock signal, as necessary, to compensate for any fluctuations
in the speed of the time code. As a result,
the pitch and speed of the digital audio
playback is adjusted accordingly (and
with minimal distortion) to stay in sync
with the SMPTE source.
For specifics on using hardware sync with
your Digidesign hardware, consult the
appropriate manufacturer’s manuals.
NOTE: You may wish to contact Opcode for
product information on the Studio 64 XTC.
Lock Audio to Tape
Lock Audio to Tape uses DAE’s on-thefly sample rate conversion capability in
software to match the audio playback to
the received SMPTE. Unfortunately, the
real-time sample rate conversion isn’t perfect because of latencies in the Macintosh
hardware itself and some amount of distortion is introduced in the process. Also,
Vision & Studio Vision Pro — Audio Reference Manual
327
PART 6: Advanced Audio Techniques
the pitch of the audio varies with the
speed of the tape, and if your audio has
long, sustained tones, this pitch variation
is sometimes noticeable. Of course, the
pitch of MIDI data never varies.
PRO TOOLS & SESSION 8: Because Pro
Tools and Session 8 hardware contains
Superclock support and doesnÕt support onthe-fly sample rate conversion, you cannot
use this method to lock audio to tape. The
Lock Audio to Tape command is disabled
and SMPTE synchronization is performed as
described in Acadia: Syncing Audio to
SMPTE (pg. 326).
To enable Lock Audio to Tape:
햲 Choose Options>Sync Options.
햳 Set the Receive Sync mode to MIDI
Using this method will lock the digital
audio tightly with the tape, but because
on-the-fly conversion is being applied to
the audio signal during both recording
and playback, the signal is distorted twice.
In this case, you’re trading audio purity
for tight sync. If tight sync is a must, try
running a few experiments on your own—
you may find the conversion distortion
hardly noticeable.
NOTE: If using a digital multitrack like the
Alesis ADAT, you might want to try disabling Lock Audio to Tape.
Many of the digital multitracks offer very
stable playback and, therefore, can deliver a
reliable SMPTE time code source—
making the use of Lock Audio to Tape
unnecessary.
Time Code, and set the Receive
Sync source to the desired device
(usually your MIDI interface).
For details on using the Sync Options
dialog, see you MIDI Reference Manual.
햴 If your hardware is supported, click
the option for Lock Audio to Tape
so it becomes checked.
햵 Click the OK button to close the Sync
Options dialog.
햶 Initiate playback of your SMPTE
source, then click the Play button in
VisionÕs Control Bar.
Vision constantly monitors the speed of
your tape and adjusts the sample rate to
match the speed of the tape. This results
in on-the-fly conversion. On-the-fly conversion is discussed in more detail in
About Sample Rate Conversion
(pg. 301).
328
Opcode Systems, Inc.
CHAPTER 30: ReWire
Vision now includes ReWire support. This
powerful feature allows audio signals
from ReWire compatible applications to
be routed directly through Vision’s consoles, providing the same sends, plug-ins,
and EQs you have access to with any
other audio signal in Vision.
WHO SHOULD READ THIS
CHAPTER?
ABOUT REWIRE
Vision’s implementation of ReWire allows
three very important functions.
•
•
This chapter applies to Acadia users with
ReWire-compatible applications.
•
Audio Streaming
ReWire allows up to 64 channels of
audio to be routed (real-time) from
one application to another.
Sample Accurate Synchronization
After Vision and your ReWire-compatible soft synth detect each other,
sample-accurate sync happens
automatically.
Transport Functionality
The transport controls of all ReWire
compatible applications in your
system are automatically linked. You
can press play, stop, etc. in any application and all will perform in sync.
Vision & Studio Vision Pro — Audio Reference Manual
329
CONFIGURING YOUR SYSTEM
FOR REWIRE
Follow these simple steps to configure
your system to work with ReWire.
햲 Put the ReWire extension in your
System Folder>Extensions folder.
햳 Install a ReWire compatible
application for use with Vision.
This could include ReBirth, a ReWire
compatible software synthesizer, or any
other ReWire compatible application.
See the following sections for examples
of how to use Vision with Rebirth and
Retro AS-1 via ReWire.
햴 Allocate more RAM to Vision.
ReWire requires that additional memory
be allocated to Vision before it is
launched. Vision may crash or hang if it
doesn't have enough memory to load
when launched with ReWire installed.
With several VST plug-ins in your plugins folder, allocating 30,000 to 35,000K
for Vision is usually sufficient.
To increase the amount of allocated
memory, quit Vision (if it is open) and
single-click on its icon in the Finder.
Choose File>Get Info and enter a higher
number into the Preferred Size field (in
the Memory section of the Window).
Close the window and launch Vision
again.
330
For more information about RAM and
Acadia mode, see page 86.
After launching Vision, open the Audio
Instruments window. Scroll to the bottom
of the window. Following the Instruments, Inputs, Outputs, and Busses
sections is a fifth section for your ReWire
compatible application(s).
햵 Enable the ReWire channels you want
to use in Vision.
For more information about enabling
inputs and outputs in Acadia mode, see
Enabling Inputs and Outputs (pg. 39).
NOTE: Enabled inputs and outputs consume valuable CPU resources.
Therefore, to preserve CPU resources,
enable only the inputs you plan to use.
Opcode Systems, Inc.
CHAPTER 30: ReWire
EXAMPLE 1: USING VISION
WITH REBIRTH
When using Vision and ReBirth together
via ReWire, the two applications are automatically synced. ReWire takes care of
this for you; you don’t need to set Vision
or ReBirth to send or receive MIDI Beat
Clock or MIDI Time Code when working
with ReWire. All necessary information is
transmitted via the ReWire extension.
햵 In Vision, choose Windows>Audio
Instruments.
Scroll to the bottom of the window, and
you will see something like this:
ReBirth 2.01 is recommended when using
the ReWire extension with Vision 4.5.
Also, as previously discussed, make sure
that you have enough memory allocated
to Vision.
햲 Launch Vision.
For ReWire to work properly, Vision
must be launched before Rebirth.
햳 Under Options>Sync Options, put a
check next to Remote Start.
This will enable you to play and stop
Vision from ReBirthÕs transport controls.
You can control ReBirth from VisionÕs
transport controls even if Remote Start
is not checked.
Enable any ReBirth channels (inputs)
you wish to use. Remember, each
enabled input requires RAM, so itÕs best
to enable only the inputs you plan on
using. These inputs usually correspond
to the ReBirth sounds you are using.
햶 Open a Console.
햷 Choose Build Console From>Enabled
ReWire Channels from the Console
window pop-up menu.
VisionÕs play button begins to flash.
햴 Launch ReBirth.
Open the ReBirth file that you wish to
work with, or begin a new file.
Vision & Studio Vision Pro — Audio Reference Manual
331
햸 Press Play in either Vision or ReBirth.
Vision and ReBirth begin to play in sync.
햹 Look at the Console you set up in
step 7.
ReBirthÕs audio appears in the appropriate Console channels.
햺 While listening to the song, set up
your mix and assign any sends, plugins, EQs, etc., that youÕd like.
If this dialog appears, quit both applications and then launch them in the correct
order.
Quitting Vision and ReBirth
Vision cannot be quit while ReBirth is
open when using the ReWire Extension.
If you try to quit Vision while ReBirth is
open, the following error message will
appear:
Launching Vision and ReBirth
It's important to launch Vision before
launching ReBirth 2.0 (or higher) with
ReWire installed. If you launch the applications in the incorrect order, you’ll see
this dialog:
Click the OK button and then quit
ReBirth before quitting Vision.
332
Opcode Systems, Inc.
CHAPTER 30: ReWire
EXAMPLE 2: USING VISION
WITH RETRO AS-1
Using Vision with Retro is somewhat different than using Vision with ReBirth,
because Retro is a software synthesizer
that must be triggered with MIDI. To trigger Retro with MIDI, you must have the
Retro AS-1 OMS Driver in your System
Folder>OMS Folder.
After installing the Retro OMS driver,
choose Studio>MIDI Cards and Interfaces in OMS, which will update your
OMS setup to include Retro AS-1.
햲 In Retro AS-1Õs control panel, select
Plug-In from the Audio Output pop-up
menu.
Figure 30.1: Retro Control Panel
Selecting Plug-In enables RetroÕs outputs to work with ReWire. If any other
option is selected in this pop-up,
Retro AS-1Õs audio output will not be
routed through Vision.
Plug-In does not refer specifically to
VST plug-ins; you must choose this
option whether or not you plan to use
VST plug-ins.
햳 In Vision, assign your MIDI tracks to
Retro instruments.
After Retro AS-1 is included in your OMS
Studio Setup, save your setup and go to
Windows>Instruments in Vision. Open
the Instruments Window popup menu and
choose Make from Studio Setup. Click
Make to include Retro in your list of
MIDI instruments.
In this example, weÕre assuming that you
already have MIDI notes assigned to
Retro AS-1.
For more information about configuring
Retro AS-1 with OMS, please see your
Retro AS-1 manual.
The following example shows how to use
Retro with Vision via ReWire (when Retro
is installed and configured in OMS).
Vision & Studio Vision Pro — Audio Reference Manual
333
햴 Open the Audio Instruments window,
and scroll to the bottom to see your
Retro inputs.
햷 Press Play, and youÕll hear your MIDI
tracks.
햸 Look at the Console you set up in
step 4.
RetroÕs audio appears in the appropriate
Console channels.
햹 While listening, set up your mix and
assign any sends, plug-ins, EQs, etc.,
that youÕd like.
Enable any Retro channels you wish to
use. These inputs should match the
Retro MIDI channels that youÕre using (in
step 1).
Remember, each enabled input requires
RAM, so itÕs best to enable only the
inputs you plan on using.
햵 Open a Console.
햶 Choose Build Console From>Enabled
ReWire Channels from the Console
window pop-up menu.
Setting Retro AS-1’s Audio
Output
If Retro’s Audio Output is set to something other than Plug-in when you
launch Vision (with ReWire installed),
you will see this dialog box.
See step 1 on page 333 for an explanation.
334
Opcode Systems, Inc.
CHAPTER 30: ReWire
ReWire Inputs
ReBirth and Retro automatically remove
all enabled individual inputs from the Mix
input. Other ReWire applications may
behave differently; again, it is up to the
manufacturer to decide.
ReWire channels are referred to as
“inputs” in Vision. An audio signal “output” in another application (like ReBirth)
is sent via ReWire to an input in Vision.
For example, if Retro AS-1 Main and
Retro AS-1 Ch 1 are enabled, the
Retro AS-1 Main input will contain only
the signal from Retro channels 2-15.
ADDITIONAL REWIRE NOTES
For documentation purposes, “input” and
“channel” are synonymous when
discussing ReWire.
Enabled ReWire Channels in the
Audio Instruments Window
By default, the only enabled ReBirth or
Retro input (in the Audio Instruments
window) is the “Mix” (or “Main”) input.
The Mix input includes all audio from the
application. Other ReWire applications
may or may not have a “Mix” channel; it is
up to the manufacturer to decide.
You can also enable individual ReWire
inputs. This is useful if you want to mix
each channel separately, but it does
require more RAM.
NOTE for ReBirth Users: In addition to
individual inputs and a general Mix input,
ReBirth also includes an 808 Mix and a
909 Mix input.
If you enable an individual input while the
“Mix” input is enabled, you may hear the
individual channel on its own input and
the Mix input. This could cause an undesirable “doubling” effect. However,
Enabling and Disabling ReWire
Channels
You cannot enable or disable ReWire
channels while playing. If you need to
enable or diable a ReWire channel, stop
playback before making the change.
Mono/Stereo Status of ReWire
Channels
You cannot change ReWire channels’
mono/stereo status. Each channel’s
mono/stereo status is determined by the
manufacturer and cannot be modified.
ReWire and Synchronization
When the ReWire extension is located in
the System Folder>Extensions Folder,
Vision’s Send Sync option does not need
to be enabled to sync Vision with other
ReWire compatible applications. All
required synchronization information is
communicated between applications via
the ReWire extension.
Vision & Studio Vision Pro — Audio Reference Manual
335
However, if you wish to control Vision
from the transport controls of another
application (such as ReBirth), you must
check Remote Start under Options>Sync
Options.
When Remote Start is checked, Vision’s
play or record button starts to flash, indicating that it can be controlled from an
external source. For more information
about Remote Start, see your MIDI Reference Manual.
Active in Background
Active in Background is required when
using Vision with ReBirth via ReWire, and
it is automatically checked whenever the
“ReBirth Engine” extension is enabled.
336
Opcode Systems, Inc.
CHAPTER 31: Audio Scrubbing
WHO SHOULD READ THIS
CHAPTER?
햳 Press and hold the Command key.
The cursor changes into the Speaker
cursor.
This chapter applies only to those who
use DAE.
Audio Scrubbing is not supported by
Acadia.
AUDIO SCRUBBING IN THE
GRAPHIC WINDOW
Vision, when used with DAE, allows you
to audibly find precise locations in an
audio event by “scrubbing.” By holding
down the Command key while dragging
the mouse, Vision lets you “scrub” the
audio event either forward or backward
and at varying speeds.
To use scrubbing:
햲 Move the cursor over the audio event
you wish to scrub.
Speaker cursor indicates
scrubbing is enabled
햴 While continuing to hold the
Command key, click and drag to the
right to hear the event played forward,
or drag to the left to hear the event
played backward.
The playback speed is determined by
how far the Speaker cursor is from the
actual playback pointÑthe further the
Speaker cursor is from the playback
point, the faster the audio plays back.
The closer the Speaker cursor is to the
playback point, the slower the audio
plays back. Normal playback speed is
obtained when the cursor is dragged
about 2-3 seconds ahead of the playback point. The maximum scrubbing
speed of DAE is 1.5 times the normal
playback speed.
Vision & Studio Vision Pro — Audio Reference Manual
337
PART 6: Advanced Audio Techniques
Scrubbing and Audio Outputs
When you drag the Speaker
cursor well in front of the
current playback point (greater
than 2-3 seconds ahead),
the audio plays at an
accelerated speed (up to a
maximum of 1.5 times the
normal playback speed).
When you drag the Speaker
cursor just barely ahead of
the current playback point
(less than 2-3 seconds ahead),
the audio plays at a slower
speed. This lets you audibly
find a precise edit point.
When you drag the Speaker
cursor around 2-3 seconds
ahead of the current playback
point, the audio plays at its
normal playback speed.
CURRENT PLAYBACK POINT
Figure 31.1: Scrubbing Speeds
NOTE: Vision allows you to scrub only one
audio event at a time. In order to “skip” to
another audio event, you must release the
mouse button, then Command-drag on the
event you wish to hear.
338
You can scrub both mono and stereo
events. For Pro Tools systems that are not
equipped with the TDM bus, the playback
of scrubbed audio events always appears
at Outputs 1 & 2 of your DAE audio hardware, no matter what output its Audio
Instrument is assigned to.
For example, if you’re scrubbing an audio
event that’s assigned to an Audio Instrument that uses Output #4, the scrubbed
audio will be sent to Outputs 1 & 2. When
you play the audio event normally (that is,
any way other than scrubbing), the audio
will be sent to Output #4.
NOTE: This is the same output reassignment that occurs when you audition audio
from the Import dialog box.
TDM USERS: TDM systems (such as Pro
Tools III) behave differently. TDM systems
look to see which output the scrubbed Audio
Instrument is assigned to and then plays the
scrubbed audio event using that output pair.
For example, if you scrub an audio event
thatÕs assigned to an Audio Instrument using
Output #4, then the scrubbed audio will be
sent to both Outputs 3 & 4. When you play
normally, the scrubbed output will be sent to
Output #4 only.
Opcode Systems, Inc.
CHAPTER 31: Audio Scrubbing
Scrubbing and Output Volume
Scrubbed audio always plays at the maximum output level. This is either 0 dB or
+6 dB depending on your choice in the
Audio Preferences dialog box as discussed in Maximum Fader Position
(pg. 173). Scrubbing ignores both the
velocity of the event and any associated
MIDI volume commands.
AUDIO SCRUBBING IN THE
TRACK OVERVIEW AREA
There are a few additional rules you need
to be aware of when scrubbing in the
Tracks Window:
•
•
•
You can scrub audio in the Track Window’s Track Overview area in much the
same way as in the Graphic Window. To
do so:
햲 In the Track Overview area, move the
cursor over the audio event you wish
to scrub.
햳 Press the Command key on your
Macintosh.
The cursor changes into the Speaker
cursor ( ).
•
햴 Click and drag to the right to hear the
event played forward, or drag to the
left to hear the event played
backward.
•
If you scrub over a phrase that contains only MIDI events, Vision plays
all the MIDI events in all tracks. No
audio events will play.
If you scrub over a phrase that contains only a single audio event, Vision
plays back that audio event. No MIDI
events will play.
If you scrub over a phrase that contains multiple audio events, one of
two things happens:
CASE 1: If you begin scrubbing at a
time where only one audio event is
present, Vision will play back that
audio event. It will not play other
audio events in the phrase, nor will it
play MIDI events.
CASE 2: If you begin scrubbing at a
time where there is more than one
audio event present, Vision will not
play anything. Vision cannot scrub
multiple audio events.
If you scrub over a phrase that contains a single audio event along with
MIDI events, Vision will play the
audio events only. No MIDI events
will play.
If you start scrubbing between
phrases, Vision will play all the MIDI
events in all tracks. No audio events
will play.
Vision & Studio Vision Pro — Audio Reference Manual
339
PART 6: Advanced Audio Techniques
340
Opcode Systems, Inc.
1
2
3
4
5
Menus
6
7
Vision & Studio Vision Pro — Audio Reference Manual
341
PART 7: Menus
342
Opcode Systems, Inc.
CHAPTER 32: The Audio Menu
This chapter discusses each of the Audio
menu commands. Many of these commands are covered in detail by earlier
chapters, though this chapter will give
you a general overview of each command
before cross-referencing a related
chapter.
RETAIN
When you choose this command, Vision
retains only the audio in the selected
region and clears all data comprising the
rest of the selected audio event(s). Like
all edit operations, if you have multiple
events in the track, only the events
selected will be affected. To use the
command:
햲 Select a region of audio you wish to
retain.
You can select across all audio events
for a time region (as shown in this example), or you can select a region of time
Figure 32.1: Audio Menu
Vision & Studio Vision Pro — Audio Reference Manual
343
PART 7: Menus
within a single Audio Instrument. Audio
selection techniques are discussed in
Selecting Audio Events (pg. 184).
Audio in this
region will be retained
NOTE: As with other edit operations, you’ll
most likely want to display the waveform in
High Resolution mode when you use the
Retain command—this lets you see more
clearly the peaks and valleys of the waveform. For more information, see Waveform
Display (pg. 354).
SEPARATE
Audio in this
region will be trimmed
Figure 32.2: Selecting a Region of Audio
Events to Retain
햳 Choose Audio>Retain.
Vision clears the data in any selected
audio events that appear outside the
selection region.
You can separate a single audio event into
many separate audio events. For example,
suppose you have a speech track and you
want to rearrange the words. You can separate the single audio event into many
separate audio events (one for each
word), then shuffle them around to create
entirely new sentences.
You can separate an audio event into multiple events in one of two ways.
•
•
You can split an audio event at the
edit point.
You can separate a section of an audio
event from the rest of the event.
To split an audio event:
햲 In the Graphic Window, select either
Figure 32.3: Retained Audio
The Retain command can be undone
since it does not actually remove data
from your hard disk; rather it simply
removes the track’s pointer to that data.
Also, you can lengthen any audio events
that were automatically trimmed by the
Retain command as discussed in Trimming or Lengthening Audio Events
(pg. 195).
344
the Marquee or I-beam tool.
Figure 32.4: Marquee and I-beam Tools
Opcode Systems, Inc.
CHAPTER 32: The Audio Menu
햳 Move the cursor over the eventÕs
lower select region and click at the
desired split point.
The cursor becomes a cross-hair. If you
click the cursor over the top region of an
audio event, youÕll select the entire
eventÑthis is not what you want to do.
Make sure you click in the bottom region
of the event.
To separate a section of an audio event
from the rest of the event:
햲 In the Graphic Window, select either
the Marquee or I-beam tool.
햳 Drag across the portion of the audio
event that you want to separate from
the rest of the event.
Drag across the lower third
of an audio event to select
a portion of that event.
Click in lower portion of
audio event to define
the split point
햴 Choose Audio>Separate.
햴 Choose Audio>Separate.
Vision separates the original audio event
into two audio events (separated at the
edit point).
Vision divides the event into individual
events.
Three separate audio events are
created by this application of the
Separate command
Two separate audio events are
created by using the
Separate command
Figure 32.5: Audio Event Separated
Notice that no audio event information is
deleted. You can play back the track and
it will sound just as it did before you performed the separation.
Vision & Studio Vision Pro — Audio Reference Manual
345
PART 7: Menus
NOTE: As with other edit operations, you’ll
most likely want to display the waveform in
High Resolution mode when you use the
Separate command—this lets you see
more clearly the peaks and valleys of the
waveform. For more information, see
Waveform Display (pg. 354).
•
•
•
STRIP SILENCE/SLICE AUDIO
Use the Strip Silence command to remove
(“gate”) any selected audio that falls
below a specified amplitude for a specified
amount of time. Use the Slice Audio command to break a long audio file into
smaller audio events (using the Strip
Silence parameters) without removing
silence. When you choose this command,
Vision opens the Strip Silence dialog box.
Figure 32.6: Strip Silence Dialog Box
Use the pop-up menu to select either Strip
Silence or Slice Audio.
You can remove unwanted noise that
occurs below the lowest threshold of
recorded audio (for example, analog
tape hiss).
It’s a fast way to clear silent passages
from your audio events, saving disk
space.
You can break up one long audio
event into separate short audio events
in order to work with the audio more
easily.
Doing this has many benefits,
including:
a) You can easily copy and paste
small sections of audio (such as a particular drum sound, or an oft-repeated
vocal line).
b) You can quantize individual events
(such as separate drum hits in a
recorded drum track).
c) If you’re syncing to tape and are
playing back digital audio using only
the session sample rate (as is
required with Acadia), breaking
audio into smaller events means there
is less likelihood of digital audio drifting “out of sync” with audio on tape.
To learn about Strip Silence dialog box,
how to gate audio with the Strip Silence
command, and how to separate auto-separate audio using the Slice Audio
command, see Chapter 27: Strip Silence
and Slice Audio.
Use the Strip Silence dialog box to define
what Vision sees as “silence.” The Strip
Silence and Slice Audio commands are
very useful features for a number of
reasons:
346
Opcode Systems, Inc.
CHAPTER 32: The Audio Menu
GET EVENT INFO
Choose this command to get information
about an audio event. When you choose
Audio>Get Event Info, Vision opens the
Audio Event Info dialog box.
•
•
Sample Size is the bit depth of the
dynamic range of the audio event.
Sample Size can also be thought of
as the resolution of the file in bits.
Channels shows you whether the
event’s file is mono or stereo. If the
audio event is part of a linked stereo
file, then the dialog box displays
information about both the left and
right channels of the audio event.
Figure 32.7: Audio Event Info Dialog Box
The Audio Event Info dialog box is a convenient, quick way to look up specific
information about any audio event. It’s
also an easy way to rename an event from
within the Graphic Window.
The Audio Event Info Dialog box contains
the following information:
•
•
•
•
•
•
Event Name displays the name of
the selected audio event. You can use
this field to change the name of the
event, if desired.
Duration shows the duration of the
audio event.
Audio File displays the name of the
audio file that the event references.
File Volume displays the hard disk
on which the audio file resides.
File Format is the file format in
which the audio file is stored.
Sample Rate is the sample rate at
which the audio in the file was
recorded.
Figure 32.8: Audio Event Info Dialog for a
Linked Stereo Event
•
Sample Start and Sample End display the sample number at which the
audio event begins and ends in the
wave data portion of the audio file.
SHORTCUT: You can open the Audio
Event Info dialog box directly from the
Graphic Window by clicking the event
name in the lower left corner of any audio
event (Audio>Show Audio Event
Names must be enabled). When you move
the cursor over an event name in the
Graphic Window, it turns into a question
mark. Click with the question mark cursor
and the Audio Event Info dialog box opens
for that event.
Vision & Studio Vision Pro — Audio Reference Manual
347
PART 7: Menus
EDIT EVENT SOUNDFILE
Choose this command to launch a sample
editing program that opens to display the
selected audio file. The program that
opens depends on which audio system
you’re using.
TIP: If you hold down the Option key when
you choose this command, you can open a
sample editing program that’s different
than the last program you used.
Acadia
NOTE: This section discusses the Edit
Event Soundfile command when used
with Acadia. If you’re using Vision with
DAE, see DAE (pg. 348).
Choose this command to open Opcode’s
Audioshop so you can process the actual
audio data you recorded in Vision. It’s up
to you to know how to use Audioshop.
Read your Audioshop manual if you
haven’t done so.
To use the Edit Soundfile command:
햲 Select an audio event in Vision by
clicking anywhere in its upper select
region.
햳 Choose Audio>Edit Soundfile.
If this is the first time youÕre using this
command, you will be prompted with a
dialog box to locate Audioshop. In the
future, Vision will remember where it is,
unless you move it. If, at some later time,
you want to open a different sample edit-
348
ing program with this command, hold
down the Option key when you choose
it.
Audioshop will open allowing you to edit
the entire audio file that contains the
selected audio event.
If Audioshop is already running, it will
become the active application, but no
new file is openedÑyour selection is not
communicated to Audioshop.
IMPORTANT: If you don’t see the changes
you made in Audioshop reflected in Vision
(or if you are unsure these changes are
reflected), use the Rebuild Waveform
command in Vision’s File Management
dialog box.
DAE
NOTE: This section discusses the Edit
Event Soundfile command when used
with DAE. If you’re using Vision with Acadia, see Acadia (pg. 348).
Choose this command to open Sound
Designer II so you can process the actual
sound data you recorded using Vision. All
audio in the selected event’s audio file will
be displayed in Sound Designer II’s Waveform Editing window, and the event, or
portion of it that you selected in Vision,
will be highlighted (if you’re using Sound
Designer II version 2.6 or better).
IMPORTANT: It is up to you to know how
to use Sound Designer II. If you’re unfamiliar with sound processing, it is very possible
that you will disrupt your wave data—and
your sequence—by shifting wavedata in
Opcode Systems, Inc.
CHAPTER 32: The Audio Menu
time or by editing outside of the selection
region. Read the user’s manual that came
with Sound Designer II if you haven’t done
so.
All Vision editing operations (except
Compact and Delete File) are nondestructive. Editing sound files in Sound
Designer II, however, is a destructive process. If you edit a soundfile and you don’t
like your edit, you’ll have lost your original data unless you made a backup copy
of the original file.
You can select an entire audio event for
editing, or just a portion of one.
햲 Select an entire audio event in Vision
by clicking anywhere in its upper
select region.
Alternately, you could select a portion of
an audio event by clicking in its lower
select region and dragging with the Marquee or I-beam.
햳 Choose Audio>Edit Soundfile.
If this is the first time youÕre using this
command, you will be prompted with a
dialog box to locate Sound Designer II.
In the future, Vision will remember where
it is, unless you move it. If, at some later
time, you want to open a different
sample editing program with this command, hold down the Option key when
you choose it.
If Sound Designer II is already running, it
will become the active application.
Sound Designer IIÕs Waveform Editing
window opens to display all audio in the
selected eventÕs audio file.
If youÕre editing a linked stereo audio
event, Sound Designer II will open two
Waveform Editing windows, one for the
left and one for the right channel.
IMPORTANT: With other programs or earlier versions of Sound Designer II, Vision
may not be informed of the changes and,
therefore, be unable to automatically
recompute the waveform summary. If you
do not see the changes you made in Sound
Designer II reflected in Vision (or if you are
unsure these changes are reflected), use the
Rebuild Waveform command in the File
Management dialog box.
All audio in the selected audio event’s
audio file will be displayed as one long
waveform, since the concept of “audio
events” is unique to Vision.
The only way you have of determining
from this waveform where the boundaries
of your selected audio event are is the
highlighted area in the Waveform Editing
window.
Do not edit outside this highlighted area;
if you do you’ll cross over the boundaries
of the audio event (or portion of it) that
you wanted to edit.
NOTE: In order to avoid accidental loss of
the current selection range, you can save it
in Sound Designer II as a Region. As soon
as you enter Sound Designer, use the Capture Region command.
Vision & Studio Vision Pro — Audio Reference Manual
349
PART 7: Menus
Don’t perform any operations that move
wave data, such as a cut or paste. If you
cut out a portion of audio from the file, for
example, then everything in the file that’s
to the right of the cut will shift to fill the
gap. The references in the Vision
sequence file of where on the hard disk it
should play back from will be inaccurate.
As a result, audio events that reside in this
file may not play back correctly.
You can safely perform these operations
in Sound Designer II:
•
•
•
•
•
Fade in
Fade out
Normalize
Revert
EQ (Equalize)
LINK EVENTS
Choose this command to link two
selected mono events into a single linked
stereo event. The two events being linked
must share the same Start and End times.
You should select the two events that you
want to link from within the Graphic
Window—this way you can see the two
events and easily tell whether they share
the same Start and End times. If the Start
and End times are not exactly the same
and you still wish to link the two events,
you can make them the same by using the
Retain or Cut commands. If you try to
link events with different Start and End
times, Vision will warn you that they are
not the same.
350
NOTE: Link Events works only on the first
two selected audio events in the currently
selected track. This is different than the
Unlink Events command (discussed
below), which works on all selected events
in all selected tracks.
UNLINK EVENTS
Choose this command to unlink all
selected events that are currently linked.
This is particularly useful if you’ve
recorded a linked stereo event, then
decide later that it doesn’t need to be stereo. After a stereo event has been
unlinked, you may wish to delete one of
the two resulting audio events in order to
free up an additional playback channel.
Deleting the audio event does not delete
the disk space that was used by it—for
that you must use the File Management
dialog box.
FILE MANAGEMENT
Choose this command to open the File
Management dialog box.
Figure 32.9: Typical File Management Dialog Box
Opcode Systems, Inc.
CHAPTER 32: The Audio Menu
This dialog box contains information
about each audio file used by the active
Vision file. Since each Vision file may use
a different group of audio files, the File
Management dialog box displays only the
audio files used by the Vision file that’s
currently open.
In addition, the File Management dialog
box allows you to see how much of an
audio file is unused by the active Vision
file and, if desired, delete the unused data
from your disk by compacting the file.
There are many useful operations that can
be performed from within the File Management dialog box. To learn about files
and the File Management dialog box, see
Chapter 25: File Management.
CONVERSION OVERVIEW
Choose this command to open the Conversion Overview dialog box.
Use this dialog box to convert audio files
to a common session sample rate or
sample size and to convert interleaved
stereo files to DAE-compatible linked
mono files. Generally, you will not need
this command (or dialog box) unless you
are converting Studio Vision 1.4 or earlier
files for use with this version of Vision.
This dialog box appears whenever you:
•
•
•
•
•
Open a Vision file that uses audio files
with different sample rates (as could
be created in Studio Vision 1.4 and
earlier);
Import an audio file that is not using
the current session sample rate;
Open a Vision file that uses interleaved stereo audio files and DAE;
Attempt to import an interleaved
stereo audio file using DAE;
Choose Audio>Conversion
Overview.
The Conversion Overview dialog box is
discussed in detail in Chapter 26: Sample
Rate Conversion and Deinterleaving.
BUFFER SIZE
Choose this command to open the Buffer
Size dialog box. The appearance of the
dialog box changes depending on which
audio system you use.
Figure 32.10: Typical Conversion Overview Dialog
Use the Buffer Size dialog box to tell
Vision how much memory to set aside for
use as a digital audio RAM buffer. Vision
uses the RAM buffer to store digital audio
temporarily before sending it to your hard
disk, or before playing it.
Vision & Studio Vision Pro — Audio Reference Manual
351
PART 7: Menus
To learn more about setting a buffer size
and using the RAM Buffer Size dialog
box, see one of the following chapters
(depending on the audio system you’re
using):
•
•
Acadia—see The Buffer Size Dialog
(pg. 87).
DAE—see Allocating RAM to the Digital Audio RAM Buffer (pg. 99).
SAMPLE RATE/SIZE
Choose this command to open the Set
Session Sample Rate dialog box.
Higher session sample rates produce
better audio quality, but use more disk
space (because there are more sample
points per second). You can save disk
space by using a low sample rate, but this
degrades the sound quality.
To get the best audio quality, you should
record all of your sound files at the same
rate as your hardware sample rate. When
you do this, the sample rates of your files
will always match the hardware sample
rate, and sample rate conversion on playback will not be necessary.
To learn more about sample rates and the
Set Session Sample Rate dialog box, see
one of the following chapters (depending
on the digital audio management system
you’re using):
•
•
Acadia—see The Session Sample
Rate (pg. 18).
DAE—see Set a Session Sample Rate
and size (pg. 105).
Figure 32.11: Set Session Sample Rate Dialog
Box
Use the dialog box to set a session sample
rate before you record. The session
sample rate is the sample rate that Vision
uses to both record and play back audio.
NOTE: Users of Pro Tools 24 can choose
between 16 and 24 bits; however, all files
should have the same bit depth. Users of
other audio systems should always use 16
bits.
352
HARDWARE SETUP
Choose this command to open the Hardware Setup dialog box, which you use to
tell Vision about the audio hardware
you’re using.
The appearance and function of the dialog
box changes depending on which audio
system you use. Specifically:
Opcode Systems, Inc.
CHAPTER 32: The Audio Menu
•
•
Acadia—When in Acadia mode,
Vision uses an Acadia Hardware
Setup dialog box. For information,
see Hardware Setup (pg. 14).
DAE—Vision, when used with DAE,
uses a DAE Hardware Setup dialog
box, as discussed in Hardware Setup
(pg. 101).
AUDIO SYSTEM
Choose this command to open a submenu
of Audio System choices.
WAVEFORM HEIGHT
Use this submenu to select the height of
the audio events displayed in the Graphic
Window.
Figure 32.13: Waveform Height Submenu
Choose one of the following options in the
Audio>Waveform Height submenu to
set the waveform height. Your choices
are:
•
Figure 32.12: Audio System Submenu
The audio system you choose depends on
your audio hardware.
•
•
•
•
•
DAE: Select this option to use Vision
with any professional Digidesign digital audio hardware. Digidesign
hardware uses an audio system called
the Digidesign Audio System (DAE).
If you select this system and DAE is
not available, Vision will use MIDI
Only instead.
Acadia: Select this option to use
Vision with the Macintosh’s built-in
audio hardware or with any other
ASIO-compatible audio hardware.
MIDI only: Select this option if you
are using Vision strictly as a MIDI
sequencer and are not recording or
playing digital audio files.
Automatic: Vision selects an event
height based on the number of audio
events in the window.
Grow: Increases the vertical size of
the waveforms.
Shrink: Reduces the vertical size of
the waveforms.
TIP: You can add key equivalents to the
Shrink and Grow commands for quick
increasing and reducing of waveform sizes.
See the MIDI Reference Manual for details
on setting key equivalents for commands.
Vision & Studio Vision Pro — Audio Reference Manual
353
PART 7: Menus
WAVEFORM DISPLAY
Use this submenu to select the display
resolution of waveforms as displayed in
the Graphic Window.
Figure 32.14: Waveform Display Submenu
Choose one of the three options in the
Audio>Waveform Display submenu to
set a waveform display resolution. The
three waveform display options are:
•
•
•
Fast: Allows Vision to redraw waveforms fairly quickly, a useful feature
during recording sessions.
High Resolution: If you are zoomed
in enough, displays waveforms in
greater detail than Fast mode, showing clearly the peaks and valleys of
the waveform, a useful feature during
editing procedures.
Off: Displays a waveform as a rectangular bar. This takes Vision virtually
no time to draw and is useful if you
want to work extremely quickly and
viewing the waveform is not a
concern.
Off
You’ll notice immediately after recording
that it takes time for Vision to compute
the wave data summary. If you want to
save time during recording sessions, you
can disable all computation of the summary by disabling the waveform display.
To do this, check Off in the Audio>Display Waveform submenu. Audio will be
represented as rectangular bars in the
Audio Instrument’s color, which takes
Vision virtually no time to draw.
Figure 32.15: Waveform Display Off
You can perform editing operations on
audio bars if you don’t care about viewing
the waveform. However, Strip Silence is
not possible.
Fast
Checking Fast allows Vision to redraw
waveform displays fairly quickly, which is
especially desirable when you’re recording or playing back audio.
Each of the options is discussed in detail
in the following sections.
Figure 32.16: Fast Waveform Display
354
Opcode Systems, Inc.
CHAPTER 32: The Audio Menu
The waveform display has a blockier
appearance than in High Resolution mode
(discussed in the following section).
Vision creates a summary for all audio
data and displays waveforms based on
this summary. The summary consists of
the minimum and maximum of every
group of 256 samples in the audio file,
truncated to 8 bits. The summary is
stored as a resource with the audio file. In
Fast mode, Vision displays a summary of
audio data rather than the actual data
stored on your hard disk.
High Resolution
Checking High Resolution allows Vision
to display the actual waveforms, which is
desirable when you’re editing and need to
clearly see all peaks and valleys.
Figure 32.17: High Resolution Waveform Display
You must be zoomed in a lot—displaying
less than 256 samples per pixel (the resolution of the audio summary)—in order
for the High Resolution option to display a
waveform more detailed than the Fast
mode waveform. Since tempo is bar
based, the greater the tempo, the more
you’ll be able to zoom in; so tempo works
in conjunction with the amount you’re
zoomed in to affect the High Resolution
display.
When zoomed in far enough, Vision reads
the actual audio data on your hard disk. If
you’re not zoomed in enough, Vision
reads the summary it created of the waveform and displays the waveform the same
as it appears in Fast mode.
Redrawing in High Resolution mode is
slower than in Fast mode when zoomed
in.
IMPORTANT: You may want to raise the
tempo in order to be able to zoom in more
while using the High Resolution display.
However, before you perform any edit operations, make sure you revert the tempo to
the desired playback tempo.
SHOW AUDIO EVENT NAMES
If the Audio>Show Audio Event
Names option is enabled (checked),
audio event names are displayed in the
lower left corner of the event in the
Graphic Window. This option does not
affect audio event names in the List
Window (where names are always displayed and can be edited), or the Tracks
Window (where the waveform is too small
to contain any text).
Vision & Studio Vision Pro — Audio Reference Manual
355
PART 7: Menus
ACTIVE IN BACKGROUND
Display Names
enabled
Checking Active in Background tells
Vision to not release DAE when switching
out of Vision to another application.
NOTE: Active in Background is only available to DAE users. All other hardware users
will have this item grayed out.
Display Names
disabled
Figure 32.18: Audio Event Names in the Graphic
Window
Initially, audio events default to the name
of the referenced audio file (or the region
of a Sound Designer II file, if you import a
region), but you can rename audio events
for easier identification. To learn more
about naming audio events, see Renaming
Audio Events (pg. 184).
AUDIO PREFERENCES
The appearance of the Audio Preferences
dialog box changes depending on which
audio system you’re using:
•
•
Acadia—See Chapter 11: Acadia:
Optimizing for Digital Audio.
DAE— See Chapter 17: DAE: Audio
Preferences.
MIX AUDIO ON CAPTURE
If the Audio>Mix Audio on Capture
option is enabled (checked), Vision
includes audio data in a Capture operation
when you choose one of the Edit>Capture commands.
For details on how to capture audio into a
mix, see Capturing a Mix (pg. 320).
There are differences between mixing
audio using an Edit>Capture command
and mixing audio using the DSP>Mix
command. For details about all digital
audio mixing operations, see Chapter 28:
Mixing Digital Audio (Bouncing).
356
Opcode Systems, Inc.
CHAPTER 33: DSP Menu: Mix, Normalize,
Reverse, Invert Phase, and
Convert Sample Rate
The DSP menu contains numerous algorithms designed to process audio
completely within the digital domain.
DSP commands work on mono, stereo
interleaved, or linked audio files with bit
depths of 8, 16, or 24.
This chapter deals with the first five commands in the window: Mix, Normalize,
Reverse, Invert Phase, and Convert
Sample Rate.
If you select multiple audio files on which
to perform a DSP operation, all selected
audio files must be the same type (mono,
interleaved, or linked) and the same bit
depth (8, 16, or 24). The only exception to
this rule is the Mix command.
You can undo any DSP command. This
provides a convenient way to do an “A-B
comparison” between the processed and
unprocessed audio.
Figure 33.1: DSP Menu
DSP commands are constructive—meaning they create new audio files without
altering your original audio data.
The following sections describe the Mix,
Normalize, Reverse, Invert Phase, and
Convert Sample Rate algorithms in detail.
Vision & Studio Vision Pro — Audio Reference Manual
357
PART 7: Menus
MIX
NORMALIZE
Use this command to mix together any
selected audio events or regions from
anywhere within a sequence -- Vision
examines the selected audio files and calculates a new, mixed audio file.
Choose this command to scale the amplitude of the selected audio so that its peak
value is set to 0db. This process, known
as normalizing, is particularly useful for
increasing the audio level of sounds that
were recorded too quietly.
This command mixes together selected
audio events and their velocity settings. If
you select to mix over a range of time,
then any volume and pan controllers
assigned to Audio Instruments within that
time region will be incorporated into the
new mixed audio file.
The Mix command lets you mix the
following:
•
•
•
•
audio from multiple tracks
audio on multiple Instruments within
tracks
entire audio events
sections of audio events
Unlike other DSP commands, Mix works
on selections that include audio files of
different types (mono, interleaved,
linked) and different bit depths (8, 16, 24).
To learn all the details about mixing audio
and the DSP>Mix command, see
Chapter 28: Mixing Digital Audio
(Bouncing).
358
Audio prior to normalizing
Audio after normalizing
Figure 33.2: Example of Normalizing Audio
To use the Normalize command:
햲 Select the audio event(s), or portion
of events, you wish to normalize.
햳 Choose DSP>Normalize.
Unless you disabled its display in the
DSP Preferences dialog (discussed on
page 423), Vision opens a Save As
dialog box.
Opcode Systems, Inc.
CHAPTER 33: DSP Menu: Mix, Normalize, Reverse, Invert Phase, and Convert Sample Rate
햷 Click Save.
Vision creates a new audio file (or files)
for the normalized audio. It creates one
or more new audio events to play that
audio, replacing the original audio
event(s) in your sequence.
NOTE: If you never want to see this
Save As dialog box again (that is, you
always accept the default name and folder),
click the Bypass this dialog next time
option in the Save As dialog box.
Figure 33.3: Save As Dialog for Normalize
When you normalize audio, Vision constructs one or more new audio files
(depending on the file saving option you
select in the DSP Preferences dialog
box, discussed on page 423). It leaves
your original audio file (or files)
unaffected.
햴 Use the File Format pop-up menu to
specify the desired file format (AIFF
or Sound Designer II).
햵 Navigate to the folder in which you
Should you wish to make the Save As dialog
re-appear, choose DSP>DSP Preferences, select “Normalize” from its
Apply to pop-up menu, then uncheck the
Bypass Save As Dialog option.
REVERSE
Choose this command to reverse the playback order of samples in the selected
audio. This is exactly the same as playing
an analog tape “backwards.”
want to save the file.
By default, Vision selects the folder you
specify in the DSP Preferences dialog
(discussed on page 423).
햶 Type a name for the normalized audio
file.
Audio prior to reversing
By default, Vision suggests a name
based on the auto-naming options you
specify in the DSP Preferences dialog
(discussed on page 423).
Audio after reversing
Figure 33.4: Example of Reversing Audio
Vision & Studio Vision Pro — Audio Reference Manual
359
PART 7: Menus
To use the Reverse command:
햲 Select the audio event(s), or portion
of events, you wish to reverse.
햳 Choose DSP>Reverse.
Unless you disabled its display in the
DSP Preferences dialog (discussed on
page 423), Vision opens a Save As
dialog box.
햶 Type a name for the reversed audio
file.
By default, Vision suggests a name
based on the auto-naming options you
specify in the DSP Preferences dialog
(discussed on page 423).
햷 Click Save.
Vision creates a new audio file (or files)
for the reversed audio. It creates one or
more new audio events to play that
audio, replacing the original audio
event(s) in your sequence.
NOTE: If you never want to see this
Save As dialog box again (that is, you
always accept the default name and folder),
click the Bypass this dialog next time
option in the Save As dialog box.
Figure 33.5: Save As Dialog for Reverse
Should you wish to make the Save As dialog
re-appear, choose DSP>DSP Preferences, select “Reverse” from its Apply to
pop-up menu, then uncheck the Bypass
Save As Dialog option.
When you reverse audio, Vision constructs one or more new audio files
(depending on the file saving option you
select in the DSP Preferences dialog
box, discussed on page 423). It leaves
your original audio file (or files)
unaffected.
햴 Use the File Format pop-up menu to
specify the desired file format (AIFF
or Sound Designer II).
햵 Navigate to the folder in which you
want to save the file.
By default, Vision selects the folder you
specify in the DSP Preferences dialog
(discussed on page 423).
360
Opcode Systems, Inc.
CHAPTER 33: DSP Menu: Mix, Normalize, Reverse, Invert Phase, and Convert Sample Rate
INVERT PHASE
Choose this command to switch all the
positive and negative values of the
selected audio, essentially turning it
“upside down.” This process doesn’t
change the sound of the audio by itself,
but it may have an affect on how the audio
“fits in” when mixed with other Instruments in a song.
Figure 33.7: Save As Dialog for Invert Phase
Audio prior to inverting phase
Audio after inverting phase
When you invert audio, Vision constructs
one or more new audio files (depending
on the file saving option you select in the
DSP Preferences dialog box, discussed
on page 423). It leaves your original
audio file (or files) unaffected.
햴 Use the File Format pop-up menu to
specify the desired file format (AIFF
or Sound Designer II).
햵 Navigate to the folder in which you
want to save the file.
Figure 33.6: Example of Inverting the Audio Phase
To use the Invert Phase command:
햲 Select the audio event(s), or portion
of events, you wish to invert.
햳 Choose DSP>Invert Phase.
Unless you disabled its display in the
DSP Preferences dialog (discussed on
page 423), Vision opens a Save As
dialog box.
By default, Vision selects the folder you
specify in the DSP Preferences dialog
(discussed on page 423).
햶 Type a name for the inverted audio
file.
By default, Vision suggests a name
based on the auto-naming options you
specify in the DSP Preferences dialog
(discussed on page 423).
Vision & Studio Vision Pro — Audio Reference Manual
361
PART 7: Menus
햷 Click Save.
Vision creates a new audio file (or files)
for the inverted audio. It creates one or
more new audio events to play that
audio, replacing the original audio
event(s) in your sequence.
The Phase Invert button (in Acadia
mode) has the same effect that Invert
Phase creates. However, the Phase
Invert button modifies the audio signal
real-time without generating a new audio
file. For information about the Phase
Invert button, see Phase (pg. 55).
NOTE: If you never want to see this
Save As dialog box again (that is, you
always accept the default name and folder),
click the Bypass this dialog next time
option in the Save As dialog box.
Should you wish to make the Save As dialog
re-appear, choose DSP>DSP Preferences, select “Invert Phase” from its
Apply to pop-up menu, then uncheck the
Bypass Save As Dialog option.
CONVERT SAMPLE RATE
햳 Choose DSP>Convert Sample
Rate.
Unless you disabled its display in the
DSP Preferences dialog (discussed on
page 423), Vision opens the Convert
Sample Rate dialog box.
The dialog box displays the sample rate
of the existing audio and contains a field
for entering the new sample rate.
Figure 33.8: Convert Sample Rate Dialog Box
햴 Enter the desired sample rate in the
New Sample Rate numerical.
햵 Click OK.
Unless you disabled its display in the
DSP Preferences dialog (discussed on
page 423), Vision opens a Save As
dialog box.
Choose this command to change the
sample rate of the selected audio event.
To use the Convert Sample Rate
command:
햲 Select the audio event(s) you wish to
convert.
You cannot convert a portion of an audio
event -- you must convert entire events.
362
Opcode Systems, Inc.
CHAPTER 33: DSP Menu: Mix, Normalize, Reverse, Invert Phase, and Convert Sample Rate
햹 Click Save.
Vision creates a new audio file (or files)
for the converted audio. It creates one or
more new audio events to play that
audio, replacing the original audio
event(s) in your sequence.
NOTE: If you never want to see this
Save As dialog box again (that is, you
always accept the default name and folder),
click the Bypass this dialog next time
option in the Save As dialog box.
Figure 33.9: Save As Dialog for Convert
Sample Rate
When you convert the audioÕs sample
rate, Vision constructs one or more new
audio files (depending on the file saving
option you select in the DSP Preferences dialog box, discussed on
page 423). It leaves your original audio
file (or files) unaffected.
햶 Use the File Format pop-up menu to
specify the desired file format (AIFF
or Sound Designer II).
햷 Navigate to the folder in which you
want to save the file.
By default, Vision selects the folder you
specify in the DSP Preferences dialog
(discussed on page 423).
햸 Type a name for the converted audio
file.
By default, Vision suggests a name
based on the auto-naming options you
specify in the DSP Preferences dialog
(discussed on page 423).
Should you wish to make the Save As dialog
re-appear, choose DSP>DSP Preferences, select “Convert Sample Rate” from
its Apply to pop-up menu, then uncheck
the Bypass Save As Dialog option.
Doesn’t Vision Already Offer
Sample Rate Conversion?
Yes, Vision does have another method of
off-line sample rate conversion (as discussed in Chapter 26: Sample Rate
Conversion and Deinterleaving), but its
methods and purposes are somewhat different. Specifically:
•
Choosing DSP>Convert Sample
Rate does not change Vision’s session sample rate. Therefore, if your
session sample rate is different than
the rate you convert to, the newly
converted file will play at the wrong
speed.
Vision & Studio Vision Pro — Audio Reference Manual
363
PART 7: Menus
•
•
364
Audio>Conversion Overview converts entire audio files (and all audio
events contained within those audio
files). DSP>Convert Sample Rate
converts only the selected audio
events.
DSP>Convert Sample Rate uses a
higher quality (but slower) sample
rate conversion algorithm.
Opcode Systems, Inc.
CHAPTER 34: DSP Menu: EQ and
Fade/Crossfade
The DSP menu contains numerous algorithms designed to process audio
completely within the digital domain.
DSP commands work on mono, stereo
interleaved, or linked audio files with bit
depths of 8, 16, or 24.
This chapter deals with the EQ and Fade/
Crossfade commands.
If you select multiple audio files on which
to perform a DSP operation, all selected
audio files must be the same type (mono,
interleaved, or linked) and the same bit
depth (8, 16, or 24). The only exception to
this rule is the Mix command.
Figure 34.1: DSP Menu
DSP commands are constructive—meaning they create new audio files without
altering your original audio data.
You can undo any DSP command. This
provides a convenient way to do an “A-B
comparison” between the processed and
unprocessed audio.
The following sections describe the EQ
and Fade/Crossfade algorithms in detail.
Vision & Studio Vision Pro — Audio Reference Manual
365
PART 7: Menus
햵 Click OK.
EQ
Choose this command to alter the tonal
characteristics of the selected audio.
Unless you disabled its display in the
DSP Preferences dialog (discussed on
page 423), Vision opens a Save As
dialog box.
To use the EQ command:
햲 Select the audio event(s), or portion
of events, you wish to equalize.
햳 Choose DSP>EQ.
Unless you disabled its display in the
DSP Preferences dialog (discussed on
page 423), Vision opens the EQ dialog
box.
쐏
쐃
쐇
쐋
Figure 34.2: EQ Dialog Box
햴 Set the EQ parameters as desired.
All EQ parameters are discussed in The
EQ Dialog Box (pg. 367).
Figure 35.1: Save As Dialog for Convert
Sample Rate
When you equalize audio, Vision constructs one or more new audio files
(depending on the file saving option you
select in the DSP Preferences dialog
box, discussed on page 423). It leaves
your original audio file (or files)
unaffected.
햶 Use the File Format pop-up menu to
specify the desired file format (AIFF
or Sound Designer II).
햷 Navigate to the folder in which you
want to save the file.
By default, Vision selects the folder you
specify in the DSP Preferences dialog
(discussed on page 423).
366
Opcode Systems, Inc.
CHAPTER 34: DSP Menu: EQ and Fade/Crossfade
햸 Type a name for the equalized audio
file.
By default, Vision suggests a name
based on the auto-naming options you
specify in the DSP Preferences dialog
(discussed on page 423).
햹 Click Save.
Vision creates a new audio file (or files)
for the equalized audio. It creates one or
more new audio events to play that
audio, replacing the original audio
event(s) in your sequence.
NOTE: If you never want to see this
Save As dialog box again (that is, you
always accept the default name and folder),
click the Bypass this dialog next time
option in the Save As dialog box.
Should you wish to make the Save As dialog
re-appear, choose DSP>DSP Preferences, select “EQ” from its Apply to
pop-up menu, then uncheck the Bypass
Save As Dialog option.
The EQ Dialog Box
As you can see in Figure 34.2 on
page 366, there are four elements in the
EQ dialog box. These are:
쐃
Filter Type—use this pop-up menu
to select the type of filtering you want
to apply.
A Low Pass filter removes high frequencies from the audio (frequencies
higher than the value set in the Frequency numerical).
A High Pass filter removes low frequencies from the audio (frequencies
lower than the value set in the Frequency numerical).
A Band Pass filter removes frequencies both above and below the
specified Frequency, allowing only a
narrow “band” of frequencies to in the
processed sound.
Vision & Studio Vision Pro — Audio Reference Manual
367
PART 7: Menus
Slope—Use this pop-up menu to
select how steeply the filter is applied
once the selected Frequency is
reached.
The four Slope choices are shown in
graphically in Figure 35.2.
AMPLITUDE
Filter frequency (as set
in the Frequency
numerical)
쐏
Q Factor—Use this numerical to set
the amount of “resonance” applied at
the selected Frequency. Resonance
emphasizes the harmonics that are
closest to the filter’s specified Frequency, as shown in Figure 35.3.
High ÒQ FactorÓ
emphasizes harmonics near the
corner Frequency
AMPLITUDE
쐇
FREQUENCY
Figure 35.3: Effects of Q Factor Parameter
FREQUENCY
Steep
Very Steep
Medium Gradual
NOTE: Q Factor and Slope are
related—increasing the Q Factor also
increases the Slope. If you apply a high
Q Factor and a steep slope, you may
hear unwanted audio resonances.
Figure 35.2: Filter Slopes (shown on a LowPass Filter)
NOTE: Slope and Q Factor are
related—increasing the slope also
increases the Q Factor. If you apply a
high Q Factor and a steep slope, you
may hear unwanted audio resonances.
쐋 Frequency—Use this numerical to
set the filter’s corner frequency. This
is the frequency at which the selected
filter type “kicks in” (as shown in
Figure 35.2).
368
Opcode Systems, Inc.
CHAPTER 34: DSP Menu: EQ and Fade/Crossfade
FADE/CROSSFADE
Use this command to crossfade overlapping audio events and/or to fade-in or
fade-out one or more audio events. Crossfades can help provide seamless
transitions between disparate audio
events.
The Fade/Crossfade Settings
Dialog Box
Vision supports numerous fade and crossfade options, all of which are available in
the Fade/Crossfade Settings dialog box.
This dialog appears when you select the
desired audio events (or portions of audio
events) and choose DSP>Fade/
Crossfade.
�
�
�
�
As you can see in the previous illustration,
there are four separate areas in the dialog
box:
쐃
Fade/Crossfade length mode
From the pop-up menu, select
whether you want to manually set
fade and/or crossfade lengths, or
have Vision automatically set them
based on your selection.
쐇 Crossfade parameters
These parameters determine the
length of the crossfade, its shape, and
its position relative to the splice point.
You can completely disable the crossfade feature should you only wish to
create fade-ins or fade-outs.
The various crossfade techniques are
discussed in Creating Crossfades
(pg. 374).
쐋 Fade In/Out parameters
These parameters separately determine the length of fade-ins and
fade-outs, as well as the shape of each
fade. You can completely disable
either fade feature independently.
The various fade-in and fade-out techniques are discussed in Creating
Fade-Ins and Fade-Outs (pg. 370).
쐏 File Length option
Use this option to choose how Vision
creates new files based on the Fade/
Crossfade settings. The following section discusses this in detail.
Figure 35.4: Basic Fade/Crossfade Settings
Dialog Box
Vision & Studio Vision Pro — Audio Reference Manual
369
PART 7: Menus
File Length Option
If the File Length option at the bottom of
the dialog box is set to “fewer events,
larger file size”, Vision creates new audio
events that contain date both inside and
outside the fade/crossfade regions
defined in this dialog box. In other words,
if you select a pair of 30 second audio
events and crossfade them over a length
of 50ms, Vision would generate a single
new audio event that was 1 minute long. It
would replace the two original events with
this new, single event.
If the File Length option at the bottom of
the dialog box is set to “more events,
smaller file size”, Vision creates new
audio events that are only as long as the
fade/crossfade lengths. In other words, if
you select a pair of 30 second audio
events and crossfade them over a length
of 50ms, Vision would generate a single
new audio event that was 50ms long. It
would replace portions of the original two
events with this new crossfade event and
leave the unaffected portions of the original events intact.
Obviously, the top option means you have
fewer audio events to keep track of, but
you consume a lot more hard disk space
by duplicating unchanged audio. The biggest advantages to this option are: 1) you
can change the sequence tempo without
messing up your fades/crossfades, and 2)
you can easily open the new file in a separate sound editing program (like Peak or
Sound Designer II) for further editing.
370
The bottom option means you conserve
hard disk space and shorten processing
times, but it complicates your file management and editing efforts by creating more
audio events. You should use this option
only if you don’t plan to perform any additional editing of events (or move them
around within the sequence).
It’s up to you to decide which file writing
method works best for you.
Creating Fade-Ins and Fade-Outs
Fade-ins and Fade-outs use the following
portion of the Fade/Crossfade Settings
dialog box:
쐄
쐃
쐇
쐋
쐊
쐏
쐅
쐎
쐂
쐆
Figure 35.5: Fade-in, Fade-out Parameters in
Fade/Crossfade Dialog Box
쐃
Fade-in Length
Enter the desired fade-in length. If
the “set fade/crossfade lengths” popup at the top of the dialog box is set to
use selection range, then this field
is disabled (since it’s set automatically to the length of your audio
selection).
Opcode Systems, Inc.
CHAPTER 34: DSP Menu: EQ and Fade/Crossfade
쐇
쐋
쐏
쐄
쐂
쐆
쐊
Fade-in Shape
Select the desired fade-in shape (linear or exponential) from this pop-up
menu. The choice you make is indicated graphically in region 쐋.
Fade-in Illustration
Illustrates the fade-in shape chosen
by pop-up menu 쐇.
Minimum Length fade-in option and
length setting
If Vision is unable to create a fade-in
of the length entered in 쐃, (perhaps
because the audio event is shorter
than the fade-in length), enable this
option to allow shorter fade lengths
(down to the specified minimum).
Fade-in Enable/Disable option
If you don’t want Vision to generate
any fade-ins when you process the
audio, uncheck this box. For example, if you may want to create only
crossfades or fade-outs, then disable
the fade-in option.
Fade-Out Length
Enter the desired fade-out length. If
the Set fade/crossfade lengths popup at the top of the dialog box is set to
use selection range, then this field is
disabled (since it’s set automatically
to the length of your audio selection).
Fade-out Shape
Select the desired fade-out shape
(linear or exponential) from this
pop-up menu. The choice you make is
indicated graphically in region 쐊.
Fade-out Illustration
Illustrates the fade-in shape chosen
by pop-up menu 쐆.
쐎
Minimum Length fade-out option and
length setting
If Vision is unable to create a fade-out
of the length entered in 쐂, (perhaps
because the audio event is shorter
than the fade-out length), enable this
option to allow shorter fade lengths
(down to the specified minimum).
쐅 Fade-out Enable/Disable option
If you don’t want Vision to generate
any fade-outs when you process the
audio, uncheck this box. For example, if you want to create only
crossfades or fade-ins, then disable
the fade-out option.
There are many ways to create fade-ins
and fade-outs. The following sections discuss just some of the possible techniques.
Creating Automatic Fade-outs
To create a fade-out whose length is
based on your selection:
햲 Select the last part of an audio event
(or events).
햳 Choose DSP>Fade/Crossfade.
Unless you disabled its display in the
DSP Preferences dialog (discussed on
page 423), Vision opens the Fade/
Crossfade Settings dialog box.
Vision & Studio Vision Pro — Audio Reference Manual
371
PART 7: Menus
햴 From the top pop-up menu, select
use selection range.
햸 Use the File Format pop-up menu to
specify the desired file format (AIFF
or Sound Designer II).
햹 Navigate to the folder in which you
want to save the file.
When you do this, Vision automatically
assumes your selection is the desired
fade-in length and fills in the Fade-in
length automatically.
햵 Select the desired fade-out shape
from the pop-up menu.
햶 Make sure the fade-in and crossfade
options are disabled.
햷 Choose the desired file length option
as discussed in File Length Option
(pg. 370), then click OK.
Unless you disabled its display in the
DSP Preferences dialog (discussed on
page 423), Vision opens a Save As
dialog box.
By default, Vision selects the folder you
specify in the DSP Preferences dialog
(discussed on page 423).
햺 Type a name for the faded audio file.
By default, Vision suggests a name
based on the auto-naming options you
specify in the DSP Preferences dialog
(discussed on page 423).
햻 Click Save.
Vision creates a new audio file (or files)
for the faded audio. It creates one or
more new audio events to play that
audio, replacing the original audio
event(s) in your sequence.
NOTE: If you never want to see this
Save As dialog box again (that is, you
always accept the default name and folder),
click the Bypass this dialog next time
option in the Save As dialog box.
Should you wish to make the Save As dialog
re-appear, choose DSP>DSP Preferences, select “Fade/Crossfade” from its
Apply to pop-up menu, then uncheck the
Bypass Save As Dialog option.
Figure 35.6: Save As Dialog for Convert
Sample Rate
When you fade audio, Vision constructs
a new audio file. It leaves your original
audio file (or files) unaffected.
372
Opcode Systems, Inc.
CHAPTER 34: DSP Menu: EQ and Fade/Crossfade
Creating Automatic Fade-ins
To create a fade-in whose length is based
on your selection, apply a technique similar to the one discussed previously,
except you should select the first part of
an audio event (or events) before choosing DSP>Fade/Crossfade.
Creating Manual Fades
To create fade-ins and/or fade-outs of any
length:
햲 Select some audio.
햳 Choose DSP>Fades/Crossfades.
Unless you disabled its display in the
DSP Preferences dialog (discussed on
page 423), Vision opens the Fade/
Crossfade Settings dialog box.
햸 Choose the desired file length option
as discussed in File Length Option
(pg. 370), then click OK.
Unless you disabled its display in the
DSP Preferences dialog (discussed on
page 423), Vision opens a Save As
dialog box.
햹 Configure the Save As dialog box as
discussed in Creating Automatic
Fade-outs (pg. 371), then click Save.
Vision creates a new audio file for the
faded audio. It creates one or more new
audio events to play that audio file,
replacing the original audio event(s) in
your sequence.
NOTE: When you process multiple, whole
audio events, Vision applies the same fade
times to all the selected events.
햴 From the top pop-up menu, select
All events will be processed with the
same fade-in and/or fade-out times.
Manually.
햵 Type the desired fade lengths into the
Fade/Crossfade Settings dialog.
햶 Select the desired fade-in and/or
fade-out shapes from their pop-up
menus.
햷 Make sure the crossfade option is
disabled.
If you want each audio event to have a different fade time, use the Fade/Crossfade
command on only one audio event at a
time.
Vision & Studio Vision Pro — Audio Reference Manual
373
PART 7: Menus
쐇
Creating Crossfades
Crossfades let you create seamless transitions between “spliced” audio events, as
long as you remember a few simple rules:
•
•
The audio events you wish to crossfade must reside in the same track
and be assigned to the same Audio
Instrument.
Crossfades cannot be created if the
audio files referenced by the audio
events do not contain any overlapping
data.
Crossfades use the following portion of
the Fade/Crossfade Settings dialog box:
쐃
쐇
쐋
쐏
�
�
쐆
Figure 35.7: Crossfade Parameters in Fade/
Crossfade Dialog Box
쐃
374
Crossfade Length
Enter the desired crossfade length. If
the Set fade/crossfade lengths popup at the top of the dialog box is set to
“use selection range,” then this field
is disabled (since it’s set automatically to the length of your audio
selection).
쐋 Crossfade shape
Select the desired crossfade shape
(linear or equal power) from this popup menu. The choice you make is
indicated graphically in region 쐄.
Linear: This type of crossfade fades
out one file linearly while the other
fades in linearly.
Equal Power: This type of crossfade
uses non linear fades and is useful
when linear crossfades exhibit a
decrease in volume.
쐏 Crossfade Position
Select the location of the splice point
from this pop-up menu. The choice
you make is indicated graphically in
region 쐄.
Crossfade Enable/Disable option
Check this box to enable the creation
of crossfades.
If you don’t want Vision to generate
any crossfades when you process the
selected audio, uncheck this box. For
example, if you may want to create
only fade-ins or fade-outs, then disable the crossfade option.
Opcode Systems, Inc.
CHAPTER 34: DSP Menu: EQ and Fade/Crossfade
쐂
BEFORE: places the crossfade
region before the splice point.
CENTERED: places the crossfade region centered over about
splice point.
AFTER: places the crossfade
region after the splice point.
Splice Point
NOTE: This option is disabled if you
select “use selection range” from the
Set fade/crossfade lengths pop-up
menu at the top of the dialog box.
쐄 Crossfade Illustration
Illustrates the crossfade shape
chosen in pop-up menu 쐋 and the
crossfade position chosen in pop-up
menu 쐏. It also illustrates whether
the crossfade is being set manually,
or is using the selection range (as set
in the Set fade/crossfade lengths
pop-up menu).
For manually set crossfades,
the graphic illustrates the
splice point.
Minimum Length crossfade option
and length setting
If Vision is unable to create a crossfade of the length entered in 쐇,
enable this option to allow shorter
crossfade lengths (down to the specified minimum).
For example, if the files referenced by
the selected audio events don’t contain enough data around the splice
point (or inside the selection range)
to create the crossfade, checking this
option allows Vision to create smaller
crossfades.
쐆 Automatic Crossfade Repositioning
option
If Vision is unable to create a crossfade of the desired length in the
specified position, enable this option
to allow the crossfade to shift around
the splice point as necessary.
For example, if the file referenced by
one audio event contains enough data
around its splice point to create a
crossfade, but the other file doesn’t,
checking this option allows Vision to
move the splice point as necessary to
achieve the specified crossfade
length.
NOTE: This option is disabled if you
select “use selection range” from the
Set fade/crossfade lengths pop-up
menu at the top of the dialog box.
For crossfades set by selection
range, the graphic illustrates
the selection range.
Vision & Studio Vision Pro — Audio Reference Manual
375
PART 7: Menus
Creating Crossfades - an Example
햴 Select a range of audio that includes
all the takes.
There are many ways to create crossfades. This example illustrates just one of
the many possible techniques. In it, you’ll
see how to create a simple crossfade in
which you replace a section of one take
with another.
햲 Assume you have two takes (as
shown below), and want to use a
portion of Take 2 in place of Take 1.
햵 Choose DSP>Fade/Crossfade.
Unless you disabled its display in the
DSP Preferences dialog (discussed on
page 423), Vision opens the Fade/
Crossfade Settings dialog box.
햳 Drag Take 1 over Take 2, so that they
share the same Audio Instrument.
Crossfades work only with audio files
that are assigned to the same Audio
Instrument in the same track.
Drag Take 2 onto the same
Audio Instrument as Take 1
Figure 35.8: Completely configured Fade/
Crossfade Settings dialog box
햶 Configure the dialog box as needed.
Specifically:
Set the Set fade/crossfade lengths to
manually.
Enable Crossfades by checking the
Create box.
Disable Fade ins and Fade outs!
376
Opcode Systems, Inc.
CHAPTER 34: DSP Menu: EQ and Fade/Crossfade
Set the desired crossfade length (we
chose 150 ms), shape (we chose equal
power), and position (we chose centered at).
If desired, set the options that allow
Vision to shorten or shift your crossfades
if needed.
Choose whether you want to create a
large single new file, or smaller files the
length of the crossfades (we chose small
files).
햷 Click OK.
Unless you disabled its display in the
DSP Preferences dialog (discussed on
page 423), Vision opens a Save As
dialog box.
햹 Navigate to the folder in which you
want to save the file.
By default, Vision selects the folder you
specify in the DSP Preferences dialog
(discussed on page 423).
햺 Type a name for the crossfaded audio
file.
By default, Vision suggests a name
based on the auto-naming options you
specify in the DSP Preferences dialog
(discussed on page 423).
햻 Click Save.
Vision creates a new audio file (or files)
for the crossfaded audio. It creates one
or more new audio events to play that
audio, replacing the original audio
event(s) in your sequence.
New, crossfaded events
Figure 35.9: Save As Dialog Box for
Crossfades
When you crossfade audio, Vision constructs a new audio file. It leaves your
original audio file (or files) unaffected.
햸 Use the File Format pop-up menu to
specify the desired file format (AIFF
or Sound Designer II).
NOTE: If you never want to see this
Save As dialog box again (that is, you
always accept the default name and folder),
click the Bypass this dialog next time
option in the Save As dialog box.
Should you wish to make the Save As dialog
re-appear, choose DSP>DSP Preferences, select “Fade/Crossfade” from its
Apply to pop-up menu, then uncheck the
Bypass Save As Dialog option.
Vision & Studio Vision Pro — Audio Reference Manual
377
PART 7: Menus
378
Opcode Systems, Inc.
CHAPTER 35: DSP Menu: Pitch Shift,
Formant Shift, Time Scale, and
Adjust Audio Tempo
The DSP menu contains numerous algorithms designed to process audio
completely within the digital domain.
DSP commands work on mono, stereo
interleaved, or linked audio files with bit
depths of 8, 16, or 24.
This chapter deals with the Pitch Shift,
Formant Shift, Time Scale, and
Adjust Audio Tempo commands.
If you select multiple audio files on which
to perform a DSP operation, all selected
audio files must be the same type (mono,
interleaved, or linked) and the same bit
depth (8, 16, or 24). The only exception to
this rule is the Mix command.
You can undo any DSP command. This
provides a convenient way to do an “A-B
comparison” between the processed and
unprocessed audio.
Figure 36.1: DSP Menu
DSP commands are constructive—meaning they create new audio files without
altering your original audio data.
The following sections describe the
Pitch Shift, Formant Shift, Time Scale,
and Adjust Audio Tempo algorithms in
detail.
Vision & Studio Vision Pro — Audio Reference Manual
379
PART 7: Menus
PITCH SHIFT
Use this command to change the pitch of
any audio event(s) without changing the
playback duration. You can pitch-shift
audio up or down as much as one octave.
TIP: If you wish to shift pitch more than an
octave, use the Pitch Shift command more
than once. Keep in mind that the audio
quality will suffer the further you shift the
pitch from its natural frequency.
To use the Pitch Shift command:
햲 Select the audio event(s) you wish to
pitch shift.
If you select a portion of an audio event,
the entire event will be pitch shifted.
Therefore, if you want to pitch shift only a
portion of an event, you must first separate that portion into a new event using
the Audio>Separate command.
햳 Choose DSP>Pitch Shift.
Unless you disabled its display in the
DSP Preferences dialog (discussed on
page 423), Vision opens the Pitch Shift
dialog box.
Figure 37.1: Pitch Shift Dialog Box
햴 Enter the number of half-steps that
you want to shift the audio.
Positive values result in an upward pitch
shift; negative values result in a downward pitch shift.
For example, to raise the pitch a minor
third, enter a value of +3.
햵 If desired, set a fine tune value for the
shift (+/- 50 cents).
햶 From the pop-up menu, select a Pitch
Shift Quality.
Vision offers two types of pitch shifting
algorithms: Faster and Best.
380
Opcode Systems, Inc.
CHAPTER 35: DSP Menu: Pitch Shift, Formant Shift, Time Scale, and Adjust Audio Tempo
Faster takes less time to calculate the
pitch shift, and it produces a somewhat
lower fidelity audio file. In most cases,
however, Faster quality will produce satisfactory audio results.
Users with high end PowerMac computers will probably want to start with Best,
unless the processing times become too
long.
햷 If desired, check Maintain voice
character.
This option lets you pitch-shift an audio
event without inducing ÒDarth VaderÓ or
ÒChipmunkÓ effects -- the pitch-shifted
signal retains all the vocal characteristics
of the original performance, so it sounds
as if the same singer is simply singing in
a different key.
Enabling this option requires more computation and, therefore, more processing
time.
You can use this option with any type of
audio (not just vocals), but the results
may be less noticeable because formants are less pronounced in non-vocal
instruments.
햸 Click OK.
Unless you disabled its display in the
DSP Preferences dialog (discussed on
page 423), Vision opens a Save As
dialog box.
Figure 37.2: Save As Dialog for Pitch Shift
When you pitch-shift audio, Vision constructs one or more new audio files
(depending on the file saving option you
select in the DSP Preferences dialog
box, discussed on page 423). It leaves
your original audio file (or files)
unaffected.
햹 Use the File Format pop-up menu to
specify the desired file format (AIFF
or Sound Designer II).
햺 Navigate to the folder in which you
want to save the file.
By default, Vision selects the folder you
specify in the DSP Preferences dialog
(discussed on page 423).
햻 Type a name for the shifted audio file.
By default, Vision suggests a name
based on the auto-naming options you
specify in the DSP Preferences dialog
(discussed on page 423).
Vision & Studio Vision Pro — Audio Reference Manual
381
PART 7: Menus
햽 Click Save.
Vision creates a new audio file (or files)
for the shifted audio. It creates one or
more new audio events to play that
audio, replacing the original audio
event(s) in your sequence.
햴 Click the to numerical to highlight it.
햵 Play a note on your MIDI controller.
In this example, we played a D3.
NOTE: If you never want to see this
Save As dialog box again (that is, you
always accept the default name and folder),
click the Bypass this dialog next time
option in the Save As dialog box.
Should you wish to make the Save As dialog
re-appear, choose DSP>DSP Preferences, select “Pitch Shift” from its
Apply to pop-up menu, then uncheck the
Bypass Save As Dialog option.
Using a MIDI Controller to Enter a
Pitch Shift
You can enter a pitch shift interval from
your MIDI controller. To do so:
햲 In the Pitch Shift dialog box, click the
from numerical to highlight it.
햳 Play a note on your MIDI controller.
Notice that Vision automatically sets the
Interval numerical to reflect the range (in
this case, -4 half-steps to indicate a
downward pitch shift of a major third).
NOTE: Vision uses the from and to
numericals only as an input method for
entering pitch shift intervals—you do not
have to enter notes in the actual key of the
audio.
In this example, we played an F#3.
NOTE: The controller must be enabled in
VisionÕs Settings>Enable Input Devices
dialog box.
382
Opcode Systems, Inc.
CHAPTER 35: DSP Menu: Pitch Shift, Formant Shift, Time Scale, and Adjust Audio Tempo
FORMANT SHIFT
Use this command to change the formants of any audio event(s) with or
without changing the playback pitch.
Formants are what define a sound’s resonant environment -- for example, a male
and female might sing the same note, but
the tonal characteristics of that note are
completely different. This is because of
the differences in their head and chest
size, their bone and throat structure, and
so on.
By shifting only a sound’s formants, you
can subtly or radically alter its resonant
characteristics, effectively altering the listener’s perception of the singer’s age, sex,
or personality.
For example,
•
•
If you select a female vocal and shift
the formants lower, then the resulting
audio sounds as if it were sung by a
man. The pitch is the same, but by
altering the formants, you have effectively changed the character of the
voice.
Similarly, if you select the same
female vocal and shift the formants
higher, then the resulting audio
sounds as if it were sung by a child.
Again, the pitch is unaltered -- only
the formants, which describe the
sound’s resonant environment, have
changed.
•
•
Subtle formant shifts could slightly
age a singer, or make him/her sound
more youthful.
Formant shifting can also affect nonvocal audio selections, though the
effect is generally less pronounced.
Still you might want to experiment -you never know when you’ll accidentally stumble on that perfect sound!
Using the Formant Shift
Command
To use the Formant Shift command:
햲 Select the audio event(s) you wish to
formant shift.
If you select a portion of an audio event,
the entire event will be formant shifted.
Therefore, if you want to shift only a portion of an event, you must first separate
that portion into a new event using the
Audio>Separate command.
햳 Choose DSP>Formant Shift.
Unless you disabled its display in the
DSP Preferences dialog (discussed on
page 423), Vision opens the Formant
Shift dialog box.
Figure 37.3: Formant Shift Dialog Box
Vision & Studio Vision Pro — Audio Reference Manual
383
PART 7: Menus
햴 Enter the number of half-steps that
you want to shift the formants.
Positive values shift the formants up,
which produces the effect of decreasing
the size of the singerÕs resonant head
and chest cavities -- making it sound as
if the audio were sung by a smaller
individual.
Negative values shift the formants down,
creating the sensation that the audio
emanated from a larger singer.
햵 If desired, set a fine tune amount for
the formant shift (+/- 50 cents).
햶 Click OK.
Unless you disabled its display in the
DSP Preferences dialog (discussed on
page 423), Vision opens a Save As
dialog box.
햷 Use the File Format pop-up menu to
specify the desired file format (AIFF
or Sound Designer II).
햸 Navigate to the folder in which you
want to save the file.
By default, Vision selects the folder you
specify in the DSP Preferences dialog
(discussed on page 423).
햹 Type a name for the shifted audio file.
By default, Vision suggests a name
based on the auto-naming options you
specify in the DSP Preferences dialog
(discussed on page 423).
햺 Click Save.
Vision creates a new audio file (or files)
for the shifted audio. It creates one or
more new audio events to play that
audio, replacing the original audio
event(s) in your sequence.
NOTE: If you never want to see this
Save As dialog box again (that is, you
always accept the default name and folder),
click the Bypass this dialog next time
option in the Save As dialog box.
Figure 37.4: Save As Dialog for Formant Shift
Should you wish to make the Save As dialog
re-appear, choose DSP>DSP Preferences, select “Formant Shift” from its
Apply to pop-up menu, then uncheck the
Bypass Save As Dialog option.
When you formant-shift audio, Vision
constructs one or more new audio files
(depending on the file saving option you
select in the DSP Preferences dialog
box, discussed on page 423). It leaves
your original audio file (or files)
unaffected.
384
Opcode Systems, Inc.
CHAPTER 35: DSP Menu: Pitch Shift, Formant Shift, Time Scale, and Adjust Audio Tempo
Changing a Singer’s Gender
Perhaps this title is misleading. Obviously, Vision can’t change a singer’s
gender, but it can change the listener’s
perception of the singer’s gender.
You probably noticed that, in Figure 37.3,
the right half of the Formant Shift dialog
box contains some disabled pitch shift
numericals. To activate the pitch shift
numericals, check the Pitch checkbox.
The Pitch numericals enable you to
modify an audio event’s pitch as well as its
formants. This becomes particularly
intriguing when you realize that, in a
single action, you can shift both pitch and
formants -- but by different amounts and
in the same or different directions! Using
this technique, you can change the listeners perception of a singer’s age or gender,
or create radical vocal effects.
For example, to change a female vocal
into a male vocal:
햵 In the Pitch side of the dialog box,
enter the desired amount of pitch
shift.
In this example, we selected -5
semitones.
NOTE: Obviously, the amount of pitch
shift you choose depends on the context
of your sequence and whether or not the
vocal is spoken or sung. This number
was chosen only for sake of example.
햶 In the Formants side of the dialog
box, enter some lesser amount of
formant shift.
In this example, we selected -3
semitones.
NOTE: Generally, a little bit of formant
shifting goes a long way. If you want to
maintain natural sounding vocal characteristics, you probably wonÕt want to shift
formants by a large number of semitones. Of course, you can experiment all
you want with unnatural sounding
effects!
햲 In a Graphic Window, select the audio
event you wish to process.
햳 Choose DSP>Formant Shift.
Unless you disabled its display in the
DSP Preferences dialog (discussed on
page 423), Vision opens the Formant
Shift dialog box.
햴 Check the Pitch option.
햷 Select the desired Pitch Shift
Quality from the pop-up menu.
Vision offers two types of pitch shifting
algorithms: Faster and Best.
Vision & Studio Vision Pro — Audio Reference Manual
385
PART 7: Menus
Faster takes less time to calculate the
pitch shift, and it produces a somewhat
lower fidelity audio file. In most cases,
however, Faster quality will produce satisfactory audio results.
Users with high end PowerMac computers will probably want to start with Best,
unless the processing times become too
long.
햸 Click OK.
Unless you disabled its display in the
DSP Preferences dialog (discussed on
page 423), Vision opens a Save As
dialog box.
햹 Configure the dialog as discussed
previously, then click Save.
Vision creates a new audio file (or files)
for the shifted audio. It creates one or
more new audio events to play that
audio, replacing the original audio
event(s) in your sequence.
TIME SCALE
Use this command to either stretch or
shrink the selected audio’s length to fit a
new time duration. Vision performs this
operation without affecting the pitch of
the original audio data.
The Time Scale Dialog Box
To open the Time Scale dialog box:
햲 Select the audio event(s) you wish to
time scale.
햳 Choose DSP>Time Scale.
Unless you disabled its display in the
DSP Preferences dialog (discussed on
page 423), Vision opens the Time Scale
dialog box.
Figure 37.5: Time Scale Dialog Box (shown in
SMPTE Mode)
Figure 37.5 shows a typical Time Scale
dialog box, which is discussed in the following sections.
386
Opcode Systems, Inc.
CHAPTER 35: DSP Menu: Pitch Shift, Formant Shift, Time Scale, and Adjust Audio Tempo
Selecting the Viewing Mode
You can use the Time Scale dialog box in
one of two time modes: SMPTE or Bars/
Beats.
•
•
From the Display pop-up menu, select
SMPTE to display all times in
SMPTE, for film scoring and other
time-based composing (as shown in
Figure 37.5).
From the Display pop-up menu, select
Bars/Beats to display all times in
musical bars and beats, for traditional
musical compositions (as shown in
Figure 37.6).
Setting a New Time Range
Vision gives you three different ways to
set a new time range:
•
•
Set a Scale Factor
Enter a value in the Scale Factor
numerical to automatically scale the
selected audio by that amount.
For example, if you know you want
the selected audio to be twice as long,
enter a Scale Factor of 2.0. Vision
automatically fills in the End Time
and Duration numericals.
Set an End Time
Enter a new End Time and Vision
lengthens or shortens the selected
audio data to end at that time.
For example, if you know the selected
audio has to end at Bar 5, Beat 1,
enter that value in the End Time
numerical. Vision automatically fills
in the Duration and Scale Factor
numericals.
•
Set a Duration
Enter a new Duration and Vision
scales the selected audio to last for
that amount of time.
For example, if you know the selected
audio has to be exactly 6 Bars long,
enter that value in the Duration
numerical. Vision automatically fills
in the End Time and Scale Factor
numericals.
IMPORTANT: You cannot lengthen an
audio event by more than double, nor can
you shorten it by more than half. If you wish
to do so, you’ll need to make multiple applications of the Time Scale command. Keep
in mind that the more you scale audio, the
more its sound quality will suffer.
Using the Time Scale Command
햲 Select the audio event(s) you wish to
time scale.
If you select a portion of an audio event,
the entire event will be time scaled.
Therefore, if you want to scale only a
portion of an event, you must first separate that portion into a new event using
the Audio>Separate command.
햳 Choose DSP>Time Scale.
Unless you disabled its display in the
DSP Preferences dialog (discussed on
page 423), Vision opens the Time Scale
dialog box.
Vision & Studio Vision Pro — Audio Reference Manual
387
PART 7: Menus
햴 From the Display pop-up menu,
select the mode in which you wish to
view sequence times.
In this example, weÕve selected Bars/
Beats mode.
When you time-scale audio, Vision constructs one or more new audio files
(depending on the file saving option you
select in the DSP Preferences dialog
box, discussed on page 423). It leaves
your original audio file (or files)
unaffected.
햷 Use the File Format pop-up menu to
specify the desired file format (AIFF
or Sound Designer II).
햸 Navigate to the folder in which you
want to save the file.
Figure 37.6: Time Scale Dialog Box (shown in
Bars/Beats Mode)
햵 Enter a new time scale factor in the
Time Scale dialog box.
Use one of the three methods discussed
in Setting a New Time Range (pg. 387).
햶 Click Scale.
Unless you disabled its display in the
DSP Preferences dialog (discussed on
page 423), Vision opens a Save As
dialog box.
By default, Vision selects the folder you
specify in the DSP Preferences dialog
(discussed on page 423).
햹 Type a name for the scaled audio file.
By default, Vision suggests a name
based on the auto-naming options you
specify in the DSP Preferences dialog
(discussed on page 423).
햺 Click Save.
Vision creates a new audio file (or files)
for the scaled audio. It creates one or
more new audio events to play that
audio, replacing the original audio
event(s) in your sequence.
NOTE: If you never want to see this
Save As dialog box again (that is, you
always accept the default name and folder),
click the Bypass this dialog next time
option in the Save As dialog box.
Should you wish to make the Save As dialog
re-appear, choose DSP>DSP Preferences, select “Time Scale” from its
Apply to pop-up menu, then uncheck the
Bypass Save As Dialog option.
Figure 37.7: Save As Dialog for Time Scale
388
Opcode Systems, Inc.
CHAPTER 35: DSP Menu: Pitch Shift, Formant Shift, Time Scale, and Adjust Audio Tempo
ADJUST AUDIO TEMPO™
Use this command to “mold” your audio
data to a sequence tempo. This command
causes your audio to stretch and compress to fit either the existing Tempo Map
or an entirely new, static tempo.
Vision molds the audio to a sequence
tempo by time scaling it—always making
sure that your audio plays at its original
pitch, no matter what the tempo.
There are two ways to use the Adjust
Audio Tempo™ command:
•
•
You can adjust the selected audio to
match the tempo of an existing
Tempo Map.
You can adjust the selected audio to
match a new, static tempo.
The following sections illustrate examples
of both processes.
Adjusting Audio to a Tempo Map
Follow through this example to see why
this process is useful and how to perform
it.
SCENARIO:
Assume you’ve already recorded your
MIDI and audio tracks, and you’re
putting the final touches on the
sequence. You decide that the song
needs a more energetic ending, so
you add an accelerando to the last
four bars.
PROBLEM:
MIDI tracks easily follow the accelerando, speeding up but staying on
pitch. Unfortunately, audio tracks
maintain their original playback
speed, and now lag behind the beat.
SOLUTION:
Use the Adjust Audio Tempo™
command to automatically time compress the existing audio so that it
follows the new accelerando tempo
map, while staying in perfect pitch.
PROCESS:
Perform the following steps:
햲 Create an accelerando in the final four
measures of your sequence using
any standard tempo editing
techniques.
In this example, weÕll gradually increase
the tempo from 110 bpm to 140 bpm
during the final four bars.
Vision & Studio Vision Pro — Audio Reference Manual
389
PART 7: Menus
햵 Choose DSP>Adjust Audio
Draw an accelerando in
the Tempo Strip Chart
Tempoª.
Unless you disabled its display in the
DSP Preferences dialog (discussed on
page 423), Vision opens the Adjust
Audio Tempo dialog box.
햶 Make sure ÒTempo MapÓ appears in
the top pop-up menu.
Choose ÒTempo MapÓ from
the pop-up menu
햳 Select the final four measures of your
audio track(s).
Selecting the region of audio you
need to adjust
Figure 37.8: Adjust Audio Tempo Dialog Box
(for molding audio to an existing Tempo
Map).
햴 Choose Audio>Separate to create a
separate audio event for the region
you wish to accelerate and select that
audio event.
You donÕt have to separate the audio in
order to use the Adjust Audio Tempo
command. However, since you only
need to process the final four bars, you
can save hard disk space and processing time by processing only the region
that needs to change.
390
If ÒNew TempoÓ appears, simply select
ÒTempo MapÓ from the pop-up menu as
shown in Figure 37.8.
햷 Enter the tempo at which the audio
was originally recorded.
In this example, the audio was originally
recorded at 110 bpm.
Opcode Systems, Inc.
CHAPTER 35: DSP Menu: Pitch Shift, Formant Shift, Time Scale, and Adjust Audio Tempo
햸 Click OK.
Unless you disabled its display in the
DSP Preferences dialog (discussed on
page 423), Vision opens a Save As
dialog box.
햻 Type a name for the tempo-adjusted
audio file.
By default, Vision suggests a name
based on the auto-naming options you
specify in the DSP Preferences dialog
(discussed on page 423).
햽 Click Save.
Vision creates a new audio file (or files)
for the tempo-adjusted audio. It creates
one or more new audio events to play
that audio, replacing the original audio
event(s) in your sequence.
Figure 37.9: Save As Dialog for Adjust Audio
Tempo
When you adjust audio tempo, Vision
constructs one or more new audio files
(depending on the file saving option you
select in the DSP Preferences dialog
box, discussed on page 423). It leaves
your original audio file (or files)
unaffected.
NOTE: If you never want to see this
Save As dialog box again (that is, you
always accept the default name and folder),
click the Bypass this dialog next time
option in the Save As dialog box.
Should you wish to make the Save As dialog
re-appear, choose DSP>DSP Preferences, select “Adjust Audio Tempo” from
its Apply to pop-up menu, then uncheck
the Bypass Save As Dialog option.
햹 Use the File Format pop-up menu to
specify the desired file format (AIFF
or Sound Designer II).
햺 Navigate to the folder in which you
want to save the file.
By default, Vision selects the folder you
specify in the DSP Preferences dialog
(discussed on page 423).
Vision & Studio Vision Pro — Audio Reference Manual
391
PART 7: Menus
Adjusting Audio To A New, Static
Tempo
Follow through this example to see why
this process is useful and how to
perform it.
SCENARIO:
Assume you’ve added a perfect vocal
track to your MIDI sequence, but
you’d like the whole song to be a bit
faster.
햳 Choose DSP>Adjust Audio
Tempoª.
Unless you disabled its display in the
DSP Preferences dialog (discussed on
page 423), Vision opens the Adjust
Audio Tempo dialog box.
햴 Make sure ÒNew TempoÓ appears in
the top pop-up menu.
Choose ÒNew TempoÓ from
the pop-up menu
PROBLEM:
MIDI tracks can easily play at a faster
tempo, but audio tracks maintain
their original playback speed, and
now lag behind the beat.
SOLUTION:
Use the Adjust Audio Tempo command to create a new, static tempo
and automatically time compress the
existing audio to match it.
PROCESS:
Perform the following steps:
햲 Select the audio event(s) you want to
Figure 37.10: Adjust Audio Tempo Dialog Box
(for molding audio to a new, static tempo)
If ÒTempo MapÓ appears, simply select
ÒNew TempoÓ from the pop-up menu as
shown in Figure 37.10.
햵 Enter the tempo at which you want
the entire sequence to play.
In this example, weÕre increasing the
tempo to 125 bpm.
adjust to a new, static tempo.
If you select a portion of an audio event,
the entire event will be adjusted. Therefore, if you want to adjust only a portion
of an event, you must first separate that
portion into a new event using the
Audio>Separate command.
392
햶 Click OK.
Unless you disabled its display in the
DSP Preferences dialog (discussed on
page 423), Vision opens a Save As
dialog box.
Opcode Systems, Inc.
CHAPTER 35: DSP Menu: Pitch Shift, Formant Shift, Time Scale, and Adjust Audio Tempo
햷 Configure the dialog as discussed
previously, then click Save.
Vision creates a new audio file (or files)
for the tempo-adjusted audio. It creates
one or more new audio events to play
that audio, replacing the original audio
event(s) in your sequence.
IMPORTANT: This process replaces the
entire sequence’s Tempo Map with the new,
static tempo you entered.
Vision & Studio Vision Pro — Audio Reference Manual
393
PART 7: Menus
394
Opcode Systems, Inc.
CHAPTER 36: DSP Menu: Audio-to-MIDI™ and
MIDI-to-Audio™
The DSP menu contains numerous algorithms designed to process audio
completely within the digital domain.
This chapter deals with the Audio-toMIDI™ and MIDI-to-Audio™ commands.
You can undo any DSP command. This
provides a convenient way to do an “A-B
comparison” between the processed and
unprocessed audio.
The following sections describe the
Audio-to-MIDI™ and MIDI-to-Audio™
algorithms in detail.
WHO SHOULD READ THIS
CHAPTER?
Figure 38.1: DSP Menu
DSP commands are constructive—meaning they create new audio files without
altering your original audio data.
This chapter applies only to owners of
Studio Vision Pro.
DSP commands work on mono, stereo
interleaved, or linked audio files with bit
depths of 8, 16, or 24.
If you select multiple audio files on which
to perform a DSP operation, all selected
audio files must be the same type (mono,
interleaved, or linked) and the same bit
depth (8, 16, or 24). The only exception to
this rule is the Mix command.
Vision & Studio Vision Pro — Audio Reference Manual
395
PART 7: Menus
AUDIO-TO-MIDI™
•
NOTE: This command is available only to
owners of Studio Vision Pro.
Choose this command to create MIDI
data that replicates the selected audio
data.
You can convert single audio events, but
you cannot perform audio to MIDI conversion if your selection spans more than
one audio event.
IMPORTANT: Vision can only convert
audio data that contains monophonic performances. It cannot recognize chords—
only single notes.
How Vision Converts Audio Data
to MIDI Data
Vision analyzes the audio data and creates
MIDI data of the following types:
•
•
•
396
Notes—Vision analyzes audio pitch
and creates MIDI notes based on the
analysis.
Velocity—Vision analyzes the loudness of each audio note’s attack and
uses the analysis to assign a MIDI
velocity to each MIDI note.
Volume—Vision analyzes how the
volume of an audio note changes over
time. It then generates MIDI volume
changes based on the analysis. By
analyzing both volume and velocity,
Vision creates an accurate MIDI representation of the dynamics
contained in your audio file.
•
Brightness—Vision analyzes the
tonal characteristics of your audio file
and generates MIDI brightness controller data to match. You can then
map the brightness data to a similar
parameter in your MIDI device to
make its timbral changes match the
audio’s.
Pitch bend—Vision analyzes any
pitch fluctuations that occur in the
audio file and generates MIDI pitch
bend data to match.
NOTE: You can enable or disable any of
these MIDI conversion options. For example, you can convert audio to MIDI by
analyzing only the notes and their velocities, while ignoring volume, brightness, and
pitch bend characteristics. For more information, see Using the Audio-to-MIDI™
Command (pg. 397).
Audio-To-MIDI™ Uses
The following are just some of the many
uses for Opcode’s Audio-to-MIDI™
command:
•
Create MIDI sequences without
playing a MIDI keyboard
Sing each track and convert it to
MIDI data. Play a track on the guitar,
bass, saxophone, or whatever other
instrument you like, then convert it to
a MIDI track.
Opcode Systems, Inc.
CHAPTER 36: DSP Menu: Audio-to-MIDI™ and MIDI-to-Audio™
•
•
Edit audio files in the MIDI
domain
You can convert audio data into
MIDI, edit the MIDI data, then apply
your MIDI edits to your original
audio file (using the MIDI-toAudio™ command). In this way you
can:
• fix wrong notes in your audio
performance
• add harmony parts to your audio
performance
• create completely different
dynamics, timbres, and “feels”
• Change the timing of your audio
performance
• create bizarre new effects
Add “feel” to your MIDI
performance
You can sing along with your MIDI
notes and apply the volume, brightness, and pitch bend changes derived
from your voice to your MIDI
performance.
Figure 39.1: Basic Audio-to-MIDI Dialog Box
햴 From the pop-up Audio Template
menu, select the type of audio
contained in the file you wish to
convert.
For example, if you recorded a picked
electric bass guitar and want to generate
a MIDI duplicate of the performance,
select the Bass (Electric) template.
햵 From the pop-up MIDI Instrument
Using the Audio-to-MIDI™
Command
menu, select the MIDI Instrument that
will play the MIDI data youÕre about to
generate.
Follow through this example to learn how
to use Vision’s Audio-to-MIDI™
command:
햲 Select an audio event.
햳 Choose DSP>Audio-to-MIDIª.
Vision opens the Audio-to-MIDI dialog
box. This dialog box is discussed completely in The Basic Audio-to-MIDI
Dialog Box (pg. 398).
햶 If the template you choose is
generating pitch bend data (as
indicated by a checked Pitch Bend
option), then you must tell Vision to
Vision & Studio Vision Pro — Audio Reference Manual
397
PART 7: Menus
match the pitch bend range of your
MIDI Instrument.
IMPORTANT: You must do this before
you convert the audio because Vision
needs this information to generate the
proper pitch bend data.
IMPORTANT: Make sure your synthesizerÕs pitch bend range is equal to or
greater than the maximum pitch bend
contained in the audio file. For example,
if your audio data contains pitch glides of
a major third (4 semitones), you must
program your synthesizerÕs pitch bend
range to 4 semitones or greater.
NOTE: If youÕre not satisfied with the
outcome of your Audio-to-MIDIª conversion, modify some of these basic
parameters and try again. If youÕre still
not satisfied with the conversion, click
the More Choices button to access all
the Audio-to-MIDIª parameters (as discussed in The Expanded Audio-to-MIDI
Dialog Box (pg. 400).
The Basic Audio-to-MIDI Dialog
Box
Figure 39.2 shows a typical Audio-toMIDI dialog box. Notice that it’s split in
half—Audio parameters are in the left half
and MIDI parameters are in the right half.
쐃
쐇
쐋
햷 If you know the pitch range of your
original audio file, enter that range
into the Input Range numericals.
쐆
Figure 39.2: Basic Audio-to-MIDI Dialog Box
NOTE: You can enter these numbers
from a MIDI keyboard, if that keyboard is
enabled in VisionÕs Enable Input Devices
dialog box.
쐃
Vision analyzes the audio data and generates MIDI data, which it places in the
same track as the original audio file.
쐄
쐏
For example, a standard electric bass
guitar has a pitch range from E1 to G4.
But, if you only played notes between E1
to A2, you can help the Audio-to-MIDI
conversion by entering ÒE1Ó and ÒA2Ó
into the Input Range numericals.
햸 Click OK.
398
쐂
The following is a list of parameters contained in the basic Audio-to-MIDI dialog
box:
Audio Template pop-up menu—
From this pop-up menu, select the
template that most closely matches
your audio’s characteristics. The template you select determines the
default setting of every Audio-toMIDI™ parameter (with the excep-
Opcode Systems, Inc.
CHAPTER 36: DSP Menu: Audio-to-MIDI™ and MIDI-to-Audio™
tion of MIDI Instrument selection).
You can create your own audio templates as described in Creating
Custom Audio Templates (pg. 405).
쐇 Audio Instrument (fixed)—This
field shows the name of the Audio
Instrument containing the audio data
you wish to convert. You cannot
change this field—it appears here
only as a reminder.
쐋 Input Range numericals—This set
of numericals tells Vision what your
audio file’s pitch range is.
When you select an Audio Template,
Vision automatically sets the range
numericals to a reasonable default
(based on the overall pitch range of
the characteristic instrument). If you
have a rough idea of the pitch range
actually used by your audio file, you
can improve Audio-to-MIDI™ performance by manually adjusting the
range numericals.
쐏 Pitch Bend Exceeds numerical—
This numerical tells the conversion
algorithm how much audio pitch
bending to accept before generating a
new MIDI note. This is further
described in the following examples:
Example #1: An electric guitar player
often bends a string to raise the pitch
one semitone. Therefore, this numerical should be set to 1 half-step for
electric guitar (since it’s unlikely any
pitch bends greater than this will
occur).
Example #2: A trombone player often
creates glissandos over a wide pitch
range. To accurately capture such
pitch bends as glissandos (and not as
a series of individual notes), this
numerical should be set to a large
number of half-steps.
쐄 MIDI Instrument pop-up menu—
From this pop-up menu, select the
MIDI Instrument that will play the
MIDI data Vision creates.
쐂 Generate options—Use these check
boxes to tell Vision what types of
MIDI data you want it to generate.
There are four options:
Notes option (fixed)—This option is
always checked in the basic Audio-toMIDI dialog box—you cannot disable
it. Vision always generates MIDI
notes and MIDI velocity values from
the audio it analyzes.
Volume option—If you select this
option, Vision creates MIDI volume
data (controller #7) to insure that relative MIDI volume levels match those
contained in your original audio file.
Vision & Studio Vision Pro — Audio Reference Manual
399
PART 7: Menus
Pitch Bend option—If you select
this option, Vision creates pitch bend
data to accurately reflect every subtle
(or not so subtle) pitch fluctuation
contained in your original audio file.
The amount of pitch bend created by
a MIDI device is based on that
device’s pitch bend range parameter.
Some devices globally apply a pitch
bend range to all patches—other
MIDI devices apply different pitch
bend ranges to each patch.
Vision must know the pitch bend
range of your MIDI device before
generating MIDI pitch bend data—
this insures that Vision creates the
proper pitch bend values. Enter the
pitch bend range of your MIDI device
into the Pitch Bend Range numerical. Always make sure that this value
is greater than or equal to the Pitch
Bend Exceeds numerical (as
described in Item 쐏).
Brightness—If you select this
option, Vision creates MIDI brightness data to insure that your MIDI
data matches the relative timbral
values in your original audio file. Generally, MIDI brightness is mapped to
controller #73, but you can select any
controller value from the corresponding pop-up menu.
쐆 More Choices button—Click this
button to expand the Audio-to-MIDI
dialog box to see the entire parameter
set. Use the entire parameter set to
fine-tune the conversion process or to
create your own Audio-to-MIDI™
templates. For more information, see
The Expanded Audio-to-MIDI Dialog
Box (pg. 400).
400
The Expanded Audio-to-MIDI
Dialog Box
If you click the More Choices button in a
basic Audio-to-MIDI dialog box, the box
expands to show all the Audio-to-MIDI™
parameters.
쐄
쐃
쐂
쐇
쐋
쐆
쐏
쐊
Figure 39.3: Expanded Audio-to-MIDI Dialog Box
Figure 39.3 shows a typical expanded
Audio-to-MIDI dialog box and its extra
parameters. These are:
쐃
Create new note if parameters—
Use these parameters to help Vision
decide when to generate new MIDI
notes. There are three parameters
involved in this process (as indicated
by the border around them):
Pitch Bend exceeds numerical—
This was described in Item 쐏 of The
Basic Audio-to-MIDI Dialog Box
(pg. 398).
Note length exceeds pop-up
menu—Use this pop-up menu to finetune your conversion algorithm by
removing spurious notes created by
Opcode Systems, Inc.
CHAPTER 36: DSP Menu: Audio-to-MIDI™ and MIDI-to-Audio™
the Audio-to-MIDI algorithm. This
parameter is discussed in detail in
Using the “Note Length Exceeds”
Parameter (pg. 402).
Pitch is stable for pop-up menu—
This pop-up menu tells the conversion algorithm to generate a MIDI
note if the audio’s fluctuating pitch
remains stable for a set amount of
time.
For example, if the audio slowly glissandos from C4 up to G4 but lingers
at E4 for longer than the Pitch is
stable for value, then Vision creates
a MIDI note at E4.
If you don’t want Vision to create new
notes from a wavering or gliding
audio input, select higher values from
the pop-up menu.
쐇 Conversion Speed pop-up menu—
Use this pop-up menu to tell Vision
how quickly to perform the Audio-toMIDI™ conversion.
“Slower” does not necessarily mean
“better.” In fact, “Fast” will work for
most conversions. Basically, this
parameter tells Vision how much of
the audio’s upper-harmonic spectrum
to consider when performing an
Audio-to-MIDI™ conversion. Source
material that’s rich in harmonic content may require slower conversions.
쐋 Concert ‘A’ numerical—Use this
numerical to tell Vision how your
source audio is tuned. Most American
instruments are tuned to A=440 Hz,
though different countries or styles of
music sometimes use slightly different values.
쐏
Unpitched Audio option and Assign
To numerical—Check this option if
your audio source is unpitched (such
as a percussion track) or if you want
Vision to only extract rhythmic information from the audio file. Use the
Assign To numerical to tell Vision
which single MIDI note to create
when performing the Audio-toMIDI™ conversion.
쐄 Volume pop-up menu—From this
pop-up menu, select how you want
Vision to generate MIDI volume data.
There are two choices:
Relative—If you select this option,
Vision generates a different MIDI
velocity value for each note, then generates MIDI volume levels based on
the changes in volume relative to the
note’s velocity.
Absolute—If you select this option,
Vision gives all MIDI notes a velocity
value of 100, and uses only MIDI
volume data to mirror the dynamics
contained in your audio performance.
NOTE: If you un-check the Generate
Volume option, then Vision always generates dynamic MIDI velocity data.
쐂 Brightness controller pop-up
menu—From this pop-up menu,
select which MIDI controller will play
the extracted brightness data (if the
Brightness option is checked).
NOTE: If your MIDI device doesn’t
respond to the standard MIDI brightness controller messages, you can use
this pop-up menu to assign brightness
data to any MIDI controller, then con-
Vision & Studio Vision Pro — Audio Reference Manual
401
PART 7: Menus
figure your synthesizer so that the
selected controller modulates its VCF
frequency or another similar
parameter.
쐆 Use selected notes option—Check
this option to extract “feel” characteristics (pitch bend, volume,
brightness) from the audio data and
apply them to user-specified MIDI
notes. For more information, see
Using the “Use Selected Notes” Options
(pg. 403).
쐊 Fewer Choices button—Click this
button to collapse the Audio-to-MIDI
dialog box to see only its basic parameters as described in The Basic Audioto-MIDI Dialog Box (pg. 398).
Using the “Note Length Exceeds”
Parameter
Sometimes the MIDI data generated by
the conversion can contain extra notes of
very short duration. This may occur if:
•
•
•
your attacks aren’t clean (such as a
slight catch in the throat of a vocalist
or some fret noise from a guitar), or...
your audio contains some attack blurring (such as from early reflections or
reverb), or...
your audio recording is noisy.
For example, if you convert an electric
guitar performance to MIDI, the algorithm might sometimes create two notes
on the attack—one when the pick hits the
string and another immediately afterward
when the string reaches full vibration. To
402
eliminate the double note, select a Note
length exceeds value that’s longer than
the duration of the first (spurious) note.
This parameter works differently depending on whether the pitch of the spurious
note is the same or different than the
pitch of the “real” note:
•
Spurious note is the same pitch
as the “real” note:
Spurious note of same pitch (created by ÒdirtyÓ attack)
Figure 39.4: MIDI conversion w/spurious
note of same pitch
If the spurious note is the same pitch
as the second “real” note, and you
select a Note length exceeds value
greater than the length of the spurious note, then Vision creates a single
MIDI note that begins with the first
attack (where the spurious note
would normally be created) and ends
where the “real” note ends.
Figure 39.5: MIDI conversion w/spurious
note removed
Opcode Systems, Inc.
CHAPTER 36: DSP Menu: Audio-to-MIDI™ and MIDI-to-Audio™
•
Spurious note is a different pitch
than the “real” note:
Spurious note of different pitch
(created by ÒdirtyÓ attack)
Using the “Use Selected Notes” Options
If you check the Use selected notes
option, Vision will not extract MIDI note
values from the audio data—instead,
Vision uses existing MIDI notes, and it
creates other types of MIDI data, which it
applies to those existing notes.
Figure 39.6: MIDI conversion w/spurious
note of different pitch
If the spurious note is a different pitch
than the second “real” note, and you
select a Note length exceeds value
greater than the length of the spurious note, then Vision ignores the
spurious note and creates a single
MIDI note that begins and ends at the
times dictated by the “real” note.
If you check the Use selected notes
option, Vision produces a second option
called Generate new velocities.
•
•
Figure 39.7: MIDI conversion w/spurious
note removed
If you check this option, Vision analyzes the dynamics of the audio and
replace the velocities of your existing
MIDI notes with those it derives from
the audio data.
If you un-check this option, Vision
uses the velocity values of your existing MIDI notes instead of those it
derives from the audio data.
The following examples illustrate why
these parameters are helpful and how to
use them.
EXAMPLE 1: “Wailing”
Assume you have a recording of a flowing,
passionate, coloratura vocal performed in
a non-western scale (such as some
middle-eastern vocals). If you’d like to
convert that vocal to MIDI data and play it
on a synthesizer, you’ll need to forget
about generating MIDI notes—there basically aren’t any.
Vision & Studio Vision Pro — Audio Reference Manual
403
PART 7: Menus
To convert this type of audio performance
into MIDI:
햲 In the Graphic Window, draw a single
MIDI note that runs the duration of the
audio event you wish to convert.
Draw that MIDI note roughly in the
middle of the range of pitches being
sung.
햳 Shift-click the MIDI note and the audio
event to select both.
햴 Choose DSP>Audio-to-MIDIª.
Vision opens the basic Audio-to-MIDI
dialog box.
햵 Click the More Choices button to
see the expanded dialog box.
햶 Check the Use generated notes
option.
햷 Un-check the Generate new
velocities option.
햸 Check those values you want to
generate (such as pitch bend,
volume, and brightness).
햹 Make sure to set a very wide pitch
bend range (such as +/- 12 semitones)
on both the Audio and MIDI sides of
the dialog box.
햺 Click OK.
Vision generates the requested MIDI
data (such as volume, pitch bend, or
brightness), using the single MIDI note
as the baseline for the data it generates.
404
EXAMPLE 2: “Vocoding”
Assume you’d like to use your voice to
add character to a MIDI performance. To
do so:
햲 Record the MIDI notes whose
character you want to modify.
햳 In the same track, overdub your voice
singing the same thing as the MIDI
notes.
햴 Select both the MIDI notes and the
audio data.
햵 Choose DSP>Audio-to-MIDIª.
Vision opens the basic Audio-to-MIDI
dialog box.
햶 Click the More Choices button to
see the expanded dialog box.
햷 Check the Use generated notes
option.
햸 Check the Generate new
velocities option.
This lets your MIDI notes take on additional dynamic characteristics from your
vocal.
햹 Check those values you want to
generate (such as pitch bend,
volume, and brightness).
햺 Click OK.
Vision generates the requested MIDI
data, using your original MIDI notes, but
extrapolating new MIDI controller information from your vocal recording.
Opcode Systems, Inc.
CHAPTER 36: DSP Menu: Audio-to-MIDI™ and MIDI-to-Audio™
Creating Custom Audio
Templates
햴 Choose Add Template from the
pop-up menu.
You can create your own Audio Templates using the expanded Audio-to-MIDI
dialog box. Audio Templates retain the
value of all parameters in the Audio-toMIDI dialog box, except:
•
•
•
•
•
MIDI Instrument selection
Absolute vs. Relative volume
MIDI Pitch Bend range
Brightness controller selection
Status of the Use Selected Notes
check box.
Creating a New Audio Template
To save a custom Audio Template.
햲 Set all the Audio-to-MIDI parameters
as desired.
햳 Press and hold the mouse on the
Audio-to-MIDI dialogÕs pop-up menu.
Vision opens a dialog box.
햵 Type a name for your template, then
click OK.
Vision saves the template in the ÒSV
Audio-to-MIDI TemplateÓ file, located in
the same folder as the Studio Vision
application.
Updating an Existing Audio Template
You can modify an existing Audio Template by selecting it in the Audio Template
pop-up menu, changing the desired
parameters, then choosing Update Template from the Audio-to-MIDI dialog’s
pop-up menu.
Renaming an Audio Template
You can rename an existing Audio Template by selecting it in the Audio Template
pop-up menu, then choosing Rename
Template from the Audio-to-MIDI dialog’s pop-up menu.
Vision & Studio Vision Pro — Audio Reference Manual
405
PART 7: Menus
Deleting an Audio Template
You can also delete Audio Templates. To
do so:
햲 Choose Delete Template from the
Audio-to-MIDI dialogÕs pop-up menu.
Vision opens a dialog box asking if
youÕre sure you want to delete the
selected template.
햳 Click OK.
Vision deletes the template.
NOTE: You cannot delete the factory templates that ship with Vision.
MIDI-TO-AUDIO™
NOTE: This command is available only to
owners of Studio Vision Pro.
Choose this command to apply MIDI
edits to the selected audio data.
MIDI-to-Audio™ conversion provides an
intuitive way to edit audio data using
user-friendly MIDI editing techniques.
You can edit the MIDI data created by an
Audio-to-MIDI™ conversion, then apply
those edits to your original audio file. This
lets you:
•
Re-Analyze Audio
The Audio-to-MIDI dialog’s pop-up menu
contains one additional option called Reanalyze Audio.
You will only need to use this command if,
after performing an Audio-to-MIDI™ conversion, you edit the original audio data in
an external editing program (such as
AudioShop, Sound Designer II, or Peak)
and then want to use that same audio file
to perform another Audio-to-MIDI™
conversion.
INSIDER’S NOTE: When you process
audio data externally, Vision has no way of
knowing what changes occurred. Choosing
Re-analyze Audio forces Vision to re-perform all its advanced audio-to-MIDI
computations on the audio file.
406
•
•
•
•
•
fix wrong notes in your audio
performance
add harmony parts to your audio
performance
Change the timing of your audio
performance
stabilize a “wobbling” pitch
create completely different dynamics, timbres, and “feels”
create bizarre new effects
The following section discusses the individual components of the MIDI-to-Audio
dialog box. Using the MIDI-to-Audio™
Command (pg. 408) provides several
step-by-step examples of how to use
MIDI-to-Audio™ conversion.
Opcode Systems, Inc.
CHAPTER 36: DSP Menu: Audio-to-MIDI™ and MIDI-to-Audio™
쐏
The MIDI-to-Audio Dialog Box
When you select a time region that contains both MIDI and Audio data, then
choose DSP>MIDI-to-Audio™, Vision
opens a MIDI-to-Audio dialog box as
shown in Figure 39.8 (unless disabled in
the DSP Preferences dialog).
쐃
쐇
쐋
쐏
쐆
쐄
쐂
Figure 39.8: MIDI-to-Audio™ Dialog Box
The following is a list parameters contained in the MIDI-to-Audio dialog box:
쐃
Use Selected MIDI Pitch Bend
option—Check this option if you want
Vision to apply changes in MIDI pitch
bend to your original audio
performance.
쐄 Process Note Until pop-up menu—
This is one of those “tweaky” parameters that can have a drastic affect on
the modified audio file. You have two
processing options.
Use Selected MIDI Notes option—
Check this option if you want Vision
to apply MIDI note changes to your
original audio performance.
쐇 Use Selected MIDI Velocity
option—Check this option if you want
Vision to apply changes in MIDI
velocity to your original audio
performance.
쐋 Use Selected MIDI Volume
option—Check this option if you want
Vision to apply changes in MIDI
volume to your original audio
performance.
End of note: Choose this option if
your original audio file is very legato,
or was recorded with reverb or in an
ambient space.
Next note: Choose this option if your
original audio file contains notes that
begin with a breath sound or other
similarly characteristic attack
attribute.
For more information, see Using the
“Process Note Until” Options
(pg. 415).
Vision & Studio Vision Pro — Audio Reference Manual
407
PART 7: Menus
쐂
Pitch Shift Quality pop-up menu—
Vision offers two types of pitch shifting algorithms: Faster and Best.
Using the MIDI-to-Audio™
Command
The following sections discuss a few of
the many uses for the MIDI-to-Audio™
command.
Whenever your applied MIDI edits
will affect the pitch of your audio performance, you need to tell Vision
which pitch shift algorithm to apply.
Faster takes less time to calculate the
pitch shift, and it produces a somewhat lower fidelity audio file. In most
cases, however, Faster quality will
produce satisfactory audio results.
Users with high end PowerMac computers will probably want to start with
Best, unless the processing times
become too long.
쐆 Maintain voice character option
Fixing Wrong Notes
One of the simplest and most useful features of MIDI-to-Audio™ conversion is
using MIDI data to correct mistakes in an
audio performance. To do so:
햲 Select an audio event and convert it
to MIDI data.
Audio-to-MIDIª conversion is discussed
in detail in Audio-to-MIDIª (pg. 396).
This option lets you pitch-shift an audio
event without inducing ÒDarth VaderÓ or
ÒChipmunkÓ effects -- the pitch-shifted
signal retains all the vocal characteristics
of the original performance, so it sounds
as if the same singer is simply singing in
a different key.
Enabling this option requires more computation and, therefore, more processing
time.
You can use this option with any type of
audio (not just vocals), but the results
may be less noticeable because formants are less pronounced in non-vocal
instruments.
408
Opcode Systems, Inc.
CHAPTER 36: DSP Menu: Audio-to-MIDI™ and MIDI-to-Audio™
햳 In the MIDI track that Vision
generates, use standard MIDI editing
techniques to correct the wrong note.
햶 Check the Notes option and leave
the other options unchecked.
Since you only edited the pitch of a MIDI
note, youÕll speed up the MIDI-to-Audio
analysis by un-checking the other,
unchanged types of MIDI data.
햷 Click OK.
You could either drag the note to the correct pitch or modify the pitch bend data
in the Strip Chart, depending on how
ÒwrongÓ the note is.
햴 In the Graphic WindowÕs Ruler, drag
to select the time range you want to
convert.
This selects all MIDI data (notes and
controllers) plus all Audio data in the
range.
Drag a range in the ruler to select
both MIDI and Audio data
Unless you disabled its display in the
DSP Preferences dialog (discussed on
page 423), Vision opens a Save As
dialog box.
햸 Select the type of audio file you wish
to create, name it, and select a
volume or folder in which to store it.
햹 Click Save.
Vision creates a new audio file and
places a new audio event in your
sequence. This new audio event sounds
exactly like your original audio event, but
with all the notes played at the correct
pitch.
햵 Choose DSP>MIDI-to-Audioª.
Unless you disabled its display in the
DSP Preferences dialog (discussed on
page 423), Vision opens the MIDI-toAudio dialog box.
Vision & Studio Vision Pro — Audio Reference Manual
409
PART 7: Menus
Stabilizing Pitch Fluctuations
You can stabilize a “wobbling” vocalist by
converting the vocal to MIDI, removing
the pitch bend data, then applying the
edits to the vocal performance. To do so:
햴 Using the Pencil tool and a flat curve
shape, draw a new pitch bend of
value = 0.
햲 Select an audio event and convert it
to MIDI data.
Audio-to-MIDIª conversion is discussed
in detail in Audio-to-MIDIª (pg. 396).
햳 In the MIDI track that Vision
ÒDrawÓ a new, ßat pitch bend of
value = 0.
generates, open a Strip Chart for
pitch bend.
햵 In the Graphic WindowÕs Ruler, drag
Figure 39.9: Pitch Bend data generated by
Audio-to-MIDI™ conversion
to select the time range you want to
convert.
This selects all MIDI data (notes and
controllers) plus all Audio data in the
range.
햶 Choose DSP>MIDI-to-Audioª.
Unless you disabled its display in the
DSP Preferences dialog (discussed on
page 423), Vision opens the MIDI-toAudio dialog box.
410
Opcode Systems, Inc.
CHAPTER 36: DSP Menu: Audio-to-MIDI™ and MIDI-to-Audio™
햷 Check the Pitch Bend option and
Creating Audio Harmonies
leave the other options unchecked.
Since you only edited pitch bend, youÕll
speed up the MIDI-to-Audio analysis by
un-checking the other, unchanged types
of MIDI data.
You can create custom harmonies using
standard MIDI editing techniques, then
apply those harmonies to your audio data.
To do so:
햲 Select an audio event and copy it to
another track.
햳 In the new track, select the copied
audio event and convert it to MIDI
data.
Audio-to-MIDIª conversion is discussed
in detail in Audio-to-MIDIª (pg. 396).
햸 Click OK.
Unless you disabled its display in the
DSP Preferences dialog (discussed on
page 423), Vision opens a Save As
dialog box.
햹 Select the type of audio file you wish
to create, name it, and select a
volume or folder in which to store it.
햺 Click Save.
Vision creates a new audio file and
places a new audio event in your
sequence. This new audio event sounds
exactly like your original audio event, but
with all the pitch bend ÒwobbleÓ removed
from the vocal.
Vision & Studio Vision Pro — Audio Reference Manual
411
PART 7: Menus
햴 In the MIDI track that Vision
generates, use standard MIDI editing
techniques to create a harmony part.
햷 Choose DSP>MIDI-to-Audioª.
Unless you disabled its display in the
DSP Preferences dialog (discussed on
page 423), Vision opens the MIDI-toAudio dialog box.
햸 Check the Notes option and leave
the other options unchecked.
Since you only created new MIDI notes,
thereÕs no reason to apply any other
types of MIDI data to the audio edit.
햵 Delete the original MIDI notes, leaving
only the newly-created harmony
notes.
햹 Click OK.
Unless you disabled its display in the
DSP Preferences dialog (discussed on
page 423), Vision opens a Save As
dialog box.
햺 Select the type of audio file you wish
to create, name it, and select a
volume or folder in which to store it.
햻 Click Save.
햶 In the Graphic WindowÕs Ruler, drag
to select the time range you want to
convert.
This selects all MIDI data (notes and
controllers) plus all Audio data in the
range.
412
Vision creates a new audio file and
places a new audio event in your
sequence. This new audio event sounds
exactly like your original audio event, but
uses the harmonizing notes.
햽 Copy the newly created audio event
back into the original track and
Opcode Systems, Inc.
CHAPTER 36: DSP Menu: Audio-to-MIDI™ and MIDI-to-Audio™
assign it to a different Audio
Instrument.
햳 In the MIDI track that Vision
generates, click the note you wish to
lengthen.
When you play the sequence, both audio
events play, creating a perfectly harmonized performance.
Changing Audio Timing
You can lengthen or shorten MIDI notes,
then apply the changes to the audio
data—creating an entirely different rhythmic feel to your audio performance. To do
so:
햴 Choose Do>Scale Time.
Vision opens the Scale Time dialog box.
햲 Select an audio event and convert it
to MIDI data.
Audio-to-MIDIª conversion is discussed
in detail in Audio-to-MIDIª (pg. 396).
Vision & Studio Vision Pro — Audio Reference Manual
413
PART 7: Menus
햵 Enter a new length for the MIDI note.
In this example, weÕve changed the
length of the note to 360.
햸 Choose DSP>MIDI-to-Audioª.
Unless you disabled its display in the
DSP Preferences dialog (discussed on
page 423), Vision opens the MIDI-toAudio dialog box.
햹 Check the Notes options and leave
the others unchecked.
NOTE: You cannot lengthen or shorten a
note by a factor of more than 2, nor can
you pitch-shift audio greater than one
octave up or down.
햶 Click OK.
Vision lengthens the selected MIDI note
(also scaling any pitch bend, volume, or
brightness data) and, to accommodate it,
shifts all the other notes later in time.
Since you only edited a MIDI note,
thereÕs no reason to apply any other
types of MIDI data back to the audio,
although other kinds of MIDI data can be
edited and used to modify the audio
event if you desire.
햺 Click OK.
Unless you disabled its display in the
DSP Preferences dialog (discussed on
page 423), Vision opens a Save As
dialog box.
햻 Select the type of audio file you wish
to create, name it, and select a
volume or folder in which to store it.
햽 Click Save.
Vision creates a new audio file and
places a new audio event in your
sequence.
Notice that the Audio data no longer
aligns with the MIDI data.
햷 In the ruler at the top of the Graphic
Window, drag to select all MIDI and
audio data.
414
Opcode Systems, Inc.
CHAPTER 36: DSP Menu: Audio-to-MIDI™ and MIDI-to-Audio™
This new audio event sounds exactly like
your original audio event, but with the
second note extended in duration.
You can scale time automatically, without
opening the Scale Time dialog box. To do
so:
햲 Select a MIDI note.
햳 Hold down the Option and Shift keys,
then move the cursor over one of the
edit points in the Graphic WindowÕs
ruler.
Using the “Process Note Until”
Options
The easiest way to understand this option
is by example.
EXAMPLE 1:
Suppose you recorded your original audio
with reverberation, then performed an
Audio-to-MIDI™ conversion as shown in
Figure 39.10.
Gap between MIDI notes occurs
when reverberation level falls to a
very low level
The cursor becomes a Scale Time
Cursor.
Scale Time cursor positioned over
edit point
Reverberant tail
햴 Option-Shift-drag the edit point to
lengthen or shorten the selected note,
scaling time as you do so.
Figure 39.10: Audio-to-MIDI™ conversion of
reverberant notes
If you change the pitch of the first MIDI
note, your Graphic Window looks as
follows:
Vision & Studio Vision Pro — Audio Reference Manual
415
PART 7: Menus
Now, if you perform a MIDI-to-Audio conversion, Vision changes the pitch of the
first audio note from “A” to “C”.
This audio is unchanged.
This audio is pitch-shifted
to ÒCÓ.
What happens to the
audio in THIS range?
Figure 39.11: Pitch Shifted Audio Quandary #1
Look at Figure 39.11. What does Vision
do with the area in question? This is the
purpose of the Process Note Until popup menu.
If you select the Next note option, Vision
pitch-shifts the first audio note ALL THE
WAY to the beginning of the second
MIDI note, regardless of how long the
first MIDI note is. This means the final
little reverb tail (contained in the rectangular area shown in Figure 39.11) would
also be pitch-shifted—providing the
proper audio result.
Velocity changes work in a similar way.
For example, if you reduce the velocity of
the first note, then select the End of note
option, Vision attenuates only the audio
enveloped by the first note. This would
cause the reverb tail between the end of
the first note and the beginning of the
second note to be too loud. If you select
the Next note option, Vision attenuates
the first audio note all the way to the
beginning of the second MIDI note,
resulting in a more “natural” sounding
reverb.
If you select the End of note option,
Vision pitch-shifts only the audio data
enveloped by the duration of the MIDI
note. In this example, the pitch of the first
note would shift from “A” to “C”, but the
final little reverb tail (contained in the
rectangular area shown in Figure 39.11)
would not be pitch-shifted. This would
cause a disconcerting jump in pitch at the
tail of the note.
416
Opcode Systems, Inc.
CHAPTER 36: DSP Menu: Audio-to-MIDI™ and MIDI-to-Audio™
EXAMPLE 2:
Suppose you recorded a vocal performance without any reverberation, then
performed an Audio-to-MIDI™ conversion
as shown in Figure 39.12.
Now, if you perform a MIDI-to-Audio™
conversion, Vision changes the pitch of
the first audio note from “A” to “C”.
This audio is
unchanged.
Gap between MIDI notes occurs
when audio level is low
This audio is
pitch-shifted to
ÒCÓ.
What happens to the
audio in THIS range?
SingerÕs ÒbreathÓ sound
Figure 39.12: Audio-to-MIDI conversion of
“breathy” vocalist
If you change the pitch of the first MIDI
note, your Graphic Window looks as
follows:
Figure 39.13: Pitch Shifted Audio Quandary #2
Look at Figure 39.13. What does Vision
do with the area in question?
If you select the Next note option, Vision
pitch-shifts the first audio note ALL THE
WAY to the beginning of the second
MIDI note, regardless of how long the
first MIDI note is. This means the little
breath that the singer takes before the
second note (contained in the rectangular
area shown in Figure 39.13) would also be
pitch-shifted. This would result in an
unnatural sounding audio performance.
If you select the End of note option,
Vision pitch-shifts only the audio data
enveloped by the duration of the MIDI
note. In this example, the pitch of the first
note would shift from “A” to “C”, but the
Vision & Studio Vision Pro — Audio Reference Manual
417
PART 7: Menus
little breath that the singer takes before
the second note (contained in the rectangular area shown in Figure 39.13) would
not be pitch-shifted—providing the
proper audio result.
Velocity changes work in a similar way.
For example, if you increase the velocity
of the first note, then select the Next note
option, Vision boosts the volume of the
first audio note ALL THE WAY to the
beginning of the second MIDI note. The
little breath that the singer takes before
the second note will become unnaturally
loud. If you select the End of note option,
Vision boosts only audio enveloped by the
first note. The little breath that the singer
takes before the second note is
unchanged, providing a more “natural”
sound.
418
Opcode Systems, Inc.
CHAPTER 37: DSP Menu: Premiere Plug-Ins
and DSP Preferences
The DSP menu contains numerous algorithms designed to process audio
completely within the digital domain.
DSP commands work on mono, stereo
interleaved, or linked audio files with bit
depths of 8, 16, or 24.
This chapter deals with the Premiere
Plug-Ins and DSP Preferences options.
If you select multiple audio files on which
to perform a DSP operation, all selected
audio files must be the same type (mono,
interleaved, or linked) and the same bit
depth (8, 16, or 24). The only exception to
this rule is the Mix command.
Figure 40.1: DSP Menu
DSP commands are constructive—meaning they create new audio files without
altering your original audio data.
You can undo any DSP command. This
provides a convenient way to do an “A-B
comparison” between the processed and
unprocessed audio.
The following sections describe Premiere
Plug-Ins and DSP Preferences.
Vision & Studio Vision Pro — Audio Reference Manual
419
PART 7: Menus
PREMIERE PLUG-INS
Vision supports audio plug-ins designed
to work with Adobe Premiere. There are
numerous third-party audio processing
plug-ins available from many companies,
including Opcode.
Figure 41.1: Typical Premiere Plug-Ins Submenu
These plug-ins are hardware-independent
and, as such, can be used with any audio
system supported by either Vision or
Studio Vision Pro.
Installing Premiere Plug-ins
Vision looks for plug-ins in a folder named
“Audio Plug-ins” that resides in the
Opcode Folder in your System’s Extensions folder.
Therefore, you have two installation
choices:
•
•
You may install your Premiere plugins directly into the “Audio Plug-ins”
folder, or...
You may install your Premiere plugins in any folder you wish, but you
need to create an alias to those plugins. Put the alias into the “Audio
Plug-ins” folder.
If you have a lot of plug-ins stored in a
folder somewhere else on your hard
disk, you can create an alias to that
folder, then put the folder’s alias in
your “Audio Plug-ins” folder.
NOTE: Some plug-ins may not be able to
use the alias method of installation. If you
follow these instructions and the plug-in
doesn’t appear in the DSP>Premiere
Plug-Ins submenu, copy the actual plug-in
into the “Audio Plug-ins” folder.
Premiere Plug-In Basics
Although every plug-in operates differently, the following guidelines apply to
using Vision with all Adobe Premiere
plug-ins.
Figure 41.2: Location of Premiere Plug-ins
420
STUDIO VISION PRO USERS: Premiere
plug-ins use Apple’s Sound Manager to preview the effect of any edits. Once you use the
plug-in to generate a new audio file, you
can play that file using your audio system of
choice (DAE or Acadia). DAE users can
use Digidesign’s latest version of Digi
Sound Drivers or Digi Output Drivers to
make their Digidesign hardware play back
the Sound Manager audio preview of Premiere plug-ins.
Opcode Systems, Inc.
CHAPTER 37: DSP Menu: Premiere Plug-Ins and DSP Preferences
To apply a Premiere plug-in to an audio
event:
햲 Select the audio event(s), or portion
of events, you wish to modify.
햳 Choose DSP>Premiere Plug-Ins.
Vision produces a submenu showing the
name of every plug-in installed in the
Audio Plug-ins folder, located as shown
in Figure 41.2 on page 420.
햵 Edit the parameters within the
plug-ins edit window.
Most Premiere plug-ins (including all
Opcode plug-ins) include their own documentation, which will teach you about
the various features within that plug-in.
햶 To preview your edits, click the
plug-insÕ Preview button.
NOTE: All Opcode plug-ins support
audio preview, but some 3rd party plugins may not.
Previewing the audio effect is discussed
in ÒPreviewing Effects (pg. 422).Ó
햷 Click OK.
햴 Select the desired plug-in from this
submenu.
Unless you disabled its display in the
DSP Preferences dialog (discussed on
page 423), Vision opens an edit window
for the selected plug-in. Each plug-in has
its own unique edit window.
The following example shows the edit
window for OpcodeÕs fusion:VOCODE.
NOTE: Different plug-ins use different
names for the button that applies the
changes to your audio event. Some may
use a Process or an Apply button. See
your plug-insÕ documentation for more
information.
Unless you disabled its display in the
DSP Preferences dialog (discussed on
page 423), Vision opens a Save As
dialog box.
Figure 41.3: Edit Window for Opcode’s
fusion:VOCODE Plug-in
Figure 41.4: Save As Dialog for Premiere
Plug-In
Vision & Studio Vision Pro — Audio Reference Manual
421
PART 7: Menus
When you modify audio, Vision constructs one or more new audio files
(depending on the file saving option you
select in the DSP Preferences dialog
box, discussed on page 423). It leaves
your original audio file (or files)
unaffected.
햸 Use the File Format pop-up menu to
specify the desired file format (AIFF
or Sound Designer II).
햹 Navigate to the folder in which you
want to save the file.
By default, Vision selects the folder you
specify in the DSP Preferences dialog
(discussed on page 423).
햺 Type a name for the modified audio
file.
By default, Vision suggests a name
based on the auto-naming options you
specify in the DSP Preferences dialog
(discussed on page 423).
햻 Click Save.
Vision creates a new audio file (or files)
for the modified audio. It creates one or
more new audio events to play that
audio, replacing the original audio
event(s) in your sequence.
NOTE: If you never want to see this
Save As dialog box again (that is, you
always accept the default name and folder),
click the Bypass this dialog next time
option in the Save As dialog box.
Should you wish to make the Save As dialog
re-appear, choose DSP>DSP Preferences, select “Premiere Plug-Ins” from its
Apply to pop-up menu, then uncheck the
Bypass Save As Dialog option.
422
Previewing Effects
You can preview the effect that a Premiere plug-in has on your audio file.
The preview is the first 10 seconds of the
first selected audio event, played from its
beginning and looped continuously. If the
audio event is less than 10 seconds, then
the entire audio event is used and it, too,
loops continuously.
If you select a portion of an audio event,
then Vision uses the first 10 seconds of
the selected range, or the entire range if
the selection is shorter than 10 seconds.
NOTE: Audio preview uses RAM that’s
external to the RAM partition set aside for
Vision. If there’s not enough RAM left in
your system, then the audio preview “borrows” RAM from Vision. If Vision cannot
spare all the RAM required for the audio
preview, it will simply shorten the length of
the preview.
Recalling Parameter Settings
Some higher quality plug-ins (such as
Opcode’s fusion:EFFECTS series) let you
save parameter settings under a specific
name. By creating and storing a number
of different parameter sets (frequently
called “patches”), you can create your
own library of specialized effects, which
you can apply to any audio file in Vision.
Allocate More RAM to Vision
Some Premiere plug-ins may use a sizeable portion of Vision’s RAM allocation to
run.
Opcode Systems, Inc.
CHAPTER 37: DSP Menu: Premiere Plug-Ins and DSP Preferences
For this reason, you should always
increase the amount of RAM allocated to
Vision if you wish to run Premiere plugins. Different plug-ins require different
amounts of RAM. Some may require an
allocation increase of only 1 or 2MB -others may require as much as 8 MB.
To open the DSP Preferences dialog box,
choose DSP>Preferences.
쐃
쐇
BOTTOM LINE: Always increase Vision’s
RAM allocation as much as possible if you
plan to use Premiere plug-ins.
쐋
쐏
DSP PREFERENCES
Choose this command to open a dialog
box in which you tell Vision how to
manage all the audio events and audio
files created by the various DSP
commands.
For each (or every) DSP command you
can specify:
•
•
•
•
•
Whether or not to display the DSP
menu’s settings dialog box (if it has
one).
Whether or not to display a Save As
dialog box each time you perform a
DSP function.
How the files are written to disk.
Where the files are saved, and in what
format.
How files are automatically named.
쐄
쐂
쐆
Figure 41.5: DSP Preferences Menu
As you can see in Figure 41.5, there are
numerous elements in the DSP Preference dialog. Specifically:
쐃
Apply to
Use this pop-up menu to select the
DSP command for which you wish to
set the Preferences. You can set Preferences for each individual DSP
command, or you can set them globally by choosing “All DSP
Commands.”
You can make these selections globally,
or save them with individual Vision files.
Vision & Studio Vision Pro — Audio Reference Manual
423
PART 7: Menus
쐇
Select any of
these items to
assign unique
preferences to
the corresponding DSP menu
command.
Select this item to assign the same
preferences to all DSP menu
commands.
In general, you’ll probably set preferences using the “All DSP Commands”
option. However, it may be advantageous to specify different default save
locations, auto-naming techniques,
and so on for individual DSP commands. The flexibility is there for you
to use as you wish.
TIP: Start by setting the desired preferences
for “All DSP Commands,” then set any
desired differences for specific DSP
commands.
424
Dialogs
These options let you disable the display of one, or both, of the dialog
boxes that sequentially appear following your invoking of a DSP command.
The first dialog that normally appears
when you invoke a DSP command is
the Settings dialog box, in which you
set all the parameters for that particular DSP operation.
The second dialog that normally
appears is a Save As dialog box that
asks you to name the file, select a
save location, and confirm or set
some additional file type options.
If you check the Bypass Settings
Dialog option, then the Settings
dialog box never appears. This is convenient if, for example, you always
apply the same parameters every time
you choose a DSP command.
IMPORTANT: If you check the
Bypass Settings Dialog option, the
only way you’ll ever see the Settings
dialog again is to choose the DSP
Preferences command and uncheck
this option. Therefore it’s important
that you check this option only if you
don’t intend to alter your DSP settings
very frequently.
Opcode Systems, Inc.
CHAPTER 37: DSP Menu: Premiere Plug-Ins and DSP Preferences
If you check the Bypass Save As
Dialog option, then the Save As
dialog box never appears. This is convenient if, for example, you establish
an auto-naming technique, default
storage folder, and audio format that
you don’t intend to change.
You can also bypass the Save As
dialog box by checking the “Bypass
Save As Dialog” option in the Save As
dialog box itself. When you do that,
the Save As dialog will be bypassed
only for the DSP command you are
currently using.
IMPORTANT: If you check the
Bypass Save As Dialog option, the
only way you’ll ever see the Save As
dialog again is to choose the DSP
Preferences command and uncheck
this option. Therefore, it’s important
that you check this option only if you
don’t intend to alter file options very
frequently.
Since these options can be enabled or
disabled individually for each DSP
command, they provide an invaluable
time savings to the busy recording
engineer or composer.
NOTE: If a particular option does not
apply to the chosen DSP command, it
is disabled.
쐋
Audio Events option
Use this option to tell Vision how to
create processed audio events when
your original selection included only
a portion of an audio event.
If you select Separate, Vision applies
the DSP process only to the selected
time range. In your sequence, it separates the original audio event and
inserts the newly processed audio
event into the selected time region
If you select a region of an audio event,
then apply a DSP command to it (Reverse,
in this example), the resulting audio event
looks as follows:
Original
Audio
Events
New audio event created by
DSP operation is only as long
as the original selection.
This option saves disk space since
DSP operations contain only the
affected region. However, it results in
more audio events for you to keep
track of.
Vision & Studio Vision Pro — Audio Reference Manual
425
PART 7: Menus
If you select One Event, Vision creates a new audio event the same
length as the one you’re processing.
DSP operations are performed on the
selected time range and any audio
outside that range is copied to the
new audio event, creating a single
new event.
If you select a region of an audio event,
then apply a DSP command to it (Reverse,
in this example), the resulting audio event
looks as follows:
New audio event created by DSP operation
is as long as the original event -- the new
Þle contains both the
reversed audio and a
copy of the unaffected,
non-reversed audio.
쐏
File Saving Option
If you select multiple audio events to
process, this option determines how
Vision saves the processed file(s).
Specifically:
If you select numerous audio events,
then invoke a DSP operation that
uses the “Save All new events in a
single file” preference, then Vision
writes all the processed data into a
single new audio file and all new
audio events point to this single file.
This option creates fewer audio files,
but each audio file is referenced by
numerous audio events, as illustrated
in Figure 41.6.
Reversed audio
This option creates larger files on
disk, but results in easier editing,
since there are fewer audio events to
keep track of. It also lets you freely
move or copy the event -- even to
places with different tempos, and it
makes it easier to edit the event in an
external sample editing program
such as Peak or Sound Designer II.
NOTE: This option is disabled for the
many DSP operations for which it does
not apply -- in these instances, all saves
use the One Event method.
426
Opcode Systems, Inc.
CHAPTER 37: DSP Menu: Premiere Plug-Ins and DSP Preferences
1. With the All option selected in the pop-up
menu...
audio files, but each audio file is
smaller and is initially referenced by a
single audio event, as illustrated
below:
2. Select numerous events.
1. With the Each option selected in the pop-up
menu...
2. Select numerous events.
3. Invoke a DSP operation (this example users
Invert Phase).
4. All processed events are written to the hard drive
as a single audio Þle (as shown below).
3. Invoke a DSP operation (this example uses
Invert Phase).
Hard Drive
4. Each processed event is written to the hard drive
as its own audio Þle (as shown below).
My Song-001.Inv
Hard Drive
My Song-001.Inv
My Song-002.Inv
My Song-003.Inv
My Song-004.Inv
5. And each new audio event references a portion
of this new audio Þle (as shown above).
5. And each new audio event references
its own individual audio Þle.
Figure 41.6: Using the “Save All new events
in a single file” Option
If you select numerous audio events,
then invoke a DSP operation that
uses the “Save each new events in a
separate file” preference, then Vision
writes each of the processed files into
its own file and assigns them a new
audio event. This option creates more
Figure 41.7: Using the “Save Each new event
in a separate file” Option
Vision & Studio Vision Pro — Audio Reference Manual
427
PART 7: Menus
NOTE: If you select the Each option
without enabling the Bypass Save As
Dialog option, Vision will only display
a Save As dialog box for the FIRST file
that needs saved. Subsequent files will
be saved in the same folder you selected
in that first Save As dialog.
If you type a name other than the
default, that name will be used only for
the first file. Subsequent files will
return to using the automatic names
discussed in item 쐂.
쐄 Default Folder
This button opens a standard Save As
dialog box, in which you specify the
default file format and the default
folder in which all processed files (of
the specified type) are stored.
When you’ve navigated to the desired
folder, click the Select “folder
name” button to make it the default -its name will appear under the
Default Folder button in the DSP
Preferences dialog box.
Name of current default folder
TIP: This feature (along with the autonaming options discussed in item 쐂) is
particularly useful if you check Bypass
Save As Dialog (discussed in item
쐇), since it lets you define a default
storage location and file type, eliminating the need to constantly see Save As
dialog boxes after invoking DSP
operations.
쐂 Auto-naming options
Use these two pop-up menus to specify exactly how you want each DSP
operation to automatically name the
new files that it creates.
You can select to save all files in
either AIFF or Sound Designer II
format.
428
Opcode Systems, Inc.
CHAPTER 37: DSP Menu: Premiere Plug-Ins and DSP Preferences
You can specify both a default prefix
and a default suffix. To specify the
prefix, select it from the left-most popup menu, as shown below.
The area below the pop-up menus
always shows an example of how your
default file names will appear.
Example of how file names will appear
To specify a default suffix, select it
from the right-most pop-up menu, as
shown below.
You can enter a custom prefix and/or
suffix by selecting the Custom option
from either pop-up menu.
TIP: This feature (along with the
default folder options discussed in item
쐄) is particularly useful if you check
Bypass Save As Dialog (discussed
in item 쐇), since it lets you define a
default file name, eliminating the need
to constantly see Save As dialog boxes
after invoking DSP operations.
NOTE: If you don’t check the Bypass
Save As Dialog option, you can
always overwrite the naming defaults
whenever a Save As dialog appears
after you invoke and configure a DSP
operation.
쐆 Save with sequence files
Check this option if you want each
Vision file to remember its own DSP
Preferences. This lets you set completely different sets of preferences
for different files, keeping your hard
disk and separate recording projects
more organized.
If this option is unchecked, all Vision
files will use your most recent preference selections.
Vision & Studio Vision Pro — Audio Reference Manual
429
PART 7: Menus
430
Opcode Systems, Inc.
1
2
3
4
5
6
Index
Vision & Studio Vision Pro — Audio Reference Manual
7
431
Index
432
Opcode Systems, Inc.
Index
INDEX
Symbols
µ-law 2-1
in Audio Format dialog 229
Numerics
24 Bit 24
A
Acadia
Audio Preferences 88
Disk resources 85
fixed allocation 37
importing audio 207
Mix command 316
playing stereo files 42
recording a track 29
recording overview 25
recording step-by-step 26–31
ReWire 329
selecting 14
syncing 326
system requirements 14
Acadia audio system 353
Action buttons
Import Audio dialog (DAE) 210
Active in Background 19, 356
Add All
Import Audio dialog (Acadia) 207
Add button
Import Audio dialog (DAE) 210
Add tracks to existing movie
Export as QuickTime Movie dialog 222
Add/Open
Import Audio dialog (Acadia) 207
Adjust Audio Tempo™ 389
to a new, static tempo 392–393
to a tempo map 389–391
Opcode Manual Template
advanced recording techniques 31
AIFF
in Audio Format dialog 228
All Enabled Outputs
Mix (Acadia) 318
appending to files 239
Apply to
DSP Preferences 423
in Audio Recording Preferences 240
ASIO 13
using 3rd-party hardware 17
ASIO driver
selecting 15
ASIO Drivers folder 13
assigning
an Audio Instrument 29, 119
EQ (Acadia) 53
plug-ins 47
plug-ins (example) 47–48
Attack time
example 314
in Strip Silence dialog 313
Audio
Display Names 183
Introduction 3
Show Audio Event Names 355
audio channels
definition 35
audio event 8
names 183
vs. audio file 7
Audio Events
DSP Preferences 425
audio events
breaking into phrases 247
changing Instrument assignments 191
changing length 194
changing start times 190
comparing 250
copying 197
cutting 197
in Graphic window 177
433
Index
in List window 178
in Tracks window 178
lengthening 196
muting (Graphic window) 248
muting (List window) 250
pasting 197
renaming 184
selecting 177, 184, 187
selecting portions of 187
selecting time range 188
trimming 195
unmuting 249
velocity 254
viewing as waveforms 179
Audio File
in Get Event Info 347
audio file
vs. audio event 7
Audio Format dialog 228
µ-law 2-1 229
AIFF 228
anatomy 228
Bypass this dialog next time 233
Channels 231, 232
Compression 229
Deinterleave 232
dithered 231
File format 228
IMA 4-1 229
Interleave 232
MACE 3-1 229
MACE 6-1 229
Mono 231
No Change 232
Normalize on Mix 232
Off (Normalize) 232
On (Normalize) 232
Output file size 233
Prevent Clipping (Normalize) 233
Sample Rate 229
Sample Size 230
Sound Designer II 228
434
Stereo - 1 interleaved file 231
Stereo - 2 mono files 231
Sun .au 228
WAVE 228
Audio Instruments
assigning 29, 119
assignment in Graphic Window 191
assignment in List Window 193
assignment in Tracks Window 193
basics 8
colors 134
panning 254
recording from 80
recording from (TDM) 170
setting number of 36
Audio Instruments & Routings
see Audio Instruments window 37
Audio Instruments (DAE)
Mute 135
naming 133
number of 133
Output 142
Plug-Ins column 145
Poly 138
Sends 145
Solo 135
stereo 138, 139
Voice 136, 137
Audio Instruments window 35
audio channels 35
Audio Instruments 35
Busses 35
Color 38
EQs column 43
Inputs 35
Mute 40
Name 38
number of Instruments 36
Output column 42
Outputs 35
picture 35
Plug-Ins column 43
Opcode Systems, Inc.
Index
SampleCell TDM 166
Sends column 43
Solo 40
Stereo column 41
Audio Instruments window (DAE) 131
Audio Instruments window menu
clearing routings 146
Reset All Routings 43, 146
Audio Instruments window menu (DAE) 146
Audio menu
Active in Background 19, 356
Audio Preferences 356
Audio System 353
Buffer Size 351
Conversion Overview 351
Edit Event Soundfile 348
File Management 350
Get Event Info 184, 347
Hardware Setup 352
Link Events 350
Mix Audio on Capture 320, 321, 356
Retain 343
Sample Rate/Size 352
Separate 344
Session Sample Rate 18
Strip Silence/Slice Audio 346
Unlink Events 350
Waveform Display 182, 354
Waveform Height 182, 353
audio pan 276
fader 257, 260
Faders window 270
in List window 255
in Strip Chart 256
Audio Preferences 356
Audio Preferences (Acadia) 88
Dither Outputs 91
Fade duration 90
Maximum Fader Position 89
Medium 90
None 90
Play Offset 92
Opcode Manual Template
Process While Stopped 91
Sharp 90
Smooth 90
Smooth Audio Controllers 90
Audio Preferences (DAE) 173
end-to-end onto one track 174
Fade duration 174
Import Multiple Files... 174
Maximum Fader Position 173
Medium 174
None 174
onto multiple empty tracks 174
Sharp 174
Smooth 174
Smooth Audio Controllers 174
Audio Recording Preferences 240
Apply to 240
Create unique filenames by concatenating
242
Default Folder 242
Save All new takes in a single file 240
Save each new take in a separate file 241
Save with sequence files 243
audio signal flow (in Consoles) 46
Audio System 353
A 353
Audio Templates (Audio-to-MIDI dialog box)
405
audio tracks
number of 83
audio volume 276
fader 260
faders 257
Faders window 270
in List window 255
in Strip Chart 256
in the Strip Chart 270
Audiomedia II/III 99
Record Monitor 113
Audio-to-MIDI dialog box
Audio Templates 405
basic 398–400
435
Index
expanded 400–402
Generate new velocities 403
Note Length Exceeds 402
Re-analyze Audio 406
Use Selected Notes 403
Audio-to-MIDI™ command 396
uses 396
using 397
auditioning 245
assembling a new take 251
by muting events 248
by muting events (List window) 250
comparing audio events 250
individual audio events 247
with Mute buttons 246
with Solo buttons 246
with the Audio Instruments window 247
Auto (Record Monitor)
Acadia 23
DAE 111
Auto Compact 23, 243
Record Monitor (DAE) 111
Automatic (Waveform Height) 182, 353
automation
Audio Pan 276
Audio Volume 276
audio volume in the Strip Chart 270
audio volume/pan in Faders window 270
Automation submenu 276
DAE/TDM 263
EQ Band Parameter submenu 278
EQ Enable 278
inserting events in the Strip Chart 267, 268
menus 265
MIDI submenu 282
Mute 277
Phase Invert 278
Plug-In Bypass 277
plug-in parameter names 281
Plug-in Parameter submenu 279
plug-in parameter values 281
plug-in recording tip 264
436
recording 264
removing plug-ins 49, 275
Send Levels 277
Solo 277
types of events 275
viewing events in Strip Chart 266
Automation submenu 276
Auto-naming
DSP Preferences 428
auto-separating (with Slice Audio) 309
Available
Record Monitor (DAE) 111
Available Recording Time 23
B
B (plug-in bypass) 51
Band Pass
in EQ dialog box (DSP menu) 367
bank templates (plug-ins) 65
Bars/Beats
Time Scale dialog box 387
bit depth
see Sample Size
Bits column
in File Management window 286
Bouncing
see Mixing
Buffer Size 351
Acadia 87
DAE 100
with TDM plug-ins 130
Buffer Size dialog
File Buffer Size 87
File Buffers 87
Memory Available 88
Memory Required 88
Process Ahead 88
Bus (Send area) 58
Busses
creating a submix 76
mono & stereo 59
naming 134
Opcode Systems, Inc.
Index
recording from 81
recording from (TDM) 170–172
soloing 40
stereo (in DAE) 139
Bypass button
Plug-In area 51
Plug-In Edit window 65
Plug-In Edit window (TDM) 154
Bypass Save As Dialog (DSP Preferences) 425
Bypass Settings Dialog (DSP Preferences) 424
Bypass this dialog next time
in Audio Format dialog 233
C
Cancel button
Import Audio dialog (Acadia) 208
Import Audio dialog (DAE) 210
Capture 320, 321
Capture Post-Outputs
Mix (Acadia) 318
Capture Pre-Outputs
Mix (Acadia) 318
Capture Seq->Seq 321
Capture Seq->Track 321
Card to Use
Hardware Setup (DAE) 102
Card Type
Hardware Setup (DAE) 101
CD
importing audio from 208, 217–218
Channel
EQ window 70
Plug-In Edit window (Acadia) 65
Plug-In Edit window (TDM) 153
Channel 1-2 Input
Hardware Setup (DAE) 103
Channels
in Audio Format dialog 231, 232
in File Management window 285
in Get Event Info 347
Checking Disk Allocation (DAE) 106
Choose 6
Opcode Manual Template
Clear Clip and Undo 287
File Management menu 299
clearing Consoles 62
Click 5
clipping
avoiding 28, 118
Instruments, Inputs, Busses 60
Outputs 60
Clipping Indicators 23
Console 60
Record Monitor (DAE) 110
Clock Source
Hardware Setup 15
Color
Audio Instruments window 38
Compact
File Management menu 286
Compression
in Audio Format dialog 229
Console
assigning Outputs 60
audio signal flow 46
clearing 62
clipping LEDs 60
mono vs. stereo signal 46
recording fader movements 259
using (example) 258
virtual consoles (Acadia) 78
virtual Consoles (TDM) 168
with TDM Plug-Ins 148
Consolidate
File Management menu 287
Conversion Overview 220, 304, 351
Convert All button 306
Convert button 306
Done button 306
File List 304
Hardware Setup button 305
Session Sample Rate 305
Session Sample Size 305
vs. DSP>Convert Sample Rate 363–364
Convert All button
437
Index
in Conversion Overview 306
Convert button
in Conversion Overview 306
Convert Sample Rate command 362
vs. Conversion Overview 363–364
Copy Bank
Template pop-up 67
Copy Faders 272
and "faced" plug-ins 282
examples 273–275
number of parameters 275
Copy Program
Template pop-up 67
Copy Settings
Template pop-up 73
Template pop-up (TDM) 155
Copy to Folder
File Management menu 291
tip 293
copying
audio events 197
CPU Resources 84
Create new movie
Export as QuickTime Movie dialog 222
Create unique filenames by concatenating
DSP Preferences 428
in Audio Recording Preferences 242
Crossfade (Fade/Crossfade) 374
crossfades
see Fade/Crossfade
creating (example) 376–377
Cut command 350
cutting
audio events 197
D
DAE 97
allocating RAM 99
automation 263
Buffer Size (setting) 100
importing audio 209
mixing 319
438
recording a track 120
recording overview 115
recording step-by-step 116–121
scrubbing 337
syncing 327
system requirements 97
DAE audio system 353
Default Folder
DSP Preferences 428
in Audio Recording Preferences 242
Deinterleave
File Management menu 298
in Audio Format dialog 232
Deinterleaving 303
steps 303
Delete Bank Template
Template pop-up 67
Delete button
File Management menu 297
Delete Program Template
Template pop-up 67
Delete Template
Template pop-up 73
Template pop-up (TDM) 155
Device
Hardware Setup 15
Dialogs
DSP Preferences 424
Digidesign DirectIO 13, 15
control panel 16
Digital Format
Hardware Setup (DAE) 103
Disk I/O
Hardware Setup (DAE) 102
Disk Resources 85
Display Names command 183
Dither Outputs
Audio Preferences (Acadia) 91
dithered
in Audio Format dialog 231
Do menu
Toggle Mutes 250
Opcode Systems, Inc.
Index
Done button
Import Audio dialog (Acadia) 208
Import Audio dialog (DAE) 210
in Conversion Overview 306
Double-click 5
Drag 5
dragging plug-ins 49
DSP menu
Adjust Audio Tempo™ 389
Audio-to-MIDI™ 396
Convert Sample Rate 362
DSP Preferences 423
EQ 366
Fade/Crossfade 369
Formant Shift 383
Invert Phase 55, 361
MIDI-to-Audio™ 406
Mix 316, 358
Normalize 89, 173, 358
Pitch Shift 380
Premiere Plug-Ins 420
Reverse 359
Time Scale 386
DSP Preferences 423
Apply to 423
Audio Events 425
auto-naming 428
Create unique filenames by concatenating
428
Default Folder 428
Dialogs 424
One Event 426
Save All new events in a single file 426
Save each new events in a separate file 427
Save with sequence files 429
Separate 425
DSP>Mix
vs. Export Audio Mix 225, 315
Duration
in Get Event Info 347
Time Scale dialog box 387
Dynamic Voice Allocation 124, 136
Opcode Manual Template
dynamic voice allocation
and audio playback 199–201
E
Edit Event Soundfile command 348
with Acadia 348
with DAE 348
Edit menu
Capture 320, 321
Capture Seq->Seq 321
Capture Seq->Track 321
effects (Premiere Plug-Ins)
previewing 422
Eject button
Import Audio dialog (DAE) 210
Enable (EQ Band parameter) 279
enabling
inputs and outputs 39
End of note (MIDI-to-Audio™ dialog box) 407
End of note (Process Note Until) 416, 417, 418
End Time
Time Scale dialog box 387
end-to-end onto one track
Audio Preferences (DAE) 174, 211
EQ
assigning (Acadia) 53
EQ area
anatomy 54
EQ Edit button 54
EQ Toggle button 55
EQ type 55
gain faders 55
Phase Toggle button 55
EQ Band Enable
overriding 278
EQ Band Parameter submenu 278
EQ command 366
EQ Curve (EQ window) 70
EQ dialog box (DSP menu) 367
EQ Edit button (EQ area) 54
EQ Enable 278
EQ Panel (1-4)
439
Index
EQ window 70
EQ toggle (main)
EQ window 70
EQ Toggle button (EQ area) 55
EQ types 71
EQ area 55
High Cut 72
High Shelf 72
Low Cut 71
Low Shelf 71
Parametric 71
EQ window 69
Channel 70
EQ Curve 70
EQ Panel (1-4) 70
EQ toggle (main) 70
Mute 70
Solo 70
Template Functions pop-up 70
Template pop-up 70
EQs column
Audio Instruments window 43
Equal Power (Fade/Crossfade) 374
Event Name
in Get Event Info 347
Events column
in File Management window 285
Export as QuickTime Movie (File menu) 206
Export as QuickTime Movie dialog 222
Add tracks to existing movie 222
Create new movie 222
Export Audio option 223
Export MIDI option 223
Export selector 222
Replace tracks in existing movie 222
Export Audio Events
in File menu 206
vs. Export Audio Mix 227
Export Audio Mix 223
in File menu 206
Use EQs, plug-ins, etc. 318
vs. DSP>Mix 225, 315
440
vs. Export Audio Events 227
Export Audio option
Export as QuickTime Movie dialog 223
Export MIDI option
Export as QuickTime Movie dialog 223
Export selector
Export as QuickTime Movie dialog 222
Export Settings
Template pop-up (TDM) 155
exporting
audio mix 223
individual audio events 225
individual audio events (example) 227
exporting audio
as QuickTime movie 221
exporting MIDI
as QuickTime movie 221
External Beat Clock
Sync mode 325
F
faceless (plug-ins) 64
Fade duration
Audio Preferences (Acadia) 90
Audio Preferences (DAE) 174
fade in 181
Fade In/Out (Fade/Crossfade) 370
fade ins
automatic 373
manual 373
fade outs
automatic 371
manual 373
Fade/Crossfade command 369
fader
mapping to volume/pan 260
fader events 271
faders
changes from previous versions of Vision
271
explanation 271–272
volume and pan 257
Opcode Systems, Inc.
Index
Faders window 259
audio volume and pan 270
Fast (Waveform Display) 182, 354
File and Item Lists
Import Audio dialog (DAE) 210
File Buffers
number (Acadia) 87
Size (Acadia) 87
File column
in File Management window 284
File Format
in Audio Format dialog 228
in Get Event Info 347
File Info
Import Audio dialog (Acadia) 207
File Length (Fade/Crossfade) 370
File List
Import Audio dialog (Acadia) 207
in Conversion Overview 304
File Management 350
File Management menu 286
Clear Clip and Undo 299
Compact 286
Consolidate 287
Copy to Folder 291
Copy to Folder tip 293
Deinterleave 298
Delete 297
Find File 298
Label 288
Label (example) 290–291
Move to Folder 294
Rebuild Waveform 183, 298
Remove from List 299
Rename 295
Sample Rate Convert 297
Select All 299
Select Unused 299
File Management window 283
Bar Display 284
Bits column 286
Channels column 285
Opcode Manual Template
Events column 285
File column 284
organizing audio files 286
playing files 286
Sample Rate column 285
Size column 285
Type column 285
Unused column 285
viewing the file path 284
File menu
Export as QuickTime Movie 206
Export Audio Events 206
Export Audio Mix 206, 223
Import Audio 206
Import Audio Using QuickTime 206
File Volume
in Get Event Info 347
Filter Type
in EQ dialog box (DSP menu) 367
Find File
File Management menu 298
Fine tune (Pitch Shift) 380
Fixed Voice Allocation 124, 136
and audio playback 202–203
assigning voices 124, 137
fixing wrong notes
with MIDI-to-Audio™ 408
Flip button (Plug-In Edit window) 65
Formant Shift
changing a singer’s gender 385
Formant Shift command 383
Format button 233
Frequency
EQ Band parameter 278
in EQ dialog box (DSP menu) 367, 368
G
Gain (EQ Band parameter) 278
gain faders (EQ area) 55
gating audio (with Strip Silence) 308
Generate new velocities (Audio-to-MIDI dialog
box) 403
441
Index
Get Event Info command 184, 347
shortcut 347
Graphic window
audio events 177
Audio Instrument assignment 191
importing audio 212
selecting audio events 184
Grow (Waveform Height) 182, 353
H
Hardware Sample Rate
vs. Session Sample Rate 302
Hardware Setup
Device 15
Hardware Setup (Acadia) 352
Clock Source 15
Open Control Panel 16
Sample Rate 15
Hardware Setup (DAE) 101
Card to Use 102
Card Type 101
Channel 1-2 Input 103
Digital Format 103
Disk I/O 102
Interface 103
Other Options 103
Sample Rate 103
Select Card Type 102
Session 8 102
Slot 102
Sync Mode 103
Hardware Setup button
in Conversion Overview 305
harmony
creating using MIDI-to-Audio™ 411
High Cut
automation 279
EQ type 72
High Pass
in EQ dialog box (DSP menu) 367
High Resolution (Waveform Display) 182, 355
High Shelf
442
automation 279
EQ type 72
I
IMA 4-1
in Audio Format dialog 229
Import Audio
in File menu 206
Import Audio dialog (Acadia) 207
Add All 207
Add/Open 207
Cancel 208
Done 208
File Info 207
File List 207
Import 207
Import multiple files 208
Play/Stop 208
Remove 208
Import Audio dialog (DAE)
Action buttons 210
Add button 210
Cancel button 210
Desktop button 210
Done button 210
Eject button 210
File and Item Lists 210
Remove button 210
Sound File Information 210
Import Audio Using QuickTime
in File menu 206
Import Bank
Template pop-up 68
Import List
Import Audio dialog (Acadia) 207
Import Multiple Files...
Audio Preferences (DAE) 174
Import Audio dialog (Acadia) 208
Import Program
Template pop-up 67
Import Settings
Template pop-up (TDM) 155
Opcode Systems, Inc.
Index
importing audio
Acadia 207
DAE 209
foreign file formats 219
from a CD 208, 217–218
from QuickTime movies 213
Graphic window 212
if Conversion Overview appears 220
List window 212
multiple files (DAE) 211
shortcuts 212
stereo linked files (Acadia) 208
importing MIDI
from a QuickTime movie 212
individual audio events
exporting 225
exporting (example) 227
Inputs
enabling 39
monitoring (Record Monitor) 28, 119
naming 134
recording from 80
recording from (TDM) 169
stereo (DAE) 140
Instrument
Record Monitor (Acadia) 23
Record Monitor (DAE) 111
Instrument setups
saving 44, 146
Interface
Hardware Setup (DAE) 103
Interleave
in Audio Format dialog 232
interleaved files
see stereo files
Internal Clock
Sync mode 325
Invert Phase
DSP menu 55
with Phase button 55
Invert Phase command 361
Opcode Manual Template
L
Label
File Management (example) 290–291
File Management menu 288
length (of audio events)
changing 194
lengthening audio events 196
Linear (Fade/Crossfade) 374
Link Events command 350
Link Pairs 23
Record Monitor (DAE) 111
List window
audio events 178
Audio Instrument assignment 193
audio volume/pan 255
importing audio 212
selecting audio events 185
Load From
Template pop-up 73
Load Templates From
Template pop-up 68
Template pop-up (TDM) 155
Lock Audio to Tape 327
enabling 328
Low Cut
automation 279
EQ type 71
Low Pass
in EQ dialog box (DSP menu) 367
Low Shelf
automation 279
EQ type 71
M
MACE 3-1 (compression)
in Audio Format dialog 229
MACE 6-1 (compression)
in Audio Format dialog 229
Maintain voice character
MIDI-to-Audio™ dialog box 408
Pitch Shift 381
443
Index
Manual Conventions
Choose 6
Click 5
Double-click 5
Drag 5
menu items 6
Move 5
Press and hold 5
Release 5
Select 6
Maximum Fader Position 269, 276
Acadia 89
DAE 173
when to set 90
Medium
Audio Preferences (Acadia) 90
Audio Preferences (DAE) 174
Memory Available (Buffer Size dialog) 88
Memory Required (Buffer Size dialog) 88
Menu Items 6
MIDI only audio system 353
MIDI submenu 282
MIDI Time Code
Sync mode 325
MIDI-to-Audio dialog box 407
MIDI-to-Audio™ command 406
changing audio timing 413
creating audio harmonies 411
fixing wrong notes 408
stabilizing pitch fluctuations 410
using 408
Minimum duration
in Strip Silence dialog 312
mix
getting rid of silence 322
Mix command 316, 358
resulting audio files 322
silence 322
using silence 323
zero crossings 181
Mix (Acadia) 316
All Enabled Outputs 318
444
Capture Post-Outputs 318
Capture Pre-Outputs 318
Output destinations 318
Mix (DAE) 319
Mix Audio on Capture 320, 321, 356
monitoring 78
example (TDM) 167
input in Record Monitor 28, 119
TDM 166
thru mode 167
voice allocation 167
while recording 33, 124
Mono
in Audio Format dialog 231
mono in/mono out
Acadia 51
TDM 152
mono in/stereo out
Acadia 51
TDM 152
mono plug-ins
using (Acadia) 52
using (TDM) 152
mono vs. stereo
in Console 46
Move (Manual Conventions) 5
Move to Folder
File Management menu 294
MTC/Machine Control
Sync mode 325
multiple takes 33, 123
Mute 277
Audio Instruments (DAE) 135
Audio Instruments window 40
EQ window 70
Plug-In Edit window (Acadia) 65
Plug-In Edit window (TDM) 154
muting audio events
Graphic window 248
List window 250
Opcode Systems, Inc.
Index
N
Name
Audio Instruments window 38
names
of audio events 183
Next note
MIDI-to-Audio™ dialog box 407
Process Note Until 416, 417, 418
No Change
in Audio Format dialog 232
no send (Send area) 58
None
Audio Preferences (Acadia) 90
Audio Preferences (DAE) 174
Normalize 89, 358
in Audio Format dialog 232
Note Length Exceeds (Audio-to-MIDI) 402
number of audio tracks 83
O
Off 23
Normalize (in Audio Format dialog) 232
Record Monitor (DAE) 111
Waveform Display 182, 354
On 23
Normalize (in Audio Format dialog) 232
Record Monitor (DAE) 111
One Event
DSP Preferences 426
on-the-fly punching (DAE)
see QuickPunch 127
onto multiple empty tracks
Audio Preferences (DAE) 174, 211
Open Control Panel
Hardware Setup 16
organizing audio files
in File Management window 286
Other Options
Hardware Setup (DAE) 103
Output
Audio Instruments (DAE) 142
Opcode Manual Template
Pro Tools I & Pro Tools II 145
Pro Tools III/24/Mix/Mix Plus 143
Send area 58
Session 8/Project 144
output
vs. voice 7
Output column
Audio Instruments window 42
Output destinations
Mix (Acadia) 318
Output file size
in Audio Format dialog 233
Output Pair (Send area) 58
Outputs
assigning in Consoles 60
enabling 39
naming 134
recording from 82
stereo (DAE) 140
Outputs (TDM)
and panning 158
assigning in Audio Instruments window
156
assigning in Console 156
routing options 157
P
pan
fader 257, 260
Faders window 270
in List window 255
in Strip Chart 256
pan fader
available/unavailble 62
panning
and Outputs 158
Audio Instruments 254
in Consoles 62
Parametric
automation 279
EQ type 71
Paste Bank
445
Index
Template pop-up 67
Paste Program
Template pop-up 67
Paste Settings
Template pop-up 73
Template pop-up (TDM) 155
pasting
audio events 197
Peak 181
Performance window 83
CPU 84
RAM resources 86
Phase Invert 278
Phase Toggle button (EQ area) 55
inverting phase with 55
pitch fluctuations
stabilizing with MIDI-to-Audio™ 410
Pitch Shift command 380
Pitch Shift Quality 380
MIDI-to-Audio™ dialog box 408
Play Offset
Audio Preferences (Acadia) 92
determining 94
Play/Stop
Import Audio dialog (Acadia) 208
playing
in File Management window 286
Plug-In area 50
Bypass button 51
Edit button 50
Plug-In Selector 51
Plug-In Type 51
Plug-In Bypass 277
Plug-In Edit window 63
anatomy 64
Bypass button 65
Channel 65
Flip button 65
Mute 65
Plug-In parameters 65
Plug-In Selector 64
Program 65, 66
446
Slot 65
Solo 65
TDM 153
Template 64, 66
Plug-In Edit window (TDM)
Bypass button 154
Channel 153
Mute 154
Plug-In Selector 153
Slot 153
Solo 154
Templates 153
Plug-In parameters 279
Plug-In Edit window 65
Plug-In Selector
Plug-In Edit window (Acadia) 64
Plug-In Edit window (TDM) 153
plug-ins
assigning 47
assigning (example) 47–48
assigning (TDM) 150
bypassing (TDM) 155
mono in/mono out 51
mono in/stereo out 51
mono/stereo (TDM) 151
multiple instantiations 282
parameter names 281
parameter values 281
rearranging 49
removing 49, 275
saving/recalling templates 65
sharing plug-ins 75
stereo in/stereo out 51
tip for recording automation 264
using mono 52
using mono (TDM) 152
using stereo 52
using stereo (TDM) 151
Plug-Ins column
Audio Instruments (Acadia) 43
Audio Instruments (TDM) 145
Poly
Opcode Systems, Inc.
Index
Audio Instruments (DAE) 138
pops and clicks 180, 181
Post Fader 59
Pre Fader 59
Pre/Post Fader Button (Send area) 59, 161
Premiere Plug-Ins 420
allocating RAM 422
basics 420
installing 420
location 420
previewing effects 422
recalling parameter settings 422
Press and hold 5
Prevent Clipping (Normalize)
in Audio Format dialog 233
printing effects
real-time 79
Pro Tools 24 98
Record Monitor 112
Pro Tools 24 Mix/Mix PLus 98
Pro Tools I/II
Record Monitor 112
Pro Tools III
NuBus & PCI 98
Record Monitor 112
Pro Tools Project 98
Record Monitor 113
Process Ahead 88
Process Note Until 415
End of note 416, 417, 418
MIDI-to-Audio™ dialog box 407
Next note 416, 417, 418
Process While Stopped
Audio Preferences (Acadia) 91
Program (Plug-In Edit window) 65, 66
program templates (plug-ins) 65
Q
Q Factor
in EQ dialog box (DSP menu) 368
QuickPunch 127
files 129
Opcode Manual Template
Record Monitor (DAE) 111
using (example) 128–129
QuickTime movie
exporting audio/MIDI 221
importing audio 213
importing audio to a sequence 215
importing audio to a track 214
importing MIDI 212
R
RAM
(DAE) determining amount 100
allocating to DAE buffer 99
Buffer Size dialog 87
resources 86
Re-analyze Audio (Audio-to-MIDI dialog box)
406
rearranging
plug-ins 49
ReBirth
launching with Vision 332
quitting with Vision 332
Remote Start 336
using via ReWire (example) 331
Rebuild Waveform 183
File Management menu 298
Record Enable Indicators
Record Monitor (Acadia) 22
Record Monitor (DAE) 110
record file
designating 26, 116
disabling 27, 117
Record Monitor 23, 111
Record File Options
Record Monitor (DAE) 111
record levels
Record Monitor 22, 110
setting 27, 118
Record Monitor
anatomy of 22
Auto 23
Auto Compact 23, 243
447
Index
available recording time 23
clipping indicators 23
Instrument 23
Link Pairs 23
Off 23
On 23
opening 21
record enable indicators 22
Record File 23
record levels 22
record source 22
Sample Size 23
Thru 23
variations in appearance 24
Record Monitor (DAE)
Auto 111
Auto Compact 111
Available 111
Clipping Indicators 110
Instrument 111
Link Pairs 111
Off 111
On 111
QuickPunch 111
Record Enable Indicators 110
Record File 111
Record File Options 111
Record Levels 110
Record Monitor menu 110
Source 110
Thru 111
Record Monitor menu 22
Audio Recording Preferences 240
in Record Monitor (DAE) 110
Record Offset
determining 93
record source 22
recording
a track in Acadia 29
a track in DAE 120
appending to files 239
automation 264
448
closing/releasing a file 238
Console/fader movements 259
different takes 237
from Audio Instruments (Acadia) 80
from Audio Instruments (TDM) 170
from Audio Instruments, Busses, and Outputs 79
from Busses 81
from Busses (TDM) 170–172
from Inputs 80
from inputs (TDM) 169
from Outputs 82
from SampleCell 169
from SampleCell TDM 170
multiple takes 33, 123
overview (Acadia) 25
overview (DAE) 115
plug-in automation tip 264
step-by-step (Acadia) 26–31
step-by-step (DAE) 116–121
stereo (Acadia) 31
stereo (DAE) 122
stereo/mono instruments 27, 32, 117, 122
while monitoring 33, 124
recording techniques
advanced 31
Release (mouse) 5
Release time
in Strip Silence dialog 313
Remote Start
with ReBirth (via ReWire) 336
Remove button
Import Audio dialog (Acadia) 208
Import Audio dialog (DAE) 210
Remove From List 288, 294
File Management menu 299
Rename
File Management menu 295
renaming
audio events 184
Replace tracks in existing movie
Export as QuickTime Movie dialog 222
Opcode Systems, Inc.
Index
Reset All Routings
Audio Instruments window menu 43, 146
Retain command 343, 350
Retro AS-1
Audio Output setting 334
using via ReWire (example) 333
Retro AS-1 OMS Driver 333
Reverse command 359
ReWire 329
about 329
audio streaming 329
configuration 330
default enabled inputs 335
Mix/Main input 335
ReBirth example 331
Remote Start 336
Retro AS-1 example 333
sample accurate synchronization 329
Send Sync 335
transport functionality 329
Routings
reseting/clearing 43
S
Sample End
in Get Event Info 347
Sample Rate
Hardware Setup 15
Hardware Setup (DAE) 103
in Audio Format dialog 229
in Get Event Info 347
Sample Rate column
in File Management window 285
Sample Rate Conversion 301
steps 303
two methods 302
Sample Rate Convert
File Management menu 297
Sample Rate/Size 352
Sample Size 23
in Audio Format dialog 230
in Get Event Info 347
Opcode Manual Template
Sample Size Conversion 302
steps 303
Sample Start
in Get Event Info 347
SampleCell 165
in Audio Instruments window (TDM) 166
recording from 169
SampleCell TDM
recording from 170
sampler
creating files for (example) 227
Save All new events in a single file
DSP Preferences 426
Save All new takes in a single file 240
Save as Default
Template pop-up 73
Template pop-up (TDM) 155
Save Bank (Template pop-up) 67
Save Bank As (Template pop-up) 67
Save Bank as Default (Template pop-up) 68
Save each new event in a separate file
DSP Preferences 427
Save each new take in a separate file 241
Save Program (Template pop-up) 67
Save Program As (Template pop-up) 67
Save Settings
Template pop-up 73
Template pop-up (TDM) 154
Save Settings As
Template pop-up 73
Template pop-up (TDM) 154
Save with sequence files
DSP Preferences 429
in Audio Recording Preferences 243
saving
Instrument setups 44, 146
Scale Factor
Time Scale dialog box 387
scrubbing 337
and audio Outputs 338
and Output volume 339
in the Track Overview 339
449
Index
Select 6
Select All (File Management menu) 299
Select Card Type
Hardware Setup (DAE) 102
Select Unused 294
File Management menu 299
selecting
audio events 184
MIDI/Audio/Strip Chart simultaneously
189
multiple tracks 189
Send
mono/stereo Busses 59
post fader 59
pre fader 59
Send area
anatomy 57
Bus 58
no send 58
Output 58
Output Pair 58
Pre/Post Fader Button 59
Send Level 59
Send Selector 58
Send area (TDM) 159
Pre/Post Fader Button 161
Send Level 162
Send Level 277
Acadia 59
TDM 162
Send Selector (Send area) 58
Send Sync
and ReWire 335
Sends
Audio Instruments (DAE) 145
destinations 56
displaying 56
displaying (TDM) 158
uses 56
Sends column
Audio Instruments window 43
Separate
450
DSP Preferences 425
Separate command 344
separating audio
automatically (with Slice Audio) 309
Session 8 98
Hardware Setup (DAE) 102
Record Monitor 113
Session Sample Rate 18
in Conversion Overview 305
setting 105
vs. Hardware Sample Rate 105, 302
Session Sample Size
in Conversion Overview 305
setting record levels 27, 118
Sharp
Audio Preferences (Acadia) 90
Audio Preferences (DAE) 174
Show Audio Event Names 355
Show Masking Tape 163
Shrink (Waveform Height) 182, 353
signal flow in consoles 46
silence
including in a mix 322
removing from a mix 322
using mixed silence 323
Silence threshold
in Strip Silence dialog 311
Size column
in File Management window 285
Slice Audio 307
auto-separating 309
vs. Strip Silence 310
Slope
in EQ dialog box (DSP menu) 368
Slot
Hardware Setup (DAE) 102
Plug-In Edit window (Acadia) 65
Plug-In Edit window (TDM) 153
Smooth
Audio Preferences (Acadia) 90
Audio Preferences (DAE) 174
Smooth Audio Controllers 126
Opcode Systems, Inc.
Index
Acadia 90
DAE 174
SMPTE
Time Scale dialog box 387
Solo 277
Audio Instruments (DAE) 135
Audio Instruments window 40
EQ window 70
Plug-In Edit window (Acadia) 65
Plug-In Edit window (TDM) 154
soloing
Busses 40
Sound Designer II 210
in Audio Format dialog 228
operations 350
with Edit Event Soundfile (DAE) 349
Sound File Information
Import Audio dialog (DAE) 210
Sound Manager
ASIO driver 13, 15
control panel 16
Sound Manager Input Options 16
Sound Tools II
Record Monitor 113
Source
Record Monitor (Acadia) 22
Record Monitor (DAE) 110
start times (audio events)
changing 190
stereo
Audio Instruments (DAE) 138, 139
Busses (DAE) 139
Inputs (DAE) 140
Outputs (DAE) 140
Stereo - 1 interleaved file
in Audio Format dialog 231
Stereo - 2 mono files
in Audio Format dialog 231
stereo Audio Instruments
and importing audio (Acadia) 208
Stereo column
Audio Instruments window 41
Opcode Manual Template
stereo files
importing (Acadia) 208
playing (Acadia) 42
stereo in/stereo out (plug-ins) 51
stereo plug-ins
using 52
using (TDM) 151
stereo recording
Acadia 31
DAE 122
stereo voicing
Pro Tools III/24 141
stereo vs. mono
in Console 46
Strip Chart
and Maximum Fader Position 270
audio volume/pan 256
automation events 266
Strip Silence 307
gating audio 308
vs. Slice Audio 310
Strip Silence dialog 311
Attack time 313
Minimum duration 312
Release time 313
Silence threshold 311
Strip Silence/Slice Audio command 346
submix
creating 76
example 163
Sun .au
in Audio Format dialog 228
SuperClock 327
Sustain audio across segments 194
Sync Mode
Hardware Setup (DAE) 103
Sync mode
External Beat Clock 325
Internal 325
MIDI Time Code 325
MTC/Machine Control 325
syncing (Acadia) 326
451
Index
Lock Audio to Tape 326
syncing (DAE) 327
hardware sync 327
Lock Audio to Tape 327
SuperClock 327
system requirements
DAE 97
T
takes
multiple (Acadia) 33
multiple (DAE) 123
recording in different files 237
TDM 147
assigning plug-ins 150
creating a Console 148–149
mono/stereo plug-ins 151
using mono plug-ins 152
using stereo plug-ins 151
Template
Plug-In Edit window (Acadia) 64, 66
Template Functions pop-up
EQ window 70
Template pop-up
Copy Bank 67
Copy Program 67
Copy Settings 73
Delete Bank Template 67
Delete Program Template 67
Delete Template 73
EQ window 70
Import Bank 68
Import Program 67
Load From 73
Load Templates From 68
Paste Bank 67
Paste Program 67
Paste Settings 73
Save as Default 73
Save Bank 67
Save Bank As 67
Save Bank as Default 68
452
Save Program 67
Save Program As 67
Save Settings 73
Save Settings As 73
Template pop-up (TDM)
Copy Settings 155
Delete Template 155
Export Settings 155
Import Settings 155
Load Templates From 155
Paste Settings 155
Save as Default 155
Save Settings 154
Save Settings As 154
Templates
Plug-In Edit window (TDM) 153
tempo
and audio event resolution 179
Thinning Volume and Pan Data (DAE) 126
Thru
Record Monitor (Acadia) 23
Record Monitor (DAE) 111
Time Scale command 386
using 387
timing
changing with MIDI-to-Audio™ 413
Toggle Mutes command 250
Tracks window
audio evnets 178
Audio Instrument assignment 193
selecting audio events 185
trimming (audio events) 195
Type (EQ Band parameter) 278
Type column
in File Management window 285
U
Unlink Events command 350
unmuting
audio events 249
Unused column
in File Management window 285
Opcode Systems, Inc.
Index
Use Selected MIDI Notes 407
Use Selected MIDI Pitch Bend 407
Use Selected MIDI Velocity 407
Use Selected MIDI Volume 407
Use Selected Notes 403
Use Zero Crossings 314
V
velocity
of audio events 254
vs. volume 253
viewing the file path
in File Management window 284
virtual Consoles
Acadia 78
TDM 168
Vision
using your manuals 3
Vision Effects Templates file 65
Vocoding
with Audio-to-MIDI 404
Voice
Audio Instruments (DAE) 136, 137
voice
vs. output 7
voice allocation
Acadia 37
Audiomedia 137
dynamic 124
fixed 124
Pro Tools I & II 137
Pro Tools III/24 137
Session 8/Project 137
Sound Tools II 137
volume
fader 260
faders 257
Faders window 270
in List window 255
in Strip Chart 256
volume vs. velocity 253
Opcode Manual Template
W
WAVE
in Audio Format dialog 228
Waveform Display 182, 354
and Slice Audio 309
and Strip Silence 308
Fast 182
High Resolution 182
Off 182
Waveform Height 182, 353
Automatic 182
Grow 182
key equivalents 353
Shrink 182
Where Is
see Find File
Width (EQ Band parameter) 278
Z
Zero Crossings 180
zero crossings
and the Mix command 181
Use Zero Crossings option 314
using while editing 180
zooming
audio events 179
453