1
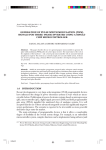
“I declare that I have read this thesis and, in my opinion it is suitable in terms of scope and quality for purpose of awarding a Bachelor Degree in Engineering (Electrical - Control and Instrumentation).” Signature : …………………………………... Name of Supervisor : DR HAZLINA BINTI SELAMAT Date : 30 APRIL 2010 AUTOMATIC ROOM LIGHTING SYSTEM MASITAH BINTI BAHARUDDIN This thesis is submitted in part fulfillment of requirement for the awarding of Degree in Bachelor of Engineering (Electrical - Control and Instrumentation) Faculty of Electrical Engineering Universiti Teknologi Malaysia APRIL 2010 ii “I declare that this thesis entitle AUTOMATIC ROOM LIGHTING SYSTEM is the result of my own research except as cited in the references. This thesis has not been accepted for any degree and is not concurrently submitted in candidature of any degree.” Signature : …………………………………... Name of Candidate : MASITAH BINTI BAHARUDDIN Date : 30 APRIL 2010 iii Dedicated to my beloved parents and family iv ACKNOWLEDGEMENT Alhamdulillah, praise to Allah S.W.T for His blessings, I manage to complete my Final Year Project. First and foremost, I would like to give the deepest appreciation to my supervisor Dr Hazlina Selamat for her guidance and support throughout the accomplishment of this project. I also would like to thank my friends and my classmates who have helped me in various ways in completing this project. And special thanks to my friend Wynn Emma who has helped me in so many ways in duration of this project. Last but not least, I am indebted to my parents, for their long loving support and prayers, not only now, but throughout this whole years that brought me to who I am now. v ABSTRACT Lighting design is a common task in any building design. Artificial lighting accounts for 30 to 50 percent of total energy usage in a building. Daylight provides natural lighting throughout the day especially in Malaysia so a proper and effective lighting strategy which takes daylight into account not only provides comfort to the consumer but can also contribute to cost effectiveness. Nowadays people seek comfort and ease to their everyday life. Thus, this project will help in providing eye comfort as well as strive for cost saving. The Automatic Room Lighting System will enable the user to choose three different types of modes, which is the study mode, relax mode and sleep mode. These three modes will gives different level of illumination suits for these various tasks while taking natural daylight into account. The system also will be able to detect motion in the provided area, which will on/off the light automatically after some time. This system may be implemented in a multipurpose room especially. I believe this project may give more variety to the current available lighting systems for consumer to choose from. vi ABSTRAK Rekabentuk pencahayaan adalah salah satu tugas asas dalam rekabentuk bangunan. Pencahayaan buatan menyumbang sehingga 30 hingga 50 peratus jumlah penggunaan tenaga elektrik di dalam sesebuah bangunan. Cahaya matahari memberikan pencahayaan semulajadi sepanjang hari terutamanya di Malaysia, oleh itu pencahayaan yang sesuai and efektif yang mengambil kira faktor pencahayaan semulajadi bukan sahaja memberi keselesaan, malah dapat menyumbang kepada penjimatan kos. Pengguna hari ini mencari keselesaan and kemudahan dalam kehidupan harian. Jadi, projek ini diharap dapat membantu dalam menyediakan keselesaan pandangan disamping cuba mengurangkan kos penggunaan elektrik. Sistem Pencahayaan Bilik Automatik ini membolehkan pengguna memilih tiga mod penggunaan, iaitu mod belajar, mod relak dan mod tidur. Ketiga-tiga mod ini akan memberikan tahap kecerahan yang berbeza yang sesuai untuk pekerjaan disamping mengambil kira pencahayaan semulajadi. Sistem ini juga berkebolehan untuk mengesan pergerakan di dalam ruang tertentu, dan akan membuka dan memadam lampu berdasarkan kewujudan penghuni setelah beberapa ketika. Sistem ini boleh digunakan terutamanya di ruang serbaguna. Saya percaya projek ini akan memberi lebih pilihan kepada pengguna dalam memilih sistem pencahayaan. vii TABLE OF CONTENTS CHAPTER TITLE 1 PAGE DECLARATION ii DEDICATION iii ACKNOWLEDGEMENTS iv ABSTRACT v ABSTRAK vi TABLE OF CONTENTS vii LIST OF TABLES x LIST OF FIGURES xi INTRODUCTION 1.1 General Introduction 1 1.2 Problem Statement 2 1.3 Project Objectives 3 1.4 Scope of Project 4 viii 2 LITERATURE REVIEW 2.1 Light and Measurement 5 2.2 Daylight Distribution 6 2.3 Efficient Lighting Methods 7 2.3.1 Manual Dimming 8 2.3.2 Timer 9 2.4 Illumination Levels 9 2.5 Photosensor 10 2.5.1 Photodiode 11 2.5.2 Photoresistor 12 2.6 Occupancy sensor 13 2.6.1 Passive Infrared (PIR) 14 2.6.2 Active Ultrasound Device 15 2.7 PIC Microcontroller 15 2.8 Previous Projects 16 2.8.1 Intelligent Lighting System for Commercial 17 Building 3 2.8.2 Automated Home Lighting System 17 2.8.3 Home Automation Lighting System 18 HARDWARE AND SOFTWARE DEVELOPMENT 3.1 Introduction 19 ix 4 5 3.2 Methodology 20 3.3 Hardware: Circuits Components 21 3.3.1 PIC16F877A 21 3.3.2 BPW34 Vishay Silicon PIN Photodiode 22 3.3.3 Passive Infra-red (PIR) Sensor 24 3.3.4 LM324 as Amplifier 25 3.3.5 IRFZ48N as switch 25 3.4 Hardware Development 26 3.5 Software Development 31 DATA RESULT AND ANALYSIS 4.1 Introduction 35 4.2 Testing Procedure 35 4.3 Circuit Troubleshoot 40 CONCLUSION AND FUTURE WORK 42 REFERENCES APPENDIX x LIST OF TABLES TABLE TITLE PAGE 2.1 SI photometry units 5 2.2 Minimum lighting levels by task 10 3.1 PIC16F877A features 22 3.2 Basic characteristic of BPW34 Vishay Silicon PIN Photodiode 23 3.3 Output voltage with corresponding brightness 32 4.1 Response of BPW34 under various lighting conditions 36 4.2 Illuminance in various conditions 37 4.3 Output voltage for various positions of light sensor 38 xi LIST OF FIGURES FIGURE TITLE PAGE 1.1 Example of over-illumination and energy waste 3 1.2 Prototype model 4 2.1 Plan view of daylight 7 2.2 Example of a dimmer 8 2.3 Example of a timer 9 2.4 Example of photodiode 11 2.5 Photoresistor or LDR 12 2.6 Basic LDR circuit 12 2.7 Typical configuration of PIR circuit 14 3.1 Flow of project 20 3.2 Pins diagram of PIC16F877A 22 3.3 PIR sensor by Cytron Technologies 24 3.4 Pin outs of LM324 25 3.5 IRFZ48N N-channel enhancement mode transistor 25 3.6 PIC power up circuit 26 3.7 Light sensing circuit 27 3.8 A non-inverting amplifier 27 3.9 Occupancy sensor 28 3.10 Lamp power up circuit 28 3.11 Mode selection circuit 29 3.12 Mode selection indicator circuit 29 3.13 Full circuit diagram 30 3.14 Graph of diode capacitance vs. reverse voltage 31 xii 3.15 Light sensing circuit 32 3.16 Main flowchart of the system 33 3.7 Functions flowchart 33 4.1 Conditions vs. illuminance plot 36 4.2 Top view of prototype 37 4.3 Position of light sensor 39 4.4 PIR test result 39 4.5 (a) PIR output without detection 40 (b) PIR output with detection 40 4.6 Full circuit in standby 41 4.7 Full brightness at study mode 41 CHAPTER 1 INTRODUCTION 1.1 General Introduction Lighting system is one of the major and essential features in a building design. It gives aesthetic or practical effect besides providing illumination for tasks and activities. Lighting can includes both natural illumination from daylight and also artificial lighting provided by light sources such as lamps. Artificial lighting represents a major component of energy consumption, accounting for a major component of all energy consumed worldwide. Proper lighting can enhance task performance, while poorly designed lighting may results in energy waste and adverse health effects from over-illumination. Lighting controls helps to deal with energy conservation, gives consumers more choice and make lighting system more flexible. Most common lighting method today is the on/off switch. There are few other available technologies including manual dimming, photosensor, occupancy sensor, timer and centralized control. 2 Efficient use of natural energy may help in energy saving as well provides consumer with proper illumination. The use of sensors such as occupancy sensor will respond to presence of people in a room is an example of ways to strive for energy efficiency. 1.2 Problem Statement Artificial lighting contributes major of electrical energy consumption worldwide. People often forget to turn off the light in their house when they go out so the room is lit even when there is no need for it. Sometimes the lights continue to be on until the room is already illuminated by natural light. Consumer often overlooked the energy that is wasted by letting this happen. Besides, this act also leads to increase in electrical bill. There is also a problem of the use of excessive amounts of light (also known as over-illumination). Over-illumination can be defined as presence of light intensity beyond the need for a specified activity [1]. Providing light to an already bright room may leads to over-illumination. 3 Figure 1.1: Example of over-illumination and energy waste 1.3 Project Objectives Many methods can be applied to implement an energy efficient lighting system. In this project, the main objectives are: To implement a lighting system that able to automatically adjust its brightness according to the surroundings, brightening or dimming when necessary. To enable certain modes of lighting. i.e. study mode, relax mode and sleep mode. Different mode will give different level of illumination. To detect any motion in the room that will switch on/off the light automatically. 4 1.4 Scope of Project The strategy is to take into account natural daylight and presence of people in the room. The project covers the development of hardware for the system which will include light sensor and occupancy sensor. The modes for the hardware is written and burned into the PIC microcontroller to control the whole system. The prototype is a box of 30x20x20cm with a window and a door. The point of interest is set to the middle of the room. Door Window 20cm 20cm 30cm Figure 1.2: Prototype Model CHAPTER 2 LITERATURE REVIEW 2.1 Light and Measurement Light is magnetic radiation, particularly radiation of wavelength visible to human eye (400nm-700nm). It is measured with two main alternative sets of units: radiometry consists of measurements of light power at all wavelengths, while photometry measures light with wavelength weighted with respect to a standardized model of human brightness perception. Photometry is useful to quantify illumination intended for human use. The SI unit for photometry system is summarized in the following table. [2] Table 2.1: SI photometry units [2] Quantity Symbol SI unit Abbr. Notes Luminous Qv lm·s lumen second energy Luminous flux units are sometimes called talbots F lumen (= cd·sr) lm also called luminous power Luminous Iv candela (= lm/sr) cd an SI base unit Lv candela per cd/m2 units are sometimes intensity Luminance square metre called "nits" 6 Illuminance Ev lux (= lm/m2) lx used for light incident on a surface Luminous Mv 2 lux (= lm/m ) lx emittance Luminous used for light emitted from a surface Lumen per watt efficacy lm/W ratio of luminous flux to radiant flux In this project, light level is being measured in unit Lux (lx) where lux is the metric unit measure for illuminance of a surface. One lux is equal to one lumen per square meter where lumen is the unit of light flow or luminous flux. The lumen rating of a lamp is a measure of the total light output of the lamp. Illuminance can be measure using light meter located on work surface or by using simple arithmetic and manufacturers’ photometric data. [3] 2.2 Daylight Distribution Daylighting is lighting an indoor space with openings such as windows and skylights that allow daylight into the building. This type of lighting is chosen to save energy, to avoid hypothesized adverse health effects of over-illumination by artificial light, and also for aesthetics. Artificial lighting energy use can be reduced by simply installing fewer electric lights because daylight is present, or by dimming/switching electric lights automatically in response to the presence of daylight. To design a lighting system that taking daylight into account, research on daylight distribution are necessary to understand. 7 Figure 2.1: Plan view of daylight Figure 2.1 shows the concentration of daylight in a room with A, B, C and D are the areas. Naturally, the closer the area to the window, the higher the light concentrated on the place and the concentration becomes lower the further it is from the window. If sensors are put in the area of A, B and C, area A which gets the most daylight will turn off or dimmed first. Area B which gets medium daylight will dim while area C that received less daylight receives a full power to maintain brightness. 2.3 Efficient Lighting Methods Lighting controls helps reduce energy usage and enable lighting design to be more flexible. There are many types of efficient lighting methods available today such as manual dimming, photosensor, occupancy sensor and timer. Suitable lighting method for a room can be determined by the room purpose or task. In this part, only manual dimming and timer method will be briefly explained. occupancy sensor method will be covered in the next part. Photosensor and 8 2.3.1 Manual Dimming Dimming controls are usually used to match lighting levels with human needs and to save energy. When combined with photosensors that measure local light levels, dimming controls can correct for dirt buildup in fixtures and lamp lumen depreciation. Dimming controls are also used to modulate lamp output to account for incoming daylight. Dimming may be accomplished in either a stepped or continuous fashion. Step-dimming ballasts typically offer two or three lighting levels, and they can be used with occupancy sensors so that the sensors are able to dim the lamps rather than turn them off, which can reduce on-off cycling and extend lamp life. Continuous dimming controls let users adjust lighting levels over a range of lighting output. They offer more flexibility than step dimming and are used in a wide variety of applications, including mood-setting and daylight dimming. Dimming can be accomplished on all lamp types found in commercial buildings: incandescent, fluorescent, and HID. [4] Figure 2.2: Example of a dimmer 9 2.3.2 Timer Timer operates based on either elapsed time after triggering or on programmed schedules using clock time. Elapsed-time switches, also called timer switches, typically fit into or over a standard wall-switch box and allow occupants to turn lights on for a period that is determined either by the occupant or by the installer. Lights go off at the end of that interval unless the cycle has been restarted by the occupant or manually turned off sooner. Time intervals typically range from 10 minutes to 12 hours. Elapsed-time switches are much simpler to specify than occupancy sensors, are less prone to user maladjustment, and are low in cost. [4] Figure 2.3: Example of a timer 2.4 Illumination Levels The following is a list of minimum lighting levels by task provided by ergonomic study. [5] 10 Table 2.2: Minimum lighting levels by task Task Lighting level (lx) Casual reading 300 Writing 500 Studying 1000 Food preparation 750 Dining 200 TV viewing 150 Laundry 200 Detailed work >1000 This information is used to put together the modes. It is decided that for study mode, lighting level will be about 1000 lx, while for relax mode, lighting level will be 150 lx to 300 lx. For sleep mode, lighting level needed is close to candle lit room which is about 50 lx. 2.5 Photosensor A photosensor is an electronic component that detects the presence of visible light, infrared transmission and ultraviolet energy. Most photosensors consist of semiconductor having photoconductivity property, in which the conductance varies depending on the intensity of radiation striking the material. There are several varieties of photosensor and the most common types are photodiode and photoresistor. 11 2.5.1 Photodiode A photodiode is designed to be responsive to optical input. Due to its waterclear epoxy, the device is sensitive to visible and infrared radiation. The large active area combined with a flat case gives a high sensitivity at a wide viewing angle. Photodiodes can be used in either zero bias or reverse bias. Diodes have extremely high resistance when reverse biased. This resistance is reduced when light of an appropriate frequency shines on the junction. Hence, a reverse biased diode can be used as a light detector by monitoring the current running through it. Some photodiodes look similar to a light emitting diode (LED). They have two wires coming from the bottom. The longer one is the anode while shorter one is the cathode. Photodiodes have a lower light sensitivity than cadmium sulphide LDR but give a fair quicker response in light level. [6] Figure 2.4: Example of photodiode 12 2.5.2 Photoresistor Photoresistor or light dependent resistor (LDR) is a device which converts a light signal into electrical signal. The semiconductor resistance decreases with increase in light intensity. The most common material for LDR is cadmium sulphide which contained no or very few free electrons when not illuminated. When light fall on the device have high enough frequency, the photons absorbed by the semiconductor give bound electrons enough energy to jump into conduction band. The resulting free electron and the hole conduct electricity, thus lowering resistance. [6] Figure 2.5: Photoresistor or light dependent resistor The resistance of LDR varies according to amount of light falls on it. The relationship between the resistance RL and light intensity Lux for a typical LDR is RL 500 LuxK Consider a circuit of LDR Figure 2.6: Basic LDR circuit 13 The LDR is connected to 5V input through a 3.3kΩ resistor, using voltage divider, the output voltage of the LDR is V0 5RL R L 3 .3 Reworking the equation, the light intensity equation obtained is 2500 500 V0 Lux 3.3 ……………………………………………………… (1) For a low cost LDR, at the same light intensity, the part to part variation in resistance can be as high as 50 percent. Therefore such a low cost LDR is seldom used for measuring light intensity but more for light presence/absence detection. [7] 2.6 Occupancy sensor Occupancy sensor is an energy conservation device designed to sense the presence of human occupants in a given area. Occupancy sensors normally sense the presence of one or more persons within a designated area and produce occupancy signals to indicate a presence. Two most common types of occupancy sensors are passive infrared and active ultrasonic devices. 14 2.6.1 Passive Infra-red All objects emit infrared radiation that is invisible to human eye. This is also known as black body radiation. This radiation although invisible to the naked eye, it may be detected by electronic devices designed for such a purpose. The term passive in this instance means that the PIR device does not emit an infrared beam but merely passively accepts incoming infrared radiation. A passive infrared (PIR) sensor will turn on the load whenever it detects a moving or newly apparent heat source. PIR sensor measures infrared (IR) light radiating from objects in its field of view. [8] The theory of operation: Pyroelectric devices like PIR sensor have elements made of crystalline material that generates an electrical charge when exposed to infrared radiation. The changes in the amount of infrared striking the element change the voltages generated, which then be measured by an on-board amplifier. PIR sensor contains a special filter called a Fresnel lens, which focuses the infrared signals onto the element. As the ambient infrared signals change suddenly, the amplifier trips the output to indicate motion. [9] Figure 2.7: Typical configuration of PIR sensor 15 2.6.2 Active Ultrasonic Device Active Ultrasonic Device emits and receives ultrasonic sound energy to the point of interest. Object motion within the region of interest and in the range of the ultrasonic motion sensor is detected and an alarm signal representative thereof is produced. The effective range of ultrasonic motion detectors differs from design range whenever the actual ambient atmospheric sound propagation conditions vary from the design or nominal atmospheric conditions. 2.7 PIC Microcontroller PIC is a family of Harvard architecture microcontrollers made by Microchip Technology, derived from the PIC1640 originally developed by General Instrument's Microelectronics Division. The name PIC initially referred to "Peripheral Interface Controller". PICs are popular with both industrial developers and hobbyists alike due to their low cost, wide availability, large user base, extensive collection of application notes, availability of low cost or free development tools, and serial programming (and re-programming with flash memory) capability. Some series available from PIC family are PIC12, PIC16, PIC17, and PIC18 ranging from 6-pins to 40-pins. The PIC architecture is distinctively simple. It is characterized by the following features: Separate code and data spaces (Harvard architecture) A small number of fixed length instructions 16 Most instructions are single cycle execution (4 clock cycles), with single delay cycles upon branches and skips A single accumulator (W), the use of which (as source operand) is implied (i.e. is not encoded in the opcode) All RAM locations function as registers as both source and/or destination of math and other functions. A hardware stack for storing return addresses A fairly small amount of addressable data space (typically 256 bytes), extended through banking Data space mapped CPU, port, and peripheral registers The program counter is also mapped into the data space and writable (this is used to implement indirect jumps). Unlike most other CPUs, there is no distinction between memory space and register space because the RAM serves the job of both memory and registers, and the RAM is usually just referred to as the register file or simply as the registers. [10] 2.8 Previous Projects In aid of completing this project, some previous projects by UTM students were studied. 17 2.8.1 Intelligent Lighting System for Commercial Building This project was completed by Sukor bin Muhammad in 2009. His thesis includes the research of current lighting system that has been implemented for commercial building in Malaysia as well as intelligent lighting system adopted by some commercial buildings in Malaysia. He has performed a study on lighting usage of various UTM buildings. He then designed a project that takes natural light into account when designing a lighting system using photosensor and occupancy sensor. From his findings, most building in UTM and commercial building only use the common on/off method and no dimming or occupancy sensor is installed at all. The intelligent lighting in his project only focus on design occupied sensor and photosensor circuit. The system is not the complete function for intelligent lighting system. For future studies, he suggested a dimming circuit that can control artificial light so that it can be controlled to complement the available daylight. 2.8.2 Automated Home Lighting System This project was completed by Jong Han Siong in 2009. He modified a lighting system that automatically adjusts its brightness according to its surrounding by using clapping. The project allow for a suitable level of brightness at all times and to render the need of manual adjustment obsolete. User can adjust brightness of the room as well as turning the light on and off by clapping. There are also buttons for further brightness control and 7-segment display to show current setting of the device. 18 Some problem faced in his project was the output light would sometimes flicker and there was delay in time the device receive the clapping sound. But overall, his project has been successfully implemented. 2.8.3 Home Automation Lighting System The project was completed by Goh Lin Chian in 2009. His project uses the automation concept to control lighting in a house. He also designed a motion detection circuit to detect any passerby in the area provided. He designed a graphic user interface so that lights can be controlled simultaneously from the home personal computer and uses the concept of local area network (LAN) that enable user to interconnect the personal computer which is located in other part of the house. CHAPTER 3 HARDWARE AND SOFTWARE DEVELOPMENT 3.1 Introduction This chapter will discuss and explain the methodology, components used in this project, the circuit designs as well as software development. The methodology consists of the project flow stage by stage. The components used in this project will be explained in this chapter including reasons for selection. The circuit designs will also be discussed in this chapter until the software development. 20 3.2 Methodology The project was done in few stages. 1 • Understanding the problem 2 • Literature review 3 • Component selection and circuit design 4 • Hardware development 5 • PIC microcontroller programming 6 • Combining hardware and programming 7 • Testing and troubleshooting 8 • Implement system Figure 3.1: Flow of project Understanding the problem: first thing to do is to get a clear view on the problem. In other word, understand how the system will work, the input and output of the system. Literature review: gather information related to the topic and try to read and understand. Component selection: after getting information on the sensors do comparison on the sensors available and choose the best sensor that suits the project. Besides the sensors, suitable PIC also has to be chosen. 21 Circuit design: next is the circuit design process. Designs from books and internet that are related to the project have to be studied and understand to aid the design process. Refer to components datasheets for the connections. Hardware development: if there are no problems with the design, proceed to hardware development. PIC microcontroller programming: Next is to write a programming for the PIC microcontroller. The programming’s source code can be written either in C Language or in Assembly language. The PIC microcontroller is the one that will control the system and will do the processes between the inputs and the outputs. Combining hardware and programming: burn the program into the PIC and combine to the hardware. Testing and troubleshooting: test the system for any problems and ensure the system work as planned. 3.3 Hardware: Circuit Components 3.3.1 PIC16F877A PIC16F877A is a 40-pin enhanced FLASH/EEPROM 8-bit microcontroller from PIC16 family from Microchip Technology. This microcontroller has 5 ports, A, B, C, D and E. Port A may be use for analog inputs and port C has two CCP pins that may be use for pulse width modulation to control the brightness of lamp. 22 Figure 3.2: Pins diagram of PIC16F877A The PIC16F877A is chosen because of its economical and low cost, availability of the chip and its related software and developer. The basic features of PIC16F877A can be viewed in Table 3.1 below. Table 3.1: PIC16F877A features 3.3.2 BPW34 Vishay Silicon PIN Photodiode The BPW34 is a high speed and high sensitive PIN photodiode in a miniature flat plastic package. Its top view construction makes it ideal as a low cost replacement of TO–5 devices in many applications. [15] 23 Due to its waterclear epoxy the device is sensitive to visible and infrared radiation. The large active area combined with a flat case gives a high sensitivity at a wide viewing angle. Features of BPW34 Vishay Silicon PIN Photodiode Large radiant sensitive area (A=7.5 mm2) Wide angle of half sensitivity j = ± 65˚ High photo sensitivity Fast response times Small junction capacitance Suitable for visible and near infrared radiation Photodiode are chosen for this project because it has higher accuracy light intensity measurement compared to LDR which is more suitable for detection of light, rather than the brightness level. It has very fast response to light changes, so it is suitable to be use in this project. Besides, the relationship photocurrent and illuminance is very linear on a log-log scale makes it easier for calculation. BPW34 also is easy to get with fairly low cost. Table 3.2: Basic characteristic of BPW34 Vishay Silicon PIN Photodiode 24 3.3.3 Passive Infra-red (PIR) Sensor The PIR sensor by Cytron Technologies is a pyroelectric device that detects motion by measuring changes in the infrared levels emitted by surrounding objects. This motion can be detected by checking for a high signal on a single I/O pin. The product features include: Single bit output Small size makes it easy to conceal Compatible with all types of microcontrollers 5V till 20V operation with <100A current draw Figure 3.3: PIR Sensor by Cytron Technologies This sensor will give a voltage output when motion is detected within its range of view. This sensor is suitable to detect any presence of human in a room, but the minor downside is that in needed to detect motion continuously to stay in high state. This may be overcome by putting delay into the controller so the lamp will stay on longer without detection. Due to its availability, fairly low cost and easy to use, therefore this sensor is chosen to be use in this project. 25 3.3.4 LM324 as Amplifier The LM324 integrated circuit is a quad operational amplifier (Op-Amp). The device has four individual Op=Amp circuits housed in a single package. Figure 3.4: Pin Outs of LM324 3.35 IRFZ48N as switch MOSFET IRFZ48N is used as a switch. Its basic function is to control the drain current by the gate voltage. By applying a suitable drive voltage to the Gate of an FET the resistance of the Drain-Source channel can be varied from an "OFFresistance" of many hundreds of kΩ's, effectively an open circuit, to an "ONresistance" of less than 1Ω, effectively a short circuit. MOSFET can also be driven to turn "ON" fast or slow, or to pass high currents or low currents. This ability to turn the power MOSFET "ON" and "OFF" allows the device to be used as a very efficient switch. [18] Figure 3.5: IRFZ48N N-channel enhancement mode transistor 26 3.4 Hardware Development Power source used in this project is 12V. The LM7805 will regulate the given 12V voltage to constant 5V to supply the PIC16F877A. The purpose of using diode 1N4007 (D1) is for circuit protection in case the polarity of the power source is incorrect. Capacitor 10μF (U2) and 100nF (U3) is used to stabilize the voltage input and output of the LM7805. A green LED is used as power indicator. Figure 3.6 below shows the connection of PIC power up circuit. Figure 3.6: PIC power up circuit For light sensing circuit, the photodiode is coupled to a 10kΩ resistor. Output voltage is measured between the R1 resistor and ground. The output is sent to an operational amplifier with a gain of 10. The amplified voltage is sent as analog input into PIC analog pin (AN0). Figure 3.7 shows the connection of the circuit. 27 Figure 3.7: Light sensing circuit Amplifier used in this project is LM324 Quad Op-Amp. It has four individual OpAmp circuits housed in a single package. The gain of the amplifier can be set easily by using these equations: 𝑉𝑜𝑢𝑡 = 𝑉𝑖𝑛 ∗ 𝐴𝑚𝑝𝑙𝑖𝑓𝑖𝑒𝑟 𝑔𝑎𝑖𝑛 ………...………………………………………... (2) Where 𝐺𝑎𝑖𝑛 = 1 + (𝑅2 /𝑅1 ) ….……...…………………………………………………. (3) Figure 3.8: A non-inverting Amplifier Occupancy sensor used in this project is the PIR sensor from Cytron Technologies. It can be used directly by connecting 5V power into positive (+) pin, ground to negative (–) pin, and output to PIC as digital input. When motion is 28 detected, the output will go high for several seconds depending on the on-board delay time setting. Figure 3.9 below shows the connection of occupancy sensor. Figure 3.9: Occupancy sensor For lamp power up circuit, output from PIC will trigger the MOSFET IRFZ48N to let current through which will control the lamp to be either ON or OFF. The duty cycle in the PIC will control the levels of brightness in the room. Figure 3.10 below shows the connection of lamp circuit. RC2 Figure 3.10: Lamp power up circuit 29 For mode selection circuit, the push buttons used are normally open. 5V is supplied continuously to PIC. When a button is pushed, the corresponding pin will go low (0V) to indicate selection to the PIC. Figure 3.11: Mode selection circuit Mode indication circuit contains 3 yellow LEDs which each will turn on when corresponding mode is selected. RB0 RB1 RB2 Figure 3.12: Mode selection indicator 30 Full circuit diagram is as shown below. Figure 3.13: Full circuit diagram The PIR sensor will have to be leave for a few second (about 10 second) to familiarize with its environment. Without any motion in its path, the output of PIR sensor is 0V. When a motion is detected, the output will go high (5V). This output is sent directly to PIC16F877A to indicate occupancy. Photodiode BPW34 is used to detect brightness in the room. This light sensor is used in reverse biased that will produce reverse light current when light detected. The photodiode is coupled to a 10KΩ resistor. The output voltage from the resistor is to be measured and sent to an operational amplifier to increase its output voltage by a factor of 10. Then the output is used as the brightness input into the PIC. 31 The 3 switches are to be chosen by user to change mode of lighting in the room. Button A is for the Sleep Mode while button B and button C is for Relax Mode and Study Mode respectively. The 3 LEDs is used as indication of which mode currently in use. 3.4 Software Development From literature review, the modes are set at: 1. Sleep mode at 50lx 2. Relax mode at 250lx 3. Study mode at 1klx From photometric data of photodiode BPW34, the relationship of lux and output voltage can be calculated. Figure 3.14: Diode Capacitance vs. Reverse Voltage 32 VCC 5V BPW34 OPAMP R1 10kOhm R2 10kOhm R3 1kOhm Figure 3.15: Light sensing circuit When the photodiode is coupled to a 10kΩ resistor, using basic Ohm’s Law; 𝑉𝑜𝑢𝑡 = 𝐼𝑝 ∗ 𝑅𝐿 Where RL=10kΩ From the graph, Equation of reverse current and brightness can be obtained. 𝐼𝑝 = 0.1333 𝑙𝑢𝑥 So, 𝑙𝑢𝑥 = 1333 ∗ 𝑉𝑜𝑢𝑡 …………………………………………………………… (4) Table 3.3 below shows the Vout for needed brightness. Table 3.3: Output voltage with corresponding brightness Brightness (lux) Output voltage, Vout (V) 50 0.04 250 0.19 1000 0.75 The programming is started by making the flowchart of the whole system to get the idea on the flow of the program. 33 Figure 3.16: Main flowchart of the system Figure 3.17: Functions flowchart The program will start off with the lamp in off condition. Then the program will continuously in standby mode to detect any motion from occupancy sensor’s field of view. When the PIR (occupancy sensor) is triggered by movement, the output of the sensor will go high for approximately 10 seconds. If this sensor is triggered repeatedly, the output will stay in high condition longer. This output is sent to PIC RD0 pin where port D on the PIC has already been set to digital input. After RD0 is triggered, the PIC will check for analog input obtained from photodiode in RA0/AN0 34 pin. If the room is dark (i.e. night time), the lamp will automatically go on with full brightness where else if the room is already illuminated by sunlight, the lamp will stay off. Then the program will standby for user to choose a mode. When a mode is chosen, for example sleep mode (50lx), the main program will call for function sleep mode. Otherwise if the user doesn’t choose any mode, the room will stay at its last condition. Let say the sleep mode is chosen, the lamp will automatically dim to 50lx where based on calculation, Vout from photodiode should be 0.04V. This 0.04V is been amplified by LM324 by a gain of 10, so the output from photodiode circuit into PIC should be 0.4V. The duty cycle of the PWM has to be calibrated first with 255 output as full brightness. Next, the system will continuously check for any changes in brightness by increasing or decreasing the PWM duty cycle to achieve the target brightness. If occupant is no longer detected in the room (there has been no movement at all), the program will enter delay function, it will check for occupancy after 30 seconds. If still no motion, then the system will go back to starting point. Light sensor calibration: Analog to digital input from AN0 pin: Reference voltage = 5V ADC resolution is 10 bits, so 2n = 210 = 1023 quantization level ADC voltage resolution = 5V/1023 = 0.00488V or 4.88mV CHAPTER 4 DATA RESULT AND ANALYSIS 4.1 Introduction This section will discuss sensors testing, circuit troubleshooting and data analysis. Having designed project and developed the hardware and software for this project, it is necessary to ensure the functionality of the project. Much testing has to be done to ensure all part worked as intended. 4.1 Testing procedure To test the light sensor, the BPW34 was placed in environments with various amounts of brightness and a multimeter was used to measure the output voltage. The light sensor was tested under complete darkness, dim light, normal room light, direct flash light and on overcast day. The obtained output is as in Table 4.1 below. 36 Table 4.1: Response of BPW34 under various lighting conditions 𝐼𝑝 = 𝑉𝑜𝑢𝑡 /𝑅𝐿 ,(μA) Illuminance (lx) 0 0 0 Dim lights 0.04 4 53.32 Normal room lights 0.19 19 253 Direct flash light 1.3 130 1732 Overcast day 2.66 266 3545 Conditions Output voltage, 𝑉𝑜𝑢𝑡 Complete darkness Conditions vs. Illuminance 4000 3545 3500 3000 2500 1732 2000 1500 Illuminance 1000 500 0 53.32 253 0 Complete Dim Lights Darkness Normal Direct Flash Overcast Lighting Light Day Figure 4.1: Conditions vs. illuminance plot This result is being compared to reference to check whether the photodiode working properly. From Wikipedia site: 37 Table 4.2: Illuminance in various conditions [16] From table above, it is confirmed that the photodiode is working properly after comparing the results obtained from the experiment with the reference. Another test done for light sensor is to find the best placement of the sensor in this particular case. The sensor was put in 4 main positions inside the prototype and the output voltage was noted. The positions tested for are as shown in Figure 4.2. Figure 4.2: Top view of prototype 38 Position 1 and 4 is on the wall of the prototype, while position 3 is at the corner and position 1 is directly under the 12Vdc lamp. The external light source is from an AC table lamp positioned 5cm from the window at 90˚. The output obtained for each position is as follow. Table 4.3: Output voltage for various positions of light sensor Lamp only (full brightness) Lamp + External light source Position Vout Lx Vout Lx 1 0.19 253 0.32 426 2 0.19 253 0.34 453 3 0.17 230 0.23 306 4 0.17 230 0.23 306 Based on the experiment, position 2 that is directly underneath the lamp is found as the best position to put the light sensor. The position seems to get the optimum light from both sources. But after consideration, to ease the output reading it is decided that the lamp should be put on the wall (position 1) where the light use is also optimized and the sensor is nearest to the point of interest. In real case too, naturally it is more practical to put light sensor on the wall nearest to the target point instead of middle of the room or on the floor. 39 Figure 4.3: Position of light sensor For PIR sensor test, the room is divided into 24 squares of 5x5cm. The PIR is mounted on the middle top of the box (representing the roof of the room). Movement was made on each of the squares one by one and the output of PIR sensor was being monitored. The result of the experiment is as shown on figure 4.4 below. Figure 4.4: PIR test result The shaded areas represent the areas in which motion can be detected by the sensor. It can be seen that the area covers almost all of the room and especially covers the middle of the room. Since the box’s roof is only 20cm high, therefore the area covered was not very large. As state in the datasheet, the sensor should be able 40 to sense motion up to approximately 5 meter range. Upon motion detection, the output goes high to 3.32V for approximately 15 second. Figure 4.5(a): PIR output without detection 4.2 Figure 4.5(b): PIR output with detection Circuit troubleshoot After finish up with the hardware soldering connections and writing program, the program is burned inside the PIC and then connected to the circuit to check for functionality. Maximum output voltage being delivered from lamp is only 0.19V which is about 253lx. This is much less than the intended 1klx. Due to few constraints, the mode’s setting has to be reduced proportionally. For study mode, the brightness which should be 1000lx is set to 253lx. Relax mode to 60lx and sleep mode to 10lx. Testing of the circuit revealed problem from the program. Due to the failure of the program to control the system, the overall performance of the program is not confirms to the objectives. The lamp successfully be on upon motion detection and will automatically off after several seconds without detection. The study mode is 41 successfully implemented which the brightness of the room is at its full. The other modes are not working correctly which may due to the error in programming. Due to time constraint, the program was not been able to be repaired further. Figure 4.6: Full circuit in standby Figure 4.7: Full brightness at study mode CHAPTER 5 CONCLUSION AND FUTURE WORK There were many problem encountered in duration of this project. Unfortunately the project was not fully successful to be implemented into the hardware. This may be cause by several probable causes as been discussed in the previous chapter. Only 1 objective was accomplished that is the light will be on when occupant is being detected and off after 30 seconds after the no motion detected. The other two objectives that are the 3 modes with different level of brightness and the dimmer light using PWM were not successfully implemented. Only one mode work as it was supposed to that is the study mode with the lamp with its full brightness. So the objective is considered not accomplished. It is hope that in future work, the system can be continued until it is successfully implemented. Some future works that can also be done to improve the system’s functionality 1. Use a lamp that can deliver much higher brightness. 2. Do a study on how the system implementation can reduce the energy consumption. 3. Add a form of blinds that can automatically open and close with certain mode chosen. 4. Remote control to change the mode remotely. REFERENCES 1. Over-illumination http://en.wikipedia.org/wiki/Over-illumination 2. Photometric (optics) http://en.wikipedia.org/wiki/Photometry_%28optics%29 3. Light Resource.com, Light Research Center, Light Board, IES Lighting Handbook, 5th Edition 4. Lighting Control http://www.esource.com/escrc/0013000000DP22YAAT2/BEA1/PA/PA_Lig hting/PA-40 5. Study of Light Level by Task, http://ergonomics.about.com/od/lighting/a/lightleveltask.htm 6. Photodiodes and photoresistor, http://www.circuitstoday.com 7. Measurement of LDR and photodiode, http://www.emant.com/ 8. PIR Motion Sensor, http://www.gadgetshack.com/ 9. PIR sensor datasheet, Parallax Inc. http://www.parallax.com/dl/docs/prod/audiovis/PIRSensor-V1.2.pdf 10. PIC16F877A datasheet, http://ww1.microchip.com/downloads/en/DeviceDoc/35007b.pdf 11. Sukor bin Muhammad (2009), Intelligent Lighting System for Commercial Building, UTM Skudai 12. Goh Lin Chian (2009), Home Automation Lighting System, UTM Skudai 13. Jong Han Siong (2009), Automated Home Lighting System, UTM Skudai 14. Parr, E.A. Industrial Control Handbook Second Edition, ButterworthHeinemann Ltd 15. PICmicro Family Tree, PIC16F Seminar Presentation http://www.microchip.com.tw/PDF/2004_spring/PIC16F%20seminar%20pr esentation.pdf 16. Illuminance in various conditions, http://en.wikipedia.org/wiki/Lux 17. Vishay Semiconductor, BPW34 Silicon PIN Photodiode datasheet http://www.datasheetcatalog.org/datasheet/vishay/81521.pdf 18. Cytron Technologies, Passive Infra-red Sensor Product User’s Manual http://www.cytron.com.my/datasheet/sensor/PIR_UserManualv1.pdf 19. MOSFET as a switch, http://www.electronicstutorials.ws/transistor/tran_7.html APPENDIX