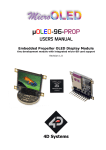
1
4D
SYSTEMS
TURNING TECHNOLOGY INTO ART
DATASHEET
4Display Shields
4Display-Shield-96/128/160/144
Document Date: 6th September 2012
Document Revision: 1.0
Uncontrolled Copy when printed or downloaded.
Please refer to the 4D Systems website for the latest Revision of this document
4Display-Shield-96/128/160/144 – Arduino Shields
Contents
1. Description...................................................................................................................................3
2. Features .......................................................................................................................................4
3. Hardware Description ..................................................................................................................5
3.1. 4Display-Shield-96 Arduino Shield – Featuring a 4D Systems µOLED-96-G2 ......................................... 5
3.2. 4Display-Shield-128 Arduino Shield – Featuring a 4D Systems µOLED-128-G2 ..................................... 6
3.3. 4Display-Shield-160 Arduino Shield – Featuring a 4D Systems µOLED-160-G2 ..................................... 7
3.4. 4Display-Shield-144 Arduino Shield – Featuring a 4D Systems µLCD-144-G2 ....................................... 8
3.5. Jumper Settings ...................................................................................................................................... 9
4. Related Products........................................................................................................................10
5. Schematic Design .......................................................................................................................11
6. Specifications and Ratings..........................................................................................................12
7. Legal Notice ...............................................................................................................................13
8. Contact Information...................................................................................................................13
4Display-Shield-96/128/160/144 – Arduino Shields
4D SYSTEMS
4Display-Shield
and easily draw lines, circles, text and even display
Images as well as play Video clips.
1. Description
The 4Display-Shield provides an easy way of
interfacing 4D Systems display modules to the
Arduino-Duemilanove, the Arduino-Mega and
many other Arduino compatible boards. The
4Display-Shields come in 4 models, featuring a 5
way multiswitch joystick and male headers that
help connect the 4Display-Shield to the Arduino
boards. The 5 position joystick is connected to the
Arduino D2, D3, D4, D5 and D6 pins. The
communication interface between the 4DisplayShield and the Arduino is via the Serial UART. Both
the TX and RX signals are jumpered on the shield
PCB so that the Arduino UART can be freed-up
when it's being programmed.
The 4Display-Shield can be purchased in four
models, featuring one of the following displays:
• µOLED-96-G2
• µOLED-128-G1 (or µOLED-128-G2)
• µOLED-160-G1 (or µOLED-160-G2)
• µLCD-144-G2
These feature packed display modules, coupled
with a convenient Arduino Shield, makes an ideal
platform for learning and experimenting with the
4D Systems display modules.
The 4Display-Shield is integrated with a full colour
OLED or TFT LCD screen (model dependant), tiny
yet poweful GOLDELOX graphics processors and a
micro-SD connector which supports standard and
high-capacity memory cards. The memory card can
be used to store images, icons, video clips and
data logging.
The 4D Systems display module on the 4DisplayShield can be programmed as a stand-alone
controller, or as a serial slave to the Arduino. To
change how the display module is programmed,
simply download the 4D Systems Workshop 4 IDE
software from the 4D systems website,
www.4dsystems.com.au, and follow the on screen
instructions.
When configured as a serial slave, the Arduino
takes the role of the host controller. This allows
you to develop your graphics applications using
the Arduino development environment and
software tools. The GOLDELOX processor has a rich
set of serial commands built inside the chip and
the commands are sent from the Arduino via the
serial (UART) interface. All it takes is a few bytes of
serial data from the Arduino and you can quickly
© 2012 4D SYSTEMS
The following links (not affiliated to 4D Systems)
may prove useful when configuring the 4DisplayShield as a serial slave:
http://embeddedcomputing.weebly.com/serial-lcd.html
http://jennylc.com/4d/
http://nicholasboka.com/?page_id=23
http://code.google.com/p/displayshield4d/
http://code.google.com/p/uoled-library/
When configured as a stand-alone processor, the
4Display-Shield becomes a stand-alone device and
all display application code is written in the
Workshop 4 IDE, using the 4DGL Language. Don't
let the name scare you off, 4DGL is an easy to
learn but a powerful high level language. It allows
the developer to write applications in a high level
syntax similar to popular languages such as BASIC,
C and Pascal and run it directly on the GOLDELOX
processor. If you can write Arduino code then you
can certainly write 4DGL code. The display
modules are stand-alone devices. It allows the
user to take complete control of all available
resources on the display module such as the Serial
Port, the graphics display and the micro-SD
memory card. Thus graphics intensive processes
can be completely offloaded from the Arduino and
run on the GOLDELOX processor, along with microSD card processes and access to the GOLDELOX I/O
pins. It provides the user complete control over
the display module allowing them to offload a lot
of overhead from the host processor by creating
the 'work horse' objects within the display module
itself.
So, for a game of Tetris, rather than sending all the
tetris graphics objects (tile blocks, borders, game
score, etc etc), as serial graphics primitives, entire
functions can be created in 4DGL and receive
simple serial commands to control them. This also
gives a neat division between the graphics
functions and the game itself, allowing changes in
the games appearance without altering the main
Arduino game code, effectively allowing you to
'change skins' for the games appearance.
Page 3 of 13
www.4dsystems.com.au
4Display-Shield-96/128/160/144 – Arduino Shields
4D SYSTEMS
4Display-Shield
2. Features
• On-board micro-SD memory card adaptor for
storing of icons, images, animations, etc. Supports
standard and high capacity (HC-SD) memory cards.
• 5-Way multifunction Joystick switch directly
connected to Arduino D2, D3, D4, D5 and D6 pins.
• Powered from the Arduino board, uses the 5V
supply pin.
• RoHS Compliant.
4Display-Shield-96
4Display-Shield-96 Arduino Shield
• 4D Systems µOLED-96-G2 Display Module
• 96 x 64 resolution, 65K true to life colours,
PMOLED screen.
• 0.96” diagonal size, Viewing Area: 20mm x
14mm.
• No back lighting with near 180° viewing angle.
4Display-Shield-128
• 4D Systems µOLED-128-G1 (or µOLED-128-G2)
Display Module
4Display-Shield-128 Arduino Shield
• 128 x 128 resolution, 65K true to life colours,
PMOLED screen.
• 1.5” diagonal size, Viewing Area: 27mm x
27mm.
• No back lighting with near 180° viewing angle.
4Display-Shield-160
• 4D Systems µOLED-160-G1 (or µOLED-160-G2)
Display Module
• 160 x 128 resolution, 65K true to life colours,
PMOLED screen.
4Display-Shield-160 Arduino Shield
• 1.7” diagonal size, Viewing Area: 33.6mm x
27mm.
• No back lighting with near 180° viewing angle.
4Display-Shield-144
• 4D Systems µLCD-144-G2 Display Module
• 128 x 128 resolution, 65K true to life colours,
LCD-TFT screen.
• 1.44” diagonal size, Viewing Area: 25.5mm x
26.5mm.
4Display-Shield-144 Arduino Shield
• LED back lighting with greater than 150°
viewing angle.
© 2012 4D SYSTEMS
Page 4 of 13
www.4dsystems.com.au
4Display-Shield-96/128/160/144 – Arduino Shields
4D SYSTEMS
4Display-Shield
3. Hardware Description
3.1. 4Display-Shield-96 Arduino Shield – Featuring a 4D Systems µOLED-96-G2
The 4Display-Shield-96 is an Arduino Shield featuring a 4D Systems µOLED-96-G2 display module, and a
joystick for a user interface.
The 4Display-Shield-96 provides a simple serial interface between the Arduino platform and the 4D Systems
display, allowing rapid hardware prototyping and development.
Programming the 4Display-Shield-96 with the 4D Systems Workshop 4 Software is required to get started, and
there the user can choose the programming environment to use.
Workshop 4 provides the user with 3 programming environments, to give the freedom of choice for how the
display module will be configured.
Please refer to the Datasheet of the µOLED-96-G2 display module for further information, available from the
4D Systems website, www.4dsystems.com.au
The Designer environment of the 4D Systems Workshop 4 software, enables the full display power of the
µOLED-96-G2 display module to be harnessed. This is where 4DGL logic is written in its natural form, and
enables the user to make this 4Display-Shield into a controller, along with simply being a display to the
Arduino. Please refer to the “4DGL-Programmers-Reference-Manual.pdf” and “GOLDELOX-4DGL-InternalFunctions.pdf” documents for more information on the 4DGL programming language.
The ViSi environment enables a visual programming experience for the user to quickly create a display using
drag-and-drop objects. The user can simply lay the objects on the display and generate 4DGL code
automatically for those objects. The user then manipulates this code the 4DGL codespace to further configure
based on the users application requirements. This environment allows the user to immediately see what the
display will look like once programmed.
The Serial environment enables the display to turn into a slave serial display, allowing all development to be
done in the Arduino IDE. Writing commands from the Arduino and sending them over the Serial port, will
enable the user to draw primitives, text, play video, animations and much more. This is the most common
environment used for Arduino users. Please refer to the “Workshop-4-IDE-User-Manual.pdf” documentation
for futher information on the commands available.
© 2012 4D SYSTEMS
Page 5 of 13
www.4dsystems.com.au
4Display-Shield-96/128/160/144 – Arduino Shields
4D SYSTEMS
4Display-Shield
3.2. 4Display-Shield-128 Arduino Shield – Featuring a 4D Systems µOLED-128-G2
The 4Display-Shield-128 is an Arduino Shield featuring a 4D Systems µOLED-128-G1 (or µOLED-128-G2) display
module, and a joystick for a user interface.
The 4Display-Shield-128 provides a simple interface between the Arduino platform and the 4D Systems
display, allowing rapid hardware prototyping and development.
Programming the 4Display-Shield-128 with the 4D Systems Workshop 4 Software is required to get started,
and there the user can choose the programming environment to use.
Workshop 4 provides the user with 3 programming environments, to give the freedom of choice for how the
display module will be configured.
Please refer to the Datasheet of the µOLED-128-G1/G2 display module for further information, available from
the 4D Systems website, www.4dsystems.com.au
The Designer environment of the 4D Systems Workshop 4 software, enables the full display power of the
µOLED-128-G1/G2 display module to be harnessed. This is where 4DGL logic is written in its natural form, and
enables the user to make this 4Display-Shield into a controller, along with simply being a display to the
Arduino. Please refer to the “4DGL-Programmers-Reference-Manual.pdf” and “GOLDELOX-4DGL-InternalFunctions.pdf” documents for more information on the 4DGL programming language.
The ViSi environment enables a visual programming experience for the user to quickly create a display using
drag-and-drop objects. The user can simply lay the objects on the display and generate 4DGL code
automatically for those objects. The user then manipulates this code the 4DGL codespace to further configure
based on the users application requirements. This environment allows the user to immediately see what the
display will look like once programmed.
The Serial environment enables the display to turn into a slave serial display, allowing all development to be
done in the Arduino IDE. Writing commands from the Arduino and sending them over the Serial port, will
enable the user to draw primitives, text, play video, animations and much more. This is the most common
environment used for Arduino users. Please refer to the “Workshop-4-IDE-User-Manual.pdf” documentation
for futher information on the commands available.
Note: 4Display-Shield-128 modules will start shipping with µOLED-128-G2 instead of µOLED-128-G1 modules
without warning or notice. No operational differences exist with respect to this Arduino Shield.
© 2012 4D SYSTEMS
Page 6 of 13
www.4dsystems.com.au
4Display-Shield-96/128/160/144 – Arduino Shields
4D SYSTEMS
4Display-Shield
3.3. 4Display-Shield-160 Arduino Shield – Featuring a 4D Systems µOLED-160-G2
The 4Display-Shield-160 is an Arduino Shield featuring a 4D Systems µOLED-160-G1 (or µOLED-160-G2) display
module, and a joystick for a user interface.
The 4Display-Shield-160 provides a simple interface between the Arduino platform and the 4D Systems
display, allowing rapid hardware prototyping and development.
Programming the 4Display-Shield-160 with the 4D Systems Workshop 4 Software is required to get started,
and there the user can choose the programming environment to use.
Workshop 4 provides the user with 3 programming environments, to give the freedom of choice for how the
display module will be configured.
Please refer to the Datasheet of the µOLED-160-G1/G2 display module for further information, available from
the 4D Systems website, www.4dsystems.com.au
The Designer environment of the 4D Systems Workshop 4 software, enables the full display power of the
µOLED-160-G1/G2 display module to be harnessed. This is where 4DGL logic is written in its natural form, and
enables the user to make this 4Display-Shield into a controller, along with simply being a display to the
Arduino. Please refer to the “4DGL-Programmers-Reference-Manual.pdf” and “GOLDELOX-4DGL-InternalFunctions.pdf” documents for more information on the 4DGL programming language.
The ViSi environment enables a visual programming experience for the user to quickly create a display using
drag-and-drop objects. The user can simply lay the objects on the display and generate 4DGL code
automatically for those objects. The user then manipulates this code the 4DGL codespace to further configure
based on the users application requirements. This environment allows the user to immediately see what the
display will look like once programmed.
The Serial environment enables the display to turn into a slave serial display, allowing all development to be
done in the Arduino IDE. Writing commands from the Arduino and sending them over the Serial port, will
enable the user to draw primitives, text, play video, animations and much more. This is the most common
environment used for Arduino users. Please refer to the “Workshop-4-IDE-User-Manual.pdf” documentation
for futher information on the commands available.
Note: 4Display-Shield-160 modules will start shipping with µOLED-160-G2 instead of µOLED-160-G1 modules
without warning or notice. No operational differences exist with respect to this Arduino Shield.
© 2012 4D SYSTEMS
Page 7 of 13
www.4dsystems.com.au
4Display-Shield-96/128/160/144 – Arduino Shields
4D SYSTEMS
4Display-Shield
3.4. 4Display-Shield-144 Arduino Shield – Featuring a 4D Systems µLCD-144-G2
The 4Display-Shield-144 is an Arduino Shield featuring a 4D Systems µLCD-144-G2 display module, and a
joystick for a user interface.
The 4Display-Shield-144 provides a simple interface between the Arduino platform and the 4D Systems
display, allowing rapid hardware prototyping and development.
Programming the 4Display-Shield-144 with the 4D Systems Workshop 4 Software is required to get started,
and there the user can choose the programming environment to use.
Workshop 4 provides the user with 3 programming environments, to give the freedom of choice for how the
display module will be configured.
Please refer to the Datasheet of the µLCD-144-G2 display module for further information, available from the
4D Systems website, www.4dsystems.com.au
The Designer environment of the 4D Systems Workshop 4 software, enables the full display power of the
µLCD-144-G2 display module to be harnessed. This is where 4DGL logic is written in its natural form, and
enables the user to make this 4Display-Shield into a controller, along with simply being a display to the
Arduino. Please refer to the “4DGL-Programmers-Reference-Manual.pdf” and “GOLDELOX-4DGL-InternalFunctions.pdf” documents for more information on the 4DGL programming language.
The ViSi environment enables a visual programming experience for the user to quickly create a display using
drag-and-drop objects. The user can simply lay the objects on the display and generate 4DGL code
automatically for those objects. The user then manipulates this code the 4DGL codespace to further configure
based on the users application requirements. This environment allows the user to immediately see what the
display will look like once programmed.
The Serial environment enables the display to turn into a slave serial display, allowing all development to be
done in the Arduino IDE. Writing commands from the Arduino and sending them over the Serial port, will
enable the user to draw primitives, text, play video, animations and much more. This is the most common
environment used for Arduino users. Please refer to the “Workshop-4-IDE-User-Manual.pdf” documentation
for futher information on the commands available.
© 2012 4D SYSTEMS
Page 8 of 13
www.4dsystems.com.au
4Display-Shield-96/128/160/144 – Arduino Shields
4D SYSTEMS
4Display-Shield
3.5. Jumper Settings
On the 4Display-Shield there is a 2x3 way jumper header (JP1), used to enable or disable the RX, TX and RESET
lines between the Arduino and the display module.
When the shunt is connected between the two relevant pins, the feature of that configuration point is
enabled. When disconnected, the feature is disabled.
•
•
•
RESET – when the two pins are joined with the shunt, RESET is connected between the display module and
Digital Pin D7 of the Arduino.
RX – when the two pins are joined with the shunt, RX0 is from the display module is connected to the
Arduino TX pin
TX – when the two pins are joined with the shunt, TX0 is from the display module is connected to the
Arduino RX pin
Disconnection of these jumpers will be required when programming the display module or the Arduino, as
they share the same serial bus for both communications and for their individual programming.
RESET
RX
TX
© 2012 4D SYSTEMS
Page 9 of 13
www.4dsystems.com.au
4Display-Shield-96/128/160/144 – Arduino Shields
4D SYSTEMS
4Display-Shield
4. Related Products
µOLED-96-G2
µOLED-128-G1
µOLED-160-G1
µOLED-160-G2
© 2012 4D SYSTEMS
Page 10 of 13
µOLED-128-G2
µLCD-144-G2
www.4dsystems.com.au
4Display-Shield-96/128/160/144 – Arduino Shields
4D SYSTEMS
4Display-Shield
5. Schematic Design
© 2012 4D SYSTEMS
Page 11 of 13
www.4dsystems.com.au
4Display-Shield-96/128/160/144 – Arduino Shields
4D SYSTEMS
4Display-Shield
6. Specifications and Ratings
RECOMMENDED OPERATING CONDITIONS
Parameter
Supply Voltage (VCC)
Operating Temperature
Input Low Voltage (VIL)
Input High Voltage (VIH)
Reset Pulse (tRP)
Conditions
All pins
All pins
External Open Collector
Min
4.5
-10
GND
2.0VCC
5.0
Typ
------
Max
5.5
+65
0.8VCC
VCC
--
Units
V
°C
V
V
ms
For further specifications, specific to the actual display module, please refer to the 4D Systems website for
further information, www.4dsystems.com.au
ORDERING INFORMATION
Order Codes:
•
4Display-Shield-96
•
4Display-Shield-128
•
4Display-Shield-160
•
4Display-Shield-144
Package: 105mm x 65mm x 30mm
Packaging: Module sealed in antistatic foam padded 4D Systems Box
© 2012 4D SYSTEMS
Page 12 of 13
www.4dsystems.com.au
4Display-Shield-96/128/160/144 – Arduino Shields
4D SYSTEMS
4Display-Shield
7. Legal Notice
Proprietary Information
The information contained in this document is the property of 4D Systems Pty. Ltd. and may be the subject of
patents pending or granted, and must not be copied or disclosed without prior written permission.
4D Systems endeavours to ensure that the information in this document is correct and fairly stated but does
not accept liability for any error or omission. The development of 4D Systems products and services is
continuous and published information may not be up to date. It is important to check the current position with
4D Systems. 4D Systems reserves the right to modify, update or makes changes to Specifications or written
material without prior notice at any time.
All trademarks belong to their respective owners and are recognised and acknowledged.
Disclaimer of Warranties & Limitation of Liability
4D Systems makes no warranty, either expressed or implied with respect to any product, and specifically
disclaims all other warranties, including, without limitation, warranties for merchantability, non-infringement
and fitness for any particular purpose.
Information contained in this publication regarding device applications and the like is provided only for your
convenience and may be superseded by updates. It is your responsibility to ensure that your application meets
with your specifications.
In no event shall 4D Systems be liable to the buyer or to any third party for any indirect, incidental, special,
consequential, punitive or exemplary damages (including without limitation lost profits, lost savings, or loss of
business opportunity) arising out of or relating to any product or service provided or to be provided by 4D
Systems, or the use or inability to use the same, even if 4D Systems has been advised of the possibility of such
damages.
4D Systems products are not fault tolerant nor designed, manufactured or intended for use or resale as on line
control equipment in hazardous environments requiring fail – safe performance, such as in the operation of
nuclear facilities, aircraft navigation or communication systems, air traffic control, direct life support machines
or weapons systems in which the failure of the product could lead directly to death, personal injury or severe
physical or environmental damage (‘High Risk Activities’). 4D Systems and its suppliers specifically disclaim
any expressed or implied warranty of fitness for High Risk Activities.
Use of 4D Systems’ products and devices in 'High Risk Activities' and in any other application is entirely at the
buyer’s risk, and the buyer agrees to defend, indemnify and hold harmless 4D Systems from any and all
damages, claims, suits, or expenses resulting from such use. No licenses are conveyed, implicitly or otherwise,
under any 4D Systems intellectual property rights.
8. Contact Information
For Technical Support: [email protected]
For Sales Support: [email protected]
Website: www.4dsystems.com.au
Copyright 4D Systems Pty. Ltd. 2000-2012.
© 2012 4D SYSTEMS
Page 13 of 13
www.4dsystems.com.au
Mouser Electronics
Authorized Distributor
Click to View Pricing, Inventory, Delivery & Lifecycle Information:
4D Systems:
4Display-Shield-96 4Display-Shield-128 4Display-Shield-160 4Display-Shield-144