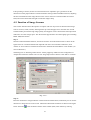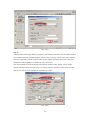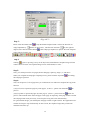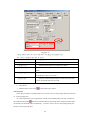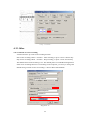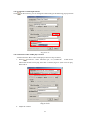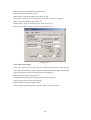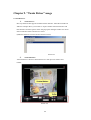
1
CamDocument
VideoCenterMini Manual
Version:Release2.3.4
Index
Chapter 1. Brief Introduction of CamDocument ...................................................2
Chapter 2. System requirements and installation...................................................3
2-1. Foreword of this chapter.........................................................................3
2-2. Hardware Installation .............................................................................4
2-3. USB driver installation .........................................................................13
2-4. Installation of application software- VideoCenterMini ........................31
Chapter 3. Operational interfaces of application .................................................38
3-1. Basic operational interface ...................................................................39
3-2. Introduction of command line ..............................................................41
3-3. Introduction of toolbar..........................................................................43
3-4. Introduction of function button.............................................................45
3-5. Automatic Focus(For AF models) ........................................................46
3.6 Hotkeys ..................................................................................................49
Chapter 4. Basic functions of application ............................................................52
4-1. Foreword of Basic functions.................................................................52
4-2. Operate the copy function.....................................................................54
4-3. the function of electrograph..................................................................58
4-4. Presentation function ............................................................................59
4-5. Function of Image Scanner...................................................................61
4-6. Video recording function ......................................................................64
4-7. Snapshot and e-mail function ...............................................................69
4-8. Copy Book function..............................................................................73
4-9. File Searching function.........................................................................80
4-10. OCR ....................................................................................................83
4.11 Measurement........................................................................................85
4-12. Other ...................................................................................................92
4-13.Barcode Recognition ...........................................................................96
4-14.Video Warping ....................................................................................99
4-15.VideoCenter2X2 Multiple windows version.....................................100
Chapter 5. Advanced Image functions of application........................................103
5-1.Images Processing function .................................................................103
5-2. Images Save and Load........................................................................107
5-3. Display Fit .......................................................................................... 111
5-4.Show Video.......................................................................................... 111
Chapter 6. Still Image Annotation and Drawing................................................ 113
6-1 Start drawing or annotating .................................................................113
6-2 Annotation ...........................................................................................113
I
6-3. Setting the function of pressing the left mouse button .......................121
6-4.Show Video and More ... .....................................................................122
Chapter 7. Introduction of application ...............................................................124
7-1. Video source dialog ............................................................................124
7-2. Basic video processing .......................................................................125
7-3. Location of file storage.......................................................................138
7-4 Camera Field of View Measure and Adjust.........................................139
7-5 Parameters save & load .......................................................................141
Chapter 8 Video Effect.......................................................................................142
8-1 Video effect menu item........................................................................142
Chapter 9. “Twain Driver” usage.......................................................................145
9.1 Twain Driver........................................................................................145
9.2 Twain Toolbar......................................................................................146
9.3 Other Setup ..........................................................................................148
9.4 Hotkeys ................................................................................................156
Chapter 10. FAQ ................................................................................................157
10.1 Grab Failed FAQ.............................................................................157
10.2 Installation FAQ..............................................................................158
10.3 Software FAQ .................................................................................159
10.4 General FAQ...................................................................................162
Addendum:5 million pixels dual resolution mode.............................................166
II
I
Chapter 1. Brief Introduction of CamDocument
1.Package of CamDocument contains the following:
1. One set of CamDocument
2. One quickstart manual
3. One CD (including hardware device driver, software application and documentation)
4. One USB cord
5. One travel bag
If the package you purchased does not contain the above items or has been damaged, please
contact your local reseller or our company to protect your interest.
Picture of CamDocument shown as below:
Figure 1-1
2.Recommended system requirements:
1. Pentium IV or equivalent CPU, 512MB RAM or above
2. USB2.0 port (built in or plug in),
3. CD ROM
4. Operating system: Microsoft Windows 2000(SP4), Windows XP (SP1) or Windows 2003
5. Microsoft DirectX 9.0 or above pre-installed (DirectX9.0c is included in the installation CD)
6. Microsoft XML Core Services (MSXML) 4.0. (MSXML 4.0 is included in the installation CD)
3.Overview of installing hardware and software:
1. Installation of CamDocument:
CamDocument is foldable and portable. Please refer to chapter 2-2 for “how to extend and fold
CamDocument
2. Installation of Windows hardware diver:
In order to install the Windows hardware driver, please connect CamDocument to your personal
II
computer using USB2.0 cord provided. Then Windows will detect the New image USB device.
Please insert the installation CD and follow the instruction to complete the installation.
Please make sure the driver is placed under the document folder of usbcam. If you are not familiar
with the method of installing USB device, please refer to chapter 2-3: “Installation for
CamDocument USB hardware device”.
3. Installation of application software:
After completing the installation of CamDocument, please execute the selection of setting up
VideoCenter Mini application software. VideoCenter Mini is the sole-developed software by
Supplier and is a free bundled soflware ships with CamDocument. The detail installation of
VideoCenter Mini will be illustrated in the chapter 2-4 Installation for Application Software.
4.Figure of application:
Figure 1-2
5.Functions of CamDocument:
CamDocument is a portable and speedy CamDocument with concise and spaceless look, which
can completely capture and store any forms of document or image in 0.5 second to two seconds.
CamDocument with three millions high resolutions can provide the high quality image to meet
your requirement of the document imaging. The VideoCenter Mini software is incorporated with
CamDocument to provide the imaging functions. The detail operation of software will be
illustrated in software operation manual in the installation CD.
2
Chapter 2. System requirements and installation
2-1. Foreword of this chapter
1.System requirements:
1. Pentium IV or equivalent CPU or above.
2. RAM: 512MB or above
3. Built-in USB 2 port or USB 2.0 interface card
4. Operation system: Microsoft windows 2000 (SP4), Windows xp (SP1) ,Windows 2003 or
Windows Vista
5. Microsoft Direct X 9.0 or above (The bundled CD has Direct X 9.0 Version inside)
6. Microsoft XML Core Services (MSXML) 4.0. (The bundled CD has XML4.0 installer inside)
2.Steps of installation for the initiative:
Step 1:
Unfold CamDocument first. Please refer to 2 - 1. Hardware Installation for details.
Step 2:
First, plug CamDocument into the personal computer via USB 2.0 port. The Windows operating
system will detect this device automatically and indicate the new USB 2.0 device detected. When
the system asks for installing the hardware driver, please insert CD containing the driver and
follow the instructions to complete the installation. Please make sure the driver is placed under the
folder of usbcam. More information will be found in 2 - 2. Installation for USB Hardware Device
Driver .
Step 3:
After completing the installation of CamDocument, please execute the selection of setting up
VideoCenterMini application software. VideoCenterMini is the software developed by Supplier
and is bundled software with CamDocument. Please refer to 2 - 3. “Installation for application
software” for more information.
3.Annotation:
It is suggested to install Xvid MPEG4 software to reduce the capacity requirements for recording
images; however the system is required more resources.
4.After the completion of the above steps, please check the following again:
1. Pentium IV or equivalent cpu, 512MB RAM, or above.
2. PC with USB 2.0 port or Interface card.
3. Operating system: Microsoft Windows 2000(SP4), Windows XP (SP1) or Windows 2003.
4. Installing Microsoft Direct X 9.0 or above RUNTIME environment.
5. Installing Microsoft XML Core Services (MSXML) 4.0.
6. Installing CamDocument.
7. Installing VideoCenter Mini application software.
3
8. Installing Xvid MPEG4 video (Optional).
9. Executing VideoCenter Mini application software according to the user manual.
2-2. Hardware Installation
the Guide for Extending and Packing CamDocument (Skip this section if other type)
1.The concept of product's design:
CamDocument is foldable and portable. Due to its small dimension, it can be used on the go.
CamDocument can capture the document or real objects up to A4 size. Its contactless design
avoids the paper jam trouble usually brought by the traditional sheet-fed type scanner. This
versatile design will become your excellent document-imaging assistant.
<Fig. 2-2-2>Extended
<Fig. 2-2-1> Folded
2. The original packing of CamDocument is shown in the following figure :
<Fig. 2-2-3>
Before you use CamDocument to do image capturing, you must extend CamDocument from its
folded packing. The step will be shown as follows.
3.The main part description of CamDocument:
4
<Fig.2-2-4>
1.
Camera lens
7.
the Second node
13. Cable box
2.
Mini USB2.0 connector
8.
the First node
14. column sleeve
3.
the camera arm
9.
Aluminum column (1)
15. USB2.0 cable
4.
the Fifth node
10. Front fender
16. Aluminum column (2)
5.
the Fourth node
11. Base
17. Aluminum column (3)
6.
the Third node
12. Side fender
4.Extending CamDocument :
Before using the CamDocument, you must extend the device.
Step 1 :
Place the CamDocument camera upright on the desk, as below.
5
<Fig. 2-2-5>
Step 2 :
Remove the cable box, and rotate the parts as shown in figures 2-1-5, 2-1-6 to the proper position.
<Fig. 2-2-6>
<Fig. 2-2-7>
Step 3:
Continue the same step as above, move the camera head to the position as below.
<Fig. 2-2-8>
<Fig. 2-2-9>
Step 4:
Continue the step as above, move the camera head to the position as below.
6
<Fig. 2-2-10>
<Fig. 2-2-11>
Step 5:
Continue the steps, move the camera head to the position as below.
<Fig. 2-2-12>
<Fig. 2-2-13>
Step 6:
Continue the step to move the camera head to the position as below.
<Fig. 2-2-14>
7
Step 7:
Move both locker to surround the connector, and lock the connector properly. To lock the column
sleeve, push the handle to the center. To release the column sleeve, move the handle to the bottom
or to the top.
<Fig. 2-2-15>
Step 8:
Continue the step as above, move the camera head to the position as below.
<Fig. 2-2-16>
<Fig. 2-2-17>
Step 9:
Move the camera head to the position as below, and make sure that the head is faced downward.
<Fig. 2-2-18>
8
Step 10:
Get the USB cable from the cable box, and plug the smaller connector to the camera head properly.
Please make sure that the cable is firmly held.
<Fig. 2-2-19>
<Fig. 2-2-20>
Step 11:
Please arrange the cable as below.
<Fig. 2-2-22>
<Fig. 2-2-21>
Step 12:
When finishing, place the cable box to the bottom as below.
<Fig. 2-2-23>
9
Step 13:
Please pull out the front fender for proper paper alignment, you may also pull out the side fender
for better balance.
<Fig. 2-2-24>
<Fig. 2-2-25>
5.USB cable arrangement :
CamDocument has facilities for cable arrangement to make operations more smoothly. See below
figures for reference.
Fig.1 : cable jaw on camera
head
Fig. 2 : cable jaw on
column
Fig. 3 : cable jaw on base
<Fig. 2-2-26>
<Fig. 2-2-27>
<Fig. 2-2-28>
Besides, the cable box is to house USB cable when folded. The use of the cable box is as below.
Step 1:
Hold the cable box and press the lock as below to remove it.
<Fig. 2-2-29>
<Fig. 2-2-30>
10
Step 2:
If you want to place the box back, just push it down as below.
<Fig. 2-2-31>
<Fig. 2-2-32>
6.Folding CamDocument :
If you want to fold the camera set, please refer to the below steps. They are just the reverse of the
extending steps.
Step 1:
Please push back the front fender and side fender as below.
<Fig. 2-2-33>
<Fig. 2-2-34>
Step 2:
Remove the USB connector from camera head and detach the USB 2.0 cable from CamDocument.
Put the cable in the cable box.
<Fig. 2-2-35>
<Fig. 2-2-36>
11
Step 3:
Continue for folding, move the camera head to the position as below.
<Fig. 2-2-37>
<Fig. 2-2-38>
Step 4:
Continue for folding, move the camera head to the position as below.
<Fig. 2-2-39>
Step 5:
Continue for folding, move the camera head to the position as below.
<Fig. 2-2-41>
<Fig. 2-2-40>
12
Step 6:
Continue for folding, move the camera head to the position as below.
<Fig. 2-2-43>
<Fig. 2-2-42>
Step 7:
Finally, put the cable box on the base and complete the folding for CamDocument.
<Fig. 2-2-44>
2-3. USB driver installation
2-3-1 Install the program first, then connect to USB port
1) Driver installation under Windows 2000
1. Connect to USB port, system will search the device driver automatically. To make sure
the installation is successfully, (Fig2-3-1) you can click on “Start”, then “Run”, Input
“devmgmt.msc” in the dialog box, then click on “confirm” button.
Fig 2-3-1
13
2. Open “device manager” dialog box, (Fig2-3-2) expand “Image device”. If you can see
“New image Supercam” there, then that means the driver is installed successfully. You can
continue the installation of other related software, otherwise you need to check the USB
connection and reinstall the driver.
Please connect to same USB port next time you using it to avoid reinstallation of the driver.
Fig 2-3-2
2.Driver installation under Windows XP
1. After the program installed (step show as 2-3), reconnect to USB port. Hardware
installation wizard will pop up. (Fig2-3-3)
Fig 2-3-3
2. Installing driver. (Fig2-3-4)
14
Fig2-3-4
3. Click “Finish”, after installation finish. (Fig2-3-5)
Fig 2-3-5
After finish, open device manager window, click to expand “Image device”. To make sure “New
image SuperCam” is show up and working properly. (Fig2-3-6)
Fig 2-3-6
15
2-3-2 Connect to USB port first, and then install the program
This installation method is same as manually install USB driver. The installation step is the
same for Windows 2000 and Windows XP.
Note: USB CD-ROM drive installed file location
1.\ USBDriver \ UsbCam_Vid\: the new driver (XP/2000/2003)
2. \ USBDriver \ UsbCam\: earlier version of driver (XP/2000/2003)
3 .\ USBDriver \ Vista_UsbCam_Vid\: System drive of Vista
As shown in Fig2-3-7, follow step 2.1 expanding up the CamDocument, connect to the USB
port
Fig2-3-7
1. CamDocument Driver Installation step by step under Windows 2000
1.
Connect CamDocument to the USB port. System will auto detect the new hardware and
open up the “Found new hardware” dialog box (Fig2-3-8). Click “Next” to continue.
16
Fig 2-3-8
2.
Select “Search for suitable driver for my device “option, then click “Next”. (Fig2-3-9)
Fig 2-3-9
3.
Select “Specify a location” option, click “Next” to search for the driver. (Fig2-3-10)
17
Fig 2-3-10
4.
Click”Browse..”.
(Fig2-3-11)
18
Fig 2-3-11
5.
Browse to UsbCam_Vid folder in the CD, and then click “Open”. (Fig2-3-12)
Fig 2-3-12
6.
Click “OK”.
(Fig2-3-13)
Fig 2-3-13
7.
Click “Next” to continue, if the driver is found. (Fig2-3-14)
19
Fig 2-3-14
8.
Click “Yes”.(Fig2-3-15)
Fig 2-3-15
9.
Starting copy related file to hard disk. (Fig2-3-16)
.
Fig 2-3-16
10. Click “finish”,and finish the “New imageImage SuperCam” installation. (Fig2-3-17)
20
Fig 2-3-17
11. To make sure the installation is successfully, (Fig2-3-18) you can click on “Start”, then
“Run”, Input “devmgmt.msc” in the dialog box, then click on “confirm” button.
Fig2-3-18
12. Open “device manager” dialog box, (Fig2-3-19) expand “Image device”. If you can see
“New image Supercam” there, then that means the driver is installed successfully. You
can continue the installation of other related software, otherwise you need to check the
USB connection and reinstall the driver.
Please connect to same USB port next time you using it to avoid reinstallation of the driver.
Fig2-3-19
21
2.CamDocument AF Driver Installation under Windows XP
Remark: CamDocument AF model drivers installation – 3 Drivers for New image SuperCam,
USB Serial Converter and USB Serial Port.
Windows XP and Windows 2003 are the same install step.Take the Windows XP for example.
Step 1--10 : install New image SuperCam.
Step 11--13: install USB Serial Converter.
Step 14--17: install USB Serial Port.
1. Begin to install the New image SuperCam. System will pop up hardware installation
wizard dialog box, please select to install. (Fig2-3-20)
Fig2-3-20
2. Click “Browse”. (Fig2-3-21)
Fig2-3-21
3. Select the UsbCam_Vid folder in the CD, then click “OK”. (Fig2-3-22)
22
Fig 2-3-22
4. Click “Next”. (Fig2-3-23)
Fig 2-3-23
5. Starting copy related file to hard disk. (Fig2-3-24)
.
Fig 2-3-24
6. Click “Browse”. (Fig2-3-25)
23
.
Fig 2-3-25
7. Select the “EXT2800.AX” in the UsbCam_Vid folder of the CD, then click “Open”.
(Fig2-3-26)
Fig 2-3-26
8. Click “OK”. (Fig2-3-27)
24
Fig 2-3-27
9. Starting copy related file to hard disk. (Fig2-3-28)
Fig 2-3-28
10. Click “finish”,and finish the “New image SuperCam” installation. (Fig2-3-29)
Fig 2-3-29
11. Begin to install the USB<->Serial. Click the “Install from a list of specific location” ,and
click “Next”. (Fig2-3-30)
25
.
Fig 2-3-30
12.After chose the path, Chick “Next”. (Fig2-3-31)
Fig 2-3-31
13. Starting copy related file to hard disk. (Fig2-3-32)
Fig 2-3-32
1.
Click “Finish” ,and finish the “USB Serial Converter” installation. (Fig2-3-33)
26
Fig 2-3-33
14. Begin to install the USB Serial Port. Click the “Install from a list of specific
location” ,and click “Next”. (Fig2-3-34)
Fig 2-3-34
15.After chose the path, Chick “Next”. (Fig2-3-35)
27
Fig 2-3-35
16.Starting copy related file to hard disk. (Fig2-3-36)
Fig 2-3-36
17.Click “Finish”,and finish the “USB Serial Port” installation. (Fig2-3-37)
Fig2-3-37
3. CamDocument Driver Installation step by step under Windows Vista
1.Connect CamDocument to the USB port. System will auto detect the new hardware and
open up the “Found new hardware” dialog box (Fig2-3-38). Select “Locate and install driver
software” to continue.
28
Fig 2-3-38
2. Select “Don’t search online” option. (Fig2-3-39)
Fig 2-3-39
3. Select “I don’t have the disc.Show me other options” to continue. (Fig2-3-40)
29
Fig 2-3-40
4. Select”Browse my computer for driver software” option. (Fig2-3-41)
Fig 2-3-41
5. Browse to \USBDriver\Vista UsbCam_Vid\ folder in the CD, and enable “Include
subfolders”, click “Next” to continue. (Fig2-3-42)
Fig 2-3-42
6. Select “Install this driver software anyway” to continue. (Fig2-3-43)
30
Fig 2-3-43
7. Click “Close”,and finish the “New image SuperCam” installation. (Fig2-3-44)
Fig 2-3-44
2-4. Installation of application software- VideoCenterMini
2-4-1 Installation step under Windows 2000:
1. Please load the program CD into CD-ROM, start the installation program,select English
setup. (Fig: 2-4-1)
31
Fig: 2-4-1
2. Installation options are displayed in the installation window below,( Fig 2.4-2)
Fig2-4-2
1)Readme for Instruction
2)DirectX9.0 Runtime(Required): Graphics API provided by Microsoft, must be installed;
3)MsXML4 engine(Required):Microsoft XML4 Core Services, must be installed;
4)Xvid MPEG4(Optional):Xvid MPEG4 is suggested to install when using digital video
recorder;
5)VideoCenterEasy(Tiny):Simple version, including VideoCenterEasy ,Twain Interface;
32
6)VideoCenter Software: full installation, include main program VideoCenterMini, TWAIN
driver, Mini software(Briefing, Copier, VideoCenter2X2/3X3,VideoCenterEasy etc) .
Please make sure you had DirectX 9.0 or higher and MsXML4 engine installed before you start
install the program. If you are not sure, you can just install it by selecting the first two installation
option. Restart the installation program, click to install VideoCenter, as shown in the picture above;
the software will be installed including: VideoCenterMini and related component. (Fig: 2-4-2)
3. Click “next” to continue. (Fig2-4-3)
Fig2-4-3
4. Input the required information in the field. (Fig2-4-4)
Fig2-4-4
5. Select the current operating system, click “next” to continue. (Fig2-4-5)
33
Fig2-4-5
6. Select the installation location, click “next” to continue. (Fig2-4-6)
Fig2-4-6
7. Select the program folder, click “next” to continue. (Fig2-4-7)
34
(Fig2-4-7)
8. Wait until installation finish, otherwise click “cancel” to abort. (Fig2-4-8)
35
36
Fig2-4-8
9. Please select shortcuts displayed on the desktop, click “next” to continue. (Fig2-4-9)
Fig2-4-9
10. Click “finish” to exit the wizard. (Fig2-4-10)
Fig2-4-10
Note: In order to make sure the program is installed properly, you can click on “Start” button
then “Program” then “VideoCenter” then “VideoCenterMini”, or simply click on the shortcut on
the desktop. As the Picture below: (Fig2-4-11)
37
Fig2-4-11
If you want to uninstall the program, you can click on “Start” button then “Program” then
“VideoCenter” then “Uninstall VideoCenter”,or start from “Control Panel” then “Add Remove
Program” click “Uninstall” on the pop up window for this program. (Fig2-4-12)
Fig2-4-12
2-4-2 Installation under Windows XP
Installation step under Window XP is similar to Windows 2000. The only different is the
driver installation of CamDocument. Please refer to 2-3 for the software installation of USB
driver.
Chapter 3. Operational interfaces of application
Overview:
This chapter will illustrate the basic operational interfaces of VideoCenterMini to the user. The
38
arrangement of operation instruction is based on the function supported by the software, so you
can manipulate the software easily and quickly.
3-1. Basic operational interface
Execute VideoCenterMini application software
Step 1 :
Pleas start the VideoCenterMini short-cut path as the figure below indicated to execute the
software or click Windows "Startup" to select "Programs", "VideoCenter" and " VideoCenterMini
".
<Fig. 3-1-1>
Step 2 :
The user interface of VideoCenterMini is shown as the figure below. When moving the mouse to
Selection Bar, a pop up help will be displayed on the screen in about one to two seconds. This
interface contains selection bar, tool bar, command bar, status bar, and playback bar. The status of
the software is indicated in the lower portion of the screen.
39
<Fig. 3-1-2>
The Selection bar indicates the functions provided by the software.
Those functions are : (1) Copy (2) Copy and Save (3) Scanner (4) DVR (5) Presentation. Click the
function you are looking for, and follow the related instruction to operate.
There are several functions under the Scanner as following :
(1) Black(6) - means the captured image is in the black mode.
(2) Color(7) - means the captured image is in the color mode.
(3) None(Q): the captured image is only stored in the hard disk.
(4) Email(M): means the captured image will be emailed to the defined email address.
(5) Fax(X): means the captured image will be faxed to the defined fax number via Windows fax
driver.
(6) PDF(P): means the captured image will be in the PDF format, or in the TIFF format.
(7) Mail PDF(Z): means the captured image emailed will be in the PDF format, or in the TIFF
format.
(8) Copy Book: means to capture a book or a magazine.
(3) ~ (8) are also available for copysave function.
Notice: Resume the program:
You can resume the program by the following steps.
Step 1:
Press the
button in the upper left corner to close the program, see below figure.
40
Step 2:
Open a new window execute dialog of general Windows [File] function in Windows command
line to resume the program.
<Fig. 3-1-3>
Save the arguments of application setting:
The above Setting and selection could be saved as application arguments file by the [Windows]
File -> Save as operation. When the setting saved as argument file (*.vms), in next time when you
start this program, you can load the file for quick operation setting.
3-2. Introduction of command line
The Windows command line show as below:
(1) File (F):
<Fig. 3-2-1>
It is the general Windows [File] function about the argument setting files. Includes the Open ,
Close , Save , Save As and so on. The Brief introduction as below:
1. New (N): Open a new window execute dialog.
2. Open (O): Open a argument file that saved previously. (*.vms)
3. Close (C): Close the current dialog.
4. Save (S): Save the current setting arguments. (*.vms)
5. Save As (A): Save the current setting arguments as a new file. (*.vms)
6. Print (P): For printer operation.
(2) View (V):
41
<Fig. 3-2-2>
For Windows dialog [View] selection, it is the selection of menu toolbar, status bar, function
selection and playback bar appearance. You can use this selection to disable or enable the function
dialog bar.
( 3 ) Action (A) :
<Fig. 3-2-3>
In [Action] selection, includes:
1. Video Effect:For object visualization purposes. See Chapter 8 for details.
2. Load Camera Params: Load the camera parameter file that saved previously. (*.CAM)
3. Save Camera Params: Save the camera parameters as a file. (*.CAM)
4. Display Image File: Load the image files that saved previously, and process some changes on it.
5. Save Video Graph: Save the video graphic application file by Windows DirectX form. (*.grf)
(4) Settings (S):
42
<Fig. 3-2-4>
In [Setting], you can set the Region of Inure [ROI], you can select disable or enable the ROI effect.
When the ROI effect is enabled, the region outside the ROI will not be seen and saved, and it
would be covered by color [Mask Color] that defined in the setting dialog as below.
1. There is two methods to decide the region. You can decide it by X and Y aspect (from 100% to
0 %) or decide it by predefined Size likes A4, A5, A6, and other sizes.
2. If you enable the [Keep Aspect (4:3)] selection, the aspect ratio of X and Y will be keep in 4:3
ratio when it changed.
3. Click the [Mask Color] button to select the mask color. (Default is green)
<Fig. 3-2-5>
3-3. Introduction of toolbar
(1) For Windows toolbar as following figuration 3-3-1. The description in short
as below:
<Fig. 3-3-1>
(2) Selection items of the toolbar is shown above. They are explained from left to
right.
1. Exit:The accelerate button to exit.
2. Open : Open a argument file that saved previously.(*.vms)
3. Save(As) : Save the current setting arguments.(*.vms)
4. Video Source(Page Up): The setting dialog of video source and others.
5. Video Process(Page Down): The setting dialog of basic video processing.
43
6. Play(F2): Start the video. Before capture the image, you must ensure that the button
is active.
7. Pause(F4): Pause the playing video.
8. Stop(F3): Stop playing video.
9. Snapshot(F1): Process the single image capture and save action.
10. Grab and Draw(Alt+G):Grab one image. The grabbed image will be displayed in
the full screen fashion and one can add annotation or draw. Usefully for
visualization.
11. Grab and Draw and rotate 90(Alt+C):Grab one image. The grabbed image will be
shown in the full screen fashion and fit the screen horizontally. One can add
annotation and draw. Usefully for visualization of A4 size document.
12. Full Resolution:The grabbed images will be at the full resolution of the image
sensor (3 million or 5 million pixels).
13. Recording(F5): Start the video recording action.
14. Stop Rec(F6): Stop the video recording action.
15. Snap135 : Set the snapshot image mode by odd order.(page 1, 3, 5.., special design
for copy book)
16. Snap642 : Set the snapshot image mode by even and back order.(page 6, 4, 2..,
special design for copy book)
17. Snap246 : Set the snapshot image mode by even order.(page 2, 4, 6.., special design
for copy book)
18. Snap(F7): Set the Snapshot image mode by one by one order. When this is not
enabled, the captured images will not be saved.
19. Stop Snap(F11): Stop the Snapshot process and setting.
20. None: No turning the image when saved.
21. Turn right: Turning the image 90 degree when saved.
22. Upside down: Turning the image 180 degree when saved.
23. Turn left: Turning the image 270 degree when saved.
24. Image Display(End): Search and display the images that saved in previous time.
25. ROI(Home): Region of inure setting. Include aspect, mask color and others.
26. Replace(F12): Press (End) button to show the current captured images. Select the
one to be replaced and press (F12) button to take the New image for the
replacement.
27. Search: Searching the image files by conditions.
28. Fill Screen Video(Ctrl+A): the live video will be displayed in full screen mode.
29. Video Quality:To bring up a popup dialog box for the control of the video quality.
Controllable factors: brightness, contrast, hue, saturation, sharpness and exposure.
30. Snap folder(Ctrl+M): Open the snap folder.
44
31. Selection Ba(Ctrl+Q)r:To bring up the selection bar.
32. Book Copy: To enter the book copy mode. Successive grabbed images will be
rotated 180 degree. In other words, when copying a book, you first make sure that
the first page is oriented correctly. Then when taking the picture of the second page,
you have to rotate the book by 180 degree. The second grabbed image will then be
rotated by 180 degree to make the orientation right. The computer will do this for
you if this mode is invoked.
33. AF: Automatic Focus
34. Home: Stop Mask/Enlarge the video becomes its default.
1).Mask/Video image Cropping:Press Ctrl key when in the video window, also
press the left-button of mouse, then move the mouse cross over to set the cropping
size. Then release the mouse and Ctrl to obtain the grab zone.
2).Enlarge:Press Ctrl key in the video window, also press right-button of mouse,
then move mouse over the zone that you need to enlarge. Then release mouse
button and Ctrl key to obtain the enlarge zone.
3-4. Introduction of function button
The function selection dialog box is on the left side of the video window. By placing the cursor on
a particular item for one or two seconds, a popup tip will be shown.
45
1. (1) Function selection:
1. Copier(1) : Operate the copy function. If you got to copying
book, enable the Copy Book button.
2. CopySave (2): Operation the copy and save to file function.
3. Scanner (3): Capture the document or others and save the files.
You could select other function like fax, mail. To make the job.
4. DVR (4): Video recording function. The saved file format is
*.AVI.
5. Presenter: Operate the presenter function.
(2) Save mode:
1. Mono (6): Save the image in mono mode(black and white). The
default file format is *.tif.
2. Color (7): Save the image in color mode. The default file format
is *.jpg.
(3) Outside process:
1. Email (M): Send the image file outside by e-mail.
2. FAX(X): Send the image outside by fax function.
3. PDF (P): Make a PDF file By the saved images.
4. Mail PDF (Z): Make a PDF file By the saved images and mail
out it.
5. None (0): No other process, the default setting.
(4) Others:
1. Copy Book: Special design for copy book process.
2. L-R: The left and right balance for voice.
3. 0-H: The voice volume control.
<Fig. 3-4-1>
4. Grab(F1): Grab image. The captured images will be saved in
time order under the default directory D:\snapshot\snapshot\
3-5. Automatic Focus(For AF models)
3.5.1 AF300/500 models
Method 1. Click the
Method 2.Click the
Entering AF Setting window
to enter Basic Video Processing window:
46
<Fig. 3-5-1>
: 2X Zoom on Preview Screen for AutoFocus Operation
Entering AF Setting window as below:
<Fig. 3-5-2>
1).Zoom X2:2X Zoom on Preview Screen for AutoFocus Operation
2).Aperture : 2 options “F2.8” and ”F5.6” for your choice.
47
3).Shutter : To choose “ Open” or “Close” the Shutter .
4).PC Manually Focus Control:
: the Shortest focus.
: the Farthest focus.
fine tune for focusing operation
5).PC AutoFocus Control:
Auto:Start AutoFocusing
Stop:Stop AutoFocusing
6).Other Focus Setting:
7).FocusZone:Adjustment of White Rectangle shown on the preview screen
8).Level : Setup Sharpness detection under FocusZone and to find the Focus Point
9).Brightness : Value of changes in light detection (Auto)
1. Enable “Brightness” will auto adjust Level “Value”
2. Disable “Brightness” will allow manually Level “Value” adjustment
3. The higher the Level “Value” is, it may not be easy to find the focus point
4. The lower the level “Value” is, the easier to find the focus point
10). Four Focus Mode:
11). Nine Focus position option:
12).Select Port:Select COM Port.
Note:
1. When AutoFocusing is done, make sure to return to “Main” window or other setup
window on Basic Window Processing to exit AutoFocusing setup for completion
2. Make sure you have exited AutoFocusing setup following above point 1 when you close
the VideoCenter
3. If you do not exit AutoFocusing setup and close the VideoCenter, you will find one black
area show on the left side of preview screen when you re-start VideoCenter. In this case,
please re-start the PC to restore the right setting for normal preview display
3.5.2 AF200 models
Click the
Entering AF Setting window
1)Camera control
48
<Fig. 3-5-3>
Focus: Default is opening auto focus. As the first auto focus ready, recommend set to disable.
Iris: Iris controls how much the light into the lens. Only Auto; manual is useless.
Focus and Iris ‘s default is auto.
2)Video Proc Amp
<Fig. 3-5-4>
Adjust video Brightness; Contrast; Hue; Saturation; Sharpness; and Gamma.
Recommend keep as the default.
3.6 Hotkeys
Alt_F1 grab and not change focus
49
Alt_G
Visualizer Grab
Alt_C
Visualizer Grab A4
Alt_F2
Toggle Pause/Resume snapshot.
Alt_F3
Pop explorer to explore the diredtory of the current grabbed image.
Alt_A
Set B/W noise level at 0.80
Alt_E
Set B/W noise level at 0.95
For the active view:
Down Arrow : enable rotate 180 degree when grab
Right Arrow : enable rotate right 90 degree when grab
Up Arrow : enable rotate 0 degree when grab
Left Arrow : enable rotate left 90 degree when grab
Home: Pop up video mask definition dialog box
End : Pop up image file read / write property sheet
Insert : Pop up context menu
Page Down: Pop up video processing property sheet
Page Up: Pop up camera source selection dialog
Escape: Toggle focus between sstqatic image dlg and view
Enter : grab an image when view is on focus delete the static image dlg when it is on focus
F1: grab an image when view is on focus. Focus stays on vieww.
F2: start play
F3: stop play
F4: pause play
F5: start recording
F6: stop recording
F7: start snapshoting
F8: start snapshoting 135
F9: start snapshoting 642
F10: start snapshoting 246
F11: stop snapshoting
F12: replacement grab
Ctrl_V: Enter Visualizing A4 mode
Ctrl_S: Video fit width and height
Ctrl_R: Video fit width or height
Ctrl_W: Video fit width
Ctrl_X: Video fit height
50
Ctrl_T: toggle between showing video window or the static image dialog
Ctrl_D
toggle zoom x2
Ctrl_B
Video effect
Ctrl_H
Visual 90
Ctrl_K
Start video recording
Ctrl_L Stop video recording
51
Chapter 4. Basic functions of application
4-1. Foreword of Basic functions
Overview:
This chapter will illustrate the fundamental operation of VideoCenterMini to the user. The
arrangement of operation instruction is based on the function supported by the software, so you
can manipulate the software easily and quickly.
Execute VideoCenterMini application software.
Step 1:
Pleas start the VideoCenterMini short-cut path as the figure below indicated to execute the
software or click Windows "Startup" to select "Programs", "VideoCenter" and " VideoCenterMini
".
<Fig. 4-1-1>
Step 2:
The user interface of VideoCenterMini is shown as the figure below. When moving the mouse to
Selection Bar, a pop up help will be displayed on the screen in about one to two seconds. This
interface contains selection bar, tool bar, command bar, status bar, and playback bar. The status of
the software is indicated in the lower portion of the screen.
52
<Fig. 4-1-2>
The Selection bar indicates the functions provided by the software.
Those functions are: (1) Copy (2) Copy and Save (3) Scanner (4) DVR (5) Presentation. Click the
function you are looking for, and follow the related instruction to operate.
There are several functions under the Scanner as following:
(1) Black (6) - means the captured image is in the black mode.
(2) Color (7) - means the captured image is in the color mode.
(3) None (Q): the captured image is only stored in the hard disk.
(4) Email (M): means the captured image will be emailed to the defined email address.
(5) Fax(X): means the captured image will be faxed to the defined fax number via Windows fax
driver.
(6) PDF (P): means the captured image will be in the PDF format, or in the TIFF format.
(7) Mail PDF (Z): means the captured image emailed will be in the PDF format, or in the TIFF
format.
(8) Copy Book : means to capture a book or a magazine.
(3) ~ (8) are also available for copysave function.
Notice: Resume the program:
You can resume the program by the following steps.
Step 1:
Press the
button in the upper left corner to close the program, see below figure.
53
Step 2:
Open a new window execute dialog of general Windows [File] function in Windows command
line to resume the program.
<Fig. 4-1-3>
4-2. Operate the copy function
CamDocument with it bundled software can be used as a copy machine. CamDocument can
capture the document in less than 2 seconds, and the document will be printed out through the
default printer. Steps of operating copy function are as follows :
4 - 2 - 1. Simple copier function
Step 1:
After the software is started, please click the "Copier" button from the Selection bar. And the
dialog of "Video Source Dialog" will be popped up. Please choose "Simple One Channel” and
"New image SuperCam" and click "Enter". Followed by press "cross" button in upper-night corner,
or press "OK" to close this dialog.
<Fig. 4-2-1>
54
Step 2:
The "Basic Video Processing" dialog will be shown. The dialog shows the setting options for the
default printer. Normally you do not need to change the setting, Click "Apply" to finish this step.
The photocopy setting is only effective under photocopy mode. You can close the dialog by
pressing "x" button in right-top Conner.
[Copier] setting description:
The setting for copier functions, as follows:
<Fig. 4-2-2>
1. Camera Field of View: The setting for the image field, resolution and printer resolution. The
items could be different by different printer. Make some tiny modification when need.
2. Rotate: Rotate the image by the degree when printed out.
3. Quality: Set the print out quality. The selection could be fast, normal, high, or best. Select the
proper one as your need.
4. Clean: Choose the noisy clot level of the mono h/w image. The less the value is, the less the
noise is.
5. Apply: Click [Apply] button to make sure the setting.
6. Copies:The number of copies.
Step 3:
Place the document under CamDocument head and at the same time the document will be
displayed on the working window. The top of document toward left as shown. Press the
"grab" button on the tool bar or the F1 key on the key board, and then the document will print out
from your printer in the black/white mode and not be saved in the computer.
55
<Fig. 4-2-3>
Step 4:
After pressing
"grab", a preview dialog will be popped up as the figure below. This preview
dialog is size adjustable. Following the same steps described above to make another document
copy. You may move this preview dialog anywhere on the screen. Next time, the dialog will be
popped at where you placed it before.
<Fig. 4-2-4>
4 - 2 - 2. Copy and Save function
If you want to copy and save the document as files, choose "CopySave" instead of "Copy". The
56
operation will be the same as the previous description. Pressing the
"grab" button the printed
document will be shown on the preview dialog as well as stored under the default file path
D:\Snapshot\Snapshot (more see in the remark). The file folder name is defined automatically by
Greenwich time. The default file name of the file folder is started from A00000001 which will be
increased by one after each snapshot, and the default file type is TIFF.
(Remark)Location of file storage:
The image will be stored in the partition of hard disk in sequence of D.E.F.
The location of image file is different from that of video file. The image files will be located under
\SnapShot and video file are under \VideoRecording. The subdirectory name (folder) is made
according to Greenwich time automatically, however, you can change the subdirectory name by
your wish.
The format of name is 20041204121537Z, it is composed by year, month, day and time. The Z
means Greenwich Time.
The sub-directory name according to Greenwich Time could be helpful when travel between
different time zones.
<Fig. 4-2-5>
As for changing storage format, directory name and so on, please refer to this User Operation
Guide in section 6-3 "Location of file storage" for more details about it.
4 - 2 - 3. Copy Book function
If you want to copy a book or magazine and so on, you could follow those steps.
Step 1:
Select the Scanner or CopySave function.
Step 2:
You could select one of the two procedures;
(1) Capture odd pages sequentially and then capture the even pages in reverse order.
(2) Capture each page sequentially. You must then rotate the book 180° each page.
57
If you choose method (1), click the
button. Then, click the
button first. When finish the odd pages, click the
button and capture the even pages reversely.
If you choose method (2), checked the "Copy Book" selection and click the
button. Then
capture every page from the beginning, and each time turn the book 180°. The orientation of
captured images will be corrected automatically.
Step 3:
On the tool bar, select
, and press "print" button to print or "PDF" button to pack to a PDF file.
4-2-4 Book copying
There are two ways to copy a book.
(1) Copy the odd pages first and then the even pages in reverse order.
(2) Grabbing in page sequence and rotating 180 alternatively.
To take method (1), press
press
,then taking odd pages. Finishing odd pages, press
,then
,taking Pictures in reverse order. It will terminate automatically.
To take method (2), press the Book Copy item on the main menu first,then press
to start
grabbing. Turn the book 180 degree for each page. The computer will rotate the page back to
make the orientation of each page correctly.
4-3. the function of electrograph
When we choose the function of copy save or conversion,at the same time,choose the fax
option,the computer which install the modem (Modem) , fax software and shoot an instrument
composes simulated system of fax machine , Play arrive at electrograph role.
The function of fax and printing is not only use in the mode of Modem fax。The main procedure of
CamDocument can call the Microsoft Office component Document Scanning,can enter into print
setup,also can save the image as the mode of many pages.
the operation steps as follow:
.
1.Choose the function mode
.
2.After catch up the image,choose
3.Take photos.
4.Then ,Find the button in the toolbar
finish photoing in batch,after click this button,pop
up the property setting of print,as(Figure 4-3-1)
58
<Fig. 4-3-1>
printer's name,can choose a printer of locality or network to print;also can select
,saving the task of printing.In this way you can
save many photos as the document of pages which extention name is mdi.
4-4. Presentation function
CamDocument is a handy tool for presentation. It can present the 3D objects directly on the screen.
The operator can manipulate the direction of camera head to catch the image. See the steps below.
Step 1 :
Start VideoCenterMini software, and click "Presentation" from the selection bar. The dialog box of
"Selecting Video Source" will be popped up on the screen. Please make sure that the video source
is "simple one channel and video camera is", "New image SupeCam" If yes, press "OK" and to
continue. The 3D object, document or image will be displayed on the screen.
59
<Fig. 4-4-1>
Step 2:
From the View menu item, select the "selection bar" sub item to restore the selection bar.
<Fig. 4-4-2>
For more advanced operations related to object visualization, please refer to Chapter 8. You may
press the Action-Video Effect menu item to invoke the advanced operations.
Adjustment for focus:
60
Like operating a camera, the lens of camera head can be adjusted to get a good focus on the
document. Put the paper under the camera head after starting VideoCenterMini software, adjusting
the focus head based on the image shown on the screen. The lens is mounted under the camera
head, and can be turned left and right to make the images sharp.
4-5. Function of Image Scanner
The scanner function allows the operator to capture and store any forms of document and image
such as invoices, books, articles, and magazines up to A4 full-page size in less than one second.
CamDocument provides the high image quality and supports various file formats and compression
methods to save the storage space. The file formats supported are more than eighty types including
JEPG. TIFF, PDF and etc.
Step 1:
Start the VideoCenterMini software, and click "Scanner" from the Selection bar as shown in the
figure below. It is assumed that the file captured will not be sent outwards. Otherwise, click
"Email" or "Fax" button to send the file outwards to the desired email address or fax number (see
more in Remark 1).
The dialog box of "Selecting Video Source" will be popped up. Make sure the configuration is
"Simple One Channel" and the source is New image SuperCam as below. Click "OK" to continue.
<Fig. 4-5-1>
Step 2 :
Place the document or image under the camera head of CamDocument, meanwhile you can see the
document or image shown on the screen. The head of document toward left as shown in the figure
below. Press the
"start the batch" bottom on the toolbar (dark). Then follow by clicking
61
"grab" or pressing F1 key on the key board. The captured file will not be saved, if not enable
"start the batch".
The direction of image shown is adjustable by clicking
those buttons on the tool
bar.
The direction selection:
for original,
for turn right 90 degree,
for turn over 180 degree,
for turn left 90 degree. Please select the direction and grab the Pictures without saving to
and
disk to make sure alignment is right.
The captured image can be in black/white or color. The default file format is JEPG for the color
mode and TIFF group4 for black mode. The storage batch is preset under D:\snapshot\snapshot\
(see more in remark 2). Click "close the batch" to finish this snapshot batch.
<Fig. 4-5-2>
Step 3 :
After pressing "
grab", a preview dialog will be popped up as shown in the figure below. This
preview dialog is size adjustable. Follow the same actions described above to make another
document image snapshot.
62
<Fig. 4-5-3>
If you want to review the saved files, select
on the tool bar. The dialog will be popup. Please
refer to 4-8 for the detail of “File searching function”.
Remark 1: Other selections of function
The operator can select the "Email" or "Fax" to email or fax the captured image outwards, not
only saved in the computer.
The captured images can be in PDF or TIFF format, once you select the PDF or Email PDF button
from the function bar.
Select "PDF Email" under snapshot function, the files in the same batch will be transferred into
the PDF or TIFF files and be emailed.
Under the condition of selecting Email or Fax, the files in the same batch will be sent out one by
one, but selecting "PDF" will group the files in the same batch into a "PDF" file or a "TIFF" file.
Be sure to click "stop the batch" to begin executing the e-mail and other send out functions.
Remark 2 : The location of stored images
The location of stored images is preset in hard disk partition of D.E and F in sequence. The
location of still images is different from video recordings. The images are saved under the
directory \SnapShot, and the video recordings are under the directory \VideoRecording.
63
The subdirectory (file folder) is generated according to Greenwich time as the figure below.
<Fig. 4-5-4>
Of course, those setups are changeable; please refer to User Operation Guide in section 7-3
"Location of file storage" for more details about it.
Adjustment for focus:
Like operating a camera, the lens of camera head can be adjusted to get a good focus on the
document. Put the paper under the camera head after starting VideoCenterMini software, adjusting
the focus head based on the image shown on the screen. The lens is mounted under the camera
head, and can be turned left and right to make the images sharp.
4-6. Video recording function
CamDocument and its bundled software provides the real time video recording function. There is
no time limit on the length of recording. Turn the camera head up or down to make recording in
accordance with your reeds. The operation procedure is as below.
Step 1 :
Start the VideoCenterMini software and click "DVR" from the selection bar, see the below.
The dialog box of "Selecting Video Source" will be popped up on the screen. Please make sure
that the video source is "simple one channel and video camera is", "New image SupeCam" If yes,
press "OK" and to continue.
64
<Fig. 4-6-1>
Step 2:
A "Basic Video Processing" dialog is popped up. The default resolution is max resolution (2048 x
1536). Please select the suitable resolution for the video recording. You can select 320 x 240 (20
fps) for VCD quality, and 640 x 480 for DVD quality. Higher resolution needs more disk space.
The default video is MPEG. It is suitable for every resolution.
The video orientation can be changed by the flipping selection in this dialog: "None" means
original, and "X" means turn right to left, "Y" means turn over, and "XY" means turn over and
right to left. You can try it and make sure which way is right.
<Fig. 4-6-2>
65
Step 3 :
Click
"Start Recording" on the tool bar or press "F5" key on the keyboard to start. Like
operating a video camera, you can see what you record on the screen. Once you want to stop
recording please Click
"Stop Recording" on the tool bar. The file of video recording is preset
under the path: D:\VideoRecording\Video.( see more in annotation)
<Fig. 4-6-3>
(Remark)The location of stored files:
The location of video files is preset in hard disk partition of D, E and F in sequence. The location
of video files is different from images snapshot. The image files are saved under the directory
\SnapShot, and the video recordings are under the directory \VideoRecording.
The subdirectory (file folder) is generated according to Greenwich Time. The video files will be
stored as the figure below.
66
<Fig. 4-6-4>
As for changing storage format, directory name and so on, please refer to Advanced User
Operation Guide.
Use CamDocument as a video camera:
Here is an example as setting up CamDocument as a video camera to shoot a real scene.
Step 1:
Remove the cable box, and move it as the figures to the proper position.
<Fig. 4-6-5>
<Fig. 4-6-6>
Step 2:
Continue the step as below, move the camera head to capture.
67
<Fig. 4-6-7>
<Fig. 4-6-8>
Step 3:
Place the cable box on the base, and tilt the camera head to 60 degree for plugging the USB cable.
<Fig. 4-6-10>
<Fig. 4-6-9>
Step 4:
Move the camera head to proper position as figure, and select the direction for "XY" and press
"Apply" to make sure the video orientation is correct. Then follow the video recording procedures
as described before.
<Fig. 4-6-11>
68
<Fig. 4-6-12>
4-7. Snapshot and e-mail function
The scanner or Copy function allows the operator to capture and store any forms of document and
image such as books, articles, and magazines up to A4 full-page size in less than one second.
When you process scan or copy the image function. You also can send the images by e-mail to
others.
Before process the e-mail function, please make sure that the proper setting had done. The
description of pre-setting about the e-mail function as below: (refer Remark 1)
First, you must start the application and select the scan or copy function as below.
Step 1:
Start the VideoCenterMini software, and click "Scanner" or "CopySave" from the Selection bar as
shown in the figure below. The dialog box of "Selecting Video Source" will be popped up. Make
sure the configuration is "Simple One Channel" and the source is New image SuperCam as below.
Click "OK" to continue.
Beside the above step, please click on the E_Mail button under left to perform the send by e-mail
process.
69
<Fig. 4-7-1>
Step 2:
Place the document or image under the camera head of CamDocument, meanwhile you can see the
document or image shown on the screen. The head of document toward left as shown in the figure
below. Press the
"start the batch" bottom on the toolbar (dark). Then follow by clicking
"grab" or pressing F1 key on the key board. The captured file will not be saved, if "start the
batch" is disabled.
The direction of image shown is adjustable by clicking
those buttons on the tool
bar.
The direction selection:
and
for original,
for turn right 90 degree,
for turn over 180 degree,
for turn left 90 degree. Please select the direction and grab the Pictures without saving to
disk to make sure alignment is right.
The captured image can be in black/white or color. The default file format is JEPG for the color
mode and TIFF group4 for black mode. The storage batch is preset under D:\snapshot\snapshot\
(see more in remark 2). Click "close the batch" to finish this snapshot batch.
70
<Fig. 4-7-2>
The operator can select the "Email" or "Fax" to email or fax the captured image outwards, not
only saved in the computer.
The captured images can be in PDF or TIFF format, once you select the PDF or Email PDF button
from the function bar.
Select "PDF Email" under snapshot function, the files in the same batch will be transferred into
the PDF or TIFF files and be emailed.
Under the condition of selecting Email or Fax, the files in the same batch will be sent out one by
one, but selecting "PDF" will group the files in the same batch into a "PDF" file or a "TIFF" file.
Be sure to click "stop the batch" to begin executing the e-mail and other send out functions.
Step 3:
After pressing "
grab", a preview dialog will be popped up as shown in the figure below. This
preview dialog is size adjustable. Follow the same actions described above to make another
document image snapshot.
<Fig. 4-7-3>
Step 4:
When you complete the snapshot job, Please click the stop button
. Then the images will be
send out by e-mail if you had proper set the option about the e-mail process.
<Fig. 4-7-4>
Remark 1: The setting pages of e-mail function
Step 1:
Click the toolbar button
, and then select the [Snapshot] item. Then click the [Dispatch] button
71
as below for setting the e-mail selection.
<Fig. 4-7-5>
Step 2:
A popup dialog box as Fig. 4-6-6 is shown.
(1) Three ways to send out email.
A)Attachment: Images are attached as email.
B)Notification:Notify the receiver to FTP download the grabbed images.
C)Mail Client:Invoke email client software.
(2) Target Server IP︰Fill in the local mail server IP like 210.64.168.15 or www.mail.com. If
MAPI checkbox is checked, then the item can be ignored.
(3) To: Recipient like [email protected]
(4) From: Sender like [email protected]. If MAPI checkbox is checked, then the item can be ignored.
(5) File Type: Attachment file type. Default is PDF. One can chose other format.
(6) Local FTP Server Name: IP of the local FTP server. This is for the FTP downloading.
(7) Email client path: e mail client file path.
(8) KeyTitle: Check to enable one to key in the title of the e mail.
72
<Fig. 4-7-6>
Remark 2: The location of stored images
The location of stored images is preset in hard disk partition of D.E and F in sequence. The
location of still images is different from video recordings. The images are saved under the
directory \SnapShot, and the video recordings are under the directory \VideoRecording.
The subdirectory (file folder) is generated according to Greenwich Time as the figure below.
<Fig. 4-7-7>
4-8. Copy Book function
The copy book function is to make copying of a book easier. The scanner (or CopySave) function
has the copy book option which allows the operator to capture and store any forms such as books,
articles, and magazines up to A4 full-page size.
The operator could choose different mode to complete the copy book operation, and the default
73
mode is by sequential image capture.
4-8-1. Perform the copy book operation by sequential order
Step 1:
Start the VideoCenterMini software, and click "Scanner" from the Selection bar as shown in the
figure below. It is assumed that the file captured will not be sent outwards. Otherwise, click
"Email" or "Fax" button to send the file outwards to the desired email address or fax setting.
The dialog box of "Selecting Video Source" will pop up. Make sure the configuration is "Simple
One Channel" and the source is New image SuperCam as below. Click "OK" to continue.
<Fig. 4-8-1>
Step 2:
Place the book or magazines under the camera head of CamDocument, at the mean time you can
see the book shown on the screen. The top of the book toward left as shown in the figure below.
Press the
"start the batch" button on the toolbar (dark).
Mask:
Mothod1: Press Ctrl key when in the video window, also press the left-button of mouse, then
move the mouse cross over to set the cropping size. Then release the mouse, Ctrl to obtain the
button in toolbar, then video window become
grab zone. If you want to clear mask zone, click
default setup.
74
Mothod2:Click on the ROI
button on the toolbar as below to set the region for capturing
that would suit the book length and width.
<Fig. 4-8-2>
Step 3:
Choose the direction of image adjustable by
buttons on the tool bar, the direction selection:
for turn right 90 degree. Next click "Copy Book" from the Selection bar. Then the snapshot
image will be toward to top.
75
<Fig. 4-8-3>
step 4:
clicking
"grab" or pressing F1 key on the key board, meanwhile the snapshot image of book
will be shown as below. The captured image can be in black and white or color. The default file
format is JEPG for the color mode and TIFF group4 for black mode.
<Fig. 4-8-4>
76
Step 5:
Next on, you could process to the next page (the even page) for capturing. For general book
design, you should place the page toward to right as below. The application will transfer the image
to top automatically. In other words, the snapshot image that you had seen should be toward to
top.
Step 6:
The odd page capture operation is the same as above step 4, and the even page is the same as step 5. If
(stop snap) button. If you had chose the outward method
you have finished copying, please click
likes [PDF] before this process, then the application will going to transform those pages to PDF file. For
other operation notes, please refer to 4-4. “Function of Image Scanner” for details.
<Fig. 4-8-5>
4-8-2. Perform the copy book operation by odd then even page order
Perform the copy book operation by odd then even pages are most the same as above, except that the
selection of snap mode is different.
Step 1:
Start the VideoCenterMini software, and click "Scanner" from the Selection bar as shown in the
figure below. It is assumed that the file captured will not be sent outwards. Otherwise, click
"Email" or "Fax" button to send the file outwards to the desired email address or fax number.
The dialog box of "Selecting Video Source" will pop up. Make sure the configuration is "Simple
One Channel" and the source is New image SuperCam as below. Click "OK" to continue.
77
<Fig. 4-8-6>
Step 2:
Place the book or magazines under the camera head of CamDocument, meanwhile you can see the
book shown on the screen. The head book torward left as shown in the figure below.
Mask:
Mothod1: Press Ctrl key when in the video window, also press the left-button of mouse, then
move the mouse cross over to set the cropping size. Then release the mouse, Ctrl to obtain the
button in toolbar, then video window become
grab zone. If you want to clear mask zone, click
default setup.
Mothod2:Click on the ROI
button on the toolbar as below to set the region for capturing
that would suit the book length and width.
78
<Fig. 4-8-7>
Step 3:
Please click the toolbar button
image adjustable by
to stop the default snapshot mode. Choose the direction of
buttons on the tool bar , The direction selection:
degrees.Next click the toolbar button
for turn right 90
(Start odd page snapshot) to operate. Then the snapshot
image will be toward to top.
<Fig. 4-8-8>
step 4:
clicking
"grab" or pressing F1 key on the key board, meanwhile the snapshot image of book
will be shown as below. The captured image can be in black/white or color.
Step 5:
Next, you could process the next page(still the odd page) capturing. Page 3, 5, and then 7.
When you complete the odd pages snapshot process, please click the stop button
the odd pages operation.
for ending
Step 6:
Next, for the process of even pages that you could choose two method to complete the copy book
function.
(1)If you want to capture the pages by order page 2, 4, then 6.., please click the button
for
process.
button for
(2)If you prefer to capture the pages by order page 6, 4, then 2.., please click the
process. This method means from end page to start page for capturing. If the page number exceeds
the odd pages that saved previously, it will stop the saving file action automatically.
For general book design, you should place the page toward to right as below. The application will
transfer the image to top automatically. In other words, the snapshot image that you had seen
should be toward to top.
79
<Fig. 4-8-9>
Step 7:
If you complete the copy interval, please click
One can press the
(stop snap)button.
button in the toolbar to examine the images grabbed. Once the dialog
loop button to confirm all the images are OK. If
popup<Fig. 4-7-12>, one can press the
some images are not properly grabbed, one can press
After confirming, press
(Replace) button, and then grab again.
to start converting.
If you press the “PDF” button, then the computer will start to convert all the grabbed images in
this session into a PDF file. It may take a while.
<Fig. 4-8-10>
4-9. File Searching function
File [Searching] Settings as below:
File searching function searches the files stored by capture process. The search qualification
contains :
Suffix: Setup the suffix name(Top level folder path).
Period: For date and time period condition.
Title: For file title qualification.
Result: Setup the match condition. There are three modes :
Match All: Matches the whole file title.
Match: Matches the left part of the file title.
Search: Matches any part of the file title.
80
Folder: This checked selection means searching the folder or not.
Example: d:/snapshot/myfile/20041206123507Z/John.jpg, "myfile" is suffix,"20041206123507Z"
is qualified in "Period", and "John.jpg" is qualified in "Title".
<Fig. 4-9-1>
In searching function, the suffix selection could be the folder name created by user or the default
name Snapshot. If it is blank, it will be default.
If you check the "Video" selection, the searching target range is the video recording files. The
video default root location is \VideoRecording.
If you set the "Title" to blank, then the found files will be all the files. You can set some search
conditions and get the file you need. Click the "Search" button to start the process.
The searched file will be listed on the list control, and you could view it by click on it. The
Snapshot dialog for image viewer will be shown up.
If you check the folder button and searching, you will get a list of directories instead of file paths.
When you click on the directory name in the list box, the directory list dialog will be shown up as
below. It will list all files located in the directory. You can click the listed file name to further
process this image or do some process on all those files.
81
<Fig. 4-9-2>
The "load" property page is an image file browser. It shows all files in a directory and allows you
to Figk up one to be displayed and processed in the preview dialog.
The function buttons on the left are [>>] display the next one, [<<] display the previous one, [|<]
display the first one. And [>|] display the last one.
Below the button is number entry, it is the index of the file displayed.
The [X] button for deleting file.
On the bottom of the dialog, there are more selections. You could select Ascent, Decent to arrange
the file list. Filter means the file name filter, and *.* means all the files. When you check the
Thumb selection, the file list will also list the thumb images for every file. Click the >>PDF
button to pack all images to a PDF file. It will be created and named by the folder name. The PDF
file will be stored on upper directory.
>>TIFF button to pack all images to a TIFF file. It will be created and named by the folder name.
The TIFF file will be stored in upper directory.
>>LOOP button for display the images by order and automatically. The number beside it can use
to select the display speed. The larger the slower.
>>PRINT button to print all images by default printer.
Note: PDF files will not be read and are skipped.
The " Save" property page is to save the image shown on the preview dialog to disk. You can
select a file format and its compression method. If you do not know about the compression
method of a file format, you choose “Undefined Compression".
"ROI" button means to save only the ROI portion of the image.
"Original" button means to save the original image.
"Displayed" button means to save the image seen on the preview dialog.
82
<Fig. 4-9-3>
Note: Not all Compression methods applicable to all file formats.
Note: Ignore the Template ID, Template, Rotate Range, Step selections.
4-10. OCR
The main procedure of CamDocument could call the Microsoft Office component Document
Imaging to implement the function of Optical Character Recognize.
4-10-1 Brief Introduction of OCR
1.
What is OCR?
OCR:Convert the text image (eg:scanned document) into the real text character.It's also called
text recognize.
2.
The advantage of using the OCR
The letter on the image file is hard to be used,but after converted by OCR,the operation of
copying and pasting the text will be allowed.
The average image file can not carry out a full text retrieve ,but after recognized by OCR,we
can do the retrieve of the image all over the passage.
Applications to some other industry,such as the digital of the note of the bank and the
document.OCRplays an important part in improving the society’s information level.
3.
Knowing the current technique of OCR
As the current technique of OCR,the rate of accurate can’t be assured to be 100%. Using the
OCR make you type less,but the result need to be checked.
As the current technique,it’s quite difficult to make the original format,so the results from
OCR still need to be retypeset.
The procedure can remind you of installing the component for the first time you use the OCR
function of Microsoft Office.
4-10-2 Application of OCR to CamDocument
The operating steps as follow:
1. Select the function mode
2.
Select toolbar video dealing
.
reshoot in batches,look at the Picture 4-10-2,there is an
option zone of the OCR below. "righting" and "straighting",default to be selected.After being
selected,while using the OCR,the procedure will rectify the direction of the letter automatically.
83
< Fig.4-10-2>
The simplified Chinese user chooses language: CHINESE_SIMPLIFIED = 2052
Five options in pulling listing under the pattern:
Mode
Explaination
None
Unable to use OCR
Tiff Direct Sync
Add the OCR's function on each Picture taken.
Tiff Direct Async
Do all the OCR operation in batches after finish photoing in
batch.
Build the index,so the Picture can be found search as the
Tiff Extra Index
content(refer to the “4.9.3 search”)
Create a .txt file automatically,the content is the letter that
Tiff Extra Text
can be recognized after done by OCR.
After setting,press the Enter button.
3.
Take photos.
4. Find the button in the toolbar
(finish photoing in batch).
4-10-3 search
In the main procedure of CamDocument,we can retrieve all over the passage,namely the function
of
locating image files.
As is mentioned in the“4-10-2 application of OCR in the CamDocument”,the state of reshoot,in
the toolbar video dealing
reshoot in batches in the OCR mode select“Tiff Extra Index”mode,
the software will build the index atuomatically,in order to retrieve all over the passage,namely the
function of locating image files.
84
click toolbar
search
,look at the Picture 4-10-3.select the result of search”search”enter the
keyword in the text frame which is at the side of "content including",then click
.Waiting for
dealing the result will show in the underside of list.
< Fig.4-10-3>
4.11 Measurement
4-11.1 Rectify Measurement Value
1.Press the ruler on the desk
2.Press below icon to capture the image. (Fig. 4-11-1)
< Fig.4-11-1>
3.Place the mouse on the captured image and double click the mouse on the left key
to pop up below window. Select the “Analysis Report” from the “Annote” list
(Fig.4-11-2)
< Fig.4-11-2>
85
4.Enable “Line” and “Measure” under Annotate setup as fig. 4-11-3
< fig.4-11-3 >
5.Hold the mouse on the left key and draw one line along the rule. See Fig. 4-11-4
< Fig. 4-11-4 >
6.Press
button to call the Caslibrate setup window. Enter the Length and
complete the setup. ( See fig. 4-11-5)
86
< Fig. 4-11-5 >
Systme will memorize this Measurement setup and value for further rectification.
Please check and test this Measurement Setup as Fig. 4-11-6
< fig. 4-11-6 >
4-11.2 Types of Measurement
Press “Measure” to call the setting window (Fig. 4-11-7)
87
< Fig. 4-11-7 >
1.Point Measurement:Value of the point’s Coordinates ( Fig. 4-11-8)
图 4-11-8
2.Line Measurement:Value of the Line Length ( Fig. 4-11-9)
88
< Fig. 4-11-9 >
3.Polyline Measurement: Value of the Polyline ( See Fig. 4-11-10)
< Fig 4-11-10 >
4.Polygon Measurement:Value of the Polygon
( See Fig. 4-11-11)
89
perimeter and its area measurement
< Fig. 4-11-11 >
5.Angle Measurement:Positive Value for CounterClockwise direction and negative
value for clockwise direction ( Fig. 4-11-12 )
< Fig. 4-11-12 >
6.Chord Measurement:Value of Chord made by 3 points ( Fig. 4-11-13 )
90
图 4-11-13
7.Circle Measurement: Value of Circle’s radius made by 3 points ( Fig. 4-11-14)
图 4-11-14
8.Count Measurement:Value of the black dots and its selected area measurement(Fig.
4-11-15)
91
< Fig. 4-11-15 >
4-12. Other
4-12-1. function of screen recording
“Videocentermini” provide screen recording function.
Start screen recording: Menu – Function – Start recording, or press “ctrl+k” shortcut key.
Stop screen recording: Menu – Function – Stop recording, or press “ctrl+k” shortcut key
The default format of the recording is avi. The default path is: D:\VideoRecording\Screen.
If the screen recording function is not working on the computer, you can try to change the
default setting of “Data source of recording”. Choose” Microsoft ADPCM”.
<Fig. 4-12-1>
92
4-12-2. functions of audio input feature
Click
on the tools bar, you can change the audio setting in the following pop up window.
<Fig. 4-12-2>
4-12-3 function of video media player feature
“Videocentermini” Have video media player function. Step as follow:
1. Select
on tool bar,select“Based on .grf , .avi ,or media file” as data source.
Then select the file want to play, then click “Confirm”(fig.4-12-3)You can even play
DVD with it
<Fig. 4-12-3>
2. Adjust the volume.
93
3. Click “Start play” button on the tool bar. “Pause” and “Stop” button sit beside “Start”
button. You can also control the playing speed and playing status. (fig.4-12-4)
Start play
Audio
Play bar
<Fig. 4-12-4>
4-12-4. select option tab “Main”
Click
up(fig.4-12-5)
on the tool bar,Common and advance video processing option will pop
Fig. 4-12-5
94
1). Zoom X2: Double up the display screen.
2). Keep aspect: fix ratio of Long and Wide.
3). Deskew: system will adjust the position of the Picture, to line up with the border.
4). Vignelting black enable: Click on “Grab Blacd” to capture a Picture in black. Then select
“vgnetting”.“derkew”and“vignetting black enable”three options to remove the black
frame outside the border. This is useful option for photo of rectangle shape item. The effect of
before and after using this option shown in Fig. 4-12-6.
Fig. 4-12-6
5). Vignelting removall: Click on “ grab black“ to capture a white background. Then select
“vignelting removall “,
Take photo of the document you want to back up. This function will remove the shadow
outside the border. The effect of before and after using this option are shown in Fig.4-12-7.
Fig.4-12-7
95
6).
: you can adjust the setting according to your requirement.
7). Target DPI: Setup the DPI value in Mono mode or color mode.
8).
AF AutoX2: Autofocus, twice the video Large.
9). Color : To save the image in color mode under Jpeg format.
Gray: To save the image in gray mode under Jpeg format.
Black&White : To save the image in Black&White mode under Tiff format.
10).Preview: Enable/disable the preview window pop up.
11). B/W Noice Level: Adjustable for image quality at B/W mode.
12). Twain TX Rate: Setup the Twain Transmission Speed.
13). Hand Detect: During TimeBased Scan mode, Hand Detect will avoid hand image to be
scanned during page changing.
4-13.Barcode Recognition
VideoCenter main program has the function of barcode recognition
1.Barcode Recognition scanning
1).Refer to Charpter 4.1 to enter scanner mode,
dialog box of “Basic Video Processing” will poped
select “scanner” from the selection bar, the
up.
Please confirm soure is “New image
SuperCam”and others keep default , then click “ok” to continue.
2).Click video Process
button (Page Down) , The dialog box of “Basic Video Processing”
will be poped up, click “Snapshot” Tag, then select “Batch Barcode Title”to enable barcode
recognition function, then click“Apply”button to close dialog box.
96
Fig 4.13-1
3).If you want advanced functions such as Mask, Rotation, DPI, Video processing etc, pls
refer to the function of scanner,
4).After setting, you can start barcode recognition scanning,
from selection bar, (Fig4.13-2)
Fig4.13-2
97
click “Grab” button(Alt+Enter)
5).The captured image file name will be created as barcode No., such as
“9771007077005.jpg”in Fig4.13-3 below. Default storage location is in the folder named by time
in D:\snapshot\sanpshot\
Fig 4.13-3
2.Barcode parameter setting (Fig 4.13-1)
1).Barcode setting: click “barcode setting”and a dialog box will be poped up as below
(Fig4.13-1),
Fig 4.13-4
Barcode Type: Barcode types options, it’s suggested to select all.
Barcode Zone: Full screen is defaulted as X=0,Y=0,W=1,H=1, for example,
X=0.5,Y=0.5,W=1,H=1 , it means barcode zone is 1/4 of top left corner of the full screen.
Directions: Recognition directions, it’s suggested to select all.
MultipleRead: Multiple Reader, It’s suggested not to enalbe
BarcodeLength: Barcode lengh, default is 0-200;
98
Skew Tolerance: Default is 45 degree
It’s suggested to select default settings for above to keep best recognition
2).Batch Barcode Title: Enable batch barcode title, the captured image name will be created as
barcode Number recognized.
3).Barcode type: click “barcode type” button, image storage subfolder name will be changed as
barcode Number recognized. (Fig 4.13-5)
Fig 4.13-5
4).Grab Barcode title: Grab image immediately and saved file name as barcode Number, no matter
whether
“Batch Barcode Title”is enabled or not
4-14.Video Warping
VideoCenter main program have the function of Vignetting, see below for how to do,
Click button
from tool bar(Page Down), select tag“Vignetting”, as shown in Fig 4.14-1
99
Fig4.14-1
1.Select “Warping Ex”—“Perspective bacl”,then “Video Warping Ex”become optional
2.Enalbe “Video Warping Ex” ,
3.Big Step: you can select X1,X2,X3, it’s suggested to select.
4.Tuning Corners
: Four circles in the picture stand for four corners of rectangle,
buttons U,D, L, R are warp directions. For example, select circle in the top left corner , press U
button continiously ,the top left conrner of video will be dragged to up accordingly.
button – drag to down, press L button—drag to left,
Press D
press R button-drag to right.
4-15.VideoCenter2X2 Multiple windows version
VideoCenter main program has multiple windows versions of VideoCenter2X2、3X3、4X3,
their function , settings are same as single window version –VideoCenterMini. Below is brief
introduction of window selection, storage location, and monitoring function etc.
1.Firstly start program of VideoCenter multiple windows version, see Fig. 4.15-1 . it’s
different from single version since the window has been devided into four small ones, Every
divided window has their own video setup, independent parameter.
Fig4.15-1
2.select one small window, left click to select the top-left window. To know which window
has been selected, you can check the status bar at the bottom right corner of window,
100
0:0,0:1, windows
the windows in first line are showed in turn as
in second line are named in turn as 1:0,1:1 and so on.
3.Select ‘DVR”on the Selection bar ,
image superCam” for Source,
video source dialog box will pop up.
Select “New
make sure this device is not used by others at the same time. We
recommend you select [Annotate]:it will display time stamp mark, remark.Other settings keep
default, then click button “ok”to continue. (as showed in Fig 4.15-2)
Fig 4.15-2
4.Video parameter settings: It suggested to take video solution as 320X240 or 640X480 .
Recording with sound please refer to Charpter 4.7,
Advanced settings please refer to
Charter7.2-3.
5.Start recording: click the “ start recording” button( or F5) in the tool bar
6.End recording: click the “end recording” button (or F6) in the tool bar
to start recording
to end recording
7.Repeat step 2-5, enable other windows for recording.
DVR files default fortmat is as *.avi, default storage location is D:\VideoRecording\Video;
DVR file in the first window is saved in the folder named by time of
D:\VideoRecording\Video\00\,
file in the second windos is saved in the folder named by time of
D:\VideoRecording\Video\01\, and so on.
101
Remarks:
still Imaged captured by “scanner” function is saved in the default location of
D:\Snapshot\;
Still Image captured in the first window is saved in D:\Snapshot\Snapshot\00\, image in the
second window is saved in D:\Snapshot\Snapshot\01\, and so on.
8.Windows Drag: in the multiple windows, you can put the cursor to seperation lines between
the windows, then drag the line to resize the window after cusor status is changed
9.Keyboard hotkey: as showed in Fig4.15-3, in the list of drop-down menu of “Action” in the
command bar , Shift+F1—F11 is available for all small windows ,
for example, select
Action>start video recording all(Shift+F5), video recording will be started in all windows, and
select Action>stop video recording all(Shift+F5), video recording will be stopped in all windows
Fig4.15-3
102
Chapter 5. Advanced Image functions of application
5-1.Images Processing function
For general image files, VideoCenter application offers some image processing function. You can
use those advanced functions to modify the image as your need.
5-1-1. How to start the function
In any process, when you see the Snapshot dialog that show the image. Then you can process the
function on this image.
Simply just click the mouse right button twice, shown below. Choose the first selection "Basic
Image Processing".
<Fig. 5-1-1>
5-1-2. Geo adjustment
The first function of image process is Geo adjustment, shown below.
(1)Rotate: Rotate the image by the defined degree. (By select bar)
(2)Zoom: Zoom in/out the image by the defined degree.
(3)Reduce: Reduce the image size by the defined degree. (1 means 1/2, 2 means 1/4 and 3 for 1/8..)
(4)Centered: Rotate the image according to the image center.
(5)Reset: Cancel the changes and reset the image to original.
(6)Fit: The image size according to the dialog size, fit the dialog by X or Y ratio.
(7)Even: Get the image only by the even line.
(8)Odd: Get the image only by the odd line.
103
(9)Rotate: Rotate the image by the defined degree. (By Text)
(10)Apply: Apply the changed image to replace the original.
In Mirror selection, you can select the mode and click [Mirror] button to get the effect.
(1)X: Mirror the image by X direction.
(2)Y: Mirror the image by Y direction.
(3)XY: Mirror the image by XY direction.
<Fig. 5-1-2>
5-1-3. RGB Adjustment
For RGB adjustment includes the three color R, G, and B adjustment. You could move the select
bar to make modification according to the color.
The other buttons for image processing, described below:
(1) Sharpen : Sharpen the image more effect.
(2) Guass: Transfer the image by Guass effect.
(3) Highpass: Transfer the image by Highpass filter effect.
(4) Lowpass: Transfer the image by Lowpass filter effect.
(5) Inverse: Transfer the image by inverse effect.
(6) Erode: Transfer the image by erode effect.
(7) ToGray: Transfer the image to gray effect.
(8) Dilate: Transfer the image to dilate effect.
(9) Apply: Apply the changed image to replace the original.
(10) Reset: Cancel the changes and reset the image to original.
Beside the above, the Repeat means the repeat times of the processing, the default is 1 times. The
other selection is processing pattern, you can select 3x3 or 5x5 pattern mode for processing.
104
<Fig. 5-1-3>
5-1-4. Contrast Adjustment
For image contrast adjustment, the user could process it by two method as below:
(1) Static Stretch: Make image contrast adjustment by static stretch.
(1) Dynamic Stretch: Make image contrast adjustment by dynamic stretch.
You can move the select bar to define the degree. The select item includes Gain, Low (pass) and
High (pass) three types.
When complete the adjustment, click the [Apply] button to replace the original image.
<Fig. 5-1-4>
5-1-5. State of image
105
The state of image function describes the state of image that includes the Width, Height and Depth
of original image and displayed image.
<Fig. 5-1-5>
5-1-6.WarpAd
Take the photo from the side.
Fig 5.1-6
Can do warp & keystone correction for the image in the current window.
1.Big Step: you can select X1,X2,X3, it’s suggested to select.
106
2.
:Four circles in the picture stand for four corners of rectangle, buttons U,D, L, R
are warp directions. For example, select circle in the top left corner , press U button
continiously ,the top left conrner of video will be dragged to up accordingly.
drag to down, press L button—drag to left,
Press D button –
press R button-drag to right.
3.After adjusting, select “warp back” to confirm warp
4.Finally save the image, click button
in
the toolbar to finish save job
5-2. Images Save and Load
5-2-1. How to start the function
In any process, when you see the Snapshot dialog that show the image. Then you can process the
function on this image.
Simply just click the mouse left button twice, it will shown as below. Chose the second selection:
"Save or Load".
<Fig. 5-2-1>
5-2-2. Load the image file
This function includes the load, Save and print out the image files.
First, click the [File Name] button to get the image file.
107
<Fig. 5-2-2>
If you want to get all the files under the directory, click [Icon] button.
The below dialog will show on the files that you select.
You could review those files and make some modification likes save as other format and so on.
The searched file will be listed on the list control, and you could view it by click on it. The
Snapshot dialog for image viewer will be shown up.
After you click [icon] button, the list dialog will be shown up as below. It will list all files located
in the directory. You can click the listed file name to further process this image or do some process
on all those files.
<Fig. 5-2-3>
108
<Fig. 5-2-4>
Descriptions of above:
The "load" property page is an image file browser. It shows all files in a directory and allows you
to Figk up one to be displayed and processed in the preview dialog.
The function buttons on the left are [>>] display the next one, [<<] display the previous one, [|<]
display the first one. And [>|] display the last one.
Below the button is number entry, it is the index of the file displayed.
The [X] button for deleting file.
On the bottom of the dialog, there are more selections. You could select Ascent, Decent to arrange
the file list. Filter means the file name filter, and *.* means all the files. When you check the
Thumb selection, the file list will also list the thumb images for every file. Click the >>PDF
button to pack all images to a PDF file. It will be created and named by the folder name. The PDF
file will be stored on upper directory.
>>TIFF button to pack all images to a TIFF file. It will be created and named by the folder name.
The TIFF file will be stored in upper directory.
>>LOOP button for display the images by order and automatically. The number beside it can use
to select the display speed. The larger the slower.
>>PRINT button to print all images by default printer.
Note: PDF files will not be read and are skipped.
5-2-3. Save the image
The user could save the processed image to file. The other selection for save is described as below:
[File Name]: The filename will be saved.
[File Type]: The image file type will be saved.
[Compression Type]: Select the compression type when saving.
109
[Selected File Type]: Display the selected file type.
[Template ID]: No use in this section.
[JPEG Quality]: Define the JPEG quality when saving.
[Image Source]: Select the saved image source from the original or displayed.
[ROI] : apply the ROI(Region Of Inure) rule.
[Rotate range]: Apply the rotate degree to image when saved.
[Step range]: Apply the stepping degree to image when saved.
<Fig. 5-2-5>
5-2-4. Print out the image
Before process the print out action. The user could select some choice to meet the need.
(1)Fit: When checked this selection, the print out image will fit the paper automatically.
(2)Scale: Define the image scale when print out, the default is 1.
The other three buttons for selection are:
[Print Displayed]: Print out the displayed (been processed) image.
[Print Original]: Print out the original image.
[Print Stack]: Print out the images in stack.
The sub-dialog for Printing Status is only for display the print job status.
110
<Fig. 5-2-6>
5-3. Display Fit
For Snapshot image, when you select the "Display Fit" function as below. The image on snapshot
dialog will be transfer to the proper size by the dialog length or width. Compare to “full screen”
mode under 5.1.2 image setting, the effective of current full screen mode is not as good as it.
<Fig. 5-3-1>
<Fig. 5-3-2>
5-4.Show Video
Return to the video window.
111
<Fig. 5-4-1>
112
Chapter 6. Still Image Annotation and Drawing
6-1 Start drawing or annotating
On the still image window, one can do simple drawing rectangle boxes by drag the mouse with the
right button pressed. If one double clicks the right mouse button when the still image window is
shown, one will see a popup menu as shown below for more control of drawing and annotating:
<Fig. 6-1-1>
1. Viewing: Selecting the mode to display the still image. A submenu as shown in Fig. 6-1-2 is
seen.
Full:The still image is displayed at the original resolution.
Fit WidthOrHeigh: Still image fit the width or height of the display window.
Fit Width: Still image fit the width of the display window.
Fit Height: Still image fit the height of the display window.
<Fig. 6-1-2>
6-2 Annotation
On the still image window, one can do simple drawing rectangle boxes by drag the mouse with
the right button pressed. If one double clicks the right mouse button when the still image window
is shown, one will see a popup menu as shown below for more control of drawing and annotating:
<Fig. 6-2-1>
By selecting the Annote menu item, a popped up shown as below:
113
Undo: to remove the previous annotation.
Redo: restore the annotaion “Undo” previously.
Clear: remove all annotaion.
<Fig. 6-2-2>
There are three modes of operation for adding annotations to a still image: Simple, Standard, and
Analysis Report.
6-2-1 Simple
A dialog as shown in Fig. 6-2-3 will be popped up. One can add a mark or text. If the Fixed
checkbox is uncheck, one move the mouse with the right button pressed to define a rectangle for
the mark or text. When one release the right button, the mark or text will be added to the still
image. If the Fixed checkbox is checked, then one can add a fixed size mark to the still image by
simply click the right mouse button. If the Line checkbox is checked, then one can add a straight
line by moving the mouse with the right button down. The subarea “Thickness” is for selection the
line width. To add text, firstly type the text into the “Text” editor. Then using the mouse with the
right button pressed to define a rectangle for the location of the text. And then press the “Add”
button. The “Font” button is not the selection of the text font. The “OPAQUE” checkbox is for the
background color of the text. If checked, the background color of the text drawn is the color
selected by the “Color” button.
<Fig. 6-2-3>
6-2-2 Standard
114
A dialog box with four property pages as in Fig. 6-2-4 is shown. With this selection, one can
save the annotated images along with other related data to form a report which consists of a
descriptive XML file and a directory tree to encompass the annotated images. Each report is seen
as a subdiredtory in Windows file system.
1. New:
For adding a new report.
Path Prefix: The path prefix of the subdirectory which contains the report.
Report ID: the title of the report. In Fig. 6-2-4, for example, the subdirectory for the report is :
C:\MyReport\12\.
Author ID: The name of the author of this report.
Create button: Create a new folder. Create failed if the report already existed.
Apply button: Apply what is edited to the report.
Save button: Save the current report to the disk.
Load button: Load a previously saved report from the disk.
Comment: Any remarks or comments about the whole report can be edited here.
<Fig. 6-2-4>
2. Set:
The images in the report are organized as a number of sets. Each set contains several images.
The Sets combo box shows the existing sets. One can select one as the current set.
The Add New button is for adding a new set.
Comment: Any remarks or comments about the whole set can be edited here.
115
<Fig. 6-2-5>
3. Image:
The Image combo box shows all the images in the current set. The AddNew button is to add the
displayed image with the adding annotation to the current set. If the ROI checkbox is checked,
then only the ROI select by moving the mouse with right button down is added.
The Load button enables one to load an image from this report. Usually, select an image first by
the combo box and then load.
The File Type Selection combo box is for selection of the file format when the image is saved.
And the Compression Type combo box is for the compression method.
The Comment editor is for the remarks about the selected image.
<Fig. 6-2-6>
Tha Annotate property sheet is the same as the one in Simple mode.
6-2-4 Analysis Report
When this is selected, a dialog as in Fig. 6-2-7 is shown. It contains four more property pages
than that of the Standard mode. New, Set, Image, and Annotate property pages are the same.
116
<Fig. 6-2-7>
4. Match:
This is for the comparison of the shapes of two images. Usually, the two images to be compared
are of different sizes. The bigger one is referred to as the background image, the smaller one as the
foreground image. In our case, the image displayed in the still image window is the background
button is for the importing of the foreground image. The foreground image is
image. The
overlapped over the background image. One can use the controls of this property page to move the
foreground image and adjust the overlap parameters.
1. Amount of the horizontal displacement
2. Moving the foreground horizontally
3. Moving the foreground vertically
4. Amount of the horizontal displacement
5. Zooming of the foreground
6. Adjust the transparency of the foreground
7. Rotating the foreground.
8. Zooming factor of the foreground.
9. The degree of transparency of the foreground
10. Rotating angle of the foreground
11. Enable resizing the background
12. Using three colors to show the overlapping. Blue: foreground, Red: background, Green:
overlap
13. Loading foreground image
14. Selection of match method
15. Adjusting the overlapping portion of the foreground image
117
<Fig. 6-2-8>
5. Calibration:
In many of the image analysis work, some sort of measuring an object of interest on the
background or the displayed image is desired. To make any kind of measure meaningful, the
actual physical size of a pixel is required. The Calibration dialog is for this purpose.
For the purpose of calibration, one has to bring up the annotate property page in Analysis Report
as shown in Fig 6-2-9.
And do the following steps:
1. Check the “Measure” checkbox.
2. Check the “Line” checkbox.
3. Draw a line over an object with known length.
4. Press the “Cal” button and a dialog box like Fig. 6-2-10 shown.
5. On the Know Dis edit, enter the length and the Unit edit; enter the name of the measurement
unit. The buttons x, y, xy are for the selection the direction of correction. X means in the
horizontal direction, y vertical direction and xy both directions.
6. The save and load buttons are for saving the calibrate results to a file for future use.
<Fig . 6-2-9>
118
<Fig. 6-2-10>
6. Measure:
After calibration, one can do these measures:
Point --- the coordinate of a pixel by place the cursor to the point
Line --- Moving the mouse with right button down from the first point to the second point to
measure the line length.
Polyline --- Moving the mouse with right button down from the first. And the end of a line
segment, release the right button and press again. Double click the right button at the end of the
polyline. Measure the length of the polyline.
Polygon --- Moving the mouse with right button down from the first vertex. And the end of a line
segment, release the right button and press again. Double click the right button at the end of the
last vertex. Measure the area of the polygon and its perimeter.
Angle --- Measure the angle formed by two intersected line segments or three points. Move the
mouse with right button down from the first point to the end of a line segment and then release the
right button and press again.
Chord --- Measure the chord length formed by three points. Use the mouse to define the three
points like for defining an angle.
Circle -- Measure the circle length formed by three points. Use the mouse to define the three
points like for defining an angle.
Count --- Measure the number of connected regions in a polygon. One must first use the Binarize
or the Adaptive property page to convert the display image into a black and white monochrome
image. Define a polygon with the mouse as in the “Polygon” measure. The number of black
regions in the polygon will be returned. Also the total area of the black areas is returned.
119
<Fig. 6-2-11>
7. Binarize:
This property page offers several methods to convert a color image into a black and white
monochrome image. They are:
1. Simple --- Convert each pixel to black or white by comparison of its brightness with a threshold.
The slide bar is to determine the threshold value in terms of percentage of the white pixel. The
combo box is for the selection of comparison method. For example ComLess means pixels less
than the threshold Turing into black and higher or equal into white.
2. Color Figkup --- Convert each pixel to black or white based on the hue of that pixel. The low
and the high slide bar are used to define a region of hue. Converting is based on whether the hue
of the pixel is in the region or not.
3. Brightness Figkup --- Convert each pixel to black or white based upon the brightness of that
pixel. The low and the high slide bar is used to define a region of brightness. Converting is based
on whether the hue of the pixel is in the region or not.
4. The “Both, KeepOut and KeepIn” buttons --- If “Both” button is selected for “Color Figkup and
Brightness Figkup” operation, the pixels in the region are turning into black and otherwise into
white. If “”KeepOut” button is selected, pixels in the region are turning into black and otherwise
unchanged. If “”KeepIn” button is selected, pixels not in the region are turning into white and
otherwise unchanged.
120
<Fig. 6-2-12>
8. Adaptive:
This property offers an adaptive method to convert the color images into a black and white image.
To do adaptive binarization, press the “Apply” button in the Adaptive Binarize via Mean sub-area.
If you see too many black dots, reduce the “Offset Percent” to a lower value, say, 0.9 and try again.
In general, the lower the value means the less the black dots. We do not suggest changing other
parameters. If you want to remove the shadows before binarization, you may press the “Apply”
button in the “Shadow removal” sub-area.
<Fig. 6-2-13>
6-3. Setting the function of pressing the left mouse button
121
<Fig. 6-3-1>
Selectable left button functions:
Drag image: Moving mouse with left button pressed will drag the still image.
Zoom image: Moving mouse with left button pressed will zoom in/out the still image. Double
click the left mouse button will set the still image in original size.
Free Drawing Thin: Moving mouse with left button pressed will be like a thin drawing pen.
Default color is red.
Free Drawing Thick: Moving mouse with left button pressed will be like a thick drawing pen.
Default color is red.
Select Pen Color: A color selection dialog is popped up to select the color of the free drawing pen.
<Fig. 6-3-2>
6-4.Show Video and More ...
6-4-1 Show Video
Select this menu item to display the video window.
<Fig. 6-4-1>
6-4-2 More...
A popup menu as shown in Fig. 6-4-3.
See Chapter 5.
122
<Fig. 6-4-2>
<Fig. 6-4-3>
123
Chapter 7. Introduction of application
Overview:
This chapter will illustrate the operational setting of VideoCenterMini to the user. The setting of
operation instruction is based on the function supported by the software, so you can manipulate
the software easily and quickly
7-1. Video source dialog
After the software is started and click the function selection button from the Selection bar. And
the dialog of "Video Source Dialog" will pop up. The setting items of it for define the video
configuration, device and so on.
<Fig. 7-1-1>
The setting items as following:
1. Configuration: Select the video configuration type. It could be one of next:
(1) Default: The default video device for "New image SuperCam".
(2) Base on GRF, AVI or media file: Select the video from the Windows DirectX configuration file
(*.GRF). or avi file. If you got media file to play, likes VCD or DVD file. Select this one and
point out the file name.
(3) Popup an input file: Select a media file directly.
(4) Simple one channel: Select a video device for source, likes "New image SuperCam" image
device.
2. Source: The video source device name.
124
3. Mask: The setting for Sampler, SealMask. The application will select items automatically, so it's
none for modification except under special need.
4. Tracker: It's none for setting.
5. Video Recording: It's none for setting.
6. Compressor: Select the image compress type for image. The default is MJPEG Compressor.
7. Output File: The default output avi file, leave it to default will be fine.
function, and the "Save Camera Params"
The above setting process is the same as toolbar
under Windows Setting for saving the camera parameters (for above items) as a file. (*.CAM)
7-2. Basic video processing
1) [Main] setting description:
Fig. 7-2-1
1). Zoom X2: Double up the display screen.
2). Keep aspect: fix ratio of Long and Wide.
3). Deskew: system will adjust the position of the Picture, to line up with the border.
4). Vignelting black enable: Click on “Grab Blacd” to capture a Picture in black. Then select
“vgnetting”.“derkew”and“vignetting black enable”three options to remove the black
frame outside the border. This is useful option for photo of rectangle shape item. The effect of
before and after using this option shown in Fig.7-2-2.
125
Fig. 7-2-2
5). Vignelting removall: Click on “ grab black“ to capture a white background. Then select
“vignelting removall “,
Take photo of the document you want to back up. This function will remove the shadow
outside the border. The effect of before and after using this option are shown in Fig. 7-2-3.
Fig. 7-2--32
6).
: you can adjust the setting according to your requirement.
7). Target DPI: Setup the DPI value in Mono mode or color mode.
8).
AF AutoX2: Autofocus, twice the video Large.
9). Color : To save the image in color mode under Jpeg format.
Gray: To save the image in gray mode under Jpeg format.
Black&White : To save the image in Black&White mode under Tiff format.
10). B/W Noice Level: Adjustable for image quality at B/W mode.
126
11). Twain TX Rate: Setup the Twain Transmission Speed.
12). Hand Detect: During TimeBased Scan mode, Hand Detect will avoid hand image to be
scanned during page changing.
2) [Images] setting description:
1. Video Format: Select the video stream format for the device. It shows the width and the height
of the stream.
2. Flipping: Setting the video stream orientation.
3. Capture Pin or Preview Pin: Some video sources output two video streams: capturing and
previewing. Always select Capture Pin for CamDocument or USB Cam.
4. "Source from" box: Information in this box indicates the window on the image sensor array and
the width and the height of the video stream.
5. Aspect: If you check this item, the video show in display window has the same aspect ratio of
the video stream otherwise, it fits the window.
6. Dual: check this to enable the dual mode, in the sense that the capture still image has different
dimension from the video stream. The mode is only for capture still image Video stream shots.
It only work under the resolution 1024 x 768 for 3 mega device, and 1280 x 960 ,1856 x
1944,1856 x 1936 resolution for 5 mega device.
When enable it, you should check other options likes Delay time and some chip auto correction
function in Setting.
7. Delay: Delay time between shots in dual mode.
8. Acc: The captured still image is the average of a number of consecutive shots. Select the shots
to accommodate. More shots result in less noisy image.
9. Apply: Click [Apply] button to make sure the setting.
127
<Fig. 7-2--4>
3) [Recording] setting description:
The setting for video recording function, as follows:
<Fig. 7-2-5>
The setting as below:
1. Preset or Timebased : Select the video file name that recorded is fixed preset name or time. The
default is named by time.
2. File under [Fixed Preset Output File]: Define the fixed video file name.
3. The setting under [Time Based] : Setting the time based interval and max no. of file (0 means
128
no limit).
4. Sync with Play: If you checked this item, then the recording will start synchronize with the
video start play.
5. Apply: Click [Apply] button to make sure the setting.
4) [Snapshot] setting description:
The setting for image snapshot function, as follows:
1. Disks: The setting for the storage disks sequence, default is "d e f", it means first disk is d:, then
disk e: , disk f:.
2. Main: Primary storage path. Default folder: \Snapshot.
3. Suffix: Set the suffix for the folder name, default is "Snapshot", you could enter your specific
folder name on this item.
4. File Type Selection: Select the file type for image storage, default is "JPEG". You can slect
others as your need.
5. JPEG Quality: Selection for the JPEG quality.
6. Manual or Timebased: The selection for image snapshot process type. You could select
manually or automatically by time interval. You could define the timebased setting on the
[Timebased Parameters] items.
7. Fixed .img: If you checked this item, the saved file will be in *.img format.
8. Fixed Folder: If you checked this item, the saved file will be under the suffix name folder. (No
time sub-folder)
9. Apply: Click [Apply] button to make sure the setting.
10. Dispath : Click [Dispath] button to set the dispath items for E-mail. The description as follows:
<Fig. 7-2-6>
129
Dispatch by e-mail setting:
(1) Select the type for images data : you can select : 1.Attachment, 2.Notification or Mail Client.
(2) Mail Server IP : Fill in the mail server IP address. If the below select for mail is [MAPI], then
this item will be disable.
(3) To : Fill in the mail address that you want. If you got multiple address, please separate each
one with ';'.
(4) File Type: Select the file type for images that mail out. The default type is PDF.
(5) Key Tile: Checked this item, if you want to key in your own mail title instead of system
default.
5) [Copier] setting description:
The settings for copier function, as follows:
<Fig. 7-2-7>
1. Camera Field of View: The setting for the image field, resolution and printer resolution. The
items could be different by different printer. Make some tiny modification when need.
2. Rotate: Rotate the image by the degree when printed out.
3. Quality: Set the print out quality. The selection could be fast, normal, high, or best. Select the
proper one as your need.
4. Clean: Choose the noisy clot level of the mono h/w image. The less the value is, the less the
noise is.
5. Apply: Click [Apply] button to make sure the setting.
6. Copies:Number of copies.
6) [Search] setting description:
130
The setting for file searching function, as follows :
<Fig. 7-2-8>
File searching function searches the files stored by capture process. The search qualification
contains:
Suffix: Setup the suffix name (Top level folder path).
Period: For date and time period condition.
Title: For file title qualification.
Result: Setup the match condition. There are three modes:
Match All: Matches the whole file title.
Match: Matches the left part of the file title.
Search: Matches any part of the file title.
Folder: This checked selection means searching the folder or not.
Example: d:/snapshot/myfile/20041206123507Z/John.jpg, "myfile" is suffix,"20041206123507Z"
is qualified in "Period", and "John.jpg" is qualified in "Title".
In searching function, the suffix selection could be the folder name created by user or the default
name SnapShot. If it is blank, it will be default.
If you check the "Video" selection, the searching target range is the video recording files. The
video default root location is \VideoRecording.
If you set the "Title" to blank, then the found files will be all the files. You can set some search
conditions and get the file you need. Click the "Search" button to start the process.
7) [Mask] setting description:
The setting for image Mask function, as follows :
131
<Fig. 7-2-9>
A video mark can be defined so only the un-marked area of the video will be grabbed and seen.
(1) ROI Enable: Turn on/off the mask. Without mask, the whole video is seen.
(2) KeepAspect (4:3): If checked, the aspect ratio of the mask is maintained at 4:3/
(3)Mask Color: Select the color for the mask. Preset is green.
The alignment sub-area is to define the alignment of the mask.
Center: The mask is centered.
Top: The mask is aligned to the top vertically and centered horizontally.
A4 paper: Mask is aligned to the top of an A4 paper.
Printer: Mask is aligned to the top of the printing area of a printer.
Predefine Sizes: List of predefined sizes to choose from.
Step: Fine tune adjustment value for the 4 directions (Top, Bottom, Left, Right)
Grab Keep Mask:When enabled, full screen image to be saved for the document and mask area.
When you have the Mask Color in “White” and enable the “Grab Keep Mask”, the captured image
will be displayed and printed in center position.
8) [Settings] setting description:
The setting for image Settings function, as follows:
132
<Fig. 7-2-10>
This property page directly controls the registers in the image sensor.
AGC and Gain: Enable or disable the AGC of the sensor. When disable one the set the gain
through the sliding bar.
AEC and Time: Enable or disable the AEC of the sensor. When disable, one can set the exposure
time of imaging a frame. The number like 15 indicating the exposure time is 1/15 sec. Choose
exposure time as a multiple of your power line frequency can avoid the horizontal stripes.
Banding Filter: Choose to assure the minimum exposure time is 1/120 sec.
AWB: Enable or disable the AWB.
Luminance: Indicate the average value of the R.G.B channel and average of the R.G.B value.
Color Bias: Enable to fine tune the color.
Window: Select a window on the image sensor as the output window for the video stream from the
sensor. Only X, Y is changeable. W, H is fixed by the driver.
Zoom: (For CamDocument 500, SuperIris 300, 500 only). Check to enable the zooming. X.Y
spins to allow one to choose the zoom window.
CLK Divided by : Allows one to divide the pixel clock rate and hence to reduce the frame rate.
Quality: Show the dialog to adjust the brightness, hue, saturation, sharpness, contrast, etc. of the
video stream.
9) [Video Quality] setting description:
The setting for Video Quality function show as follows:
133
<Fig. 7-2-11>
Gamma: Choose the level of gamma correction applied to the video stream.
Enable: Enable or disable the gamma correction.
Non-persistent: Enable to make the parameters selected in the property page disappears after shoot
down video center mini program.
Focusing: Zoom in the video stream and Increase the frame rate to make the adjustment of the lens
easier check to switch to the focus mode uncheck to return the normal mode.
Color: To fine tune the color of the video stream.
Bias: the offset of each color.
Gain: The gain of each color.
Gray: Check to indicate R.G.B to be tuned together.
Reset: Set all values to zero.
10) [Vignetting] setting description:
The setting for Vignetting function show as follows:
134
<Fig. 7-2-12>
Vignette: It means that the image gets darker when one moves toward the border.
Disable radio button: disable the vignetting removal effect.
Still image button: apply vignetting removal effect to the captured still image.
Video: apply vignetting removal effect to the video stream. Not available yet.
Grab white background: Place a white paper under the lens. The white paper must occupy the
whole video image.
Grab button: Push this button to capture the image of the white paper.
Save button: Save the captured image to a selected file name.
Load button: Load the captured image from a selected name.
Save Default button: Save the captured image to the default file name.
Load default button: Load the captured image from the default name.
Gain: Select the gain factor. A higher value will generate images of higher contrast.
White Balance: including white balance as a part if vignetting removal or not.
Warping Ex: About whether the quadrangle warping applicable to the grabbed images.
None: not applicable.
Perspective: perspective warping method is applied.
Bilinear: bilinear warping method is applied
Perspective back: backward perspective warping method is applied.
Bilinear back: backward bilinear warping method is applied
Load: To load the warping coefficients from a file.
Star Video VG:Enable Video Vignetting.
Stop Video VG:Stop VideoVignetting
135
11) [Video Warping] setting description:
In the lower left section, one will see a combo box with the following selections: 【A4Vertical】
Rotating the video by 90 degree and nearly fit the video window horizontally, useful for
visualization of A4 document. 【A4 1.25XV】 and 【A4 2XV】 have the additional effect of
zooming the video by a factor of 1.23 and 2. Video effect supports video cropping, zooming and
panning.
Video cropping means to cut a rectangle region out of the original full size video. The
“Cropping” sub-area is used to define the cropping region in terms of percentage of the original
video stream. The Rotating sub-area is to used to define the video rotation angle and whether the
rotation is around the center.
The Scaling sub-area is used to define the scaling factor of the video. The check boxes on the
upper right corner of the dialog, i.e., Enable Cropping, Enable Scale, and Enable Rotating are used
to enable the associated functions. Once the parameters about cropping, scaling, and rotating are
defined, one can press the Go button with the enable checkbox next to Go button to start the video
warping. Or to press the Go button with the checkbox to enable uncheck for terminate the video
warping.
The Pannign or Zooming or Rotating sub-area enables one to do zooming and panning in
animated mode, continuously panning or zooming. Continuously rotating is not available yet. Z
step is the zoom factor of each step. H Step is the horizontal panning step in terms of percentage.
V Step is the vertical panning step in terms of percentage. The Interval is the delay between each
step in terms of millisecond. R Step is not used.
The Interpret sub-area enables one to select a proper interpretation method for the video effect.
Nearest neighbor means the nearest pixel is selected. It is the fastest, but one will see some
“boxing effect” occasionally. Linear, Cube and Super are three different interpretations. Suggest
one tries to see which one generates the best result. Usually Linear is good enough.
The Input Pin sub-area indicates the resolutions of the video stream before warping. It is the video
stream generated by the camera. Output Pin sub-area indicates the resolution of the video stream
after the warping takes place. They are generated by the computer. One should not try to modify
them.
136
<Fig. 7-2-13>
Input Pin: The video stream dimension before warping.
Output Pin: The video stream dimension after warping.
Cropping: Definition of the cooping window apply to the video stream directly output from the
image sensor. The number indicates the fraction of the video stream. "Left" means the left offset.
"Top" means the top offset. "Width" means thee width of the window. "Height" means the height
of the window.
Enable Cropping: Enable or disable cropping.
Enable Rotating: Enable or disable rotating.
Enable Scale: Enable or disable scaling.
Angle: Rotation angle in degrees.
Centered: Check to make the rotation w.r.t the center of the cropped video image.
X.Y: Scaling factor in X direction or in Y direction.
Interpret: Choose an interpretive method.
Panning: Moving the cropping window horizontally then vertically.. H.
H: Horizontal step in fraction.
V: Vertical step in fraction.
Interval: Time interval between moves.
Enable: Check to start panning. Uncheck to stop panning.
Load default button: Load the captured image from the default name.
Enable: Enable or Disable warping.
Go: Push to start the warping effect.
12) [AF] setting description:
137
7-3. Location of file storage
Change the file storage location and format
If you want to change the file storage location, format and so on. Please click the
[Page Down] key on the keyboard, or click the toolbar for Basic Video Processing dialog as
below.
<Fig. 7-3-1>
138
Click the "Snapshot" item first. the setting items about this toFig describe as following :
1. disks : The setting for the storage disks sequence, default is "d e f", it means the first disk for
storage is d:, if the disk is full, then save the file to disk e: then disk f:..
You could make modification about it likes "C", and the files will be saved in disk C.
2. Fixed .img: If you checked this item, the saved file will be in *.img format.
3. Fixed Folder: If you checked this item, the saved file will be under the suffix name folder
instead of saved under the sub-folder named by date and time.
4. File Type Selection: Select the file type for image storage. The default type for color image is
"JPEG" and for the mono image is "TIFF". You can select others as your need.
5. JPEG Quality: Selection for the JPEG quality.
6. Manual or Timebased: The selection for image snapshot process type. You could select
manually or automatically by time interval. You could define the timebased setting on the
[Timebased Parameters] items.
7. Target mode: the setting for those items as below:
(1) Printf (fit) : Save and print out the image by fit the range type.
(2)Print Scale: Save and print out the image by the scale degree.
(3)Key in Title: If it's checked, application will Ask user to enter the file name before saving.
(4)Multiple Pages TIFF: If it's checked, the saved file type will be multiple images when save as
TIFF.
7-4 Camera Field of View Measure and Adjust
For more precise purpose, users can measure and adjust camera field of view
as your requirement.
1.Program’ default Camera Field of View
300 million pixels: Length 29.7cm Width 22.3cm
500 million pixels: Length 34.6cm Width 25.95cm
2.Manusure actual Camera Field of View
300million pixels: Measuring the actual field of solution 2048x1536
500million pixels: Measuring the actual field of solution 1280x960
For example of 300 million pixel, selecting the resolution of 2048x1536.Then
use a ruler to measure and record the numbers of actual field of length and width
(Fig 7.4-1)
139
<Fig 7.4-1>
3. Adjust the Camera Field of View
Mothod1: Every time open the software, it will appear Video Source Dialog. Fill in the
actual numbers in Camera Field of View. It will keep default Field when you not change.
<Fig 7.4-2>
(Page Down)in the toolbar. Select the video
Mothod2:When the images appear, click
quality of video process. Fill in the actual measuring numbers in Camera Field of View(Fig 7.4-3)
140
<Fig 7.4-3>
7-5 Parameters save & load
After video processing parameters setting, settings can be saved and loaded for next operation .
you can save parameter file as .vms or .cam
1.VMS parameter file
1) Save: select Menu>File>Save as , or click button
.vms parameter file.
on the toolbar, save as
Such as VideoC1.vms.
2)Load: you can double click on .vms parameter file, program videocentermini will be started
automatically. Make sure button
is pressed down, then make sure button
is pressed down
before starting batch scanning.Otherwise captured image will not be saved.
2.CAM parameter file
1) Save: select Menu>Action>Save Camera Params, save as .cam parameter file
2) Load: Open Videocentermini firstly, then select Menu>Action>Load Camera
Params,choose the file you have saved.
141
Chapter 8 Video Effect
8-1 Video effect menu item
Select the Action—Video Effect menu item will bring up a submenu as seen below (Fig. 8-1-1).
<Fig. 8-1-1>
Full Screen:
The video window will be full screen with a floating toolbar as in Fig. 8-1-2:
<Fig. 8-1-2>
Switch to regular video window.
Switch on/off the selection bar.
To show A4 documents in video
Grab and Draw
142
Grab and Draw and Rotate 90 degree.
8-1-2 Video Fit
Width and Height: Video stream fit into the video window both horizontally and vertically.
Width or Height:Video stream fit into the video window horizontally or vertically.
Width:Video stream fit into the video window horizontally
Height:Video stream fit into the video window vertically.
<Fig. 8-1-3>
8-1-3 Object Motion
Select a frame refresh rate based upon the motion of the object.
Still: Object is not moving. Highest resolution is assumed.
Slow Motion: Object moving slowly. Second highest resolution is assumed.
Moving: Object moving. Third highest resoltuion is assumed.
<Fig. 8-1-4>
143
8-1-4 Grabbing
Grab: Same as
Grab A4:same as
Archive:same as
or
Mail Archive Out: At the end of a snapshot session, a Outlook Express dialog box will pop up to
enable
mailing out the grabbed images.
8-1-5 Video processing functions.
1. Video Zoom:
Same as
in the selection bar.
2. Show Static:
Show the still image display window.
3. More:
A popup menu as in Fig. 8-1-7 is shown. Select Video Source is the same as
<Fig. 8-1-5>
Press the Rotate menu item, Fig. 8-1-8 is shown.
<Fig. 8-1-6>
4.Exit:
Same as
, click it to exit this program.
144
.
Chapter 9. “Twain Driver” usage
9.1 Twain Driver
1.
Twain Source :
Run any Software that supports standard Twain interface. Take Microsoft Word
2003 for example: Move your mouse to “Input” toolbar and select“Picture”and
then find the “Scanner”option. There will pop op the dialogue window for Twain
Source Selection show as Picture 9-1 below.
(Different Software in Twain Source selection varies)
Picture 9-1
2.
Twain Interface:
Twain Interface is shown as below Picture 9-2 with preview window and
toolbar.
Picture 9-2
145
9.2 Twain Toolbar
Introduction:
1.
Scan Mode :
1) Normal
: press
2) Copybook (1)
to scan the image.
: press
to start the book scanning in sequential
order from page 1. Next, rotate the book 180° to take the next page and press
again. Please rotate the book for each page scanning. Finally press
to
stop and complete the book scanning.
3) Copybook (2) 135/642: press
then even order. Then press
page3, page5…etc). Press
to select the book scanning in First odd
to start the Odd page book scanning (page1,
to complete the Odd page book scanning. Program
will now change the page option from
to
automatically and you can
start the even page book scanning (page6, page4, page2…etc). When even page
scanning completed, press
to stop this book scanning.
2.
Page number : display the current page number during scanning.
3.
Parameter selection : select parameter from the saved parameter list for
different scanning environment.
System will load the previous parameter used when
you run it.
4.
Image Position :
1) No rotation
2) Left rotation 90˚
3) Right rotation 90˚
4) Rotation 180˚
5.
Time Interval scanning :
Auto image scanning set by Seconds.
146
6.
VideoChannel Control (Mini) : Mask, Video Quality, AF setup
7.
Color / Black&White :
1) Color : To save the image in color mode under Jpeg format.
2) Black&White : To save the image in Black&White mode under Tiff format.
8.
VideoChannel Control : Image, Snapshot, Mask, Settings, Video Quality,
Main, AF and TWAIN buttons setup.
147
9.
Home : restore the image to its original status from Mask or Enlargement
adjustment.
1) Mask : Hold the left-button on the mouse and draw one rectangle size from the
preview window for desired scanning areas. To go back to its full size image,
move the mouse to the preview window and one click left-button on the mouse
again or press
2) Enlargement : Hold the right-button on the mouse and select the desired area
for enlargement. To go back to its original image size, move the mouse to the
preview window and one click right button on the mouse again or press
10.
Scan : Start Scanning
11.
Stop : Complete the scanning
9.3 Other Setup
9.3.1 Video Source Dialog:
Hold the left button on the mouse and move the mouse from inside the preview window to
outside the preview window in “
Picture 9-1.
“
direction to call the Video Source Dialog shown as
148
Picture 9-1
9.3.2 VideoChannel Control:
Hold the left button on the mouse and move the mouse from inside the preview window to
outside the preview window in “
“ direction to call the VideoChannel Control shown as
Picture 9-2. You can adjust the setting for following:
1)
Main
149
2)
Image
3)
Snapshot
150
4)
Mask
5)
Setting
151
6)
Video Quality
7)
Vignetting
152
8)
AF
153
9)
TWAIN Buttons :
a)
Select Buttons: enable different function operation on Twain Interface
b)
Post Processing : post image processing setup after scanning is completed.
9.3.3 Video Source Properties:
Hold the left button on the mouse and move the mouse from inside the preview window to
outside the preview window in “
“ direction to call the Video Source Properties shown as
Picture 9-3. for Brightness, Contrast, Hue, Saturation, Sharpness and Exposure controls.
154
Picture 9-3
9.3.4 VideoChannel Control (Simplified version for AF models):
Hold the left button on the mouse and move the mouse from inside the preview window to
outside the preview window in “
“ direction to call the VideoChannel Control shown as
Picture 9-4 for Mask, Video Quality and AF controls setup.
Picture 9-4
155
9.4 Hotkeys
Alt-Up
Video Rotate 0 degree
Alt-Right
Video Rotate 90 degree
Alt-Down
Video Rotate 180 degree
Alt-Left
Video Rotate 270 degree (left 90 degree)
Alt-0
Select the 0th parameter file, usually the default one (the last one).
Alt-1
Select the 1th parameter file, usually the default one (the last one).
Alt-2
Select the 2nd parameter file, usually the default one (the last one).
Alt-3
Select the 3rd parameter file, usually the default one (the last one).
Alt-4
Select the 4th parameter file, usually the default one (the last one).
Alt-5
Select the 5th parameter file, usually the default one (the last one).
Alt-6
Select the 6th parameter file, usually the default one (the last one).
Alt-7
Select the 7th parameter file, usually the default one (the last one).
Alt-8
Select the 8th parameter file, usually the default one (the last one).
Alt-9
Select the 9th parameter file, usually the default one (the last one).
Alt-Enter
Grab
Alt-End
Stop Grabing
Alt-F1
Select normal mode
Alt-F2
Select rotational book mode
Alt-F3
Select odd/even page book mode
Alt-F6
Increase the video
Alt-F7
Reduce the video brightness
Alt-F9
Increment of wait seconds by 3 seconds
Alt-F10
Decrement of wait seconds by 3 seconds
Alt-F11
Bring up the focusing and video quaility property sheet
Alt-Ins
Bring up the TWAIN property sheet
Alt-Del
Close the UI window
Alt-F12
Toggle between B/W and Color
Alt-Z
Video zoom in
Alt-C
Video zoom out
Alt-Home
Video zoom home
brightness
156
Chapter 10. FAQ
10.1
Grab Failed FAQ
When running the VideoCenter System, the preview window either shows black or white
screen without any live video image and there is ”Grab Failed” pop up window when
you press ”Grab” to get capture image. Please check the following:
1.Make sure these 2 necessary software were installed successfully ( DxrrectX 9.0.MSxml
4.0 and above )
2.If you install the system under Windows 2000, make sure Windows 2000 version have been
upgraded to Service Pack 4 (SP4)
3.When enable ”Copier”, ”CopySave”, and ”Scan” function with popup window for Video
Source Selection, make sure the Source is “New image SuperCam” and “Sampler”and “Mask”
is checked.
4.Make sure CamDocument is used for one system only. Either VideoCenter system or Twain
Driver application.
5.Check Window Hardware Device Manager on Imaging Device for “New image SuperCam”.
Universal Serial Bus controller for “USB Serial Converter” drivers to be installed successfully.
6.Check the USB cable if connected well to both computer and CamDocument. In some cases,
the computer USB port may not provide enough power for CamDocument and will cause the
problem. In this case, please insert the CamDocument to another USB port for further
checking.
7.Please run Setup0.bat to do the Windows Registering again (Location: \VideoCenter\
\MiniDistributePackage\Setup0.bat) In Windows 2003 Server OS, if there is some error
message causing the failure in Windows Registering, please re-edit C:\BOOT.INI. Make one
copy first and disable the “read only“ attributes. Use the Notepad for editing and deleting
“/noexecute=optin” parameter. Save it and re-start the computer and run the Setup0.bat to do
the Windows Registering.
8.Press Ctrl+Alt+Del to check Windows Task Manager for “vm303_sti.exe”. Please end this
program and do the setup to disable this program from running when Windows Startup.
157
9.Make Sure the USB port is for USB2.0 Interface. In Motherboard setup: USB 2.0
Controller—Enable,USB 2.0 Controller Mode:HIGH Speed;Regarding the USB cable, make
sure it supports USB2.0 and length no longer than 1M to avoid signal weakening problem.
10.2
Installation FAQ
1.First time, when I plug in the CamDocument connector to USB port, but there is no
"search for new hardware wizard" found on the Windows?
The situation means that CamDocument USB device is not work well. Please re-plug the USB
cable between CamDocument and PC; also make sure that the light above the camera head is
turn on.
2.What attentions should be paid on Windows XP installation?
The device driver of CamDocument installed under the Windows XP could be the older version
(Omnivision Supercam) instead of new one. When this happens, the CamDocument cannot
work properly. Please refer the installation Guide for CamDocument to resolve it.
When I install the software completely, but there still some error when executes?
In order to make sure the success of software installation, it is required to restart the computer
after first time installation.
If still not work, try to remove the software and check the install environment step, and try it
again.
3.VideoCenter cannot run?
After the installation, make sure you have restarted the Windows.
4.What is the basic Hardware Requirement for CamDocument?
USB 2.0 Interface.Pentium 4 and above CPU,512M RAM and above
5.CamDocument only works with USB2.0 interface?
Yes. CamDocument will not work on USB 1.1 Interface. If there’s only USB1.1 Interface, you
can have one external USB2.0 Card as the solution.
6.Why the Video Source pop up window does not have “New image supercam” as
source?
Please check if the USB cable is connected well and then check if drivers are well installed.
Please refer to the driver installation manual.
158
7.During System Installation on Windows Server 2003 Operation System, it detects one
or more DirectX (R) component to be banned for usage. Why ?
Due to Windows Server 2003 Operation System does not allow hardware image speedup,
DirectX Image speedup. Here are the step to enable the image speeding:
Hardware Image Speedup: Open the “Control Panel”. Select “Appearance and Themes”. Go to
“Display” for Display Properties. Select “Advanced” for Plug and Play Monitor and go to
“Troubleshoot”. Then find the Hardware acceleration and have it in “Full” for Max. Speed Seup.
DirectX Image Speedup: Select from “Star Menu” and go to “Run” and enter “dxdiag.exe” to
pop up “DirectX Diagnostic Tool”. Go to “Display setup” and enable “DirectDraw Acceleration”,
“Direct3D Acceleration” and “AGP Texture Acceleration”.
10.3
Software FAQ
1.Where can I find the captured images or videos by CamDocument ?
Still Images:D:\snapshot\snapshot\. Folder in time order
Video:D:\VideoRecording\Video\ Folder in time order
Screen Recording:D:\VideoRecording\Screen\ Folder in time order
The Main Disk for storage follows D.E.F.C order. That is, when D disk is full, system will go to
E disk for the storage.
2.Why the preview window keep flickering or in abnormal color in the beginning ?
Due to low computer hardware performance, the flickering light source or light reflection
problem, the AGC, AEC control from the system will result the flickering image on the preview
screen during the auto adjustment in the beginning. When the clear and normal image shows
up, please go to setup page from “Basic Video Processing (hotkey PageDown) “ and select
“ Video Quality“ to disable AGC, AEC control or type in the value for good video quality
3.Why the captured image in Full Screen?
When this happened, please have the mouse on the captured image and double click the left
key on the mouse to popup one window and select “Show Video“ to go back to system. Then
go to command bar for the Action(A) and select “Show still image (¼)“ from its list. Next time
when you grab the image, it will be for ¼ full window size. And you can do further modify the
preview window size.
4.How to disable the preview window pop up?
Open “Basic Video Processing (hotkey PageDown)“ and disable “preview“ option for the
“Main“ setup window.
159
5.Why the captured image not saved?
Check if the F7 Hotkey for Start Grabbing Pages is enabled or not. It must be enabled so as to
save the captured images.
6.How to change the storage path?
Open “Basic Video Processing (hotkey PageDown)“ and go to “Snapshot” setup window. If you
want to change the storage disk location, please modify the “disks” location by entering the
disk name(ex. “e” ), enable “fixed folder” and press “Apply” to complete the setup. If you want
to modify the folder name, please go to Suffix and enter the new folder name (ex. notes),
enable the “fixed folder” and press “Apply” to complete the setup. When above setup is done,
go back to system and press F11 hotkey to Stop Grabbing Pages and then press F7 hotkey to
Start Grabbing Pages to activate the above setup.
Result after changing the storage disk from d to c: c:\Snapshot\Snapshot\A00000001.jpg
Result after changing the storage disk and folder name: c:\Snapshot\Note\A00000001.jpg
Note: If the “fixed folder” is not enabled, it will generate further sub-directory in Greenwich time
order. For example: c:\Snapshot\Note\20090120073358Z\A00000001.jpg
7.How to change the file name for captured image?
Open “Basic Video Processing (hotkey PageDown)“ and go to “Snapshot” setup window.
Enable the “Key in Title”, “Fixed folder” and press “Apply” to complete the setup. When going
back to system, it will detect the new setup changes and Stop Grabbing Pages. Please press
F7 hotkey to Star Grabbing Pages again for active the new setup. Next time when grabbing
any image, it will popup Key in Title window for entering the name of the capture image.
Result after naming the file: C:\Snapshot\Note\note1.jpg
Note: If the “fixed folder” is not enabled, it will generate further sub-directory in Greenwich time
order. For example: c:\Snapshot\Note\20090120073358Z\note1.jpg
8.How to make one Tif file for more than one pages?
This setup is for “Mono” mode only. Open “Basic Video Processing (hotkey PageDown)“ and
go to “Snapshot” setup window. Enable the “Multiple Page TIFF” and press “Apply” to
complete the setup. When going back to system, it will detect the new setup changes and Stop
Grabbing Pages. Please press F7 hotkey to Star Grabbing Pages again for active the new
setup. Now one can grab more than 1 page into one Tiff format file.
9.Why the “Copier” and “CopySave” function do the printout directly?
In default setting, “Copier” and “CopySave” will do the printout directly by sending the printout
command to the printer. To disable this function, open “Basic Video Processing (hotkey
160
PageDown) and go to “Snapshot” setup window. Disable the “Print Scale” to stop the printout
setup.
10.How to do the DPI setup ?
Open “Basic Video Processing (hotkey PageDown)“ and go to “Main” setup window. There is
Target DPI setup for Color and Mono Mode. Please select the DPI value from the dropdown
list or enter the desired DPI value manually. Make sure to check on “Enable” to complete the
setup.
11.How to reduce the noise on the B/W captured image ?
Open “Basic Video Processing (hotkey PageDown)“ and go to “Main” setup window. Go to
“B/W Noise Level” Value setup to lower the value to improve the noise status.
12.How to pack the captured images into one PDF file?
Enable PDF function first. After all the images were captured, please press F11 hotkey to Stop
Grabbing Page. Then the system will create one PDF file with all the images captured.
Note: For standard PDF file in portrait mode, please make necessary direction setup before
starting the capturing images especially for documents.
13.How to do the first odd then even copybook function ?
Please refer to the VideoCenterMini Operation Guide(on the CD) on Chapter 4.8 for detail
operation guide.
14.How to capture A3 size document ?
In standard, CamDocument can capture upto A4 size document. With the A3 Stand,
CamDocument will be placed higher to enlarge the view for capture area upto A3 size
document. We suggest for CamDocument500 Series with A3 Stand to get the best and clear
captured image.
15.When I log in to Windows with my “USER” id and password, I cannot use
CamDocument and its system. Why?
The VideoCenter System is designed for “ADMINISTRATOR” and “POWER USER” login to
use the product.
16.In “Scanner” mode, there is no default mask function enabled. Why?
The default mask function works in “Copier” and “CopySave” mode. You can either change the
mode to “Copier” or “CopySave” and then go back to “Scanner” mode or manually open the
“Mask” setup for further setting.
161
17.When system installation completed, there is still some error when executes. Why?
After software installation, it is required to restart the computer before first time running the
system. If still not work, remove the software and reinstall the system.
18.Does the system provide “ScreenRecording” function?
CamDocument is with “ScreenRecording” function. Please press (CTRL+K) to start the screen
recording and press (CTRL+L) to stop it.
19.When the document file size is smaller then the preview screen, how to capture the
document file only?
Please use “Mask” setup to mask out the undesired area in capturing. Please refer to
VideoCenterMini Operation Guide(on the CD) on Chapter 7.2 for detail operation.
20.Why there’s only black image on the system with CamDocumentAF model
Very possible the “Shutter” is closed. Please open AF setup page and have the “Shutter” in
open mode to get the image.
21.How to save new CamDocument parameters for next usage?
When completing the new parameters setup, please go to command bar on File(F) and choose
“Save as” from the list to create a xxx.vms file. Next time to apply this new parameters, please
go to command bar on File(F) and find the history xxx.vms file, double click the left key on the
mouse on the file to active the setting. Then press Hotkey F2 to Star Play and press F7 to Start
Grabbing pages. The system will apply new parameters setting for operation.
22.Can other software operate CamDocument via Twain Driver?
Yes. Make sure the Twain Driver (File Name: VG300DS.DS) is installed on
C:\Windows\twain_32\ For Twain Select Source, please choose “VideoGrab”
23.Where is the Twain Driver parameters file?
Twain Driver parameters are all save under C:\Program Files\DocExpressParam\
24.What to do when Twain Driver Interface is damaged and not running well ?
Please delete parameters files from C:\Program Files\DocExpressParam\ and restart the
Twain Driver Interface again.
10.4
General FAQ
1.How to make focus adjustment when the preview image is not clear ?
162
For CamDocument Model: Manually adjust the focus from the lens with original image or press
Hotkey “Ctrl+D” to zoom in the image for better manually focus adjustment.
For CamDocumentAF Model: It is Software adjustment. Please go to VideoCentermini Maual
(on the CD) on Chapter 3.5 for detail operation.
2.Is any type of USB 2.0 chip not compatible with CamDocument ?
According to the test process, various USB 2.0 chip from the embedded or external interface
card is compatible with CamDocument.
3.What is the requirement on the USB cable for CamDocument?
The USB Cable needs to follow USB2.0 and not over 1M in length to guarantee the good
video signals to CamDocument.
4.Why connecting CamDocument to computer’s front USB port cannot work?
Most computer’s front USB port is for extension purpose and may have stability and power
supply problem. So we ask users to connect the CamDocument to computer’s back USB port
with good stability for video signal transmission and power supply.
5.Does CamDocument support other output such as TV-Out and etc?
No, only supports USB2.0 interface.
6.How many application software does CamDocument support?
In addition to the bundled software-VideoCenter Mini.,CamDocument also support Windows
WDM, VFW and TWN.
7.Is any adjustment required after moving or reinstalling CamDocument?
In general, there is no need for adjustment after moving or reinstalling CamDocument. The
lens of camera head could be required adjustment, if the image shown on the screen is not
clear enough.
8.Does CamDocument require the additional light?
The ambient light is good enough for CamDocument to capture images. If you want to add the
extra light due to different environment, the adjustment of lens is required to make the image
shown on the screen as sharp as possible. Or there’s LED light accessory to choose as the
solution.
9.What can be adjustable on the camera lens?
163
The focus of camera is adjustable to cope with the changes in environment as to the exposure.
The Auto-Exposure function is pre-setup. If you require changing the exposure, please follow
the instruction from the operation manual
10.How to deal with the abnormal exposure?
In certain circumstances, the exposure may be abnormal because of the refection from the
captured material, or uneven ambient light. When that happens, please adjust the light, focus,
or exposure to resolve.
11.How many operation modes of CamDocument are available?
CamDocument is a foldable design, so the mode of CamDocument is changeable according to
your needs. For example, CamDocument can be used as web-cam or CamDocument. Once
you change the mode of CamDocument, some focus adjustment could be required.
12.Can CamDocument be integrated with other application?
Yes, if you want to integrate CamDocument with your existing application. New image supports
the corresponding API and SDK tools. Please contact us to get more information
13.There’s no image shown after the hardware and software are all installed. Why?
Please check to make sure the USB interface support USB2.0. Or this problem will occur.
14.When connecting the CamDocument to different USB port, the system cannot find
the CamDocument. Why?
When connecting the CamDocument to each new USB port, it is required to install the
necessary hardware drivers all over again.
15.What requirement to install the VideoCenter System on Windows2000 ?
Please make sure Windows2000 with Service pack 4(SP4).
16.Why there is some lag problem on the video?
Please install XVID software. It is included on the CD. After installation, please go from “Start”
-> “Programs” ->XVID->Configure Encoder->Other Opitions… and disable “Display encoding
status”.
17.What is the best way to scan books/magazines with CamDocument?
There is one “copybook” function for “Sequential pages scanning” or “First odd then even page
scanning”. Please look for VideoCenterMini Operation Guide(on the CD) on Chapter 4.8 for
details operation.
164
18.Is it necessary to install DirectX9.0 and MSXML4 to run CamDocument System ?
Yes.
19.What is the camera field of view?
Different height will have different camera field of view. This can be measured artificially.
20.What is the best height for capturing different size document ?
CamDocument in standard height can take A4 size document. When changing different height,
one can do the measurement and press hotkey PageDown to call the “Basic Video
Processing” and go to “Video Quality” and look for “Camera Field of View” to enter the new
measured value for Width and Height.
21.Why some graphic software package cannot open TIFF files generated by
VideoCenterMini?
The TIFF formats supported by VideoCenterMini is JPEG-TIFF format Compression = 7, not
Compression = 6. If your viewer supports only Compression 6 TIFF format, you will not be able
to see Compress 7 type TIFF.
165
Addendum:5 million pixels dual resolution
mode
5 mega device can use the dual resolution for scanning 5million pixels photos.
1. Open the VideoCenter Mini。
2. Select the Scanner function. And the dialog of "Video Source Dialog" will be popped up.
Please choose "New image SuperCam",then press "OK" to close this dialog.
166
3. You can set up as needed。For instance,the size and direction of shooting.
4. The scan mode of 5 million pixels for A4 is 2192X1640.The other resolution would not
fully display all of the A4 size.
167
5. Support 5 million pixels dual resolution mode are three models
The first is for 1856X1944(1856x1936), In this mode shoot Twice will be
a 5 million pixels Document. Select the resolution, choose the dual model.
6. The second is for 2048X1536, In this mode shoot Fourth will be a 5 million
pixels Document. Select the resolution, choose the dual model.
168
7. The Third is for 1280X960, In this mode shoot Sixth will be a 5 million
pixels Document. Only in this mode will be the same as with the scope of
the Pre-View Document,The other two kinds will be greater than the scope
of the Pre-View Document. Select the resolution, choose the dual model.
169
Dual model shooting A4 paper, the standard model for the 1280 X960. The
standard model is 1280 x 960 for dual model shooting A4 paper.
8. There is shortcut of the dual model in the tool bar.You can cancel or
set the model by the shortcut.
9. It is shooting several times to get one document.SO if that your Computer
Grade doesn’t enough or the Light changes, The shooting photos may be
dissatisfactory.
10. Abolishing automatic exposure, in order to avoid repeated interception,
as the impact of different exposure value
Double-click the right mouse button in the video window.Clice the
application:”Show Properties” ”Source Property…”. Abolishing automatic
exposure function.
170
11. If the document has been the situation Colors show differences,it may
be that the resources of the computer systems is inadequate.
Delay time can be increased in order to avoid this problem.(Option)
12. If the document has been the situation Colors show differences,you can
set the exposure time and the gain value.(Option)
171
13. Press the “grab”button, document scanning completed. Wait a jiff, There will
be static images. Computer resources are different, have different waiting
times.
172