1
What to Do If…
Windows XP
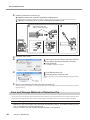
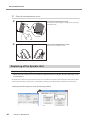
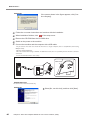
1. If the [Found New Hardware Wizard] appears, click [Finish] to close it.
2. Click the [Start] menu, then right-click [My Computer]. Click [Properties].
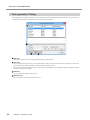
3. Click the [Hardware] tab, then click [Device Manager]. The [Device Manager] appears.
4. At the [View] menu, click [Show hidden devices].
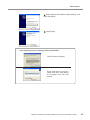
5. In the list, find [Printers] or [Other device], then double-click it. When the model name you are using or [Unknown device]
appears below the item you selected, click it to choose it.
6. Go to the [Action] menu, and click [Uninstall].
7. In "Confirm Device Uninstall" window, crick [OK].
8. Close the [Device Manager] and click [OK].
9. Detach the USB cable from the computer, and then restart Windows.
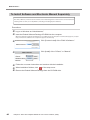
10. Uninstall the driver. Carry out the steps from step 3 in page 50 “Uninstall the Driver Windows XP / Vista / 7 ” to uninstall
the driver.
11. Install the driver again according to the "Setup Guide" ( "Installing and Setting Up the Software” ) or procedure in page
45 "To Install Driver Separately."
Uninstalling the Driver
When uninstalling the driver, perform following operation.
Windows 8
*If the driver is uninstalled without following the procedure given below, there is a possibility that it might not be able to
be re-installed.
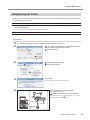
1. Turn the machine off, and disconnect the cable that is connecting the PC and the machine.
2. Start Windows.
3. Click [Desktop].
4. Move the mouse to the lower right corner to display Charm and click [Settings].
5. On the task bar, click [Control Panel], and then [Uninstall a program].
6. Select the machine's driver that you want to uninstall, and then click [Uninstall].
7. When a message prompting you to confirm that you want to uninstall the driver appears, click [Yes].
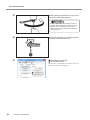
8. On the task bar, click [Start], and then [Desktop].
9. Start Windows Explorer to open the drive and folder where the driver is located. (* Notes)
10. Double-click the "SETUP64.EXE"(64-bit version) or "SETUP.EXE" (32-bit version).
11. When the [User Account Control] dialog box appears, click [Continue].The driver's installer starts.
12. Click [Uninstall]. Select the machine that you want to uninstall, and then click [Start].
13. If it is necessary to restart your computer, a window prompting you to restart it appears. Click [Yes].
14. After the computer is restarted, display the Control Panel and click [View devices and printers].
15. If the icon of the device you wish to remove is shown, right-click on the icon to click on [Remove device].
(*)
When you are using the CD-ROM, specify one of the following folders. (The CD drive is drive D in this example).
D:\Drivers\25D\WIN8X64 (64-bit version)
D:\Drivers\25D\WIN8X86 (32-bit version)
If you're not using the CD-ROM, go to the Roland DG Corp. website (http://www.rolanddg.com/), and download
the driver for the machine you want to delete. Then, specify the folder where you extracted the downloaded file to.
Windows XP / Vista / 7
*If the driver is uninstalled without following the procedure given below, there is a possibility that it might not be able to
be re-installed.
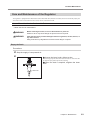
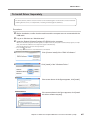
1. Before you start uninstallation of the driver, unplug the USB cables from your computer.
2. Log on to Windows as “Administrator.”
3. From the [Start] menu, click [Control Panel]. Click [Uninstall a program].
50
Chapter 4 Read This Chapter Whenever You Face a Problem. (FAQ)