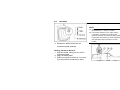
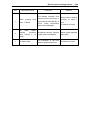
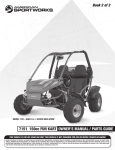
1
HS500
OWNER’S
MANUAL
No one under the age of 16 should operate this vehicle.
Provincial / Municipal governments have different
regulations pertaining to owning and operating an
off-road vehicle; learn the regulations in your area.
READ THIS MANUAL CAREFULLY
For questions regarding this UTV,
please contact HISUN at:
(877) 838-6188
www.hisunmotors.com
REV. 01231401
Owner’s Manual
Owner Manual
INTRODUCTION
Congratulations on your purchase of the HS500UTV-4/HS500UTV-3. This Owner’s / Operator’s manual
will provide you information regarding safe operation, operational instructions, maintenance and care. Fully
understanding this manual and following all of the instructions herein will provide the knowledge needed to
have safe and enjoyable UTV operation.
If you have any questions regarding the operation or maintenance of your UTV, please consult
the dealer.
IMPORTANT SAFETY MESSAGES
●
READ THIS MANUAL CAREFULLY AND COMPLETELY BEFORE OPERATING YOUR UTV. MAKE SURE
YOU UNDERSTAND ALL INSTRUCTIONS.
●
PAY CLOSE ATTENTION TO THE WARNING AND CAUTION LABELS ON THE UTV.
●
NEVER OPERATE THE UTV WITHOUT PROPER TRAINING OR INSTRUCTION.
●
THIS UTV, AND ANY OTHER UTV OVER 90cc, SHOULD NOT BE RIDDEN BY ANYONE UNDER 16 YEARS
OF AGE.
Owner’s Manual
IMPORTANT MANUAL INFORMATION
FAILURE TO FOLLOW THE WARNINGS CONTAINED IN THIS MANUAL CAN RESULT IN SERIOUS INJURY
OR DEATH. Particularly important information is distinguished in this manual by the following
notations:
The Safety Alert Symbol means ATTENTION!
YOUR SAFETY IS INVOLVED!
Failure to follow WARNING instructions could result in severe injury or death to
the machine operator, bystander or a person inspecting or repairing the
machine.
A CAUTION indicates special precautions that must be taken to avoid damage
to the machine.
NOTE:
A NOTE provides key information to make procedures easier or clearer.
Owner Manual
IMPORTANT NOTICE
This UTV is designed and manufactured for OFF - ROAD use only. It is illegal and unsafe to operate this
UTV on any public street, road or highway.
This UTV complies with all applicable OFF - ROAD noise level and spark arrester laws and regulations in
effect at the time of manufacture.
Please check your local riding laws and regulations before operating this UTV.
When the temperature is below -4°F (-20°C), park the UTV in a place where the temperature is higher
than -4°F (-20°C). Start the UTV after the UTV has warmed up. Please see page 6-3 on the warming up
process.
Follow the proper parking procedures when the temperature is higher than 100°F (38°C): turn off the
engine; make sure the radiator fan is on for 3 minutes before turning off the power switch.
Starting the UTV for the first time will take longer because the fuel will need reach the fuel injectors. To
start the UTV the first time, hold the ignition key on at 5-second intervals. Allow the starter to rest 15
seconds between each start attempt.
Owner’s Manual
1
Location of the Warning and
Specification Labels
1-1
2
Safety Information
2-1
Description and Vehicle
Identification
Identification Number Records
Vehicle Identification Number
3-1
3-3
3-3
Control Functions
Main Switch
Indicator and Warning Lights
Use of EPS system
Speedometer Unit
Odometer and Trip Meter Modes
Clock time adjustment
Four-wheel drive indicator
Differential gear lock indicator
Fault code indicator
4-1
4-1
4-2
4-4
4-6
4-6
4-7
4-7
4-7
4-8
3
4
Fuel level indicator
Switches
On-Command Four-Wheel-Drive and
Differential Gear Lock Switches
Accelerator Pedal
Brake Pedal
Parking Brake Lever
Drive Select Lever
Fuel Tank Cap
Seats
Seat Belts
Glove Compartment
Cargo Bed
Opening and Closing the Tailgate
Lifting and Lowering the Cargo Bed
Front and Rear Shock Adjustment
Spring preload
Rebound damping force
Compression damping force
Trailer Hitch Bracket
4-9
4-9
4-10
4-14
4-15
4-15
4-16
4-17
4-17
4-18
4-21
4-21
4-22
4-22
4-24
4-27
4-28
4-29
4-30
Owner Manual
Auxiliary DC Jack
5
Pre Operation Checks
Brakes
Brake Fluid Level
Brake Fluid Leakage
Brake Operation
Fuel
Gasohol
Engine Oil
Coolant
Final Gear Oil
Differential Gear Oil
Throttle Pedal
Throttle Freeplay
Throttle Freeplay Inspection
Throttle Freeplay Adjustment
Steering Wheel Inspection
Seat Belts
Fittings and Fasteners
Lights
Switches
Tires
How to Measure Tire Pressure
Tire Wear Limit
4-31
5-1
5-2
5-2
5-3
5-3
5-4
5-4
5-5
5-6
5-7
5-7
5-8
5-9
5-9
5-9
5-10
5-10
6
5-10
5-10
5-11
5-11
5-12
5-13
Operation
Starting the Engine in Low
Temperatures
Starting the Engine
Warming Up
Drive Select Lever Operation and
Driving In Reverse
Parking
Parking on a Slope
6-1
Vehicle Break-in Period
6-9
6-1
6-2
6-3
6-4
6-8
6-8
Engine Break-In
6-10
Accessories
Loading
6-11
6-12
Owner’s Manual
7
Driving Your Vehicle
Getting to Know Your Vehicle
Learning to Operate Your Vehicle
Turning your Vehicle
Operating Improperly in Reverse
Braking
Going Uphill
Going Downhill
Crossing Through Shallow Water
Vehicle Immersion
Riding Over Rough Terrain
Riding in Brush or Wooded Areas
Encountering Obstacles on the Trail
8
Periodic Maintenance and
Adjustment
Periodic Maintenance Chart for the
Emission Control System
General Maintenance and Lubrication
Chart
7-1
7-1
7-5
7-6
7-7
7-8
7-8
7-10
7-12
7-13
7-15
7-17
7-17
8-1
8-3
8-4
Hood
Console
EFI System
ECU
EFI System inspection
Engine oil and oil filter cartridge
To Check the Engine Oil Level
To Change the Engine Oil
Final Gear Oil
Changing the Final Gear Oil
Differential Gear Oil
Changing The Differential Gear Oil
Coolant
Checking the coolant level
Axle Boots
Spark Plug Inspection
Inspection
Installation
Cleaning the Engine Air Filter
Elements
8-7
8-8
8-9
8-12
8-12
8-12
8-13
8-14
8-17
8-18
8-19
8-20
8-21
8-21
8-23
8-23
8-24
8-25
8-26
Owner Manual
V-belt Cooling Duct Check Hose
V-belt Case Drain Plug
Cleaning the Spark Arrester
Valve Clearance
Front Brake Pad Check
Rear Brake Pad Check
Checking the Brake Fluid Level
Brake Fluid Replacement
Checking the Brake Pedal
Parking Brake Lever Free Play
Adjustment
Brake Light Switch Adjustment
Cable Inspection and Lubrication
Brake Pedal and Accelerator Pedal
Lubrication
Rear Knuckle Upper and Lower Pivot
Lubrication
Steering Shaft Lubrication
Wheel Removal
Wheel Installation
Battery
Battery Maintenance
Fuse Replacement
Replacing A Headlight Bulb
Headlight Beam Adjustment
Tail/brake Light Bulb Replacement
Troubleshooting
Solution to Common Problems in the
Vehicle
8-30
8-30
8-31
8-33
8-33
8-34
8-34
8-35
8-35
8-37
8-38
8-39
8-40
8-40
8-41
8-41
8-42
9
Electric power steering system
Electric power steering system
Introduction
Advantages of EPS system:
Important information for safety
Introduction of EPS system
What is EPS system
Typical parts of EPS system
Construction of EPS
Operation and use of EPS system
EPS system operation
8-43
8-45
8-45
8-47
8-50
8-51
8-53
8-54
9-1
9-1
9-1
9-2
9-3
9-3
9-4
9-4
9-10
9-10
Owner’s Manual
EPS system’s inspection,
maintenance, repair
To drive UTV at every time, need
to do daily inspection of EPS system
Malfunction assortment
Solutions for common fault
Maintenance and repair’s
supplemental description
EPS system periodic maintenance
EPS system parameter table
EPS system basic technical
parameters
EPS system working conditions
Motor assy basic parameters
9-15
12
9-15
9-19
13
9-26
9-28
9-29
9-29
9-29
9-29
10 Cleaning and Storage
Cleaning
Storage
10-1
10-1
11 Specifications
11-1
10-3
Fault code of Electronic Injection
12-1
System
USA EPA Emissions Limited
Warranty
13-1
1-1
Location of the Warning and Safety Labels
`
⑭
⑬
Location of the Warning and Safety Labels
1-2
Read and understand all of the labels on your vehicle. They contain important information for safe
and proper operation of your vehicle.
Never remove any labels from your vehicle. If a label becomes difficult to read or comes off, a
replacement label is available by contacting your dealer.
2
1-3
Location of the Warning and Safety Labels
Location of the Warning and Safety Labels
1-4
1-5
Location of the Warning and Safety Labels
Location of the Warning and Safety Labels
9
10
1-6
1-7
11
Location of the Warning and Safety Labels
12
13
14
Safety Information
2-1
SAFETY INFORMATION
This off-highway utility vehicle handles differently from other vehicles including cars and UTVs.
SEVERE INJURY OR DEATH can result if you do not follow these instructions:
● Read this manual and all labels carefully and follow the operating procedures described.
● This vehicle is designed to carry the driver and one passenger. NEVER CARRY PASSENGERS IN
THE CARGO BED.
● Always be sure the driver and passenger are wearing seat belts.
● Never give a ride to a passenger who is too small to reach and hold the handgrip fixed before the
seat.
● Always avoid operating the vehicle on any paved surfaces, including sidewalks, driveways, parking
lots, and streets.
● Never operate this vehicle on any public street, road, or highway, even dirt or gravel streets.
● Never operate this vehicle without wearing an approved motorcycle helmet that fits properly. You
should also wear eye protection (goggles or a face shield), gloves, over-the-ankle boots, long-sleeved
shirt or jacket, and long pants.
● Never consume alcohol or drugs before or while operating this vehicle.
● Never operate at speeds too fast for your skills or the conditions. Always go at a speed that is proper
for the terrain, visibility, operating conditions, and your experience.
2-2
●
●
●
●
●
●
●
●
●
Safety Information
Never attempt jumps or other stunts.
Always inspect your vehicle each time you use it to be sure it is in safe operating condition, Always
follow the inspection and maintenance procedures and schedules described in this manual.
Always keep hands, arms, feet, and legs inside the vehicle at all times during operation. Keep your
feet on the floorboard. Never hold onto the enclosure. Your hand could be injured if it is caught
between the enclosure and an obstacle outside the vehicle.
Always keep both hands on the steering wheel when driving.
Never wrap your thumbs and fingers around the steering wheel. This is particularly important when
driving in rough terrain. The front wheels will move right and left as they respond to the terrain, and
this movement will be felt in the steering wheel. A sudden jolt could wrench the steering wheel around,
and your thumbs or fingers could be injured if they are in the way of the steering wheel spokes.
Always go slowly and be extra careful when operating on unfamiliar terrain. Always be alert to
changing terrain conditions when driving the vehicle.
Never operate on excessively rough, slippery, or loose terrain until you have learned and practiced
the skills necessary to control the vehicle on such terrain. Always be especially cautious on these
kinds of terrain.
Never turn at excessive speed. Practice turning at slow speeds before attempting to turn at faster
speeds. Do not attempt turns on steep inclines.
Never operate the vehicle on hills that are too steep for it or for your abilities. Go straight up and down
hills where possible. Maximum slope angle: 15°.
Safety Information
●
●
●
●
●
●
●
●
●
●
2-3
Never operate on hills that are slippery or ones where you will not be able to see far enough ahead of
you. Never go over the top of a hill at speed if you cannot see what is on other side.
Always follow proper procedures for going uphill. If you lose control and cannot continue up a hill,
back down the hill with the engine in reverse gear. Use engine braking to help you go slowly. If
necessary, use the brakes gradually to help you go slowly.
Always check terrain before going down hills. Go as slowly as possible. Never go down a hill at high
speed.
Always check for obstacles before operating in a new area.
Never operate the vehicle in fast flowing water or water deeper than the floorboards on this model.
Remember that wet brakes may have reduced stopping ability. Test your brakes after leaving water. If
necessary, apply the brake several times to let friction dry out the linings.
Always be sure there are no obstacles or people behind you when you operate in reverse. When it is
safe to proceed in reverse, go slowly.
Do not brake abruptly when carrying loads in the cargo bed.
Always use the size and type of tires specified in this manual.
Always make sure the tires have the proper tire pressure as described in this manual.
Never exceed the stated load capacity. Cargo should be as far forward in the bed as possible, and
distributed evenly from side to side. Be sure cargo is secured so that it cannot move around during
operation. Reduce speed and follow instructions in this manual for carrying cargo or pulling a trailer.
Allow greater distance for braking.
2-4
Safety Information
WARNING
POTENTIAL HAZARD
Improper handling of gasoline.
WHAT CAN HAPPEN
Gasoline can catch fire and you could be burned.
HOW TO AVOID THE HAZARD
Always turn off the engine when refueling. Do not refuel right after the engine has been running
and is still very hot. Do not spill gasoline on the engine or exhaust pipe(or muffler)when
refueling. Never refuel while smoking, or while in the vicinity of sparks, open flames, or other
sources of ignition such as the pilot light of water heaters and clothes dryers. When transporting
the vehicle in another vehicle, be sure it is kept in an upright position. Otherwise, fuel may leak
out of the engine or fuel tank.
WHAT CAN HAPPEN
Gasoline is poisonous and can cause injuries.
HOW TO AVOID THE HAZARD
If you should swallow some gasoline or inhale a lot of gasoline vapor, or get some gasoline in
your eyes, see your doctor immediately. If gasoline spills on your skin, wash with soap and
water. If gasoline spills on your clothing, change your clothes.
Safety Information
2-5
WARNING
POTENTIAL HAZARD
Starting or running the engine in a closed area.
WHAT CAN HAPPEN
Exhaust fumes are poisonous and may cause loss of consciousness and death within a short
time.
HOW TO AVOID THE HAZARD
Always operate your vehicle in an area with adequate ventilation.
3-1
1.
2.
3.
4.
5.
6.
7.
8.
9.
10.
11.
12.
Description and Vehicle Identification
Headlights
Front shock absorber assembly adjusting ring
Brake fluid reservoir
Air filter element(engine and air intake duct)
V-belt case
Driver seat
Driver seat belt
Spark plug
Cargo bed
Tail/brake lights
Rear shock absorber assembly adjusting ring
Cargo bed release levers
13.
14.
15.
16.
17.
18.
19.
20.
21.
22.
Spark arrester
Passenger seat belt
Passenger seat
Oil filter cartridge
Engine oil dipstick
Battery
Fuses
Coolant reservoir
Radiator cap
Fuel tank cap
Description and Vehicle Identification
23.
24.
25.
26.
27.
28.
29.
30.
31.
32.
33.
NOTE:
The vehicle you have purchased may differ slightly from
those in the figures of this manual.
Light switch
Steering wheel
Starter
Main switch
On-Command four-wheel-drive
switches
Multi-function meter unit
Auxiliary DC jack
Drive select lever
Parking brake lever
Accelerator pedal
Brake pedal
and
differential
3-2
lock
3-3
Description and Vehicle Identification
Identification Number Records
Record the Vehicle Identification Number and
Vehicle Identification Number
model label information in spaces provided for
The Vehicle Identification Number (VIN) is
assistance when ordering spare parts from a
stamped into the frame.
service center or for reference in case the
vehicle is stolen.
1. VEHICLE IDENTIFICATION NUMBER:
2. MODEL LABEL INFORMATION
1. Vehicle identification number
NOTE:
The vehicle identification number (VIN) is used
to identify your vehicle.
CONTROL FUNCTIONS
Main switch
1.
Main switch
Control Functions
4-1
Functions of the respective switch positions
are as follows:
ON:
All electrical circuits are supplied with power,
and the headlights and taillights illuminate
when the light switch is on.
OFF:
All electrical circuits are switched off. The key
can be removed in this position.
START:
The electric starter is engaged by turning and
holding the key in this position. Release the
key when the engine starts.
4-2
Control Functions
Indicator and Warning Lights
CAUTION:
●
●
●
Do not operate the electric starter
continuously for more than 5 seconds at
a time or starter damage could occur.
Wait at least 5 seconds between each
start attempt.
Do not turn the key to the “START”
position with the engine running, or
damage to the electric starter can result.
See starting instructions prior to starting
the engine. (See pages 6-1 - 6-3 for
details.)
1.
2.
3.
4.
5.
6.
7.
8.
9.
10.
11.
12.
13.
Four-wheel locked showing light
Fault indicator light of EPS system
differential gear lock indicator
Coolant temperature warning light
Emergency indicator
Reverse indicator light “R”
Neutral indicator light “N”
High-range indicator light “H”
Low-range indicator light “L”
Mechanical parking brake indicator light “ ”
Engine indicator light “P”
Position indicator
Far light indicator
Low-Range Indicator Light “L”
This indicator light comes on when the drive
select lever is in the “L” position.
Mechanical Parking Brake Indicator Light
“ ”
This indicator light comes on when the
mechanical parking brake is applied.
High-Range Indicator Light “H”
This indicator light comes on when the drive
select lever is in the “H” position.
Control Functions
4-3
This indicator light comes on when the drive
select lever is in the “R” reverse position.
Coolant Temperature Warning Light “ ”
When the coolant temperature reaches a
specified level, this light comes on to warn
that the coolant temperature is too hot. If
the light comes on during operation, stop the
engine as soon as it is safe to do so and
allow the engine to cool down for about 15
minutes.
CAUTION:
Neutral Indicator Light “N”
This indicator light comes on when the drive
select lever is in the “N” position.
z The engine may overheat if the vehicle is
overloaded. If this happens, reduce the
load to specification.
Reverse Indicator Light “R”
z After restarting, make sure that the light
4-4
Control Functions
is out. Continuous use while the light is
on may cause damage to the engine.
monitors working condition of EPS system.
Fault can be displayed by fault indicator light
High beam indicator
The light being on means headlight is at high
beam mode.
and fault indicator of EPS system, so the
Position light indicator
The light being on means that the position
light fixed in the front headlight has been
turned on.
himself/herself safe.
driver can acknowledge fault of EPS in time
and
take
some
measures
to
keep
When fault occurs on EPS system, fault
indicator light will be lit up. At the same time,
fault indicator of EPS system will display the
Emergency indicator“ ”
The light being on means emergency lamp is
on.
Use of EPS system
Meter is an important part of UTV.
Meter works together with EPS system and
fault code for maintenance.
z
Open main switch of UTV, and EPS
system will automatically enter into
working state.
Control Functions
z
Check the meter. If fault indicator light of
Speedometer Unit
EPS system does not be lit, ECU can be
for regular use.
z
If fault indicator light of EPS system is lit,
that means EPS system find out some
fault during ECU self-checking process,
then you should consult your local
dealer for maintenance in time.
1.
2.
3.
4.
5.
6.
7.
8.
Speed indicator
Clock/Hour/ fault code meter
RPM indicator
Metric/mile button
“TRIP/ODO” button
Right turn indicator light
Left turn indicator light
Clock/Hour/ fault code reset button
4-5
4-6
Control Functions
Speedometer unit functions:
z a speedometer (which shows the speed)
z an odometer (which shows the total
distance covered)
z a tripometer (which can be cleared and
then show any new distances traveled)
z an RPM indicator (which shows the
revolutions per minute of the engine)
z a clock
z an EFI fault code indicator (which shows
the fault code for problems with the EFI )
Odometer and trip meter modes
On the display panel there are two large
buttons, one located on the left side and one
on the right side. Quickly pressing the
button on the left side toggles the display
from the odometer, to the tripometer, and
then to the hours meter; then it starts the
cycle over.
The odometer displays the total distance
traveled by the UTV.
The tripometer
records distances for a specific trip and can
record distances from 0 through 999.9 miles.
To reset a trip meter, select it by pressing the
left button, Press left button to switch to small
mileage (Trip), press the right button for a
long time to reset. The tripometer can be
used to estimate the distance that can be
traveled with a full tank of fuel. This
information will enable you to judge the fuel
consumption.
To change the display from miles per hour to
kilometers per hour press the right side
Control Functions
button on the display. This will also change
the displayed mileage from miles to
kilometers.
Clock time adjustment
Press the left button and hold for three
seconds and the clock goes into the hour
‘set’ mode.
1. Press the right button to set the hour.
2. Press the left button again and the clock
goes into the minute ‘set’ mode.
3. Press the right button to set the minutes.
4. Press the left button again and the clock
will exit the ‘set’ mode.
Four-wheel drive indicator “ ”
There are two 4WD indicators on the display
panel.
The left 4WD indicator has a blinking
4-7
circle on the front axle when the grey and
yellow
4WD selector buttons are pressed in
indicating the “4WD” function has been
activated.
This position also indicates that
the 4WD is NOT locked.
This allows the
wheels on the left and right sides to rotate at
different speeds to accommodate turning.
Differential gear lock indicator
The right 4WD symbol will show an ‘X’ over
the center of the front axle when the lever is
moved to the right and the yellow differential
gear lock button is set to out position, which
means the differential is not operational and
is locked. When riding an UTV on muddy and
slippery roads or when climbing a steep hill,
make sure the 4WD lock indicator is on.
4-8
Control Functions
When riding on a flat road at a comparatively
high speed, adjust the settings to
“2WD/UNLOCK” and there are no symbols
in either of the 4WD indicators.
Riding an UTV while the differential is
functioning and is NOT locked, may improve
the stability and safety of the UTV operation.
CAUTION:
When the selector is set to 4WD, the right
4WD symbol front axle will have an ‘X’ in the
middle . When riding on good surfaces you
should unlock the differential and press in
the yellow and the gray buttons to the 2WD
unlocked position. There should be no
symbols showing in either the left or right
4WD indicators.
CAUTION:
If the display indicators flash or the
speedometer does not show the speed while
the UTV is in motion, Ask a dealer to check
the speed sensor and circuits.
Fault code indicator
When the EFI encounters faults, the ECU will
send the fault code to the instrument display,
and it will flash on the clock.
If there are more than one fault code, they
will be shown in rolling sequence. When
fault codes are present, in order to see the
time press the clock button, the time will be
shown. Then after five seconds, the fault
code returns again. Only after the fault is
Control Functions
fixed, will the time show automatically.
The description for the fault codes are shown
in Chapter 11 of this manual.
Switches
Fuel level indicator
The fuel level display will indicate the fuel
volume. When the fuel is getting low the fuel
pump symbol will flash.
1. Light switch “OFF/
/
”
Light switch “OFF/ /
”
Set the switch to “ ”to turn on the low
beam and the taillights.
1. Fuel level indicator
2.
Fuel level warning indicator
Set the switch to “
”to turn on the high
beam and the taillights.
Set the switch to “OFF” to turn off all the
lights.
4-9
4-10
Control Functions
CAUTION:
Do not use the headlights with the engine
turned off for an extended period of time. The
battery may discharge to the point that the
starter motor will not operate properly. If this
happens, remove the battery and recharge it.
On-Command Four-Wheel–Drive and
Differential Gear Lock Switches
1.
On-Command four-wheel –drive switch “2WD”/ “4 WD”
2.
Differential gear lock switch “LOCK”/ “4WD”
This vehicle is equipped with an
On-Command four–wheel-drive switch
“2WD”/ “4WD”and a differential gear lock
switch “4WD”/ “LOCK”. Select the
appropriate drive according to terrain and the
Control Functions
conditions.
z Two-wheel drive (”2WD”): Power is supplied to the rear wheels only.
z Four-wheel drive (“4WD’): Power is
supplied to the rear and front wheels.
z Four–wheel drive with the differential
gear locked (“4WD-LOCK”): Power is
supplied to the rear and front wheels
when the differential gear is
locked.Unlike the 4WD mode, all wheels
turn at the same speed regardless of
traction.
4-11
WARNING
POTENTIAL HAZARD
Changing from 2WD to 4WD or from 2WD
to 2WD-Differential UNLOCK, or
vice-versa while the vehicle is moving.
WHAT CAN HAPPEN
The vehicle handles differently in 4WD
than in 2WD and in 2WD- Differential
UNLOCK in some circumstances.
Changing from 2WD to 4WD or from 2WD
to 2WD–Differential UNLOCK, or
vice-versa while moving may cause the
vehicle to unexpectedly handle
differently. This could distract the
operator and increase the risk of losing
control and an accident.
HOW TO AVOID THE HAZARD
Always stop the vehicle before changing
from 2WD to 4WD or from 2WD to
2WD–Differential UNLOCK.
4-12
Control Functions
On-Command four-wheel-drive switch
“2WD/4WD”
the select lever is set to positionⓐ, and
then set the switch to “2WD”.
On-Command Differential Gear Lock
Switch “4WD”/”LOCK”
1.
2.
Select lever
On-Command four –wheel-drive
switch “2WD/4WD”
To change from 2WD to 4WD ,stop the
vehicle, and then set the switch to
“4WD”.When the vehicle is in 4WD, the
4WD indicator will come on in the
multi-function meter unit display .To change
from 4WD to 2WD .stop the vehicle ,be sure
1.
On-Command differential gear lock switch “4WD”/ “LOCK”
2.
Select lever
To lock the differential gear in 4WD, stop the
vehicle, make sure the On-Command
four-wheel-drive switch is set to “4WD”,
move the select lever to positionⓑ, and then
Control Functions
set the switch to “LOCK”. When the
differential gear is locked, the differential
gear lock indicator light will come on along
with the differential gear lock indicatorin the
multifunction meter unit display .To release
the differential gear lock , stop the vehicle
and set the switch to “4WD”.
WARNING
POTENTIAL HAZARD
Riding too fast while the vehicle is in
4WD-LOCK.
WHAT CAN HAPPEN
All wheels turn at the same speed when
the differential is locked, so it takes more
effort to turn the vehicle. The amount of
effort required is greater the faster you
go. You may lose control and have an
accident if you cannot make a sharp
enough turn for the speed you are
traveling.
4-13
HOW TO AVOID THE HAZARD
Always ride at a slow speed when the
vehicle is in 4WD-LOCK, and allow extra
time and distance for maneuvers.
NOTE:
z When the switch is set to “LOCK”, the
differential gear lock indicator and
indicator light will flash until the
differential gear is locked.
z When the indicator and indicator light are
flashing, turning the steering wheel back
and forth will help the differential gear
lock to engage.
z Riding before the differential gear lock is
properly engaged (e.g., when the
indicator and indicator light are flashing)
4-14
Control Functions
will cause the engine speed to be limited
until engagement is complete.
Accelerator pedal
Press the accelerator pedal down to increase
engine speed. Spring pressure returns the
pedal to the rest position when released.
Always check that the accelerator pedal
returns normally before staring the engine.
1. Accelerator pedal
Before starting the engine, check the
accelerator pedal to be sure it is operating
smoothly. Make sure the accelerator pedal
fully returns to the idle position as soon as it
is released.
Control Functions
4-15
Brake pedal
Press the brake pedal to slow or stop the
vehicle.
WARNING
POTENTIAL HAZARD
Malfunction of the accelerator pedal.
WHAT CAN HAPPEN
A faulty pedal that makes it difficult to
speed up or slow down could cause loss
of control.
HOW TO AVOID THE HAZARD
Check the operation of the accelerator
pedal before you start the engine .If it
does not work smoothly, check for the
cause. Correct the problem before
operating the vehicle. Consult a service
center if you cannot find or solve the
problem yourself.
1.
Brake pedal
Parking brake lever
The parking brake lever is located at the right
side of the driver’s seat. It will help keep the
vehicle from moving while parked.
To set the parking brake, pull the lever up
completely.
To release the parking brake, pull up on the
4-16
Control Functions
lever, press the release button, and then
push the lever all the way down. Spring
pressure helps return the lever to the
released position. Be sure to fully release the
parking brake before starting out, Failure to
do so may result in poor performance and
premature wearing of the rear brake and
V-belt.
Drive select lever
The drive select lever is used to shift you
vehicle into the low, high, neutral and reverse
positions. (Refer to pages 6-4—6-6 for the
drive select lever operation.)
1.
1.
Parking brake lever
2. Release button
Drive select lever
Control Functions
Fuel tank cap
Remove the fuel tank cap by turning it
counterclockwise.
1.
4-17
Seats
To remove a seat, pull its seat lock lever
upward, lift the front of the seat, and then
slide the seat forward and up.
Fuel tank cap
1.
Driver seat
3.
Seat lock lever (×2)
2.
Passenger seat
4-18
Control Functions
To install a seat, insert the projection on the
rear of the seat into the seat holders and
push down on the seat at the front.
WARNING
POTENTIAL HAZARD
A loose seat.
WHAT CAN HAPPEN
The operator could lose control or the
operator or passenger could fall if the
seat is loose during operation.
HOW TO AVOID THE HAZARD
Make sure the seat is securely latched.
Seat belts
This vehicle is equipped with three-point seat
belts for both the operator and passenger.
Always wear the seat belt while riding in the
vehicle.
Control Functions
4-19
2. Push the latch plate into the buckle until it
clicks. Pull up on the latch plate to make
sure it is secure.
1.
Seat belt (×2)
3.
Buckle (×2)
2. Latch plate (×2)
To wear the seat belt properly, do the
following:
1. Hold the latch plate as you pull the belt
across your lap and chest. Make sure the
belt is not twisted and is not caught on
any portion of the vehicle, your clothing,
or any equipment you are carrying.
1.
Buckle
2. Latch plate
3. Put the lap portion of the belt low on your
hips. Push down on the buckle end of the
belt as you pull up on the shoulder part
so the belt is snug across your hips.
4. Position the shoulder belt over your
shoulder and across your chest. The
4-20
Control Functions
shoulder belt should fit against your
chest. If it is loose, pull the belt out all the
way and then let it retract.
5. To release the buckle, firmly press the
release button.
WARNING
POTENTIAL HAZARD
Not wearing the seat belt or wearing the
seat belt improperly.
WHAT CAN HAPPEN
There is increased risk of being killed or
seriously injured in an accident.
HOW TO AVOID THE HAZARD
Always wear your seat belt when riding in
the vehicle.
Be sure the seat belt is close fitting
1.
Buckle
2.
Release button
across your hips and chest and is latched
securely.
Control Functions
Glove compartment
Cargo bed
CAUTION:
To protect from damage, do not put metal
products, like tools or sharply edged
products directly in the glove compartment. If
they must be stored, wrap them in
appropriate cushion material.
a.
Unlock
b.
Open.
1.
Cargo bed
3.
Cargo hook(×4)
2.
Tailgate
4-21
4-22
Control Functions
Opening and closing the tailgate
Lifting and lowering the cargo bed
1.
1.
Tailgate
2. Latch (×2)
To open
Unhook the latches, and then lower the
tailgate.
To close
Place the tailgate in the original position, and
then hook the latches.
Cargo bed release lever
To lift
Push down cargo bed release lever on left or
right side of the vehicle; slowly lift up cargo
bed until it stops.
To lower
Lower cargo bed slowly to its original position
and be sure it locks into place.
Maximum load limit: 350lb (159kg)
Control Functions
WARNING
POTENTIAL HAZARD
Pinch points.
WHAT CAN HAPPEN
You or someone else could be pinched
between the cargo bed and the frame
when the bed is being lowered.
HOW TO AVOID THE HAZARD
Before closing the bed, be sure others
are standing away from the vehicle. Keep
hands and fingers away from the pinch
points between the bed and the frame.
4-23
WARNING
POTENTIAL HAZARD
Overloading the cargo bed
WHAT CAN HAPPEN
Could cause changes in vehicle handling
which could lead to an accident.
HOW TO AVOID THE HAZARD
Never exceed the stated maximum load
limit for this cargo bed.
Cargo should be properly distributed and
securely attached.
Reduce speed when carrying cargo.
Allow greater distance for braking.
4-24
Control Functions
The passenger could fall, be thrown out,
Front and Rear Shock Adjustment(Option 1)
The spring preload can be adjusted to suit
the operating conditions.
You can reduce preload for a softer ride, or
increase preload if frequent bottoming out of
the UTV occurs.
or be struck by objects in the cargo bed.
CAUTION:
WARNING
POTENTIAL HAZARD
Carrying a passenger in the cargo bed
WHAT CAN HAPPEN
HOW TO AVOID THE HAZARD
Never carry a passenger in the cargo bed.
This cargo bed is designed to carry cargo
only.
Frequent or severe bottoming out of the UTV
can cause increased wear or damage to the
vehicle.
Adjust the spring preload as follows.
To increase the spring preload, turn the
adjusting ring in direction
.
To decrease the spring preload, turn the
adjusting ring in direction
.
Control Functions
Standard position: B
A-Minimum(soft)
E-Maximum(hard)
1.
Spring preload adjusting ring
2.
Position indicator
NOTE:
A special wrench can be obtained at a
service center to make this adjustment.
1.
Special wrench
4-25
4-26
Control Functions
Front and Rear Shock Adjustment(Option 2)
WARNING
WARNING
POTENTIAL HAZARD
These
shock
Improper shock absorber adjustment.
contain highly pressurized nitrogen gas,
WHAT CAN HAPPEN
read
Uneven adjustment can cause poor
information before handling the shock
handling and loss of stability, which
absorber assemblies.
could lead to an accident.
·Do not tamper with or attempt to open
HOW TO AVOID THE HAZARD
the cylinder assemblies.
Always adjust the shock absorbers on
· Do not subject the shock absorber
the left and right side to the same setting.
assemblies to an open flame or other
and
absorber
understand
the
assemblies
following
high heat source. This may cause the unit
to
explode
due
to
excessive
gas
pressure.
·Do not deform or damage the cylinders
in any way. Cylinder damage will result in
poor damping performance.
Control Functions
·Do not dispose of a damaged or worn
out shock absorber assembly yourself.
Take the shock absorber assembly to a
HSUN dealer for any service.
The spring preload, rebound damping and
compression damping forces of the front
and rear shock absorber assemblies can be
adjusted to suit the operating conditions.
4-27
Spring preload
1. Loosen the locknut.
2. Turn the spring preload adjusting nut in
direction ⓐ to increase the spring
preload and thereby harden the
suspension, and in direction ⓑ to
decrease the spring preload and thereby
soften the suspension.
NOTE:
Never turn an adjusting mechanism beyond
the minimum and maximum settings.
1.
3.
Locknut
2.
Special wrench
Spring preload adjusting nut
4-28
Control Functions
· A special wrench can be obtained at a
HSUN dealer to make this adjustment.
·The spring preload setting is determined
by measuring distance A, shown in the
illustration. The shorter distance A is, the
lower the spring preload; the longer distance
A is, the higher the spring preload. With each
complete turn of the adjusting nut.
Spring travel setting(Front)
Minimum(soft): 412mm(16.22 in)
Maximum(hard): 426mm(16.77 in)
Spring travel setting(Rear)
Minimum(soft): 330mm(12.99in)
Maximum(hard): 430mm(16.93 in)
3. Tighten the locknut.
NOTE:
Always tighten the locknut against the
adjusting nut, and then tighten it to the
specified torque.
Rebound damping force
Turn the rebound damping force adjusting
1.
Distance A
screw in direction S to increase the rebound
damping force and thereby harden the
damping, and in direction F to decrease the
rebound damping force and thereby soften
the damping.
Control Functions
4-29
Compression damping force
Turn the compression damping force
adjusting screw (use 3.0 allen wrench) in
direction ⓐ to increase the compression
damping force and thereby harden the
damping, and in direction ⓑ to decrease the
compression damping force and thereby
soften the damping.
1.Rebound damping force adjusting screw
a)
Compression damping force adjusting screw
4-30
Control Functions
WARNING
·Suspension components become hot
during
operation.
Never
touch
the
compression damping force adjusting
screw,
the
rebound
damping
force
Trailer hitch bracket
This vehicle is equipped with a 1 ¼ in
receiver bracket for a standard trailer hitch.
Trailer towing equipment can be obtained at
a service center. (See pages 6-12 - 6-14 for
precaution information.)
adjusting screw or the oil reservoir with
your bare hand or skin until suspension
components have cooled.
·Always adjust the shock absorber
assemblies on the left and right side to
the same setting. Uneven adjustment can
cause poor handling and loss of stability,
which could lead to an accident.
1.
Trailer hitch bracket
Control Functions
jack.
Auxiliary DC jack
The auxiliary DC jack is located at the right
side of the front panel. The auxiliary DC jack
can be used for suitable work lights, radios,
etc. The auxiliary DC jack should only be
used when the engine is running.
1.
1.
Auxiliary DC jack cap
1. Set the light switch to “OFF”.
2. Start the engine. (See pages 6-1 - 6-3.)
3. Open the auxiliary DC jack cap, and then
insert the accessory power plug into the
4-31
Auxiliary DC jack
Maximum rated capacity for the auxiliary
DC jack:
DC 12V, 120W (10 A)
4-32
Control Functions
4. When the auxiliary DC jack is not being
used, cover it with the cap.
CAUTION:
z Do not use accessories requiring more
than the above maximum capacity. This
may overload the circuit and cause the
fuse to blow.
z If accessories are used without the
engine running or with the headlights
turned on, the battery will lose its charge
and engine starting may become difficult.
z Do not use an automotive cigarette
lighter or other access with a plug that
gets hot because the jack can be
damaged.
Pre Operation Checks
5-1
Before using this vehicle, check the following items:
ITEM
ROUTINE
Brakes
●
Parking brake
●
Fuel
●
Engine/Gear box oil
●
Coolant reservoir
●
●
Check operation, free play, fluid level and fluid leakage
Fill with DOT 4 brake fluid if necessary
Check for proper operation, condition and free play
PAGE
5-2 - 5-3, 8-35
6-8 - 6-9
●
Check fuel level
Fill with fuel if necessary
Check oil level
Fill with oil if necessary
Check coolant level
Fill with coolant if necessary
●
Check for leakage
●
Check for proper accelerator pedal operation
5-8
Seat belts
●
Check for proper operation and belt wear
5-10
Steering
●
Check for proper operation
5-10
Fittings and fasteners
●
Check all fittings and fasteners
5-11
Lights and switches
●
Check for proper operation
Wheels and tires
●
Check tire pressure, wear and damage
Axle boots
●
Check for damage
Instrument
●
Check for complete and correct display
4-2 - 4-8
Light/Indicator
●
Check for light / indicator operation
4-2 - 4-8
Final gear oil /
Differential gear oil
Accelerator pedal
●
●
5-4 - 5-5
5-5
5-6,8-19 - 8-20
5-7
5-11
5-11 - 5-13,8-41 - 8-42
8-23
5-2
Pre Operation Checks
WARNING
POTENTIAL HAZARD
Failure to inspect the vehicle before
operating. Failure to properly maintain the
vehicle.
Brakes
Check for correct brake pedal free play. If the
brake pedal free play is incorrect, have a
service center adjust it. (See pages 8-38 8-40.)
WHAT CAN HAPPEN
Increases the possibility of an accident or
equipment damage.
HOW TO AVOID THE HAZARD
Always inspect your vehicle each time you
Check the operation of the brake pedal. It
should move smoothly and there should be a
firm feeling when the brakes are applied. If not,
have the vehicle inspected by a service center.
use it to make sure the vehicle is in safe
operating condition. Always follow the
inspection and maintenance procedures
and schedules described in the Owner’s
Brake fluid level
Check the brake fluid level. Add fluid if
necessary. (See pages 8-35)
Manual.
Recommended brake fluid: DOT 4
Pre Operation Checks
Brake fluid leakage
Check to see if any brake fluid is leaking out of
the pipe joints or the brake fluid reservoir. Apply
the brakes firmly for one minute. If there is any
leakage, have the vehicle inspected by a
service center.
5-3
WARNING
POTENTIAL HAZARD
Driving with improperly operating brakes.
WHAT CAN HAPPEN
You could lose braking ability which could
lead to an accident.
Brake operation
Test the brakes at slow speed after starting out
to make sure they are working properly. If the
brakes do not provide proper braking
performance, inspect the brake system. (See
pages 8-33 - 8-38.)
HOW TO AVOID THE HAZARD
Always check the brakes at the start of
every ride. Do not operate the vehicle if you
find any problem with the brakes. If a
problem cannot be corrected by the
adjustment procedures provided in this
manual, have the vehicle inspected by a
service center.
5-4
Pre Operation Checks
Fuel
Make sure there is sufficient gasoline in the
tank.
Recommended fuel:
Unleaded gasoline only
Fuel tank capacity:
7.7 gal (29L)
Your engine has been designed to use regular
unleaded gasoline with a pump octane number
([R+M] /2) of 91 or higher, or research octane
number of 91 or higher. If knocking or pinging
occurs, use a different brand of gasoline or
premium unleaded fuel. Unleaded fuel will give
you longer spark plug life and reduced
maintenance cost.
CAUTION:
Use only unleaded gasoline. The use of leaded
gasoline will cause severe damage to internal
engine parts, such as the valves and piston
rings, as well as to the exhaust system.
Gasohol
The UTV uses an electric fuel injection system,
and its emissions completely meet the
requirements of relevant rule of the United
States. Mixed fuel is forbidden to use on the
UTV. Mixed fuel will cause engine to work
abnormally and cause deterioration.
Pre Operation Checks
5-5
POTENTIAL HAZARD
Engine oil
Make sure the engine oil is at the specified level.
Add oil as necessary. (See pages 8-12-8-13)
Improper care when refueling.
CAUTION:
WARNING
WHAT CAN HAPPEN
Fuel can spill, which can cause a fire and
severe injury. Fuel expands when it heats
up. If the fuel tank is overfilled, fuel could
spill out due to heat from the engine or the
sun.
HOW TO AVOID THE HAZARD
Do not overfill the fuel tank. Be careful not
to spill fuel, especially on the engine or
exhaust pipe. Wipe up any spilled fuel
immediately. Be sure the fuel tank cap is
closed securely.
In order to prevent clutch slippage
(since the engine oil also lubricates the
clutch), do not mix any chemical
additives. Do not use oils with a diesel
specification of “CD” or oils of a
higher quality than specified. In addition,
do not use oils labeled
“ENERGYCONSERVING II” or
higher.
z Make sure that no foreign material
enters the crankcase.
z
5-6
Pre Operation Checks
Recommended engine oil type and
quantity:
See page 10-2
Coolant
Check the coolant level in the coolant reservoir
when the engine is cold. (The coolant level will
vary with engine temperature.) The coolant
level is satisfactory if it is between the minimum
and maximum level marks on the coolant
reservoir. If the coolant level is at or below the
minimum level mark, add additional coolant to
bring the level up to maximum level mark. If
coolant is not available, add distilled water.
Change the coolant every two years.
CAUTION:
Hard water or salt water is harmful to the engine.
You may use soft water if you cannot get
distilled water.
Coolant reservoir capacity
(up to the maximum level mark):
0.37 qt, (0.35L)
WARNING
POTENTIAL HAZARD
Removing the radiator cap when the engine
and radiator are still hot.
WHAT CAN HAPPEN
You could be burned by hot fluid and steam
blown out under pressure.
HOW TO AVOID THE HAZARD
Wait for the engine to cool before removing
the radiator cap. Always use a thick rag over
the cap. Allow any remaining pressure to
escape before completely removing the cap.
Pre Operation Checks
5-7
Final gear oil
Make sure the final gear oil is at the specified
level. Add oil as necessary. (See pages 8-17 8-18 for details)
Recommended oil:
SAE 80 API GL-4 Hypoid gear oil
If desired, an SAE 80W90 hypoid gear oil may
be used for all conditions.
NOTE:
GL-4 is a quality and additive rating, GL-5 or
GL-6 rated hypoid gear oils may also be used.
Differential gear oil
Make sure the differential gear oil is at the
specified level. Add oil as necessary. (See
pages 8-19 - 8-20 for details.)
5-8
Pre Operation Checks
WARNING
Failure to check or maintain proper
operation of the throttle system can result in
an accident and lead to serious injury or
death if the throttle pedal sticks during
operation.
Never start or operate this vehicle if it has a
sticking or improperly operating throttle
pedal.
Immediately contact your service center for
service if throttle problems arise.
Always check the pedal for free movement
and return before starting the engine and
occasionally during operation.
Recommended oil:
SAE 80 API GL-5 Hypoid gear oil
Throttle Pedal
Check to see that the accelerator pedal
operates correctly. It must operate smoothly
and fully spring back to the idle position when
released. Have a service center repair as
necessary for proper operation.
Throttle Freeplay
If the throttle pedal has excessive play due to
cable stretch or mis-adjustment, it will cause a
delay in throttle response, especially at low
engine speed. The throttle may also not open
fully. If the throttle pedal has no freeplay, the
throttle may be hard to control, and the idle
speed may be erratic. Check the throttle pedal
freeplay. Adjust the freeplay if necessary.
Throttle Freeplay Inspection
1. Lift the parking brake to the top to park the
car.
2. Apply the brakes. Start the engine. Allow it
to warm up thoroughly.
3. Measure the distance the throttle pedal
moves before the engine begins to pick up
speed. Freeplay should 1/16 to 1/8 inches
(1.5-3mm).
Pre Operation Checks
5-9
Throttle Freeplay Adjustment
1. Remove both seats. Remove the middle
cover of the engine.
2. Loosen the nut of throttle cable on the
valve,
Spin the throttle cable inside/ outside to
increase the throttle pedal’s moving
distance to 1.5-3 mm.
1.Accelerator Cable column nut
3. Tighten the the nut.
5-10
Pre Operation Checks
4. Resume the center cover and seat to their
position
Steering Wheel Inspection
Check the steering wheel for specified freeplay
and smooth operation.
1. Position the vehicle on level ground.
2. Lightly turn the steering wheel left and right.
3. There should be 0.8″-1.0″ (20-25 mm)
of freeplay.
If there is excessive freeplay, strange noises, or
the steering feels rough or″catchy, ″have the
steering system inspected by an authorized
service center。
Seat belts
Make sure that both seat belts are not frayed or
damaged. The seat belt must move smoothly
when pulled out and retract on its own when
released. The latch plate should click securely
into the buckle and release when the release
button is pushed firmly. Wash off any dirt or
mud which could affect operation. Have a
service center repair as necessary for proper
operation.
Fittings and fasteners
Always check the tightness of chassis fittings
and fasteners before a ride. Take the vehicle to
a service center or refer to the Service Manual
for correct tightening torque.
Lights
Check the headlights and tail/brake lights to
make sure they are in working condition. Repair
Pre Operation Checks
as necessary for proper operation.
5-11
Tires
WARNING
Switches
Check the operation of all switches. Have a
service center repair as necessary for proper
operation.
POTENTIAL HAZARD
Operating this vehicle with improper tires,
or with improper or uneven tire pressure.
WHAT CAN HAPPEN
Use of improper tires on this vehicle, or
operation of this vehicle with improper or
uneven tire pressure, may cause loss of
control, increasing your risk of accident.
HOW TO AVOID THE HAZARD
1. The tires listed below have been
approved by Manufacturer for this
model. Other tire combinations are not
recommended.
2.
Type
Size
Front
25×8-12
6PR
Rear
25×10-12
6PR
5-12
Pre Operation Checks
3. The tires should be set to the
5. Use no more than the following pressures
recommended pressure:
when seating the tire beads.
2
Front 10psi (70kpa, 0.7 kgf/cm )
Front 36psi (250kpa, 2.5kgf/cm2)
Rear 10psi (70kpa, 0.7 kgf/cm2)
Rear 36psi (250kpa, 2.5kgf/cm2)
Check and adjust tire pressures when the
Higher pressures may cause the tire to burst.
tires are cold. Tire pressures must be
Inflate the tires very slowly and carefully. Fast
equal on both sides.
inflation could cause the tire to burst.
4. Tire pressure below the minimum
specified could cause the tire to dislodge
from the rim under severe riding
conditions. The following are minimums:
Front 9psi (63 kpa, 0.64kgf/cm2)
Rear 9psi (63 kpa, 0.64kgf/cm2)
How to measure tire pressure
Use the tire pressure gauge.
NOTE:
The tire pressure gauge is included as standard
equipment. Make two measurements of the tire
pressure and use the second reading. Dust or
dirt in the gauge could cause the first reading to
be incorrect.
Set pressure with tires cold. Set tire pressures
to the following specifications:
Recommended
Pressure
10psi (70kpa
Front
(0.70kgf/ cm2)
10psi (70kpa
Rear
(0.70kgf/ cm2)
Minimum
9 psi (63kpa,
0.64kgf/ cm2)
9 psi (63kpa,
0.64kgf/ cm2)
Maximum
Pre Operation Checks
5-13
Tire wear limit
When the tire groove decreases to 0.12 in (3
mm) due to wear, replace the tire.
11 psi, (77kpa,
0.77kgf/ cm2)
11 psi, (77kpa,
0.77kgf/ cm2)
a. Tire wear limit
1. Tire pressure gauge
6-1
Operation
WARNING
WARNING
POTENTIAL HAZARD
POTENTIAL HAZARD
Operating vehicle without being familiar
Freezing control cables due to cold
with all controls.
weather conditions.
WHAT CAN HAPPEN
WHAT CAN HAPPEN
Loss of control, which could cause an
Loss of vehicle control, which could
accident or injury.
lead to an accident or collision.
HOW TO AVOID THE HAZARD
HOW TO AVOID THE HAZARD
Read the Owner’s Manual carefully. If
When riding in cold weather, always
there is a control or function you do not
make sure all control cables work
understand, ask your service center.
smoothly before you begin riding.
Starting the engine in low
temperatures
1. Check the throttle cable, parking cable,
and the reverse lock out cable, and make
sure that they are not frozen.
2. Start the engine (see P6-2).
Starting the Engine
CAUTION:
See the “Engine Break-In”section prior to
operating the engine for the first time.
1. Turning the key to “ON”, the light in the
display will turn on, and electronic
injection system’s fuel pump will start to
work; wait for 10 second before the
following operation.
2. Apply the brake.
3. Shift the drive select lever into the neutral
position.
NOTE:
When the drive select lever is in the
neutral position“N”, the neutral indicator
light should come on. If the neutral
indicator light does not come on, ask a
●
●
Operation
6-2
service center to inspect the electric
circuit.
The engine can be started in any gear if
the brake is applied. However, it is
recommended to shift into neutral ”N”
before starting the engine.
4. With your foot off the accelerator pedal,
start the engine by turning the key to
“START”.
NOTE:
If the engine fails to start, release the key,
and then try starting again. Wait a few
seconds before the next attempt. Each
cranking should be as short as possible to
preserve battery energy. Do not crank the
engine more than 5 seconds on each
attempt.
6-3
Operation
5. Continue warming up the engine until it
idles smoothly before riding.
WARNING
POTENTIAL HAZARD
Engine idle speed exceeds the regulated
speed.
WHAT CAN HAPPEN
Will make it difficult to select the proper gear,
which could lead to loss of control, causing
serious injury or even death.
HOW TO AVOID THE HAZARD
Because of electronic injection system, the idle
speed will be speed up when the voltage of
battery is low.
Place the gear on position ‘N’, and press the
throttle pedal to make the engine run at
2500RPM to charge the battery for 5-10
minutes; when the voltage of battery is over
12V, the idle speed will be normal. If the
idle speed is still high, please contact your
service center.
Warming Up
To get maximum engine life, always warm up
the engine before driving. Never accelerate
hard with a cold engine! To see whether or
not the engine is warm, check if it responds
to the throttle normally.
1. Release the brakes and press the
accelerator pedal gradually.
2. If the rotation rate of the engine
accelerates with pedal steadily, the
warming-up procedure has been ready
and the vehicle can been ridden.
3.
Otherwise, go on with the third step.
Continue warming up the engine until it
idles smoothly.
CAUTION:
See the “Engine break-in” section prior to
operating the engine for the first time.
Drive Select Lever Operation and
Driving In Reverse
CAUTION:
Before shifting, you must stop the UTV and
return the throttle lever to the closed position;
otherwise the transmission may be
damaged.
Shifting: Neutral to High and High to Low
Operation
6-4
1. Stop the vehicle. Keep your foot off the
accelerator pedal.
2. Apply the brakes, and then shift by
moving the drive select lever along the
shift guide.
NOTE:
Make sure that the drive select lever is
completely shifted into position.
6-5
Operation
the shift guide.
NOTE:
Please kick the brake pedal first, before place
gearshifts lever to“reverse”position.
● In the brake pedal, there is a cable, which is
connected to a position pin located on the
gearshift assembly. Only when the brake pedal
is depressed, the position pin will be retracked,
and gearshifts can be removed to “reverse”
position.
●
1.
Drive select lever
3. Release the brakes and press the
accelerator pedal gradually.
Shifting: Neutral to Reverse
1. Stop the vehicle. Keep your foot off the
accelerator pedal.
2. Apply the brake pedal.
3. Shift from neutral to reverse or vice versa
by moving the drive select lever along
1.Position pin
2.Cadle
3. Adjust
Operation
until the vehicle starts moving.
6-6
4. Check behind for people or obstacles,
and then release the brake pedal.
5. Press the accelerator pedal gradually
and continue to watch to the rear while
backing up.
1.
Drive select lever
NOTE:
● When in reverse, the reverse indicator
light should be on. If the light does not
come on, ask a service center to inspect
the reverse indicator light electrical
circuit.
● Due to the synchronizing mechanism in
the engine, the light may not come on
6-7
Operation
WARNING
POTENTIAL HAZARD
Parking on a hill or other incline.
WHAT CAN HAPPEN
The vehicle could roll out of control,
increasing the chance of an accident.
HOW TO AVOID THE HAZARD
Avoid parking on hills or other inclines. If
you must park on an incline, apply the
parking brake, and block the front and
rear wheels with rocks or other objects.
Never park the vehicle on hills that are
too steep.
WARNING
POTENTIAL HAZARD
Improperly operating in reverse.
WHAT CAN HAPPEN
You could hit an obstacle or person
behind you, resulting in serious injury.
HOW TO AVOID THE HAZARD
When you shift into reverse, make sure
there are no obstacles or people behind
you. When it is safe to proceed, go
slowly.
Operation
Parking
6-8
Parking on a Slope
a) When parking, stop the engine and shift
the drive select lever into the neutral
position.
b) Push the brake pedal down, and pull the
parking brake to top position to park the
vehicle
1. Bring the vehicle to a stop by applying
the brakes.
2. Stop the engine.
3. With the brakes applied, set the parking
brake.
1.Parking handbar
6-9
Operation
1.parking handbar
NOTE:
Like many other vehicles, the parking brake
acts on the rear wheels. For the parking
brake to operate all four wheels, shift to 4WD
before stopping the engine.
Vehicle Break-in Period
The break-in period for your new UTV
vehicle is the first 25 hours of operation, or
the time it takes to use the first three tanks
full of gasoline. No single action on your part
is as important as a proper break-in period.
Careful treatment of a new engine and drive
components will result in more efficient
performance and longer life for these
components. Perform the following
procedures carefully.
CAUTION:
●
Excessive heat build-up during the first
three hours of operation will damage
close-fitted engine parts and drive
components. Do not operate at full throttle
or high speeds during the first three hours
●
of use.
Use of any engine oil not mentioned in
this manual will cause severe damage to
the engine.
Engine Break-In
There is never a more important period in the
life of your vehicle than the period between 0
and 25 hours. For this reason, we ask that
you carefully read the following material.
Because the engine is brand new, you must
not put an excessive load on it for the first
several hours of running.
During the first 25 hours, the various parts in
the engine wear and polish themselves to the
correct operating clearances. During this
period, prolonged full throttle operation or
any condition which might result in excessive
engine heating must be avoided. However,
Operation
6-10
momentary (2-3 seconds maximum) full
throttle operation under load does not harm
the engine.
Each full throttle acceleration sequence
should be followed with a substantial rest
period for the engine by cruising at lower
r/min so the engine can rid itself of the
temporary build up of heat. If any abnormality
is noticed during this period, consult a
service center.
0-10 Hours:
Avoid continuous operation above half
throttle. Allow a cooling off period of five to
ten minutes after every hour of operation.
Vary the speed of the vehicle from time to
time. Do not operate it at one set throttle
position.
6-11
Operation
10-25 Hours:
Avoid prolonged operation above 3/4 throttle.
Rev the vehicle freely but do not use full
throttle at any time.
After break-in:
The vehicle can now be operated normally.
Brake System Break-in
Apply only moderate braking force for the
first 50 stops. Aggressive or overly forceful
braking when the brake system is new could
damage brake pads and rotors.
CVT Break-in (Clutches/Belt)
A proper break-in of the clutches and drive
belt will ensure a longer life and better
performance. Break in the clutches and belt
by operating at slower speeds during the
break-in period as recommended. Pull only
light loads. Avoid aggressive acceleration
and high speed operation during the break-in
period.
Accessories
Accessories can affect the handing and
control of your vehicle. Keep the following in
mind when considering an accessory or
operating a vehicle that has accessories.
● Choose only accessories designed for
your vehicle. Your service center has a
variety of genuine accessories. Other
accessories may also be available on the
market. However, it is not possible for to
●
●
●
test all nonstandard accessories, nor
have any control over the quality or
suitability of them. Choose a genuine
accessory, or one that is equivalent in
design and quality.
Accessories should be rigidly and
securely mounted. An accessory that can
shift position or come off while you are
operating could affect your ability to
control the vehicle.
Do not mount an accessory where it
could interfere with your ability to control
the vehicle. Examples include (but are
not limited to) an object that limits your
ability to turn the steering wheel or one
that limits your view.
Use extra caution when driving a vehicle
Operation
6-12
with accessories. The vehicle may
handle differently than it does without
accessories.
Loading
Cargo or a trailer can change the stability
and handling of a vehicle. You must use
common sense and good judgment when
carrying cargo or towing a trailer. Keep the
following points in mind:
● Never exceed the weight limits shown.
An overloaded vehicle can be unstable.
● Choose a trailer hitch drawbar designed
for use with a 1 ¼ in receiver.
● Do not exceed the maximum tongue
weight. You can measure tongue weight
with a bathroom scale. Put the tongue of
6-13
Operation
the loaded trailer on the scale with the
tongue at hitch height. Adjust the load in
the trailer, if necessary, to reduce the
weight on hitch. If you are carrying cargo
and towing a trailer, include the tongue
weight in the maximum vehicle load limit.
MAXIMUM LOADING LIMIT
● Vehicle loading limit (total weight of
cargo, operator, passenger and
accessories, and tongue weight):
882 lb (400Kg)
● Cargo bed:350 lb (159Kg)
● Trailer hitch:
Pulling load (total weight of trailer
and cargo): 1,212lbf (550Kgf)
Tongue weight (vertical weight on
trailer hitch point): 110lbf (50Kgf)
●
●
Load cargo in the cargo bed as close to
the center of the vehicle as possible and
tie it down using the cargo hooks
equipped on the cargo bed.
Tie down cargo securely in the trailer.
●
●
●
●
Make sure cargo in the trailer cannot
move around. A shifting load can cause
an accident.
Make sure the load does not interfere
with controls or your ability to see where
you are going.
Drive more slowly than you would without
a load. The more weight you carry, the
slower you should go. Although
conditions vary, it is good practice not to
exceed low range whenever you are
carrying heavier loads or when towing a
trailer.
Allow more braking distance. A heavier
vehicle takes longer to stop.
Avoid making sharp turns unless at very
slow speeds.
●
Operation
6-14
Avoid hills and rough terrain. Choose
terrain carefully. Added weight affects the
stability and handling of the vehicle.
6-15
Operation
WARNING
POTENTIAL HAZARD
Overloading this vehicle or carrying or
towing cargo improperly.
WHAT CAN HAPPEN
Could cause changes in vehicle handling
which could lead to an accident.
HOW TO AVOID THE HAZARD
Never exceed the stated load capacity for
this vehicle.
Cargo should be properly distributed and
securely attached.
Reduce speed when carrying cargo or
pulling a trailer. Allow greater distance
for braking.
Your Vehicle
DRIVING YOUR VEHICLE
GETTING TO KNOW YOUR VEHICLE
This off-highway utility vehicle will handle
and maneuver differently form an ordinary
passenger car or other vehicle.
Before you begin to use your vehicle, be sure
you have read this Owners Manual
completely and understand all the features.
Pay particular attention to the safety
information on pages 2-1 - 2-5. Please read
all the caution and warning labels on your
vehicle.
This vehicle is designed for the operator and
one passenger. The driver and passenger
must always wear a seat belt. Never carry
passengers in the cargo bed.
7-1
WARNING
POTENTIAL HAZARD
Not wearing the seat belt.
Wearing the seat belt improperly.
WHAT CAN HAPPEN
There is increased risk of being killed or
seriously injured in an accident.
HOW TO AVOID THE HAZARD
Always wear your seat belt when riding in
the vehicle.
Be sure the seat belt is close fitting
across your hips and chest and is latched
securely.
7-2
Your Vehicle
WARNING
POTENTIAL HAZARD
Carrying a passenger in the cargo bed.
WHAT CAN HAPPEN
The passenger could fall or be struck by
objects in the cargo bed.
HOW TO AVOID THE HAZARD
Never carry a passenger in the cargo bed.
The cargo bed is designed to carry cargo
only.
The total weight of operator, passenger,
accessories, cargo, trailer tongue weight,
and the vehicle itself must not exceed 1,880
lbs (853Kg).
WARNING
POTENTIAL HAZARD
Overloading this vehicle or carrying or
towing cargo improperly.
WHAT CAN HAPPEN
Could cause changes in vehicle
handling which could lead to an
accident.
HOW TO AVOID THE HAZARD
Never exceed the stated load capacity
for this vehicle.
Cargo should be properly distributed
and securely attached.
Reduce speed when carrying cargo or
pulling a trailer. Allow greater distance
for braking.
Always follow the instructions in your
Owner’s Manual for carrying cargo or
pulling a trailer.
Your Vehicle
7-3
The driver and passenger must always wear
a seat belt, an approved motorcycle helmet,
eye protection and protective clothing,
including over-the-ankle boots, gloves, a
long-sleeved shirt or jacket, and long pants.
Keep hands and feet inside the vehicle at all
times.
7-4
Your Vehicle
WARNING
POTENTIAL HAZARD
Operating this vehicle without wearing an
approved motorcycle helmet, eye
protection, and protective clothing.
WHAT CAN
HAPPEN
Operating without
an approved
motorcycle helmet
increases your
chances of a severe
head injury or death
in the event of an
accident.
Operating without eye protection can
result in an accident and increases your
chances of a severe injury in the event of
an accident.
HOW TO AVOID THE HAZARD
Always wear an approved motorcycle
helmet that fits properly. You should also
wear:
eye protection
(goggles or face shield)
gloves
boots
long-sleeved shirt or jacket
long pants
LEARNING TO OPERATE YOUR VEHICLE
You should become familiar with the
performance characteristics of the vehicle in
a large, flat area that is free of obstacles and
other vehicles. Practice control of the
accelerator pedal, brakes, steering, and drive
select lever. Drive at a slow speed and
become comfortable at that speed before
gradually increasing your speed. Become
familiar with the way the vehicle feels in low
and high ranges, first in two-wheel drive
(2WD) and then in four-wheel drive (4WD)
and four-wheel drive with the differential
locked. Practice driving in reverse. Take the
time to learn basic operation before
attempting maneuvers that are more difficult.
Your Vehicle
7-5
Perform the Pre-Operation Checks on pages
5-1 - 5-11. Set the parking brake, shift to
neutral, and follow the instructions on page
6-1 to start the engine. Once it has warmed
up you are ready to begin driving your
vehicle. With the engine idling, shift the drive
select lever into low or high. Then release the
parking brake. Press the accelerator pedal
slowly and smoothly. The centrifugal clutch
will engage and you will start to accelerate.
Avoid higher speeds until you are thoroughly
familiar with the operation of your vehicle.
When slowing down or stopping, take your
foot off the accelerator pedal and smoothly
press the brake pedal. Improper use of the
brakes can cause the tires to lose traction,
reducing control and increasing the
possibility of an accident.
7-6
Your Vehicle
CAUTION:
Do not shift from low to high or vice versa
without coming to a complete stop and
waiting for the engine to return to normal idle
speed. Damage to the engine or drive train
may occur.
TURNING YOUR VEHICLE
The vehicle is easier to steer in two-wheel
drive (2WD) than four-wheel drive (4WD).
Steering takes the most effort in 4WD with
the differential locked.
It is possible for the vehicle to roll over or go
out of control if you attempt sharp,
high-speed turns. You should also be careful
making sharp turns on rough terrain. Do not
attempt to turn around or make abrupt
maneuvers on slope.
Position your hands on the steering wheel so
that your thumbs and fingers do not wrap
around the wheel. This is particularly important
when driving in rough terrain. The front
wheels will move right and left as they
respond to the terrain, and this movement
will be felt in the steering wheel. A sudden jolt
could wrench the steering wheel around, and
your thumbs or fingers could be injured if
they are in the way of the steering wheel
spokes.
Your Vehicle
7-7
Follow these precautions when operating in
reverse:
1. Always check for obstacles or people
behind the vehicle.
2. Apply the throttle lightly. Never open the
throttle suddenly.
3. Back up slowly.
4. Apply the brakes lightly for stopping.
5. Avoid making sharp turns.
Operating Improperly in Reverse
Improperly operating in reverse could result
in a collision with an obstacle or person.
Always follow proper operating procedures.
Before shifting into reverse gear, always
check for obstacles or people behind the
vehicle. When it is safe to proceed, back up
slowly.
7-8
Your Vehicle
BRAKING
Braking ability is affected by the type of
terrain. In most cases, gradual application of
the brakes is more effective than abrupt
braking, particularly on loose surfaces like
gravel. Always allow for greater braking
distance on rough, loose, or slippery
surfaces.
GOING UPHILL
Do not attempt to climb hills until you have
mastered basic maneuvers on flat ground.
Use proper driving techniques to avoid
overturns on hills and slopes. Drive straight
up hills, and avoid crossing the side of a hill,
which increases your chance of rollover.
Practice first on gentle slopes before
attempting steeper hills. Always check the
terrain carefully before attempting any hill.
Use common sense and remember that
Your Vehicle
7-9
some hills are too steep for you to climb.
Maximum slope angle:15°
WARNING
POTENTIAL HAZARD
Operating on excessively steep hills.
WHAT CAN HAPPEN
The vehicle can over turn more easily on
extremely steep hills than on level
surfaces or small hills.
HOW TO AVOID THE HAZARD
Never operate your vehicle on hills too
steep for it or your abilities. Never
operate vehicles on hills steeper than 15
Choose carefully which hills you attempt to
climb. Avoid hills with slippery surfaces or
ones where you will not be able to see far
enough ahead of you.
°.
Do not drive across the face of a hill. Go
straight up the hill.
Practice on smaller hills before
attempting large hills.
7-10
Your Vehicle
Before climbing the hill, first be sure you are
around. With your foot on the brake, look
operating in low range 4WD or, if necessary,
behind you and plan your descent. Shift the
with 4WD. To climb a hill, you need traction,
drive select lever in reverse so you can use
momentum, and steady throttle. Travel fast
the engine brake if necessary to slow your
enough to keep your momentum going, but
descent. Release the brake and begin to
not so fast that you cannot react to changes
coast down the hill. Use engine braking as
in the terrain as you climb. Slow down when
much as possible, gently applying the brakes
you reach the crest of the hill if you cannot
when necessary.
clearly see what is on the other side-there
could be another person, an obstacle, or a
GOING DOWNHILL
sharp drop off.
Check the terrain carefully before going
down a hill. When possible, choose a path
If you start to lose traction or momentum
that lets you drive your vehicle straight
when climbing, and you decide you will be
downhill. Avoid sharp angles that could allow
unable to continue, use the brakes to come
the vehicle to pitch or roll over. Carefully
to a stop. Do not attempt to turn the vehicle
choose your path and drive no faster than
you will be able to react to obstacles that may
appear.
WARNING
POTENTIAL HAZARD
Going down a hill improperly.
WHAT CAN HAPPEN
Could cause loss of control or cause the
vehicle to overturn.
HOW TO AVOID THE HAZARD
Always check the terrain carefully before
you start down any hill. Never go down a
hill at high speed. Avoid going down a hill
at an angle that would cause the vehicle
to lean sharply to one side. Go straight
down the hill where possible.
Your Vehicle
7-11
Before starting downhill, make sure the
vehicle is in low-range 4WD. On most slopes,
this will let you use engine braking to help
you go downhill slowly. Go as slowly as
possible. If you pick up too much speed,
apply the brakes gently. Avoid sudden
application of the brakes, which could cause
the vehicle to start sliding.
If you are sliding or skidding, try to steer in
the direction the vehicle is sliding to help you
regain control.
If you must turn on the hill to avoid an
obstacle, do so slowly and carefully. If the
vehicle starts to tip, gradually steer in the
downhill direction if there are no obstacles in
your path. As you regain proper balance,
gradually steer again in the direction you
want to go.
7-12
Your Vehicle
CROSSING THROUGH SHALLOW WATER
If you must cross shallow, slow moving water
up to the depth of the vehicle’s floorboards,
choose your path carefully to avoid sharp
drop-offs, large rocks, or slippery surfaces
that could cause the vehicle to overturn.
Never operate through water deeper than 13
in (33 cm) or fast flowing water.
Wet brakes may have reduced effectiveness.
After leaving the water, test your brakes. If
necessary, apply the brakes several times to
let friction dry out the linings.
WARNING
POTENTIAL HAZARD
Operating this vehicle through deep or
fast-flowing water.
WHAT CAN HAPPEN
Loss of control, which could result in an
accident including overturn, which could
increase the risk of drowning.
HOW TO AVOID THE HAZARD
Never operate this vehicle in fast flowing
water or in water deeper than 13 in
(33cm).
Remember that wet brakes may have
reduced stopping ability. Test your
brakes after leaving water. If necessary,
apply the brakes several times to let
friction dry out the linings.
Your Vehicle
CAUTION:
After riding your vehicle in water, be sure to
drain the trapped water by removing the
check hose at the bottom of the air filter case,
the V-belt cooling duct check hose, the drive
select lever box check hose and the V-belt
case drain plug. Wash the vehicle in fresh
water if it has been operated in salt water or
muddy conditions.
7-13
Vehicle Immersion
CAUTION:
If your vehicle becomes immersed, major
engine damage can result if the machine is
not thoroughly inspected. Take the vehicle to
your service center before starting the
engine.
If it is impossible to take your vehicle to a
service center before starting it, follow the
steps outlined below.
1. Move the vehicle to dry land.
2. Check the air box. If water is present, dry
the air box and replace the filter with a
new filter.
3. Remove the spark plugs.
4. Turn the engine over several times.
7-14
Your Vehicle
5. Dry the spark plugs and reinstall them, or
install new plugs.
6. Attempt to start the engine. If necessary,
repeat the drying procedure.
7. Take the vehicle to your service center
for service as soon as possible, whether
you succeed in starting it or not.
8. If water has been ingested into the CVT,
make sure to inspect the hole without
water left inside. If it is muddy water,
open the CVT cap and wash the parts
before you reassemble.
9. Check the gearshift, release the water
inside. Wash if necessary.
CAUTION:
Make sure all components that are washed
and assembled are coated lightly with
grease.
1.Air filter case check hose
Your Vehicle
7-15
1. Drive select lever box check hose
1.V-belt cooling duct check hose
1.V-belt case drain plug
Riding Over Rough Terrain
Operating over rough terrain should be done
with caution. Look for obstacles that could
cause damage to the vehicle or could lead to
a rollover accident. Avoid jumping the vehicle
as injury, loss of control, and damage to the
7-16
Your Vehicle
vehicle could occur.
WARNING
POTENTIAL HAZARD
Failure to use extra care when operating
this vehicle on unfamiliar terrain.
WHAT CAN HAPPEN
You can come upon hidden rocks,
bumps, or holes, without enough time to
react. Could result in the vehicle
overturning or going out of control.
HOW TO AVOID THE HAZARD
Go slowly and be extra careful when
operating on unfamiliar terrain. Always
be alert to changing terrain conditions
when operating the vehicle.
Riding in Brush or Wooded Areas
When operating in areas with brush or trees,
watch carefully on both sides and above the
vehicle for obstacles such as branches that
the vehicle might hit, causing an accident, or
for brush that might enter the vehicle as you
pass and strike the driver or passenger.
Never hold onto the enclosure so your hand
is outside the vehicle. Hold the handgrip
inside the enclosure.
Encountering Obstacles on the Trail
If you cannot go around an obstacle such as
a fallen tree trunk or a ditch, stop the vehicle
where it is safe to do so. Set the parking
brake and get out to inspect the area
Your Vehicle
7-17
thoroughly. Look from both your approach
side and the exit side. If you believe you can
continue safely, decide the path that will
allow you to get over the obstacle at as close
to a right angle as possible to minimize
vehicle tipping. Go only fast enough to
maintain your momentum but still give
yourself plenty of time to react to changes in
conditions. If there is any question about
your ability to maneuver safely over the
obstacle, you should turn around, if the
ground is flat and you have the room, or back
up until you find a less difficult path.
7-18
Your Vehicle
WARNING
POTENTIAL HAZARD
Improperly operating over obstacles.
WHAT CAN HAPPEN
Could cause loss of control or a collision.
Could cause the vehicle to overturn.
HOW TO AVOID THE HAZARD
Before operating in a new area, check for
obstacles.
Use extreme caution when operating over
large obstacles, such as large rocks or
fallen trees.
Periodic Maintenance and Adjustment
8-1
NOTE:
If you do not have a torque wrench available
Periodic Maintenance and Adjustment
Periodic inspection, adjustment and
during a service operation requiring
lubrication will keep your vehicle in the safest
one, take your vehicle to service center to
and most efficient condition possible. Safety
check the torque settings and adjust them as
is an obligation of the vehicle owner. The
necessary.
most important points of vehicle inspection,
adjustment and lubrication are explained on
the following pages.
The service information included in this
manual is intended to provide you, the owner,
with the necessary information for
completing your own preventive
maintenance and minor repairs. The tools
provided in the Owner’s tool kit are sufficient
for this purpose, except that a torque wrench
is also necessary to properly tighten nuts and
bolts.
1.
Owner’s tool kit
2.
Tire pressure gauge
8-2
Periodic Maintenance and Adjustment
WARNING
POTENTIAL HAZARD
Servicing an engine while it is running.
WHAT CAN HAPPEN
Moving parts can catch clothing or parts
of the body, causing injury.
Electrical components can cause shocks
or can start fires.
HOW TO AVOID THE HAZARD
Turn off the engine when performing
maintenance unless otherwise specified.
Have a service center perform service if
you are not familiar with vehicle service.
WARNING
POTENTIAL HAZARD
Operating this vehicle with improper
modifications.
WHAT CAN HAPPEN
Improper installation of accessories or
modification of this vehicle may cause
changes in handling which in some
situations could lead to an accident.
HOW TO AVOID THE HAZARD
Never modify this vehicle through
improper installation or use of
accessories. All parts and accessories
added to this vehicle should be genuine
or equivalent components designed for
use on this vehicle and should be
installed and used according to
instructions.
If you have questions, consult an
authorized service center.
Periodic Maintenance and Adjustment
Periodic Maintenance Chart for the Emission Control System
8-3
● For vehicles not equipped with an odometer or hour meter, follow the month maintenance intervals.
● For vehicles equipped with an odometer or an hour meter, follow the mile (km) or hours maintenance intervals. However, keep in mind
that if the vehicle is not used for a long period, the month maintenance intervals should be followed.
● Items marked with an asterisk should be performed by service center, as they require special tools, data and technical skills.
ITEM
ROUTINE
Valves*
●
Fuel line*
●
●
●
●
Spark plug
●
●
●
Exhaust system*
●
●
Whichever
Comes first
Month
miles
(km)
hours
Check valve clearance.
Adjust if necessary.
1
200
(320)
20
INITIAL
3
6
750
1,500
(1,200) (2,400)
75
150
○
Check fuel hose for cracks or damage.
Replace if necessary.
Check condition.
Adjust gap and clean.
Replace if necessary.
Check for leakage.
Tighten if necessary.
Replace gasket(s) if necessary.
○
○
EVERY
6
12
1,500
3,000
(2,400)
(4,800)
150
300
○
○
○
○
○
○
○
○
○
○
○
○
Crankcase breather
system*
●
●
Check breather hose for cracks or damage.
Replace if necessary.
○
○
○
Spark arrester
●
Clean.
○
○
○
8-4
Periodic Maintenance and Adjustment
General maintenance and lubrication chart
ITEM
ROUTINE
Cooling system
●
●
●
Air filter element
●
●
Engine oil
Engine oil filter cartridge
●
Whichever
Comes first
Month
Miles
(Km)
hours
Check coolant leakage.
Repair if necessary.
Replace coolant every 24 months.
Clean.
Replace if necessary.
1
200
(320)
20
○
Replace (warm engine before draining.)
Replace
○
○
●
●
Check oil lever oil leakage.
Replace.
○
Accelerator pedal*
●
V-belt*
●
●
Wheels*
●
●
Check operation and free play.
Check operation.
Check for wear, cracks, or damage.
Check balance/damage/runout.
Replace if necessary.
Check operation/brake pad wear/fluid leakage/
see page 8-6.
Correct if necessary. Replace pads if worn to the limit.
Check operation/brake pad wear/fluid leakage/
see NOTE page 8-6.
Correct if necessary. Replace pads if worn to the limit.
Check operation and for leakage.
Check toe-in/Adjust if necessary.
Differential gear oil
●
Front brake*
●
●
Rear brake*
●
Front and rear suspension*
●
●
75
6
1,500
(2,400)
150
○
○
(1,200)
EVERY
6
12
1,500
3,000
(2,400)
(4,800)
150
300
○
○
Every 20─40 hours
(More often in wet or dusty areas.)
●
Final gear oil
INITIAL
3
750
○
○
○
○
○
○
○
○
○
○
○
○
○
○
○
○
○
○
○
○
○
○
○
○
○
○
○
○
○
○
○
Periodic Maintenance and Adjustment
ITEM
ROUTINE
Whichever
Comes first
Month
Miles
(Km)
hours
Wheel bearings*
●
●
Check bearing assemblies for looseness/damaged.
Stabilizer bushings*
●
Check for cracks or damage.
●
Check all chassis fittings and fasteners.
Check if necessary.
Fittings and fasteners*
Rear upper and lower
knuckle pivots*
Drive shaft universal joint*
●
●
●
●
Steering system*
●
Engine mount*
Front and rear axle boots*
●
●
●
●
Repair if damaged.
1
200
(320)
20
INITIAL
3
750
(1,200)
75
○
○
○
Lubricate with lithium–soap-based grease.
Lubricate with lithium-soap-based grease.
Check operation and for looseness/Replace if
damaged.
Check toe-in/Adjust if necessary
Check for cracks or damage.
Check bolt tightness.
Check operation.
Replace if damaged.
○
○
○
○
6
1,500
(2,400)
150
8-5
EVERY
6
12
1,500
3,000
(2,400)
(4,800)
150
300
○
○
○
○
○
○
○
○
○
○
○
○
○
○
○
○
○
○
○
○
○
○
○
○
8-6
Periodic Maintenance and Adjustment
NOTE:
●
●
Recommended brake fluld:DOT4
Brake fluid replacement.
● When disassembling the master cylinder or caliper, replace the brake fluid. Check the brake fluid level
and add fluid as required.
● On the inner parts of the master cylinder and caliper, replace the oil seals every two years.
● Replace the brake hoses every four years, or if cracked or damaged.
Periodic Maintenance and Adjustment
8-7
Hood
To open
Unhook the hood latches, and then slowly tilt
the hood up until it stops.
1.
1.
Latch (×2)
Hood
To close
Lower the hood slowly to its original position,
and then hook the hood latches.
Secure projections ① on the underside of the
hood into slots ② on the back of the
instrument panel. Secure slots ③ on the side
of the hood around projections ④ on the
frame.
8-8
Periodic Maintenance and Adjustment
Console
To remove
1. Remove the seats. (See pages 4-17─
4-18 for seat removal and installation
procedures.)
2. Remove the parking brake lever boot.
3. Pull the console upward (the drive select
lever boot will come loose.)
1.
Projection (×2)
2.
Slot (×2)
3.
Slot (×2)
4.
Projection (×2)
CAUTION:
z Make sure that all cables and wires are in
place when closing the hood.
z Do not drive the vehicle with the hood
open, unlatched, or removed.
1.
Console
To install
1. Place the console in its original position.
Periodic Maintenance and Adjustment
2. Install the parking brake lever boot.
3. Install the seats.
CAUTION:
z When installing the console, be sure not
to pinch the cables or wires.
z Make sure that the groove at the bottom
of the parking brake lever boot and the
drive select lever boot fits securely
around the edge of the hole in the
console.
8-9
EFI system
EFI engine was completely different from the
engine which uses carburetor, it consist of
ECU, EFI-cables, sensors, actuators and
other advanced components.
As the following pictures:
1. Oxygen sensor
2. Oxygen sensor threaded sleeve
3. Exhaust Pipe
8-10
Periodic Maintenance and Adjustment
1. High voltage wire
2.Ignition signal plug
3. Ignition coil
1. ECU
1. Throttle
2. Intake Pipe Joint
3. Intake Pipe
4. Fuel injector
5. Fuel injector seat
6. Intake temperature sensor/pressure sensor
Periodic Maintenance and Adjustment
Fuel injector
Inject the fuel into the cylinder
8-11
Intake air temperature sensor
Inspect engine intake air temperature,
according to the temperature, ECU will
automatically adjust the fuel injection volume.
1. Idle speed stepper motor
2. Air damper degree sensor
3. Throttle
Air damper
For the purpose of adjustment of air intake
volume.
Idle speed stepper motor
To stabilize the idle speed
Air intake pipe pressure sensor
For testing the negative pressure of the air
intake pipe, engine has the different working
conditions, the 2 parameters- opening of air
damper and pressure of air intake determine
the engine’s working condition, ECU will
adjust the fuel injection volume according to
different negative pressure and opening of
air damper. Adjust the engine fuel injection
volume can adjust the output power and
output torque.
Water temperature sensor
For testing cooling water
temperature,
8-12
Periodic Maintenance and Adjustment
according to the temperature difference,
diagnostic
apparatus"
for
inspection,
ECU will automatically revise fuel injection
diagnostic apparatus can provide a more
volume, to ensure the smooth operation of
detailed faliure information. Diagnostic
the engine all the time.
apparatus equipped with its own user
Ignition signal
manual.
Ignition signal arising from the magneto to
provide the ECU with correct ignition timing signal.
ECU
It is the core of EFI system, it used a
specially designed micro computer chip as a
controller,according to the information from
sensors, has been calculated to ensure
accurate control in different conditions from
the nozzle of the fuel injection volume. To
achieve
fuel-efficient
low
emissions
performance of the EFI engine.
1. Diagnostic apparatus cable
EFI System inspection
If the EFI system has failure, the meter will
display the appropriate failure code, you can
also use the special "EFI system failure
2. EFI cables
Engine oil and oil filter cartridge
The engine oil level should be checked
before each operation. In addition, the oil
Periodic Maintenance and Adjustment
must be changed and the oil filter cartridge
NOTE:
replaced at the intervals specified in the
The engine oil should be between the
periodic maintenance and lubrication chart.
minimum and maximum level marks.
To check the engine oil level
1. Place the vehicle on a level surface.
2. Remove the console. (See page 8-7-8-8
for console removal and installation
procedures.)
3. Check the engine oil level on a cold
engine.
NOTE:
If the engine was started before checking the
oil level, be sure to warm up the engine
sufficiently, and then wait at least ten minutes
until the oil settles for an accurate reading.
4. Remove the engine oil filler cap and wipe
off the dipstick with a clean rag.
5. Insert the dipstick in the oil filler hole
(without screwing it in), and then remove
it again to check the oil level.
1.
Maximum level mark
2.
3.
Dipstick
4. Engine oil filler cap
8-13
Minimum level mark
6. If the engine oil is at or below the
minimum level mark, add sufficient oil of
the recommended type to raise it to the
8-14
Periodic Maintenance and Adjustment
correct level.
7. Insert the dipstick into the oil filler hole,
and then tighten the oil filler cap.
8. Install the console.
To change the engine oil (with or without
oil filter cartridge replacement)
1. Remove the console. (See page 8-7-8-8
for console removal and installation
procedures.)
2. Place an oil pan under the engine to
collect the used oil, and then remove the
engine oil filler cap.
3. Remove the engine oil drain bolt to drain
the oil from the crankcase.
1.
Engine oil drain bolt
NOTE:
Skip steps 4-6 if the oil filter cartridge is not
being replaced.
4. Remove the oil filter cartridge with an oil
filter wrench.
Periodic Maintenance and Adjustment
1.
Oil filter cartridge
2. Oil filter wrench
NOTE:
An oil filter wrench is available at a nearby
service center.
5. Apply a light coat of engine oil to the
O-ring of the new oil filter cartridge.
NOTE:
Make sure the O-ring is seated properly.
1.
8-15
O-ring
6. Install the new oil filter cartridge with an
oil filter wrench, and then tighten it to the
specified torque with a torque wrench.
Tightening torque:
Oil filter cartridge:
12 ft·lbf (17Nm, 1.7m·kgf)
8-16
Periodic Maintenance and Adjustment
Recommended engine oil:
See page 10-2.
Oil quantity:
Without oil filter cartridge replacement
2.01 qt (1.9L)
With oil filter cartridge replacement:
2.22 qt (2.1L)
CAUTION:
1.
Oil filler cartridge
2.
Torque wrench
7. Install the engine oil drain bolt, and then
tighten it to the specified torque.
Tightening torque:
Engine oil drain bolt:
22 ft·lbf (30Nm, 3.0m·kgf)
8. Add the specified amount of
recommended engine oil, and then install
engine oil filler cap and tighten.
z In order to prevent clutch slippage (since
the engine oil also lubricates the clutch),
do not mix any chemical additives. Do
not use oils with a diesel specification of
“CD” or oils of a higher quality than
specified. In addition, do not use oils
labeled “ENERGY CONSERVING II” or
higher.
z Make sure that no foreign material enters
the crankcase.
9. Start the engine, and then let it idle for
Periodic Maintenance and Adjustment
8-17
several minutes while checking it for oil
leakage. If oil is leaking, immediately turn
the engine off and check for the cause.
10. Turn the engine off, wait at least ten
minutes, and then check the oil level and
correct it if necessary.
11. Install the console.
Final gear oil
Checking the final gear oil level
1. Place the vehicle on a level surface.
2. Remove the oil filler bolt, and then check
the oil level in the final gear case.
1.
Speedometer sensor
3.
Correct oil level
2.
final gear oil
NOTE:
The oil level should be at the brim of the filler
hole.
3. If the oil is below the brim of the filler hole,
add sufficient oil of the recommended
type to raise it to the correct level.
8-18
Periodic Maintenance and Adjustment
bolt to drain the oil.
CAUTION:
1. Be sure no foreign material enters the
final gear case.
2. Please clean the sensor every 320 mile
period.
3. Install the oil filler bolt, and then tighten it
to the specified torque.
Tightening torque:
Final gear oil filler bolt:
17 ft·lbf (23 Nm, 2.3 m·kgf,)
Changing the final gear oil
1. Place the vehicle on a level surface.
2. Place a container under the final gear
case to collect the used oil.
3. Remove the oil filler bolt and the drain
1.
Final gear oil drain bolt
4. Install the drain bolt, and then tighten it to
the specified torque.
Tightening torque:
Final gear oil drain bolt:
14 ft·lbf (20 Nm, 2.0 m·kgf )
5. Add the recommended final gear oil up to
the brim of the filler hole.
Periodic Maintenance and Adjustment
8-19
Differential gear oil
Checking the differential gear oil level
Recommended oil:
1. Place the vehicle on a level surface.
SAE 80 API GL-4Hypoid gear oil
2. Remove the differential gear oil filler bolt
Oil quantity:
and check the oil level. It should be up to
0.26 qt (0.25 L)
the brim of the filler hole. If the level is
low, add sufficient oil of the
CAUTION:
recommended type to raise it to the
Be sure no foreign material enters the final
specified level.
gear case.
CAUTION:
6. Install the oil filler bolt, and then tighten it
to the specified torque.
Tightening torque:
Final gear oil filler bolt:
17 ft·lbf (23 Nm, 2.3 m·kgf)
7. Check for oil leakage. If oil leakage is
found, check for the cause.
Be sure no foreign material enters the
differential gear case.
8-20
Periodic Maintenance and Adjustment
Changing the differential gear oil
1. Place the vehicle on a level surface.
2. Place a container under the differential
gear case to collect the used oil.
3. Remove the differential gear oil filler bolt
and differential gear oil drain bolt to drain
the oil.
1. Differential gear oil filler bolt
2. Correct oil level
3.
Differential gear oil
3. Install the differential gear oil filler bolt,
and then tighten it to the specified torque.
Tightening torque:
Differential gear oil filler bolt:
17 ft·lbf (23Nm, 2.3 m·kgf)
1.
Differential gear oil drain bolt
4. Install the differential gear oil drain bolt,
and tighten it to the specified torque.
Periodic Maintenance and Adjustment
Tightening torque:
Differential gear oil drain bolt:
7.1 ft·lbf (9.8Nm, 0.98 m·kgf)
5. Fill the differential gear case with the
recommended oil.
Recommended oil:
SAE 80 API GL-5 Hypoid gear oil
Oil quantity:
0.34 qt (0.32 L)
CAUTION:
Be sure no foreign material enters the
differential gear case.
6. Install the differential gear oil filler bolt,
and then tighten it to the specified torque.
8-21
Tightening torque:
Differential gear oil filler bolt:
17 ft·lbf (23Nm, 2.3m·kgf)
7. Check for oil leakage. If oil leakage is
found, check for the cause.
Coolant
The coolant level should be checked before
each ride.
Checking the coolant level
1. Place the vehicle on a level surface.
2. Open the hood. (See pages 8-7-8-8 for
hood opening and closing procedures.)
3. Check the coolant level in the coolant
reservoir when the engine is cold as the
coolant level varies with engine
temperature.
8-22
Periodic Maintenance and Adjustment
NOTE:
The coolant should be between the minimum
Coolant reservoir capacity
and maximum level marks.
(up to the maximum level mark):
0.37 qt (0.35L)
CAUTION:
Mix anti freeze with distilled water only.
However, if distilled water is not available,
soft water may be used for refilling.
1.
Coolant reservoir cap
2.
Maximum level mark
Changing the coolant
The coolant must be changed by a service
center at the intervals specified in the
periodic maintenance and lubrication chart.
3.
Minimum level mark
4. If the coolant is at or below the minimum
level mark, remove the reservoir cap,
add coolant to the maximum level mark,
install the reservoir cap, and then close
the hood.
NOTE:
● Adding water instead of coolant lowers
the antifreeze content of the coolant. If
water is used instead of coolant, have a
service center check the antifreeze
content of the coolant as soon as
Periodic Maintenance and Adjustment
●
possible.
The radiator fan is automatically
switched on or off according to the
coolant temperature in the radiator.
8-23
1.
Axle boots
Check the protective boots for holes or tears.
If any damage is found, have them replaced
by a service center.
1. Rear axle boot (×2 each side)
Spark plug inspection
Removal
1. Lift the cargo bed up. (See pages 4-21 4-22 for cargo bed lifting and lowering
procedures.)
2. Remove the spark plug cap.
1.Front axle boot (×2 each side)
8-24
1.
Periodic Maintenance and Adjustment
Spark plug cap
3. Use the spark plug wrench in the tool kit
to remove the spark plug as shown.
1.
Spark plug wrench
Inspection
The spark plug is an important engine
component and is easy to inspect. The
condition of the spark plug can indicate the
condition of the engine. The ideal color of the
porcelain insulator around the center
electrode is a medium-to-light tan for a
vehicle that is being ridden normally.
Periodic Maintenance and Adjustment
Do not attempt to diagnose such problems
yourself. Instead, take the vehicle to a
service center. You should periodically
remove and inspect the spark plug because
heat and deposits will cause the spark plug
to slowly break down and erode. If electrode
erosion becomes excessive, or if carbon and
other deposits are excessive, you should
replace the spark plug with the specified
plug.
Specified spark plug:
DR8EA (NGK)
Installation
1. Measure the electrode gap with a wire
thickness gauge and, if necessary, adjust
the gap to specification.
Spark plug gap:
0.023-0.027 in (0.6 - 0.7 mm)
8-25
a. Spark plug gap
2. Clean the surface of the spark plug
gasket and its mating surface, and then
wipe off any grime from the spark plug
threads.
3. Install the spark plug and tighten it to the
specified torque.
8-26
Periodic Maintenance and Adjustment
element and air filter case.
Tightening torque:
Spark plug:
12.7 ft·lbf (17.5 Nm, 1.75 m·kgf)
NOTE:
If a torque wrench is not available when you
are installing the spark plug, a good estimate
of the correct torque is 1/4 to 1/2 turn past
finger tight. Have the spark plug tightened to
the specified torque as soon as possible.
1.
4. Install the spark plug cap.
5. Lower the cargo bed.
Cleaning the engine air filter element
NOTE:
There is a check hose at the bottom of the air
filter case. If dust or water collects in this
hose, empty the hose and clean the air filter
Air filter check hose
1. Remove the seats. (See pages 4-17 4-18 for seat removal and installation
procedures.)
2. Remove the console. (See page 8-7-8-8
for console removal and installation
procedures.)
3. Remove the air filter case cover by
unhooking the holders.
Periodic Maintenance and Adjustment
1.
Holder (×4)
2.
Air filter case cover
1.
Air filter element
4. Remove the air filter element.
5. Remove the sponge material from its
frame.
1.
3.
Air filter frame
2.
Element retaining plate
Sponge material
8-27
8-28
Periodic Maintenance and Adjustment
6. Wash the sponge material gently but
CAUTION:
thoroughly in solvent.
Do not twist the sponge material when
squeezing it.
WARNING
POTENTIAL HAZARD
Using low flash point solvents or
gasoline to clean the sponge material.
WHAT CAN HAPPEN
Low flash point solvents or gasoline can
catch fire or explode.
HOW TO AVOID THE HAZARD
Use parts cleaning solvent to clean the
sponge material.
7. Squeeze the excess solvent out of the
sponge material and let it dry.
8. Inspect the sponge material and replace
it if damaged.
9. Thoroughly apply foam air filter oil or
other quality liquid foam air filter oil (not
spray type) to the sponge material.
NOTE:
The sponge material should be wet but not
dripping.
10. Pull the sponge material over its frame.
11. Install the air filter element.
12. Install the air filter case cover and be
sure the crankcase breather hose is
connected.
Periodic Maintenance and Adjustment
8-29
element rubber joint to the fuel system and
manifold fittings securely to avoid the
possibility of unfiltered air entering the
engine.
CAUTION:
1.
Crankcase breather hose
13. Install the console.
14. Install the seats.
NOTE:
The air filter element should be cleaned
every 20-40 hours. It should be cleaned and
lubricated more often if the vehicle is
operated in extremely dusty areas. Each time
air filter element maintenance is performed,
check the air inlet to the air filter case for
obstructions. Check the air filter
Never operate the engine with the air filter
element removed. This will allow unfiltered
air to enter, causing rapid engine wear and
possible engine damage. Additionally,
operation without the air filter element will
affect performance with subsequent poor
performance and possible engine
overheating.
8-30
Periodic Maintenance and Adjustment
V-belt cooling duct check hose
V-belt case drain plug
The V-belt cooling duct check hose is located
The V-belt case drain plug is located under
under the driver seat. (See pages 4-17 - 4-18
the driver seat. (See pages 4-17 - 4-18 for
for seat removal and installation procedures.)
seat removal and installation procedures.)
If dust or water collects in the V-belt cooling
After riding in water deep enough to allow
duct check hose, remove the hose and clean
water to enter the V-belt case, remove the
it.
drain plug to drain any water from the case.
NOTE:
If water drains from the V-belt case after
removing the drain plug, have a service
center inspect the vehicle as the water may
affect other engine parts.
1.
V-belt cooling duct check hose
Periodic Maintenance and Adjustment
1.
V-belt case drain plug
Cleaning the spark arrester
Be sure the exhaust pipe and muffler are
cool before cleaning the spark arrester.
1. Remove the bolts.
1.
8-31
Bolt(×3)
2. Remove the tailpipe by pulling it out of
the muffler.
3. Tap the tailpipe lightly, and then use a
wire brush to remove any carbon
deposits from the spark arrester portion
of the tailpipe and inside of the tailpipe
housing.
8-32
Periodic Maintenance and Adjustment
WARNING
1.
Tailpipe
2.
Spark arrester
4. Insert the tailpipe into the muffler and
align the bolt holes.
5. Install the tailpipe by installing the bolts,
and then tighten the bolts to the specified
torque.
Tightening torque:
Tailpipe bolt:
6.9 ft·lbf (9.5 Nm, 0.95 m·kgf)
POTENTIAL HAZARD
Improper cleaning of the spark arrester.
Hot exhaust system
WHAT CAN HAPPEN
Could injure the eyes.
Could cause burns.
Could cause carbon monoxide
poisoning, possibly leading to death.
Could start a fire.
HOW TO AVOID THE HAZARD
When cleaning the spark arrester:
Always let the exhaust system cool prior
to touching exhaust components.
Do not start the engine when cleaning the
exhaust system.
Periodic Maintenance and Adjustment
8-33
Valve clearance
The correct valve clearance changes with
use, resulting in improper fuel-air supply or
engine noise. To prevent this, the valve
clearance must be adjusted regularly. This
adjustment however, should be left to a
professional service technician.
Front brake pad check
Each brake pad is provided with wear
indicator grooves, which allow you to check
the brake pad wear without having to
disassemble the brake. To check the brake
pad wear, check the wear indicator grooves.
If a brake pad has worn to the point that the
wear indicator grooves have almost
disappeared, have a service center replace
the brake pads as a set.
1.
Brake pad wear indicator groove
NOTE:
The wheels need to be removed to check the
brake pads. (See pages 8-41-8-42 for wheel
removal and installation procedures.)
8-34
Periodic Maintenance and Adjustment
Rear brake pad check
Checking the brake fluid level
Each brake pad is provided with wear
Insufficient brake fluid may let air enter the
indicator grooves, which allow you to check
brake system, possibly causing the brakes to
the brake pad wear without having to
become ineffective. Before riding, check that
the brake fluid is above the minimum level
disassemble the brake. To check the brake
mark and replenish if necessary.
pad wear, check the wear indicator grooves.
If a brake pad has worn to the point that the
wear indicator grooves have almost
disappeared, have a service center replace
the brake pads as a set.
1.
1.
Brake pad wear indicator groove
Minimum level mark
A low brake fluid level may indicate worn
brake pads and/or brake system leakage. If
the brake fluid level is low, be sure to check
the brake pads for wear and the brake
system for leakage.
Periodic Maintenance and Adjustment
8-35
the fluid and may result in vapor lock.
The brake fluid reservoir is located under the
z
Brake fluid may deteriorate painted
hood. (See pages 8-7- 8-8 for hood opening
surfaces
or plastic parts. Always clean up
and closing procedures.)
spilled fluid immediately.
z Have a service center inspect the brake
Observe these precautions:
system if the brake fluid level goes down.
z When checking the fluid level, make sure
the top of the brake fluid reservoir is
level.
z Use only the recommended quality brake
fluid. Otherwise, the rubber seals may
deteriorate, causing leakage and poor
braking performance
Recommended brake fluid: DOT 4
z Refill with the same type of brake fluid.
Mixing fluids may result a harmful
chemical reaction and lead to poor
braking performance.
z Be careful that water does not enter the
brake fluid reservoir when refilling. Water
will significantly lower the boiling point of
Brake fluid replacement
Complete fluid replacement should be done
only by trained service personnel. Have a
service center replace the following
components during periodic maintenance
or when they are damaged or leaking.
z Replace the oil seals every two years.
z Replace the brake hoses every four
years.
Checking the brake pedal
Have a service center check the brakes at
the intervals specified in the periodic
maintenance and lubrication chart. There
8-36
Periodic Maintenance and Adjustment
should be no free play in the brake pedal.
The brakes should operate smoothly and
WARNING
there should be no brake drag. If the brakes
POTENTIAL HAZARD
feel soft or spongy, this could indicate air in
Operating with improperly serviced or
the brake system. Have a service center
adjusted brakes.
check the brake system if necessary.
1.
Brake pedal
WHAT CAN HAPPEN
You could lose braking ability, which
could lead to an accident.
HOW TO AVOID THE HAZARD
After servicing:
z Make sure the brakes operate
smoothly and that the brake pedal
position is correct.
z Make sure the brakes do not drag.
z All air must be bled from the brake
system.
Replacement of brake components
requires professional knowledge. These
procedures should be performed by a
service center.
Periodic Maintenance and Adjustment
Parking brake lever free play adjustment
Periodically check the parking brake lever
free play and adjust it if necessary.
1. Shift the drive select lever into low gear
“L”.
2. Remove the seats. (See page 4-16 4-17 for seat removal and installation
procedures.)
3. Remove the console. (See page 8-7-8-8
for console removal and installation
procedures.)
4. Check the parking brake lever free play.
The maximum free play is equal to one
click of the parking brake lever. If
necessary, adjust the free play as
follows.
8-37
1.Parking brake lever free play
NOTE:
The parking brake lever must be released
when checking and adjusting the parking
brake lever free play.
5. Loosen the locknut.
8-38
6.
7.
8.
9.
Periodic Maintenance and Adjustment
Brake light switch adjustment
The brake light switch, which is activated by
the brake pedal, is properly adjusted when
the brake light comes on just before braking
takes effect. If necessary, adjust the brake
light switch as follows.
1. Open the hood. (See pages 8-7 - 8-8 for
hood opening and closing procedures.)
2. Turn the adjusting nut while holding the
brake light switch in place. To make the
brake light switch in place. To make the
1. Locknut
2. Adjusting nut
brake light come on earlier, turn the
. To make
adjusting nut in direction
Turn the adjusting nut in direction
to
the brake light come on later, turn the
increase the free play or in direction
.
adjusting nut in direction
to decrease the free play.
Tighten the locknut.
Install the console.
Install the seats.
Periodic Maintenance and Adjustment
8-39
WARNING
1.
Brake light switch.
3.
Close the hood.
2.
Adjusting nut
Cable inspection and lubrication
Lubricate the inner cables and the cable
ends. If the cables do not operate smoothly,
ask a service center to replace them.
POTENTIAL HAZARD
Damaged control cables.
WHAT CAN HAPPEN
Corrosion can result when the outer
covering of control cables becomes
damaged. Cables can also become frayed
or kinked. Operation of controls could be
restricted, which could cause an accident
or injury.
HOW TO AVOID THE HAZARD
Inspect cables frequently. Replace
damaged cables.
Recommended lubricant:
Engine oil
8-40
Periodic Maintenance and Adjustment
Brake pedal and accelerator pedal
with a grease gun.
lubrication
Lubricate the pivoting parts.
Recommended lubricant:
Lithium-soap-based grease
(all-purpose grease)
Recommended lubricant:
Lithium-soap-based grease
Rear knuckle upper and lower pivot
lubrication
Lubricate the knuckle upper and lower pivots
Steering shaft lubrication
Lubricate the pivot points.
Recommended lubricant:
Lithium-soap-based grease
(all-purpose grease)
Periodic Maintenance and Adjustment
8-41
Wheel removal
Loosen the wheel nuts .
Elevate the vehicle and place a suitable
stand under the frame.
Remove the nuts from the wheel.
Remove the wheel.
1.
Nut(×4)
8-42
Periodic Maintenance and Adjustment
Wheel installation
1. Install the wheel and the nuts.
NOTE:
● The arrow mark
on the tire must
point toward the rotating direction of the
wheel.
● Tapered nuts are used for both the front
and rear wheels. Install the nut with its
tapered side towards the wheel.
1.
Tapered nut
2. Lower the vehicle so that the wheel is on
the ground.
3. Tighten the wheel nuts to the specified
torque.
Wheel nut torque:
Front:40 ft·lbf (55Nm, 5.5 m·kgf)
Rear:40 ft·lbf (55Nm, 5.5 m·kgf)
1.
Arrow mark
Periodic Maintenance and Adjustment
Battery
This vehicle is equipped with a sealed-type
battery. Therefore it is not necessary to
check the electrolyte or add distilled water in
the battery. If the battery seems to have
discharged, consult a service center.
CAUTION:
Do not try to remove the sealing caps of the
battery cells. You may damage the battery.
8-43
8-44
Periodic Maintenance and Adjustment
WARNING
POTENTIAL HAZARD
Failure to handle batteries or battery electrolyte carefully.
WHAT CAN HAPPEN
You could be poisoned. You could be severely burned by the sulfuric acid in battery
electrolyte. Batteries produce explosive gases.
HOW TO AVOID THE HAZARD
Avoid contact with skin, eyes or clothing. Always shield eyes when working near batteries.
Keep out of reach of children.
Antidote:
EXTERNAL: Flush with water.
INTERNAL: Drink large quantities of water or milk. Follow with milk of magnesia, beaten
egg or vegetable oil. Get prompt medical attention.
EYES: Flush with water for 15 minutes and get prompt medical attention. Keep batteries
away from sparks, flames, cigarettes or other sources of ignition. Ventilate when charging
or using in a closed space.
Periodic Maintenance and Adjustment
8-45
Battery maintenance
1. When the vehicle is not used for a month
or longer, remove the battery and store it
in a cool, dark place. Completely
recharge the battery before reinstallation.
CAUTION:
A special battery charger (constant
voltage/ampere or constant voltage) is
required for recharging a sealed-type battery.
Using a conventional battery charger may
shorten the battery life.
2. Always make sure the connections are
correct when putting the battery back in
the vehicle.
1. Positive battery lead
2.
Negative battery lead
Fuse replacement
The main fuse and the fuse box are located
under the hood, the ECU are located under
the seat.(See pages 8-8 for hood opening
and closing procedures. And see page 4-17
for remove seat.)
If a fuse is blown, turn off the main switch
and install a new fuse of the specified
amperage.
8-46
Periodic Maintenance and Adjustment
If a fuse is blown, replace it as follows.
a fuse.
1. Turn the key to “OFF” and turn off the
3. Remove the blown fuse, and then install
electrical circuit in question.
a new fuse of the specified amperage.
2. Remove the hood opening, then unplug
the relay assembly and open the relay
cover.
1. Screw M3 (×4)
2. Relay cover
CAUTION:
To prevent accidental short-circuiting, turn off
the main switch when checking or replacing
1. Relay assembly
3. Relay
2. Backup fuse
4. Fuse box
5. Adapter connector 3
6. Adapter connector 2
7. Adapter connector 1
8. ECU
Periodic Maintenance and Adjustment
Specified Fuse:
Main Fuse:
Headlight Fuse:
ECU Fuse:
Auxiliary DC Jack Fuse:
Signaling System Fuse:
2WD/4WD Fuse
Backup Fuse:
Speedmeter/ECU
-normal open Fuse:
8-47
WARNING
30.0A
15.0A
15.0A
10.0A
10.0A
10.0A
5.0A/10.0A/15.0A
5.0A
4. Turn the key to “ON” and turn on the
electrical circuit in question to check if
the device operates.
5. If the fuse immediately blows again, have
a service center check the electrical
system.
POTENTIAL HAZARD
Using an improper fuse
WHAT CAN HAPPEN
An improper fuse can cause damage to
the electrical system, which could lead to
a fire.
HOW TO AVOID THE HAZARD
A/ways use a fuse of the specified rating.
Never use a material in place of the
proper fuse.
Replacing a headlight bulb
If a headlight bulb bums out, replace it as
follows.
1. Lift the hood up.(See pages 8-7-8-8 for
hood opening and closing procedures.)
2. Remove the cover at the rear of the
headlight by pulling it off.
8-48
1.
Periodic Maintenance and Adjustment
Cover at the rear of the headlight
3. Remove the headlight bulb holder cover
by pulling it off.
1.
Headlight bulb holder cover
4. Remove the headlight bulb holder by
pushing it in and turning it
counterclockwise.
Periodic Maintenance and Adjustment
8-49
WARNING
1.
Headlight bulb holder
5. Remove the defective bulb by pulling it
out.
POTENTIAL HAZARD
A headlight bulb is hot when it is on and
immediately after it is turned off.
WHAT CAN HAPPEN
You can be burned, or a fire could start if
the bulb touches something flammable.
HOW TO AVOID THE HAZARD
Wait for the bulb to cool before touching
or removing it.
6. Insert a new headlight bulb into the bulb
holder by pushing it in.
8-50
Periodic Maintenance and Adjustment
turning it clockwise.
8. Install the bulb holder cover and the
cover at the rear of the headlight.
CAUTION:
Make sure the headlight bulb holder cover is
securely fitted over the bulb holder and
seated properly.
9. Close the hood.
10. Adjust the headlight beam if necessary.
1.
Do not touch the glass part of the bulb.
CAUTION:
Do not touch the glass part of the headlight
bulb to keep it free from oil, otherwise the
transparency of the glass, the luminosity of
the bulb, and the bulb life will be adversely
affected. Thoroughly clean off any dirt and
fingerprints on the headlight bulb using a
cloth moistened with alcohol or thinner.
7. Install the bulb holder by pushing it is and
Headlight beam adjustment
CAUTION:
It is advisable to have a service center make
this adjustment.
To raise the beam, turn the adjusting screw in
direction 。
To lower the beam, turn the adjusting screw
in direction .
Periodic Maintenance and Adjustment
1.
Headlight beam adjusting screw
1.
Panel A
1.
Panel B
Tail/brake light bulb replacement
If a tail/brake light bulb burns out, replace it
as follows:
1. Remove panel A (if replacing the left
tail/brake bulb) or panel B (if replacing
the right tail/brake bulb) by removing the
quick fasteners and bolts.
8-51
8-52
Periodic Maintenance and Adjustment
1.
Quick fastener(×8)
3.
Panel A
2.
Bolt(×2)
2. Remove the bulb holder(together with
the bulb)by turning it counterclockwise.
1.
Tail/brake light bulb holder
3. Push the defective bulb in and turn it
counterclockwise to remove it from the
bulb holder.
4. Push a new bulb in and turn it clockwise
to install in the bulb holder.
5. Install the bulb holder(together with the
bulb)by turning it clockwise.
6. Install the panel by installing the quick
fasteners and bolts, and then tighten the
bolts to the specified torque.
Tightening torque:
Panel bolt:
4.7 ft·lbf (6.5N·m, 0.65 m·kgf)
Periodic Maintenance and Adjustment
8-53
Imitation parts may look like genuine parts,
but they are often inferior.
Consequently, they have a shorter service
life and can lead to expensive repair bills.
Troubleshooting
Although vehicles receive a rigid inspection
before shipment from the factory, trouble
may occur during operation. Any problem in
the fuel, compression, or ignition systems
can cause poor starting and loss of power.
The troubleshooting chart describes a quick,
easy procedure for making checks. If your
vehicle requires any repair, take it to a
service center.
The skilled technicians at a service center
ship have the tools, experience, and know
how to properly service your vehicle.
WARNING
POTENTIAL HAZARD
Checking the fuel system while smoking
or near an open flame.
WHAT CAN HAPPEN
Fuel can ignite or explode, causing
severe injury or property damage.
HOW TO AVOID THE HAZARD
Do not smoke when checking the fuel
system. Make sure there are on open
flames or sparks in the area, including
pilot lights from water heaters of
furnaces.
8-54
Periodic Maintenance and Adjustment
Solution to Common Problems in Vehicle
The below tables show some common problems that may come up when you are driving a UTV,
which will help to solve these problems. To repair a UTV requires technical skills, if you cannot
repair the UTV yourself, please contact your service center.
Table 1: Solution of Common Problems in Appearance Parts and Impact Fittings.
S/N
Problems
Solutions
1. Replace whit a new plastic cover.
1
Plastic cover damaged
2. Check if support brackets are bent or deformed, repair and
re-paint if needed before replacing new plastic cover.
3. Re-apply decals and re-rivet warning labels.
1. Replace with a new bumper.
2
Bumper damaged
2. Check if support brackets are bent or deformed, repair and
re-paint if needed before replacing new bumper.
Periodic Maintenance and Adjustment
S/N
Problems
8-55
Solutions
1. Replace Front Skid Plate with a new one.
3
Damaged Front Skip Plate
2. Check if the gearbox or front differential / rear axles are
damaged or leaking.
3. Check plastic cover for damaged and replace if needed.
4
Warning labels
1. Replace damaged warning labels
8-56
Periodic Maintenance and Adjustment
Table 2:Solution of Common Problems in Brake System
S/N
Problems
Solutions
1. Check whether brake disc plates deformed or damaged.
1
Locked braking system
2. Check whether hydraulic cylinder is locked or brake clamp
assembly parts are deformed or damaged.
1. Check the disc brake pads for excessive wear.
2
Brake performance
decreases
2. Check the brake pads and rotor disc for excessive wear or
oil which might have gotten on either.
3. Check brake fluid and refill if necessary.
3
Grinding noises from front
brake or brake rotor
become red during
operation due to heat.
1. Check brake rotor for excess wear.
2. Check whether hydraulic cylinder is locked or brake clamp
assembly parts are deformed or damaged.
1. Check whether brake disc plates deformed or damaged.
4
Grinding noises from front
brake or brake rotor
become red during
operation due to heat.
2. Check whether hydraulic cylinder is locked or brake clamp
assembly parts are deformed or damaged.
3. Check if rear brake is locked and will not release. Check if
the parking brake is in the “ON” position.
Periodic Maintenance and Adjustment
S/N
Problems
8-57
Solutions
1. Check if front brakes (left and right) are applying equal force
to the right and left brake rotors.
2. Check if a lack of front brake power has caused the rear
wheels to “lock up” locked before front wheels.
5
Pulling to the left or right
during high speed braking
3. Check if the left and right absorber springs are applying the
same force and are within the specifications.
4. Check if the front wheels and front wheel axle nuts are loose
or damaged.
5. Check if the front wheel hub inner splines and front wheel
axle outer splines are worn or loose.
6. Check whether rubber washers connected to front
suspension rocker and frame are damaged.
8-58
Periodic Maintenance and Adjustment
Table 3: Solution of Common Problems in Running System
S/N
Problems
1
Steering wheel is loose
and shifts up and down
when pulled.
2
Front wheel steering
clearance excessive
Solutions
1. Check if the steering wheel nut is loose or damaged.
2. Check if the steering column clip and clip seat loose or
damaged.
3. Check if the steering column bottom end inner bearing is
damaged.
1. Check if the tie-rod and steering column locknut has
loosened or become damaged, or if the steering knuckle and
steering column locknut has loosened or is damaged.
2. Check if the tie-rod two ball joints are damaged or loose.
1. Check if the steering knuckle bearing is damaged.
2. Check if the king pin ball joint is damaged.
3
Front wheels sway during
operation
3. Check if the front wheel and axle locknut is loose or damaged.
4. Check if the front wheel hub inner splines and front wheel
axle outer splines are worn or loose.
5. Check if the rubber washers connected to front suspension
rocker arms and frame are damaged.
Periodic Maintenance and Adjustment
S/N
Problems
8-59
Solutions
1. Check if the rear axle bearings are damaged.
2. Check if the sliding bearings connected to rear axle bearing
housing and rocker arm are loose or damaged.
4
Rear wheels sway
during operation
3. Check if the rear wheel and axle locknut are loose or
damaged.
4. Check if the rear wheel hub inner splines and rear wheel
axle outer splines are worn or loose.
5. Check if the rubber washers connected to rear suspension
rocker arms and frame are damaged.
1. Check if the wheel rims are bent or deformed.
5
6
Wheels hop during oper
Shock absorbers become
soft or not comfortable
during use.
2. Check if the front and rear axles are bent.
3. Check if the tires are aging, deformed or need air.
1. Check if the vehicle is overloaded.
2. Check if the shocks need replacing.
3. Check if the shock absorbers have lost their damping force
and their travel.
8-60
S/N
Periodic Maintenance and Adjustment
Problems
Solutions
1. Check if the drive shaft spline is broken.
7
Front drive shaft makes
noise during use.
2. Check if the splines in left & right axles and front & rear drive
shafts are broken.
3. Check if the gears in rear drive shaft and reduction gear box
differential are worn.
4. Check the dust covers of universal joints in right & left drive
shafts are damaged.
Periodic Maintenance and Adjustment
8-61
Table 4: Solution of Common Problems in Electrical System
S/N
Problems
1
Lights do not work.
2
Vehicle cannot go into 4
wheel drive mode.
3
Rear differential will not
work.
4
Rear differential will not
work.
5
Meter display is not
normal.
6
Start switch on meter
board will not work.
Solutions
1. Check if the headlight switch functions well.
2. Check if the wires are broken.
3. Check if the lamps or bulbs are broken.
1. Check if the control switch on meter board works well.
2. Check if the differential lock control magneto plug in rear
reduction gear box is damaged.
3. Check if any wires are broken.
1. Check if the control switch on meter board works well.
1. Check if the differential lock control magneto plug in rear
reduction gear box is broken.
2. Check if any wires are broken.
1. Check if the sensor is damaged.
2. Check if the meter is broken.
3. Check if the surface of speed sensor is contaminated with
iron dust.
1. Check if the switch is broken.
2. Check if any wires are broken.
3. Check if the ECU is broken
8-62
S/N
Periodic Maintenance and Adjustment
Problems
Solutions
1. Check if the ECU is broken.
2. Check if the nozzle is clogged or the nozzle to the ECU
connection is disconnected.
3. Check if the engine speed signal sensor is broken.
7
EFI system
4. Check if the engine speed signal to ECU connection is
disconnected.
5. Check if the inlet pressure/temperature sensor is
damaged or the ECU connection is disconnected.
6. Check if the throttle sensor is damaged or the ECU
connection is disconnected.
7. Check if the Sub-harness (cable) of the electrical injection
is broken.
Periodic Maintenance and Adjustment
8-63
Table5: Solution of Common Problems in Engine System
S/N
Problems
1
Power or performance is
falling.
2
Popping noise in engine.
3
Engine is difficult to start
at low temperatures.
4
Coolant boils.
5
Engine cannot start.
Solutions
1. Check and clean the core of air cleaner.
2. Check muffler for partly blocked and clean spark arrestor.
1. Check air cleaner and admission line for leaks.
2. Check the connection joint of exhaust pipe with engine or
muffler for leaks.
3. Check the grade of gasoline to see if it’s too low.
1. Check if the battery voltage goes down when the
temperature goes down.
2. If the temperature is under -18Ԩ, place the vehicle in
warmer place for starting.
1. Check cooling fan of radiator for blockage by soil or dirt.
2. Check the speed sensor of radiator for damage and Check
the fan for failure.
3. Check if antifreeze meets the requirements stated in the
owners manual
1. Check the battery. A low battery can cause motor not to
star or run poorly
2. Check the starting motor for damage.
3. Check if the spark plug is fouled or burned.
4. Check if the air cleaner is blocked.
8-64
S/N
5
Periodic Maintenance and Adjustment
Problems
Engine cannot start.
6
Cylinder and cylinder
head
7
Piston and piston rings
8
Valve, camshaft and
crankshaft
Solutions
5. Check if the oil circuit is working properly.
6. Check if the exhaust system is blocked.
1. Check if the spark plug is loose.
2. Check if the cylinder head or cylinder body is loose.
3. Check if the cylinder head gasket is broken.
4. Check if the cylinder gasket is broken.
5. Check if the cylinder body is worn, damaged or seized.
1. Check for an improperly installed piston ring.
2. Check if the piston ring is worn or broken.
3. Check if the piston ring is seized.
4. Check if the piston is seized or damaged.
1. Check for an Improperly sealed valve.
2. Check for improperly connected valve and valve seat.
3. Check if the valve timing is improper.
4. Check if the valve spring is broken.
5. Check if the camshaft is seized.
Periodic Maintenance and Adjustment
S/N
Problems
9
Crankcase and
crankshaft
10
Valve gear
8-65
Solutions
1. Check if the crankcase installed improperly.
2. Check if the crankshaft is seized.
1. Check for improperly adjusted valve clearance.
2. Check for improperly adjusted valve timing.
WARNING
POTENTIAL HAZARD
Removing the radiator cap when the engine and radiator are still hot.
WHAT CAN HAPPEN
You could be burned by hot fluid and steam blown out under pressure.
HOW TO AVOID THE HAZARD
Wait for the engine to cool before removing the radiator cap. Always use a thick rag over the
cap. Allow any remaining pressure to escape before completely removing the cap.
NOTE:
If it is difficult to get the recommended coolant, tap water can be temporarily used, provided that
it is changed to the recommended coolant as soon as possible.
9-1
Electric power steering system
INTRODUCTION
Our UTV is equipped with Electric Power
Steering System (EPS). To keep reliability of
EPS during operation, please correctly use
EPS system according to the following
descriptions and keep daily inspection and
maintenance.
This chapter also provides important
information to safely use EPS system. If you
encounter any problem during operation or
maintenance, please feel free to consult your
local dealer.
ADVANTAGES OF EPS SYSTEM:
1) High efficiency. Traditional hydraulic
power steering system is connected by
mechanical and hydraulic, and it is of low
efficiency, usually only 60%-70%.
However, EPS system is connected by
mechanical and electric motor and it is
much high efficiency with up to 90%.
2) Less energy consumption. In practical
driving process of UTV, time in steering
condition is only 5% among the total
travelling time. As to hydraulic power
steering system, as long as the engine is
running, the hydraulic pump is always in
working condition, and fuel consumption
will increase 4%-6%. However, EPS
system starts the motor, only when it
needs steering, to generate power
without increasing fuel consumption.
3) The power characteristics of EPS system
can be controlled by software, so that
UTV can be satisfied with power steering
characteristics at various speeds.
4) Feeling comfortable on road. Inside of
EPS system, we use rigid connection, so
under auxiliary of start motor, the impact
of road barriers on steering wheel can be
greatly decreased.
5) No pollution to environment. For the
traditional hydraulic power steering
system, the hydraulic circuit has
hydraulic hose and fittings inside so oil
leaks may occur, and hydraulic hose is
not recycled, so this is produce pollution
to environment. However, EPS system
has not pollution to environment.
6) When engine does not start, EPS system
can also work as battery, and once
sufficient power generate, steering power
can be workable.
Electric power steering system
9-2
IMPORTANT INFORMATION
FOR SAFETY:
UTV you buy is equipped with EPS system,
please read this chapter carefully before
operating UTV, and only you are familiar with
and master enough of EPS system about
using methods and precautions information
can you start to drive your UTV.
Make inspection and maintenance on EPS
system on regular, and ensure the security
and reliability when you use your UTV.
z
Please carefully read this chapter before
operation or driving to acknowledge
completely about correct way to operate
and drive the UTV with EPS system, and
also characteristics, functions and limits
of
UTV.
Doing
inspection
and
9-3
Electric power steering system
maintenance on EPS system on regular,
correct operation and driving skills will
ensure the security and reliability of
UTV.
z
To make sure your EPS system will be
useful for a long time and no problem,
please
follow
the
method
for
maintenance in this chapter.
z
This chapter also includes detailed
disassembly
and
maintenance
information. User wants to repair by
themselves
must
have
qualified
mechanical
skills,
electronic
maintenance skills and the special tools
mentioned in the manual.
INTRODUCTION OF EPS SYSTEM
What is EPS system
The EPS system (Electric Power Steering
System) is a complete set of parts, including
a special ECU only for EPS system
(hereinafter referred to as ECU), many
sensors and actuators, by signal such as
monitoring UTV speed, the operating force of
the steering wheel, as well as temperature of
ECU and motor to provide an accurate power
torque of the motor and aligning torque. As a
result, it will have easy steering function and
soft effect of steering wheel aligning.
Typical parts of EPS system
In general, EPS system has the following
parts:
• Steering torque sensor
• Motor to generate power torque
• EPS system control unit (ECU)。
• Speed sensor。
• Temperature sensor
• Battery voltage sensor
• Mechanical reduction transmission
mechanism(Reducer)
• Gear/rack type steering gear
• Steering rod joint
• Ball stud of steering knuckle
• Steering shaft and universal joint
Electric power steering system
Construction of EPS
1. Structure chart of EPS
9-4
① Steering wheel
② Reducer
③ Motor
④ Steering transmission shaft
⑤ Universal joint
⑦ Tie rod
⑥ Tie rod joint
⑧ Steering knuckle
⑨ Steering gear
9-5
Electric power steering system
2. Steering Torque Sensor:
Install sensor on the reducer.
3. ECU:
ECU is sophisticated electronic equipment,
and controls all the power performance of
EPS, so do not repair ECU by yourself.
If any problem happens on ECU, please
contact your local dealer to repair it.
① Sensor
No change after the sensor fixed.
Sensor assembly position is certained and
can not make any change, if found sensor
postion was changed caused by bolt
looseness, please tighten the bolt and
initialize the ECU at once(See Page 9-27)
① Upper housing
② ECU unit
③ Seal ring
④ Lower housing
Installation position of ECU and reducer
① ECU
② Reducer
The installation location of the ECU will be
greatly effected by temperature changes and
external humidity. Housing has a membrane
made of Goretex material for pressure
balance between inside the shell and the
Electric power steering system
9-6
surrounding environment, but also to prevent
the parts from moisture intrusion.
Do not remove the membrane or replace by
other parts.
On the shell of ECU unit, there are sets of
electric plugs by cables and function as
follows:
• P1:supply power to EPS system
• P2:supply power to motor of EPS
• P3 : connect with cable of UTV and
transfer single that ECU required
• P4:connect with steering torque sensor,
supply power to steering torque
sensor and accept single of torque
• P5:connect with motor
9-7
Electric power steering system
Outside view of reducer
4. Reducer:
Install reducer on the frame of UTV.
Install motor and steering torque sensor on
reducer.
5. Gear/rack type steering gear
UTV use gear/rack type steering gear to
perform steering function. Steering gear was
fixed on frame.
Electric power steering system
Installation position of steering as follows:
6. Electronic connectivity diagram of EPS
system:
① ECU (with waterproof metal box)
② ECU split cable
③ Battery
④ Meter
⑤ Steering torque sensor
⑥ Motor
⑦ Speed sensor
⑧ Main switch
⑨ Fuse
9-8
9-9
Electric power steering system
7. Meter:
Meter is an important part of UTV.
Meter works together with EPS system and
monitors working condition of EPS system.
Fault can be displayed by fault indicator light
and fault indicator of EPS system, so the
driver can acknowledge fault of EPS in time
and take some measures to keep
himself/herself safe.
When fault occurs on EPS system, fault
indicator light will be lit up. At the same time,
fault indicator of EPS system will display the
fault code for maintenance.
① Fault indicator light of EPS system
② Fault indicator of EPS system
Fault code diagram
No.
Fault
code
Fault style
Fault indicator
light of EPS
system
1
F00001
1#fault of steering
torque sensor
lit
2
F00002
2#fault of steering
torque sensor
lit
3
F00006 ECU overheating
4
F00005
low voltage battery
alarm
lit
5
F00003
Dynamic motor without
power alarm
lit
6
F00011
Fault
of
sensor
lit
7
F00010 ECU non-working
speed
Electric power steering system
9-10
OPERATION AND USE OF EPS SYSTEM
EPS system operation
Operate as the following steps:
z Assembling your new UTV.
z Ensure main switch is off.
main switch
lit
lit
① Main switch
② OFF
③ ON
④ START
9-11
Electric power steering system
CAUTION:
If main switch is not off, ECU can be
destroyed by battery power in on-off
condition during the following connection
with cables.
z Use screw/nut to connect the connecting
+ and ○
- of
terminals of cables firmly to ○
battery.
①
Battery
②
Positive Wire Of Cable
③
Positive Wire Of EPS System
④
Negative Wire Of Cable
⑤
Negative Wire Of EPS System
⑥
Nut
⑦
Screw
Electric power steering system
CAUTION:
9-12
Meter
If connection terminals do not fixed, power of
ECU may be constantly on-off during UTV
driving, and finally cause ECU damaged.
z
z
z
Open main switch of UTV, and EPS
system will automatically enter into
working state.
Check the meter. If fault indicator light of
EPS system does not be lit, ECU can be
for regular use.
If fault indicator light of EPS system is lit,
that means EPS system find out some
fault during ECU self-checking process,
then you should consult your local
dealer for maintenance in time.
① Fault indicator light of EPS system
② Fault indicator of EPS system
CAUTION:
Drive UTV with faulty EPS system may
cause accident, severe injury or even death.
Never operate UTV with faulty EPS system.
9-13
Electric power steering system
z Supply steering power according to speed
UTV’s steering power can change as
different various speeds and steering angle.
EPS systems can supply different power
torque depending on the speed and steering
angle.
① T1:steering resistant torque which is checked by steering
power sensor
② T2:power torque on steering gear which is supplied by EPS
system
③ Power Torque In Static Condition
④ Power Torque At Middle Speed
⑤ Power Torque At The Highest Speed
Stationary, the maximum power torque can
make UTV U-turn or stop into place as much
as possible to ease the steering operation.
With increased speed, reduce power torque
can make UTV at high speed, to make ii
easier to maintain driving direction.
As shown, power auxiliary effect depends not
only on speed, but also steering torque
exerted by the driver. If the driver is to
impose a smaller steering torque, power
torque of the EPS system will be relatively
small. This can be achieved outstanding
auto-centering effect, that means when UTV
is in straight-line, steering system will be not
sensitive (the steering wheel does not move
from side to side).
z Fault alarm and protection function
In order to ensure EPS system can supply a
long-term, reliable working, a variety of
detection and alarm functions are set in the
ECU software program. Once fault has been
checked on EPS system, UTV can accurate
shutdown the EPS system.
Shut off the EPS system, UTV will be able to
continue to complete the steering function
through the mechanical structure of the
steering system. However, at this time the
driver will feel the turning resistance
Electric power steering system
9-14
increases, you can continue your driving of
UTV only throw a greater force to operate the
steering system.
CAUTION:
When meter indicated malfunction of EPS
system or when the driver found EPS system
operation abnormally, please do some steps
as below:
z Stop vehicles immediately, close the
main switch, open the front panel’s
repair cover, and pull up the outlet which
power supply for EPS system (See page
9-7)
z Driving UTV to dealer by lower velocity
and repair EPS system.
9-15
Electric power steering system
EPS SYSTEM’S INSPECTION,
MAINTENANCE, REPAIR:
EPS system had already inspected by strict
quality restriction before delivery, so it has
high reliability.
But if there is no inspection or maintenance
as stated time period during in use of EPS, it
may cause EPS system work abnormally or
spare parts in EPS system are damaged
abnormally.
When EPS system work wrong or get
malfunction, the malfunction warning and
fault code can be indicated on meter.
Malfunction assortment:
z During long time continuous fast
steering, especially when ambient
temperature is very high, it may cause
z
ECU radiator of high temperature, and at
this time ECU can get through detection
temperature sensor’s signal to issue
ECU over-heating failure warning’s fault
code to meter. Meanwhile, EPS system
fault indicator light is lighten.
When ECU detected 1# steering torque
sensor or 2# steering torque sensor had
fault, then it will indicate 1# steering
torque sensor fault or 2# steering torque
sensor fault code to dash board.
Meanwhile, EPS system fault indicator
light is lighten.
When ECU detected the storage batter’s
voltage is lower than 9VDC through
sensor, it will indicate the fault code of
storage battery voltage low to dash
board. Meanwhile, EPS system fault
z
z
z
indicator light will be lighten.
When ECU detected motor is out of
work through sensor, it will indicate fault
code of dynamic motor without power
warning to dash board. Meanwhile, EPS
system fault indicator light is lighten.
When ECU detected the speed sensor
had fault, it will indicate vehicle speed
sensor fault code to dash board.
Meanwhile, EPS system fault indicator
light is lighten.
When ECU detected its own fault and
can not be work normally, it will indicate
EUC stop working code to dash board.
Meanwhile, EPS system fault indicator
light is lighten.
To drive UTV at every time, need to do
Electric power steering system
9-16
daily inspection of EPS system
Before drive UTV at every time, need to do
daily inspection as following steps.
1.
Check steering system’s mechanical part
of each part’s interval.
z Check steering wheel is loosened or not.
Move steering wheel and Check whether is
loosen or with squeak through axis direction
and horizontal direction. If defection found,
repair or replace it.
Steering wheel’s
range of free
clearance is:0-15mm(0-0.59in.)
If the free clearance is over range, check
spare parts as below, any defection found,
replace it. Any defection found, replace it.
z
9-17
Electric power steering system
z Steering tie rod ball head is whether to
wear down。
z Swizzle ball of knuckle wear out or not
z Gear rack on steering wheel wear out or
not
z Spline on steering drive shaft is loosen
or not
z Between input and output shaft’s
reducer whether had idle running.
z The steering system checking in
steering process:
Turn the steering wheel from left to right and
right to left .it required smoothly and no
blocking allowed.
2. Check steering power in static condition
Let UTV stop on the level road, steering
wheel is placed in a straight forward position.
z Check tire inflation pressure whether
meet specified requirements (see tire
instructions or UTV user manual).
If necessary, refill it.
z Check front wheel’s front beam, wheel
offset positioning whether is correct (see
UTV user manual).
If necessary, adjust it.
z Open the main switch.
z Turn the steering wheel left and right
successively, turning force on both sides
should be equal.
Turn the steering wheel to rotate back and
forth; turning shall be smoothly, no block, no
recoil forces which opposite of operation
force.
If any problem found, it must driven to dealer
Electric power steering system
and repair it immediately.
3. Steering force’s checking during running
conditions:
z During running process, the feeling of
steering force to the left and right must
be consistent.
z During steering, turning shall be
smoothly, no block, no recoil force which
opposite of operation force.
z During return process, the return force is
equal to the velocity at both left and right
directions.
If any problem occurs, it must driven to
dealer and repair it immediately.
9-18
9-19
Electric power steering system
Solutions for common fault:
1. Open the main switch, no auxiliary power of left and right steering.
S/N
FAULT PHENOMENON
FAULT POINT
SOLUTION
Special fuses of ECU is
blown in fuses box (see
figure 1), Or ECU is damaged
Replace
fuses.
dealers for repair
Meter warning fault
code:F00001&F00002
Sensor is damaged or
sensor’s connector with bad
contact or ECU is damaged
To dealers for repair
Meter warning
code:F00005
Low voltage
battery
Charge storage battery,
replace it if necessary.
1
Meter warning
code:F00010
2
3
fault
fault
in
storage
To
Electric power steering system
S/N
FAULT PHENOMENON
4
Meter warning
code:F00003
5
No electrical power
connected
fault
6
No meter alarm, UTV
can electrify
7
No meter alarm
FAULT POINT
9-20
SOLUTION
Motor is damaged or driving
circuit in motor is damaged or
power motor special fuses
are blown.
Replace
fuses,
dealer for repair
Main fuses melted.
Replace fuses
ECU initialization choose pin
connector with poor contact
(sees attached figure 2), or in
the wire cable is disconnect
Reinsert well, replace
connector or repair
cables.
ECU is damaged
To dealers for repair.
to
9-21
Electric power steering system
Figure 1:Fuses box
①
ECU dedicated fuse
Electric power steering system
2. Open the main switch, only steering left or right is power-assisted.
S/N
Fault phenomenon
Fault point
9-22
Solution
1
No meter alarm
ECU damaged
To dealers for repair.
2
Meter warning fault
code : F00001 or
F00002
Sensor damaged, sensor’s
connector with bad contact or
ECU damaged
To dealer for repair.
3. All have auxiliary power to turn left or right, when turned the steering wheel is not smooth,
locked, backswing and other feelings.
S/N
Fault phenomenon
Fault point
Solution
1
Steering
system
mechanical parts has
the big gap
Steering system mechanical
parts become loose or
damaged.
Retighten loose bolts.
Replace
damaged
spare parts.
2
Mechanical
without gap
ECU damaged, or the ECU
software program has error.
To dealers for repair.
parts
9-23
Electric power steering system
4. When running, all have power-assisted to turn left or right, when return ability is slowly or
during return processing out of nimbleness.
S/N
Fault phenomenon
fault
Fault point
Solution
The speed sensor damaged,
or from meter to ECU transmit
speed signal ‘s guide wire
broken circuits or ECU
connectors is loose
Replace speed sensor.
Check
and
repair
cables.
Replace
connector assembly.
1
Meter warning
cod:F00011
2
No meter alarm
Positional
parameter
of
steering wheel (front wheel)
error.
Adjust front wheel’s
positional parameter.
3
No meter alarm
EPS system’s speed reducer
damaged
To dealers for repair.
Electric power steering system
5. All have power-assisted to turn left or right,but steering become more heavy.
S/N
Fault phenomenon
fault
9-24
Fault point
Solution
ECU radiator overheat, ECU
reduce the power of the motor’s
output torque automatically, or
ECU‘s inside temperature
alarm sensor damaged.
Remove dirt or another
covering on shell of
ECU.
To dealers for repair.
1
Meter warning
code:F00006
2
No
meter
alarm,
steering
becomes
more difficult if no
power.
Mechanical steering system’s
spare parts are damaged.
Adjust、repair damaged
spare parts.
3
No meter alarm
ECU damaged, or the ECU
software program has error.
To dealers for repair.
9-25
Electric power steering system
6. All have power-assisted to turn left or right,the power of steering to left and right is
different.
S/N
Fault phenomenon
Fault point
Solution
1
No meter alarm
Two channels’ parameters of
sensor changed
Replace sensor or go
to dealers for repair.
2
No meter alarm. No
power-assisted
the
power of steering to
left and right is
different
Mechanical steering system’s
spare parts are damaged.
Adjust、repair damaged
spare parts.
3
No meter alarm
ECU damaged, or the ECU
software program has error.
To dealers for repair.
4
No meter alarm
The initialization parameter of
ECU has error.
Restart initialization for
ECU
Electric power steering system
7. Open main switch, steering to the same direction automatically.
S/N
1
2
Fault phenomenon
No meter alarm
No meter alarm ,
Sensor no loosening.
Fault point
Sensor is loosen
The initialization parameter of
ECU has error.
Maintenance and repair’s supplemental
description:
1. Restart initialization to ECU parameter:
z Park UTV on the flat ground and keep
the front wheels to be forward always.
z Pull-out initialization selects connector.
(See Page 9-22 )
z Push UTV back and forth for several
times, and flap the wheels for several
times.
z Open the main switch and wait for 5
seconds.
9-26
Solution
To dealers for repair.
Restart initialization for
ECU
Reinsert pin connector to finish the ECU
parameter initialization process.
Then, open the main switch; check whether
the fault is removed. If it is not removed,
follow the previous steps of initialization
process. Because the different mechanical
clearance of UTV, it may require 3-5 times to
be repeated in order to get the correct
initialization parameters.
If a customer complaint" vehicle deviation", it
should take into account the fault causes not
only includes the EPS system fault, also
z
9-27
Electric power steering system
includes a chassis mechanical failure,
customers may use" Deviation" to describe a
specific situation. So four wheel alignment
need to be adjusted at first time, then ECU
replacement and repair needed.
2. The Fault of closing function
The main objective to research and develop
EPS system is needed to ensure that the
vehicle is still controlled by driver when
malfunction happened. Therefore we will not
allow
any
directions
(clockwise
or
counterclockwise) suddenly appear bigger
undesirable steering torque.
Therefore, the EPS system has many
monitoring function, used to identify the
sensor, actuator and the involvement of the
EPS
system
function
whether
is
malfunctioning. All cannot continue to
reliable accurate control motor malfunction
will lead to the interruption of motor control
ECU, then closed function of EPS system.
Close the EPS system’s bad results will also
cause the driver can not obtain power
steering.
But close measure is mainly used for
preventing error control motor.
When fault occurs, power steering disappear
is a predetermined EPS system response
characteristic. Although the driver may feel
the characteristics of some accidents, but
increases the control force, can ensure the
vehicle steering performance is not affected.
Neither the EPS steering system nor
hydraulic power steering system, when fault
occurs, power steering will disappear. When
a fault occurs, the two systems reaction will
be similar. This fault occurs, EPS system
fault indicator light inside of meter will be
lighten. If above circumstances happened,
EPS system will be no power steering, and
through the instrument to show the
corresponding fault code and remind driver
to take care.
3. The software function forms’ limit position
Although the mechanical structure of the
EPS system has mechanical limit position, it
is still possible for EPS system to realize the
function of decreasing steering power before
reaching the mechanical limit position in form
of slope curve. Although the customer will
feel the steering resistance increases, when
turned to the limited position process will
Electric power steering system
9-28
become obviously more smoothly.
In addition, it can also reduce the steering
system’s
mechanical
and
electrical
components’ load, which helps in obtaining
reliable function and long service life.
EPS system Periodic maintenance
For primary use after 50 hours, adjust EPS
system part of parameters according to the
steering system’s clearance variation and
chassis changes.
Please go to the dealer for alignment.
For every 100 hours using time, according to
the steering system and the chassis changes,
adjust EPS system relevant parameters.
9-29
Electric power steering system
CAUTION:
Before adjust ECU for every time, please
check the clearance of mechanical part and
adjust four wheels fixed position of UTV.
EPS SYSTEM PARAMETER TABLE
EPS system basic technical parameters
EPS system working conditions
1. Working environment temperature:
-40℃~+85℃
2. Working voltage:(9~16V) DC
3. The seal type:IP65
4. Input shaft rotation angle:
large than ±1.25rmp
5. Wheel rotation speed:
10round/min~15round/min
Motor assy basic parameters
z Type: DC permanent magnet control
motor
z Rated working time: 3 min/per time
z Rated power:170W(nominal value)
z Rated operational voltage: 12V DC
z Rated motor revolving speed :
(1050r±300r)/min
z Rated operational current:30A±3A
Rated output torque :1.6N·m±0.16N·m
Cleaning and Storage
10-1
Cleaning
Frequent, thorough cleaning of your vehicle
will not only enhance its appearance but also
will improve its general performance and
extend the useful life of many components.
1. Before cleaning the vehicle:
a. Block off the end of the exhaust pipe to
prevent water entry. A plastic bag and
strong rubber band may be used.
b. Make sure the spark plug and all filler
caps are properly installed.
2. If the engine case is excessively greasy,
apply degreaser with a paintbrush. Do
not apply degreaser to the wheel axles.
3. Rinse the dirt and degreaser off with a
garden hose. Use only enough pressure
to do the job.
CAUTION:
Excessive water pressure may cause water
seepage and deterioration of wheel bearings,
brakes, transmission seals and electrical
devices. Many expensive repair bills have
resulted from improper high-pressure
detergent applications such as those
available in coin-operated car washes.
4. Once the majority of the dirt is hosed off,
wash all surfaces with warm water and
mild, detergent-type soap. An old
toothbrush or bottlebrush is handy for
hard-to-get-at places.
5. Rinse the vehicle off immediately with
clean water and dry all surfaces with a
10-2
Cleaning and Storage
chamois, clean towel or soft absorbent
cloth.
6. Clean the seats with vinyl upholstery
cleaner to keep the cover pliable and
glossy.
7. Automotive type wax may be applied to
all painted and chrome plated surfaces.
Avoid combination cleaner waxes as
many contain abrasives that may scratch
the paint or protective finish. When
finished, start the engine and let it idle for
several minutes.
WARNING
POTENTIAL HAZARD
Operation with wet brakes after washing.
WHAT CAN HAPPEN
Wet brakes may have reduced stopping
ability, increasing the chance of an
accident.
HOW TO AVOID THE HAZARD
Test the brakes after washing. Apply the
brakes several times at slow speeds to let
friction dry out the linings.
Cleaning and Storage
Storage
Long-term storage (60 days or more) of your
vehicle will require some preventive
procedures to guard against deterioration.
After thoroughly cleaning the vehicle,
prepare for storage as follows:
1. Fill the fuel tank with fresh fuel and add
the specified amount of Fuel Stabilizer
and Conditioner or equivalent product.
Operate the vehicle for at least 5 minutes
to distribute treated fuel through the fuel
system.
2. Drain the fuel from the fuel system as
much as possible and pour the drained
fuel into the fuel tank.
10-3
Specified amount:
1 oz of stabilizer to each gallon of fuel (or
7.5 ml of stabilizer to each liter of fuel)
NOTE:
Use of fuel stabilizer and conditioner
eliminates the need to drain the fuel system.
Consult a service center if the fuel system
needs to be drained instead.
3. Remove the spark plug, pour about one
tablespoon of SAE 10W40 or 20W40
motor oil in the spark plug. Ground the
spark plug wire and turn the engine over
several times to coat the cylinder wall
with oil.
4. Lubricate all control cables.
5. Block up the frame to raise all wheels off
the ground.
10-4
Cleaning and Storage
6. Tie a plastic bag over the exhaust pipe
outlet to prevent moisture from entering.
7. If storing in a humid or salty atmosphere,
coat all exposed metal surfaces with a
light film of oil. Do not apply oil to any
rubber parts or the seat covers.
8. Remove the battery and charge. Store it
in a dry place and recharge it once a
month. Do not store the battery in an
excessively warm or cold place (less
than 32°F (0°C) or more than 86°F
(30°C)).
NOTE:
Make any necessary repairs before storing
the vehicle.
Specifications
Model
Dimensions:
Overall length
Overall width
Overall height
Seat height
Wheelbase
Ground clearance
Minimum turning radius
Basic weight with oil and full fuel tank
Engine:
Engine type
Cylinder arrangement
Displacement
Bore × stroke
Compression ratio
Starting system
Lubrication system
HS500UTV-4/HS500UTV-3
3010mm (118.5 in)
1460m m (57.5 in) for HS500UTV-4
1670m m (65.7 in) for HS500UTV-3
1940mm (76.4 in)
818mm (32.2 in)
1890mm (74.4 in)
280mm (11.0 in)
3900mm (154 in)
543 kg (1,197 l b)
Liquid cooled 4-stroke, Water cool
Forward-inclined single cylinder
3
471cm
84.5×84.0mm
9.4:1
Electric starter
Wet sump
11-1
11-2
Specifications
Model
HS500UTV-4/HS500UTV-3
Engine oil:
Type
Recommended engine oil classification
API service SG type or higher, JASO standard MA
CAUTION:
Quantity:
Without oil filter cartridge replacement
With oil filter cartridge replacement
In order to prevent clutch slippage(since the engine
oil also lubricates the clutch ), do not mix any
chemical additives. Do not use oils with a diesel
specification of “CD” or oils of a higher quality than
specified. In addition, do not use oils labeled
“ENERGY CONSERVING Ⅱ” or higher.
1.90L (2.01 qt )
2.10L (2.22 qt )
Specifications
Model
HS500UTV-4/HS500UTV-3
Final gear case oil:
Type
SAE80 API GL-4 Hypoid gear oil
Quantity:
0.25L (0.26 qt )
Differential gear case oil:
Type
SAE80 API GL-5 Hypoid gear oil
Quantity:
0.32L (0.34 qt )
Radiator capacity(including all routes):
2.50L (2.64 qt )
Air filter:
Engine
Wet element
Intake duct
Dry element
Fuel:
Type
Unleaded gasoline only
Fuel tank capacity
29 L (7.6 gal )
Throttle valve:
Type/quantity
DELPHI / MT05
11-3
11-4
Specifications
Model
HS500UTV-4/HS500UTV-3
Spark plug:
Type
DR8EA
Spark plug gap
0.6-0.7 mm (0.023-0.027 in)
Clutch type:
Wet, centrifugal automatic
Transmission:
Primary reduction system
V-belt
Secondary reduction system
Shaft drive
Secondary reduction ratio
Transmission type
V-belt automatic
Operation
Right hand operation
Reverse gear
1.471
Sub transmission ratio
low
2.059
High
1.238
Chassis:
Frame type
Steel tube frame
Caster angle
5.0°
Trail
26.0mm (1.02 in )
Specifications
Model
HS500UTV-4/HS500UTV-3
Tire:
Tubeless
Type
Size
Brakes:
Ⅰ:
Front brake
Rear brake
Ⅱ:
Front brake
Rear brake
Suspension:
Front / rear suspension
front
25×8-12
rear
25×10-12
Type
Operation
Type
Operation
Type
Operation
Type
Operation
Dual disc brake
Foot operation
Single disc brake
Foot operation
Dual disc brake
Foot operation
Dual disc brake
Foot operation
Double wishbone
11-5
11-6
Specifications
Model
Shock absorber:
Front shock absorber
HS500UTV-4/HS500UTV-3
Coil spring/oil damper for HS500UTV-4
Coil spring/oil or airbag damping for HS500UTV-3
Rear shock absorber
Wheel travel:
Front wheel travel
Rear wheel travel
Electrical:
Ignition system
Generator system
Battery type
Battery capacity
Bulb voltage, wattage × quantity:
Headlight
Tail/brake light
Coil spring/oil damper for HS500UTV-4
Coil spring/oil or airbag damping for HS500UTV-3
130mm (5.12in)
150mm (5.91in)
ECU
AC magneto
U1L-11 or GSU1-9
12V32.0Ah or 12V30.0Ah
12V30.3W/30.0W × 2
12V5.0W/21.0W × 2
Specifications
Model
Indicator lights:
Neutral / Reverse indicator light
Coolant temperature warning light
Parking brake indicator light
On-Command four-wheel-drive/differential gear
lock indicator
On-Command differential gear lock indicator light
High-range/ Low-range indicator light
Main Fuse:
Headlight Fuse:
ECU Fuse:
Auxiliary DC Jack Fuse:
Signaling System Fuse:
2WD/4WD Fuse
HS500UTV-4/HS500UTV-3
LED
LED
LED
LED
LED
LED
30.0A
15.0A
15.0A
10.0A
10.0A
10.0A
11-7
12-1
Fault Code of Electronic Injection System
Fault Code of Electronic Injection System
DTC
DTC Description
Number
Related Calibration
HEX
DEC
P0107
MAP Circuit Low Voltage or Open
KsDGDM_MAP_ShortLow
107
263
P0108
MAP Circuit High Voltage
KsDGDM_MAP_ShortHigh
108
264
P0112
IAT Circuit Low Voltage
KsDGDM_IAT_ShortLow
112
274
P0113
IAT Circuit High Voltage or Open
KsDGDM_IAT_ShortHigh
113
275
KsDGDM_CoolantShortLow
117
279
KsDGDM_CoolantShortHigh
118
280
P0117
P0118
Coolant/Oil Temperature Sensor Circuit
Low Voltage
Coolant/Oil Temperature Sensor Circuit
High Voltage or Open
P0122
TPS Circuit Low Voltage or Open
KsDGDM_TPS_ShortLow
122
290
P0123
TPS Circuit High Voltage
KsDGDM_TPS_ShortHigh
123
291
P0131
O2S 1 Circuit Low Voltage
KsDGDM_O2_1_ShortLow
131
305
Fault Code of Electronic Injection System
12-2
P0132
O2S 1 Circuit High Voltage
KsDGDM_O2_1_ShortHigh
132
306
P0031
O2S Heater Circuit High Voltage
KsDGDM_O2_HeaterShortHigh
31
49
P0032
O2S Heater Circuit Low Voltage
KsDGDM_O2_HeaterShortLow
32
50
P0201
Injector 1 Circuit Malfunction
KsDGDM_INJ_CYL_A_Fault
201
513
P0202
Injector 2 Circuit Malfunction
KsDGDM_INJ_CYL_B_Fault
202
514
P0230
FPR Coil Circuit Low Voltage or Open
KsDGDM_FPP_CircuitShortLow
230
560
P0232
FPR Coil Circuit High Voltage
KsDGDM_FPP_CircuitShortHigh
232
562
P0336
CKP Sensor Noisy Signal
KsDGDM_CrankNoisySignal
336
822
P0337
CKP Sensor No Signal
KsDGDM_CrankNoSignal
337
823
P0351
Cylinder 1 Ignition Coil Malfunction
KsDGDM_EST_A_Fault
351
849
P0352
Cylinder 2 Ignition Coil Malfunction
KsDGDM_EST_B_Fault
352
850
P0505
Idle Speed Control Error
KsDGDM_IdleControl
505
1285
P0562
System Voltage Low
KsDGDM_SysVoltLow
562
1378
12-3
Fault Code of Electronic Injection System
P0563
System Voltage High
KsDGDM_SysVoltHigh
563
1379
P0650
MIL Circuit Malfunction
KsDGDM_MIL_Circuit
650
1616
P1693
Tachometer Circuit Low Voltage
KsDGDM_TAC_Circuit_Low
1693
5779
P1694
Tachometer Circuit High Voltage
KsDGDM_TAC_Circuit_High
1694
5780
P0137
O2S 2 Circuit Low Voltage
KsDGDM_O2_2_ShortLow
137
311
P0138
O2S 2 Circuit High Voltage
KsDGDM_O2_2_ShortHigh
138
312
P0038
O2S Heater 2 Circuit High Voltage
KsDGDM_O2_HeaterShortHigh
38
56
P0037
O2S Heater 2 Circuit Low Voltage
KsDGDM_O2_HeaterShortLow
37
55
P0500
VSS No Signal
KsDGDM_VSS_NoSignal
500
1280
P0850
Park Neutral Switch Error
KsDGDM_ParkNeutralSwitch
850
2128
P0445
CCP short to high
KsDGDM_CCP_CircuitShortHigh
445
1093
P0444
CCP short to low/open
KsDGDM_CCP_CircuitShortLow
444
1092
P0171
BLM Max Adapt(Kohler Special)
KsFDIAG_BLM_MaxAdapt
171
369
P0172
BLM Min Adapt(Kohler Special)
KsFDIAG_BLM_MinAdapt
172
370
P0174
PE System Lean(Kohler Special)
KsFDIAG_PESystLean
174
372
Hisun Motors Corp., U.S.A.
Emission Control System Warranty Statement
13-1
YOUR WARRANTY RIGHTS AND OBLIGATIONS
Hisun Motors Corp., U.S.A. (hereinafter “HISUN”) is pleased to explain the emission control system
warranty on your Off-Road ATV or UTV vehicle. New off-road motor vehicles must be designed, built
and equipped to meet California’s anti-smog standards. HISUN must warrant the emission control system
on your vehicle for 5,000 km, or at least 30 months, whichever comes first, provided that there has been no
abuse, neglect or improper maintenance of your vehicle. This off-road vehicle was designed to meet the
emission standards for 10,000 km, or five years, whichever comes first.
Your emission control system warranty covers components whose failure would increase an engine’s
emissions of any regulated pollutant
Where a warrantable condition exists, HISUN will repair your vehicle at no cost to you, including diagnosis,
parts and labor.
If an emission-related part on your vehicle is defective, the part will be repaired or replaced by HISUN. This
is your EMISSION CONTROL SYSTEM WARRANTY.
NOTICE! Use of any HISUN brand vehicle in any type of competitive event completely and absolutely
voids this and all other warranties offered by HISUN.
OWNER’S WARRANTY RESPONSIBILITIES
As the vehicle owner, you are responsible for the performance of the required maintenance listed in your
owner’s manual. HISUN recommends that you retain all receipts covering maintenance on your vehicle,
but HISUN cannot deny warranty solely for the lack of receipts or for your failure to ensure the performance
of all scheduled maintenance.
You are responsible for presenting your vehicle to the HISUN dealer as soon as a problem exists. The
warranty repairs should be completed in a reasonable amount of time, not to exceed 30 days.
Hisun Motors Corp., U.S.A.
Emission Control System Warranty Statement
13-2
As the vehicle owner, you should be aware that HISUN may deny your warranty coverage if your vehicle or
a part has failed due to abuse, neglect, improper maintenance or unapproved modifications.
If you use your vehicle in any type of competitive event, this warranty is immediately and completely void.
If you have any questions regarding your warranty rights and responsibilities, you should contact Hisun
Motors Corp., U.S.A., 1434 Patton Place, Ste. 106, Carrollton, TX 75007, 972-446-0760, U.S.
Environmental Protection Agency at 2000 Traverwood Drive, Ann Arbor, MI 48105, or (for California registered
off-road vehicles only) the California Air Resources Board at 9528 Telstar Avenue, El Monte, CA 91731.
YOUR WARRANTY RIGHTS AND OBLIGATIONS
Hisun Motors Corp., U.S.A. warrants that each HISUN brand off-road vehicle:
A. is designed, built and equipped so as to conform at the time of initial retail purchase with all
applicable regulations of the United States Environmental Protection Agency, and the California Air
Resources Board; and
B. is free from defects in material and workmanship which cause such vehicle to fail to conform to
applicable regulations of the United States Environmental Protection Agency or the California Air
Resources Board for the periods specified above.
I. Coverage. Warranty defects shall be remedied during customary business hours at any
authorized HISUN dealer located within the United States of America in compliance with the Clean
Air Act and applicable regulations of the United States Environmental Protection Agency and the
California Air Resources Board. Any part or parts replaced under this warranty shall become the
property of HISUN.
II. Limitations This Emission Control System Warranty shall not cover any of the following:
A. Repair or replacement as a result of
(1) accident,
Hisun Motors Corp., U.S.A.
Emission Control System Warranty Statement
13-3
(2) misuse,
(3) repairs improperly performed or replacements improperly installed, unless performed by a HISUN
authorized dealer,
(4) use of improper replacement parts or accessories not conforming to
specifications set forth by HISUN, which adversely affect performance and/or
(5) Use in competitive racing or related events.
B. Inspections, replacement of parts and other services and adjustments required for required
maintenance.
C. Any vehicle equipped with an odometer or hour meter on which the odometer mileage or
hour meter reading has been changed so that actual mileage cannot be readily determined.
III. Limited Liability
A. The liability of HISUN under this Emission Control System Warranty is limited solely to the
remedying of defects in material or workmanship by an authorized HISUN dealer at its
place of business during customary business hours. This warranty does not cover
inconvenience or loss of use of the vehicle or transportation of the vehicle to or from the
HISUN dealer. HISUN shall not be liable for any other expenses, loss or damage, whether
direct, incidental, consequential or exemplary arising in connection with the sale or use of
or inability to use the HISUN brand vehicle for any purpose. Some states do not allow the exclusion or
limitation of any incidental or consequential damages, so the above limitations may not apply to you.
B. No express emission control system warranty is given by HISUN except as specifically set
forth herein. Any emission control system warranty implied by law, including any warranty
of mechanability or fitness for a particular purpose, is limited to the express emission
control system warranty terms stated in this warranty. The foregoing statements of
warranty are exclusive and in lieu of all other remedies. Some states do not allow limitations on how long an
implied warranty lasts, so the above limitations may not apply to you.
Hisun Motors Corp., U.S.A.
Emission Control System Warranty Statement
13-4
C. No dealer is authorized to modify this Limited Emission Control System Warranty issued by
HISUN.
IV. LEGAL RIGHTS. This warranty gives you specific legal rights, and you may also have other rights
which vary from state to state.
V. This warranty is in addition to the limited vehicle warranty.
VI. ADDITIONAL INFORMATION. Any replacement part that is equivalent in performance and
durability may be used in the performance of any maintenance or repairs by the owner. However, HISUN
is not liable for these parts. The owner is responsible for the performance of all required maintenance.
Such maintenance may be performed at a service establishment or by any individual. The warranty period
begins when the vehicle is placed into service.
If you have any questions regarding your warranty rights and responsibilities, you should contact Hisun
Motors Corp., U.S.A., the U.S. Environmental Protection Agency at 2000 Traverwood Drive, Ann Arbor, MI
48105, or (for California registered off-road vehicles only) the California Air Resources Board at 9528
Telstar Avenue, El Monte, CA 91731.
Hisun Motors Corp., U.S.A.
1434 Patton Place, Ste. 106
Carrollton, TX 75007
Phone: 972-446-0760
Fax: 972-446-0765
HISUN MOTORS
1434 Patton Place
Suite 106
Carrollton, Texas 75007
PH
TF
(972) 446-0760
(877) 838-6188
www.hisunmotors.com