1
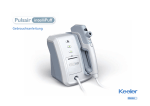
Instructions for use
Home
Back
Next
Contents
1. Copyright and Trademarks
11. Preparing the patient
2. Introduction
12. Taking the reading
3. Symbols
13. Display examples
4. Warnings and cautions
14. Printing
5. Cleaning instructions
15. Replacing the printer paper
6. Power supply assembly
16. User menu options
7. Wall mounting
17. Calibration, maintenance and inspection
8. Tonometry pressure variations in the
human eye
9. Names of controls and components
18. Specifications and electrical ratings
19. Accessories
20. Contact and disposal information
10. Measurement procedures
Please click on the contents to go straight to your chosen section or navigate by using the 'Next'
and 'Back' buttons to the right. Clicking on 'Home' will bring you back to this page.
As part of our policy for continued product development we reserve the right to amend specifications at any time without prior notice.
Home
Back
Next
Copyright and Trademarks
The information contained within this manual must not be
Description of the product
reproduced in whole or part without the manufacturer’s prior
The Keeler Pulsair intelliPuff is an “air puff” Tonometer designed
written approval.
to accurately measure Intra Ocular Pressure (IOP) without making
contact with the surface of the eye.
The manufacturer reserves the right to make changes to
specifications and other information contained in this document
Air impulse tonometry is a variant of the general applanation
without prior notice.
tonometry in which a portion of the cornea is flexed by
mechanical stimuli in which the force/pressure required to
Pulsair intelliPuff™ is a registered Trademark of
produce the flexing effect is related to the intraocular pressure.
Keeler Limited 2007.
The air puff technique requires directing a calibrated quantized
Copyright © Keeler Limited 2007.
packet of air towards the central portion of the cornea, and the
detection of the pre-defined deformation of the cornea through
Published in the UK. April 2007.
optical means and reflections from the corneal surface.
Please read and follow these instructions carefully.
Home
Back
Next
Introduction
Thank you for purchasing the Keeler Pulsair
intelliPuff™.
The product has been designed and manufactured to
ensure that you will enjoy many years of
trouble free and safe use.
Please follow the User Instructions to
ensure optimum performance.
Home
Back
Next
Symbols
Read user instructions for Warnings, Cautions and
additional information.
The CE mark on this product indicates it has been
0088
tested to and conforms with the provisions noted
within the 93/42/EEC Medical Device Directive.
Double insulated.
Type BF protections against shock.
Home
Back
Next
Warnings and cautions
Caution
Warning
• Do not use if the product is visibly damaged and periodically • The product has been designed to function safely when at an inspect for signs of damage.
ambient temperature between +10ºC and +35ºC.
• Do not use in the presence of flammable gases.
• Use correct Keeler power supply.
• This product should not be immersed in fluids.
• Keep out of the reach of children.
• Do not fit mains power adapter into a damaged mains
• To prevent condensation from forming, allow instrument to outlet socket.
come to room temperature before use.
• Route power cords safely to eliminate risk of tripping or • Only mount on wall according to Keeler Instructions.
damage to user.
• Federal law restricts this device to sale by or order of a physician.
• Only use approved Keeler power supply EP39-32777
Home
Back
Next
Cleaning instructions
Only manual non-immersion cleaning as described should
be used for this instrument. Do not autoclave or immerse in
cleaning fluids. Always disconnect power supply from source
before cleaning.
a Wipe the external surface with a clean absorbent, non-
shedding cloth dampened with a water / detergent solution (2% detergent by volume) or water / isopropyl alcohol solution (70% IPA by volume). Avoid optical surfaces.
b Ensure that excess solution does not enter the instrument.
Use caution to ensure cloth is not saturated with solution.
c Surfaces must be carefully hand-dried using a clean non-
shedding cloth.
d Safely dispose of used cleaning materials.
Home
Back
Next
Power supply assembly
Set Plug
Replace the blanking plate with the appropriate mains plug
adapter if required, or use IEC 60320 TYPE 7 connector
(not supplied).
IEC 60320 TYPE 7 connector
Home
Back
Next
Wall mounting
Your Pulsair intelliPuff is supplied with a sturdy wall mounting
bracket.
1. The bracket has four holes allowing it to be securely fixed to an appropriate wall or vertical surface.
2. Choose carefully the intended location for your intelliPuff with
particular consideration to health and safety aspects, for example the routing of the power lead, and it’s position in regard to the user and the patient.
3. Use the wall mounting bracket as a template and clearly mark the position of the holes in the wall. Ensure that there are no live utilities where you are to drill.
4. Drill the appropriate size holes for the screws and rawplugs supplied.
5. Attach the plate securely to the wall.
6. Carefully locate the mounting pegs of the plate to the key
holes on the back of your Pulsair intelliPuff and allow the Pulsair be lowered into its final and secure position.
Home
Back
Next
Tonometry, pressure variations in the human eye
The Keeler Pulsair intelliPuff measures intra-ocular pressure by
automatically releasing a gentle puff of air onto the cornea.
This is known as an event.
An single reading can sometimes be misleading as the IOP will
vary as a result of pulse, respiratory and diurnal fluctuations. In
addition blinking, squeezing, fluid intake, physical activity, body
position and even the direction of gaze can influence IOP.
Up to 4 readings may be required in order to reduce the impact
of these variants to a constant IOP.
Pulsair intelliPuff software will recognise the readings and give
a sound notification when two consecutive readings are +/1mmHg of each other indicating that further measurements may
not be required.
Home
Back
Next
Names of controls and components
1. On off push button
7. Forehead rest
To turn the intelliPuff on, push the on off button –
Push to release, or push to return the
a green LED will indicate the unit is on.
forehead stabiliser to its discrete position.
To turn off the intelliPuff, push the on off button –
the green LED will go out.
2. Test eye
This is useful for user training; it will not return an IOP measurement.
7
8. Right (OD) / Left (OS) indicators
These will indicate the eye to be
measured; the OD/OS button will
toggle between these indicators.
3. Printer active LED
When lit, this indicates the printer is activated; replacing the handset in the cradle will force a print. Alternatively a print can
2
be forced at any time using the print button on the handset.
1
8
3
4. Printer cover
Access to the printer paper is via this cover, use your finger in the lip on the top of the cover and gently pull towards you to open the printer cover.
4
5. Serial port
5
The serial port is used for calibration, systems checking and 6
data output (located on rear of instrument).
6. Power input
Insert the low voltage power lead (located on rear of instrument) use only Keeler power supplies.
Home
Back
Next
Names of controls and components
9. Display
When all the required readings have been taken the figure The display shows the recorded IOP reading and the averaged displayed is the IOP that is recorded for the patient. IOP reading.
When two consecutive readings are within 1mmHg an audible sound will be heard indicating that sufficient readings may After the first reading is taken the display shows the measured IOP. After each of the consecutive reading is taken the display shows the average of the readings taken so far, i.e. the first figure displayed is the actual reading, the second figure is an average of the first two readings etc., up to a maximum of
4 readings per eye.
Note: The displayed figure is rounded to the nearest whole number or displayed to one decimal place depending on the user setting accessed via the menu.
The displayed average is based on the actual readings which are taken to one decimal place. For example, readings of 15.4,
16.3, 14.2 and 16.9 are averaged by adding them together
which equals 62.8 and dividing by the number of readings taken, 4. This gives a final figure of 15.7, or 16 depending on user settings.
have been taken.
9
8
Home
Back
Next
Names of controls and components
Main control buttons
10.Print / Menu button
A press of less than one second will print the acquired data; press and hold for more than 3 seconds to access the menu and sub menu functions.
11.Review button
13.OD / OS button
‘Menu Change button’
This toggles between
recording data for the left
or right eyes. This button also
is used to toggle through 11
12
the menu options when in
13
menu mode, refer to section
17 for full instructions.
15
14
10
16
You can review the readings taken at any time:
Press the Review button. The display shows the readings
taken in the order they were taken, the final figure
14.Eyepiece
displayed is the cumulative average, the IOP.
The Eyepiece allows the user to view the patient’s eye and The Pulsair memory is retains a rolling four readings, per
align the targeting system.
eye. New readings automatically replace the oldest.
To review the other eye, press the OD/OS button once
The puff tube and puff lens is the part of the Pulsair intelliPuff and then press the review button.
through which the Pulsair is aligned and a gentle puff of air is To clear the memory you can either replace the hand unit in emitted.
the holster and remove again or press the Demo button.
12.Demo button
The demo button will produce a sample puff to demonstrate to a patient the softness of the puff and alleviate any apprehension.
15.Puff tube and lens
16.Alignment LEDs
The two green LED’s located on the front of the hand unit act as a guide when you are lining up
the patients eye to take a reading.
Home
Back
Next
Measurement procedures
4
5
Prepare the device
2
6
1. Plug in the power supply cord to the instrument. The power
socket is located at the rear of the instrument.
3
2. Turn the instrument on using the on off push switch located on
the front of the instrument.
3. Lift the handpiece from the cradle.
1
4. Remove the red protective dust cap from the puff tube.
5. When the hand unit is removed from the holster the two green LED’s on
the front illuminate, and the pump starts, the intelliPuff will perform a system check, when complete the display will read ‘OK’, refer to section
14 for a full list of display data.
6. Before using the Pulsair intelliPuff press the Demo button to dispel any
minute particles of dust or moisture which may have settled whilst the Pulsair intelliPuff was not in use.
Pull out short form
instructions
7
7. Align the handpiece with the patients cornea – the Pulsair will automatically fire when correctly aligned.
Note: For quick alignment reference, please refer to the short form instructions located at the
rear of the instrument and accessed by using the pull out tab on the back left hand side.
Home
Back
Next
Preparing the patient
Before using the Pulsair intelliPuff you should make your patient
Before taking a reading you should:
feel at ease and ensure they are located in an optimum reading
location, preferably with their head supported. This is because
1. Ask the patient to blink to ensure a good and reflective
apprehension and nervousness may adversely affect the readings
tear film.
obtained. Follow the points outlined below to achieve this:
2. Ensure the patient and instrument optics are not positioned 1. Ensure that the patient is comfortable and in a relaxed under direct lighting (i.e. spot lights or sunlight).
position.
3. Ensure the patient’s eyes are fully opened. This helps to
2. Ask the patient to remove their contact lenses or spectacles if prevent squeezing, where the patient unconsciously tenses their eyelids and increases IOP.
worn and to blink and breathe normally.
3. In order to reassure the patient, you can demonstrate the 4. Throughout the reading process, you should:
procedure, using the Demo button, on the back of the Allow the patient to blink at intervals in order to maintain
patient’s hand prior to taking a reading.
the corneal tear film.
Home
Back
Next
Taking the reading
Once the Pulsair intelliPuff and the patient are
prepared, you are ready to take a reading.
7. Move closer. At a distance of approximately 15mm,
a black cross on red or ‘bow tie’ image appears.
1. The Pulsair intelliPuff is set to automatically select the right Centre this image (on the central bar) and the
eye as the first eye to be measured. If you wish to select the Pulsair intelliPuff fires.
left eye, press the OD/OS button on the hand unit.
8. Once you have taken a reading, remain in the operating position; 2. Lift the hand unit, the pump starts and the two green LED’s wait a few seconds for the air chamber to refill. When the ‘bow
tie’ image appears Pulsair intelliPuff takes a subsequent reading. When two successive readings within 1mmHg of each other 3. From a distance of about 30 cms (12 inches), look
are recorded, a sound may be emitted (if sounds are enabled in the menu settings). If successive readings of within 1mmHg of each other are not obtained, Keeler recommend taking up to four readings.
illuminate.
through the eyepiece and locate the patient’s eye.
4. Slowly move closer to the patient, maintaining
alignment. Support the Pulsair intelliPuff against your
free hand and/or use the ‘pop out’ forehead stabilizer.
Continued on next page
5. Continue to move in slowly towards the patient,
two green dots appear.
6. Continue to move closer, a red reflex appears.
Home
Back
Next
Taking the reading
9. When two consecutive readings are within 1mmHg an audible sound will be heard indicating that sufficient readings may have been taken.
10.If a reading is recorded as a non event or bad event,
a bad event long high pitch tone will be heard.
11.The first reading will be the measured value; successive readings will display the running average IOP. Outlying or spurious readings will automatically be excluded from the calculation.
12.At any time the review button will allow you to view the individual readings.
13.If the unit does not fire, repeat step 3-7.
To measure the other eye, press the OD/OS button on the hand
unit and repeat processes 3 - 7.
Home
Back
Next
Display examples
The unit will display STBY when power is on.
When a pressure (IOP) of greater than 25mmHg is detected, the
unit will display >25, the puff intensity will automatically be
increased from the soft puff to the normal puff level for
subsequent measurements.
The unit will display ‘wait’ for one second while the system initialises.
The unit will perform regular self tests – if a possible discrepancy
When no fault is found, OK is displayed and the unit
in operating parameters is suspected the ‘run self test’ message
defaults to measure the right eye OD.
will be displayed for up to 15 seconds. To continue to use the unit
press the OD/OS button to clear the message. The results displayed
thereafter may be suspect. Refer to the user menu options section
in this manual for guidance on running the self test.
Shows first reading of 14mmHg.
The LED OD/OS indicator shows which eye the reading relates to.
Display shows error.
(Signified by a long high pitch sound).
If 0.1 significant figure is selected using the menu options.
In this case there is no indication on the display that the
reading is the first or average of more than 1.
Home
Back
Next
Printing
The results can be printed by pressing the print button on the
handpiece, or if the user menu is set to automatically print by
replacing the handpiece in the cradle.
Sample print
Name:
The reading in brackets (20) indicates a discarded value (not
Date:
taking into account in the average calculations).
Time:
The Name, Date and Time fields are to be manually written in by
Right Eye:
the operator.
Avg IOP: 10.4 mmHg
Data: (20), 10, 10, 10
Average is printed in XX.X and data in only 2 digits.
Only the last 4 of data on each eye are printed.
Left Eye:
Avg IOP: 10.5 mmHg
Data: 10, 11, 10, 10
Home
Back
Next
Replacing the printer paper
1. Access to the printer paper is via the printer cover, use your finger in the lip on the top of the cover and gently pull towards you to open the printer cover.
Remove the empty paper roll.
2
3
2. Place the new roll of paper into the paper holder, making sure the free end is loose at the top of the roll.
3. Feed the free end of paper through the gap in the cover.
4. Close the cover.
1
Home
Back
Next
User menu options
1. With the unit switched on and the handpiece removed, press and
IntelliPuff levels
Clinical (CLIN) Clinical mode will give the most accurate IOP
hold menu button for more than 3 second to enter the user menu.
2. The display will show the first user option and the current selection i.e. [prnt off] or [prnt on].
measurement possible with this hand-held Tonometer. In this
mode, precise alignment is essential in order to satisfy the firing
criteria. It is recommended to set the IOP format to xx.x when
3. To change the user option, press the CHANGE button once, in this mode.
‘toggling’ the CHANGE button will cycle through the option(s).
4. Pressing the MENU (print) button will move you forward to
the next user option, in this case the buzzer control.
Auto (AUTO) Auto mode will automatically reduce the alignment
sensitivity of the Pulsair when there is some difficulty in
achieving the firing criteria. AUTO mode is the default setting.
5. Use the CHANGE (OD/OS) button to make your preferred selection.
Note: to run the self test press the DEMO button, not the
CHANGE button.
The last choice above “Run Test”
6. Continue to repeat steps 4 and 5 until ‘OK’ is displayed, your
(Selected by pressing Demo button)
would start a self test program
Pulsair intelliPuff is now ready to use with your preferred settings.
(around 45 seconds), the result of
Menu option
Display
Change options
Printer control
PRNT
OFF / ON
Buzzer control
BUZ
ON / OFF
intelliPuff level
Puff
CLIN (clinical)
AUTO
IOP Format
IOP:
XX / XX.X
Full self test
Run
Test/wait
which should be printed.
MENU
CHANGE
DEMO BUTTON
Home
Back
Next
Calibration, maintenance and inspection
Clean the puff tube lens on a weekly basis:
1. Moisten a cotton bud with Isopropyl Alcohol.
2. Move the tip of the bud around the lens in a circular motion.
3. After one circle the bud should be discarded to avoid smearing on the lens.
4. Look at the puff tube lens from the patient’s side, if traces of tear film can still be seen, repeat above steps until clear.
Note: Care should be taken not to damage the Puff Tube
Regular inspection
assembly during cleaning.
Inspect your power supply unit and cable for damage regularly.
Caution
Before inspecting, disconnect the power supply from the Pulsair
Never use a dry cotton bud or tissue to clean the puff tube lens.
intelliPuff and the mains.
Never use a silicone impregnated cloth or tissue to clean the
puff tube lens.
If the outer insulation of the cable appears to be damaged
discontinue use immediately. Contact your local dealer for a
External cleaning
replacement.
Keep the unit free of dust.
Home
Back
Next
Calibration, maintenance and inspection
General
Keep the instrument free from dust.
If the unit is to remain unused for any length of time, turn the
On off push button switch to Off and remove the power supply.
Use the dust cover to protect the unit.
Before using the Pulsair intelliPuff again, press the Demo button
to dispel any minute particles of dust.
Servicing and calibration
Keeler recommends an annual calibration for the Tonometer.
This must be performed by an authorised Pulsair service centre
or distributor. The unit performs a self function check when
switched on and will indicate if a fault is found.
Home
Back
Next
Specifications and electrical ratings
Console dimensions 260 x 215 x 220mm (H x D x W)
Hand Unit dimensions 315 x 150 x 46mm (H x D x W)
Console weight 2.465Kg
Hand Unit weight 0.890Kg
Calibrated range 5mmHg to 50mmHg
Displayed accuracy 0.1mmHg
Working distance
20mm from surface of patient’s cornea to front surface of first lens.
This equates to a nominal distance of 15mm from the front of the puff tube
shroud to the front surface of the patient’s cornea
Displayed scale 4 character dot matrix scrolling
Illumination system
LED infra red
Length of umbilical cord 2 M
Complies with Safety (Medical) EN 60601-1:1990 plus amendments A1:1993, A11:1993, A12:1993, A2:1995 and A13:1996. EN ISO 15004:1998, Clause 6.3 optical radiation hazard, Clause 7.3 environmental conditions. EN60601-1-2 for EMC
Power Supply Unit Switch mode, (110 – 240V)+/- 10% multi plug type compliant to EN 60601-1
EN 61000-6-2, EN 61000-6-3
Power supply output
30 VA (12V DC 2.5A)
Frequency 50/60 Hz
Home
Back
Next
It is well established that exposure of the eye to intense light
sources for extended periods of time poses a risk of retinal photic
injury. Many ophthalmic instruments illuminate the eye with
intense light. The light levels on the Pulsair have been set at the
lowest level possible.
No visible retinal lesions have been identified as a result of using
Pulsair tonometers, however, young children and persons with
diseased eyes may be at a higher risk. The risk may also be slightly
Relative output / Arbitrary Units
Specifications and electrical ratings
1
0.8
Red LED
0.6
Green LED
0.4
0.2
0
1100
300 400 500 600 700 800 900 1000 1100
Wavelength / nm
increased if the person being examined has had any exposure
with the same instrument or an other ophthalmic instrument
Figure 1: Spectral irradiance of instrument at user plane
using an intense visible light source during the previous 24 hours.
This will apply particularly if the eye has been subjected to retinal
photography.
Note: This device complies with EN60601-1-2 for EMC, and should
not present problems to other equipment or be affected by other
devices. As a precaution, avoid using this device in close proximity
to other equipment.
Photochemical
source radiance
Source
Radiance
(mW cm-2 sr-1)
Aphakic, LA (305-700nm)
Red LED
3.22
Phakic, LB (380-700nm)
Red LED
3.20
Aphakic, LA (305-700nm)
Green LED
<0.01
Phakic, LB (380-700nm)
Green LED
<0.01
Table 2: Calculated photochemical source radiances
Home
Back
Next
Accessories
Accessories supplied
Dust cover
Printer paper
Puff tube dust cap
Wall mounting bracket
User manual (printed / CD depending on market)
Quick user guide/pull out card
Consumable
Printer paper
Home
Back
Next
Contact Information
Manufacturer
Scotland Sales Office
USA Sales Office
Keeler Limited
Clewer Hill Road
Windsor
Berkshire
SL4 4AA
Keeler Scotland
25 Deerdykes View
Westfield Estate
Cumbernauld
G68 9HN
Keeler USA
456 Parkway
Broomall
PA 19008
USA
Freephone: 0800 521251
Tel: +44 (0) 1753 857177
Fax:+44 (0) 1753 827145
Freephone: 0800 521251
Tel: +44 (0) 1236 721214
Fax:+ 44(0) 1236 721231
Toll Free: 1 800 523 5620
Tel: 1 610 353 4350
Fax:1 610 353 7814
Disposal of old Electrical and Electronic Equipment
(Applicable in the European Union and other European Countries with
To Reduce the Environmental impact of WEEE (Waste Electrical Electronic
separate Collection Systems).
Equipment) and minimise the volume of WEEE entering landfills we
encourage at Product end of life that this Equipment is recycled and reused.
This Symbol on the Product or on its Packaging and instructions
indicates that it was put on the market place after August 2005 and
If you need more information on the collection reuse and recycling then
that this product shall not be treated as Household Waste.
please contact B2B Compliance on 01691 676124 (+44 1691 676124).
0088
EP59-70004 Issue B
Home
Back
Next