1
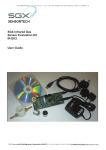
QUICK START GUIDE
CAX-01/CAX-03/CAX-04
STEP 1: CONNECTIONS
Option 1. Antenna and RF Cable Connections
ANT IN
Converter Box’s Rear Panel
1. Connect an antenna cable to the “ANTENNA IN" jack on the rear of the Converter Box.
2. Connect the “RF OUT” jack from the rear of the Converter Box to the “ANT IN” jack on your TV using
the RF cable supplied with the Converter Box.
3. Connect the AC power cable of the Converter Box to suitable wall outlet.
Note
• If you connect “RF OUT” of Converter Box to ANT. IN of your TV, you can watch the video and the
audio of the Converter Box on Ch.3 or Ch.4 of your TV. The RF output channels can be selected in
output channel of menu-option. (Refer to page 15 in user manual)
※ CAX-03 and CAX-04 have analog pass-through.
~ These models are capable of passing through the analog signal to the TV set in standby mode.
QUICK START GUIDE
CAX-01/CAX-03/CAX-04
Option 2. Analog TV (Monitor) Connection with RCA Cables
Converter Box Rear Panel
A/V IN
TV Connection Panel
1. Connect an antenna cable to the “ANTENNA IN" jack on the rear of the Converter Box.
2. Connect the “R-AUDIO-L” jacks and “VIDEO” jack from the converter box to the “A/V IN” jacks on
your TV using RCA-type cables.
3. Connect the AC power cable of the Converter Box to suitable wall outlet.
Option 3. VCR Connection with RCA Cables
Converter Box Rear Panel
A/V IN
VCR Connection Panel
1. Connect an antenna cable to the “ANTENNA IN" jack on the rear of the Converter Box.
2. Connect the L/R “AUDIO OUT” jacks and “VIDEO OUT” jack from the Converter Box to the “A/V IN”
jacks on your VCR using RCA-type cables.
3. Connect the AC power cable of the Converter Box to suitable wall outlet.
QUICK START GUIDE
CAX-01/CAX-03/CAX-04
STEP 2: PROGRAM THE REMOTE CONTROLLER
You can control TV sets of all major brands after programming the Converter Box remote controller with
the PGM(Program) button.
1. Refer to the Program Code List (page 21 in user manual).
Search the brand of your TV set and the 3-digit program code. If your TV set is not on the list, skip the
rest of this section and go to “STEP 3: TURN ON THE CONVERTER BOX”.
※ If you have lost the user manual, visit www.casticonverter.com
2. Keep the PGM button pressed while entering the correct 3-digit program code with the Number(0~9)
buttons. After entering the 3-digit program code, release the PGM button.
+
3. Aim the remote controller toward your TV and press the TV POWER button on the remote controller
to check if the TV responds properly. If there is no response from your TV set, try step 2 again with
another program code. If your TV responds properly, the programming is completed.
CAX-01/CAX-03/CAX-04
QUICK START GUIDE
STEP 3: TURN ON THE CONVERTER BOX
1. Press POWER on the converter box or BOX POWER on the remote controller.
The power indicator will turn green if the power is on.
2. Press TV POWER of remote controller to turn on your TV
3. When the converter box is connected only to RF cable, if current channel of TV is not CH04 or CH03,
press CH04 or CH03 of remote controller. ※ Initial RF output channel is CH04
4. When the converter box is connected to RCA cables, if your TV is in Tuner mode, press INPUT of remote
controller to switch to AV mode.
STEP 4: SETTING THE OSD LANGUAGE
1. Press the MENU to display MENU LIST on the screen.
2.
3.
4.
5.
Select OPTION menu using ◀/▶ then press ENTER or ▼.
Use ▲/▼ to select “Language” then press ▶ or ENTER.
Use ▲/▼ to select the desired language then press ENTER.
Press MENU or ◀ to return to the previous category or press
EXIT to return to TV viewing.
STEP 5: AUTO CHANNEL SCANNING
1. Press the MENU to display MENU LIST on the screen.
2. Press ENTER or ▼ to enter the sub-menu of CHANNEL menu.
Use ▲/▼ to select ‘Channel Scan’.
3. Press ENTER or ▶ to start auto scan of available channels.
If you want to stop channel scan in the middle of the scanning
process, press ENTER.
4. After the channel scan is completed, the channel with the
lowest channel number will appear on the TV screen.
5. Press MENU or ◀ to return to the previous category or press
EXIT to return to TV viewing.
Your Converter Box is now ready for use !
Please, read the User Manual for further details on using the Converter Box.