1
14_User Guidance and Dimensioning
User Guidance and Dimensioning_15
Module field
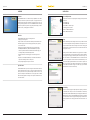
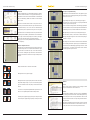
Clicking on Module fields opens a window with all parameters required to
cover the roof with solar modules. For covering a prior defined field, it is entered with the selection of the first check boxes Number of columns and Number of rows. Alternatively, a Number of PV modules or the desired Output
may be entered.
The next section determines how the modules are to be placed on the roof.
To do this, enter Start X and Start Y where the edge of the module field is entered in X and Y direction, or select a corner of the roof to which the modules
are aligned. The option of a symmetrical covering of the roof is also possible.
In the bottom section of the window, the modules are positioned in Portrait
or Landscape format. In addition, a minimum distance of the module field to
the roof edges can be entered. Depending on the module use, various applications may be impossible and their corresponding fields inactive.
This way, you can create as many individual module fields until the roof is
covered completely.
Buttons for editing the module area
Depending on the selected module and entered project data, buttons can be
used on the left edge of the screen to edit the module area. Buttons comprising options that are not available can only be seen in outlines. All buttons
have mouseovers describing their respective function. Inactive buttons are
shaded grey. The buttons are faded in after selecting a module by doubleclicking it.
Other Options of Graphic Dimensioning
In addition to the above described basic features of the graphic design, additional options can be called up by right-clicking on the respective modules,
restricted areas or roof areas.
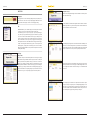
By right-clicking on the empty roof area, the following options appear:
• PV modules: Select or remove all modules or, respectively, add additional
modules in portrait or landscape format.
• Zoom: Picture detail is enlarged, reduced or automatically properly adjusted
• View: Switch between Levels, between Stand-system view and Module view.
Additionally, Load zones, Coordinates and Grid can be shown or hidden.
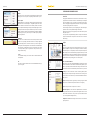
When right-clicking on a restricted area, the following functions appear:
Select restricted area, Features, or Show or Hide coordinates. Furthermore,
the origin of the graphic design can be set at a restricted area by clicking on
Coordinates g Set origin.
Right clicking on one of the modules can select the module or show the Module
grid. The module grid shows the complete design of the field with modules
without restricted areas. Additionally, by right-clicking on a module – as with
the restricted areas – it is possible to Show coordinates or Hide coordinates
and set the Origin at the respective module.
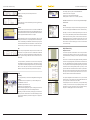
Adding a new module above or below the selected module.
Shifting modules to the left, respectively right.
Shifting modules to the top and, respectively bottom. Select the desired modules by double-clicking on a single one or, in case of several modules, by drawing a frame around the modules. Now, they can be moved in the desired
direction.
Cover still free roof area symmetrically with modules in portrait format. Cover
still free roof area symmetrically with modules in landscape format.
Zoom in the picture of graphic design, respectively zoom out the picture detail.
Zoom out the picture of graphic design, respectively zoom in the picture detail.
Inverters
Selection
Inverters for the system to be designed are selected according to a similar
principle as the determination of the modules before.
Data Base
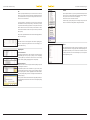
Various data bases are available for the selection of inverters. The TRITEC data
base exclusively includes models from the current TRITEC product range.
Aside from that, the user is able to set up its own data base – with User – with
specially selected inverter models. The corresponding inverters must be manually entered for it.
Alternatively, an individual list of inverters already set up can be created and
summarized in the Favourites data base. To add a module to the list of favourites, click on the star icon next to the drop-down menu Selection.