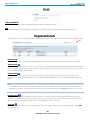
1
Ad
dministrator Manual
Study Island A
How to Get Started Using the Program
20099-2010
200
www.studyisland.com
800-419-3191
[email protected]
3400 Carlisle St. Suite 345 Dallas, TX 75204 ~ 1-800-419-3191 ~ support@ studyisland.com
DearAdministrator,
Welcome!
Thank you forpurchasing Study Island. To ensure success in using this program, we have developed this
usermanual. In the pages that follow, you will find an explanation ofyourduties as administrator.
Please keep in mind, we are here to help ifyou everrun into a problem orhave a question. Technical
support is included with yourpurchase, so please feel free to call us at 800-419-3191, email us at
support@ studyisland.com, orclick on the “Live Support” link located at the top left cornerofthe Admin Page.
Sincerely,
Study Island Support
www.studyisland.com
800-419-3191
[email protected]
Table of Contents
I. Frequently Asked Q uestions………………………………………………………………………………………………………………………………....
ons
4
iI. Getting Started……………………………………………………………………………………………………………………………………………...
Started
5
a. Step 1: Choose a Study Island Administrator………………………………………………………………………………………………………….
5
b. Step 2: RegisterYourStudents and Teachers…………………………………………………………………………………………………………
5
c. Step 3: Distribute Usernames and Passwords…………………………………………………………………………………………………………
9
d. Step 4: Print the TeacherInstructions and Distribute to Teachers...………………………………………….…….………………………………….
9
e. Step 5 (optional): Arrange Students Into Classes……..……………………………………………………………….……………………………….
10
f. Step 6 (optional): Setup Automatically E-mailed Reports …………………………………………………………………………………………….
10
g. Step 7 (optional): Distribute a Letterto the Parents…………………………………………………………………………………………………...
10
III
II I . Administration Page………………………………………………………………………………………………………………………………………...
Page
10
a. Admin Functions……………………………………………………………………………………………………………………………………...
ons
10
-
School Information………………………………………………………………………………………………………………………..
10
-
AlterSubjects…………………………………………………………………………………….……….………………………………..
10
-
Add Users……………………………………………………………………………………….………………...………………………..
10
-
Import Users………………………………………………………………………………………….……...……………………………..
10
-
Easy Login Setup...…………………………………………………………………………………………………………………………
11
-
Adjust Student Difficulty…………………………………………………………………………………………………………………..
11
-
Restrict Access…………………………………………………………………………………………………………………….
13
-
Export Users……………………………………………………………………………………….……………………………………….
13
-
Export Statistics…………………………………………………………………………………….…………..………………………….
13
-
Reset High Scores…….…………………………………………………………………….……………………………………………...
13
-
ClearStatistics……………………………………………………………………………………………………………………………
13
-
Printable UserList………………………………………………………………………………………………………………………….
b. School Preferences ……………………………………………………………………………………………………………………………………
………
13
13
-
Student Messaging (Profanity Check)…...…………………………………………….…………………….………………………………
14
-
Attributes Change………..…………………………………………………………………………………….…………………………...
14
-
MultiplayerGames……….……………………………………………………………………….……………..………………………….
14
-
Block Score Improvement When Students Correct Missed Q uestions……………………………………………………………………..
14
-
Block All Students’Usernames from Displaying on the High Score Tables………………………………………………………………..
14
-
Allow Classroom Response System (CRS) Integration……..…….………………………….…………………………………………….
14
-
Allow Teachers to Adjust the Difficulty forStudents…….…………………………………….…………….……………………………
14
-
Allow Teachers to Override the Following School Preferences forStudents in TheirClass (Games, TimerVisible, Scratchpad, Highlighters,
Remedial Topics)…………………………………………………………………………………………………………….
c . Registered Users
Users………………………………………………………………………………………………………………………………..……
14
16
-
Previous Grade……….………………………………………………………………………..……………………………………………
16
-
Advance Grade….……………………………………………………………………………….…………...……………………………..
16
-
Change School………………..……………………………………………………………….……………………………………………
16
-
Reset Passwords………………………………………………………………………………………..………..………………………….
16
-
ClearStats………….…………………………………………………….…………………………….…………...………………………..
16
-
Remove Users…………………………………………………………………………………….…………….…..……………………….
17
-
Teachers Trusted/Not Trusted……………………………………………………………….………………..…………………………….
17
-
Registered Users – Password & Edit Attributes……………………………………………….……………..………………………………
17
IV.
IV. School Stats Page………………………………………………………………………………………………………………..……………..…………...
Page
17
Page………………………………………………………………………………………………………………………………………...
V. Class Manager Page
20
a.
Create Classes and Assignments………………………………………………....………………………………………………………………..
20
b.
LiveView…………………………………………………………………………………………………………………………………...
20
c.
Parent Notifications…...………………………………………………………………………………………………………………………….
21
d.
Writing Assignment……………………………………………………………………………………………………………………………..
22
e.
Custom Assessment Builder…………………………………………………………………………………………………………………….
VI . Tools and Features…………………………………………………………………………………………………………………………………………
Features
23
24
a.
Create New Topic/Message Center/My Attributes/Professional Development..………………………………………………………………..
24
b.
Certificate ofCompletion………………………………………………………………………………………………………………………….
36
c.
Back-to-School Checklist…………………………………………………………………………………….…………………………………….
VII
ons…………………………………………………………………………………………………………………………………...
VI I . Letters and Instructions
a.
TeacherLetter……………………………………………………………………………………………………………………………………..
b.
Parent Letter………………………………………………………………………………………………………………………………………
VIII
VII I . Appendices……………………………………………………………………………………………………………………………………………….
ces
35
25
25
37
39
a.
Glossary……………………………………………………………………………………………………………………………………..
39
b.
Report Graph ……………………………………………………………………………………………………………………………………..
42
www.studyisland.com
800-419-3191
[email protected]
Frequently Asked Q uestions
1.
How do I find my students’usernames and/or passwords? See “Printable UserList” under“School Stats” on page 27.
2.
H ow do I register my students? See page 5.
3.
How do I advance my students when they enter a new grade? See “Registered Users,” then “Advance Grade” on page 16.
4.
How do I create a class or grouping of students? See “Class Manager” starting on page 27.
5.
How do I create an assignment? See “Class Manager” starting on page 27.
6.
How do I view my students’data? See “School Stats Page” and report information starting on page 17.
7.
How do I delete student data? See “Admin Functions,” then “ClearStatistics” starting on page 10 or“School Stats Page,” then
“Delete Individual Sessions” on page 17.
8.
How do I delete a student from Study Island? See “Registered Users,” then “Remove Users” starting on page 16.
9.
How do I prevent my students from working on material that is not on their grade level? See “Admin Functions,” then
“Option 2 – Restrict Students to EasierorHarderMaterial” starting on page 10.
10. How do I use my CRS clickers with Study Island? See page 14.
11. How do I create a printable version of Study Island’s questions? See “Printable Worksheet” under“Study Modes” on page 26.
12. Why can’t my student access the games? See “School Preferences Menu,” then “Games (On/Off)” starting on page 13.
13. What are the passing parameters? See “Admin Functions,” then “Option 1 – Adjust Passing Parameters” starting on page 10.
14. How do I change Study Island’s passing parameters? See question number13 above.
15. How do I add a new student to my existing class? See “Class Manager,” then “Tip” on page 27.
16. Can my students start over without permanently deleting previous data? Yes. See “Admin Functions,” then “Start Date”
starting on page 10.
17. How do I edit student information? See “Registered Users,” then “Registered Users – Password and Edit Attributes” starting on
page 16.
18. Can I prevent my students from accessing material other than the assignments I created? Yes. See “Class Manager,” then
“Block OtherMaterial” starting on page 27.
19. Why can’
can’t my students access the Post Test? See “TeacherInstructions,” then “Step 7” starting on page 25.
20. How do I transfer a student to a different school? See “Registered Users,” then “Change School” on page 16.
www.studyisland.com
800-419-3191
[email protected]
Getting Started
Look for the
icon throughout our manual! The
indicates that a corresponding video tutorial is available on our Help Tab.
Study Island is an online standards mastery and test preparation program built from state standards and available in all fifty
t states.
One ofDistrict Administration’s Readers’Choice Top 100 Products of2008, Study Island is used by over9 million students in 19,000
1
schools and now has high school, reading intervention, K1, and GED products. Rooted in foundational and statistical research, the
dynamic self-paced
paced program allows teachers to customize instruction to students’needs while allowing students to study in standard
test format, interactive game mode, orusing interactive response systems. Study Island is currently compatible with eInstructi
u on,
Promethean, and TurningTech.
Step 1: Choose a S ingle Study Island Administrator per Campus
C ampus
Functions ofa Study Island Administrator:
•
•
•
Registerthe students and teachers into the program
Update the rosteras needed
Handle the administrative settings ofthe program locat
located on the
Administration Page
To manage multiple schools from one login,
you may want to obtain a “District Login.”
Please do so by calling ourCustomerRelations
team at 800-419-3191.
800
Step 2: Register Your Students and Teachers
T eachers
Tip: Due to universal access ofstudent records, we do not
recommend sharing yourStudy Island login codes with anyone except
the designated Administratorand the principal ofthe school.
Locate yourpassword insi
n de the front coverof
yourmanual orin yourwelcome email.
Only the designated Administratorcan registerusers foryourschool. There are two ways to registeryourusers. Option 1 is suitable if
you do not have a large numberofstudents and teachers to register. Option 2 would be more appropriate ifyou are planning on
registering a large amount ofusers.
Option 1: Register Users Individually:
1.
Visit http://www.studyisland.com and enteryourAdministratorlogin information
on.
2.
Upon logging in, you are taken to the Admin Page. On the Admin Page, click the “Add Users” link located at the top left ofthe
page in the “Admin Functions” box.
3.
Registereach userby filling out the form and then clicking the ““Add User” link. You must pick a unique username foreach
user. All usernames mustt be unique in ournational database so that statistics can
n be created foreach student.
stude Ifyou try to
registera student and the system will not accept that particularusername, it means that anotherstudent (possibly even from a
different school) is already using that username and you should entera different username.
www.studyisland.com
800-419-3191
[email protected]
Tip: We recommend adding a school identifier, such as @ MHS, or.tigers to yourusernames. Using an extension
such as yourschool’s name ormascot helps make every username unique in the Study Island system.
system
We recommend that each student and teacherhave a unique password. Ifyou choose to give each student the same initial
password, you should check the “force reset ofpassword upon login” option to preserve data security. The administratorand
teachers will have access to the updated information via the “P
“Printable UserList” link.
4.
Ifyou want to add additional users, click “Add User.” To complete the registration process, click “Fi
Finished Adding Users.”
5.
Afteryou are finished registering all ofth
the students and teachers, go to “Step 3: Distribute Usernames and Passwords”
d on
page 9.
Tip: We recommend registering teachers before registering students.
Option 2: Register Users via Database File:
1.
Create separate database files forstudents and teacherss.
Before you start:
o Microsoft Excel and comma delimited text files are supported.
o Do not include formatting such as borders orhidden columns and/orblank
nk cells within yourdata range.
ange
o Only use the first worksheet in the workbook.
Yourfile should contain the following fields which are NOT case-sensitive:
•
First Name (required) – the first name ofthe user
•
Last Name (required) – the last name ofthe user
www.studyisland.com
•
800-419-3191
[email protected]
Grade (required) - the grade level ofthe user
o The grade must be one ofthe following: K,1,2,3,4,5,6,7,8,9,10,11,12.
o Teachers must also be assigned a grade level;however, they will not be restricted to that level.
Example Database File (required fields only):
First Name
Jeff
Sarah
Pete
Susie
•
Last Name
Morgan
Roberts
Johnson
Jones
Grade
3
4
4
3
Username (optional) – the username forthe user
o Each username must be unique.
o Ifyou do not include this field in the database file, the
Study Island system will auto generate a username for
each student. You will be able to choose the format ofthe
usernames during the upload process.
Auto-generated usernames might look
something like a.lastname@ suffix. The suffix is
designed to help make each username
unique in the Study Island database.
•
Password (optional) – the password forthe user
o Ifyou do not include this field in the database file, the Study Island system will allow you to create a default
password forall students.
o Ifusing the default password option, we recommend checking “force reset ofpassword” so that students will be
prompted to create a new password the first time they log in.
•
SIS Primary Key
Key (optional) – the unique student ID number
o Ifyourschool's Student Information System (SIS) has a unique ID numberforeach student, you can include it in
the database file.
o This is optional and will allow you to upload a complete student list without duplicating existing users as long as
the SIS Primary Key remains the same.
•
Homeroom (optional) – the homeroom class forthe student
o Ifyou include a homeroom column on yourspreadsheet, the program will automatically create a class with that
title and put the students into that class.
o Please note that the admin will need to assign an “Owner” to the class, and students can only be put into one (1)
class each during the import process. Additional classes can be added later.
•
Other Database Fields (optional, forreporting purposes only) – additional informational data fields
o Field options are: Subpopulation information such as Gender, Ethnicity, Economically Disadvantaged, Title I
Participant, Migratory Student, Gifted/Talented, Special Education and LEP/ELL.
o Including this information will allow you to run several reports that show statistics based on these categories.
2.
Visit http://www.studyisland.com and enteryouradministratorlogin information.
3.
Upon logging in, you are taken to the Admin Page. On the Admin Page, click the “Import Users” link located at the top left of
the page in the “Admin Functions” box.
4.
Click “Browse” to locate and select the database file you wish to upload, and select yourfile type. Click “Upload Database File.”
5.
Complete the “UserInformation” section by mapping yourcolumns to ourfields.
•
•
Ifyou have separate columns in yourdatabase file forthe students’first and last names, use the dropdown boxes by “First
Name” and “Last Name.” Click on the dropdown box and select the column heading that corresponds with “First Name”
and “Last Name.”
Ifyou have a column with the students’full names, instead click on the dropdown box that says “Full Name” and select
the column heading that corresponds with it.
www.studyisland.com
6.
Forthe “Grade” box, select the column heading that corresponds with the grade level.
7.
For“UserType” select “Student” or“Teacher
Teacher.”
8.
Complete
ete the “Username Decisions” section.
•
•
9.
800-419-3191
[email protected]
Ifyou entered a username column in yourdatabase file, use the “UserName” dropdown box to select the corresponding
column name.
Ifyou did not entera username column in yourdatabase, select “Auto Generate” in the dropdown box next to
“UserName” and enterthe “School Identifier.” (Hint: Most schools ch
choose
oose theirschool’s name, initials, ormascot to make it
easy forthe students to remember.) Next, click on the dropdown box next to “Auto Generation Method” and choose the
desired username format.
Complete
mplete the “Password Decisions” section.
•
•
Ifyou entered a password column in yourdatabase file, use the “Password” dropdown box to select the corresponding
column name.
Ifyou did not entera password column in yourdatabase, select “Use Default Password” from the dropdown box by
“Password.” Enteryourpassword in the “Default Password” box. This default password
assword will be assigned to all students. If
using the “Default Password” option, we recommend checking “force rreset ofpassword upon login”
n so that students will
be prompted to create a new password the first time they log in. The administratorand teachers will have access to the
updated information in case a student forgets his/hernew password
d.
www.studyisland.com
800-419-3191
[email protected]
10. When you are finished with this page, click “Continue.”
11. Ifyou included optional data fields, map them to the corresponding columns as in the priorsteps. Ifyou did not include
optional fields such as SIS primary key, gender, etc. in yourfile, please click “Next” and skip to step 12.
•
•
Example: Ifin yourfile you have marked an “X” next to students that are involved in the Special Education program and
left the otherstudents blank, you may need to map what that means foroursystem by selecting a Study Island value for
each.
When you have finished mapping
ng, click “Next.”
12. Review the userinformation. Please note: The students are not registered yet.
yet
13. Click “RegisterUsers” at the top ofthe page.
Ifyou need help creating oruploadi
upload ng a
file, please contact oursupport team at
800-419-3191
3191 and we will help you
through the registration process.
Step 3: Distribute Usernames and Passwords
Afteryou are finished registering the students, you need to distribute the usernames and passwords to the teachers and
students. To do so, click “Printable UserList” on the admin page. Teachers can also find the Printable UserList at the top ofthe
School Stats page.
“I was concerned about registering the
students and the kids remembering their
passwords. It didn’t seem to be a problem.
We had a print-out ofall the passwords in
case they forgot.”
-Kenyetta Barrett, Admin, Gideon
Elementary, TX
Step 4: Print the Teacher Instructions and D
Di
istribute to TTeachers
eachers
Locate the Study Island
nd TeacherInstruction Sheet on page 25ofthis manual.
Tip: There is also a reference manual available forteachers.
www.studyisland.com
800-419-3191
[email protected]
Studentss into Classes
Step 5 (optional): Arrange Student
Teachers have the ability to set up theirown classes;however, the administratorcan also set up classes forthem. See the
“Class Manager” section on page 27 ofthis manual fordetailed instructions.
Step 6 (optional): Set up Automatically Emailed Reports
“The reports and data are most
beneficial and helpful to the
teachers;they use this weekly
information to guide their
instruction forbenchmark and
state assessments.”
-Nancy Pfingsten, Literary Coach,
Glenridge Middle, FL
Every week a summary report ofstudent progress is emailed to teachers and administrators whose
email address is on the weekly report recipient list.
• Click “School Stats” on the left side ofthe page.
• Pull the report ofyourchoice.
• Click “Automatically Email Report” within the report
to sign up to receive it periodically via email.
On the “School Stats”
page, the “Emailed
Report Manager”
feature allows you to
manage yoursettings.
Step 7 (optional): Distribute a Letter to the Parents
See page 37 fora parent letter.
See page 38 fora parent letter in Spanish.
Admin Functions
To access this page, you will need to log in with the admin username and password.
*Only schools that have access to K-1 will see “Easy Login Setup.”
School Informati
o rmation
This feature allows you to change the school contact information. Information will not be distributed orsold to an outside party.
Alter Subjects
This feature gives you the option ofrearranging orremoving topics from a subject. When you altera subject the changes go into
effect forall users within yourschool. You can also add “Custom Material” in as a Study Island topic.
Add Users
This function allows the Administratorto add students and teachers as users on an individual basis. Please see the preceding
“Getting Started” section on page 5 forcomplete instructions.
Import Users
This link allows you to registerstudents via an Excel orcomma delimited text file. Fordetailed instructions, referto page 6 ofthis
handbook underthe section titled “Getting Started (Step 2, Option 2).”
www.studyisland.com
800-419-3191
[email protected]
Easy Login Setup
This feature allows admins to create a more u
user-friendly login forkindergarten and first grade users. Note: Only
On schools that have
access to kiindergarten orfirst grade products will have this option.
1.
2.
3.
Make sure yourstudents are registered as Study Island users.
From the Admin Screen,
creen, click “Easy Login Setup” underAdmin Functions.
Fill out the Easy Login username and password information, and select whetheryou’d like to enable the password option.
Once activated, the Easy Login feature allows KK-1 users to login using the same username and password.
1.
2.
3.
Students will enterthe universal username and password on the main Study Island page.
Students will then click on the first letteroftheirname and select theirname from the list.
Students will eithercontinue into the program orthey will be prompted to entera password.
Adjust Student Difficulty
In orderto complete the program, students must “pass” each topic within a subject
ect. This feature allows you to adjust the
percentage that the student needs to meet in orderto pass that topic.
Option 1 – Adjust Passing Parameters: The “Adjust Passing Parameters” feature enables you to adjust the percentage that a
student needs to achieve in orderpass the topics. Adjusting the passing parameters does not affect the difficulty level of
the questions;it only affects the percentage a student must achieve to pass a topic. You can find Study Island’s default
passing parameters by choosing the grade on the left side ofthe page, then choosing the subject. Once the page loads, the
minimum requirements are underthe column “Passing Goal.” The first numberis the minimum number
numb ofquestions that
must be answered, and the second numberis the minimum percentage that must be achieved.
To Adjust the “Passing Parameters:””
1. Check the boxes to the left ofthe names you want to change.
2. In the box adjacent to “Subject to Change,” select which subject you would like to change.
3. Next to “Passing Level,” select the preferred percentage.
www.studyisland.com
800-419-3191
[email protected]
Start Date
Date
Resetting the “Start Date” clears out the student’s stats (without deleting them) and forces him orherto start fresh;
however, teachers may still access old stats.
Reports will only include statistics from sessions performed afterthe new “Start Date.” Please note that you will still be
able to access the students’previous stats by using the filterfeature on the reports.
To reset the “Start Date,” check the box next to the name ofthe student you want to reset, and then scroll up to the top of
the page. Select the new “Start Date
ate” from the dropdown boxes and click "Set Start Date."
Option 2 - Restrict Students to Easier or Harder Material: With this option, administrators can limit students to wor
w king on
lowerorhighergrade-level
level material. This is a great feature to use with special needs students.
Select the class orgrade level
el the student is in and click “Next.” The next screen will allow you to check offthe name ofthe
student, and then at the top you can select the grade to which you want to rest
restr
rict access. Check the box for“Hide Grade
Level Frrom User” ifyou wish and click “Restrict Users To This Level
Level.” See screenshot on next page.
Option 3 - Text
Text--toSpeech refers to the ability to play text as spoken words and is now available in all grade
to -Speech: Text-to-Speech
levels. The sound can be heard through speakers orheadphones. Text
Text-to-Speech
Speech is designed forand most beneficial to
beginning readers, special needs students, and auditory learners. Note: Admins must allow teachers to enable Text-to-Speech
Text
by going to the admin page and checking the box by “Allow teachers to adjust the difficulty forstudents.” underSchool
Preferences.
www.studyisland.com
800-419-3191
[email protected]
To Enable Text-to-Speech:
1. Click “Adjust Student Difficulty” underSchool Preferences on the admin page.
2. Select the class orgrade from the dropdown box underOption 3 and click “Next.”
3. Select the appropriate student(s) by placing a check in the box next to theirname orby choosing “Check All.”
4. Click “Update Text-Speech setting forselected users.”
5. Click OK ifyou are sure you want to change the setting forthe selected users.
To Use Text-to-Speech:
1. Use the mouse to select the text you wish to have read aloud.
2. Click the Play icon.
Restrict Access
See page 12. This is the same as the feature in Option 2 under“Adjust Student Difficulty.”
Export Users
This link allows you to export userdata (first name, last name, grade, username, password, etc) into an Excel file. This is useful ifyou
need to make a mass change to yourusers. You can export the students into an Excel file, make necessary changes, and then reimport them back into the program. TIP: Do not change the SIS Keys.
Export Statistics
This feature allows you to export all student stats from Study Island. This is useful forthose who wish to archive data between
school years, build theirown reporting engine, and/orload the data into a different system forreporting purposes.
Reset High Scores
This feature allows you to reset the “High Score Tables” forthe games. Resetting only affects yourschool’s game scores;it will not
adjust the overall Study Island test scores.
Clear Stati
Statistics
cs
This feature allows you to permanently remove recorded data by individual student, class, subject orprogram. To delete individual
test sessions, please see instructions on page 17.
Printable User List
This feature allows you to print a rosterofyourstudents’usernames and passwords.
School Preferences Menu
The following features in the School Preferences box affect all Study Island students registered underyourschool’s account.
www.studyisland.com
800-419-3191
[email protected]
Student Messaging
Study Island offers a messaging centerwhere users can message the administrator, teachers, and students. This message feature is
helpful in assigning homework orsimply allowing the student to ask a question without being embarrassed in front ofother
students.
In the cases where the
Messaging Option:
setting is “Off”, students
• “On” – students will be able to message both teachers and otherstudents.
can attempt sending a
•
“Off(except teachers)” - students will only be able to message the teachers and
message to otherstudents;
administrator. Teachers also have the ability to message students.
however, upon clicking
•
“Off(everyone)” - students will not be able to send messages to anyone, including
“Send Message” they will
teachers and the administrator. Teachers do not have the ability to message the
be notified that their
students either.
message was blocked.
• “OffDuring School Hours” – messaging will be turned offbetween 8 a.m. – 4 p.m.
local time
Profanity Check - When profanity is detected in a student’s message, the message will be forwarded to the principal and
administrator. The message will be blocked and will not be sent through to its intended recipient.
Attributes Change
You can choose whetherthe students will be able to change the following attributes: username, password, usertype, and school
name.
Multiplayer Games
When the games are turned on the students have the option ofplaying multiplayergames (ifthe chosen game allows
multiplayers). This feature allows you to enable the statistics, disable the statistics, orturn the multiplayergames off. Multiplayer
game scores will be applied only to the userwho is logged in on that computer.
Block Score Improvement When Students Correct Missed Q uestions
When students have completed a session, they have the ability to go back through and redo any missed questions.
Yes – When a student successfully retakes the missed question, his orherscore WILL NOT improve.
No – When a student successfully retakes the missed question, his orherscore WILL improve.
Some teachers prefernot to allow score improvement in orderto see the actual score the first time the student answers the
questions.
Usernames
Di
splayi
Block All Students'Userna
mes from D
isp
laying on the High Score Tables
When you select “Yes,” students’usernames will not display when they achieve the High Score Table.
Allow Classroom Response System (CRS) Integration
When you select “Yes,” yourteachers will be able to use theirCRS classroom clickers with the Study Island program. Please note
that yourschool will need to have already purchased a CRS program.
To Use a CRS with Study Island:
1. Click on the grade level on the left side ofthe screen and choose the subject.
2. Check offthe topic(s) you want to study, and click “Start Studying” in the upperright
corner.
3. Choose “Classroom Response Systems” in the “Session Type” dropdown box.
4. Click the appropriate CRS icon.
5. Choose the numberofquestions and click “Next.”
6. Choose the Class and assign clickers. Click “Next.”
You can also go to the
Help page (click on Clickers
once in Help) to find
detailed instructions and
system requirements to
run CRS.
Allow Teachers to Adjust the Difficulty for Students
When you select “Yes,” yourteachers will be able to adjust the passing parameters fortheirstudents on theirSchool Stats page.
Allow Teachers to Override These Settings for Students in Their Class
When you select “Yes,” yourteachers will be able to override the school's game, timer, and remedial topic settings. Teachers can
override school preferences on the "Edit Class"link (located in the “Class Manager” section from the main menu) fortheirclasses. If
a student is in more than one class which has overridden the school preferences, the student's preferences will be set to the
preferences forthe class whose title is first alphabetically.
www.studyisland.com
800-419-3191
[email protected]
Teachers may use this to create different preferences forsubsets ofstudents in tthei
heirclass by creating additional smallerclasses and
ordering the class titles alphabetically.
Games (On/Off)
“They LOVE the game
portion. Ofcourse, we set it
up so that they had to score
a certain percentage before
they could actually play a
game. They worked harder
to get to that point.”
-Deborah Hamrick, Asst.
Principal, Gaffney Middle, SC
Study Island enables students to learn using a standard multiple
ple-choi
choice format oran interactive game
format. The content ofthe games is the same as the content ofthe regulartest mode. Playing the
games will affect the students’scores just as ifthey were taking a regulartest session.
Game Opti
ptions:
On
Off
OffDuring School Hours – 8 a.m. – 4 p.m. (local time)
On Iff% Correct >
o Allows access to the games only ifthe students achieve a certain cumulati
cumul ve score fora subject.
A student would only be able to access the games ifhis orheroverall subject score meets the specified
percentage.
o You can find the student’s current overall pe
per
rcentage by going to the School Stats page and
pulling an Individual Student Report, and scrolling all the way down to the bottom ofthe page.
•
•
•
•
Timer Visible
This feature allows you to hide the timerthat is displayed wh
when the students are taking a test
orgame session. While the students do not see the timerifyou hide it, the timerstill records
the time.
There is no time limit on
questions ortest sessions,
and time is kept for
reporting purposes only!
Scratchpad
This feature allows you to enable ordisable the scratchpad forstudent use during practice
sessions.
Highlighters
This feature allows you to enable ordisable the highlighters forstudent use during practice sessions.
Remedial Topics or Building Block Topics
This feature allows you to turn the remedial or“Building Block Topics” offand on. Formore information on remedial topics, see the
remedial topics section ofthe TeacherManual
anual on page 17.
www.studyisland.com
800-419-3191
[email protected]
Tools
Study Island Manuals
Access an electronic copy ofthe “AdministratorManual” and the “TeacherManual” here.
Help
Access the Help page here. You will find documentation, video tutorials, and otherhelpful information in the help section.
Registered Users
Toward the bottom ofthe Admin Page, to the right of“Registered Users,” select a grade from the “Show Users In” dropdown box.
Previous Grade
This button allows you to send a student back a grade level ifthe student is registered underthe wrong grade orifretained.
Advance Grade
At the end ofthe school year, you can advance yourstudents to the next grade by simply checking the boxes beside theirnames
and clicking the “Advance Grade” button. Advance all students at one time by selecting “All Users,” orifadvancing one grade at a
time, start with the highest grade level first.
Change School
Ifa student is transferring to anotherschool that is using Study Island, this button will allow you to transferall ofhis orher
information to the new school. You will first need to notify the admin ofthe otherschool that you will be transferring students
there.
Tip: The admin forthe school that the student is leaving must make the transfer, so ifthe student is transferring into yourschool,
the admin forthe otherschool will need to make the transfer. To complete the transfer, choose the new school from the
dropdown box and click “Submit”. Ifthe student is transferring to anotherdistrict, call us at 800.419.3191 forthe school code.
Reset Passwords
This will reset the passwords formultiple students at one time. Similarly to when you first registerthe students, you will be
prompted to establish a password and given the option to force password reset upon login. This feature is most useful when a
group ofstudents have forgotten theirpasswords orat the beginning ofthe school year.
Clear Stats
Choosing “ClearStats” allows you to remove the statistics forone ormultiple students. This function permanently deletes ALL of
the user’s statistics.
www.studyisland.com
800-419-3191
[email protected]
Remove Users
This two-step process allows you to remove users. You can remove users by selecting the students you would like to remove and
clicking “Remove Users.” Once removed, they will appearunderthe “Removed Users” section. Here, you will be able to re-register
the students orpermanently delete them. Once you are certain that you want to permanently delete the users, select the
student(s) and click “Delete Selected Users.”
Teachers – Trusted vs. Not Trusted
Administrators can choose whetherornot to allow teachers to view the school stats and student passwords. When registered, the
teachers are automatically registered as “Trusted” users. This enables them to view the reports. In orderto change theirstatus to
“Not Trusted,” simply check the box beside theirname and select “Mark Selected Users as Not Trusted” from the dropdown box by
“Trust Users.”
Registered Users – Password and Edit Attributes
Each registered userhas two links to the right ofhis orhername: Password and Edit Attributes. Clicking the “Password” icon
displays the user’s password. The “Edit Attributes” icon allows you to update the userinformation such as username, password,
grade level, and usertype.
School Stats Page
The “School Stats” page is used to generate reports on student progress. You can access this page through the “School Stats” link on
the left side ofthe screen. Both the administratorand teachers have access to this page;students do not. Here, the teachers are able to
run reports on theirstudents and also view a copy ofthe “Printable UserList.” (See the Help tab fora description ofthe various reports.)
See Appendix B on page 42 formore report details.
Delete Individual Test Sessions
Teachers can delete individual test sessions by going to the School Stats page and pulling an Individual Student Report.
1. Click the numberofsessions that corresponds with the topic in question (underthe Sessions column).
2. Check the session you wish to delete.
3. Click “Remove Checked Sessions.”
You can also delete entire topics by checking offthe box to the left ofthe topic title and then clicking “Remove Checked Records.”
There are several reports available (see chart on next page). Choose yourfavorite! Tip: Viewing data is easierifstudents are organized
into classes using Class Manager.
www.studyisland.com
IF YOU WANT TO:
800-419-3191
[email protected]
TRY THIS:
Find the strengths/weaknesses
ofthe class
Select Class Summary Report.
Select “By Subject.” Click “Suggested Topics” or
“Performance Level Breakdown.”
View individual statistics fora student’s
progress
Select Individual Student Report.
Choose the student you’d like to view.
Find the percentage ofthe program
that has been completed with Blue
Ribbons
Select Blue Ribbon Report.
Select the class and program you wish to view.
View a breakdown ofall students and
theirprogress within a subject and
topic
Select Class Gradebook Report.
Choose “By Subject Broken Down By Topic.”
View a student’s missed questions
Select Individual Student Report and view the
report.
Click on the session numberforthe topic you’d
like to view. Click “View Missed” to see the missed
questions.
www.studyisland.com
IF YOU WANT TO:
800-419-3191
[email protected]
TRY THIS:
View the dates and times ofstudent
logins
Select Login Report.
Use the filterfunction to see specific dates and
times within the previous three months.
View student statistics based on state
assessment reporting categories
Select Class Gradebook Report.
Select “Subject Broken Down by Reporting
Category.”
Compare usage and performance
between classes and/orgrade levels
Select Class Comparison Report.
Select “By Program Broken Down By Subject.”
Choose the classes and program you’d like to view.
Compare students with otherStudy
Island users in the state
Select Class Summary Report or
Individual Student Report.
Choose the class orindividual student (ifrunning
the Individual Student Report).
Click “Compare with Others.”
View results foran assignment created
in Class Manager
Select Assignment Report.
Select the class and assignment.
www.studyisland.com
800-419-3191
[email protected]
Class Manager Page
The “Class Manager” page allows the admin and teachers to create classes forstudents. See the TeacherManual foradditional details.
•
How to C reate a C lass:
1. Click “Class Manager” on the left-hand side ofthe screen.
2. Entera title foryournew class and click “Next.” OPTIONAL: Teachers may choose to “Override School Preferences.” Here,
teachers may control game features, remedial topics, and timervisibility.
3. Click the maroon arrow by the preferred grade level, then check offthe students you wish to add to the class. Ifyou wish
to add all students in a grade level, check the box next to that grade level.
4. Click “Save” at the bottom ofthe screen.
•
How to Create an A ssignment:
gnment:
1. Click “Class Manager“ and locate the class to which you want to add an assignment.
2. Click the “Class Page and Assignments” icon on the farright.
3. Click “Add Assignment.”
4. Select the date assigned and the date due by clicking in the boxes foreach. Note that this sets yourexpectations forthe
students, but does not automatically set yourassignment to expire at the end ofthe time period.
5. Enteran Assignment Title.
6. Type instructions orany relevant information in the “Additional Info” box (optional).
7. Use the “Preferences” drop-down menu to adjust the preferences foryourassignment.. Ifan admin allows, teachers may
choose “Override School Preferences” (optional).
Creating a Class Page
Once a class is created, a Class Page can be made forthat class. A Class Page can only be made by the school’s admin orthe ownerof
the class. The Class Page must be activated in orderforstudents to access assignments.
Class Pages can include the following:
• Class Assignments – instruct students to complete a specific Study Island topic(s)
• Class Notes – post class notes
• Class Schedule – post class events
• Class Links – post class links to otherwebsites
LiveView
LiveView is a real-time monitoring system that allows the admin and teachers to observe students’progress as they work. LiveView
displays which students in yourclass are logged in, the assignment and/ortopic(s) on which they are working, and the number
questions correct out ofthe numberattempted. You can sort any ofthe columns in the Current Activities section. LiveView also offers
an individual student Summary Report, a Weekly Class Performance/Usage Chart, and a Blue Ribbon chart. Please note that LiveView
requires Adobe Flash 8 to operate.
How to Use LiveView:
1. Click “Class Manager” on the left side ofthe screen. Be sure you have already created yourclass. Ifnot, please see page 27 for
instructions on creating a class.
2. Click “LiveView” located above the list ofclasses.
3. Click on yourclass title on the left side ofthe screen.
4. (Optional) To view an Individual Student Summary Report, click on a student’s name. The Summary Report will appearat the
bottom left ofthe screen.
Class
How to View C
lass Info Charts:
1. Select the program in the dropdown box next to “Chart/UserProgram Data.”
2. To enlarge the chart, click on the chart itself.
Tip: LiveView is designed to update every 10 seconds, however, some servers may take longerto automatically
update. Manual updates are available by clicking the “Refresh Now” button located at the top ofthe screen.
www.studyisland.com
800-419-3191
[email protected]
Parent Notifications
Parent Notifications are automatic emails designed to keep parent(s) involved in theirstudent(s) education process and to promote
bettercommunication between parents and teachers. With this feature, a teachercan keep parents informed oftheirstudents(s)
progress in the program by creating any ofseveral types ofParent Notification Requests. It is recommended that teachers entervalid
email addresses under“My Attributes” priorto creating new Notifications forthis feature to work properly. Please note
n ote that the admin
or teacher must set up “Parents” and “Parent Groups” before a new Notification can be created.
To Create a Parent for Parent Notifications:
1. Click “Class Manager” on the left hand side ofthe screen.
2. Locate the Class Title and click on the Parent Notification icon on the right side ofthe screen.
3. Click “Add a Parent.”
4. Select a student using the dropdown box by “Student.”
5. Click “Add New Parent.”
6. Entera Parent First Name, Last Name, Email Address and Type from the dropdown box by “Type.”
7. Click “Save” afteradding each parent.
To Create a Parent Group:
1. Click “Class Manager” on the left hand side ofthe screen.
2. Locate the Class Title and click on the Parent Notification icon on the right side ofthe screen.
3. Click “Create Parent Group.”
4. Entera name and description forthe Parent Group.
5. Click each Parent Name on the left side ofthe box under“Available Parents” and use the arrows to add the selected Parents to
the group on the right side ofthe screen under“Parents in Group.” Also, you can click on “Move All Parents to Group” to move
all the “Available Parents” to the “Parents in Group” section on the right.
6. Click “Save” aftersetting up each Parent Group.
To Create a Parent Notification:
1. Click “Class Manager” on the left hand side ofthe screen.
2. Locate the Class Title and click on the Parent Notification icon on the right side ofthe screen.
3. Click “Create a Parent Notification.”
4. Select the type ofNotification. There are several options available including Assignment Due/ReminderAlert and Low Score
Warning. See chart below.
5. Entera Notification Name.
6. Select the Frequency, Time, Start and End Dates, and Program and Subject from the dropdown boxes. Please note that
options here may vary depending on answerchoices.
7.
8.
9.
Select the Recipients from the dropdown box by “Send To.”
Click “Save.”
(Optional) Click “Preview Email” to see how the email will appearto selected recipient(s).
Tip: Look on the right side ofthe Notification box forexplanations!
www.studyisland.com
800-419-3191
[email protected]
Writing Assignment
The Writing Assignment feature is a streamlined, paperless way to develop students’writing skills. Teachers can choose from a
selection ofgrade-specific writing prompts orcreate theirown writing assignments. Students can use online graphic organizers to plan
written responses, then create and submit compositions electronically. Afterviewing submitted assignments online, teachers will be
able to leave comments and grade and/orsend the composition back to students forrevisions. Note: A student will see “Writing
Portfolio” as an option on the left side ofthe screen only once that student has turned in his orherfirst composition. Ifa student saves
a composition forlater, he orshe will access the saved composition through the assignment.
To Create a Writing Assignment:
1. Click “Class Manager” on the left side ofthe screen.
2. Click on the Class Page and Assignment icon to the right ofthe class title. Note: ifyou have
not yet created a class, please see page 27 forinstructions.
3. Click “Add Assignment,” then click “Create Writing Assignment.”
4. Select the date assigned and the date due by clicking in the box foreach. Note that this
sets yourexpectation forthe students, but not automatically set yourassignment to expire
at the end ofthe time period.
5. Enteran Assignment Title and type instructions orany relevant information in the
“Additional Info” box (optional).
Students can access
current and previous
writing compositions by
clicking “Writing Portfolio”
on the left side ofthe
page aftera composition
has been submitted.
www.studyisland.com
800-419-3191
[email protected]
6.
7.
8.
9.
Click the class that corresponds to the student(s) you would like to add to the assignment.
Check “Select All” orthe individual students you want to add to the assignment.
Select a Writing Prompt, Graphic Organizer(optional), and Writing Rubric under“Writing Assignment Options.”
Select “Activated” from the dropdown menu at the bottom ofthe screen. To keep it deactivated, select “Deactivated.” NOTE:
When you keep an assignment deactivated, students are unable to see it. This can be a great option forteachers who want to
plan ahead!
10. Click “Save Assignment.”
Tip: Teachers can access compositions by clicking the “View and Grade Assignments” icon under“Class Page and Assignments.”
Ifthe
writing assignment has been deleted, the teachercan log in as the student and click “Writing Portfolio” to access the composition.
Custom Assessment Builder
The Custom Assessment Builderallows teachers to create theirown customized assessments to measure student proficiency and
progress. Teachers can choose questions from eitherthe standard Study Island question bank orfrom a new question bank designed
specifically forthe Custom Assessment Builder. At this time, Custom Assessment Builderis available formath and reading in grades 3-8.
Please note that not all subjects and topics have unique question banks available.
To Create a Custom Assessment:
1. Click “Class Manager” on the left side ofthe screen.
2. Click the “Class Page and Assignments” icon to the right ofthe class name, then click “Add Assignment” foreithera class or
individual student.
3. Select “Create Custom Assessment.”
4. Select the date assigned and the due date, then enteran assignment title.
5. Type instructions orany relevant information in the “Additional Info” box (optional).
6. Choose a grade and subject under“Select Q uestions,” then click “Get Topic List.”
7. Click the “Select Q uestions” icon to the right ofthe desired topic.
8. (Optional) Check the box by “Show questions from both practice and assessment item banks” ifyou wish to include standard
Study Island practice questions as well as unique Custom Assessment questions in yourassessment. Custom Assessment
questions will be aqua and say “Assessment.” Standard Study Island questions will be grey and say “Practice.”
9. Choose the numberof“instances” foreach question stem. An instance is the numberoftimes that specific question stem will
appearon the assessment. While the question stem will remain the same, the actual values included in the question will vary
foreach instance. Please note that standard Study Island practice questions do not have instances.
10. Click “Add” to add the question to the assessment;the question will turn yellow. Aftera question has been added, you may
click “Remove” to remove it.
11. Scroll to the top ofthe page and click “Save Selections.”
12. Select “Activated” from the drop down menu at the bottom ofthe screen. To keep it deactivated, select “Deactivated”. NOTE:
When you keep an assignment deactivated, the students are unable to see it.
13. Click “Save Assignment.”
www.studyisland.com
800-419-3191
[email protected]
Create New Topic
The “Create New Topic” page allows teachers and admins to create theirown custom material foruse in the Study Island program.
Students can access this material by clicking “Custom Material” on the left side ofthe page.
Admins can also add custom material to the otherStudy Island topics by clicking “AlterSubjects” on the admin page. Fordetailed
instructions on creating Custom Material, see “Features” in the Help tab orcontact us at 800-419-3191, option 3.
Message Center
The “Message Center” allows users to send messages to otherStudy Island users. Please see page 14 forfurtherdetails.
My Attributes
The “My Attributes” page allows users to change theiruserinformation, including username, password, and otherattributes. Please
note that the admin can block attribute changes from the admin page.
Additional Features
Professional Development
The Professional Development Toolbox is designed as a teacherresource and includes math and reading lesson plans, demonstration
videos, activities forinstruction, and digital and supplemental resources. Each lesson plan contains a pre-assessment, guided practice
activities, and differentiated activities foron-level, struggling, and advanced learners. The video, ifavailable, corresponds to the lesson
plan and covers the pre-assessment, introduction ofnew material, and guided practice activities. Please note that Professional
Development features are not available in all topics.
To access the Professional Development Toolbox:
1. Click a grade level underPrograms on the left hand side ofthe screen.
2. Click a subject.
3.
4.
Click the green checkmark ( ) to the right ofthe topic forwhich you would like to view the Professional Development
Toolbox.
Click the tab you wish to view (Videos, Lesson Plans, orDigital Resources). Please note that not all Professional Development
Toolboxes contain all toolbox features.
www.studyisland.com
800-419-3191
[email protected]
Study Island
Teacher Instructions
DearTeacher,
Welcome! Yourschool has recently purchased Study Island, ouronline standards mastery program. To ensure yoursuccess with Study
Island, we have included some basic information to help you get started. Also, please keep in mind that ifyou have any questions you
can call 800-419-3191, email support@ studyisland.com, orclick on “Live Support” in the top left cornerofyourscreen while logged into
the program.
Study Island Support
How Study Island W orks:
• Each student and teacherhas his orherown username and password.
• The program is divided into sections based on subject (math, reading, etc.).
• Each section is made up ofapproximately 15-30 topics, and each topic corresponds to a standard (ormultiple related standards)
from yourstate curriculum.
• Topics consist ofa lesson and a bank ofpractice questions with explanations..
• It is helpful to view the lesson before answering the questions in the topic.
Goal of the Study Island Program:
The goal ofthe program is to earn a Blue Ribbon, or“pass” every topic (denoted by
demonstrated proficiency in all areas tested.
). Ifa student passes every topic, he orshe has
How to Get Your Students S tarted:
tarted:
Ifyourstudents do not have usernames and passwords, contact the
administratorforStudy Island at yourschool.
Teachers, feel free to practice for
yourself;yourgrades will not be
counted toward the school statistics!
1.
2.
3.
4.
Go to www.studyisland.com.
To log in, students will entertheirunique usernames and passwords underthe “MemberLogin” section located on the left
side ofthe screen.
Click a subject tab.
Click “Pretest” to begin ifthere is a Pretest available. Aftercompleting the Pretest, the student is ready to move on to the
topics within the subject. Ifthere is no Pretest forthe subject, skip this and go to the next step.
Students must complete ten questions in the pretest to move on to the remainderofthe topics within the subject.
5.
6.
Click on a topic to start studying. Fora multiple-topic test, check the box beside each topic and click “Start Studying” in the
upper-right corner.
Students will receive a Blue Ribbon next to the topics they have passed and a red triangle next to the topics in which they
need additional work.
Students will receive a Blue Ribbon when they pass that topic. The passing requirements vary by topic and can be viewed
on the topics screen underthe column “Passing Goal.” The “YourResults” column shows the score the student currently
has. Both columns show the numberofquestions or“items” taken in each topic and the corresponding “score.”
Students will receive this symbol next to a topic in which additional help is needed. In most cases, they will be given
access to a Building Block Topic, which they must pass before returning to the on-grade-level topic.
Students will receive a White Ribbon when they pass a Building Block Topic.
www.studyisland.com
800-419-3191
[email protected]
Tip: Ribbons are awarded based on a student’s cumulative score forthe topic. Forexample, ifa student does multiple
sessions in the same topic, his orhercumulative score is calculated as follows:
Session 1:
5 correct out of10 attempted
Session 2:
3 correct out of5 attempted
Session 3:
4 correct out of5 attempted
Cumulative Score =
12 out of20 = 60%
**Unanswered questions in a topic are disregarded. Students can end a session at any time by clicking “END STUDY SESSION”
without a negative effect to theirscores. They can return to that topic to complete the session at any time. Tip: Each time a
Blue Ribbon is earned, students can click on the ribbon icon to print it!
7.
Aftercompleting all ofthe topics in a subject, the student can move to the “Post Test.” The Post Test becomes available when
students have completed every topic and have earned Blue Ribbons in all but 3 topics. Once the Post Test is complete, the
student has passed the subject. Students may go back at any time and retake any areas in which they had difficulty.
Study Modes
There are fourdifferent study-session modes. To access them, check the box next to the topic then click “Start Studying.” On the next
page, select the numberofquestions and click the dropdown box next to “Session Type.”
Select from the following modes:
•
Test Mode – Standard multiple choice orshort answerformat. By default, questions are in this mode. The numberofquestions
will automatically default to the minimum numberrequired to meet the passing parameterforthat topic. Students have the
ability to choose the numberofquestions forthat test session.
•
Classroom Response System - Teachers will be able to use theirCRS classroom clickers with the Study Island program. Please
note that yourschool will need to have already purchased a CRS system to be able to use this feature. You can find complete
instructions and system requirements online by clicking Help, then Clickers.
•
Game Mode – There are many different games that yourstudents can play. Updated versions of
Java and Flash are required to play the games, and are available online as free downloads. Game
Mode questions contain the same content as otherstudy modes. Please note: Playing the
games WILL affect the students’scores just as if they were taking a regular test session.
The difficulty level does not pertain to the questions, but ratherto the level at which the game is
played.
•
Printable Worksheet – Students can choose one ormultiple topics by putting a check mark next to the topics they want to
include on theirworksheet. Answers are located at the bottom ofa teachercopy;however students do not have access to the
answers. Please note that questions taken in the Printable Worksheet mode cannot be entered into Study Island
reports.
“I used the printable worksheets as well to help students work on ‘showing
work’on math problems. I could not have been as effective in my role in
summerschool without Study Island.”
-Crystal Potter, Mitchell Jr. High, IN
Remember: You
have the option to
control iforwhen
students have access
to game mode.
www.studyisland.com
800-419-3191
[email protected]
School Stats
“Ourschool statistics
indicate that the more
students use Study Island,
the betterthey perform
on state tests.”
--Marianne Bursi, Principal,
ExplorerMiddle, FL
When you log in as a teacher, it will default to the “School Stats” page. You
can generate a variety reports on student progress in each topic by
individual orclass. Bargraphs show student progress compared to the
school and state averages. You can filtermost reports by date and also set
them up to be automatically emailed to you every week. Additional
information on each Study Island report is found starting on page 8 in the
Study Island TeacherManual and online underthe Help tab.
Familiarize
yourselfwith the
various reports to
find the ones that
best suit your
needs.
Printable User List
To print a rosterofyourstudents’usernames and passwords, click “Printable UserList” at the top ofthe School Stats page.
Tip: The Printable UserList is an easy way to look up students’passwords ifthey forget.
“The most beneficial
attribute ofthe program is
that teachers can
manipulate the instruction
to the level ofthe child –
which supports
differentiated instruction.”
-Eric Seymour, Principal,
Northport K-8, FL
A djust Difficulty Level
1. Adjust Passing Parameters - In orderto complete the program, students must “pass” each topic
within a subject. You can adjust the passing parameters fora student based on the student’s proficiency
level and yourexpectations forthat student. See page 7 in yourTeacherManual fordetailed instructions.
2. Restrict Student Access – You can restrict student access to a certain grade level. See page 13 in
yourTeacherManual fordetailed instructions.
3. Text
Text--toto -Speech - Refers to the ability to play text as spoken words and is now available to all grade
levels. The sound can be heard through speakers orheadphones. Text-to-Speech is designed forand most
beneficial to beginning readers, special needs students, and auditory learners. See page 13 in yourTeacher
Manual fordetailed instructions.
Class Manager
Study Island enables teachers to group students into specific classes. Classes are simply groupings. A student can be in more than one
class at a time, and there is no limit to the numberofclasses you can create. Classes can also include students from more than one
grade level. Study Island does NOT require users to use classes orclass pages. These are optional features.
To Create a Class:
1. Click “Class Manager” on the left hand side ofthe screen
2. Entera title foryournew class and click “Next”
(OPTIONAL
OPTIONAL:
OPTIONAL: Teachers may choose to “Override School Preferences.” Here, teachers
may control game features, remedial topics, and timervisibility.)
3. Click the maroon arrow by the preferred grade level, then check offthe students
you wish to add to the class. Ifyou wish to add all students in a grade level, check
the box next to that grade level.
4. Click ‘Save’at the bottom ofthe screen.
Easily view student progress
and class averages
Send messages to all
students in yourclass
Create class pages and class
assignments
Tip:To edit an existing class click the “Edit Class” icon on the Class Managerpage. To add a student to the class, repeat steps
3 and 4. To remove a student from the class, uncheck the box by the student’s name and click “Save.”
www.studyisland.com
800-419-3191
[email protected]
To Create an Assignment:
1. Click “Class Manager“ and locate the class to which you want to add an assignment.
2. Click the “Class Page and Assignments” icon on the farright.
3. Click “Add Assignment.”
4. Select the date assigned and the date due by clicking in the boxes foreach. Note that this sets yourexpectations forthe
students, but does not automatically set yourassignment to expire at the end ofthe time period.
5. Enteran Assignment Title.
6. Type instructions orany relevant information in the “Additional Info” box (optional).
7. Adjust the preferences foryourassignment.. Ifthe admin allows, teachers may choose “Override School Preferences”
(optional).
www.studyisland.com
800-419-3191
[email protected]
A. Assigning to a Class(es)
1.
Check the box(es) that corresponds to the class you would like to add.
B. Assigning to Individual Students
1.
2.
Click the maroon arrow next to the class that corresponds to the student(s) you would like to add to the assignment.
Check the students you want to add to the assignment.
NOTE: Ifyou wish to assign to only selected students, be sure the box forthe class as a whole is unchecked.
C. Add Topics to the Assignment:
1.
2.
3.
4.
5.
Choose a grade and subject under“Select Topics.”
Click “Get Topic List.”
Select the topics.
Select “Activated” from the drop down menu at the bottom ofthe screen. To keep it deactivated, select “Deactivated”. NOTE:
When you keep an assignment deactivated, the students are unable to see it. This can be a great option forteachers who
want to plan ahead!
Click “Save Assignment.”
Creating a Class Page
Once a class is created, a Class Page can be made forthat class. A Class Page can only be made by the school’s admin orthe ownerof
the class. The Class Page must be activated in orderforstudents to access assignments.
1.
2.
3.
Click “Class Manager” on the left side ofthe screen.
Click the “Class Page and Assignments” icon to the right ofthe class name.
Choose “Yes” from the dropdown box by “Class Page Activated.” There must be a note orassignment created before the Class
Page can be activated.
Class Pages can include the following:
• Class Assignments – instruct students to complete a specific Study Island topic(s)
• Class Notes – post class notes
• Class Schedule – post class events
• Class Links – post class links to otherwebsites
www.studyisland.com
800-419-3191
[email protected]
Additional options that appearonce the Class Page is activated:
• Default for Students – When “Yes” is selected, students will see the Class Page upon login. When “No” is selected, students
will need to click “My Class” on the left.
• Block Other Material – When “Yes” is selected, students will only be able to access Study Island topics assigned on the Class
Page(s). They will not be able to navigate to othertopics via the navigation baron the left. Caution: Ifyou share students with
anotherteacher, be sure to discuss whetherthis feature will work foryou. When you select “Block OtherMaterial,” ALL subjects
will be blocked. In orderforstudents to access otherteachers’material, those teachers will need to create assignments, as well.
LiveView
LiveView is a real-time monitoring system that allows the admin and teachers to observe students’progress as they work. LiveView
displays which students in yourclass are logged in, the assignment and/ortopic(s) on which they are working, and the number
questions correct out ofthe numberattempted. You can sort any ofthe columns in the Current Activities section. LiveView also offers
an individual student Summary Report, a Weekly Class Performance/Usage Chart, and a Blue Ribbon chart. Please note that LiveView
requires Adobe Flash 8 to operate.
How to Use LiveView:
1. Click “Class Manager” on the left side ofthe screen. Be sure you have already created yourclass. Ifnot, please see page 27 for
instructions on creating a class.
2. Click “LiveView” located above the list ofclasses.
3. Click on yourclass title on the left side ofthe screen.
4. (Optional) To view an Individual Student Summary Report, click on a student’s name. The Summary Report will appearat the
bottom left ofthe screen.
How to View Class Info Charts:
1. Select the program in the dropdown box next to “Chart/UserProgram Data.”
2. To enlarge the chart, click on the chart itself.
Tip: LiveView is designed to update every 10 seconds, however, some servers may take longerto automatically
update. Manual updates are available by clicking the “Refresh Now” button located at the top ofthe screen.
Parent Notifications
Parent Notifications are automatic emails designed to keep parent(s) involved in theirstudent(s) education process and to promote
bettercommunication between parents and teachers. With this feature, a teachercan keep parents informed oftheirstudents(s)
progress in the program by creating any ofseveral types ofParent Notification Requests. It is recommended that teachers entervalid
email addresses under“My Attributes” priorto creating new Notifications forthis feature to work properly. Please note
n ote that the admin
or teacher must set up “Parents” and “Parent Groups” before a new Notification can be created.
To Create a Parent for Parent Notifications:
1. Click “Class Manager” on the left hand side ofthe screen.
2. Locate the Class Title and click on the Parent Notification icon on the right side ofthe screen.
3. Click “Add a Parent.”
4. Select a student using the dropdown box by “Student.”
5. Click “Add New Parent.”
6. Entera Parent First Name, Last Name, Email Address and Type from the dropdown box by “Type.”
7. Click “Save” afteradding each parent.
To Create a Parent Group:
1. Click “Class Manager” on the left hand side ofthe screen.
2. Locate the Class Title and click on the Parent Notification icon on the right side ofthe screen.
3. Click “Create Parent Group.”
4. Entera name and description forthe Parent Group.
5. Click each Parent Name on the left side ofthe box under“Available Parents” and use the arrows to add the selected Parents to
the group on the right side ofthe screen under“Parents in Group.” Also, you can click on “Move All Parents to Group” to move
all the “Available Parents” to the “Parents in Group” section on the right.
6. Click “Save” aftersetting up each Parent Group.
www.studyisland.com
800-419-3191
[email protected]
To Create a Parent Notification:
1. Click “Class Manager” on the left hand side ofthe screen.
2. Locate the Class Title and click on the Parent Notification icon on the right side ofthe screen.
3. Click “Create a Parent Notification.”
4. Select the type ofNotification. There are several options available including Assignment Due/ReminderAlert and Low Score
Warning. See chart below.
5. Entera Notification Name.
6. Select the Frequency, Time, Start and End Dates, and Program and Subject from the dropdown boxes. Please note that
options here may vary depending on answerchoices.
7.
8.
9.
Select the Recipients from the dropdown box by “Send To.”
Click “Save.”
(Optional) Click “Preview Email” to see how the email will appearto selected recipient(s).
Tip: Look on the right side ofthe Notification box forexplanations!
www.studyisland.com
800-419-3191
[email protected]
Writing Assignment
The Writing Assignment feature is a streamlined, paperless way to develop students’writing skills. Teachers can choose from a
selection ofgrade-specific writing prompts orcreate theirown writing assignments. Students can use online graphic organizers to plan
written responses, then create and submit compositions electronically. Afterviewing submitted assignments online, teachers will be
able to leave comments and grade and/orsend the composition back to students forrevisions. Note: A student will see “Writing
Portfolio” as an option on the left side ofthe screen only once that student has turned in his orherfirst composition. Ifa student saves
a composition forlater, he orshe will access the saved composition through the assignment.
To Create a Writing Assignment:
1. Click “Class Manager” on the left side ofthe screen.
2. Click on the Class Page and Assignment icon to the right ofthe class title. Note: if
you have not yet created a class, please see page 3 in the TeacherManual.
Students can access current
and previous writing
3. Click “Add Assignment.”
compositions by clicking
4. Click “Create Writing Assignment.”
“Writing Portfolio” on the left
5. Select the date assigned and the date due by clicking in the box foreach. Note
side ofthe page aftera
that this sets yourexpectation forthe students, but not automatically set your
composition has been
assignment to expire at the end ofthe time period.
submitted.
6. Enteran Assignment Title and type instructions orany relevant information in the
“Additional Info” box (optional).
7. Click the class that corresponds to the student(s) you would like to add to the assignment.
www.studyisland.com
800-419-3191
[email protected]
8. Check “Select All” orthe individual students you want to add to the assignment.
9. Select a Writing Prompt, Graphic Organizer(optional), and Writing Rubric under“Writing Assignment Options.”
10. Select “Activated” from the dropdown menu at the bottom ofthe screen. To keep it deactivated, select “Deactivated.” NOTE:
When you keep an assignment deactivated, students are unable to see it. This can be a great option forteachers who want to
plan ahead!
11. Click “Save Assignment.”
To Review/Grade a Writing Assignment:
1. Click “Class Manager” on the left side ofthe screen, then click on the Class Page and Assignment icon to the right ofthe class
title.
2. Click the View and Grade Assignments icon to the right ofthe assignment title.
3. Click “Grade” next to the submitted composition. Here you will be able to view the submitted assignment online, leave
comments, and grade and/orreturn the compositions to students forrevisions.
4. Click “Mark as Completed” when you are finished grading the assignment.
To Delete a Composition:
1. Click “Schools Stats” on the left side ofthe screen.
2. Choose Assignment Report from the dropdown box by “Report Type.”
3. Select the Class and Assignment and click “View Report.”
4. To the right ofthe student’s name, click the numberunderthe “# Versions” column.
5. Check offthe appropriate composition and click “Remove Checked Records.”
Tip: Teachers can access compositions by clicking the View and Grade Assignments icon under“Class Page and Assignments.”
Ifthe
writing assignment has been deleted, the teachercan log in as the student and click “Writing Portfolio” to access the composition.
Custom Assessment Builder
The Custom Assessment Builderallows teachers to create theirown customized assessments to measure student proficiency and
progress. Teachers can choose questions from eitherthe standard Study Island question bank orfrom a new question bank designed
specifically forthe Custom Assessment Builder. At this time, Custom Assessment Builderis available formath and reading in grades 3-8.
Please note that not all subjects and topics have unique question banks available.
To Create a Custom Assessment:
1. Click “Class Manager” on the left side ofthe screen.
2. Click the “Class Page and Assignments” icon to the right ofthe class name, then click “Add Assignment” foreithera class or
individual student.
3. Select “Create Custom Assessment.”
4. Select the date assigned and the due date, then enteran assignment title.
5. Type instructions orany relevant information in the “Additional Info” box (optional).
6. Choose a grade and subject under“Select Q uestions,” then click “Get Topic List.”
7. Click the “Select Q uestions” icon to the right ofthe desired topic.
8. (Optional) Check the box by “Show questions from both practice and assessment item banks” ifyou wish to include standard
Study Island practice questions as well as unique Custom Assessment questions in yourassessment. Custom Assessment
questions will be aqua and say “Assessment.” Standard Study Island questions will be grey and say “Practice.”
9. Choose the numberof“instances” foreach question stem. An instance is the numberoftimes that specific question stem will
appearon the assessment. While the question stem will remain the same, the actual values included in the question will vary
foreach instance. Please note that standard Study Island practice questions do not have instances.
10. Click “Add” to add the question to the assessment;the question will turn yellow. Aftera question has been added, you may
click “Remove” to remove it.
11. Scroll to the top ofthe page and click “Save Selections.”
12. Select “Activated” from the drop down menu at the bottom ofthe screen. To keep it deactivated, select “Deactivated”. NOTE:
When you keep an assignment deactivated, the students are unable to see it.
13. Click “Save Assignment.”
www.studyisland.com
800-419-3191
[email protected]
Create New Topic Page
The “Create New Topic” page allows teachers and admins to create theirown custom material foruse in ourprogram. Students can
access this material by clicking “Custom Material” on the left side ofthe page. Admins can also add custom material to the otherStudy
Island topics by clicking “Alter Subjects” on the admin page. Fordetailed instructions on creating Custom Material, see the Help tab or
contact us at 800-419-3191, option 3.
Message Center
The “Message Center” page allows users to send messages to otherStudy Island
users. Please see page 17 ofthe TeacherManual forfurtherdetails.
“To motivate the students, I send messages of
encouragement through [the Message Center].”
-JenniferYokom, Teacher, WA Wright Elementary, TN
My Attributes
The “My Attributes” page allows users to change theiruserinformation, including
username, password, and otherattributes. Please note that the admin can block attribute changes from the admin page.
Forinformation regarding implementation ideas and activities referto page 19 ofthe TeacherManual, the Help tab under
Training/Implementation, and the Study Island newsletter.
Additional Features
Professional Development
The Professional Development Toolbox is designed as a teacherresource and includes math and reading lesson plans, demonstration
videos, activities forinstruction, and digital and supplemental resources. Each lesson plan contains a pre-assessment, guided practice
activities, and differentiated activities foron-level, struggling, and advanced learners. The video, ifavailable, corresponds to the lesson
plan and covers the pre-assessment, introduction ofnew material, and guided practice activities. Please note that Professional
Development features are not available in all topics.
To access the Professional Development Toolbox:
1. Click a grade level underPrograms on the left hand side ofthe screen, then click a subject.
2. Click the green checkmark ( ) to the right ofthe topic forwhich you would like to view the Professional Development
Toolbox.
3. Click the tab you wish to view (Videos, Lesson Plans, orDigital Resources). Please note that not all Professional Development
Toolboxes contain all toolbox features.
www.studyisland.com
800-419-3191
[email protected]
BackBack-toto -School Checklist
Update School Contact Information
1.
Login to Study Island as the Administrator.
2.
Click on “School Information” underthe Admin Functions box.
3.
Update the principal and administrator’s name and email addresses as needed.
Delete Users No Longer Enrolled in Your School
1.
On the Admin Page, select “All Users” in the dropdown box at the bottom right ofthe screen labeled “Show Users In.”
2.
Check the boxes next to the users you wish to remove. Ifyou wish to remove an entire grade level, click “Select All Grade Level
‘X’Users” listed at the top ofthat grade level.
3.
Click “Remove Users” located directly above any grade level.
4.
When the page reloads, select “Removed Users” in the dropdown box at the bottom right ofthe screen labeled “Show Users
In.”
5.
Check the boxes next to the users you wish to remove. Ifyou wish to delete all users in the Removed Users list, click “Select All
Removed Users.”
6.
Click “Delete Selected Users” above the removed userlist. Note: This will permanently delete the selected users and theirdata.
Advance Students a Grade Level
1.
On the Admin Page, select “All Users” in the dropdown box at the bottom right ofthe screen labeled “Show Users In.”
2.
Check the boxes next to the users you wish to advance. Ifyou wish to advance an entire grade level, click “Select All Grade
Level ‘X’Users” listed at the top ofthat grade level. Note: We recommend advancing all students in all grades simultaneously
by clicking “Check All Listed Users.” Ifyou choose to advance students one grade level at a time, we recommend starting with
the highest grade level.
3.
Click “Advance Grade” above any grade level.
Add New Students
Please referto page 5 ofthe AdministratorManual orthe online tutorials located on the Help tab fordetailed instructions.
Edit Classes
1.
Click “Class Manager” on the left side ofthe page.
2.
Review existing classes.
3.
Remove, edit, oradd classes as necessary. See pages 27-30 fordetailed instructions.
Distribute Usernames and Passwords to Teachers
1.
Click “Printable UserList” on the Admin page.
2.
Print and distribute to appropriate teachers.
Direct Teachers to the Teacher Manual
This certifies that
has successfully mastered all levels of
Study Island - 2009-2010.
_______________________________
Teacher
________________________________
Principal
www.studyisland.com
800-419-3191
[email protected]
Dear Parent or Guardian,
O ur schoolhas purchased a subscription to a research
research-based
based standards mastery program called Study Island. During our subscription,
your child can access Study Island free of charge anyw here th
that Internet access is available. Study Island has site-w
site ide security features
in place to provide greater peace of mind.
W e are excited about the benefits this program can bring to our students, and w e encourage you to take advantage of this opportunity.
Please feelfree to contact Study Island at 800-419
419-3191 or support@ studyisland.com if you have any questions.
Sincerely,
Principal
U sing Study Island from H ome
Study Island is completely W eb-based,
based, w hich allow s students to access the program from any computer w ith an Internet connection
and a standard W eb brow ser. Study session results are automatically recorded for teacher review , including results from sessions
completed outside of school.
The program is divided into sections based on subject (math, reading, etc.). Each section is made up of 15 to 30 topics, w ith each topic
containing about 20 to 30 questions. Topics are accompanied by a lesson,
n, w hich contains a brief overview of the materialcovered in
that topic.
Follow the instructions below to use the program:
1.
Go to w w w .studyisland.com.
2.
Enter your username and passw ord at the upper left side of the screen, and click “Submit.” Students w illreceive a username and
passw ord from their school.
3.
Click on a subject (math, reading, etc.).
4.
If this is the first time using the program, click "Pretest." You must complete 10 Pretest questions to unlock the rest of the
othe
content in that subject. If there is no Pretest option, or if you have already taken the Pretest, you may move on to the other
content topics.
5.
Choose a Session Type. The default setting is Test mode, how ever students may also select Printable W orksheet or Game mode if
permitted by the school.
6.
To pass a topic, you must meet the passing requirements, w hich are based on a minimum number
umber of questions answ ered (usually
10) and a minimum percentage correct (around 70% ). A blue ribbon icon (
) is displayed next to allpassed topics.
7.
O nce you have completed the Pretest, you may w ork through the remainder of the topics in any order. You must pass alltopics
before taking the Post Test.
8.
O nce you have passed allthe topics, you must pass the Post Test to complete the subject. Ignore this step if the subject has no
Post Test.
9.
W hen you pass alltopics in allsubjects, you have completed the program.
To A ccess Reports:
Select a subject under Reports on the left-hand
hand side of the screen to access your reports.
“W e have one building that repeatedly has students doing
thousands of problems over our vacation breaks and over
summer. That says a lot about the program.”
-Cheryl
CherylSmith, Director, Assessment & Support, M iamisburg
City Schools, O H
37
www.studyisland.com
800-419-3191
[email protected]
Estimados Padres o Tutores:
N uestra escuela ha comprado una suscripción a un programa de dominio de estándares basado en investigación, este programa se
llama Study Island. ¡Durante elperíodo de suscripción su hijo puede acceder a Study Island de manera gratuita en cualquier lugar que
tenga acceso a Internet!En todo elsitio de Study Island existen sistemas de seguridad internos para brindarle una mayor tranquilidad.
i
Estamos muy entusiasmados con los beneficios que este programa puede brindar a nuestros alumnos, nosotros queremos que usted
saque provecho de esta oportunidad. Si tiene alguna duda o comentario, por favor no dude en ponerse en contacto con Study Island al
teléfono 800-419-3191 o alcorreo electrónico support@ studyisland.com
and.com.
Sinceramente,
ElDirector
U tilizando Study Island en la C asa
Study Island es un programa que está completamente basado en Internet, esto permite a los alumnos tener acceso alprograma desde
de
cualquier computadora que tenga una conexión a Internet y un bu
buscador
scador de internet estándar. Los resultados de las sesiones de Study
Island se registran automáticamente para que los profesores puedan revisarlos, esto incluye los resultados de las sesiones que
qu se
realizan fuera de la escuela.
Elprograma está dividido en secciones basadas por las materias (M atemáticas, Lectura, etc.). Cada sección se compone de 15 a 30
temas, cada tema se compone de 20 a 30 preguntas. Los temas están acompañados de una lección, la cualcontiene una breve
descripción delmaterialcubierto en eltema.
Siga las siguientes instrucciones para usar elp
programa:
rograma:
1.
Vaya alsitio w w w .studyisland.com
2.
Ingrese elnombre delusuario “username” y la contraseña “passw ord” en la parte izquierda superior. Después haga clic en el
botón “Submit”.. Los estudiantes recibirán elnombre delusuario y la contraseña en la escuela.
3.
H aga clic en una materia (M atemáticas, Lectura, etc.).
4.
Si está utilizando elprograma por primera vez haga clic en elbotón “pretest” examen preliminar. U sted deberá de completar
10 preguntas delexamen preliminar para tener acceso alcontenido restante de la materia. Si no hay una opción de
“pretest” examen preliminar o si ya la tomó, usted puede acceder a los otros temas.
5.
Elija un tipo de sesión. Eltipo de sesión que aparece como regla, es elmodo de prueba, no obstante los estudiantes pueden
seleccionar otros modos como elde impresión de hoja de trabajo o juegos, en caso de que estén permitidos en la escuela.
6.
Para aprobar un tema, usted debe de cumplir con los requi
requisitos
sitos para aprobar. Estos requisitos se basa en elnúmero de
preguntas contestadas (generalmente 10) y un porcentaje mínimo de respuestas correctas (70% ). U n icono de un listón azul
aparecerá junto a todos los temas que sean aprobados.
7.
U na vez que haya completado elexamen preliminar, usted podrá acceder elresto de los temas en elorden que usted desee.
U sted debe de aprobar todos los temas antes de tomar elPost Test.
8.
U na vez que usted haya aprobado todos los temas, usted será capaz de aprobar elPost Test. U sted debe de aprobar elPost
Test para completar la materia. En caso que la materia no tenga Post Test, ignore este paso.
9.
U na vez que haya aprobado todos los temas de todas las materias, usted habrá terminado elprograma.
Repo
eportes:
C omo A cceder a los R
eportes:
Seleccione una materia en lado izquierdo de la pantalla para tener acceso a los informes
38
www.studyisland.com
800-419-3191
[email protected]
A ppendix A : Glossary
Adjust Student Difficulty - feature found on the SchoolStats page that allow s admins and teachers (if allow ed) to adjust the percentage
correct required to achieve the blue ribbon (
) and force students into low er or higher grade levelmaterial
Administrator – person
erson from your schoolor district designated to register students and teacher
teachers,
s, update the roster as needed, and set
globalpreferences for the program
Advance - to
o promote students to a higher grade level
Assignment - topic(s)
opic(s) chosen by the teacher for the students to complete;created on the Class M anager Page and accessed through
the Class Page. See ‘Completed Assignment.’
Attributes – individual
ndividualdata for each user, such as grade level, username, passw ord, and demographics
Block O ther M aterial- feature
eature that allow s you to designate the materialto w hich your students have acces
access.
s. Students w illonly be able
to access Study Island topics assigned on the Class Page(s).
Blue Ribbon – the designation of topic mastery
Building Block – remedial
emedialmaterialautomatically generated w hen a student does not meet certain passing requirements
Class – a group or grouping of students created on the Class M anager Page
Class M anager – Study
tudy Island page w here teachers can manage classes, and create/edit assignments and class pages
Class Page – informationalpage created by teachers in Class M anager containing assignments, notes, etc. for students
Class Properties – settings chosen for each class by the teacher (e.g. game access, timer visibility, and rremedial
emedialtopic availability)
Create N ew Topic - editor
ditor w ith w hich Custom M aterialcan be created
Classroom Response Systems (CRS) – interactive
nteractive handheld classroom devices w hich w ork in conjunction w ith the Study Island program
Completed Assignment - assignment
ssignment in w hich students have earned a Blue Ribbon in each included topic
Custom M aterial– questions created by teachers added into the Study Island program
Database File - school-generated
generated file containing student information used to register users in Study Island
Default Passw ord - school-chosen
chosen passw ord given to allusers upon registration if unique pa
passw
ssw ord is not specified
H igh Score Table - record
ecord of high game scores achieved in game mode
H omeroom - optional
ptionalfield used during registration to automatically place students in a class
Import - method
ethod of registering users by uploading a database file containing user information
Items - number of questions
Lesson - brief topic overview
Live View - a real-time
time monitoring system that allow s teachers to observe students’ progress as they w ork
M apping Fields - process
rocess of matching your database fields to re
recognized Study Island fields
39
www.studyisland.com
800-419-3191
[email protected]
N ot Trusted - setting designated by Admin that limits teacher functions and access to student data
O ff grade Level- see ‘Building Block’
O w ner - teacher or Admin in controlof class
Parent N otification - an automatic notification process designed to communicate student progress to parents via email
Pass Topic - to pass a topic, a student must achieve a specified percentage correct w hile having attempted a minimum number of
questions
Passing Parameters - requirements to designate topic mastery;consists of minimum percentage and minimum number of questions
Post Test – nondiagnostic topic designed to determine subject mastery
Pretest - nondiagnostic topic designed to introduce users to the Study Island program
Printable U ser List - roster of users’ usernames and passw ords
Printable W orksheet - session type that allow s users to print questions from a Study Island topic
Register - to add users to the program manually or via a database file
RemedialTopics - see ‘Building Block’
Report - Study Island statisticaldata organized in a view able format
SchoolIdentifier - suffix added to a username to prevent a high number of duplicates (e.g.:schoolname, initials, or mascot)
Session - duration of time in w hich a user participates in a Test, Game, Classroom Response System, or Printable W orksheet w ithin the
Study Island program
Session Type - see ‘Study M ode’
SIS Primary Key - identification number that can be added w hen registering users to identify users in our system
Start Date - the day the user w as created and/or the date from w hich stats are show n
Study M ode - method in w hich students can w ork through Study Island topics;options include Test, Game, Classroom Response
System and Printable W orksheet
Suffix - see ‘SchoolIdentifier’
Topics - individualsegments w ithin a subject
Trusted - setting designated by the admin that allow s teacher functions and access to student data
W hite Ribbon - designation of Building Block mastery
40
www.studyisland.com
800-419-3191
[email protected]
Icon Glossary
Text H ighlighter - U sed for highlighting text in a question
Font Size Changer - U sed for changing the font size of a
question
Text to Speech - Rollover to hear audio of question
*Audio available for K-1 only
Envelope - Link to M essage Center
Building Block - Remedialmaterialautomatically generated
w hen a student does not meet certain passing requirements
H azard Triangle - Denotes student is struggling in topic
Blue Ribbon - Designation of topic mastery
W hite Ribbon - Designation of topic mastery for a Building
Block topic
Preview Class Page – Default
Preview Class Page – N ot Default
Edit Class or Edit Assignment
Class Page and Assignments
Remove Class or Assignment
Deactivate Assignment
Activate Assignment
Assignment Results
Locked Assignment
View Lesson
View Q uestions
View Expectation
View Standards M ap
41
Blue
Ribbon
Class Gradebook
Program
Subject Subject by By
By
By
All
by
by Topic Reporting Topic Subject Program Activity
Subject
Students with stats (not ALL students)
X
X
X
X
Filter by date
X
X
X
X
Histogram / graph
X
X
X
X
X
X
X
X
Automatically Email Report
X
X
Open in Excel
X
X
X
Sort
X
X
X
Send message to student from report
X
X
X
X
X
X
X
X
X
X
X
X
X
X
X
X
X
X
X
X
Compare with others
X
X
X
Building Block stats
X
X
X
X
X
X
X
X
X
X
X
Click on stats to get more details
X
X
X
X
X
X
X
X
X
X
X
X
X
X
X
X
X
X
X
X
X
Program Subject
Subject by By
By
By
All
by
by
Reporting Topic Subject Program Activity
Subject
Topic
X
X
X
X
All
By Subject
Subjects
X
X
X
By
Subject
Class Comparison
X
X
X
All
Subjects
Class Summary
X
X
Click on name to get more details
Individual
Student
X
X
X
Suggested topics
X
X
X
X
X
Item analysis
X
Disaggregate view
X
Shows blue ribbons
X
Time spent
X
X
X
Grade (proficient, below basic, etc.)
X
X
X
X
X
X
X
X
X
X
X
X
X
X
X
X
X
X
X
X
Benchmarking
Assignment
Gradebook
Trend Report
Weekly
High
Login
Score
* Item
Class
Class
Individual Executive Usage Cumulative
Performance
Analysis Summary Comparison Student Summary Graph Performance
X
X
X
Students with stats (not ALL students)
X
Filter by date
X
Histogram / graph
X
X
X
X
X
X
X
X
Automatically Email Report
X
Open in Excel
X
X
X
X
X
Sort
Send message to student from report
X
X
X
X
X
X
X
X
X
X
X
X
Click on name to get more details
Click on stats to get more details
Building Block stats
Compare with others
Suggested topics
X
Item analysis
X
X
Disaggregate view
X
Shows blue ribbons
Time spent
X
X
X
X
X
Grade (proficient, below basic, etc.)
Students with
Has
Filter by
Stats (not ALL Date Inside Histogram Automatically
/Graph
Email Report
students)
Report
Class Gradebook
Report
By Program Broken Down by Subject
By Subject Broken Down by Topic
By Subject Broken Down by Reporting Category
By Topic
By Subject
By Program
All Activity
X
X
X
X
X
X
Blue Ribbon Report
Individual Student All Subjects
Report
By Subject
Class Summary
All Subjects
Report
By Subject
Class Comparison
Report
By Program Broken Down by Subject
By Subject Broken Down by Topic
By Subject Broken Down by Reporting Category
By Topic
By Subject
By Program
All Activity
X
X
X
X
X
X
X
X
X
X
X
X
X
X
X
X
X
X
X
X
X
X
X
X
X
X
Assignment Report
Benchmarking
Report
Trend Report
Weekly Report
High Score Report
Login Report
Gradebook Format
* Item Analysis
Class Summary Format
Class Comparison Format
Individual Student Format
Executive Summary Format
X
X
X
X
X
X
X
X
X
X
X
X
Open in
Excel
X
X
X
X
Sort
X
X
X
X
X
X
X
X
Click
Click
Send
Name for Stats for
Building
Message Details
Details Block Stats
X
X
X
X
X
X
X
X
X
X
X
X
X
X
X
X
X
X
X
X
X
X
X
X
X
X
X
X
X
X
X
X
X
X
X
X
X
X
X
X
X
X
X
X
Usage Graph
Cumulative Performance Graph
Performance Graph
X
X
X
X
X
X
X
X
X
X
X
X
X
X
X
X
X
X
X
X
X
X
X
Compare Suggested
Item
Disaggregate
Blue
with Others
Topics
Analysis
View
Ribbons
Time
Spent
Grade (proficient,
below basic, etc)
X
X
X
X
X
X
X
X
X
X
X
X
Blue Ribbon Report
Individual Student
Report
X
X
X
X
Class Summary
Report
X
X
X
X
X
X
X
X
X
X
X
X
X
X
X
Class Gradebook
Report
Class Comparison
Report
Assignment Report
X
X
X
X
X
X
X
X
X
X
Benchmarking
Report
Trend Report
Weekly Report
High Score Report
Login Report