1
User Manual
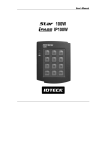
100RV
Standalone RFID Access Controller
Table of contents
......................................................
ii
...................................................
1
.........................................
3
.................................................
4
...............................................................
4
..............................................
4
......................................................
4
....................................................
4
........................................................
5
.......................................................
5
.........................................................
5
................................
5
.........................................................
5
.............................................................
6
..........................................................
7
......................................................
7
.....................................
9
..........................................................
9
Table of contents
1
Safety Information
1 IMPORTANT SAFETY INSTRUCTIONS
2
Product introduction
1 Features
1.1 Single Door Access Control
1.2 User Registration
1.3 Keypad Registration
1.4 Buzzer On/Off
1.5 External I/O Pins
1.6 Duress Alarm
1.7 Limited Access Tries for an Unregistered Card
2 What's included
3 At a glance
3.1 Front / Rear
4 Cable color scheme
3
Installation and external connection
1 Cable selection
2 Bypass diode connection
3 I/O connection
. . . . . . . . . . . . . . . . . . . . . . . . . . . . . . . . . . . . . . . . . . . . . . . . . . 10
. . . . . . . . . . . . . . . . . . . . . . . . . . . . . . . . . . . . . . . . . . . . . . . . . . . . . . . . . . 10
3.1 Input Connection
. . . . . . . . . . . . . . . . . . . . . . . . . . . . . . . . . . . . . . . . . . . . . . . . . . . . . . 10
Exit Button Connection
. . . . . . . . . . . . . . . . . . . . . . . . . . . . . . . . . . . . . . . . . . . . . . . . . . . 11
Door Contact Sensor Connection
. . . . . . . . . . . . . . . . . . . . . . . . . . . . . . . . . . . . . . . . . . . 11
Auxiliary Input Device Connection (AUX 1 (green), AUX 2 (green with white stripes),
AUX 3 (green with red stripes) . . . . . . . . . . . . . . . . . . . . . . . . . . . . . . . . . . . . . . . . . . . . . 11
3.2 Output Connection
. . . . . . . . . . . . . . . . . . . . . . . . . . . . . . . . . . . . . . . . . . . . . . . . . . . . 11
Door open (POWER FAIL SAFE) when the power is disconnected from the door lock
p.ii
100RV
. . . . . . . . . . . . . . . . . . . . . . . . . . . . . . . . . . . . . . . . . . . . . . . . . . . . . . . . . . . 12
(Door Relay)
Door close (POWER FAIL SECURE) when the power is disconnected from the door lock
. . . . . . . . . . . . . . . . . . . . . . . . . . . . . . . . . . . . . . . . . . . . . . . . . . . . . . . . . . . 12
(Door Relay)
Alarm Connection (Alarm Relay)
. . . . . . . . . . . . . . . . . . . . . . . . . . . . . . . . . . . . . . . . . . . . 12
Chime Bell Connection (the chime bell operated by TTL-level signal must be installed in
. . . . . . . . . . . . . . . . . . . . . . . . . . . . . . . . . . . . . . . . . . . . . . . . . . . . . . . . . . . . . 12
advance.)
. . . . . . . . . . . . . . . . . . . . . . . . . . . . . . . . . . . . . . . . . . . . . . . . 13
4 External reader connection
. . . . . . . . . . . . . . . . . . . . . . . . . . . . . . . . . . . . . . . . . . . . . 13
4.1 Proximity Reader Connection
4
. . . . . . . . . . . . . . . . . . . . . . . . . . . . . . . . . . . . . . . . . . . . . . . . . . . . . . . . 14
Initialization
. . . . . . . . . . . . . . . . . . . . . . . . . . . . . . . . . . . . . . . . . . . . . . . . . . . . . . . . . 14
1 Basic operations
. . . . . . . . . . . . . . . . . . . . . . . . . . . . . . . . . . . . . . . . . . . . . . . . . . . . . . . . . . . 14
1.1 Initial state
1.2 Predefi ned Operation for a Registered Card
1.3 Exit Button Operation
. . . . . . . . . . . . . . . . . . . . . . . . . . . . . . . . . 14
. . . . . . . . . . . . . . . . . . . . . . . . . . . . . . . . . . . . . . . . . . . . . . . . . . 14
1.4 Predefined Operation for an Unregistered Card
1.5 Secure Mode Operation
1.6 Duress Alarm
. . . . . . . . . . . . . . . . . . . . . . . . . . . . . . . . . . . . . . . . . . . . . . . . . 14
. . . . . . . . . . . . . . . . . . . . . . . . . . . . . . . . . . . . . . . . . . . . . . . . . . . . . . . . . 15
1.7 How to use the chime bell
2 Initialization
. . . . . . . . . . . . . . . . . . . . . . . . . . . . . . . . . . . . . . . . . . . . . . . 15
. . . . . . . . . . . . . . . . . . . . . . . . . . . . . . . . . . . . . . . . . . . . . . . . . . . . . . . . . . . . 15
3 Forced initialization with external line
5
Reader mode setup
. . . . . . . . . . . . . . . . . . . . . . . . . . . . . . . . . . . . . . . . 16
. . . . . . . . . . . . . . . . . . . . . . . . . . . . . . . . . . . . . . . . . . . . . . . . . . 17
1 Reader mode setup (RF only)
. . . . . . . . . . . . . . . . . . . . . . . . . . . . . . . . . . . . . . . . . . . . . . . 17
2 Reader mode setup (RF + P/W)
. . . . . . . . . . . . . . . . . . . . . . . . . . . . . . . . . . . . . . . . . . . . . 18
3 Reader mode setup (PIN only)
. . . . . . . . . . . . . . . . . . . . . . . . . . . . . . . . . . . . . . . . . . . . . . 18
4 Reader mode setup (RF/PIN combination mode)
5 Enabling keypad input for the card number
6
. . . . . . . . . . . . . . . . . . . . . . . . . . . . . . . 14
User management
. . . . . . . . . . . . . . . . . . . . . . . . . . . . . . . . 19
. . . . . . . . . . . . . . . . . . . . . . . . . . . . . . . . . . . . 19
. . . . . . . . . . . . . . . . . . . . . . . . . . . . . . . . . . . . . . . . . . . . . . . . . . . 21
1 To register cards in RF only mode
. . . . . . . . . . . . . . . . . . . . . . . . . . . . . . . . . . . . . . . . . . . . 21
2 Registering cards in a combination of RF and P/W modes
3 To register cards in PIN mode
. . . . . . . . . . . . . . . . . . . . . . . . . . . . . . . . . . . . . . . . . . . . . . . 22
4 Registering cards in RF card / PIN combination mode
5 To delete a registered card or PIN number
7
Basic setup
. . . . . . . . . . . . . . . . . . . . . . . . . 21
. . . . . . . . . . . . . . . . . . . . . . . . . . . . 22
. . . . . . . . . . . . . . . . . . . . . . . . . . . . . . . . . . . . . 23
. . . . . . . . . . . . . . . . . . . . . . . . . . . . . . . . . . . . . . . . . . . . . . . . . . . . . . . . . 24
1 DURESS alarm
. . . . . . . . . . . . . . . . . . . . . . . . . . . . . . . . . . . . . . . . . . . . . . . . . . . . . . . . . . 24
2 To specify the retry count for an unregistered ID
. . . . . . . . . . . . . . . . . . . . . . . . . . . . . . . . 24
3 To specify the keypad input suspension time if the retry count with an unregistered ID
p.iii
Table of contents
100RV
exceed the limit
. . . . . . . . . . . . . . . . . . . . . . . . . . . . . . . . . . . . . . . . . . . . . . . . . . . . . . . . . . . . 25
4 To specify the delayed start time in secure mode
. . . . . . . . . . . . . . . . . . . . . . . . . . . . . . . . 25
. . . . . . . . . . . . . . . . . . . . . . . . . 26
5 To specify the operation time of the door contact sensor
6 To specify the limited time for the keypad input
. . . . . . . . . . . . . . . . . . . . . . . . . . . . . . . . 26
. . . . . . . . . . . . . . . . . . . . . . . . 27
7 To specify the alarm output port for the dismantled device
8 To open or close the entry door
. . . . . . . . . . . . . . . . . . . . . . . . . . . . . . . . . . . . . . . . . . . . . 27
9 To set or release the quick mode
. . . . . . . . . . . . . . . . . . . . . . . . . . . . . . . . . . . . . . . . . . . . 28
10
8
To set or release the toggle mode for the door relay
I/O time setup
. . . . . . . . . . . . . . . . . . . . . . . . . . . . 28
. . . . . . . . . . . . . . . . . . . . . . . . . . . . . . . . . . . . . . . . . . . . . . . . . . . . . . 29
1 To specify the output time if the card is authenticated
. . . . . . . . . . . . . . . . . . . . . . . . . . . 30
. . . . . . . . . . . . . . . . . . . . . . . . 30
2 To specify the output time if the card is not authenticated
3 To specify the DURESS TTL output
. . . . . . . . . . . . . . . . . . . . . . . . . . . . . . . . . . . . . . . . . . . 31
4 To specify the alarm output for an input error of the door contact sensor
5 To specify the alarm operation time for AUX 1
. . . . . . . . . . . . . . . . . . . . . . . . . . . . . . . . . 32
6 To specify the alarm operation time for AUX 2
. . . . . . . . . . . . . . . . . . . . . . . . . . . . . . . . . 33
7 To specify the alarm operation time for AUX 3
. . . . . . . . . . . . . . . . . . . . . . . . . . . . . . . . . 33
8 To activate or deactivate the door relay by the door contact sensor
9
Advanced setting
. . . . . . . . . . . . . . . . . 34
. . . . . . . . . . . . . . . . . . . . . . . . . . . . . . . . . . . . . . . . . . . . . . . . . . . . 36
1 To specify the TTL output operation mode
2 To set the chime bell function
. . . . . . . . . . . . . . . . . . . . . . . . . . . . . . . . . . . . . 36
. . . . . . . . . . . . . . . . . . . . . . . . . . . . . . . . . . . . . . . . . . . . . . 36
3 To specify the chime bell operation time
. . . . . . . . . . . . . . . . . . . . . . . . . . . . . . . . . . . . . . 37
4 To specify the input mode for AUX 1
. . . . . . . . . . . . . . . . . . . . . . . . . . . . . . . . . . . . . . . . . 37
5 To specify the input mode for AUX 2
. . . . . . . . . . . . . . . . . . . . . . . . . . . . . . . . . . . . . . . . . 38
6 To specify the input mode for AUX 3
. . . . . . . . . . . . . . . . . . . . . . . . . . . . . . . . . . . . . . . . . 38
7 To specify the input mode for the exit button
. . . . . . . . . . . . . . . . . . . . . . . . . . . . . . . . . . 39
8 To specify the input mode for the door contact sensor
10
. . . . . . . . . . . . 31
Additional features
1 MUTE
. . . . . . . . . . . . . . . . . . . . . . . . . . . 39
. . . . . . . . . . . . . . . . . . . . . . . . . . . . . . . . . . . . . . . . . . . . . . . . . 40
. . . . . . . . . . . . . . . . . . . . . . . . . . . . . . . . . . . . . . . . . . . . . . . . . . . . . . . . . . . . . . . . . 40
2 To specify the use of the tamper alarm
. . . . . . . . . . . . . . . . . . . . . . . . . . . . . . . . . . . . . . . 40
3 To check the output specified for a registered card user
. . . . . . . . . . . . . . . . . . . . . . . . . . 41
4 To check the output specified for an unregistered card user
. . . . . . . . . . . . . . . . . . . . . . . 41
5 To check the output specified for the door contact sensor alarm
. . . . . . . . . . . . . . . . . . . 42
6 To check the output specified for AUX 1
. . . . . . . . . . . . . . . . . . . . . . . . . . . . . . . . . . . . . . 42
7 To check the output specified for AUX 2
. . . . . . . . . . . . . . . . . . . . . . . . . . . . . . . . . . . . . . 42
Table of contents
p.iv
100RV
8 To check the output specified for AUX 3
11
Other information
1 Initial values
13
. . . . . . . . . . . . . . . . . . . . . . . . . . . . . . . . . . . . . . . . . . . . . . . . . . 44
. . . . . . . . . . . . . . . . . . . . . . . . . . . . . . . . . . . . . . . . . . . . . . . . . . . . . . . . . . . . 44
2 Function codes
12
. . . . . . . . . . . . . . . . . . . . . . . . . . . . . . . . . . . . . . 43
. . . . . . . . . . . . . . . . . . . . . . . . . . . . . . . . . . . . . . . . . . . . . . . . . . . . . . . . . . 45
Troubleshooting
. . . . . . . . . . . . . . . . . . . . . . . . . . . . . . . . . . . . . . . . . . . . . . . . . . . 47
1 Troubleshooting
. . . . . . . . . . . . . . . . . . . . . . . . . . . . . . . . . . . . . . . . . . . . . . . . . . . . . . . . . 47
Product specifications
. . . . . . . . . . . . . . . . . . . . . . . . . . . . . . . . . . . . . . . . . . . . . . . 54
1 Product specifications
. . . . . . . . . . . . . . . . . . . . . . . . . . . . . . . . . . . . . . . . . . . . . . . . . . . . 54
. . . . . . . . . . . . . . . . . . . . . . . . . . . . . . . . . . . . . . . . . . . . . . . . . . . . . 55
14
RMA Request
15
Warranty Policy and Limitation of Liability
Back cover
. . . . . . . . . . . . . . . . . . . . . . . . . . . . . . . . 57
. . . . . . . . . . . . . . . . . . . . . . . . . . . . . . . . . . . . . . . . . . . . . . . . . . . . . . . . . . . . 59
p.v
Table of contents
1
Safety Information
CAUTION: TO REDUCE THE RISK OF ELECTRIC SHOCK, DO NOT REMOVE COVER
(OR BACK) NO USER SERVICEABLE PARTS INSIDE. REFER SERVICING TO
QUALIFIED SERVICE PERSONNEL.
This symbol indicates that dangerous voltage consisting a risk of electric shock is
present within this unit.
This exclamation point symbol is intended to alert the user to the presence of
important operating and maintenance (servicing) instructions in the literature accompanying
the appliance.
WARNING
To reduce the risk of fire or electric shock, do not expose this appliance to rain or moisture.
WARNING
1.
Be sure to use only the standard adapter that is specified in the specification sheet.
Using any other adapter could cause fire, electrical shock, or damage to the product.
2.
Incorrectly connecting the power supply or replacing battery may cause explosion, fire,
electric shock, or damage to the product.
3.
Do not connect multiple controllers to a single adapter. Exceeding the capacity may
cause abnormal heat generation or fire.
4.
Securely plug the power cord into the power receptacle. Insecure connection may
cause fire.
p.1
100RV
5.
When installing the controller, fasten it securely and firmly. The fall of controller may
cause personal injury.
6.
Do not place conductive objects (e.g. screwdrivers, coins, metal parts, etc.) or
containers filled with water on top of the controller. Doing so may cause personal injury
due to fire, electric shock, or falling objects.
7.
Do not install the unit in humid, dusty, or sooty locations. Doing so may cause fire or
electric shock.
8.
If any unusual smells or smoke come from the unit, stop using the product. In such
case, immediately disconnect the power source and contact the service center.
Continued use in such a condition may cause fire or electric shock.
9.
If this product fails to operate normally, contact the nearest service center. Never
disassemble or modify this product in any way. (SAMSUNG is not liable for problems
caused by unauthorized modifications or attempted repair.)
10.
When cleaning, do not spray water directly onto parts of the product. Doing so may
cause fire or electric shock.
CAUTION
1.
Do not drop objects on the product or apply strong blows to it. Keep away from a
location subject to excessive vibration or magnetic interference.
2.
Do not install in a location subject to high temperature (over 50°C), low temperature
(below -30°C), or high humidity. Doing so may cause fire or electric shock.
3.
If you want to relocate the already installed product, be sure to turn off the power and
then move or reinstall it.
4.
Remove the power plug from the outlet when there is a lighting storm. Neglecting to
do so may cause fire or damage to the product.
5.
Keep out of direct sunlight and heat radiation sources. It may cause fire.
6.
Install it in a place with good ventilation.
7.
Avoid aiming the controller directly towards extremely bright objects such as sun.
8.
Apparatus shall not be exposed to dripping or splashing and no objects filled with
liquids, such as vases, shall be placed on the apparatus.
9.
The Mains plug is used as a disconnect device and shall stay readily operable at any
time.
p.2
Safety Information
100RV
1 IMPORTANT SAFETY INSTRUCTIONS
1.
Read these instructions.
2.
Keep these instructions.
3.
Heed all warnings.
4.
Follow all instructions.
5.
Do not use this apparatus near water.
6.
Clean only with dry cloth.
7.
Do not block any ventilation openings. Install in accordance with the manufacturer’s
instructions.
8.
Do not install near any heat sources such as radiators, heat registers, or other apparatus
(including amplifiers) that produce heat.
9.
Do not defeat the safety purpose of the polarized or grounding-type plug. A polarized
plug has two blades with one wider than the other. A grounding type plug has two
blades and a third grounding prong. The wide blade or the third prong is provided for
your safety. If the provided plug does not fit into your outlet, consult an electrician for
replacement of the obsolete outlet.
10.
Protect the power cord from being walked on or pinched particularly at plugs,
convenience receptacles, and the point where they exit from the apparatus.
11.
Only use attachments/accessories specified by the manufacturer.
12.
Use only with cart, stand, tripod, bracket, or table specified by the manufacturer, or
sold with the apparatus.
13.
Unplug this apparatus when a card is used. Use caution when moving the cart/
apparatus combination to avoid injury from tip-over.
14.
Refer all servicing to qualified service personnel. Servicing is required when the
apparatus has been damaged in any way, such as power supply cord or plug is
damaged, liquid has been spilled or objects have fallen into the apparatus, the
apparatus has been exposed to rain or moisture, does not operate normally, or has
been dropped.
Safety Information
p.3
2
Product introduction
1 Features
This controller is best designed for a single entry door control (single door access control).
This product can save up to 512 cards including the master card, with which you can make
an effective management (such as adding, deleting or changing the settings) of the cards.
Its epoxy adhesion and aluminium case guarantees shock-resistance and stable operation in
a challenging environment.
This product features 5 external ports that can be connected to the Exit button, Door
Contact Sensor, Motion Sensor, and Fire Sensor. It also has 2 relay outputs that can control
the door lock and alarm relay. The dual tamper switch triggers an alert if the product is
forcibly disassembled.
You can use the keypad to confi gure all settings as necessary.
This product is designed for a standalone system.
1.1
Single Door Access Control
You can use the RF card to control a single door.
1.2
User Registration
You can register a total of 512 cards including the Master Card.
1.3
Keypad Registration
100RV is equipped with the built-in keypad that you can use to register, delete cards or
confi gure various settings independently.
p.4
100RV
1.4
Buzzer On/Off
With the help of various buzzer tones, you can check the operation status and the current
settings and results of the product.
1.5
External I/O Pins
100RV has 5 input ports and 4 output ports installed (2 relay and 2 TTL outputs).
The input ports can receive signals from the Exit button and the Door Contact sensor, while
the two relays can be connected to the door lock and the alarm device. One of the TTL
output ports can function as a chime bell in connection with the door bell.
1.6
Duress Alarm
This is used in a situation where you should open the door inevitably by a robber insisting to
do so. Entering the two-digit duress alarm password with pressing the
button and
recognizing the registered card (or card number) can open the door normally, while you can
set to produce the TTL signal notifying the door is forcibly opened.
1.7
Limited Access Tries for an Unregistered Card
You can specify the limit of times to try accessing the door, and the suspended operation
time of the keypad for an improper access.
2 What's included
Check if the following items are included in the product package.
Product introduction
p.5
100RV
3 At a glance
p.6
Product introduction
100RV
3.1
Front / Rear
1. System Status LED
Indicates the operation status of the system.
2. Keypad
Use this to confi gure or release settings as appropriate, or enter a card
number.
3. TAMPER SWITCH
A tamper switch to detect falling from the wall.
4. 17-PIN Connector
Used to connect to the power source or I/O cable.
5. Buzzer
Piezo buzzer.
6. Fixing Hole
Fixing hole for wall-mounting.
4 Cable color scheme
Item
Cable color
Signal Line
Description
Power
Red
DC + 12V
Power (+12V)
Black
GND
Earth-grounding for power
Blue with white stripes
NC(RL1)
Door Relay NC Terminal
Gray with red stripes
COM(RL1)
Door Control Relay (COM) Port
White with red stripes
NO(RL1)
Door Relay NO port
Purple with white stripes
NC(RL2)
Alarm Relay (NC) Port
White
COM(RL2)
Alarm Relay (COM) Port
Output
Product introduction
p.7
100RV
Item
Input
Cable color
Signal Line
Description
Purple
NO(RL2)
Alarm Relay (NO) Port
Orange with white stripes
TTL
TTL Output Port
Brown with white stripes
CHI
Chime Bell Output
Orange
EXIT
Exit button connection port
Yellow with red stripes
CONTACT
Door Contact Sensor Connection Port
Green
AUX IN 1
Aux Input #1
Green with white stripes
AUX IN 2
Aux Input #2
Green with red stripes
AUX IN 3
Aux Input #3
Pink
DATA_0
Wiegand Data 0 Input Port
Sky blue
DATA_1
Wiegand Data 1 Input Port
p.8
Product introduction
Installation and external connection
3
1 Cable selection
Number
Item
Cable type
Power (DC12V)
Belden #9409, 18 AWG 2 Conductor, Unshielded
DC Power → This Product
Reader (power and data)
Belden #9512, 22 AWG 4 Conductor, Shielded
External Reader → This Product
Belden #9514, 22 AWG 8 Conductor, Shielded
Door Contact Sensor
Belden #9512, 22 AWG 4 Conductor, Shielded
Exit Button
Belden #9514, 22 AWG 8 Conductor, Shielded
Sensor Input
Input → This Product
Door Lock,
Belden #9409, 18 AWG 2 Conductor, Unshielded
Alarm Device
Lock (Alarm) → This Product
p.9
100RV
The cables should be thick enough to allow the maximum current consumed by
the reader.
2 Bypass diode connection
If you connected an inductor (door locks or alarm device) to the output relay, there should
occur a voltage surge while the inductor is turning on and off. If you do not connect a
reverse diode to the relay, the surge voltage will cause damage to the electric circuit of the
controller. To reduce this surge, it is recommended to connect a reverse diode between the
devices.
Figure 3-1
100RV_bypass_diode_connection
3 I/O connection
3.1
Input Connection
p.10
Installation and external connection
100RV
1.
Connect the DC 12V(+) of the power supply unit to the red line.
2.
Connect the GND(-) of the power supply unit to the black line.
Exit Button Connection
1.
Connect one line of the Exit button to the orange line.
2.
Connect the other line of the Exit button to GND.
Door Contact Sensor Connection
1.
Connect one line of the door contact sensor to the yellow with red stripes.
2.
Connect the other line of the door contact sensor to GND.
Auxiliary Input Device Connection (AUX 1 (green), AUX 2 (green with white
stripes), AUX 3 (green with red stripes)
3.2
1.
Connect one line of the external input device to AUX 1, AUX 2, or AUX 3.
2.
Connect the other line of the external input device to GND(-).
Output Connection
Figure 3-2
100RV_outputconnection
Installation and external connection
p.11
100RV
Door open (POWER FAIL SAFE) when the power is disconnected from the door lock
(Door Relay)
1.
Connect the relay COM line (gray with red stripes for locking the door) to DC +12V.
2.
Connect the relay NC line (blue with white stripes for locking the door) to the plus(+)
line of the door lock.
3.
Connect the minus (-) line of the door lock to GND (-).
Door close (POWER FAIL SECURE) when the power is disconnected from the door
lock (Door Relay)
1.
Connect the relay COM line (gray with red stripes for locking the door) to DC +12V.
2.
Connect the relay NO line (white with red stripes for locking the door) to the plus (+)
line of the door lock.
3.
Connect the minus (-) line of the door lock to GND (-).
Alarm Connection (Alarm Relay)
1.
Connect the relay COM (white for the alarm device) to DC +12V.
2.
Connect the relay NO line (purple for the alarm device) to the plus (+) line of the alarm
device.
3.
Connect the minus (-) line of the alarm device to GND (-).
Chime Bell Connection (the chime bell operated by TTL-level signal must be installed
in advance.)
1.
Connect the chime bell line (brown with white stripes) of the controller to DC +5V.
2.
Connect the GND line of the power supply unit to GND (-) of the chime bell.
3.
Press
to activate EthNeT chime bell.
p.12
Installation and external connection
100RV
4 External reader connection
4.1
Proximity Reader Connection
1.
Connect the DC 12V(+) of the power supply unit to the plus (+) line of the reader.
2.
Connect the GND(-) line of the power supply unit to the minus (-) line of the reader.
3.
Connect the Wiegand data input line 0 of the proximity reader to the purple line.
4.
Connect the Wiegand data input line 1 of the proximity reader to the sky blue line.
For a list of compliant readers (external readers), see the followings:
- Standard 26bit Wiegand format proximity reader
- Proximity/keypad readers of 4-/8-bit burst format are not supported.
Installation and external connection
p.13
4
Initialization
1 Basic operations
1.1
Initial state
While the product is working normally, the orange LED indicator blinks every one second.
1.2
Predefi ned Operation for a Registered Card
When reading a registered card, it opens the door with the melody.
1.3
Exit Button Operation
If you press the Exit button, the door will be opened.
1.4
Predefined Operation for an Unregistered Card
When reading an unregistered card, it produces an alarm with the melody for two seconds.
You can specify the use of the alarm and change the operation time.
1.5
Secure Mode Operation
The person who exits the last can set the secure mode using the keypad.
Set Secure mode: Press the
button twice and press
.
Release secure mode: Present and authenticate a registered card or the Master Card to the
reader. You can use the keypad to specify the delayed start time for the Secure mode. (Refer
to the delayed start time in Secure mode on page 24.)
p.14
100RV
For effective security purposes, you can set to activate the sensors (via auxiliary
input ports) only in Secure mode.
1.6
Duress Alarm
If you are forced to open the door under a robber’s control, enter the Duress password and
press
1.7
with the number of your registered card (or PIN). (See page 23.)
How to use the chime bell
When you have connected and set the chime bell, press
to ring the chime bell. (See
page 33.)
2 Initialization
If you have the Master Card registered, you can use it to initialize the device.
1.
Present the Master Card to the device.
2.
Press the
3.
The system will restore the factory default settings with all LED indicators blinking.
button twice and press
.
Initializing the system will lose all data.
If the product works abnormally, use initialization to restore the default settings.
Initialization
p.15
100RV
3 Forced initialization with external line
1.
Turn off the product, shortcircuit between the green line and the orange line with
white stripes, and turn it back on.
2.
When the initialization is completed, 3 LED indicators are blinking with a beep.
3.
Restore the connection of the two lines back to their original state.
p.16
Initialization
5
Reader mode setup
●
You can specify the operation mode for the device.
●
Once a mode is specifi ed, it will not switch until you perform the initialization.
●
You must keep the Master Card in safe for later use as it is required for your change to
the device settings.
●
If progression is halted for more than one minute during any of the following processes,
the operation mode of the reader will return to the previous state.
1 Reader mode setup (RF only)
No Master Card or Master PIN is ever registered.
If you remember the Master Card or the Master PIN was registered, initialize the product
and try again.
1.
When you turn on the product, all of the 3 LED indicators will flash with a beep.
• No flashing of the 3 indicators denotes that the reader mode is already specified.
2.
Press Button
and
Button in sequence and press
.
When the mode is specifi ed, only the green LED indicator flashes.
3.
Present a card that you want to register as the Master Card to the device.
When the Master Card is registered, only the red LED indicator flashes.
4.
Present cards to register with the device one after another, and the device will register
them with a beep. If you don’t want to register the cards right now, simply jump to
Step 5 above without through Step 4 above.
5.
Present the registered Master Card to the product once again.
6.
The device enters Standby mode with only the orange LED indicator flashing.
p.17
100RV
2 Reader mode setup (RF + P/W)
No Master Card or Master PIN is ever registered.
If you remember the Master Card or the Master PIN was registered, initialize the product
and try again.
1.
When you turn on the product, all of the 3 LED indicators will flash with a beep.
• No flashing of the 3 indicators denotes that the reader mode is already specified.
2.
Press Button
and
Button in sequence and press
.
3.
Present a card that you want to register as the Master Card to the device.
When the Master Card is registered, only the red LED indicator flashes.
4.
Present a card to the device, enter the 4-6 digit password and press
.
If you don’t want to register the cards right now, simply jump to Step 5 above without
through Step 4 above.
5.
Present the registered Master Card to the product once again.
6.
The device enters Standby mode with only the orange LED indicator flashing.
3 Reader mode setup (PIN only)
No Master Card or Master PIN is ever registered.
If you remember the Master Card or the Master PIN was registered, initialize the product
and try again.
1.
When you turn on the product, all of the 3 LED indicators will flash with a beep.
• No flashing of the 3 indicators denotes that the reader mode is already specified.
2.
Press
Button and
Button in sequence and press
.
When the mode is specifi ed, only the green LED indicator fl ashes.
3.
Enter the 4-6 digit Master PIN number and press
.
When the Master PIN is registered, only the red LED indicator flashes.
4.
Enter a PIN number to register (4-6 digits) and press
p.18
.
Reader mode setup
100RV
Repeat the step above if you want to register PIN numbers with the device in sequence.
If you don’t want to register the PIN number right now, simply jump to Step 5 above
without through Step 4 above.
5.
Enter the 4-6 digit Master PIN number again and press
.
6.
The device enters Standby mode with only the orange LED indicator flashing.
4 Reader mode setup (RF/PIN combination mode)
No Master Card or Master PIN is ever registered.
If you remember the Master Card or the Master PIN was registered, initialize the product
and try again.
1.
When you turn on the product, all of the 3 LED indicators will flash with a beep.
• No flashing of the 3 indicators denotes that the reader mode is already specified.
2.
Press
Button and
Button in sequence and press
.
3.
Present a card that you want to register as the Master Card to the device.
When the Master Card is registered, only the red LED indicator flashes.
4.
Present cards or PIN numbers (4-6 digits) to register with the device one after another,
and the device will register them with a beep. If you don’t want to register the cards
right now, simply jump to Step 5 above without through Step 4 above.
5.
Present the registered Master Card to the product once again.
6.
The device enters Standby mode with only the orange LED indicator flashing.
5 Enabling keypad input for the card number
Ensure that you must have registered the Master Card.
1.
Press
2.
Repeat Step 1 above to release the specified mode, press
Reader mode setup
Button and
Button in sequence and press
p.19
.
Button and
Button
100RV
in sequence, and press
.
You can set the device to allow you to control the door by entering the 8 digit card
number using the keypad.
The default is “Keypad Input Disabled”.
p.20
Reader mode setup
6
User management
1 To register cards in RF only mode
Ensure that you must have registered the Master Card and the device is specifi ed in RF
ONLY mode.
1.
Present the Master Card to the device.
When the mode is specified, only the green LED indicator flashes.
2.
Press Button
and Button
in sequence and press
.
When the device enters Standby, only the red LED indicator fl ashes.
3.
Present a card to the device, it will be registered with a beep.
Repeat this step if you want to register multiple cards.
4.
Present the Master card to the device again, and the device will switch to normal
mode. If no input is made for 20 seconds, the device will switch to normal mode.
2 Registering cards in a combination of RF and P/W
modes
Ensure that you must have registered the Master Card and the device is specifi ed in RF +
P/W mode.
1.
Present the Master Card to the device.
When the mode is specifi ed, only the green LED indicator flashes.
2.
Press Button
and Button
in sequence and press
p.21
.
100RV
When the device enters Standby, only the red LED indicator flashes.
3.
Present a card to the device, enter the 4-6 digit password and press
.
Repeat this step if you want to register multiple cards.
4.
Present the Master card to the device again, and the device will switch to normal
mode.
If no input is made for 20 seconds, the device will switch to normal mode.
3 To register cards in PIN mode
Ensure that you must have registered the Master Card and the device is specifi ed in PIN
mode.
1.
Enter the Master PIN number and press
.
When the mode is specified, only the green LED indicator flashes.
2.
Press
Button and Button
in sequence and press
.
When the mode is specified, only the green LED indicator flashes.
3.
If you enter a user number (4-6 digits) to register and press
, the PIN number will
be registered with a beep.
Repeat this step if you want to register multiple PIN numbers.
4.
Present the Master PIN number to the device again, and the device will switch to
normal mode.
If no input is made for 20 seconds, the device will switch to normal mode.
4 Registering cards in RF card / PIN combination mode
Ensure that you must have registered the Master Card and the device is specifi ed in RF Card
/ PIN combination mode.
1.
Present the Master Card to the device.
p.22
User management
100RV
When the mode is specified, only the green LED indicator flashes.
2.
Press Button
and Button
in sequence and press
.
When the device enters Standby, only the red LED indicator flashes.
3.
Present cards or PIN numbers (4-6 digits) to register with the device one after another,
and the device will register them with a beep.
Repeat this step if you want to register multiple cards or PIN numbers.
4.
Present the Master PIN number to the device again, and the device will switch to
normal mode.
If no input is made for 20 seconds, the device will switch to normal mode.
The door may be accessed in two ways: using the card or the PIN number.
5 To delete a registered card or PIN number
Ensure that you must have registered the Master Card or the Master PIN number and the
device is specifi ed in a certain mode.
This is applicable in all modes.
1.
Enter the Master Card or Master PIN.
When the mode is specified, only the green LED indicator flashes.
2.
Press Button
and Button
in sequence and press
.
When the device enters Standby, only the red LED indicator flashes.
3.
Present a card or PIN number to delete.
Repeat this step if you want to register multiple cards or PIN numbers.
4.
Present the Master card to the device again, and the device will switch to normal
mode.
If no input is made for 20 seconds, the device will switch to normal mode.
User management
p.23
7
Basic setup
1 DURESS alarm
If you are forced to open the door under the control of a criminal such as a robber, enter the
predefi ned password with the number of your registered card (or PIN), which outputs the
emergency TTL signal.
1.
Present the Master Card to the device.
2.
Press Button
3.
Enter the two-digit Duress code and press .
and Button
in sequence and press
.
• The default code is set to “00”. However, the number “77” can not be used because it
is set for the Secure mode.
2 To specify the retry count for an unregistered ID
You can specify the retry count for authentication with an unregistered card or PIN.
If the retry count exceeds the set limit, the keypad input will be suspended for the next one
minute. (You can specify the keypad input suspension time in “To specify the keypad input
suspension time if the retry count with an unregistered ID exceeds the limit” on page 24.)
1.
Present the Master Card to the device.
2.
Press Button
3.
Enter the two-digit retry count and press
and Button
in sequence and press
.
• You can specify a number from 00 to 99.
p.24
.
100RV
• The retry count for an unregistered ID is defaulted to “05”.
3 To specify the keypad input suspension time if the
retry count with an unregistered ID exceed the limit
1.
Present the Master Card to the device.
2.
Press Button
3.
Enter the two-digit keypad input suspension time (unit: minute) and press
and Button
in sequence and press
.
.
• The default is set to “01”.
You can specify a time from 01 to 99 minutes.
You can specify the time of the keypad input suspension (followed by an alarm) if
an unregistered user keeps trying to open the door for certain times (the code
number is set to “82”).
4 To specify the delayed start time in secure mode
1.
Present the Master Card to the device.
2.
Press Button
3.
Enter the two-digit delayed start time (unit: minute) and press
and Button
in sequence and press
.
.
• The default is set to “00”.
See the table below for your reference.
Secure Mode
When the last person set the Secure mode before exiting the offi ce, the
external sensors will get activated since then.
Delayed Start
Basic setup
If the external sensors get activated right after you set the Secure mode,
p.25
100RV
your motion will be detected before you can get out of the secure area,
which will trigger the alarm. Thus, it is recommended to set the Secure
mode to get activated after a certain time.
Enter the delayed start time by the minute; the sensor operation in Secure mode
must have been specifi ed in advance. (Refer to “Alarm Operation Time for
Auxiliary Input” on pages 30-31)
5 To specify the operation time of the door contact
sensor
The Door Contact sensor detects the opening of the door.
If the door is forcibly opened by an unregistered user, the Door Contact Sensor will perform
the predefi ned alarm operation after the set time. (For setting the alarm operation time,
refer to 4 To specify the alarm output for an input error of the door contact sensor.)
1.
Present the Master Card to the device.
2.
Press Button
3.
Enter the two-digit operation time (unit: second) and press
and Button
in sequence and press
.
.
• The default is set to “00” second, which means the Door Contact Sensor is disabled.
• You can specify from 01 to 99.
6 To specify the limited time for the keypad input
When it passes a certain time during your setting using the keypad , all your settings will be
ignored and return to the initial state.
Specify the delay time between the input of the last key and restoring the previous state.
1.
Present the Master Card to the device.
p.26
Basic setup
100RV
2.
Press Button
and Button
in sequence and press
3.
Enter the two-digit operation time (unit: second) and press
.
.
• The default is set to “20” second.
• You can specify from 10 to 99.
7 To specify the alarm output port for the dismantled
device
Specify the alarm type for the dismantled device. The alarm rings from the dismantlement of
the device to the authentication of the Master Card or a registered card.
1.
Present the Master Card to the device.
2.
Press Button
3.
Provide the alarm output port and press
and Button
in sequence and press
.
.
• The default is set to “02” (alarm).
For the alarm output port settings, refer to Output port table.
• The alarm for the dismantled device occurs regardless of the operation mode of
either Normal or Secure so you simply specify the operation port only. (To specify the
operation port, refer to the operation port settings in the Output Port Setting Table.)
8 To open or close the entry door
Follow the step below If you want to keep the door open regardless of the authentication
process using the Master Card or PIN.
1.
Present the Master Card to the device.
2.
Press Button
and Button
in sequence and press
.
• To release opening the door, repeat Step 1 above, select the <
Basic setup
p.27
> buttons and
100RV
press
.
9 To set or release the quick mode
The QUICK mode is applicable to RF ONLY mode (01) and PIN ONLY mode (03) and RF/PIN
combination mode (05), which enables you to open the door by simply pressing
without the need of the PIN number. (This is useful for the normal business hours when the
door entries and exits occur frequently.)
1.
Present the Master Card to the device.
2.
Press Button
and Button
in sequence and press
.
• To release the QUICK mode, repeat Step 1 above, select the <
press
> buttons and
.
• The default is set to “not used”.
10 To set or release the toggle mode for the door relay
In the Toggle mode, the door opens if it is closed or vice versa by presenting a registered
card or entering the PIN.
1.
Present the Master Card to the device.
2.
Press Button
and Button
in sequence and press
.
• To release the Toggle mode, repeat Step 1 above, select the <
press
> buttons and
.
• The default is set to “not used”.
p.28
Basic setup
8
I/O time setup
Output Port Setting Table
You must specify the port settings using whatever combination of the followings if you
want the device to operate in Secure mode or normal + Secure mode.
Port
Setting Value
Operation mode setting value
Operate only in Secure mode
Example
EX 1)
00
If only the door relay operates in normal and
Secure modes
Normal and Secure modes: 50
Door Relay: +01
Output Port Setting Value: 51
EX 2)
If the alarm relay and the TTL output operate in
Secure mode
Secure Mode: 00
Alarm Relay, TTL: +06
Output Port Setting Value: 06
Operate in normal mode and
50
Secure mode
Operation port setting value
Operate the door relay only
01
Operate the alarm relay only
02
Operate the TTL output only
04
Operate the door relay and TTL
05
output
Operate the alarm relay and TTL 06
output
p.29
100RV
1 To specify the output time if the card is authenticated
You can specify the output time if the card ID is authenticated.
When the card ID is authenticated, the door relay and the TTL output operate for a set time.
1.
Present the Master Card to the device.
2.
Press Button
3.
Enter the two-digit door open time and press
4.
Specify the two-digit TTL output time and press
and Button
in sequence and press
.
.
.
• For instance, if you set the door open time to “03” and TTL to “00”, the door relay
operates for 3 seconds for an authenticated card ID.
• By default, the door relay operates for “03” seconds while the TTL output works for
“00” second in normal and Secure modes.
• You can specify from 00 to 99.
2 To specify the output time if the card is not
authenticated
You can specify the output time if an unregistered card or PIN number fails in getting
authenticated.
1.
Present the Master Card to the device.
2.
Press Button
3.
Refer to the output port table on page 28 and specify a desired output mode.
twice and press
.
• If you want the alarm relay alone to operate in normal and Secure modes for an
unauthenticated card, select the <
> buttons and press
4.
Enter the two-digit door relay output time and press
5.
Enter the two-digit alarm relay output time and press
6.
Enter the two-digit TTL output time and press
p.30
.
.
.
.
I/O time setup
100RV
• You can specify a two-digit time from 00 to 99 seconds.
By default, only the alarm relay operates for “02” seconds in normal and Secure modes.
Other output ports that are not specifi ed for the output mode will not be
activated.
For instance, if you set the output mode to [5][2] and assign the operation time
for each output device by following the steps 4, 5, and 6 above, only the alarm
relay will operate.
3 To specify the DURESS TTL output
If you enter the Duress code and present a registered card, the TTL output operates. Specify
the TTL operation time for this purpose. (For the Duress code, refer to 1 DURESS alarm.)
1.
Present the Master Card to the device.
2.
Press Button
3.
Specify the two-digit TTL output time (unit: second) and press
and Button
in sequence and press
.
.
• The default is set to “03” second.
You can specify a time from 00 to 99 seconds.
4 To specify the alarm output for an input error of the
door contact sensor
You can specify the output port and operation time if an error occurs from the Door Contact
Sensor.
You must have specifi ed the operation time of the Door Contact Sensor. (Refer to “To
specify the operation time of the Door Contact Sensor” on page 25.)
1.
Present the Master Card to the device.
I/O time setup
p.31
100RV
2.
Press Button
and Button
in sequence and press
.
3.
Refer to the output port table on page 28 and specify a desired output mode.
• If you want the alarm relay alone to operate in normal and Secure modes in case of
an error from the Door contact Sensor, select the <
4.
Enter the two-digit door relay output time and press
5.
Enter the two-digit alarm relay output time and press
6.
Enter the two-digit TTL relay output time and press
> buttons and press
.
.
.
.
• You can specify a two-digit time from 00 to 99 seconds.
• By default, all output times are set to “00”.
Other output ports that are not specifi ed for the output mode will not be
activated.
For instance, if you set the output mode to [5][2] and assign the operation time
for each output device by following the steps 4, 5, and 6 above, only the alarm
relay will operate.
5 To specify the alarm operation time for AUX 1
1.
Present the Master Card to the device.
2.
Press Button
3.
Refer to the output port table on page 28 and specify a desired output mode.
and Button
in sequence and press
.
• If you want the alarm relay alone to operate in normal and Secure modes in case of
an input through the auxiliary port, select the <
4.
Enter the two-digit door relay output time and press
5.
Enter the two-digit alarm relay output time and press
6.
Enter the two-digit TTL relay output time and press
> buttons and press
.
.
.
.
• You can specify a two-digit time from 00 to 99 seconds.
• By default, all output times are set to “00”.
p.32
I/O time setup
100RV
Other output ports that are not specifi ed for the output mode will not be
activated.
For instance, if you set the output mode to [5][2] and assign the operation time
for each output device by following the steps 4, 5, and 6 above, only the alarm
relay will operate.
6 To specify the alarm operation time for AUX 2
1.
Present the Master Card to the device.
2.
Press Button
3.
Refer to the output port table on page 28 and specify a desired output mode.
and Button
in sequence and press
.
• If you want the alarm relay alone to operate in normal and Secure modes in case of
an input through the auxiliary port, select the <
4.
Enter the two-digit door relay output time and press
5.
Enter the two-digit alarm relay output time and press
6.
Enter the two-digit TTL relay output time and press
> buttons and press
.
.
.
.
• You can specify a two-digit time from 00 to 99 seconds.
• By default, all output times are set to “00”.
Other output ports that are not specifi ed for the output mode will not be
activated.
For instance, if you set the output mode to [5][2] and assign the operation time
for each output device by following the steps 4, 5, and 6 above, only the alarm
relay will operate.
7 To specify the alarm operation time for AUX 3
I/O time setup
p.33
100RV
1.
Present the Master Card to the device.
2.
Press Button
3.
Refer to the output port table on page 28 and specify a desired output mode.
and Button
in sequence and press
.
• If you want the alarm relay alone to operate in normal and Secure modes in case of
an input through the auxiliary port, select the <
4.
Enter the two-digit door relay output time and press
5.
Enter the two-digit alarm relay output time and press
6.
Enter the two-digit TTL relay output time and press
> buttons and press
.
.
.
.
• You can specify a two-digit time from 00 to 99 seconds.
• By default, all output times are set to “00”.
Other output ports that are not specified for the output mode will not be
activated.
For instance, if you set the output mode to [5][2] and assign the operation time
for each output device by following the steps 4, 5, and 6 above, only the alarm
relay will operate.
8 To activate or deactivate the door relay by the door
contact sensor
You can set the Door Contact Sensor to control the door lock. This is to allow the Door
Contact Sensor to control the doorrelay where the sensor keeps the door relay active from
the normal opening of the door to its closing.
This is useful when the door stays open with just one authentication.
1.
Present the Master Card to the device.
2.
Press Button
and Button
in sequence and press
.
• To release the control by the Door contact Sensor, repeat Step 1 above, select the <
> buttons and press
.
p.34
I/O time setup
100RV
The default is set to “disabled”.
I/O time setup
p.35
9
Advanced setting
1 To specify the TTL output operation mode
This is to switch the TTL output from LOW (0V) to HIGH (5V) when it is activated.
1.
Present the Master Card to the device.
2.
Press Button
and Button
in sequence and press
• To release the setting, repeat Step 1 above, select the <
.
> buttons and press
.
The default is set to “switch from HIGH(5V) to LOW(0V)”.
2 To set the chime bell function
You can specify the use of the chime bell.
Use the chime bell in the TTL level (5V) for this purpose.
The default output time is 5 seconds. For changing the output time, refer to 3 To specify the
chime bell operation time.
1.
Present the Master Card to the device.
2.
Press Button
twice and press
.
p.36
100RV
• To release the setting, press the <
> buttons and press
.
The default is set to “use the chime bell”.
3 To specify the chime bell operation time
You can specify the chime bell operation time.
1.
Present the Master Card to the device.
2.
Press Button
3.
Specify the two-digit operation time (unit: second) and press
and Button
in sequence and press
.
.
The default is set to “05” second.
You can specify a time from 00 to 99 seconds.
4 To specify the input mode for AUX 1
You can specify an operation for the auxiliary port 1 when it switches from LOW (0V) to
HIGH (5V).
1.
Present the Master Card to the device.
2.
Press Button
and Button
in sequence and press
• To release the setting, repeat Step 1 above, select the <
.
Advanced setting
p.37
.
> buttons and press
100RV
The default is set to “switch from HIGH(5V) to LOW(0V)”.
5 To specify the input mode for AUX 2
You can specify an operation for the auxiliary port 2 when it switches from LOW (0V) to
HIGH (5V).
1.
Present the Master Card to the device.
2.
Press Button
and Button
in sequence and press
.
• To release the setting, repeat Step 1 above, select the <
> buttons and press
.
The default is set to “switch from HIGH(5V) to LOW(0V)”.
6 To specify the input mode for AUX 3
You can specify an operation for the auxiliary port 3 when it switches from LOW (0V) to
HIGH (5V).
1.
Present the Master Card to the device.
2.
Press Button
and Button
in sequence and press
• To release the setting, repeat Step 1 above, select the <
.
> buttons and press
.
The default is set to “switch from HIGH(5V) to LOW(0V)”.
p.38
Advanced setting
100RV
7 To specify the input mode for the exit button
You can specify an operation for the Exit button when it switches from LOW (0V) to HIGH
(5V).
1.
Present the Master Card to the device.
2.
Press Button
and Button
in sequence and press
• To release the setting, press the <
.
> buttons and press
.
The default is set to “switch from HIGH(5V) to LOW(0V)”.
8 To specify the input mode for the door contact sensor
You can specify an operation for the Door Contact Sensor when it switches from LOW (0V)
to HIGH (5V).
1.
Present the Master Card to the device.
2.
Press Button
and Button
in sequence and press
• To release the setting, repeat Step 1 above, select the <
.
The default is set to “switch from HIGH(5V) to LOW(0V)”.
Advanced setting
p.39
.
> buttons and press
10
Additional features
1 MUTE
You can mute the keypad tone or melody in normal operation.
1.
Present the Master Card to the device.
2.
Press Button
and Button
in sequence and press
.
• To release the setting, repeat Step 1 above, select the <
> buttons and press
.
By default, it is set to “enabled”.
2 To specify the use of the tamper alarm
You can maintain the alarm setup in normal operation and release it in case of a service
repair requiring the dismantlement of the device. You must set the alarm mode when you
have installed the device.For the alarm output port settings, refer to 7 To specify the alarm
output port for the dismantled device.
1.
Present the Master Card to the device.
2.
Press Button
twice and press
.
• To release the alarm setting for the dismantled device, repeat Step 1 above, select the
p.40
100RV
<
> buttons and press
.
The default is set to “disabled”.
You can release the alarm for the dismantled device by presenting the Master Card
or a registered card.
3 To check the output specified for a registered card
user
You can check the output setting that you specifi ed in “To specify the output time if the
card is authenticated”. (See page 28.)
1.
Present the Master Card to the device.
2.
Press Button
and Button
in sequence and press
.
4 To check the output specified for an unregistered card
user
You can check the output setting that you specifi ed in “To specify the output time if the
card is not authenticated”. (See page 29.)
1.
Present the Master Card to the device.
2.
Press Button
Additional features
and Button
and Button
p.41
.
100RV
5 To check the output specified for the door contact
sensor alarm
You can check the output setting that you specifi ed in “To specify the alarm output for an
input error of the Door contact Sensor”. (See page 30.)
1.
Present the Master Card to the device.
2.
Press Button
and Button
in sequence and press
.
6 To check the output specified for AUX 1
You can check the output setting that you specifi ed in “To specify the alarm operation time
for AUX 1”. (See page 30.)
1.
Present the Master Card to the device.
2.
Press Button
and Button
in sequence and press
.
7 To check the output specified for AUX 2
You can check the output setting that you specifi ed in “To specify the alarm operation time
for AUX 2”. (See page 31.)
1.
Present the Master Card to the device.
2.
Press Button
and Button
in sequence and press
p.42
.
Additional features
100RV
8 To check the output specified for AUX 3
You can check the output setting that you specifi ed in “To specify the alarm operation time
for AUX 3”. (See page 31.)
1.
Present the Master Card to the device.
2.
Press Button
Additional features
and Button
in sequence and press
p.43
.
11
Other information
1 Initial values
This product operates in the following initial values:
For changing the settings or registering/deleting the user card, refer to the applicable
section in this document.
1.
Entry permitted for a registered card
- The door control relay operates for 3 seconds.
- The green LED indicator fl ashes for 3 seconds.
2.
Entry denied for an unregistered card
- The alarm relay operates for 2 seconds.
- The red LED indicator fl ashes for 2 seconds.
3.
Duress Mode Password : 00
The TTL output port produces a signal for 3 seconds in Duress mode.
4.
QUICK MODE : Disabled
5.
Chime Bell Output : Enabled
Chime Bell Operating Time : 0.5 second
6.
Melody Sound : Enabled
7.
Keypad Input Limited Use : 20 seconds
8.
When an input signal is sensed : ‘H’ → ‘L’ (common for all inputs)
9.
When a TTL output signal is sensed : ‘H → L’
10.
Patrol Mode Delay Time : 00 minute
11.
Door Sensor Sensing Time : 00 second
12.
Retry count for an unauthenticated entry : 05 times
13.
Alarm for Dismantled Device : Disabled
Dismantled device Alarm Output Port : 02 (Alarm Relay)
14.
Toggle Mode : Disabled
p.44
100RV
15.
Control Lock by the Door Sensor : Disabled
2 Function codes
No.
Code number
Function item
1
11
Additional user card registration (RF CARD ONLY MODE)
2
12
Additional user card and PIN registration (RF CARD + PIN MODE)
3
13
Additional PIN registration (PIN ONLY MODE)
4
14
Delete a registered card or PIN number
5
15
Additional user card or PIN registration (RF/PIN combination
mode)
6
21
To specify the output time if the card is authenticated
7
22
To specify the output time if the card is not authenticated
8
24
Set the Door Contact Sensor alarming time
9
25
Set the AUX 1 alarming time
10
26
Set the AUX 2 alarming time
11
27
Set the AUX 3 alarming time
12
29
Set the Duress Mode password (2 digits)
13
30
Set the TTL output time in Duress Mode
14
31
To check the output of the registered card user (test on code 21)
15
32
To check the output of the unregistered card user
16
34
To check the output specififi ed for the Door Contact Sensor alarm
17
35
To check the output specififi ed for AUX 1
18
36
To check the output specififi ed for AUX 2
19
37
To check the output specififi ed for AUX 3
20
39
Set the chime bell ringing time
21
41
Set the door open
22
42
Release the door opening
23
43
Set the QUICK Mode
24
44
Release the QUICK Mode
25
45
Toggle to control the door relay
26
46
Release the toggling to control the door relay
27
47
Set to control the door relay using the Door Contact Sensor
28
48
Release the control of the door relay using the Door Contact
Other information
p.45
100RV
No.
Code number
Function item
Sensor
29
51
Turn off the sound
30
52
Turn on the sound
31
60
To specify the keypad input suspension time if the retry count with
an unregistered ID exceeds the limit
32
61
Sense if AUX 1 switches from L to H
33
62
Sense if AUX 1 switches from H to L
34
63
Sense if AUX 2 switches from L to H
35
64
Sense if AUX 2 switches from H to L
36
65
Sense if AUX 3 switches from L to H
37
66
Sense if AUX 3 switches from H to L
38
67
Sense if the Exit button switches from L to H
39
68
Sense if the Exit button switches from H to L
40
69
Sense if the Door Contact Sensor switches from L to H
41
70
Sense if the Door Contact Sensor switches from H to L
42
71
Set the TTL output to H
43
72
Set the TTL output to L
44
73
Keypad input enabled
45
74
Keypad input disabled
46
77
Chime bell enabled
47
78
Chime bell disabled
48
80
Set the starting delay time for Patrol Mode
49
81
Set the operation time for the Door Contact Sensor
50
82
To specify the retry count for an unregistered ID
51
83
Set the limitation time for the keypad input
52
84
Set the alarm output port for the dismantled device
53
88
Dismantled device alarm enabled
54
89
Dismantled device alarm disabled
55
99
System Initialization (all settings deleted)
p.46
Other information
12
Troubleshooting
1 Troubleshooting
If the product does not function properly, please see the below for trouble shooting.
Problem
When I turn on the product, it
Action
1.
Check if the product is installed properly and works
normally.
does not recognize the card with
just the 3 LED indicators blinking.
- In the initial setup of the product or after it is initialized
Set the operation mode and register the Master card and
user cards as usual because the product is in the initial
state.
I.
100RV modes available : Mode Number + ENT
√ RF Only : 01 + ENT
√ RF + P/W : 02 + ENT
√ PIN Only : 03 + ENT
√ RF or PIN : 05 + ENT
II.
Master Card (or (PIN): 4 ~ 6 digits (Mode 03 or 05) +
ENT)
III.
Enter the user card or PIN number and provide the
password according to the mode
IV.
Master Card (or (PIN): 4 ~ 6 digits (Mode 03 or 05) +
ENT)
√ For more information about registering the Master
Card and the user card, refer to the initial setup
section in the user manual.
2.
If this happens while the product is operating normally
(with the Master Card and user card registered) Product
malfunction
I.
Power: OFF → ON
p.47
100RV
Problem
Action
II.
If the problem persists, perform the initialization
process for the next step.
√ For more information about initializing the
product, refer to the initialization section in the user
manual.
III.
If the problem persists after you have followed the
procedures above, contact a designated service
center.
The product just switches to
1.
If no key input is entered within 20 seconds in a set mode,
normal operation mode while I
the product will switch to normal operation mode
am registering a user in a set
automatically. (normal operation)
mode or configure the settings.
I can not register an additional
1.
Check if the product is installed properly and works
normally.
user card (or PIN).
- In the initial setup of the product or after it is initialized
Set the operation mode and register the Master card and
user cards as usual because the product is in the initial
state.
I.
100RV modes available : Mode Number + ENT
√ RF Only : 01 + ENT
√ RF + P/W : 02 + ENT
√ PIN Only : 03 + ENT
√ RF or PIN : 05 + ENT
II.
Master Card (or (PIN): 4 ~ 6 digits (Mode 03 or 05) +
ENT)
III.
Enter the user card or PIN number and provide the
password according to the mode
IV.
Master Card (or (PIN): 4 ~ 6 digits (Mode 03 or 05) +
ENT)
√ For more information about registering the Master
Card and the user card, refer to the initial setup
section in the user manual.
2.
If this happens when you try to register an additional card
in normal operation mode
- Register the user card only as the Master Card is already
registered.
I.
Master Card (or (PIN): 4 ~ 6 digits (Mode 03 or 05) +
ENT)
II.
Command for an additional card registration
p.48
Troubleshooting
100RV
Problem
Action
according to the operation mode
√ RF Only : 11 + ENT
√ RF + P/W : 12 + ENT
√ PIN Only : 13 + ENT
√ RF or PIN : 15 + ENT
III.
Enter the user card or PIN number and provide the
password according to the mode
IV.
Master Card (or (PIN): 4 ~ 6 digits (Mode 03 or 05) +
ENT)
√ For more information about registering the user
card, refer to the additional user registration section
in the user manual.
3.
If the problem persists after you have followed the
procedures above, contact a designated service center.
The user card (or PIN) is not
deleted.
Check the operation status of the product
1.
Check if the product works properly.
- If the product operates normally (and you have the
Master Card or the PIN number)
I.
If you have the card to delete
√ Master Card (or (PIN): 4 ~ 6 digits (Mode 03 or
05) + ENT)
√ Enter the command to delete the user: 14 + ENT
√ Enter another card to delete (if you have multiple
cards to delete)
√ Master Card (or (PIN): 4 ~ 6 digits (Mode 03 or
05) + ENT)
II.
If you have lost the card to delete. But you know the
card number
√ Master Card (or (PIN): 4 ~ 6 digits (Mode 03 or
05) + ENT)
√ Enter the command to enable the keypad input:
73 + ENT
√ Master Card (or (PIN): 4 ~ 6 digits (Mode 03 or
05) + ENT)
√ Enter the command to delete the user: 14 + ENT
√ Enter another card to delete and press ENT (if you
have multiple cards to delete)
√ Master Card (or (PIN): 4 ~ 6 digits (Mode 03 or
05) + ENT)
Troubleshooting
p.49
100RV
Problem
Action
√ For more information about deleting the user card,
refer to the user deletion section in the user manual.
- If you have lost the Master Card (or PIN)
III.
Registering or deleting the user card is not possible
without the Master Card
IV.
Initializing the product
√ For more information about initializing the
product, refer to the initialization section in the user
manual.
2.
If the problem persists after you have followed the
procedures above, contact a designated service center.
I lost the Master Card and could
1.
You must initialize the product if you want to change the
not register or delete the card or
device settings without the Master Card (or PIN).
change the settings.
(Initializing the product will restore all your settings
regarding the Master Card and user cards to the factory
default.)
I.
Initialization using the external cable
√ Turn off the product and detach it from the wall.
√ Connect the orange line of the product to the
orange line with the white stripes.
√ Turn on the product and check the initial state
(LED indicators blink with the increasing bell sound)
√ Disconnect the two short-circuited lines and turn
off the product
2.
If the problem persists after you have followed the
procedures above, contact a designated service center.
100RV can recognize a presented
RF card but can not recognize the
RF card number using the keypad.
1.
Check if the buzzer sounds when you press a key.
- If you hear the buzzer sound
I.
Master Card (or (PIN): 4 ~ 6 digits (Mode 03 or 05) +
ENT)
II.
Enter the command to enable the keypad input: 73 +
ENT
III.
For more information, refer to the section of
enabling or disabling the keypad input for a card
number in the user manual.
- If you hear the buzzer sound after a certain time
IV.
The keypad input will be suspended for one minute
(default) if you enter unregistered numbers in 5
consecutive times (default).
p.50
Troubleshooting
100RV
Problem
Action
V.
To change the retry count for an unauthenticated
access
√ Master Card (or (PIN): 4 ~ 6 digits (Mode 03 or
05) + ENT)
√ Enter the command to set the retry count for an
unauthenticated access 82 + ENT
√ Enter a new retry count: two digits + ENT (ex. 10
+ ENT  the retry count is 10.)
√ For more information, refer to the retry count
setting section in the user manual.
VI.
To change the keypad suspension time
√ Master Card (or (PIN): 4 ~ 6 digits (Mode 03 or
05) + ENT)
√ Enter the command to change the keypad
suspension time: 60 + ENT
√ Enter a new time: two digits + ENT (ex. 10 + ENT
 the keypad input will be suspended for 10
minutes.)
√ For more information, refer to the applicable
section for the keypad suspension in the user
manual.
- If the buzzer stays inactive
VII.
Initialize the product.
Initializing the product will restore all your settings
regarding the Master Card and user cards to the
factory default.
2.
If the problem persists after you have followed the
procedures above, contact a designated service center.
The Exit button does not work at
1.
all.
Check if the Exit button is connected to 100RV properly.
- Ensure that the Exit button is of the NO type.
2.
Check if the Exit button works normally.
- Check the connection cable between the Exit button and
100RV for any disconnection or short-circuit.
- Try to connect the two lines on the Exit button.
I.
If 100RV responds when you press the Exit button
√ Replace the Exit button  it is defective
II.
If 100RV does not respond at all
√ Initialize the product  the product malfunctions
or is damaged.
Troubleshooting
p.51
100RV
Problem
Action
(Initializing will restore all data settings to the
default.)
√ For more information, refer to the initialization
section in the user manual.
III.
If the problem persists after you have followed the
procedures above, contact a designated service
center.
The external reader can the RF
1.
properly.
card but the RF card data will not
be transferred to 100RV or
Check if the external reader is connected to 100RV
2.
irrelevant data is transferred.
Check if the external reader works normally.
- Check the connection cable between the external reader
and 100RV for any disconnection or short-circuit.
- Check if there occurs a noise on the connection cable
between the external reader and 100RV.
I.
If you have to use a measuring device such as an
oscilloscope or a multimeter, please
consult with a qualifi ed technician.
I.
Measure the Wiegand communication cable and
check if the exit reader works properly.
: Check the Wiegand output state of the external
reader by referring to the user manual, and replace
the reader if it shows an abnormal output.
II.
If there occurs a noise on the Wiegand
communication cable using the measuring device
: Reinforce the GND line by using the shield line and
space line as additional GND points.
: Extend the Wiegand communication range along
with the stable signal reception using the repeater
III.
For more information, refer to the external reader
connection section in the user manual.
1.
If the problem persists after you have followed the
procedures above, contact a designated service center.
The door lock does not operate at
1.
all.
Check if the door lock is connected to 100RV properly.
The connection method may differ depending on the type
and operation mode (NO, NC) of the door lock.
2.
Check the status of the door lock
- Check the connection cable between the door lock and
100RV for any disconnection or short-circuit.
- Check if the door lock works normally.
p.52
Troubleshooting
100RV
Problem
Action
I.
If you have to use a measuring device such as an
oscilloscope or a multimeter, please consult with a
qualified technician.
II.
Remove the door lock from 100RV, and check the
relay output of 100RV:
Replace the door lock if the relay output of 100RV
shows a normal state.
III.
For more information, refer to the door lock
connection section in the user manual.
3.
If the problem persists after you have followed the
procedures above, contact a designated service center.
Troubleshooting
p.53
13
Product specifications
1 Product specifications
Item
100RV
User
512 Users
Power / Current
DC 12V / Max.180mA
Reader Port
External Reder Port 1ea : 26bit Wiegand for Exit
Reading Time (Card)
30ms
Door Open Time
00~99 Sec. (Default 3Sec.)
Input Port
5ea : Exit Button, Door Sensor, Aux#1, #2, #3
Output Port
2ea : 2 Form-C Relay Output (COM, NO, NC) / DC12~18V, Rating
Max.2A
1ea : Chime Bell Output / DC5V, Rating Max.500mA
1ea : TTL Output / DC5V, Rating Max.20mA
LED Indicator
3 LED Indicators (Red, Green and Orange)
Beeper
Piezo Buzzer
Keypad
12 Key Touch Keypad with Back Lighting
Operating Temperature
-30°C to +50°C
Operating Humidity
10% to 90% relative humidity non-condensing
Color / Material
Silver with Black/ Polycarbonate & Aluminum Die casting
Dimension (W x H x
87.0 x 109.0 x 25.0
D(mm))
Weight
380 ± 10g
If you want to connect a reader or an accessory (door-lock, alarming device, etc) to
this product, use only a rated adapter considering the power and current
consumption.
p.54
14
RMA Request
To make the RMA request, the product must be initially registered on IDTECK webpage.
After registering the product, send it to IDTECK RMA Center.
Please follow the instructions below:
1. Please register the RMA request via IDTECK webpage.
: www.idteck.com → “Support & Download” → “Online RMA” → “RMA REQUEST”
(Please refer to the IDTECK webpage for more details.)
2. RMA Code will be issued after the RMA Center reviews the RMA request form.
3. Enclose the product along with the RMA Code and send it to IDTECK RMA
Center.
(Product without RMA Code is not accepted.)
If you have any questions or problems regarding the RMA services, please contact us using
the contact information below. Friendly representatives at IDTECK are always standing by to
provide the best after sales services.
p.55
100RV
IDTECK Headquarter
5F, Ace Techno Tower B/D, 684-1, Deungchon-Dong,
Gangseo-Gu, Seoul, 157-030, Korea
Tel: +82 2 2659 0055
Fax: +82 2 2659 0086
E-mail: [email protected]
Website: www.idteck.com
E-Training Center: http://www.idtecktraining.com
IDTECK Production Facility and RMA Center
2F, 89-4, Dodang-Dong, Weonmi-Gu,
Bucheon-Si, Gyeonggi-Do 420-130, Korea
Tel: +82 2 2659 0055
Fax: +82 2 2659 0086
E-mail: [email protected]
Website: www.idteck.com
E-Training Center: http://www.idtecktraining.com
The specifications contained in this manual are subject to change without notice at
any time.
p.56
RMA Request
Warranty Policy and Limitation of
Liability
15
IDTECK warrants this product against defects in material and workmanship for the period
specified below from the date of purchase under normal customer use. This Warranty
doesn’t apply: 1) to any product which has been dismantled without authorization of
IDTECK or/and has a damaged or detached QC label on its back side; 2) to any losses,
defects, or damages caused by improper testing, operation, installation, maintenance,
modification, alteration, or adjustment; 3) to any product with a damaged or faded serial
number on it; or 4) to any losses, defects, or damages caused by lightning or other electrical
discharge, natural disaster, misuse, accident or neglect.
This Limited Warranty is in lieu of all other warranties, obligations, or liabilities on the part of
IDTECK, and IDTECK DISCLAIMS ANY AND ALL WARRANTY, WHETHER EXPRESS OR
IMPLIED, OF MERCHANTABILITY OR FITNESS FOR A PARTICULAR PURPOSE.IDTECK does
not, and cannot, know who is present, what property is located, where this product will be
used; it would be extremely difficult to determine the actual damages that may result from a
failure of the product to perform as anticipated; and the low price of this product is based
upon the nature of the product provided and the limited liability that IDTECK assumes.
IDTECK IS NOT RESPONSIBLE FOR ANY PERSONAL INJURY, PROPERTY DAMAGE OR LOSS,
DIRECT, SPECIAL, INCIDENTAL OR CONSEQUENTIAL DAMAGES, OR OTHER LOSS, AND
IDTECK’S MAXIMUM LIABILITY SHALL NOT IN ANY CASE EXCEED THE PURCHASE PRICE OF
THE PRODUCT.
To obtain repair or replacement under the terms of this warranty, visit IDTECK’s Website (
http://www.idteck.com) and place an online RMA request. After an RMA code is issued,
return the product along with the authorization RMA code.
p.57
100RV
p.58
Warranty Policy and Limitation of Liability
The specifications contained in this manual are subject to change without notice at any time.
FFMA0246
5F, Ace Techno Tower B/D, 684-1, Deungchon-Dong,
Gangseo-Gu, Seoul, 157-030, Korea
Tel : +82-2-2659-0055
Fax : +82-2-2659-0086
E-mail : [email protected]
May. 2013 Copyright IDTECK Co., Ltd.