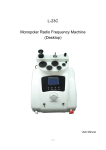
1
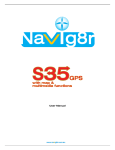
User Manual
USING YOUR NAVIGATOR at the first time
1. Charge completely.
2. Install into your vehicle.
3. Initialize software as described in the manual.
4. Make sure that the car is outside the garage and it is not covered by
anything (treed, bridges, etc).
5. Normally it takes a bit longer to receive the GPS signal the first time
you turn on the unit. Your device has to locate 3 satellites to function.
This time to find the satellites is significantly shorter after the first time
you use the device. If you move your unit over 300km without it being
used, it may need a little more time to locate the satellites again.
2
Introduction
This manual is a complete instruction for the device. Please ready this manual
carefully before using.
3.6 Where can I get software updates?
26
3.7 Where can I get additional maps and guides?
26
3.8 How to Install the MSActiveSync?
26
3.9 How to download the files from the website and put in my SD Card?
28
3.10 What Kind of Formats Does The Device Support?
29
5
4. Connecting to Your PC
29
1. Getting Started
6
5. Troubleshooting and Maintenance
29
1.1 Unpacking
6
5.1 Resetting Your System
29
1.2 Over View
6
5.2 Troubleshooting
30
1.3 Using Your Device in a Vehicle
8
5.2.1 Power Problems
30
1.3.1 Using the Car bracket
8
5.2.2 Screen Problems
30
1.3.2 Connecting the Car Charger
8
5.2.3 Connection Problems
31
1.3.3 Connecting to AC Power supply and Charging the Battery
8
5.2.4 GPS Problems
31
1.3.4 Assembly
9
5.2.5 Voice Too Small Or No Voice
31
1.4 Starting up
10
5.2.6 Why can not use my download files (Option)
32
32
Safety and Regulatory Information
11
5.3 Maintaining Your Device
2.Main Menu Selection
11
6. Battery, Charger and Safety Precaution
33
2.1 Navigation
12
6.1 About Charging
33
2.2 Bluetooth
12
6.2 About the AC Adapter and the Car Charger
33
2.3 Music
18
6.3 About the Battery
33
2.4 Photo
18
7. Specifications
34
2.5 E-book
20
2.6 Vedio
21
2.7 System
22
3.FREQUENTLY ASKED QUESTIONS
25
3.1 I can't find an address
25
3.2 There is a failure in the map / POIs are missing
26
3.3 Voice instructions are unclear in a specific situation
26
3.4 I have problems to get a GPS fix
26
3.5 Where can I get technical support?
26
1.5 Power saving
3
4
Safety and Regulatory Information
Important Safety Notices and Warnings
Global Positioning System
1.Getting Started
1.1Unpacking
The Global Positioning System (GPS) is a satellite-based system that provides
location and timing information around the Globe.
GPS is operated and controlled under the sole responsibility of the Government of the
United States of America, who are respon sible for its availability and accuracy. Any
changes in GPS availability and accuracy, or in environmental conditions, may
impact the operation of your dervice .We cannot accept any liability for the
availability and accuracy of GPS.
Precautions and Notices
For your own safety, do not operate the controls of the product while driving.
Use this product prudently. The product is intended to be used only as a navigation
aid. It is not for precise measurementof direction, distance, location or topography.
The calculated route is for references only. It is the user's responsibility to follow the
traffic signs and local regulations along the roads When you get off the car, do not
leave your device on the dashboard or the car glass that is subject to direct sunlight.
The overheating of the battery can cause malfunction and /or danger.
Unpack your device box and identify the contents. You should have:
(1) Unit. Its main features are a touch-sensitive LCD screen, 1 SD card slot, 1
volume control switch. Details see the photo below.
(2) Holder to hold the device.
(3) Bracket, its main features is to fix the device on a car .
(4) Car Charger. With 12V cigarette lighter adapter. This is the normal way of
providing power to your device when it's in your vehicle.
(5) AC adapter(Option), included for you to charge and work with your device even
when It's not in your vehicle. When you use the adapter, please make sure it is
cooled by placing it in a ventilated area.
GPS is operated by the United States government, which is solely responsible for the
performance of GPS. Any change to the GPS system can affect the accuracy of all
GPS equipments.
(6) USB data cable for connecting your device to a Windows PC
GPS satellite signals can not pass through solid materials (except glass).When you
are inside a tunnel or building, GPS positioning is not available.
(8) SD card(Option), containing map data.
A minimum of 4 GPS satellite signals is needed to determine current GPS position.
Signal reception can be affected by situations such as bad weather or dense overhead
obstacles (e.g. trees and tall buildings)
(10) Installation CD(Option), containing PC connection software and extra maps.
The wireless devices might interfere the reception of satellite signals and cause the
reception of the signal to be unstable. For better signal reception, it is recommended
that you use a car antenna (option)
(7) GPS External Antenna (Option) is used when the GPS signal is not so strong and
it should mounted on the top of the car or on the front of the car window .
(9) User Manual.
*Note: please check optional accessories with local retailer/importer/distributor.
1.2 Over View
Aircraft and Hospitals
Use of devices with an antenna is prohibited on most aircraft, in many hospitals and
in many other locations. The device must not be used in these environments.
5
6
1.3 Using Your Device in a Vehicle
A stand and a car charger are supplied with your device.
1.3.1 Using the Car Bracket
Caution:
Select an appropriate location for the stand. Never place the stand where the driver's
field of vision is blocked.
If the car's windshield is tinted with a reflective coating, an external antenna
(optional) maybe be needed to route the. Antenna to the top of the car through a window.
When closing the car window, be careful not to pinch the antenna cable (Cars with an
anti-jam window design may automatically leave adequate space as needed.).
(1) Charger Indicator Light
(2) Saving Power Switch
(3) GPS Antenna
(4) Speaker
(5) USB Connector
(6) Earphone Jack
(7) DC Jack
(8) Reset Key
(9) External GPS Antenna Connector
(10) Volume Switch
(11) SD Card Slot: for accessing data as maps.
Note: Before using GPS navigation software and maps, you need to insert the
storage Card included with your device. Do not remove the card during GPS
operation.
(12) Unit Power On/Off
Do not expose the device to high temperatures. We recommend that you do not leave
the device in direct sunlight forlong periods or in an unattended car on sunny days.
High temperatures can cause permanent damage.
Do not attempt to service the device yourself! Do not open, puncture or disassemble it.
Doing so may be dangerous and will invalidate your warranty.
7
1.3.2 Connecting the Car Charger
The car charger supplies power to your device when you are using the device in a car.
Caution: To protect your device against sudden surges in current, connect the car
charger only after the car engine has been started. Connect one end of the car charger
to the power connector of your device. Connect the other end to the cigarette lighter
in the car to power and charge your device.
To Cigarette Lighter
1. Device power connector
2. Vehicle power connector
1.3.3 Connecting to AC Power supply and Charging the Battery
1. Fully charge the battery before using your device for the first time
2. Connect the adapter cable to the bottom of your device.
3. Plug the AC adapter into a wall outlet.
8
Press 2 sides button, pull back lightly and then take off the suction. If the bracket still
doesn't detach from your windscreen, tug gently on the clear plastic tab at the edge of
the suction mount, to break the vacuum seal.
1.Press 2 sides button
2.Pull back lightly
3.Take off the suction
The charge indicator glows amber when charging is in progress. Do not disconnect
your device from AC power until thebattery is fully charged, when the charge
indicator turns green. This will take a couple of hours.
1.3.4 Assembly
1.4 Starting up
To get started, put the device into the holder and assemble holder with bracket.
Take off the protected film on the bottom or the suction. Then put the bracket onto a
suitable location of your windscreen or side window, make sure the window or the
suction or windscreen is clean and without water and some dirty things inside, fixing
the stand on that position..
Note: Controlling 5 different levels of suction by pressing down the button
(See below picture)
Push the System Power button to the "ON" position, when first time to use, and leave
it on "ON" position.(Suggestion: please leave it on "OFF " position if long time not use.)
Controlling 5 different
levels of suction by
pressing down the button
Note: that some newer vehicles may have a heat reflective shield embedded in the
win dscreen. In some cases this can prevent proper GPS signal reception. If this turns
out to be a problem in your vehicle, you will need to purchase and install the GPS
external antenna kit.
Under normal journey conditions, the suction mount is perfectly sufficient to hold the
bracket in position. Note that suction may be lost if left overnight, due to condensation
and low temperature. For this reason, and for security, we recommend Removing Both
the suction mount bracket and the device when leaving your vehicle overnight.
To remove the bracket, three steps as below:
9
Insert the supplied SD card (optional) into the slot at the bottom of device.
Tap "OK "then enter into the "Main Menu " Operation Screen as below.
10
2.1 Navigation
Please refer the navigation software user manul for the details.
2.2 Bluetooth
1)Tap the "Bluetooth" on the main menu and enter into following display.
Telephone record
Then select the functions you need and then go directly to the way you need.
The last ring up phone
Telephone keyboard
1.5 Power saving
Press the power button
on the top side of your device to turn on and off your
device for saving power. When you press the power button to turn off the unit,
your device actually enters a suspend state and the system stops operation. Once
you turn on the system again, it resumes.
2.Main Menu Selection
Main Menu is the start of all functions. It includes two or six function icons such as
navigation, Music with Mp3, Photo, Ebook, Vedio player with Mp4, and system
setting . You can choose your desired functions as you like.
Pair device mangaer
Pair
Bluetooth setting
In addition, there is a close icon on top right corner and a status message on down,
the status messages are for pair and connection. When the blue light start flickering,
it means the Bluetooth has already been opened, but didn't connect, if the blue light
keep bright, then connected.
If PND and Bluetooth mobile phone have not paired ( this reference instruction is
for Nokia N-gage) it will display "disconnected".
2 To pair PND with Bluetooth mobile phone, please click "Pair" icon, and enter into
pair interface, then it will count down form 60 seconds
11
12
4 After confirmed, PND display connection established.
Put the mobile phone near the PND, and press TOOLING.>>BLUETOOTH>>PAIR DEVICE
>>OPTION>>NEW PAIR OF DEVICE, After a while, mobile phone will find a new device
"XXXX", that is the PND device. Press the "OPTION" again, the mobile will ask you to enter
the pin code XXXX of device, then enter 8888 and confirm, the mobile phone will clue on pair
finished. Press "OPTION" in third time, choose "connect" it will connect successfully, and a
speaker sign will appear beside the Mobile devices on the phone. And the PND will end the fair
display automatically, and mobile sign on device will change to red, and the direction blue light
will change from twinkle to keep bright. Then you can make a call.
5 Then you can press phone keypad to make a call.
6 There are three function key on phone kepad, they are:
7 Enter the telephone number (not more than 16 numbers, at most 16 characters
showed on screen.)
3 If ever paired, PND will connect the device which was paired before automatically
when enter into bluetooth interface, please see the below picture. And that the mobile
phone has ever paired will display: Accept connecting XXXX yes or not? Please press
"Yes". Then you do not need to enter Pin code and searching new device again.
8 Press the call out button, it will display: outgoing call and the number you
calling out.
13
14
9 If the user has not cancelled the call initiative, but cancelled automatically, it will
display "call fail", that means failed call.
10
If incoming call, it will display "incoming call" and the telephone number.
11 If you accept the incoming call, it will display "active call". Then you can hear
the voice through the PND, and talk through the Microphone, display the time.
15
12 If you want to keep Bluetooth open, please press " " to minimum the interface
of Bluetooth connection. And you can press " " to go back to the main interface,
navigation or other operation interface. In such cases, you can also answer incoming
call with your Bluetooth, even in navigation.
13 Call Record: 20records of each outgoing call, received call and missed call can
be record in PND. The communication record included phone number, timing, and
communication time.
14 Your can re-dial your last dialled call directly if you ever made a call, otherwise
no reaction.
15 Please check if your device had connected with mobile before making a call. If
not, please press "Talk" icon in Phone keypad interface and it will pair automatically.
After connected, your number will be dialed out.
16 Bluetooth setting
It includes the information of your own device.
The name of your Bluetooth (can't be changed)
PIN Code: using the little keypad beside, and enter the PIN Code to do interface setting.
If you select "Keep Bluetooth function when Bluetooth interface is closed" frame then
you can receive incoming call even Bluetooth interface closed. Bluetooth function will
closed if the frame is not selected and all incoming call will not show on device.
16
2.3 Music
1) Tap the icon "Music" on the main menu and enter into following display.
Page up
Page down
17 PIN Code Setting. (not more than 16 numbers, at most 16 characters showed on
screen.) Please use the New PIN cod for pair with mobile after setting, otherwise it
will not be paired.
Return to previous
2)Tap your desired file and enter into the following display.
It supports verious player format. Please refer to DOWNLOAD AND UPDATE.
If no MP3 files can be found,it will enter into playing directly.
A
G
B
H
C
18 Pair Devices
All mobiles which are paired and connected with device will be shown on this interface.
And you can edit them. When the PND device connected with one mobile phone, and
you want to connect with other mobile phone, you should disconnect the current
connection, please choose the mobile phone you want to connect, and press "connect".
If you can't find the mobile phone on this interface, you should turn back to the
Bluetooth main interface, and press "Pair" icon, then reconnect with the mobile-phone
you want.
I
D
J
E
F
A: Return to main menu
B: Circle
C: Auto play
D: Volume control
3) Tap "
E: Return to previous menu
F: Next
G: Previous
H: Stop
I: Speed bar
J: Pause/play
" and return to main menu.
2.4 Photo
1)Tap " Photo" on the main menu and enter into the following display.
17
18
2.5 E-book
2) Tap the file on the screen and enter into the following picture.
1) Tap"E-book" in the main manu and enter into the following display:
E
A
F
B
H
C
G
D
A: previous
B: next
C: return to previous menu
D: current picture name
3) Tap "
E: zoom out
F: zoom in
G: rotate
H: full screen
2) Tap the file on the picture and enter into the following display.
A
" and return to main menu.
B
Tips: Tap FULL SCREEN button, it will display in full screen size
C
D
G
E
F
Tap PREVIOUS or NEXT button to view the pictures.
If picture is too big or the device does not support the format,it will be dark screen
or can not read.
19
A: Return to main menu
B: Previous
C: Next
D: Return to previous menu
3) Tap "
E: Pages chose
F: Current page/total pages
G: Current file name
" and return to main menu.
20
2.6 Vedio Player
1) Tap the icon "Vedio" on the main menu and enter the following display.
When playing in full screen, double press the screen again,it will return to original
playing size.
Page up
Page down
Return to previous
2.7 System
2)Tap the file and enter into the following display.
It supports verious player format, please refer to DOWNLOAD AND UPDATE.
Tap the icon "System" on the main menu and enter into the following setting.
C
A
A
B
F
B
D
E
G
C
G
D
H
E
F
A: Return to main menu
B: Pause/play
C: Stop
D: Speed
3) Tap "
E: Volume control
F: Full screen
G: Return to previous menu
H: Speed bar
" and return to main menu.
A: return to main menu
E: date and time
B: volume
F: language
C: power
G: system information
D: backlight
1)Tap the icon "Backlight" and enter into the following display.
Tips: Tap NEXT button to recircle the movie.
Tap full screen button or double press the screen, it will play in full screen.
21
22
A. Under BACKLIGHT icon, tap " " to weaken the backlight, tap " " to stronger
the backilght.
B. Under battery icon, tap "<" or ">" button to select the duration of auto power off
the backlight.
C. Under AC power icon, tap "<"or ">"to select the duaration of auto power off the
backlight when using AC adaptor.
2) Tap the icon "Sys Info" and enter into the following display
B) Tap "<"or ">" icon to select the language or color display.
4)Power
Tap the icon "Power" and enter into following display.
A
C
B
A.Factory setup
B.GPS reset
C.Calibration
Tap "Calibration" and enter the adjustment of touchscreen
According to the information on the screen,press the right cross centre
Then take the operation under instruction until the following screen display.
5)Volume
A) Tap the icon "Volume" and enter into volume setting display.
B)Tap" " or " " to adjust volume of speaker.
3) Language
A)Tap the icon "Language" and enter into the following display.
6) Date and Time
A) Tap the icon "Date and Time" and enter into the following display.
23
24
and look for the address. Also make sure that the city in which you are looking for
an address is correct.
Sometimes the official postal address differs from the address you are looking for.
In that case, search for an address nearby that you know of and browse on the map.
If you find the address on the map but you can not find it while searching for it,
please contact the manufacturer or your retail know of and browse on the map.
Store for information about software updates.
3.2 There is a failure in the map / POIs are missing.
B)Tap DATE icon and use "<" or ">" icon to adjust the date.
If you detect an error in the map data (e.g. a street is missing completely), we would
like to inform our map data provider.
Please contact the manufacturer or your retail store for information about software
updates.
3.3 Voice instructions are unclear in a specific situation:
If you could not fully understand the voice command for a manoeuvre, either hit the
repeat command button or ask your companion to take a look at the map.
3.4 I have problems to get a GPS fix.
C)Tap TIME icon and use "<" or ">" icon to adjust the time.
If you have problems getting a satellite fix with the GPS (you can see how many
satellites are being received on the main menu at the bottom left) please make sure,
that you are outside and the GPS antenna has a good visibility to the open sky.
Some models also do support an additional external active antenna. Please also
consult with the hardware manual of your device to get further information of how
to obtain a GPS fix.
3.5 Where can I get technical support?
Please contact the manufacturer or your retail store.
3.6 Where can I get software updates?
Please contact the manufacturer or your retail store for information about software
updates.
3.7 Where can I get additional maps and guides?
3.0 FREQUENTLY ASKED QUESTIONS
3.1 I can't find an address.
Please make sure you have correctly spelled your entry. If you do not know how an
address is spelled correctly, simply enter the parts of the address, you know for sure
(e.g. "Lond", "Leic" for Leicester Square in London). Then browse in the result list
25
Please contact the manufacturer or your retail store for information about software
updates.
3.8 How to Install the MSActiveSync?
ActiveSync allows you to establish a connection and transfer files (i.e.MP3 Files)
between your device and your computer
Caution: Do not connect your device to your computer before ActiveSync is installed.
26
Down the "MsActiveSync" from below website:
www.microsoft.com/windowsmobile/downloads/activesync42.mspx
Step1: Turn on your PC and your device , then connect them by the supported
USB cable.
Step2: After Wizard display, press "NO" and then press "Next".
3.9 How to download the files from the website and put in my SD Card?
Step1:Turn your PC and your device , then connect them by USB cable.
Step2:After Wizard display, press "NO" and then press "Next".
Step3: Tap "Explore" button.
Step3:Tap "Explore" button.
Step4: Enter into the MEDIA file of the SDMMC
Step4: Copy the Map file to the "Cities" file of SDMMC folder.
27
28
Put
Put
Put
Put
Put
Music files to the MP3 Directory
Movie files to MP4 Directory
photos and pictures in the Picture Directory
the web files to TEXT Directory
the map in the Cities Directory
3.10 What Kind of Formats Does The Device Support?
Support Music Format: MP3 WMA WAV
Support Movie Format: AVI DIVX XVID
Support Picture Format: JPEG BMP GIF
Support E-Book Format: TXT
WMV
ASF
4. Connecting to Your PC
Two ways to update or change the maps, the software, the multi-media files to your
device. You'll probably want to link it to Your PC.
1: Using The Card-reader
1.1 Insert the SD Card to the card-reader and USB cable to connect with PC.
1.2 Copy the update maps/software/multi-media files to the correct file Route on
your SD Card
1.3 Take out the SD Card from the card-reader and insert to your device.
1.4 The device will show you the contents of the SD Card and press the functions
and go.
2: Using MSActiveSync software
2.1 Set up the MSActiveSync on the PC ( See 3.8 How to install the MSActiveSync?)
2.2 Connect the device and PC via USB cable
2.3 MSActiveSync will run automatically once the decvice connect with PC(But
make sure the device is power on)
2.4 Put the map/software/multi-media files to the correct file Route on SD Card
***Remarks: Map and software update must do according to software user manual
5. Troubleshooting and Maintenance
5.1 Resetting Your System
Resetting your system is similar to restarting your computer. Occasionally, you may
need to reset your device. For example,
you should reset your system when it stops responding or appears to be "frozen" or "
locked up To reset your system, press the Reset button on left side of your device.
29
If your device still does not respond after being reset,you can use the following steps
to clear the memory, and reset the system settings to factory defaults.
Disconnect all cables, including the AC Adaptor, from your device.
Use the stylus pen or your finger to slide the ON/OFF switch to the OFF position
Wait for 1 minute and then slide the switch back to the ON position.
Your device will automatically turn on and the Main screen will appear.
Note: Once you clear the memory with this ON/OFF switch, all the settings you have
changed in the System Settings will be erased, you need to re-enter any personal
settings, including time and date once again.
5.2 Troubleshooting
5.2.1 Power Problems
Power does not turn on when using battery power
> Make sure the power switch is already in ON position
> The remaining battery power may be too low to run your device.
> Connect the AC adapter to your device and to AC power or Connect the Car
Charger to your device and to external DC power.
5.2.2 Screen Problems
A) Screen is off
If the screen does not respond even after you press the power button, try the following
in order until the problem is solved:
> Connect the AC adapter to your device and to external AC power.
30
> Connect the Car Charger to your device and to external DC power.
>Reset your system.
B) Screen responds slowly
Make sure that your device is not running out of battery power.
C) Screen freezes
Reset your system.
D) Screen is hard to read
Make sure that the power is enough
Make sure that the backlight of the display is on
Move to a location with more light
If the problem still exists, reset your system.
E) Inaccurate response to stylus pen taps or finger tip
Recalibrate the touch screen.
5.2.3 Connection Problems
Cable Connection Problems
> Make sure that your device and your computer are both turned on before trying to
establish a connection.
> Make sure that the cable is securely plugged into the USB port on your computer
and on the device. Connect the USB cable directly to your computer
> Reset your device before connecting the cable. Always disconnect your device
before you Restart your computer.
5.2.4 GPS Problems
When there are no valid signals available, consider the following:
> Make sure that the GPS antenna is adjusted to the horizontal position (parallel to
the ground) and it has a clear view of the sky.
> Note that the GPS reception can be affected by:
- Bad weather.
- Dense overhead obstacles (e.g. trees and tall buildings).
- Other wireless device in the car.
- Reflective car window tint.
5.2.5 Voice Too Small Or No Voice
If the earphone is in the earphone jack, the speaker will be w/o voice, take the
earphone from the unit, then the voice out comes Rotate the Volume Switch to
the + position and upwards
Check the Sound Set on your System ,make sure your voice setting is correct
31
and the voice volume is big or not
5.2.6 Why can not use my download files (Option)
The file format is not supported
The file is not in the correct Route
MP3 Route is as: SD card \media\mp3
MP4 Route is as SD card \media\mp4
JPG,BMP files Route is: SD card \media\pic
Map and navigation Voice is: SD Card \Cities\...
5.3 Maintaining Your Device
Taking good care of your device will ensure trouble-free operation and reduce the risk
of damage to your device.
> Keep your device away from excessive moisture and extreme temperatures.
> Avoid exposing your device to direct sunlight or strong ultraviolet light for extended
periods of time.
> Do not place anything on top of your device or drop objects on your device.
> Do not drop your device or subject it to severe shock.
> Do not subject your device to sudden and severe temperature changes. This could
cause moisture condensation
Inside the unit, which could damage your device. In the event of moisture
condensation, allow the device to dry out completely before use.
> Take care not to sit on the device. We advise not to carry the device in one's back
pocket for that reason.
> The screen surface can easily be scratched. Use the stylus or your fingers tap on
the screen. Avoid touching it with any sharp objects. Non-adhesive generic screen
protectors designed specifically for use on portable devices with LCD panels may be
used to help protect the screen from minor scratches.
> Never clean your device with it powered on. Use a soft, lint-free cloth moistened
with water to wipe the screen and the exterior of your device.
> Do not use paper towels to clean the screen.
> Never attempt to disassemble, repair or make any modifications to your device.
Disassembly, modification or any attempt at repair could cause damage to your device
and even bodily injury or property damage and will void any warranty.
Do not store or carry flammable liquids, gases or explosive materials in the same
compartment as your device, its parts or accessories.
32
6. Battery, Charger and Safety Precaution
6.1 About Charging
> Use only the AC adapter and the DC Car Charger supplied with your device. Use
of another type of AC adapter or Car Charger will result in malfunction and/or danger.
> The AC adapter input rated 100~240V AC,50/60Hz, 0.4A, output rated +5V 2.0 A,
DC Car Charge input rated DC input 12V DC output 5V 2A.
> Use a specified Lithium-Lion battery in the equipment.
6.2 About the AC Adapter and the Car Charger
> Do not use the adapter or the car charger in a high moisture environment. Never
touch the adapter when your hands or feet are wet.
> Allow adequate ventilation around the adapter or the car charger when using it to
operate the device or charge the battery. Do not cover the AC adapter or the car
charger with paper or other objects that will reduce cooling. Do not use the AC
adapter while it is inside a carrying case.
> Connect the AC adapter to a proper power source. The voltage requirements are
found on the product case and/or packaging.
> Do not use the adapter or the car charger if the cord becomes damaged.
> Do not attempt to service the unit. There are no serviceable parts inside. Replace
the unit if it is damaged or exposed to excess moisture.
7. Specification
CPU: Samsung SC-2440A
SDRAM: 64M Bytes
ROM: 32/64 MB NAND Flash
Display: 4.3" TFT LCD with Touch Panel, resolution 480 x 272
Map storage: SD/MMC Card
USB Device: USB 1.1
OS: Microsoft Windows CE.NET 5.0
Working temperature: 0~60oC
Storage temperature: -20oC~80oC
Power: 5V, 2A
6.3 About the Battery
> Use a specified charger approved by the manufacturer.
CAUTION: This unit contains a non-replaceable internal Lithium Ion battery. The
battery can burst or explode, releasing hazardous chemicals. To reduce the risk of fire
or burns, do not disassemble, crush, puncture, or dispose of in fire or water.
> Important instructions (for service personnel only)
- Replace only with the same or equivalent type recommended by the manufacturer.
- The battery must be recycled or disposed of properly.
- Use the battery only in the specified equipment.
CAUTION: Risk of explosion if battery is replaced by an incorrect type. Dispose of
used batteries according to the instructions.
33
34