1
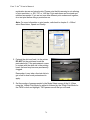
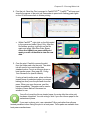
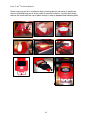
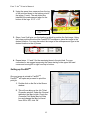
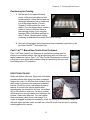
Chapter 6 –Printing White Ink 4. Print the job. Send the Print command in FastARTISTTM. FastRIPTM will open and show the progress of the print job. Remember to press both flashing green lights on the UI at the same time to initiate printing. Within FastRIPTM, right click on the file loaded in the queue and select Spool Only. After the file finishes spooling, right click on the file again and select View Raw Data. If you chose the 1440dpi one pass white print mode you will not be able to view the raw data. 5. Cure the print. Carefully remove the shirt from the holder and cure the print. The white ink will need to be cured longer than standard colors. Cure in a conveyor dryer or heat transfer press. (See page 54- Curing Your Garments for specific details) If using a heat transfer press, place a silicone treated piece of parchment paper (a common baking pan liner) over the print and close the press. When you open the press, peel the paper immediately. The paper can be used a number of times before it becomes too wrinkled to use. You will only use the silicone treated paper for curing after the entire print has been completed. You risk ruining a shirt if you use silicone paper in the pretreatment phase. If you want a glossy print, use a standard Teflon pad rather than silicone treated parchment when curing the print in a heat press. Teflon pads are available from heat press manufacturers. 77