1
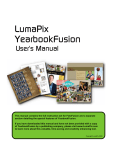
Licensing and Learning is the box that you will need to click in order to activate your copy of Lumapix. Select the
learning section to peruse through tutorial videos, review Frequently Asked Questions or type your query into the
online help manual.
Still have questions about how to use the software? Call Michelle @ 780.449.3558 to book an online training
session.
For technical assistance with installing Lumapix, please contact Fotofusion directly at 1.877.586.2749
System
Requirements
Questions regarding setting up your system? Contact Lumapix directly at1.877.586.2749
Advanced users can visit the site for more detailed instuctions or trouble shooting;
http://site.lumapix.com/business-solutions/yearbookfusion-yearbook-software#customizing-setting-up-schools
Basic Requirements
PC
Pentium 4 or faster
Operating Systems:
Windows 8
Windows 7
Windows Vista
Windows XP SP3
Mac (v5 only)
Intel CPU required – 450 MHz or faster
X11 Required
Operating Systems:
Apple OSX 10.8 (“Mountain Lion”)
Apple OSX 10.7 (“Lion”)
Apple OSX 10.6 (“Snow Leopard”)
Apple OSX 10.5 (“Leopard”)
Memory (minimum)
Less than 100 page project: 1.5GB RAM
More than 100 page project: 2GB vRAM
More than 200 page project: 3GB RAM
Memory (recommended)
The more memory, the better.
Detailed Requirements
All
Display resolution: Minimum 1024×768
Disk Space:
Minimum: 100MB free required
More recommened: Downloaded
content from the online marketplace /
remote storage can consume a lot of
space)
Internet access
A working e-mail account for licensing
information.
Required for activation, recommended
for use.
Activation is easiest when online,
although offline activation is available.
Once activated, the software can run
offline
High-speed internet access is strongly
recommended
Online users have access to:
Templates and other graphical content
Email and web output
Help file
Instructional videos
Updates and upgrades
Network Configuration
Firewall Configuration
FotoFusion communicates with *.lumapix.com,
*.amazonaws.com and *.fotoscraps.com
Port 80: For Marketplace Content
Port 21: For FTP upload to Publishers
Port 443: For Remote Storage
Binary transfer should be enabled
Soap headers should not be filtered
User Permissions:
Complete read/write permissions should be allowed to the
following:
Windows 7:‘C:/ProgramData/LumaPix’
Windows Vista:‘C:/ProgramData/LumaPix’
Windows XP:‘C:/Documents and Settings/All Users/Application
Data/LumaPix’
Network Administrators not using Remote Storage:
FotoFusion does not embed images in a project. As such, for collaborative working we advise storing project files and all related
images in a shared network location. The following is an example setup which can be used for schools or adapted for studios
running FotoFusion::Extreme.
Create an area on your network to store candid images, imported PSPA photos and project files.
Create an Active Directory group, for example Yearbook Users, which have read/write access to this folder.
Map this folder to a standard network drive, Y:/Yearbook.
Using a batch script, or otherwise, set this drive to be mapped at logon for Yearbook Users.
Advise your Yearbook committee that all project files, images and imported PSPA photos should be saved to this folder.
Index
1.0
2.0
3.0
4.0
5.0
Installing the Lumapix YearbookFusion Software
Create Screen Features
What is a Yearbook?
Managing Your Yearbook Project
4.1. Naming Your Project
4.2. Storing Imagery for a Project
4.3. Saving and Sharing Projects
4.4. Suggest Order for Creation of a Yearbook Project
Creating a Yearbook Project
5.1. Creating Panel Pages
5.2. Importing and editing your PSPA data
5.2.1. What is a PSPA CD?
5.3. Importing the PSPA Set
5.4. Organizing and Editing your Data
5.5. Adding Additional or New images to the PSPA
5.6. Removing Images from the PSPA
5.7. Ranking Individuals with a Panel
5.8. Adding Titles to Staff Panels
5.9. Creating your Panel Pages
5.10. Panel Attributes
5.11. Configuring the Image Grid
5.11.1. Frames
5.11.2. Layout
5.11.3. Knockouts
5.12. Configuring the Name Labels
5.12.1. Label Settings
5.12.2. Font
5.13. Configuring the Header Text
5.14. Adding a Background or Paper
5.15. Populating and Sorting your Panel
5.16. Grouping the Panel Set
5.17. Sorting the Panel Set
5.18. Customizing your Panel Pages
5.19. Adding Group Photos to your Panel Pages
5.20. Adding Titles and Using the Text Tool
5.20.1. Adding text to the canvas
5.20.2. Adding Text to a Frame
5.20.3. The Text Editor
5.20.4. Editing Text and Changing Text Appearance
5.20.5. Layout Tab
5.20.5.1. Selecting a Font Type
5.20.5.2. Setting the Font Size
5.20.5.3. Font Attributes
Page
1
1
2
3
3
4
4
5
6
7
7
7
8
11
12
12
13
13
14
15
16
16
18
18
19
20
20
21
21
22
23
24
25
26
27
27
27
28
28
29
29
29
30
6.0
5.20.5.4. Text Alignment and Spacing
5.20.6. Appearance Tab
5.20.6.1. Text Body
5.20.6.2. Text Outline
5.20.6.3. Matte Tab
5.20.6.4. Convert to Matte
5.20.6.5. To add Shadow to Text
5.21. Designing your Cover
5.22. Designing and Adding Candid Pages to Your Project
5.23. Adding Clipart, Papers and Other Embellishments
5.23.1.
Papers
5.23.2.
Frames
Completing and Uploading your project
6.1. Uploading your completed file to your publisher
*Helpful Tips are located at the back.
30
31
31
31
32
33
33
34
35
36
37
37
38
38
UBuild IT Yearbook User Guide
1
1.0 Installing the Lumapix YearbookFusion software
A link to the software will be emailed to you with detailed instructions on how to download
and activate your licence for use. IMPORTANT! Ensure that the computer(s) that you are
installing YearbookFusion onto has the correct specifications to run the software properly.
A complete spec document can be found at the end of this manual in Appendix A –
Yearbook Fusion System Specs.
The software must be downloaded and activated on every computer that will be working
on a project. Your licence covers activation for up to 40 machines. Remember, your
licence is valid for one year from the date that you activate.
Before diving into the software and the whole yearbook process
there are a few guidelines you should follow and terminology you
may need to know!
2.0 Create Screen Features
The YearbookFusion screen works the same way as any windows program. You can
access commands by using the drop down menus, quick icon buttons, keyboard CTRL
shortcuts, and right click on the mouse. A navigation of some of the features is detailed in
the screen shot below.
UBuild IT Yearbook User Guide
2
It is important that you take a few minutes to familiarize yourself with the different features
on this screen; play a little and everything will make sense! NOTE: If you hover your
mouse over any of the quick icon buttons, a help bubble will tell you what the button does.
This screen is where all your work will happen and the pages of your project will be
created.
3.0 What is a Yearbook?
Yearbooks are usually composed of two kinds of pages; panel pages and candid pages.
A panel page is the standard presentation style for school portraits in yearbooks. It
consists of a grid of student photos, with names next to or under the photos.
A candid page is more of a scrapbook or newsletter-style page which contains custom
text and informal portraits.
Sample Panel Page
Sample Candid Page
YearbookFusion allows you to automate the production of panel pages. You can
customize the panel, changing the border style, the number of images per page and the
text appearance.
Candid pages can be created from scratch by dragging in an image at a time or by using
the autocollage
feature.
Covers can be designed by the user or a template can be inserted and manipulated as
required.
UBuild IT Yearbook User Guide
3
4.0 Managing your Yearbook Project
There is no one correct work flow for creating a yearbook project. Some yearbooks are
created by a single individual on one computer, others are created by a group of people
working on a shared computer, or by a group of people working in various locations.
Regardless of the number of people working on the book, one person should be
appointed the Project Manager. The Project Manager will usually assign particular tasks
to members of the committee. This person will also set deadlines so the project can be
submitted for printing according to the schedule determined by the publisher.
If the yearbook is being created by a group, each team member may have one or more
sections assigned to them, with an expected page count for each section. ICON will set
your agreed target page count as part of the software licence. You will see this page
count displayed in the bottom of the Create screen. Page count does not include the
cover.
Here is sample grid of how a yearbook project could be managed. Design your own
grid to suit your yearbook team and workflow.
Section
Page #
Page count
Assigned to
Image source
Due by
Cover
0
0
Pam
D:\Lincoln Net\Ybk\Class Artwork
May 15
Principal Message
1
1
Jess
D:\Lincoln Net\Ybk\Staff
May 15
Panels
2-15
14
Pam
PSPA cd
Apr 30
Sports
16-19
4
Nicole
D:\Lincoln Net\Ybk\Candids\Sports
May 30
Field Trips
20-21
2
Jess
D:\Lincoln Net\Ybk\Candids\Field Trips
May 15
22
1
Jess
D:\Lincoln Net\Ybk\Candids\Volunteers
May 15
Volunteers\Parent Day
Drama & Performance
23
1
Katarina
D:\Lincoln Net\Ybk\Candids\Performances
May 15
Halloween
24
1
Mariette
D:\Lincoln Net\Ybk\Candids\Halloween
May 15
Christmas
25
1
Katarina
D:\Lincoln Net\Ybk\Candids\Christmas
May 15
26-27
2
Mariette
D:\Lincoln Net\Ybk\Candids\Gr6 Grad
Jun 2
28
1
Pam
No imagery
Jun 2
Grade Six Grad
Autograph Pg
Received
PGM
PGM
4.1 Naming Your Project
Firstly, my suggestion is that you create a folder on your system named “Yearbook
DATE”. All the relevant information pertaining to the yearbook should be kept in this
folder. After you have started a New Project (See Page 6) and you are at the Create
Screen, save the file and name the project by the school, then the word “yearbook” and
the year (eg: Campbelltown Yearbook 2010) to ensure that your project can be
uploaded correctly and not overwrite a file already there.
UBuild IT Yearbook User Guide
4.2
4
Storing Imagery for a Project
It is important to remember that the software looks for the images every time a project is
opened (the imagery seen in the screen are “thumbnails”) so it is best that the imagery
is transferred to the same place that the project is being stored. I suggest that the
imagery is also stored in your “Yearbook DATE” folder in a folder labeled “Yearbook
Images”.
Example: Imagery stored on flash drives:
You are designing the Halloween and Christmas pages. The images for the Halloween
page are stored on one flash drive and the Christmas images are stored on another.
You create your Halloween page using the images on flash drive 1, then remove that
flash drive to access the images to make your Christmas page on flash drive 2.
As you removed the flash drive that stored the “Halloween” images, your project will
now have lost the location of those images and there will be an error message written
across all of them. The message will tell you the path that the software was following to
find where the image was stored.
To restore the location of the missing images, you will need to follow specific
instructions. Please refer to Appendix C: Locating Missing Images.
4.3
Saving and Sharing Projects
Depending on the working environment of the team, projects can be saved and
shared in several ways. The project manager should begin a yearbook project
and save the file in a folder labeled “Yearbook DATE”.
1. If your team is working in a computer lab, you may find that working off a shared
network drive works best. All users will save parts of the project to a common
shared directory, and find folders containing candid photos and other graphic
sources in this same location.
2. If your team is working from various locations (home, school, library, internet cafe,
etc.) without a network, projects (the pages assigned to you to work on) will be
saved to your local drive, then transferred to the project manager by archiving them.
An archive creates a .scrappackage file, which contains all the source images and
project "recipe" that can be sent to another user to be restored intact on a dvd or
memory stick. The project manager can restore the archives, and insert the resulting
projects into a master project. For more information on archiving see Appendix B:
Archiving and Restoring Projects.
UBuild IT Yearbook User Guide
5
3. If your publisher has provided your school with Remote Storage, you will be
provided with the option to save projects to a LumaPix network server. All users
with a high speed internet connection, regardless of where they are physically
located, can save their projects to this shared server storage space. Remote
storage will allow you to make and delete folders, and rename and delete projects.
After choosing the Remote Storage option, you will be prompted to create a nickname.
This is used to identify the individual who made the project, and who currently has it
opened. If a project is marked with a lock, then another person in the group is editing
it. Two users cannot work on the same project at the same time. The lock can be
overwritten by right-mouse selecting the page thumbnail, in case a user has kept the
project open on their computer accidentally, and has left for the day. You will be able
to see who has the project locked by trying to open it - their nickname will appear.
4.4
Suggested Order for Creation of a Yearbook Project
I have found the following order of operations to be the most efficient and logical way of
designing your yearbook project, however, there is no right or wrong way.
1.
2.
3.
4.
Create New Project using 8.5x11 Softcover.
Import PSPA cd.
Customize your panel grid.
Populate the panel, sorting by homeroom. Move your classes into the order you
would like them displayed in your book.
5. Make corrections to student and staff information by cross referencing with class
lists provided by the school. Note missing students and staff. These images can be
taken by yourself or Icon will come out and take them for you. See Adding
Additional or New Images to the imported PSPA set (Pg 12).
6. Customize each panel page if required, adding titles, groups, clipart, etc.
7. Add and design your cover and candid pages.
UBuild IT Yearbook User Guide
6
5.0 Creating a Yearbook Project
When you are ready to begin using the YearbookFusion software, you will need to create
a New project. When you start the software, you will be initially greeted with the following
screen:
I recommend that you “turn off” this
screen by clicking off the check mark on
“Show this when Starting FotoFusion”.
Turning this off allows you to be directed
to the “startup wheel” whenever you open
the software.
The startup screen is used to create a new
project, load a project you have saved, look at
the marketplace etc.
To start a New Project! Click on the New
Project part of the window, at the Start Here
Screen, choose, Blank> Preset Size> 8.5x11
Softcover.
I have designed the softcover book to work
directly with my printing capabilities. The safe
and bleed zones have been set for you.
Anything placed within the green margins will
be completely in the finished product.
Anything between the green margin and the
red margin will have some of the content in
the finished product.
UBuild IT Yearbook User Guide
5.1
7
Creating Panel Pages
Panel pages can be created as a separate project or as part of a larger project including
candid pages.
Panels are created in three steps:
1. Importing a pspa cd, to associate an image database with your project;
2. adding an empty panel grid to your page and customizing it to suit your design
tastes and needs;
3. Populating the panel with images, according to your grouping and sorting needs.
Panels can only be made on Album-Side type pages (not covers or double-spreads).
If you need to change the page type, click on the Pages hover, right-mouse select
your page and ensure you have "album side" selected.
Panel pages can be changed in most respects at any point of the design process. You
can reconfigure the look of the panel after it has been populated, re-sort the panel
after the images have been added, and even change data and add students after the
panel has been made.
5.2
Importing and Editing your PSPA Data
5.2.1 What is a PSPA CD?
The PSPA CD is the standardized format to provide a set of portraits and
important information associated with these images to schools or other
organizations.
A PSPA CD contains the image files of the portraits taken by the
photographer(s) assigned to your school or group, and associates these to a
text-format data file. The data file links the portrait images to important
information such the name of the person in the photo, their grade or homeroom
and other details.
YearbookFusion will import the data file and portrait photos directly into the
software. It will allow you to correct or add data linked to the images, and
create panel pages with the images.
Panel pages will display the portrait images, and usually include the name of
the person in the photo, and are sorted according to homeroom, grade, teacher
or other group affiliation.
If more than one PSPA CD is provided, YearbookFusion will allow the two data
sets and images to be merged into a common database.
UBuild IT Yearbook User Guide
5.3
Importing the PSPA Set
In order to use the images and data, you must import the information into
YearbookFusion. This action is only required once (per computer).
1. Insert the CD into your computer.
2. At the Create screen, click on the Add Yearbook Panel button on
the Panel Toolbar.
3. This will open a standard "browse" window. Navigate to your CD
drive or the location that you stored the downloaded information.
You will see something resembling this window:
Find the file named INDEX.TXT and open it. This is the data file that contains the
information required to associate the student portraits to data related to the student.
8
UBuild IT Yearbook User Guide
9
YearbookFusion will then display the following window:
***Take a moment to review the headings such as “Last Name” or “Grade” to make sure
the information is correct. If it appears that the last name is under “Grade” you can right
click the heading to change to the appropriate title.
Your school name will appear automatically if your software is activated.
4. Click IMPORT.
Note: Duplicates: Provides rules for subsequent PSPA CD imports. If this is your
first import, or you are changing data sets, leave it as "replace school in
database." If you are merging a second PSPA CD to one already imported (eg.
retakes or a 2nd set of images), then select "Integrate with existing database", or
"append" if the file numbers have been restarted (00001) in the 2nd CD.
YearbookFusion may offer a suggestion about your data import at this stage.
Continue with the import and choose to ignore the warning.
Once the import starts, you will be prompted to provide a folder location where the
images will be imported. It is preferable to import and save them to your local C:
drive to avoid problems with interruptions of network connectivity, or a USB drive
which can be unplugged.
UBuild IT Yearbook User Guide
10
At the end of the import, YearbookFusion may show an error message. The
message relates to incomplete data related to certain images. YearbookFusion will
prompt you to check the Organizer tab, in the buckets, to see which files have
missing information.
Here is an example of a message received after importing. FotoFusion has found a
few problems in the import, and organized the affected photos in the Organizer to
allow you to manually fix the data.
The data that you will most likely be missing is “Teacher” as Icon does not organize
the imagery that way. Icon imagery is organized by Homeroom.
Once you click OK, you will be taken directly to the Organize Screen.
UBuild IT Yearbook User Guide
5.4
11
Organizing and Editing your Data
The Organize feature is where the database and imagery for the panel pages is stored
and manipulated.
The Organizer is divided into several sections...
On the left-hand side, you will find SOURCE, SEARCH and SCHOOL tabs.
Click on the SCHOOL tab. You can search or filter your images by class, by a last name,
etc by choosing or typing criteria in the area provided on the left hand side of the screen,
under the School Search.
As you click on each image, that images’ attributes will be listed on the right hand side of
the screen, under the Properties. You can correct spelling of names, move students to
different classes, exclude people who cannot be in the yearbook etc.
To add or correct data, click on the image. (You
can select multiple images at once, by holding the
control key on your keyboard and selecting the
images, or by drawing a marquee over a selection of
images, or by clicking Ctrl-A to select all images in a
set. This will allow you to correct common missing
information such as a new Homeroom.)
If one image is selected, it will appear in preview, and the
information associated with the file will appear in the
Custom Attributes area. Multiple - selected images will
display no preview, but show common attributes assigned
to the group.
To add the missing information, simply type in the
appropriate empty box, or select from the drop down menu.
You do not need to hit Enter or Apply; the information is
added immediately, and will save in YearbookFusion's
database.
Please note: the changes made in YearbookFusion's
Organizer ONLY apply to the computer they were made
on. The information does not over-write the PSPA CD,
and is not transferred to other computers using the same
image set. As such, panel page creation is best done on
one computer.
UBuild IT Yearbook User Guide
5.5
12
Adding Additional or New images to the PSPA
Portraits that are not part of a PSPA can also be added.
1. Click on the Organize tab, and click on the Source tab (top left). Explore to where
the image(s) that you wish to include in the database are stored.
2. Select the image(s), then click on the
Organizer. The image(s) will be moved into Bucket 1.
button at the top of the
3. Click on this bucket. Select the image(s), either one at a time or as a group, then
use the Custom Attributes area to the right to add the necessary data linked to
these image(s) - the student's name, grade, homeroom, etc. Some fields will have
drop-box while other information will be typed in manually.
NOTE: Do not add the data before clicking "Add Student" -- the images need to be
added to the database first.
4. The data will now be associated with the images. Click on
button at the top of the Organizer to ensure that the images have been properly
associated with the database, and will be included in the panel pages.
Adding students can occur at any time during the panel creation
either before or after the panels have been set up and
populated.
5.6
process -
Removing Images from the PSPA
Occasionally, you may need to exclude an image from the imported PSPA (eg.
FOIP students, duplicates, retakes, or students who have left the school).
1. Click on the Organize tab, and click on the School tab. Locate the image(s) that you
do not wish to include in the yearbook panels -- use their last name, or grade, or
homeroom to search for the image.
2. When you find the image(s) in the preview area, select the thumbnail(s). The image
and associated data will appear in the Custom attributes area. Turn the "Exclude"
option to Yes. The image will not appear in any panel.
Images can also be excluded directly from a populated panel. Right click any image
within a panel to exclude it. This will turn the Exclude attribute to "yes" in the
Organize tab and the image will disappear from the panel.
UBuild IT Yearbook User Guide
5.7
13
Ranking Individuals within a Panel
If you would like to have your teachers on the student panel pages at the front of a
panel in the correct order, you will have to assign a “Priority” ranking to them.
1. Click on the Organizer tab and click on the School tab.
2. Select the sort criteria in the Homeroom field to Staff.
3. Select all (CTRL A) the images and select Teacher in the drop
down menu.
4. This will give all the teachers a rank of “3” and place them at the front of their
classes. If you have student teachers and/or assistants that you would like on the
page too, select them and give them a rank of “4” in the Priority box.
5. You will now have to associate every teacher and assistant with their classes so
they will appear on the class panel pages. Click on each teacher and in their custom
attributes, use the down arrow and select the Homeroom they are associated with.
If you require the staff to be on both the class panel pages and a staff panel page
you will have to associate them with both Homerooms.
For instance, Mrs. Kirby needs to be on the Staff panel page and on the Class 1B
panel page. Click on her image and in the Homeroom box in the Custom Attributes
area, type in Staff;1B. She will appear on both panel pages.
NOTE: When you prioritize images they will appear that way on all panels they are
associated with (ie: On the Staff page they will also appear in teacher, then assistant
order, not alphabetically). If you prefer staff to be in order by last name instead of
rank, you will need to disable the current staff page and populate a new staff panel
page. Please contact Icon if you need assistance.
6. You can prioritize or “rank” everyone in a panel – Principal could be “1”, Vice
Principal “2”, teachers “3”, assistants “4” and students “5” or just leave them blank
(blanks are automatically assumed to be the lowest rank).
5.8
Adding Titles to Staff Panels
To have the staff title (ie: Educational Asst., Principal, Class 1B) appear below their
name on the panel page you will have to provide a title and then tag that attribute in
the labels section when customizing your panels. See Label Settings in Configuring
Label Names (Pg 21).
1. Click on the Organizer tab and click on the School tab.
2. Select the Staff Member and in the Title section in the Custom Attributes and type in
their title.
UBuild IT Yearbook User Guide
5.9
14
Creating your Panel Pages
Return to the Create Screen. The following default panel will appear.
If you would like to use a pre-defined panel set. Click on Simple. Pick the relevant
style that you would like and then you can customize the panel(s) individually or as a
whole. To use the Simple option, you must define your students and staff into groups
first.
Advanced Panel Option
There is no predefined order for applying attributes to your panel - you can add
backgrounds before or after adding an empty panel, and you can change the look of the
panel frames and text position before or after populating the panels with images.
At the top of the panel editor toolbar, you will find three icons.
The first section allows you to configure the way your
panel is populated - more details on this in the section
on populating and sorting your panel.
UBuild IT Yearbook User Guide
The second section allows you to configure the way the
panels look overall (the attributes).
The third section allows you to change the way the
image frames look in the panel.
5.10 Panel Attributes
The panel attributes are displayed in three options, image grid, header text and name
labels.
* Please note you may also hover over the shadow for the Page Header and
Name Labels to adjust shadow settings. You may adjust the shadow for the
panels by hovering over the shadow in the third section (frame attributes).
15
UBuild IT Yearbook User Guide
16
5.11 Configuring the Image Grid
Click on the grid of four frames. The following toolbar will appear, and is divided into
four sections, frames, layout, locks and remove knockouts.
Frames – to change the size and spacing of the
panel frames on the page
Remove Manual Knockouts
5.11.1 Frames
The first section of the editor allows you to set the size and spacing of the panel
frames.
You can do so by changing their width (displayed in inches). Increasing the
width will make fewer larger frames and decreasing the width will add smaller
frames to the panel.
NOTE: You can make changes to the configuration by typing in numbers or by
dragging the arrow back and forth – this will change the size of the frames
interactively.
UBuild IT Yearbook User Guide
17
Alternatively, you can define the maximum number of rows and columns in the
panel, and make the panel snap to that value. There are three options when
setting the columns and rows:
1. Free will cause the frames' width value to take precedent over the number of
columns and rows (ie. the columns and rows will change as the width of the
frames changes, no limits).
2. Fit will cause the panel to snap exactly to the selected number of columns
and rows, regardless of the specified frame width or page size (ie. use this
exact number of columns and rows).
3. Max will not allow the panel to grow beyond the specified number of
columns and rows (ie. "no more than" x columns or rows).
II (Column) and = (Row) spacing allows you to increase the inset (distance)
between the panel frames. Increase the column width to space the panel
frames further apart; increase the row spacing to create more room between the
rows of frames.
Features allows you to feature the first (or more) image nodes – this is handy if
you would like the teacher to be highlighted.
Knockouts allows candid imagery, text titles, clipart etc to be placed on the
image grid and the imagery will “scatter” to avoid the frame. For further
information see Designing and Adding Candid Images (Pg 35).
Here is an example where the columns and rows have been defined and the column and
row spacing has been increased, the first image has been “featured”.
UBuild IT Yearbook User Guide
18
5.11.2 Layout
The Layout section of the panel editor allows you to specify where your panel
will fall on your page, with respect to the margins and sides of the page.
To understand how this works, first, a little terminology: The gutter is the side of
the page that runs into the book's binding. The edge is the side of the page that
runs on the outside of the book. Gutters and edges change from side to side on a
album sides, because the binding edge of the page flips from page to page.
The top is the top margin inside of the “safe” (green) zone and bottom is the
bottom margin inside of the “safe” (green) zone.
Frames drop box options allow you to define which side your panel will be
justified. The default is Gutter, which will cause the frames to be snug to the
gutter (binding side) of the album page. You can
change this option to the edge of the page, or
always justify to the left or the right sides, or the
centre of the page, or the full width of the page.
Last Row drop box options allow you to choose the
justification of your last row of panels. The last row
of a panel will often not fill up all columns, so you
can choose how the panel will deal with the extra space, either justifying it to the
gutter or edge, to the left of the right, or centered.
5.11.3 Knockouts
You can create deliberate spaces within the grid on a
per page basis, where other image or text frames can
be inserted (eg. logos), or to create a new pattern. To
change the grid's shape, click on the individual frames
on the panel to turn them off.
If the panel is not populated with images, the frame
will switch from grey bordered frames to translucent
red frames. If the panel is populated with images, the
image in the frame will be bumped to the next
available frame, and the remainder of the image set
will flow over.
UBuild IT Yearbook User Guide
19
To turn a frame back on, click on the empty frame again.
If you click on Automatic, the frames will move automatically as you insert
logos or candid imagery.
To remove all knockouts (setting it back to a full grid) click on the Remove
Manual Knockouts button on the Panel Settings editor.
5.12 Configuring the Name Labels
Click on the First Last (the text will turn red) in the panel attributes toolbar. The
following toolbar will appear, and is divided into three sections, label settings and font
and shadow.
Label Settings – to specify where the text will appear.
Font – to define the label font options and information that
appears on the label.
Shadow – to add a shadow to the name label.
UBuild IT Yearbook User Guide
20
5.12.1 Label Settings
The Style drop down menu allows you to specify where the student names will
appear - on the beside the panel or beside the image or under each image
frame.
The Width and Height changes the amount of space
that the label can occupy. Increasing the width with the
labels aligned to the side of the panel will make the
text larger and might possibly reduce the number of
frames per row. Changing the height when the labels
are aligned under the frames will reduce or increase
the space between rows.
Changing the Space will move the label closer or
further away from the panel image frames, giving it
more of a margin
5.12.2 Font
The font area works in a similar manner to all font menus. You can change font
type, font attributes, justification, colour etc as well as being able to “tag”
information to an image.
Font Window
The software will default your labels to show the first and last name that is
associated in the custom attributes area in the organize screen. You can add
other information or change the tag attributes.
To add a title underneath the names,
unlock the labels (under Locks in Panel
Settings), place your cursor after the last
% and click until the information is no
longer highlighted. Press the enter key,
then click on Tags, User custom tags,
School, Title. You will now see that
there is another “tag” added %DB:AS.
UserCustom.attributes. school.title%
On your populated panel page the label
names will show the first and last name
with the title underneath.
Remember, the title field in the custom attributes
area in the Organize screen must be filled in
order for it to show up.
UBuild IT Yearbook User Guide
21
To view all the options of the Text Editor please refer to the Adding Titles and
Using the Text Tool (Pg 27) section of this manual.
5.13 Configuring the Header Text
Click on the ABCDEF in the panel attributes toolbar. This “header” is tagged to the
grouping information that you use when populating the panel.
All of ICON’s PSPA information is grouped by Homeroom, therefore, the homeroom or
class information that was provided to us at picture time will be grouped in the same
way. For example, if the data provided showed your classes listed as 2-Rm11 or 1B,
that is how they will show up in the header.
The Header Settings will default to Type: “Group
+ Cont’d”. I suggest choosing “None” after you
have populated and organized your class panels
in the order you would like and then make your
own page titles. The header design options are
limited and can only be used at the top of the
page.
5.14 Adding a Background or Paper
To add a great design element to your panel pages use a solid color, or add a textured
paper from the Paper hover as a canvas background.
To add a solid color: Choose, Tools, Page, Canvas Color, Canvas Fill Properties.
Click on the Background Fill tab and choose a color. You can play around with the
opacity etc in the General tab to get it just right.
To add a Paper: Click on the Papers hover, select a “paper”, click and hold, then drag
the paper into the “grey” area and release, this will automatically become the canvas
background. If you happen to drag the paper onto the panel page do not panic! Simply
right click on the paper and choose “Set as Canvas Background”.
Add a background color or Paper before populating your panels, so the design
element will carry across every page of the panel set. If you want to make each page of
the panel set different, first populate the panel and then custom-tint or apply a different
background paper to every page of your panel.
UBuild IT Yearbook User Guide
22
Note: If you are designing your own page style, and wish to have a particular image or
graphic appear on every panel page (eg. a logo), be sure to assign the frame to the
canvas background layer before populating the panels.
Select the frame(s) you wish to have repeated on each page, then right click on your
mouse and select "Move to layer..." then assign the frame(s) to the canvas layer. This
will result in the duplication of these frames on all pages of the panel set.
5.15 Populating and Sorting Your Panel
Populating your panel refers to the process of adding the images to the empty panel
grid. Before the panel can be populated, your PSPA database must be imported.
To access the Panel Population options, click in the Panel Editor:
The first section is the Panel Population
editor, which allows you to specify who
will appear in the panel -- everyone on the PSPA
import, or just one subsection.
Select Show All. You can refine who actually ends
up appearing in the panel later.
Select “Apply”.
Now you are going to group and sort the images so
they appear in their classes.
UBuild IT Yearbook User Guide
23
5.16 Grouping the Panel Set
If you do not specify a grouping criteria and choose to show ALL of the panel set, you
would get one giant panel including every person in the school in alphabetical order not a very useful way of organizing your book! Grouping and sorting options allow you
to tell the panel how it will organize itself.
The Panel Set Grouping options use information that has already been associated
with the PSPA dataset. For all ICON PSPA datasets the information is grouped by
“Homeroom”.
By default, no grouping will be set. In the Group by:
drop-box choose “Homeroom” and the Sort by:
“Homeroom”.
The software will group and sort the panels
alphabetically on the pages within the parameters
you set when designing your panel.
If you would like the pages to be sorted in a different
order, click on one of the names in this list -- or hold
the Ctrl key on your keyboard, and select more than
one and use the up and down arrow keys, to move one
or more groups to a different position in the panel set.
For instance, in most cases you will want the Staff
page to come first. Select “Staff” and use the up arrow
to advance them to the top.
If there are any classes that you do not want as part of the yearbook panel (eg: Making
a Grade Six Writeups page and using imagery that is not part of the PSPA set). Select
them and turn off the Enable button. They will disappear from the panel set.
To save space, maybe you would like all the Grade 1s to run one after the other. Select
all the classes and turn off the Page Break button. Now, the 1-2 class will start on the
same page as the last line of the 1-1 class, and the 1-3 class will start following the 1-2
class.
UBuild IT Yearbook User Guide
24
5.17 Sorting the Panel Set
Sorting allows you to organize the panels internal to the grouping. This is useful to first,
alphabetize your images, and second, to enable certain people in the set to rise to the
top of the panel group. By default the options are set to
the following: Priority, Last Name, First Name
Priority sorting allows you to create panels where the
teacher will automatically be placed in front of the
students, or create a staff page where the principal will
appear at the top, followed by the vice-principals,
teachers, support staff, etc.
This is dependant on values being assigned for the
selected field in the Organizer.
To see the results of your work, click on the hover at the bottom of the
Create screen.
Hit Page Down on your keyboard (or Page Up) to move through the pages on your
Create screen to see the entire set of pages.
UBuild IT Yearbook User Guide
25
5.18 Customizing your Panel Pages
You can now manipulate and customize each panel page to create a design that is
pleasing to the eye. As many classes are not of the same size, I suggest that you look
at each page individually and size the panels accordingly. In the examples below, you
will see how the sizes of the panel images are different in order to accommodate
number of students and also to make the page look attractive.
In order to make changes that affect only the one page, you need to apply the settings
to only that one panel group.
At the top of the Panel Toolbar you will see two drop down
menus, one that reads “Select a Preset ….” , and another that
reads “Apply settings to All Panels”. These are the default
settings.
To make changes to the Grade 3 panel only, you would select
the corresponding group from the drop down menu, and then
change the panel configuration. The rest of the groups will
remain in their original configuration, while the selected group
will appear differently.
UBuild IT Yearbook User Guide
Settings for
Class 2W
26
Settings for
Class 3H
5.19 Adding Group Photos to your Panel Pages
Many schools like to have the class group photos as part of the panel page. This
cannot be automated when creating the panel page and therefore needs to be
added afterward. To add a class photo in the same location on every panel
page, complete the following:
1. In the create screen, on the first panel page, select Image Frame from the
Create Empty Frame icon.
2. Resize the empty image frame by dragging
on one of the blue corners, until you have
achieved the size of frame you would like
(most group photos fit nicely into a 4x3
sized frame).
3. Place the frame in the desired location on
the page (if you have chosen Knockout as part of your panel attributes,
the frame will scatter the panel images to make room so you might have to
resize your panel images to accommodate).
4. With the frame selected, choose Copy from the edit menu (CTRL “C”),
move to the next page and Paste (CTRL “V”). Continue “pasting” on
every page. You will notice that the empty frame is located in exactly the
UBuild IT Yearbook User Guide
27
same place on each page. You may need to adjust your panel images as
in #3 above.
5. Locate your class group pictures through the Images tab and
drag and drop the corresponding group onto each page.
5.20 Adding Titles and Using the Text Tool
Using the main Text Frame tool is similar to the text tool in the Panel
toolbar. You have all the same functions, but you use the main tool instead of
the text tool within the Panel toolbar.
5.20.1 Adding Text to the Canvas
Click on any empty area on or outside the canvas. An Image
toolbox will appear. Click inside the “T” and the text editor
will appear.
A new text frame will read "Double Click to Change" until you
add your own text.
5.20.2 Adding Text to a Frame
You can add text attached to a specific frame on the canvas. This means
that if you move the frame, the text moves with it. Using text-on-frames
also allows you to use information about the particular image as text.
Select the frame that will "own" the text frame. The image toolbox will
open. Click the Text option, just as above,
which will create a new text frame attached to
the image frame.
The text frame will move and rotate with the
'parent' frame, although it can be
independently sized and positioned. This is
useful for creating labels for individual pictures
and contact sheets or other layouts.
Note: that if you have multiple frames selected
when you click the 'add text' button, all frames
will receive a text frame.
5.20.3 The Text Editor
When a text frame on your canvas is selected, the Text toolbox will
appear:
The T icon allows you to launch the Text Editor, to apply new attributes
UBuild IT Yearbook User Guide
28
and edit your text.
Drag on the T icon to dynamically change the frame size; if your text is
set to "resize to fit," your font size will grow or shrink accordingly. Hold
Ctrl on your keyboard and drag on this icon to dynamically change the
outline width.
To dynamically change the shadow of your text, drag on the shadow
portion of this icon. To learn more about shadow options, consult the
Shadow Editor section below.
The Arrange icon works in the same manner as the icon on the Frame
toolbox. Consult the Arrange and Distributing Frames (Pg 120) section
of the complete YearbookFusion User’s Manual held on the ICON ftp
site to learn more.
5.20.4 Editing Text and Changing Text Appearance
To edit text:
1. Click on any text frame. The Text Toolbox will appear - click on
the T icon to launch the Text Editor.
2. Replace the “Double-Click to C hange” with any text you want. It
can be a few words or entire paragraphs.
Note: There is no spell checker in FotoFusion. If you are concerned about
the spelling in your text, you should compose it first in a word processing
software (eg. MS Word, Word Perfect, etc.) to check your work. You can
cut and paste it into FotoFusion's text editor after you have ensured it is
correct.
UBuild IT Yearbook User Guide
29
5.20.5 Layout Tab
The appearance of text within text frames
can be changed through the Text Editor.
Note: you can multiple-select text frames
(hold Ctrl on your keyboard and click on each
text frame) and all changes made in the Text
Editor will be applied to the selected frames,
or use the Toolbar Selection Tool
and select the Image Text or Canvas Text
options to select all items of this type on the
canvas.
The Text Editor displays any True-Type,
PostScript, or Open-Type Font available in
the C: \Windows\Fonts folder on your system.
5.20.5.1 Selecting a Font Type
Click on the down arrow to see all
available fonts, then select one to
apply to your text.
5.20.5.2 Setting the Font Size
There are two ways to change the size of the text in a text frame:
1. By setting the font size directly: the Font Editor includes a
'Size' control, measured in point size. Simply drag or click
this control to set a size for the text in the currently-selected
frame. Note: doing so will check the 'lock size' option for that
text box; this becomes important if you later want to resize
the text by the second method, namely, manually resizing
with the text frame handles. You will need to UNLOCK it
before the text will resize when you pull on the handles
2. By resizing the text frame interactively: If the text is
unlocked, pulling on the frame handles will resize the
text.
Changing the drop-box options beside the font size will cause the
font size to relate to the size of your text frame in different ways.
Resize to Fit: Your text will grow or shrink to fit the frame. Point
size is ignored.
Lock and Clip: Your text will stay exactly at the point size selected.
If your text frame is shrunk too small, the text will be cut off. This is
the option to choose if you need an exact point size.
Do Not Exceed: Your text will grow but only to the maximum font
size. This feature is particularly useful for creating templates where
the text content may change based on exif tag data.
UBuild IT Yearbook User Guide
5.20.5.3
30
Font Attributes
Other font attributes include bold, italic, strikeout and
underline. The width of the strikeout and underline can be
changed via the adjacent line size option.
5.20.5.4
Text Alignment & Spacing
Within the text frame, text can be positioned by setting the
alignment in the text editor;
The following options appear in the text
editor, to adjust the position of your text
relative to the text frame, and to change the
spacing between parts of the text.
1. Flush Right / Center / Flush
Left: Click on the buttons to
select your option.
2. Justification with all
characters / Justification
with spaces only: Click
on the buttons to select
your option
3. Align to top of frame / Align to center of
frame / Align to bottom of frame: Click
on the buttons to select your option.
4. Inter-character spacing: changes the
space between letters. (R) restores to
default: Click/drag on the value
to change. Click on (R) to restore to the
default value.
5. Inter-line spacing: increases the
spacing between lines of text. (R)
restores to default. Click/drag on
the value to change. Click on (R)
to restore to the default value.
UBuild IT Yearbook User Guide
31
5.20.6 Appearance Tab
The appearance tab is where you would change font colour, opacity
and outline attributes of the font.
5.20.6.1
Text Body
To make the text body more translucent:
Click on the Opacity control and change the
value to a lower number.
To change the color of the text:
Type in the R-G-B values, or click on the color
picker box to open the color editor.
Drag the Blur control to interactively set the blur
on the text.
5.20.6.2
Text Outline
The outline for the text can have a unique color
and transparency typically a black edge around
a text body.
To make the outline more translucent
Click on the Opacity control and change the
value to a lower number.
To make the outline wider or narrower
Drag the Size control
A dashed outline is also available
Click on Dash to set the size of the spacing.
Examples
of Text Effects
UBuild IT Yearbook User Guide
5.20.6.3
32
Matte Tab
Applying a matte to your text can add texture and flare. Not all
mattes are appropriate for text -- for instance, a star-shaped matte
will only cut off part of your text.
However, textured mattes like gradients will add a distressed look
to your text. Within the Matte tab you are given a set of standard
emf mattes to choose from.
To add a standard matte to text:
Click the Enable check box
Select your matte of choice from
the drop box
Use the Invert and Soften
functions to change the direction
of the matte and soften it.
To convert text into a texture matte:
1. Type in your text, and select the font type (other font
attributes can be applied (eg: bold, blur) while others will be
ignored when the text
is changed into a matte
(outline, color).
2. With the text box
selected, Click on the
Search tab. The
following menu will
appear. Select a matte
that you like and drag it
on the text. The text
will now take on that
effect.
UBuild IT Yearbook User Guide
5.20.6.4
33
Convert to Matte
You can also convert text into a matte that takes on the properties
of an image or Paper.
Heavier, bolder fonts will be more effective to display images
than thin fonts.
To convert text into a matte that uses an image or a paper:
3. Type in your text, and select the font type (other font
attributes can be applied (eg: bold, blur) while others will be
ignored when the text is changed into a matte (outline,
color).
4. Click on the Convert to Matte
Button in the Matte tab. The
text will now turn into an image
frame.
5. Select a picture from the
Images tab or a Paper
from the Papers tab and
drag it onto the text. The
text will now take on part of the image – you can drag the
crop tool to use different parts of the image, and the text can
be resized with the frame handles.
If you need to edit the text, you will need to UNDO (CtrlZ) the matte application.
5.20.6.5
To add Shadow to Text
The text shadow option is found by placing your mouse
and hovering underneath the Text tool. You will see a
red “shadow” on the T. When you click on the “shadow” the
following toolbar appears:
The shadow is always applied as a default.
1. To turn the shadow off, click on the check
mark.
2. Offset determines how far from the frame the
shadow is displayed. If you increase the value, the shadow
will appear farther away from the image.
3. Blur makes the shadow harder or softer,
4. Angle determines the apparent position of the light source
producing the shadow of the frame.
5. Amount determines the opacity of the shadow effect.
UBuild IT Yearbook User Guide
34
6. Shadow Inside is used
mainly for images.
7. Click on the the color chip opens the color editor; this allows
you to pick a new color for the shadow. In the example
shown the shadows have been used to make the text appear
to glow.
5.21 Designing your Cover
YearbookFusion is packaged with a set of cover templates that you can either
use as is, or edit to your liking. Designing a cover from scratch using student
artwork or imagery is always a great option. To insert a cover template:
1. Have your project open and the first page visible in the Create screen.
2. Click on the LP Art tab and click on the word
Embellishments. Choose Templates from
the drop down menu and a series of cover
templates will appear.
3. Click on a cover template that you like and
drag it onto your page. Depending on the type
of template you are inserting the following popup menu may appear:
4. Select Append, and the cover will be dropped into your project. It should
appear after the first page, but sometimes ends up at the end of the
project. You may have to delete blank pages.
5. In the Pages hover menu, select the page labeled Cover and press the
up arrow to move it to the front.
UBuild IT Yearbook User Guide
35
To design your own cover:
1. In the Pages hover menu, click on the Add Pages button and select
Cover Sheet. Using the arrows, move the Cover to the front of the
project. Design away!
5.22 Designing and Adding Candid Pages to your Project
A yearbook is just not a yearbook without those funny pictures that are taken
throughout the year reminding us what school life really is about! Provided below
is a quick and easy way to make your candid pages, however, there are
extensive design options and instructions in the complete YearbookFusion User’s
Manual held on the ICON ftp site.
To make a single album side candid page:
1. Ensure that all the images that you would like on your candid page are in
a folder within your main yearbook project folder.
2. Add a album side page to your project (either using the Add Pages icon
at the top of the Create screen or the Add Pages icon in the Pages hover
at the bottom of the Create screen).
3. Explore to the folder containing your pictures
through the Images tab, select the images you
would like to place on the page or select all
(CTRL “A”) and click the Autocollage button
4. Lumapix will automatically create a candid page
with all your images organized. You can
continue to click on the Autocollage button until
you like the configuration. Images can be moved
from one frame to another and you can apply design options to the frames
as you like.
5. Add a title to the page and you’re done!
UBuild IT Yearbook User Guide
36
5.23 Adding Clipart, Papers and Other Embellishments
Adding embellishments to your book makes the final product standout and
provides interest. LumaPix is packaged with a number of graphic
embellishments and ICON has provided a number of clipart options as well. New
content will be added over time, so be sure to check often for additions.
To add clipart and other embellishments:
1. Click on the LP Art hover, next to the Papers and Frames hover on the
Create screen. The system defaults to show you clipart that is directly
related to schools by searching with the keyword “yearbook”.
2. Select a piece of clipart that you like and drag it onto your page. All clipart
can be resized by dragging the blue resizing bars.
3. Even more content can be found by clicking on the Gallery button, on the
left-side of your canvas. Choose either the LumaPix Clipart folder or the
folder labeled Clipart (this is ICON’s clipart) to see subfolders of content.
Explore these folders to find clip art for your yearbook.
UBuild IT Yearbook User Guide
37
5.23.1 Papers
Click on the Papers hover over the canvas on the Create screen to view a
list of over 200 FREE textures that can be used as backgrounds or
graphic elements on your pages. Included
in your licence, ICON has provided you with
$20.00 towards any Premium products that
you would like to use.
5.23.2 Frames
The Frames hover, also located over the
canvas area on the Create screen will
display over 100 "smart" frames. Drag and
drop these onto your candid images to give them texture, borders and
effects.
Note: smart frames cannot be added to panel images.
UBuild IT Yearbook User Guide
38
6.0 Completing and uploading your project
Before submitting the project to ICON, the yearbook project manager needs to compile
all pages into one complete project.
Archived project pages that have been submitted by users not on a shared network
space, will need to be restored and saved locally.
If the project pages have been saved to a shared network or remote storage, then the
yearbook project manager will append the pages from that project to the main project.
1. Click on the
button to open the Pages hover and use the append pages
option to find the component pages of the yearbook. Reorder them accordingly
(up/down arrows), and ensure that page count has been respected.
2. Check for resolution warnings (when an image is of insufficient quality or overzoomed) and for red frame numbers (images that have become disconnected
from the original files). Files with red resolution warnings should be replaced,
to ensure that the project will print with sufficient quality.
3. Save this master yearbook project to your yearbook folder as “SchoolName
Final Yearbook 2010”.
6.1
Uploading your completed file to your publisher
YearbookFusion will allow you to directly upload your projects to ICON’s server. You
do not need to configure anything to send the files(except to ensure that you have
rights to upload to ftp sites); the software provided to you will have all the variables
preset to send your projects directly to our server.
1. In the File menu, choose the UPLOAD TO PUBLISHER option.
2. Select Upload as Flattened Images (Faster).
3. If you wish to give Icon access to the complete file in order to make
corrections, then choose Upload Complete Project.
4. Uploading can take quite a bit of time, and is dependent on the speed
of your internet connection, your publisher's server, and the size of
your project.
Helpful Tips
1
Accessing Icon’s FTP Site
2
Archive/Restore/Append a Project
3
Sample write-ups for biography pages
4
Locating Missing Images in Lumapix
5
Replace an Image in the PSPA
6
Panel Menu Overview
HOW TO RETRIEVE FILES FROM THE ICON FTP SITE AND
COPY FOLDERS FROM YOUR COMPUTER ONTO THE
ICON SITE
To access the Icon ftp site to transfer files to your computer:
Download the free software below - it is a file transfer software that will speed up the process.
http://filezilla-project.org/download.php?type=client
Once it is downloaded and on your machine, start the software.
In the bar at the top, type:
Host:
mail.iconexp.com
Username:
yearbook
Password:
iconexp
Your file folders (on the computer you are using) will be listed on one side and the remote (Icon)
site on the other side. The Icon side will show all the folders that are on the remote (Icon) site.
1.
2.
3.
4.
Double click the type of yearbook (Standard, U-Build IT, Custom)
Double click on your school folder.
Select the folders or files you wish to copy.
Drag them into the folder on your computer.
The process may take a little while depending on the size of the files.
To transfer a folder from your computer to your school folder on the Icon site:
Your file folders (on the computer you are using) will be listed on one side and the remote (Icon)
site on the other side. The Icon side will show all the folders that are on the remote (Icon) site.
1.
2.
3.
4.
Double click the type of yearbook (Standard, U-Build IT, Custom).
Double click on your school folder.
Select the folders or files on your computer.
Drag them into the open school folder on the Icon site.
The process may take a little while depending on the size of the files.
If you have any questions regarding the ftp site or anything to do with yearbooks, please do not
hesitate to contact me at any time.
Julie Szachta
Manager, Yearbook Division
The Icon Experience
780-449-3558 Ext. 260
[email protected]
HOW TO ARCHIVE/RESTORE/APPEND A PROJECT FOR USE
BY ANOTHER PERSON OR TO MOVE TO ANOTHER
COMPUTER
In order to use a project that has been created by another person or move your project from one computer to
another you will need to Archive and then Restore the project.
To archive a project:
1. Begin with your project open on the screen. Select File, Archive/Restore, Archive, public sharing (any
online user). Save the archived project where you will find it again!
2. The software will run through a variety of steps and save it for you.
To restore an archived project:
1. Start up Lumapix software and at the “wheel” choose, new project, Softcover Yearbook.
2. At the main screen, click on File, Archive/Restore, Restore. Explore to where the archived project is stored
and click on it and select Open. The system will restore the document for your use.
3. Save the project to your drive.
To append projects:
1. Open your main project. Navigate to the page that you would like to insert the additional project (pages will
be inserted after).
2. At the main screen, click on File, Append Project. Explore to where the saved project is stored and click on
it and select Open. The project will be inserted. If you want to move the pages, click and hold, then drag
and drop into the correct place.
3. Save the project with the newly inserted pages.
If you have any questions regarding templates or anything to do with yearbooks, please do not hesitate to
contact me at any time.
Julie Szachta
Manager, Yearbook Division
The Icon Experience
780-449-3558 Ext. 260
[email protected]
Sample Write-ups
Write ups should be typed in a word document, with the question followed by a colon,
one space and then the answer. Each question and answer needs to be on a separate
line with no hard returns.
Some samples of questions are listed below, but use whatever works for your school.
With limited space it is wise to keep it to 3-4 questions per student.
Nickname
Proudest Grade 6 Moment
Future Plans
Comments
Favorite thing to do
Favorite Saying
Memorable Moment
Sport, Hobby, Activity
Favorite Subject
Favorite Color
Ambition
A Superpower I want
Sample Setup
Grade 6D
Student Name
Nickname: -Proudest Grade 6 Moment: Getting 100% three times in a row on book reports.
Sport/Hobby: Dancing, Singing, Crocheting
Future Plans: Dancer, Pop Star, Actress
Student Name
Nickname: -Proudest Grade 6 Moment: Going skiing at Rabbit Hill.
Sport/Hobby: Soccer
Future Plans: Police Officer
Student Name
Nickname: Chicken Legs
Proudest Grade 6 Moment: When I was the camel and did the camel dance.
Sport/Hobby: Football, Soccer, Break Dancing, Skateboarding, Snowboarding, Road
Hockey
Future Plans: Pro Football Player or Pro Skateboarder
LumaPix Yearbook::Fusion
How to Locate Missing Images
1. Select Tools > Locate Missing Images. The following screen will appear:
2. Click on Find Missing. The system will run through and place all the missing
images in the box below.
3. Click Select All (at the top right of the screen).
4. Click on Browse for sources … and browse to the folder that the images are
kept in, select OK.
5. Once all the images have been found, click on Select All (at the bottom right of
screen) then Match. Your screen will show all the matched imagery. You may
need to browse to several sources if your imagery is kept in different places or
folders.
6. Once you have all your missing images matched. Click on Select All (at the
bottom right of the screen) and click on Apply Matches.
7. The system will apply all matches to your project and the Image Locator screen
will return blank. Click on X (close) button at the top right.
If the Image Locator screen returns and still shows document pages in the top scroll
bar, you will need to repeat the process until all images are found and matched.