1
User Manual
BlackStar SPLURF for Cinema 4D
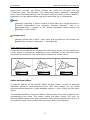
Along these normals, the Spline Surface can easily be extruded with the
"Thickness" value. The Extrusion Tool offers three styles: Upwards, Downwards
and in both directions starting from the patch itself (this style is called "Middle").
Optionally you can add adequate caps when extruding up- or downwards.
Note:
Although extruding a Spline Surface is done along the normal direction it
remains independent from changing "Reverse Normals". This is to
guarantee that a change of the normal alignment cannot modify the
topology of your model.
Unimportant:
Always behave like a duck - keep calm and unruffled on the surface but
paddle like the devil underneath. – Jacob Braude
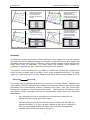
Three splines and "Corner"-value
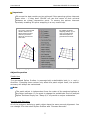
As SPLURF can create Spline Surfaces also with three splines you can specify the
corner where to emerge the subdivision from. Needless to say there are three
opportunities resulting in look-alike Spline Surfaces as shown below:
S2
S1
S3
S2
S2
S1
S1
S3
S3
[Fig. 2: Different corner alignments when using three splines]
Spline Surface Offsets
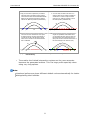
A powerful feature of the SPLURF Spline Surface Object consists of applying
individual offsets to each assigned spline. With these values you can easily
achieve defined distances or gaps between patches – even if they use the same
spline.
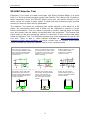
The standard behaviour limits the offsets' starting value to be less or equal to the
corresponding end value. This simply means the patch cannot "flip over" by
defining offsets causing the starting position being kind of behind the end one. If
you explicitly want not to prohibit this case just check "Allow flipping".
6