1
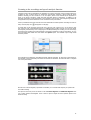
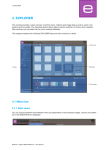
Table of Contents
Introduction............................................................................................................................................2
Installation of the application...................................................................................................................3
What is SuperMemo UX...........................................................................................................................4
First steps with the application.................................................................................................................5
Learning.................................................................................................................................................7
Basic types of exercises...........................................................................................................................8
Other types of exercises in SuperMemo UX.............................................................................................10
Memorization with SuperMemo UX.........................................................................................................15
Listening to the recordings and speech analysis function..........................................................................17
Additional options..................................................................................................................................20
Editing options of the application............................................................................................................22
Creating one’s own courses....................................................................................................................24
What to do in case of problems..............................................................................................................26
1
Introduction
Welcome among the users of the SuperMemo UX application and thank you for choosing our offer.
The information in this manual applies universally to all the courses available with the SuperMemo UX
application. The operating instructions, learning principles and types of exercises are described below on the
basis of the course Fast Track to CAE.
The actual screen layouts in the application may be slightly different from these presented in the manual.
We kindly invite you to register the course you have bought. The registration will enable us to inform you
about new products and services, offer special discounts and be of better help should any questions or
problems arise. You can register the course by filling out an online registration form. You can find the link to
the registration form at http://www.supermemo.pl in the Help tab of the main menu.
All trademarks in this manual are property of their respective owners.
2
Installation of the application
After you have inserted the disc in your CD-ROM drive, the setup application will be launched automatically.
However, if the autorun feature of your CD-ROM is disabled on your computer, the setup application will not
be launched automatically. In such case open the autorun.exe file that can be found on the disc.
After the setup application has been launched, you will see a dialogue box enabling you to start the
installation. After you choose ‘Install’, the setup application will check whether the environment essential for
SuperMemo UX to work is already installed on your computer. The environment includes the following
applications: Internet Explorer v. 6.0 or later, Windows Installer v. 3.0, Windows Media Player v. 9.0 or later,
.NET Framework v. 2.0. If any of the above mentioned environment components is missing, the setup
application will install it automatically. All the applications are necessary for the SuperMemo UX application
to work correctly. The installation may take up to 20 minutes, depending on the speed of your computer,
and requires up to 300 MB of free hard drive space.
After a successful installation of the environment, the SuperMemo UX application and course setup will start.
Follow the instructions that appear in the dialogue box. You can choose to have the entire course installed
on your computer hard drive or to use the CD-ROM while learning. The installation requires up to 400 MB of
hard drive space, depending on the course size and installation chosen.
To uninstall the SuperMemo UX application, follow these steps:
• In the Control Panel, choose Add/Remove Programs,
• In the dialogue box that appears, choose SuperMemo UX,
• Click Add/Remove…
Minimum system requirements for the application:
-
Pentium 400 MHz processor or faster,
256 MB of RAM,
CD-ROM drive,
sound card,
microphone
Windows 2000 SP3, Windows XP or later,
300 MB of hard drive space.
3
What is SuperMemo UX
SuperMemo is a family of computer-assisted learning applications. Statistically, a simple information item
(like a date, a number or a new foreign word) is remembered for up to several days without recalling it
through usage, association or repetition. Successive repetitions tend to reinforce memory traces, therefore
the intervals between repetitions necessary to keep information in the memory become longer. By analyzing
the processes of retention and forgetting, SuperMemo finds the optimum timing for the review of the learnt
material with minimum number of repetitions and minimum time spend on revisions.
SuperMemo analyzes how each user manages to remember individual information items and schedules the
repetition on a day when the item is close to being forgotten. As a result the time spent on learning and
repetition is minimalised.
In SuperMemo the rate of recall, i.e. memorization effectiveness, is measured constantly during regular
repetitions. Intervals between repetitions are set individually and dynamically so that you reach your
required level of knowledge retention.
SuperMemo in the UX version is equipped in a smartly designed, intuitive and easy-to-use user interface. All
types of exercises used in the previous application version have been newly implemented. Moreover, new
types of exercises, prepared especially for language courses, have been added, as well as a scheduler, that
enables clear presentation of the learning plan and progress.
SuperMemo UX also enables to:
•
•
•
•
multiple user management; with only one installation many users can learn from the courses, without the need to copy them,
learn from many courses simultaneously,
choose the material that should be taught, including and excluding information from the repetitions,
automatic online upgrade both of the application and course material.
SuperMemo UX is a tool for computer-assisted learning. The application will enable you to remember a great
number of information items provided that you will work with the material regularly and systematically. It is
therefore recommended to have a regular learning schedule with SuperMemo UX, ideally on a daily basis.
Even 10-15 minutes of learning with the application a day will be a source of satisfaction with the learning
results. Your memorization of grammatical rules will be permanent because you will practise their usage on
real language exaples.
This method is applied in the practice part of the course. With diverse and interactive exercises the learning
with the SuperMemo UX application not only brings good results but it is also pleasant.
4
First steps with the application
To run the previously installed application, you have to click the SuperMemo UX icon in the Start menu or
on the desktop.
First you will see the login box. The application can be used by several users. If there is only one user of the
application, simply choose the Don’t ask me again option and the application will automatically log in the
latest user.
When you run the application for the first time, you have to create a new account. Click New and fill out the
form (as the one shown below). You have to enter any Login of your choice (e.g. your name) and,
optionally, a password.
After you have logged in, you will see the main window of the application. This window presents your study
plan for the given day. A list of your courses and your learning progress will be displayed. Here you can also
change the settings of individual courses.
The next step is to choose the course you are going to learn from. If it is not the first course installed on
your computer with the SuperMemo UX application, a list of installed courses will be displayed automatically.
Choose the one you are going to learn from.
5
Of course you can choose many courses to learn from. All the courses that you choose will be presented in
the learning process without the need to switch between them.
To return to the list of installed courses later, choose the Course / Installed courses… option in the
upper menu of the application. You can also choose a course manually or create your own new course. To
do that, choose the select option in the main window of the application or choose the Course / New…
option.
In the upper part of the window a set of round buttons is displayed for quick access to the major options of
the application.
This button brings you to the main window of the application with a session plan displayed. It
includes a list of installed courses and additional data such as the number of repetitions, new
exercises and drills, and the percentage of the material introduced. There is also a link to the course
settings. For more information go to the chapter Course settings.
This button brings you to the scheduler. It is a schedule of the repetitions planned for the month.
The application displays the data for all the courses. The user can choose a particular course from
the droplist. Use the arrows in the lower part of the window to go to the next or previous month.
This button brings you to the dictionary. For more information on this tool go to the chapter
Additional options: Dictionary below.
This button brings you to the login box in which you can switch the user. For more information on the
login box go to the beginning of this chapter.
This button brings you to the edit mode which allows you to create and edit your own courses. You
can edit your own courses only. For more information on this option go to the chapter Creating
one’s own courses.
This button brings you to the setting options of the application.
This button brings you to the help file, i.e. this user’s manual.
This button closes the application.
In the lower right corner you will find a navigation panel with three buttons for navigation and learning. The
panel can be dragged with the mouse to any place on the screen. For more information on the panel and its
settings go to the chapter Additional options: Navigation panel.
6
Learning
There are two ways to start learning:
– click the name of a given course in the main window,
– click the Start button in the navigation panel.
The sample learning process presented below is based on the Angielski. No problem! course. After you
have started learning, you will first see the title page of the course. Click Next to go to the first presentation
page.
First listen and read the text presented. After you have familiarised yourself with the material presented,
click Next to go to the next exercises related to this part of the material.
7
Basic types of exercises
One of the interactive types of exercise consists in typing in the English translation. The first letters of the
words have been given to help you find the correct translation.
After you have typed in your answer, click Check answer. If your answer is correct, it will be displayed in
green. Otherwise your answer will be in red and below or next to it you will see the correct answer.
In the majority of cases, your answers are checked automatically. Depending on the correctness of your
answer, the application highlights the suggested mark. However, it is the user who decides on the final
mark. This option is especially useful when the user makes just a small error, e.g. a spelling mistake. The
application will suggest a negative mark, although the answer was very close to the correct one.
The display mode for correct answers described above applies to all types of exercises except for the
“question – answer” type of tasks. In this case the answer has to be given out loud or in the user’s mind.
The correct (or sample) answer is displayed below the question.
8
The application will mark your answer by highlighting in white one of the three options: Didn’t know,
Almost, I knew. However, it is the user who makes the final decision. Decide for yourself which mark you
should receive by clicking the appropriate button.
Please remember that the mark you receive for each exercise determines how they are scheduled for
repetition. If you have made a mistake in the exercise or if your answer is far from the one proposed by the
application, and you think you haven’t mastered the material yet, choose Didn’t know or Almost. The
exercises that receive such a mark enter the drill cycle automatically. You will therefore have an opportunity
to do the exercise again in the same study session. The exercises that receive the I knew mark do not
enter the drill cycle. However, you may come across them in the repetitions scheduled by SuperMemo UX for
the following days.
After you have marked yourself, the next exercises will be displayed automatically until all the tasks in the
set scheduled for the given session have been completed. If there are any exercises marked as Didn’t
know or Almost in the given session, the application will bring you to the drill cycle and you will do these
exercises again. This time you can also mark your answer, however you will only have two marks at your
disposal, Didn’t know and I knew, as you see the exercise for the second time in the same session.
The exercises are drilled in the same session until you have marked all your answers with the I knew
option.
When you go through the daily set of exercises and repetitions, the application will finish the study sessions
and will bring you to the main window. To continue learning and doing exercises from the next set, click
Start or the name of course you want to continue learning from. If you want to finish learning for the day
and exit the application, click Exit.
9
Other types of exercises in SuperMemo UX
A commonly used type of exercise in the SuperMemo UX application is the multiple-choice test. In this type
of exercise the application will give you a few options to choose from. Click the one that you think is correct.
Then click Check answer. The application will check your answer, i.e. it will mark the correct answer in
green and an incorrect answer in red.
In some multiple-choice tests more than one option is correct. The icons next to the options are then square
, and change into
after an option has been chosen. If the icon is round
, it means that only one
option is correct. The icon changes into
after you have chosen an option.
After you have answered the task, mark yourself by choosing the button suggested by the application or any
other if you do not agree with the suggested mark.
10
A similar type of exercise is the droplist. You choose one answer from a set of options. You can see the
options by clicking the arrow icon .
The application will complete the sentence with the answer you have chosen.
11
Click Check answer to see whether your answer is correct (green colour) or not (red colour).
As usual, you should mark yourself for your answer. The button Check answer transforms into three
marking buttons. The suggested mark is highlighted. After you have marked yourself, the application will
proceed to the next exercise automatically.
Another type of exercise consists in matching the listed elements with a category or gaps in the text. The
elements can be moved many times. After you have dragged an element to a given gap, an arrow
will
appear next to it. It allows you to move back an element if you think you have dragged it to an incorrectly.
The arrows will be visible until you click Check answer button.
12
After you have click Check answer, the application will show you with an appropriate colour whether your
answers were correct or not.
In the courses there are also exercises in which you will be asked to put the given elements in the correct
order. The elements that can be moved are framed. After you have completed the task, click Check
answer.
The application will display the correct answer in green. If your answer is incorrect, the application will mark
it in red and show the correct answer below it. As usual, you should mark your answer by choosing the
appropriate mark.
13
The last type of exercise in SuperMemo UX to be presented here is an exercise that consists in searching for
and selecting in the text an element according to the instructions. The word over which the mouse cursor is
placed changes its colour and when it is clicked, it will be underlines or crossed out. Another click on it will
make the underline or cross-out disappear. In this type of exercise usually many elements are underlined or
crossed out. After you have clicked Check answer, the application will display the correct answers in green
and the incorrect in red. After you have marked your answer, the next exercise will be displayed.
14
Memorization with SuperMemo UX
To start your everyday learning session with the application, click Start button (or choose a course from the
list). During the session the application will guide you through the following stages:
•
repetitions scheduled for the given day (if any),
•
memorizing new information,
•
drills of exercises which have been poorly marked in this session.
Repetitions scheduled for the given day
Memorizing new information
Drills of the new material
The memorization with the SuperMemo UX application is an endless cycle of repetitions. However, do not be
afraid that you will lose your time repeating the material with which you are perfectly familiar. After several
repetitions such material will be repeated so seldom that it will virtually disappear from your study plan.
SuperMemo UX organizes repetitions in a way that allows you to revise the material that is indeed close to
be forgotten on a given day. To go through repetitions, click Start button (or choose a course from the list).
Only after you have done all the repetitions scheduled for a given day does the application proceed to the
presentation of the new material. The final stage is a drill session to master the information items that have
been poorly marked at the previous stages of the learning sessions. They are drilled until they receive a
positive mark.
Even if you are not going to learn new material, you should use the Start option to check whether there are
any repetitions scheduled for you by the SuperMemo UX application. Undone repetitions accumulate and
after a longer break it may be difficult to catch up.
The more days a given repetition is delayed, the more difficult will be the answer to a question in
SuperMemo UX repetitions. Irregular work with SuperMemo UX can be therefore extremely demotivating.
15
While learning new material, you can skip anything you do not want to
learn or return to a previously completed set of exercises. To do this, in
the table of contents choose the page from which you want to continue
learning. You can also navigate between pages with the PageUp
and PageDown buttons (Note: you can change the page only while
learning new material).
The nodes in the table of contents have various symbols, which can also
change during the learning process. The pages skipped in the learning
process are marked with an empty icon
. The pages aimed for
repetitions are marked
. After the exercises have been displayed in
the learning mode for the first time, the colour of their titles becomes
lighter, which means that they have entered the repetition cycle. The
pages that are not meant for repetition (so-called one-time pages) are
marked with a symbol
, which means that the application will not
display them again in the learning mode. You can return to them in the
review mode.
SuperMemo UX usually schedules the first repetition of any page within
2 or 3 days from its first display in the learning process. This interval
does not depend on the mark received. The mark will be crucial for
determining the interval for further repetitions. If the marks are positive,
the interval will grow. If the marks are poor, the interval between
repetitions will be very short and the exercises will enter the drill cycle in
the same learning session.
In the upper left screen corner SuperMemo UX displays the study plan which is a box with the data on the
course, exercises and repetitions. The data change during learning.
In the above example:
•
0 - shows the number of repetitions from previous lessons, which will begin the learning session,
•
10 - shows the number of pages to be learnt in the current session,
•
3 - shows the number of exercises that have entered the drill stage (drill stage comprises all the
exercises that have been marked as Didn’t know or Almost).
The study plan also shows at which stage of learning you are at present. Of course, you can go to a
different learning stage (or even to a different course) by choosing the relevant item in the study plan.
If, while learning new material and switching between pages, you find a page that has been previously
completed/learnt, the application will switch to the review mode (signalled properly in the study plan). You
can return from the review mode to the learning mode by using the option Resume learning in the
navigation panel or simply by clicking a different stage directly in the study plan.
16
Listening to the recordings and speech analysis function
Language courses with the SuperMemo UX application use a built-in and state-of-the-art speech analyser. It
provides you with a unique option for autonomous pronunciation perfection. Having heard the native
speaker’s recording, the user records his or her own speech, which is then assessed by the application in
terms of the accent, intonation, speed and other important aspects of articulation. In addition to the
automatic assessment of these parameters by the application, there are also various diagrams generated by
the application that provide information on the correctness of the pronunciation.
Texts in presentations and most exercises have been illustrated with native speakers’ recordings. To listen to
them, click the player icon
that appears on the page.
To simply listen to the recording, click the left part of the icon (with a green arrow). If you click the right
part of the icon (with a small downward arrow), an additional player window will open. You can then access
the frequently used functions, such as stopping or forwardind/rewinding the recording. You can also change
the speed of the recording (this option depends on the chosen mechanism to play the recordings). To go to
the pronunciation drill module from this window click Speech option. It is available only for single words
and short phrases.
The SuperMemo UX application uses advanced speech analysis algorithms. On their basis, partial marks for
the intonation, accent, speed and pronunciation correctness are calculated. The total final mark is a weighed
sum of the partial marks.
With the use of several diagrams, SuperMemo UX enables you to visualise and compare your speech with
the model recording.
The options in the lower part of the window in the fields Basic diagrams and Additional diagrams allow
you to switch between the diagrams. There is also an option to adjust the user’s speed of speech to the
model recording.
17
Graphs generated by the application
Spectrogram
The sounds you produce are different from one another. For example, the difference between “a” and “s” is
more audible than the difference between “a” and “o”. The source of the differences and similarities
between the sounds are their component frequencies. Each sound is comprised of so-called basic tones. The
application decomposes sounds into these basic tones and draws them on a spectrogram. The higher in the
spectrogram the higher are the component frequencies, and the lighter the point the greater the amplitude
of this component.
Amplitude
The amplitude diagram shows the air vibration registered by your microphone. With the amplitude diagram
it is easy to notice the end of one sound and the beginning of another.
Intonation
Th eintonation diagram shows how high the vowels are pronounced in a given expression. This diagram is
drawn on the amplitude diagram or on the spectrogram.
Accent
The accent diagram shows how much energy was transmitted in a given moment of time. It shows therefore
how loudly you pronounce a given part of the utterance. This diagram is also drawn on the amplitude
diagram or on the spectrogram.
What does each mark show?
Mark for intonation
To see an intonation diagram select the Intonation option in the Additional diagrams field.
When you speak, your speech has a certain melody. Changing the voice modulation creates the melody.
There is a different melody for an affirmative, interrogative and exclamative sentence. If your mark for
intonation has been low, you should certainly work on its improvement. Otherwise you will be
misunderstood. Listen repeatedly to those fragments of the recording that have been marked with green on
the model diagram. This means that in these fragments you should pronounce voiced sounds, which you
have failed to do previously. This is why you intonation diagram is different from the model one.
Mark for accent
To see an accent diagram select the Accent option in the Additional diagrams field.
Accent provides information on how loudly you pronounce a given fragment of an utterance. If the model
diagram changes dynamically and is very irregular while yours is flat, it means that your recording should be
more expressive andless monotonous. Listen repeatedly to the fragments where your diagram has lower
values than the model one, and then repeat them much louder than you did originally. And analogically, if
your accent diagram has a higher value than the model one, produce the utterance more quietly.
Mark for speed
The mark for speed is comprised of the mark for how quickly you uttered a given phrase (if you have
uttered it slower than the model recording, the application will subtract points from your score) and for the
tempo of a given phrase (if you pronounced the first word of the utterance quickly and the last one slowly,
the application will subtract points from your score). Try to speak at the same pace as the native speaker
does in the model recording.
Mark for correctness
The mark for correctness shows whether you pronounced the same sounds as in the recording. If you
pronounced “a” instead of “o”, or if you have skipped a sound in the utterance, the application will subtract
points from your score.
Final mark
The final mark is comprised of the partial marks described above:
• intonation,
• accent,
• speed,
• correctness
and marks for the following parameters:
•
•
•
•
•
lightness of individual sounds,
degree of sound phonation,
energy transmitted in particular bands of the utterance,
speed of sound amplitude changes,
others.
18
A few pieces of advice for the application to understand you well
• Speak loudly and clearly. If the application informs you that you speak too loudly, move away the
microphone instead of lowering your voice.
• Follow the native speaker in the recording in his or her accent, intonation and speed.
• Do not smack your lips or click your tongue. Do not breathe out loudly both before the articulation and
after you have finished it. The application may interpret it as a part of your utterance.
• Work in a silent room. Additional sounds may interfere with the correct functioning of the application.
• Be patient. Try to repeat the same fragment several times. Repetition will guarantee your final success.
If the application informs you that you speak too quietly, i.e. you will see a comment saying Too quietly
above the progress bars, choose the Settings option (this button appears in the lower part of the window).
In the advanced sound settings for recording with a microphone choose the Mic Boost option (microphone
capacity boost). The layout of the window below depends on the sound card and drivers installed on your
computer. You should also adjust the loudness for recording with a microphone (possibly you may need to
lower the quality of recording).
19
Additional options
Course settings
You can access the course settings from the main window of the application. You just need to click the link
change next to the course name. You will see a settings window where you can change the number of
exercises planned for a single session and the forgetting index. Additionally, with the More droplist button
you can reset the learning progress, unsubscribe from a course or delete a course from the hard drive
completely.
Resetting the learning progress
To reset the learning progress (delete all repetition data and start from the beginning) you should use the
Course / Reset progress option in the main menu of the application or use an alternative option available
in the course settings.
Dictionary
Some of the courses in our offer include a built-in dictionary. The option is available in the menu Tools /
Dictionary or by clicking the dictionary icon
. After running the dictionary you can look up a phrase by
typing it in the Look for phrase field or by searching it directly in the list. Before the search choose the
translation direction, e.g. English-Polish or Polish-English.
Language keyboard (diacritics)
Some exercises in language courses aim at checking your knowledge of the orthography. Some languages
use special letters which cannot be typed in from the standard Polish keyboard. In SuperMemo UX you will
find a keyboard icon
. next to the field where you have to type in a text. When you click the icon, you will
see a small window with diacritics characteristic of this language. When you click a letter, it will appear in
the field where you have to type in your answer. Double-click a letter if you want to type in a capital.
An alternative solution is to install a given language keyboard in Windows. Such an option is available in the
regional and language options of the Control Panel.
Navigation panel
With the navigation panel you can move from page to page, mark yourself and use the basic application
functions. It is one of the most frequently used elements of the application. It is therefore possible to use
the keyboard to operate the navigation panel. If NumLock is on, the navigation panel can be operated with
the numerical keyboard. The 4 button operates the left panel button, the 5 button operates the middle one
and the 6 operates the right one. The buttons can be assigned different functions in the application settings,
available in the top menu Tools / Options). In the application settings you can also change the button
animation speed or switch to the simplified panel version.
20
Multiple user management
The SuperMemo UX application enables many users to learn from the same course. You simply need to open
a separate account for each user of the application. After the user has logged in to the application, they will
see only their learning progress. It is possible to switch between the users while using the application. To do
this, click the round user switch icon
or choose the User / Switch … option from the application menu.
21
Editing options of the application
The option of creating and editing one’s own courses is available in the latest version of the SuperMemo UX
application. A built-in course editor enables an intuitive and easy preparation of your own courses with a
variety of exercises. The application also enables you to illustrate the pages with graphics and sound
recordings. Your own recordings are compatible with the built-in speech analyser, therefore you can also
use it for the purpose of your own courses.
To create a new course in SuperMemo UX you have to click the select link in the main window of the
application or choose Course / New … from the menu. You will see a small window in which you have to
choose the option for creating a new course and type in its name. The application will create a catalogue
named after the course where all the course data will be saved.
Click the name of the course to enter the learning mode of the newly created course. The new course
contains only one empty page displayed with a default template. To start editing the course you have to
switch to the editing mode by clicking
button or by pressing F9. You will then see an additional tool bar
with the basic editing options.
More advanced options are available in the top menu of the application.
22
The tool bar is comprised of two lines. The upper line comprises basic options that enable you to:
Edit the entire course page
•
change the page template,
•
add a new page at the end of the current chapter,
•
insert a new page before the current page,
•
cut a page,
•
copy a page,
•
paste a page before the current page,
•
delete a page,
Use multimedia options
•
open a window with a media list for the current page,
•
define an automatic question sound,
•
define an automatic answer sound,
Use course options
•
edit course properties (course description, authors, www address, etc.)
The lower line of the tool bar comprises options that enable you to:
Edit particular areas of the page
•
•
•
•
•
•
•
•
•
•
bold,
italics,
underline,
cross-out,
superscript,
subscript,
default format,
numbered list,
bulleted list,
table,
Define interactive page elements
•
•
•
•
•
•
•
additional graphics,
additional sound recording to be played if clicked,
spellpad,
multiple choice with 1 correct answer,
multiple choice with more than 1 correct answers,
droplist,
“true - false” component.
For more details place the mouse cursor over a particular option.
23
Creating one’s own courses
After you have created your own course (for details go to Editing options of the application chapter)
and entered in the edit mode, you can start adding texts and define the exercises.
Creating the structure
First it is recommended to give the page a title. To do this, click the page name in the table of contents or
press F2. After you have entered the title, press ESC.
Then click page parameter button
to change the page template and type. Choose Chapter to be the
page type and click OK. Notice that the page icon
in the table of contents has changed and that a plus
symbol has appeared to show that the page is now a chapter and that it contains other pages. Open the
branch in the table of contents and click the only page in the chapter.
Now choose the option to add a new page at the end
or to insert a new page
in order to add more
pages in this chapter. While adding new pages you define their template and type. Notice that by adding
pages in the chapter and changing them into chapters you can create a complicated tree structure of the
course. Create a page of the SuperMemo exercise type.
Edit the contents of the page
A page contains several areas that can be edited. For exercises, in the Question / Information area the
content of the question is presented, whereas for presentations a text is shown. The Answer area contains
the answer. It is displayed only in the answer mode. Now click the question area and enter the question. To
finish editing the page press ESC or click anywhere outside the edited area. Proceed analogically with the
answer.
You have already defined the most basic type of “question – answer” exercise. You can now add sound
recordings to it. If you want to an automatic question sound, click the question sound icon . Notice that a
has appeared above the question. There is a “no entry” sign on the icon, which means
sound player icon
that no sound has been defined to be played on this page. Click the player icon and choose the mp3 file that
you want to be played on this page.
The selected file will be added to the media list of the current page. To see which files are used by a given
page click the
icon to open the file list. In this window you can change files, add new ones, play them,
etc.
Adding other media
Now try to insert additional graphics to your question. Click the question area to enter the edit mode of the
question, place the mouse cursor where you want to insert the graphics and click the graphics icon . You
will see a window that enables you to define the graphics parameters. Choose the Image embedded on
the page option, and then click the Add button. You will see a familiar window with a media list of the
current page. Use the Add option to add any graphics to the current page. While adding the file the
application will ask you about the index for it.
All multimedia files added to a given page are indexed with successive etters of alphabet. The letters “q”
and ”a” have a special purpose: a sound recording indexed as “q” will be automatically played with the
question, whereas a sound recording indexed as “a” will be automatically played with the answer. The
application automatically suggests the following free letter, so you just have to click OK, and then Close.
Notice that you can now choose an image to be embedded on the page (the selected image will appear in
the preview window). Click OK to finish embedding the image.
Analogically, you can add sound recordings (to be played if clicked). You just have to use the sound icon
while editing the question.
Interactive exercises
Now try to create another exercise, this time an interactive one. Such an exercise usually does not contain
any answer, whereas there are interactive components inserted in the question. The most basic type of this
component in Spellpad. Try to create a simple exercise with the spellpad component. Go to the edit mode
of the question and type in any sentence. Then using the mouse select the word instead of which a gap will
appear in the learning process. Then click the spellpad icon . The selected text will appear in a new
window as one of the possible answers. You can add alternative correct answers in separate lines. In the
Settings tab you can deifne additional spellpad settings. Click OK to finish definign the spellpad.
You can create other exercises with interactive components in a similar way. For example, it is often
necessaary to create a multiple choice exercise with one correct answer. For this, you can choose either
24
Multiple choice single select
or Droplist . A similar type of exercise is Multiple choice multiple
select , however here the user can choose more than one possible options. Notice that the options are
ordered randomly every time the exercise is displayed so that the user cannot simply memorize the position
of the correct answer.
The last component you can choose while creating exercises is the “True-false”. The component enables the
user to choose e.g. if a given sentence is true or not.
Of course, many components can be mixed in one exercise. In more advanced exercises you can use tables
which can be defined using the icon .
The exercises that you created earlier can be later edited. To change the properties of a component you
simply need to double-click the component and the settings window will open.
Course properties
Now you only need to open the course properties window
and complete the course information, i.e. the
description, authors, etc. In this window you can also chnage the name of the course. You can also provide
a link to the course description in the Internet and define an icon symbolising the course.
To view your course in the learning mode, click the
button or press F9 to exit the edit mode.
This is the end of the description on how to create your own course. Have a go on your own and create
your own courses.
Note: the editing options of the application are simplified in order to make the application maximally userfriendly. In the SuperMemo World offer there is also a separate professional version of the Editor used in
commercial courses. For more information go to our website at http://www.supermemo.eu.
25
What to do in case of problems
In case of any questions or problems with the correct functioning of the application, follow these steps:
•
read the brochure How to learn with SuperMemo UX (this text); press F1 to access its full version in the
SuperMemo UX application,
•
if you do not find the answer to your question there, go to our website at http://www.supermemo.pl.
The Help tab includes answers to FAQs and solutions to the most common problems.
If you do not find the answer to your questions there either, send us an email to: [email protected]. If
you do not have access to email, you can call us at: +48 61 873 62 60, Monday till Friday, 8:00-16:00 CET.
26