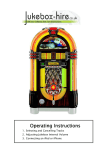
1
Disclaimer
Document Part Number: 900203-002 (June 2009)
TouchTunes and the TouchTunes logo are trademarks of TouchTunes Music Corporation.
All other brand and product names are trademarks or registered trademarks of their respective
corporations.
The mention of any product does not constitute an endorsement by TouchTunes Music Corporation.
This manual is furnished under a lease agreement and may only be copied or used within accordance
with the terms of such lease agreement. The content of this manual is furnished for informational use
only, is subject to change without notice, and should not be construed as a commitment by
TouchTunes Music Corporation. TouchTunes Music Corporation assumes no responsibility or liability
for any errors or inaccuracies that may appear in this document.
Except as permitted by such lease agreement, no part of this publication may be reproduced, stored
in any retrieval system, or transmitted, in any form or by any means, electronic, mechanical, recording,
or otherwise, without prior written consent of TouchTunes Music Corporation.
Changes are periodically made to the information herein; these changes will be incorporated into new
editions of this publication. TouchTunes may make improvements and/or changes in the products
and/or software programs described in this publication at any time.
If you have comments on this manual or the products it describes, address them to:
TouchTunes Music Corporation
Attention: Publications
400 Sainte Croix Avenue, Suite 200 E
Montreal, Quebec, Canada H4N 3L4
Service Hotline: 1-847-353-1954
Fax: (847) 419-3304
TouchTunes may use or distribute whatever information you supply in any way it believes appropriate
without incurring any obligations to you.
Copyright © 2009 TouchTunes Music Corporation. All rights reserved, including those to reproduce
this publication or parts thereof in any form without permission in writing from TouchTunes Music
Corporation.
Table of Contents
1 Introducing the TouchTunes Operator Dashboard
1
Overview. . . . . . . . . . . . . . . . . . . . . . . . . . . . . . . . . . . . . . . . . . . . . . . . . . . . . . . . . . . . . . . . . . . . . . . . . . . . . . . . . . . . . . . . . . . . . . . . . . . . 1
Browsers Supported by the TouchTunes Dashboard . . . . . . . . . . . . . . . . . . . . . . . . . . . . . . . . . . . . . . . . . . . . . . . . . . . . . . . . . . 2
Help Resources for the TouchTunes Dashboard. . . . . . . . . . . . . . . . . . . . . . . . . . . . . . . . . . . . . . . . . . . . . . . . . . . . . . . . . . . . . . . 3
Key Documentation Learning and Reference Features . . . . . . . . . . . . . . . . . . . . . . . . . . . . . . . . . . . . . . . . . . . . . . . . . . . . . . . . 3
Documentation Conventions . . . . . . . . . . . . . . . . . . . . . . . . . . . . . . . . . . . . . . . . . . . . . . . . . . . . . . . . . . . . . . . . . . . . . . . . . . . . . . . . 4
Contacting TouchTunes . . . . . . . . . . . . . . . . . . . . . . . . . . . . . . . . . . . . . . . . . . . . . . . . . . . . . . . . . . . . . . . . . . . . . . . . . . . . . . . . . . . . . 4
2 Learning About the TouchTunes Dashboard
7
Overview. . . . . . . . . . . . . . . . . . . . . . . . . . . . . . . . . . . . . . . . . . . . . . . . . . . . . . . . . . . . . . . . . . . . . . . . . . . . . . . . . . . . . . . . . . . . . . . . . . . . 7
Discovering the Features and Benefits of the TouchTunes Dashboard . . . . . . . . . . . . . . . . . . . . . . . . . . . . . . . . . . . . . . . . . 8
Navigating the TouchTunes Dashboard . . . . . . . . . . . . . . . . . . . . . . . . . . . . . . . . . . . . . . . . . . . . . . . . . . . . . . . . . . . . . . . . . . . . . . 11
Understanding the Dashboard Workflow . . . . . . . . . . . . . . . . . . . . . . . . . . . . . . . . . . . . . . . . . . . . . . . . . . . . . . . . . . . . . . . . . . . . . 14
3 Setting Up the Dashboard
17
Overview. . . . . . . . . . . . . . . . . . . . . . . . . . . . . . . . . . . . . . . . . . . . . . . . . . . . . . . . . . . . . . . . . . . . . . . . . . . . . . . . . . . . . . . . . . . . . . . . . . . . 17
Key Dashboard Concepts . . . . . . . . . . . . . . . . . . . . . . . . . . . . . . . . . . . . . . . . . . . . . . . . . . . . . . . . . . . . . . . . . . . . . . . . . . . . . . . . . . . . 18
Obtaining a Dashboard User Account . . . . . . . . . . . . . . . . . . . . . . . . . . . . . . . . . . . . . . . . . . . . . . . . . . . . . . . . . . . . . . . . . . . . . . . . 19
Log On to the TouchTunes Dashboard . . . . . . . . . . . . . . . . . . . . . . . . . . . . . . . . . . . . . . . . . . . . . . . . . . . . . . . . . . . . . . . . . . . . . . . 21
Log Out of the TouchTunes Dashboard. . . . . . . . . . . . . . . . . . . . . . . . . . . . . . . . . . . . . . . . . . . . . . . . . . . . . . . . . . . . . . . . . . . . . . . 28
Resetting Dashboard Passwords . . . . . . . . . . . . . . . . . . . . . . . . . . . . . . . . . . . . . . . . . . . . . . . . . . . . . . . . . . . . . . . . . . . . . . . . . . . . . 29
4 Setting Up TouchTunes Dashboard Sub-User Accounts
31
Overview. . . . . . . . . . . . . . . . . . . . . . . . . . . . . . . . . . . . . . . . . . . . . . . . . . . . . . . . . . . . . . . . . . . . . . . . . . . . . . . . . . . . . . . . . . . . . . . . . . . . 31
Adding a Sub-User Account to the TouchTunes Dashboard . . . . . . . . . . . . . . . . . . . . . . . . . . . . . . . . . . . . . . . . . . . . . . . . . . . 32
Removing a Sub-User Account from the TouchTunes Dashboard . . . . . . . . . . . . . . . . . . . . . . . . . . . . . . . . . . . . . . . . . . . . . 37
5 Entering Your Jukebox Locations in the TouchTunes Dashboard
39
Overview. . . . . . . . . . . . . . . . . . . . . . . . . . . . . . . . . . . . . . . . . . . . . . . . . . . . . . . . . . . . . . . . . . . . . . . . . . . . . . . . . . . . . . . . . . . . . . . . . . . . 39
Adding a Location to the TouchTunes Dashboard . . . . . . . . . . . . . . . . . . . . . . . . . . . . . . . . . . . . . . . . . . . . . . . . . . . . . . . . . . . . 40
Moving a Jukebox to a Location in the TouchTunes Dashboard . . . . . . . . . . . . . . . . . . . . . . . . . . . . . . . . . . . . . . . . . . . . . . . 44
Modifying Location Details in the TouchTunes Dashboard . . . . . . . . . . . . . . . . . . . . . . . . . . . . . . . . . . . . . . . . . . . . . . . . . . . . 46
Modifying the Public and Private Details in the TouchTunes Dashboard . . . . . . . . . . . . . . . . . . . . . . . . . . . . . . . . . . . . . . . 47
6 Locating Music and Sending it to Jukeboxes Using the Dashboard
49
Overview. . . . . . . . . . . . . . . . . . . . . . . . . . . . . . . . . . . . . . . . . . . . . . . . . . . . . . . . . . . . . . . . . . . . . . . . . . . . . . . . . . . . . . . . . . . . . . . . . . . . 49
toc
Searching for Music using Keywords . . . . . . . . . . . . . . . . . . . . . . . . . . . . . . . . . . . . . . . . . . . . . . . . . . . . . . . . . . . . . . . . . . . . . . . . . 50
Staying Informed . . . . . . . . . . . . . . . . . . . . . . . . . . . . . . . . . . . . . . . . . . . . . . . . . . . . . . . . . . . . . . . . . . . . . . . . . . . . . . . . . . . . . . . . . . . . 54
Searching for Music by Song or Album ID Number . . . . . . . . . . . . . . . . . . . . . . . . . . . . . . . . . . . . . . . . . . . . . . . . . . . . . . . . . . . . 55
Adding Songs from Compiled Lists . . . . . . . . . . . . . . . . . . . . . . . . . . . . . . . . . . . . . . . . . . . . . . . . . . . . . . . . . . . . . . . . . . . . . . . . . . 58
Identifying New Music Added to the TouchTunes Music Library . . . . . . . . . . . . . . . . . . . . . . . . . . . . . . . . . . . . . . . . . . . . . . 61
Requesting Music from TouchTunes . . . . . . . . . . . . . . . . . . . . . . . . . . . . . . . . . . . . . . . . . . . . . . . . . . . . . . . . . . . . . . . . . . . . . . . . . 63
Adding Music for Jukeboxes to the Music Cart . . . . . . . . . . . . . . . . . . . . . . . . . . . . . . . . . . . . . . . . . . . . . . . . . . . . . . . . . . . . . . . 65
Downloading Music from the Music Cart to a Jukebox . . . . . . . . . . . . . . . . . . . . . . . . . . . . . . . . . . . . . . . . . . . . . . . . . . . . . . . . 67
Transferring Pending Music and Software to a USB Device . . . . . . . . . . . . . . . . . . . . . . . . . . . . . . . . . . . . . . . . . . . . . . . . . . . . 70
Updating a Jukebox on Location with the USB Content Updater . . . . . . . . . . . . . . . . . . . . . . . . . . . . . . . . . . . . . . . . . . . . . . 76
Reviewing Music Transfers . . . . . . . . . . . . . . . . . . . . . . . . . . . . . . . . . . . . . . . . . . . . . . . . . . . . . . . . . . . . . . . . . . . . . . . . . . . . . . . . . . 78
7 Managing Music on Jukeboxes Using the TouchTunes Dashboard
83
Overview. . . . . . . . . . . . . . . . . . . . . . . . . . . . . . . . . . . . . . . . . . . . . . . . . . . . . . . . . . . . . . . . . . . . . . . . . . . . . . . . . . . . . . . . . . . . . . . . . . . . 83
Viewing Music on a Jukebox . . . . . . . . . . . . . . . . . . . . . . . . . . . . . . . . . . . . . . . . . . . . . . . . . . . . . . . . . . . . . . . . . . . . . . . . . . . . . . . . . 84
Finding Duplicate Songs on Jukebox . . . . . . . . . . . . . . . . . . . . . . . . . . . . . . . . . . . . . . . . . . . . . . . . . . . . . . . . . . . . . . . . . . . . . . . . . 85
Tracking Song Popularity . . . . . . . . . . . . . . . . . . . . . . . . . . . . . . . . . . . . . . . . . . . . . . . . . . . . . . . . . . . . . . . . . . . . . . . . . . . . . . . . . . . . 86
Removing Music from a Single Jukebox . . . . . . . . . . . . . . . . . . . . . . . . . . . . . . . . . . . . . . . . . . . . . . . . . . . . . . . . . . . . . . . . . . . . . . 89
Removing Music from Multiple Jukeboxes. . . . . . . . . . . . . . . . . . . . . . . . . . . . . . . . . . . . . . . . . . . . . . . . . . . . . . . . . . . . . . . . . . . . 91
8 Managing Jukebox Income Using the TouchTunes Dashboard
97
Overview. . . . . . . . . . . . . . . . . . . . . . . . . . . . . . . . . . . . . . . . . . . . . . . . . . . . . . . . . . . . . . . . . . . . . . . . . . . . . . . . . . . . . . . . . . . . . . . . . . . . 97
Configuring the Revenue Model for a Jukebox. . . . . . . . . . . . . . . . . . . . . . . . . . . . . . . . . . . . . . . . . . . . . . . . . . . . . . . . . . . . . . . . 98
Reviewing Jukebox Revenue . . . . . . . . . . . . . . . . . . . . . . . . . . . . . . . . . . . . . . . . . . . . . . . . . . . . . . . . . . . . . . . . . . . . . . . . . . . . . . . . . 114
9 Configuring Music and Game Settings Using the TouchTunes Dashboard 127
Overview. . . . . . . . . . . . . . . . . . . . . . . . . . . . . . . . . . . . . . . . . . . . . . . . . . . . . . . . . . . . . . . . . . . . . . . . . . . . . . . . . . . . . . . . . . . . . . . . . . . . 127
Setting Up the Background Music Mode on a Jukebox . . . . . . . . . . . . . . . . . . . . . . . . . . . . . . . . . . . . . . . . . . . . . . . . . . . . . . . . 128
Setting Up the Attract Mode on a Jukebox. . . . . . . . . . . . . . . . . . . . . . . . . . . . . . . . . . . . . . . . . . . . . . . . . . . . . . . . . . . . . . . . . . . . 132
Scheduling Background Music and Attract Modes for a Jukebox . . . . . . . . . . . . . . . . . . . . . . . . . . . . . . . . . . . . . . . . . . . . . . 136
10 Viewing Your Invoices with the TouchTunes Dashboard
147
Overview. . . . . . . . . . . . . . . . . . . . . . . . . . . . . . . . . . . . . . . . . . . . . . . . . . . . . . . . . . . . . . . . . . . . . . . . . . . . . . . . . . . . . . . . . . . . . . . . . . . . 147
Viewing TouchTunes Invoices . . . . . . . . . . . . . . . . . . . . . . . . . . . . . . . . . . . . . . . . . . . . . . . . . . . . . . . . . . . . . . . . . . . . . . . . . . . . . . . . 148
11 Managing Music Filters for a Jukebox in the TouchTunes Dashboard
151
Overview. . . . . . . . . . . . . . . . . . . . . . . . . . . . . . . . . . . . . . . . . . . . . . . . . . . . . . . . . . . . . . . . . . . . . . . . . . . . . . . . . . . . . . . . . . . . . . . . . . . . 151
Viewing Music Filters on a Jukebox using the TouchTunes Dashboard. . . . . . . . . . . . . . . . . . . . . . . . . . . . . . . . . . . . . . . . . 153
Setting Up Explicit and Edited Music Filters for a Jukebox . . . . . . . . . . . . . . . . . . . . . . . . . . . . . . . . . . . . . . . . . . . . . . . . . . . . . 156
Determining the Music Styles Allowed on a Jukebox . . . . . . . . . . . . . . . . . . . . . . . . . . . . . . . . . . . . . . . . . . . . . . . . . . . . . . . . . . 161
Scheduling TuneCentral for a NextGen Jukebox . . . . . . . . . . . . . . . . . . . . . . . . . . . . . . . . . . . . . . . . . . . . . . . . . . . . . . . . . . . . . . 167
Scheduling a Music Filter Set on a Gen 3 Jukebox . . . . . . . . . . . . . . . . . . . . . . . . . . . . . . . . . . . . . . . . . . . . . . . . . . . . . . . . . . . . . 173
12 Setting Up Communications Settings Using the TouchTunes Dashboard 181
Overview. . . . . . . . . . . . . . . . . . . . . . . . . . . . . . . . . . . . . . . . . . . . . . . . . . . . . . . . . . . . . . . . . . . . . . . . . . . . . . . . . . . . . . . . . . . . . . . . . . . . 181
Configuring Jukebox-related Communications Settings. . . . . . . . . . . . . . . . . . . . . . . . . . . . . . . . . . . . . . . . . . . . . . . . . . . . . . . 182
Rebooting a Jukebox Remotely . . . . . . . . . . . . . . . . . . . . . . . . . . . . . . . . . . . . . . . . . . . . . . . . . . . . . . . . . . . . . . . . . . . . . . . . . . . . . . 184
13 Monitoring Jukeboxes Using the TouchTunes Dashboard
185
Overview. . . . . . . . . . . . . . . . . . . . . . . . . . . . . . . . . . . . . . . . . . . . . . . . . . . . . . . . . . . . . . . . . . . . . . . . . . . . . . . . . . . . . . . . . . . . . . . . . . . . 185
Viewing Jukebox Connectivity Status. . . . . . . . . . . . . . . . . . . . . . . . . . . . . . . . . . . . . . . . . . . . . . . . . . . . . . . . . . . . . . . . . . . . . . . . . 186
Viewing Gen 3 Jukebox Diagnostics . . . . . . . . . . . . . . . . . . . . . . . . . . . . . . . . . . . . . . . . . . . . . . . . . . . . . . . . . . . . . . . . . . . . . . . . . . 188
14 Monitoring and Managing PlayPorTTs Using the TouchTunes Dashboard 191
Overview. . . . . . . . . . . . . . . . . . . . . . . . . . . . . . . . . . . . . . . . . . . . . . . . . . . . . . . . . . . . . . . . . . . . . . . . . . . . . . . . . . . . . . . . . . . . . . . . . . . . 191
Managing PlayporTT Settings . . . . . . . . . . . . . . . . . . . . . . . . . . . . . . . . . . . . . . . . . . . . . . . . . . . . . . . . . . . . . . . . . . . . . . . . . . . . . . . 192
Modifying Game Settings on a PlayPorTT . . . . . . . . . . . . . . . . . . . . . . . . . . . . . . . . . . . . . . . . . . . . . . . . . . . . . . . . . . . . . . . . . . . . . 193
Modifying Money Settings on a PlayPorTT . . . . . . . . . . . . . . . . . . . . . . . . . . . . . . . . . . . . . . . . . . . . . . . . . . . . . . . . . . . . . . . . . . . . 194
Modifying System Schedule settings on a PlayPorTT . . . . . . . . . . . . . . . . . . . . . . . . . . . . . . . . . . . . . . . . . . . . . . . . . . . . . . . . . . 196
Modifying System Tools settings on a PlayPorTT . . . . . . . . . . . . . . . . . . . . . . . . . . . . . . . . . . . . . . . . . . . . . . . . . . . . . . . . . . . . . . 198
Monitoring PlayPorTT Gaming Statistics . . . . . . . . . . . . . . . . . . . . . . . . . . . . . . . . . . . . . . . . . . . . . . . . . . . . . . . . . . . . . . . . . . . . . 199
15 Frequently Asked Questions About the Operator Dashboard
203
Overview. . . . . . . . . . . . . . . . . . . . . . . . . . . . . . . . . . . . . . . . . . . . . . . . . . . . . . . . . . . . . . . . . . . . . . . . . . . . . . . . . . . . . . . . . . . . . . . . . . . . 203
General Dashboard Questions . . . . . . . . . . . . . . . . . . . . . . . . . . . . . . . . . . . . . . . . . . . . . . . . . . . . . . . . . . . . . . . . . . . . . . . . . . . . . . . 204
User Account and Login-Related Questions. . . . . . . . . . . . . . . . . . . . . . . . . . . . . . . . . . . . . . . . . . . . . . . . . . . . . . . . . . . . . . . . . . . 205
Location-Related Questions. . . . . . . . . . . . . . . . . . . . . . . . . . . . . . . . . . . . . . . . . . . . . . . . . . . . . . . . . . . . . . . . . . . . . . . . . . . . . . . . . . 206
Music Search and Management-Related Questions . . . . . . . . . . . . . . . . . . . . . . . . . . . . . . . . . . . . . . . . . . . . . . . . . . . . . . . . . . . 206
Income and Accounting-Related Questions . . . . . . . . . . . . . . . . . . . . . . . . . . . . . . . . . . . . . . . . . . . . . . . . . . . . . . . . . . . . . . . . . . 208
Music Filter-Related Questions . . . . . . . . . . . . . . . . . . . . . . . . . . . . . . . . . . . . . . . . . . . . . . . . . . . . . . . . . . . . . . . . . . . . . . . . . . . . . . . 209
Jukebox Configuration-Related Questions. . . . . . . . . . . . . . . . . . . . . . . . . . . . . . . . . . . . . . . . . . . . . . . . . . . . . . . . . . . . . . . . . . . . 210
Jukebox Troubleshooting-Related Questions . . . . . . . . . . . . . . . . . . . . . . . . . . . . . . . . . . . . . . . . . . . . . . . . . . . . . . . . . . . . . . . . . 211
PlayPorTT-Related Questions . . . . . . . . . . . . . . . . . . . . . . . . . . . . . . . . . . . . . . . . . . . . . . . . . . . . . . . . . . . . . . . . . . . . . . . . . . . . . . . . 211
toc
Introducing the
TouchTunes Operator Dashboard
This chapter introduces the Dashboard and provides you with information about system requirements,
the documentation set, and getting customer support.
Contents
Overview . . . . . . . . . . . . . . . . . . . . . . . . . . . . . . . . . . . . . . . . . . . . . . . . . . . . . . . . . . . . . . . . . . . 1
Browsers Supported by the TouchTunes Dashboard . . . . . . . . . . . . . . . . . . . . . . . . . . 2
Help Resources for the TouchTunes Dashboard . . . . . . . . . . . . . . . . . . . . . . . . . . . . . . . 3
Key Documentation Learning and Reference Features . . . . . . . . . . . . . . . . . . . . . . . . 3
Documentation Conventions . . . . . . . . . . . . . . . . . . . . . . . . . . . . . . . . . . . . . . . . . . . . . . . . 4
Contacting TouchTunes . . . . . . . . . . . . . . . . . . . . . . . . . . . . . . . . . . . . . . . . . . . . . . . . . . . . . 4
Overview
The TouchTunes Dashboard is a Web-based application for managing and monitoring your
jukeboxes over the Internet. You can use the Dashboard to do the following:
• Search for, transfer and manage music on your jukeboxes.
1
Introducing the TouchTunes Operator Dashboard
• View reports showing the current status of your jukeboxes, the revenue your jukeboxes have
generated (including how much is awaiting collection) and the most popular songs for each
jukebox.
• Control what music is available on a jukebox through music filters.
• Configure a jukebox’s music, credit and hardware settings.
• View diagnostics showing the health of your jukeboxes.
• Set alerts so that a jukebox automatically notifies you in case your attention is required.
Using the Dashboard saves you time and money since you can perform most jukebox
management tasks remotely on your computer instead of physically travelling to the jukebox.
This frees your time to focus on adding locations and growing your business rather than on
having to spend unnecessary time managing your jukeboxes on location.
In this chapter, you will be able to answer the following questions:
• “What Web browser can I use for the TouchTunes Dashboard?” (p. 2)
• “What resources are available in case I need help with the TouchTunes Dashboard?” (p. 3)
• “How can I use this guide to learn about the TouchTunes Dashboard?” (p. 3)
• “How can I contact TouchTunes for information about and help with the Dashboard?” (p. 4)
Browsers Supported by the TouchTunes Dashboard
What Web browser can I use for the TouchTunes
Dashboard?
The TouchTunes Dashboard is a Web-based application that works over the Internet in your web
browser. You need the following to use the Dashboard:
• A connection to the Internet, dial-up or broadband
• A Web browser
The Dashboard supports all of the most popular Web browsers, including:
• Internet Explorer 5.0 and above
• Mozilla Firefox 1.0 (or Mozilla Suite 1.2) and above
• Safari 1.0 and above
• Opera 7.0 and above
• Netscape 7.0 and above
In general, the Dashboard’s stability and performance are affected more by the Web browser you
use than by your Internet connection. While you may still be able to use the TouchTunes
Dashboard if your Web browser is not listed above, unsupported browsers or browser versions
may compromise your Dashboard experience. TouchTunes recommends you check the Web
browser version that is installed on your computer to maximize the stability and performance of
your Dashboard. In most cases, the version of the browser you are using can be viewed from its
Help | About menu.
2
Help Resources for the TouchTunes Dashboard
Help Resources for the TouchTunes Dashboard
What resources are available in case I need help with the
TouchTunes Dashboard?
The following resources are available to assist you as you use the Dashboard:
• Help bubbles integrated directly in the Dashboard provide immediate assistance with carrying
out Dashboard tasks. See “Using Help Bubbles” on page 3.
• Documentation (including this guide and other related documentation) provides more indepth assistance to help you get the most from the TouchTunes Dashboard. See “Using this
Guide and Finding Related Documentation” on page 3.
Using Help Bubbles
A help bubble is an area within the TouchTunes Dashboard user interface (UI) that provides a brief
description of the Dashboard function and directions on how to perform tasks associated with
this function.
Figure 2 Help bubbles assist you throughout the Dashboard
Every Dashboard function features a help bubble. As you become more experienced with the
Dashboard, you may choose to minimize help bubbles by default to have more UI space for
performing tasks. You will still be able to click on a minimized help bubble to re-open it if you
need help at a later time.
Figure 3 A minimized help bubble
Using this Guide and Finding Related Documentation
This guide provides more in-depth information and detailed procedures than the help bubbles
on the Dashboard. Using help bubbles in conjunction with this guide will allow you to get the
most from the TouchTunes Dashboard.
• In addition to this guide, you can refer to the Quickstart Guide or Installation and Setup Guide for
your jukebox(es).
These Guides are available from the TouchTunes | Documentation page in the Dashboard.
Key Documentation Learning and Reference Features
How can I use this guide to learn about the TouchTunes
Dashboard?
In addition to standard documentation features (table of contents, index, cross-references,
screenshots), this guide is designed to make learning about and using the TouchTunes
3
Introducing the TouchTunes Operator Dashboard
Dashboard easy, practical and efficient. Each chapter in this guide has separate sections for
conceptual information (background information that you should know before doing a task) and
“how-to” information (the procedures or steps done to perform the task). By placing each type of
information in its own section, it will be easier for you to know where to look for the information
you need.
Chapters in this guide are divided into the following sections:
Key Concepts: This section provides all the conceptual information you should understand to
perform tasks described in the Detailed Directions section of the chapter. For example, the Key
Concepts section in the Music Filters chapter defines the different types of filters used
throughout the TouchTunes Dashboard and explains guidelines for using them. You should
understand these key concepts before you set up a music filter through the Dashboard.
Detailed Directions: This section provides complete information on all of the specific tasks you
can perform in the TouchTunes Dashboard. For example, in the Music Filters chapter, the
Detailed Directions section describes how to create, manage and schedule each type of music
filter available in the Dashboard.
Documentation Conventions
This guide uses the following documentation conventions.
Notation:
Right-click
Usage:
Click with the rightmost mouse
button.
A folder or file path.
Example:
Right-click the image and choose Save
Picture As.
Italic
Open C:\My Documents and
Settings\My Music.
Bold
Specific areas of the user interface, Choose My Jukeboxes in the
as well as menu commands.
Navigation menu.
Vertical bar Separates menu commands.
Choose TouchTunes | Contacts from
the Navigation menu.
Contacting TouchTunes
How can I contact TouchTunes for information about and
help with the Dashboard?
You can contact TouchTunes by:
• Using the links on the Contacts page in the TouchTunes Dashboard. Refer to the following
section.
• Calling TouchTunes by phone. See “Contacting TouchTunes by Phone” on page 5.
Contacting TouchTunes Directly from the Dashboard
You can use the Contacts page in the TouchTunes Dashboard to e-mail many departments at
TouchTunes, including Technical Support. You can use the links on the Contacts page to:
• Get help from Technical Support department.
• Request music from the Music department.
4
Contacting TouchTunes
• Check on your contract or jukebox shipments with the Sales department.
• Suggest future Dashboard features and enhancements to the R&D department.
• Review your invoices and statements with the Finance department.
• Resolve licensing questions with the Legal department.
Using the Contacts page is the easiest way to contact TouchTunes and also allows TouchTunes
to respond to your question, problem or request very quickly. To access the Contacts page,
choose TouchTunes | Contacts and then follow the appropriate e-mail link for the department
you want to contact:
Figure 4 The Contacts page in the TouchTunes Dashboard
Contacting TouchTunes by Phone
You can also get assistance with the TouchTunes Dashboard by calling the TouchTunes Technical
Support department toll-free at 1-888-711-5853. If you are outside of the toll-free area, you can
still contact the TouchTunes Technical Support department by dialling 1-847-353-1954 and
pressing 1 when prompted.
5
Introducing the TouchTunes Operator Dashboard
Note: Long-distance telephone charges may apply if you are calling from outside of the toll-free
area.
6
Learning About the TouchTunes
Dashboard
This chapter explains how the TouchTunes Dashboard’ can simplify jukebox
management for you. It also shows you how to navigate in the Dashboard
and provides a general workflow for managing your jukeboxes.
Contents
Overview . . . . . . . . . . . . . . . . . . . . . . . . . . . . . . . . . . . . . . . . . . . . . . . . . . . . . . . . . . . . . . . . . . . 7
Discovering the Features and Benefits of the TouchTunes Dashboard . . . . . . . . . 8
Navigating the TouchTunes Dashboard . . . . . . . . . . . . . . . . . . . . . . . . . . . . . . . . . . . . 11
Understanding the Dashboard Workflow . . . . . . . . . . . . . . . . . . . . . . . . . . . . . . . . . . 14
Overview
The TouchTunes Dashboard helps you to reduce or eliminate location visits for jukebox
management tasks, such as selecting music or configuring settings for a jukebox. Using the
TouchTunes Dashboard reduces the time, money and stress associated with these tasks, since
you can manage your jukeboxes securely and remotely via the Internet from your office or
home.
If you are new to the TouchTunes Dashboard, read this chapter to understand how your
business can benefit from the Dashboard and familiarize yourself with its layout and general
workflow.
In this chapter, you will find answers to the following questions:
• “What are the main features and benefits of the TouchTunes Dashboard?” (p. 8)
7
Learning About the TouchTunes Dashboard
• “What are the different areas in the TouchTunes Dashboard? How do I navigate around the
Dashboard?” (p. 11)
• “What is the general workflow (sequence of events) that I should follow when managing my
jukeboxes through the TouchTunes Dashboard?” (p. 14)
Discovering the Features and Benefits of the TouchTunes Dashboard
What are the main features and benefits of the TouchTunes
Dashboard?
The TouchTunes Dashboard is designed to reduce the time and effort you spend managing your
jukeboxes at their physical locations. The following sections explain the major features of the
Dashboard and show how they can benefit your business.
Remote Jukebox Management
The primary purpose of the TouchTunes Dashboard is to reduce (or even eliminate) onsite visits
related to jukebox configuration and management. Instead of travelling to a location, you can
do all of the following tasks using the Dashboard from the comfort of your home or office:
• Search for, transfer and manage music on all your jukeboxes simultaneously.
• Configure settings (such as music filters or credit rules) for a jukebox.
• View revenue generated by each jukebox as well as the played songs that were responsible for
this revenue.
• Check that a jukebox is running properly and be alerted of problems.
Managing your jukeboxes remotely not only saves you time, money and stress, it can also
improve the image of your business. For example, assume that a restaurant owner contacts you
at night to ask if you can remove all songs with explicit lyrics from his jukebox since this does not
fit his restaurant’s image. Instead of travelling to his location the next day to do this, you use the
TouchTunes Dashboard from home adjust the explicit music filter on his jukebox the same night.
By using the Dashboard, you saved the time you would have spent travelling to the restaurant
and the restaurant owner had his issue handled promptly. Similarly, the owner of a family
oriented restaurant might ask you to turn on the explicit content for a private party he is hosting.
The Dashboard enables you to make adjustments to your jukeboxes from anywhere that has
Internet access.
Full-featured Music Search Capabilities
The TouchTunes Dashboard provides comprehensive, user-friendly music search capabilities
that are available on a TouchTunes jukebox. You can find music by:
• Searching for an artist, album or song title.
• Entering a TouchTunes Music ID number.
• Browsing pre-compiled music lists, such as those compiled by Billboard Magazine
• Viewing a list of newly music added to the TouchTunes music library.
• Sylvie’s Picks, TouchTunes’ own music recommendations, which uses a highly visible album
jackets for quick music browsingTouchTunes.
• Checking out the music loaded on stock hard drives, by TouchTunes, for different markets.
8
Discovering the Features and Benefits of the TouchTunes Dashboard
• Viewing a list of the most popular songs from all of your jukeboxes, as well as from individual
jukeboxes.
Using this feature allows you to handle music requests from location owners very quickly, which
can increase plays and revenues. For example, assume that several bars located near a university
ask you to add an song from a obscure group that is becoming popular with their students but
which is not yet available on their jukeboxes. You use the music search capabilities in the
Dashboard to find the song in the TouchTunes music catalog and transfer it to each of their
jukeboxes. By using the Dashboard, you saved yourself the time to order the song for each
location and the bar owners got a popular (and profitable) song quickly added to their
jukeboxes.
Centralized Music Storage and Transfer
The Music Cart is a storage area only accessible through the TouchTunes Dashboard that
provides a single location where you can keep all the music to be sent to your jukeboxes. You
can use the Music Cart to transfer selected music to a single jukebox or to all the jukeboxes you
manage. You can also save music in the Music Cart between Dashboard sessions, in case you are
interrupted while selecting or transferring music; when you return to the Dashboard, all of your
music reappears in the Cart. This feature allows you to consolidate and handle all music requests
from all your location owners at once, rather than on a piecemeal basis.
Using the Music Cart provides flexibility and saves you time when managing music for your
jukeboxes because you can use it to transfer music to multiple jukeboxes simultaneously. For
example, assume that several location owners ask you to add an increasingly popular song to
each of their jukeboxes. Instead of transferring the same song to each location during your next
onsite visit, you use the Dashboard to send it to all your jukeboxes from the Music Cart at once.
By using the Music Cart, you not only substantially reduced the time required to add a new song
to your jukeboxes, you also improved the chances that this popular song will get played in each
of your locations.
Access to Useful Statistics and Reports
The TouchTunes Dashboard can help improve your business by providing useful and timely
information about your jukeboxes. You can use the Dashboard to generate and view reports
showing:
• Revenues generated for all jukeboxes over a user-definable period. You can also “drill-down”
and see a detailed report showing the revenues for each jukebox.
• Detailed song- and play-related statistics for each jukebox, including song title, album, artist,
music style/genre, date the song was downloaded, its relative popularity, the total number of
times a song has been played, and the date and time a song was played, among others. You can
sort these statistics by any category to answer questions like “what are the most popular of the
newest songs on my jukeboxes?”
• Information for each location where you have a jukebox installed, including details such as the
address and phone number of the location, as well as name of the contact person responsible
for the jukebox.
Using this feature allows you to get timely information about your jukeboxes, which can identify
business opportunities. For example, assume that you notice in the song-related reports that a
certain dance song is becoming more and more popular on several jukeboxes. Instead of
waiting for the location owners to request this song, you transfer it to all your jukeboxes to
maximize revenues as the song gets more popular.
9
Learning About the TouchTunes Dashboard
You can also sort these reports in various ways that can help you identify situations at locations
that you were otherwise unaware of. For example, say that your revenue reports in the
Dashboard show that jukebox revenue at a particular bar has decreased significantly over the
past two weekends. You contact the bar owner and discover that he has brought in a DJ to play
music during the weekend, which is a violation of your contract with him. The owner agrees to
cancel the DJ and your weekend revenues for this location return to normal.
Delegation of Management Tasks
Depending on the size and/or organization of your business, you can create additional
Dashboard user accounts to allow your employees (or even your location owners) to handle
certain jukebox management tasks through the TouchTunes Dashboard. When you create these
accounts, you also set up security rules that define what Dashboard functionality and jukebox
locations these additional users can access.
Using this feature allows you to delegate jukebox management tasks to other people while
ensuring that each user only has access to the functionality and locations they need. For
example, you can create a Dashboard account for a location owner so they can use their
knowledge of their clientele’s musical tastes to select songs for their jukebox. At the same time,
you configure the account so the location owner cannot view your revenue information and/or
discover which of his competitors are also your clients.
Monitoring and Diagnostic Tools
The TouchTunes Dashboard provides a suite of tools to help you keep your jukeboxes up and
running. These tools include:
• Identifying any major jukebox problems directly on the Dashboard home page that appears
when you log in.
• Displaying a report showing the current status of all your jukeboxes, including the last time
they connected and the ISP used for dial-up connections.
• Providing access jukebox settings so you can troubleshoot issues, such as communications
problems between a jukebox and the TouchTunes server.
For Gen 3 jukeboxes, the TouchTunes Dashboard provides an even more comprehensive suite of
troubleshooting tools. With these jukeboxes, you can view diagnostics in the Dashboard that
show the status of key jukebox components at a glance. You can also use the Dashboard to
configure jukeboxes to send you email alerts if a major problem occurs, such as a coin or bill
acceptor malfunctioning.
Using these features allows you to identify and handle jukebox problems long before your
location owners do. For example, assume you receive an email alert from a jukebox telling you
that its coin acceptor is malfunctioning. You immediately dispatch a technician to replace the
acceptor. The location owner later calls you to say that she was amazed with your service since
none of her customers or staff noticed that there was even a problem in the first place.
Consolidated Location Information
The TouchTunes Dashboard allows you to keep track of all your locations in a single place. For
example, you can add information for a location like the name and phone number for its contact
person. While this feature is obviously convenient for you, it can also increase your business since
your locations become available in the MyTouchTunes website (www.mytouchtunes.com). This
website helps people who are trying to locate TouchTunes jukeboxes in their area to find your
locations. By adding locations to the Dashboard, you can drive business to your jukeboxes and
promote your locations at the same time.
10
Navigating the TouchTunes Dashboard
Single Source to get TouchTunes Contact, Support and Documentation
Although you use the TouchTunes Dashboard primarily as a jukebox management tool, you can
also use it to contact TouchTunes and view documentation. A single Contacts page provides
email links to many departments at TouchTunes, including Technical Support, Sales, Finance,
Legal and the Music department. You can also access Dashboard-related news articles (such as
any upcoming scheduled outages) and related technical documentation for your jukeboxes
through the Dashboard.
Using the Dashboard to email TouchTunes means that you do not have to spend time playing
“telephone tag” to ask a question or get help and also allows TouchTunes staff to respond more
quickly to your question, problem or request.
24/7 Availability
TouchTunes provides all of the hardware, software and IT resources needed to keep the
Dashboard running virtually 24 hours a day, 7 days a week. Having the TouchTunes Dashboard
available all the time means that you can manage jukeboxes when you find it convenient, rather
than when you can cram in another onsite visit into your schedule.
Navigating the TouchTunes Dashboard
What are the different areas in the TouchTunes Dashboard?
How do I navigate around the Dashboard?
The TouchTunes Dashboard is divided into four main areas, as shown by the following diagram:
a
b
c
d
Figure 3 a) Quick Link area b) Main Menu bar c) Secondary Menu bar d) Display panel
The following sections explain the contents and functions of each UI component.
11
Learning About the TouchTunes Dashboard
Main Menu Bar
Use the main menu bar to access the major TouchTunes Dashboard functions. The following list
provides a brief overview of each major Dashboard function appearing in the main menu bar:
Menu Bar
Item
My Music
My Reports
My
Jukeboxes
Advanced
My Info
TouchTunes
Description
Access the Music Portal, search for and transfer music to jukeboxes,
browse music currently loaded on jukeboxes, and view/ review music
transfers.
Generate, view and export reports showing the status, locations, revenues
and play statistics for all your jukeboxes. You can also view statistics for
PlayporTT by handheld or by game, and generate PDF copies of your
TouchTunes invoices.
View a summary showing the status, location and history of a jukebox. You
also use this function to modify settings, view current diagnostics for Gen
3 jukeboxes or reboot a Gen 3 jukebox remotely if it is connected by a
broadband connection. PlayporTT game devices can also be modified
from this location. A PlayporTT tower can be identified from the Choose
another device drop-down menu by its “PP” prefix.
Schedule when TuneCentral is available on a Gen 2 jukebox.
View and modify your own user account settings and preferences, and
create and manage Dashboard sub-user accounts. You also use this
function to set up email alerts that let you know if a serious problem with
a jukebox (such as a jammed bill collector) occurs.
Contact various TouchTunes departments (such as sales or legal), submit
music requests to the music department, get help from technical support
and view documentation for your jukeboxes.
When you click an item in the main menu bar:
• The secondary menu bar area displays related functions that allow you to perform tasks, such
as searching for music by ID or configuring jukebox settings.
• The display panel shows the page associated with the highlighted item in the secondary menu
bar.
Secondary Menu Bar
Use the secondary menu bar to select jukebox management tasks that you want to perform.
When you click an item in the secondary menu bar, the page for the selected function appears
in the display panel. For example, when you click on My Jukeboxes in the main menu bar, the
secondary menu bar shows related options to do the following for a jukebox:
• View a detailed summary for a jukebox (Summary)
• Check at its diagnostic status (Diagnostics)
• Modify its settings (Settings)
• View its current location (Locations)
Most procedures in this guide provide navigation instructions for both main and secondary
menu bars in the same step. Unless stated otherwise, an item to the left of the pipe character (|)
is located in the main menu bar, while the item to the right of this character is located in the
12
Navigating the TouchTunes Dashboard
secondary menu bar. For example, a step like:
“Choose My Jukeboxes | Settings...” means that you choose My Jukeboxes in the main menu
bar first, then you choose Settings in the secondary menu bar.
Quick Link Area
Use the Quick Link area to access the most popular Dashboard features, as well as log out of the
TouchTunes Dashboard. The following table explains the features associated with each item in
this area.
Choose:
Home
Music Cart
Help
Logout
To:
Return to your Dashboard home page, which lists all main and secondary
menu items on a single page for easy reference
View the music that is currently in your Music Cart.
Display a brief summary of help features and resources for the TouchTunes
Dashboard.
Log out of the TouchTunes Dashboard.
Display Panel
Use the display panel to perform the task associated with the TouchTunes Dashboard feature or
function selected in the secondary menu bar. In this guide, the procedure that explains how to
perform each task also explains the user interface that appears in the display panel of the
Dashboard.
Unlike the menu bars, the appearance of the display panel can change based on the Dashboard
function you are using. For example, when you choose My Jukeboxes | Settings, the display
13
Learning About the TouchTunes Dashboard
panel divides into two sub-panels: the left sub-panel shows all the types of jukebox settings you
can modify, while the right sub-panel allows you to modify individual settings for a jukebox.
Figure 4 Display panel area divided into two vertical sub-panels
Understanding the Dashboard Workflow
What is the general workflow (sequence of events) that I
should follow when managing my jukeboxes through the
TouchTunes Dashboard?
A workflow is a procedure showing the general order of work associated with achieving a goal.
The following procedure shows the workflow associated with managing your jukeboxes
through the TouchTunes Dashboard. You may find this workflow useful while you are first
learning how to use the Dashboard or evaluating where you can integrate the Dashboard into
your normal business practises.
To use the TouchTunes Dashboard:
1. Obtain a TouchTunes Dashboard user account, set up your account and your preferences, and
log in to the Dashboard. See “Setting Up the Dashboard” on page 17.
14
Understanding the Dashboard Workflow
2. Create and configure Dashboard user accounts for your employees or location owners who
may also use the Dashboard to perform jukebox management. See “Setting Up TouchTunes
Dashboard Sub-User Accounts” on page 31.
3. For each jukebox, add its location to the Dashboard and enter details like the name, phone
number and contact person for the establishment. See “Entering Your Jukebox Locations in
the TouchTunes Dashboard” on page 39.
4. Search for and select music to be added, organize the music in lists, and then transfer this
music to the jukeboxes or to a USB device. See “Locating Music and Sending it to Jukeboxes
Using the Dashboard” on page 49.
5. View, modify or remove music already on your jukeboxes. See “Managing Music on Jukeboxes
Using the TouchTunes Dashboard” on page 83.
6. Set up the revenue model (jukebox credit rules, Play Next! and TuneCentral credit settings) for
each jukebox and monitor the revenue each jukebox earns. See “Managing Jukebox Income
Using the TouchTunes Dashboard” on page 97.
7. View TouchTunes invoices (such as music service invoices) to track your costs. See “Viewing
Your Invoices with the TouchTunes Dashboard” on page 147.
8. Configure general music settings (such as background music modes) for each jukebox. See
“Configuring Music and Game Settings Using the TouchTunes Dashboard” on page 127.
9. Create and manage music filters (rules that control what music is available for play) for each
jukebox, such as removing explicit music. See “Managing Music Filters for a Jukebox in the
TouchTunes Dashboard” on page 151.
10.Set the time window when a jukebox will contact the TouchTunes server to download new
music and/or settings. See “Setting Up Communications Settings Using the TouchTunes
Dashboard” on page 181.
11.View the current status of your jukeboxes, set up email alerts to let you know of emergencies
and monitor diagnostics showing the health of each jukebox. See “Monitoring Jukeboxes
Using the TouchTunes Dashboard” on page 185.
15
Learning About the TouchTunes Dashboard
16
Setting Up the Dashboard
This chapter explains how to get an account for the Dashboard, log on and
customize the Dashboard according to your preferences.
Contents
Overview . . . . . . . . . . . . . . . . . . . . . . . . . . . . . . . . . . . . . . . . . . . . . . . . . . . . . . . . . . . . . . . . .
Key Dashboard Concepts . . . . . . . . . . . . . . . . . . . . . . . . . . . . . . . . . . . . . . . . . . . . . . . . . .
Obtaining a Dashboard User Account . . . . . . . . . . . . . . . . . . . . . . . . . . . . . . . . . . . . .
Log On to the TouchTunes Dashboard . . . . . . . . . . . . . . . . . . . . . . . . . . . . . . . . . . . . .
Customize Your Dashboard User Account . . . . . . . . . . . . . . . . . . . . . . . . . . . . . . . . . .
Set Dashboard Preferences . . . . . . . . . . . . . . . . . . . . . . . . . . . . . . . . . . . . . . . . . . . . . . . .
Resetting Dashboard Passwords . . . . . . . . . . . . . . . . . . . . . . . . . . . . . . . . . . . . . . . . . . .
17
18
19
21
24
26
29
Overview
The TouchTunes Dashboard is a free service, but you must have a user account to use it. The
Dashboard uses this account to identify you and load relevant information, such as your
jukeboxes and locations. Getting a Dashboard user account is free. Your user account also
allows you to customize the Dashboard by setting your preferences.
In this chapter, you learn about:
• “Key Dashboard Concepts” on page 18
• “Obtaining a Dashboard User Account” on page 19
• “Log On to the TouchTunes Dashboard” on page 21.
17
Setting Up the Dashboard
• “Customize Your Dashboard User Account” on page 24.
• “Set Dashboard Preferences” on page 26.
• “Resetting Dashboard Passwords” on page 29.
In addition, you will be able to answer the following question:
• What are the different types of user accounts for the TouchTunes Dashboard?
• How can I get access to TouchTunes Dashboard? What do I need to do to get an Dashboard
account?
• How do I log on to the TouchTunes Dashboard?
• How do I reset my lost or forgotten Dashboard password.
Key Dashboard Concepts
Master and Sub-Accounts
What are the different types of user accounts for the
TouchTunes Dashboard?
Everyone who uses the TouchTunes Dashboard requires a user account. However, you need to
understand that there are two different types of Dashboard user accounts:
• Master Dashboard account: This is the user account that TouchTunes creates through the
procedure described in “Obtaining a Dashboard User Account” on page 19.
• Dashboard sub-accounts: These are user accounts that you can create for your employees and/
or location owners.
There are several factors that differentiates a master account from sub-accounts. The first (and
most obvious) factor is to whom the account is issued. In general, the master Dashboard account
is issued to a company, while a sub-account is issued to a specific person. For example, a large
jukebox vendor will have a single master Dashboard account while each employee has their own
sub-account.
Another differentiating factor between master and sub-accounts lies in how the account is used.
In larger businesses, the master Dashboard account is used for administrative purposes, such as
for creating and managing sub-accounts. Dashboard sub-accounts are tailored more for an
individual’s job or role. For example, the master Dashboard account can create a sub-account for
a location owner that restricts them to music search and management functionality in the
Dashboard.
Sub-accounts cannot manage any account other than their own, whereas the master Dashboard
account can view and manage all accounts.
18
Obtaining a Dashboard User Account
Obtaining a Dashboard User Account
How can I get access to TouchTunes Dashboard? What do I
need to do to get an Dashboard account?
Request a user account for the TouchTunes Dashboard by filling out an electronic form and
submitting it to TouchTunes. TouchTunes must create your Dashboard user account before you
can begin using the TouchTunes Dashboard, which may take up to 24 hours.
The following procedure explains how to access the electronic form used to request a
Dashboard user account and also shows you how to complete the form and submit it to
TouchTunes. Before doing this procedure, note the following:
• The procedure requires that you are contacted by TouchTunes to confirm that your music
vending company is a TouchTunes partner. This procedure should be done by someone who is
senior enough in your company to provide this information.
• You only need a single Dashboard user account per music vending company, since you can
create sub-accounts to provide access to the TouchTunes Dashboard to other employees and
location owners.
To obtain a Dashboard User Account:
1. In a Web browser, connect to the TouchTunes Dashboard by navigating to the following URL:
https://operator.touchtunes.com
The Login page for the Dashboard appears.
Figure 4 TouchTunes Dashboard Login page
Tip: You can also access the Login page for the Dashboard by following the link from the main
TouchTunes Web site.
2. Open the Need an account? help bubble.
The help bubble explains why you need a user account and how to request one.
19
Setting Up the Dashboard
3. Click the request form link in the help bubble.
A user account request form appears.
Figure 5 Dashboard User Account Request form
You must complete and submit this form to TouchTunes in order to get your Dashboard user
account.
20
Log On to the TouchTunes Dashboard
4. In the Your Contact Information area, enter the following in the indicated fields:
• The name of your company.
• Your name, phone number and email address.
• A time when you can be contacted by TouchTunes in Central Time.
5. In the Requested Account Information area, enter a username and password for your
Dashboard user account in the indicated fields.
Note that all usernames and passwords for the Dashboard must be unique and are subject to
approval by TouchTunes.
Tip: Usernames and passwords are case-sensitive. For added security, include numbers,
upper- and lower-case letters in your username and password, such as JuKEboX07.
6. Click Send to submit the completed form to TouchTunes.
Figure 6
Figure 7 Submitting the request for a Dashboard account
7. If you missed or did not enter the expected information in a field, the Dashboard prompts you
to correct your mistake and resubmit the form. Otherwise, your completed form is sent to
TouchTunes. Once your form is received, a TouchTunes employee will call you during the time
you specified to verify that your business operates TouchTunes equipment, finalize the details
of your user account and send you a confirmation email with your Dashboard username and
password.
Note: TouchTunes Dashboard user accounts are only issued between Monday and Friday
during normal business hours (8 AM to 5 PM, Central Time). If you are immediately recognized
by the TouchTunes sales representative, your account will automatically be set up and you will
receive a confirmation email.
8. When you receive your username and password, you can log in to the TouchTunes
Dashboard. See “Log On to the TouchTunes Dashboard” on page 21.
Log On to the TouchTunes Dashboard
How do I log on to the TouchTunes Dashboard?
Log in to the TouchTunes Dashboard through a Web browser using the login credentials
(username and password) for your Dashboard user account.
21
Setting Up the Dashboard
To log on to the TouchTunes Dashboard:
1. In a Web browser, connect to the TouchTunes Dashboard by navigating to the following URL:
https://operator.touchtunes.com
The Login page for the TouchTunes Dashboard appears.
Figure 8 Login page for the TouchTunes Dashboard
Tip: Add this URL to your Favorites or Bookmarks so you can return the TouchTunes
Dashboard later.
2. Enter the username and password for your user account in their respective fields and then
click Login.
22
Log On to the TouchTunes Dashboard
Your TouchTunes Dashboard home page appears.
a
b
Figure 9 a) Dashboard function area b) Jukeboxes Summary area c) What’s New area
23
c
Setting Up the Dashboard
a
b
c
d
e
Figure 10 a) Reports b) Jukebox information c) Advanced settings d) My Info e) Contacting TouchTunes
You can use your Dashboard home page to do the following:
• Jump directly to a Dashboard function, such as searching for music, creating a report or
contacting TouchTunes.
• View a summary of your Jukeboxes and their status in the Jukeboxes Summary area.
• View any new TouchTunes-related news or technical support documentation in the What’s
New area.
For more on these Dashboard functions, see the section “Navigating the TouchTunes
Dashboard” on page 11.
Customize Your Dashboard User Account
You can customize the user account for the TouchTunes Dashboard by doing the following:
• Change the username and password for the TouchTunes Dashboard user account.
• Enter the contact information of the person responsible for the administration of the
TouchTunes Dashboard.
24
Log On to the TouchTunes Dashboard
Note that customizing your user account has no impact on the Dashboard itself. To change the
way your Dashboard appears and works, see “Set Dashboard Preferences” on page 26.
Tip: If you are setting up the Dashboard for the first time, use these procedures to enter the
contact information of the person responsible for administering the TouchTunes Dashboard.
To customize your Dashboard user account:
1. Click My Info | Web account in the Dashboard navigation bar.
The Edit Your Web Account page appears. You use this page to customize your Dashboard
user account.
Figure 11 Editing Your Web Account Page
2. To change the username and password for your user account, do the following:
• Enter the new username in the Username field.
• Enter the new password in the Password and Confirm Password fields.
Next, enter the contact information for the person responsible for administering the
TouchTunes Dashboard. This information may be used by TouchTunes employees to contact
this person regarding Dashboard-related issues, such as scheduled Dashboard outages for
maintenance.
Note: Fields marked with an asterisk (*) are mandatory.
25
Setting Up the Dashboard
3. Enter the name of the person responsible for administering the TouchTunes Dashboard in the
Full name field.
4. Enter the email address of the person responsible for administering the TouchTunes
Dashboard in the Email address field.
5. Enter the phone number of the person responsible for administering the TouchTunes
Dashboard in the Phone number field.
6. (Optional) Enter the mobile phone number of the person responsible for administering the
TouchTunes Dashboard in the Mobile Phone number field.
7. Enter the language that should be used to communicate with the person responsible for
administering the TouchTunes Dashboard in the Preferred Language field.
8. Click Save User Info.
If a mandatory field is empty, the Dashboard prompts you to enter information for the person
responsible for administering the TouchTunes Dashboard in that field. Otherwise, the user
account information is updated.
Set Dashboard Preferences
You can control how the TouchTunes Dashboard appears and works in certain situations using
the Dashboard Preferences page. For example, you can set the information for your jukeboxes
that appears in the Dashboard.
Note: TouchTunes saves your preferences for the Dashboard in a small text file called a cookie.
Your web browser must be configured to accept cookies for your preferences to be set properly
when you log on to the Dashboard again. Because cookies are saved to your computer’s hard
disk, if you use more than one computer to access the TouchTunes Dashboard, you must set up
your preferences again on the other computer.
To set your preferences for the Dashboard:
1. Click My Info | Preferences in the Dashboard navigation bar.
26
Log On to the TouchTunes Dashboard
The Dashboard Preferences page appears. You use this page to control how the Dashboard
appears and works when you are logged in.
Figure 12 The Dashboard Preferences page
Use the following guide to setting preferences for the TouchTunes Dashboard:
• To change the way your jukeboxes appear in a list, do the next two steps.
• To set the content for help bubbles appear in the Dashboard by default, do step 4.
• To control whether selected songs are removed from the Music Cart after a successful
operation, do step 5.
2. In Jukeboxes Identification, select one of the following from the left drop-down list to control
the identifying information that appears first when a list of your jukeboxes appear in the
Dashboard:
Jukebox ID: (Default) Shows the ID number of a jukebox.
Jukebox Location: Shows the current location of a jukebox.
Tune Central ID:
• Shows the ID number for Tune Central, if the jukebox is equipped with this
option.
has Tune Central:
• Shows if the jukebox contains Tune Central.
3. Repeat the previous step to set up the remaining lists in the Jukeboxes Identification area and
configure the remaining information that is displayed to identify your jukeboxes in the
Dashboard.
27
Setting Up the Dashboard
Setting up the Jukeboxes Identification area also sets the way jukeboxes are sorted in the
Dashboard. For example, selecting Jukebox Location as the first item means that jukeboxes
are sorted in alphanumeric order first.
4. Enable Show Help to show the contents of help bubbles in the Dashboard UI.
This option is enabled by default in the Dashboard.
5. Enable Remove Songs When Done to remove songs involved in an operation (such as a music
transfer to a jukebox) from your Music Cart when the operation is successfully completed.
This option is disabled by default, since you may want to transfer the same songs from the
Music Cart to other jukeboxes.
6. Click Save Your Preferences.
Your Dashboard preferences are saved.
Log Out of the TouchTunes Dashboard
How do I log out of TouchTunes Dashboard?
Log out of the TouchTunes Dashboard when you are done using it. Logging out ensures that no
one uses the Dashboard from your computer without your knowledge.
To log out of the Dashboard:
Click Logout in the Quick Links area.
You are logged out immediately. The Login page reappears in your Web browser.
1. You may be prompted to confirm pending changes you have made through the Dashboard
to the settings of a Gen 2 jukebox. Once you confirm these changes, you are logged out of the
Dashboard automatically.
28
Resetting Dashboard Passwords
Resetting Dashboard Passwords
How do I reset my lost or forgotten Dashboard password.
If you lose or forget your password, you can request a new one directly from the login screen.
The previous password is invalidated and the new one is e-mailed to you.
Requesting a new password from the login page
Dashboard administrators can also reset passwords for their sub-users from the
My Info > Sub-Users page by pressing the Reset Password button.
An account administrator resetting a password for a sub-user
Once they have logged back on to Dashboard with their new password, users can always change
their passwords from the My Info > Web Account page.
29
Setting Up the Dashboard
30
Setting Up TouchTunes Dashboard
Sub-User Accounts
This chapter explains how you set up and manage sub-user accounts in the
Dashboard to delegate jukebox management tasks to employees or location
owners.
Contents
Overview . . . . . . . . . . . . . . . . . . . . . . . . . . . . . . . . . . . . . . . . . . . . . . . . . . . . . . . . . . . . . . . . . 31
Adding a Sub-User Account to the TouchTunes Dashboard . . . . . . . . . . . . . . . . . 32
Removing a Sub-User Account from the TouchTunes Dashboard . . . . . . . . . . . 37
Overview
A sub-user account (also called a sub-user) is a user account for the TouchTunes Dashboard that
you create to allow other people to view and manage your jukeboxes in the Dashboard. You
create sub-user accounts to delegate certain management tasks (such as music selection) to
your employees or location owners.
Because you create and manage sub-users, you also control the Dashboard functionality and
jukebox locations to which they have access. Properly implementing these security restrictions
is important to ensure employees only have access to the functionality and/or locations that are
relevant to their jobs. For example, you can configure sub-user accounts for your technical
support staff so they can view the settings on all of your jukeboxes but not view revenue reports
or TouchTunes invoices.
31
Setting Up TouchTunes Dashboard Sub-User Accounts
In this chapter, you will find answers to the following questions:
• “Can I give my technicians, jukebox music managers and/or location owners restricted access
to the Dashboard, such as preventing them from viewing my jukebox revenues?” (p. 32)
• “How do I remove a sub-user account from the TouchTunes Dashboard?” (p. 37)
Adding a Sub-User Account to the TouchTunes Dashboard
Can I give my technicians, jukebox music managers and/or location owners restricted
access to the Dashboard, such as preventing them from viewing my jukebox revenues?
Add a sub-user account for each person who needs to perform tasks using the TouchTunes
Dashboard. When you create a sub-user account, you also set what Dashboard functionality and
jukebox locations the person is able to access. For example, you can allow the following:
• Browsing the TouchTunes music catalog.
• Accessing Technical Documentation, related News articles and Technical Support documents.
Conversely, you can also restrict the following actions:
• Viewing and accessing all jukebox locations.
• Creating additional sub-users.
You can customize the Dashboard functionality for a sub-user by assigning them a pre-defined
role that corresponds to their job description or responsibilities. When you assign a sub-user a
role, you give them permission to access certain Dashboard features while preventing them
from accessing others. For example, assigning the “Money Manager” role to an employee who
handles your accounting tasks allows them to view jukebox revenue reports and TouchTunes
invoices in the TouchTunes Dashboard. Using roles simplifies the setup of permissions for a subuser account since you do not have to indicate what individual Dashboard features are available
to them.
The TouchTunes Dashboard also provides a special role for location owners that allows them to
choose and manage music for their location. This allows the location owner to tailor the music
on their jukebox based on their knowledge of their clientele’s musical taste. For example, assume
that one of your locations is a Latin dance club. You create a Dashboard sub-user account for
Estaban, the club owner, because you yourself are unfamiliar with Latin dance music. Estaban
can then use the Dashboard to view the music catalog and select music that he knows will be
popular with his patrons.
Before creating and assigning Dashboard sub-user accounts, you should establish a set of best
practices that all employees and location owners must follow when using the Dashboard.
Explaining these practices allows everyone to understand what the rights, expectations and
responsibilities are for their sub-user account. The following examples are good practices to
assume when creating sub-users:
• Ensure there is only one sub-user account per person. This helps to simplify the tracking of subuser accounts and ensures that you can find the role(s) assigned to each person.
• Forbid sub-users from sharing their Dashboard user account usernames and passwords. This
helps to ensure the overall security of the Dashboard against outside abuse.
32
Adding a Sub-User Account to the TouchTunes Dashboard
To add a sub-user account:
1. On the TouchTunes Dashboard, choose My Info | Sub-Users.
The Dashboard Sub-Users page appears, showing all current Dashboard sub-user accounts.
Figure 5 Dashboard Sub-Users page
33
Setting Up TouchTunes Dashboard Sub-User Accounts
2. Click Create a New User.
The Create a New Sub-User page appears. You use this page to create a new Dashboard subuser account.
Create a New Sub-User page
3. At the top of the Create a New Sub-User page, enter the following information for the new
account in the fields indicated:
• The username and password for the account.
• The full name, email address and phone number of the person using the account.
• (Optional) The mobile phone number of the person using the account.
• The preferred language of the person using the account (English/French/Spanish).
Entering this information allows you to maintain contact details for the person using the new
sub-account.
In the next four steps, you set the roles for and jukebox locations available to the new subuser. Although these steps are not mandatory, doing them ensures that the sub-user can only
access the Dashboard functionality and locations that are relevant for their job.
34
Adding a Sub-User Account to the TouchTunes Dashboard
4. Navigate to the Permissions area.
Figure 6 Permissions area of the Create a New Sub-User page
5. Select the role (or roles) for the sub-user in the Permissions area, using the following table as
a guide.
Sub-User
Account Role:
Account
Administrator
Location
Owner
Money
Manager
What Dashboard functionality is
available when you assign this role?
Account Administrators can search for and
manage music, view jukebox revenues,
monitor jukebox status and diagnostics
and configure jukebox settings.
To whom should I assign
this role?
Assign this role to senior
staff or trusted employees in
your organization as this
role allows the most
Dashboard functionality.
This user can manage music for a single
Assign this role to a location
location. Location Owners can search for, owner so they can manage
order and transfer songs from the
music for their location.
TouchTunes music library to their jukebox, Location Owners cannot be
as well as view and delete songs on their assigned any other roles.
jukebox.
This user can monitor and manage
Assign this role to
jukebox-related revenues. Money
employees who are
Managers can access and view reports
responsible for monitoring
showing jukebox revenue, plays and
jukebox revenues and
content, view TouchTunes invoices, as well expenses.
as the history showing song transactions
and songs played.
35
Setting Up TouchTunes Dashboard Sub-User Accounts
Sub-User
Account Role:
Music
Manager
Settings
Manager
What Dashboard functionality is
available when you assign this role?
This user can manage music for multiple
locations. Music Managers can search for,
order and transfer songs from the
TouchTunes music catalog to any jukebox,
as well as delete content and view song
transactions for multiple jukeboxes.
This user can monitor the status and
manage and settings for multiple
locations. Settings Managers can add and
manage jukebox locations, view the status
and diagnostics for jukeboxes and modify
their settings for setup or troubleshooting.
To whom should I assign
this role?
Assign this role to
employees responsible for
selecting and managing
music content on your
jukeboxes.
Assign this role to
employees responsible for
installing, supporting,
monitoring, and
maintaining your jukeboxes.
You can assign multiple roles to a sub-user account. For example, you can assign your
technicians both the Settings Manager and Music Manager roles to allow them to
troubleshoot jukebox problems and help location owners download music through the
Dashboard.
In order to simplify the creation of sub-users, their creation now employs a more useful logic
flow. When a sub-user is created or edited and given the rights of a Location Owner, they
cannot also be assigned any other rights, as these other rights would be mutually exclusive.
For the same reasons, when the Account Administrator checkbox is selected, sub-users are
also automatically given all other rights except those of a Location Owner, namely Account
Administrators, Money Manager, Music Manager or Settings Managers. However, these
automatically selected profiles are only recommendations and can be deselected before
saving the sub-users profile.
Tip: If you are creating an account for a location owner, make sure you agree in advance how
many songs they are permitted to download per week or month. Otherwise, you might end
up being charged for a large number of downloads initiated by the location owner.
6. Navigate to the Locations Access area.
Figure 7 Locations Access area of the Create a New Sub-User page
36
Removing a Sub-User Account from the TouchTunes Dashboard
7. Do one of the following to select the locations that the sub-user can access:
• Enable Can See All Locations to allow the sub-user to access jukeboxes in all current and
future locations.
• Select the jukeboxes in the Can Only See the Selected Locations area to which you want
to give the sub-user access. When this is enabled for a sub-user, you must manually add any
new jukebox locations to which you want to allow the sub-user access.
Tip: If your employees are organized by geographic area (such as by state/province, county
or city), use the Can Only See the Selected Locations area to filter out jukeboxes that are not
geographically close to them.
8. Click Save User Info to create the new sub-user account.
If any mandatory information for the sub-user account is missing, you are prompted to fill it
in. Otherwise, the sub-user account is created and appears in the Dashboard Sub-Users page.
Figure 8 The new sub-user now appears on the Dashboard Sub-Users page
Removing a Sub-User Account from the TouchTunes Dashboard
How do I remove a sub-user account from the TouchTunes
Dashboard?
You can remove sub-user accounts when a person no longer needs access to the Dashboard,
such as for employees who leave your company. Regularly removing Dashboard sub-user
accounts is a good way to maintain Dashboard security and protect yourself and your customers
against abuse by past employees.
37
Setting Up TouchTunes Dashboard Sub-User Accounts
To remove a sub-user account:
1. In the TouchTunes Dashboard, choose My Info | Sub-Users.
The Dashboard Sub-Users page appears, listing all current Dashboard sub-user accounts. You
use the controls on this page to edit and/or delete sub-users.
2. Click Remove for the sub-user to be deleted.
Figure 9 Removing a Sub-User
Figure 10
You are prompted to confirm this action before the indicated sub-user account is deleted.
Note: The next step permanently deletes a Dashboard sub-user account. Before continuing,
ensure that the indicated sub-user is the one that you want deleted. If you delete the wrong
sub-user account by accident, you will need to manually recreate it.
3. Click OK to confirm the action.
The sub-user account is deleted and the Dashboard Sub-Users page shows the sub-user
accounts remaining.
38
Entering Your Jukebox Locations in
the TouchTunes Dashboard
This chapter explains how to add and manage locations in the TouchTunes
Dashboard so you can track where each of your jukeboxes is installed and
who is responsible for them.
Contents
Overview . . . . . . . . . . . . . . . . . . . . . . . . . . . . . . . . . . . . . . . . . . . . . . . . . . . . . . . . . . . . . . . . .
Adding a Location to the TouchTunes Dashboard . . . . . . . . . . . . . . . . . . . . . . . . . .
Moving a Jukebox to a Location in the TouchTunes Dashboard . . . . . . . . . . . . .
Modifying Location Details in the TouchTunes Dashboard . . . . . . . . . . . . . . . . .
Modifying the Public and Private Details in the TouchTunes Dashboard . . . .
39
40
44
46
47
Overview
A location is a generic term used to identify any establishment where you install a TouchTunes
jukebox, such as a bar, a club or a restaurant. You manage your locations through the
TouchTunes Dashboard to keep track of where each of your jukeboxes is located and identify
who is responsible for them.
Setting up your locations in the Dashboard also allows you to:
• Identify the origin of jukebox revenues, since the revenue reports will later be categorized by
location.
• View music-related operating expenses for each location, since a TouchTunes music service
invoice is broken down by location.
• Track the operating history of a jukebox, such as the date when your jukebox was delivered to
a location and how long it has been there.
39
Entering Your Jukebox Locations in the TouchTunes Dashboard
In this chapter, you will find answers to the following questions:
• “How do I set up my locations in the TouchTunes Dashboard?” (p. 40)
• “How do I move a jukebox to a different location in the TouchTunes Dashboard?” (p. 44)
• “How do I change a location’s name or contact information in the TouchTunes Dashboard?” (p.
46)
Adding a Location to the TouchTunes Dashboard
How do I set up my locations in the TouchTunes Dashboard?
Add a location to the TouchTunes Dashboard to record the details for the location, such as its
name, address and the name of the contact person at the establishment who is responsible for
the jukebox.
To add a location and associate a jukebox with it:
1. In the TouchTunes Dashboard, choose My Jukeboxes | Summary.
The Jukebox Manager page appears. You use the Location Information area on this page to
add or modify the location for a jukebox.
Figure 6 Jukebox Manager page
40
Adding a Location to the TouchTunes Dashboard
2. From the Choose a Jukebox list, select the jukebox you want to associate with the new
location.
If the jukebox is currently associated with a location, its information appears in the Location
Information area. Otherwise, this area shows that the jukebox is located in your warehouse
and is not associated with a location.
3. Do one of the following:
• If the jukebox is currently associated with an existing location, click Change This Jukebox
Location, choose Add a New Location for This Jukebox in the window that appears and
then click Create.
• If the jukebox is in your warehouse and is not currently assigned to a location, click Add New
Location.
41
Entering Your Jukebox Locations in the TouchTunes Dashboard
The Create Location page appears. This page is divided between the Location Profile and
Help areas:
Figure 7 Creating a new Location in Dashboard
The Public Profile area is used to record contact information for the establishment, while the
Private Profile area is used to record information about the clientele of the establishment.
4. In the Public Profile area, enter the following information for the location in the fields
indicated:
• The name of the location. *
• The location type (from the drop-down menu).*
• A brief description of the place of business
• The street address of the location, including suite number if necessary.
• The city and state, province or territory where the establishment is located. *
42
Adding a Location to the TouchTunes Dashboard
• The zip code or postal code of the location. *
• The business phone and fax number for the location. *
• Location (Public or Private)
Note: Asterisks (*) indicate required fields. If you are unable to modify the Private/Public
setting, you may have the Keep all locations private set on the My Info | Corporate Profile
page.
5. In the Private Profile area, enter the following information for the location in the fields
indicated:
• The location’s internal name
• The name of a contact
• The preferred language for the contact person, in case TouchTunes needs to contact them
directly, such as when providing technical support (English/French/Spanish).
• The fax number for the contact
Note: The information you enter in the Private Profile area will never be made public.
Figure 8 Location Profile area completed for new location
43
Entering Your Jukebox Locations in the TouchTunes Dashboard
Note: You cannot modify the Country field for a location. If this field is incorrect, contact
TouchTunes Technical Support.
Next, enter demographic information for the location in the Private Profile area.
The location is added to the Dashboard. The Jukebox Manager page reappears, showing that
the jukebox is associated with the new location.
Figure 9 Jukebox associated with its new location
Moving a Jukebox to a Location in the TouchTunes Dashboard
How do I move a jukebox to a different location in the
TouchTunes Dashboard?
You can associate (or move) any jukebox to any location in the TouchTunes Dashboard. When
you associate a jukebox with a location in the Dashboard, you can monitor jukebox activity (such
as revenue or plays) for that location.
Moving a jukebox in the TouchTunes Dashboard has no effect on where the jukebox is physically
located. For example, assume a new bar across town agrees to use one of your jukeboxes.
Although you move the jukebox to the new location in the TouchTunes Dashboard, the physical
jukebox remains in your warehouse. You (or the bar owner) must arrange for the physical
transport of this jukebox to the bar.
44
Moving a Jukebox to a Location in the TouchTunes Dashboard
To move a jukebox from one location to another:
1. In the TouchTunes Dashboard, choose My Jukeboxes | Summary.
2. From the Choose a Jukebox list, select the jukebox you want to move.
The current location of the selected jukebox appears in the Location Information area. You
use the controls in this area to move the jukebox, edit the location information or create a
new sub-user for this location.
Tip: You can also display the Jukebox Manager page for a particular jukebox by clicking the
name of the jukebox on the Jukeboxes Route Report page that appears when you choose
My Reports | Summary.
3. In the Location Information area, click Change this Jukebox Location.
The Change this Jukebox Location window appears, showing all locations currently entered
in the Dashboard.
4. Select the new location for the jukebox from the list and then click Move.
45
Entering Your Jukebox Locations in the TouchTunes Dashboard
The jukebox is moved. Its new location appears in the Location Information area of the
Jukebox Manager page.
Figure 10 Jukebox Manager page showing new location of the jukebox
Modifying Location Details in the TouchTunes Dashboard
How do I change a location’s name or contact information
in the TouchTunes Dashboard?
You can modify the details for a location in the TouchTunes Dashboard to track location-related
changes, such as when a restaurant moves or changes its name. You also do this to add or update
demographic information for a location to track changes in its clientele.
The following procedure explains how you modify the details for an existing location in the
Dashboard. You cannot use this procedure to move an existing jukebox to a brand new location.
To move a jukebox to a new location, first set up the new location for the jukebox in the
Dashboard using the procedures in “Adding a Location to the TouchTunes Dashboard” on
page 40, and then move it to this new location using the procedures in “Moving a Jukebox to a
Location in the TouchTunes Dashboard” on page 44.
46
Modifying the Public and Private Details in the TouchTunes Dashboard
To modify the details for a location:
1. Choose My Jukeboxes | Summary, select the jukebox associated with the location you want
to edit from the list, and then click Edit this Location Information on the Jukebox Manager
page that appears.
2. Change the details for the location on the Modify Location page, then click Confirm and
Agree at the bottom.,
Figure 11 Modify Location page
Modifying the Public and Private Details in the TouchTunes Dashboard
How do I allow my jukeboxes to be found more easily by
potential customers?
Making the location of your jukeboxes public lets myTouchTunes.com users find your location
easily with the upcoming mySpots feature. When you indicate on the Dashboard that you would
like to make the location of your jukeboxes public, your location is added to the myTouchTunes
database. Then, through Google Maps™ functionality, the myTouchTunes Web page overlays
indicators on the mySpots map to let potential customers know where they can find your place
of business.
1. In the Dashboard, choose My Jukeboxes | Summary.
The Jukebox Manager page appears. You use the Location Information area on this page to
add or modify the location for a jukebox.
2. Click Edit this Location Information.
47
Entering Your Jukebox Locations in the TouchTunes Dashboard
3. Change the setting from Private to Public, or vice versa, and click Confirm and Agree.
Figure 12 Make your jukeboxes public from the Dashboard and put your locations on the map
Note: If you are unable to modify this setting, you may have the Keep all locations private set
on the My Info | Corporate Profile page.
48
Locating Music and Sending it to
Jukeboxes Using the Dashboard
This chapter explains how to use the TouchTunes Dashboard to search for new
music, manage music selections and download music to jukeboxes or USB
devices.
Contents
Overview . . . . . . . . . . . . . . . . . . . . . . . . . . . . . . . . . . . . . . . . . . . . . . . . . . . . . . . . . . . . . . . . .
Searching for Music using Keywords . . . . . . . . . . . . . . . . . . . . . . . . . . . . . . . . . . . . . . .
Staying Informed . . . . . . . . . . . . . . . . . . . . . . . . . . . . . . . . . . . . . . . . . . . . . . . . . . . . . . . . . .
Searching for Music by Song or Album ID Number . . . . . . . . . . . . . . . . . . . . . . . . .
Adding Songs from Compiled Lists . . . . . . . . . . . . . . . . . . . . . . . . . . . . . . . . . . . . . . . . .
Identifying New Music Added to the TouchTunes Music Library . . . . . . . . . . . . .
Requesting Music from TouchTunes . . . . . . . . . . . . . . . . . . . . . . . . . . . . . . . . . . . . . . . .
Adding Music for Jukeboxes to the Music Cart . . . . . . . . . . . . . . . . . . . . . . . . . . . . . .
Downloading Music from the Music Cart to a Jukebox . . . . . . . . . . . . . . . . . . . . .
Transferring Pending Music and Software to a USB Device . . . . . . . . . . . . . . . . .
Updating a Jukebox on Location with the USB Content Updater . . . . . . . . . . . .
Reviewing Music Transfers . . . . . . . . . . . . . . . . . . . . . . . . . . . . . . . . . . . . . . . . . . . . . . . . .
49
50
54
55
58
61
63
65
67
70
76
78
Overview
You can use the TouchTunes Dashboard to help you search for and download music to any of
your jukeboxes from the TouchTunes music library. Using the Dashboard centralizes all of the
following music search and transfer functions in a single tool that you can access at any time:
• Search for music using the song title, album name, artist name or TouchTunes ID number
49
Locating Music and Sending it to Jukeboxes Using the Dashboard
• View various music lists compiled by TouchTunes or one of its partners, such as Billboard
Magazine.
• Request music to be added to the TouchTunes music library.
• Store music to be downloaded to your jukeboxes.
• Initiate and review music downloads to your jukeboxes.
In this chapter, you will be able to answer the following questions:
• “How do I use the TouchTunes Dashboard to search for music by song title, album name or
artist?” (p. 50)
• “Can I find music in the TouchTunes library by song or album ID using the TouchTunes
Dashboard?” (p. 55)
• “How do I add songs from compiled lists, such as Sylvie’s Picks or Billboard’s Top 100, using the
TouchTunes Dashboard?” (p. 58)
• “How do I use the TouchTunes Dashboard to find songs that were recently added to the
TouchTunes library?” (p. 61)
• “Can I use the TouchTunes Dashboard to request music that is not in the TouchTunes library?”
(p. 63)
• “What is the Music Cart? How do I move songs from a music search or a pre-compiled list in the
TouchTunes Dashboard to the Music Cart?” (p. 65)
• “How do I use the TouchTunes Dashboard to download music to my jukeboxes?” (p. 67)
• “How can I tell which songs have recently been downloaded to, or are pending download to a
jukebox through the TouchTunes Dashboard?” (p. 78)
Searching for Music using Keywords
How do I use the TouchTunes Dashboard to search for music
by song title, album name or artist?
You can search the TouchTunes music library for a song, album or artist by supplying one or more
words (called keywords) from its name. Searching for music by keyword is the easiest way to find
songs in the TouchTunes music library.
To search for music by keyword:
1. In the TouchTunes Dashboard, go to the Music Portal page.
2. In the Quick Search area, type in your keyword to search for a song, album or artist and
choose the type of search to be run based on your keyword, such as a song title, album, artist
50
Searching for Music using Keywords
or ID.
Figure 7 Music Portal page
The Search for Music page appears with your results.
Figure 8 Search for Music page
• From the Search for Music page, you can refine your Quick Search by limiting the number
of results, or perform a new search.
51
Locating Music and Sending it to Jukeboxes Using the Dashboard
To start a new search from the Search for Music page:
• Enter the keyword(s) for the music you are looking for in the Search For field.
• Choose the type of search to be run using the keyword, such as a song title or artist name
search.
• (Optional) Set the number of matching search results to be displayed in the Dashboard.
a
b
c
Figure 9 a. Keyword search type b. Search For field c. Search result display control
Tip: You can use a keyboard shortcut to quickly select the type of keyword search. Press
Alt+Shift+R to search artists, Alt+Shift+S to search song titles, Alt+Shift+L to search album
names and Alt+Shift+A to search artist, song and album names.
1. Click Search.
52
Searching for Music using Keywords
The Dashboard searches the TouchTunes music library and displays matches for the keyword
in the Search Results area.
Figure 10 Search Results area
Note the following about keyword searches and their search results:
• Keyword searches look for matches that either sound (or are spelled) like the search term.
The closeness of the match is reflected in the score assigned to each search result. In the
example above, the group Rush receives the maximum score of 100 because it is a perfect
match to the search term “rush”. Artists with the search term in their names (such as Otis
Rush) or who have similar sounding names (such as Lush or Russ Ballard) earn lower scores.
• The Dashboard provides search results for artist, album and song title for every keyword
search, even if you only specified one of these types. Each set of results is independent,
meaning search results for song titles containing “rush” are independent of search results
with artist or album names containing the same term.
• The keyword that you entered in step 2 remains in the Search For field in case you want to
refine your search.
53
Locating Music and Sending it to Jukeboxes Using the Dashboard
2. (Optional) Use the controls in the View Results For area to view other songs, artist or albums
found by the search.
a
Figure 11 a. View Results For area
3. Browse through the search results to find music for your jukebox(es):
• Click + (plus sign) to expand an album or artist and show its associated music in the Search
Results area.
• Click - (minus sign) to hide the music associated with an artist or album in the Search
Results area.
Figure 12 Album and songs associated with an artist expanded in Search Results area
4. (Optional) Export the search results from the TouchTunes Dashboard to any of the file formats
listed at the bottom of the Search Results area.
5. Once you have found the music you were looking for, add it to the Music Cart so you can
download it to your jukeboxes. See “Adding Music for Jukeboxes to the Music Cart” on
page 65.
Staying Informed
How do I use the Dashboard to see what is going on in the
music industry?
The Music Portal page has several areas to keep you informed of the goings-on in the music
industry.
54
Searching for Music by Song or Album ID Number
• Hit Lists and Top 10 keep you up to date with the most popular songs on TouchTunes
jukeboxes, including a song’s position from the previous week.
• Big Buzz keeps you in the loop with the happenings of the music industry.
• The Upcoming New Releases area alerts you to upcoming release dates for music that will be
soon be available for your jukeboxes.
Figure 13 The Hit Lists, Top 10, BIG Buzz and Upcoming New Releases areas of the Music Portal keep you informed
Searching for Music by Song or Album ID Number
Can I find music in the TouchTunes library by song or album
ID using the TouchTunes Dashboard?
You can use the TouchTunes Dashboard to search for songs or albums using the ID numbers
used to identify all music in the TouchTunes music library. You can usually find a song’s ID
number beside its title whenever a list of songs appears in the Dashboard, such as in keyword
search results, pre-compiled music lists or jukebox content lists. This type of search can be much
faster than a keyword search, but you need to ensure that the ID numbers for your songs and/or
albums are correct or you may end up with unwanted music in your search results.
To search for music by ID:
1. In the TouchTunes Dashboard, choose My Music | Search by ID.
55
Locating Music and Sending it to Jukeboxes Using the Dashboard
The Search by ID page appears. You use this page to search for a song or album by its ID
number.
Figure 14 Search by ID page
2. Select the type of search (for songs IDs or for albums IDs) using the controls in the area at the
bottom of the page.
You must select the type of ID search as the Dashboard will remove the IDs of the songs (or
albums) that do not correspond to the selected search type. If you have song IDs and album
IDs, a separate search for each type of ID number is required.
3. In the field provided, enter the song or album ID numbers for either the songs or the albums
you want to find, separated by any of the following:
• Space
• Comma
56
Searching for Music by Song or Album ID Number
• Line break (each ID appears on a new line)
Figure 15 Song IDs entered for search
4. Click Search.
The Dashboard searches the TouchTunes music library for the songs or albums matching the
ID numbers you entered, and displays its results in the Search Results area.
Figure 16 Result set for song IDs entered in Search by ID area
Note the following about ID searches and their search results:
• All songs or albums in the Search Results area are automatically selected so you can add
them to the Music Cart. You can deselect any songs in this area to stop it from being added
to the Music Cart and downloaded to a jukebox. For example, you may deselect a song from
57
Locating Music and Sending it to Jukeboxes Using the Dashboard
the Search Results area if a location inadvertently requested an explicit version of a song
rather than the edited version.
• Songs or albums in the Search Results area are sorted in ascending order by their ID
number. You cannot reorder this list.
• The ID numbers for songs in the result set also remain visible in the field above the Search
Results area in case you want to add to your search.
5. (Optional) Check that the songs or albums in the Search Results area match the titles you
expected to find.
By double-checking the search results against your list of music, you can identify any music
that was either included with the search results or removed entirely from the search because
of an incorrect song or album ID.
6. (Optional) Export the search results from the TouchTunes Dashboard to any of the following
file formats listed at the bottom of the Search Results area.
7. Once you have found the music you were looking for, add it to the Music Cart so you can
download it to your jukeboxes. See “Adding Music for Jukeboxes to the Music Cart” on
page 65.
Adding Songs from Compiled Lists
How do I add songs from compiled lists, such as Sylvie’s Picks
or Billboard’s Top 100, using the TouchTunes Dashboard?
You can use the TouchTunes Dashboard to quickly add songs from compiled lists, or entire lists
to your music cart. These lists include Sylvie’s Picks —current and upcoming hits compiled by
TouchTunes’ own in-house music expert, as well as lists from Billboard.
To view and add music from a compiled music list:
1. In the TouchTunes Dashboard, choose My Music | Music Portal
58
Adding Songs from Compiled Lists
The TouchTunes Music Portal page appears. The Music Portal page contains links to many
compiled song lists.
Figure 17 The Music Portal’s many compiled song lists (indicated in red for illustrative purposes)
The following table shows the compiled music lists available in the TouchTunes Dashboard.
List:
Sylvie’s Picks
List Description:
Current and upcoming hits chosen by the TouchTunes in-house
music expert, Sylvie. By clicking a Sylvie’s Pick, you can easily add
a recommended song, the entire album that contains the song or
find other songs from the same artist on different albums.
59
Locating Music and Sending it to Jukeboxes Using the Dashboard
List:
Hit Lists
List Description:
Billboard Top 25 music list for various music styles, such as Rock
or Pop as well as the Billboard Top 40 list.
Special Features - Music on the Billboard Top 100 and Top 25 lists for certain music
Billboard Charts
styles.
Special Features - List for different themed events, such as hits from the 1980’s or
Themes
90’s.
2008 New Albums Albums released in the current year.
Latest Additions to All the current, back-catalog and classic songs that are new to the
our Catalog
catalog.
New Since Last
The latest songs available since the last catalog release.
Catalog
Top 100
List of the most played songs on all TouchTunes jukeboxes for
various music styles, such as Rock or Latin.
Local Bands
Music lists of local talent.
Stock Hard Drives The music mix included on each of the stock hard drives
provided by TouchTunes.
2. Select the compiled music list that you are interested in using the lists on the Music portal
page.
In this example, a compiled list from Billboard is selected.
60
Identifying New Music Added to the TouchTunes Music Library
A page showing the contents of the music list opens. You can use the Show a Different Hot
List drop-down menu to choose another compiled music list.
Figure 18 Billboard Hot Latin Tracks April5 ‘08
3. Browse through the music list to find music for your jukebox(es):
• Click + (plus sign) to expand an album or artist in the list and show its associated music.
• Click - (minus sign) to hide the music associated with an artist or album in the list.
4. Once you have found the music you were looking for, add it to the Music Cart so you can
transfer it to your jukeboxes. See “Adding Music for Jukeboxes to the Music Cart” on page 65.
Identifying New Music Added to the TouchTunes Music Library
How do I use the TouchTunes Dashboard to find songs that
were recently added to the TouchTunes library?
TouchTunes is always adding new songs and albums to its music library. You can use the
TouchTunes Dashboard to view a list of the latest music added to the library so you can keep
your jukeboxes stocked with the most recent songs.
Tip: You can also access a complete content list for the music library, as well as updated lists of
new releases in Adobe PDF format from the TouchTunes website.
To identify new music added to the TouchTunes music library:
1. In the TouchTunes Dashboard, choose My Music | Music Portal.
61
Locating Music and Sending it to Jukeboxes Using the Dashboard
The Hot Lists area at the bottom of the Music Portal page contains several lists of songs that
have been recently added to the TouchTunes music catalog.
Figure 19 TouchTunes Hot Lists area on the Music Portal
A list of the latest new releases added to the TouchTunes music catalog appears.
Figure 20 List of new music added to the TouchTunes music library
2. Once you have found the music you were looking for, add it to the Music Cart so you can
transfer it to your jukeboxes. See “Adding Music for Jukeboxes to the Music Cart” on page 65.
62
Requesting Music from TouchTunes
Requesting Music from TouchTunes
Can I use the TouchTunes Dashboard to request music that
is not in the TouchTunes library?
TouchTunes is always interested in receiving your suggestions to help build and improve its
music library. You can use the Dashboard to send your music requests directly to the TouchTunes
music department. Once you submit a music request, you receive an e-mail from TouchTunes
indicating the status and result of your request. You can also use the Dashboard to monitor
music requests.
• To submit a music request, see “To request music from TouchTunes:” on page 63.
• To monitor the status of submitted requests, see “To check the status of your music requests:”
on page 64.
To request music from TouchTunes:
1. In the TouchTunes Dashboard, choose TouchTunes | Contacts. The Contact TouchTunes
page opens.
2. Click the Contact the Music Department link.
3. In the Company’s Contact Information area, check that the contact information for your
company is correct.
You can also add the contact details for an alternate person in your company (such as your
jukebox music manager) if you want TouchTunes to contact them about this music request
instead.
4. If necessary, fill in the required details for the alternate contact person in the Other Contact
Information... area.
Next, fill in the details for your music requests in the Request area. You use this area to list the
songs, albums or artists that you want added to the TouchTunes music library.
5. Do the following in the Your Request area:
• Use the list to indicate whether the music you are requesting is a song, an album or an artist.
• Enter the name of the song, artist or album in the field provided.
a
b
Figure 21 a) List for setting type of music requested b) Field for entering name of song, artist or album requested
6. To create additional music requests, click Add Another Music Request and then repeat the
previous step until all of your music requests appear in the Requests area.
7. Click Send to submit your request(s).
The Dashboard confirms that your music request is sent to the TouchTunes music
department. You receive an e-mail from TouchTunes indicating the status and result of your
request.
63
Locating Music and Sending it to Jukeboxes Using the Dashboard
To check the status of your music requests:
1. In the TouchTunes Dashboard, choose My Music| Music Requests.
Your Music Requests page appears, showing all of your current and past music requests with
their status.
Figure 22 Your Music Requests page
The status column shows the current state of your music requests:
• New requests have not been reviewed by the TouchTunes music department.
• Pending requests are being reviewed by the TouchTunes music department.
• Completed requests have been reviewed by the TouchTunes music department.
You can check on any completed request to see if the requested music was added to the
TouchTunes music library.
2. (Optional) Click a completed request in the list to view its results.
64
Adding Music for Jukeboxes to the Music Cart
A page appears, showing the result of your music request. If music you requested was added
to the TouchTunes music library, it appears in the Music Added area so you can transfer it to
your jukeboxes.
Figure 23
3. (Optional) Export the search results from music request to any of the file formats listed at the
bottom of the Music Added area.
4. Add the requested music to the Music Cart so you can transfer it to your jukeboxes. See
“Adding Music for Jukeboxes to the Music Cart” on page 65.
Adding Music for Jukeboxes to the Music Cart
What is the Music Cart? How do I move songs from a music
search or a pre-compiled list in the TouchTunes Dashboard
to the Music Cart?
The Music Cart is a storage area where you keep selected songs or albums until you are ready to
download them to your jukeboxes. As you find music that you want to make available on your
jukeboxes, you add it to the Music Cart. Once you have collected all of the music for download
in the Music Cart, you transfer it from the Music Cart to your jukeboxes using the procedures in
the next section (Downloading Music from the Music Cart to a Jukebox).
To add music for your jukeboxes to the Music Cart:
1. Find the music you want to distribute to your jukeboxes through keyword searches, music ID
searches, pre-compiled music lists or music requests.
2. Select the music you want to add to the Music Cart by doing one of the following:
65
Locating Music and Sending it to Jukeboxes Using the Dashboard
• Select the songs, albums or artists individually in the search results or music list.
• Click Select All to select all songs, albums or artists in the search results or music list.
Figure 24 Selected music to be added to the Music Cart
3. Click Add to Cart.
The selected music is added to the Music Cart. When you add music to the Music Cart, a
message appears on the current page in the Dashboard to confirm the number of songs
added and the Music Cart icon in the Quick Links area is updated to show the number of
songs currently in the Music Cart.
Figure 25 Songs added to Music Cart
4. Do either of the following:
• To add other more music to the Music Cart, repeat steps 1 to 3.
66
Downloading Music from the Music Cart to a Jukebox
• To download music from the Music Cart to your jukeboxes, see “Downloading Music from
the Music Cart to a Jukebox” on page 67.
• To download music from the Music Cart to your USB device, see “Transferring Pending Music
and Software to a USB Device” on page 70.
Downloading Music from the Music Cart to a Jukebox
How do I use the TouchTunes Dashboard to download
music to my jukeboxes?
You can transfer music from the Music Cart to any of your jukeboxes using the TouchTunes
Dashboard. If any of your jukeboxes are equipped with TuneCentral, you can also transfer music
directly to the TuneCentral hard drive.
To transfer music from the Music Cart to a jukebox:
1. Access the Music Cart by doing one of the following:
• Click the Music Cart icon in the Quick Links area.
• Choose My Music | Music Cart.
The Music Cart page appears. You use this page to view the current contents of the Music
Cart, as well as to transfer music to your jukeboxes.
Figure 26 Music Cart page
The left side of the Music cart page shows the current contents of your Music Cart, while the
right side of the page shows a list of your jukeboxes.
2. Select the music to be transferred in the Your Music Cart area by doing one of the following:
67
Locating Music and Sending it to Jukeboxes Using the Dashboard
• Select the songs, albums or artists individually.
• Click Select All to select all of the songs in the Music Cart.
Figure 27 Songs in Music Cart selected for transfer to jukebox(es)
3. (Optional) Enable Remove the Selected Songs from the Cart After a Successful Operation
if you want to automatically delete the songs from your Music Cart once they have been
transferred to the jukebox.
You normally enable this option to keep your Music Cart organized as you transfer music to
your jukeboxes. However, you should disable this option if:
• You want to transfer a subset of the selected songs to other jukeboxes later.
• You want to save the Music Cart to reuse it in a future Dashboard session.
Tip: You can remove music from the Music Cart manually by choosing the songs to be deleted
and then clicking Remove From Cart.
Next, choose the jukeboxes where you want the selected music to be transferred. If any of
your NextGen jukeboxes have TuneCentral installed, set whether you want to transfer music
to the local drive or the TuneCentral drive.
Note: Gen 3 jukeboxes do not have a separate TuneCentral unit. For Gen 3 jukeboxes,
TuneCentral refers to the TouchTunes central music repository.
68
Downloading Music from the Music Cart to a Jukebox
4. If necessary, choose Send to Jukebox or Send to TuneCentral to determine the drive to
which the music will be transferred.
Note: The Send to TuneCentral option is available only on NextGen jukeboxes, and only those
equipped with a TuneCentral unit.
5. Select the jukebox(es) where the selected music from the Music Cart will be transferred.
You can transfer the same set of music from the Music Cart to as many jukeboxes as you like.
Click Select All to transfer the selected music to all your jukeboxes (or to all jukeboxes
equipped with TuneCentral).
6. Click Order Songs to initiate the music transfer to the jukebox(es).
The following indicators appear on the Music Cart page to confirm the music transfer:
• A message appears at the top of the page.
• The color of the selected jukebox(es) changes to show the jukebox where the music is going.
• The value in the Orders column for the jukebox is incremented by the number of songs
being transferred.
69
Locating Music and Sending it to Jukeboxes Using the Dashboard
• The value in the Capacity column for the jukebox is recalculated to show the remaining
capacity of the jukebox.
Figure 28 Confirmation of transfer from Music Cart to jukebox
Music transfers appear to occur instantly in the TouchTunes Dashboard. While this is generally
the case with broadband-connected jukeboxes, jukeboxes that connect through a dial-up
connection only receive their music the next time they connect to the TouchTunes server. This
may result in a lag of up to 24 hours from the time you initiate the music transfer to the time
when the music is downloaded from the TouchTunes server to the jukebox. If you have a fast
Internet connection to the Dashboard, you may choose to transfer the pending update to a
USB device, then physically connect the device to the jukeboxes on your route.
Note: The number of songs that can be downloaded per night to a jukebox connecting to the
TouchTunes server over a dial-up network connection may be limited. Using a USB device is
an excellent to transfer more songs to these jukeboxes.
Transferring Pending Music and Software to a USB Device
What is the USB Content Updater? How do I use the USB
Content Updater to update my jukeboxes?
The USB Content Updater is an online tool that enables you to download software and music
updates from the TouchTunes’ Operator Dashboard to a USB device. You can then bring this
70
Transferring Pending Music and Software to a USB Device
device with you to locations and transfer its contents directly to a Gen 3 jukebox through its USB
port.
The Updater is capable of creating updates for multiple jukeboxes on a single USB device. If a
USB device contains updates for more than one jukebox, the USB Content Updater
automatically identifies which jukebox the device has been plugged into and updates that
jukebox accordingly.
Caution: It is important never to interrupt an in-progress jukebox software upgrade.
Doing so may render a jukebox hard drive unusable and require it to be reformatted by
TouchTunes.
If you have broadband access to the Operator Dashboard, but maintain jukeboxes that are
connected to the Internet through a slower, dial-up connection, your business can benefit
considerably from the functionality of the USB Content Updater.
The USB Content Updater can send the following to a USB device:
• The latest Gen 3 jukebox software available
• Songs missing from Morph operations
• Songs from a Hard Drive swap
• Popular NextGen (Gen 2) songs, so you can quickly transfer them to a new Gen 3 hard drive
• Pending songs:
• requested from patrons through TuneCentral
• ordered to local jukeboxes by operators
• ordered to local jukeboxes by TouchTunes
The USB Content Updater does not:
• Download TouchTunes music catalogs
• Transfer content to jukeboxes running NextGen (Gen 2) software or Gen 3 software prior to
release 3.3.1
• Work with USB devices older than the 2.0 standard
To transfer pending songs, NextGen songs from your previous hard drive and software
updates to a USB device:
1. Plug your USB device into one of your computer’s USB slots.
2. Delete any files on your USB device and ensure its file system is formatted as FAT32.
3. At the top of the Operator Dashboard page, click the My Jukeboxes tab, then the USB
Content Updater tab.
71
Locating Music and Sending it to Jukeboxes Using the Dashboard
4. From the Select Gen 3 jukeboxes to update area in the left panel, select the Gen 3 jukeboxes
you will be updating on location with the USB Content Updater.
Figure 29 Selecting Gen 3 jukeboxes to update
Note: Remember that the USB Content Updater can store updates for multiple jukeboxes on a
single USB device, so long as you have adequate space on the device.
5. Continue to scroll down the left side of the page to the Select NextGen jukeboxes to
prepare for a Gen 3 upgrade area. Select any NextGen (Gen 2) jukeboxes that you intend to
upgrade to Gen 3 in the near future or have recently upgraded to Gen 3.
Figure 30 Selecting NextGen (Gen 2) jukeboxes that have been or will soon be upgraded to Gen 3
72
Transferring Pending Music and Software to a USB Device
6. On the right side of the page, click Download Content Updates.
Figure 31 Initiating the USB Content Updater
The TouchTunes USB Content Updater will load.
Figure 32 The USB Content Updater
Note: The USB Content Updater is a Java applet that requires a minimum version of Java 1.6 to
be installed on your computer. If the USB Content Updater fails to load, ensure you have the
most recent version of Java installed on your computer and that your browser supports it.
7. In the Step 1 area, check any of the following options to add them to the update package:
73
Locating Music and Sending it to Jukeboxes Using the Dashboard
• Include software update will include the latest TouchTunes jukebox software in the update
package
• Include pending music will include songs you have ordered from the Operator Dashboard
• Include Nextgen Top Songs will add the most popular NextGen (Gen 2) songs from the
jukeboxes you selected in Step 5. On location, you will be able to quickly restore these
NextGen songs to the same jukebox after it is upgraded to Gen 3. You can add these songs
to a USB device before or after you have converted a NextGen jukebox to Gen 3.
Figure 33 Selecting the content to include in the update package
8. Create a new folder on your computer’s hard drive where you can temporarily store the USB
Content Updater files.
9. In the Step 2 area of the USB Content Updater, click the Browse button, then browse to the
folder you created on your hard drive.
74
Transferring Pending Music and Software to a USB Device
10.Click Open from the browse window to begin the transfer of the update files to the folder on
your hard drive.
Figure 34 Saving the update package to a temporary directory on a hard drive
11.When the USB Content Updater status reads "Completed", the files have been successfully
transferred from the Operator Dashboard to your temporary hard drive folder.
Figure 35 A successfully created update package
12.Transfer the files in the temporary hard drive on your computer to your USB device. Note that
the files must be transferred to the root folder of your USB device in order for your jukebox to
75
Locating Music and Sending it to Jukeboxes Using the Dashboard
recognize the update. This means the files on your USB device must not be located in any
folder or subfolder on the USB device.
Figure 36 The right way and wrong way to store the update package on a USB device
Updating a Jukebox on Location with the USB Content Updater
Once you have created an update package on a USB key, you are ready to bring that key to your
locations, and transfer the content to your jukebox or jukeboxes.
Note: The USB Content Updater is compatible with Gen 3 jukeboxes running Gen 3 software
release 3.3.1 or higher. If your jukebox is running software older than this release, you will need
to contact TouchTunes Technical Support about updating your jukebox for you. Once your
software has been updated, you will be able to use the USB Content Updater for any future
software upgrades.
To update your jukeboxes using your USB device:
1. Open your jukebox so you can access its USB ports.
The USB ports are located on the jukebox’s MJS or JCB unit, the main hardware component
within your jukebox that houses its hard drive and CPU. You can use any of the available USB
slots for the connection.
76
Updating a Jukebox on Location with the USB Content Updater
2. With the jukebox powered on and displaying the main album selection screen (below), plug
the USB device into a USB port.
Figure 37 The main customer screen on a Gen 3 jukebox
77
Locating Music and Sending it to Jukeboxes Using the Dashboard
The USB device is mounted automatically by the jukebox and after a few moments, the USB
Content Updater screen appears.
Figure 38 A jukebox’s USB Updater page
3. Touching the screen, select whether to update the jukebox’s music, its software, or both.
4. Touch Install to begin the music and/or software update.
Caution: It is important never to interrupt an in-progress jukebox software upgrade.
Doing so may render a jukebox hard drive unusable and require it to be reformatted by
TouchTunes.
The update time will vary depending on the number of songs to transfer to your jukebox and
whether or not you are upgrading the jukebox’s software as well. The jukebox will reboot
automatically if you update its software.
Reviewing Music Transfers
How can I tell which songs have recently been downloaded to, or are
pending download to a jukebox through the TouchTunes Dashboard?
You can use the TouchTunes Dashboard to review upcoming or completed music downloads to
your jukebox(es). You use this feature to respond to questions from location owners about the
music requests for their jukebox.
• To view upcoming music transfers, see “To view upcoming music transfers to your jukeboxes:”
on page 79.
78
Reviewing Music Transfers
• To view music transfers that have already occurred, see “To review completed music transfers
to your jukeboxes:” on page 80.
If you are troubleshooting issues with music downloads initiated through the TouchTunes
Dashboard, keep in mind that transfers involve three separate components: the TouchTunes
Dashboard, the TouchTunes server and your jukebox(es). You use the Dashboard to tell the
TouchTunes server what music you want and to which jukebox(es) it should go. However, the
actual transfer is managed between the TouchTunes server and your jukebox. In most cases,
music download problems are due to jukebox communications problems, not with the
TouchTunes Dashboard or server.
To view upcoming music transfers to your jukeboxes:
1. In the TouchTunes Dashboard, choose My Music | Pending.
The Pending Transactions page appears. Use this page to view the upcoming music transfers
to your jukeboxes.
2. If necessary, select the jukebox whose music transfers you want to view from the Choose
Another Jukebox list.
Songs to be transferred to the jukebox appear.
Figure 39 List of songs to send to a jukebox
You can use the controls on this page to remove songs from the music transfer, as well as to
set the priority in which songs should be downloaded to the jukebox.
3. (Optional) To remove songs from the download, select the songs to be removed from the
download list and then click Cancel.
79
Locating Music and Sending it to Jukeboxes Using the Dashboard
4. To control the order in which songs are downloaded, select the higher-priority songs from the
download list and then click High Priority.
The status of the selected songs are set to High Priority. High priority songs are downloaded
before all other songs when the jukebox connects to the TouchTunes server.
5. (Optional) When you change the song download priority on a single jukebox, you will now be
prompted to change the priority for the selected songs on your other jukeboxes as well. This
enables you to quickly send specific songs to your jukeboxes more quickly than others.
To review completed music transfers to your jukeboxes:
1. In the TouchTunes Dashboard, choose My Music | History.
The Transactions History page appears. Use this page to view completed music transfers to
your jukeboxes.
Figure 40 Transactions History page
2. In the Transactions History area, do the following to select the music transfers that you want
to review:
• Select the jukebox whose music transfers you want to view from the Choose Another
Jukebox list.
• Select the starting date from which you want to view the music transfer history using the
View Transactions Executed Since... list.
80
Reviewing Music Transfers
• (Optional) Set the number of songs to display on each page.
a
b
c
Figure 41 a. List of jukeboxes b. List of starting dates available c. Number of transferred songs to display on each page
Note: If the selected jukebox has no transaction history, the View Transactions Executed
Since... list is empty.
81
Locating Music and Sending it to Jukeboxes Using the Dashboard
Songs that have been transferred to the jukebox since the starting date appear.
Figure 42 List of songs transferred to the jukebox
3. (Optional) Export the list of transferred music to any of the file formats listed at the bottom of
the area.
82
Managing Music on Jukeboxes Using
the TouchTunes Dashboard
This chapter explains how you can track and manage the music on a jukebox
using the TouchTunes Dashboard.
Contents
Overview . . . . . . . . . . . . . . . . . . . . . . . . . . . . . . . . . . . . . . . . . . . . . . . . . . . . . . . . . . . . . . . . .
Viewing Music on a Jukebox . . . . . . . . . . . . . . . . . . . . . . . . . . . . . . . . . . . . . . . . . . . . . . .
Tracking Song Popularity . . . . . . . . . . . . . . . . . . . . . . . . . . . . . . . . . . . . . . . . . . . . . . . . . .
Removing Music from a Single Jukebox . . . . . . . . . . . . . . . . . . . . . . . . . . . . . . . . . . . .
Removing Music from Multiple Jukeboxes . . . . . . . . . . . . . . . . . . . . . . . . . . . . . . . . .
83
84
86
89
91
Overview
You can use the TouchTunes Dashboard to help you perform music management tasks on your
jukebox, such as identifying popular songs or removing music from all of your jukeboxes. Using
the Dashboard for these tasks allows you to centralize and streamline your music management
in a single tool that is accessible anywhere that you have an Internet connection.
In this chapter, you will find answers to the following questions:
• “How do I find out what songs are on a jukebox using the TouchTunes Dashboard?” (p. 84)
• “Can I find out what songs are being played on a jukebox through the TouchTunes
Dashboard?” (p. 86)
• “How do I delete songs on a jukebox using the TouchTunes Dashboard?” (p. 89)
83
Managing Music on Jukeboxes Using the TouchTunes Dashboard
• “Can I use the TouchTunes Dashboard to delete a song (or songs) from multiple jukeboxes
simultaneously?” (p. 91)
Viewing Music on a Jukebox
How do I find out what songs are on a jukebox using the
TouchTunes Dashboard?
You can use the TouchTunes Dashboard to view the songs that are currently loaded on a jukebox.
You can also use this list to identify the most popular songs on the jukebox, as well as those
songs to be deleted from the jukebox.
To view music on a jukebox:
1. In the TouchTunes Dashboard, choose My Music | Jukebox Content.
The Jukebox Content page appears. You use this page to view and manage music on any of
your jukeboxes.
Figure 8 Jukebox Content page
84
Finding Duplicate Songs on Jukebox
The Search Results area shows the songs currently loaded on the selected jukebox (called
the content list), as well as any songs that are scheduled for download to the jukebox. Use the
following table to interpret the information displayed for each song in this area.
Column:
Song
Song ID
Artist
Album
Year
Genre/Style
Received
Plays
Popularity
Last Played
Description:
Name of song
ID number for song
Artist name
Album name
Year that song was released
Music genre/style of song
Date that song was downloaded to the
jukebox
Number of plays for the song
Number of plays per day for the song, based
on the length of time the song has been on
the jukebox
Date and time when the song was last
played
2. If necessary, select the jukebox whose songs you want to view from the Choose Another
Jukebox list.
Finding Duplicate Songs on Jukebox
How do I find and remove duplicate songs on a jukebox?
Duplicate songs can accumulate on a jukebox over time. The Dashboard has a tool that helps
you find and remove duplicate songs to free up space for more music.
To find duplicate songs on a jukebox:
1. In the TouchTunes Dashboard, choose My Music | Jukebox Content.
2. Select a jukebox from the drop-down menu and click the Duplicate Songs button.
85
Managing Music on Jukeboxes Using the TouchTunes Dashboard
This will produce a list of songs by the same artist, with the same title. The resulting list can
be filtered to show all duplicates, or just the songs that have an explicit or edited counterpart.
Sort duplicate songs on a jukebox and use filters to easily remove only the ones you want
• To delete songs from this page, select them with the checkbox on the left, then click Remove
Selected.
Tracking Song Popularity
Can I find out what songs are being played on a jukebox
through the TouchTunes Dashboard?
You can use the TouchTunes Dashboard to find out what the most popular songs (those that are
played the most) are for any jukebox. You can access a chart in the Dashboard that shows the
most popular songs over the previous 30, 60 and 120 days for your jukeboxes. You can also view
a list of the most popular songs on a jukebox for each of these time periods. You can use this
feature to identify songs that are increasing in popularity across several jukeboxes so you can
transfer these songs to other jukeboxes and maximize your revenues.
Tip: You can also use the Jukebox Content page to identify popular songs on a jukebox.
Reordering the content list for a jukebox on this page by the Popularity column shows you the
86
Tracking Song Popularity
most popular songs. To access the Jukebox Content page, see “Viewing Music on a Jukebox” on
page 84.
To track historical song popularity:
1. In the TouchTunes Dashboard, choose My Music | Top Songs.
The Top Songs page appears. The summary chart on this page shows the number the popular
songs over the last 30, 60 and 90 days for each of your installed jukeboxes (or TuneCentral
installations).
Figure 9 Top Songs page
Each statistic in the chart is a link to a list of the most popular songs for all of your jukeboxes
or TuneCentrals, or to each jukebox or TuneCentral. You can follow these links to identify
songs that have been steadily rising in popularity on a jukebox (or on several jukeboxes) that
should be available on your other jukeboxes.
Note: The top song statistics listed for a jukebox and TuneCentral are independent of each
other. This means that the list of top songs for a jukebox excludes the top songs on its
TuneCentral and vice-versa.
87
Managing Music on Jukeboxes Using the TouchTunes Dashboard
2. Follow one of the links in the chart.
3. A list showing the top songs for the jukebox or TuneCentral appears. You can use this list to
select popular songs on one jukebox (or TuneCentral) that you want to transfer to other
jukeboxes (or TuneCentrals), as well as to export the list to an external file.
Figure 10 Top Songs listing of a jukebox for the previous 30 days
4. (Optional) Re-order the songs in the list by clicking a column heading so you can to identify
increasingly popular songs that should be available on other jukeboxes.
Tip: The arrow icons beside the column heading shows whether the list is in ascending or
descending order.
88
Removing Music from a Single Jukebox
5. Select songs in the list that you want to transfer to other jukeboxes, and then click Add to
Cart.
Figure 11 Adding Top Songs to the Cart
6. The selected songs in the list are transferred to the Music Cart. You can now transfer these
songs to other jukeboxes; see “Downloading Music from the Music Cart to a Jukebox” on
page 67.
7. (Optional) Export the list of songs for the jukebox from the TouchTunes Dashboard to any of
the file formats listed at the bottom of the Search Results area.
Removing Music from a Single Jukebox
How do I delete songs on a jukebox using the TouchTunes
Dashboard?
You can use the TouchTunes Dashboard to delete songs from a jukebox. You remove songs from
a jukebox either when they are not played anymore and/or when you need to free space for new
songs.
Tip: You can identify the least popular songs on a jukebox by using the Popularity column on the
Jukebox Content page. See “Viewing Music on a Jukebox” on page 84.
The following procedure explains how you remove songs from a single jukebox. You can also use
the TouchTunes Dashboard to remove songs from multiple jukeboxes; see “Removing Music
from Multiple Jukeboxes” on page 91.
To remove music from a jukebox:
1. View the content list for a jukebox. See “Viewing Music on a Jukebox” on page 84.
89
Managing Music on Jukeboxes Using the TouchTunes Dashboard
2. Select the song(s) to be removed from the jukebox in the Search Results area.
Figure 12 Songs to be deleted from the jukebox
3. Click Remove Selected.
You are prompted to confirm the removal of the selected songs.
4. When prompted, click OK.
The songs are set to be deleted from the jukebox.
Tip: You can view a list of the songs to be deleted from the jukebox from the Pending
Transactions page in the Dashboard, in case you deleted a song by accident.
90
Removing Music from Multiple Jukeboxes
The Jukebox Content page reappears, confirming the removal of the songs. The selected
songs are also removed from the Search Results area on the page.
Figure 13 Confirmation of the songs removed
Music deletions appear to occur instantly in the TouchTunes Dashboard. While this is
generally the case with broadband-connected Gen 3 jukeboxes, jukeboxes that connect
through a dial-up connection only delete the selected music the next time they connect to
the TouchTunes server. This may result in a lag of up to 24 hours from the time you initiate the
removal to the time when the music is deleted from the jukebox.
Removing Music from Multiple Jukeboxes
Can I use the TouchTunes Dashboard to delete a song (or
songs) from multiple jukeboxes simultaneously?
You can use the TouchTunes Dashboard to remove the same song (or songs) from multiple
jukeboxes. Using this feature can save you a lot of time if you manage music for multiple
jukeboxes based on a standard list of songs or a pre-compiled music list, such as the Billboard
Magazine lists.
For example, assume that you manage five jukeboxes for a local chain of family restaurants.
Every week, you update the music on these jukeboxes with the latest Billboard Top 40 list to
ensure that the jukeboxes for all of these restaurants are always stocked with the most popular
music. To do this, you first remove the old Billboard Top 40 list from all of the jukeboxes using the
following procedure. Once this music is removed from all of the jukeboxes, you add the new
Billboard Top 40 music list to the jukeboxes using the procedures in “Adding Songs from
Compiled Lists” on page 58.
91
Managing Music on Jukeboxes Using the TouchTunes Dashboard
To remove music from multiple jukeboxes:
1. View the contents of the Music Cart by doing either of the following:
• Click the Music Cart icon in the Quick Links area.
• Choose My Music | Music Cart.
The Music Cart page appears. The left side of this page shows the current contents of your
Music Cart, while the right side of the page shows a list of your jukeboxes.
Figure 14 Music Cart page
2. Do one of the following:
• If your Music Cart is empty, go to step 3 to find the music that you want to remove from your
jukeboxes.
• If your Music Cart contains songs, continue to the next step to empty it out before
continuing.
Although the Music Cart is usually used to distribute songs to jukeboxes, you can also use it
to remove a song or set of songs from multiple jukeboxes. However, you should empty the
Music Cart beforehand to prepare for this operation.
3. (Optional) Clean out the contents of the Music Cart by clicking Select All, then Remove From
Cart, and then clicking OK when prompted to all the songs in the Cart.
The Music Cart is now empty.
4. Do one of the following to find the music you want to remove from your jukeboxes:
• Find the song(s) on one jukebox that you want removed from other jukeboxes using the
procedure in “Viewing Music on a Jukebox” on page 84.
• Find the song(s) on multiple jukeboxes that you want to remove using the procedure in
“Viewing Music on a Jukebox” on page 84. DUPE
92
Removing Music from Multiple Jukeboxes
• Find the song(s) or pre-compiled music list that you want removed from your jukeboxes
using any of the search methods listed in the chapter “Locating Music and Sending it to
Jukeboxes Using the Dashboard” on page 49.
5. Add the songs to be removed to the Music Cart, using the procedure in “Adding Music for
Jukeboxes to the Music Cart” on page 65.
The Music Cart now contains the songs that you want deleted from your jukeboxes.
Figure 15 Music to be removed from jukeboxes in Music Cart
6. (Optional) Enable the Remove the selected songs... option to empty the Music Cart
automatically once the operation is completed.
Next, select the jukeboxes from which you want to remove the songs in the cart.
93
Managing Music on Jukeboxes Using the TouchTunes Dashboard
7. Select the jukebox(es) from which the selected music in the Music Cart will be removed.
8. You can delete the same set of music in the Music Cart from as many jukeboxes as you like.
Click Select All to remove the selected music from all of your jukeboxes.
Note: You cannot remove music from the TuneCentral drive of a jukebox.
9. Click Delete Songs to initiate the removal of the songs from the jukebox(es).
You are prompted to confirm the removal of the selected songs.
10.When prompted, click OK.
The songs are set to be deleted from the jukeboxes and the following indicators appear on
the Music Cart page to confirm this operation:
• A message appears at the top of the page.
• The color of the selected jukebox(es) changes to show the jukebox from which the music is
being removed.
94
Removing Music from Multiple Jukeboxes
• The value in the Delete column for the jukebox is incremented by the number of songs
being removed.
• The value in the Capacity column for the jukebox is recalculated to show the remaining
capacity of the jukebox.
Figure 16 Confirmation of deletion of songs from multiple jukeboxes
Tip: You can view a list of the songs to be deleted from the jukebox from the Pending
Transactions page in the Dashboard, in case you deleted a song by accident.
Music deletions appear to occur instantly in the TouchTunes Dashboard. While this is
generally the case with broadband-connected Gen 3 jukeboxes, jukeboxes that connect
through a dial-up connection only delete the selected music the next time they connect to
the TouchTunes server. This may result in a lag of up to 24 hours from the time you initiate the
removal to the time when the music is deleted from the jukebox.
95
Managing Music on Jukeboxes Using the TouchTunes Dashboard
96
Managing Jukebox Income Using the
TouchTunes Dashboard
This chapter explains how you can set up your revenue model for a location
through the TouchTunes Dashboard, track how much revenue is being
brought in by a location, and manage split values between you and a location
owner.
Contents
Overview . . . . . . . . . . . . . . . . . . . . . . . . . . . . . . . . . . . . . . . . . . . . . . . . . . . . . . . . . . . . . . . . . 97
Configuring the Revenue Model for a Jukebox . . . . . . . . . . . . . . . . . . . . . . . . . . . . . 98
Reviewing Jukebox Revenue . . . . . . . . . . . . . . . . . . . . . . . . . . . . . . . . . . . . . . . . . . . . . . 114
Overview
A revenue model is a term used to refer to the set of rules that determine how a jukebox earns
its income. The two general components of a revenue model include:
• Income derived from customers paying to play songs or use services (such as TuneCentral) on
a jukebox.
• Expenses required to run the jukebox (also called splits or off-the-top fees), such as the amount
paid to a location owner to cover costs like electricity, as well as their return for the space in
their establishment provided for the jukebox.
You can use the TouchTunes Dashboard to set up a revenue model for each of your jukeboxes,
as well as monitor statistics that show how well your model is working. Using the Dashboard for
these tasks allows you to quickly readjust your jukebox’s revenue model and maximize your
income for a location.
For example, assume that you install one of your jukeboxes in a new downtown bar. To generate
interest around the jukebox at this location, you set the price per song at a low level to
97
Managing Jukebox Income Using the TouchTunes Dashboard
encourage people to use the jukebox. Over the next month, you follow revenue- and playrelated statistics for the jukebox using the Dashboard and notice that it is now being used
throughout the day. This indicates that the bar’s clientele are using the jukebox more regularly.
Since you now feel more certain about the long-term success of the jukebox at this location, you
raise the price per song to maximize the income this jukebox is generating.
In this chapter, you will find answers to the following questions:
• “How do I use the TouchTunes Dashboard to set up the revenue model (credit rules, Play Next!
& TuneCentral credit settings, off-the-top fees and billing splits) for a jukebox?” (p. 98)
• “What are credits and credit rules? How do I set up the credit rules for a jukebox in the
TouchTunes Dashboard?” (p. 99)
• “How do I set the cost of Play Next! and TuneCentral through the TouchTunes Dashboard?” (p.
106)
• “Can I set up splits and off-the-top values for my collections using the TouchTunes Dashboard?”
(p. 111)
• “Can I view, track and verify location earnings through the TouchTunes Dashboard?” (p. 114)
• “How do I view revenue for my jukeboxes using the TouchTunes Dashboard?” (p. 115)
• “How do I view the revenue in my jukeboxes waiting to be collected using the TouchTunes
Dashboard?” (p. 120)
• “How do you track the number of plays for a jukebox through the TouchTunes Dashboard?” (p.
122)
• “Can I check the location take for a jukebox in the TouchTunes Dashboard?” (p. 123)
Configuring the Revenue Model for a Jukebox
How do I use the TouchTunes Dashboard to set up the revenue model
(credit rules, Play Next! & TuneCentral credit settings, off-the-top fees and
billing splits) for a jukebox?
You use the TouchTunes Dashboard to configure every aspect of the revenue model for your
jukeboxes, including the prices for credits and the cost for using Play Next! or TuneCentral. Once
your jukebox is operating, you use the Dashboard to adjust its revenue model and maximize
your revenue opportunities for the location.
The following procedure shows the general steps involved in setting up a revenue model for a
jukebox. Follow these steps in order when you are setting up a jukebox for the first time. Once
the jukebox is running, you can perform any individual step at a later date to adjust its revenue
model.
To configure the revenue model for a jukebox:
1. Create or modify credit rules that determine the cost per jukebox credit for the location. See
“Setting Up the Credit Rules for a Jukebox” on page 99.
Jukebox credits are the “currency” required for customer to play songs, bump up their song’s
priority in the list or vote for popular music. You set up rules that define the exchange rate
between coinage (dollars and coins) and jukebox credits.
98
Configuring the Revenue Model for a Jukebox
2. Set the Play Next! and TuneCentral credit structure for the jukebox. See “Configuring Play
Next! and TuneCentral Credit Settings” on page 106.
Play Next! and TuneCentral are two of the most popular features on TouchTunes jukeboxes.
You use the Dashboard to configure the cost of these features for a jukebox to enhance
jukebox usage and revenue.
3. For Gen 3 jukeboxes, set the billing splits and off-the-top values for the jukebox to refine your
revenue model further. See “Setting Billing Splits and Off-The-Top Fees” on page 111.
Setting Up the Credit Rules for a Jukebox
What are credits and credit rules? How do I set up the credit
rules for a jukebox in the TouchTunes Dashboard?
All functions for a jukebox are priced in jukebox credits, which is a virtual currency used for
pricing and paying for services on a TouchTunes jukebox. Customers exchange their real money
for credits according to a pre-set exchange rate called a credit rule that you set for the jukebox.
The credit rule is the most critical component of a revenue model because it determines the
price of a song, and has a major resulting impact on the usage and profitability of a jukebox.
You can use the TouchTunes Dashboard to set up, review and modify the credit rule(s) for a
jukebox. Managing your credit rules using the Dashboard allows you to quickly adjust the
revenue model for a jukebox and maximize your revenue for a location. For example, you can
create or adjust a credit rule to increase usage of the jukebox, such as reducing the price of songs
during Happy Hour. You can also adjust credit rules to take advantage of special events that
attract many people to a location, such as Superbowl Sunday.
NextGen and Gen 3 jukeboxes have separate procedures for setting up credit rules through the
TouchTunes Dashboard.
• To set up credit rules on NextGen jukeboxes, see “To create or modify credit rules for NextGen
jukeboxes:” on page 99.
• To set up credit rules on Gen 3 jukeboxes, see “To modify the credit rule for Gen 3 jukeboxes:”
on page 103.
To create or modify credit rules for NextGen jukeboxes:
1. In the TouchTunes Dashboard, choose My Jukeboxes | Settings.
The Music & System Settings page appears, which is the default page for jukebox settings.
You use this page to select the jukebox that you want to configure.
99
Managing Jukebox Income Using the TouchTunes Dashboard
2. If necessary, select the jukebox whose credit rules you want to modify from the Choose
Another Jukebox list.
3. Choose Credits from the left-side menu.
The Credit Settings page appears. You use the controls on this page to create and manage the
credit rules for the jukebox, as well as to set the cost of using the Play Next! and promotional
credit settings.
Figure 9 Credit settings page
4. Navigate to the Credit Rules Sets area.
100
Configuring the Revenue Model for a Jukebox
This area shows the credit rules currently in place on a jukebox. The associated Schedule area
shows when each credit rule is used on the jukebox.
Figure 10 Credit Rules and Schedule area
Figure 11
NextGen jukeboxes include the following default credit rules:
• DEFAULT_SET: This is the default credit rule used unless otherwise indicated.
• Weekend: This is the credit rule set intended for use during the weekend.
• Happy Hour: This is the credit rule set intended for use during happy hour (typically 4 PM to
7 PM) on weekdays.
In some cases, you may see additional credit rules set up for a jukebox in this area. For
example, the jukebox in this example has a credit rule for the weekly Ladies’ Night event that
occurs every Wednesday evening at this location.
5. Do one of the following:
• To add a new credit rule, click Add Credit Rules Set and continue to the next step.
• To modify a credit rule, click [edit] beside the name of the rule and go to step 7.
• To remove a non-default credit rule, click Remove Rules Set and confirm the action when
prompted.
Note: Make sure you are deleting the right credit rule before confirming the deletion. You
cannot recover a credit rule once it is deleted.
101
Managing Jukebox Income Using the TouchTunes Dashboard
6. Enter the name for the new credit rule set in the Rules Set Name field.
Figure 12
Creating and naming a new credit rule
Tip: Use a descriptive name for a new credit rule as it cannot be renamed once the credit rule
is created.
Next, define the credit rule by setting exchange rates between coinage and jukebox credits.
You can set up to five exchange rates per credit rule to handle each major coinage
denomination (bill or coin) that may be used for the jukebox.
7. Use the controls in the New Credit Rules Set or Edit Credit Rules Set area(s) to define the
exchange rate between coinage and jukebox credits.
Figure 13 Exchange rates modified for an existing credit rule
When you are setting up credit rules, you must make sure that they are consistent, meaning
that each successive exchange rate in the rule provides at least the same exchange rate as the
previous one. You cannot save credit rules for a jukebox that do not meet this rule. To
understand this concept, consider the following two credit rules:
Coinage
amount:
$1
$5
$10
102
Credits for
inconsistent
credit rule:
2
9
24
Exchange Rate
(Cost/Credit) for
inconsistent
credit rule:
50 cents/credit
55 cents/credit
42 cents/credit
Credits for
consistent
credit rule:
2
12
26
Exchange Rate
(Cost/Credit) for
consistent credit
rule:
50 cents/credit
41 cents/credit
38 cents/credit
Configuring the Revenue Model for a Jukebox
Coinage
amount:
$20
Exchange Rate
Credits for (Cost/Credit) for
inconsistent inconsistent
credit rule: credit rule:
50
40 cents/credit
Exchange Rate
Credits for (Cost/Credit) for
consistent consistent credit
credit rule: rule:
54
37 cents/credit
The first credit rule is inconsistent because the cost per credit at $5 (55 cents/credit) is higher
than that the cost per credit for the previous entry, $1 (50 cents/credit). The second credit rule
is consistent because the cost per credit for each denomination is at least equal to the one
previously.
One guideline you can use to ensure consistency is to use the first line for the credit rule to
define the basic credit rule (the exchange rate for a single jukebox credit). This helps you
compare the cost per credit for successive exchange rates and ensure consistency for the rest
of the rule.
Tip: To maximize revenues, avoid setting your basic credit rule at less than two credits for $1
(each credit equals 50 cents).
8. Once you have set up all necessary exchange rates for the credit rule, save it by clicking
Create Credit Rules Set (for a new credit rule) or Save Credit Rules Set (for an existing credit
rule).
The credit rule set is saved and the new or updated rule appears in the Credit Rules Sets area.
If the jukebox is connected through a broadband connection, it is updated when you log out.
If the jukebox is connected through a dial-up connection, the credit rule is updated the next
time the jukebox connects to the TouchTunes server.
Tip: Make sure you explain the credit rule(s) for a jukebox to the location owner. This allows
the location owner to handle customer questions about the price of jukebox credits. Credit
rules also appear on the jukebox play screen for easy reference.
9. (Optional) Schedule when each credit rule is active on the jukebox using the controls in the
Schedule area. See “Scheduling Background Music and Attract Modes for a Jukebox” on
page 136.
To modify the credit rule for Gen 3 jukeboxes:
1. In the TouchTunes Dashboard, choose My Jukeboxes | Settings.
The Music Settings page appears, which is the default page for jukebox settings. You use this
page to select the jukebox that you want to configure.
103
Managing Jukebox Income Using the TouchTunes Dashboard
2. If necessary, select the jukebox whose credit rules you want to access from the Choose
Another Jukebox list.
3. Choose Money from the left-side menu.
The Gen 3 Money Settings page appears. You use the controls on this page to create and
manage the credit rules for the jukebox, as well as to configure its Play Next!, TuneCentral and
promotional credit settings.
Figure 14 Money Settings page for a Gen 3 jukebox
4. If necessary, navigate to the Credit Rules Sets area.
This area is where you set the default credit rule for the jukebox. Gen 3 jukeboxes support a
single default credit rule called the Operator Set.
104
Configuring the Revenue Model for a Jukebox
5. Click [edit] to modify the Operator Set credit rule.
The structure of this credit rule appears. Modify the credit rule by setting exchange rates
between coinage and jukebox credits. You can set up to five exchange rates per credit rule to
handle each major coinage denomination (bill or coin) that may be used for the jukebox.
6. Use the controls in the Edit Credit Rules Set area to define the exchange rate between
jukebox credits and coinage.
Figure 15 Exchange rates modified for the default credit rule
When you are setting up credit rules, you must make sure that they are consistent, meaning
that each successive exchange rate in the rule provides at least the same exchange rate as the
previous one. You cannot save credit rules for a jukebox that do not meet this rule. To
understand this concept, consider the following two credit rules:
Coinage
amount:
$1
$5
$10
$20
Credits for
inconsistent
credit rule:
2
9
24
50
Exchange Rate
(Cost/Credit) for
inconsistent
credit rule:
50 cents/credit
55 cents/credit
42 cents/credit
40 cents/credit
Credits for
consistent
credit rule:
2
12
26
54
Exchange Rate
(Cost/Credit) for
consistent credit
rule:
50 cents/credit
41 cents/credit
38 cents/credit
37 cents/credit
The first credit rule is inconsistent because the cost per credit at $5 (55 cents/credit) is higher
than that the cost per credit for the previous entry, $1 (50 cents/credit). The second credit rule
is consistent because the cost per credit for each denomination is at least equal to the one
previously.
One guideline you can use to ensure consistency is to use the first line for the credit rule to
define the basic credit rule (the exchange rate for a single jukebox credit). This helps you
compare the cost per credit for successive exchange rates and ensure consistency for the rest
of the rule.
105
Managing Jukebox Income Using the TouchTunes Dashboard
Tip: To maximize revenues, avoid setting your basic credit rule at less than two credits for $1
(each credit equals 50 cents).
7. Once you have set up all the exchange rates for the credit rule, save the rule by clicking Save
Credit Rules Set.
The (default) Operator Set credit rule is saved. If the jukebox is connected through a
broadband connection, it is updated immediately. If the jukebox is connected through a dialup connection, the credit rule is updated the next time the jukebox connects to the
TouchTunes server.
Figure 16 Updated credit rule applied for the TouchTunes jukebox
Configuring Play Next! and TuneCentral Credit Settings
How do I set the cost of Play Next! and TuneCentral through
the TouchTunes Dashboard?
Play Next! and TuneCentral are two premium TouchTunes jukebox features that require
additional credits to access. Play Next! makes the selected song the next song played in the
queue, while TuneCentral allows access to a larger library of songs than what is available on the
standard hard drive of the jukebox.
You can set the cost for Play Next! and TuneCentral using the TouchTunes Dashboard. Using the
Dashboard for this allows you to modify the costs for these services and maximize revenue for a
jukebox without having to visit the location.
NextGen and Gen 3 jukeboxes have separate procedures for configuring Play Next! and
TuneCentral costs through the TouchTunes Dashboard.
• To set the credits required for Play Next! and TuneCentral on a NextGen jukebox, see “To
configure Play Next! credit settings for a NextGen jukebox:” on page 106 and/or “To configure
TuneCentral credit settings for a NextGen jukebox:” on page 108.
• To set the credits required for Play Next! and TuneCentral on a Gen 3 jukebox, see “To configure
Play Next! and TuneCentral credit settings for a Gen 3 jukebox:” on page 109.
To configure Play Next! credit settings for a NextGen jukebox:
1. In the TouchTunes Dashboard, choose My Jukeboxes | Settings.
The Music & System Settings page appears, which is the default page for jukebox settings. You
use this page to select the jukebox that you want to configure.
106
Configuring the Revenue Model for a Jukebox
2. If necessary, select the NextGen jukebox whose Play Next! credit settings you want to access
from the Choose Another Jukebox list.
3. Choose Credits from the left-side menu.
The Credit Settings page appears. You use this page to set the cost of using Play Next! on the
jukebox.
Figure 17 Credit settings page for a Gen 3 jukebox
4. Enable Play Next! to activate this feature on the jukebox.
When this option is unchecked, the Play Next! feature is not available on the jukebox.
5. Use the Surcharge list to set the additional cost in credits to use Play Next!.
Figure 18 Play Next! enabled and cost set to 2 credits
107
Managing Jukebox Income Using the TouchTunes Dashboard
The Play Next! Surcharge list sets the additional cost in credits for using this feature. For
example, if the cost to play a song on the jukebox is 1 credit, and the Play Next! surcharge is 2
credits, the total cost for having the song play next is 3 credits.
6. Click Accept Changes to save the Play Next! credit settings for the jukebox.
The Play Next! credit settings for the jukebox are updated.
To configure TuneCentral credit settings for a NextGen jukebox:
1. In the TouchTunes Dashboard, choose My Jukeboxes | Settings.
The Music & System Settings page appears, which is the default page for jukebox settings. You
use this page to select the jukebox that you want to configure.
2. If necessary, select the jukebox whose TuneCentral credit settings you want to access from
the Choose Another Jukebox list.
3. Navigate to the TuneCentral Feature area on the page.
4. Do the following to configure the TuneCentral for the jukebox:
• If necessary, enable TuneCentral to activate this feature on the jukebox.
• Use the Price list to set the additional cost in credits for playing a song on TuneCentral.
• If necessary, enable Daily Update to update TuneCentral during the daily communications
period between the jukebox and the TouchTunes server.
Figure 19 TuneCentral enabled with the cost set to 2 credits
108
Configuring the Revenue Model for a Jukebox
The TuneCentral Price list sets the additional cost in credits for using this feature. For example,
if the cost to play a song on the jukebox is 1 credit, and the cost for using TuneCentral is 3
credits, the total cost for having the song play next is 4 credits.
5. Click Accept Changes to save the TuneCentral credit settings.
The TuneCentral credit settings for the jukebox are updated.
To configure Play Next! and TuneCentral credit settings for a Gen 3 jukebox:
1. In the TouchTunes Dashboard, choose My Jukeboxes | Settings.
The Music & System Settings page appears, which is the default page for jukebox settings.
You use this page to select the jukebox that you want to configure.
2. If necessary, select the jukebox whose Play Next! and TuneCentral settings you want to access
from the Choose Another Jukebox list.
3. Choose Money from the left-side menu.
109
Managing Jukebox Income Using the TouchTunes Dashboard
The Gen 3 Money Settings page appears. You use the controls on this page to configure its
Play Next! and TuneCentral credit settings, as well as manage the credit rules for the jukebox.
Figure 20 Gen 3 Money Settings page for a Gen 3 jukebox
4. In the Play Next! area, do the following to set the cost of using the Play Next! feature:
• If necessary, enable Play Next! to activate this feature on the jukebox.
• Use the Surcharge list to set the additional cost in credits to use Play Next!.
Figure 21 Play Next! enabled and cost set at 2 credits
When the Play Next! option is unchecked, the Play Next! feature is not available on the
jukebox. The Play Next! Surcharge list sets the additional cost in credits for using this feature.
For example, if the cost to play a song on the jukebox is 1 credit, and the Play Next! surcharge
is 2 credits, the total cost for having the song play next is 3 credits.
5. Set the additional cost to use TuneCentral (in credits) using the Surcharge list in the
TuneCentral area.
Figure 22 TuneCentral cost set to 2 credits
110
Configuring the Revenue Model for a Jukebox
The TuneCentral Surcharge list sets the additional cost in credits for using this feature. For
example, if the cost to play a song on the jukebox is 1 credit, and the cost for using
TuneCentral is 3 credits, the total cost for having the song play next is 4 credits.
6. Click Accept Changes to save the Play Next! and TuneCentral credit settings for the jukebox.
The Play Next and TuneCentral credit settings for the jukebox are updated.
Setting Billing Splits and Off-The-Top Fees
Can I set up splits and off-the-top values for my collections
using the TouchTunes Dashboard?
The income from each jukebox is divided based on your relationship and contract with the
location owner. In most cases, jukebox income is subject to off-the-top fees and billing splits. An
off-the-top fee is an amount charged for the use of the jukebox and/or TuneCentral. Fees are
deducted “off-the-top” from the gross jukebox income first, and then the remaining income may
be divided between you and the location owner according to an agreed percentage called a
billing split.
You can use the TouchTunes Dashboard to set your off-the-top fees and billing split for a Gen 3
jukeboxes. Setting this information up in the Dashboard simplifies the division of income when
collecting jukebox revenue. Once the off-the-top values and billing split for a jukebox is set up,
you can use the Dashboard to calculate the operator and location take of the income.
To set billing splits and off-the-top fees:
1. In the TouchTunes Dashboard, choose My Jukeboxes | Settings.
The Music & System Settings page appears, which is the default page for jukebox settings.
You use this page to select the jukebox that you want to configure.
2. If necessary, select the jukebox whose billing split and off-the-top fees you want to access
from the Choose Another Jukebox list.
3. Choose Bookkeeping from the left-side menu.
111
Managing Jukebox Income Using the TouchTunes Dashboard
The Gen 3 Bookkeeping Settings page appears.
Figure 23 Bookkeeping Settings page for a Gen 3 jukebox
You use the controls on this page to set the off-the-top values and billing split for your
jukebox.
Note: This Dashboard page is not available for Gen 1 or NextGen jukeboxes.
4. Set the billing split for the location as a percentage in the Billing Split Settings area by doing
one of the following:
• Drag the slider to the appropriate value.
• Enter the percentage in the Location Percentage field.
Figure 24 Billing split set to 33% for location
When you modify one control in this area, the other control is updated automatically. Next,
enter the values for the jukebox and/or TuneCentral off-the-top fees. You can configure these
fees as a fixed amount, as a percentage of the coinage (gross income from the jukebox) or as
a fee per play.
5. If you are setting an off-the-top fee for the jukebox, do the following in the Jukebox Off-TheTop area:
• From the Rule Type list, select the method used to calculate this fee.
112
Configuring the Revenue Model for a Jukebox
• Set the fee amount or percentage value in the field provided.
Figure 25 Jukebox off-the-top fee set to $100
Note: You can set the off-the-top fee for a jukebox as a percentage of its revenue, a price per
play, or a fixed amount to match your specific business model.
6. If you are setting an off-the-top fee for TuneCentral, do the following in the TuneCentral OffThe-Top area:
• From the Rule Type list, select the method used to calculate this fee.
• Set the fee amount or percentage value in the field provided.
Figure 26 TuneCentral off-the-top fee set to 50 cents per play
You have set up the billing split and off-the-top values for the jukebox. Now apply these
changes to the jukebox.
7. Click Accept Changes.
113
Managing Jukebox Income Using the TouchTunes Dashboard
The Gen 3 Money Settings page reappears to confirm that these values are applied to the
jukebox.
Figure 27 Billing split and off-the-top fees set for a Gen 3 jukebox
When you collect revenue for this jukebox, you can use the Billing Split Example area on this
page (or on the jukebox itself ) to calculate the off-the-top fees and splits.
Note: The amounts entered for the billing split and off-the-top fees do not appear when you
view jukebox revenues on the jukebox itself. Only the location and operator splits appear on
the jukebox.
8. Use the Billing Split Example area to calculate off-the-top fees and splits. See “Checking a
Location’s Take from a Gen 3 Jukebox” on page 123.
Reviewing Jukebox Revenue
Can I view, track and verify location earnings through the
TouchTunes Dashboard?
Every TouchTunes jukebox reports certain revenue-related statistics to the TouchTunes server
daily. You can use the TouchTunes Dashboard to view your jukebox revenues, as well as to
calculate your collections and verify the location’s take from jukebox revenue.
114
Reviewing Jukebox Revenue
Using the Dashboard to follow your jukebox revenues allows you to assess how well you revenue
model is working and identify any changes required to maximize income. For example, assume
that you notice that one of your jukeboxes has experienced a spike in the number of plays but
that the revenue has not risen accordingly. You investigate and discover that the bar where the
jukebox is located launched a promotion that is attracting a large number of customers on the
weekend. Once you are aware of this promotion, you can adjust the revenue model for the
jukebox to take advantage of this weekend promotion and maximize revenues for your jukebox
during this time.
The following sections explain how you can review the revenue generated by your jukeboxes:
• To view a summary or detailed breakdown of jukebox revenues over a certain time period, see
“Viewing Jukebox Revenue” on page 115.
• To review the number of plays for a jukebox, see “Tracking Jukebox Plays” on page 122.
• To calculate and/or verify the location take from a Gen 3 jukebox, see “Checking a Location’s
Take from a Gen 3 Jukebox” on page 123.
Viewing Jukebox Revenue
How do I view revenue for my jukeboxes using the
TouchTunes Dashboard?
You can view the revenue for any of your jukeboxes using the TouchTunes Dashboard. You can
view a high-level summary showing revenues from all your jukeboxes, as well as a detailed
revenue breakdown for each individual jukebox over a certain time period.
To view jukebox revenue:
1. In the TouchTunes Dashboard, choose My Reports | Revenues.
115
Managing Jukebox Income Using the TouchTunes Dashboard
The Revenues page appears.
Figure 28 The Revenues page
The Report area on this page shows a revenue summary for all your jukeboxes, which shows
revenue for the last 90 days by default. You can adjust this page to reflect the revenues earned
over a specified time period. You also use this area to access a detailed revenue breakdown
for a jukebox.
2. If necessary, set the time period over which you want to view jukebox revenues by clicking
the calendar icon beside the From and To fields to set the starting and ending date for the
revenue summary.
3. Click Show.
The Dashboard recalculates the jukebox revenues for the selected time period and updates
the Revenues page.
The following table explains the content of the revenue summary report in the Report area:
Column:
Location
Device ID
Description:
The name of the location for the jukebox.
The ID number of the jukebox or PlayPorTT.
Device Type Jukebox or PlayPorTT
Cash
The total revenue that has come from bills and coins.
Revenues
116
Reviewing Jukebox Revenue
Column:
Credit Card
Revenues
Revenue
Last
Revenue
Description:
The total revenue that has come from credit cards.
The total revenue earned by the jukebox over the
specified time period.
The date when the jukebox last reported its revenue
to the TouchTunes server.
4. (Optional) Re-order the information in the report by clicking a column heading.
Figure 29 Report reordered by revenue in descending order
Tip: The arrow icons beside the column name shows whether the information is sorted in
ascending or descending order.
5. Do one of the following additional options:
• Export the revenue summary for all jukeboxes, by going to step 11.
• View a detailed breakdown of revenue for a single jukebox, by continuing to the next step.
6. In the Reports area, click the ID of the jukebox for which you want to view a detailed revenue
breakdown.
117
Managing Jukebox Income Using the TouchTunes Dashboard
The Revenue Details page appears. You use this page to view a detailed breakdown of
revenue for an individual jukebox.
Figure 30 Revenue Details page
By default, this page shows the amount of revenue earned by the jukebox each day over the
period you specified earlier. Each daily amount is also displayed as a bar graph showing the
percentage of the total revenue earned by the jukebox during this day.
A Summary area also appears at the end of the list showing the total revenue, daily average
and group average calculated for the selected time period.
Figure 31 Summary for a detailed revenue breakdown
7. If necessary, set the time period over which you want to view the detailed revenue
breakdown by clicking the calendar icon beside the From and To fields to set its starting and
ending dates.
118
Reviewing Jukebox Revenue
The report is updated and shows the income earned by the jukebox during the specified time
period.
You can also reorganize the revenue information in the report by consolidating it into specific
groups. The following table shows the different methods of grouping revenue information.
Grouping
method:
None
Day of Month
Week
Week Day
Month
Quarter
Year
Description:
Revenue is not grouped; each day’s revenue is shown
individually.
Revenue is grouped by day of the month (1st-31st).
Revenue is grouped by week.
Revenue is grouped by weekday (Monday to Sunday).
Revenue is grouped by month.
Revenue is grouped by calendar quarter.
Revenue is grouped by year.
8. Set the method by which want to group revenue using the Group By list.
9. From the Start Week On list, set whether the starting day of the week is a Sunday or a
Monday.
10.Click View to re-generate the revenue breakdown for the jukebox using the settings that you
defined.
119
Managing Jukebox Income Using the TouchTunes Dashboard
The detailed revenue breakdown is regenerated using the settings selected in steps 7 to 9.
Figure 32 Detailed breakdown of jukebox revenue grouped by week
11.(Optional) Export the revenue summary or breakdown from the TouchTunes Dashboard to
any of the file formats listed at the bottom of the Search Results area.
Note: You cannot export a detailed revenue breakdown that is grouped.
Viewing Uncollected Jukebox Revenue
How do I view the revenue in my jukeboxes waiting to be
collected using the TouchTunes Dashboard?
You can view the uncollected revenue for any of your jukeboxes using the TouchTunes
Dashboard. You can view a high-level summary showing uncollected revenues from all your
jukeboxes, as well as a detailed revenue breakdown for each individual jukebox. The detailed
summary for a single jukebox contains information about how much revenue has been
generated from coins, bills and credit cards as well as how many bills have been rejected.
To view the uncollected revenue of your jukeboxes or a single jukebox:
• In the TouchTunes Dashboard, choose My Reports | Collection.
120
Reviewing Jukebox Revenue
The Revenues Since Last Collection page appears with a summary report of uncollected
revenue on all your jukeboxes.
Figure 33 Revenues Since Last Collection summary report
• To view the income breakdown of the revenue awaiting collection of a specific jukebox, click
its ID under the Jukebox ID heading.
Figure 34 A detailed view of the revenue awaiting collection on a specific jukebox
121
Managing Jukebox Income Using the TouchTunes Dashboard
Tracking Jukebox Plays
How do you track the number of plays for a jukebox through
the TouchTunes Dashboard?
You can use the TouchTunes Dashboard to view a report showing the number of plays per week
for your jukeboxes. This report also breaks down plays into categories so you can see what
features of the jukebox are being used most. You can use this feature to identify excessive free
plays or decreasing paid plays for a jukebox.
To view the plays for a jukebox:
1. In the TouchTunes Dashboard, choose My Reports | Plays.
The Plays page appears. This page shows a weekly report of play-related statistics for the
selected jukebox.
Figure 35 Plays page
Use the following table to interpret this report.
Column:
Location
Jukebox ID
BGM
Attract
Promo
Game
Free play
ratio
Normal
122
Description:
The name of the location for the jukebox.
The ID number of the jukebox.
Number of plays when jukebox is running in background music
mode.
Number of plays when jukebox is running in attract mode.
Number of promotional plays used on the jukebox.
Number of free plays won from the games on the jukebox.
Ratio of free plays (including promotional, TuneCentral and other free
plays) to total plays as a percentage.
Number of normal (paid) plays on the jukebox.
Reviewing Jukebox Revenue
Column:
Play Next
TuneCentral
Linked
Games
Description:
Number of times Play Next! was used.
Number of plays from TuneCentral.
Number of plays from other systems linked to the jukebox, such as a
Merit or JVL countertop system.
Tip: You can re-order the play information in the report by clicking a column heading. The
arrow icon beside the column name shows whether the information is sorted in ascending or
descending order.
2. (Optional) Choose the week for which you want to view play related statistics, and then
choose Show.
Tip: The weeks in this list reflect TouchTunes billing weeks and may not match your collection
schedule for the jukebox.
The Dashboard recalculates the play-related statistics for the selected week.
Figure 36 Plays report showing statistics for another week
Checking a Location’s Take from a Gen 3 Jukebox
Can I check the location take for a jukebox in the
TouchTunes Dashboard?
If you set up your billing splits and off-the-top fees for a Gen 3 jukebox in the TouchTunes
Dashboard using the procedures in “Setting Billing Splits and Off-The-Top Fees” on page 111,
you can also use the Dashboard to calculate a location’s take (the share of jukebox income for a
location) from your collections. Using the Dashboard for this shows the calculations for the
division of jukebox income to the location owner and allows both of you to verify that these
amounts are correct.
123
Managing Jukebox Income Using the TouchTunes Dashboard
To calculate your collections for a jukebox:
1. In the TouchTunes Dashboard, choose My Jukeboxes | Settings.
The Music & System Settings page appears, which is the default page for jukebox settings. You
use this page to select the jukebox that you want to configure.
2. If necessary, select the jukebox whose billing split and off-the-top fees you want to access
from the Choose Another Jukebox list.
3. Choose Bookkeeping from the left-side menu.
The Gen 3 bookkeeping page appears, showing the off-the-top fees and billing split for the
jukebox that you set earlier.
Figure 37 Bookkeeping page for a Gen 3 jukebox
Note: This Dashboard feature is not available for Gen 1 or NextGen jukeboxes.
124
Reviewing Jukebox Revenue
You use the controls in the Billing Split Example area to calculate the location’s take for a
jukebox based on the billing split and off-the-top values you set earlier.
4. Navigate to the Billing Split Example area at the bottom of this page.
This area shows the most common formula used to calculate the division of jukebox income.
You can enter the income for the jukebox and TuneCentral in the highlighted (light yellow)
fields, while the billing split and off-the-top fees are derived from the settings in the top half
of the page.
As you enter income information, the Dashboard recalculates the jukebox and TuneCentral
off-the-top fees, deducts these fees from their respective incomes, and calculates the location
and operator takes according to the established billing split. Each calculation appears in the
Billing Split Example area for your verification.
5. Do one of the following to enter the jukebox income on the Jukebox Coinage line:
• If your off-the-top fee is a fixed amount or is based on a percentage of the income, enter a
monetary value in the $ (money) field.
• If your off-the-top fee is based on the number of plays, enter the number of plays for the
jukebox in the Plays field.
For the jukebox in this simplified example, the jukebox coinage is $256.00 and the jukebox
off-the-top fee is fixed at $100.
a
b
Figure 38 a. Jukebox Coinage $ (money) field b. Jukebox Coinage Plays field
6. Repeat the previous step to set up the TuneCentral income on the TuneCentral Coinage line.
For the jukebox in this simplified example, each $1 equals 2 credits. Since the TuneCentral offthe-top was set to 50 cents per play and the Plays report indicates that there were 77 plays,
the resulting TuneCentral off-the-top fee is $38.50.
Figure 39 TuneCentral off-the-top fee calculated based on the number of plays
125
Managing Jukebox Income Using the TouchTunes Dashboard
The Billing Split Example area shows the resulting income for the operator and the location
owner.
Figure 40 Billing Split Example area, showing Location and Operator takes for a jukebox based on jukebox and TuneCentral
coinage and play information
126
Configuring Music and Game Settings
Using the TouchTunes Dashboard
This chapter explains how to view and configure music-related and gamerelated settings for jukeboxes and playporTTs from the TouchTunes
Dashboard.
Contents
Overview . . . . . . . . . . . . . . . . . . . . . . . . . . . . . . . . . . . . . . . . . . . . . . . . . . . . . . . . . . . . . . . .
Setting Up the Background Music Mode on a Jukebox . . . . . . . . . . . . . . . . . . . . .
Setting Up the Attract Mode on a Jukebox . . . . . . . . . . . . . . . . . . . . . . . . . . . . . . . .
Scheduling Background Music and Attract Modes for a Jukebox . . . . . . . . . .
127
128
132
136
Overview
You use the TouchTunes Dashboard to configure an idle jukebox to run in one of the following
special modes:
• Background music mode: In this mode, the jukebox plays background music for a location. You
use this mode to provide background music via the jukebox and provide an alternative to BGM
services like satellite radio.
• Attract mode: In this mode the jukebox plays background music at regular intervals and
displays self-promotional advertising on its screen. You use this mode to encourage usage of
the jukebox among a location’s patrons.
127
Configuring Music and Game Settings Using the TouchTunes Dashboard
You use these modes to generate interest in the jukebox among the patrons of a location, as well
as to demonstrate the value of the jukebox to the location owner by providing him with
background music services.
In this chapter, you will find answers to the following questions:
• “How do I set up the background music mode for a jukebox using the TouchTunes Dashboard?”
(p. 128)
• “How do I set up the attract mode for a jukebox using the TouchTunes Dashboard?” (p. 132)
• “Can I schedule when the background music and attract modes are active for a jukebox through
the TouchTunes Dashboard?” (p. 136)
Setting Up the Background Music Mode on a Jukebox
How do I set up the background music mode for a jukebox
using the TouchTunes Dashboard?
You can configure an idle jukebox to play background music by enabling its background music
mode (also called BGM mode) in the TouchTunes Dashboard. When a jukebox is running in this
mode, it plays songs at random from its library or a preset music list.
Gen 2 and Gen 3 jukeboxes have separate procedures to set up the background music mode
through the TouchTunes Dashboard.
• To set up this mode on a Gen 2 jukebox, see “To set up the BGM mode for a Gen 2 jukebox:” on
page 128.
• To set up this mode on a Gen 3 jukebox, see “To set up the BGM mode for a Gen 3 jukebox:” on
page 130.
To set up the BGM mode for a Gen 2 jukebox:
1. In the TouchTunes Dashboard, choose My Jukeboxes | Settings.
The Music & Systems Settings page appears. You use this page to select the jukebox that you
want to configure.
2. If necessary, select the jukebox with the BGM mode that you want to configure from the
Choose Another Jukebox list.
3. Select Background & Attract from the left-side menu.
128
Setting Up the Background Music Mode on a Jukebox
The Background & Attract Settings page appears.
Figure 10 Background & Attract Settings page
You use the controls in the Background Music (BGM) area on this page to activate and
configure the background music mode for this jukebox.
4. Enable the background music mode for this jukebox.
5. Choose one of the following options to control the music played by the jukebox when it is
running in BGM mode:
• Choose Play any song to allow the jukebox to play any song from its local hard drive at
random when in BGM mode.
• Choose Play top... to allow the jukebox to play any of the most popular songs on the
jukebox when in BGM mode. You use the associated list to limit the jukebox to choosing
among the top 50 to 500 songs when running in this mode.
129
Configuring Music and Game Settings Using the TouchTunes Dashboard
• Choose Play bottom... to allow the jukebox to play any of the least played songs on the
jukebox when in BGM mode. You use the associated list to limit the jukebox to choosing
among the bottom 50 to 500 songs when running in this mode.
Figure 11 Background music mode set to play the top 50 songs
6. Click Accept Changes.
7. (Optional) Schedule when the BGM mode is active on the jukebox. See “Scheduling
Background Music and Attract Modes for a Jukebox” on page 136.
To set up the BGM mode for a Gen 3 jukebox:
1. In the TouchTunes Dashboard, choose My Jukeboxes | Settings.
The Gen 3 Music Settings page appears.
Figure 12 Music Settings page for a Gen 3 jukebox
130
Setting Up the Background Music Mode on a Jukebox
You use the controls in the Background Music area to activate and configure the
background music mode for this jukebox.
2. If necessary, select the jukebox with the BGM mode that you want to configure from the
Choose Another Jukebox list.
3. Enable the background music mode for this jukebox.
4. Use the Delay Before Start list to set the number of minutes a jukebox must wait after
playing a song chosen by a customer before it can switch to BGM (or attract) mode.
5. Use the Delay Between Songs list to set the number of minutes between songs when a
jukebox is running in BGM mode.
Next, use the controls in the Background Music area to control what music the jukebox can
play when in BGM mode.
6. Select the pre-compiled music list containing the songs that the jukebox can play when
running in BGM mode from the Song List control.
7. (Optional) To see the list of songs in a background song list before setting it, click the preview
link.
Figure 13 Previewing a background song list
131
Configuring Music and Game Settings Using the TouchTunes Dashboard
The preview screen will open with a list of songs. Close the window when you are done with the
preview.
Figure 14 Background song preview window
8. Click Accept Changes.
9. (Optional) Schedule when the selected BGM mode is active on the jukebox.
See “Scheduling Background Music and Attract Modes for a Jukebox” on page 136.
Setting Up the Attract Mode on a Jukebox
How do I set up the attract mode for a jukebox using the
TouchTunes Dashboard?
You can use the TouchTunes Dashboard to set up a jukebox to run in attract mode, where an idle
jukebox plays songs at regular intervals and displays promotional messages on its screen to
attract business. You can activate attract mode through the Dashboard to generate interest in
the jukebox at a location where the jukebox is new or where jukebox usage has been decreasing.
Gen 2 and Gen 3 jukeboxes have separate procedures to set up the background music mode
through the TouchTunes Dashboard.
• To activate and configure this mode on a Gen 2 jukebox, see “To set up attract mode for a Gen
2 jukebox:” on page 133.
132
Setting Up the Attract Mode on a Jukebox
• To activate and configure this mode on a Gen 3 jukebox, see “To set up attract mode for a Gen
3 jukebox:” on page 135.
To set up attract mode for a Gen 2 jukebox:
1. In the TouchTunes Dashboard, choose My Jukeboxes | Settings.
The Music & Systems Settings page appears. You use this page to select the jukebox that you
want to configure.
2. If necessary, select the jukebox whose attract mode you want to configure from the Choose
Another Jukebox list.
3. Select Background & Attract from the left-side menu.
The Background & Attract Settings page appears.
Figure 15 Background & Attract Settings page
You use the controls in the Attract Mode area on this page to activate and configure this
mode.
133
Configuring Music and Game Settings Using the TouchTunes Dashboard
4. Enable the attract mode for this jukebox.
5. Choose one of the following options to control the music played by the jukebox when it is
running in attract mode:
• Choose Play Any Song to allow the jukebox to play any song at random when in attract
mode.
• Choose Play Top... to allow the jukebox to play any of the most popular songs on the
jukebox when in attract mode. You use the associated list to limit the jukebox to choosing
among the top 50 to 500 songs when running in this mode.
Figure 16 Jukebox set to play music from the top 50 songs when running in attract mode
Next, set the length of time a jukebox must be idle before it can switch to attract mode.
6. Use the controls in the Idle Time Delay area to set the number of hours and minutes that the
jukebox must be idle before attract mode can be activated.
Figure 17 Jukebox set to go into attract mode after 30 minutes
A song is played once the jukebox has been idle for the period of time set in the Idle Time
Delay area. If the jukebox continues to remain idle, a song is played each time the jukebox
reaches the interval defined in this area until a customer plays a song.
Tip: To maximize your jukebox revenue, set a delay of at least 15 minutes for the jukebox to
be idle before attract mode is activated.
7. Click Accept Changes.
8. (Optional) Schedule when attract mode is active on the jukebox. See “Scheduling
Background Music and Attract Modes for a Jukebox” on page 136.
134
Setting Up the Attract Mode on a Jukebox
To set up attract mode for a Gen 3 jukebox:
1. In the TouchTunes Dashboard, choose My Jukeboxes | Settings.
The Gen 3 Music Settings page appears.
Figure 18 Music Settings page for a Gen 3 jukebox
Because attract mode is very similar to background music mode, you use the controls in the
Background Music area on this page to activate and configure both modes for this jukebox.
2. If necessary, select the jukebox whose attract mode you want to configure from the Choose
Another Jukebox list.
3. Enable the attract (and background music) mode for this jukebox.
The only difference between background music and attract modes on a Gen 3 jukebox is the
amount of time between songs:
• For the background music mode, the delay between songs should be 2 minutes or less.
• For attract mode, the delay between songs should be 15 minutes or more.
135
Configuring Music and Game Settings Using the TouchTunes Dashboard
4. Use the Delay Before Start list to set the number of minutes (and seconds) a jukebox must
wait after playing a song chosen by a customer before it can switch to attract mode.
5. Use the Delay Between Songs list to set the number of minutes (and seconds) that a jukebox
waits between songs when running in attract mode.
Figure 19 Jukebox set to wait 20 minutes between songs when running in attract mode
A song is played once the jukebox has been idle for the period of time set in the Delay Before
Start list. If the jukebox remains idle for the period of time defined by the Delay Between
Songs list, a song is played each time the jukebox reaches this interval until a customer plays
a song.
Tip: To maximize your jukebox revenue, set a delay between songs of at least 15 minutes.
6. Select the pre-compiled music list containing the songs that the jukebox can play when
running in BGM mode from the Song List control.
Songs are played from the selected list while the jukebox is in attract mode.
7. Click Accept Changes.
8. Schedule when attract mode is active on the jukebox. See “Scheduling Background Music
and Attract Modes for a Jukebox” on page 136.
Scheduling Background Music and Attract Modes for a Jukebox
Can I schedule when the background music and attract
modes are active for a jukebox through the TouchTunes
Dashboard?
You can use the TouchTunes Dashboard to set when background music and attract modes
(collectively called jukebox modes) are active on a jukebox. Using the Dashboard to schedule
when jukebox modes are active allows you to customize the behavior of a jukebox for special
events at a location, such as a daily Happy Hour.
Gen 2 and Gen 3 jukeboxes have separate procedures to schedule jukebox modes through the
TouchTunes Dashboard.
• To schedule these modes on a Gen 2 jukebox, see “To schedule jukebox modes for a Gen 2
jukebox:” on page 137.
• To schedule these modes on a Gen 3 jukebox, see “To schedule background music and attract
modes for a Gen 3 jukebox:” on page 139.
136
Scheduling Background Music and Attract Modes for a Jukebox
To schedule jukebox modes for a Gen 2 jukebox:
1. In the TouchTunes Dashboard, choose My Jukeboxes | Settings.
The Music & Systems Settings page appears. You use this page to select the jukebox that you
want to configure.
2. If necessary, select the jukebox whose jukebox mode you want to configure from the Choose
Another Jukebox list.
3. Select Background & Attract from the left-side menu.
137
Configuring Music and Game Settings Using the TouchTunes Dashboard
The Background & Attract Settings page appears.
Figure 20 Background & Attract Settings page
You use the Schedule area on this page to view and set when the BGM and attract modes are
active on this jukebox. By default, a jukebox always runs in normal mode (BGM and attract
mode disabled) unless otherwise indicated.
4. Do one of the following to schedule a mode for the jukebox:
• Click on any event listed on the schedule to modify its settings.
• Click Add period to add a time period when you want to run the jukebox in the background
music or attract mode.
The Add a New Period area (for new events) or Edit Period area (for scheduled events)
appears below the schedule legend. You use these controls to create and configure events on
138
Scheduling Background Music and Attract Modes for a Jukebox
a jukebox’s schedule, including the jukebox mode and the credit rule used during the
scheduled event.
Figure 21 Add a New Period area
5. Do the following to set up or modify the event:
• Use the Day(s) list to set the days of the week when the jukebox mode and/or credit rule is
active on the jukebox.
• Use the From and To lists to set the time period when the jukebox mode and/or credit rule
is active on the jukebox.
• Use the Credit Rules list to choose the credit rule used to price songs and services on the
jukebox during the event. See “Setting Up the Credit Rules for a Jukebox” on page 99.
• Use the Play Mode list to set the jukebox mode used during the event (Normal, Background
[music], or Attract mode).
6. Update the schedule by clicking Add Period (to add a new event to the schedule) or Change
Period (to update an existing event on the schedule).
The schedule is updated. If you set an event to run in BGM or attract mode, its color changes
to indicate its mode. For example, the jukebox whose schedule is shown below runs in
background mode during weekends and runs in attract mode during the location’s weekly
Ladies Night event on Wednesday evenings. Otherwise, the jukebox runs in normal mode.
Figure 22 Jukebox whose BGM mode is active on weekends and attract mode is active Wednesday from 7 to 9 PM
To schedule background music and attract modes for a Gen 3 jukebox:
1. In the TouchTunes Dashboard, choose My Jukeboxes | Settings.
139
Configuring Music and Game Settings Using the TouchTunes Dashboard
The Gen 3 Music Settings page appears.
Figure 23 Music Settings page for a Gen 3 jukebox
2. Click Schedule This Setting in the Background Music area.
140
Scheduling Background Music and Attract Modes for a Jukebox
The Background Music Scheduling View window appears. You use this window to schedule
when the jukebox is running in BGM or attract modes.
Figure 24 Background Music Scheduling View window
3. Do one of the following to set the schedule for the background music or attract modes:
• Click Add Scheduling Event.
• Click any future time slot in the schedule (below the red line) that is open.
141
Configuring Music and Game Settings Using the TouchTunes Dashboard
The Scheduling window appears. You use this window to create or modify a jukebox mode
event for the jukebox schedule that controls when the background music or attract modes
are active.
4. In the Step 1: Choose a Recurrence area, select one of the following options to set whether
and how often the jukebox mode event repeats:
Option:
Does not
repeat
Weekly
Monthly
Yearly
142
Result:
Use Case:
The mode is activated
Use this option when you want to activate BGM
only once on the jukebox. or attract mode for certain occasions that do
not repeat on a regular basis, such as an office
party or wedding reception.
The jukebox mode event Use this option when you want to reactivate
repeats on the specified BGM or attract mode on the same days each
day(s) of the week.
week, such as between 5 and 7 PM each
weekday for Happy Hour.
The jukebox mode event Use this option when you want to activate BGM
repeats on the same day or attract modes on a particular day each
each month.
month, such as for special theme-based days
on the 5th, 15th and 25th of each month.
The jukebox mode event Use this option to activate BGM or attract
repeats on the day each modes on a certain day each year, such as for
year.
Christmas on December 25th each year.
Scheduling Background Music and Attract Modes for a Jukebox
The controls in the Set Time and Specify Action(s) areas change depending on what option
you choose. Next, use these controls to define the jukebox mode and the duration during
which the jukebox may run in this mode.
5. In the Set Time area, do the following to set the day(s) and time when the jukebox can run in
BGM or attract mode:
• From the Setting Value At list, select the starting time when mode is active on the jukebox.
• Set the day(s) of the week, month or year that the jukebox can run in the selected mode.
• (Optional) For weekly events, set the duration (in months) over which the jukebox can run in
the selected mode.
Figure 25 Set Time area showing date(s) and time when the background music or attract mode can be run on jukebox
6. In the Specify Action(s): Background Music area, configure the background music and/or
attract mode using the procedures in “To set up the BGM mode for a Gen 3 jukebox:” on
page 130 or “To set up attract mode for a Gen 3 jukebox:” on page 135.
Figure 26 Specify Action area set to run the jukebox in background music mode every weekday from 5 PM
143
Configuring Music and Game Settings Using the TouchTunes Dashboard
7. (Optional) Click Add Scheduling Event Template and then repeat the previous two steps to
either extend the time period for the jukebox mode and/or schedule other modes for the
jukebox.
Figure 27 Scheduling window showing extension of background music mode
You should be aware of the following when using the Scheduling window:
• You can remove any additional scheduled event by clicking Remove Scheduled Event
Template. Because the Dashboard does not confirm this action, be sure that you are
removing the correct event before clicking this button. Otherwise, you must re-create the
event.
• There is no limit as to how many events can be set up in the Scheduling window. A good
rule-of-thumb is to set the schedule for one jukebox mode before scheduling the other
mode on the same jukebox. Otherwise, you may become confused between schedules.
144
Scheduling Background Music and Attract Modes for a Jukebox
8. Once you complete the schedule for the jukebox mode, click Save Schedule in the Step 3:
Accept or Discard Changes area.
The Background Music Scheduling View window reappears, confirming the jukebox mode
events you scheduled.
Figure 28 Dashboard schedule showing when jukebox can run in background music mode
Recurring events in the schedule are identified in the schedule by an arrow icon with the
letter following the icon indicating whether the event recurs weekly (w), monthly (m) or
yearly (y).
Figure 29 Recurring weekly event
9. (Optional) Do any of the following:
145
Configuring Music and Game Settings Using the TouchTunes Dashboard
• Schedule another jukebox mode event by clicking Add Scheduled Event and then
repeating steps 4 to 8.
• Modify a jukebox mode event by clicking Edit in the time period for the event and then
modifying its details in the Scheduling window that appears. Note that modifying one
instance of a recurring jukebox mode event changes all instances of this event. For example,
if you move the starting time for the background music mode from 5 PM to 5:15 PM for one
weekly event, all other events are also moved to 5:15 PM.
• Delete a jukebox mode event by clicking Remove in the time period for the event and then
confirming the action. Note that when you delete one instance of a recurring jukebox mode
event, all instances of the events are deleted. You cannot delete a single event from a series
of recurring events.
10.Return to the Dashboard by clicking Close at the top of the Background Music Scheduling
View window.
The Gen 3 Music Settings page reappears.
146
Viewing Your Invoices with the
TouchTunes Dashboard
This chapter explains how you can view monthly invoices for all of your
TouchTunes jukeboxes in the TouchTunes Dashboard.
Contents
Overview . . . . . . . . . . . . . . . . . . . . . . . . . . . . . . . . . . . . . . . . . . . . . . . . . . . . . . . . . . . . . . . . 147
Viewing TouchTunes Invoices . . . . . . . . . . . . . . . . . . . . . . . . . . . . . . . . . . . . . . . . . . . . . 148
Overview
You can use the TouchTunes Dashboard to view monthly invoices for your TouchTunes
jukeboxes. You can use these invoices to view a breakdown of all jukebox costs billed to your
account for the month for all of your locations, including music played by type, music and
services, leasing costs, internet connection costs if applicable, and sales tax. You can also view
other types of invoices and statements in the TouchTunes Dashboard, which provide a subset
of related billing and statistical information.
TouchTunes invoices are published in Adobe PDF format. You use the Adobe Acrobat Reader to
view these invoices; you can download this free application from a link on the Help Bubble on
the Invoices page.
In this chapter, you will find answers to the following questions:
• “How do I view invoices from TouchTunes (such as music services invoices) using the
TouchTunes Dashboard?” (p. 148)
147
Viewing Your Invoices with the TouchTunes Dashboard
Viewing TouchTunes Invoices
How do I view invoices from TouchTunes (such as music
services invoices) using the TouchTunes Dashboard?
You can use the TouchTunes Dashboard to view monthly invoices for your TouchTunes
jukeboxes.
To view TouchTunes invoices:
1. In the TouchTunes Dashboard, choose My Reports | Invoices.
Figure 11 Invoices for the current year are displayed. In this case none are available yet for 2008.
2. If you know the number of the invoice you want to access, type it in the View Invoice # field,
then click Show Invoice.
Note: If you do not know the invoice number, proceed to step 3.
The requested invoice’s details appear.
3. If you do not know the number of the particular invoice you want to access, do one of the
following to locate it:
• If necessary, click the year for which you want to view an invoice.
148
Viewing TouchTunes Invoices
• Sort the invoices in the list in ascending or descending or by month, invoice #, or invoice
date, by clicking the corresponding arrow icons.
a
b
Figure 12 a. Click to sort invoices by month from earliest to latest b. Click to sort invoices by month, from latest to earliest
4. Click the type of invoice you want to view from the Documents column.
You are provided a list with different types of invoices and statements. The Detailed Invoice
includes all information available, while the other invoices listed provide different views of
the same information, such as the number of music plays during the invoice period. These
different views of the same information may be useful to different people in your
organization, such as accounting and sales.
Figure 13 Different ways of viewing the information in the November invoice
149
Viewing Your Invoices with the TouchTunes Dashboard
The invoice or statement opens up in Adobe Reader, where you can read, print, or save it for
archiving purposes.
Figure 14 Page one and two of a sample invoice
150
Managing Music Filters for a Jukebox
in the TouchTunes Dashboard
This chapter explains how to use the TouchTunes Dashboard to create and
manage different types of music filters that control the music available for
play on a jukebox.
Contents
Overview . . . . . . . . . . . . . . . . . . . . . . . . . . . . . . . . . . . . . . . . . . . . . . . . . . . . . . . . . . . . . . . .
Viewing Music Filters on a Jukebox using the TouchTunes Dashboard . . . . .
Setting Up Explicit and Edited Music Filters for a Jukebox . . . . . . . . . . . . . . . . . .
Determining the Music Styles Allowed on a Jukebox . . . . . . . . . . . . . . . . . . . . . .
Scheduling TuneCentral for a NextGen Jukebox . . . . . . . . . . . . . . . . . . . . . . . . . . .
Scheduling a Music Filter Set on a Gen 3 Jukebox . . . . . . . . . . . . . . . . . . . . . . . . .
151
153
156
161
167
173
Overview
A music filter is a rule that controls the music that is available for play on a jukebox. You create
music filters in the TouchTunes Dashboard to restrict or remove the availability of certain songs,
artists, albums or musical styles from a jukebox based on requests from a location owner. For
example, a family restaurant might request that you put in a music filter that prevents songs
with explicit lyrics from being played on their jukebox as this does not fit their image.
Although the most common use for music filters is to prevent certain music from being played
on a jukebox, you can also use them to do the following:
• Match the music selection on a jukebox with a location’s theme. For example, you may use a
filter to restrict a jukebox in a Western-themed bar to Country & Western music.
151
Managing Music Filters for a Jukebox in the TouchTunes Dashboard
• Highlight seasonal music that becomes popular during certain times of the year. For example,
you can create a filter so Christmas-related songs are only available from late-November
through December.
• Disable TuneCentral during certain time periods to restrict the songs available to a list of preapproved songs. For example, if your employees choose the music that is played in a location,
you can create a filter that restricts them to the list of pre-approved songs chosen by the
location owner.
TouchTunes jukeboxes support several different types of music filters. The filter types available
on your jukebox depend on whether it is a NextGen or Gen 3 unit. While Gen 3 jukeboxes
generally support more types of music filters, any music filter that is available on the jukebox
itself is also available through the TouchTunes Dashboard. The following table explains the
different types of music filters and shows on which jukebox generation they are available:
Filter Type:
Explicit
music filters
Edited
music filters
Allowed
Styles filters
Name filters
Exclusion
filters
Filter
Description:
Availability:
Enables or disables explicit music from being selected or NextGen and Gen
played.
3 jukeboxes
Enables/disables edited music (explicit music where the Gen 3 jukeboxes
offending text is removed or “bleeped out”) from being only
selected or played.
Shows/hides a particular style or genre of music from
NextGen and Gen
being selected or played.
3 jukeboxes
Shows/hides a particular song, album or artist from
NextGen and Gen
being selected or played.
3 jukeboxes
Allows particular songs, albums or artists to be selected Gen 3 jukeboxes
and played that would otherwise have been removed by only
one of the other music filter types.
Note: You cannot create music filters through the Dashboard for any first-generation jukeboxes.
Music filters only set whether certain songs, albums or artists are available for play on a jukebox.
Although music that has been filtered out appears to have been removed from the jukebox, its
associated music files remain on the jukebox. Because every song on a jukebox occupies space,
you should ensure that your music filters and music management practises support each other.
This means ensuring that every song that is on a jukebox has a reasonable chance of being
played and earning revenue by looking at the music filters for a location and asking the question:
“What is the possibility that this music filter may be changed or removed?”
• If there is a possibility that a music filter may be changed or removed, leave the music files on
the jukebox.
• If there is no possibility that a music filter may be changed or removed, you should replace the
music files on the jukebox that are being filtered out with songs that do stand a reasonable
chance of being played and earning revenue.
For example, assume you have downloaded music from a Hot List that includes Pop, Rock, Hiphop and Rap songs to a jukebox in a family-style restaurant. The restaurant owner asks you to
get rid of all the Hip-hop and Rap songs from the jukebox as these songs conflict with their
152
Viewing Music Filters on a Jukebox using the TouchTunes Dashboard
image. To do this, you create an allowable styles music filter that excludes all songs in the Hiphop and Rap styles. Although all Hip-hop and Rap songs seem to disappear from the music
library once you apply the filter, these songs continue to occupy space on the jukebox that could
be used for other music. To ensure that all songs on the jukebox have a reasonable chance of
being played and earning revenue, you should remove all the Hip-hop and Rap music from the
jukebox and replace it with more Pop and Rock music selections.
In this chapter, you will find answers to the following questions:
• “How do I see what music filters are currently applied to a jukebox using the TouchTunes
Dashboard?” (p. 153)
• “How do I prevent music with explicit lyrics from being played on a jukebox using the
TouchTunes Dashboard?” (p. 156)
• “Can I control what music styles appear on a jukebox through the TouchTunes Dashboard?” (p.
161)
• “Can I schedule TuneCentral through the TouchTunes Dashboard? Do music filters apply to
TuneCentral?” (p. 167)
• “Can I schedule my music filters using the TouchTunes Dashboard?” (p. 173)
Viewing Music Filters on a Jukebox using the TouchTunes Dashboard
How do I see what music filters are currently applied to a
jukebox using the TouchTunes Dashboard?
You can view all filters currently applied to a jukebox through the jukebox settings.
To view music filters on a jukebox:
1. In the TouchTunes Dashboard, choose My Jukeboxes | Settings.
153
Managing Music Filters for a Jukebox in the TouchTunes Dashboard
The settings for the jukebox appear in the Dashboard.
Figure 12 Jukebox settings page for a NextGen jukeboxes
2. From the Choose Another Jukebox list, select the jukebox whose filters you want to view.
3. Choose Filters from the left-side menu.
154
Viewing Music Filters on a Jukebox using the TouchTunes Dashboard
The default music filters for the selected jukebox appear on the Music Filters page.
Figure 13 Music Filters page for a NextGen jukebox
Gen 3 jukeboxes support filter sets. Each filter set can store different music filters and filter
settings than the default.
4. (Optional) Select the filter set that you want to view or modify from the Choose a Filter Set
list.
155
Managing Music Filters for a Jukebox in the TouchTunes Dashboard
The music filters for the selected filter set appear in the Music Filters page.
Figure 14 Music filters in a filter set for a Gen 3 jukebox
Setting Up Explicit and Edited Music Filters for a Jukebox
How do I prevent music with explicit lyrics from being
played on a jukebox using the TouchTunes Dashboard?
You use the explicit music filter to prevent music with explicit lyrics from being played on a
jukebox. For example, you can use this filter to remove Rock, Rap or Hip-Hop songs with explicit
lyrics from the jukebox located in a family-style restaurant.
On Gen 3 jukeboxes, you can also set up an edited music filter for a jukebox to control if edited
music (radio-friendly versions of explicit songs with the offending lyrics removed or “bleeped
out”) are available on a jukebox. You can use edited music to replace explicit songs on your
jukeboxes. For example, you could choose to replace explicit Rock, Rap or Hip-Hop songs with
their edited versions that are free of the offending lyrics.
NextGen and Gen 3 jukeboxes have separate procedures for setting up explicit (and edited)
music filters.
• To set up the explicit music filter for a NextGen jukebox, see “To set up an explicit music filter
for a NextGen jukebox:” on page 157.
• To set up the explicit and edited music filters for a Gen 3 jukebox, see “To set up explicit and
edited music filters for a Gen 3 jukebox:” on page 158.
156
Setting Up Explicit and Edited Music Filters for a Jukebox
Tip: To identify the generation of your jukebox, choose My Jukeboxes | Summary in the
Dashboard, select your jukebox from the list on the page that appears, and look at the Type field
in the Jukebox Information and Status area.
Figure 15 Jukebox Information and Status area
1. To set up an explicit music filter for a NextGen jukebox:
2. View the music filters on a jukebox. See “Viewing Music Filters on a Jukebox using the
TouchTunes Dashboard” on page 153.
The Explicit Content area shows whether music with explicit lyrics can be played on a
jukebox. By default, this music filter is disabled so that all music (including music with explicit
lyrics) are available on the jukebox.
Figure 16 Explicit content area
3. Do one of the following to set how the explicit music filter works:
• Disable Allow Explicit Content to apply the explicit music filter. This prevents music with
explicit lyrics from being available on the jukebox.
• Enable Allow Explicit Content to remove the explicit music filter. This allows music with
explicit lyrics to be available on a jukebox.
The music filter is set. You must save the explicit music filter setting in order to apply it to the
jukebox.
4. Click Save Changes at the bottom of the Music Filters page.
157
Managing Music Filters for a Jukebox in the TouchTunes Dashboard
The Confirmation page appears. You use this page to confirm the music filter settings before
they are applied to the jukebox.
Figure 17 Confirmation page for a NextGen jukebox
5. Click Apply Changes.
The Music Filters page reappears to confirm the change to the music filter.
The music filter is applied to the jukebox the next time it connects to the TouchTunes server.
If your jukebox connects to the TouchTunes server using a broadband connection, the
settings are applied to the jukebox when you log out of the Dashboard. Otherwise, the
setting on the jukebox is updated the next time it connects to the TouchTunes server through
its dial-up connection.
To set up explicit and edited music filters for a Gen 3 jukebox:
1. View the music filters on a jukebox. See “Viewing Music Filters on a Jukebox using the
TouchTunes Dashboard” on page 153.
158
Setting Up Explicit and Edited Music Filters for a Jukebox
The Explicit Content area shows whether music with explicit lyrics is available to be played
on a jukebox. The explicit music filter is disabled by default so you can select all music,
including those with explicit lyrics.
Figure 18 Explicit Content and Edited Content areas for a Gen 3 jukebox.
2. Set the explicit and edited music filters using the following table as a guide:
Allow Explicit
Content
Result:
Setting:
Explicit music unavailable Disabled
Edited music unavailable
Allow Edited
Content
Setting:
Disabled
Explicit music unavailable Disabled
Edited music available
Enabled
Explicit music available
Edited music unavailable
Enabled
Disabled
Explicit music available
Edited music available
Enabled
Enabled
Content Setting
Examples:
The explicit and edited music filter are set.You must save the explicit and edited music filter
settings in order to apply it to the jukebox.
3. Click Save Changes at the bottom of the Music Filters page.
159
Managing Music Filters for a Jukebox in the TouchTunes Dashboard
The Confirmation page appears. You use this page to confirm the music filter settings, as well
as to save music filters to filter sets.
Figure 19 Confirmation page for Gen 3 jukeboxes
Next, determine if the music filter(s) are saved as the default settings for the jukebox or are
saved as a filter set. You save the explicit and/or edited filters to a filter set if you want to be
able to control when these settings are active on a jukebox. For more information on filter sets
and when to use them, see “Scheduling a Music Filter Set on a Gen 3 Jukebox” on page 173.
4. Do one of the following to determine if the explicit (and/or edited) music filter setting should
become the default setting for a jukebox or should be applied to a music filter set:
• To update the default jukebox settings with the music filter settings, make sure Save As
Default Filter is selected and then continue to step 5.
• To update an existing filter set with the music filter settings, choose Save For Scheduling
and then go to step 6.
• To create a new filter set with the music filter settings, choose Save For Scheduling and then
go to step 7.
160
Determining the Music Styles Allowed on a Jukebox
5. To make the explicit and edited filter settings the default settings for the jukebox, click Save
As Default Filter.
The Music Filters page reappears to confirm the change to the explicit and edited filters.
6. To update an existing filter set with the new music filter settings, choose the filter set you
want to update from the list that appears and then click Save As An Existing Filter Set.
The Music Filters page reappears to confirm the change to the filter set. To schedule when a
filter set is active, “Scheduling a Music Filter Set on a Gen 3 Jukebox” on page 173.
7. To create a filter set from the music filter settings, enter the name for the new filter set in the
field indicated and then click Save as...
The Music Filters page reappears to confirm that a new filter set is created from the music
filter settings. To schedule when a filter set is active, see “Scheduling a Music Filter Set on a
Gen 3 Jukebox” on page 173.
Determining the Music Styles Allowed on a Jukebox
Can I control what music styles appear on a jukebox
through the TouchTunes Dashboard?
You use the allowed styles music filter to set the music styles (music categories such as Pop, Rock
or Rap) that are available for play on a jukebox. You generally use this filter to match the music
available on a jukebox to a location’s particular theme, such as featuring Country & Western
music on the jukebox of a bar with a western theme.
Most general music styles contain multiple sub-genres; for example, the Pop music genre
contains sub-genres like Alternative, Dance and Disco. While you use the allowable styles music
filter to control the general music styles on a jukebox, you can also use this filter to tailor the
music selection for a location by adding or removing sub-genres.
NextGen and Gen 3 jukeboxes have separate procedures for setting up the allowed styles music
filters.
161
Managing Music Filters for a Jukebox in the TouchTunes Dashboard
• To set up the allowed styles music filter on a NextGen jukebox, see “To set the music genres and
styles for a NextGen jukebox:” on page 162
• To set up the allowed styles music filter on a Gen 3 jukebox, see “To set the music genres and
styles for a Gen 3 jukebox:” on page 164.
To set the music genres and styles for a NextGen jukebox:
1. View the music filters for a jukebox. See “Viewing Music Filters on a Jukebox using the
TouchTunes Dashboard” on page 153.
2. Navigate to the Allowed Styles area on the Music Filters page.
This area shows all available music styles for the jukebox. By default, all music genres are
available on a jukebox.
Figure 20 Allowed Styles area for a NextGen jukebox
3. Click + (plus sign) beside the name of the music genre that you want to modify.
The styles for the music genre appear.
Figure 21 Styles for the Country music genre
4. Do any of the following to customize the music styles and genres for the jukebox:
• To add a music genre to the jukebox, enable the Select All / None option for the genre.
• To remove a music genre from the jukebox, disable the Select All / None option for the
genre.
162
Determining the Music Styles Allowed on a Jukebox
• To remove a music style from the jukebox, disable its option.
• To add a music style to the jukebox, enable its option.
Only the music for styles or genres that are enabled are available for play on the jukebox.
Figure 22 Bluegrass music style disabled in the Country music genre
5. Once you have customized the music genres and styles for the jukebox, click Save Changes
at the bottom of the Music Filters page.
The Confirmation page appears. You use this page to confirm the music filter settings before
they are applied to the jukebox.
Figure 23 Confirmation page for a NextGen jukebox
6. Click Apply Changes.
163
Managing Music Filters for a Jukebox in the TouchTunes Dashboard
The Music Filters page reappears to confirm the change to the music filter.
The music filter is applied to the jukebox the next time it connects to the TouchTunes server.
If your jukebox connects to the TouchTunes server using a broadband connection, the
settings are applied to the jukebox when you log out of the Dashboard. Otherwise, the
setting on the jukebox is updated the next time it connects to the TouchTunes server through
its dial-up connection.
To set the music genres and styles for a Gen 3 jukebox:
1. View the music filters on a jukebox. See “Viewing Music Filters on a Jukebox using the
TouchTunes Dashboard” on page 153.
2. Navigate to the Allowed Styles area on the Music Filters page.
This area shows all the music genres available for a jukebox. By default, all music styles are
available on a jukebox.
Figure 24 Allowed Styles area for a Gen 3 jukebox
3. Click + (plus sign) beside the name of the music genre that you want to modify.
164
Determining the Music Styles Allowed on a Jukebox
The music styles for this genre appear.
Figure 25 Styles for the Country music genre
4. Do any of the following to add or remove music genres or sub-genres from the jukebox:
• To add a music genre to the jukebox, enable the Select All / None option for the genre.
• To remove a music genre from the jukebox, disable the Select All / None option for the
genre.
• To remove a music style from the jukebox, disable its option.
• To add a music style to the jukebox, enable its option.
Disabling an option removes the music for the genre or style from play on the jukebox.
Figure 26 Bluegrass music style disabled in the Country music genre
5. Once you have customized the music genre and styles for the jukebox, click Save Changes at
the bottom of the Music Filters page.
165
Managing Music Filters for a Jukebox in the TouchTunes Dashboard
The Confirmation page appears. You use this page to confirm the music filter settings, as well
as to save music filters as filter sets for scheduling.
Confirmation page for Gen 3 jukeboxes
Next, determine if the music filter is saved as the default settings for the jukebox or are saved
as a filter set. You save the allowed styles music filter to a filter set if you want to be able to
control when these settings are active on a jukebox. For more information on filter sets and
when to use them, see “Scheduling a Music Filter Set on a Gen 3 Jukebox” on page 173.
6. Do one of the following to determine if the allowed styles filter becomes the default for a
jukebox or is saved to a music filter set:
• To update the default jukebox settings with the music filter settings, ensure that Save As
Default Filter is selected and then continue to step 7.
• To update an existing filter set with the music filter settings, choose Save For Scheduling
and then go to step 8.
• To create a new filter set from the music filter settings, choose Save For Scheduling and
then go to step 9.
166
Scheduling TuneCentral for a NextGen Jukebox
7. To make the allowed styles music filter settings the default for the jukebox, click Save As
Default Filter.
The Music Filters page reappears to confirm that the allowed styles filter is changed.
8. To update an existing filter set with the new music filter settings, choose the filter set you
want to update from the list that appears and then click Save As An Existing Filter Set.
The Music Filters page reappears to confirm the change to the filter set. To schedule when a
filter set is active, “Scheduling a Music Filter Set on a Gen 3 Jukebox” on page 173.
9. To create a filter set from the music filter settings, enter the name for the new filter set in the
field indicated and then click Save as...
The Music Filters page reappears to confirm that a new filter set is created from the music
filter settings. To schedule when a filter set is active, see “Scheduling a Music Filter Set on a
Gen 3 Jukebox” on page 173.
Scheduling TuneCentral for a NextGen Jukebox
Can I schedule TuneCentral through the TouchTunes
Dashboard? Do music filters apply to TuneCentral?
You can use the TouchTunes Dashboard to schedule when music from the TuneCentral music
library is available on NextGen jukeboxes. Unlike other music filters, you use the Advanced menu
in the Dashboard to add, modify or remove events to the TuneCentral schedule for a jukebox.
However, TuneCentral availability is considered a music filter because you can use it to restrict
music selections on a jukebox. When TuneCentral is unavailable, the music available on a
jukebox is restricted to only the music stored on its local drive (the main hard drive in the
jukebox).
You can use this filter if a location owner asks you to restrict the music for their location to
selections from a pre-approved music playlist over a certain time period. To do this, you load the
pre-approved music to the local drive of the jukebox and then disable TuneCentral for this time
period. During this period, music from TuneCentral is not available and the only selections from
167
Managing Music Filters for a Jukebox in the TouchTunes Dashboard
this list can be played on the jukebox. Outside of this time period, music from TuneCentral is
accessible on the jukebox.
Note that all other music filters (such as explicit and Name filters) are applied to the all music
currently available on a jukebox. When TuneCentral is unavailable, music filters apply to the
music on the local drive of the jukebox. When TuneCentral becomes available, music filters apply
to both the music on the local drive and the music in TuneCentral.
• To add a new event to, or modify an existing event on the TuneCentral schedule for a jukebox,
see “To schedule when TuneCentral is available:” on page 168.
• To remove an existing event from the TuneCentral schedule for a jukebox, see “To remove an
existing event from the TuneCentral schedule:” on page 171.
To schedule when TuneCentral is available:
1. In the TouchTunes Dashboard, choose Advanced | Schedules.
The Advanced Features & Schedules page appears. The TuneCentral Schedule area on this
page shows the current schedule for TuneCentral on the jukebox. You use the controls in this
area to add or modify events to the schedule.
Figure 27 Advanced Features and Schedules page for NextGen jukeboxes
Note: Not all users can modify the TuneCentral schedule for a jukebox. When a jukebox is
associated with a Customer account, you can view its TuneCentral schedule but you cannot
modify it. For more information, contact TouchTunes Technical Support.
168
Scheduling TuneCentral for a NextGen Jukebox
2. If necessary, select the jukebox for which you want to schedule TuneCentral availability from
the Choose Another Jukebox list.
3. Do either of the following:
• To add a new event to the TuneCentral schedule, click Add a New TuneCentral Schedule.
• To modify an existing event on the TuneCentral schedule, click the event in the TuneCentral
Schedule area.
The TuneCentral Schedule page for the jukebox appears. You use the controls on this page to
define the time period when TuneCentral is available.
Figure 28 TuneCentral Schedule page for a new event
4. Use the controls in the Start Time and End Time areas to define the time period when
TuneCentral is available.
Tip: Set the Start Time and End Time to the same value to schedule TuneCentral for an entire
day (23 hours and 59 minutes).
169
Managing Music Filters for a Jukebox in the TouchTunes Dashboard
5. In the Days area, select one of the following to define the day(s) of the week for the
TuneCentral schedule:
Select:
Everyday
Weekdays
Weekends
Custom
To:
Enable TuneCentral at the specified time each day during
the week.
Enable TuneCentral at the specified time from Monday to
Friday.
Enable TuneCentral at the specified time on Saturday and
Sunday only.
Enable TuneCentral at the specified time on a particular day.
Figure 29 TuneCentral Schedule page configured to allow TuneCentral availability over the weekend
You are now ready to add the new event to or update the event on the TuneCentral schedule.
6. Click Add TuneCentral Period (to add a new TuneCentral event to the schedule) or Accept
Schedule Changes to TuneCentral Period (to update an existing event on the schedule).
170
Scheduling TuneCentral for a NextGen Jukebox
The TuneCentral area on the Advanced Features & Schedules page shows the updated
TuneCentral schedule.
Figure 30 Advanced Features & Schedules page showing new TuneCentral scheduled event
To remove an existing event from the TuneCentral schedule:
1. In the TouchTunes Dashboard, choose Advanced | Schedules.
171
Managing Music Filters for a Jukebox in the TouchTunes Dashboard
The Advanced Features & Schedules page appears. The TuneCentral Schedule area on this
page shows the current schedule for TuneCentral on the jukebox.
Figure 31 Advanced Features and Schedules page for NextGen jukeboxes
2. If necessary, select the jukebox for which you want to schedule TuneCentral availability from
the Choose Another Jukebox list.
The TuneCentral Schedule area shows current scheduled TuneCentral events for the
jukebox.
3. Click the event that you want to remove from the TuneCentral schedule.
172
Scheduling a Music Filter Set on a Gen 3 Jukebox
The details for the scheduled event appear in the TuneCentral Schedule page.
Note: The next step permanently removes a scheduled event from the TuneCentral schedule.
Ensure that the event you want to delete appears in the TuneCentral Schedule page before
continuing.
4. On the TuneCentral Schedule page, click Remove Period.
The Advanced Features & Schedules page reappears, confirming that the event is removed
from the TuneCentral schedule.
Scheduling a Music Filter Set on a Gen 3 Jukebox
Can I schedule my music filters using the TouchTunes
Dashboard?
You can schedule when a filter set (a single group of music filters) are applied to a Gen 3 jukebox.
Scheduling filter sets gives you flexibility to accommodate locations with rules about when
certain music (such as explicit music or music in a particular genre) should be available on their
jukebox.
For example, assume that one of your jukeboxes is installed in a location with connected bar and
restaurant sections. The location owner asks you to set up their jukebox using the following
rules:
• From 12 - 8 PM, explicit and edited music should not be available on the jukebox, since this is
the time when families with children are usually in the restaurant.
• From 8 - 10 PM, edited music can be available on the jukebox, since families with children are
less likely to be in the restaurant.
• From 10 PM onwards, explicit music can be available on the jukebox, since it is unlikely that
families with children will be in the restaurant.
To do this, you first create a separate filter set for each time period with the appropriate settings
for the explicit and edited music filters. Once these filter sets are created, you schedule the time
period when each set is active according to the schedule set by the location owner.
173
Managing Music Filters for a Jukebox in the TouchTunes Dashboard
To schedule a music filter set:
1. View the music filters on a jukebox. See “Viewing Music Filters on a Jukebox using the
TouchTunes Dashboard” on page 153.
2. Select any filter set from the Choose a Filter Set list and then click Schedule This Setting.
The Music Filters Scheduling View page appears. You use this page to set when a filter set is
active on a jukebox.
Figure 32 Music Filters Scheduling View page
3. Do one of the following to set the schedule for a filter set:
• Click Add Scheduling Event.
• Click any future time slot in the schedule (below the red line) that is open.
174
Scheduling a Music Filter Set on a Gen 3 Jukebox
The Scheduling window appears. You use this window to define when a filter set is active on
the jukebox.
Figure 33 Scheduling window
4. In the Step 1: Choose a Recurrence area, select one of the following options to set whether
and how often a filter set repeats:
Option:
Does not
repeat
Weekly
Monthly
Yearly
Result:
The filter set is applied to the
jukebox only once.
Use Case:
Use this option when you want to apply a
filter set for certain occasions that do not
repeat on a regular basis, such as an office
party or wedding reception.
The filter set repeats on the
Use this option when you want to reapply
specified day(s) of the week.
a filter set on the same day each week,
such as to restrict explicit music from
being played between 5 and 9 PM each
day except for weekends.
The filter set repeats on the same Use this option when you want to reapply
day each month.
a filter set each month, such as to
accommodate special theme-based days
on the 5th, 15th and 25th of each month.
The filter set repeats on the day Use this option to reapply a filter set on a
each year.
certain day each year, such as to allow
Christmas music to be available only on
December 25th each year.
The controls in the Set Time and Specify Action(s) areas change depending on what option
you choose. Next, use these controls to define when and for how long a filter set will be active
on a jukebox.
175
Managing Music Filters for a Jukebox in the TouchTunes Dashboard
5. In the Set Time area, do the following to set the day(s) and time when a filter set is applied:
• From the Setting Value At list, select the starting time when the filter set is active on the
jukebox. The filter set is active on the jukebox from this time until the next scheduled filter
set event.
• Set the day(s) of the week, month or year that the filter set is active.
• (Optional) For weekly filters, set the duration (in months) over which the filter is active.
Figure 34 Set Time area showing a music filter that is repeated on Monday, Wednesday and Friday of each week
6. In the Specify Action(s) area, select the filter from the Music Filters list that is to be active on
the jukebox at the time and date specified in the previous step.
176
Scheduling a Music Filter Set on a Gen 3 Jukebox
7. (Optional) Click Add Scheduling Event Template and then repeat the previous two steps to
either extend the time period for the filter set and/or schedule other music filters for the
jukebox.
Figure 35 Scheduling window showing extension of the No_ExplicitEdited Music filter duration
You should be aware of the following when using the Scheduling window:
• You can remove any additional scheduled event by clicking Remove Scheduled Event
Template. Because the Dashboard does not confirm this action, be sure that you are
removing the correct event before clicking this button. Otherwise, you must re-create the
event.
• There is no limit as to how many filter set events can be set up in the Scheduling window. A
good rule-of-thumb is to set the schedule for a single filter set before scheduling other filter
sets on the same jukebox. Otherwise, you may become confused between schedules for
different filter sets.
• There is no limit on how long a filter set can be active on a jukebox. However, consider
making a filter set the default filter set for the jukebox if you want to apply a music filter set
for several hours on a regular basis. Otherwise, the filter set schedule may become so
congested that adding or modifying scheduling events becomes nearly impossible.
177
Managing Music Filters for a Jukebox in the TouchTunes Dashboard
8. Once you complete the schedule for your music filter sets, click Save Schedule in the Step 3:
Accept or Discard Changes area.
The Music Filters Scheduling View page reappears, showing the filter set(s) that you
scheduled. Each filter set event scheduled in the jukebox appears in its time period.
Figure 36 Dashboard schedule showing a weekly filter set event
Recurring events in the schedule are identified by a icon with the letter following the icon
indicating whether the event recurs weekly (w), monthly (m) or yearly (y).
Figure 37 Recurring weekly event
Once you schedule a filter set event in the TouchTunes Dashboard, you can add additional
events, as well as modify or delete existing filter set events.
9. (Optional) Do any of the following:
178
Scheduling a Music Filter Set on a Gen 3 Jukebox
• Schedule another filter set event by clicking Add Scheduled Event and then repeating
steps 4 to 8.
• Modify an event for a filter set by clicking Edit in the time period for the event and then
modifying the details for the filter set in the Scheduling window that appears. Note that
modifying one instance of a repeating filter set event changes all instances of this event. For
example, if you move the starting time for one weekly filter set event from 5 PM to 5:15 PM,
all other events are also moved to 5:15 PM.
• Delete a scheduled event for a filter set by clicking Remove in the time period for the event
and then confirming the action. Note that when you delete one instance of a repeating filter
set event, all instances of the events are deleted. You cannot delete a single filter set event
from a series of recurring events.
10.Return to the Dashboard by clicking Close at the top of the Music Filters Scheduling View
page.
The Music Filters page reappears to confirm that the jukebox schedule is updated.
179
Managing Music Filters for a Jukebox in the TouchTunes Dashboard
180
Setting Up Communications Settings
Using the TouchTunes Dashboard
This chapter explains how to set the connection time when your TouchTunes
jukebox communicates with the TouchTunes server through the TouchTunes
Dashboard.
Contents
Overview . . . . . . . . . . . . . . . . . . . . . . . . . . . . . . . . . . . . . . . . . . . . . . . . . . . . . . . . . . . . . . . . 181
Configuring Jukebox-related Communications Settings . . . . . . . . . . . . . . . . . . . 182
Overview
You can use the TouchTunes Dashboard to establish the connection period when your jukebox
will communicate with the TouchTunes server. The connection period is used to accomplish
different tasks, depending on the type of connection established between the jukebox and the
TouchTunes server:
• On jukeboxes using dial-up Internet access, the connection period is when the jukebox calls
the TouchTunes server for all communication related needs, such as downloading new songs,
receiving configuration changes made via the TouchTunes Dashboard, reporting revenue, or
periodically, downloading software upgrades.
• On jukeboxes using broadband internet access, the connection period is when the jukebox
reports its daily income and plays, as well as downloads and installs any available jukebox
software updates. However, because the jukebox is continually connected to the TouchTunes
server, many other communication-related tasks (such as settings changes done through the
Dashboard) are immediate.
181
Setting Up Communications Settings Using the TouchTunes Dashboard
In this chapter, you will find answers to the following questions:
• “What communications-related settings for a jukebox are available through the TouchTunes
Dashboard? How do I modify the time period when a jukebox calls the TouchTunes server?” (p.
182)
Configuring Jukebox-related Communications Settings
What communications-related settings for a jukebox are available through
the TouchTunes Dashboard? How do I modify the time period when a
jukebox calls the TouchTunes server?
The only setting you can control solely from the TouchTunes Dashboard is the starting and
ending time for the daily connection period when your jukebox connects to the TouchTunes
server.
This is a safety precaution that prevents you or your employees from inadvertently preventing
the jukebox from communicating with the TouchTunes server. If a jukebox does not connect to
the TouchTunes server for three to five days, it automatically shuts down and must be reset by
TouchTunes.
To access the full set of communication settings, you must go on-site. See the Jukebox Software
Operator’s Manual for a breakdown of all communication settings available for your jukebox.
Note: The name of the connection period setting varies by jukebox generation. For example,
this setting is called the Calling Window for NextGen jukeboxes.
To view jukebox-related communications settings:
1. In the TouchTunes Dashboard, choose My Jukeboxes | Settings.
2. If necessary, select the jukebox whose connection window you want to change from the
Choose Another Jukebox list.
3. Choose Connection from the left-side menu.
182
Configuring Jukebox-related Communications Settings
The Connection Settings page appears. You use the controls on this page to set the
connection window when the jukebox communicates with the TouchTunes server.
Figure 13 Connection Settings Page
Before setting the connection window, note the following:
• For jukeboxes using a dial-up Internet connection, the longer the calling window, the more
songs the jukebox will be able to download, which can have a greater impact on slower dialup connections. The busiest time for the TouchTunes server is between 4 and 8 AM Eastern
time. If you can set the jukebox to call outside of this time period, you may get better
throughput.
• If you are using a broadband connection, while the jukebox may be continually connected
to the Internet, the calling window is still used to identify when songs are downloaded and
software maintenance can occur. Since the functionality of the jukebox could be interrupted
during software maintenance, the calling window should remain outside of the location's
operating hours.
Note: Software maintenance only occurs a few times per year.
• Connection times can be displayed in 24-hour time format (00:00-24:00) or in the 12 -hour
AM/PM format
4. To set when the jukebox will begin its connection each night, select a time from the Start
Connection At list.
5. To set when the jukebox will end its connection each night, select a time from the End
Connect At list.
6. Click Accept Changes.
The Connection Settings page indicates whether the changes were successful.
If the jukebox to which you are applying changes is connected by dial-up, these new settings
will be applied at the next connection time. The jukebox then continues to use these new
settings.
183
Setting Up Communications Settings Using the TouchTunes Dashboard
If the jukebox to which you are applying changes is connected by broadband, the changes
will be applied immediately. If you are in the middle of the current connection time, the new
connection window is implemented the following night.
For more information on connection settings, and more details on setting the connection
time, see the Jukebox Software Operator’s Manual for your jukebox. This document is available
from the Documentation page in the Dashboard, which you can access by choosing
TouchTunes | Documentation.
7.
Rebooting a Jukebox Remotely
How can I reboot a jukebox through the Dashboard?
Rebooting a jukebox can sometimes fix issues that cannot otherwise be resolved. To make this
process more convenient, Gen 3 jukeboxes with through a broadband connection can be
rebooted remotely from the Dashboard.
To reboot a Gen 3 jukebox that has a broadband connection
1. In the TouchTunes Dashboard, choose My Jukeboxes | Summary.
2. From the drop-down menu, select the jukebox you want to reboot.
3. Click the Initiate Reboot button.
Communications with the jukebox should resume once it has completely rebooted.
184
Monitoring Jukeboxes Using the
TouchTunes Dashboard
This chapter explains how to monitor the status of your jukeboxes through
TouchTunes Dashboard, as well as how to view the current diagnostics for
Gen 3 jukeboxes.
Contents
Overview . . . . . . . . . . . . . . . . . . . . . . . . . . . . . . . . . . . . . . . . . . . . . . . . . . . . . . . . . . . . . . . . 185
Viewing Jukebox Connectivity Status . . . . . . . . . . . . . . . . . . . . . . . . . . . . . . . . . . . . . 186
Viewing Gen 3 Jukebox Diagnostics . . . . . . . . . . . . . . . . . . . . . . . . . . . . . . . . . . . . . . 188
Overview
You can use the TouchTunes Dashboard to monitor the general status of all of your jukeboxes
and ensure they are operating properly. Using the Dashboard to monitor the health of your
jukeboxes can help you identify, diagnose and correct problems with a jukebox even before the
location owner becomes aware there was a problem in the first place.
The Dashboard provides useful connection-related information for all of your jukeboxes,
including their connection modes, the last time each jukebox connected to the TouchTunes
server and the number of new songs it received during this connection. You can use this
information to ensure that your jukeboxes are operating properly, as well as troubleshoot any
connectivity problems, such as the jukebox not being able to call to the TouchTunes server
because its phone line was accidentally unplugged.
Gen 3 jukeboxes provide a thorough list of diagnostics in the TouchTunes Dashboard that
indicate the status of key jukebox components, such as the bill and coin collectors. You can also
configure the Dashboard to alert you by e-mail in case of critical problems with one of these
components.
185
Monitoring Jukeboxes Using the TouchTunes Dashboard
In this chapter, you will find answers to the following questions:
• “How do I know if my jukeboxes are connecting properly to the TouchTunes Dashboard?” (p.
186)
• “What diagnostics can I monitor for a Gen 3 jukebox using the TouchTunes Dashboard?” (p.
188)
Viewing Jukebox Connectivity Status
How do I know if my jukeboxes are connecting properly to
the TouchTunes Dashboard?
You can view a report showing the connection status for all of your jukeboxes in the TouchTunes
Dashboard and use this report to quickly identify any jukeboxes with connectivity problems. If
necessary, you can then troubleshoot the issue and schedule an on-site visit to correct the
problem.
To view the status of your jukeboxes:
1. In the TouchTunes Dashboard, choose My Reports | Jukeboxes.
The Jukeboxes Route Report page appears, listing all of your jukeboxes and showing their
status.
Figure 14 Jukeboxes Route Report page
186
Viewing Jukebox Connectivity Status
Use the following table to help you interpret this report.
Column:
Location
Jukebox ID
Model
Status
Last Connection:
Date and Time
Last Connection:
Connection Mode
Description:
The current location of the jukebox.
The ID number of the jukebox.
The jukebox model and TuneCentral installation status.
The current overall status of the jukebox. Green
checkmark icons ( ) in this column indicate healthy
jukeboxes. Otherwise, an icon indicating the type of
problem with the jukebox appears here.
The date and time of the last connection between the
jukebox and the TouchTunes server.
The connection mode used for the last connection
between the jukebox and the TouchTunes server.
• If your jukeboxes use a dial-up connection, the phone
number of the Internet service provider appears here.
• If your jukeboxes use a broadband connection, a
connectivity status icon appears here. Green icons ( )
indicate no connectivity problems, yellow icons ( )
show connectivity problems but indicate that the
jukebox was able to connect to the TouchTunes server
within the past two days, while red icons ( ) indicate
there has been no connection at all between the server
and the jukebox.
Connection(s) Today: The total duration of the connections between the
Duration
jukebox and the TouchTunes server today.
Connection(s) Today: The total number of new songs sent to the jukebox and
New Songs Sent
TuneCentral during its last connection.
2. (Optional) Click the link above the report to view only jukeboxes experiencing problems.
The Jukeboxes Route Report page shows only the jukeboxes experiencing problems, such as
when the jukebox library is full.
The following icons in the Status column show the general problem with a jukebox:
Icon (Name):
(Sleep Mode)
Problem Indicated:
The jukebox is currently in sleep mode. This mode is generally
used when moving jukeboxes between locations and may not
indicate a problem.
187
Monitoring Jukeboxes Using the TouchTunes Dashboard
Icon (Name):
Problem Indicated:
The music library for the jukebox is full. You can disregard this
icon if you have enabled the Automatically Delete Songs
(Full Jukebox
when Jukebox is Full option in the Music & System Settings
Library)
page for a Gen 2 jukebox. Otherwise, you should remove
songs from the jukebox music library; see “Removing Music
from a Single Jukebox” on page 89.
The jukebox can connect to the TouchTunes server, but is not
able to maintain the connection. To handle this problem,
(Unstable
check the duration of the connection window for the jukebox
Connection)
to ensure that it is long enough; see “Configuring Jukeboxrelated Communications Settings” on page 182. If the this is
fine, check the connection settings of the jukebox on-site
using its Operators Guide.
The jukebox has not connected to the TouchTunes server
(Communications within the last 5 days. You can disregard this icon if the
jukebox is new and its communications settings are not yet
Down)
configured. Otherwise, this icon indicates that the jukebox is
experiencing major communications difficulties. To handle
this problem, you must check the connection settings for the
jukebox on-site using its Operators Guide.
3. (Optional) Export the report showing the status of your jukeboxes from the TouchTunes
Dashboard to any of the file formats listed below the report area.
Viewing Gen 3 Jukebox Diagnostics
What diagnostics can I monitor for a Gen 3 jukebox using
the TouchTunes Dashboard?
For Gen 3 jukeboxes that use a broadband Internet connection, you can use the TouchTunes
Dashboard to monitor diagnostics that continually test the health of key components, including:
• The temperature and status of the jukebox hardware
• Activation of the jukebox operator UI
• The status of bill or coin collectors
Using the Dashboard to monitor these diagnostics allows you to identify certain jukebox
components that are either experiencing problems or have failed, and schedule an on-site visit
before the location owner is even aware of the problem.
Tip: You can set up e-mail alerts for jukebox diagnostics in the TouchTunes Dashboard. If a
diagnostic test on a jukebox indicates a component failure, you are alerted through an e-mail.
To set up e-mail alerts, choose My Info | Alerts and then follow the instructions in the Help
bubble. You can set alerts to be sent to multiple e-mail addresses. For further assistance on
setting up e-mail alerts, contact TouchTunes Technical Support.
You can also disable diagnostic tests on the Dashboard if you are already aware of a problem. For
example, assume that you have dispatched a technician to troubleshoot an unstable connection
188
Viewing Gen 3 Jukebox Diagnostics
problem with one of your jukeboxes. Because you know that your technician needs to access the
Operator UI (a special UI that is used when configuring jukebox settings on-site), you can disable
this diagnostic test to avoid seeing false alerts when the technician is accessing this UI.
To view jukebox diagnostics:
1. In the TouchTunes Dashboard, choose My Jukeboxes | Diagnostics.
The Jukebox Diagnostics page appears. You use this page to view diagnostics for your Gen 3
jukeboxes.
Figure 15 Jukebox Diagnostics page
2. If necessary, choose the jukebox whose diagnostics you want to view from the Choose a
Jukebox list.
Diagnostics for the selected jukebox appear.
3. Review the icons for each diagnostic test to identify any components on the jukebox that
have failed.
Green icons in the list indicate that the component is functioning properly, while red icons
indicate components that have failed or are experiencing problems. White icons indicate
diagnostic tests that have been disabled.
Figure 16 A problem indicated on coin acceptor’ s micro switch
189
Monitoring Jukeboxes Using the TouchTunes Dashboard
Tip: If you find that some of the diagnostic tests for a jukebox are generating too many false
alerts, you may be able to adjust the test through the TouchTunes Dashboard. Diagnostic
tests are accessible through the hardware settings for a jukebox. To access these settings,
choose My Jukeboxes | Settings, select Hardware from the left-side menu, and then use the
controls in the Diagnostics & Alerts area to adjust the test.
4. (Optional) To disable the diagnostic test for a component, click [disable] beside its status
icon.
You are prompted to confirm that the test should be disabled.
5. Click OK when prompted.
The diagnostic test is disabled for the selected jukebox and its status icon turns white.
A disabled diagnostic test remains disabled until you manually re-enable it by clicking
[enable] beside its status icon.
190
Monitoring and Managing PlayPorTTs
Using the TouchTunes Dashboard
This chapter explains how you can monitor and manage your PlayporTT
game devices through the TouchTunes Dashboard.
Contents
Overview . . . . . . . . . . . . . . . . . . . . . . . . . . . . . . . . . . . . . . . . . . . . . . . . . . . . . . . . . . . . . . . .
Managing PlayporTT Settings . . . . . . . . . . . . . . . . . . . . . . . . . . . . . . . . . . . . . . . . . . . .
Modifying Game Settings on a PlayPorTT . . . . . . . . . . . . . . . . . . . . . . . . . . . . . . . . .
Modifying Money Settings on a PlayPorTT . . . . . . . . . . . . . . . . . . . . . . . . . . . . . . . .
Modifying System Schedule settings on a PlayPorTT . . . . . . . . . . . . . . . . . . . . . .
Modifying System Tools settings on a PlayPorTT . . . . . . . . . . . . . . . . . . . . . . . . . .
Monitoring PlayPorTT Gaming Statistics . . . . . . . . . . . . . . . . . . . . . . . . . . . . . . . . . .
191
192
193
194
196
198
199
Overview
Like jukeboxes, PlayporTTS can be managed and monitored directly from the TouchTunes
Dashboard. When communicating with a PlayPorTT using the TouchTunes Dashboard, the
communications are sent to the PlayPorTT tower and then communicated to each PlayPorTT
connected to it. This means the settings that can be modified from the Dashboard will affect
each PlayPorTT connected to the tower. However, although the handhelds connected to a
tower will share the same settings, it is possible to examine money and gaming statistics for a
specific handheld.
191
Monitoring and Managing PlayPorTTs Using the TouchTunes Dashboard
Managing PlayporTT Settings
Where can I adjust my PlayporTT settings on the
TouchTunes Dashboard?
The My Jukeboxes - Settings page is also used to modify settings on your PlayporTT gaming
devices.
You can identify a PlayPorTT tower from the Choose another device drop-down menu by its
“PP” prefix.
Figure 15 Selecting a PlayPorTT from the drop-down list of devices
• To set up Game settings on a PlayporTT, see “How do I modify the Game settings for my PlayPorTT
handhelds using the TouchTunes Dashboard?” on page 193
• To set up Money settings on a PlayporTT, see “How do I modify the Money settings for my
PlayPorTT handhelds using the TouchTunes Dashboard?” on page 194
• To set up System Schedule settings on a PlayporTT, see “How do I modify the System Schedule
settings for my PlayPorTT handhelds using the TouchTunes Dashboard?” on page 196
• To set up System Tools settings on a PlayporTT, see “How do I modify the System Tools settings for
my PlayPorTT handhelds using the TouchTunes Dashboard?” on page 198
192
Modifying Game Settings on a PlayPorTT
Modifying Game Settings on a PlayPorTT
How do I modify the Game settings for my PlayPorTT
handhelds using the TouchTunes Dashboard?
The Games page enables you to control game settings on your PlayPorTTs, including the price
for each game.
To set up the game settings for a PlayPorTT:
1. In the TouchTunes Dashboard, choose My Jukeboxes | Settings.
2. Select a PlayPorTT to manage from the drop-down list. You can identify a PlayPorTT tower
from the Choose another device drop-down menu by its “PP” prefix.
3. At the left of the screen, click Games.
Figure 16 The Games setting page for PlayPorTTs on the Dashboard
The Games page appears.
The following describes the function of each setting on the Games page:
Games Options
• Reset to Defaults - Select this to return all game rules to the factory default values.
• Card Game Graphics - Select either Cards or Tiles
• Allow Wild Cards - Check this option to enable wild cards to be used in card games.
193
Monitoring and Managing PlayPorTTs Using the TouchTunes Dashboard
• Show Trivia Answers - Check this option to show the answers to trivia questions that are
answered incorrectly.
• High Score Free Games - Check this option to give free games to patrons who break existing
high scores on games.
• Fan Card Decks 10 seconds - Check this option to display the full deck to patrons before a game
starts.
• Allow Buy In - Check this option to allow a game to be continued, if the game supports it.
Games pricing
• Change All - Set the pricing (in credits) for all your games simultaneously. You can set them
to 1,2,3 or 4 credits. If you set them all to disabled, the games will not be playable. Note that
you can also set the pricing for each game individually.
Modifying Money Settings on a PlayPorTT
How do I modify the Money settings for my PlayPorTT
handhelds using the TouchTunes Dashboard?
The Money page enables you to set and modify money settings for your PlayPorTTs. This
includes which increments it will accept with credit card purchases and which Credit Rules Set is
active. To set the price for games individually, use the Game settings page.
To set up the money settings for a PlayPorTT:
1. In the TouchTunes Dashboard, choose My Jukeboxes | Settings.
2. Select a PlayPorTT to manage from the drop-down list. You can identify a PlayPorTT tower
from the Choose another device drop-down menu by its “PP” prefix.
194
Modifying Money Settings on a PlayPorTT
3. At the left of the screen, click Money.
Figure 17 The Money settings page for PlayPorTTs on the Dashboard
The Money settings page appears.
The following describes the function of each setting on the Money page:
Credit Cards
• Check off the amounts a customer can select when purchasing credits with a credit card.
Free play
• Check this to offer the use of the PlayPorTT at no cost to your patrons.
Credit Rules Sets
• Reset to Defaults - Select this to return all credit rules to the factory default values.
Active Credit Rules Set - Select and activate a Credit Rule Set that was created on PlayPorTT
handheld or edited from the TouchTunes Dashboard.
To edit a Credit Rule:
1. Next to the Preset 1,2,3,4,5, or 6, click Edit.
The Edit Credit Rules Set for that Preset is displayed.
195
Monitoring and Managing PlayPorTTs Using the TouchTunes Dashboard
2. Adjust the Credit Set using the drop-down menus. Note that the Dashboard will not permit a
credit rule set that penalizes a patron for purchasing more credits at once.
For example, while you can a Credit Rule to give a Patron 1 credit for 25 cents, and 3 credits
for 50 cents, you cannot give a patron 2 credits for 25 cents and 3 credits for 50 cents (since
this penalizes a customer for purchasing more credits)
3. Click Save Credit Rules Set.
Figure 18 Adjusting a Credit Rules Set
Modifying System Schedule settings on a PlayPorTT
How do I modify the System Schedule settings for my
PlayPorTT handhelds using the TouchTunes Dashboard?
The System Schedules page enables you to set and modify the schedule for Erotic Content on
your PlayPorTTs.
To set up the Erotic Content schedule for a PlayPorTT:
1. In the TouchTunes Dashboard, choose My Jukeboxes | Settings.
2. Select a PlayPorTT to manage from the drop-down list. You can identify a PlayPorTT tower
from the Choose another device drop-down menu by its “PP” prefix.
196
Modifying System Schedule settings on a PlayPorTT
3. At the left of the screen, click System Schedules.
Figure 19 The System Schedules page for PlayPorTTs on the Dashboard
The System Schedules page appears.
The following describes the function of each setting on the System Schedules page:
Erotic Content Scheduling
• Change All - Select Off, Topless or Nude to quickly set the Erotic Content level for different time
periods
• Midnight to 1am - Select Off, Topless or Nude to set the Erotic Content level for these
specific hours
• 1am to 2am - Select Off, Topless or Nude to set the Erotic Content level for these specific
hours
• etc...
197
Monitoring and Managing PlayPorTTs Using the TouchTunes Dashboard
Modifying System Tools settings on a PlayPorTT
How do I modify the System Tools settings for my PlayPorTT
handhelds using the TouchTunes Dashboard?
The System Tools page enables you to modify and define the level of control you want to give to
your location owners.
To modify the System Tools settings for a PlayPorTT:
1. In the TouchTunes Dashboard, choose My Jukeboxes | Settings.
2. Select a PlayPorTT to manage from the drop-down list. You can identify a PlayPorTT tower
from the Choose another device drop-down menu by its “PP” prefix.
3. At the left of the screen, click System Tools.
Figure 20 The System Tools page for PlayPorTTs on the Dashboard
The System Tools page appears.
The following describes the function of each setting on the System Tools page:
Security and Access
• Operator PIN - Set the Pin that gives Administrative rights from a PlayPorTT’s operator menu.
This PIN is not intended to be shared with location owners.
Location Access
• Enabled - Allow a location to access the PlayPorTT’s operator menu, with location-level access.
• Location PIN - Set the PIN that gives a location-owner level access to a PlayPorTT’s operator
menu.
198
Monitoring PlayPorTT Gaming Statistics
• Allow High Score Access - Enable someone with location owner-level rights to a view, reset or
clear High Scores.
• Allow Volume Access - Enable someone with location owner-level rights to modify a
PlayPorTT’s volume.
• Allow Local Service Credit - Enable someone with location owner-level rights to add service
credits to a PlayporTT or set it to operate in free mode.
• Allow Release from Dock - Enable someone with location owner-level rights to release a
PlayPorTT from its dock from the operator menu.
• Allow Jukebox Button Access - Enable someone with location owner-level rights to turn a
PlayPorTT’s ability to access the jukebox’s UI (and play songs from it) on or off.
Monitoring PlayPorTT Gaming Statistics
Where can I see a money and gaming statistics for my
PlayporTT handhelds on the TouchTunes Dashboard?
The TouchTunes Dashboard has a page dedicated to providing you with this type of information.
To see the Game statistics for a location’s PlayPorTTs:
1. In the TouchTunes Dashboard, choose My Reports | Games. The Games page appears.
2. Select a Start Date and End date for the report, then click the Show button.
Figure 21 The My Reports - Game page tracks the gaming statistics for your PlayporTTs.
199
Monitoring and Managing PlayPorTTs Using the TouchTunes Dashboard
Use the following table to help you interpret the gaming statistics.
Column:
Location
Device ID
Free Game
Paid Game
Free Game Ratio
# of Players
Buyin Rounds
Buyin Credits
Linked Games
Total Game
Description:
The current location of the PlayporTT Tower.
The ID number of the PlayporTT Tower.
The number of free games played on all connected PlayporTTs.
The number of paid games played on all connected PlayporTTs.
The percentage of all played games that were free.
The number of unique players for all handhelds connected to the
tower.
The number of times a game was joined while in progress.
The number of credits bought in order to join an in-progress game.
The total number of linked games played for all PlayporTTs connected
to the tower.
The total number of games played for all PlayporTTs connected to the
tower.
You can also click a specific Device ID to see two additional breakdowns, by HandHeld device
and by Game.
The By Hand Helds page tracks the gaming statistics for all the PlayporTTs connected to the
tower, by handheld device.
Figure 22 The By Hand Helds report for a single PlayporTT tower
200
Monitoring PlayPorTT Gaming Statistics
Use the following table to help you interpret the gaming By HandHelds.
Column:
Device ID
Free Game
Paid Game
Buyin Rounds
Description:
The Unit number of the PlayporTT handheld.
The number of free games played on a specific handheld.
The number of paid games played on a specific handheld.
The number of times a game was joined while in progress on a
specific handheld.
Buyin Credits
The number of credits bought in order to join an in-progress game.
Average Game Duration The length of the average game on a specific handheld, in seconds.
Total Game
The total number of games played on a specific handheld
The By Games page tracks the gaming statistics for your PlayporTTs connected to the tower, for
each game.
Figure 23 The By Games report for a single PlayporTT tower
Use the following table to help you interpret the statistics By Game.
Column:
Games
Free Game
Paid Game
Buyin Rounds
Buyin Credits
Average Game
Duration
Total Game
Description:
The name of the game on the PlayPorTT.
The number of times a specific game was played for free,
on all handhelds.
The number of times a specific game was played, with
paid credits, on all handhelds
The number of times a game was joined while in
progress, on all handhelds.
The total credits earned through buyins for a specific
game.
The average length of a specific game, using statistics
from all handhelds, in seconds.
The total number of times a game was played, on all
handhelds.
201
Monitoring and Managing PlayPorTTs Using the TouchTunes Dashboard
202
Frequently Asked Questions About
the Operator Dashboard
This chapter provides the most frequently asked questions and answers for
the Operator Dashboard and shows where to find this information in the
guide.
Contents
Overview . . . . . . . . . . . . . . . . . . . . . . . . . . . . . . . . . . . . . . . . . . . . . . . . . . . . . . . . . . . . . . . .
General Dashboard Questions . . . . . . . . . . . . . . . . . . . . . . . . . . . . . . . . . . . . . . . . . . . .
User Account and Login-Related Questions . . . . . . . . . . . . . . . . . . . . . . . . . . . . . . .
Location-Related Questions . . . . . . . . . . . . . . . . . . . . . . . . . . . . . . . . . . . . . . . . . . . . . .
Music Search and Management-Related Questions . . . . . . . . . . . . . . . . . . . . . . .
Income and Accounting-Related Questions . . . . . . . . . . . . . . . . . . . . . . . . . . . . . . .
Music Filter-Related Questions . . . . . . . . . . . . . . . . . . . . . . . . . . . . . . . . . . . . . . . . . . . .
Jukebox Configuration-Related Questions . . . . . . . . . . . . . . . . . . . . . . . . . . . . . . . .
Jukebox Troubleshooting-Related Questions . . . . . . . . . . . . . . . . . . . . . . . . . . . . . .
PlayPorTT-Related Questions . . . . . . . . . . . . . . . . . . . . . . . . . . . . . . . . . . . . . . . . . . . . .
203
204
205
206
206
208
209
210
211
211
Overview
This chapter consists of frequently asked questions and answers that will assist you in your dayto-day use of the TouchTunes Dashboard.
203
Frequently Asked Questions About the Operator Dashboard
General Dashboard Questions
When is the Operator Dashboard available?
The Operator Dashboard is available almost all the time, 365 days a year. On very rare occasions,
it may be unavailable for maintenance or updating. This allows you to perform jukebox
management tasks (such as downloading music to your jukeboxes) whenever it suits you, rather
than whenever you have the time to visit a location. The constant availability of the Dashboard
is one of its major benefits. For other features and benefits of the Operator Dashboard, see
“Discovering the Features and Benefits of the TouchTunes Dashboard” on page 8.
What are the main features and benefits of the TouchTunes Dashboard?
By using the Operator Dashboard to remotely configure and monitor your jukeboxes, you can
spend less time travelling to locations and more time growing your music vending business. You
also use the Dashboard to streamline certain jukebox configuration tasks (such as distributing
music across several of your jukeboxes) and/or centralize the monitoring of jukebox health and
status in one place. Finally, using the Dashboard and setting your jukebox locations to Public
allows users of myTouchTunes to find your place of business easily on the Internet. For more
detailed information about the features and benefits of the Operator Dashboard, see
“Discovering the Features and Benefits of the TouchTunes Dashboard” on page 8.
What is the general workflow that I should follow when managing my jukeboxes through
the TouchTunes Dashboard?
The Operator Dashboard provides an integrated workflow that shows the series of events
involved with configuring and monitoring your jukeboxes. Knowing this workflow can help you
learn how to use the Dashboard more quickly and see how you can integrate it with your general
business procedures.
Although the general Dashboard workflow is mirrored in the structure of this guide, you can
view a more in-depth workflow in “Understanding the Dashboard Workflow” on page 14.
What Web browser can I use for the TouchTunes Dashboard?
You need a Web browser to use the Operator Dashboard, as it is a Web-based application. You
can use the Dashboard through most current Web browsers, including Microsoft Internet
Explorer 5.0 and higher, Mozilla 1.0 and higher and Apple Safari 2.0 and higher. For a full list of
supported Web browsers, see “Browsers Supported by the TouchTunes Dashboard” on page 2.
What are the different areas in the TouchTunes Dashboard? How do I navigate around the
Dashboard?
The Operator Dashboard features a user-friendly user interface (UI) that is easy to use and helps
you perform different tasks. For a tour of the Operator Dashboard, see “Navigating the
TouchTunes Dashboard” on page 11.
What resources are available in case I need help with the TouchTunes Dashboard?
Besides this document, you can use the help bubbles in the Operator Dashboard interface to get
immediate assistance with using Dashboard features. You can also refer to related documents
that provide more in-depth information about how to use the Dashboard with your jukeboxes.
For more information about the resources available to help you learn how to use the Operator
Dashboard, see “Help Resources for the TouchTunes Dashboard” on page 3.
204
User Account and Login-Related Questions
How can I contact TouchTunes for help and information about the Dashboard?
You can contact TouchTunes either directly from the Operator Dashboard or by contacting us by
phone or e-mail. To learn how to contact TouchTunes, see “Contacting TouchTunes” on page 4.
Can I reboot my jukeboxes from the Dashboard?
You can reboot Gen 3 jukeboxes from the Dashboard if are connected through broadband
connections. To learn how to reboot a jukebox, see “Rebooting a Jukebox Remotely” on
page 184.
User Account and Login-Related Questions
How can I get access to TouchTunes Dashboard? What do I need to do to get an Dashboard
account?
You need to request a Dashboard user account before you can begin using the Dashboard. See
“Obtaining a Dashboard User Account” on page 19 for instructions on requesting a Dashboard
user account from TouchTunes.
How much does it cost to get a Dashboard user account and use the Operator Dashboard?
Setting up an account and using the Dashboard is completely free. In order to get a Dashboard
user account, your business must currently be a valid TouchTunes partner. See “Obtaining a
Dashboard User Account” on page 19.
How do I log on to the TouchTunes Dashboard?
Once you receive your Dashboard username and password confirmation from TouchTunes, log
on to the Dashboard. For instructions on logging on to and out of the Dashboard, see “Log On
to the TouchTunes Dashboard” on page 21 and “Resetting Dashboard Passwords” on page 29.
How do I reset my lost or forgotten Dashboard password.
If you lose or forget your password, you can request a new one directly from the login screen.
Dashboard administrators can also reset passwords for their sub-users. See “Resetting
Dashboard Passwords” on page 29.
Can I give my technicians, jukebox music managers and/or location owners restricted
access to the Dashboard, such as preventing them from viewing my jukebox revenues?
You can create sub-user accounts that allow your employees and/or locations owners to use the
Operator Dashboard. When you create a sub-user account, you assign it a role that determines
what information the account can and cannot access. For example, you can assign your location
owners accounts that only allows them to browse the music catalog and select music for their
location. To learn how to set up sub-user accounts, see “Adding a Sub-User Account to the
TouchTunes Dashboard” on page 32.
How do I remove a sub-user account from the TouchTunes Dashboard?
You should remove sub-user accounts from the Operator Dashboard when they are no longer
needed in order to maintain Dashboard security and protect yourself against abuse by former
employees. For instructions on removing a sub-user account, see “Removing a Sub-User
Account from the TouchTunes Dashboard” on page 37.
205
Frequently Asked Questions About the Operator Dashboard
Location-Related Questions
How do I set up my locations in the TouchTunes Dashboard?
You set up each location where one of your jukeboxes is installed in the Operator Dashboard to
keep track of where they are and also to have more detailed breakdowns of costs and expenses
on your TouchTunes invoices. For more instructions on entering locations, see “Adding a
Location to the TouchTunes Dashboard” on page 40.
How do I move a jukebox to a different location in the TouchTunes Dashboard?
Once you have set up your locations in the Operator Dashboard, you “move” your jukeboxes to
them. This creates an association between the location and the jukebox in the Dashboard but
does not actually move the physical unit. Moving jukeboxes to your locations in the Dashboard
also allows prospective customers to locate your jukeboxes through the myTouchTunes website.
To learn how to move a jukebox to a location, see “Moving a Jukebox to a Location in the
TouchTunes Dashboard” on page 44.
How do I change a location’s name or contact information in the TouchTunes Dashboard?
You can edit the name or contact information for a location in the Operator Dashboard, in case
a restaurant or bar changes their name or ownership. Registering this change in the Dashboard
allows you to keep all of your location-related information in a single tool. For instructions on
editing information about a location, see “Modifying Location Details in the TouchTunes
Dashboard” on page 46.
Music Search and Management-Related Questions
Can I see what songs are on a jukebox at any given time using the TouchTunes Dashboard?
You can see a list of the songs currently on any of your jukeboxes using the Operator Dashboard.
Besides keeping track of what songs are on your jukebox, you can also use this list to identify and
remove the least popular songs for a jukebox in order to free up space for other music. For
instructions on browsing the list of songs on a jukebox, see “Viewing Music on a Jukebox” on
page 84.
How do I find and remove duplicate songs on a jukebox?
The Dashboard’s Jukebox Content page is equipped with a simple tool that locates duplicate
songs on jukeboxes. See “Finding Duplicate Songs on Jukebox” on page 85 for more on finding
and deleting duplicate songs.
How do I use the Dashboard to see what is going on in the music industry?
The Dashboard’s Music Portal contains several areas, including Hit Lists, Big Buzz and the
Upcoming New Releases areas that contain song rankings, news from the music industry and a
list of songs that will soon be available from TouchTunes. See “Staying Informed” on page 54 for
more on the Dashboard’s Music Portal.
How do I use the TouchTunes Dashboard to search for music by song title, album name or
artist?
The Dashboard’s Music Portal is the fastest way to find music for your jukeboxes in the
TouchTunes music library. The Music Portal contains the Dashboard’s search functionality for
206
Music Search and Management-Related Questions
finding songs, albums or artists. The Quick Search allows you to enter a search term (such as part
of a song’s name) start your search. The Dashboard’s Music Portal finds potential songs, albums
and artists in the music library and shows you how closely they matched your original search
term. The Music Portal is also full of great lists of songs you can add in their entirety to your
jukeboxes. To learn more about using the keyword search feature, see “Searching for Music
using Keywords” on page 50.
Can I find music in the TouchTunes library by song or album ID using the TouchTunes
Dashboard?
Every song and album in the TouchTunes music library is identified by a unique ID number. The
Music ID search feature is the fastest way to find and compile a list of songs or albums using the
Operator Dashboard: you enter the music ID numbers in the Dashboard and then start your
search. The Dashboard finds all the songs or albums corresponding to the IDs you entered and
compiles them into a list that you can then distribute to all of your jukeboxes. For more
information about music IDs and the music ID search, see “Searching for Music by Song or
Album ID Number” on page 55.
How do I add songs from compiled lists, such as Sylvie’s Picks or Billboard’s Top 100, using
the TouchTunes Dashboard?
You can access many different compiled music lists in the Operator Dashboard including those
from Billboard Magazine, such as the Billboard Top 40. You can also use the Dashboard to view
the music lists put together by Sylvie, TouchTunes’ own in-house music expert. You can use
these music lists to keep your jukeboxes stocked with both current and upcoming hit music for
a number of different music styles. To learn about the music lists available through the Operator
Dashboard and how to access them, see “How do I add songs from compiled lists, such as Sylvie’s
Picks or Billboard’s Top 100, using the TouchTunes Dashboard?” on page 58.
How do I use the TouchTunes Dashboard to find songs that were recently added to the
TouchTunes library?
You can access a special music list in the Operator Dashboard that includes only the latest music
added to the TouchTunes music library. You can use this list to ensure your jukeboxes are
updated with the latest new music available. For instructions on accessing this music list, see
“Identifying New Music Added to the TouchTunes Music Library” on page 61.
Can I use the TouchTunes Dashboard to request music that is not in the TouchTunes library?
TouchTunes is always interested in finding new music to add to its music library. If you cannot
find songs, albums, or artists in the TouchTunes music library, you can send a music request to
the TouchTunes music department to have them added to the library. To use the music request
feature in the Dashboard, see “Requesting Music from TouchTunes” on page 63.
What is the Music Cart? How do I move songs from a music search or a pre-compiled list in
the TouchTunes Dashboard to the Music Cart?
The Music Cart in the Operator Dashboard is a storage area where you can store music you find
from a search or pre-compiled list before distributing it to your jukeboxes. The Music Cart
provides a single place where you can both store and transfer music to your jukeboxes, greatly
simplifying the process for distributing music to your jukebox network. To learn how to add
songs to the Music Cart, see “Adding Music for Jukeboxes to the Music Cart” on page 65.
207
Frequently Asked Questions About the Operator Dashboard
How do I use the TouchTunes Dashboard to download music to my jukeboxes?
You can move music stored in your Music Cart to any of your jukeboxes or to the TuneCentral
drives attached to your jukeboxes. You can move a song (or songs) to a single jukebox, to a set
of jukeboxes, or to every one of your jukeboxes in a single action. For instructions on transferring
music from the Music Cart to your jukeboxes, see “Downloading Music from the Music Cart to a
Jukebox” on page 67.
How can I tell which songs have recently been downloaded to, or are pending download to
a jukebox through the TouchTunes Dashboard?
The Operator Dashboard keeps a record of what songs are or have been transferred to your
jukeboxes. You can access these records through the Dashboard to answer questions from
location owners who are asking when their requested music will be available on their jukebox.
To access song transfer records, see “Reviewing Music Transfers” on page 78.
Can I find out what songs are being played on a jukebox through the TouchTunes
Dashboard?
You can use the Operator Dashboard to generate a report showing you the most popular songs
over the past 30, 60 and 120 days for all of your jukeboxes, as well as for each individual jukebox.
You can use these reports to identify songs that are rising in popularity on some of your
jukeboxes that you may want to distribute to your other jukeboxes. For instructions on
generating this report, see “Tracking Song Popularity” on page 86.
How do I delete songs on a jukebox using the TouchTunes Dashboard? Can I use the
TouchTunes Dashboard to delete a song (or songs) from multiple jukeboxes
simultaneously?
You can use the Operator Dashboard to delete any song from a single jukebox or from all of your
jukeboxes in a single action. To learn how to do this, see “Removing Music from a Single
Jukebox” on page 89 or “Removing Music from Multiple Jukeboxes” on page 91.
Income and Accounting-Related Questions
What are credits and credit rules? How do I set up the credit rules for a jukebox in the
TouchTunes Dashboard?
Credits are the currency used within a jukebox for playing songs, voting for downloads or using
to bump up a song in the play queue with the Play Next! feature. Customers use real-world
currency to buy jukebox credits according to the exchange rate you set up for a jukebox called
a credit rule. To learn more about credit rules and how to set them, see “Setting Up the Credit
Rules for a Jukebox” on page 99.
How do I set the cost of Play Next! and TuneCentral through the TouchTunes Dashboard?
Play Next! and TuneCentral are premium features that you can set the price for through the
Operator Dashboard. For instructions on setting the price of these premium features, see
“Configuring Play Next! and TuneCentral Credit Settings” on page 106.
How do I view revenue for my jukeboxes using the TouchTunes Dashboard?
Each jukebox reports its daily revenue during its daily communications with the TouchTunes
server. You can view a revenue summary for all of your jukeboxes, as well as a detailed revenue
breakdown for each jukebox through the Operator Dashboard. For NextGen and Gen 3
jukeboxes, you can also see how much revenue is awaiting your collection and the last time a
208
Music Filter-Related Questions
jukebox’s revenue was collected. To learn how to access revenue summary and reports for your
jukeboxes, see “Viewing Jukebox Revenue” on page 115.
How do you track the number of plays for a jukebox through the TouchTunes Dashboard?
In some cases, your off-the-top fees depend on the number of jukebox and/or TuneCentral
plays. You can view the number of jukebox and TuneCentral plays through the Operator
Dashboard. For instructions on viewing the number of plays, see “Tracking Jukebox Plays” on
page 122.
How do I allow my jukeboxes to be found more easily by potential customers?
When you indicate on the Dashboard that you would like to make the location of your jukeboxes
public, your location is added to the myTouchTunes database. Then, through Google Maps™
functionality, the myTouchTunes Web page overlays indicators on the mySpots map to let
potential customers know where they can find your place of business. See “Modifying the Public
and Private Details in the TouchTunes Dashboard” on page 47.
Can I set up splits and off-the-top values for my collections using the TouchTunes
Dashboard? Can I check the location take for a jukebox in the TouchTunes Dashboard?
For each Gen 3 jukebox, you can enter off-the-top fees and billing splits in the Operator
Dashboard for the location where the jukebox is installed. Recording these values here allow you
to calculate the operator and location take for the jukebox when you collect and divide the
income between you and the location owner.
To learn how to enter off-the-top fees and billing splits through the Operator Dashboard, see
“Setting Billing Splits and Off-The-Top Fees” on page 111. To learn how to calculate location and
operator takes, see “Checking a Location’s Take from a Gen 3 Jukebox” on page 123.
How do I view invoices from TouchTunes (such as music services invoices) using the
TouchTunes Dashboard?
You can view PDF copies of your current and past TouchTunes invoices (including music services
invoices) through the Operator Dashboard. For instructions on accessing these invoices, see
“Viewing TouchTunes Invoices” on page 148.
Music Filter-Related Questions
How do I see what music filters are currently applied to a jukebox using the TouchTunes
Dashboard?
A music filter is a rule that controls what music is and is not available to play on a jukebox. You
can view the music filters you have set up for a jukebox through the Operator Dashboard. Using
the Dashboard to see what music filters are installed on a jukebox allows you to identify filters
that need to be created or modified to accommodate location requests. For instructions on how
to view the music filters on a jukebox, see “Viewing Music Filters on a Jukebox using the
TouchTunes Dashboard” on page 153.
How do I prevent music with explicit lyrics from being played on a jukebox using the
TouchTunes Dashboard?
You can set up an explicit music filter in the Operator Dashboard to prevent music with explicit
lyrics from being played on a jukebox. With Gen 3 jukeboxes, you can set up an additional edited
music filter that controls whether edited music (radio-friendly versions of explicit songs with the
offending lyrics removed) is available for play on a jukebox.
209
Frequently Asked Questions About the Operator Dashboard
To learn how to set up explicit (and edited) filters on a jukebox, see “Setting Up Explicit and
Edited Music Filters for a Jukebox” on page 156.
Can I control what music styles appear on a jukebox through the TouchTunes Dashboard?
You can set up an allowed styles filter in the Operator Dashboard to control the music styles and
genres that are available on a jukebox. You may set up this filter to configure the music on a
jukebox with the theme of a location, such as removing all music styles other than Country &
Western for a cowboy-themed bar. For instructions on setting up an allowed styles filter on a
jukebox, see “Determining the Music Styles Allowed on a Jukebox” on page 161.
Can I schedule TuneCentral through the TouchTunes Dashboard? Do music filters apply to
TuneCentral?
Although music filters cannot be scheduled on a Gen 2 jukebox, you can schedule when music
in the TuneCentral library is available. This feature allows you to restrict music selections on a
jukebox to a preset list of songs on its local drive during certain time periods, which can be useful
if a location owner allows their employees to choose background music. To learn how to set
TuneCentral availability, see “Scheduling TuneCentral for a NextGen Jukebox” on page 167.
Can I schedule my music filters using the TouchTunes Dashboard?
You can schedule music filters for a Gen 3 jukebox through the Operator Dashboard. This feature
allows you to accommodate locations with specific music requests, such as a restaurant/bar that
wants to schedule when the family-friendly or more explicit versions of songs are available for
play on their jukebox. For instructions on scheduling music filters, see “Scheduling a Music Filter
Set on a Gen 3 Jukebox” on page 173.
Jukebox Configuration-Related Questions
How do I set up the background music mode for a jukebox using the TouchTunes
Dashboard?
You can set up a jukebox to provide background music for a location by running it in background
music mode. While a jukebox is running in this mode, it plays songs at random from either its
entire music library or a defined subset of this music. You can use the background music mode
on a jukebox to provide an alternative to other background music services (such as satellite
radio) for a location. It is also possible to see a preview of the songs in a background music
playlist. To activate and configure this jukebox mode, see “Setting Up the Background Music
Mode on a Jukebox” on page 128.
How do I set up the attract mode for a jukebox using the TouchTunes Dashboard?
You can set up a jukebox to attract business and increase usage at a location by running it in
attract mode. Like background music mode, the jukebox plays songs at random from either its
entire music library or a subset of music that you define when running in attract mode. However,
a jukebox running in attract mode also displays self-promotional advertising on its screen and
inserts longer pauses between songs to encourage customers to try out the jukebox. For
instructions on activating and configuring this jukebox mode, see “Setting Up the Attract Mode
on a Jukebox” on page 132.
210
Jukebox Troubleshooting-Related Questions
Can I schedule when the background music and attract modes are active for a jukebox
through the TouchTunes Dashboard?
You can schedule when a jukebox is running in its background music or attract modes through
the Operator Dashboard. This feature allows you to customize the jukebox mode to drive
jukebox usage and maximize your revenues. For example, you can schedule a jukebox in a bar
to run in background music mode to provide background music during lunchtime and then
switch to attract mode during Happy Hour to attract business. To learn how to schedule the
background music or attract modes, see “Scheduling Background Music and Attract Modes for
a Jukebox” on page 136.
How do I modify the time period when a jukebox can call the TouchTunes server?
You can use the Operator Dashboard to modify the time period during which a jukebox calls the
TouchTunes server (called the communications window). This is the only communications setting
that you can modify remotely using the Dashboard; all other communications settings must be
configured on-site. For instructions on modifying the communications window for a jukebox,
see “Configuring Jukebox-related Communications Settings” on page 182.
Jukebox Troubleshooting-Related Questions
How do I know if my jukeboxes are connecting properly to the TouchTunes Dashboard?
You can use the Operator Dashboard to check whether your jukeboxes are connecting to the
TouchTunes server properly. Doing this can help you identify jukeboxes with communication
problems that are preventing them from connecting to the TouchTunes server and receiving
new music and updates. To check the communications between your jukeboxes and the
TouchTunes server, see “Viewing Jukebox Connectivity Status” on page 186.
What diagnostics can I monitor for a Gen 3 jukebox using the TouchTunes Dashboard?
Gen 3 jukeboxes allow you to monitor diagnostic tests that show the current status of several
key components, including its bill collector, its coin collector and its system hardware. You can
use these diagnostic tests to identify components that are experiencing problems or have failed.
You can then take the appropriate action, such as obtaining replacement parts and/or
scheduling a visit by a technician. For instructions on how to monitor jukebox diagnostics, see
“Viewing Gen 3 Jukebox Diagnostics” on page 188.
PlayPorTT-Related Questions
Where can I see all the settings for my PlayPorTTs that I can adjust remotely, using the
TouchTunes Dashboard?
The TouchTunes Dashboard has PlayPorTT settings pages for Games, Money, System Schedules
and System Tools. See “Managing PlayporTT Settings” on page 192 for more information.
How can I change the access rights for my location owners from the TouchTunes
Dashboard?
The Operator Dashboard has a page dedicated to changing these access rights. See “Modifying
System Tools settings on a PlayPorTT” on page 198.
211
Frequently Asked Questions About the Operator Dashboard
Can I change the price I charge for games using the TouchTunes Dashboard?
The money settings can quickly be modified from the Dashboard using the PlayPorTT Money
Settings page. See “Modifying Money Settings on a PlayPorTT” on page 194.
Where can I see how many free games are being played on a PlayPorTT?
If you want to see how many free games are being played on a PlayPorTT, you can see PlayPorTT
statistics by Game, or by Hand Held from the My Reports - Games page. See“Monitoring
PlayPorTT Gaming Statistics” on page 199.
212