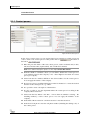
1
26.01.2007
AGILIA Dybabase
Dynabase
Thank you for purchasing AGILIA software. This user manual will introduce you to the
most important functions of AGILIA in a quick and efficient way.
This part of the manual describes the handling of the module: Dynabase.
Please read the following manual thoroughly. Should you have questions nevertheless,
please do not hesitate and contact our support: [email protected], +43 732 602232-50.
In reference to our products we provide trainings. In case of interest we willingly send
you a detailed description of our trainings. Do you have any questions? Send us an e-mail
at: [email protected] or call us at: +43 732 602232.
Note: The views of the displayed menus, menu items and screenshots may possibly differ
from your actual screen view – depending on your individual settings, your rights in AGILIA
and on the modules you have purchased.
ebit e business & IT EntwicklungsGmbH
Kellergasse. 14 * 4020 Linz * Austria
call +43 732 602232 * fax +43 732 602232 5555
email [email protected] * surf www.ebitonline.com
All rights reserved. This manual and its parts are copyrighted. No part of this document may be
reproduced, stored in or introduced into a retrieval system, or transmitted in any form or by any
means (electronic, mechanical, photocopying, recording, or otherwise), or for any purpose,
without the prior written permission of the ebit e business & IT EntwicklungsGmbH.
ebit e business & IT EntwicklungsGmbH provides no warranty for the correctness of this user
manual. Modification of the text is reserved. ebit e business & IT EntwicklungsGmbH disclaims
any liability for the content or use of this manual.
The terms agilia, ebit and the ebit logo are trademarks of ebit e business & IT
EntwicklungsGmbH.
© ebit e business & IT EntwicklungsGmbH
2 / 77
AGILIA Dybabase
1
2
3
4
5
6
7
8
9
Dynabase
GENERAL INFORMATION ............................................................................................................. 5
Where Do I Find the Menu Item Profiles?........................................................................................ 5
Where Do I Find the Menu Item Extension Assistant? .................................................................... 5
Where Do I Find the Menu Item Reports? ....................................................................................... 5
The Design of Profiles...................................................................................................................... 6
QUICK SEARCH ............................................................................................................................. 7
2.1 Search Profiles – Quick Search .............................................................................................. 7
2.1.1 Search Result - Person ................................................................................................ 7
2.1.2 Search Result - Company .......................................................................................... 10
2.1.3 Search Tickets............................................................................................................ 11
2.1.4 Sort ............................................................................................................................. 12
2.1.5 Target Group .............................................................................................................. 12
2.1.6 Combined Search....................................................................................................... 13
2.2 Edit Profiles ........................................................................................................................... 14
2.3 Delete Profiles ....................................................................................................................... 14
2.4 Buttons and Symbols ............................................................................................................ 15
HISTORY - TICKETS .................................................................................................................... 18
3.1 Information Ticket.................................................................................................................. 19
3.2 Reminder............................................................................................................................... 19
3.3 Information Material .............................................................................................................. 20
3.4 Workflow Ticket..................................................................................................................... 20
3.4.1 Ticket.......................................................................................................................... 22
3.4.2 Mailing ........................................................................................................................ 23
3.5 Contact Ticket ....................................................................................................................... 25
CREATE NEW PERSON............................................................................................................... 26
4.1 Person ................................................................................................................................... 26
4.1.1 History ........................................................................................................................ 28
4.1.2 Address ...................................................................................................................... 29
4.1.3 Phone / Fax ................................................................................................................ 30
4.1.4 Internet – E-mail & Hompage..................................................................................... 31
4.1.5 Relationship................................................................................................................ 33
CREATE NEW COMPANY ........................................................................................................... 35
5.1 Company............................................................................................................................... 36
5.1.1 Contact person ........................................................................................................... 38
5.1.2 Opportunity – Step 1 .................................................................................................. 40
5.1.3 Opportunity – Step 2 .................................................................................................. 42
RAPID INPUT ................................................................................................................................ 44
CREATE DYNAMIC EXTENSIONS .............................................................................................. 46
7.1 Select classes ....................................................................................................................... 46
7.2 Settings ................................................................................................................................. 47
7.3 Different Types ...................................................................................................................... 48
7.3.1 Boolean Term............................................................................................................. 48
7.3.2 Number....................................................................................................................... 48
7.3.3 Decimal ...................................................................................................................... 49
7.3.4 Text ............................................................................................................................ 49
7.3.5 Date ............................................................................................................................ 50
7.3.6 Combo box ................................................................................................................. 50
7.3.7 List .............................................................................................................................. 51
EDIT DYNAMIC EXTENSIONS..................................................................................................... 52
REPORTS...................................................................................................................................... 53
9.1 General Information .............................................................................................................. 53
9.1.1 Where Do I Find the Menu Item Reports? ................................................................. 53
9.2 Sales Report ......................................................................................................................... 54
9.3 Consolidation Report............................................................................................................. 56
9.4 Contact Report ...................................................................................................................... 58
© ebit e business & IT EntwicklungsGmbH
3 / 77
AGILIA Dybabase
Dynabase
10 MASTER DATA – DYNABASE..................................................................................................... 60
10.1 Title........................................................................................................................................ 60
10.1.1 Create New Title......................................................................................................... 61
10.1.2 Title Text and Salutation Address Field ..................................................................... 61
10.2 Legal Form ............................................................................................................................ 63
10.3 Academic Title....................................................................................................................... 63
10.4 Job Title................................................................................................................................. 64
10.5 Type of Address .................................................................................................................... 64
10.6 Phone type ............................................................................................................................ 65
10.7 Customer Type...................................................................................................................... 65
10.8 Templates ............................................................................................................................. 66
10.9 Contact Function ................................................................................................................... 67
10.10
New Contact Type...................................................................................................... 68
10.11
Return Reasons ......................................................................................................... 68
10.12
Lock Codes ................................................................................................................ 69
10.13
Connection Types ...................................................................................................... 69
10.14
Information Material.................................................................................................... 70
10.15
Word Template........................................................................................................... 71
10.16
Quantity Unit............................................................................................................... 71
10.17
Document File Types ................................................................................................. 71
10.18
Calendar Categories .................................................................................................. 72
11 MASTER DATA – SALES MANAGER ......................................................................................... 73
11.1 Period Group......................................................................................................................... 73
11.2 Expected Revenue................................................................................................................ 74
11.3 Contact Project Role ............................................................................................................. 74
11.4 Sales Steps ........................................................................................................................... 75
11.5 Products ................................................................................................................................ 76
11.6 Sections ................................................................................................................................ 77
© ebit e business & IT EntwicklungsGmbH
4 / 77
AGILIA Dybabase
Dynabase
The module Dynabase is the core of AGILIA. Here you are able to manage all your
address- and contact data in an efficient and convenient way.
With Profiles you can compile new persons and companies.
The Extension assistant is part of the module Dynabase from AGILIA. It enables you to
create dynamic extensions in an easy and rapid way. Those dynamic extensions
complement your version of AGILIA in consequence (see separate handbook).
Reports is part of the module Dynabase from AGILIA. You can easily and quickly
conduct reports with it.
In this part of the user manual you will find the description of those parts that deal with
the new creation and administration of contact data (including the corresponding reports)
and will show how to extend AGILIA with your personally-created fields.
Where Do I Find the Menu Item Profiles?
In the menu DYNABASE you find the menu item PROFILES. Here you have the choice
between following menu items:
QUICK SEARCH, LIST, NEW PERSON, NEW COMPANY.
Figure 1: Menu Profiles
Where Do I Find the Menu Item Extension Assistant?
In the menu DYNABASE you find the menu item EXTENSION ASSISTENT.
Figure 2: Menu Extension assistant
Where Do I Find the Menu Item Reports?
In the menu DYNABASE you find the menu item REPORTS.
Figure 3: Menu Reports
© ebit e business & IT EntwicklungsGmbH
5 / 77
AGILIA Dybabase
Dynabase
The Design of Profiles
When creating a new profile in AGILIA you have to distinguish between persons and
companies. A profile is therefore an umbrella term for person and company – including
the corresponding data (address, phone, fax, e-mail, homepage …).
In AGILIA a person is an object that contains data, that only/also belong to a person (e.g.
only: first name or date of birth; also: last name).
In AGILIA a company is an object that contains data, which only/as well belong to a
company (e.g. only: legal form; as well: last name).
Certain data apply both for persons and companies (e.g. address, phone, fax …); other
data for example only apply for companies (e.g. contact persons).
Put in an image, the design of profiles appears as follows:
Figure 4: Design of profiles
Note: Please note that profiles only exist within clients. In other clients those particular
profiles may not or do not exist.
You recognize this design by the different symbols:
•
Persons:
•
Companies:
© ebit e business & IT EntwicklungsGmbH
6 / 77
AGILIA Dybabase
Dynabase
In order to get to the profile-search and to be able to edit profiles, select in the menu
DYNABASE the menu item PROFILES and then QUICK SEARCH.
2.1
Search Profiles – Quick Search
The quick search consists of four different tabs: Searching, Tickets, Sorting and Target
group. You are able to use the fields of the different tabs in combination to specify your
search result and in order to define the sorting or to save the result as a target group (for
further processing).
Figure 5: Quick Search
AGILIA provides the possibility to search for already existing data/profiles. You can use
different attributes (fields) for searching profiles and combinations also work ("AND").
In order to search a certain profile, please type in the name, system number, customer
number or any other known detail of the profile(s) you want to find.
When searching please bear in mind following rules:
Input
Result
Public
Every profile that begins with "Public" will be in the results.
Public.
The result will be only profiles with the name "Public".
<blank>Public
Every profile that contains the word "Public" in the name will
be in the results.
<blank>Public.
All profiles that end with "Public" will be found.
Note: Upper and lower case can be neglected
2.1.1 Search Result - Person
Example (see figure below) - How to search for an existing profile? Enter the search
terms, e.g. "Public" for the field "Name" and the zip code.
© ebit e business & IT EntwicklungsGmbH
7 / 77
AGILIA Dybabase
Dynabase
Figure 6: Search profiles
The search function consists of text fields and shortlists. Select the search criteria in the
list and type the terms in the search field – click the button
to start the
search.
Note: You can decide whether the result should include contact person or not and whether
certain criteria concerning the sales manger should apply or not. Just set the right priorities in
the checkboxes on the right (see figure above).
The result will be displayed as following and you will see all the details:
Figure 7: Search result
Here you see whether the resulting profile is a person
or a company
.
Titles and names of the profile are displayed. You can click on the name and you will
be directed to the editing mask of this profile, this means you open the profile.
Here you see further details – depending on how many data have been entered:
Address, phone number, e-mail address and URL – and so on. Click on the details
and you will be able to alter or delete the existing data.
History - This is a quick link to the history of the profile. Just click on it and the
corresponding history of this particular profile will be opened in a new window. In
the history you are able to see and sort the tickets of a profile.
Reminder - With this button you are able to set a reminder for this particular profile.
© ebit e business & IT EntwicklungsGmbH
8 / 77
AGILIA Dybabase
Dynabase
VCF – the electronic vCard or better say the electronic business card. With this
function you are able to use the existing contact details for your e-mail program (i.e.
MS Outlook).
Workflow Ticket - By clicking on this button you will automatically open a new
window where you are able to generate a new workflow ticket with the given profile
data.
Word integration – If you click on this button the word integration will be opened
where you are able to write an extensive text which will be saved with the profile.
!
Info Ticket – Click on this button and you will make a new info ticket for this profile.
" Information Material – Here you can order or send new information material for this
profile. Click on the button and the information material ticket will be opened in a
new window.
Contact Ticket – This will open the contact ticket in a new window.
Edit – By clicking on edit you are able to make changes or add new details to your
profile.
Rapid Input – Click on this button and the mask "Rapid Input" will be opened.
If you put your cursor over this button the further information will appear in an
additional window: System number and CustomerID.
See 11.
Here you see two e-mail buttons: The first will open the e-mail program of AGILIA
and the second will lead to your personal e-mail program, e.g. MS Outlook.
Click on the "Internet" button and the stated homepage will be opened in a new
window.
© ebit e business & IT EntwicklungsGmbH
9 / 77
AGILIA Dybabase
Dynabase
2.1.2 Search Result - Company
Figure 8: Search profiles – Company
If you search for companies further search criteria may apply:
If you search for profiles that are companies, you are able to search for particular
company profiles of a certain account manager. Therefore just click on the button
and a new window will be opened where you can select the desired account manager.
Note: When saving a company profile you can define an account manager for this
particular company.
If you set the checkbox "mine" only those profiles will be searched and found where
the current user (you) is saved as account manager.
You are able to search for certain opportunities of a company.
You can decide whether the contact persons of the company should be found or not –
just activate or deactivate the checkbox.
A further selection for your search is the sales manager. Depending on how the
profiles were generated you are able to search for competitors, sales partners or
customers. You can combine the checkboxes. When you want to find all your saved
competitors, set the checkbox, leave the name field empty and click on
.
Note: When saving a company profile you can define those details for a particular
company. This can be used for a better selection when searching for company profiles.
© ebit e business & IT EntwicklungsGmbH
10 / 77
AGILIA Dybabase
Dynabase
Figure 9: Search result – Company
When searching for companies you will receive additional information as the
structure of a company profile is slightly different to a person profile. Here you also
see the contact person of this particular company (if the contact person was created
when saving the profile).
You can also see opportunities that were saved for this profile. Just click on the
details and you get directly to the profile's details, where you can change or add data.
2.1.3 Search Tickets
AGILIA is also supporting the possibility to search certain tickets. This function is
relevant when searching tickets of a particular period of time, particular ticket types or
both selections combined.
Note: It is also possible to combine the ticket search with the profile search – just enter the
desired profile data in the tab "Searching" and click on the tab "Tickets" to enter the
necessary dates (if desired) or (de)active the different ticket check boxes to set the search
criteria.
Figure 10: Serach tickets
Click on the tab "Ticket" to open the ticket search.
You are able to search for tickets in a certain period of time. If you want to narrow
the period of time enter a beginning and/or end date.
Note: You have to enter at least one search term to use this function.
© ebit e business & IT EntwicklungsGmbH
11 / 77
AGILIA Dybabase
Dynabase
You are able to select the tickets that should be in the result. Just click on the desired
check boxes to (de)activate them.
2.1.4 Sort
You are able to define how the search result will be sorted.
Figure 11: Sorting
Click on the tab "Sorting" to open the ticket sorting.
Define the key for the sorting of the search result. If you choose to sort the results
(profiles) by its customer number, select "Customer number" from the list.
Note: By default the results are sorted by name.
Select the sort direction – whether the resulting profiles should appear in an
ascending or descending order.
2.1.5 Target Group
A target group is a certain number of profiles, which might be used for exporting,
importing or any other further processing of a certain amount of profiles in AGILIA.
You are able to save your search result as a target group. The saved target group can be
loaded and used at any time.
Note: This might be handy if you often use the same group of profiles, if you have to repeat a
certain search or if you want to process (export, import …) the selected (found) profiles.
© ebit e business & IT EntwicklungsGmbH
12 / 77
AGILIA Dybabase
Dynabase
Figure 12: Save as target group
Click on the tab "Targetgroup" to open the target group.
Enter a name for saving the results of this search as a target group.
Figure 13: Load target group
To load a particular target group, click on the button
group for the appearing new window.
and select the desired target
Note: You are able to select more than one target group.
Note: Target groups can be imported by means of the Import Manager.
If the selected target group is loaded successfully its name will appear in the list. Now
you are able to search in the profiles of the selected target group.
Note: Click on the name of the target group and all its profile will be loaded into
Dynabase (List). This is a convenient way to import or load profiles to Dynabase.
If you want to delete an already loaded target group, click on the button
.
2.1.6 Combined Search
As mentioned above you are able to combine the different tabs to specify your search
result in detail.
© ebit e business & IT EntwicklungsGmbH
13 / 77
AGILIA Dybabase
Dynabase
Example: In case you want to search for an "Info Ticket" of a certain profile for a certain
period of time, type the required name in the "Searching" tab and enter the period of time
in the "Tickets" tab. Then set the required checkbox of the tickets you want to search.
When you have finished your selections click on
to start the quick search.
The resulting profile(s) will be sorted as predefined in the "Sorting" tab.
2.2
Edit Profiles
For editing profile data click on the profile name in the according result line. It is also
possible to click on the according lines of the profile's details, e.g. click on the address
when you want to access directly the address details.
Figure 14: Edit profiles – Direct access
The editing window contains the same functions and fields like the window for creating a
profile (person/company). Those fields are already filled with data of the profile.
If you click on the symbol
you are also able to access the profile and edit data.
In general you are able to change data or add new data to the selected profile and save the
modifications.
2.3
Delete Profiles
You can delete single objects from a profile (e.g. one of more phone numbers) as well as
whole profiles. Click on the profile name in the result of the search and you will access
the profile's details.
After clicking on the symbol the system will ask – due to data-safety reasons – whether
you want to delete the object/profile or not. Confirm and the selected object/profile will
be deleted.
© ebit e business & IT EntwicklungsGmbH
14 / 77
AGILIA Dybabase
Dynabase
Figure 15: Delete profile – Confirmation
Note: When you delete objects of a profile the system is not able to reactivate the deleted
objects.
2.4
Buttons and Symbols
Figure 16: Buttons and symbols 1
In the menu DYNABASE, menu item PROFILES data sets are displayed in line form, you
will also see its details, e.g. address, phone number and so on:
shows, that this profile is a person.
shows, that this profile is a company.
The title(s) and name(s) of the profile are stated.
opens the History-window. This is a quick link to the history of the profile
Here you find all tickets, word documents, appointments … of this profile..
Just click on it and the corresponding history of this particular profile will be
opened in a new window.
Note: When you start an operation (with clicking on the buttons) you leave an entry in the
history of the profile. In the history you can control and edit the different tickets.
Reminder - With this button you are able to set a reminder for this particular
profile.
© ebit e business & IT EntwicklungsGmbH
15 / 77
AGILIA Dybabase
Dynabase
VCF - the electronic vCard or better say the electronic business card. With
this function you are able to use the existing contact details for your e-mail
program (i.e. MS Outlook).
Workflow Ticket - By clicking on this button you will automatically open a
new window where you are able to generate a new workflow ticket with the
given profile data.
opens the Word-integration. Select a Word-template (which has been
uploaded before in the menu System, menu item Master data).
Info Ticket – Click on this button and you will make a new info ticket for
this profile.
Information Material – Here you can order or send new information material
for this profile. Click on the button and the information material ticket will
be opened in a new window.
Retour – This will open the Return Ticket window.
opens a new contact ticket. Here you can document the contact.
Edit – By clicking on edit you are able to make changes or add new details to
your profile.
Rapid Input – Click on this button and the mask "Rapid Input" will be
opened. The profile data will appear in the input mask.
If you put your cursor over this button the further information will appear in
an additional window: System number and CustomerID.
Figure 17: Buttons and symbols 2
Retour – This will open the Return Ticket window.
opens a new contact ticket. Here you can document the contact.
opens the fax program of AGILIA. Here you can select predefined templates
and send a fax to an existing fax number or enter a new fax number.
opens the preset fax client (e.g. MS Outlook) and you can send a fax to the
desired fax number.
opens the email program of AGILIA in a new pop up window. This pop-upmail is also a possibility to send a message to the e-mail-address.
Note: This e-mail is saved as history ticket, too. The sender of the message will
receive an e-mail for checking purposes.
© ebit e business & IT EntwicklungsGmbH
16 / 77
AGILIA Dybabase
Dynabase
opens the preset e-mail-client (e.g. Microsoft Outlook) and you can send a
message to the desired e-mail-address.
Click on the "Internet" button and the stated homepage will be opened in a
new window.
© ebit e business & IT EntwicklungsGmbH
17 / 77
AGILIA Dybabase
#
Dynabase
$%
To open the history of a profile click on the symbol
or click on the button
in the profile's details. A new window will be opened. Here you find all
tickets, word documents, appointments … of this profile. Here you are able to see the
already existing tickets.
Figure 18: History of a profile – Tickets
It is also possible to sort the tickets by date or ticket type.
By clicking on one of the different ticket types you are able to create a new ticket.
When searching for any particular ticket type(s) use the checkboxes to limit your
results. Select the necessary ticket type checkboxes and click on the button
To open (and close) an existing ticket click on the symbol(s)
.
When opening an existing ticket you are able to change the saved details: Choose a
new date, enter a new subject or comment. Either save the changes or reload the
existing ticket.
If you want to delete an existing ticket, click on the button
deletion of the ticket.
© ebit e business & IT EntwicklungsGmbH
and confirm the
18 / 77
AGILIA Dybabase
3.1
Dynabase
Information Ticket
Figure 19: Information ticket
You can save information for profiles with the info ticket.
Enter the subject, date and the comment for the info ticket. When selecting the date it is
possible to use calendar function – just click on the symbol .
In order to save the ticket click on the button
.
Note: Under certain circumstances info tickets are automatically generated by the system.
3.2
Reminder
Figure 20: Reminder
Here you can save a new appointment or reminder.
Enter a start and if necessary an end date. You can use the calendar function – just
click on the symbol .
© ebit e business & IT EntwicklungsGmbH
19 / 77
AGILIA Dybabase
Dynabase
If you want to be reminded by AGILIA of an upcoming appointment, select the
checkbox "Reminder" and set the time you want to be notified in advance.
It is possible to assign the reminder to a certain category, e.g. birthday, vacations,
meeting, and so on. A certain color code applies to the category
Note: You are able to change or create new calendar categories in the M ASTER D ATA –
Menu S YSTEM .
Enter the location, subject and further comments for this reminder.
In order to save the ticket click on the button
3.3
.
Information Material
Figure 21: Information material
Here you see the status of the information material, whether it is already sent, still in
progress or not created as it is in this case. Should there be a contact person
(company) you can select the person that should receive the sent information
material.
Activate the necessary checkbox to define the information material(s) which should
be sent.
Note: You are able to change existing or create new information materials in the M ASTER
D ATA – Menu S YSTEM .
Set the date when the information material should be sent. You can use the calendar
function – just click on the symbol .
In order to save the ticket and send it, click on the button
3.4
.
Workflow Ticket
You are able to directly create a new ticket for the open profile – just click on the
workflow ticket and a new window will be opened. There the existing data of this
particular profile will already be shown. You are able to change the data or use the
existing details for posting this ticket.
To be able to work with workflow tickets it is necessary that a workflow is already
existing in AGILIA (see user manual "Ticketing").
© ebit e business & IT EntwicklungsGmbH
20 / 77
AGILIA Dybabase
Dynabase
Figure 22: Workflow ticket – Profile tab
In the tap "Profile" the data of the loaded profile will appear. Here you can make
changes or leave the details unaltered.
Note: In the figure above there are no details of the profile shown. Normally you would
see here the details of the loaded profile.
Mailing: Here it is possible to send e-mails, fax or info material (postal).
Ticket: Here it is possible to select the necessary ticket flow or to enter ticket data,
e.g. title/name or ticket text.
Figure 23: Ticketing - Buttons
Save profile: This will save the entered data as profile (in the system – Dynabase).
Save: This button basically has the same effect as "Save profile". The only difference
is that the ticketing-window will be closed after saving.
Complete: The ticket will be completed and closed and can no longer be edited.
Further inquiries: The ticket is sent back by one step. There it can be edited again.
After the editing of the ticket is finished it will be in the inbox of the one inquiring.
Send: When clicking on "Send" the ticket will be sent to the next step according to
the established ticket flow. There it is available for further use.
Close: This will close the window. All data that has not been saved will be deleted.
Note: Depending on the step of the ticket flow you are currently in some buttons will not
appear (only grey).
© ebit e business & IT EntwicklungsGmbH
21 / 77
AGILIA Dybabase
Dynabase
3.4.1 Ticket
Figure 24: Entering a new ticket
Ticket head: This shows the ticket-ID (consecutive number) and the selected profile.
If the selected profile is a company the contact person will be shown.
Note: You might also see more details – depending on the selected ticket flow.
Note: Normally you would see the further profile data such as the profile name. This is
only an example!
Ticket information: Here you enter or select the name of the ticket, ticket type and
ticket flow. Other fields may exist – like you see in the figure above, e.g.
Communication Channel and Priority.
Note: The actual number of fields depends on the selected ticket flow.
New message: You see date/time of the ticket and who has created the ticket. You
can also document internal and external communication. If you mark a follow up it
will be saved in your personal calendar and AGILIA will alarm you with a blinking
icon (reminder).
Note: It is also possible to add attachments to the ticket if necessary.
Predefined flows: Here you can enter predefined ticket flows (see administration).
Only ticket name and the message (and also the follow up time) have to be entered.
© ebit e business & IT EntwicklungsGmbH
22 / 77
AGILIA Dybabase
Dynabase
3.4.2 Mailing
In AGILIA it is possible to use e-mails, fax or information material (postal) to answer
queries. The possibilities will be described in the following section. By clicking "Close"
or "Send" the selected way of answering a query is confirmed.
Note: You will find a corresponding entry for all three answering options in the history of the
profile.
3.4.2.1 E-mail
Figure 25: Sending e-mails
E-mails consist – like in MS Outlook – of receiver, subject, message text and sometimes
attachments. In case you often want to send the same or similar e-mails (same subject or
similar message or attachments) AGILIA supports the possibility of saving templates.
Click on -button and in the now opened pop-up window you will see the already
established templates.
If you select a template and the subject, message and attachments can be used in the email.
Note: You are able to change the message and subject – the attachment may not be
changed.
© ebit e business & IT EntwicklungsGmbH
23 / 77
AGILIA Dybabase
Dynabase
3.4.2.2 Fax
Figure 26: Sending faxes
In contrary to sending e-mails you have to use templates for sending faxes. Select a
template and then enter or choose a fax number for the profile.
3.4.2.3 Information material / Letter
Information material / letter for example means mailings or folders that could be printed
by an external company and sent to the customer – usually on the postal way. Here you
can select profiles that will receive information material (see above - Information
Material).
Figure 27: Sending information material / letter
© ebit e business & IT EntwicklungsGmbH
24 / 77
AGILIA Dybabase
3.5
Dynabase
Contact Ticket
Figure 28: Contact ticket
The date is already prefilled in the contact ticket – if necessary you can overwrite this
field or select a date by clicking on the symbol (opens the calendar).
Select a contact type from the drop down menu (you can change the contact types in
the MASTER DATA).
Select the contact person and opportunity (and phone number) if necessary – this
applies for companies.
You have to enter a comment for the contact ticket and you are able to add further
details.
If necessary you can upload a file into the system that will be saved with the contact
ticket. Click on the dot button and a corresponding window will be opened.
Furthermore you are able to set a reminder for this ticket. Just fill out the needed
fields.
© ebit e business & IT EntwicklungsGmbH
25 / 77
AGILIA Dybabase
Dynabase
& ' (
In this chapter you learn which steps are necessary to create a new person in AGILIA.
In the menu PROFILES select the menu item NEW PERSON.
Note that with the buttons
reload the input mask.
The checkbox
to reactivate them.
you are able to save the new entries and to
enables you to set (certain parts of) a profile inactive respectively
2 Steps to save a profile:
First you have to enter the personal data of the profile, e.g. title, first name, profile
name (this is a required field), and if necessary further data. Then click on
to
save the profile.
Now you are able to save further details – history, address, phone/fax, internet,
relation.
4.1
Person
Figure 29: New person
The title is a required field. Select the fitting title from the list.
In order to select the academic title open the dot-button
select the desired title.
of the particular field and
Note: The administration of the titles is carried out in the menu S YSTEM , menu item
M ASTER DATA .
In order to select the academic title open the dot-button
select the desired title.
© ebit e business & IT EntwicklungsGmbH
of the particular field and
26 / 77
AGILIA Dybabase
Dynabase
In the field "First name" you can enter the first name. You are able to enter more than
one first name if necessary. The input of a first name is optional.
You can enter a middle name – the input is optional.
The last name (profile name) is a required field. Enter it in the field "Profile name".
You can enter an additional name – the input is optional.
You are able to select an academic title that is placed behind the name, e.g. MBA or
MAS.
!
In the field "Alias" you can enter synonyms, which can be used for searching this
profile as well, e.g. "EU" for "European Union".
" In the field "Comment" you can enter any text you want.
Note: To ease the input of text AGILIA provides an edit pop up – just click on
the edit window.
to open
With the checkbox "Active" you can set the profile active or inactive.
You can enter a Customer ID. The customer number can be assigned arbitrary and is
indefinite.
You can enter a Personal ID. The personal ID can be assigned arbitrary and is
indefinite.
You can select an account manager from the list of account member – which have
been predefined in the system – for this profile if necessary.
The checkbox "Customer" is a default checkbox that serves for a more detailed
specification of the profile.
In case you want to select a customer type for this profile click on the dot-button
and select the type from the new window.
Note: The administration of the customer types is carried out in the menu S YSTEM , menu
item M ASTER DATA .
In the field "Date of birth" you can either enter the full date of birth
(DD/MM/YYYY) or only the year of birth (YYYY).
Return shipments (active) - you can enter the number of mail returns of all active
addresses of this profile. This field is mainly used for editing automatically generated
data.
You can either save the profile immediately with a click on
have filled in all other details for this profile.
In case you want to reload the input mask, click on
saved, will be lost.
or you wait until you
. Data, which has not been
After saving the general data of the profile you see further buttons on the left side and the
profile name, system number and so on in the header.
© ebit e business & IT EntwicklungsGmbH
27 / 77
AGILIA Dybabase
Dynabase
Figure 30: Saved profile (new person)
After saving the new profile it is also possible to select lock codes for this profile. You
can assign different lock codes for the profile. Those lock codes for example affect the
usage of profiles in certain campaigns/projects.
Note: The administration of the lock codes is carried out in the menu S YSTEM , menu item
M ASTER DATA .
4.1.1 History
To open the history of an profile click on the symbol
or click on the button
in the profile's details. A new window will be opened. Here you find all
tickets, word documents, appointments … of this profile. Here you are able to see the
already
existing
tickets
(see
chapter
© ebit e business & IT EntwicklungsGmbH
28 / 77
AGILIA Dybabase
Dynabase
History - Tickets)
4.1.2 Address
Figure 31: New address
To enter a new address for the profile click on
.
and then on the button
You can select between different types of addresses (e.g. mailing address, billing
address, home address, company address …).
Note: You can administer and create address types in the menu S YSTEM , menu item
M ASTER DATA .
You can enter district and street name of the address.
You can enter (additional) number, staircase, floor, door of the address.
Enter a zip code of the city.
Note: You can open the search window and search for the city/zip code. If you select the
desired result, the fields zip code, city, region, country and country code will be
automatically filled with the saved details.
Enter the name of the city, if necessary a region, and the country.
You can use a country code if needed.
© ebit e business & IT EntwicklungsGmbH
29 / 77
AGILIA Dybabase
Dynabase
Note: The country code can be filled out with the already for the client preset country
code. You can change this settings in the menu S YSTEM , menu item C LIENT . The preset
data can be overwritten if required.
Post Counter – the number of return tickets on this address.
Enter further details (comments) if necessary.
!
It is possible to deactivate the address of a profile.
Note: With the checkbox "active" you can set parts (objects) of the profile active resp.
inactive.
" In the field "Free address line (1 and 2)" you can enter an additional address line.
a new address-object will be opened
When you click on the button
underneath the first address-object for this profile. This might be necessary for the entry
of more than one address per profile (e.g. mailing and billing address).
You can either save the address immediately with a click on
have filled in all other details for this profile.
or you wait until you
After saving the new address will appear on the left side in the address tab. With a click
on it you are able to open it again, make changes or delete the address.
In case you have not filled out all required fields you will get an error message or the
address will be saved as "Incomplete address".
4.1.3 Phone / Fax
Figure 32: New phone number
To enter a new phone or fax number open
.
and then click on the button
Select the desired phone type (cell phone, landline …).
Note: You can administer and create phone types in the menu S YSTEM , menu item
M ASTER DATA .
Enter a country code – this is optional.
Note: The country code can be already filled out with the preset country code. You can
change this setting in the menu S YSTEM , menu item C LIENT . If required this date can be
overwritten.
© ebit e business & IT EntwicklungsGmbH
30 / 77
AGILIA Dybabase
Dynabase
The entry of phone number can be separated into area code and number.
Enter the phone number in this field.
Note: You can enter the number including the area code in this field.
If necessary you can add a phone number extension to the phone number.
You can assign the phone number to a certain address, e.g. primary residence and
other residences. Select the relevant address from the drop down menu – only already
saved addresses for this profile will appear!
In the same input mask you are able to enter the fax number if necessary. Fill out the
fields as described above (phone number).
You can either save the profile immediately with a click on
have filled in all other details for this profile.
In case you want to reload the input mask, click on
saved, will be lost.
or you wait until you
. Data, which has not been
Figure 33: Saved phone/fax number
After saving the new address will appear on the left side in the address tab. With a click
on it you are able to open it again, make changes or delete the address.
4.1.4 Internet – E-mail & Hompage
Figure 34: New e-mail address and homepage address
To enter a new e-mail and homepage address open
button
.
and then click on the
Enter the complete e-mail address in the field "E-mail", e.g. [email protected] and
the complete homepage address (URL) if necessary. Those are required fields.
Note: The entry of the e-mail address will be verified automatically on its syntactical validity –
not on its basically existence.
With the checkbox "E-mail invalid" you can select e-mail addresses – if necessary – as
invalid.
© ebit e business & IT EntwicklungsGmbH
31 / 77
AGILIA Dybabase
Dynabase
You can either save the profile details immediately with a click on
until you have filled in all other details for this profile.
In case you want to reload the input mask, click on
saved, will be lost.
or you wait
. Data, which has not been
Figure 35: Saved e-mail address
After saving the new e-mail address and homepage address they will appear on the left
side in the internet tab. With a click on it you are able to open it again, make changes or
delete the addresses.
By clicking on the button you open the set e-mail client, e.g. Microsoft Outlook, and
you are able to send an immediate message to the selected address.
By clicking on the button you open a new pop-up window. This pop-up-mail is also a
possibility to send a message to this e-mail address.
Note: This sent e-mail will be saved as history-ticket, too. The sender will also receive the email for checking purposes.
© ebit e business & IT EntwicklungsGmbH
32 / 77
AGILIA Dybabase
Dynabase
Figure 36: Send pop-up e-mail
Click on the "Internet" button and the stated homepage will be opened in a
new window.
4.1.5 Relationship
Figure 37: New relationship
To enter a new relationship open
.
and then click on the button
Select a connection type. This field is a required field.
Note: You find the administration of the connection types in the menu S YSTEM , menu item
M ASTER DATA .
In the field "Relationship with" you are able to search such profiles with which this
profile has a connection. Use the button and a new window will be opened.
© ebit e business & IT EntwicklungsGmbH
33 / 77
AGILIA Dybabase
Dynabase
Figure 38: Search profile(s) for relationship
Enter the search term for the profile(s) you want to find.
In this search you have to use parameters to define what you are searching for.
For example "n" means last name or "f" first name. You are able to combine those
parameters to limit your results.
Click on
to start the search and select the desired profile from the results.
Figure 39: Established relationship
Now the current profile will have a relationship with the selected second profile.
Note: If you click on the second profile – in this case "eBIT" – you will automatically switch to
this particular profile.
© ebit e business & IT EntwicklungsGmbH
34 / 77
AGILIA Dybabase
Dynabase
& '
)
$
In this part of the user manual you learn which steps are necessary to create a new
company in AGILIA.
In the menu PROFILES select the menu item NEW COMPANY.
Note: In the following section only such objects/elements are described which appear in the
process of creating a new company only. For the rest of the objects please compare the
descriptions
in
the
chapter
© ebit e business & IT EntwicklungsGmbH
35 / 77
AGILIA Dybabase
Dynabase
Create New Person.
5.1
Company
Figure 40: New company
The title is a required field. Select the fitting title from the list.
In the field "Profile name" enter the name of the company. This field is a required
field.
In the field "Legal form" you can select a legal form from the list.
Note: The administration of the legal form is carried out in the menu S YSTEM , menu item
M ASTER DATA .
In the field "Alias" you can enter synonyms, which can be used for searching this
profile as well, e.g. "EU" for "European Union".
The checkboxes "Competitor", "Sales partner", "Customer" are default checkboxes
that serve for a more detailed specification of the profile. Activate if necessary.
You can either save the profile immediately with a click on
have filled in all other details for this profile.
In case you want to reload the input mask, click on
saved, will be lost.
or you wait until you
. Data, which has not been
After saving the general data of the profile you see further buttons on the left side and the
profile name, system number and so on in the header.
© ebit e business & IT EntwicklungsGmbH
36 / 77
AGILIA Dybabase
Dynabase
Figure 41: Saved profile (new company)
After saving the new profile it is also possible to select lock codes for this profile. You
can assign different lock codes for the profile. Those lock codes for example affect the
usage of profiles in certain campaigns/projects.
Note: The administration of the lock codes is carried out in the menu S YSTEM , menu item
M ASTER DATA .
Note: In the following section only such objects/elements are described which appear in the
process of creating a new company only. For the rest of the objects please compare the
descriptions
in
the
chapter
© ebit e business & IT EntwicklungsGmbH
37 / 77
AGILIA Dybabase
Dynabase
Create New Person.
5.1.1 Contact person
Figure 42: New contact person
In the object contact person you can register data from company-associated persons. In
and then on
order to enter a new contact person for the profile click on
the button
.
Enter the personal details of the new contact person, such as academic and job title,
title, first and last name (required field), date of birth and comment.
Note: For a detailed description please see the chapter Create New Person.
With the checkbox "Standard contact" you can define, whether this contact person is
your standard contact in this company or not – there might be more than one contact
person per company.
Select from the list "Address affiliation" the desired address for the contact person.
You can apply the address of the company.
If necessary select a predefined function from the list "Function" or enter the desired
function of the contact person, e.g. "CEO".
It is possible to enter a description of the function.
It is also possible to save the department where the contact person is working in the
company. Please enter here.
Select from the lists "Phone" and "Fax" – if more than one number is existing – the
matching number(s) of this contact person. You can apply the numbers of the
company.
In the fields "Phone extension" and "Fax extension" enter the extensions.
!
In the field "Cell phone" enter the cell phone number (including the dialing code) of
the contact person.
© ebit e business & IT EntwicklungsGmbH
38 / 77
AGILIA Dybabase
Dynabase
" E-mail: see section Internet – E-mail & Hompage.
Homepage: see section Internet – E-mail & Hompage.
You can either save the profile immediately with a click on
have filled in all other details for this profile.
In case you want to reload the input mask, click on
saved, will be lost.
or you wait until you
. Data, which has not been
Figure 43: Saved contact person (company)
After saving the contact person it will appear in the left area. It is possible to create more
contact persons – follow the steps as described above.
Now some more buttons will appear that apply for the contact person:
If you put your cursor over this button the further information will appear in
an additional window: InstanceID, created at (date), created by (client),
changed at (date), changed by (client).
Workflow Ticket - By clicking on this button you will automatically open a
new window where you are able to post a new workflow ticket for the given
profile.
Print view: This will open a new window with the print version of the
contact person – see next figure.
© ebit e business & IT EntwicklungsGmbH
39 / 77
AGILIA Dybabase
Dynabase
Figure 44: Print version (contact person)
5.1.2 Opportunity – Step 1
Figure 45: New opportunity
In the opportunity object you are able to define the settings for a sales opportunity. In
order to enter a new contact person for the profile click on
and then on the
button
.
Put an internal project name in this field. This field is a required field.
Define under which name the customer will know this project. This field is a required
field.
Enter some further details if required.
Declare the budget for this opportunity.
Select a sales progress from the preset sales progresses. This field is a required field.
© ebit e business & IT EntwicklungsGmbH
40 / 77
AGILIA Dybabase
Dynabase
Note: The administration of the sales progress is carried out in the menu S YSTEM , menu
item M ASTER DATA .
You can add a comment to the sales progress.
You can enter an estimated further sales potential volume if necessary.
Select the probability of handling this project/opportunity successfully. This field is a
required field.
!
Select an opportunity manager (salesman) from the list if required.
" Enter the date of the first initial contact – the point in time when you have first
learned about this sales opportunity.
Select possible competitors for this opportunity from the new window "Competitor".
Select members for the project team if required.
Select the name of the initial contact person of the customer's company from the list
of contact persons.
Select possible sales partners from the new window that will appear.
State the planned completion date (internal). This field is a required field.
State the planned completion date (customer).
You have to select the currency in which the opportunity should be calculated.
You can either save the profile immediately with a click on
have filled in all other details for this profile.
In case you want to reload the input mask, click on
saved, will be lost.
or you wait until you
. Data, which has not been
Note: After the first change of the opportunity has been saved you find the corresponding
opportunity-ticket via the button (History). Here you can monitor all done changes.
Note: When an opportunity-object reaches the next sales(progress)-step, that will lead to a
completion (positive or negative) the opportunity is shifted from Dynabase into the History. In
case you want to reactivate a completed opportunity (not completed sales step), do so in the
History of a profile. It will again appear in the Dynabase.
After saving the opportunity it will appear in the left area. It is possible to create more
opportunities – please follow the steps as described above.
Now some more buttons will appear that apply for the opportunity:
If you put your cursor over this button the further information will appear in
an additional window: InstanceID, created at (date), created by (client),
changed at (date), changed by (client).
Print view: This will open a new window with the print version of the
contact person – see next figure.
© ebit e business & IT EntwicklungsGmbH
41 / 77
AGILIA Dybabase
Dynabase
5.1.3 Opportunity – Step 2
Figure 46: Opportunity details
After saving the opportunity for the first time you are able to define further details.
It is possible to select certain products from preset sections, e.g. Hardware, …
Note: The administration of the sections is carried out in the menu S YSTEM , menu item
M ASTER DATA . There you are able to create new sections.
Here you can select products, enter price, quantity and so on.
Note: The administration of the products is carried out in the menu S YSTEM , menu item
M ASTER DATA . This is one way to create new products.
By clicking on the dot-button
products per section.
of the field "Select" you can select the desired
If you want to create new products, click on the dot-button
and a new window will appear.
of the field "Create"
Figure 47: New products
It is also possible to upload and save files with the opportunity, e.g. sales offer.
© ebit e business & IT EntwicklungsGmbH
42 / 77
AGILIA Dybabase
Dynabase
Figure 48: Calculation
After saving the opportunity for the second time you will see that the products are
calculated and those figures correspond with the sales volume potential.
Note: When an opportunity-object reaches the next sales(progress)-step, that will lead to a
completion (positive or negative) the opportunity is shifted from Dynabase into the History. In
case you want to reactivate a completed opportunity (not completed sales step), do so in the
History of a profile. It will again appear in the Dynabase.
© ebit e business & IT EntwicklungsGmbH
43 / 77
AGILIA Dybabase
* )+
Dynabase
)
Figure 49: Rapid input
© ebit e business & IT EntwicklungsGmbH
44 / 77
AGILIA Dybabase
Dynabase
With the function "Rapid input" it is possible to enter new profiles and date in an efficient
and convenient way. In case you do not want to import data this is a way to create new
profiles because all the necessary objects and fields are displayed at once.
Note: In case you use dynamic extensions they will be displayed in the rapid input mask.
Enter the required data in the according fields as it is described in the chapters Create
New Person and Create New Company. The fields basically correspond with or are
identical with the fields used when creating a new person or company. It is possible to
enter "Industries" and also four different phone data if required.
Note: When you want to create a new company profile and you enter details in the person
fields, the person will become automatically the contact person of the company. In case you
want to create just a new person, leave the company fields empty and the new profile will be
saved as person.
After entering the necessary data click on
to save the new profile. In case you
to open a new rapid input mask. When
want to create more profiles click on
clicking on
the input mask will be reloaded.
Rapid Input – Click on this button in Dynabase (profile) and the mask
"Rapid Input" will be opened. The profile data will appear in the input mask.
It is possible to load an existing profile into the rapid input mask (see above)
and make changes. After the changes click on
to save the changed
profile as a new profile.
Note: If you do not make any changes and use the button
profile will be saved.
© ebit e business & IT EntwicklungsGmbH
an identical
45 / 77
AGILIA Dybabase
Dynabase
,$
-.
In this part of the user manual you learn all steps which are necessary to create new
dynamic extensions in AGILIA.
In the menu DYNABASE, menu item EXTENSION ASSISTANT different so called classes are
provided, e.g. person, company …, which you are able to extend. To search and display
the classes use the wild cards that are commonly used in AGILIA (mainly %).
Figure 50: Classes in the extension assistant
Note: It might be possible that certain default dynamic extensions have already been installed
on your system, e.g. "Newsletter".
7.1
Select classes
Figure 51: Create new dynamic extension
Select a class for which you want to create a new dynamic extension.
Note: The views of the displayed menus, menu items and screenshots may possibly differ
from your actual screen view – depending on your individual settings, your rights in AGILIA
and on the modules you have purchased.
Click on the button
and new dialog will open for the dynamic extension.
© ebit e business & IT EntwicklungsGmbH
46 / 77
AGILIA Dybabase
7.2
Dynabase
Settings
At first you have to define certain settings for the dynamic extension (name, position …).
Figure 52: New dynamic extension – settings
Define – if you have the choice at this point – whether the dynamic extension should
be valid for persons or companies or generally for all profiles. This selection is a
required field.
Select the type of dynamic extension from the list "Type". Depending on the type the
setting fields in the succeeding steps will differ. This field is a required field.
Note: You find a detailed description of the different extension-types in subsequence.
With the field "Field name (database" you define the name of this field in the
database. This field is a required field.
Note: Be aware that for the input of the field name in the database you must not use
special characters or blanks.
With the "Field name (display)" you specify the name of the field, which will later
appear in AGILIA. This field is a required field.
The column-position (X) defines in which column the new field will be positioned.
This field is a required field.
The line-position (Y) defines in which line the new field will be positioned. This field
is a required field.
With "Display editable" you can establish whether the content of the field may be
edited later in the Dynabase or not.
Click on
to see the next step of the dialog. Depending on the selected type the
dialogs differ a little bit.
© ebit e business & IT EntwicklungsGmbH
47 / 77
AGILIA Dybabase
7.3
Dynabase
Different Types
Select the relevant type – as described further on – and define your settings in detail. Then
click on
to confirm the settings and make them effective.
You have created a new field with your dynamic extension.
7.3.1 Boolean Term
Figure 53: Boolean term
Select "Boolean term" and you can decide between the two values "True" and "False".
The chosen value will be later displayed as a checkbox..
Note: With those values you define whether the checkbox will already be displayed as
selected (True) or not selected (False).
7.3.2 Number
Figure 54: Number
By selecting the checkbox "Required field" you define whether this field should be a
required field.
You can enter a value in the field "Default value" which will be already filled out later on.
Note: The default value is only considered when creating a new profile. It is not being
considered for already existing data or when importing data.
The lower bound specifies the smallest number which may be entered.
The upper bound specifies the largest number which may be entered.
© ebit e business & IT EntwicklungsGmbH
48 / 77
AGILIA Dybabase
Dynabase
7.3.3 Decimal
Figure 55: Decimal
By selecting the checkbox "Required field" you define whether this field should be a
required field.
You can enter a value in the field "Default value" which will be already filled out later on.
Note: The default value is only considered when creating a new profile. It is not being
considered for already existing data or when importing data.
The lower bound specifies the smallest number which may be entered.
The upper bound specifies the largest number which may be entered.
The number of figures after the decimal defines how many figures may be entered after
the decimal.
7.3.4 Text
Figure 56: Text
By selecting the checkbox "Required field" you define whether this field should be a
required field.
You can enter a value in the field "Default value" which will be already filled out later on.
Note: The default value is only considered when creating a new profile. It is not being
considered for already existing data or when importing data.
With the "Field length (database)" you define how long (characters) the text field may be
in the database. This field is a required field.
The width (in characters) and height (in lines) determine the dimensions of the text field.
Those fields are required fields.
© ebit e business & IT EntwicklungsGmbH
49 / 77
AGILIA Dybabase
Dynabase
7.3.5 Date
Figure 57: Date
By selecting the checkbox "Required field" you define whether this field should be a
required field.
You can enter a value in the field "Default value" which will be already filled out later on.
Note: The default value is only considered when creating a new profile. It is not being
considered for already existing data or when importing data.
In the field "From – date" you select the earliest date which is allowed to be entered.
In the field "To – date" you select the latest date which is allowed to be entered.
7.3.6 Combo box
Figure 58: Combo box
By selecting the checkbox "Required field" you define whether this field should be a
required field.
You can enter a value in the field "Default value" which will be already filled out later on.
Note: The default value is only considered when creating a new profile. It is not being
considered for already existing data or when importing data.
In the field "Elements" you can enter all the elements which should be included in the
combo box later on.
© ebit e business & IT EntwicklungsGmbH
50 / 77
AGILIA Dybabase
Dynabase
7.3.7 List
Figure 59: List
By selecting the checkbox "Required field" you define whether this field should be a
required field.
Select an already existing reference table from the list "Table". This is a required field.
Note: You can create reference tables in the menu D YNABASE – I MPORT MANAGER , menu item
R EFERENCE TABLES .
Select in the field "Qualifier" which column of the reference table should be the so called
qualifier. This field is a required field.
of the field "Columns" you choose the columns of the
By clicking on the dot-button
reference table which will be displayed in your list. This field is a required field.
© ebit e business & IT EntwicklungsGmbH
51 / 77
AGILIA Dybabase
-+
Dynabase
,$
-.
After creating dynamic extensions you can edit and change or even delete them.
Select in the menu DYNABASE the menu item EXTENSION ASSISTANT and you get an
overview over all existing dynamic extensions of the different classes. You can search
and display those classes by using the in AGILIA common wildcard %.
Figure 60: Extension assistant
Click on the particular dynamic extension that you want to edit. The extension will be
displayed in detail. Now you can make changes, save them or delete the dynamic
extension.
Note: In case there is a delay while deleting a dynamic extension, please refresh your screen
view.
© ebit e business & IT EntwicklungsGmbH
52 / 77
AGILIA Dybabase
Dynabase
! * )
9.1
General Information
The module Dynabase constitutes the core of AGILIA, where you are able to manage all
your address- and contact data in an easy and convenient way.
Reports is part of the module Dynabase of AGILIA. You can easily and quickly conduct
reports with it.
In this part of the user manual you will find the description of those parts that deal with
the creation of reports in the module Dynabase.
9.1.1 Where Do I Find the Menu Item Reports?
In the menu DYNABASE you find the menu item REPORTS. Here you have the choice
between following menu items:
SALES REPORT, CONSOLIDATION REPORT and CONTACT REPORT.
Figure 61: Menu - Reports
Note: The views of the displayed menus, menu items and screenshots may possibly differ
from your actual screen view – depending on your individual settings, your rights in AGILIA
and on the modules you have purchased.
Only the following report will be described in this chapter (possibly you have no access to
some of the following reports):
•
Sales report
•
Consolidation report
•
Contact report
© ebit e business & IT EntwicklungsGmbH
53 / 77
AGILIA Dybabase
9.2
Dynabase
Sales Report
In this part of the user manual you learn the necessary steps and settings for arranging a
sales report in AGILIA.
Figure 62: Sales report – Step 1
You can choose if you want to limit the report on
•
still open opportunities
•
already closed opportunities
You can choose if you want to apply the report to
•
the opportunities of all users
•
the opportunities of the current user
Note: Please note that the selection of these options could be restricted – depending on your
assigned role in AGILA.
By clicking
you start the sales report.
Figure 63: Sales report – Result
This is an example of a sales report of all open opportunities of the current user. In the
result of your sales report you see the details and sums of the report.
You can sort the result by the particular column name. Use the buttons
.
When you click on the actual name of the company or the project name the corresponding
company or opportunity will be opened in the Dynabase.
To open a new report, click on the button
. In case you want to retry the
report, that means you want to start the same report all over again, please click on the
.
button
© ebit e business & IT EntwicklungsGmbH
54 / 77
AGILIA Dybabase
Dynabase
With the button
it is possible to copy the results of the report in the clipboard
of your system. From there it is available for further processing in other programs (e.g.
MS Excel) – work with copy and paste.
In order to print the finished report please click on the button
the report-window use the button
.
© ebit e business & IT EntwicklungsGmbH
and for closing
55 / 77
AGILIA Dybabase
9.3
Dynabase
Consolidation Report
In this part of the user manual you learn the necessary steps and settings for conducting a
consolidation report in AGILIA.
Figure 64: Consolidation report
Select the sale steps you want your report based on (without completion, positive
completion, negative completion).
Note: You find the administration of the sales steps in the menu S YSTEM , menu item
M ASTER DATA .
Select one or more opportunity manager(s) – the data is being consolidated in the
report according to the selection of those managers.
Note: In case you do not select a manager the report will consist of every manager in the
system.
You have to select a period group, for which the report should be conducted.
Note: You find the administration of the period groups the menu S YSTEM , menu item
M ASTER DATA .
It is possible to change select different currencies.
In order to conduct the desired report click on
appear in the second tab of the window.
© ebit e business & IT EntwicklungsGmbH
and the new report will
56 / 77
AGILIA Dybabase
Dynabase
The result of the consolidation report possibly could look like the following:
Figure 65: Consolidation report – Result
In the result of the consolidation report you see (if selected) the planned revenue, sums
and further details of the report.
Click on
processing.
to copy the results of the report to the clipboard for further
It is possible to switch between the report parameters and the actual report.
Click on
to update the existing report.
© ebit e business & IT EntwicklungsGmbH
57 / 77
AGILIA Dybabase
9.4
Dynabase
Contact Report
In this part of the user manual you learn the necessary steps and settings a contact report
in AGILIA.
Figure 66: Contact report
Enter the time period for which you want to create the contact report – you are able to
select a date by clicking on the symbol . Those fields are required fields.
Select the user(s) – which have created the contact ticket – for which you want to do
the report. This field is a required field. By clicking the dot-button
of the field
"Created by" you open a new window where you select the user(s).
Note: If you do not select any user the contact report will consider all relevant users of
the system.
If you activate the checkbox "Show null values" the report will also consider users
with non-existing contact tickets and will show them in the result.
Select the according ticket type(s). This is a required selection.
Determine which ticket-subtypes you want to consider in your contact report. This is
a required selection.
Click on
to start the contact report.
In the result of the contact report you see the contact types, sums and further details of the
report.
Click on
particular report.
to start a new contact report or on
to rerun/retry this
Click on
to copy the results of the report to the clipboard, from where it can
be further used in other programs.
Click on
to start printing the results.
© ebit e business & IT EntwicklungsGmbH
58 / 77
AGILIA Dybabase
Dynabase
If you click on certain details of the report a particular list with further details of the
tickets of this ticket type will open itself in the same dialog box. Here you are able to see
the details (tickets) of the particular contact type per user and other details.
© ebit e business & IT EntwicklungsGmbH
59 / 77
AGILIA Dybabase
Dynabase
" /
10.1
,
0 ,$
Title
Figure 67: Title – Overview
In this overview you see which forms of address (title) already exist in AGILIA by
default.
Note: For searching use the wildcards which are commonly used in AGILA (mainly %).
The values in brackets (p) or (c) stand for "Person" respectively "Company". To see
further details of the different titles click on the title-name.
Figure 68: Title – Details
In the more detailed view you see all settings for the particular title. Not only the sex was
defined, also the input and export code as well as the title type were set. In the fields
"Title text" and "Salutation address field" the corresponding title text and salutation are
already entered.
© ebit e business & IT EntwicklungsGmbH
60 / 77
AGILIA Dybabase
10.1.1
Dynabase
Create New Title
Figure 69: New title
In the menu SYSTEM – menu item MASTER DATA select the command TITLE – NEW TITLE.
You have to define a title name in the field "Title", e.g. Mr. This is a required field.
Select the sex of the title, e.g. male, female, no sex. This is a required field.
Define both input- and export code. With those codes are useful for a fast data input
respectively export.
Note: Codes are helpful for creating new profiles. You enter the code instead of the
content of the particular field. The correct code will be automatically transformed into the
corresponding content.
Select in the field "Title type" whether the profile with this title should be processed
as a person or as a company.
10.1.2
Title Text and Salutation Address Field
The text for a title can be put together of different elements. The available elements
are labeled in a certain way in the data base and have to be used exactly in this certain
way when creating a new title text.
Name
sex
p.profilename
p.firstname
p.nameaddition
p.legalform
a.title
j.title
a.highesttitle
Meaning (Use)
Sex (m – male, f – female, n – neutral e.g. company)
Profile name (person, company)
First name (person)
Name affix (person)
Legal form (company)
Academic title (title)
Job title (title)
Highest academic title
© ebit e business & IT EntwicklungsGmbH
61 / 77
AGILIA Dybabase
Dynabase
j.highesttitle
Highest job title
The design of a title is working like this for example:
Those parts which are the same for every profile are entered in a normal way, e.g.
"Dear Mr." To use the above mentioned elements certain syntax is necessary. You
have to put them between placeholders (%), e.g. Dear Mr. %p.firstname%
%p.profilename%
For the elements p.firstname and p.profilename the corresponding first and last name
of the profile are inserted. You receive for example Dear Mr. John Public
If an element is empty, because no first name is known for example, then an error is
occurring when creating the text. To avoid thi error you can make use of square
brackets. This means that the element can be left out when no element is available:
Dear Mr. [%p.firstname%] %p.profilename%
If no first name is known it is left out (like the following blank character). The result
is : Dear Mr. Public
It is also possible to combine several elements in square brackets. They are separated
by a hypen |. The first element which is not empty will be displayed.
A few examples:
If a job title is available, the
salutation should be:
If that does not apply but an
academic title is available:
Or like this:
The combination:
Dear Mr. [%j.title%]
Dear Mr. [%a.highesttitle% %p.profilename%]
Dear Mr. [%p.profilename%]
Dear Mr. [%j.title% | % a.highesttitle%
%p.profilename% | %p.profilename%]
You can create comparisons and logical connections. It is checked whether a certain
condition is applying or not:
[(%sex% = = 'm') Sir]
Sir, if the sex is male
Sir, if the sex is male;
Madam, if the sex if female
[(%sex% = = 'm') Sir | Madam]
Characters for comparison are called operators:
like:
=
==
is
unlike:
#
!=
<>
logical and:
&
&&
and
logical or":
|
||
or
not:
~
!
not
In the field "Salutation address field" you can enter a text which will be displayed
with the salutation in the address field. The text of a salutation field is consisting of
different elements. There are elements available in the data base that are labeled in a
© ebit e business & IT EntwicklungsGmbH
62 / 77
AGILIA Dybabase
Dynabase
certain way. You have to use this exact way when creating a salutation (see above):
e.g. Mr. [%j.title%][%a.title%][ %p.firstname%] %p.profilename%
10.2
Legal Form
Figure 70: Legal forms – Overview
You need legal forms for profiles of companies.
In this overview you see which forms of legal forms might already exist in AGILIA by
default.
Note: For searching use the wildcards which are commonly used in AGILA (mainly %).
Figure 71: New legal form
In order to create a new legal form select in the menu SYSTEM – menu item MASTER
DATA the command LEGAL FORM – NEW LEGAL FORM.
You have to enter a name for the legal form. This is a required field.
10.3
Academic Title
Figure 72: Academic title - Overview
In this overview you see which forms of academic titles might already exist in AGILIA
by default.
Note: For searching use the wildcards which are commonly used in AGILA (mainly %).
To see further details of the different titles click on the name of the academic title.
© ebit e business & IT EntwicklungsGmbH
63 / 77
AGILIA Dybabase
Dynabase
In order to create a new academic title select in the menu SYSTEM – menu item MASTER
DATA the command ACADEMIC TITLE – NEW ACADEMIC TITLE.
Figure 73: New academic title
Enter the code for the new academic title – this code is able to substitute the title at the
input.
Note: Codes are helpful for creating new profiles. You enter the code instead of the content of
the particular field. The correct code will be automatically transformed into the corresponding
content.
In the field "Title" you have to enter the name of the title, e.g. Dr. This is a required field.
The field "Highest title" is used in letter salutations for example, then only the highest title
is being used. At profiles with only one title you have to enter the title both in the field
"Title" and "Highest title".
10.4
Job Title
See 10.3 Academic Title.
10.5
Type of Address
Figure 74: Types of address – Overview
In this overview you see which types of address might already exist in AGILIA by
default.
Note: For searching use the wildcards which are commonly used in AGILA (mainly %).
To see further details of the different types click on the name of the address type.
In order to create a new address type select in the menu SYSTEM – menu item MASTER
DATA the command TYPE OF ADDRESS – NEW ADDRESS TYPE.
© ebit e business & IT EntwicklungsGmbH
64 / 77
AGILIA Dybabase
Dynabase
Figure 75: New address type
You have to enter the name of the address type. This is a required field. And you have to
enter the type for the VCF - the electronic vCard or better say the electronic business card.
You can select whether the address type should be defined as standard or not.
10.6
Phone type
Figure 76: Phone types – Overview
In this overview you see which phone types might already exist in AGILIA by default.
Note: For searching use the wildcards which are commonly used in AGILA (mainly %).
To see further details of the different types click on the
.
In order to create a phone type select in the menu SYSTEM – menu item MASTER DATA the
command PHONE TYPE – NEW PHONE TYPE (for further details see 10.5 Type of Address)
Figure 77: New phone type
10.7
Customer Type
Figure 78: Customer type – Overview
In AGILIA you can create customer types according to your wishes. In the overview you
see which customer types might already exist in AGILIA.
Note: For searching use the wildcards which are commonly used in AGILA (mainly %).
To see further details click on the name of the customer type. You can edit settings if
required.
© ebit e business & IT EntwicklungsGmbH
65 / 77
AGILIA Dybabase
Dynabase
In order to create a new customer type select the command CUSTOMER TYPE – NEW
CUSTOMER TYPE in the menu SYSTEM – menu item MASTER DATA.
Figure 79: New customer type
You have to enter a name for the new customer type. This is a required field.
You have to enter a customer type number. This is a required field.
Figure 80: Copy customer type
You are able to copy a customer type into another client of the system. So the customer
types are available in other clients, too.
Therefore select the command CUSTOMER TYPE – COPY TYPE.
Select the dot-button of the field "Client". A new selection window is opened. There
you choose those clients where the customer type should be copied to.
10.8
Templates
In certain dialogs you are able to select templates in AGILIA if required, e.g. tickets, email-sending.
In order to enter a new template into the system select in the menu SYSTEM – menu item
MASTER DATA the command TEMPLATES – NEW TEMPLATE.
Figure 81: New template
You have to enter a name for the new template. This is a required field.
Enter a subject.
© ebit e business & IT EntwicklungsGmbH
66 / 77
AGILIA Dybabase
Dynabase
Select the category of the new template (e-mail or fax). This is a required field.
You can select that the fax should be sent as gfi-fax.
You can enter a text for the template which will be saved with it. When using this
particular template it is displayed as preset.
You can add a comment to the template which can be helpful when using it.
If necessary you can upload a file which will be saved as attachment.
10.9
Contact Function
With the contact functions you can for example define the contact functions of contact
persons in AGILIA. For this you have to have already configured contact functions.
Figure 82: Contact functions – Overview
In this overview you see which contact functions might already exist in AGILIA.
Note: For searching use the wildcards which are commonly used in AGILA (mainly %).
To see further details of the different types click on the name of the function. You can edit
settings if required.
In order to create a new contact function select in the menu SYSTEM – menu item MASTER
DATA the command CONTACT FUNCTION – NEW CONTACT FUNCTION.
Figure 83: New contact function
You have to enter a name in the field "Contact function". This is a required field.
Figure 84: Copy contact function
You are able to copy a contact function into another client of the system. So the contact
functions are available in other clients, too.
Therefore select the command CONTACT FUNCTION – COPY FUNCTION.
Select the dot-button of the field "Client". A new selection window is opened. There
you choose those clients where the functions should be copied to.
© ebit e business & IT EntwicklungsGmbH
67 / 77
AGILIA Dybabase
Dynabase
10.10 New Contact Type
Figure 85: Contact types – Overview
In this overview you see which contact types might already exist in AGILIA.
Note: For searching use the wildcards which are commonly used in AGILA (mainly %).
To see further details of the different types click on the name of the contact type. You can
edit settings if required.
In order to create a new contact function select in the menu SYSTEM – menu item MASTER
DATA the command CONTACT TYPE – NEW CONTACT TYPE.
Figure 86: Neue Kontaktart
You have to enter a name in the field "Contact type". This is a required field.
10.11 Return Reasons
Figure 87: Return reasons – Overview
In this overview you see which return reasons might already exist in AGILIA.
Note: For searching use the wildcards which are commonly used in AGILA (mainly %).
To see further details of the different reasons click on the name of the return reason and
then on . You can edit settings if required.
In order to create a new return reason select in the menu SYSTEM – menu item MASTER
DATA the command RETURN REASON – NEW RETURN REASON.
© ebit e business & IT EntwicklungsGmbH
68 / 77
AGILIA Dybabase
Dynabase
Figure 88: New return reason
Enter a code for the new return reason.
Note: Codes are helpful for creating new profiles. You enter the code instead of the content of
the particular field. The correct code will be automatically transformed into the corresponding
content.
You have to enter a name for the new return reason. This is a required field.
With the checkbox "Change profiles automatically to inactive" you can define, that – if a
return reason applies to a profile – this profile should be automatically set inactivel
10.12 Lock Codes
In order to create a new lock code in the system select in the menu SYSTEM – menu item
MASTER DATA the command LOCK CODES.
Here you see the lock codes which already exist in the system. Either select an existing
lock code and change it or you select a lock code which is not taken yet and edit it
according to your wishes. You are able to edit or create new lock codes by clicking on the
right mouse button and selecting the desired action.
Click on "Edit lockcode" and it will be opened to show its details.
Figure 89: New lock code
Enter a name – this is a required field – or overwrite if necessary the existing value in this
field. Activate the checkboxes if necessary to define for which channels you want to be
able to use this lock code.
10.13 Connection Types
In the overview you see which connection types might already exist in AGILIA.
Either select an existing connection type and change it or you select a connection type
which is not taken yet and edit it according to your wishes. You can edit settings if
© ebit e business & IT EntwicklungsGmbH
69 / 77
AGILIA Dybabase
Dynabase
required or create new connection types by clicking on the right mouse button and
selecting the desired action.
In order to create a new connection type select in the menu SYSTEM – menu item MASTER
DATA the command CONNECTION TYPES – NEW CONNECTION TYPE or click on "New
connection type" in the context menu of the connection type.
Figure 90: New connection type
Enter the "from" and "to" relationship in the field. These are required fields.
Enter a code for the new connection type.
Note: Codes are helpful for creating new profiles. You enter the code instead of the content of
the particular field. The correct code will be automatically transformed into the corresponding
content.
10.14 Information Material
Figure 91: Information material – Overview
In the overview you see which information material might already exist in AGILIA.
Note: For searching use the wildcards which are commonly used in AGILA (mainly %).
To see further details of the different information materials click on the name of the
material. You can edit settings if required.
In order to create a new information material select in the menu SYSTEM – menu item
MASTER DATA the command INFORMATION MATERIAL – NEW INFORMATION MATERIAL.
Figure 92: New information material
You have to enter a name for the new information material. This is a required field.
You have to define an export code for the information material. This is a required field.
© ebit e business & IT EntwicklungsGmbH
70 / 77
AGILIA Dybabase
Dynabase
Note: This export code can also be exported with the export of data (information material).
You can select an availability-date for the information material and select whether there is
a text per (information material) ticket or not.
With the checkbox "use for new tickets" you define whether the information material
should be available for selection when creating an information ticket.
10.15 Word Template
In the overview you see which word templates might already exist in AGILIA.
Note: For searching use the wildcards which are commonly used in AGILA (mainly %).
To see further details of the different information materials click on the name of the
material. You can edit settings if required.
In order to create a new word template select in the menu SYSTEM – menu item MASTER
DATA the command WORD TEMPLATE – NEW WORD-TEMPLATE.
Figure 93: Neue Word Vorlage
You have to enter a name for the new word template. This is a required field.
You have to upload a template. Click on the dot-button
and select the template in the new window.
of the field "Upload template"
10.16 Quantity Unit
In the overview you see which quantity units might already exist in AGILIA.
Note: For searching use the wildcards which are commonly used in AGILA (mainly %).
In order to create a new quantity unit select in the menu SYSTEM – menu item MASTER
DATA the command QUANTITY UNIT– NEW QUANTITY UNIT.
Figure 94: New quantity unit
You have to enter a name for the new quantity unit. This is a required field.
It is possible to select whether it can be used only for new entries or not.
10.17 Document File Types
In the overview you see which document file types might already exist in AGILIA.
© ebit e business & IT EntwicklungsGmbH
71 / 77
AGILIA Dybabase
Dynabase
Note: For searching use the wildcards which are commonly used in AGILA (mainly %).
In order to create a new file type select in the menu SYSTEM – menu item MASTER DATA
the command DOCUMENT FILE TYPES– NEW FILETYPE.
Figure 95: New document file type
You have to enter a name for the new quantity unit. This is a required field.
You have to enter a filetype extension – e.g "doc" for MS Word files – this is a required
field.
If already uploaded you are able to select a specific icon for the document file type – if
not, please upload a new icon.
10.18 Calendar Categories
Figure 96: New calendar category
In order to create a new calendar category select in the menu SYSTEM – menu item
MASTER DATA the command CALENDAR CATEGORIES (SYSTEM) – NEW CATEGORIE.
Enter the name of the new calendar category. This is a required field.
Enter the color code as follows, e.g. 0x00FF00 (green). This is a required field.
You have to enter a name for the outlook category. This is a required field.
If you want to be this calendar category a private appointment, select the
corresponding checkbox.
Now you are able to select the newly created calendar category for the creation of new
calendar entries.
© ebit e business & IT EntwicklungsGmbH
72 / 77
AGILIA Dybabase
/
11.1
Dynabase
,
0
/
1
Period Group
Figure 97: Period group – Overview
In AGILIA you can establish period groups. In the overview you see which period groups
might already exist in AGILIA.
To see further details click on the name of the period group (right mouse button) and click
on "Edit period group". You can edit settings if required.
In order to create a new period group either select the command PERIOD GROUP – NEW
PERIODGROUP in the menu SYSTEM – menu item MASTER DATA or click on "New period
group" in the context menu of any existing period group.
Figure 98: New period group
You have to enter a name for the new period group. This is a required field.
Select the period type, e.g. week, month or quarter. The period group will be parted
according to this selection, e.g. in weeks, months or quarters.
Select the start- and end date of the period.
© ebit e business & IT EntwicklungsGmbH
73 / 77
AGILIA Dybabase
11.2
Dynabase
Expected Revenue
Figure 99: Expected revenue – Overview
In AGILIA you can create expected revenues per period group. In the overview you see
which expected revenues might already exist in AGILIA.
To see further details click on the name of the opportunity manager. You can edit settings
if required.
In order to create a new expected revenues click with the right mouse button on the period
group and select
.
Figure 100: New expected revenue
You have to select a sales manager. This is a required field. If necessary change the
currency.
Then it is possible to enter or edit the expected revenue for each period of time of the
period group (quarter, month, and week).
If necessary repeat this process for adding new sales managers to the period and to create
new expected revenues per sales manager.
11.3
Contact Project Role
In AGILIA you can create contact project roles according to your wishes. In the overview
you see which contact project roles might already exist in AGILIA.
Note: For searching use the wildcards which are commonly used in AGILA (mainly %).
To see further details click on the name of the contact project role. You can edit settings if
required.
© ebit e business & IT EntwicklungsGmbH
74 / 77
AGILIA Dybabase
Dynabase
In order to create a new contact project role select the command CONTACT PROJECT ROLE
– NEW PROJECT ROLE in the menu SYSTEM – menu item MASTER DATA.
Figure 101: New contact project role
You have to enter a name for the new contact project role. This is a required field.
11.4
Sales Steps
Figure 102: Sales progress – Overview and details
In AGILIA you can establish sales progresses (steps) according to your wishes. In the
overview you see which sales progress might already exist in AGILIA.
To see further details click on the name of the sales progress. You can edit settings if
required, delete the sales step or reload it.
In order to create a new sales progress select the command SALES PROGRESS – NEW SALES
in the menu SYSTEM – menu item MASTER DATA. Another way of doing so is
to click with the right mouse button on the sales steps and select "New sales step" from
the context menu:
PROGRESS
© ebit e business & IT EntwicklungsGmbH
75 / 77
AGILIA Dybabase
Dynabase
Figure 103: New sales step
You have to enter a name for the new sales progress.
In the menu "Completion" select whether the sales step requires positive, negative or
no completion.
You can select a minimum and maximum completion probability from the lists.
With the checkbox "Date of completion required" and "Opportunity Manager
required" you define if with this particular sales step requires the stated details.
11.5
Products
Figure 104: Products – Overview
In AGILIA you can create product. In the overview you see which products might already
exist in AGILIA.
Note: For searching use the wildcards which are commonly used in AGILA (mainly %).
To see further details click on
to open the product. You can edit settings if required.
In order to create a new contact project role select the command PRODUCTS – NEW
PRODUCT in the menu SYSTEM – menu item MASTER DATA.
Figure 105: New product
You have to enter a product name for the new product. This is a required field.
Select the quantity unit (e.g. "Pieces") from the menu and also select to which parent
(section) the product belongs to - click on the dot-button of the field "Parent" to open
the selection-window.
© ebit e business & IT EntwicklungsGmbH
76 / 77
AGILIA Dybabase
11.6
Dynabase
Sections
In AGILIA you can create sections to which certain products belong to. In the overview
you see which sections might already exist in AGILIA.
Note: For searching use the wildcards which are commonly used in AGILA (mainly %).
To see further details click on
to open the section. You can edit settings if required.
In order to create a new section select the command SECTIONS – NEW SECTION in the
menu SYSTEM – menu item MASTER DATA.
Figure 106: New section
You have to enter a name for the new section. This is a required field.
© ebit e business & IT EntwicklungsGmbH
77 / 77