1
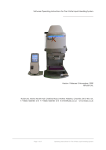
Operating Instructions For The Xtr-1 Single Tube Reader __________________________________ Version 5 Release 1 November 2011 FluidX Ltd. Monks Heath Hall, Chelford Road, Nether Alderley, Cheshire, SK10 4SY, UK. T: +44 (0) 1625 861 614 F: +44 (0) 1625 861 615 E: [email protected] www.fluidx.co.uk Page 1 of 19 Operating Instructions For The Xtr-1 Single Tube Reader This document is for information only; the manufacturer accepts no liability for errors contained herein or for incidental or consequential damages with the furnishing, performance, or use of this material. Unless otherwise specified references to names or parts is purely casual and has the purpose of illustrating the product. The contents of this publication may not be reproduced in any form or by any means (including electronic storage and retrieval or translation into a foreign language) without prior agreement and written consent from the copyright owner. The information contained in this document is subject to change without notice. Page 2 of 19 Operating Instructions For The Xtr-1 Single Tube Reader TABLE OF CONTENTS 1. WELCOME 4 2. INTRODUCTION 4 3. XTR-1 SYSTEM SET-UP 5 3.1 System Requirements 5 3.2 Starting the Installation 6 3.3 Complete the Hardware Installation 8 3.4 Initial Setup and Serial Number Entry 8 3.5 Activation of XTR-1 Application 9 4. OPERATING AND SOFTWARE OVERVIEW 11 4.1 Reader Tab 11 4.2 Actions Tab 12 4.2.1 Use KeyBoard Wedge 12 4.2.2 Allow Duplicates 14 4.2.3 Beep On Success 15 4.3 Log Tab 15 4.4 Minimise, Restore and Exit 15 5. TROUBLE SHOOTING 17 6. APPENDIX A: SYSTEM SPECIFICATIONS 18 7. APPENDIX C: DECLARATION OF CE CONFORMITY 19 Page 3 of 19 Operating Instructions For The Xtr-1 Single Tube Reader 1. WELCOME The XTR-1 single tube reader from FluidX is a sophisticated 2D Data Matrix code reader capable of reading standard pre-coded tubes from FLUIDX and a range of other manufacturers, assuming they adhere to the ISO 16022 Data Matrix two dimensional bar code format. The software has been designed to run with minimum user input and setup. Designed and manufactured by: fluidX Ltd. Monks Heath Hall Helford Road Nether Alderley Cheshire SK10 4SY UK Tel: +44 (0) 1625 861 614 Fax: +44 (0) 1625 861 615 Email: [email protected] www.fluidx.co.uk 2. INTRODUCTION The single tube reader installation consists of three separate sub-installations: The Single Reader Application and Drivers Microsoft .NET Framework 4 Microsoft Visual C++ 2010 Redistributable Package These installations are automatically performed by the 2D single tube reader installer. The computer will require a restart once all three installations have taken place. Should the software request a restart during the first or second installation select “No”. Only select “Yes” to restart after the third installation has been completed. Page 4 of 19 Operating Instructions For The Xtr-1 Single Tube Reader 3. XTR-1 SYSTEM SET-UP The XTR-1 solid-state single tube reader (fig 1) hardware consists of the following items: XTR-1 reader unit User manual USB memory stick which contains: o Installation Software o User Manual o License Number as 2D on Case o Calibration Window Fig 1. 3.1 System Requirements Windows® 7, Windows Vista®, Windows XP with Service Pack 2 (SP2) or higher (excluding Windows XP 64-bit); Minimum: Intel Dual-Core 1.6 GHz or higher, 1 GB of RAM; Recommended: Intel Dual-Core 3.0 GHz or higher, 2 GB of RAM Hard Drive 1.5 GB free USB 2.0 available USB Port Page 5 of 19 Operating Instructions For The Xtr-1 Single Tube Reader 3.2 Starting the Installation Before starting the installation please ensure that the single tube reader unit is NOT plugged into any USB port on the computer and that administrator permission is available to install applications. If User Account Control is enabled (Windows Vista and 7) a warning message will be displayed before the application starts. Press “Yes” to continue. The reader should be plugged in after the software installation has completed and the computer has been restarted. Place the installation USB Memory Stick into a spare USB port. The installation should start automatically. If this does not occur, navigate to the drive associated with the USB Stick and open (fig 2). Fig 2. The installation can be started manually by double clicking on the FluidX XTR-1 Setup.exe Icon. Page 6 of 19 Operating Instructions For The Xtr-1 Single Tube Reader Fig 3 Fig 4 Click “Next” to commence the installation (fig 3) and select the installation directory required (fig 4). Fig 5 Fig 6 Select the program shortcut menu entry (fig 5) and select options required (fig 6). Fig 7 Fig 8 Check the Installation settings and click Install to start the process (fig 7) and wait until the installation has completed (fig 8). Page 7 of 19 Operating Instructions For The Xtr-1 Single Tube Reader Fig 9 Lastly, restart the computer (fig 9). 3.3 Complete the Hardware Installation Once the computer has restarted insert the XTR-1 USB cable in the first available USB port. Windows will automatically load the appropriate drivers. Fig 10 Fig 11 The XTR-1 drivers will be installed automatically (fig 10), wait until the drivers are installed and “Your device is ready to use” appears (fig 11). 3.4 Initial Setup and Serial Number Entry Once the drivers have been installed the application can be started from the desktop shortcut. Fig 12 Fig 13 Page 8 of 19 Operating Instructions For The Xtr-1 Single Tube Reader When the application first opens, the “XTR Decice needs calibrating” dialog will appear along side the main XTR-1 application. Place the white USB memory stick box over the scanning window and press “OK”. (Fig 12). This will calibrate the white balance and scanning window. Once calibrated the “Enter Serial Number” dialog box will appear (fig 13). Fig 14 fig 15 Enter the Serial Number, this can be found on the bottom of the XTR-1 reader and on the box of the USB memory stick (fig 14) The code can be entered manual by typing into the dialog box or by scanning the 2D code on the box of the USB memory stick. The Title bar of the XTR-1 application will display “XTR-1 7 Days remaining” until the installation is activated (fig 15). 3.5 Activation of XTR-1 Application The XTR-1 single tube reader and application software will function for 7 days without activation, after this time it will need to be activated. Fig 16 Fig 17 To start the activation right click on the orange “X” icon in the system tray. Select “About FluidX Tube Reader” (fig 16). The About Box will display the number of days remaining for “Activation”. Select “Activate” from the Dialog Box (fig 17). Page 9 of 19 Operating Instructions For The Xtr-1 Single Tube Reader Fig 18 Fig 19 Enter the serial number (fig 18). This can be found on the bottom of the XTR-1 reader and on the box of the USB memory stick. Then press the “Request Activation Code” button (fig 19). Fig 20 Fig 21 An email will be created, if the PC has an email client configured (fig 20). If no email client is configured copy the Site Code Mid Code Serial Number And send manually to: [email protected] An activation code will be received by email within 48 hours. In the meantime the application can be used for 7 days (fig 21). The “About” box now shows XTR-1 application is “Licensed” (fig 22). Fig 22 Page 10 of 19 Operating Instructions For The Xtr-1 Single Tube Reader 4. OPERATING AND SOFTWARE OVERVIEW Double click the new Single Reader icon on the desktop: 4.1 Reader Tab Fig 23 Fig 24 To read a tube, place the 2D-coded tube on the scanning window. The code will be displayed. Once the reader is setup and configured the main application window can be closed using the “X” in the top right hand corner. This will minimise the application to the system tray. The application will continue to function, and will read and decode tubes that are placed on the scanning window. To “Restore” the application, right click on the orange “X” in the system tray and select “Restore” (fig 25) Fig 25 Page 11 of 19 Operating Instructions For The Xtr-1 Single Tube Reader 4.2 Actions Tab Fig 26 The Actions Tab has 3 sections (fig 26): Use keyboard wedge Allow duplicates Beep on success 4.2.1 Use Keyboard Wedge Fig 27 Wedge Macros The XTR-1 keyboard wedge can be used to auto type decoded values into documents, webpages, spread sheets or any application receiving textual input. The wedge output is formatted using a macro language and is adjusted from the Keyboard Wedge settings (fig 27). The preset group can be used to quickly set generic output formats. Custom allows a more specialised output format. Preset Presets allow a prefix, suffix and terminator for the decoded value. Select the required prefix, suffix & terminator from the drop down menu for each. The wedge macros are generated automatically. Test the output formatting using the ‘Test’ button. Page 12 of 19 Operating Instructions For The Xtr-1 Single Tube Reader Custom Custom allows text and macros to be entered. Click the custom checkbox and type the macros into the text area. Test the output with the ‘Test’ button. See macros and macro reference for more information. Macros Macros are enclosed in parenthesis and prefixed with a dollar sign, e.g. $(Macro). Some Macros accept parameters and can be entered after a full stop e.g. $(Macro.Parameters). See the keyboard wedge macro reference for more information. Keyboard Wedge Macro Reference Code This will output the decoded value. E.g. The code is $(Code). MachineName This will output the name of the pc. E.g. $(Code) from pc $(MachineName) UserName This will output the name of current logged in user. E.g. $(Code) from user $(UserName) Key This macro will send a key press. The key to press is specified as a parameter. E.g. $(Code) $(Key.Enter), $(Code) $(Key.Tab). Available parameters are: $(Key.BACKSPACE) $(Key.DEL) $(Key.DOWN) $(Key.ENTER) $(Key.ESC) $(Key.LEFT) $(Key.PGDN) $(Key.PGUP) $(Key.RIGHT) $(Key.TAB) $(Key.UP) $(Key.ADD) $(Key.SUBTRACT) $(Key.MULTIPLY) $(Key.DIVIDE) Backspace Delete Down Arrow Enter Escape Left Arrow Page Down Page Up Right Arrow Tab Up Arrow Keypad Add Keypad Subtract Keypad Multiply Keypad Divide Page 13 of 19 Operating Instructions For The Xtr-1 Single Tube Reader Time This macro can be used to send time and date. The formatting is specified as a parameter. E.g. $(Time.dd-MM-yy HH-mm-ss) . Available parameters are: "d" "dd" "ddd" "dddd" "h" "hh" "H" "HH" "K" "m" "mm" "M" "MM" "MMM" "MMMM" "s" "t" "tt" "y" "yy" "yyy" "yyyy" "yyyyy" "z" "zz" "zzz" "g", "gg" The day of the month, from 1 through 31. The day of the month, from 01 through 31. The abbreviated name of the day of the week. The full name of the day of the week. The hour, using a 12-hour clock from 1 to 12. The hour, using a 12-hour clock from 01 to 12. The hour, using a 24-hour clock from 0 to 23. The hour, using a 24-hour clock from 00 to 23. Time zone information. The minute, from 0 through 59. The minute, from 00 through 59. The month, from 1 through 12. The month, from 01 through 12. The abbreviated name of the month. The full name of the month. The second, from 00 through 59. The first character of the AM/PM designator. The AM/PM designator. The year, from 0 to 99. The year, from 00 to 99. The year, with a minimum of three digits. The year as a four-digit number. The year as a five-digit number. Hours offset from UTC, with no leading zeros. Hours offset from UTC, with a leading zero for a single-digit value. Hours and minutes offset from UTC. The period or era. 4.2.2 Allow Duplicates Fig 28 With this checkbox enabled (fig 28) the same tube can be read and decoded as many times as desired. With this checkbox not enabled the same tube will not read and decode until the application is restarted. Page 14 of 19 Operating Instructions For The Xtr-1 Single Tube Reader 4.2.3 Beep On Success Fig 29 With this checkbox enabled PC with Beep (default system sound) when a tube is successfuly decoded. This should be enabled when planning to use the main application in the minimised state 4.3 Log Tab Fig 30 The Log Tab is used for diagnostics and trouble shooting purposes. 4.4 Minimise, Restore and Exit Fig 30 Fig 31 The XTR-1 application can be minimised to the system try by clicking the close “X” at the top right corner of the application (fig 30). To “Restore” the XTR-1 application, right click on the orange “X” in the system tray and select “Restore” (fig 31). Page 15 of 19 Operating Instructions For The Xtr-1 Single Tube Reader Fig 32 To “Exit” the XTR-1 application right click on the orange “X” in the system tray and select “Exit Tube Reader” (fig 32). Page 16 of 19 Operating Instructions For The Xtr-1 Single Tube Reader 5. TROUBLE SHOOTING No image in man XTR-1 application The XTR-1 is not plugged into a USB port on the PC. Slow reading Press the “Recalibrate” button and place a white card on the scanning window. Adverse lighting conditions In some lighting conditions the XTR-1 application may struggle to decode some tubes. If this is the case using the black “Doughnut” provided with the unit may help. Affix the Black “Doughnut” to the scanning surface and center on the window, perform a “Recalibration” Page 17 of 19 Operating Instructions For The Xtr-1 Single Tube Reader 6. APPENDIX A: SYSTEM SPECIFICATIONS 6.1 XTR-1 Single Tube Reader Environmental Specifications: Ambient operating temperature of processor: 5 to 50°C. Storage temperature: 5 to 50°C. Operating humidity: (non-condensing). 10 to 90% Storage humidity: (non-condensing). 5 to 95% 6.2 Power supply USB Power Source 6.3 Casing Length: 10 cm Width: 10 cm Height: 9 cm Page 18 of 19 Operating Instructions For The Xtr-1 Single Tube Reader 7. APPENDIX C: DECLARATION OF CE CONFORMITY Page 19 of 19 Operating Instructions For The Xtr-1 Single Tube Reader