1
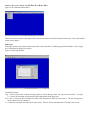
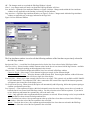
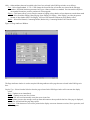
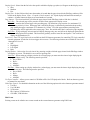
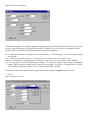
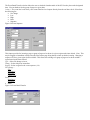
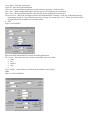
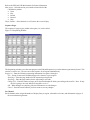
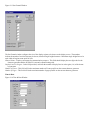
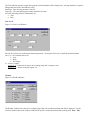
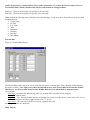
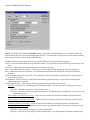
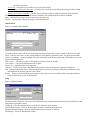
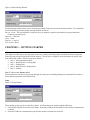
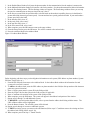
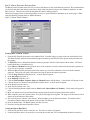
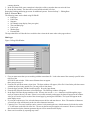
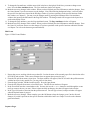
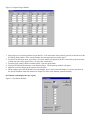
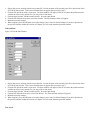
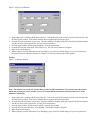
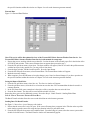
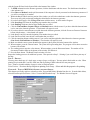
SG-Edit W for Windows®
User’s Manual
MN91
Part Number 6800197
Revision A
January 2003
Division of OutSource Engineering & Manufacturing, Inc.
2210 W. Alexander Street, Suite A
Salt Lake City, UT 84119
(801)956-0000
www.texscan-msi.com
Copyright 2003 by Texscan MSI. All rights reserved. No part of this manual may be reproduced in any form or by any
means without permission from Texscan MSI.
Printed in the United States of America. Texscan MSI reserves price and specification privileges.
CSS-MINIPLUS, SpectraGen Z-Series, SG-EDIT, SG-EDIT W, SG-EB, 3B, 4B and GP-2000 are trademarks of Texscan
MSI.
TABLE OF CONTENTS
INTRODUCTION ............................................. 4
SOFTWARE DESCRIPTION ................................................ 4
Capabilities of SG-Edit W ........................................................... 4
HOW TO USE THIS MANUAL ........................................................ 4
HELP PROCEDURES ...................................................................... 4
CHAPTER 1 – INSTALLATION ..................... 5
HARDWARE REQUIREMENTS ......................................................... 5
SOFTWARE INSTALLATION ............................................................. 5
Start the Program ........................................................................ 6
CHAPTER 2 – FUNCTIONS ........................... 6
DEFINITIONS ................................................................................ 6
PULL-DOWN MENUS ..................................................................... 7
File ................................................................................................. 7
Edit ................................................................................................ 7
SG-Edit .......................................................................................... 7
Internet .......................................................................................... 8
View ............................................................................................... 8
Help ............................................................................................... 8
TOOLBAR .................................................................................... 8
DISPLAY ....................................................................................... 8
STATUS BAR ................................................................................. 8
SPECIFIC FUNCTIONS WITHIN THE SG-EDIT PULL-DOWN MENU .. 9
Edit Pages ..................................................................................... 9
Edit Events .................................................................................. 13
Sequence Pages ........................................................................... 16
Set Channel ................................................................................. 16
Time & Date ............................................................................... 17
Line Levels .................................................................................. 17
Weather ....................................................................................... 18
External Data ............................................................................. 19
Batch Transfer ............................................................................ 20
Address Book .............................................................................. 21
Setup ............................................................................................ 21
CHAPTER 3 – GETTING STARTED ........... 22
STEP 1 – SETUP AND ADDRESS BOOK .......................................... 22
Setup ............................................................................................ 22
Address Book .............................................................................. 23
STEP 2 – BATCH TRANSFER / FETCHING DATA ........................... 24
Fetching Data Via Batch Transfer ........................................... 24
Saving the Data to Hard Drive ................................................. 24
STEP 3 – EDITING DATA ............................................................. 25
Edit Pages ................................................................................... 25
Edit Events .................................................................................. 26
Sequence Pages ........................................................................... 27
Set Channel (setup display lines per region) ........................... 27
Time and Date ............................................................................ 28
Line Levels .................................................................................. 29
Weather ....................................................................................... 29
External Data ............................................................................. 30
Saving the Data to Hard Drive ................................................. 30
STEP 4 – BATCH TRANSFER / SENDING EDITED DATA ................. 30
Sending Data Via Batch Transfer ............................................. 30
STEP 5 – PRINTING .................................................................... 31
CHAPTER 4 – TEXSCAN-MSI NOAA INTERNET WEATHER SERVICE
32
SETUP ........................................................................................ 32
DETERMINING NOAA WEATHER ZONE CODE ........................... 33
INTRODUCTION
SOFTWARE DESCRIPTION
SG-Edit W is a software application program for a PC. This software was designed to establish a communication link
between a Texscan MSI character generator and a PC. SG-Edit W can be used to create, edit, and store text files and event
schedules used by Texscan character generators.
SG-Edit W is a Windows based, user-friendly, software application. The character generator data can be stored on disk or
hard drive.
It is assumed that anyone using this software uses, and is familiar with, Microsoftâ Windows, and one of the Texscan
character generators. Features of these programs that are duplicated in those systems are not covered in detail here.
Capabilities of SG-Edit W
Using the power of a PC, SG-Edit W software can provide true offline editing of a Texscan character generator. When
editing from the PC the following functions can be performed:
§ Remotely add and edit CG text from the PC using SG-Edit W
§ Storage – The PC saves all page text and events from the CG
§ True offline editor and event scheduler. Make changes at the PC without interrupting the current CG display
§ Schedule out events up to one year in advance
§ Automatic CG time and date correction from the PC with each batch transfer
§ Page Print – Now you can have the ability to print a hard copy of any text on CG pages
§ File Conversion – Text is converted to proprietary Texscan CG text
HOW TO USE THIS MANUAL
This manual is organized step-by-step to familiarize the user with the system. It includes instructions for Installation, a
complete description of all functions available within the software, and a step-by-step tutorial in Getting Started.
HELP PROCEDURES
This manual was written to provide as much information as possible to assist the user in operating the SG-Edit W software.
The manual should answer most questions. For unusual problems or questions the user may seek further assistance from
the Technical Support Department at the following number:
(801) 956-0000
We welcome comments and suggestions. Please write or e-mail to the following address:
Texscan MSI
2210 W. Alexander Street, Suite A
Salt Lake City, UT 84119
(801) 956-0000
[email protected]
CHAPTER 1 – INSTALLATION
Hardware installation is covered only briefly in this manual. Many of the hardware requirements may already be installed
in your computer, or will be bought and installed separately from this system. An overview of hardware requirements is
given below.
Software installation is covered in detail below.
HARDWARE REQUIREMENTS
SG-Edit W can be run on any version of Microsoftâ Windows operating system. The following equipment requirements
are standard for Microsoftâ Windowsâ 95, 98, 2000, and Windowsâ NT
§ 486/25 MHz-based system or better recommended
§ At least 16 MB of memory (RAM) recommended
§ Available hard disk space
§ VGA or higher-resolution display
§ Mouse or compatible pointing device
To run SG-Edit W in conjunction with a remote character generator we recommend that the PC have the following additional requirements:
§ Internal clock
§ Modem
SOFTWARE INSTALLATION
Before beginning the installation process be sure that all other software applications are closed. CAUTION: The installation diskette can only be used once. Install the software to the correct PC. For assistance, call the Texscan technical
support team at (801) 956-0000.
1. Make a note of the serial number of the software. The serial number is located on the installation diskette. You will be
prompted to enter the serial number during the installation process while the diskette is in the drive.
2. Insert the diskette into the appropriate drive. CAUTION: The installation diskette can only be used once. Install the
software to the correct PC.
3. From Windows, press the “Start” button with the mouse.
4. From the menu that appears select “Run”.
5. Enter the following in the space provided: a:\setup.exe
6. You may also use the “Browse” button to search for the location of the 3 ¼” disk drive.
7. Using the mouse, click the “OK” button.
8. The setup executable program will begin the installation process.
9. A window will appear warning you to close all other programs before beginning the installation. Click the “Next”
button if you are ready to proceed. If you have programs or applications that are currently running, press “Cancel”.
Close all applications and then begin these steps again.
10. A window will appear where you will enter the “Name” of the user, the “Company” name, and the “Serial Number” of
this SG-Edit W software program. The serial number of the software is located on the installation diskette. When the
information has been entered click the “Next” button to proceed.
11. By default a destination will appear in the next window where the software will reside on the hard drive. You may opt
to browse for a destination folder instead. When you have selected a destination click “Next” to proceed.
12. A window will appear asking if you would like a typical, compact or custom installation. Select typical and then click
“Next” to proceed.
13. The next window will inform you that program icons will be added to the program folder listed. You may browse
through the list of existing folders for a different destination or leave it to the default. Click “Next” to proceed.
14. The installation process will complete. Click “Finish” to exit setup.
Start the Program
1. Press the “Start” button from Microsoftâ Windows.
2. From the menu select “Programs”.
3. From the menu of programs that appears, select “Texscan MSI
SG-Edit W”.
4. The program will begin.
5. Proceed to Chapter 2 for a description of all the functions within the software. To begin using the program, follow the
step-by-step tutorial in Chapter 3 Getting Started.
CHAPTER 2 – FUNCTIONS
The SG-Edit W software duplicates the functions you are able to perform while sitting at the character generator keyboard,
allowing you to make changes remotely. The functions are embodied in Windows based software creating user-friendly
functionality. The program enables you to make any changes to multiple character generator systems while each character
generator continues to display. The editing is seamless and not visible to the viewer.
This chapter is intended as a reference. It will describe each function within each pull-down menu of the SG-Edit W
software. Duplicate functions are described in the SpectraGen Z Character Generator User’s Manual. This manual assumes that the user is familiar with the use of the SpectraGen Z character generator.
This chapter will serve to familiarize the user with the location of the SpectraGen Z character generator functions within
the SG-Edit W software. For in depth information on functions refer to the SpectraGen Z character generator user’s
manual.
A tutorial of the SG-Edit W software is contained in Chapter 3 – Getting Started.
DEFINITIONS
Attribute – A user selectable display option.
Bang – A user selectable display option that updates the screen immediately.
Change File – A user specified number showing how many display pages are to be displayed before going to the next file.
Channel Name – The number or letter used to differentiate multiple character generators for batch transfer and system
access.
Crawl – A user selectable display option that updates the screen slowly, updating information from the right and moving to
the left on the screen.
Display Line – The SpectraGen Z-Series has 26 display lines that can be assigned to different regions, but there may be
more than one display line used to hold a line of text depending on character height and width.
Events – A task that the character generator performs at a specific time.
Field – An area in a menu that will accept data typed in or selected by the user.
Hidden Characters – These are unseen characters located before and after a word, phrase or line which allows the text to
Flash, use an Alt Font, change Color, or frame a Video image.
Page – An area in memory that contains up to 8 display lines of text or graphics, also containing display attributes for the
page.
Region – An area of the display screen for the display of text.
Roll – A display option that has the display roll onto the screen, displaying the first line of text at the bottom of the region,
then rolling one display line at a time until the page has filled the region, then pauses for the amount of display time.
Sequence – A user defined rotation of pages to be displayed in a particular region.
Figure 2-1 Main Window
PULL-DOWN MENUS
The pull-down menus are standard for Windows. The functions within each pull-down menu are described below.
File
Files are used to save data from distinct character generators. If your system is operating several character generators, you
may save the data in different files for each character generator. You may also create new files for backup purposes with
historical dates for future reference.
New – Create a new file.
Open – Open an existing file by browsing through a menu.
Save – Stores current file to hard drive, floppy or other storage device.
Save As – Stores current file under a new name to hard drive, floppy or other storage device
Print – Prints a selectable number of pages in color or black and white.
Print Preview – Previews the layout prior to printing.
Print Setup – Select and edit the properties for all printing.
List of Files – List of the four most recently opened files.
Exit – End program.
Edit
Undo – Removes last change made.
Cut – Remove selection to clipboard, used in conjunction with paste.
Copy – Copy selection to clipboard, used in conjunction with paste.
Paste – Places copies or cut selections to a newly selected place.
SG-Edit
This is a synopsis of the function of each selection within the SG-Edit pull down menu. When one of the
following items is selected a specific window will appear. A description of the functions within each of those
windows is covered in this chapter under “Specific Functions Within the SG-Edit Pull-Down Menu”.
Edit Pages – Each page resident on the current character generator can be edited here, including page and line attributes.
Edit Events – Existing events can be edited or new events created on the current character generator using Edit Events.
Sequence Pages – The sequence of pages to play within each region (1-6) can be edited.
Set Channel – Set the channel name, assign/edit number of display lines per region, edit number of events, and edit
number of pages of the current character generator.
Time & Date – Set/edit time and date of the current character generator.
Line Levels – Set/edit In/Out Line Levels of current character generator.
Weather – Enable/disable weather attributes of the current character generator.
External Data – Set/edit start/stop pages of external data on the current character generator (i.e. NOAA weather, Broadcast).
Batch Transfer – Send/fetch data to or from the current character generator.
Address Book – Add/remove/edit access data of all available character generators.
Setup – Setup the modem for communication between SG-Edit W PC and character generators.
Internet
Texscan-MSI Weather Setup F3 – Setup for receiving Forecast Weather Data from Texscan’s Weather Server.
Enable Texscan-MSI Weather – Starts and stops automated receiving function of Weather Data.
View
Toolbar – Displays or hides toolbar located at top of window.
Status Bar – Displays or hides status bar located at bottom of window.
Help
About – Version and release date of SG-Edit W.
Help – On screen help.
TOOLBAR
The toolbar is located at the top of the main window under the pull-down menus. Most of the toolbar is standard for
Windows.
New – Creates a new file.
Open – Opens an existing file.
Save – Saves the current file to a specified location.
Increment/Decrement Arrows – Increases or decreases the page number shown in the main window. The number of the
current page shown is indicated in the status bar at the bottom right side of the main window.
DISPLAY
The display is the screen of the main window. In the display you will see a page shown with the applicable attributes of
color and text. The number of the page that is currently displayed is indicated in the right hand corner of the Status Bar.
You may change the page being displayed using the increment and decrement arrows located on the toolbar. As you use
the increment/decrement arrows you will notice that the page number displayed in the status bar changes as well.
STATUS BAR
Located across the bottom of the main window. The number of the page that is currently shown in the display is indicated
in the right hand corner of the Status Bar. You may change the page being displayed using the increment and decrement
arrows located on the toolbar. As you use the increment/decrement arrows you will notice that the page number displayed
in the status bar changes as well.
SPECIFIC FUNCTIONS WITHIN THE SG-EDIT PULL-DOWN MENU
Figure 2-2 SG-Edit Pull-Down Menu
There are numerous windows that appear when selections are made from the SG-Edit pull-down menu. They are described
below as they appear.
Edit Pages
Each page resident on the current character generator can be edited here, including page and line attributes. Select a page
to be edited from the Page field to begin.
Figure 2-3 Edit Page Window
Available Selections:
Page – Select a page to edit or add by entering a figure (1-600) in the page field. You may also use the left (<<) or right
(>>) arrows to decrement or increment the figure that appears in the page field.
Line 1 thru 8 – Select the line to add/edit text with a click of the mouse in the box next to line #. The text will appear in
the line where the box is checked.
C – Centers the text on the line with a click of the mouse. The text will be centered on the CG output video screen.
OK – The changes made are saved and the Edit Page Window is closed.
Cancel – Any changes made will not be saved and the Edit Page Window will close.
Line Attributes – Opens the Line Attributes Window, see Figure 2-4 below. Changes made within the Line Attributes
window are only applicable to the line that is selected by the dot indicator.
Page Attributes – Opens the Page Attributes Window, see Figure 2-5 below. Changes made within the Page Attributes
window are applicable only to the page indicated in the Page field.
Figure 2-4 Line Attributes Window
The Line Attributes window is used to edit the following attributes of the line that was previously selected in
the Edit Page window:
Background Colors – A scroll bar list of background colors for the line of text selected in the Edit Page window.
Character Colors – Select from the available character colors for the line of text selected in Edit Page window. Available
selections will change depending on the background color selected.
Character Size – Select character height and width for line of text selected in Edit Page window.
Character Height – Select single (1) line character height up to octuple (8) line character height.
Character (Width ) Per Line – Select the character width from the field. Increasing the character width will decrease
the number of characters that will fit on a single line of the display.
External Video – Allows you to input external video on a line or on a page. This option is only available on SGZ-3000GL
or SGZ-4000 models. The composite NTSC video, connected to the external video input of the character generator,
will appear in the selected line on the display screen.
Use Proportional Spacing –When selected, this option will automatically add full spacing, half or three-quarter spacing to
simulate a proportional spaced line.
Line Separator – A line separator will place a thin line horizontally across the entire display screen, above or beneath (or
both) the line of text selected in the Edit Page window. You may select the color of the line separator. If you choose
to have both a top and bottom line separator they will be the same color.
Color – Only applicable when a top/bottom/both line separators are selected. When selecting a color, keep in mind the
colors that have been selected for background and text.
Top – Check the box to have a line separator appear at the top of the line of text that was selected in the Edit Page
window. Select the color of the line separator in the color field.
Bottom – Check the box to have a line separator appear beneath the line of text that was selected in the Edit Page
window. Select the color of the line separator in the color field.
Other – Other attributes that can be applied to the line of text selected in the Edit Page window are as follows:
Font – Select from Standard, 2, 3 or 4. Will change the font of the line of text that was selected in the Edit page
window. SGZ-4000 character generators have up to 4 fonts available as a standard. Previous models only have
one standard font unless you have purchased a Z-font upgrade.
Edging – This feature allows you to select the amount of edging or drop shadow of text characters to make them stand
out. Select from Max Edging, More Edging, Some Edging, No Edging. “Max Edging” provides the greatest
amount of drop shadow while “No Edging” will leave each character without any drop shadow effect.
Border – Select from Normal, Contrasting Border, Border Only, Contrasting Border with Colors Reversed.
Figure 2-5 Page Attributes Window
The Page Attributes window is used to setup the following attributes of the page that was selected in the Edit Page window:
Display Type – Select from the list below how the page selected in the Edit Page window will come onto the display
screen.
Bang – Updates screen immediately.
Splash – Updates screen one line at a time.
Crawl – Text will crawl horizontally across the screen in one line.
Roll – Updates screen as the message scrolls up from the bottom to the top until the last line of the page is displayed;
the text will hold until the page time expires.
Page Print – Each character of text will be printed to the display screen one character at a time, like a typewriter, until
it all appears.
Display Speed – Select from the list below the speed in which the display type (above) will appear on the display screen.
§ Slow
§ Medium
§ Fast
Display Time – In the field provided, enter the number of seconds that the page selected in the Edit Page window will be
visible on the display screen. Note: “0” equals 1/30 of a second. “99” equals display hold until told externally to
continue. All other numerical digits are an actual number of seconds.
Page Options – The selections below will affect the page selected in the Edit Page window if the box is checked.
Page Skip – The selected page will be passed over and will not appear on the display screen.
Page Link – Attaches the selected page to the preceding page. By definition a page consists of a maximum of 32
characters per line by 8 lines. When page link is activated, this page is electronically attached to the preceding
page making that page a maximum of 32 characters by 16 lines. All of the page attributes pertaining to the
preceding page will be applicable to the current page. Note: Do not link more than 3 consecutive pages together.
Page Wait – A page with page wait activated will display that page only once and will not be displayed again until the
data on that page has been updated. This function is generally used for items like stock quotes. You would never
display the information twice.
Line Levels – Four TTL logic line levels are available on the SGZ character generators for controlling TTL logic controlled
external equipment. Set the line levels to trigger devices to run. The following selections are available for Line Level
1 through Line Level 4:
§ Null
§ High Signal
§ Low Signal
§ Pulse
Display Window – Select a day of week, time of day, morning or night, which the page selected in the Edit Page window
will display on screen. The default is set to zero for ignoring time.
Start Time – When setting up a display window for a selected page you must enter the time to begin displaying the
page and when to stop. The following must be specified:
§ Day of Week § Hour § Minute § AM/PM End Time – When setting up a display window for a selected page you must enter the time to begin displaying the page
and when to stop. The following must be specified.
§ Day of Week
§ Hour
§ Minute
§ AM/PM
Use Tape Controller – Allows you to control a CSS-Mini or PB-1 for VCR playback of decks. Refer to character generator manual for more detail.
Video Tape Control – For detailed information on the use of the following options refer to the character generator manual.
§ Use PB-1
§ Use CSS-Mini
§ VCR Action
§ PB-1 Option, VCR Selection
§ CSS-Mini, VCR Selection
Edit Events
Existing events can be edited or new events created on the current character generator using Edit Events.
Figure 2-6 Edit Events Window
The Edit Events window is for creating, editing and scheduling events to occur on the character generator. Events can be
set up to include different types of equipment such as PB-1, CSS-Mini, Line Levels, Sequences, and Batch Transfer
functions. Refer to the character generator manual for more detailed information.
Event – Select the event number by typing it in or by incrementing (>>) or decrementing (<<) the event number using the
arrow buttons.
Active – Select if you want to activate (yes = play) the event or to deactivate (no = not play) the event.
Schedule – Select from the following options to schedule the event to play: day, hour, minute, second, AM/PM.
Type – You may not have all of the equipment that is listed here. For each type available, when you press the “Options”
button a different window of options will be available to use for editing. See Figure 2-7 through Figure 2-11 below.
The following selections are available: Levels, Sequence, Batch, PB-1, and Mini.
The following windows will appear when the types below are selected and the “Options” button is clicked:
§ Levels
Figure 2-7 Event Line Levels
The Event Batch Transfer window allows the user to schedule a batch transfer of the SG-Z to take place at the designated
time. You can batch or fetch a group of pages at a given time.
1 thru 4 – The event line levels allow you to control the line level outputs directly from the real time clock. Select from
the following list:
§ No Change
§ Low
§ High
§ Pulse
§ Sequence
Figure 2-8 Event Sequence
This feature provides for inserting a page or group of pages to be shown in a given region at the time desired. Note: This
may be flagged as immediate or delayed to allow the current page being shown to time out before inserting. Changing a
sequence file for a given region is also available. This allows the exchange of a group of pages to be shown within a
region based on the time selected.
Type – Select file change or insert.
Timing – Select delayed or immediate.
Region – Select a region for the event sequence (1-6).
File Change –
File –
Start Page –
Stop Page –
Change File Insert –
Start Page –
Stop Page § Batch
Figure 2-9 Event Batch Transfer
system Name – Enter the system name.
Logon ID – Enter the logon identification.
Direction – Fetch from character generator or send to character generator. (Fetch or Send)
Source First – When sending/fetching this is the first page you are assigning to be sent/fetched.
Source Last – When sending/fetching this is the last page you are assigning to be sent/fetched.
Destination First – Where the first page will start in the designated block. Example: Fetch page 10 through 20 and put
them starting at page 30. Page 10 then becomes page 30, page 11 becomes page 31, etc. Allows you to take a block
of pages and move it to another area in another system.
§ PB-1
Figure 2-10 Event PB-1
Refer to the SGZ manual and PB-1 manuals for further information.
PB-1 Action – Select the action you want the selected PB-1 player to perform:
§ None
§ Play
§ Rewind
§ Stop
§
Player Number – Select Video A or Video B, from which the event will play.
§Mini
Figure 2-11 Event CSS-Mini
Refer to the SGZ and CSS-Mini manuals for further information.
Mini Action – Select the action you want the selected deck of the
CSS-Mini to perform:
§ None
§ Play
§ Record
§ Rewind
§ Stop
Player Number – Select the deck (A or B) where the event will play.
Sequence Pages
The sequence of pages to play within each region (1-6) can be edited.
Figure 2-12 Sequencing Window
The Sequencing window serves the same purpose as the Edit and Sequence keys on the character generator keyboard. This
window is easier to use. The user can set the sequence for all regions simultaneously.
Region 1-6 – Enter the following sequencing information for regions 1 through 6.
File – Group of consecutive numbered pages to be shown in a given region.
Start Page – Enter the page number for the sequencing to begin with.
Stop Page – Enter the page number for the sequencing to end with.
Change File – Enter the number of pages to be shown within that file before proceeding to the next file. Note: If only
one file is going to be used, change file should be set to “1”.
OK – When changes are complete, press the OK button to save the changes.
Cancel – Press the cancel button if you don’t want to save any changes.
Set Channel
Set the channel name, assign/edit number of display lines per region, edit number of events, and edit number of pages of
the current character generator.
Figure 2-13 Set Channel Window
The Set Channel window configures the size of the display regions to be shown on the display screen. The numbers
indicate the number of text lines that may be shown, based on single height characters. Maximum single height lines to be
used within all regions must equal 26 lines.
Channel Name – Equals system name for communication purposes. This field should display the two-digit code for the
character generator that the SG-Edit W is currently communicating with.
Display Lines Per Region – In the field provided, enter/edit the number of display lines in each region (1-6) of the character generator.
Number of Events – This field will list the maximum number of Events possible on the current character generator.
Number of Pages – This field will list the maximum number of pages possible on the current character generator.
Time & Date
Figure 2-14 Time & Date Window
The Time and Date window assigns what page the clock information will be displayed on. All page attributes, except for
background color will be automatically setup.
Start Page – Enter the page number to start on.
Stop Page – The start and stop page number should be the same.
All of the following fields are automatically set.
§ Time
§ Date
Line Levels
Figure 2-15 Line Levels Window
Set/edit, in/out line levels of the current character generator. To setup the line levels see the SGZ operation manual.
Out (1-4) – Pre-condition line levels.
§ Low
§ High
§ No Change
In – Line level inputs.
Action (1, 2) – Either can be setup to be no change, page end or sequence reset.
Region (1, 2) – Pertain to display regions 1-6.
Weather
Figure 2-16 Weather Window
The Weather window allows the user to assign the page where the weather instrument data will be displayed. Use the
selections at the bottom of the window to indicate the specific weather instruments that are being used. Note: This
window is used only for systems that have these weather instruments. If you have the NOAA weather service see
Texscan-MSI NOAA Internet Weather Data Service in this manual for setup procedures.
Start Page – The start and stop page will typically be the same page.
Stop Page – The start and stop page will typically be the same page.
When checked, the following items will display on the indicated page. If you do not have the specific sensor do not check
the applicable box.
§ Current Temp
§ Hi Temp
§ Low Temp
§ Wind
§ Barometer
§ Humidity
§ Rain Day
§ Rain Month
External Data
Figure 2-17 External Data Window
The External Data window allows the user to setup different sources of external data. NOAA Weather and Broadcast are
the options available. Note: This service will be discontinued in favor of the Texscan-MSI NOAA Internet Weather
Data Service. See Texscan-MSI NOAA Internet Weather Data Service in this manual for setup procedure.
NOAA Weather
Start Page – Assign the start and stop page where you want the NOAA weather forecast to appear.
Stop Page – same as above.
Word Wrap – Y/N. Normally weather forecasts are displayed in a crawl across the screen. For the crawl select “N” for
no. To display the forecast in a page format, select “Y” for yes.
Open Codes – The open code is the NOAA forecast regional header code.
Broadcast – Available in Canada only.
Batch Transfer
Figure 2-18 Batch Transfer Window
NOTE: The batch transfer function is disabled when the Internet NOAA Weather Data service is enabled. Disable the
NOAA Weather Service to activate the batch transfer function. To reactivate the NOAA Service click on the Internet drop
down menu and click on Activate Texscan-MSI Weather.
The Batch Transfer window allows the user to send or fetch data to or from each character generator.
Connect – Starts the batch transfer as set up within the window. To be used when all of the following selections have been
made.
Disconnect – Ends communication between the PC and character generator.
Done – Closes Batch Transfer window. Can be used as a cancel button if batch transfer has not already taken place.
Send – Indicates the direction of data flow. The send button transfers data from SG-Edit W to the selected character
generator.
Fetch – Indicates the direction of data flow. The fetch button retrieves data from the selected character generator for use
on SG-Edit W software.
Direct/Modem – Indicate if the PC is connected to the character generator directly or if you will be connecting to the
character generator via modem.
Batch Transfer Actions – Select from the following options the data you want to send or fetch.
Page Text – Check the box to include page text in the batch transfer. You must also indicate the pages you want to
retrieve.
Start Page – Enter the first page you want to batch transfer.
End Page – Enter the last page you want to batch transfer. This field must have a number in it even if you are only
transferring one page.
Time and Date on Character Generator – Check the box to include time and date on character generator in batch
transfer.
Sequence Pages on Character Generator – Check the box to include page sequence on character generator in batch
transfer.
Channel on Character Generator – Check the box to include channel on character generator in batch transfer.
Events on Character Generator – Check the box to include events in batch transfer. You must also indicate the event
pages you want to retrieve.
Start Page – Enter the first event page you want to batch transfer.
End Page – Enter the last event page you want to batch transfer. This field cannot be left blank when the Events
on CG box is checked.
Line Levels – Check the box to include line levels in batch transfer.
External Data on Character Generator – Check the box to include external data on character generator in batch
transfer.
Weather on Character Generator – Check the box to include weather on character generator in batch transfer.
System – You may enter the character generator system ID in this field from which to send or fetch data.
Status – Indicates the connection status (connected or disconnected).
Progress – Incrementally indicates the progress of the batch transfer.
Address Book
Figure 2-19 Address Book Window
The Address Book window allows you to add additional character generator systems (remote or otherwise) for quick
access. You may also remove or edit existing addresses of the character generator system. The upper portion of the
window is a directory. You may highlight a selection with a click of the mouse and press the OK button to access that
specific character generator.
URL or phone – The dial-up number of the character generator system or location.
System Name – The system identification code or name.
Login Code – Login identification, if applicable.
Comment – A field for user input. May indicate the specific location of the character generator or other text.
Add – When the information for the above data fields has been entered, pressing the Add button will add the system
information to the directory portion of the window.
Remove – When a system from the directory portion of the window is selected with the mouse, pressing the Remove
button will delete the system for the directory.
Setup
Figure 2-20 Setup Window
The Setup window allows the user to enter the information for the modem communication between SG-Edit W PC and
other character generator systems.
COM Port – Select the communication port for the PC modem or direct connect.
Default Phone Number – Enter the phone number for the PC communication phone line.
Modem Initialization String – Enter the initialization string code for the PC modem.
Port Settings – Opens the Port Settings window.
Figure 2-20 Port Settings Window
The Port Settings window allows you to setup the port settings for the port selected in the Setup window. For communication with character generators the port settings should be as follows:
Bits per second – This speed should be setup based on your modem’s capability but should be no greater than 9600
(character generator speed).
Data bits – 8 data bits.
Parity – None.
Stop bits – 1 stop bit.
Flow control – None.
CHAPTER 3 – GETTING STARTED
This chapter provides step-by-step directions in retrieving, editing, and sending data to and from the character generator.
Follow the steps to begin using the SG-Edit W software. You can refer to chapter 2 for the description of specific functions within each window. The basic steps are as follows:
§ Step 1 – Setup and Address Book
§ Step 2 – Batch Transfer / Fetching Data
§ Step 3 – Editing Data
§ Step 4 – Batch Transfer / Sending Data
§ Step 5 – Printing
STEP 1 – SETUP AND ADDRESS BOOK
These instructions will take you step by step through the setup process including adding access information for remote or
direct character generators to the address book.
Setup
Figure 3-1 Setup Window
These settings are for specific use with this software. It will not change the modem settings in Windows.
1. From the SG-Edit pull-down menu select Setup. In the Setup window the information for the modem communication
is entered.
2. Select the COM Port (communication port) that the modem is connected to on the PC.
3. In the Default Phone Number field, enter the phone number for the communication line the modem is connected to.
4. In the Modem Initialization String field enter the code for the modem. See the modem manual for further information.
5. Press the Port Settings button. The Port Settings window will appear. The Port Settings window allows you to setup
the port for communication on the port selected in step 2 above.
6. In the bits per second field, the speed should be selected based on the modem’s capability, however it should not be
greater than 9600 (character generator speed). Current modems have speeds greater than 9600. If your modem has a
greater speed still select 9600.
7. In the data bits field, select “8”.
8. In the parity field, select “none”.
9. In the stop bits field, select “1”.
10. In the flow control field, select “none”.
11. When complete, press the OK button to return to the setup window.
12. From the Setup window press the OK button. You will be returned to the main window.
13. Proceed to Address Book below.Address Book
Figure 3-2 Address Book Window
Before beginning with these steps you should gather information on each system (URL address or phone number, System
ID Name, Login Code, etc.)
1. From the SG-Edit pull-down menu select Address Book. In the Address Book window the information for each
system to be accessed is entered.
2. To ADD to the address book, enter the URL address or phone number in the field (the dial up number of the character
generator system or location).
3. Enter a 2-digit system name or system ID in the field provided.
4. Enter the Login Code for that system in the field provided, if applicable.
5. Enter a Comment or description of the system in the field provided.
6. When complete, press the add button. The system will appear in the address book portion of the window.
7. Repeat steps 2 through 7 to add additional systems.
8. To REMOVE a system from the address book, select a system from the address book listing with the mouse. The
URL or Phone number will be highlighted.
9. Press the Remove button. The selected system will be deleted.
10. Repeat steps 8 through 10 to remove additional systems.
11. To EDIT an existing system, you must use the add function (follow steps 2-7) and then remove the existing one from
the address book listing (follow steps 8-10).
12. When complete proceed to Step 2 – Batch Transfer.
STEP 2 – BATCH TRANSFER / FETCHING DATA
The Batch Transfer window allows the user to send or fetch data to or from each character generator. We recommend that
you fetch all data from each character generator to begin with, each time storing it to the computer’s hard drive or other
back up device. This provides a backup and gathers the data for editing purposes.
When retrieving pages from a character generator you may see symbol characters that show up on various pages. When
using the character generator there are hidden characters.
Figure 3-3 Batch Transfer Window
Fetching Data Via Batch Transfer
1. From the SG-Edit pull-down menu select Address Book. From the listing of systems select one with a double click.
The Batch Transfer window will automatically appear with the System ID listed in the System field at the bottom of
the window.
2. To FETCH or retrieve information from the character generator, click the Fetch button with the mouse. The Fetch
button should have a dot indicator in it.
3. Select Direct or Modem from the pull down arrow if the computer is directly connected to the character generator or
if you will be accessing it via modem.
4. Within the Batch Transfer Actions portion of the window you will select what data to retrieve from the character
generator. These steps will guide you through retrieving all data on the character generator.
5. Click the Page Text button with the mouse. A check mark will appear.
6. In the Start Page field enter “1”.
7. In the End Page field enter “617”.
8. Click the Time and Date, Sequence Pages and Channel buttons with the mouse. A check mark will appear in each.
9. Click the Events on Character Generator button with the mouse. A check mark will appear.
10. In the Start Event field, enter “1”.
11. In the End Event field, enter “510”.
12. Click the remaining buttons with the mouse (Line Levels, External Data and Weather). Check marks will appear in
each.
13. Make sure that the correct system identification appears in the System field at the bottom of the window.
14. When complete, press the Connect button. The system will begin retrieving data. The progress of the retrieval will be
shown across the bottom of the window.
15. The retrieval process will take a few minutes. When complete, press the Disconnect button. The modem will be
disconnected and the Status at the bottom of the window will indicate it.
16. Press the Done button. The Batch Transfer window will close.
17. Proceed to Saving the Data to Hard Drive below.
Saving the Data to Hard Drive
1. From the File pull-down menu, select Save As. The Save As window will appear.
2. From the pull down arrow, select the drive or location to store the data. We recommend that the data be stored in a
common location.
3. In the File Name field, enter a name that is descriptive of the system the data was retrieved from.
4. Press the Save button. The data will be stored and the window will close.
Repeat the Fetching and Saving processes for additional systems. Proceed to Step 3 – Editing Data.
STEP 3 – EDITING DATA
The following items can be edited using SG-Edit W:
§ Edit Pages
§ Edit Events
§ Sequence
§ Set Channel (setup display lines per region)
§ Time and Date page
§ Line Levels
§ Weather Page
§ External Data
The steps that follow will describe how to edit the above items in the same order as they appear above.
Edit Pages
Figure 3-4 Page Edit Window
1. First you must ensure that you are working with the correct data file. Look at the name of the currently open file in the
title bar of the
SG-Edit W main window. If the correct filename does not appear
there proceed to step 2.
2. From the File pull-down menu, select Open. The Open window will appear (if the file is listed in the pull-down menu
with the last 4 previously opened files, you may select it from there).
3. From the Open window, find the location and file. Press the Open button.
4. From the SG-Edit pull-down menu, select Edit Pages. The Edit Page window will appear.
5. In the Page field enter the page number to edit. You may also use the << or >> buttons to scroll through the pages
until you come to the one you want. If there is text or data currently on that page, the data will appear in the window.
Also you will see the layout version of the selected page by pressing the OK button. The layout will appear on the
main display screen.
6. If you wish to add text to a line, select the button next to the line and enter the text. Note: The number of characters
you can fit on a line will decrease as the size of the characters increases.
7. Centering Text. The text of each line can be centered. After entering the text, with the mouse click in the box with a
“C”in the center on the left side of the line The text on the line may not appear to be centered. However, when the
data is transferred to the character generator the text will be centered on the display.
8. Enter text for each line by repeating step 6 and 7.
9. To change the line attributes, with the mouse click in the box to the right of all the lines you want to change at one
time. Press the Line Attributes button. The Line Attributes window will appear.
10. Make the necessary changes in this window. When you have finished, press the OK button to make the changes. Press
the Cancel button if you do not want to save the changes. Note: When altering background colors, it will only affect
the specific lines that were selected in the Edit Page window (if you have questions on the specific functions within
this window, see Chapter 2). You may view the changes made by pressing the OK button in the Line Attributes
window, then pressing the OK button in the Page Edit window. The changes made will be appear in the layout form
on the main display screen.
11. To change the page attributes, press the Page Attributes button. The Page Attributes window will appear.
12. Make the necessary changes in this window. When you have finished, press the OK button to make the changes. Press
the Cancel if you do not want to save the changes (if you have questions on the specific functions within this window
see Chapter 2 or refer to the character generator manual).
Edit Events
Figure 3-5 Edit Events Window
1. Ensure that you are working with the correct data file. Look at the name of the currently open file in the title bar of the
SG-Edit W main window. If the correct filename does not appear there proceed to step 2.
2. From the File pull-down menu, select Open. The Open window will appear (if the file is listed in the pull-down menu
with the last 4 previously opened files, you may select it from there).
3. From the Open window, find the location and file. Press the Open button.
4. From the SG-Edit pull-down menu, select Edit Events. The Edit Events window will appear.
5. In the Event field enter the event number to edit. You may also use the << or >> buttons to scroll through the events
until you come to the one you want. If there is data currently on that page, the data will appear in the window.
6. In the Type field, make a selection from the pull down arrow. For each type selected, a unique window will appear
when the Options button is pressed.
7. Make the necessary changes. When complete, press the OK button to keep the changes, press Cancel to discard
changes (if you have questions on the specific functions within this window see Chapter 2 or refer to the character
generator manual).
Sequence Pages
Figure 3-6 Sequence Pages Window
1. Ensure that you are working with the correct data file. Look at the name of the currently open file in the title bar of the
SG-Edit W main window. If the correct filename does not appear there proceed to step 2.
2. From the File pull-down menu, select Open. The Open window will appear (if the file is listed in the pull-down menu
with the last 4 previously opened files, you may select it from there).
3. From the Open window, find the location and file. Press the Open button.
4. From the SG-Edit pull-down menu, select Sequence Pages. The Sequencing window will appear.
5. Make the necessary changes to the sequence of each region.
6. When complete, press the OK button to keep the changes, press Cancel to discard changes (if you have questions on
the specific functions within this window see Chapter 2 or refer to the character generator manual).
Set Channel (setup display lines per region)
Figure 3-7 Set Channel Window
1. Ensure that you are working with the correct data file. Look at the name of the currently open file in the title bar of the
SG-Edit W main window. If the correct filename does not appear there proceed to step 2.
2. From the File pull-down menu, select Open. The Open window will appear (if the file is listed in the pull-down menu
with the last 4 previously opened files, you may select it from there).
3. From the Open window, find the location and file. Press the Open button.
4. From the SG-Edit pull-down menu, select Set Channel. The Set Channel window will appear.
5. Make the necessary changes.
6. When complete, press the OK button to keep the changes, press Cancel to discard changes (if you have questions on
the specific functions within this window see Chapter 2 or refer to the character generator manual).
Time and Date
Figure 3-8 Time & Date Window
1. Ensure that you are working with the correct data file. Look at the name of the currently open file in the title bar of the
SG-Edit W main window. If the correct filename does not appear there proceed to step 2.
2. From the File pull-down menu, select Open. The Open window will appear (if the file is listed in the pull-down menu
with the last 4 previously opened files, you may select it from there).
3. From the Open window, find the location and file. Press the Open button.
4. From the SG-Edit pull-down menu, select Time & Date. The Time and Date window will appear.
5. Make the necessary changes.
6. When complete, press the OK button to keep the changes, press Cancel to discard changes (if you have questions on
the specific functions within this window see Chapter 2 or refer to the character generator manual).
Line Levels
Figure 3-9 Line Levels Window
1. Ensure that you are working with the correct data file. Look at the name of the currently open file in the title bar of the
SG-Edit W main window. If the correct filename does not appear there proceed to step 2.
2. From the File pull-down menu, select Open. The Open window will appear (if the file is listed in the pull-down menu
with the last 4 previously opened files, you may select it from there).
3. From the Open window, find the location and file. Press the Open button.
4. From the SG-Edit pull-down menu, select Line Levels. The Line Levels window will appear.
5. Make the necessary changes.
6. When complete, press the OK button to keep the changes, press Cancel to discard changes (if you have questions on
the specific functions within this window see Chapter 2 or refer to the character generator manual).
Weather
Figure 3-10 Weather Window
Note: This window is used only for systems that have these weather instruments. If you do not have these instruments and are using the NOAA weather service see Texscan-MSI NOAA Internet Weather Data Service in this
manual for setup steps.
1. Ensure that you are working with the correct data file. Look at the name of the currently open file in the title bar of the
SG-Edit W main window. If the correct filename does not appear there proceed to step 2.
2. From the File pull-down menu, select Open. The Open window will appear (if the file is listed in the pull-down menu
with the last 4 previously opened files, you may select it from there).
3. From the Open window, find the location and file. Press the Open button.
4. From the SG-Edit pull-down menu, select Weather. The Weather window will appear.
5. Make the necessary changes.
6. When complete, press the OK button to keep the changes, press Cancel to discard changes (if you have questions on
the specific functions within this window see Chapter 2 or refer to the character generator manual).
External Data
Figure 3-11 External Data Window
Note: This service will be discontinued in favor of the Texscan-MSI NOAA Internet Weather Data Service. See
Texscan-MSI NOAA Internet Weather Data Service in this manual for setup steps.
1. Ensure that you are working with the correct data file. Look at the name of the currently open file in the title bar of the
SG-Edit W main window. If the correct filename does not appear there proceed to step 2.
2. From the File pull-down menu, select Open. The Open window will appear (if the file is listed in the pull-down menu
with the last 4 previously opened files, you may select it from there).
3. From the Open window, find the location and file. Press the Open button.
4. From the SG-Edit pull-down menu, select External Data. The External Data window will appear.
5. Make the necessary changes.
6. When complete, press the OK button to keep the changes, press Cancel to discard changes (if you have questions on
the specific functions within this window see Chapter 2 or refer to the character generator manual).
Saving the Data to Hard Drive
1. From the File pull-down menu, select Save As. The Save As window will appear.
2. From the pull down arrow, select the drive or location to store the data. We recommend that the data be stored in a
common location.
3. In the File Name field, enter a name that is descriptive of the system the data was retrieved from.
4. Press the Save button. The data will be stored and the window will close.
Repeat the above processes for additional systems. Proceed to Step 4 – Batch Transfer / Sending Edited Data.
STEP 4 – BATCH TRANSFER / SENDING EDITED DATA
The Batch Transfer window allows the user to send edited data to each character generator.
Sending Data Via Batch Transfer
See Figure 3-3 above for a view of the page edit window.
1. Ensure that the correct file is active or open. If the correct file name does not appear in the Title-bar at the top of the
main window, open the correct file using the Open function in the File pull-down menu.
2. From the SG-Edit pull-down menu select Address Book. From the listing of systems select the correct system with a
double click of the mouse. The Batch Transfer window will automatically appear
with the System ID listed in the System field at the bottom of the window.
3. To SEND information to the character generator, click the Send button with the mouse. The Send button should have
a dot indicator in it.
4. Select Direct or Modem from the pull down menu if the computer is directly connected to the character generator or if
you will be accessing it via modem.
5. Within the Batch Transfer Actions portion of the window you will select what data to send to the character generator.
These steps will guide you through sending the edited data to the character generator.
6. If you have edited pages, click the Page Text button with the mouse. A check mark will appear.
7. In the Start Page field enter the beginning page number that you edited.
8. In the End Page field enter the last page number that you edited.
9. Click the Time and Date, Sequence Pages and Channel buttons with the mouse if you have edited the data and want
it to be sent to the character generator. A check mark will appear in each.
10. If you have edited events and want to send the data to the character generator, click the Events on Character Generator
button with the mouse. A check mark will appear.
11. In the Start Event field, enter the beginning event number that you edited.
12. In the End Event field, enter the last event number that you edited.
13. Click the remaining buttons with the mouse if you want to send the applicable edited data to the character generator
(Line Levels, External Data and Weather). Check marks will appear in each.
14. Make sure that the correct system identification appears in the System field at the bottom of the window.
15. When complete, press the Connect button. The system will begin sending data. The progress will be shown across the
bottom of the window.
16. The sending process may take a few minutes. When complete, press the Disconnect button. The modem will be
disconnected and the Status at the bottom of the window will indicate it.
17. Press the Done button. The Batch Transfer window will close.
Repeat the Sending processes for additional systems. Then proceed to Step 5 – Printing if you would like to print any of
the data.
STEP 5 – PRINTING
You may print a hard copy of a single page, a range of pages, or all pages. You may print in black/white or color. When
printing keep in mind that if you have white text and are printing in black/white the text may not appear.
Print – Prints a selectable number of pages in color or black and white.
Print Preview – Previews the layout prior to printing.Print Setup – Select and edit the properties for printing.
CHAPTER 4 – TEXSCAN-MSI NOAA INTERNET WEATHER SERVICE
This chapter specifically applies to subscribers of the Texscan-MSI NOAA Weather Data Service. From the Main Menu,
select the Internet pull down menu. Select “Texscan-MSI Weather Setup”. The Weather Screen will appear.
The Texscan MSI Weather Setup screen has several fields. Below is a description of the information required
for each field.
Primary Weather Server and Port – Preset by Texscan-MSI.
Secondary Weather Server and Port - Preset by Texscan-MSI.
Serial # - Enter the assigned serial number for NOAA Data Service received from Texscan-MSI.
Weather Update Timeout – Enter the number of minutes to pass between each automatic weather data update from the
Texscan-MSI weather server.
Weather Streams – Setup one or two data stream feeds.
Stream # - Select data stream feed number 1 or 2.
Start Page – Enter the starting page number.
End Page – Enter the ending page number.
Forecast Type – Select a forecast type for the pull down list. If only one weather stream data feed is necessary, select
“None” as the forecast type for the unused stream.
Zone – Enter specific NOAA weather zone code. Note: If you do not know the NOAA weather zone code see “Determining NOAA Weather Zone Code” below.
Internet Connection – If you have a DSL or full-time connection select Network. If you have a dial-up connection to the
internet via modem, select Dial-up.
Dial-up – Make this selection if you have a dial-up connection to the internet via modem. When you make this
selection, it is necessary to enter the filename of the dial-up. See Help in Windows “Connecting to the Internet
using Dial-Up Networking”.
Network – Make this selection if you have a full-time connection or DSL connection to the internet service provider.
Character Generator Connection
Direct – Direct NULL modem cable connection between character generator and computer running SG-Edit W.
Dial-up Connection – Accessing the character generator from the PC via modem.
SETUP
1. In the Serial Number field, enter the assigned serial number for NOAA Data Service received from Texscan-MSI.
2. In the Weather Update Timeout field, enter the number of minutes to pass between each automatic weather data
update from the Texscan-MSI weather server.
3. In the Stream # field, select either 1 or 2 for the stream number. You may have one or two data stream feeds.
4. In the Start Page and End Page fields, specify a range of pages where you want the weather data service to be
automatically entered. Enter the character generator page number that the weather will start/end on. Note: Ensure that there are a sufficient number of pages to include all the weather data. If there are insufficient
pages the remaining data will be dumped or not show. The length of weather reports vary in size.
5. In the Forecast Type field, from the list select a forecast type. If you are only using one weather stream, select
“None” on the unused stream.
6. Enter the specific NOAA weather zone code. See “Determining NOAA Weather Zone Code” below if you do not
know the zone code.
7. In the Internet Connection fields, specify if you have a dial-up connection to the internet via modem or a full-time
network connection.
8. In the Character Generator Connection fields, specify if your PC is connected to the character generator directly
via a NULL modem cable or if you will be accessing the character generator via modem.
9. When you have completed the steps above click OK.
10. Save the setup information by clicking save on the toolbar menu.
11. From the Internet pull-down menu select Enable Texscan-MSI Weather. A check mark will appear when the
service is enabled. To disable the weather service select “Enable Texscan-MSI Weather once again and the check
mark will disappear and the service will then be disabled. Note: Do not interrupt the update procedure while
in progress. Wait until the message “Timeout Before Update” appears at the bottom of the main screen to
disable.
12. On the bottom of the main screen you may follow the progress of the SGEDIT-W pulling the data from Texscan’s
Weather Server and sending the data to the character generator. After the data transmission is complete the message will state TIMEOUT BEFORE UPDATE.
Note: Do not interrupt the update procedure while in progress.
13. After the minutes entered in the Weather Update Timeout box have expired SGEDIT-W will automatically access
Texscan’s Weather Server for subsequent data updates.
DETERMINING NOAA WEATHER ZONE CODE
To determine your NOAA weather zone go to http://weather.noaa.gov on the internet. Complete the following steps.
· Select (click on) Select your State
· Select your State (click on)
· click on Go
· Select the city or county that is nearest to your area
· Scan down the page. The Zone will be a number just above the city or county you have selected.This will be
your state abbrevations plus a Z and a three digit number(maybe be multiple three digit numbers if more than one
zone.
.
Example:
Select Utah (UT)
Select Salt Lake City from city name
The Zone number is UTZ003