1
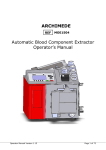
PORTABLE DATALOGGER & ACCESSORIES
FW ver.0.4.0
Archimede Datalogger
Archimede Datalogger
User Manual
rev.2 -31.01.2013-
Archimede Portable Dataloggers User Manual
INDEX
NOTE ON SYSTEM UTILIZATION
Pag.4
WASTE DISPOSAL
Pag.5
SYMBOLOGY
Pag.5
IDENTIFICATION PLATE
Pag.6
DL OVERVIEW
Pag.7
INTRODUCTION
Pag.7
LEONARDO (0CDL200UN00)
Pag.8
new LEONARDO (0CDL400N000)
Pag.9
GALILEO (0CDL100VW00)
Pag.10
ARCHIMEDE (0CDL300INCL)
Pag.11
ACCESSORIES and SPARE PARTS
Pag.12
DL STORAGE AND TRANSPORT
Pag.12
BATTERIES
Pag.13
Battery charger
Pag.13
Internal temperature
Pag.14
How to use the battery charge
Pag.14
Charge cycle and LED indications
Pag.14
THE USER INTERFACE
Pag.16
Edit boxes
Pag.20
Buttons
Pag.21
Lists
Pag.21
Radio buttons
Pag.22
Tuning backlight
Pag.22
On line help
Pag.22
THE MAIN MANU
Pag.23
CONFIGURING SITES
Pag.24
CONFIGURING PROBES
Pag.26
PROBE CALIBRATION (ONLY FOR ANALOG PROBE)
Pag.29
POLYNOMIAL CALIBRATION (ONLY FOR ANALOG PROBE)
Pag.30
CONFIGURING INCLINOMETER TUBES
Pag.31
READING INCLINOMETER TUBES
Pag.33
INCLINOMETER TESTS
Pag.36
SPIRALOMETER TESTS
Pag.39
Rev.2 -31.01.2013-
2|Page
Archimede Portable Dataloggers User Manual
T-REX TEST
Pag.40
BROWSING INCLINOMETER READINGS
Pag.41
Inclinometric Test Graph
Pag.42
T-Rex Graph
Pag.44
MANUAL READING
Pag.45
USING THE USB INTERFACE
Pag.47
USE WITH SMART EXPORT and SMART MANAGER
Pag.47
USE WITH SMART DATACAL
Pag.48
USE WITH SMART REMOTE
Pag.49
USING THE BLUETOOTH INTERFACE
Pag.51
Android 2.2 Froyo™
Pag.53
Symbian™ S60 3rd Edition
Pag.53
RIM™ ver.5.0.0.822
Pag.53
Windows Mobile™ ver.5 & 6
Pag.54
UTILITIES
Pag.55
SETTING DATE and TIME
Pag.55
CHECKING DL STATUS
Pag.56
CHECKING USER INTERFACE LANGUAGE
Pag.57
TROUBLESHOOTING
Pag.58
ASSISTANCE
Pag.59
Repairs and maintenances
Pag.59
Phone assistance
Pag.59
Technical assistance on site for the supplied instumentations
Pag.59
Training
Pag.59
APPENDIX –A-
Pag.60
Probes
Pag.60
SPECIAL KEYBOARD COMBINATIONS
Pag.61
Switch ON
Pag.61
Switch OFF
Pag.61
Emergency reset
Pag.61
Firmware upgrade
Pag.61
EARLIER FIRMWARE VERSION
Pag.62
TECHNICAL DATASHEET
Pag.63
Rev.2 -31.01.2013-
3|Page
Archimede Portable Dataloggers User Manual
NOTE ON SYSTEM UTILIZATION
To ensure a safe and efficient functioning, please read the following
instructions carefully before use.
Any unauthorized modification is considered a total responsibility of the user.
In addition to the standards listed above, the user must comply with the existing legislation on
safety and health of employees in the workplace.
Check the product for damages caused by transport.
Verify that your package includes all standard accessories and any accessories required. In case,
contact SISGEO or the distributor.
The use of the portable datalogger shall be done only after the proper connection and following
the configuration needed; so the user must carefully perform all the operations described herein.
SISGEO will not be liable for inconveniences, damages, accidents, etc.. due to lack of knowledge (or
non-application) of the requirements contained in this manual.
The use, any possible maintenance or repair of the equipment is allowed only to skilled and
authorized operators. These operators must be physically, professionally and intellectually capable.
For information or orders of spare parts always specify the Serial Number on the label on the back
of the portable datalogger reported on the identification plate showing the serial number inside
each device.
When replacing parts, use only ORIGINAL SPARE PARTS. The use of unoriginal SISGEO spare parts
may cause irregular functioning and dangers for people and objects
The product is not fit for installation in small and/or unventilated environments, with a high
humidity range or in presence of inflammable or explosive liquids. All the instruments and the
equipment furnished are not suitable for installation in potential dangerous area or when the use
of explosion-proof components is foreseen.
The electrical connections must be executed by a qualified installer, observing the effective
regulations.
The manufacturer reserves the right to make changes, in case of any manufacturing or commercial
need, without notice.
It will attempt to ensure that user manuals are updated in order to reflect functional product
revisions.
Rev.2 -31.01.2013-
4|Page
Archimede Portable Dataloggers User Manual
WASTE DISPOSAL
According to the European standard 2002/96/CE, the disused instrument must
be disposed in a correct way. The recyclable materials are recovered, in order
to avoid the environmental damage.
For more information please contact your waste disposal service or the
instrument retailer.
SYMBOLOGY
Here are the symbols used in this manual to alert the reader:
Attention! This operation must be executed only by specialized personnel.
Pay particular attention to the following information.
Rev.2 -31.01.2013-
5|Page
Archimede Portable Dataloggers User Manual
IDENTIFICATION PLATE
Each portable datalogger have two types of identification plates.
One of these reports the product registration Serial Number and is on the back of DL
It is important to communicate this information when requesting information
concerning the product.
The second plate is always located on the back of the DL.
Follow the requirements on the plates. Failure to comply with these
requirements could result in damage to the device and danger to
the operator.
Rev.2 -31.01.2013-
6|Page
Archimede Portable Dataloggers User Manual
DL OVERVIEW
Display TFT
DL model
Archimede Datalogger
Keyboard
Mini USB Connector for
PC connection/ record key
Jack Plug for battery charger
MIL Connector for
instrument connection
INTRODUCTION
Depending on the type of your portable datalogger (DL), it is possible read different instrument
types.
Analog
Digital
Probe
Vibrating wire
Leonardo
New Leonardo
Galileo
Archimede
For further details on instruments type please see “Appendix A”.
Rev.2 -31.01.2013-
7|Page
Archimede Portable Dataloggers User Manual
LEONARDO (0CDL200UN00)
The Leonardo DL has been developed to make
and store readings obtained from various
instruments analog and digital (except for
vibrating wire instruments); Leonardo DL can
not perform inclinometer tests.
The Leonardo DL is mainly composed by:
•
Shoulder and shipment bag (0CDL0BAG927)
•
Battery charger for NiMH batteries (0ECAB12VNMB)
•
Flying cable: 1 MIL connector and 6 alligator clips + ground (0ECAV7P6A00)
•
IP68 USB cable for PC connection
•
CD ROM (Manuals, Smart Manager Suite)
Shipment bag
Shoulder bag
Flying cable
USB cable
Battery charger
Rev.2 -31.01.2013-
8|Page
Archimede Portable Dataloggers User Manual
new LEONARDO (0CDL400N000)
The new Leonardo DL has been developed to make
and store readings obtained from various
instruments analog, digital and vibrating wire
instruments:
The newLeonardo DL is mainly composed by:
•
Shoulder and shipment bag (0CDL0BAG927)
•
Battery charger for NiMH batteries (0ECAB12VNMB)
•
Flying cable: 1 MIL connector and 6 alligator clips + ground (0ECAV7P6A00)
•
IP68 USB cable for PC connection
•
CD ROM (Manuals, Smart Manager Suite)
Shipment bag
Shoulder bag
Flying cable
USB cable
Battery charger
Rev.2 -31.01.2013-
9|Page
Archimede Portable Dataloggers User Manual
GALILEO (0CDL100VW00)
The Galileo DL has been developed to make and store
readings obtained from vibrating wire instruments
(and the NTC thermistor)
The Galileo DL is mainly composed by:
•
Shoulder and shipment bag (0CDL0BAG927)
•
Battery charger for NiMH batteries (0ECAB12VNMB)
•
Flying cable: 1 MIL connector and 4 alligator clips + ground (0ECAV7P4A00)
•
IP68 USB cable for PC connection
•
CD ROM (Manuals, Smart Manager Suite)
Shipment bag
Shoulder bag
Flying cable
USB cable
Battery charger
Rev.2 -31.01.2013-
10 | P a g e
Archimede Portable Dataloggers User Manual
ARCHIMEDE (0CDL300INCL)
The Archimede DL has been developed to make
and store readings obtained from inclinometer
test (both analog and digital inclinometers).
The Archimede DL is mainly composed by:
•
Shoulder and shipment bag (0CDL0BAG927)
•
Battery charger for NiMH batteries (0ECAB12VNMB)
•
IP68 external button for data storage - Archimede DL (0CDL300REMC)
•
Flying cable: 2 MIL connectors M/F 7 pins (0ECAV07V200)
•
IP68 USB cable for PC connection
•
CD ROM (Manuals, Smart Manager Suite)
Shipment bag
Shoulder bag
Battery charger
Rev.2 -31.01.2013-
Flying cable
USB cable
IP68 external button
11 | P a g e
Archimede Portable Dataloggers User Manual
ACCESSORIES AND SPARE PARTS
Flying cables:
•
1 MIL connector and 2 alligator clips + ground (0ECAV7P2A00)
•
1 MIL connector and 4 alligator clips + ground (0ECAV7P4A00)
•
1 MIL connector and 6 alligator clips + ground (0ECAV7P6A00)
•
2 MIL connectors M/F 7 pins (0ECAV07V200)
•
IP68 external button for data storage - Archimede DL only (0CDL300REMC)
•
Multiplexer measurement (0ECAV10MUX0)
External 12V battery pack (0CDL012EXBP)
Internal Bluetooth module (0CDL0BTOOTH); this module shall be requested together with DL
purchase order; can be added later only by SISGEO.
Shoulder and shipment bag (0CDL0BAG927)
Battery charger for NiMH batteries (0ECAB12VNMB)
External 12V battery pack
Multiplexer measurement cable
DL STORAGE AND TRANSPORT
To store correctly the DL, it is advised to use the supplied bag. Put carefully the DL in the suitable
compartment with the display turned inside.
During the transport it is advised to use the shoulder bag and to avoid bumps.
Rev.2 -31.01.2013-
12 | P a g e
Archimede Portable Dataloggers User Manual
BATTERIES
Each DL is powered by an internal rechargeable NiMh battery.
If properly used, the NiMH batteries are rated for at least 500 discharge cycles.
An effect known as the "memory effect", which will degrade the readout's performance during
use, may occur if the batteries are left under charge for some days or if they are repeatedly and
partially discharged. In order to prevent this, it is recommended to use exclusively the battery
charger supplied with the DL and to cycle (charge and fully discharge) the batteries at least once
every two/three weeks.
The batteries should be charged only when they are completely discharged and
not before: charge it before only when you have to use the DL.
Furthermore, if the DL is not going to be used for an extended period it is preferred to store the DL
with the batteries fully charged.
Well charged batteries provide at least 8 hours of continuous use: this means that the batteries
provide charge for more than a day's work.
If the DL is not used for months, the batteries lose their capacity due to the autodischarge. The first time a battery charger is connected, this could signal green
also if the batteries are not fully charged: it is advised to repeat the charge cycle
twice.
Using a good battery, a full battery charge allows a non-stop use of at least 8 hours: this means that with a
full charge it is possible to work on site for more than a day.
BATTERY CHARGER
The battery charger furnished is a microprocessor controlled with rapid charge in less than 3 hours.
The input voltage range is universal (90-264 V ).
This battery charger utilises a method called “–dv detection”; this method is based on the fact that
the voltage drops over the NiMH cells when the batteries are fully charged: this voltage drop is
detected when the voltage has dropped a certain percentage from the highest value and the
charge will be automatically completed. If this voltage drop does not occur, the battery charger has
a safety timer which will terminate charging after a given period of time to avoid batteries
overcharging.
For battery cells which have been idle for a long period of time, the voltage could drop in the first
part of the charge cycle. For this reason, a start-timer is built into the battery charger to prevent –
dv detection in the first minutes of the charge cycle.
Don’t take instrument readings with battery charger connected to the DL.
Rev.2 -31.01.2013-
13 | P a g e
Archimede Portable Dataloggers User Manual
Don’t use a different type of battery charger than the one supplied
(0ECAB12VNMB)
INTERNAL TEMPERATURE
If, for any reason, the internal temperature in the DL is more than 70°C there is a
safety system that disconnects the battery until the temperature decrease under
70°C. So, if after the battery charge the DL won’t switch on, wait for the battery
cooling until it returns within an adequate temperature range.
HOW TO USE THE BATTERY CHARGER
The battery charger is started by connecting the jack to the readout and then connecting the
battery charger at the voltage line.
NOTE: To avoid damages, always insert the battery charger jack in the DL before
connecting the battery charger at voltage line 90-264 VAC, 50-60Hz; likewise,
before disconnecting the battery charger jack from the readout disconnect the
battery charger from the voltage line.
The LED on the battery charger will be yellow before the fast charge starts and then the LED
changes to orange.
When the batteries are fully charged the LED will be green.
The trickle charge does not exceed 24 hours.
If the battery voltage is less than the normal one the LED will then indicate "error" by flickering
green and orange light.
CHARGE CYCLE AND LED INDICATIONS
LED
Yellow
Yellow
Orange
Green with intermittent yellow flash
Green
Alternating orange – green
MODE
Battery not connected
Battery initialisation and analysis
Fast charge
Top-off charge
Trickle charge
Error
Connecting the battery charger at the voltage, the LED will become orange for the first 5-7
seconds, then it turns to yellow when the initialisation and the analysis starts. If the battery is
connected, the actual charging will start a few seconds later when the LED changes to orange.
When the battery is charged the LED will be green in approx. 4 seconds. This is only a signal to test
Rev.2 -31.01.2013-
14 | P a g e
Archimede Portable Dataloggers User Manual
the service. When –dv has been detected, the start of the top-off charge is indicated with a green
LED with intermittent yellow flashes. The LED will be green during trickle charge.
Rev.2 -31.01.2013-
15 | P a g e
Archimede Portable Dataloggers User Manual
USER INTERFACE
To switch the DL on, press the ON/OFF key while keeping the INFO key pressed.
After a few seconds (about 5 sec.) the DL will switch on and the display will show a start-up page.
This page will display the type of DL and the version of the firmware. At the bottom of the display
the name of the DL will show up: this is an user assigned name that can be used to distinguish
between different DLs.
Keeping the name of different DLs distinct is important when importing data to a
PC, so that the source of the data can be traced.
DL type
Battery Status
Firmware
version
Unit Name
At the upper right corner the display shows the current status of the battery: the remaining charge
is shown by the number of bars.
When the battery voltage drops below a certain level, the bars will turn
red. At about 10.5V the DL will stop all activities, then it will beep and
switch off.
Rev.2 -31.01.2013-
16 | P a g e
Archimede Portable Dataloggers User Manual
To save battery consumption, after three minutes without user activity,
the display will be switched off, after ten minutes the DL will switch off.
Press ENTER or wait a few seconds to display the Main menu.
To switch the DL off press the ON/OFF key while keeping the ENTER key pressed; the DL will
display a window on top of the current page with a bar at the bottom.
When the bar is completely filled, the DL will ask to release all keys and then it will switch off.
Other keys combinations are described in the Special keyboard combinations chapter.
Rev.2 -31.01.2013-
17 | P a g e
Archimede Portable Dataloggers User Manual
The user interface is composed of a series of screens containing control items similar to those
available in Windows.
Screens contain different items such as lists, buttons, edit boxes and check or radio buttons.
Only one of the controls on the screen is selected: the currently focused control is highlighted in
blue and normally indicates the action performed by pressing the ENTER key.
Active control
If the selected control is an edit control, characters typed on the keyboard will edit its content.
Text control
Rev.2 -31.01.2013-
18 | P a g e
Archimede Portable Dataloggers User Manual
You may change the focused control by clicking the PREVIOUS (scroll) and
NEXT (scroll) keys on the left side of the keyboard. As all keys, they have an
auto-repeat behavior when held pressed.
All controls in a page are in circular list so that clicking NEXT (scroll) when the last control is
selected moves the selection to the first control of the screen. Similarly clicking PREVIOUS (scroll)
on the first control moves focus to the last control.
Rev.2 -31.01.2013-
19 | P a g e
Archimede Portable Dataloggers User Manual
EDIT BOXES
An edit box is used to display and edit text; when text to be entered is a number, either an integer
or a number with decimals, the numeric keys and the decimal point are used to directly type the
digits and decimals separator.
The +/- key is used to enter a + or – sign, while the e for the exponent part.
Just press the +/- key: the DL will show a list of characters. Press the +/- key
repeatedly till the character you wish to insert is selected, then wait till the list
of characters disappears and the selected character will be inserted in the edit
box.
When you need to enter text, all the numeric keys and the +/- and the . keys are valid: press any of
these keys repeatedly to enter the desired character.
Press the DEL key to delete the character at the left of the cursor.
If you keep the DEL key pressed for about a second, the content of the edit box is deleted (quick
delete).
The characters available for each key are:
Rev.2 -31.01.2013-
+/-
-+()%#
.
.,:;
1
1$°εµα/\
2
AB C 2 a b c
3
DEF3def
4
GHI4ghi
5
JKL5jk l
6
MNO6mno
7
PQ R S 7 p q rs
8
TUV8tuv
9
WXYZ9wxyz
0
0 ̺ (space) ! ?
20 | P a g e
Archimede Portable Dataloggers User Manual
BUTTONS
Buttons are used to select an action, which often means navigating to a new screen. Just move
focus to the desired button and click the ENTER key.
As an alternative, most buttons contain a number
at the left of their labels; just click the matching
number to trigger the button action.
Generally no BACK or ABORT button is on the screen, to return to the previous screen or abort the
current operation just press the ESC key on the keyboard.
When no button is selected, the ENTER key is normally used to confirm the most obvious
operation: for example when a list has focus, clicking the ENTER key will usually bring you to the
next screen with the currently selected item.
LISTS
Lists are used to select one of several items; when a list has focus, you may change the selected
item clicking the UP or DOWN keys.
The LEFT key will move to the beginning of the list and the RIGHT key will move to the end.
By clicking ENTER, the current item is selected.
Only in configuration windows when a list box is displayed items defined by the user (for example
sites or instruments) it is usually possible to delete the selected item pressing the DEL key when
the desired item is selected and when you are in configuration menus. The DL will require a
confirmation to avoid accidental deleting; it doesn’t happen if the item has no data inside.
Rev.2 -31.01.2013-
21 | P a g e
Archimede Portable Dataloggers User Manual
RADIO BUTTONS
Radio buttons are used to select one of a few possible options. To select an item move focus to it
clicking NEXT (scroll) or PREVIOUS (scroll) and press ENTER key.
TUNING BACKLIGHT
Backlight may be switched on and off by pressing the LIGHT key.
You may tune backlight level to adapt to field conditions.
Keep the LIGHT key pressed and press the PREVIOUS (scroll) key to increase light or the NEXT
(scroll) key to decrease it.
ONLINE HELP
In order to display online help, press the INFO key.
NOTE: actually no help on line is implemented
Rev.2 -31.01.2013-
22 | P a g e
Archimede Portable Dataloggers User Manual
THE MAIN MENU
The main menu gives access to all the functions of the DL.
Read inclinometer In this section you may select an inclinometer tube and start a new reading
session on it.
Show readings
In this section you may browse readings performed on tubes.
Configuration
In this section you may create the sites, configure inclinometer tubes and
probes used to perform readings on them.
Communication
In this section you may connect to a PC using the USB port; some DLs support
a Bluetooth module which is also managed in this section.
Utility
In this section you may set date and time, select the language for the user
interface and run a checkup for the DL.
Manual reading
In this section you may test any configured probe; this may be useful to check
that a probe operates correctly before starting an inclinometer read.
Rev.2 -31.01.2013-
23 | P a g e
Archimede Portable Dataloggers User Manual
CONFIGURING SITES
DLs have a permanent memory used to store configuration data, such as probes and Inclinometer
Tubes, as well as acquired data, that is Readings and Inclinometer Tests.
Also if the memory’s maximum capacity is remarkable (2GB), DL export and synchronization speed
with the PC depends on the inside data quantity.
We advise not to charge exceedingly DL’s memory and to use it only to save the DL’s
files
All data in a DL is divided in sites: how to define sites is up to the user, but it is
expected that they are named after the physical sites in which measurements are
performed.
To view the site’s list , select Configuration in the main menu, then select Sites. The list of sites is
initially empty. To add a new site, make sure that the edit box at the bottom of the screen is active
(you should see a blinking cursor in it) and type the name for the new site, then press ENTER.
Rev.2 -31.01.2013-
24 | P a g e
Archimede Portable Dataloggers User Manual
The new site will be displayed in the list on the screen.
The name of a site, as well as the name of a Multiplexer, Switch Panel,
Worklist or Inclinometer Tube, should be composed of the same characters
used for Microsoft Windows valid file names, that is all characters except the
following: < > : " / \ | ? *.
To delete a site, select it in the sites list and make sure that the site list has focus, then press the
DEL key; if the site is not empty, the DL will ask to confirm the operation.
Rev.2 -31.01.2013-
25 | P a g e
Archimede Portable Dataloggers User Manual
CONFIGURING PROBES
Probes are configured globally and may be used in any site: the user will
normally carry his own probes and use them on different tubes in different
sites.
To browse or edit probes, select Configuration in the Main menu, then select Probes.
The list of probes is initially empty, later you will be able to edit any of the probes defined in it by
selecting it and pressing ENTER; to define a new probe, click the New button.
Select the probe type in the list according to your probe (probes type are listed in Appendix A) and
press ENTER.
Rev.2 -31.01.2013-
26 | P a g e
Archimede Portable Dataloggers User Manual
The DL will show configuration data for your probe.
These data include:
The name used to identify the probe: this is initially set the same as the probe
Name:
category, but should be changed by the user before saving the probe.
Notes:
User notes related to the instrument.
Code:
The instrument model: this field cannot be edited by the user.
Unit:
The unit of measure: the user may either select it from the drop down list or edit a
new unit of measure. Can’t be changed for digital probes.
Decimals:
The number of digits after the decimal separator used when displaying readings; for
example 3 means that the number will be formatted as 20,000. We suggest to set
“0”.
Digital probes require no calibration since all the parameters are already inside
the inside.
Go to paragraph “INCLINOMETER TUBES CONFIGURATION” if you are using a
digital probe.
Rev.2 -31.01.2013-
27 | P a g e
Archimede Portable Dataloggers User Manual
After editing data in this screen, press ENTER, the DL will ask you to select the calibration type.
You should select the calibration type according to the calibration report of the probe.
Rev.2 -31.01.2013-
28 | P a g e
Archimede Portable Dataloggers User Manual
PROBE CALIBRATION (FOR ANALOG PROBE)
Probe calibration is normally used for biaxial inclinometers; this calibration requires two sets for
parameters one for each axis; these parameters are labeled:
•
•
•
•
•
S:
E:
M:
X:
K:
Sensitivity.
Electrical offset.
Mechanical offset.
Cross axis.
Multiplicative factor
The parameter "K" should be consistent with the previously selected unit. If, for example, it has
been selected 20kSen (α) as the unit of measure, it should be inserted 20000 as a parameter "K".
These parameters are used to convert from the electrical measurement, to the physical value:
Sin(α).
The conversion formulas are:
readingA = sin(arcsin(rawDataA / SA - EA) + MA)
readingB = sin(arcsin(rawDataB / SB - EB) + MB)
final readingA = readingA - readingB * XA
final readingB = readingB - readingA * XB
where final reading accounts for the cross axis effect.
NOTE: usually the probe’s calibration parameters are inserted by SISGEO and the probe is
supplied with the DL.
Rev.2 -31.01.2013-
29 | P a g e
Archimede Portable Dataloggers User Manual
POLYNOMIAL CALIBRATION (ONLY FOR ANALOG PROBE)
Polynomial calibration is normally used by T-REX, spiralometers and monoaxial inclinometers.
The list of available polynomials (degrees) is listed at the top of the screen. Select the polynomial
you wish to use with the UP and DOWN keys: it is possible to select one of the following families
of polynomials:
•
•
•
Ax+B
A x2 + B x + C
A x3 + B x2 + C x + D
Then click the NEXT button to edit the coefficients for the polynomial.
When you have finished entering parameters, click the Save button: the newly created instrument
will be displayed in the instruments list for the site.
NOTE: Normally the calibration parameters of the probe is set directly from SISGEO if the probe
is supplied with the DL.
Rev.2 -31.01.2013-
30 | P a g e
Archimede Portable Dataloggers User Manual
CONFIGURING INCLINOMETER TUBES
Tubes are arranged per site; to browse or edit tubes, select Configuration in the Main menu, then
select Tubes.
Tubes as defined in the DL , include parameters describing how the physical tube should be read,
so you may need to define more tubes on the DL for the same physical tube.
For example you may wish to define a spiralometer and an inclinometer tube for the same
physical tube, naming them, for example, MYTUBE-SP and MYTUBE.
First the DL will display a screen to select the site in which the inclinometer tube is or should be
defined; after a site is selected, it will display a list of tubes defined in the site.
When one or more tubes are listed it is possible to delete one of them by selecting it in the list and
pressing the DEL key: the DL will ask the user to confirm this operation.
It is also possible to make a copy of an existing tube by selecting it in the list and clicking the
Duplicate button: the DL will ask the name for the new tube.
The list is initially empty, so that the only possibility is to click the New button.
The DL will display a screen asking the name for the tube.
Rev.2 -31.01.2013-
31 | P a g e
Archimede Portable Dataloggers User Manual
Type the name you wish to use for the new tube and press ENTER:
The DL will ask for data for the new tube; these data include:
Type:
Run:
The type of tube; this may be either Vertical or Horizontal.
The type of measure to be performed on the tube; this may be:
• A1B1/A3B3
• A2B2/A4B4
• A1B1/A2B2/A3B3/A4B4
• Spiralometer
• Trex.
Unit:
Length:
Step:
Azimuth:
Notes:
The unit used to measure the steps: either meters or feet.
The useful length of the tube in the specified unit.
The useful length of the step in the specified unit.
The azimuth of the tube; this parameter may be left blank.
User notes.
Enter the required data and press ENTER to save the tube definition.
Rev.2 -31.01.2013-
32 | P a g e
Archimede Portable Dataloggers User Manual
READING INCLINOMETER TUBES
Once a tube has been defined and you have already loaded the definitions for the probes you wish
to use in your DL, you may proceed to perform tests on tubes.
In case the unit switches off during an inclinometer test, for example because of a low battery,
readings made so far are saved. Note however that the inclinometer test file is closed and it is no
more possible to add further measures to it. Anyway it will be possible to delete the partial test
and repeat it in future.
Click Read inclinometer in the Main menu, then select the site in which the inclinometer tube is
located; the DL will show a list of the tubes defined in the site.
Select the tube you wish to use and press ENTER to proceed.
The DL will ask you to enter the number for the test prompting you with the first available
number.
Enter a new number or simply press ENTER to proceed; you may perform up to 99 test on the
same tube.
The DL will ask next for the instrument to use.
Rev.2 -31.01.2013-
33 | P a g e
Archimede Portable Dataloggers User Manual
Select the instrument and press ENTER.
Then the DL will ask you to specify some options on how the test should be performed. This screen
is not displayed for T-REX tests because none of the options that can be selected in it makes sense
for such tests.
You should first select if the readings should be triggered manually or automatically after a delay.
We suggest to select the default “Delay” option, that is “Manual”
Then you should select if the runs should be performed from head to end or from end to head.
This question is not asked for spiralometer tests because in these tests you have to perform a run
“From head to end” run and then perform a run “From end to head”.
Rev.2 -31.01.2013-
34 | P a g e
Archimede Portable Dataloggers User Manual
Next the DL will ask you for the test to be used as Reference; this will normally be the first test in
the list (labeled 00), but you may choose any test in the list or click the No reference button to
perform an absolute test.
The values done when performing the test later will actually be the difference between the values
actually read and the values read for the same run and the same step during the reference test,
which will be used a zero reference.
The above mentioned page will not be shown in the Spiralometer test, because it is not expected
the reference test choice.
The reference test is not used for Spiralometer tests, so in this case the above window will not be
displayed.
At this point all data has been collected and the DL will ask which run should be performed next;
the number and type of runs depends on the inclinometer test type
A1B1/A3B3
A2B2/A4B4
A1B1/A2B2/A3B3/A4B4
Spiralometer
TREX
An A1B1 run is performed, then the probe is extracted and rotated by
180º and an A3B3 run is performed.
An A2B2 run is performed, then the probe is extracted and rotated by
180º and an A4B4 run is performed.
Runs A1B1, A2B2, A3B3 and A4B4 are performed in sequence;
between each run and the next the probe is extracted and rotated 90º.
A head to bottom run is performed; normally a second bottom to
head run is performed.
A bottom to head run is performed first; sometimes a second head to
bottom run is performed next.
Although the above sequences are the ones normally used, you may choose to perform runs in
any order you prefer.
Rev.2 -31.01.2013-
35 | P a g e
Archimede Portable Dataloggers User Manual
The DL will suggest you the first run to perform. At the end of each run the DL will suggest the next
run. It is possible to interrupt the test at the end of a run by selecting Save and exit and pressing
ENTER.
INCLINOMETER TESTS
When performing a run what is displayed in the center of the screen depends on the type of test;
the upper part of the screen and the left nonetheless contain items that are common to all tests.
At the top of the screen the Name of the probe being used and the Name of the tube are shown.
On the left the Current date and time and the Measure unit are shown. Four buttons are also
present:
Data
Click this button to view acquired data in tabular form
Save
Click this button to save acquired data and exit
Read
Click this button to read the value currently displayed and proceed to the next step
Back
Click this button to revert to last step
It is possible to stop the test anytime; pushing the ESC key will pop up a confirmation request. If
you confirm the test will be deleted, instead keeping the ESC key pusher for a few seconds, the
data will be saved and the test will be incomplete.
You may also abort the test at any time by pressing the ESC key: in this case no data will be saved.
During inclinometer tests you may trigger a read by using an external pushbutton (0CDL300REMC);
this has the same function as the Read button. To prevent the user from inadvertently triggering
multiple readings, the external button is disabled for two seconds after each push. We advise to
wait at least three seconds between each pushing.
Rev.2 -31.01.2013-
36 | P a g e
Archimede Portable Dataloggers User Manual
You may also view data in graphical form, for inclinometer and T-REX tests: just press ENTER when
the table is displayed.
When the last read for the current run is performed, the DL will display again the list of runs with
the next run preselected.
When performing an inclinometer test the screen looks as follows:
PROBE NAME
TEST NAME
DATE AND TIME
CURRENT GROOVE
MEASURE UNIT
CHECK SUM VALUES
REFERENCE VALUES
CURRENT LEVEL
The top blue box displays the Check Sum values for both channels; these are the halved sums of
the current run and the matching run (A1B1 versus A3B3 and A2B2 versus A4B4) at the current
level, that is:
The readings in the matching runs should be about opposite, so that when reading the second of
the matching runs the check values should be close to zero; these values are only available when
the matching runs has already been performed.
On the right of this box the current groove is shown.
The bottom blue box shows the Reference values, that is the values read in the same run and at
the same depth during the reference test and, on the right, the Current level in the tube.
At the center the current values are shown.
The color of the unit of measurement shown in the left part of the screen alternates from black to
blue every time reading values are updated.
Rev.2 -31.01.2013-
37 | P a g e
Archimede Portable Dataloggers User Manual
When are used digital probe, it is possible to read the temperature taken inside the probe.
To display the temperature press the Right Arrow Key, to return to the unit of measurements
press Left Arrow key.
Click Measure to record the values and proceed to the next step.
If the DL finds an incompatibility with the digital instrument (i.e. has been selected a mono-axial
digital probe while the connected probe is bi-axial) will be shown a dialog-box:
If the DL can’t read the connected digital probe will be shown a dialog box:
In this case check the connection cable.
.
Rev.2 -31.01.2013-
38 | P a g e
Archimede Portable Dataloggers User Manual
SPIRALOMETER TESTS
When performing a spiralometer test the screen looks as follows:
PROBE NAME
TEST NAME
DATE AND TIME
CURRENT GROOVE
MEASURE UNIT
CHECK SUM VALUES
CURRENT LEVEL
The top blue box displays the Check sum value; it is the halved sum of the current run and the
matching run (up for down and down for up) at the current level; the readings in the matching
runs should be exactly opposite, so that the check value should be close to zero; this value is only
available when the matching run has already been performed.
On the right of this box the current Direction is shown.
The bottom blue box shows the Current level in the tube.
At the center the current value is shown.
Rev.2 -31.01.2013-
39 | P a g e
Archimede Portable Dataloggers User Manual
T-REX TEST
When performing a TREX test the screen looks as follows:
PROBE NAME
TEST NAME
DATE AND TIME
CURRENT GROOVE
MEASURE UNIT
CURRENT VALUES IN mV
REFERENCE VALUES
CURRENT LEVEL
The top blue box displays the Current values read in mV on both channels of the TREX probe;
when a ring is detected, both values will be in the 1000mV to 9000mV range.
On the right the Current Direction (Up in our case) is shown.
The bottom blue box displays the Current Level in the tube and the Reference value read in the
same run and at the same depth during the reference test.
At the center the current value is shown; this is only displayed when both rings have been
detected: a single value is calculated from the two channels of the T-REX: the values read on the
two channels are converted in millimeters and their difference is shown.
Rev.2 -31.01.2013-
40 | P a g e
Archimede Portable Dataloggers User Manual
When a valid value is displayed, you may click the Read button to record the current value.
The DL will store the value and get ready for the next level.
BROWSING INCLINOMETER READINGS
You may browse data in an inclinometer read while you are performing the test by clicking the
Data button in the window.
From the Main menu, you may browse acquired data for any test; select Show readings in the
Main menu.
The DL will first ask you to select the site, then the inclinometer tube; after this it will show a list of
tests performed on the tube.
You may delete tests from this window by pressing the DEL key; the DL will ask
you to confirm the operation.
Select the test you wish to browse and click ENTER; the DL will display all of the data acquired for
one run.
Rev.2 -31.01.2013-
41 | P a g e
Archimede Portable Dataloggers User Manual
To view data for other runs press the PREVIOUS (scroll) and NEXT (scroll) keys.
Inclinometer test graphs
When performing Inclinometer tests there is a distinction between a reference test (usually the
first test performed) whose measures are absolute, and other tests in which, what matters, is
usually the difference between the current values and the values recorded in the reference test.
Graphs for these two types of tests are slightly different.
The graph for the reference test on the left is labeled ABSOLUTE, whereas the graph for the other
tests displays a label indicating the test being used as reference; the reference test (or the fact
that a test is absolute) is selected when starting the test and cannot be changed later.
In the absolute graph on the left the blue line represents the inclinometer tube as seen from the
top (the center being the top end of the tube).
In the relative graph the offset of the reference test is subtracted before drawing the graph and
the line represents the movement of the tube from the original path as seen from the bottom
(the center being the bottom end of the tube).
Rev.2 -31.01.2013-
42 | P a g e
Archimede Portable Dataloggers User Manual
Push ENTER again to view a different representation of the same data. This time the line
represents the displacement of the tube from the vertical line for the first, absolute, graph and
from the reference measurement for the second graph.
Again, the reference zero is the top of the tube for the first graph and the bottom for the second.
Please note that only the absolute value of the displacement is represented, look at the first graph
to view the direction of the displacement.
Please note that in each graph a single line is represented: in case more runs were performed their
values are used to obtain a single value represented in the graph.
In case of relative graphs the common set of runs available both in the reference test and in the
current test are used: for example if runs A1B1/A2B2/A3B3/A4B4 were performed for the
reference test and runs A1B1/A3B3 where performed for the current graph, only runs A1B1/A3B3
of both graphs will be used.
Press ENTER again to view the same data in tabular form again.
Rev.2 -31.01.2013-
43 | P a g e
Archimede Portable Dataloggers User Manual
T-REX Graph
When performing T-REX tests there is a distinction between a reference test (usually the first test
performed) whose measures are absolute, and other tests in which what matters is usually the difference
between the current values and the values recorded in the reference test.
Graphs for these two types of tests are slightly different.
The graph for the reference test on the left is labeled ABSOLUTE, while the graph for other tests
report a label indicating the test being used as reference; the reference test (or the fact that a test
is absolute) is selected when starting the test and cannot be changed later.
In the left absolute graph the blue line is the difference between the distance of reference rings in
each step and the ideal value of one meter.
In the relative graph, the offset of the reference test is subtracted before drawing the graph and
the line represents the elongation of the tube at each depth from the original state.
If both an UP and a DOWN runs have been performed, they will be drawn as different lines (blue
for UP and green for DOWN).
For relative graphs a line is drawn only if the relative data is available both in the current and in
the reference test.
Rev.2 -31.01.2013-
44 | P a g e
Archimede Portable Dataloggers User Manual
MANUAL READING
You may read probes without starting a new test, in order to check that they are functional; select
Manual Reading in the Main menu, then select the probe you wish to test; the DL will show the
values being read.
During the reading of a digital probe, pressing the RIGHT key, it is possible to display the
temperature read from the probe.
Reading
Attention: this function is possible only if it used a digital probe.
Rev.2 -31.01.2013-
45 | P a g e
Archimede Portable Dataloggers User Manual
If the DL finds an incompatibility with the digital instrument (i.e. has been selected a mono-axial
digital probe while the connected probe is bi-axial) will be shown a dialog-box:
If the DL can’t read the connected digital probe will be shown a dialog box:
In this case check the connection cable.
Rev.2 -31.01.2013-
46 | P a g e
Archimede Portable Dataloggers User Manual
USING THE USB INTERFACE
The DL features an mini USB interface connector for connecting to a PC.
This same connector is used for an external push-button used for inclinometer
test (Archimede DL only). These two uses are not compatible: when an external
push-button is connected the USB cable cannot be used and connecting an USB
cable when the DL expects a push-button will cause the PC to issue a warning
that the USB detection failed.
To start using the USB, select Communication in the main menu
SMART MANAGER SUITE must already be installed once you begin PC
communication; see the manual for installation and software use.
USE WITH SMART EXPORT AND SMART MANAGER
To share data with SmartExport and SmartManager, the DL must simulate an external disk: for this
click the USB Disk button and make sure that an USB cable connects the DL to the PC. The DL will
appear as an external USB disk.
If the SmartMonitor feature is enabled, SmartManager will start automatically.
Please refer to the SmartExport and SmartManager manuals for details.
Rev.2 -31.01.2013-
47 | P a g e
Archimede Portable Dataloggers User Manual
USE WITH SMART DATACAL
NOTE: This function is reserved for SISGEO technicians.
Rev.2 -31.01.2013-
48 | P a g e
Archimede Portable Dataloggers User Manual
USE WITH SMART REMOTE
SmartRemote is a software that replicates the DL screen and keyboard on a PC; this may be useful
for using the DL with a projector in a class or to provide support to a remote user controlling the
PC through Internet using such programs as VNC.
Click the Remote management button; the DL will display the initial splash screen.
On the PC run the SmartRemote program.
When it starts click the Connect button at the top of the displayed window on the PC:
The refresh button at the top may be
used in case the display fails to update.
Software’s virtual keys in the lower part
of the window, have the same function
of the real ones on DL keyboard; they
can be pushed with the left mouse
button.
To press more keys at once, for example
to obtain the effects described in the
Special keyboard combination chapter,
you may lock a key by clicking on it with
the right mouse button. Right click it
again to unlock it.
All the time the physical keyboard on
the DL is fully functional, so you may
find more comfortable to use it, instead
of the simulated keyboard on the PC.
You will notice that, when using
Rev.2 -31.01.2013-
49 | P a g e
Archimede Portable Dataloggers User Manual
SmartRemote, the DL is slightly slower than usual, this is normal and it is due to the fact that the
screen must be transmitted to the PC when it changes.
The DL is fully functional when being used with SmartRemote, except that the
USB Disk and USB Calibration functions in the Communication menu are
disabled.
Also, when reading instruments, it will not be possible to use the external
pushbutton.
Click Remote management off button in the Communication menu to terminate SmartRemote
mode.
Rev.2 -31.01.2013-
50 | P a g e
Archimede Portable Dataloggers User Manual
USING THE BLUETOOTH™ INTERFACE
The BlueTooth™ interface allows transferring data to a PC or a SmartPhone equipped with a
BlueTooth™ interface.
From the main menu select Communication, then click Bluetooth; the datalogger will beep and in
a few seconds the BlueTooth™ interface will be activated and a page will be displayed for selecting
the remote device to which data will be transferred.
This list is initially empty; to add one or more remote unit to it, make sure that they are visible.
How a BlueTooth™ device is made visible depends on the specific device; for example when using
Windows Seven, you should open the BlueTooth™ settings windows in the lower right of the
Windows bar and, after selecting Open Settings , make sure that the option Allow Bluetooth
devices to find this computer is selected.
Your PC or SmartPhone should now be able to detect the DL. The code required for pairing is:
574832
Once the DL has been added to the list of devices of the PC or SmartPhone, click the Check for BT
devices button on the DL: the PC or SmartPhone will be added to the list of BlueTooth™ devices.
To send data to a remote BlueTooth™ device, select it in the list and press the ENTER key.
Rev.2 -31.01.2013-
51 | P a g e
Archimede Portable Dataloggers User Manual
The DL will show a list of sites.
Select file
When using a PC you should now select the Receive a File option in the BlueTooth™ menu. Select
the desired reading file (for Archimede DL) or site (for other DL) and press ENTER; the DL will start
sending the acquisitions file.
The PC or SmartPhone that is receiving the data may ask you to authorize the reception or storage
of data.
Rev.2 -31.01.2013-
52 | P a g e
Archimede Portable Dataloggers User Manual
ANDROID 2.2 FROYO™
There are some precautions to take with this Operative System (OS):
•
The user should use an application that allows data transfer through Bluetooth™ because
this feature is not natively supported by the OS.
In the Android Market there are some free application. SISGEO suggest a free application
called "Bluetooth File Transfer" very appreciated by users (recommended on many sites
and forums);
•
This application should be initiated and maintained in the background; if you close it the
SmartPhone does not receive the file.
•
Once received, the file is saved in the default directory of the SD inside the smartphone.
You should find the file and then you should press and hold a few seconds; it will be open a
menu; selecting "Sharing" you can send the file as an email attachment
SYMBIAN S60 3RD EDITION™
There are some precautions to take with this Operative System (OS):
•
•
•
The user should use an application (File Manager) that allows to save the file. "SGX"
because the OS tries to interpret the content and not allow saving the file. The "file
manager" is available for free in Internet. SISGEO suggest a free application called "Active
File" (ver.1.44);
After receiving the message BlueTooth™, you have to open the File Manager; through it
you have to copy and paste the file in the desired folder.
By creating a new mail you can attach the file saved as generic.
RIM™ ver.5.0.0.822
There are some precautions to take with this Operative System (OS):
•
To receive the file is necessary to entry in the "Multimedia" folder and thought the menu
button you should select "Receive using Bluetooth" item. The smartphone will be available
to receive file. Now you can send the file from the datalogger.
Rev.2 -31.01.2013-
53 | P a g e
Archimede Portable Dataloggers User Manual
WINDOWS MOBILE™ ver. 5 & 6
There are no special precautions to take with this Operative System (OS). The file are managed as
under Microsoft Windows for PC.
.
Rev.2 -31.01.2013-
54 | P a g e
Archimede Portable Dataloggers User Manual
UTILITIES
The utilities menu features commands to set the DL clock, to run a self-test and to change the user
interface language. Click the Utility button in the main menu.
SETTING DATE AND TIME
Click the Set date & time button in the Utilities menu to display the current date and time.
To change the current date and time click one of the arrow keys: a cursor will be displayed on the
first digit of the hours field.
Rev.2 -31.01.2013-
55 | P a g e
Archimede Portable Dataloggers User Manual
You may move the cursor using the arrow keys or change the current value by typing the new value
with the numeric keys.
When you are finished editing you may either commit the new value by pressing ENTER or discard
with ESC.
CHECKING DL STATUS
Click the Unit status button in the Utilities menu to check the current status. The DL will display a
list of the tests being performed and mark each test for success or failure.
No key should be pressed during the DL self test, so if you keep a key pressed
the keyboard test will fail.
The temperature displayed on the AD converter line is the measured inside the DL at the AD
converter chip, so it will normally be a little higher than the room temperature.
CHANGING USER INTERFACE LANGUAGE
Click the Set language button in the Utilities menu to change the language used by the DL.
The DL will display a list of available languages: select your language and press ENTER.
The DL will revert to the previous screen with the newly selected language.
Rev.2 -31.01.2013-
56 | P a g e
Archimede Portable Dataloggers User Manual
If you find a DL set in language that you cannot understand, from any screen of the user interface
press ESC for a few seconds till the DL reverts to the main menu, then press the 5 button followed
by the 3 button, then select your language.
Rev.2 -31.01.2013-
57 | P a g e
Archimede Portable Dataloggers User Manual
TROUBLE SHOOTING
Problem
DL does not switch on
Cause
Recommended action
It hasn't been done the correct startup keys
combination
Repeat the startup procedure ( see paragraph
"Special combination keys " in the reference DL
manual )
A connector from the DL internal battery
disconnected
Connect the battery-charger and try to turn the DL
on. If the DL turns on contact SISGEO's assistance
Battery's temperature overcomes 70°C,
internal security system stops the power
circuit
Wait at least 30 minutes to allow the battery to
become colder and go back in the appropriate
temperature range
Check DL battery level ( available in menu Utilities -> Unit Status d irectly on DL )
The battery is not correctly recharged. Battery-recharger LED The battery-charger could have not correctly Repeat the charge procedure, checking the LED colour
sequence. Insert always first the jack in the DL and
does not perform the foreseen colorur sequence ( as in DL
detected the battery
then the plug in the network plug
manual)
Battery's temperature overcomes 70°C,
internal security system stops the power
circuit
Wait at least 30 minutes to allow the battery to
become colder and go back in the appropriate
temperature range
DL display has no back-light
Display backlight could be turned off or set
on minimum value
Turn on or set the back-light through the special keys
( see paragraph "special combination keys" in the
reference DL manuals). If this procedure will not solve
the proble, contact SISGEO assistance
DL crashes
DL software generates an unexpected error
Reset through keys combination (see "special
combination keys" in the DL manual"
Sensor's connections are wrong
Reconnect sensors in a correct way verifiying
connection scheme.
A/D converter does not understand signals
correctly
Perform automatic diagnostic directly on DL ( Utilities > Unit Status menu ); if one or more red check marks
pop up, contact SISGEO assistance
Instrument is connected to DL in a wrong
way
Verify the instrument conncections and click OK
A/D converter does not understand signals
correctly
Turn off and turn on the DL and reset
DL does not update firmware
USB connection could be wrong
Check that USB cable is correctly inserted both in the
PC and in DL port.
DL showed "Calibration file is not valid"
The calibration file is lost or damaged
Call SISGEO for assistance
DL showed "Instruments is not compatible"
The selected instrument is not compatible
with the instrument connected to the DL
Select the correct instrument and repeat the reading
The energy saving function is enabled
Disable the energy saving function (only for Sisgeo
digital inclinometer) or wait for the time necessary for
the awakening of the sensors and eventually check
the configuration (only for Sisgeo digital inclinometer
chains).
The connections to the instruments are
incorrect
Reconnect the instrument properly and repeat the
reading
DL reads incoherent values
DL showed "Check connections before continuing"
DL showed "Instruments is not connected"
Rev.2 -31.01.2013-
58 | P a g e
Archimede Portable Dataloggers User Manual
ASSISTANCE
Sisgeo S.r.l. is aware of the importance covered by the after-sales assistant service, therefore
Sisgeo Technical Support is structured to offer the following services:
REPAIRS AND MAINTENANCES
During the warranty period we assure that the equipment supplied is free from defects in
materials for a standard and appropriate use.
Repairs and/or recalibrations should always be carried out at SISGEO factory or by personnel
trained and authorized by SISGEO. In case of repair and/or recalibration please send us the
device and every accessory in the container provided, in order to prevent damage from shocks
during transport.
This procedure involves the filling out of the form on our website "www.sisgeo.com" to the link
"assistance - repairs"; once inserted the request, a confirmation with the related authorization
code will be sent to the e-mail address indicated.
The material has to be packed properly and sent in door to door basis (freight to
client charge) to:
SISGEO S.r.l.
Via F. Serpero, 4/F1 - 20060 MASATE (MI)
Attn. to Technical Assistance Office
Tel. +39-02-95764130 - Fax: +39-02-95762011 - e-mail: [email protected]
PHONE ASSISTANCE
Telephone support for installation, configuration of equipment, measurement systems and
Software.
TECHNICAL ASSISTANCE ON SITE FOR THE SUPPLIED INSTRUMENTATIONS
Technical support for the installation of monitoring systems with its commissioning and start-up,
through the add of specialized technician’s teams.
TRAINING
Possibility of training at our Factory or at site related to the installation procedures, the system
configuration and the use of measurement systems.
Rev.2 -31.01.2013-
59 | P a g e
Archimede Portable Dataloggers User Manual
APPENDIX A
PROBES/DIGITAL PROBES
Code
Name
Supply
Signal
Unit
REX451XX
T-REX removable extensometer
±12V
10000mV
mm
S241HH30
Horizontal inclinometer probe ±30°
±12V
±5000mV
SinA
S241SHXX
Horizontal probe
±12V
±5000mV
SinA
S242HVXX
Inclinometer probe
±12V
±5000mV
SinA
S242SHXX
Horizontal probe
±12V
±5000mV
SinA
S242SVXX
Servo-inclinometer probe
±12V
±5000mV
SinA
S30PR12X
Spiralmeter probe
±2.5V
±400mV
Degrees
S310PV2X
Tilt probe for cased borehole
±2.5V
±400mV
SinA
SCLIN45X
Tili portable tiltmeter
±12V
±5000mV
Degrees
Rev.2 -31.01.2013-
60 | P a g e
Archimede Portable Dataloggers User Manual
SPECIAL KEYBOARD COMBINATIONS
SWITCH ON
To switch the DL on, keep the INFO key pressed and
press the ON/OFF key till the display switches on.
SWITCH OFF
To switch the DL off, keep the ON/OFF key pressed
and press the ENTER key till the DL switches off.
EMERGENCY RESET
Should the DL become unresponsive, press the keys
OFF and DEL keys at the same time: the DL should
reset immediately.
FIRMWARE UPGRADE
To upgrade firmware, switch the DL off, then press
the following keys at the same time: 1, 3, 9 and
ENTER. While keeping them pressed press the
ON/OFF key till the DL switches on.
The DL will display a blue screen and will be ready for
firmware upgrade.
Read “Smart Manager” manual for detail
Rev.2 -31.01.2013-
61 | P a g e
Archimede Portable Dataloggers User Manual
EARLIER FIRMWARE VERSION
In case some instruments have been configured with an earlier version of the firmware, any
changes will not be applied to the instruments already configured. To apply the changes,
introduced by a new firmware, you should remove the instrument from the datalogger and reinsert it.
If, for example, with a new firmware, it has been changed the power supply of a instrument, this
one will be powered with the power supply set in the old firmware. If you want to use the new
power supply it is necessary to remove the instrument from the datalogger and re-insert it.
Rev.2 -31.01.2013-
62 | P a g e
Portable Dataloggers User Manual
TECHNICAL DATASHEET
Rev.2 -31.01.2013-
63 | P a g e
Portable Dataloggers User Manual
Rev.2 -31.01.2013-
64 | P a g e
Portable Dataloggers User Manual
Rev.2 -31.01.2013-
65 | P a g e
Portable Dataloggers User Manual
Rev.2 -31.01.2013-
66 | P a g e