1
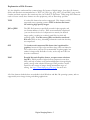
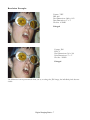
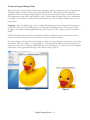
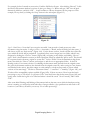
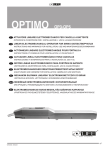
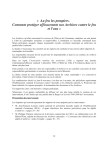
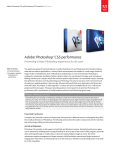
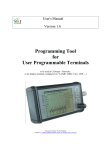
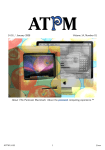
Digital Imaging Basics
by Melanie Cofield
Information Technology Lab
School of Information
The University of Texas at Austin
Summer 2005
Introduction
Digital imaging has become more than just a popular pastime in contemporary culture. Personal computers,
in addition to a plethora of hand-held electronic devices, have become the preferred mode of
communication for increasingly large portions of the population. Digital cameras and camera phones have
made taking, processing, and sharing photos almost instantaneous, making digital images a common
component of hi-tech communications.
With all this fast-paced instant gratification going around, one might not notice the extent to which
professional industries also rely on digital imaging. Publishers of both print and web materials depend
heavily on the quality and accessibility of their images. Attention to the details of how an image is created,
how it is stored, who will be using or accessing it, and how, is crucial to successful digital imaging.
An understanding of these details can also be useful to the average consumer who just wants to shoot some
pictures and email them to friends, or post them on a Web site.
Frustrating scenarios that can be avoided after learning digital imaging basics:
You get a picture emailed to you from a friend, and when you open the image
file, it takes forever to open, and when it does, you have to scroll around on
your computer screen to see the whole thing, never seeing all of it at once.
You downloaded all the images from your digital camera onto your computer,
and then tried to burn them onto a cd to give to someone. You have dozens
of pictures, and only a few will fit on a cd before it is full! This is going to take
too much time, too many cds, and this is more complicated than you thought!
You tried to print a digital image that looks great on your computer monitor,
only to realize that the image file prints really small, looks really bad, and you
don’t know how to fix that.
Objectives of this tutorial:
Review basic concepts in digital imaging, including
• Digital image production
• Resolution & File size
• Image editing
• File management
Digital imaging concepts pertinent to Conservation students in the School of Information can be found
at http://www.ischool.utexas.edu/technology/tutorials/graphics/dig_img/dig_img_kcpcr.pdf
Digital Imaging Basics - 1
Definitions of Terms
Resolution: Refers to the sharpness and clarity of an image, measured in terms of ppi and dpi.
PPI: (pixels per inch) Measurement used for
images displayed on screen
DPI: (dots per inch) Measurement used in
printing images.
Pixel: A word invented from "picture
element" - the basic unit of programmable
color on a computer display or in a computer
image.
- from http://searchsmb.techtarget.com
Megapixel: A megapixel (that is, a million
pixels) is a unit of image sensing capacity in a
digital camera. In general, the more
megapixels in a camera, the better the
resolution when printing an image in a given
size.
- from http://searchsmb.techtarget.com
Lossy: A term meaning “with losses,” used
to describe image file formats that discard
data due to compression.
Lossless: A term used to describe an image
file format that retains all the data from the
initial image file.
RGB: (Red, Green, Blue) The color model for
display devices (monitors, digital projectors,
etc.) Each displayed color is determined by a
combination of RGB.
CMYK: (Cyan, Magenta, Yellow, and Black)
The color model for printing. If you are
printing something in color, be sure you
have saved it in CMYK.
Bit-mapped (or Raster) images: Images
that have data that describe the color of each
pixel. Larger display sizes equal larger file
sizes in this type of image. Bitmapped images
cannot be rescaled without resulting in
“pixilation”, or loss of definition in the
details. JPEG and GIF images are examples
of bitmapped images.
Vector images: Vector images have data
that describe lines and curves. These images
can be enlarged and still maintain their
smooth edges (not pixilated like bitmap
images). Artists and designers will often
work with vector images, and then
“rasterize” the finalized version for
distribution and display. Adobe Illustrator
files (.ai) and CorelDraw files (.cdr) are
examples of vector images.
Proprietary: Denotes ownership and nondisclosure of details regarding format or
programming code. In the context of this
tutorial, proprietary refers to file formats
that require a certain software application
to read/open that file. For example, .psd is
the proprietary file format for Adobe
Photoshop files.
Open Source: Denotes a more accessible
way to share, improve and distribute
resources, requiring that licensing not be
specific to a particular product. See
http://www.opensource.org for more info.
Digital Imaging Basics - 2
Explanation of File Formats
It is also helpful to understand the common image file formats of digital images, how these file formats
differ, and what their recommended use is. TIFF (.tif), JPG (.jpg, .jpeg), GIF (.gif) and PNG (.png) are file
formats (and their respective file extensions) that you are likely to encounter. Other image file formats are
used to a lesser extent; these formats are often proprietary, such as Photoshop .psd files.
TIFF
A lossless file format that can be compressed. This format is widely
supported across operating systems. TIFF is the best file format
for archiving high quality images.
JPG or JPEG
The JPG file format was specifically created for photographs, and
can contain millions of colors. JPGs are automatically compressed
(you can choose the level of compression to match your desired
image quality), resulting in a relatively small file size while still
retaining quality. For this reason, JPGs are ideal for email and
Web use. JPGs are lossy, discarding information each time that they
are compressed.
GIF
The lossless and compressed file format that is preferred for
graphics, because it keeps edges and lines sharp. GIFs are limited to
256 or fewer colors, and are not recommended for photographs, but
rather for images with flat fields of color, such as clip art. GIFs can
be static or animated.
PNG
Portable Network Graphics format, an open source substitute
for GIFs. PNGs provide a higher lossless compression rate than
GIFs, and help to reduce cross-platform differences in image display
quality, among other technical advantages. PNG provides a useful
format for the storage of images during intermediate stages of
editing. See http://www.libpng.org/pub/png/ for more info.
All of the formats detailed above are readable in both Windows and Mac OS operating systems, and are
supported by most image viewing and editing applications.
Digital Imaging Basics - 3
Production of Digital Images
Digital images can be produced in a number of ways, the most common of which are detailed below.
Scanning: You can take pretty much any printed material and scan it to obtain a digital copy of it. Readily
available scanners make scanning images on paper, printed photos, slides, and negatives a fairly simple
process. Many of these scanners are “plug and play, ” which means that soon after you unpack and plug
your scanner into your computer, you can scan away without much delay.
Flatbed scanners (Figure 1) operate in a way similar to photocopier – you raise the lid, put the image face
down on the glass, close the lid, and scan. Some of these flatbed scanners even have feeder trays, to quickly
scan multiple pages.
Figure 1
www.epson.com
Figure 2
Figure 3
www.photographic.com
www.canon.com
Photo print, slide, and negative scanners (sometimes these are all combined into one scanner, as in Figure 2)
usually have a slot into which you feed the item you want scanned. You can scan these types of materials on
a flatbed scanner, but the raising and lowering of the lid often shifts or turns the items slightly, resulting in
unexpectedly crooked or off-centered scans. A small piece of tape across your item and the edge of the
scanner – NOT the glass – can help to alleviate this problem.
Digital Cameras: Digital cameras (Figure 3) and camera phones are probably the fastest, easiest way to
produce digital images. Keep in mind that there is quite a wide range of performance differences among
brands, models by the same brand, and between consumer vs. professional grade equipment. What you
really need to know is how to navigate through the function menu on your particular piece of equipment.
The user manual will be very helpful in explaining what all those weird abbreviations, codes, and acronyms
mean!
At this point, I want to point out a few notable settings on the digital camera:
1 - All digital cameras have variable settings for image quality, or “resolution.” Some cameras have options
such as “good,” “better,” and “best,” while others actually have numbered pixel dimensions, such as
640x480 or 1600x1200. What it boils down to is this: the better the quality, or higher the numbers, the
bigger the file size for each image, and the less total number of images you can fit on the memory card or
disk. So, you have to decide, do you want fewer but higher-resolution pictures, or are you a shutterbug that
needs to take 100 shots just to get a few that look good? Your situation and your skill may help determine
this decision. Part of this includes your intended use of the pictures once you get them off the camera,
which we will discuss in more detail later in this tutorial. If need be, you can purchase a memory card with
larger storage capacity to hold more pictures.
Digital Imaging Basics - 4
2 – Some digital cameras will let you choose which format you want your images saved in. All cameras will
offer .JPG (or .JPEG) format, and some will offer .TIFF format (for high quality, high-resolution images).
Additionally, some cameras may have a proprietary format option that only works with the software that
came with the camera.
3 – Certain settings on your camera may return to default settings after turning the camera off. This can be
especially annoying if you are trying to conserve the battery, but have to navigate through the menus and
reset your desired quality or format settings each time you want to take a picture. Again, familiarity with
these particular features on your camera will help a lot towards achieving better results.
Photo CDs: You may obtain a collection of digital images from your photo processor, along with your
developed prints or slides. Many photo-processing services now provide photo CDs with .jpg images on
them. If you are unfamiliar yet curious about the nature of these images, this tutorial should help you figure
out what you can and can’t do with them, and will give you suggestions for software that can help you
manipulate or organize them.
Image Size – Resolution
As mentioned in the definition of terms earlier in this tutorial, resolution refers to the sharpness and clarity
of your image. Of course, the sharpness and clarity vary depending on the context of the image. Are you
scanning or viewing your image? Are you viewing it on a computer monitor, or are you looking at a printed
page?
Scanning: When scanning your images, you are usually prompted to choose what resolution you would
like your images scanned at. The intended use or display of your images will help you make this choice.
Printing: Images intended for high-quality printing should be scanned in at no less than 150dpi, preferably
300dpi. Remember, dpi is “dots per inch”, and the more dots per inch, the sharper and crisper your images
will look on the printed page. Many publishers have minimum resolution requirements for digital image
submissions – make sure you know what’s required before you start digitizing.
Computer display: Images intended primarily for display on a computer monitor (such as email
attachments or images on a Web page) really only need a 72ppi to 96ppi resolution, as that is what computer
monitors are capable of displaying. A higher resolution will not make your image appear any better on the
screen. In fact, if you don’t expect folks to print out your images, these images should be “optimized”,
which means making them as small and compressed a file as possible (while still retaining the appropriate
visual clarity), so that they load quickly, and do not take up too much space on the hard drive.
TIP - if you need to make high resolution, large files available via the Web or computer, create “thumbnail”
versions of your images that then link to the larger images. This prevents your viewer from enduring slow
loading times for images they are not interested in seeing.
TIP - Optimizing images for computer/Web display involves compression, which throws out some pixel
data. You cannot then enlarge the images without encountering pixelation (example on pg. 7).
Digital Imaging Basics - 5
Resolution Examples (images courtesy of author)
Format: TIFF
DPI: 400
Pixel Dimensions: 2000 x 1193
Print Dimensions: 5” x 3”
File Size: 6.59MB
Ideal for Print Use
Format: JPG
DPI: 72
Pixel Dimensions: 361 x 210
Print Dimensions: 5” x 3”
File Size: 222KB
Ideal for Computer/Web
Use
Notice the difference in sharpness & clarity between these two printed images
Digital Imaging Basics - 6
Resolution Examples
Format: TIFF
DPI: 400
Pixel Dimensions: 2000 x 1193
Print Dimensions: 5” x 3”
File Size: 6.59MB
Enlarged
Format: JPG
DPI: 72
Pixel Dimensions: 361 x 210
Print Dimensions: 5” x 3”
File Size: 222KB
Enlarged
The difference is more pronounced when you try to enlarge the JPG image; the individual pixels become
visible.
Digital Imaging Basics - 7
Image Size – File size
File size is proportional to the pixel dimensions of an image, is partially determined by the file format, and it
specifically refers to how much disk space your file occupies, either on the hard drive, CD, or other storage
medium. Image files normally range in sizes measured in Kilobytes (KB or K) and Megabytes (MB or M);
extremely large files may be measure in Gigabytes (GB). Images for print will have larger file sizes, since
higher resolution = more data stored in the file. Images for Web or computer display will have smaller file
sizes. As a general rule (and there are appropriate times and places to break it), Web images should fall
between 10 and 200K; images with larger file sizes will load more slowly, and generally be too cumbersome
for effective computer distribution and display. Saving your images in .JPG or .GIF format will
automatically compress and reduce your file sizes significantly, so that you can fit more files onto a disk or
attach more to an email message, without exceeding the disk storage or file size limits.
Inserting images into presentations or other documents:
Resizing images on the screen after inserting them into your PowerPoint presentation or Word document
does *not* reduce the file size of that image; this only changes the dimensional display size of the image in
that document. Presentations and other documents that contain numerous images can become very large in
total cumulative file size. In order to keep such presentation and document files at a reasonable size, you
should appropriately resize your image files in an image editor before inserting them into your final
document.
Best Practices
Start Big: When in doubt about how you might end up using your images, opt for the highest resolution
possible. It is always better to start out with the most information possible, and then scale down as
necessary. If you start out with low resolution, you cannot get a higher resolution without scanning or
taking the picture again with higher resolution settings, and you may not get that chance.
Protect Originals: Keep the original, high-resolution versions of your images (which should be in TIFF
format, if possible) in a separate place from your working documents or optimized Web images. Back up
your important documents on some kind of external storage medium (CD-Rom or fire wire drive, for
example). This will help to ensure that you have something to go back to and work from should something
unfortunate happen to the other files.
Name Files Accurately: Develop a file naming convention that will help you accurately identify your files.
Names that include descriptive information, version or size information, or intended use information can be
helpful when managing large digital image collections.
Digital Imaging Basics - 8
Viewing File Information
There are various ways to view the file types and sizes of your image files; the most common are
demonstrated in the three bulleted examples below.
•
Right click on your file in Windows Explorer or Mac OSX Finder. Choose “Properties” or “Get
Info” (Figure 4), respectively, to see the file type or “Kind,” file size, and other information (Figure
5).
Figure 4
Figure 5
Digital Imaging Basics - 9
•
In the Windows Explorer or Mac OSX Finder, choose to view a list of your files with details, by
clicking View>> Details or the
button, respectively. This will display your detailed file
information in columns. In Mac OSX, these are labeled file Name, Date Modified, file Size, and file
Kind (Figure 6).
Figure 6
•
While working in a photo editor, such as Adobe Photoshop, you can see the file type and size
information in either the bottom border of the application window (Windows) or the top and
bottom borders of the document window (Mac OS) (Figure 7).
File type
(as indicated by
the .tif extension)
Figure 7
File size
Digital Imaging Basics - 10
Common Image Editing Tasks
Three of the most common image editing tasks are cropping, resizing, and removing red-eye from photos.
I’ll briefly explain the basics of each, using Adobe Photoshop CS. These basic processes should be
applicable to most other image editing programs. I’ll also go over batch processing, a valuable time-saver
when applying the same edits to large numbers of files. Other common editing tasks, such as adjustments
to exposure or color balance, can be performed either when you scan the image, or later when you use an
image editor.
Cropping: Often, the digital image you are working with includes more visual information than what you
really want. The process of selecting what you do want and then deleting the rest of the image is called
cropping. This is akin to trimming printed photos with scissors to fit into a frame or remove unwanted
details.
NOTE: The difference between the Crop function and the Cut function is this: Crop removes what is
outside your selection marquee; Cut removes what is inside your selection marquee.
To crop an image, select the portion of the image you wish to keep by using one of the marquee tools from
the toolbox. Then go to Image >> Crop (Figure 8). Your image will be reduced to what was inside your
selection, or in the case of using the elliptical marquee (as in this example), it is reduced to what rectangular
format most closely approaches the edges of the selection circle (Figure 9).
Figure 8
Figure 9
Digital Imaging Basics - 11
Resizing: In order to change the display or print dimensions of your image, you need to resize it. Do this
by going to Image >> Image Size, and entering the desired dimensions in either the pixel dimension (for
computer display) or document size (for print) area of the dialog box (Figure 10). You will notice when you
adjust the numbers in the pixel dimension area, the document size numbers adjust automatically (and viceversa). This is because pixel and print size are related, and affect one another. You may find it necessary to
have one image sized optimally for computer display (from the original), and another copy of the image
sized optimally for print (also from the original). Selecting “Constrain Proportions” will ensure that
adjustments to width will automatically adjust the height proportionally, and vice-versa, so that your image
doesn’t become distorted.
Figure 10
Batch Processing: You may find that you need to resize many, many images to the same pixel dimensions,
in order to create a digital portfolio, or otherwise prepare your digital images for Web display or print. To
save time on such routine tasks, you can use a function called batch processing. Basically, you decide on a
set of steps, which you record as an action. You then tell Photoshop to perform that action on the many
image files, saving you time and effort.
Step 1 – Record Action: Display the Actions pane in Photoshop by going to Window >> Actions. Then click
the “New Actions” button in the lower left of that window (Figure 11). Type a name for your action in the
dialog box that appears, and click the “Record” button (Figure 12). Then perform the operations that you
wish to perform on all of your images.
Figure 11
Figure 12
Digital Imaging Basics - 12
For example, before I created my new action, I had the file Ducky.tif open. After clicking “Record,” I click
the Ducky.tif document window to activate it, then go to Image >> Resize and type “200” into the pixel
dimension width box, and click “OK”. I could continue to edit my document, but for purposes of this
example, I’ll stop here, by clicking the “Stop” button in the action pane (Figure 13).
Figure 13
Step 2 – Batch Process: Now that I have an action recorded, I can proceed to batch process my other
documents using that action. I will go to File >> Automate >> Batch, and in the dialog box that opens, I
will choose to play my “duck action” (Figure 14A). For the Source section, I need to define the source files
upon which the action will be performed. I organized all my source images into one folder, which I now
designate by clicking the “Choose” button (Figure 14B), navigating to that folder, and clicking “Choose”
again. Next is the Destination section, in which I designate where my edited files will be saved. This should
be a separate location from my original or source files. I select “Folder” from the Destination drop down
menu, then click the “Choose” button, and navigate to and choose an appropriate folder. In the File
Naming section, I have many choices of combining the document name (derived from the original source
file), plus the document extension (also derived from the original source file, unless saving in a new format
was included in the action), plus date stamps or serial numbers, to help me keep track of various edited
versions of the same image. I’ll choose “Document Name” + “extension” + “mmddyy” (Figure 14C), and
I’ll select all the compatibility options available (Figure 14D). If there are errors, I don’t want the batch
processing to stop, so I’ll choose “Log Errors to File” from the Errors drop down menu (Figure 14E) and
specify what I want that log file to be called and where it should be saved. Now I’m ready, and I’ll click
“OK”.
After some brief flickering and flashing of document windows that may occur while the batch processing
action is running, you will end up with caboodles of images edited to your specifications and saved to the
location of your choice, all before you can say “I love batch processing!”
Digital Imaging Basics - 13
Figure 14
Digital Imaging Basics - 14
Removing Red-eye: There is a common need to retouch photos of people or animals to remove the redeye that occurs when using the flash on the camera. Since there are lots of tools out there to do this, I’ll
just briefly explain the basics of removing red-eye, and give you links to more software-specific
information.
Whatever tool you are using, you will basically be performing these tasks:
• open your image file
• zoom in on the eye or eyes you want to fix
• configure the “remove red-eye” tool with some settings best suited to your image
• choose a replacement color for the red you wish to replace
• drag or paint over the red with the mouse, replacing the red with the color you chose
After you have done this once or twice, you’ll be a pro. Remember, you can always go to the Help
menu in your image editor and type “remove red-eye” to find helpful information.
Here are some links to software specific instructions and more detailed information about the “how” and
“why” of red-eye:
•
Removing Red Eye from Digital Photos
http://graphicssoft.about.com/od/redeyeremoval/
•
ACD Digital Photo Software Tips
http://www.acdsystems.com/English/Community/ColumnsArticles/SoftwareTips/software-200505-11.htm
•
Removing Red-Eye with the GIMP
http://gimpguru.org/Tutorials/RedEye2/
File Management
You might find that thoughtful file-naming conventions (as discussed in the Best Practices section of this
tutorial) just aren’t enough - you need help organizing your ever-growing digital image collection. Here are a
few examples of software applications that can help you find, organize, and share your digital images. Some
of these offer basic editing functions as well:
•
ACDSee 7
http://www.acdsystems.com/nr/acdsee7/EN/homelife/index.htm
•
Picasa
http://picasa.google.com/index.html
•
Apple iPhoto
http://www.apple.com/ilife/iphoto/
Digital Imaging Basics - 15
Additional Resources
There are lots of digital imaging resources on the Web for amateurs, experts, or the mildly curious. Here are
some suggested additional resources to help you on your way to becoming a digital imaging whiz.
General Digital Imaging Resources:
•
About.com – Working with Digital Photos and Scanned Images
http://graphicssoft.about.com/od/digitalphotography/
•
Art-Support.com
http://art-support.com/creatingsites2.htm
Scanning Resources:
•
Scanning – Software Tips and Help
http://graphicssoft.about.com/od/scanning/
•
All Graphic Design Scanning Tips
http://www.allgraphicdesign.com/scanning.html
•
Tutorials Guide – Scanning Tutorials
http://www.tutorialguide.net/computers/scanning/
Image Editing Resources:
•
An Introduction to the Gimp
http://www.ischool.utexas.edu/technology/tutorials/graphics/gimp/index.html
•
Getting Started with Adobe Photoshop
http://www.ischool.utexas.edu/technology/tutorials/graphics/photoshop7/
•
Photoshop Tips & Tricks
http://www.graphic-design.com/Photoshop/
Digital Imaging Resources for Library Preservation & Conservation Professionals:
•
Moving Theory into Practice: Digital Imaging Tutorial from Cornell University
http://www.library.cornell.edu/preservation/tutorial/contents.html
•
Conservation Online, Stanford University
http://palimpsest.stanford.edu/bytopic/imaging/
Digital Imaging Basics - 16