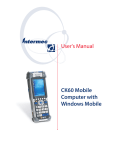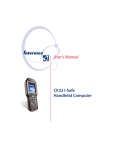
1
IDL
Developer’s
Guide
Intermec Developer Library
Resource Kit
Intermec Technologies Corporation
Worldwide Headquarters
6001 36th Ave.W.
Everett, WA 98203
U.S.A.
www.intermec.com
The information contained herein is provided solely for the purpose of allowing customers to operate and service
Intermec-manufactured equipment and is not to be released, reproduced, or used for any other purpose without
written permission of Intermec Technologies Corporation.
Information and specifications contained in this document are subject to change without prior noticed and do
not represent a commitment on the part of Intermec Technologies Corporation.
© 2005-2009 by Intermec Technologies Corporation. All rights reserved.
The word Intermec, the Intermec logo, Norand, ArciTech, Beverage Routebook, CrossBar, dcBrowser, Duratherm,
EasyADC, EasyCoder, EasySet, Fingerprint, INCA (under license), i-gistics, Intellitag, Intellitag Gen2, JANUS,
LabelShop, MobileLAN, Picolink, Ready-to-Work, RoutePower, Sabre, ScanPlus, ShopScan, Smart Mobile
Computing, SmartSystems, TE 2000, Trakker Antares, and Vista Powered are either trademarks or registered
trademarks of Intermec Technologies Corporation.
There are U.S. and foreign patents as well as U.S. and foreign patents pending.
Bluetooth is a trademark of Bluetooth SIG, Inc., U.S.A.
Microsoft, Windows, and the Windows logo are registered trademarks of Microsoft Corporation in the United
States and/or other countries.
Unicode is a trademark of Unicode Inc.
ii
IDL Resource Kit Developer’s Guide
Document Change Record
This page records changes to this document. The document was originally released
as Revision 001.
Revision
Date
005
5/2009 Revised list of supported Intermec computers to include CK3, CN4,
CN50. Added Windows Mobile 6 to list of supported platforms.
004
1/2008 Reorganized content by programming language. Added information
on virtual memory use and troubleshooting, and for web application
development.
003
7/2007 Revised Resource Kit installation instructions to include new
Intermec web site product and download locations.
002
1/2007 Included new information:
• Revised list of supported Intermec computers to include CK32,
CN3, CV30
• Added Windows Mobile 2003 to the list of supported platforms
• Added procedure for extending paths to IDL library and include
files in Visual Studio 2005
• Added programming tips for Intermec computers
• Added descriptions and procedural information for the AutoRun
utilities, including AutoCab, AutoCopy, and AutoReg, and for
PreShell and PostShell
• Described tips for using the GAC when deploying applications
IDL Resource Kit Developer’s Guide
Description of Change
iii
iv
IDL Resource Kit Developer’s Guide
Contents
Contents
Before You Begin . . . . . . . . . . . . . . . . . . . . . . . . . . . . . . . . . . . . . . . . . . . . . . . . . . . . . . . . . . . . . . . . . . . . . . . . ix
Safety Icons . . . . . . . . . . . . . . . . . . . . . . . . . . . . . . . . . . . . . . . . . . . . . . . . . . . . . . . . . . . . . . . . . . . . . ix
Global Services and Support . . . . . . . . . . . . . . . . . . . . . . . . . . . . . . . . . . . . . . . . . . . . . . . . . . . . . . ix
Warranty Information . . . . . . . . . . . . . . . . . . . . . . . . . . . . . . . . . . . . . . . . . . . . . . . . . . . . ix
Web Support . . . . . . . . . . . . . . . . . . . . . . . . . . . . . . . . . . . . . . . . . . . . . . . . . . . . . . . . . . . . . ix
Telephone Support . . . . . . . . . . . . . . . . . . . . . . . . . . . . . . . . . . . . . . . . . . . . . . . . . . . . . . . ix
Who Should Read This Guide . . . . . . . . . . . . . . . . . . . . . . . . . . . . . . . . . . . . . . . . . . . . . . . . . . . . . . x
Related Documents . . . . . . . . . . . . . . . . . . . . . . . . . . . . . . . . . . . . . . . . . . . . . . . . . . . . . . . . . . . . . . . x
About This Guide . . . . . . . . . . . . . . . . . . . . . . . . . . . . . . . . . . . . . . . . . . . . . . . . . . . . . . . . . . . . . . . . . . . . . . . .1
What Are the IDL Resource Kits? . . . . . . . . . . . . . . . . . . . . . . . . . . . . . . . . . . . . . . . . . . . . . . . . . . . . . . . . . .1
Supported Platforms . . . . . . . . . . . . . . . . . . . . . . . . . . . . . . . . . . . . . . . . . . . . . . . . . . . . . . . . . . . . . .2
Which Resource Kits Do You Need? . . . . . . . . . . . . . . . . . . . . . . . . . . . . . . . . . . . . . . . . . . . . . . . . . . . . . . . .3
About the Bluetooth Resource Kit . . . . . . . . . . . . . . . . . . . . . . . . . . . . . . . . . . . . . . . . . . . . . . . . . .3
About the Communications Resource Kit . . . . . . . . . . . . . . . . . . . . . . . . . . . . . . . . . . . . . . . . . . .4
About the Data Collection Resource Kit. . . . . . . . . . . . . . . . . . . . . . . . . . . . . . . . . . . . . . . . . . . . .4
About the Device Resource Kit . . . . . . . . . . . . . . . . . . . . . . . . . . . . . . . . . . . . . . . . . . . . . . . . . . . . .5
About the Device Management Resource Kit . . . . . . . . . . . . . . . . . . . . . . . . . . . . . . . . . . . . . . . .5
About the Mobile Gadgets Resource Kit. . . . . . . . . . . . . . . . . . . . . . . . . . . . . . . . . . . . . . . . . . . . .5
About the Printing Resource Kit. . . . . . . . . . . . . . . . . . . . . . . . . . . . . . . . . . . . . . . . . . . . . . . . . . . .6
About the RFID Resource Kit . . . . . . . . . . . . . . . . . . . . . . . . . . . . . . . . . . . . . . . . . . . . . . . . . . . . . .6
About the Antares Migration Resource Kit . . . . . . . . . . . . . . . . . . . . . . . . . . . . . . . . . . . . . . . . . .6
Understanding Development Tool Requirements . . . . . . . . . . . . . . . . . . . . . . . . . . . . . . . . . . . . . . . . . . .7
.NET Development Requirements . . . . . . . . . . . . . . . . . . . . . . . . . . . . . . . . . . . . . . . . . . . . . . . . . .7
Web Development Requirements . . . . . . . . . . . . . . . . . . . . . . . . . . . . . . . . . . . . . . . . . . . . . . . . . . .7
Java Development Requirements . . . . . . . . . . . . . . . . . . . . . . . . . . . . . . . . . . . . . . . . . . . . . . . . . . .7
C/C++ Development Requirements . . . . . . . . . . . . . . . . . . . . . . . . . . . . . . . . . . . . . . . . . . . . . . . . .8
Installing Resource Kits . . . . . . . . . . . . . . . . . . . . . . . . . . . . . . . . . . . . . . . . . . . . . . . . . . . . . . . . . . . . . . . . . . .8
After Installing Resource Kits . . . . . . . . . . . . . . . . . . . . . . . . . . . . . . . . . . . . . . . . . . . . . . . . . . . . . .9
Removing Resource Kits. . . . . . . . . . . . . . . . . . . . . . . . . . . . . . . . . . . . . . . . . . . . . . . . . . . .9
Installing New Versions of Resource Kits . . . . . . . . . . . . . . . . . . . . . . . . . . . . . . . . . . . .9
For .NET (C#, VB.NET) Developers . . . . . . . . . . . . . . . . . . . . . . . . . . . . . . . . . . . . . . . . . . . . . . . . . . . . . . .10
What You Need to Get Started . . . . . . . . . . . . . . . . . . . . . . . . . . . . . . . . . . . . . . . . . . . . . . . . . . . .10
About .NET Resource Kit Documentation . . . . . . . . . . . . . . . . . . . . . . . . . . . . . . . . . . . . . . . . .10
Developing .NET Applications . . . . . . . . . . . . . . . . . . . . . . . . . . . . . . . . . . . . . . . . . . . . . . . . . . . .11
Connecting the Intermec Computer to Your PC . . . . . . . . . . . . . . . . . . . . . . . . . . . . .11
Building and Running a Sample Program. . . . . . . . . . . . . . . . . . . . . . . . . . . . . . . . . . .11
Accessing Resource Kit Components in Your Application . . . . . . . . . . . . . . . . . . . .11
Building and Running Your Application. . . . . . . . . . . . . . . . . . . . . . . . . . . . . . . . . . . .12
Using the Global Assembly Cache (GAC) . . . . . . . . . . . . . . . . . . . . . . . . . . . . . . . . . . .12
.NET Programming Tips. . . . . . . . . . . . . . . . . . . . . . . . . . . . . . . . . . . . . . . . . . . . . . . . . . . . . . . . . .13
Capturing Keystrokes on a CK30. . . . . . . . . . . . . . . . . . . . . . . . . . . . . . . . . . . . . . . . . . .13
For Web Developers . . . . . . . . . . . . . . . . . . . . . . . . . . . . . . . . . . . . . . . . . . . . . . . . . . . . . . . . . . . . . . . . . . . . .13
What You Need to Get Started . . . . . . . . . . . . . . . . . . . . . . . . . . . . . . . . . . . . . . . . . . . . . . . . . . . .13
IDL Resource Kit Developer’s Guide
v
Contents
About Resource Kit Documentation . . . . . . . . . . . . . . . . . . . . . . . . . . . . . . . . . . . . . . . . . . . . . . .14
Developing Web Applications . . . . . . . . . . . . . . . . . . . . . . . . . . . . . . . . . . . . . . . . . . . . . . . . . . . . .14
Connecting the Intermec Computer to Your PC . . . . . . . . . . . . . . . . . . . . . . . . . . . . .14
Building and Running a Sample Program. . . . . . . . . . . . . . . . . . . . . . . . . . . . . . . . . . .14
Accessing Resource Kit Components in Your Application . . . . . . . . . . . . . . . . . . . .14
Programming Tips. . . . . . . . . . . . . . . . . . . . . . . . . . . . . . . . . . . . . . . . . . . . . . . . . . . . . . . .16
Running Your Application . . . . . . . . . . . . . . . . . . . . . . . . . . . . . . . . . . . . . . . . . . . . . . . .16
For Java Developers. . . . . . . . . . . . . . . . . . . . . . . . . . . . . . . . . . . . . . . . . . . . . . . . . . . . . . . . . . . . . . . . . . . . . .16
What You Need to Get Started . . . . . . . . . . . . . . . . . . . . . . . . . . . . . . . . . . . . . . . . . . . . . . . . . . . .16
About Resource Kit Java Help and ReadMe Files . . . . . . . . . . . . . . . . . . . . . . . . . . . . . . . . . . . .17
Developing Java Applications . . . . . . . . . . . . . . . . . . . . . . . . . . . . . . . . . . . . . . . . . . . . . . . . . . . . .17
Connecting the Intermec Computer to Your PC . . . . . . . . . . . . . . . . . . . . . . . . . . . . .18
Building and Running a Sample Program. . . . . . . . . . . . . . . . . . . . . . . . . . . . . . . . . . .18
Accessing Resource Kit Components in Your Application . . . . . . . . . . . . . . . . . . . .18
Building and Running Your Application. . . . . . . . . . . . . . . . . . . . . . . . . . . . . . . . . . . .18
Java Programming Tips . . . . . . . . . . . . . . . . . . . . . . . . . . . . . . . . . . . . . . . . . . . . . . . . . . . . . . . . . . .18
Capturing Keystrokes on a CK30. . . . . . . . . . . . . . . . . . . . . . . . . . . . . . . . . . . . . . . . . . .18
For C/C++ Developers . . . . . . . . . . . . . . . . . . . . . . . . . . . . . . . . . . . . . . . . . . . . . . . . . . . . . . . . . . . . . . . . . . .19
What You Need to Get Started . . . . . . . . . . . . . . . . . . . . . . . . . . . . . . . . . . . . . . . . . . . . . . . . . . . .20
Where to Get Platform SDKs . . . . . . . . . . . . . . . . . . . . . . . . . . . . . . . . . . . . . . . . . . . . . .21
About C/C++ Resource Kit Documentation . . . . . . . . . . . . . . . . . . . . . . . . . . . . . . . . . . . . . . . .21
Developing C/C++ Applications . . . . . . . . . . . . . . . . . . . . . . . . . . . . . . . . . . . . . . . . . . . . . . . . . . .22
Connecting the Intermec Computer to Your PC . . . . . . . . . . . . . . . . . . . . . . . . . . . . .22
Building and Running a Sample Program. . . . . . . . . . . . . . . . . . . . . . . . . . . . . . . . . . .22
Accessing Resource Kit Components in Your Application . . . . . . . . . . . . . . . . . . . .22
Building and Running Your Application. . . . . . . . . . . . . . . . . . . . . . . . . . . . . . . . . . . .23
C/C++ Programming Tips . . . . . . . . . . . . . . . . . . . . . . . . . . . . . . . . . . . . . . . . . . . . . . . . . . . . . . . .23
Capturing Keystrokes on a CK30. . . . . . . . . . . . . . . . . . . . . . . . . . . . . . . . . . . . . . . . . . .23
General Programming Tips . . . . . . . . . . . . . . . . . . . . . . . . . . . . . . . . . . . . . . . . . . . . . . . . . . . . . . . . . . . . . .24
Managing Device Settings . . . . . . . . . . . . . . . . . . . . . . . . . . . . . . . . . . . . . . . . . . . . . . . . . . . . . . . .25
Locking Down Handheld Computers . . . . . . . . . . . . . . . . . . . . . . . . . . . . . . . . . . . . . . . . . . . . . .25
Updating Applications Remotely . . . . . . . . . . . . . . . . . . . . . . . . . . . . . . . . . . . . . . . . . . . . . . . . . .25
Managing Power and Battery Life. . . . . . . . . . . . . . . . . . . . . . . . . . . . . . . . . . . . . . . . . . . . . . . . . .25
Managing Application Persistence Through a Cold Boot . . . . . . . . . . . . . . . . . . . . . . . . . . . .25
Troubleshooting Windows CE and Windows Mobile Memory Issues . . . . . . . . . . . . . . . . .26
Symptoms of Low Virtual Memory . . . . . . . . . . . . . . . . . . . . . . . . . . . . . . . . . . . . . . . . .26
Checking for Virtual Memory Problems . . . . . . . . . . . . . . . . . . . . . . . . . . . . . . . . . . . .26
Resolving Virtual Memory Problems . . . . . . . . . . . . . . . . . . . . . . . . . . . . . . . . . . . . . . .26
Packaging Your Application for Deployment . . . . . . . . . . . . . . . . . . . . . . . . . . . . . . . . . . . . . . . . . . . . . .27
Choosing a Target Location . . . . . . . . . . . . . . . . . . . . . . . . . . . . . . . . . . . . . . . . . . . . . . . . . . . . . . .28
Launching Your Application Automatically. . . . . . . . . . . . . . . . . . . . . . . . . . . . . . . . . . . . . . . . . . . . . . . .28
About the AutoRun Program . . . . . . . . . . . . . . . . . . . . . . . . . . . . . . . . . . . . . . . . . . . . . . . . . . . . .29
AutoRun Commands . . . . . . . . . . . . . . . . . . . . . . . . . . . . . . . . . . . . . . . . . . . . . . . . . . . . .29
About the AutoCab Utility . . . . . . . . . . . . . . . . . . . . . . . . . . . . . . . . . . . . . . . . . . . . . . . . . . . . . . . .30
AutoCab Commands. . . . . . . . . . . . . . . . . . . . . . . . . . . . . . . . . . . . . . . . . . . . . . . . . . . . . .30
About the AutoCopy Utility. . . . . . . . . . . . . . . . . . . . . . . . . . . . . . . . . . . . . . . . . . . . . . . . . . . . . . .31
AutoCopy Commands . . . . . . . . . . . . . . . . . . . . . . . . . . . . . . . . . . . . . . . . . . . . . . . . . . . .31
About the AutoReg Utility . . . . . . . . . . . . . . . . . . . . . . . . . . . . . . . . . . . . . . . . . . . . . . . . . . . . . . . .32
vi
IDL Resource Kit Developer’s Guide
Contents
AutoReg Commands . . . . . . . . . . . . . . . . . . . . . . . . . . . . . . . . . . . . . . . . . . . . . . . . . . . . . .32
About the PreShell and PostShell Programs . . . . . . . . . . . . . . . . . . . . . . . . . . . . . . . . . . . . . . . .32
Using PreShell. . . . . . . . . . . . . . . . . . . . . . . . . . . . . . . . . . . . . . . . . . . . . . . . . . . . . . . . . . . .32
Using PostShell. . . . . . . . . . . . . . . . . . . . . . . . . . . . . . . . . . . . . . . . . . . . . . . . . . . . . . . . . . .33
Deploying Your Application . . . . . . . . . . . . . . . . . . . . . . . . . . . . . . . . . . . . . . . . . . . . . . . . . . . . . . . . . . . . . .33
Deploying Applications via ActiveSync or Storage Cards. . . . . . . . . . . . . . . . . . . . . . . . . . . . .33
Deploying Applications through the FTP Server . . . . . . . . . . . . . . . . . . . . . . . . . . . . . . . . . . . .33
Deploying Applications using SmartSystems Foundation . . . . . . . . . . . . . . . . . . . . . . . . . . .34
Deploying Applications with Wavelink Avalanche. . . . . . . . . . . . . . . . . . . . . . . . . . . . . . . . . . .34
Getting Support. . . . . . . . . . . . . . . . . . . . . . . . . . . . . . . . . . . . . . . . . . . . . . . . . . . . . . . . . . . . . . . . . . . . . . . . .34
Additional Resources . . . . . . . . . . . . . . . . . . . . . . . . . . . . . . . . . . . . . . . . . . . . . . . . . . . . . . . . . . . . . . . . . . . .35
IDL Resource Kit Developer’s Guide
vii
viii
IDL Resource Kit Developer’s Guide
Before You Begin
Before You Begin
This section provides you with an explanation of safety icons that appear in this
guide, technical support information, and sources for additional product
information.
Safety Icons
This section explains how to identify and understand cautions and notes in this
document.
A caution alerts you to an operating procedure, practice, condition, or
statement that must be strictly observed to prevent equipment damage or
destruction, or corruption or loss of data.
Note: Notes either provide extra information about a topic or contain special
instructions for handling a particular condition or set of circumstances.
Global Services and Support
Warranty Information
To understand the warranty for your Intermec product, visit the Intermec web site at
www.intermec.com and click Support > Returns and Repairs > Warranty.
Disclaimer of warranties: The sample code included in this document is presented
for reference only. The code does not necessarily represent complete, tested
programs. The code is provided “as is with all faults.” All warranties are expressly
disclaimed, including the implied warranties of merchantability and fitness for a
particular purpose.
Web Support
Visit the Intermec web site at www.intermec.com to download our current manuals
(in PDF).
Visit the Intermec technical knowledge base (Knowledge Central) at
intermec.custhelp.com to review technical information or to request technical
support for your Intermec product.
Telephone Support
In the USA and Canada call 1-800-755-5505.
Outside the U.S.A. and Canada, contact your local Intermec representative. To
search for your local representative, from the Intermec web site, click About Us >
Contact Us.
IDL Resource Kit Developer’s Guide
ix
Before You Begin
Service Location Support
For the most current listing of service locations, click Support >Returns and
Repairs > the Repair Locations tab.
For technical support in South Korea, use the after service locations listed below:
AWOO Systems
102-1304 SK Ventium
522 Dangjung-dong
Gunpo-si, Gyeonggi-do Korea, South 435-776
Contact: Mr. Sinbum Kang
Telephone: +82-31-436-1191
Email: [email protected]
IN Information System PTD LTD
6th Floor
Daegu Venture Center Bldg 95
Shinchun 3 Dong
Donggu, Daegu City, Korea
E-mail: [email protected] or [email protected]
Who Should Read This Guide
This Developer’s Guide is written for the person who is responsible for developing
applications to use with Intermec computers and peripherals.
This document provides you with general information about using the Intermec
Developer Library Resource Kits to develop applications.
Related Documents
The Intermec web site at www.intermec.com contains our documents (as PDF files)
that you can download for free.
To download documents
1 Visit the Intermec web site at www.intermec.com.
2 Click Support > Manuals.
3 Use the Product Category field, the Product Family field, and the Product
field to help you locate the product whose documentation you want to
download.
x
IDL Resource Kit Developer’s Guide
About This Guide
This Developer’s Guide describes best practices for using the Intermec Developer
Library (IDL) Resource Kits to develop applications for your Intermec computers
and peripherals.
Before you work with the Resource Kits, you should be familiar with:
•
general programming techniques for .NET, C/C++, Java, or web applications.
•
your Intermec computers and peripherals.
•
development tools such as Microsoft Visual Studio or eMbedded Visual C++.
•
concepts for software design.
What Are the IDL Resource Kits?
The Resource Kits are the basic tools you use to develop applications for Intermec
computers and peripherals. Each Resource Kit contains components for a specific
area of application functionality, and includes documentation, tutorials and sample
code.
The Resource Kits cover these functional areas:
•
Bluetooth™: Managing communications between Bluetooth-enabled Intermec
computers and other devices.
•
Communications: Configuring network and 802.11 functionality, including
security and profile management.
•
Data Collection: Using bar code scanners, imagers, and magnetic stripe readers,
and manipulating collected data.
•
Device: Configuring and managing hardware-specific settings such as audio
beeps, screen backlight behavior, and keyboard mapping.
•
Device Management: Configuring SmartSystems-enabled Intermec devices from
your application via the Intermec SmartSystems™ API.
•
Mobile Gadgets: Adding features such as ink capture or custom buttons to
mobile applications.
•
Printing: Communicating with and configuring print reports for Intermec
receipt printers.
•
RFID: Managing and configuring Intermec RFID readers, and reading from and
writing to RFID tags.
•
Antares Migration: Compiling a Trakker Antares® (or other character-based)
application for use on newer Intermec computers.
For more information on each Resource Kit, see “Which Resource Kits Do You
Need?” on page 3.
IDL Resource Kit Developer’s Guide
1
Supported Platforms
In general, Resource Kits support Intermec computers based on these platforms:
•
Windows Mobile® 6.0, Windows Mobile 5.0, Windows Mobile 2003
•
Windows CE 4.2 and 5.0
•
Windows XP and XP Embedded
Resource Kits support these Intermec computers:
•
700 Series Color Mobile Computer
•
CK3 Handheld Computer
•
CK30, CK31, and CK32 Handheld Computers
•
CK61 Handheld Computer
•
CN2A and CN2B Mobile Computers
•
CN3 Mobile Computer
•
CN4 Mobile Computer
•
CN30 Mobile Computer
•
CN50 Mobile Computer
•
CV30 Fixed Mount Computer
•
CV60 Vehicle-Mount Computer
For Java development, the Resource Kits are compatible with Java Virtual Machines
(JVMs) that are Java 2 Micro Edition (J2ME) compliant and support Connected
Device Configuration (CDC) 1.0 and Personal Profile 1.0 or later. Intermec
recommends that you use an Intermec certified JVM on Intermec computers.
Intermec has certified several versions of IBM WebSphere Everyplace Micro
Environment for various platforms.
Some functionality depends on the options installed in your Intermec computer or
its peripherals. For more information, see the user’s guide for the Resource Kit, or
see the user’s manual for your Intermec computer.
2
IDL Resource Kit Developer’s Guide
Which Resource Kits Do You Need?
This section explains the specific application functionality that each Resource Kit
provides. Use this section to determine which Resource Kits you need.
Note: Some functionality depends on the options installed in your Intermec
computer or its peripherals. For more information, see the user’s guide for the
Resource Kit, or see the user’s manual for your Intermec computer.
About the Bluetooth Resource Kit
The Bluetooth Resource Kit provides APIs and a utility program for integrating
Bluetooth devices, including communications, discovery, and association with
Bluetooth peripherals.
Use the Bluetooth Resource Kit to:
•
enable/disable the computer's Bluetooth radio. Battery life is extended if you
enable the Bluetooth radio only when you need it.
•
set up Bluetooth virtual COM ports for applications to use to access Bluetooth
devices.
•
register Bluetooth scanners with the Intermec Data Collection Engine.
•
discover Bluetooth devices and bond them with the Intermec computer.
•
download Bluetooth setup information from a host so a customer does not need
to set up each computer from the keyboard.
•
retrieve the list of Bluetooth devices that are known by the Intermec computer.
•
allow users to select a Bluetooth device by device type and subtype. For example,
you can set up categories for Route Printer, Depot Printer, Load Printer, and
Scanner.
•
check that a Bluetooth device is in range and available.
•
execute device type-specific tests to allow the user to identify a selected device.
•
configure remote Bluetooth device parameters such as friendly name and
discoverability.
•
auto-select the first available device within a group so the user does not need to
select a device from a list.
•
decode Bluetooth Class of Device (COD) information returned by a Bluetooth
device.
•
query a device about the Bluetooth services it provides.
•
manage the Bluetooth services provided by the local device.
•
manage the Bluetooth connectable and discoverable states of the local device.
IDL Resource Kit Developer’s Guide
3
About the Communications Resource Kit
The Communications Resource Kit provides developer control over the various
network and communications radios and connections.
On all Intermec computers, use the Communications Resource Kit to:
•
configure the 802.11 radio, network and security settings.
•
configure profiles for wireless security.
•
transmit and receive messages from input connections or via TFTP.
•
get connection status.
•
exchange data with an Intermec Application Server via UDP Plus.
For the 700 Color, CK3, CK61, CN3, CN4, and CV30 computers, this Resource Kit
also provides functionality to:
•
load and unload Ethernet and 802.11 network drivers.
•
get the currently loaded network device (Ethernet or 802.11).
•
enable and disable the startup of the FTP server on bootup.
•
check the availability of the 802.11 network.
For the 700 Color, CK61, and CN3 computers, this Resource Kit also provides the
ability to communicate with the Intermec 6920 Server via NRINet.
About the Data Collection Resource Kit
The Data Collection Resource Kit includes tools and libraries for integrating bar
code scanning, imaging, and magnetic stripe card reading into your data collection
application, providing complete control over how and what data is collected.
Use the Data Collection Resource Kit to:
4
•
enable bar code scanners, and turn scanners on and off.
•
control, configure, and read data from bar code scanners.
•
set filters to filter and edit data coming from bar code scanners. For example,
you can set a filter string to only send Code 39 data to your application and
exclude data encoded in other symbologies.
•
use the virtual wedge to wedge data from bar code scanners as keyboard input.
This allows applications without any scanner support to receive scanner data.
•
enable read-ahead mode, in which data is queued until the application is ready to
read it. Read-ahead mode decouples reader performance from the application
performance; that is, data is read as fast as the user can scan it, independent of
the connection processing load.
•
set decoding and attribute options for bar code symbologies.
•
enable the Data or Read LEDs of the scanner.
•
create scanner groups to manage and configure many scanners simultaneously.
•
capture full-page documents, pictures, and signatures from imagers.
•
read data from magnetic stripe card readers.
IDL Resource Kit Developer’s Guide
About the Device Resource Kit
The Device Resource Kit provides tools for controlling and configuring device/
computer specific features such as the keyboard maps, sound, display features and
other hardware specific functionality.
Use the Device Resource Kit to:
•
generate audio beeps and clicks of varying pitches, durations, and volume levels.
•
reboot or suspend the computer.
•
retrieve power status.
•
remap keys on the 700 Color, CK3, CK61, and CN3 keypads, or CV30 keyboard
accessories.
•
save the registry or manage registry persistence on selected Intermec computers.
•
control the keypad light and the screen backlight.
•
get the type of Intermec computer at runtime.
•
switch the serial dock port for the 700 Color computer.
•
enable the display heater in the CV60.
•
launch programs on the Intermec computer.
About the Device Management Resource Kit
The Device Management Resource Kit includes components you can use to get and
set configuration information on SmartSystems-enabled Intermec computers.
The SmartSystems Foundation allows you to monitor, configure, and manage
SmartSystems-enabled Intermec computers and other devices from a host PC. For
more information on SmartSystems Foundation, visit www.intermec.com/
smartsystems.
About the Mobile Gadgets Resource Kit
The Mobile Gadgets Resource Kit includes user interface, ink capture, and other
miscellaneous controls for producing mobile data collection applications.
Use the Mobile Gadgets Resource Kit to:
•
capture “ink,” such as signatures or simple line drawings, drawn by the stylus on
the screen.
•
display a picture button in your application. A picture button allows text and
.bmp or .jpg files to be displayed at the same time on a button control.
•
implement ATM (Automated Teller Machine)-style formatted numeric input in
your application.
•
display and input data based on a format mask on 700 Color computers.
•
load images from bitmap and icon files.
IDL Resource Kit Developer’s Guide
5
About the Printing Resource Kit
The Printing Resource Kit provides tools for developing mobile printing solutions.
It includes support for line and bitmap printing, and secure printing via Intermec’s
proprietary NPCP protocol.
Use the Printing Resource Kit to:
•
print via RS-232, Bluetooth, and network connections.
•
support secure printing via NPCP, guaranteeing report integrity.
•
produce text based reports with various font styles such as boldface, compressed,
doublewide, italic, strikeout and underline.
•
set up orphan control and automatic header and footer sections of a report.
•
print bitmaps.
•
detect and handle printer warning and error conditions as returned by the
printer. Note that not all printers are capable of returning warning and error
information.
•
provide printing status information to the user, such as start of report, start of
page, end of page, page number, and printing complete.
About the RFID Resource Kit
The RFID Resource Kit assists developers integrating RFID readers into their supply
chain solutions. This kit includes the RFID legacy APIs, Intermec RFID BRI
specifications, RFID libraries for .NET and Java, and several other resources.
Use the RFID Resource Kit to:
•
read, write, update and access RFID tag data.
•
get and set RFID reader attributes.
•
get RFID reader events.
•
use the BRI (Basic Reader Interface) protocol to communicate with RFID
readers.
About the Antares Migration Resource Kit
This Resource Kit provides a path for migrating programs developed with the
Intermec PSK and EZBuilder applications to newer Intermec computers. Use this
Resource Kit to convert character-based Intermec Trakker applications for use on
the CK30, CK31, CV30, or CV60 (with Windows CE) computers.
Note: This Resource Kit supports quick migration of Antares applications for a
limited number of Intermec computers. Intermec recommends that you use other
Resource Kits to develop applications for long-term support on all platforms.
6
IDL Resource Kit Developer’s Guide
Understanding Development Tool Requirements
The programming language you use determines the required development tool,
SDKs, and runtime files. This section lists these requirements along with a list of
Resource Kits supporting that language.
.NET Development Requirements
Development Tool:
SDKs:
Runtime Files:
Supported Kits:
Visual Studio 2008 or Visual Studio 2005
None required
Microsoft .NET Compact Framework, Intermec .NET class libraries (included with
Resource Kits)
•
Bluetooth
•
Communications
•
Data Collection
•
Device
•
Device Management
•
Mobile Gadgets
•
Printing
•
RFID
Web Development Requirements
Development Tool:
SDKs:
Runtime Files:
Supported Kits:
Any web authoring tool
None required
Windows Mobile Internet Explorer or Intermec iBrowse
•
Device
•
RFID
Java Development Requirements
Development Tool:
SDKs:
Runtime Files:
Supported Kits:
IBM WebSphere Device Developer, NetBeans, Eclipse, or other Java IDE
None required
IBM WebSphere Everyplace Micro Environment (includes J9 and other runtime
libraries), Intermec class libraries (provided with Resource Kits)
•
Data Collection
•
Device
•
Device Management
•
Printing
•
RFID
IDL Resource Kit Developer’s Guide
7
C/C++ Development Requirements
Development Tool:
Visual Studio 2008, Visual Studio 2005, or eMbedded Visual C++ with Service Pack
4
SDKs:
Microsoft or Intermec SDK. For a complete list, see “What You Need to Get
Started” on page 20.
Runtime Files:
Factory-installed .dlls on Intermec computers. Additional .dlls included with
Resource Kits.
Supported Kits:
•
Antares Migration
•
Bluetooth
•
Communications
•
Data Collection
•
Device
•
Device Management
•
Mobile Gadgets (for 700 Color only)
Installing Resource Kits
After you determine which Resource Kits you need, follow the next procedure to
download the kits to your development PC.
To install Resource Kits
1 Go to www.intermec.com and choose Products > Applications & Software >
Development Tools > Developer Resource Kits. The Developer Resource Kits
page appears.
2 Click Review and download IDL Resource Kits. The Developer Resource Kits
Downloads page appears. The “Developer Tools” section includes a list of the
Resource Kits.
3 Click a Resource Kit name and follow the prompts to install it.
If your IDE is Visual Studio or eMbedded Visual C++, this message appears:
When the Help update is finished, the progress message disappears.
8
IDL Resource Kit Developer’s Guide
If your integrated development environment (IDE) is Visual Studio, this screen
appears as the Resource Kit components are added to the Visual Studio toolbox:
When the process is complete, the window closes automatically.
After Installing Resource Kits
Once the installation is finished, you can access the Resource Kit components and
documentation from within your development environment.
Shortcuts to documents, Example folders, and other information can be found in
your desktop PC Start menu, in All Programs > Intermec > Resource Kits. You
can also double-click the IDL Resource Kits icon on your desktop to browse the
Resource Kit installation.
Each Resource Kit folder includes a shortcut to its ReadMe file and user’s guide. All
Example programs include ReadMe files that explain content and installation.
Removing Resource Kits
After you install Resource Kits, you can remove them using the Add/Remove
Programs control panel applet.
Installing New Versions of Resource Kits
To install new versions of Resource Kits, repeat the procedure described in
“Installing Resource Kits” on page 8. If required, the installation process
uninstalls previous versions of the Resource Kit you are updating.
If you have installed v3.2 (or later) of the Data Collection Resource Kit, or v3.1 (or
later) of any other Resource Kit, you can install new versions using Intermec Update,
which provides automatic notification of updates for Intermec software. You can
also manually check for updates by choosing Start > Software Updates from your
desktop.
IDL Resource Kit Developer’s Guide
9
For .NET (C#, VB.NET) Developers
These Resource Kits support .NET development:
•
Bluetooth
•
Communications
•
Data Collection
•
Device
•
Device Management
•
Mobile Gadgets
•
Printing
•
RFID
What You Need to Get Started
This section explains what you should know and what software you need to install
before you start using the Resource Kits to develop applications.
All developers should be familiar with their Intermec computers and peripherals,
and with connecting the computer to the development PC and downloading files.
You can visit the Intermec web site at www.intermec.com to download PDF
versions of our current manuals. For more information, see “Related Documents”
on page x.
You should already be familiar with the .NET Framework and .NET Compact
Framework. For more information, see the MSDN documentation.
Before you install Resource Kits, make sure the following software is installed on
your development PC:
•
Microsoft Visual Studio 2008 or Visual Studio 2005
•
Microsoft ActiveSync 4.1 or later
Most Resource Kits support .NET development. Each kit includes .NET libraries,
samples, and documentation. For more information, see the user’s guide for each
Resource Kit.
Note: The Antares Migration Resource Kit supports C/C++ development only.
About .NET Resource Kit Documentation
The .NET documentation for each Resource Kit is integrated into Visual Studio
when you install the kit. In Visual Studio, choose Help > Contents and then choose
the Resource Kit user’s guide in the Contents pane.
The integrated help is also available in the Start menu at All Programs > Intermec
> Resource Kits > Resource Kit Name > User’s Guide. You do not need to have
Visual Studio running to read the documentation if you use this method.
10
IDL Resource Kit Developer’s Guide
Resource Kits also include ReadMe files with late-breaking information and user’s
guides with API reference material. Shortcuts to the ReadMe file for each Resource
Kit can be found in your desktop PC Start menu, in All Programs > Intermec >
Resource Kits > Resource Kit Name > ReadMe.
Developing .NET Applications
This section includes general information on using the Resource Kits to develop
applications.
Connecting the Intermec Computer to Your PC
To deploy applications to the Intermec computer, establish an ActiveSync
connection between the computer and your PC. For information about using
ActiveSync on the Intermec computer, see the user’s manual for your computer.
Building and Running a Sample Program
An easy way to verify that the Resource Kits are properly installed and functional is
to build and run one of the sample programs.
To build and run a sample program
1 Choose a Resource Kit and browse to its Examples folder.
2 Open the ReadMe file for the example and follow the instructions for building
and running the example.
When you deploy a .NET application from Visual Studio, you need to select the
appropriate device platform.
Accessing Resource Kit Components in Your Application
This section describes how to access Resource Kit components in your application.
For reference information about specific components, see the user’s guide for the
Resource Kit.
When you install the Resource Kits, the Intermec .NET assemblies are installed such
that Visual Studio finds them and they can be easily added as references.
Many Intermec assemblies are installed into the Visual Studio Toolbox when you
install the Resource Kits. Simply drag-and-drop from the Toolbox to add them to
your project, and a reference is added to your project automatically.
Note: Because of certain installation issues, Intermec components may not appear
in the Visual Studio toolbox after you install Resource Kits. To add components to
the toolbox manually, right-click the toolbox and select Choose Items, and then
browse to the assemblies.
To add Intermec assemblies not found in the Toolbox to your project
1 In Visual Studio, open the Solution Explorer.
2 Right-click the References folder and choose Add Reference from the pop-up
menu. The Add Reference dialog box appears. In the .NET tab, the available
assemblies for Intermec computers are grouped together with names starting
with Intermec.
IDL Resource Kit Developer’s Guide
11
The Add Reference dialog box only shows the assemblies available for the project
type you have open. You can find the actual location of the .dll files in the Path
column of that dialog box.
When you deploy your application using Visual Studio, the assemblies in the
References folder in Solution Explorer are also deployed automatically.
Note: If you convert from a Visual Studio 2003 project to a newer version of Visual
Studio, you need to add the references again, as the location has changed and the
names have been modified to delineate between CF Version 1 and CF Version 2
assemblies.
Building and Running Your Application
For information on building an application and deploying it to a device, see the
Visual Studio documentation.
When you deploy a .NET application from Visual Studio, make sure you select the
appropriate device platform.
Using the Global Assembly Cache (GAC)
This section lists some things to remember when deciding whether or not to use the
GAC for .NET assemblies.
Unique advantages of placing assemblies in the GAC:
•
Only one copy of a .dll shared by multiple applications needs to be placed in the
GAC.
•
Applications can reside anywhere on the computer independent of the location
of dependent assemblies.
•
After you place the required assemblies in the GAC, you only need to install the
application on the computer.
Unique disadvantages of placing assemblies in the GAC:
•
Automatic cleanup requires removing all applications tied to an older .dll, then
running the application using the newer version of the .dll.
•
Visual Studio deploys referenced assemblies automatically, leading to multiple
copies of the same assemblies on the computer if the end user is not careful.
Unique advantages of not placing assemblies in the GAC:
•
Deleting the application directory easily cleans up the application.
•
Not using the GAC mimics how Visual Studio distributes the application during
the development phase; all required assemblies are placed in one location.
Unique disadvantage of not placing assemblies in the GAC:
•
12
The application must be in the same directory as its associated assemblies, which
may allow for file duplication.
IDL Resource Kit Developer’s Guide
.NET Programming Tips
This section includes programming tips specific to .NET development for Intermec
computers and peripherals.
Capturing Keystrokes on a CK30
Because the CK30 does not have a touch screen, navigation and actions are triggered
by keystrokes. This section explains how to capture keystrokes on the CK30.
Override OnKeyDown in each Windows Form, similar to the following example:
protected override void OnKeyDown(KeyEventArgs e)
{
if (e.KeyCode == Keys.Escape || e.KeyCode == Keys.E)
{
. . .
e.Handled=true;
}
else if (e.KeyCode == Keys.D1)
{
. . .
e.Handled=true;
}
else if (e.KeyCode == Keys.D2)
{
. . .
e.Handled=true;
}
else if (e.KeyCode == Keys.D3)
{
. . .
e.Handled=true;
}
base.OnKeyDown(e);
}
For Web Developers
These Resource Kits support web application development:
•
Device
•
RFID
For more information, see the user’s guide for each Resource Kit.
What You Need to Get Started
This section explains what you should know and what software you need to install
before you start using the Device or RFID Resource Kits to develop web
applications.
All developers should be familiar with their Intermec computers and peripherals,
and with connecting the computer to the development PC and downloading files.
IDL Resource Kit Developer’s Guide
13
You can visit the Intermec web site at www.intermec.com to download PDF
versions of our current manuals. For more information, see “Related Documents”
on page x.
You should already be familiar with web application development and a web
authoring tool that supports the use of ActiveX controls.
About Resource Kit Documentation
Resource Kits also include ReadMe files with late-breaking information and user’s
guides with API reference material. Shortcuts to the ReadMe file for each Resource
Kit can be found in your desktop PC Start menu, in All Programs > Intermec >
Resource Kits > Resource Kit Name > ReadMe.
The Resource Kit user’s guides are available in the Start menu at All Programs >
Intermec > Resource Kits > Resource Kit Name > User’s Guide.
Developing Web Applications
This section includes general information on using the Resource Kits to develop
web applications.
Connecting the Intermec Computer to Your PC
In order to deploy applications to the Intermec computer, you need to establish an
ActiveSync connection between the computer and your PC. For information about
using ActiveSync on your PC, see the ActiveSync Help. For information about using
ActiveSync on the Intermec computer, see the user’s manual for your Intermec
computer.
Building and Running a Sample Program
An easy way to verify that the Resource Kits are properly installed and functional is
to build and run one of the sample programs.
To run a sample program
1 Choose a Resource Kit and browse to its Examples folder.
2 Open the ReadMe file for the example and follow the instructions for running
the example.
Accessing Resource Kit Components in Your Application
This section describes how to access Resource Kit ActiveX components in your web
application. For reference information about specific components, see the user’s
guide for the Resource Kit.
There are two ways to access an ActiveX component:
•
As an OBJECT HTML element.
•
As an ActiveXObject object.
These methods are shown in the following examples.
14
IDL Resource Kit Developer’s Guide
Method 1: OBJECT HTML element
<!DOCTYPE HTML PUBLIC "-//W3C//DTD HTML 4.01 Transitional//EN">
<html>
<head>
<script language="JavaScript">
var volume = 4;
var duration = 200;
var pitch = 1000;
function playMonoTone()
{
oDeviceAudio.AudioPlayTone(pitch, duration, volume);
}
</script>
</head>
<body>
<object id="oDeviceAudio" classid="CLSID:4C76D04F-D881-45E6-A277CB7F011FDD70"></object>
<form name="test1">
<p>
<input type="Button" onclick="javascript:playMonoTone();"
value="Play Monotone">
</p>
</test1>
</body>
</html>
Method 2: ActiveXObject object
<!DOCTYPE HTML PUBLIC "-//W3C//DTD HTML 4.01 Transitional//EN">
<html>
<head>
<script language="JavaScript">
oDeviceAudio = new ActiveXObject("ItcAxDevice.AudioTone");
var volume = 4;
var duration = 200;
var pitch = 1000;
function playMonoTone()
{
oDeviceAudio.AudioPlayTone(pitch, duration, volume);
}
</script>
<body>
<form name="test1">
<p>
<input type="Button" onclick="javascript:playMonoTone();"
value="Play Monotone">
</p>
</test1>
</body>
</html>
IDL Resource Kit Developer’s Guide
15
Programming Tips
•
Know your browser features.
For example, Internet Explorer Mobile and Internet Explorer for Windows CE do
not support the same feature set as the desktop. Be sure to use only features
supported by the browser you will use on the target device.
•
Test on the target device.
Windows Mobile and Windows CE devices are resource-constrained so
something that works on the desktop might fail on the target device, or not meet
performance requirements.
Running Your Application
Refer to the documentation for your web browser for information about running
your web application.
For Java Developers
These Resource Kits support Java application development:
•
Data Collection
•
Device
•
RFID
For other Resource Kits, support for Java applications is currently under
development.
What You Need to Get Started
This section explains what you should know and what software you need to install
before you start using the Resource Kits to develop Java applications.
All developers should be familiar with their Intermec computers and peripherals,
and with connecting the computer to the development PC and downloading files.
You can visit the Intermec web site at www.intermec.com to download PDF
versions of our current manuals. For more information, see “Related Documents”
on page x.
The Data Collection Resource Kit includes Java components for bar code scanning,
using the computer’s imager as a camera, and using a magnetic stripe reader.
The RFID Resource Kit includes Java components that provide the same
functionality as their .NET equivalents. The Device Resource Kit includes Java tools
for getting power status and for warm and cold booting the computer.
All Java Resource Kit components were developed and tested against the IBM J9
implementation of J2ME CDC/Personal Profile 1.0.
Before you install Resource Kits, make sure you have installed an Intermec Certified
JVM on your Intermec computer. Intermec offers these CD-ROMs that include
certified JVMs:
•
16
For the 700 Color, CK30, CK31, CN2A and CN2B: IBM WebSphere Micro
Environment for Intermec Computers (P/N 073603)
IDL Resource Kit Developer’s Guide
•
For the 700 Color, CK61, CN30, CN3, CV30, and CK32: IBM WebSphere Micro
Environment for Intermec Computers v2.x (P/N 235-203-xxx).
For more information on these products, consult your Intermec sales representative.
Note: The CV60 with Windows XP or XP Embedded supports Java with J2SE from
Sun. Java development is not supported by the CV60 with Windows CE.
You should already be familiar with the Java class packages supported by the JVM.
For more information, see the JVM documentation.
Before you install Resource Kits, make sure the following software is installed on
your development PC:
•
Microsoft ActiveSync 3.7 or later (4.1 or later for Windows Mobile 5.0 and later
devices) to download applications to the devices.
•
Java development environment. Any Java development environment can be used
to develop Java applications targeted for a JVM running on the Intermec
computer, but you should be careful to use only those Java class packages
supported by the JVM. For more information, see the JVM documentation.
Note: If you are using a Java IDE that does not support J2ME CDC/Personal
Profile 1.0 development, be careful to use only Java APIs that are supported by
CDC/Personal Profile 1.0. When compiled with a J2SE (or later) compiler, adjust
the source level to “1.4” to ensure that the generated bytecode is compatible with
WEME.
Java Standard Edition (J2SE) classes, such as Swing, will not run on the
Intermec computer. So, while your Java application may appear to run well
when tested in a desktop environment with a J2SE JVM, it can fail when
run on the Intermec computer.
About Resource Kit Java Help and ReadMe Files
The Java Help for Resource Kits that support Java development is available in the
Start menu at All Programs > Intermec > Resource Kits > Resource Kit Name >
Java Help.
Resource Kits also include ReadMe files with late-breaking information and user’s
guides with API reference material. Shortcuts to the ReadMe file for each Resource
Kit can be found in your desktop PC Start menu, in All Programs > Intermec >
Resource Kits > Resource Kit Name > ReadMe.
Developing Java Applications
This section includes general information on using the Resource Kits to develop
applications.
IDL Resource Kit Developer’s Guide
17
Connecting the Intermec Computer to Your PC
In order to deploy applications to the Intermec computer, you need to establish an
ActiveSync connection between the computer and your PC. For information about
using ActiveSync on your PC, see the ActiveSync Help. For information about using
ActiveSync on the Intermec computer, see the user’s manual for your Intermec
computer.
Building and Running a Sample Program
An easy way to verify that the Resource Kits are properly installed and functional is
to build and run one of the sample programs.
To build and run a sample program
1 Choose a Resource Kit and browse to its Examples folder.
2 Open the ReadMe file for the example and follow the instructions for building
and running the example.
3 Copy the sample application JAR file and shortcut to the Intermec computer.
For instructions, see the ReadMe file for the sample.
Note: An Intermec-certified JVM must be installed on the Intermec computer
before you deploy the application. To learn more about getting an Intermec certified
JVM, see your Intermec sales representative.
Accessing Resource Kit Components in Your Application
To use Resource Kit Java classes in your application, you must specify the Resource
Kit JAR file path (including the file name) in the classpath project property in the
development environment; otherwise, the compiler will not be able to resolve the
references.
If you selected the default install path for the Resource Kits, the JAR files are located
at C:\Program Files\Intermec\Developer Library\JavaLib. Each Resource Kit has
corresponding JAR files in this folder (for example, DataCollection.jar). For
additional information, see the Java Help for the Resource Kit in the Start menu at
All Programs > Intermec > Resource Kits > Resource Kit Name > Java Help.
Building and Running Your Application
Deploying a Java application to an Intermec computer typically involves manually
copying .jar files and setting up an application shortcut to run the Java application.
For more details, see the Java Development Guide in the Start menu at All
Programs > Intermec > Resource Kits > Java Development Guide.
Java Programming Tips
This section includes programming information specific to Java development for
Intermec computers and peripherals.
Capturing Keystrokes on a CK30
Because the CK30 does not have a touch screen, navigation and actions are triggered
by keystrokes. This section explains how to capture keystrokes on the CK30.
18
IDL Resource Kit Developer’s Guide
You can listen for key events that are fired when a key is pressed or released in a AWT
component that has keyboard focus. Additionally, you can have a AWT button in
your Java application that accepts both mouse and keyboard inputs. The next code
snippet allows you to execute application exit logic either when the Close button is
clicked or when the Enter key is pressed while the Close button has focus.
Note: On the CK30, you may set focus to a UI control by using the Tab key.
java.awt.Button btnClose = new Button("Close");
btnClose.addActionListener(new java.awt.event.ActionListener() {
// Invoked when the button is clicked.
public void actionPerforme (java.awt.event.ActionEvent e)
{
// Execute application exit logic
}
});
// Add a key listener for the key events fired when btnClose has focus.
btnClose.addKeyListener(new java.awt.event.KeyListener() {
// Invoked when a key is pressed.
public void keyPressed(java.awt.event.KeyEvent e)
{
if (e.getKeyCode() == java.awt.event.KeyEvent.VK_ENTER)
{
// Execute application exit logic
}
}
public void keyReleased(java.awt.event.KeyEvent e) {}
public void keyTyped(java.awt.event.KeyEvent e) {}
});
For C/C++ Developers
These Resource Kits support C/C++ development:
•
Antares Migration
•
Bluetooth
•
Communications
•
Data Collection
•
Device
•
Device Management
•
Mobile Gadgets (for 700 Color only)
IDL Resource Kit Developer’s Guide
19
What You Need to Get Started
This section explains what you should know and what software you need to install
before you start using the Resource Kits to develop applications.
All developers should be familiar with their Intermec computers and peripherals,
and with connecting the computer to the development PC and downloading files.
You can visit the Intermec web site at www.intermec.com to download PDF
versions of our current manuals. For more information, see “Related Documents”
on page x.
Before you install Resource Kits, make sure the following software is installed on
your development PC:
•
Microsoft Visual Studio 2008, Visual Studio 2005, or eMbedded Visual C++
(eVC) version 4.2 or later.
•
Microsoft ActiveSync 3.7 or later (4.1 or later for Windows Mobile 5.0 and later
devices or when using Visual Studio) to download applications to the devices.
•
Platform SDKs for the devices you are using. The next table lists Intermec
computers and the corresponding required platform SDKs.
Intermec Computers and Required Platform SDKs
20
Intermec
Computer
Required
Platform SDK
Development
Environment
700 Series Color
Microsoft Pocket PC 2003
SDK
Visual Studio or eVC++ 4.0 with
Service Pack 4
CK3
Microsoft Windows Mobile 6
Professional SDK
Visual Studio
CK30A, CK30B
Intermec iCE-Standard SDK
eVC++ 4.0 with Service Pack 4
CK30C, CK31
Intermec iCE-Premium SDK
eVC++ 4.0 with Service Pack 4
CK32
Microsoft Windows Mobile
5.0 SDK for Pocket PC
Visual Studio
CK61
(Windows Mobile 5.0)
Microsoft Windows Mobile
5.0 SDK for Pocket PC
Visual Studio
CK61
(Windows CE)
Intermec ITC_CE5.0.SDK
Visual Studio 2008, or
Visual Studio 2005 with Service
Pack 1
CN2A
Intermec CN2A SDK, or
Intermec iCE-Premium SDK
eVC++ 4.0 with Service Pack 4
CN2B
Microsoft Pocket PC 2003
SDK
Visual Studio or eVC++ 4.0 with
Service Pack 4
CN3
(Windows Mobile 5.0)
Microsoft Windows Mobile
5.0 SDK for Pocket PC
Visual Studio
CN3
(Windows Mobile 6.x)
Microsoft Windows Mobile 6
Professional SDK
Visual Studio
CN4
Microsoft Windows Mobile 6
Professional SDK
Visual Studio
CN30
Microsoft Windows Mobile
5.0 SDK for Pocket PC
Visual Studio
IDL Resource Kit Developer’s Guide
Intermec Computers and Required Platform SDKs (continued)
Intermec
Computer
Required
Platform SDK
Development
Environment
CN50
Microsoft Windows Mobile 6
Professional SDK
Visual Studio
CV30
(Windows CE)
Intermec ITC_CE5.0.SDK
Visual Studio
CV30
(Windows Mobile 5.0)
Microsoft Windows Mobile
5.0 SDK for Pocket PC
Visual Studio
CV60
(Windows CE)
Intermec CV60 SDK
eVC++ 4.0 with Service Pack 4
CV60
(Windows XP or XPe)
Microsoft Platform SDK
(included with Visual Studio
2005)
Visual Studio
Where to Get Platform SDKs
Intermec platform SDKs can be downloaded for free from the Intermec
Development Tools web page. Follow the next procedure to download these SDKs.
To download platform SDKs
1 Go to www.intermec.com and choose Products > Applications & Software >
Development Tools > Developer Resource Kits. The Developer Resource Kits
page appears.
2 Click Review and download IDL Resource Kits. The Developer Resource Kits
Downloads page appears.
3 Click a platform SDK in the list to download the file.
Note: If you install the Intermec CK61 or ITC_CE5.0 platform SDKs before
installing Visual Studio, you need to uninstall and reinstall the platform SDK in
order for Visual Studio to offer it as a platform choice for C++ applications.
About C/C++ Resource Kit Documentation
The C/C++ documentation for the Resource Kits is integrated into eVC4 and Visual
Studio. For eVC4, Resource Kit help topics appear in the Help Index and Search tabs
but not in the Contents.
The integrated help is also available in the Start menu at All Programs > Intermec
> Resource Kits > Resource Kit Name > User’s Guide.
Note: If you install or remove a platform SDK after installing the Resource Kits, be
sure to run the IDL Sync Utility so that the eVC4 Help system is updated properly.
The shortcut to the Sync Utility is in the Start menu at All Programs > Intermec >
Resource Kits > IDL Sync Utility.
Resource Kits also include ReadMe files with late-breaking information and user’s
guides with API reference material. Shortcuts to the ReadMe file for each Resource
Kit can be found in your desktop PC Start menu, in All Programs > Intermec >
Resource Kits > Resource Kit Name > ReadMe.
IDL Resource Kit Developer’s Guide
21
Developing C/C++ Applications
This section includes general information on using the Resource Kits to develop
applications.
Connecting the Intermec Computer to Your PC
In order to deploy applications to the Intermec computer, you need to establish an
ActiveSync connection between the computer and your PC. For information about
using ActiveSync on your PC, see the ActiveSync Help. For information about using
ActiveSync on the Intermec computer, see the user’s manual for your Intermec
computer.
Building and Running a Sample Program
An easy way to verify that the Resource Kits are properly installed and functional is
to build and run one of the sample programs.
To build and run a sample program
1 Choose a Resource Kit and browse to its Examples folder.
2 Open the ReadMe file for the example and follow the instructions for building
and running the example.
Make sure you select the appropriate platform and device in the dropdown lists in
your IDE.
Accessing Resource Kit Components in Your Application
This section describes how to access Resource Kit components in your application.
For reference information about specific components, see the user’s guide for the
Resource Kit.
Paths to the Intermec include files and library files are handled differently by
eMbedded Visual C++ and Visual Studio.
Extending C++ Paths in Visual Studio
When you install Resource Kits, paths to the platform SDKs are extended to include
paths to the Resource Kit components. On a developer PC with multiple users,
Visual Studio creates separate copies of the paths for each user. Additionally, the file
containing those paths cannot be accessed until you create a new, unmanaged C/
C++ project, or convert a VS.NET project into an unmanaged C/C++ project.
Follow the next procedure to update the paths for all applications built for a specific
platform in Visual Studio.
To extend C++ paths in Visual Studio
1 In Visual Studio, choose Tools > Options. The Options dialog box appears.
2 In the directory tree, expand Projects and Solutions and choose VC++
Directories.
3 In the Platform drop-down list, choose the platform SDK for your application.
Note: Visual Studio does not support iCE-Standard or iCE-Premium.
22
IDL Resource Kit Developer’s Guide
4 In the Show Directories for drop-down list, choose Include files.
5 Double-click the space below the last directory in the Include files list. An entry
field and a Browse button (marked with “...”) appear.
6 Enter the path to the Intermec include files (typically \Program
Files\Intermec\Developer Library\Include). You can also click the Browse button
to browse to the directory.
7 Click Open. The paths are added to the list.
8 In the Show Directories for drop-down list, choose Library files.
9 Double-click the space below the last directory in the Library files list. An entry
field and a Browse button appear.
10 Enter the path to the Intermec library files (typically \Program
Files\Intermec\Developer Library\Lib\ and then choose the appropriate
platform). You can also click the Browse button to browse to the directory.
11 Click Open. The paths are added to the list.
12 Click OK.
Extending C++ Paths in eVC4
The paths for the Intermec include files and library files for C/C++ are automatically
integrated into eVC4. To use a C/C++ function, simply add an #include statement
for the header file in your source code file, and add the library file name in eVC4
Project Settings. Refer to the function reference information in the Resource Kit
user’s guides for the names of the header and library files for the function.
Note: If you install a platform SDK after installing the Resource Kits, you should
run the IDL Sync Utility so that the eVC4 directory settings for the platform are
updated properly to include the Intermec paths. The utility is at Start > All
Programs > Intermec > Resource Kits > IDL Sync Utility.
Building and Running Your Application
For information on building an application and deploying it to a device, see the
documentation for your development environment.
Make sure you select the appropriate platform and device in the drop-down lists in
the development environment.
C/C++ Programming Tips
This section includes programming tips specific to C/C++ development for
Intermec computers and peripherals.
Capturing Keystrokes on a CK30
Because the CK30 does not have a touch screen, navigation and actions are triggered
by keystrokes. This section explains how to capture keystrokes on the CK30.
Override PreTranslateMessage in each dialog class in an MFC application as
described next.
1 Open the header file (.h) for the dialog class and add the following prototype in
the section marked “protected”:
IDL Resource Kit Developer’s Guide
23
virtual BOOL PreTranslateMessage(LPMSG lpMsg);
2 Open the source file (.cpp) for the dialog class and add the same function, as in
the following example:
BOOL CSampleDlg::PreTranslateMessage(LPMSG lpMsg)
{
if (lpMsg->message == WM_KEYUP)
{
switch(((int)(lpMsg->wParam)))
{
// VK_ values are defined in Windows header file
winuser.h
case VK_F1:
. . .
break;
case VK_F2:
. . .
break;
case VK_F3:
. . .
break;
case VK_ESCAPE:
. . .
break;
}
}
}
if( lpMsg->message == WM_KEYDOWN)
{
switch(((int)(lpMsg->wParam)))
{
case VK_RETURN:
return TRUE;
break;
}
}
return CDialog::PreTranslateMessage(lpMsg);
}
General Programming Tips
This section includes general tips and tricks for developing applications to run on
your Intermec computer.
24
IDL Resource Kit Developer’s Guide
Managing Device Settings
Changes made via Intermec SmartSystems or Wavelink Avalanche can modify
registry values. If your application updates device settings, you should use the
SmartSystems APIs in the Device Management Resource Kit rather than updating
the registry directly. Otherwise your changes will be lost when the Intermec
computer connects to the SmartSystems or Avalanche console.
Locking Down Handheld Computers
If you need to prevent end-users from accessing unauthorized applications, use
Intermec’s iLaunch or Intermec Browser applications in your solution.
For information, go to www.intermec.com and choose Products > Applications
and Software > Developer Library (for iLaunch) or Emulators/Browsers (for
Intermec Browser).
Updating Applications Remotely
Intermec SmartSystems Foundation and Wavelink Avalanche both provide the
ability to update software applications on Intermec computers. For more
information, see “Deploying Your Application” on page 33.
Managing Power and Battery Life
The battery life of your Intermec computers is greatly impacted by the screen
backlight timeout and brightness level settings. Likewise, the Auto-Shutoff setting,
which defines the amount of time of user inactivity before the Intermec computer
suspends, can also affect battery life.
Backlight timeout values, brightness levels, and Auto-Shutoff settings can be
adjusted via SmartSystems. Intermec recommends that you work with your users to
test potential settings for battery performance and best screen readability. For
example, if your users are working in an artificial light setting, a brightness level of
50% provides good readability, while users working in bright natural light need a
brightness level of 75% to 100%.
Applications should avoid “busy waits” – polling loops used solely to wait for time
to elapse or for resources to become available. Busy waits interfere with the
operating system’s ability to manage system power automatically. There is a wealth
of mechanisms that allow a process or thread to “block” while waiting for a resource.
Intelligent use of peripherals is important. Whenever possible, a peripheral should
be powered up only when it is needed. For example, instead of initializing a scanner
device at application startup, only turn on the scanner at the point when it is
needed, and immediately turn it off when it is no longer needed. It may be
convenient to leave devices turned on at all times, but doing so severely decreases
battery life.
Managing Application Persistence Through a Cold Boot
For your application to persist across cold boots, it must be installed in non-volatile
storage. For a list of options, see “Choosing a Target Location” on page 28.
IDL Resource Kit Developer’s Guide
25
Troubleshooting Windows CE and Windows Mobile Memory Issues
Virtual memory is a scarce resource on Windows CE and Windows Mobile devices.
When developing an application, you should follow best practices for memory
management to avoid running out of memory. This section provides information
for recognizing when you might be encountering a memory issue, determining if
virtual memory is indeed the culprit, and resolving virtual memory problems.
Helpful articles on the subject are listed at the end of this section.
Symptoms of Low Virtual Memory
Symptoms of low virtual memory can include the following behaviors:
•
An application may or may not run depending on load order.
•
A device may or may not be accessible. For example, your application stops
printing after it has been running awhile.
•
A device displays unexplainable behavior.
•
Device.exe error messages.
Checking for Virtual Memory Problems
Use one or more of the available memory tools to analyze the system. For
comparison, you should analyze the system before and after starting your
application.
•
MemoRx (“Memory Doctor”) allows the user to quickly glance at the report and
know if VM is a likely culprit. If it is, detailed investigation requires one of the
other tools listed here. MemoRx runs only on Windows Mobile 5 and later
devices. For more information, see the article “Virtual Memory, Hopper and
your device.”
•
Dumpmem can be used on both Windows CE and Windows Mobile devices. For
more information, see the article “Dumpmem Utility for Viewing Virtual
Address Space on Pocket PC 2002.”
•
If you own Windows CE Platform Builder, you can use command “mi” in the
Target Control Window. For more information, refer to Windows CE Platform
Builder documentation.
•
Entrek Software offers tools with a free evaluation period. From their
Companion Utilities page, see the virtual memory walker utility
(vmwalkce.exe).
•
DevHealth provides a detailed memory analysis, but is available only to Windows
Mobile OEMs and runs only on Windows Mobile devices. It is included in
Windows Mobile 5 (and later) Platform Builder (not to be confused with
Windows CE Platform Builder).
Resolving Virtual Memory Problems
If you determine that your application is out of memory, here are some options:
•
26
Check your application for memory leaks. See “Application Verifier for
Windows CE and Windows Mobile 5.0,” which refers to the stand-alone
version of Application Verifier Tool for Windows Mobile 5.0. This tool also
works with Windows Mobile 6 and can be downloaded at http://
IDL Resource Kit Developer’s Guide
www.microsoft.com/downloads/details.aspx?FamilyID=d275348a-d9374d88-ae25-28702c78748d&displaylang=en.
If you do not own Platform Builder, take special note of the instruction on the
download page to also install the Windows CE 5.0 Stand Alone CETK.
•
Use the Intermec InstallSelect utility to deselect components that you do not
need. InstallSelect is factory installed in the main Windows folder of many
Intermec computers.
•
Reduce the number of .dlls used by your application. All virtual memory is
reserved on 64KB boundaries, so round up each .dll size to the next multiple of
64KB when estimating virtual memory usage. Here are some ways to remove
.dlls:
•
Statically link when possible.
•
Move code from .dlls to the .exe.
•
Combine the code from multiple .dlls into a single .dll.
•
Use resource-only .dlls, which use a different area of memory.
•
If your application uses multiple threads, try to reduce the number of process
threads. Each thread has a certain amount of memory overhead; for example,
each thread allocates a stack.
•
For unmanaged C++ applications developed in Visual Studio, check the Stack
Reserve Size. Under Project > Properties, go to Configuration Properties >
Linker > System > Stack Reserve Size. A setting of 0 causes the linker to specify
1 MB as the amount of virtual address space to reserve for all new threads. If the
setting is 0, you should change it to 65536 (64 KB).
For more information on managing virtual memory, see these MSDN articles:
•
Memory and Power Management
•
Windows CE .NET Advanced Memory Management
•
Effective Memory, Storage, and Power Management in Windows Mobile 5.0
•
A Tour of Windows CE Memory Tools
•
Toolhelp Reference
Packaging Your Application for Deployment
For very simple applications the application executable may be the only file that
needs to be deployed; more typically, you will have a set of files to install.
•
For Windows XP or XPe applications, you can create a Windows Installer (.msi)
file.
•
For Windows Mobile and Windows CE applications you need to create a .cab file.
See the Microsoft documentation for more information.
Visual Studio includes support for .msi and .cab projects.
IDL Resource Kit Developer’s Guide
27
Choosing a Target Location
When packaging your application, one of the decisions you must make is to select
the target location for the application on the Intermec computer. Intermec
computers support these target locations:
•
The object store, which is RAM that looks like a disk. In some Intermec
computers, everything in the object store is deleted when the computer is cold
booted. In other computers, the object store is a DiskOnChip® flash so all items
in it survive a cold boot.
•
Persistent Storage Manager (PSM), an area of storage embedded in a section of
the system flash memory. This storage area is not erased during a cold boot. It
may, however, be erased if the image is reflashed.
•
The flash file store, an area of storage embedded in a section of the system flash
memory. This storage area is not erased during a cold boot. It may, however, be
erased if the image is reflashed.
•
Storage cards. Many Intermec computers support a storage card such as a
CompactFlash or Secure Digital card. The folder representing the storage card
may be named “\Storage Card”, “\SD Card”, or “\SDMMC Disk”, depending on
the Intermec computer. For specific information, see the user’s manual for your
Intermec computer.
Note: Not all computers support the same target locations. For more information,
see the user’s manual for your Intermec computer.
Launching Your Application Automatically
To have your application start automatically when the Intermec computer starts up,
place the application or a shortcut to your application in the \Windows\Startup
folder on the computer.
If you have several programs that must run in a specific order as the computer starts
up, you may be able to use the AutoRun system that allows you to customize the way
programs load. For more information on AutoRun, see the next section.
Some Intermec computers provide additional utilities you can run at boot time with
the AutoRun system:
•
Use AutoCab to automatically install .cab files on the Intermec computer. For
more information, see “About the AutoCab Utility” on page 30.
•
Use AutoCopy to move files from one location to another. For more
information, see “About the AutoCopy Utility” on page 31.
•
Use AutoReg to add registry information to the Windows CE registry. For more
information, see “About the AutoReg Utility” on page 32.
Note: See the user’s manual for your Intermec computer to determine which
AutoRun utilities are supported.
28
IDL Resource Kit Developer’s Guide
If you require advanced control of the startup process, some computers provide
PreShell and PostShell systems for starting applications before or after the
Microsoft Shell is launched. For more information, see “About the PreShell and
PostShell Programs” on page 32.
About the AutoRun Program
Use AutoRun to configure application launch sequences. The startup sequence for
Intermec Windows CE and Windows Mobile computers searches the available media
for AutoRun (Autorun.exe) in a 2577 folder and executes this program from the first
media on which it is found. The search order is as follows:
•
Secure Digital (SD) or Storage Card
•
Object Store – may be non-volatile storage or RAM
•
Disk on Chip – may map as Object Store
•
Flash File Store – may map as Object Store
Note: Not all computers support all of these media. For more information, see the
user’s manual for your Intermec computer.
AutoRun is configured through the AutoRun data file (Autorun.dat), which must
be in the same folder as the AutoRun program. Autorun.dat launches the .cab
installation utility, AutoCab, and then launches customer programs listed in the
Autouser.dat file.
Note: Do not modify Autorun.dat. You should only modify Autouser.dat to include
your applications.
AutoRun Commands
AutoRun supports these script commands in Autouser.dat:
•
EXEC: Launches a specified program, waits for it to complete (up to 10 minutes).
•
CALL: Processes a specified file of commands and returns.
•
CHAIN: Processes a specified file of commands and does not return.
•
RUN: Loads a specified program and executes it.
•
LOAD: Loads a specified program and executes it.
AutoRun handles quoted file names for the first parameter which allows you to
specify path names or file names that contain white space. Note that only one set of
quotes per command is supported, as seen in this example:
Example of AUTOUSER.DAT File
RUN “Flash File Store\Apps\some.exe” arg1, arg2, arg3
CALL “Flash File Store\2577\usercmds.dat”
IDL Resource Kit Developer’s Guide
29
About the AutoCab Utility
Use the AutoCab program (AUTOCAB.EXE) to extract files, registry settings, and
shortcuts from Windows CE and Windows Mobile .cab files. AutoCab processes all
.cab files in the “\CabFiles” folder relative to the current location of AutoCab, unless
the location is overridden by command line arguments. AutoCab can be invoked by
AutoRun, or run as a stand-alone program to install a .cab file or a folder of .cab
files.
•
AutoCab only installs the .cab file if the .cab file was not previously installed by
AutoCab. To track the .cab file installation, AutoCab marks the file with the
System attribute. This attribute is ignored if the computer is performing a cold
boot on a non-persistent file system.
•
AutoCab preserves the .cab file after installation if the ReadOnly attribute is set.
If not set, the .cab file is deleted automatically after installation.
Note: See the user’s manual for your Intermec computer to determine if the
computer supports AutoCab.
AutoCab Commands
AutoCab [-ChkRst=][-File=][-Force][-Log=][-Move=][-Quiet=][-Show=]
[-Signal=]
30
Command
Description
-ChkRst=
Set to 1 to configure AutoCab to check for the Reset flag after all .cab files
are installed. This file is created by .cab files that want a warm reset after
installation. Default is 0 (do not check for flag).
-File=
Specifies the .cab files to extract. Note that the specified files need not end
with the .cab extension.
Enclose the pathname in quotes. Otherwise, AutoCab reads the entire line as
the pathname.
-Force
Forces the specified .cab file to extract regardless of whether it was previously
extracted.
-Log=
Set to 1 to create a log file in the same folder that AutoCab is running. Useful
for debugging .cab installation. Default is 0 (disabled).
-Move=
Set to 1 to force source .cab file deletion, even when read-only bit set on file.
Default is 0 (disabled).
-Quiet=
Set to 0 to allow AutoCab to display user message box on errors. Useful for
debugging .cab installation. Default is 1 (keep quiet).
-Show=
Set to 0 to prevent showing any installation progress interfaces. Also
prevents user from canceling installation.
Set to 1 (default) to show normal installation.
Set to 2 to show Intermec installation progress interface (user can see what is
installing but cannot cancel it).
-Signal=
Set to string name of signal to use at the completion of .cab installation
before a reboot occurs (if enabled). AutoCab uses WaitForSingleObject on
this name. Default is disabled.
IDL Resource Kit Developer’s Guide
Notes
If the -File= command references a single .cab file, that file is processed. If the -File=
command references a directory, all the .cab files in that directory are processed.
If the -File= command is a wild card pattern, all files matching that pattern are
processed. If the -File= command is omitted, AutoCab processes all the .cab files in
directory “\CabFiles.”
Examples
Install all .cab files in the \Flash File Store\XYZ directory, regardless:
AutoCab -FILE="\Flash File Store\XYZ\*.cab" -FORCE
Install only one .cab file and use Intermec .cab installation display:
AutoCab -FILE=”\myCab\app.cab” -Show=2
About the AutoCopy Utility
AutoCopy (Autocopy.exe) copies or moves files from one location to another. It has
no user interface and is configured through command line arguments as described
next.
Note: See the user’s manual for your Intermec computer to determine if the
computer supports AutoCopy.
AutoCopy Commands
AutoCopy [-D["W"]] [-L["X"]] [-M[D]] [-Q[Y]] [-S["Z"]]
Command
Description
-D
Indicates the destination file name and must be fully qualified. W is a string
value.
-L
Indicates a fully qualified file name for logging to enable. Default is disabled.
X is a string value.
-M
Moves file to a destination rather than copies the file. D is an integer value (1
indicates enabled, 0 (default) is disabled).
-Q
Indicates if a message box should appear when an error occurs. Default is
disabled. Y is an integer value.
-S
Indicates a source file name and must be fully qualified. Z is a string value.
Notes
The return code from the process uses the standard error codes defined in
Winerror.h.
Examples
Use AutoCopy to copy the Audio control panel from the Flash File Store to the
Windows directory:
autocopy.exe -S"\Flash File Store\System\Audio.cpl" D"\Windows\Audio.cpl"
Use AutoCopy to move the Audio control panel from the Flash File Store to the
Windows directory:
autocopy.exe -M1 -S"\Flash File Store\System\Audio.cpl" D"\Windows\Audio.cpl"
IDL Resource Kit Developer’s Guide
31
About the AutoReg Utility
AutoReg (Autoreg.exe) adds registry information to the Windows CE registry. It has
no user interface and is configured through command line arguments.
Note: See the user’s manual for your Intermec computer to determine if the
computer supports AutoReg.
AutoReg Commands
AutoReg [-D] [-HKey] [-Q] “filename”
Command
Description
-D
Deletes the registry file after successfully loading it. This allows for
systems that have hives implemented.
-H
Saves the registry path, and all child entries, to the specific .REG registry
file.
-Q
Indicates whether a message box should appear when a fatal error occurs.
filename
Fully qualified file name to read from or write to, encased in double
quotes to support spaces in paths or file names.
Notes
The return code from the process uses the standard error codes defined in
Winerror.h.
Examples
Use AutoReg to install this registry information:
autoreg.exe "\Flash File Store\install.reg"
Use AutoReg to install this registry information, and delete the file afterwards:
autoreg.exe -D "\Flash File Store\install.reg"
Use AutoReg to extract registry information to a file:
autoreg.exe -HHKEY_LOCAL_MACHINE\Software\Intermec\Version
"\version.reg"
In this example, the input file format is the standard registry format which should
ease the creation of the input file since there are many publicly available utilities to
generate a registry file besides Notepad. One example of a tool is the Microsoft
Remote Registry Editor.
About the PreShell and PostShell Programs
Some computers provide PreShell and PostShell systems for starting applications
before or after the Microsoft Shell is launched.
Using PreShell
PreShell (Preshell.exe) is launched prior to the Microsoft Shell and must execute a
SignalStartup call before the Microsoft Shell launches.
32
IDL Resource Kit Developer’s Guide
PreShell searches the “\Flash File Store\SYSTEM” folder for an executable of the
same name. If one exists, that application is launched. This application can do what
a customer desires prior to launching the Microsoft Shell. You can use PreShell to
make your application the shell of the system. If desired, do not exit the custom
shell nor call SignalStarted.
Using PostShell
PostShell (Postshell.exe) can launch an application after the Microsoft Shell has
launched. For example, some utility applications can take advantage of “hooking”
the startup for maintenance.
PostShell searches the “\Flash File Store\SYSTEM” folder for an executable of the
same name. If one exists, that application is launched. This application can do what
a customer desires and is launched after the Microsoft Shell starts initialization.
Note: The Microsoft Shell does not require complete initialization before this
application begins, which may cause some application or system issues. These issues
are expected and are considered normal for those developing PostShell applications.
The application must test if the APIs it requires are available.
Deploying Your Application
There are multiple ways to get your application to an Intermec computer. The best
choice depends on the number of computers involved.
Deploying Applications via ActiveSync or Storage Cards
If you have only a few Intermec computers that use your application, you can deploy
your applications to one computer at a time using Microsoft ActiveSync. ActiveSync
supports serial, USB, Ethernet, IrDA, and 802.11 connections. Files can be copied
using File Explorer on a desktop or a laptop PC.
Many Intermec computers support a storage card such as a CompactFlash card or
Secure Digital card. You can copy your application install file to the card, install the
card in the Intermec computer, then use File Explorer to navigate to the install file
and run it.
Some Intermec computers also support the AutoCab utility, which runs on warm
and cold boots and extracts all .cab files that reside in a “\CabFiles” folder on the
computer. By placing your .cab file in the “\CabFiles” folder, you do not need to
manually run the .cab file to install it. For more information, see “About the
AutoCab Utility” on page 30.
Deploying Applications through the FTP Server
Many Intermec computers have a built-in FTP server that connects to a network via
Ethernet, 802.11, or WAN. The FTP server allows connections to the Intermec
computer for file transfers or computer management functions. You can also create
FTP scripts to automate the process of copying files to the Intermec computer.
Using the FTP server is a good option if you have a large number of Intermec
computers using your application.
IDL Resource Kit Developer’s Guide
33
See the user’s manual for your computer to determine if it supports FTP Server and
for details about using FTP Server.
Deploying Applications using SmartSystems Foundation
If your Intermec computer has the SmartSystems client loaded on it, you can use the
SmartSystems console to drag-and-drop your application onto your Intermec
computers. This is a good choice if you have many Intermec computers that use the
application.
The console is part of SmartSystems Foundation. To learn more about
SmartSystems Foundation, go to www.intermec.com/smartsystems.
To use SmartSystems console to install an application
1 Use the Bundle Tool to create a SmartSystems bundle for your application and
install it into the software vault. For more information, see the online help.
2 From the SmartSystems console in the Software Vault, drag-and-drop the
application onto each Intermec computer that needs the application.
You can also use SmartSystems Scan-to-Connect to connect the computer to your
network and install software. For more information,see the SmartSystems
Foundation Console online Help.
Deploying Applications with Wavelink Avalanche
If your Intermec computer has the Avalanche Enabler loaded on it, you can use the
Wavelink Avalanche™ device management system to install applications to the
computer.
Note: Avalanche is not supported by the CN50 Mobile Computer.
Each time the Avalanche Enabler is activated (typically on a warm boot), the
Intermec computer attempts to connect to the Avalanche Agent. When the
computer connects to the agent, the agent determines whether or not an update is
available and immediately starts the software upgrade, file transfer, or configuration
update.
To use Avalanche to remotely manage the Intermec computer
1 Install software packages and updates for the Intermec computer using the
Avalanche Administrative Console.
2 Schedule the Intermec computer updates or manually initiate an update using
the Avalanche Administrative Console.
For more information on using Wavelink Avalanche, contact your local Intermec
representative or visit the Wavelink web site at www.wavelink.com.
Getting Support
Visit Intermec Knowledge Central at intermec.custhelp.com to review technical
information or to request technical support for your Intermec products.
34
IDL Resource Kit Developer’s Guide
Additional Resources
For further information, visit the Intermec Developer Library web site at
www.intermec.com/idl. The web site includes links to the Developer Resource Kits
and other tools for application development.
You can also join the Intermec Developers Forum at community.intermec.com/
intr. The Developers Forum is apeer-to-peer community for anyone developing
applications for Intermec computers and peripherals.
You can visit www.intermec.com to download PDF versions of our current
manuals. For more information, see “Related Documents” on page x.
IDL Resource Kit Developer’s Guide
35
Worldwide Headquarters
6001 36th Avenue West
Everett, Washington 98203
U.S.A.
tel 425.348.2600
fax 425.355.9551
www.intermec.com
© 2009 Intermec Technologies
Corporation. All rights reserved.
Intermec Developer Library Resource Kit Developer’s Guide
*934-006-005*
P/N 934-006-005