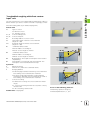
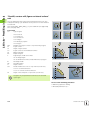
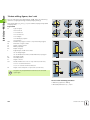
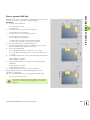
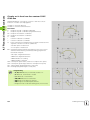
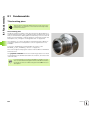
1
User’s Manual MANUALplus 620 CNC PILOT 640 smart.Turn and DIN Programming NC Software 548430-03 548431-03 688946-03 688947-03 HEIDENHAIN MANUALplus 620, CNC PILOT 620/640 1 English (en) 11/2014 smart.Turn and DIN PLUS programming This manual describes functions and features provided by lathe controls as of the following NC software numbers. Control NC software number MANUALplus 620 (HEROS 5) 548430-03 MANUALplus 620E (HEROS 5) 548431-03 CNC PILOT 640 (HEROS 5) 688946-03 CNC PILOT 640E (HEROS 5) 688947-03 The suffix E indicates the export version of the control. The export version of the control has the following limitations: Simultaneous linear movement in up to 4 axes HEROS 5 identifies the new operating system of HSCI-based controls. Machine operation and cycle programming are described in the MANUALplus 620 (ID 634864-xx) and CNC PILOT 640 (ID 730870-xx) User's Manuals. Please contact HEIDENHAIN if you require a copy of one of these manuals. The machine manufacturer adapts the features offered by the control to the capabilities of the specific machine tool by setting machine parameters. Therefore, some of the functions described in this manual may not be among the features provided by the Steuerung on your machine tool. Some of the Steuerung functions that are not available on every machine are: Positioning of spindle (M19) and driven tool Operations with the C or Y axis Please contact your machine manufacturer for detailed information on the features that are supported by your machine tool. Many machine manufacturers and HEIDENHAIN offer programming courses. We recommend these courses as an effective way of improving your programming skill and sharing information and ideas with other Steuerung users. HEIDENHAIN also offers the DataPilot programming station for PCs, which is designed for use with the respective control. The DataPilot is excellently suited for both shop-floor programming as well as offlocation program creation and production planning. It is also ideal for training purposes. The DataPilot can be run on PCs with WINDOWS operating systems. Control Programming station NC software MANUALplus 620 DataPilot MP620 634132-07 CNC PILOT 640 729666-03 DataPilot CP640 Intended place of operation The MANUALplus 620, CNC PILOT 640 complies with the limits for a Class A device in accordance with the specifications in EN 55022, and is intended for use primarily in industrially-zoned areas. Legal information This product uses open source software. Further information is available on the control under Organization mode of operation Second soft-key row LICENSE INFO SOFT KEY HEIDENHAIN MANUALplus 620, CNC PILOT 640 3 New functions of software 54843x-01 and 68894x-01 On machines with a B axis it is now also possible to drill, bore, and mill in oblique planes. In addition to this, the B axis enables you to use tools even more flexibly during turning (see „Tilted working plane” on page 584). The control now provides numerous touch probe cycles for various applications (see „General information on touch probe cycles (software option)” on page 454): Calibrating a touch trigger probe Measuring circles, circle segments, angle and position of the C axis Misalignment compensation Single-point and double-point measurement Finding a hole or stud Zero point setting in the Z or C axis Automatic tool measurement The new TURN PLUS function automatically generates NC programs for turning and milling operations based on a fixed machining sequence (see „TURN PLUS mode of operation” on page 552). G940 now provides a way to calculate the tool lengths in the basic (definition) position of the B axis (see „Calculate variables automatically G940” on page 385) For machining operations that require rechucking, you can define a separation point on the contour description with G44 (see „Separation point G44” on page 222). G927 enables you to convert tool lengths to the reference position of the tool (B axis = 0) (see „Convert lengths G927” on page 385). Recesses that were defined with G22 can now be machined with the new Cycle 870 ICP Recessing (see „"ICP recessing" unit” on page 79). 4 New functions of software 68894x-02 and 54843x-02 The miscellaneous function "Shift zero point" was introduced in ICP (see User's Manual) In ICP contours, you can now calculate fit sizes and internal threads using an input form (see User's Manual) The miscellaneous functions "Duplicate in linear/circular series, and by mirroring" were introduced in ICP (see User's Manual) The system time can now be set using an input form (see User's Manual) The parameters K, SD and U have been added to parting cycle G859 (see User's Manual) The angle of approach and departure can now be defined for ICP recess turning (see User's Manual) With TURN PLUS you can now also create programs for machining on the opposing spindle and for multipoint tools (see „Full-surface machining with TURN PLUS” on page 578) It is now also possible to select a milling contour in G797 "Area milling" (see „Area milling, face G797” on page 355) The parameter Y was added to G720 (see „Spindle synchronization G720” on page 392) The parameters O and U were added to G860 (see „Recessing G860” on page 283) HEIDENHAIN MANUALplus 620, CNC PILOT 640 5 New functions of software 68894x-03 and 54843x-03 The parameter WE was added to G32 (see „Single thread cycle G32” on page 307) The parameters U, V and W were added to G51, G56 and G59 (see „Zero point shifts” on page 259) Parameters ensuring maximum compatibility with the ICP contour description were added to G0, G1, G12/G13, G101, G102/G103, G110, G111, G112/G113, G170, G171, G172/G173, G180, G181 and G182/G183 (see „Basic contour elements” on page 201) (see „Front and rear face contours” on page 230) (see „Lateral surface contours” on page 239) (see „Contours in the XY plane” on page 504) (see „Contours in the YZ plane” on page 513) The parameter C was added to G808 (see „Hobbing G808” on page 543) The parameter U was added to G810 and G820 (see „Contourbased turning cycles” on page 270) The parameter D was added to G4 and G860 (see „Recessing G860” on page 283) (see „Period of dwell G4” on page 381) The parameter B was added to G890 (see „Finish contour G890” on page 290) The parameter RB was added to the units G840 "Contour milling, figures" and G84X "Pocket milling, figures" (see „The Global form” on page 64) (see „"Contour milling, figures, face" unit” on page 139) (see „"Pocket milling, figures, face" unit” on page 142) (see „"Contour milling, figures, lateral surface" unit” on page 151) (see „"Pocket milling, figures, lateral surface" unit” on page 154) The parameters SP and SI were added to all tapping units (see „Units—Centric drilling” on page 80) (see „Units—Drilling in C axis” on page 84) (see „"ICP tapping, Y axis" unit” on page 169) G48 was introduced to allow limiting the rapid traverse rate for rotary and linear axes (see „Reduce rapid traverse G48” on page 253) G53, G54 and G55 were introduced for zero point shifts using offset values (see „Zero point offsets—Shift G53/G54/G55” on page 261) The functions for superimposing axis movements G725 "Eccentric turning", G726 "Transition to eccentric" and G727 "Eccentric X" were introduced (see „Eccentric turning G725” on page 399) (see „Transition to eccentric G726” on page 401) (see „Eccentric X G727” on page 403) The load monitoring functions G995 "Monitoring zone definition" and G996 "Type of load monitoring" were introduced (see „Monitoring zone G995” on page 388) (see „Load monitoring G996” on page 389) The AWG submode now also supports tools with quick-change holders (see „Tool selection, turret assignment” on page 566) A tree view is available in the smart.Turn operating mode (see „Editing with active tree view” on page 40) Skip levels can be defined in the smart.Turn operating mode (see „Skip level” on page 426) 6 A function was introduced to query information on the tool status (see „Reading diagnostic bits” on page 413) In the Teach-In submode, the parameter RB was added to the cycles "Figure, axial", "Figure, radial", "ICP contour, axial" and "ICP contour, radial" (see User's Manual) In the Teach-In submode, the parameters SP and SI were added to all tapping cycles (see User's Manual) The Simulation submode provides an enhanced 3-D view (see User's Manual) Tool control graphics were introduced in the Tool Editor mode of operation (see User's Manual) An ID number can be entered directly in the turret list (see User's Manual) The tool list provides additional filter options (see User's Manual) The Transfer submode provides enhanced tool backup functionality (see User's Manual) The Transfer submode provides enhanced tool import functionality (see User's Manual) The Set Axis Values menu item now also enables you to define offset values for shifts using G53, G54 and G55 (see User's Manual) Load monitoring was introduced in the Program Run submode (see User's Manual) The definition of skip levels was introduced in the Program Run submode (see User's Manual) A function was introduced to query information on the tool status (see User's Manual) A user parameter was introduced to enable you to activate and deactivate the software limit switches for the Simulation submode (see User's Manual) A user parameter was introduced to enable you to suppress the error message for the software limit switches (see User's Manual) A user parameter was introduced to enable you to use NC Start for executing a tool change programmed in the T,S,F dialog (see User's Manual) A user parameter was introduced to divide the T,S,F dialog into separate dialogs (see User's Manual) A user parameter was introduced to enable you to prevent the zero point shift G59 that is automatically output in TURN PLUS (see User's Manual) HEIDENHAIN MANUALplus 620, CNC PILOT 640 7 8 About this manual About this manual The symbols used in this manual are described below. This symbol indicates that important information about the function described must be considered. This symbol indicates that there is one or more of the following risks when using the described function: Danger to workpiece Danger to fixtures Danger to tool Danger to machine Danger to operator This symbol indicates that the described function must be adapted by the machine tool builder. The function described may therefore vary depending on the machine. This symbol indicates that you can find detailed information about a function in another manual. Would you like any changes, or have you found any errors? We are continuously striving to improve our documentation for you. Please help us by sending your requests to the following e-mail address: [email protected]. HEIDENHAIN MANUALplus 620, CNC PILOT 640 9 10 About this manual Contents „NC programming” „smart.Turn units” „smart.Turn units for the Y axis” „DIN Programming” „Touch probe cycles” „DIN programming for the Y axis” „TURN PLUS” „B axis” „Overview of units” „Overview of G codes” 1 2 3 4 5 6 7 8 9 10 1 NC programming ..... 31 1.1 smart.Turn and DIN (ISO) programming ..... 32 Contour follow-up ..... 32 Structured NC program ..... 33 Linear and rotary axes ..... 34 Units of measure ..... 34 Elements of an NC program ..... 35 1.2 The smart.Turn editor ..... 36 Menu structure ..... 36 Parallel editing ..... 37 Screen layout ..... 37 Selecting the editor functions ..... 38 Editing with active tree view ..... 38 Shared menu items ..... 39 1.3 Program section code ..... 45 HEADER section ..... 46 CLAMPS section ..... 47 TURRET section ..... 48 BLANK section ..... 48 AUXIL_BLANK section ..... 48 FINISHED section ..... 48 AUXIL_CONTOUR section ..... 48 FACE_C, REAR_C sections ..... 49 LATERAL_C section ..... 49 FACE_Y, REAR_Y sections ..... 49 LATERAL_Y section ..... 50 MACHINING section ..... 51 END code ..... 51 SUBPROGRAM section ..... 51 RETURN code ..... 51 CONST code ..... 52 VAR code ..... 52 1.4 Tool programming ..... 53 Setting up a tool list ..... 53 Editing tool entries ..... 54 Multipoint tools ..... 54 Replacement tools ..... 55 HEIDENHAIN MANUALplus 620, CNC PILOT 640 13 2 smart.Turn units ..... 57 2.1 smart.Turn units ..... 58 "Units" menu ..... 58 The smart.Turn unit ..... 58 2.2 Units—Roughing ..... 65 "Longitudinal roughing in ICP" unit ..... 65 "Transverse roughing in ICP" unit ..... 66 "Contour-parallel roughing in ICP" unit ..... 67 "Bidirectional roughing in ICP" unit ..... 68 "Longitudinal roughing with direct contour input" unit ..... 69 "Transverse roughing with direct contour input" unit ..... 70 2.3 Units—Recessing ..... 71 "ICP contour recessing" unit ..... 71 "ICP recess turning" unit ..... 72 "Contour recessing with direct contour input" unit ..... 73 "Recess turning with direct contour input" unit ..... 74 "Parting" unit ..... 75 "Undercutting (H, K, U)" unit ..... 76 "ICP recessing" unit ..... 77 2.4 Units—Centric drilling ..... 78 "Centric drilling" unit ..... 78 "Centric tapping" unit ..... 80 "Boring, centric countersinking" unit ..... 81 2.5 Units—Drilling in C axis ..... 82 "Single hole, face" unit ..... 82 "Linear pattern drilling, face" unit ..... 84 "Circular pattern drilling, face" unit ..... 86 "Tapping, face" unit ..... 88 "Linear tapping pattern, face" unit ..... 89 "Circular tapping pattern, face" unit ..... 90 "Single hole, lateral surface" unit ..... 91 "Linear pattern drilling, lateral surface" unit ..... 93 "Circular pattern drilling, lateral surface" unit ..... 95 "Tap hole, lateral surface" unit ..... 97 "Linear tapping pattern, lateral surface" unit ..... 98 "Circular tapping pattern, lateral surface" unit ..... 99 "ICP drilling, C axis" unit ..... 100 "ICP tapping, C axis" unit ..... 102 "ICP boring/countersinking, C axis" unit ..... 103 14 2.6 Units—Predrilling in C axis ..... 104 "Predrill, contour mill, figures on face" unit ..... 104 "Predrill, contour mill, ICP on face" unit ..... 106 "Predrill, pocket mill, figures on face" unit ..... 107 "Predrill, pocket mill, ICP on face" unit ..... 109 "Predrill, contour mill, figures on lateral surface" unit ..... 110 "Predrill, contour mill, ICP on lateral surface" unit ..... 112 "Predrill, pocket mill, figures on lateral surface" unit ..... 113 "Predrill, pocket mill, ICP on lateral surface" unit ..... 115 2.7 Units—Finishing ..... 116 "ICP contour finishing" unit ..... 116 "Longitudinal finishing with direct contour input" unit ..... 118 "Transverse finishing with direct contour input" unit ..... 119 "Relief turns (undercut) type E, F, DIN76" unit ..... 120 "Measuring cut" unit ..... 122 2.8 Units—Threads ..... 123 Overview of thread units ..... 123 Handwheel superimposition ..... 123 Parameter V: Type of infeed ..... 124 "Thread, direct" unit ..... 125 "ICP thread" unit ..... 126 "API thread" unit ..... 128 "Tapered thread" unit ..... 129 2.9 Units—Milling, face ..... 131 "Slot, face" unit ..... 131 "Linear slot pattern, face" unit ..... 132 "Circular slot pattern, face" unit ..... 133 "Face milling" unit ..... 134 "Face milling ICP" unit ..... 135 "Thread milling" unit ..... 136 "Contour milling, figures, face" unit ..... 137 "ICP contour milling, face" unit ..... 139 "Pocket milling, figures, face" unit ..... 140 "ICP pocket milling, face" unit ..... 142 "Engraving, face" unit ..... 143 "Deburring, face" unit ..... 144 HEIDENHAIN MANUALplus 620, CNC PILOT 640 15 2.10 Units—Milling, lateral surface ..... 145 "Slot, lateral surface" unit ..... 145 "Linear slot pattern, lateral surface" unit ..... 146 "Circular slot pattern, lateral surface" unit ..... 147 "Helical slot milling" unit ..... 148 "Contour milling, figures, lateral surface" unit ..... 149 "ICP contour milling, lateral surface" unit ..... 151 "Pocket milling, figures, lateral surface" unit ..... 152 "ICP pocket milling, lateral surface" unit ..... 154 "Engraving, lateral surface" unit ..... 155 "Deburring, lateral surface" unit ..... 156 2.11 Units—Special operations ..... 157 "Program beginning (START)" unit ..... 157 "C axis ON" unit ..... 159 "C axis OFF" unit ..... 159 "Subprogram call" unit ..... 160 "Program section repeat" unit ..... 161 "Program end" unit ..... 162 "Tilt plane" unit ..... 163 16 3 smart.Turn units for the Y axis ..... 165 3.1 Units—Drilling in the Y axis ..... 166 "ICP drilling, Y axis" unit ..... 166 "ICP tapping, Y axis" unit ..... 167 "ICP boring/countersinking, Y axis" unit ..... 168 3.2 Units—Predrilling in Y axis ..... 169 "Predrill, contour mill, ICP in XY plane" unit ..... 169 "Predrill, pocket mill, ICP in XY plane" unit ..... 170 "Predrill, contour mill, ICP in YZ plane" unit ..... 171 "Predrill, pocket mill, ICP in YZ plane" unit ..... 172 3.3 Units—Milling in Y axis ..... 173 "ICP contour milling in XY plane" unit ..... 173 "ICP pocket milling in XY plane" unit ..... 174 "Single-surface milling, XY plane" unit ..... 175 "Centric polygon milling, XY plane" unit ..... 176 "Engraving in XY plane" unit ..... 177 "Deburring in XY plane" unit ..... 178 "Thread milling in XY plane" unit ..... 179 "ICP contour milling in YZ plane" unit ..... 180 "ICP pocket milling in YZ plane" unit ..... 181 "Single-surface milling, YZ plane" unit ..... 182 "Centric polygon milling, YZ plane" unit ..... 183 "Engraving in YZ plane" unit ..... 184 "Deburring in YZ plane" unit ..... 185 "Thread milling in YZ plane" unit ..... 186 HEIDENHAIN MANUALplus 620, CNC PILOT 640 17 4 DIN Programming ..... 187 4.1 Programming in DIN/ISO mode ..... 188 Geometry and machining commands ..... 188 Contour programming ..... 189 NC blocks of the DIN program ..... 190 Creating, editing and deleting NC blocks ..... 191 Address parameters ..... 192 Fixed cycles ..... 193 Subprograms, expert programs ..... 194 NC program conversion ..... 194 DIN/ISO programs of predecessor controls ..... 195 "Geometry" pull-down menus ..... 197 "Machining" pull-down menus ..... 197 4.2 Definition of workpiece blank ..... 198 Chuck part bar/tube G20-Geo ..... 198 Cast part G21-Geo ..... 198 4.3 Basic contour elements ..... 199 Starting point of turning contour G0-Geo ..... 199 Machining attributes for form elements ..... 199 Line segment in a contour G1-Geo ..... 200 Circular arc of turning contour G2/G3-Geo ..... 202 Circular arc of turning contour G12/G13-Geo ..... 203 4.4 Contour form elements ..... 205 Recess (standard) G22-Geo ..... 205 Recess (general) G23-Geo ..... 207 Thread with undercut G24-Geo ..... 209 Undercut contour G25-Geo ..... 210 Thread (standard) G34-Geo ..... 214 Thread (general) G37-Geo ..... 215 Bore hole (centric) G49-Geo ..... 217 4.5 Attributes for contour description ..... 218 Feed rate reduction G38-Geo ..... 218 Attributes for superimposed elements G39-Geo ..... 219 Separation point G44 ..... 220 Oversize G52-Geo ..... 220 Feed per revolution G95-Geo ..... 221 Additive compensation G149-Geo ..... 221 4.6 C-axis contours—Fundamentals ..... 222 Milling contour position ..... 222 Circular pattern with circular slots ..... 225 18 4.7 Front and rear face contours ..... 228 Starting point of front/rear face contour G100-Geo ..... 228 Line segment in front/rear face contour G101-Geo ..... 229 Circular arc in front/rear face contour G102/G103-Geo ..... 230 Bore hole on front/rear face G300-Geo ..... 231 Linear slot on front/rear face G301-Geo ..... 232 Circular slot on front/rear face G302/G303-Geo ..... 232 Full circle on front/rear face G304-Geo ..... 233 Rectangle on front/rear face G305-Geo ..... 233 Eccentric polygon on front/rear face G307-Geo ..... 234 Linear pattern on front/rear face G401-Geo ..... 235 Circular pattern on front/rear face G402-Geo ..... 236 4.8 Lateral surface contours ..... 237 Starting point of lateral surface contour G110-Geo ..... 237 Line segment in a lateral surface contour G111-Geo ..... 238 Circular arc in lateral surface contour G112/G113-Geo ..... 239 Hole on lateral surface G310-Geo ..... 240 Linear slot on lateral surface G311-Geo ..... 241 Circular slot on lateral surface G312/G313-Geo ..... 241 Full circle on lateral surface G314-Geo ..... 242 Rectangle on lateral surface G315-Geo ..... 242 Eccentric polygon on lateral surface G317-Geo ..... 243 Linear pattern on lateral surface G411-Geo ..... 244 Circular pattern on lateral surface G412-Geo ..... 245 4.9 Tool positioning ..... 246 Rapid traverse G0 ..... 246 Rapid traverse to machine coordinates G701 ..... 246 Approach tool change point G14 ..... 247 Definition of tool-change point G140 ..... 247 4.10 Linear and circular movements ..... 248 Linear movement G1 ..... 248 Circular path G2/G3 ..... 249 Circular path G12/G13 ..... 250 4.11 Feed rate, shaft speed ..... 251 Speed limitation G26 ..... 251 Reduce rapid traverse G48 ..... 251 Interrupted feed G64 ..... 252 Feed per tooth Gx93 ..... 252 Constant feed rate G94 (feed per minute) ..... 253 Feed per revolution Gx95 ..... 253 Constant surface speed Gx96 ..... 254 Speed Gx97 ..... 254 4.12 Tool-tip and cutter radius compensation ..... 255 G40: Switch off TRC/MCRC ..... 255 G41/G42: Switch on TRC/MCRC ..... 256 HEIDENHAIN MANUALplus 620, CNC PILOT 640 19 4.13 Zero point shifts ..... 257 Zero point shift G51 ..... 258 Zero point offsets—Shift G53/G54/G55 ..... 259 Additive zero point shift G56 ..... 259 Absolute zero point shift G59 ..... 260 4.14 Oversizes ..... 261 Switch off oversize G50 ..... 261 Axis-parallel oversize G57 ..... 261 Contour-parallel oversize (equidistant) G58 ..... 262 4.15 Safety clearances ..... 263 Safety clearance G47 ..... 263 Safety clearance G147 ..... 263 4.16 Tools, compensations ..... 264 Tool call T ..... 264 Correction of cut (switching the tool edge compensation) G148 ..... 265 Additive compensation G149 ..... 266 Compensation of right-hand tool tip G150 Compensation of left-hand tool tip G151 ..... 267 4.17 Contour-based turning cycles ..... 268 Working with contour-based cycles ..... 268 Longitudinal roughing G810 ..... 270 Face roughing G820 ..... 273 Contour-parallel roughing G830 ..... 276 Contour cycle, bidirectional (contour-parallel with neutral tool) G835 ..... 279 Recessing G860 ..... 281 Repeat recessing cycle G740/G741 ..... 283 Recess turning cycle G869 ..... 284 Recessing cycle G870 ..... 287 Finish contour G890 ..... 288 Measuring cut G809 ..... 291 4.18 Contour definitions in the machining section ..... 292 Cycle end / Simple contour G80 ..... 292 Linear slot on front/rear face G301 ..... 293 Circular slot on front/rear face G302/G303 ..... 293 Full circle on front/rear face G304 ..... 294 Rectangle on front/rear face G305 ..... 294 Eccentric polygon on front/rear face G307 ..... 295 Linear slot on lateral surface G311 ..... 295 Circular slot on lateral surface G312/G313 ..... 296 Full circle on lateral surface G314 ..... 296 Rectangle, lateral surface G315 ..... 297 Eccentric polygon, lateral surface G317 ..... 297 20 4.19 Thread cycles ..... 298 Overview of threading cycles ..... 298 Handwheel superimposition ..... 298 Parameter V: Type of infeed ..... 299 Thread cycle G31 ..... 301 Single thread cycle G32 ..... 305 Thread single path G33 ..... 307 Metric ISO thread G35 ..... 309 Tapered API thread G352 ..... 310 Metric ISO thread G38 ..... 312 4.20 Parting cycle ..... 313 Cut-off cycle G859 ..... 313 4.21 Undercut cycles ..... 314 Undercut cycle G85 ..... 314 Undercut according to DIN 509 E with cylinder machining G851 ..... 316 Undercut according to DIN 509 F with cylinder machining G852 ..... 317 Undercut according to DIN 76 with cylinder machining G853 ..... 318 Undercut type U G856 ..... 319 Undercut type H G857 ..... 320 Undercut type K G858 ..... 321 4.22 Drilling cycles ..... 322 Overview of drilling and boring cycles and contour reference ..... 322 Drilling cycle G71 ..... 323 Boring, countersinking G72 ..... 325 Tapping G73 ..... 326 Tapping G36—Single path ..... 328 Deep-hole drilling G74 ..... 329 Linear pattern, face G743 ..... 332 Circular pattern, face G745 ..... 333 Linear pattern, lateral surface G744 ..... 334 Circular pattern, lateral surface G746 ..... 335 Thread milling, axial G799 ..... 336 4.23 C-axis commands ..... 337 Reference diameter G120 ..... 337 Zero point shift, C axis G152 ..... 337 Standardize C axis G153 ..... 338 4.24 Front/rear-face machining ..... 339 Rapid traverse on front/rear face G100 ..... 339 Line segment on front/rear face G101 ..... 340 Circular arc on front/rear face G102/G103 ..... 341 4.25 Lateral surface machining ..... 343 Rapid traverse, lateral surface G110 ..... 343 Line segment on lateral surface G111 ..... 344 Circular arc on lateral surface G112/G113 ..... 345 HEIDENHAIN MANUALplus 620, CNC PILOT 640 21 4.26 Milling cycles ..... 346 Overview of milling cycles ..... 346 Linear slot on face G791 ..... 347 Linear slot on lateral surface G792 ..... 348 Contour and figure milling cycle, face G793 ..... 349 Contour and figure milling cycle, lateral surface G794 ..... 351 Area milling, face G797 ..... 353 Helical-slot milling G798 ..... 355 Contour milling G840 ..... 356 Pocket milling, roughing G845 ..... 366 Pocket milling, finishing G846 ..... 372 4.27 Engraving cycles ..... 374 Character set ..... 374 Engraving on front face G801 ..... 376 Engraving on lateral surface G802 ..... 377 4.28 Contour follow-up ..... 378 Saving/loading contour follow-up G702 ..... 378 Contour follow-up on/off G703 ..... 378 22 4.29 Other G codes ..... 379 Chucking equipment in simulation G65 ..... 379 Workpiece blank contour G67 (for graphics) ..... 379 Period of dwell G4 ..... 379 Precision stop G7 ..... 379 Precision stop off G8 ..... 380 Precision stop G9 ..... 380 Switch off protection zone G60 ..... 380 Actual values in variables G901 ..... 380 Zero-point shift in variables G902 ..... 380 Lag error in variables G903 ..... 380 Read interpolation information G904 ..... 381 Feed rate override 100 % G908 ..... 381 Interpreter stop G909 ..... 381 Spindle override 100 % G919 ..... 381 Deactivate zero-point shifts G920 ..... 382 Deactivate zero-point shifts, tool lengths G921 ..... 382 End position of tool G922 ..... 382 Fluctuating spindle speed G924 ..... 382 Convert lengths G927 ..... 383 Calculate variables automatically G940 ..... 383 Misalignment compensation G976 ..... 385 Activate zero-point shifts G980 ..... 385 Activate zero-point shifts, tool lengths G981 ..... 385 Monitoring zone G995 ..... 386 Load monitoring G996 ..... 387 Activate direct program-run continuation G999 ..... 387 Converting and mirroring G30 ..... 387 Transformations of contours G99 ..... 389 Spindle synchronization G720 ..... 390 C-angle offset G905 ..... 391 Traversing to a fixed stop G916 ..... 392 Controlled parting using lag error monitoring G917 ..... 394 Force reduction G925 ..... 395 Sleeve monitoring G930 ..... 396 Eccentric turning G725 ..... 397 Transition to eccentric G726 ..... 399 Eccentric X G727 ..... 401 4.30 Data input and data output ..... 403 "WINDOW"—Output window for variables ..... 403 "WINDOW"—Output file for variables ..... 403 "INPUT"—Input of variables ..... 403 "PRINT"—Output of # variables ..... 404 HEIDENHAIN MANUALplus 620, CNC PILOT 640 23 4.31 Programming variables ..... 405 Variable types ..... 406 Reading tool data ..... 408 Reading diagnostic bits ..... 411 Reading the current NC information ..... 412 Reading general NC information ..... 414 Reading configuration data—PARA ..... 416 Determining the index of a parameter element—PARA ..... 417 Expanded variable syntax CONST – VAR ..... 418 4.32 Conditional block run ..... 420 Program branching IF..THEN..ELSE..ENDIF ..... 420 Requesting variables and constants ..... 421 WHILE..ENDWHILE program repeat ..... 422 SWITCH..CASE—program branching ..... 423 Skip level ..... 424 4.33 Subprograms ..... 425 Subprogram call: L"xx" V1 ..... 425 Dialog texts in subprogram call ..... 426 Help graphics for subprogram calls ..... 427 4.34 M commands ..... 428 M commands for program-run control ..... 428 Machine commands ..... 429 4.35 G codes from previous controls ..... 430 Contour definitions in the machining section ..... 430 Simple turning cycles ..... 432 Thread cycles (4110) ..... 437 4.36 DINplus program example ..... 439 Example of a subprogram with contour repetitions ..... 439 4.37 Connection between geometry and machining commands ..... 442 Turning Operations ..... 442 C-axis machining—front/rear face ..... 443 C-axis machining—lateral surface ..... 443 4.38 Full-surface machining ..... 444 Fundamentals of full-surface machining ..... 444 Programming of full-surface machining ..... 445 Full-surface machining with opposing spindle ..... 446 Full-surface machining with single spindle ..... 448 24 5 Touch probe cycles ..... 451 5.1 General information on touch probe cycles (software option) ..... 452 Principle of function of touch probe cycles ..... 452 Touch probe cycles for automatic operation ..... 453 5.2 Touch probe cycles for single-point measurement ..... 455 Single-point measurement for tool compensation G770 ..... 455 Single-point measurement for zero point G771 ..... 457 Zero point C axis, single-point measurement G772 ..... 459 Zero point C-axis object center G773 ..... 461 5.3 Touch probe cycles for two-point measurement ..... 463 Two-point measurement G18 transverse G775 ..... 463 Two-point measurement G18 longitudinal G776 ..... 465 Two-point measurement G17 longitudinal G777 ..... 467 Two-point measurement G19 longitudinal G778 ..... 469 5.4 Calibrating the touch probe ..... 471 Calibrate touch probe standard G747 ..... 471 Calibrate touch probe via two points G748 ..... 473 5.5 Measuring with touch probe cycles ..... 475 Paraxial probing G764 ..... 475 Probing in C axis G765 ..... 476 Probing in two axes G766 ..... 477 Probing in two axes G768 ..... 478 Probing in two axes G769 ..... 479 5.6 Search cycles ..... 480 Find hole in C face G780 ..... 480 Find hole in C lateral surface G781 ..... 482 Find stud in C face G782 ..... 484 Find stud in C lateral surface G783 ..... 486 5.7 Circular measurement ..... 488 Circular measurement G785 ..... 488 Determine pitch circle G786 ..... 490 5.8 Angular measurement ..... 492 Angular measurement G787 ..... 492 Misalignment compensation after angle measurement G788 ..... 494 5.9 In-process measurement ..... 495 Measure workpieces (option) ..... 495 Switch on measurement G910 ..... 495 Measuring path monitoring G911 ..... 496 Measured value capture G912 ..... 496 End in-process measuring G913 ..... 496 Switch off measuring-path monitoring G914 ..... 496 In-process measurement example: Measuring and compensating workpieces ..... 497 In-process measurement example: Measuring and compensating workpieces (measure_pos_move.ncs) ..... 498 HEIDENHAIN MANUALplus 620, CNC PILOT 640 25 6 DIN programming for the Y axis ..... 499 6.1 Y-axis contours—Fundamentals ..... 500 Position of milling contours ..... 500 Cutting limit ..... 501 6.2 Contours in the XY plane ..... 502 Starting point of contour in XY plane G170-Geo ..... 502 Line segment in XY plane G171-Geo ..... 502 Circular arc in XY plane G172-Geo/G173-Geo ..... 503 Hole in XY plane G370-Geo ..... 504 Linear slot in XY plane G371-Geo ..... 505 Circular slot in XY plane G372-Geo/G373-Geo ..... 506 Full circle in XY plane G374-Geo ..... 506 Rectangle in XY plane G375-Geo ..... 507 Eccentric polygon in XY plane G377-Geo ..... 507 Linear pattern in XY plane G471-Geo ..... 508 Circular pattern in XY plane G472-Geo ..... 509 Single surface in XY plane G376-Geo ..... 510 Centric polygon in XY plane G477-Geo ..... 510 6.3 Contours in the YZ plane ..... 511 Starting point of contour in YZ plane G180-Geo ..... 511 Line segment in YZ plane G181-Geo ..... 511 Circular arc in YZ plane G182-Geo/G183-Geo ..... 512 Hole in YZ plane G380-Geo ..... 513 Linear slot in YZ plane G381-Geo ..... 513 Circular slot in YZ plane G382-Geo/G383-Geo ..... 514 Full circle in YZ plane G384-Geo ..... 514 Rectangle in YZ plane G385-Geo ..... 515 Eccentric polygon in YZ plane G387-Geo ..... 515 Linear pattern in YZ plane G481-Geo ..... 516 Circular pattern in YZ plane G482-Geo ..... 517 Single surface in YZ plane G386-Geo ..... 518 Centric polygon in YZ plane G487-Geo ..... 518 6.4 Working planes ..... 519 Y-axis machining ..... 519 G17 XY plane (front or rear face) ..... 519 G18 XZ plane (turning) ..... 519 G19 YZ plane (lateral view / lateral surface) ..... 519 Tilting the working plane G16 ..... 520 6.5 Tool positioning in the Y axis ..... 521 Rapid traverse G0 ..... 521 Approach tool change point G14 ..... 521 Rapid traverse to machine coordinates G701 ..... 521 26 6.6 Linear and circular movements in the Y axis ..... 522 Milling: Linear movement G1 ..... 522 Milling: Circular movement G2, G3—incremental center coordinates ..... 523 Milling: Circular movement G12, G13—absolute center coordinates ..... 524 6.7 Milling cycles for the Y axis ..... 525 Area milling—roughing G841 ..... 525 Area milling—finishing G842 ..... 526 Centric polygon milling—roughing G843 ..... 527 Centric polygon milling—finishing G844 ..... 528 Pocket milling—roughing G845 (Y axis) ..... 529 Pocket milling—finishing G846 (Y axis) ..... 535 Engraving in XY plane G803 ..... 537 Engraving in the YZ plane G804 ..... 538 Thread milling in XY plane G800 ..... 539 Thread milling in YZ plane G806 ..... 540 Hobbing G808 ..... 541 6.8 Example program ..... 542 Machining with the Y axis ..... 542 HEIDENHAIN MANUALplus 620, CNC PILOT 640 27 7 TURN PLUS ..... 549 7.1 TURN PLUS mode of operation ..... 550 TURN PLUS concept ..... 550 7.2 Automatic working plan generation (AWG) ..... 551 Generating a working plan ..... 551 Overview of machining sequences ..... 555 Setting the AWG control graphic ..... 563 7.3 Machining information ..... 564 Tool selection, turret assignment ..... 564 Contour recessing, recess turning ..... 566 Drilling ..... 566 Cutting data, coolant ..... 567 Inside contours ..... 567 Shaft machining ..... 570 7.4 Example ..... 572 Creating a program ..... 572 Workpiece blank definition ..... 572 Defining the basic contour ..... 573 Defining form elements ..... 573 Preparing the machining process, chucking ..... 574 Generating and saving a working plan ..... 575 7.5 Full-surface machining with TURN PLUS ..... 576 Rechucking the workpiece ..... 576 Defining the chucking equipment for full-surface machining ..... 577 Automatic program creation for full-surface machining ..... 578 Rechucking the workpiece in the main spindle ..... 578 Transferring the workpiece from the main spindle to the opposing spindle ..... 578 Parting and picking-off the workpiece with the opposing spindle ..... 579 28 8 B axis ..... 581 8.1 Fundamentals ..... 582 Tilted working plane ..... 582 8.2 Compensation with the B axis ..... 585 Compensation during program run ..... 585 8.3 Simulation ..... 586 Simulation of the tilted plane ..... 586 Displaying the coordinate system ..... 587 Position display with the B and Y axes ..... 587 HEIDENHAIN MANUALplus 620, CNC PILOT 640 29 9 Overview of units ..... 589 9.1 Units—"Turning" group ..... 590 "Roughing" group ..... 590 "Finishing" group ..... 590 "Recessing" group ..... 591 "Thread" group ..... 591 9.2 Units—"Drilling" group ..... 592 "Centric drilling" group ..... 592 "ICP drilling, C axis" group ..... 592 "C-axis face drilling" group ..... 592 "C-axis lateral surface drilling" group ..... 593 9.3 Units—"Predrilling in C axis" group ..... 594 "Predrilling in C-axis, face" group ..... 594 "Predrilling in C-axis, lateral surface" group ..... 594 9.4 Units—"Milling in C axis" group ..... 595 "Milling in C-axis, face" group ..... 595 "ICP milling in C axis, face" group ..... 595 "C-axis lateral surface milling" group ..... 596 "ICP milling in C axis, lateral surface" group ..... 596 9.5 Units—"Drilling, predrilling in Y axis" group ..... 597 "ICP drilling, Y axis" group ..... 597 "Predrilling in Y axis" group ..... 597 9.6 Units—"Milling in Y axis" group ..... 598 "Milling in front face" group (XY plane) ..... 598 "Milling in lateral surface" group (YZ plane) ..... 599 9.7 Units—"Special units" group ..... 600 30 10 Overview of G codes ..... 601 10.1 Section codes ..... 602 10.2 Overview of G commands in the CONTOUR section ..... 603 G commands for turning contours ..... 603 G commands for C-axis contours ..... 604 G commands for Y-axis contours ..... 604 10.3 Overview of G commands in the MACHINING section ..... 605 G commands for turning ..... 605 Cycles for turning ..... 606 C-axis machining ..... 607 Y-axis machining ..... 608 Variable programming, program branches ..... 608 Other G codes ..... 609 HEIDENHAIN MANUALplus 620, CNC PILOT 640 31 32 NC programming HEIDENHAIN MANUALplus 620, CNC PILOT 640 33 1.1 smart.Turn and DIN (ISO) programming 1.1 smart.Turn and DIN (ISO) programming The Steuerung supports the following types of NC programming: Conventional DIN programming: You program the basic contour with line segments, circular arcs and simple turning cycles. Use the smart.Turn editor in ISO mode. DIN PLUS programming: The geometrical description of the workpiece and the machining process are separated. You first program the geometry of the blank and finished part. Then you machine the workpiece, using contour-related turning cycles. Use the smart.Turn editor in ISO mode. smart.Turn programming: The geometrical description of the workpiece and the machining process are separated. You program the geometry of the blank and finished part, and you program the machining blocks as units. Use the smart.Turn editor in unit mode. Depending on the type and complexity of your machining task, you can use either simple DIN/ISO programming, "DIN PLUS" (ISO) programming or smart.Turn programming. All three named programming modes can be combined in one NC program. In DIN PLUS and smart.Turn programming, contours can be described with ICP interactive graphics. ICP saves the contour descriptions as G codes in the NC program. Parallel operation: While you are editing and testing programs, your machine can run another NC program. Contour follow-up The Steuerung uses the contour follow-up function in DIN PLUS and smart.Turn programs. The Steuerung takes the blank part as a basis and accounts for each cut and each cycle when regenerating the contour. Thus you can inspect the current contour of the workpiece during each machining stage. With the "contour follow-up" function, the Steuerung optimizes the paths for approach and departure and avoids air cuts. Contour regeneration is only available for turning operations when a blank part has been programmed. It also works with auxiliary contours. 34 NC programming 1.1 smart.Turn and DIN (ISO) programming Structured NC program smart.Turn and DIN PLUS programs are structured in fixed sections. The following program sections are created automatically in a new NC program: Beispiel: "Structured smart.Turn program" HEADER Program head: Contains information on the material of the workpiece, the unit of measure as well as further organizational data and setup information as a comment. Chucking equipment: Description of the workpiece clamping situation. Workpiece blank: The workpiece blank is stored. Programming a blank activates the contour follow-up. Finished part: The finished part is stored. It is advisable to describe the complete workpiece as a finished part. The units or fixed cycles use NS and NE to indicate the workpiece section to be machined. Machining: Use units or cycles to program the individual machining steps. In a smart.Turn program, the START unit is located at the beginning of the machining process, and the END unit at the end. End: Indicates the end of the NC program. #MEASURE_UNITS METRIC If required, for example for machining with the C axis or when programming with variables, you add further program sections. CLAMPS 1 Use ICP (Interactive Contour Programming) for describing blank and finished parts. #MATERIAL Steel #MACHINE Automatic lathe #DRAWING 356_787.9 #CLAMP_PRESS. 20 #COMPANY Turn & Co TURRET T1 ID"038_111_01" T2 ID"006_151_A" H0 D0 Z200 B20 O-100 X120 K12 Q4 BLANK N1 G20 X120 Z120 K2 FINISHED N2 G0 X0 Z0 N3 G1 X20 BR3 N4 G1 Z-24 ... MACHINING N50 UNIT ID"START" [Program beginning] N52 G26 S4000 N53 G59 Z320 N54 G14 Q0 N25 END_OF_UNIT ... [Machining commands] ... N9900 UNIT ID"END" [End of program] N9902 M30 N9903 END_OF_UNIT END HEIDENHAIN MANUALplus 620, CNC PILOT 640 35 1.1 smart.Turn and DIN (ISO) programming Linear and rotary axes Principal axes: Coordinates of the X, Y and Z axes refer to the workpiece zero point. C axis as reference axis: Angle data are with given respect to the zero point of the C axis. C-axis contours and C-axis operations: Positions on the front/rear face are entered in Cartesian coordinates (XK, YK), or polar coordinates (X, C) Positions on the lateral surface are entered in polar coordinates (Z, C). Instead of C, the linear value CY can be used ("unrolled" reference diameter). The smart.Turn editor respects only address letters of the configured axes. Units of measure You write NC programs in metric or inch values. The unit of measure is defined in the "Unit" box (See "HEADER section" on page 48.). Once the unit of measure has been defined, it cannot be edited any longer. 36 NC programming 1.1 smart.Turn and DIN (ISO) programming Elements of an NC program An NC program consists of the following elements: Program name Program section codes Units NC blocks Commands for program structuring Comment blocks The program name begins with "%" followed by up to 40 characters (numbers, uppercase letters or underscore; no diacritical marks) and the extension "nc" for main programs or "ncs" for subprograms. The first character must be a number or a letter. Program section codes: When you create a new NC program, certain program section codes are already entered. You can add new codes or delete existing ones, depending on your program requirements. An NC program must contain at least the MACHINING and END section codes. The unit begins with this keyword followed by the identification of the unit (ID"G..."). The following lines contain the G, M and T functions of this machining block. The unit ends with END_OF_UNIT followed by a check digit. NC blocks begin with an N followed by a block number (with up to five digits). The block numbers do not affect the sequence in which the program blocks are executed. They are only intended for identifying the individual NC blocks. The NC blocks of the HEADER and TURRET sections are not included in the block number organization of the editor. You can use program jumps, repeats and subprograms to structure a program (example: machining the beginning/end of a bar, etc.). Input and output: With "input" you can influence the flow of the NC program. Using "output," you can communicate with the machinist. Example: The machinist is required to check measuring points and update compensation values. Comments are enclosed in brackets "[...]." They are located at the end of an NC block or in a separate NC block. Press the key combination CTRL+K to convert an existing block into a comment (and vice versa). You can also enclose more than one program line in square brackets to mark them as a comment. To do this, enter a comment containing the character "[" and conclude the section by entering another comment containing the character "]". HEIDENHAIN MANUALplus 620, CNC PILOT 640 37 1.2 The smart.Turn editor 1.2 The smart.Turn editor Menu structure You can select the following editor modes in the smart.Turn editor: Unit programming (standard) DIN/ISO mode (DIN PLUS and DIN 66025) The menu structure of the smart.Turn editor is shown in the illustration at right. Many menu items are used in both modes. The menus differ in the area of geometry and part programming. In DIN/ISO mode the menu items "Geo(metry)" and "Mach(ining)" are displayed instead of the menu items "ICP" and "Units" (see illustrations at lower right). You can switch between the editor modes by soft key. Switches between the Unit mode and DIN/ISO mode For special cases you can change to the text-editor mode in order to edit character-by-character without syntax checking. The setting is made in the Configuration / Input mode menu item. For a description of the functions, please refer to the following chapters: Shared menu items: see "Menu structure" on page 38. ICP functions: Chapter 5 in the User's Manual Units for turning and C-axis machining: see "smart.Turn units" on page 59. Units for Y-axis machining: see "smart.Turn units for the Y axis" on page 167. G codes for turning and C-axis machining (geometry and machining): see "DIN Programming" on page 189. G codes for Y-axis machining (geometry and machining): see "DIN programming for the Y axis" on page 501. 38 NC programming 1.2 The smart.Turn editor Parallel editing Up to 6 NC programs can be opened simultaneously in the smart.Turn editor. The editor shows the names of the open programs in the tab bar. If you have changed the NC program, the editor displays the name in red. You can program in the smart.Turn editor while the machine is running a program in the automatic mode. The smart.Turn editor saves all open programs with every mode change. The program running in the automatic mode cannot be edited. Screen layout 1 2 3 4 5 6 Menu bar NC program bar with the names of the loaded NC programs. The selected program is marked. Program window Contour display or large program window Soft keys Status bar 1 2 3 4 6 5 HEIDENHAIN MANUALplus 620, CNC PILOT 640 39 1.2 The smart.Turn editor Selecting the editor functions The functions of the smart.Turn editor are contained in the main menu and various submenus. The submenus can be called by: selecting the desired menu item positioning the cursor in the respective program section Soft keys with active program window Starts the current program in the simulation. Opens the contour, in which the cursor is located, in ICP. You can access the higher-level menu: by pressing the ESC key by using the menu item Soft keys: Soft keys are available for fast switching to "neighboring operating modes," for changing the editing window or program view, and for activating the graphics. Activates the zoom function in the contour display. Switches between the DINplus view and the tree view. Switches between the Unit mode and DIN/ISO mode. Activates the contour display and starts redrawing the contour. Editing with active tree view Press the right arrow key to expand the program sections. Position the cursor on the program line you want to edit and press the right arrow key once again. The control automatically changes to the DINplus view. Make the required changes. Use the left arrow key to return to the tree view and to collapse the program section. You can adapt the tree view in the MACHINING section to suit your requirements; for example, you can combine multiple units to create a custom range of blocks. Define the new range of blocks by inserting the DINplus word BLOCKSTART at the beginning of the selected program section and the DINplus word BLOCKEND at the end. The DINplus words are available in the Extras menu > "Insert DINplus word." 40 NC programming 1.2 The smart.Turn editor Shared menu items The menu items described below are used both in smart.Turn mode and in DIN/ISO mode. "Program management" pull-down menu The "Prog" pull-down menu (program management) contains the following functions for NC main and subprograms: Open: Load existing programs New: Create new programs Close: The selected program is closed Close All: All open programs are closed Save: The selected program is saved Save As: The selected program is saved under a new name Direct opening of the last four programs When an NC program is opened or when a new NC program is created, the soft-key row is switched to the sorting and organization functions see "Sorting, file organization" on page 46.. "Head" pull-down menu (program head) The "Head" pull-down menu (program head) contains functions for editing the program head and the tool list. Program head: Edit the program header Go to chucking equipment: Positions the cursor in the "chucking equipment" section Insert chucking equipment: Describe how the workpiece is clamped Go to tool list: Positions the cursor in the TURRET section Set up the tool list: Activates the "Set up tool list" function (see page 55) "ICP" pull-down menu The "ICP" pull-down menu (Interactive Contour Programming) contains the following functions: Contour editing: Change the current contour (cursor position) Workpiece blank: Edit the description of the workpiece blank Finished part: Edit the description of the finished part New auxiliary blank: Create a new auxiliary workpiece blank New aux. contour: Create a new auxiliary contour C axis ...: Create patterns and milling contours on the front face and lateral surface Y axis ...: Create patterns and milling contours in the XY and YZ planes HEIDENHAIN MANUALplus 620, CNC PILOT 640 41 1.2 The smart.Turn editor "Goto" pull-down menu The "Goto" pull-down menu contains the following jump and search functions: Jump targets—The editor positions the cursor to the selected jump target: To beginning To tool table To finished part To machining To end Search functions Find block number: You specify a certain block number. The editor jumps to this block number if it exists. Find unit: The editor opens the list of units available in the program. Select the desired unit. Find NC word: The editor opens the dialog for entering the desired NC word. You can use the soft keys to search forward or backward. Search for contour: The editor opens the list of contours available in the program. Select the desired contour. "Configuration" pull-down menu The "Config" pull-down menu (Configuration) contains the following functions: Input mode ...: Define the input mode ... NC editor (word-by-word): The editor works in the NC mode (word by word) ... Text editor (character): The editor works character by character (no syntax checking) Settings ... ... Save: The editor memorizes the open NC programs and the respective cursor positions. ... Load last saved setting: Restores the last saved condition of the editor. Technology data: Starts the technology editor 42 NC programming 1.2 The smart.Turn editor "Miscellaneous" pull-down menu The "Misc" pull-down menu (Miscellaneous) contains the following functions: Insert block ... ... W/o block no.: The editor inserts an empty line at the cursor position (without block number). ... With block no.: The editor inserts an empty line at the cursor position (with block number). Alternative: When you press the INS key, the editor inserts a block with block number. ... Comment at line end: The editor inserts a comment at the end of the line in which the cursor is located. Edit word: You can edit the NC word at which the cursor is located. Delete word: The editor deletes the NC parameter at the cursor position. Dissolve unit: Position the cursor to the first line of a unit before selecting this menu item. The editor cancels the brackets around the unit. The unit dialog can no longer be used for this machining block, but you can edit the machining block as desired. Block numbering: The block numbering settings are the starting block number and the block-number increment. The first NC block receives the starting block number and the block-number increment is added for each further NC block. The settings for starting block number and block-number increment are tied with the NC program. HEIDENHAIN MANUALplus 620, CNC PILOT 640 43 1.2 The smart.Turn editor "Extras" pull-down menu The "Extras" pull-down menu contains the following functions: DIN PLUS word: The editor opens the selection list with all DIN PLUS words in alphabetical order. Select the desired instruction for program structuring or the input/output command. The editor inserts the DIN PLUS word at the cursor position. Comment line: The comment is inserted above the position of the cursor. Constant definition: The expression is inserted above the position of the cursor. If the DIN PLUS word "CONST" is not present yet, it is also inserted. Assignment of variables: Inserts a variable instruction. L call external (the subprogram is in a separate file): The editor opens the file selection window for subprograms. Select the subprogram and fill out the subprogram dialog. The control searches for subprograms in the sequence: current project, standard directory and then machine manufacturer directory. L call internal (the subprogram is contained in the main program): The editor opens the subprogram dialog. Block functions. This pull-down menu contains functions for marking, copying and deleting sections. Marking On/Off: Activates/Deactivates the marking mode during cursor movement. Cancel marking: After calling the menu item, no part of the program is marked. Cut: Deletes the marked part of the program and copies it to the clipboard. Copy: Copies the marked part of the program into the clipboard. Insert: Inserts the contents of the clipboard at the cursor position. Any parts of the program that are marked are replaced by the contents of the clipboard. 44 NC programming 1.2 The smart.Turn editor "Graphics" pull-down menu The "Graph." pull-down menu contains the following functions (see figure at right): Graphic ON: Activates the graphic window or updates the displayed contour. As an alternative, you can use the soft key (see table at right). Graphic OFF: Closes the graphic window. Graphic for Automatic: The graphic window is activated when the cursor is located in the contour description. Window: Sets the graphic window. During editing, the Steuerung displays programmed contours in up to four graphic windows. Set the desired windows. Magnifier on: Activates the zoom function. As an alternative, you can use the soft key (see table at right). The graphic window: Colors in contour graphics: White: workpiece blank and auxiliary blank Yellow: finished part Blue: auxiliary contours Red: contour element at the current cursor position. The arrow point indicates the direction of machining. When programming fixed cycles, you can use the displayed contour for establishing block references. Using the zoom functions, you can magnify, reduce or shift details. Soft keys with active program window Activates the contour display and starts redrawing the contour. Opens the soft-key menu for the zoom functions and displays the zoom frame. Additions/changes to the contour will not be considered until the GRAPHICS soft key is pressed again. Unambiguous NC block numbers are a prerequisite for the contour display! HEIDENHAIN MANUALplus 620, CNC PILOT 640 45 1.2 The smart.Turn editor Sorting, file organization When an NC program is opened or when a new NC program is created, the soft-key row is switched to the sorting and organization functions. Use the soft keys to select the order in which the programs are to be displayed, or use the functions for copying, deleting, etc. Soft keys file manager Deletes the selected program after confirmation prompt Makes it possible to change the program name Copies the selected program Switches the write protection attribute on or off for the selected program Activates the alphabetic keyboard Soft keys for sorting Displays the file attributes: size, date, time Sorts by file name Sorts by file size Sorts by creation date or change date Reverses the sorting direction Opens the selected program 46 NC programming 1.3 Program section code 1.3 Program section code A new NC program is already provided with section codes. You can add new codes or delete existing ones, depending on your program requirements. An NC program must contain at least the MACHINING and END section codes. Further program section codes are available in the "Insert DIN PLUS word" selection list ("Extras > DIN PLUS word" menu item). The Steuerung enters the program section code at the correct position or at the current position. German program section codes are used when German is set as the conversational language. All other languages use English program section codes. Overview of program section codes German English Program head PROGRAMMKOPF HEADER Page 48 SPANNMITTEL CLAMPS Page 49 REVOLVER TURRET Page 50 ROHTEIL BLANK Page 50 FERTIGTEIL FINISHED Page 50 HILFSKONTUR AUXIL_CONTOUR Page 50 HILFSROHTEIL AUXIL_BLANK Page 50 Beispiel: Program section codes ... [Sections of the contour description] BLANK N1 G20 X100 Z220 K1 Contour definition FINISHED N2 G0 X60 Z0 N3 G1 Z-70 ... FACE_C Z-25 N31 G308 ID"01" P-10 C-axis contours STIRN FACE_C Page 51 RUECKSEITE REAR_C Page 51 MANTEL LATERAL_C Page 51 N32 G402 Q5 K110 A0 Wi72 V2 XK0 YK0 N33 G300 B5 P10 W118 A0 N34 G309 FACE_C Z0 Y-axis contours N35 G308 ID"02" P-6 STIRN_Y FACE_Y Page 51 RUECKSEITE_Y REAR_Y Page 51 N37 G309 MANTEL_Y LATERAL_Y Page 52 ... BEARBEITUNG MACHINING Page 53 ENDE END Page 53 N36 G307 XK0 YK0 Q6 A0 K34.641 Workpiece machining HEIDENHAIN MANUALplus 620, CNC PILOT 640 47 1.3 Program section code Overview of program section codes German English Subprograms UNTERPROGRAMM SUBPROGRAM Page 53 RETURN RETURN Page 53 CONST CONST Page 54 VAR VAR Page 54 Others For more than one independent contour definition for drilling/milling, use the program section codes (FACE_C, LATERAL_C, etc.) each time. HEADER section Instructions and information in the program head (HEADER): Unit: Select dimensional system in millimeters or inches No entry: The unit set in the user parameter is used The other fields contain organizational information and set-up information, which do not influence the machining process. Information contained in the program head is preceded by "#" in the NC program. You can only select a unit when creating a new NC program. It is not possible to post-edit this entry. 48 NC programming 1.3 Program section code CLAMPS section In the CLAMPS program section you describe how the workpiece is clamped. This makes it possible to display the chucking equipment during simulation. In TURN PLUS the chucking equipment information is used to calculate the zero points and cutting limits during automatic program generation. Parameters H Chuck number D Spindle number for AWG R Clamp type O I K X Q 0: Parameter J defines the free length 1: Parameter J defines the clamping length Position of the chuck edge Chuck jaw reference Clamping length or free length of the workpiece (depending on the clamp type R) Cutting limit for outside machining Cutting limit for inside machining Overlap jaw/workpiece (pay attention to sign) Clamping diameter of workpiece blank Chuck form V 4: Outside chucking 5: Inside chucking Shaft machining AWG Z B J 0: Chuck: Automatic separation points at largest and smallest diameter 1: Shaft/chuck: Machining also starting from the chuck 2: Shaft/face driver: Outside contour can be machined completely If you do not define the parameters Z and B, TURN PLUS will use the following machine parameters (see "List of user parameters" in the User's Manual) during AWG (automatic working plan generation): Front chuck edge on spindle / counterspindle Jaw width on spindle / counterspindle HEIDENHAIN MANUALplus 620, CNC PILOT 640 49 1.3 Program section code TURRET section The TURRET program section defines the assignment of the tool carrier. For every assigned turret pocket, the tool ID number is entered. For multipoint tools, every cutting edge is entered in the turret list. If you do not program the TURRET, the tools entered in the tool list of the Machine operating mode will be used. Beispiel: Turret table ... TURRET T1 ID"342-300.1" T2 ID"C44003" ... BLANK section In this program section, you describe the contour of the workpiece blank. AUXIL_BLANK section In the AUXIL_ BLANK section, you define additional workpiece blanks, which can be activated with G702 when required. FINISHED section In this program section, you describe the contour of the finished part. After the FINISHED section you use additional section codes such as FACE_C, LATERAL_C, etc. AUXIL_CONTOUR section In this program section, you describe the auxiliary turning contours. 50 NC programming 1.3 Program section code FACE_C, REAR_C sections In this program section you describe the front and rear side contours to be machined with the C axis. The program section defines the position of the contour in Z direction. Parameter Z Position of the front/rear-face contour LATERAL_C section In this program section you describe the lateral surface contours to be machined with the C axis. The program section defines the position of the contour in X direction. Parameter X Reference diameter of the lateral-surface contour FACE_Y, REAR_Y sections For lathes with Y axis, these program section codes define the XY plane (G17) and the position of the contour in Z direction. The spindle angle (C) defines the spindle position. Parameters X Area diameter (as cutting limit) Z Position of the reference plane—default: 0 C Spindle angle—default: 0 HEIDENHAIN MANUALplus 620, CNC PILOT 640 51 1.3 Program section code LATERAL_Y section The section code identifies the YZ plane (G19). For machines equipped with a B axis, it defines the tilted plane. B, I, K Without tilted plane: The reference diameter defines the contour position in the X direction; the C-axis angle defines the position on the workpiece. I X Parameters X Reference diameter C H=0 B H=1 I C axis angle—Defines the spindle position Z K With tilted plane (see figures): LATERAL_Y additionally performs the following transformations and rotations for the tilted plane: Shifts the coordinate system to the position I, K Rotates the coordinate system by the angle B; reference point: I, K H=0: Shifts the rotated coordinate system by –I. The coordinate system is moved "back." Parameters X Reference diameter C C axis angle—Defines the spindle position B Plane angle: Positive Z axis I Plane reference in X direction (radius) K Plane reference in Z direction H Automatic shift of the coordinate system (default: 0) X X B B Z Z 0: The rotated coordinate system is shifted by –I 1: The coordinate system is not shifted Shifting "back" the coordinate system: The control evaluates the reference diameter for the cutting limit. This value is also used as the reference value for the depth that you program for drilling operations and milling contours. Since the reference diameter is referenced to the current zero point, it is recommended when working in a tilted plane, to shift the rotated coordinate system "back" by the distance –I. If the cutting limits are not needed, for example for drilling holes, you can disable the shift of the coordinate system (H=1) and set the reference diameter to 0. 52 Beispiel: LATERAL_Y HEADER ... CONTOUR Q1 X0 Z600 BLANK ... FINISHED Please note: ... X is the infeed axis in a tilted coordinate system. X coordinates are entered as diameter coordinates. Mirroring the coordinate system has no effect on the reference axis of the tilt angle ("B axis angle" of the tool call). LATERAL_Y X118 C0 B130 I59 K0 ... MACHINING ... NC programming 1.3 Program section code MACHINING section In the MACHINING program section you program the machining operations. This code must be included. END code The END code concludes the NC program. This code must be included. SUBPROGRAM section If you define a subprogram within your NC program (within the same file), it is designated with SUBPROGRAM, followed by the name of the subprogram (max. 40 characters). RETURN code The RETURN code concludes the subprogram. HEIDENHAIN MANUALplus 620, CNC PILOT 640 53 1.3 Program section code CONST code In the CONST section of the program you define constants. You use constants for the definition of a value. You enter the value directly or you calculate it. If you use constants in the calculation you must first define them. The length of the constant name must not exceed 20 characters. Lower case letters and numbers are allowed. Constants always begin with an underscore: see "Expanded variable syntax CONST – VAR" on page 420. Beispiel: CONST CONST _nvr = 0 _sd=PARA("","CfgGlobalTechPara","safetyDis tWorkpOut") _nws = _sd-_nvr ... BLANK N 1 G20 X120 Z_nws K2 ... MACHINING N 6 G0 X100+_sd ... VAR code In the VAR program section, you assign names (descriptive text) to variables: see "Expanded variable syntax CONST – VAR" on page 420. The length of the variable name must not exceed 20 characters. Lower case letters and numbers are allowed. Variables always begin with "#". Beispiel: VAR VAR #_inside_dm = #l2 #_length = #g3 ... BLANK N 1 #_length=120 N 2 #_inside_dm=25 N 3 G20 X120 Z#_length+2 K2 I#_inside_dm ... MACHINING ... 54 NC programming 1.4 Tool programming 1.4 Tool programming The designations of the tool pockets are fixed by the machine tool builder. Each tool holder has a unique T number. In the T command (MACHINING section) you program the T number, and therefore the position to which the tool carrier rotates. The Steuerung retrieves the assignment of the tools to the turret position from the turret list of the TURRET section. You can edit the tool entries individually, or you can call the tool list via the Set up the turret list menu item and then edit it. Setting up a tool list In the "Set up the turret list" function, the Steuerung provides the turret assignment as a tool list for editing. You have the following options: Editing the turret assignment: Transfer tools from the database, delete entries or move them to other positions (for soft keys see table). Loading the turret list of the Machine mode of operation. Deleting the current turret assignment of the NC program. Loading the turret list of the Machine mode of operation: Select "Head > Set up the turret list." Switch to "Special functions." Load the tool list of the Machine mode of operation into the NC program. Deleting a tool list: Select "Head > Set up the turret list." Switch to "Special functions." Delete all entries of the turret list. Soft keys in turret list Delete entry Paste entry from clipboard Cut out entry and save it in the clipboard Show entries in the tool database Save the turret assignment Close the tool list. You decide whether the changes made remain in effect The input window of the selected tool is opened for editing HEIDENHAIN MANUALplus 620, CNC PILOT 640 55 1.4 Tool programming Editing tool entries For each entry of the TURRET section you call the Tool dialog box, enter the identification number or use the identification number from the tool database. New tool entry Position the cursor and press the INS (insert) key. The editor opens the Tool dialog box. Enter the identification number of the tool. Open the tool database. Place the cursor on the tool to be loaded. Transfer the identification number of the tool. Parameters of the "Tool" dialog box T number Position on tool carrier ID number ID number (reference to database) Editing the tool data Position the cursor on the entry to be edited and press RETURN. Replacement tool Identification number of the tool to be used when the previous tool is worn out. Edit the Tool dialog box. Replacement strategy 0: Complete tool 1: Secondary cutting edge or any Multipoint tools A multipoint tool is a tool with multiple reference points or multiple cutting edges. During T call, the T number is followed by an S to identify the cutting edge. T number.S (S=0 to 9) S=0 identifies the main cutting edge, which does not need to be programmed. Examples: T3 or T3.0: Tilted position 3; main cutting edge T12.2: Tilted position 12; cutting edge 2 56 NC programming 1.4 Tool programming Replacement tools During "simple" tool life monitoring the control stops program run when a tool is worn out. However, the program run is then resumed and concluded. If you use the tool life monitoring with replacement tools function, the Steuerung automatically inserts the "sister tool" as soon as the tool is worn out. The Steuerung does not stop the program run until the last tool of the tool sequence of exchange is worn out. You can define replacement tools when setting up the turret. The "interchange chain" can contain more than one replacement tool. The interchange chain is a part of the NC program. In the T commands, you program the first tool to be changed. Defining replacement tools Place the cursor on the previous tool and press RETURN. Enter the identification number of the replacement tool (Tool dialog box) and define the replacement strategy. When using multipoint tools, you define in the replacement strategy whether the complete multipoint tool or only the worn-out cutting edge of the tool is to be replaced by a replacement tool: 0: Complete tool (default): If a cutting edge of the multipoint tool is worn out, the tool will no longer be used. 1: Secondary cutting edge or any: Only the worn-out cutting edge of the multipoint tool is replaced by another tool or another cutting edge. Any other cutting edges of the multipoint tool that are not worn out will continue to be used. HEIDENHAIN MANUALplus 620, CNC PILOT 640 57 58 NC programming 1.4 Tool programming smart.Turn units 2.1 smart.Turn units 2.1 smart.Turn units "Units" menu The "Units" menu contains the unit calls grouped by the type of machining operation. Select the Units menu to call the following pulldown menus: Roughing Recessing Drilling and predrilling (C axis and Y axis) Finishing Thread Milling (C axis and Y axis) Special operations The smart.Turn unit A unit describes a complete working block. This means that the unit includes the tool call, the technology data, the cycle call, the approach and departure strategies as well as global data, such as safety clearance, etc. All of these parameters are collected in one, clearly structured dialog box. Unit forms The unit dialog is divided into fillable forms and the forms are divided again into groups. You can navigate between the forms and groups with the smart keys. Forms in unit dialogs Overview Overview form with all necessary settings Tool Tool form with tool selection, technological settings and M functions Contour Description or selection of the contour to be machined Cycle Description of the machining operation Global View and settings of globally set values AppDep Definition of approach and departure behavior ToolExt Extended tool settings 60 smart.Turn units 2.1 smart.Turn units The Overview form The overview form summarizes the most important settings of the unit. These parameters are repeated in the other forms. The Tool form You program the technological information in this form. Tool form Tool T Tool number (number of turret pocket). TID The identification number (tool name) is entered automatically. F Feed rate: Feed rate in revolutions for machining (mm/rev). The tool is moved at the programmed value for each spindle revolution. S (Constant) cutting speed (m/min) or constant shaft speed (rev/min). Switchable with Type of turning GS. Spindle GS Type of turning MD G96: Constant surface speed. The rotational speed changes with the turning diameter. G97: Constant shaft speed. Rotational speed is independent of the turning diameter. Direction of rotation M03: Clockwise (CW) M04: Counterclockwise (CCW) SPI Workpiece spindle number (0 to 3). Spindle that is holding the workpiece (only on machines with more than one spindle). SPT Tool spindle number (0 to 3). Spindle of the driven tool. M functions MT M after T: M function that is executed after the tool call T. MFS M at beginning: M function that is executed at the beginning of the machining step. MFE M at end: M function that is executed at the end of the machining step. Soft keys in the tool form Selects the tool number Loads the feed rate, cutting speed and infeed from the technology database. A machining operation is assigned to each unit for access to the technology database. The following description shows the assigned machining mode and the unit parameters that were changed by the technology proposal. HEIDENHAIN MANUALplus 620, CNC PILOT 640 61 2.1 smart.Turn units The Contour form In the contour form you define the contours to be machined. A difference is made between the direct contour definition (G80) and the reference to an external contour definition (FINISHED or AUXIL_CONTOUR program sections). ICP contour definition parameters FK Auxiliary contour: Name of the contour to be machined NS NE You can select an existing contour or describe a new contour with ICP. Contour start block number: Beginning of contour section Contour end block number: End of contour section V NE not programmed: The contour element NS is machined in the direction of contour definition. NS=NE programmed: The contour element NS is machined opposite to the direction of contour definition. Machine form elements (default: 0) A chamfer/rounding arc is machined: 0: At start and end of the contour 1: At start of the contour 2: At end of the contour 3: No machining 4: Only chamfer/rounding is machined—not the basic element. (Requirement: the contour section consists of a single element) XA, ZA Starting point of blank (only effective if no blank was programmed): BP BF XA, ZA not programmed: The workpiece blank contour is calculated from the tool position and the ICP contour. XA, ZA programmed: Definition of the corner point of the workpiece blank. Break duration: Time span for interruption of the feed. The chip is broken by the (intermittent) interruption of the feed. Feed duration: Time interval until the next break. The chip is broken by the (intermittent) interruption of the feed. The listed soft keys are only selectable if the input cursor is in the FK field, or on NS or NE. Soft keys in the ICP contour form Opens the selection list of the contours defined in the program. Shows all contours in the graphics window. Use the arrow keys for selection. Starts the ICP editor. First, enter the desired contour name in FK. Starts the ICP editor with the currently selected contour. Opens the graphics window for selection of a part of a contour for NS and NE. 62 smart.Turn units 2.1 smart.Turn units Direct contour definition parameters for turning operations EC Type of contour 0: Normal contour 1: Plunging contour X1, Z1 Contour starting point X2, Z2 Contour end point RC Rounding: Radius of contour corner AC Start angle: Angle of the first contour element (range: 0° < 90°) WC End angle: Angle of the last contour element (range: 0° < 90°) BS –Chamfer/+radius at start: BE BP BF BS>0: Radius of rounding arc BS<0: Section length of chamfer –Chamfer/+radius at end: BE>0: Radius of rounding arc BE<0: Section length of chamfer Break duration: Time span for interruption of the feed. The chip is broken by the (intermittent) interruption of the feed. Feed duration: Time interval until the next break. The chip is broken by the (intermittent) interruption of the feed. Direct contour definition parameters for recessing operations X1, Z1 Contour starting point X2, Z2 Contour end point RC Rounding: Radii in the recess base AC Start angle: Angle of the first contour element (range: 0° <= 90°) WC End angle: Angle of the last contour element (range: 0° <= 90°) BS –Chamfer/+radius at start: BE BS>0: Radius of rounding arc BS<0: Section length of chamfer –Chamfer/+radius at end: BE>0: Radius of rounding arc BE<0: Section length of chamfer HEIDENHAIN MANUALplus 620, CNC PILOT 640 63 2.1 smart.Turn units The Global form This form contains parameters that were defined as default values in the start unit. You can edit these parameters in the machining units. Parameters on the Global form G14 Tool change point CLT G47 SCK SCI G60 No axis 0: Simultaneously 1: First X, then Z 2: First Z, then X 3: Only X 4: Only Z 5: Only Y direction 6: Simultaneous with Y (X, Y and Z axes move on a diagonal path) Coolant 0: Without 1: Circuit 1 on 2: Circuit 2 on Safety clearance: Indicates the distance to the current blank material at which the tool is not moved at rapid traverse during turning operations. Safety clearance in infeed direction: Safety clearance in infeed direction during drilling and milling operations. Safety clearance in plane: Safety clearance in the working plane during drilling and milling operations. Protection zone. During drilling and boring the protection zone monitoring is 0: Active 1: Inactive The units G840 "Contour milling, figures" and G84X "Pocket milling, figures" additionally provide the parameter RB "Retraction plane" on the Global form. 64 smart.Turn units 2.1 smart.Turn units The AppDep form Positions and variants of the approach and departure movements are defined in this form. Approach: Influence the approach strategy. "Approach" parameters APP Type of approach: No axis (switch off the approach function) 0: Simultaneous (X and Z axes approach diagonally) 1: First X, then Z 2: First Z, then X 3: Only X 4: Only Z XS, ZS Approach position: Position of the tool point before cycle call Additionally with C-axis operations: CS Approach position: C-axis position that is approached before cycle call with G110. "Approach with Y axis" parameters APP Type of approach: XS, YS, ZS CS No axis (switch off the approach function) 0: Simultaneous (X and Z axes approach diagonally) 1: First X, then Z 2: First Z, then X 3: Only X 4: Only Z 5: Only Y direction 6: Simultaneous with Y (X, Y and Z axes approach diagonally) Approach position: Position of the tool point before cycle call Approach position: C-axis position that is approached before cycle call with G110. Departure: Influence the departure strategy (also applies for Y-axis functions). "Departure" parameters DEP Type of departure: No axis (switch off the departure function) 0: Simultaneous (X and Z axes depart diagonally) 1: First X, then Z 2: First Z, then X 3: Only X 4: Only Z XE, ZE Departure position: Position of the tool point before the movement to the tool change point. HEIDENHAIN MANUALplus 620, CNC PILOT 640 65 2.1 smart.Turn units The Tool Ext form In this form you can program additional tool settings. Tool Ext form Tool T Tool number (number of turret pocket). TID The identification number (tool name) is entered automatically. B axis B Angle in the B axis (machine-dependent function) CW C tilting plane angle: Position of the C axis to determine the work position of the tool (machine-dependent function) Miscellaneous functions HC Shoe brake (machine-dependent function) 0: Automatic 1: Tighten 2: Don't tighten DF Additional function: Can be evaluated by the machine manufacturer in a subprogram (machine-dependent function) XL, ZL, Values can be evaluated by the machine manufacturer in a YL subprogram (machine-dependent function) With the Advanced T change soft key you can switch quickly and easily between the Tool and Tool Ext forms. 66 smart.Turn units 2.2 Units—Roughing 2.2 Units—Roughing "Longitudinal roughing in ICP" unit The unit machines the contour described in the FINISHED program section from "NS to NE". Any auxiliary contour defined in FK will be used. Unit name: G810_ICP / Cycle: G810 (see page 272) Contour form: see page 62 Cycle form I, K Oversize in X, Z direction (I: diameter value) P Maximum infeed E Plunging behavior Q E=0: Descending contours are not machined E>0: Plunging feed rate for declining contour elements. Descending contour elements are machined. No input: The plunging feed rate is reduced during machining of declining contour elements by up to 50 %. Descending contour elements are machined. Cutting limit (SX: diameter value)—(default: no cutting limit) Approach angle (reference: Z axis)—(default: parallel to Z axis) Departure angle (reference: Z axis)—(default: orthogonal to Z axis) Type of retraction at end of cycle H 0: Returns to starting point (first X, then Z direction) 1: Positions in front of the finished contour 2: Retracts to safety clearance and stops Contour smoothing D U 0: With each cut along the contour (within the infeed range) 1: Contour smoothing with the last cut (entire contour); retracts at 45° 2: No smoothing; retracts at 45° Omit elements (see figure) Cut line on horizontal element: O 0: No (regular proportioning of cuts) 1: Yes (may result in irregular proportioning of cuts) Hide undercutting: SX, SZ A W 0: Undercuts are machined 1: Undercuts are not machined Further forms: see page 60 Access to the technology database: Machining operation: Roughing Affected parameters: F, S, E, P HEIDENHAIN MANUALplus 620, CNC PILOT 640 67 2.2 Units—Roughing "Transverse roughing in ICP" unit The unit machines the contour described in the FINISHED program section from "NS to NE". Any auxiliary contour defined in FK will be used. Unit name: G820_ICP / Cycle: G820 (see page 275) Contour form: see page 62 Cycle form I, K Oversize in X, Z direction (I = diameter value) P Maximum infeed E Plunging behavior Q E=0: Descending contours are not machined E>0: Plunging feed rate for declining contour elements. Descending contour elements are machined. No input: The plunging feed rate is reduced during machining of declining contour elements by up to 50 %. Descending contour elements are machined. Cutting limit (SX: diameter value)—(default: no cutting limit) Approach angle (reference: Z axis)—(default: orthogonal to Z axis) Departure angle (reference: Z axis)—(default: parallel to Z axis) Type of retraction at end of cycle H 0: Returns to starting point (first X, then Z direction) 1: Positions in front of the finished contour 2: Retracts to safety clearance and stops Contour smoothing D U 0: With each cut along the contour (within the infeed range) 1: Contour smoothing with the last cut (entire contour); retracts at 45° 2: No smoothing; retracts at 45° Omit elements; do not machine form elements (see figure) Cut line on horizontal element: O 0: No (regular proportioning of cuts) 1: Yes (may result in irregular proportioning of cuts) Hide undercutting: SX, SZ A W 0: Undercuts are machined 1: Undercuts are not machined Further forms: see page 60 Access to the technology database: Machining operation: Roughing Affected parameters: F, S, E, P 68 smart.Turn units 2.2 Units—Roughing "Contour-parallel roughing in ICP" unit The unit machines the contour described in the FINISHED program section from "NS to NE" parallel to the contour. Any auxiliary contour defined in FK will be used. Unit name: G830_ICP / Cycle: G830 (see page 278) Contour form J Workpiece blank oversize (radius value)—active only if no blank has been defined. B Contour calculation 0: Automatic 1: Tool to the left (G41) 2: Tool to the right (G42) Further parameters of the contour form: see page 62 Cycle form P Maximum infeed I, K Oversize in X, Z direction (I: diameter value) SX, SZ Cutting limit (SX: diameter value)—(default: no cutting limit) A Approach angle (reference: Z axis)—(default: parallel to Z axis) W Departure angle (reference: Z axis)—(default: orthogonal to Z axis) Q Type of retraction at end of cycle H 0: Returns to starting point (first X, then Z direction) 1: Positions in front of the finished contour 2: Retracts to safety clearance and stops Type of cut lines (cutting paths) D HR 0: Constant cutting depth: Contour is shifted by a constant infeed value (paraxial) 1: Equidistant cutting lines: Cutting lines run at a constant distance from the contour (contour parallel). The contour is scaled. Omit elements; do not machine form elements (see figure) Main machining direction 0: Automatic 1: +Z 2: +X 3: -Z 4: -X Further forms: see page 60 Access to the technology database: Machining operation: Roughing Affected parameters: F, S, E, P HEIDENHAIN MANUALplus 620, CNC PILOT 640 69 2.2 Units—Roughing "Bidirectional roughing in ICP" unit The unit machines the contour described in the FINISHED program section from "NS to NE" parallel to the contour and bidirectionally. Any auxiliary contour defined in FK will be used. Unit name: G835_ICP / Cycle: G835 (see page 281) Contour form J Workpiece blank oversize (radius value)—active only if no blank has been defined. B Contour calculation 0: Automatic 1: Tool to the left (G41) 2: Tool to the right (G42) Further parameters of the contour form: see page 62 Cycle form P Maximum infeed I, K Oversize in X, Z direction (I = diameter value) SX, SZ Cutting limit (SX: diameter value)—(default: no cutting limit) A Approach angle (reference: Z axis)—(default: parallel to Z axis) W Departure angle (reference: Z axis)—(default: orthogonal to Z axis) Q Type of retraction at end of cycle H 0: Returns to starting point (first X, then Z direction) 1: Positions in front of the finished contour 2: Retracts to safety clearance and stops Type of cut lines (cutting paths) 0: Constant cutting depth: Contour is shifted by a constant infeed value (paraxial) 1: Equidistant cutting lines: Cutting lines run at a constant distance from the contour (contour parallel). The contour is scaled. D Omit elements; do not machine form elements (see figure) Further forms: see page 60 Access to the technology database: Machining operation: Roughing Affected parameters: F, S, E, P 70 smart.Turn units 2.2 Units—Roughing "Longitudinal roughing with direct contour input" unit The unit machines the contour defined by the parameters. In EC you define whether you want to machine a normal or a plunging contour. Unit name: G810_G80 / Cycle: G810 (see page 272) Contour form EC Type of contour BS 0: Normal contour 1: Plunging contour Contour starting point Contour end point Rounding: Radius of contour corner Start angle: Angle of the first contour element (range: 0° < 90°) End angle: Angle of the last contour element (range: 0° < 90°) –Chamfer/+radius at start: BE BS>0: Radius of rounding arc BS<0: Section length of chamfer –Chamfer/+radius at end X1, Z1 X2, Z2 RC AC WC BE>0: Radius of rounding arc BE<0: Section length of chamfer BP Break duration: Time span for interruption of the feed for chip breaking. BF Feed duration: Time interval until the next break. The interruption of the feed rate breaks the chip. Cycle form P Maximum infeed I, K Oversize in X, Z direction (I: diameter value) E Plunging behavior H E>0: Plunging feed rate for declining contour elements. Descending contour elements are machined. No input: The plunging feed rate is reduced during machining of declining contour elements by up to 50 %. Descending contour elements are machined. Contour smoothing 0: With each cut along the contour (within the infeed range) 1: Contour smoothing with the last cut (entire contour); retracts at 45° 2: No smoothing; retracts at 45° Further forms: see page 60 HEIDENHAIN MANUALplus 620, CNC PILOT 640 Access to the technology database: Machining operation: Roughing Affected parameters: F, S, E, P 71 2.2 Units—Roughing "Transverse roughing with direct contour input" unit The unit machines the contour defined by the parameters. In EC you define whether you want to machine a normal or a plunging contour. Unit name: G820_G80 / Cycle: G820 (see page 275) Contour form EC Type of contour BS 0: Normal contour 1: Plunging contour Contour starting point Contour end point Rounding: Radius of contour corner Start angle: Angle of the first contour element (range: 0° < AC < 90°) End angle: Angle of the last contour element (range: 0° < WC < 90°) Chamfer/radius at start BE BS>0: Radius of rounding arc BS<0: Section length of chamfer Chamfer/radius at end X1, Z1 X2, Z2 RC AC WC BE>0: Radius of rounding arc BE<0: Section length of chamfer BP Break duration: Time span for interruption of the feed. The chip is broken by the (intermittent) interruption of the feed. BF Feed duration: Time interval until the next break. The chip is broken by the (intermittent) interruption of the feed. Cycle form P Maximum infeed I, K Oversize in X, Z direction (I: diameter value) E Plunging behavior H E>0: Plunging feed rate for declining contour elements. Descending contour elements are machined. No input: The plunging feed rate is reduced during machining of declining contour elements by up to 50 %. Descending contour elements are machined. Contour smoothing 0: With each cut along the contour (within the infeed range) 1: Contour smoothing with the last cut (entire contour); retracts at 45° 2: No smoothing; retracts at 45° Further forms: see page 60 72 Access to the technology database: Machining operation: Roughing Affected parameters: F, S, E, P smart.Turn units 2.3 Units—Recessing 2.3 Units—Recessing "ICP contour recessing" unit The unit machines the contour described in the FINISHED program section axially/radially from "NS to NE". Any auxiliary contour defined in FK will be used. Unit name: G860_ICP / Cycle: G860 (see page 283) Contour form DQ Number of recessing cycles DX, DZ Distance to subsequent recess in X, Z direction (DX: radius value) Further parameters of the contour form: see page 62 Cycle form I, K Oversize in X, Z direction (I: diameter value) SX, SZ Cutting limit (SX: diameter value)—(default: no cutting limit) ET Recessing depth by which one cut is fed. P Recessing width (default: 0.8 x tool width) E Finishing feed rate. Differing feed rate used only for the finishing process. EZ Period of dwell after recessing path (default: time for one spindle revolution) Q Roughing/finishing (process variants) H 0 (SS): Roughing and finishing 1 (SP): Only roughing 2 (SL): Only finishing Type of retraction at end of cycle 0: Return to starting point Axial recess: First Z, then X direction Radial recess: First X, then Z direction O 1: Positions in front of the finished contour 2: Retracts to safety clearance and stops End of rough cut U 0: Lift-up at rapid 1: Half recessing width 45° End of finishing cut Access to the technology database: Machining operation: Contour recessing Affected parameters: F, S, E 0: Value from global parameter 1: Parting horizontal element 2: Complete horizontal element Further forms: see page 60 HEIDENHAIN MANUALplus 620, CNC PILOT 640 73 2.3 Units—Recessing "ICP recess turning" unit The unit machines the contour described by ICP axially/radially from "NS to NE". The workpiece is machined by alternate recessing and roughing movements. The unit machines the contour described in the FINISHED program section axially/radially from "NS to NE". Any auxiliary contour defined in FK will be used. Unit name: G869_ICP / Cycle: G869 (see page 286) Contour form X1, Z1 Starting point of blank: Evaluation only if no blank has been defined RI, RK Workpiece blank oversize in X and Z direction SX, SZ Cutting limit (SX: diameter value)—(default: no cutting limit) Further parameters of the contour form: see page 62 Cycle form P Maximum infeed during rough turning I, K Oversize in X, Z direction (I: diameter value) RB Turning depth compensation for finishing B Offset width U Cutting direction Q 0 (Bi): Bidirectional (in both directions) 1 (Uni): Unidirectional (in direction of contour) Sequence (roughing/finishing) A W O E H 0: Roughing and finishing 1: Only roughing 2: Only finishing Approach angle (default: opposite to recessing direction) Departure angle (default: opposite to recessing direction) Recessing feed rate (default: active feed rate) Finishing feed rate (default: active feed rate) Type of retraction at end of cycle 0: Return to starting point Axial recess: First Z, then X direction Radial recess: First X, then Z direction 1: Positions in front of the finished contour 2: Retracts to safety clearance and stops Further forms: see page 60 The Steuerung uses the tool definition to distinguish between radial and axial recessing. Turning depth compensation RB: Depending on factors such as workpiece material or feed rate, the tool tip is displaced during a turning operation. You can correct the resulting infeed error with the turning depth compensation factor. The value is usually determined empirically. 74 Access to the technology database: Machining operation: Recess turning Affected parameters: F, S, O, P smart.Turn units 2.3 Units—Recessing Offset width B: After the second infeed movement, during the transition from turning to recessing, the path to be machined is reduced by "offset width B." Each time the system switches on this side, the path is reduced by B—in addition to the previous offset. The total offset is limited to 80 % of the effective cutting width (effective cutting width = cutting width –2*cutting radius). If required, the Steuerung reduces the programmed offset width. After clearance roughing, the remaining material is removed with a single cut. "Contour recessing with direct contour input" unit The unit machines the contour defined by the parameters axially/ radially. Unit name: G860_G80 / Cycle: G860 (see page 283) Contour form: RI, RK Workpiece blank oversize in X and Z direction Further parameters of the contour form: see page 62 Cycle form Q Roughing/finishing (process variants) 0: Roughing and finishing 1: Only roughing 2: Only finishing I, K Oversize in X, Z direction (I: diameter value) ET Recessing depth P Recessing width (default: 0.8 x tool width) E Finishing feed rate: Differing feed rate used only for the finishing process EZ Period of dwell after recessing path (default: time for one spindle revolution) D Revolutions on recessing floor DQ Number of recessing cycles DX, DZ Distance to subsequent recess in X, Z direction Further forms: see page 60 The Steuerung uses the tool definition to distinguish between radial and axial recessing. Access to the technology database: Machining operation: Contour recessing Affected parameters: F, S, E HEIDENHAIN MANUALplus 620, CNC PILOT 640 75 2.3 Units—Recessing "Recess turning with direct contour input" unit The unit machines the contour defined by the parameters axially/ radially. The workpiece is machined by alternate recessing and roughing movements. The machining process requires a minimum of retraction and infeed movements. Unit name: G869_G80 / Cycle: G869 (see page 286) Contour form: RI, RK Workpiece blank oversize in X and Z direction Further parameters of the contour form: see page 62 Cycle form P Maximum infeed during rough turning I, K Oversize in X, Z direction (I: diameter value) RB Turning depth compensation for finishing B Offset width U Cutting direction Q 0 (Bi): Bidirectional (in both directions) 1 (Uni): Unidirectional (in direction of contour) Sequence (roughing/finishing) 0: Roughing and finishing 1: Only roughing 2: Only finishing Further forms: see page 60 The Steuerung uses the tool definition to distinguish between radial and axial recessing. Turning depth compensation RB: Depending on factors such as workpiece material or feed rate, the tool tip is displaced during a turning operation. You can correct the resulting infeed error with the turning depth compensation factor. The value is usually determined empirically. Offset width B: After the second infeed movement, during the transition from turning to recessing, the path to be machined is reduced by "offset width B." Each time the system switches on this side, the path is reduced by B—in addition to the previous offset. The total offset is limited to 80 % of the effective cutting width (effective cutting width = cutting width –2*cutting radius). If required, the Steuerung reduces the programmed offset width. After clearance roughing, the remaining material is removed with a single cut. Access to the technology database: Machining operation: Recess turning Affected parameters: F, S, O, P 76 smart.Turn units 2.3 Units—Recessing "Parting" unit The unit parts the workpiece. If programmed, a chamfer or rounding arc is machined on the outside diameter. At the end of cycle, the tool returns to the starting point. You can define a feed rate reduction, which becomes effective as soon as the position I is reached. Unit name: G859_CUT_OFF / Cycle: G859 (see page 315) Cycle form X1, Z1 Starting point of contour in X, Z (X: diameter value) B Chamfer/rounding B>0: Radius of rounding arc B<0: Section length of chamfer D Maximum speed XE Inside diameter (pipe) I Diameter for feed-rate reduction. Limit diameter over which traverse is at reduced feed rate. E Reduced feed rate SD Speed limitation from the diameter I up U Diameter from which the part catcher is activated (machine-dependent function) K Retraction distance after parting: Lift off the tool laterally from the plane surface before retraction Further forms: see page 60 The limit to the maximum speed "D" is only effective in the cycle. After the cycle ends, the speed limit before the cycle become effective. Access to the technology database: Machining operation: Contour recessing Affected parameters: F, S, E HEIDENHAIN MANUALplus 620, CNC PILOT 640 77 2.3 Units—Recessing "Undercutting (H, K, U)" unit Depending on KG, the unit machines one of the following undercuts: Type U: The unit machines an undercut and finishes the adjoining plane surface. Either a chamfer or a rounding arc can be machined. Type H: The end point of the undercut is determined from the plunging angle. Type K: Only one linear cut at an angle of 45° is performed. The resulting contour geometry therefore depends on the tool that is used. First, you select the Type of undercut KG, and then you enter the values for the selected type of undercut. The Steuerung changes parameters with the same address letters for the other undercuts as well. Do not change these values. Unit name: G85x_H_K_U / Cycle: G85 (see page 316) Contour form KG Type of undercut Type U: Cycle G856 (see page 321) Type H: Cycle G857 (see page 322) Type K: Cycle G858 (see page 323) X1, Z1 Contour corner point (X: diameter value) Undercut type U X2 End point, face (diameter value) I Undercut diameter K Undercut length B Chamfer/rounding B>0: Radius of rounding arc B<0: Section length of chamfer Undercut type H K Undercut length R Radius in the undercut corner W Plunge angle Undercut type K I Undercut depth (radius) Further forms: see page 60 Access to the technology database: Machining operation: Finishing Affected parameters: F, S 78 smart.Turn units 2.3 Units—Recessing "ICP recessing" unit G870 generates a recess defined by G22-Geo. The Steuerung uses the tool definition to distinguish between external and internal machining, or between radial and axial recesses. Unit name: G870_ICP / Cycle: G870 (see page 289) Contour form I Oversize in X and Z direction EZ Period of dwell after recessing path (default: time for one spindle revolution) Further parameters of the contour form: see page 62 Further forms: see page 60 Access to the technology database: Machining operation: Recessing Affected parameters: F, S HEIDENHAIN MANUALplus 620, CNC PILOT 640 79 2.4 Units—Centric drilling 2.4 Units—Centric drilling "Centric drilling" unit The unit uses stationary tools to drill axial holes in several passes. Suitable tools can be positioned up to +/– 2 mm outside the turning center. Unit name: G74_ZENTR / Cycle: G74 (see page 331) Cycle form Z1 Start point drill (starting point of hole) Z2 End point drill (end point of hole) NS Starting block no. of contour X Start point drill (starting point of hole; diameter value)— (range: –2 mm < X < 2 mm; default: 0) E Delay (dwell time at end of hole) (default: 0) D Retraction at V AB P IB JB B RI 0: Rapid traverse 1: Feed rate Feed rate reduction 0: Without reduction 1: At end of the hole 2: At start of the hole 3: At start and end of the hole Spot drilling / through drilling length (distance for feed rate reduction) Hole depth Hole depth reduction value: Value by which the feed depth decreases after every advance. Minimum hole depth: If you have entered a hole depth reduction value, the hole depth is reduced only to the value entered in JB. Retraction distance: Value by which the tool is retracted after reaching the respective hole depth. Internal safety clearance: Distance for reapproach inside the hole (default: safety clearance SCK). "Global" form G14 Tool change point No axis 0: Simultaneously 1: First X, then Z 2: First Z, then X 3: Only X 4: Only Z 5: Only Y direction 6: Simultaneous with Y (X, Y and Z axes move on a diagonal path) 80 Access to the technology database: Machining operation: Drilling Affected parameters: F, S smart.Turn units Coolant SCK 0: Without 1: Circuit 1 on 2: Circuit 2 on Safety clearance in infeed direction: Safety clearance in infeed direction during drilling and milling operations. Protection zone. During drilling and boring the protection zone monitoring is G60 2.4 Units—Centric drilling CLT 0: Active 1: Inactive BP Break duration: Time span for interruption of the feed for chip breaking. BF Feed duration: Time interval until the next break. The interruption of the feed rate breaks the chip. Further forms: see page 60 If X is not programmed or XS is in the range of –2 mm < XS < 2 mm, then the control drills at XS. HEIDENHAIN MANUALplus 620, CNC PILOT 640 81 2.4 Units—Centric drilling "Centric tapping" unit The unit cuts axial threads using stationary tools. Unit name: G73_ZENTR / Cycle: G73 (see page 328) Cycle form Z1 Start point drill (starting point of hole) Z2 End point drill (end point of hole) NS Starting block no. of contour X Start point drill (starting point of hole; diameter value)— (range: –2 mm < X < 2 mm; default: 0) F1 Thread pitch B Run-in length L Retraction length when using floating tap holders (default: 0) SR Retraction speed (default: Shaft speed for tapping) SP Chip breaking depth SI Retraction distance Further forms: see page 60 Retraction length L: Use this parameter for floating tap holders. The cycle calculates a new nominal pitch on the basis of the thread depth, the programmed pitch, and the "retraction length." The nominal pitch is somewhat smaller than the pitch of the tap. During tapping, the tap is pulled away from the chuck by the retraction length. With this method you can achieve higher service life from the taps. Access to the technology database: Machining operation: Tapping Affected parameters: S 82 smart.Turn units 2.4 Units—Centric drilling "Boring, centric countersinking" unit The unit uses stationary tools to drill axial holes in several passes. Unit name: G72_ZENTR / Cycle: G72 (see page 327) Cycle form NS Starting block no. of contour E Delay (dwell time at end of hole) (default: 0) D Retraction at RB 0: Rapid traverse 1: Feed rate Retraction plane "Global" form G14 Tool change point CLT SCK G60 No axis 0: Simultaneously 1: First X, then Z 2: First Z, then X 3: Only X 4: Only Z 5: Only Y direction 6: Simultaneous with Y (X, Y and Z axes move on a diagonal path) Coolant 0: Without 1: Circuit 1 on 2: Circuit 2 on Safety clearance in infeed direction: Safety clearance in infeed direction during drilling and milling operations. Protection zone. During drilling and boring the protection zone monitoring is 0: Active 1: Inactive Further forms: see page 60 HEIDENHAIN MANUALplus 620, CNC PILOT 640 83 2.5 Units—Drilling in C axis 2.5 Units—Drilling in C axis "Single hole, face" unit This unit machines a hole on the face of the workpiece. Unit name: G74_Bohr_Stirn_C / Cycle: G74 (see page 331) Cycle form Z1 Start point drill (starting point of hole) Z2 End point drill (end point of hole) CS Spindle angle E Delay (dwell time at end of hole) (default: 0) D Retraction at V AB P IB JB B RI 0: Rapid traverse 1: Feed rate Feed rate reduction 0: Without reduction 1: At end of the hole 2: At start of the hole 3: At start and end of the hole Spot drilling / through drilling length – distance for feed rate reduction Hole depth Hole depth reduction value: Value by which the feed depth decreases after every advance. Minimum hole depth: If you have entered a hole depth reduction value, the hole depth is reduced only to the value entered in JB. Retraction distance: Value by which the tool is retracted after reaching the respective hole depth. Internal safety clearance: Distance for reapproach inside the hole (default: safety clearance SCK). Access to the technology database: Machining operation: Drilling Affected parameters: F, S "Global" form G14 Tool change point No axis 0: Simultaneously 1: First X, then Z 2: First Z, then X 3: Only X 4: Only Z 5: Only Y direction 6: Simultaneous with Y (X, Y and Z axes move on a diagonal path) 84 smart.Turn units Coolant SCK 0: Without 1: Circuit 1 on 2: Circuit 2 on Safety clearance in infeed direction: Safety clearance in infeed direction during drilling and milling operations. Protection zone. During drilling and boring the protection zone monitoring is G60 2.5 Units—Drilling in C axis CLT 0: Active 1: Inactive BP Break duration: Time span for interruption of the feed for chip breaking. BF Feed duration: Time interval until the next break. The interruption of the feed rate breaks the chip. Further forms: see page 60 HEIDENHAIN MANUALplus 620, CNC PILOT 640 85 2.5 Units—Drilling in C axis "Linear pattern drilling, face" unit The unit machines a linear drilling pattern in which the individual features are arranged at a regular spacing on the face. Unit name: G74_Lin_Stirn_C / Cycle: G74 (see page 331) Pattern form Q Number of holes X1, C1 Polar starting point XK, YK Cartesian starting point I, J End point (XK, YK) Ii, Ji: Distance (XKi, YKi) R Distance to first/last hole Ri Incremental distance A Pattern angle (reference is XK axis) Cycle form Z1 Start point drill (starting point of hole) Z2 End point drill (end point of hole) E Delay (dwell time at end of hole) (default: 0) D Retraction at V AB P IB JB B RI RB 86 0: Rapid traverse 1: Feed rate Feed rate reduction 0: Without reduction 1: At end of the hole 2: At start of the hole 3: At start and end of the hole Spot drilling / through drilling length (distance for feed rate reduction) Hole depth Hole depth reduction value: Value by which the feed depth decreases after every advance. Minimum hole depth: If you have entered a hole depth reduction value, the hole depth is reduced only to the value entered in JB. Retraction distance: Value by which the tool is retracted after reaching the respective hole depth. Internal safety clearance: Distance for reapproach inside the hole (default: safety clearance SCK). Retraction plane (default: return to the starting position or to the safety clearance) Access to the technology database: Machining operation: Drilling Affected parameters: F, S smart.Turn units 2.5 Units—Drilling in C axis "Global" form G14 Tool change point CLT SCK G60 No axis 0: Simultaneously 1: First X, then Z 2: First Z, then X 3: Only X 4: Only Z 5: Only Y direction 6: Simultaneous with Y (X, Y and Z axes move on a diagonal path) Coolant 0: Without 1: Circuit 1 on 2: Circuit 2 on Safety clearance in infeed direction: Safety clearance in infeed direction during drilling and milling operations. Protection zone. During drilling and boring the protection zone monitoring is 0: Active 1: Inactive BP Break duration: Time span for interruption of the feed for chip breaking. BF Feed duration: Time interval until the next break. The interruption of the feed rate breaks the chip. Further forms: see page 60 HEIDENHAIN MANUALplus 620, CNC PILOT 640 87 2.5 Units—Drilling in C axis "Circular pattern drilling, face" unit This unit machines a circular drilling pattern on the face of the workpiece. Unit name: G74_Cir_Stirn_C / Cycle: G74 (see page 331) Pattern form Q Number of holes XM, CM Polar center point XK, YK Cartesian center point A Starting angle Wi Angle increment K Pattern diameter W End angle VD Rotation direction (default: 0) VD=0, without W: Figures are arranged on a full circle VD=0, with W: Figures are arranged on the longer circular arc VD=0, with Wi: The algebraic sign of Wi defines the direction (Wi<0: clockwise) VD=1, with W: Clockwise VD=1, with Wi: Clockwise (algebraic sign of Wi has no effect) VD=2, with W: Counterclockwise VD=2, with Wi: Counterclockwise (algebraic sign of Wi has no effect) Cycle form Z1 Start point drill (starting point of hole) Z2 End point drill (end point of hole) E Delay (dwell time at end of hole) (default: 0) D Retraction at V AB P IB JB B 88 0: Rapid traverse 1: Feed rate Feed rate reduction 0: Without reduction 1: At end of the hole 2: At start of the hole 3: At start and end of the hole Spot drilling / through drilling length (distance for feed rate reduction) First hole depth Hole depth reduction value: Value by which the feed depth decreases after every advance. Minimum hole depth: If you have entered a hole depth reduction value, the hole depth is reduced only to the value entered in JB. Retraction distance: Value by which the tool is retracted after reaching the respective hole depth. Access to the technology database: Machining operation: Drilling Affected parameters: F, S smart.Turn units 2.5 Units—Drilling in C axis RI Internal safety clearance: Distance for reapproach inside the hole (default: safety clearance SCK). RB Retraction plane (default: return to the starting position or to the safety clearance) Further forms: see page 60 "Global" form G14 Tool change point CLT SCK G60 No axis 0: Simultaneously 1: First X, then Z 2: First Z, then X 3: Only X 4: Only Z 5: Only Y direction 6: Simultaneous with Y (X, Y and Z axes move on a diagonal path) Coolant 0: Without 1: Circuit 1 on 2: Circuit 2 on Safety clearance in infeed direction: Safety clearance in infeed direction during drilling and milling operations. Protection zone. During drilling and boring the protection zone monitoring is 0: Active 1: Inactive BP Break duration: Time span for interruption of the feed for chip breaking. BF Feed duration: Time interval until the next break. The interruption of the feed rate breaks the chip. Further forms: see page 60 HEIDENHAIN MANUALplus 620, CNC PILOT 640 89 2.5 Units—Drilling in C axis "Tapping, face" unit This unit machines a single tap hole on the face of the workpiece. Unit name: G73_Gew_Stirn_C / Cycle: G73 (see page 328) Cycle form Z1 Start point drill (starting point of hole) Z2 End point drill (end point of hole) CS Spindle angle F1 Thread pitch B Run-in length L Retraction length when using floating tap holders (default: 0) SR Retraction speed (default: Shaft speed for tapping) SP Chip breaking depth SI Retraction distance Further forms: see page 60 Use the retraction length for floating tap holders. The cycle calculates a new nominal pitch on the basis of the thread depth, the programmed pitch, and the retraction length. The nominal pitch is somewhat smaller than the pitch of the tap. During tapping, the tap is pulled away from the chuck by the retraction length. With this method you can achieve higher service life from taps. Access to the technology database: Machining operation: Tapping Affected parameters: S 90 smart.Turn units 2.5 Units—Drilling in C axis "Linear tapping pattern, face" unit The unit machines a linear tapping pattern in which the individual features are arranged at a regular spacing on the face. Unit name: G73_Lin_Stirn_C / Cycle: G73 (see page 328) Pattern form Q Number of holes X1, C1 Polar starting point XK, YK Cartesian starting point I, J End point (XK, YK) Ii, Ji: Distance (XKi, YKi) R Distance to first/last hole Ri Incremental distance A Pattern angle (reference is XK axis) Cycle form Z1 Start point drill (starting point of hole) Z2 End point drill (end point of hole) F1 Thread pitch B Run-in length L Retraction length when using floating tap holders (default: 0) SR Retraction speed (default: Shaft speed for tapping) SP Chip breaking depth SI Retraction distance RB Retraction plane (default: return to the starting position or to the safety clearance) Further forms: see page 60 Use the retraction length for floating tap holders. The cycle calculates a new nominal pitch on the basis of the thread depth, the programmed pitch, and the retraction length. The nominal pitch is somewhat smaller than the pitch of the tap. During tapping, the tap is pulled away from the chuck by the retraction length. With this method you can achieve higher service life from taps. Access to the technology database: Machining operation: Tapping Affected parameters: S HEIDENHAIN MANUALplus 620, CNC PILOT 640 91 2.5 Units—Drilling in C axis "Circular tapping pattern, face" unit This unit machines a circular tapping pattern on the face of the workpiece. Unit name: G73_Cir_Stirn_C / Cycle: G73 (see page 328) Pattern form Q Number of holes XM, CM Polar center point XK, YK Cartesian center point A Starting angle Wi Angle increment K Pattern diameter W End angle VD Rotation direction (default: 0) VD=0, without W: Figures are arranged on a full circle VD=0, with W: Figures are arranged on the longer circular arc VD=0, with Wi: The algebraic sign of Wi defines the direction (Wi<0: clockwise) VD=1, with W: Clockwise VD=1, with Wi: Clockwise (algebraic sign of Wi has no effect) VD=2, with W: Counterclockwise VD=2, with Wi: Counterclockwise (algebraic sign of Wi has no effect) Cycle form Z1 Start point drill (starting point of hole) Z2 End point drill (end point of hole) F1 Thread pitch B Run-in length L Retraction length when using floating tap holders (default: 0) SR Retraction speed (default: Shaft speed for tapping) SP Chip breaking depth SI Retraction distance RB Retraction plane (default: return to the starting position or to the safety clearance) Further forms: see page 60 Use the retraction length for floating tap holders. The cycle calculates a new nominal pitch on the basis of the thread depth, the programmed pitch, and the retraction length. The nominal pitch is somewhat smaller than the pitch of the tap. During tapping, the tap is pulled away from the chuck by the retraction length. With this method you can achieve higher service life from taps. Access to the technology database: Machining operation: Tapping Affected parameters: S 92 smart.Turn units 2.5 Units—Drilling in C axis "Single hole, lateral surface" unit This unit machines a hole on the lateral surface of the workpiece. Unit name: G74_Bohr_Mant_C / Cycle: G74 (see page 331) Cycle form X1 Start point drill (starting point of hole; diameter value) X2 End point drill (end point of hole; diameter value) CS Spindle angle E Delay (dwell time at end of hole) (default: 0) D Retraction at V AB P IB JB B RI 0: Rapid traverse 1: Feed rate Feed rate reduction 0: Without reduction 1: At end of the hole 2: At start of the hole 3: At start and end of the hole Spot drilling / through drilling length (distance for feed rate reduction) Hole depth Hole depth reduction value: Value by which the feed depth decreases after every advance. Minimum hole depth: If you have entered a hole depth reduction value, the hole depth is reduced only to the value entered in JB. Retraction distance: Value by which the tool is retracted after reaching the respective hole depth. Internal safety clearance: Distance for reapproach inside the hole (default: safety clearance SCK). "Global" form G14 Tool change point CLT No axis 0: Simultaneously 1: First X, then Z 2: First Z, then X 3: Only X 4: Only Z 5: Only Y direction 6: Simultaneous with Y (X, Y and Z axes move on a diagonal path) Coolant Access to the technology database: Machining operation: Drilling Affected parameters: F, S 0: Without 1: Circuit 1 on 2: Circuit 2 on HEIDENHAIN MANUALplus 620, CNC PILOT 640 93 2.5 Units—Drilling in C axis SCK Safety clearance in infeed direction: Safety clearance in infeed direction during drilling and milling operations. BP Break duration: Time span for interruption of the feed for chip breaking. BF Feed duration: Time interval until the next break. The interruption of the feed rate breaks the chip. Further forms: see page 60 94 smart.Turn units 2.5 Units—Drilling in C axis "Linear pattern drilling, lateral surface" unit The unit machines a linear drilling pattern in which the individual features are arranged at a regular spacing on the lateral surface. Unit name: G74_Lin_Mant_C / Cycle: G74 (see page 331) Pattern form Q Number of holes Z1, C1 Starting point of pattern Wi Angle increment W End angle Z2 End point of pattern Cycle form X1 Start point drill (starting point of hole; diameter value) X2 End point drill (end point of hole; diameter value) E Delay (dwell time at end of hole) (default: 0) D Retraction at V AB P IB JB B RI RB 0: Rapid traverse 1: Feed rate Feed rate reduction 0: Without reduction 1: At end of the hole 2: At start of the hole 3: At start and end of the hole Spot drilling / through drilling length (distance for feed rate reduction) Hole depth Hole depth reduction value: Value by which the feed depth decreases after every advance. Minimum hole depth: If you have entered a hole depth reduction value, the hole depth is reduced only to the value entered in JB. Retraction distance: Value by which the tool is retracted after reaching the respective hole depth. Internal safety clearance: Distance for reapproach inside the hole (default: safety clearance SCK). Retraction plane (default: return to the starting position or to the safety clearance) Access to the technology database: Machining operation: Drilling Affected parameters: F, S HEIDENHAIN MANUALplus 620, CNC PILOT 640 95 2.5 Units—Drilling in C axis "Global" form G14 Tool change point CLT No axis 0: Simultaneously 1: First X, then Z 2: First Z, then X 3: Only X 4: Only Z 5: Only Y direction 6: Simultaneous with Y (X, Y and Z axes move on a diagonal path) Coolant 0: Without 1: Circuit 1 on 2: Circuit 2 on SCK Safety clearance in infeed direction: Safety clearance in infeed direction during drilling and milling operations. BP Break duration: Time span for interruption of the feed for chip breaking. BF Feed duration: Time interval until the next break. The interruption of the feed rate breaks the chip. Further forms: see page 60 96 smart.Turn units 2.5 Units—Drilling in C axis "Circular pattern drilling, lateral surface" unit This unit machines a circular hole pattern on the lateral surface of the workpiece. Unit name: G74_Cir_Mant_C / Cycle: G74 (see page 331) Pattern form Q Number of holes ZM, CM Center point of pattern A Starting angle Wi Angle increment K Pattern diameter W End angle VD Rotation direction (default: 0) VD=0, without W: Figures are arranged on a full circle VD=0, with W: Figures are arranged on the longer circular arc VD=0, with Wi: The algebraic sign of Wi defines the direction (Wi<0: clockwise) VD=1, with W: Clockwise VD=1, with Wi: Clockwise (algebraic sign of Wi has no effect) VD=2, with W: Counterclockwise VD=2, with Wi: Counterclockwise (algebraic sign of Wi has no effect) Cycle form X1 Start point drill (starting point of hole; diameter value) X2 End point drill (end point of hole; diameter value) E Delay (dwell time at end of hole) (default: 0) D Retraction at: V AB P IB JB B 0: Rapid traverse 1: Feed rate Feed rate reduction: 0: Without reduction 1: At end of the hole 2: At start of the hole 3: At start and end of the hole Spot drilling / through drilling length (distance for feed rate reduction) Hole depth Hole depth reduction value: Value by which the feed depth decreases after every advance. Minimum hole depth: If you have entered a hole depth reduction value, the hole depth is reduced only to the value entered in JB. Retraction distance: Value by which the tool is retracted after reaching the respective hole depth. HEIDENHAIN MANUALplus 620, CNC PILOT 640 Access to the technology database: Machining operation: Drilling Affected parameters: F, S 97 2.5 Units—Drilling in C axis RI RB Internal safety clearance: Distance for reapproach inside the hole (default: safety clearance SCK). Retraction plane (default: return to the starting position or to the safety clearance) "Global" form G14 Tool change point CLT No axis 0: Simultaneously 1: First X, then Z 2: First Z, then X 3: Only X 4: Only Z 5: Only Y direction 6: Simultaneous with Y (X, Y and Z axes move on a diagonal path) Coolant 0: Without 1: Circuit 1 on 2: Circuit 2 on SCK Safety clearance in infeed direction: Safety clearance in infeed direction during drilling and milling operations. BP Break duration: Time span for interruption of the feed for chip breaking. BF Feed duration: Time interval until the next break. The interruption of the feed rate breaks the chip. Further forms: see page 60 98 smart.Turn units 2.5 Units—Drilling in C axis "Tap hole, lateral surface" unit This unit machines a tap hole on the lateral surface of the workpiece. Unit name: G73_Gew_Mant_C / Cycle: G73 (see page 328) Cycle form X1 Start point drill (starting point of hole; diameter value) X2 End point drill (end point of hole; diameter value) CS Spindle angle F1 Thread pitch B Run-in length L Retraction length when using floating tap holders (default: 0) SR Retraction speed (default: Shaft speed for tapping) SP Chip breaking depth SI Retraction distance Further forms: see page 60 Use the retraction length for floating tap holders. The cycle calculates a new nominal pitch on the basis of the thread depth, the programmed pitch, and the retraction length. The nominal pitch is somewhat smaller than the pitch of the tap. During tapping, the tap is pulled away from the chuck by the retraction length. With this method you can achieve higher service life from taps. Access to the technology database: Machining operation: Tapping Affected parameters: S HEIDENHAIN MANUALplus 620, CNC PILOT 640 99 2.5 Units—Drilling in C axis "Linear tapping pattern, lateral surface" unit The unit machines a linear tapping pattern in which the individual features are arranged at a regular spacing on the lateral surface. Unit name: G73_Lin_Mant_C / Cycle: G73 (see page 328) Pattern form Q Number of holes Z1, C1 Starting point of pattern Wi Angle increment W End angle Z2 End point of pattern Cycle form X1 Start point drill (starting point of hole; diameter value) X2 End point drill (end point of hole; diameter value) F1 Thread pitch B Run-in length L Retraction length when using floating tap holders (default: 0) SR Retraction speed (default: Shaft speed for tapping) SP Chip breaking depth SI Retraction distance RB Retraction plane Further forms: see page 60 Use the retraction length for floating tap holders. The cycle calculates a new nominal pitch on the basis of the thread depth, the programmed pitch, and the retraction length. The nominal pitch is somewhat smaller than the pitch of the tap. During tapping, the tap is pulled away from the chuck by the retraction length. With this method you can achieve higher service life from taps. Access to the technology database: Machining operation: Tapping Affected parameters: S 100 smart.Turn units 2.5 Units—Drilling in C axis "Circular tapping pattern, lateral surface" unit This unit machines a circular tapping pattern on the lateral surface of the workpiece. Unit name: G73_Cir_Mant_C / Cycle: G73 (see page 328) Pattern form Q Number of holes ZM, CM Center point of pattern A Starting angle Wi Angle increment K Pattern diameter W End angle VD Rotation direction (default: 0) VD=0, without W: Figures are arranged on a full circle VD=0, with W: Figures are arranged on the longer circular arc VD=0, with Wi: The algebraic sign of Wi defines the direction (Wi<0: clockwise) VD=1, with W: Clockwise VD=1, with Wi: Clockwise (algebraic sign of Wi has no effect) VD=2, with W: Counterclockwise VD=2, with Wi: Counterclockwise (algebraic sign of Wi has no effect) Cycle form X1 Start point drill (starting point of hole; diameter value) X2 End point drill (end point of hole; diameter value) F1 Thread pitch B Run-in length L Retraction length when using floating tap holders (default: 0) SR Retraction speed (default: Shaft speed for tapping) SP Chip breaking depth SI Retraction distance RB Retraction plane Further forms: see page 60 Access to the technology database: Machining operation: Tapping Affected parameters: S Use the retraction length for floating tap holders. The cycle calculates a new nominal pitch on the basis of the thread depth, the programmed pitch, and the retraction length. The nominal pitch is somewhat smaller than the pitch of the tap. During tapping, the tap is pulled away from the chuck by the retraction length. With this method you can achieve higher service life from taps. HEIDENHAIN MANUALplus 620, CNC PILOT 640 101 2.5 Units—Drilling in C axis "ICP drilling, C axis" unit The unit machines a single hole or a hole pattern on the face or lateral surface. Using ICP, you define the holes as well as further details. Unit name: G74_ICP_C / Cycle: G74 (see page 331) Pattern form FK Finished part contour NS Starting block no. of contour Cycle form E Delay (dwell time at end of hole) (default: 0) D Retraction at V AB P IB JB B RI RB 102 0: Rapid traverse 1: Feed rate Feed rate reduction 0: Without reduction 1: At end of the hole 2: At start of the hole 3: At start and end of the hole Spot drilling / through drilling length (distance for feed rate reduction) Hole depth Hole depth reduction value: Value by which the feed depth decreases after every advance. Minimum hole depth: If you have entered a hole depth reduction value, the hole depth is reduced only to the value entered in JB. Retraction distance: Value by which the tool is retracted after reaching the respective hole depth. Internal safety clearance: Distance for reapproach inside the hole (default: safety clearance SCK). Retraction plane (default: return to the starting position or to the safety clearance) Access to the technology database: Machining operation: Drilling Affected parameters: F, S smart.Turn units 2.5 Units—Drilling in C axis "Global" form G14 Tool change point CLT No axis 0: Simultaneously 1: First X, then Z 2: First Z, then X 3: Only X 4: Only Z 5: Only Y direction 6: Simultaneous with Y (X, Y and Z axes move on a diagonal path) Coolant 0: Without 1: Circuit 1 on 2: Circuit 2 on SCK Safety clearance in infeed direction: Safety clearance in infeed direction during drilling and milling operations. BP Break duration: Time span for interruption of the feed for chip breaking. BF Feed duration: Time interval until the next break. The interruption of the feed rate breaks the chip. Further forms: see page 60 HEIDENHAIN MANUALplus 620, CNC PILOT 640 103 2.5 Units—Drilling in C axis "ICP tapping, C axis" unit The unit machines a single tap hole or a tapping pattern on the face or lateral surface. Using ICP, you define the tap holes as well as further details. Unit name: G73_ICP_C / Cycle: G73 (see page 328) Pattern form FK see page 62 NS Starting block no. of contour Cycle form F1 Thread pitch B Run-in length L Retraction length when using floating tap holders (default: 0) SR Retraction speed (default: Shaft speed for tapping) SP Chip breaking depth SI Retraction distance RB Retraction plane Further forms: see page 60 Use the retraction length for floating tap holders. The cycle calculates a new nominal pitch on the basis of the thread depth, the programmed pitch, and the retraction length. The nominal pitch is somewhat smaller than the pitch of the tap. During tapping, the tap is pulled away from the chuck by the retraction length. With this method you can achieve higher service life from taps. 104 Access to the technology database: Machining operation: Tapping Affected parameters: S smart.Turn units 2.5 Units—Drilling in C axis "ICP boring/countersinking, C axis" unit The unit machines a single hole or a hole pattern on the face or lateral surface. Using ICP, you define the hole positions as well as further details for boring or countersinking. Unit name: G72_ICP_C / Cycle: G72 (see page 327) Pattern form FK see page 62 NS Starting block no. of contour Cycle form E Delay (dwell time at end of hole) (default: 0) D Retraction at 0: Rapid traverse 1: Feed rate RB Retraction plane (default: return to the starting position or to the safety clearance) Further forms: see page 60 Access to the technology database: Machining operation: Drilling Affected parameters: F, S HEIDENHAIN MANUALplus 620, CNC PILOT 640 105 2.6 Units—Predrilling in C axis 2.6 Units—Predrilling in C axis "Predrill, contour mill, figures on face" unit The unit determines the hole position and machines the hole. The subsequent milling cycle obtains the hole position from the reference stored in NF. Unit name: DRILL_STI_KON_C / Cycles: G840 A1 (see page 359); G71 (see page 325) Figure form Q Type of figure QN X1 C1 Z1 P2 L 0: Full circle 1: Linear slot 2: Circular slot 3: Triangle 4: Rectangle, square 5: Polygon Number of polygon corners—only with Q=5 (polygon) Diameter of figure center Angle of figure center Milling top edge Depth of figure Edge length / width across flats B RE A Q2 L>0: Edge length L<0: Width across flats (inside diameter) for polygon Rectangle width Rounding radius Angle to X axis Rotational direction of slot—only if Q=2 (circular slot) W cw: In clockwise direction ccw: In counterclockwise direction Angle of slot end point—only if Q=2 (circular slot) Program only the parameters relevant to the selected figure type. Access to the technology database: Machining operation: Drilling Affected parameters: F, S 106 smart.Turn units 2.6 Units—Predrilling in C axis Cycle form JK Cutter position H 0: On the contour 1: Within the contour 2: Outside the contour Cutting direction I K R WB NF E D 0: Up-cut milling 1: Climb milling Contour-parallel oversize Infeed-direction oversize Approach radius Cutter diameter Position mark Delay (dwell time at end of hole) (default: 0) Retraction at V 0: Rapid traverse 1: Feed rate Feed rate reduction 0: Without reduction 1: At end of the hole 2: At start of the hole 3: At start and end of the hole AB Spot drilling / through drilling length (distance for feed rate reduction) RB Retraction plane (default: return to the starting position or to the safety clearance) Further forms: see page 60 HEIDENHAIN MANUALplus 620, CNC PILOT 640 107 2.6 Units—Predrilling in C axis "Predrill, contour mill, ICP on face" unit The unit determines the hole position and machines the hole. The subsequent milling cycle obtains the hole position from the reference stored in NF. If the milling contour consists of multiple sections, the unit machines a hole for each section. Unit name: DRILL_STI_840_C / Cycles: G840 A1 (see page 359); G71 (see page 325) Contour form FK see page 62 NS Starting block no. of contour NE End block no. of contour Z1 Milling top edge P2 Depth of contour Cycle form JK Cutter position H 0: On the contour 1, closed contour: Within the contour 1, open contour: Left of the contour 2, closed contour: Outside the contour 2, open contour: Right of the contour 3: Depending on H and MD Cutting direction I K R WB NF E D 0: Up-cut milling 1: Climb milling Contour-parallel oversize Infeed-direction oversize Approach radius Cutter diameter Position mark Delay (dwell time at end of hole) (default: 0) Retraction at V 0: Rapid traverse 1: Feed rate Feed rate reduction 0: Without reduction 1: At end of the hole 2: At start of the hole 3: At start and end of the hole AB Spot drilling / through drilling length (distance for feed rate reduction) RB Retraction plane (default: return to the starting position or to the safety clearance) Further forms: see page 60 108 Access to the technology database: Machining operation: Drilling Affected parameters: F, S smart.Turn units 2.6 Units—Predrilling in C axis "Predrill, pocket mill, figures on face" unit The unit determines the hole position and machines the hole. The subsequent milling cycle obtains the hole position from the reference stored in NF. Unit name: DRILL_STI_TASC / Cycles: G845 A1 (see page 369); G71 (see page 325) Figure form Q Type of figure QN X1 C1 Z1 P2 L 0: Full circle 1: Linear slot 2: Circular slot 3: Triangle 4: Rectangle, square 5: Polygon Number of polygon corners—only with Q=5 (polygon) Diameter of figure center Angle of figure center Milling top edge Depth of figure Edge length / width across flats B RE A Q2 L>0: Edge length L<0: Width across flats (inside diameter) for polygon Rectangle width Rounding radius Angle to X axis Rotational direction of slot—only if Q=2 (circular slot) W cw: In clockwise direction ccw: In counterclockwise direction Angle of slot end point—only if Q=2 (circular slot) Program only the parameters relevant to the selected figure type. Access to the technology database: Machining operation: Drilling Affected parameters: F, S HEIDENHAIN MANUALplus 620, CNC PILOT 640 109 2.6 Units—Predrilling in C axis Cycle form JT Machining direction H 0: From the inside out (from the inside towards the outside) 1: From the outside in (from the outside towards the inside) Cutting direction I K U WB NF E D 0: Up-cut milling 1: Climb milling Contour-parallel oversize Infeed-direction oversize Overlap factor (default: 0.5) Cutter diameter Position mark Delay (dwell time at end of hole) (default: 0) Retraction at V 0: Rapid traverse 1: Feed rate Feed rate reduction 0: Without reduction 1: At end of the hole 2: At start of the hole 3: At start and end of the hole AB Spot drilling / through drilling length (distance for feed rate reduction) RB Retraction plane (default: return to the starting position or to the safety clearance) Further forms: see page 60 110 smart.Turn units 2.6 Units—Predrilling in C axis "Predrill, pocket mill, ICP on face" unit The unit determines the hole position and machines the hole. The subsequent milling cycle obtains the hole position from the reference stored in NF. If the pocket consists of multiple sections, the unit machines a hole for each section. Unit name: DRILL_STI_845_C / Cycles: G845 A1 (see page 369); G71 (see page 325) Contour form FK see page 62 NS Starting block no. of contour NE End block no. of contour Z1 Milling top edge P2 Depth of contour Cycle form JT Machining direction H 0: From the inside out (from the inside towards the outside) 1: From the outside in (from the outside towards the inside) Cutting direction I K U WB NF E D 0: Up-cut milling 1: Climb milling Contour-parallel oversize Infeed-direction oversize Overlap factor (default: 0.5) Cutter diameter Position mark Delay (dwell time at end of hole) (default: 0) Retraction at V 0: Rapid traverse 1: Feed rate Feed rate reduction 0: Without reduction 1: At end of the hole 2: At start of the hole 3: At start and end of the hole AB Spot drilling / through drilling length (distance for feed rate reduction) RB Retraction plane (default: return to the starting position or to the safety clearance) Further forms: see page 60 Access to the technology database: Machining operation: Drilling Affected parameters: F, S HEIDENHAIN MANUALplus 620, CNC PILOT 640 111 2.6 Units—Predrilling in C axis "Predrill, contour mill, figures on lateral surface" unit The unit determines the hole position and machines the hole. The subsequent milling cycle obtains the hole position from the reference stored in NF. Unit name: DRILL_MAN_KON_C / Cycles: G840 A1 (see page 359); G71 (see page 325) Figure form Q Type of figure QN Z1 C1 CY X1 P2 L 0: Full circle 1: Linear slot 2: Circular slot 3: Triangle 4: Rectangle, square 5: Polygon Number of polygon corners—only with Q=5 (polygon) Figure center Angle of figure center Figure center of unrolled lateral surface Milling top edge Depth of figure Edge length / width across flats B RE A Q2 L>0: Edge length L<0: Width across flats (inside diameter) for polygon Rectangle width Rounding radius Angle to Z axis Rotational direction of slot—only if Q=2 (circular slot) W cw: In clockwise direction ccw: In counterclockwise direction Angle of slot end point—only if Q=2 (circular slot) Program only the parameters relevant to the selected figure type. Access to the technology database: Machining operation: Drilling Affected parameters: F, S 112 smart.Turn units 2.6 Units—Predrilling in C axis Cycle form JK Cutter position H 0: On the contour 1: Within the contour 2: Outside the contour Cutting direction I K R WB NF E D 0: Up-cut milling 1: Climb milling Contour-parallel oversize Infeed-direction oversize Approach radius Cutter diameter Position mark Delay (dwell time at end of hole) (default: 0) Retraction at V 0: Rapid traverse 1: Feed rate Feed rate reduction 0: Without reduction 1: At end of the hole 2: At start of the hole 3: At start and end of the hole AB Spot drilling / through drilling length (distance for feed rate reduction) RB Retraction plane (default: return to the starting position or to the safety clearance) Further forms: see page 60 HEIDENHAIN MANUALplus 620, CNC PILOT 640 113 2.6 Units—Predrilling in C axis "Predrill, contour mill, ICP on lateral surface" unit The unit determines the hole position and machines the hole. The subsequent milling cycle obtains the hole position from the reference stored in NF. If the milling contour consists of multiple sections, the unit machines a hole for each section. Unit name: DRILL_MAN_840_C / Cycles: G840 A1 (see page 359); G71 (see page 325) Contour form FK see page 62 NS Starting block no. of contour NE End block no. of contour X1 Milling top edge (diameter value) P2 Depth of contour (radius value) Cycle form JK Cutter position H 0: On the contour 1, closed contour: Within the contour 1, open contour: Left of the contour 2, closed contour: Outside the contour 2, open contour: Right of the contour 3: Depending on H and MD Cutting direction I K R WB NF E D 0: Up-cut milling 1: Climb milling Contour-parallel oversize Infeed-direction oversize Approach radius Cutter diameter Position mark Delay (dwell time at end of hole) (default: 0) Retraction at V 0: Rapid traverse 1: Feed rate Feed rate reduction 0: Without reduction 1: At end of the hole 2: At start of the hole 3: At start and end of the hole AB Spot drilling / through drilling length (distance for feed rate reduction) RB Retraction plane (diameter value) Further forms: see page 60 114 Access to the technology database: Machining operation: Drilling Affected parameters: F, S smart.Turn units 2.6 Units—Predrilling in C axis "Predrill, pocket mill, figures on lateral surface" unit The unit determines the hole position and machines the hole. The subsequent milling cycle obtains the hole position from the reference stored in NF. Unit name: DRILL_MAN_TAS_C / Cycles: G845 A1 (see page 369); G71 (see page 325) Figure form Q Type of figure QN Z1 C1 CY X1 P2 L 0: Full circle 1: Linear slot 2: Circular slot 3: Triangle 4: Rectangle, square 5: Polygon Number of polygon corners—only with Q=5 (polygon) Figure center Angle of figure center Figure center of unrolled lateral surface Milling top edge Depth of figure Edge length / width across flats B RE A Q2 L>0: Edge length L<0: Width across flats (inside diameter) for polygon Rectangle width Rounding radius Angle to Z axis Rotational direction of slot—only if Q=2 (circular slot) W cw: In clockwise direction ccw: In counterclockwise direction Angle of slot end point—only if Q=2 (circular slot) Program only the parameters relevant to the selected figure type. Access to the technology database: Machining operation: Drilling Affected parameters: F, S HEIDENHAIN MANUALplus 620, CNC PILOT 640 115 2.6 Units—Predrilling in C axis Cycle form JT Machining direction H 0: From the inside out (from the inside towards the outside) 1: From the outside in (from the outside towards the inside) Cutting direction I K U WB NF E D 0: Up-cut milling 1: Climb milling Infeed-direction oversize Contour-parallel oversize Overlap factor (default: 0.5) Cutter diameter Position mark Delay (dwell time at end of hole) (default: 0) Retraction at V 0: Rapid traverse 1: Feed rate Feed rate reduction 0: Without reduction 1: At end of the hole 2: At start of the hole 3: At start and end of the hole AB Spot drilling / through drilling length (distance for feed rate reduction) RB Retraction plane (default: return to the starting position or to the safety clearance) Further forms: see page 60 116 smart.Turn units 2.6 Units—Predrilling in C axis "Predrill, pocket mill, ICP on lateral surface" unit The unit determines the hole position and machines the hole. The subsequent milling cycle obtains the hole position from the reference stored in NF. If the pocket consists of multiple sections, the unit machines a hole for each section. Unit name: DRILL_MAN_845_C / Cycles: G845 A1 (see page 369); G71 (see page 325) Contour form FK see page 62 NS Starting block no. of contour NE End block no. of contour X1 Milling top edge (diameter value) P2 Depth of contour Cycle form JT Machining direction H 0: From the inside out (from the inside towards the outside) 1: From the outside in (from the outside towards the inside) Cutting direction I K U WB NF E D 0: Up-cut milling 1: Climb milling Infeed-direction oversize Contour-parallel oversize Overlap factor (default: 0.5) Cutter diameter Position mark Delay (dwell time at end of hole) (default: 0) Retraction at V 0: Rapid traverse 1: Feed rate Feed rate reduction 0: Without reduction 1: At end of the hole 2: At start of the hole 3: At start and end of the hole AB Spot drilling / through drilling length (distance for feed rate reduction) RB Retraction plane (diameter value) Further forms: see page 60 Access to the technology database: Machining operation: Drilling Affected parameters: F, S HEIDENHAIN MANUALplus 620, CNC PILOT 640 117 2.7 Units—Finishing 2.7 Units—Finishing "ICP contour finishing" unit The unit finishes the contour described by ICP from "NS to NE" in one pass. Unit name: G890_ICP / Cycle: G890 (see page 290) Contour form B Switch on TRC (type of tool radius compensation) HR 0: Automatic 1: Tool to the left (G41) 2: Tool to the right (G42) 3: Automatic, without tool angle compensation 4: Tool to the left (G41), without tool angle compensation 5: Tool to the right (G42), without tool angle compensation Main cutting direction 0: Automatic 1: +Z 2: +X 3: -Z 4: -X SX, SZ Cutting limit (SX: diameter value)—(default: no cutting limit) Further parameters of the contour form: see page 62 Cycle form Q Type of approach (default: 0) 0: Automatic selection—the Steuerung checks: Diagonal approach First X, then Z direction Equidistant around the barrier Omission of the first contour elements if the starting position is inaccessible 1: First X, then Z direction 2: First Z, then X direction 3: No approach—tool is located near the starting point of the contour area. Access to the technology database: Machining operation: Finishing Affected parameters: F, S 118 smart.Turn units 2.7 Units—Finishing Cycle form H Type of retraction. Tool backs off at 45° against the machining direction and moves to the position I, K (default: 3): D E 0: Diagonal 1: First X, then Z direction 2: First Z, then X direction 3: Stops at safety clearance 4: No retraction motion (tool remains on the end coordinate) 5: Diagonal to start position 6: First X, then Z direction to start position 7: First Z, then X direction to start position 8: With G1 to I and K Cycle end position. Position that is approached at the end of the cycle (I: diameter value). Omit elements (see figure) Plunging behavior O E=0: Descending contours are not machined E>0: Plunging feed rate for declining contour elements. Descending contour elements are machined. No input: The plunging feed rate is reduced during machining of declining contour elements by up to 50 %. Descending contour elements are machined. Feed rate reduction for circular elements (default: 0) I, K 0: Feed rate reduction is active 1: No feed rate reduction DXX Additive correction numbers 1 – 16 G58 Contour-parallel oversize (radius) DI Axis-parallel oversize X DK Axis-parallel oversize Z Further forms: see page 60 If feed rate reduction is active, at least four spindle revolutions are used to machine every "small" contour element. With the address Dxx you activate an additive compensation for the entire cycle run. The additive compensation is switched off again at the end of the cycle. You edit additive compensation values in the Program Run mode of operation. HEIDENHAIN MANUALplus 620, CNC PILOT 640 119 2.7 Units—Finishing "Longitudinal finishing with direct contour input" unit The unit finishes the contour defined by the parameters in one pass. In EC you define whether you want to machine a normal or a plunging contour. Unit name: G890_G80_L / Cycle: G890 (see page 290) Contour form EC Type of contour 0: Normal contour 1: Plunging contour X1, Z1 Contour starting point X2, Z2 Contour end point RC Rounding: Radius of contour corner AC Start angle: Angle of the first contour element (range: 0° < AC < 90°) WC End angle: Angle of the last contour element (range: 0° < WC < 90°) BS Chamfer/radius at start BS>0: Radius of rounding arc BS<0: Section length of chamfer BE Chamfer/radius at end BE>0: Radius of rounding arc BE<0: Section length of chamfer Cycle form E Plunging behavior E>0: Plunging feed rate for declining contour elements. Descending contour elements are machined. No input: The plunging feed rate is reduced during machining of declining contour elements by up to 50 %. Descending contour elements are machined. B Switch on TRC (type of tool radius compensation) 0: Automatic 1: Tool to the left (G41) 2: Tool to the right (G42) 3: Automatic, without tool angle compensation 4: Tool to the left (G41), without tool angle compensation 5: Tool to the right (G42), without tool angle compensation DXX Additive correction numbers 1 – 16 G58 Contour-parallel oversize (radius) Further forms: see page 60 With the address Dxx you activate an additive compensation for the entire cycle run. The additive compensation is switched off again at the end of the cycle. You edit additive compensation values in the Program Run mode of operation. 120 Access to the technology database: Machining operation: Finishing Affected parameters: F, S, E smart.Turn units 2.7 Units—Finishing "Transverse finishing with direct contour input" unit The unit finishes the contour defined by the parameters in one pass. In EC you define whether you want to machine a normal or a plunging contour. Unit name: G890_G80_P / Cycle: G890 (see page 290) Contour form EC Type of contour 0: Normal contour 1: Plunging contour X1, Z1 Contour starting point X2, Z2 Contour end point RC Rounding: Radius of contour corner AC Start angle: Angle of the first contour element (range: 0° < AC < 90°) WC End angle: Angle of the last contour element (range: 0° < WC < 90°) BS Chamfer/radius at start: BS>0: Radius of rounding arc BS<0: Section length of chamfer BE Chamfer/radius at end BE>0: Radius of rounding arc BE<0: Section length of chamfer Cycle form E Plunging behavior E>0: Plunging feed rate for declining contour elements. Descending contour elements are machined. No input: The plunging feed rate is reduced during machining of declining contour elements by up to 50 %. Descending contour elements are machined. B Switch on TRC (type of tool radius compensation) 0: Automatic 1: Tool to the left (G41) 2: Tool to the right (G42) 3: Automatic, without tool angle compensation 4: Tool to the left (G41), without tool angle compensation 5: Tool to the right (G42), without tool angle compensation DXX Additive correction numbers 1 – 16 G58 Contour-parallel oversize (radius) Further forms: see page 60 With the address Dxx you activate an additive compensation for the entire cycle run. The additive compensation is switched off again at the end of the cycle. You edit additive compensation values in the Program Run mode of operation. HEIDENHAIN MANUALplus 620, CNC PILOT 640 Access to the technology database: Machining operation: Finishing Affected parameters: F, S, E 121 2.7 Units—Finishing "Relief turns (undercut) type E, F, DIN76" unit The unit machines the undercut defined by KG, and then the adjoining plane surface. The cylinder chamfer is executed when you enter at least one of the parameters 1st cut length or 1st cut radius. Unit name: G85x_DIN_E_F_G / Cycle: G85 (see page 316) Overview form KG Type of relief turn (undercut) E: DIN 509 type E; Cycle G851 (see page 318) F: DIN 509 type F; Cycle G852 (see page 319) G: DIN 76 type G (thread undercut); Cycle G853 (see page 320) X1, Z1 Contour starting point (X1: diameter value) X2, Z2 Contour end point (X2: diameter value) App Approach see page 65 Parameters on the "Type E" form I Undercut depth (default: value from standard table) K Undercut length (default: value from standard table) W Undercut angle (default: 15° from standard table) R Undercut radius (default: value from standard table) H Type of departure 0: To the starting point 1: Plane surface end Parameters on the "Type F" form I Undercut depth (default: value from standard table) K Undercut length (default: value from standard table) W Undercut angle (default: 15° from standard table) R Undercut radius (default: value from standard table) P2 Face depth (default: value from standard table) A Face angle (default: 8° from standard table) H Type of departure 0: To the starting point 1: Plane surface end Access to the technology database: Machining operation: Finishing Affected parameters: F, S, E 122 smart.Turn units 2.7 Units—Finishing Parameters on the "Type G" form FP Thread pitch I Undercut diameter (default: value from standard table) K Undercut length (default: value from standard table) W Undercut angle (default: 30° from standard table) R Undercut radius (default: value from standard table) P1 Undercut oversize H No input: Machining in one cut P1>0: Division into pre-turning and finish-turning; P1 is the longitudinal oversize; the transverse oversize is always 0.1 mm Type of departure 0: To the starting point 1: Plane surface end Additional parameters for "cylinder first cut" B Cylinder 1st cut length (no input: no cylinder start chamfer) WB 1st cut angle (default: 45°) RB Positive value: 1st cut radius, negative value: chamfer (no input: no element) E Reduced feed rate for plunging and the first cut (default: active feed rate) U Grinding oversize for cylinder Further forms: see page 60 Access to the technology database: Machining operation: Finishing Affected parameters: F, S, E Undercuts can only be executed in orthogonal, paraxial contour corners along the longitudinal axis. Parameters that are not programmed are automatically calculated by the Steuerung from the standard table. HEIDENHAIN MANUALplus 620, CNC PILOT 640 123 2.7 Units—Finishing "Measuring cut" unit The unit performs a cylindrical measuring cut with the length defined in the cycle, moves to the breakpoint for measuring and stops the program. After the program was stopped, you can manually measure the workpiece. Unit name: MEASURE_G809 / Cycle: G809 (see page 293) Contour form EC Machining location 0: Outside 1: Inside XA, ZA Contour starting point R Measuring cut length P Measuring cut oversize O Approach angle: If an approach angle is entered, the cycle positions the tool over the starting point taking into account the safety clearance, and from there plunges at the specified angle to the diameter to be measured. ZR Workpiece blank starting point: Collision-free approach for inside machining Cycle form QC Machining direction V D WE 0: -Z 1: +Z Measuring cut counter: Number of workpieces after which a measurement is performed Additive correction numbers 1 – 16 Directions 0: Simultaneously 1: First X, then Z 2: First Z, then X Xi, Zi: Additive correction numbers 1 – 16 AX Departing position X Further forms: see page 60 124 smart.Turn units 2.8 Units—Threads 2.8 Units—Threads Overview of thread units "Thread, direct" cuts a simple internal or external thread in longitudinal direction. "ICP thread" cuts a single or multi-start internal or external thread in longitudinal or transverse direction. The contour on which the thread is cut is defined with ICP. "API thread" cuts a single or multi-start API thread. The depth of thread decreases at the overrun at the end of thread. "Tapered thread" cuts a single or multi-start tapered internal or external thread. Handwheel superimposition If your machine features handwheel superimposition, you can overlap axis movements during thread cutting in a limited area: X direction: Maximum programmed thread depth depending on the current cutting depth Z direction: +/- a fourth of the thread pitch Machine and control must be specially prepared by the machine tool builder for use of this cycle. Refer to your machine manual. Remember that position changes resulting from handwheel superimposition are no longer effective after the cycle end or the "last cut" function. HEIDENHAIN MANUALplus 620, CNC PILOT 640 125 2.8 Units—Threads Parameter V: Type of infeed With the V parameter you define the type of infeed for thread cutting cycles. The following infeed types are available: 0: Constant mach. X-section The control reduces the cutting depth after each infeed to achieve a consistent chip cross section and removal rate. 1: Constant infeed The control uses the same cutting depth for each infeed without exceeding the maximum infeed I. 2: EPL with distribution of cuts The control uses the thread pitch F1 and the constant shaft speed S to calculate the cutting depth for a constant infeed. If the thread depth is not a multiple of the cutting depth, the control uses the depth of the remaining cut for the first infeed. With the "distribution of remaining cuts," the control divides the last cutting depth into four partial cuts. The first cut is half the calculated cutting depth, the second is a quarter and the third and fourth each are an eighth. 3: EPL without distribution of cuts The control uses the thread pitch F1 and the constant shaft speed S to calculate the cutting depth for a constant infeed. If the thread depth is not a multiple of the cutting depth, the control uses the depth of the remaining cut for the first infeed. All subsequent infeeds are constant and correspond to the calculated cutting depth. 4: MANUALplus 4110 The control performs the first infeed with the maximum infeed I. To determine the subsequent cutting depths, the control uses the formula gt = 2 * I * SQRT "current no. of cuts", where "gt" is the absolute depth. The cutting depth decreases with each infeed since the current number of cuts is incremented by 1 with each infeed. If, as a result, the remaining cut depth R falls below the value defined in R, the control uses the value from R as the new constant cutting depth! If the thread depth is not a multiple of the cutting depth, the control performs the last cut to the final depth. 5: Constant infeed (4290) The control uses the same cutting depth for each infeed; the cutting depth corresponds to the maximum infeed I. If the thread depth is not a multiple of the cutting depth, the control uses the depth of the remaining cut for the first infeed. 126 smart.Turn units 2.8 Units—Threads 6: Constant infeed with remaining cutting (4290) The control uses the same cutting depth for each infeed; the cutting depth corresponds to the maximum infeed I. If the thread depth is not a multiple of the cutting depth, the control uses the depth of the remaining cut for the first infeed. With the "distribution of remaining cuts," the control divides the last cutting depth into four partial cuts. The first cut is half the calculated cutting depth, the second is a quarter and the third and fourth each are an eighth. "Thread, direct" unit The unit cuts a simple internal or external thread in longitudinal direction. Unit name: G32_MAN / Cycle: G32 (see page 307) Thread form O Thread location KE 0: Internal thread (infeed in +X) 1: External thread (infeed in –X) Approach see page 65 Start diameter Starting position Z End point of thread Thread pitch Thread depth (automatically for metric ISO threads) Maximum infeed (radius) Number of cuts (only if I is not programmed and the infeed V is 0 or 1) Run-out position K 0: At the end of the threading cut 1: At the start of the threading cut Run-out length APP XS ZS Z2 F1 U I IC Access to the technology database: Machining operation: Thread cutting Affected parameters: F, S HEIDENHAIN MANUALplus 620, CNC PILOT 640 127 2.8 Units—Threads Cycle form H Kind of displacement (type of offset; offset between the individual infeeds in cutting direction) V 0: Without offset 1: From left 2: From right 3: Alternately left/right Type of infeed (for details, see page 126) 0: Constant mach. X-section 1: Constant infeed 2: W/ remaining cutting (with distribution of remaining cuts) 3: W/o remaining cutting (without distribution of remaining cuts) 4: Same as MANUALplus 4110 5: Constant infeed (same as 4290) 6: Constant with distribute. (same as 4290) A Approach angle (angle of infeed; reference: X axis; 0°<A<60°; default: 30°) R Remaining cut depth (only with V=4) C Starting angle D No. of gears (threads per unit) Q No. no load (number of dry runs) Further forms: see page 60 "ICP thread" unit The unit cuts a single or multi-start internal or external thread in longitudinal or transverse direction. The contour on which the thread is cut is defined with ICP. Unit name: G31_ICP / Cycle: G31 (see page 303) Thread form FK Auxiliary contour: see page 62 NS Starting block no. of contour NE End block no. of contour O1 Machine form element O 0: No machining 1: At beginning 2: At end 3: At beginning and end 4: Only chamfer and rounding arc Thread location Access to the technology database: Machining operation: Thread cutting Affected parameters: F, S 0: Internal thread (infeed in +X) 1: External thread (infeed in –X) 128 smart.Turn units 2.8 Units—Threads J1 Thread orientation From 1st contour element 0: Longitudinal 1: Transverse F1 Thread pitch U Thread depth (automatically for metric ISO threads) A Approach angle (angle of infeed; reference: X axis; 60°<A<60°; default: 30°) D No. of gears (threads per unit) K Run-out length Cycle form H Kind of displacement (type of offset; offset between the individual infeeds in cutting direction) V 0: Without offset 1: From left 2: From right 3: Alternately left/right Type of infeed (for details, see page 126) 0: Constant mach. X-section 1: Constant infeed 2: W/ remaining cutting (with distribution of remaining cuts) 3: W/o remaining cutting (without distribution of remaining cuts) 4: Same as MANUALplus 4110 5: Constant infeed (same as 4290) 6: Constant with distribute. (same as 4290) R Remaining cut depth (only with V=4) I Maximum infeed (radius) IC Number of cuts (only if I is not programmed) B Run-in length P Overrun length C Starting angle Q No. no load (number of dry runs) Further forms: see page 60 HEIDENHAIN MANUALplus 620, CNC PILOT 640 129 2.8 Units—Threads "API thread" unit This unit cuts a single or multi-start API thread. The depth of thread decreases at the overrun at the end of thread. Unit name: G352_API / Cycle: G352 (see page 312) Thread form O Thread location 0: Internal thread (infeed in +X) 1: External thread (infeed in –X) X1, Z1 Starting point of thread (X1: diameter value) X2, Z2 End point of thread (X2: diameter value) W Taper angle (reference: Z axis; –45°<W<45°) WE Run-out angle (reference: Z axis; 0°<WE<90°; default: 12°) F1 Thread pitch U Thread depth (automatically for metric ISO threads) Cycle form I Maximum infeed (radius) H Kind of displacement (type of offset; offset between the individual infeeds in cutting direction) V 0: Without offset 1: From left 2: From right 3: Alternately left/right Type of infeed (for details, see page 126) 0: Constant mach. X-section 1: Constant infeed 2: W/ remaining cutting (with distribution of remaining cuts) 3: W/o remaining cutting (without distribution of remaining cuts) 4: Same as MANUALplus 4110 5: Constant infeed (same as 4290) 6: Constant with distribute. (same as 4290) A Approach angle (angle of infeed; reference: X axis; 60°<A<60°; default: 30°) R Remaining cut depth (only with V=4) C Starting angle D No. of gears (threads per unit) Q No. no load (number of dry runs) Further forms: see page 60 Access to the technology database: Machining operation: Thread cutting Affected parameters: F, S 130 smart.Turn units 2.8 Units—Threads "Tapered thread" unit The unit cuts a single or multi-start tapered internal or external thread. Unit name: G32_KEG / Cycle: G32 (see page 307) Thread form O Thread location X1, Z1 X2, Z2 W F1 U KE 0: Internal thread (infeed in +X) 1: External thread (infeed in –X) Starting point of thread (X1: diameter value) End point of thread (X2: diameter value) Taper angle (reference: Z axis; –45°<W<45°) Thread pitch Thread depth (automatically for metric ISO threads) Run-out position K 0: At the end of the threading cut 1: At the start of the threading cut Run-out length Access to the technology database: Machining operation: Thread cutting Affected parameters: F, S HEIDENHAIN MANUALplus 620, CNC PILOT 640 131 2.8 Units—Threads Cycle form I Maximum infeed (radius) IC Number of cuts (only if I is not programmed) H Kind of displacement (type of offset; offset between the individual infeeds in cutting direction) V 0: Without offset 1: From left 2: From right 3: Alternately left/right Type of infeed (for details, see page 126) 0: Constant mach. X-section 1: Constant infeed 2: W/ remaining cutting (with distribution of remaining cuts) 3: W/o remaining cutting (without distribution of remaining cuts) 4: Same as MANUALplus 4110 5: Constant infeed (same as 4290) 6: Constant with distribute. (same as 4290) A Approach angle (angle of infeed; reference: X axis; 0°<A<60°; default: 30°) R Remaining cut depth (only with V=4) C Starting angle D No. of gears (threads per unit) Q No. no load (number of dry runs) Further forms: see page 60 132 smart.Turn units 2.9 Units—Milling, face 2.9 Units—Milling, face "Slot, face" unit The unit mills a slot from the starting position to the end point on the face of the workpiece. The slot width equals the diameter of the milling cutter. Unit name: G791_Nut_Stirn_C / Cycle: G791 (see page 349) Cycle form Z1 Milling top edge Z2 Milling floor L Slot length A1 Angle to X axis X1, C1 Polar slot target point XK, YK Cartesian slot target point P Maximum infeed FZ Infeed rate Further forms: see page 60 Access to the technology database: Machining operation: Milling Affected parameters: F, S, FZ, P HEIDENHAIN MANUALplus 620, CNC PILOT 640 133 2.9 Units—Milling, face "Linear slot pattern, face" unit The unit machines a linear slot pattern in which the individual features are arranged at a regular spacing on the face of the workpiece. The starting points of the slots correspond to the pattern positions. You define the length and the position of the slots in the unit. The slot width equals the diameter of the milling cutter. Unit name: G791_Lin_Stirn_C / Cycle: G791 (see page 349) Pattern form Q Number of slots X1, C1 Polar starting point XK, YK Cartesian starting point I, J End point (XK, YK) Ii, Ji: Distance (XKi, YKi) R Distance to first/last contour Ri Incremental distance A Pattern angle (reference is XK axis) Cycle form Z1 Milling top edge Z2 Milling floor L Slot length A1 Angle to X axis P Maximum infeed FZ Infeed rate Further forms: see page 60 Access to the technology database: Machining operation: Milling Affected parameters: F, S, FZ, P 134 smart.Turn units 2.9 Units—Milling, face "Circular slot pattern, face" unit The unit machines a circular slot pattern in which the individual features are arranged at a regular spacing on the face of the workpiece. The starting points of the slots correspond to the pattern positions. You define the length and the position of the slots in the unit. The slot width equals the diameter of the milling cutter. Unit name: G791_Cir_Stirn_C / Cycle: G791 (see page 349) Pattern form Q Number of slots XM, CM Polar center point XK, YK Cartesian center point A Starting angle Wi Angle increment K Pattern diameter W End angle V Rotation direction (default: 0) VD=0, without W: Figures are arranged on a full circle VD=0, with W: Figures are arranged on the longer circular arc VD=0, with Wi: The algebraic sign of Wi defines the direction (Wi<0: clockwise) VD=1, with W: Clockwise VD=1, with Wi: Clockwise (algebraic sign of Wi has no effect) VD=2, with W: Counterclockwise VD=2, with Wi: Counterclockwise (algebraic sign of Wi has no effect) Cycle form Z1 Milling top edge Z2 Milling floor L Slot length A1 Angle to X axis P Maximum infeed FZ Infeed rate Further forms: see page 60 Access to the technology database: Machining operation: Milling Affected parameters: F, S, FZ, P HEIDENHAIN MANUALplus 620, CNC PILOT 640 135 2.9 Units—Milling, face "Face milling" unit Depending on Q, the unit mills surfaces or the defined figure. The unit cuts the material around the figures. Unit name: G797_Stirnfr_C / Cycle: G797 (see page 355) Figure form Q Type of figure 0: Full circle 1: Single surface 2: Width across flats 3: Triangle 4: Rectangle, square 5: Polygon QN Number of polygon corners (only with Q=5 polygon) X1 Diameter of figure center C1 Angle of figure center Z1 Milling top edge Z2 Milling floor X2 Limit diameter L Edge length B Width/Width across flats RE Rounding radius A Angle to X axis Cycle form QK Machining operation J Roughing Finishing Milling direction H 0: Unidirectional 1: Bidirectional Cutting direction 0: Up-cut milling 1: Climb milling P Maximum infeed I Contour-parallel oversize K Infeed-direction oversize FZ Infeed rate E Reduced feed rate U Overlap factor Further forms: see page 60 136 Access to the technology database: Machining operation: Finish milling Affected parameters: F, S, FZ, P smart.Turn units 2.9 Units—Milling, face "Face milling ICP" unit The unit mills the contour defined with ICP on the face of the workpiece. Unit name: G797_ICP / Cycle: G797 (see page 355) Contour form FK see page 62 NS Starting block no. of contour Z1 Milling top edge Z2 Milling floor X2 Limit diameter Cycle form QK Machining operation J Roughing Finishing Milling direction H 0: Unidirectional 1: Bidirectional Cutting direction 0: Up-cut milling 1: Climb milling P Maximum infeed I Contour-parallel oversize K Infeed-direction oversize FZ Infeed rate E Reduced feed rate U Overlap factor Further forms: see page 60 HEIDENHAIN MANUALplus 620, CNC PILOT 640 Access to the technology database: Machining operation: Finish milling Affected parameters: F, S, FZ, P 137 2.9 Units—Milling, face "Thread milling" unit The unit mills a thread in existing holes. Place the tool on the center of the hole before calling G799. The cycle positions the tool on the end point of the thread within the hole. Then the tool approaches on "approach radius R" and mills the thread. During this, the tool advances by the thread pitch F. Following that, the cycle retracts the tool and returns it to the starting point. With parameter V, you can program whether the thread is to be milled in one rotation or, with single-point tools, in several rotations. Unit name: G799_Gewindefr_C / Cycle: G799 (see page 338) Position form Z1 Start point drill (starting point of hole) P2 Thread depth I Thread diameter F1 Thread pitch Cycle form J Direction of thread H 0: Right-hand thread 1: Left-hand thread Cutting direction V 0: Up-cut milling 1: Climb milling Milling method 0: The thread is milled in a 360-degree helix 1: The thread is milled in several helical paths (singlepoint tool) R Approach radius Further forms: see page 60 138 Access to the technology database: Machining operation: Finish milling Affected parameters: F, S smart.Turn units 2.9 Units—Milling, face "Contour milling, figures, face" unit The unit mills the contour defined by Q on the face of the workpiece. Unit name: G840_Fig_Stirn_C/ Cycle: G840 (see page 361) Figure form Q Type of figure QN X1 C1 Z1 P2 L 0: Full circle 1: Linear slot 2: Circular slot 3: Triangle 4: Rectangle, square 5: Polygon Number of polygon corners—only with Q=5 (polygon) Diameter of figure center Angle of figure center Milling top edge Depth of figure Edge length / width across flats B RE A Q2 L>0: Edge length L<0: Width across flats (inside diameter) for polygon Rectangle width Rounding radius Angle to X axis Rotational direction of slot—only if Q=2 (circular slot) W cw: In clockwise direction ccw: In counterclockwise direction Angle of slot end point—only if Q=2 (circular slot) Program only the parameters relevant to the selected figure type. Access to the technology database: Machining operation: Milling Affected parameters: F, S, FZ, P HEIDENHAIN MANUALplus 620, CNC PILOT 640 139 2.9 Units—Milling, face Cycle form JK Cutter position H 0: On the contour 1: Within the contour 2: Outside the contour Cutting direction P I K FZ E R O 0: Up-cut milling 1: Climb milling Maximum infeed Contour-parallel oversize Infeed-direction oversize Infeed rate Reduced feed rate Approach radius Plunging behavior NF 0: Straight (vertical plunge)—The cycle moves the tool to the starting point; the tool plunges at feed rate and mills the contour. 1: In predrilling—The cycle positions the tool above the hole; the tool plunges and mills the contour. Position mark (only if O=1) "Global" form RB Retraction plane Further parameters: see page 64 Further forms: see page 60 140 smart.Turn units 2.9 Units—Milling, face "ICP contour milling, face" unit The unit mills the contour defined with ICP on the face of the workpiece. Unit name: G840_Kon_C_Stirn / Cycle: G840 (see page 361) Contour form FK see page 62 NS Starting block no. of contour NE End block no. of contour Z1 Milling top edge P2 Depth of contour Cycle form JK Cutter position H 0: On the contour 1, closed contour: Within the contour 1, open contour: Left of the contour 2, closed contour: Outside the contour 2, open contour: Right of the contour 3: Depending on H and MD Cutting direction P I K FZ E R O 0: Up-cut milling 1: Climb milling Maximum infeed Contour-parallel oversize Infeed-direction oversize Infeed rate Reduced feed rate Approach radius Plunging behavior 0: Straight (vertical plunge)—The cycle moves the tool to the starting point; the tool plunges at feed rate and mills the contour. 1: In predrilling—The cycle positions the tool above the hole; the tool plunges and mills the contour. NF Position mark (only if O=1) RB Retraction plane Further forms: see page 60 HEIDENHAIN MANUALplus 620, CNC PILOT 640 141 2.9 Units—Milling, face "Pocket milling, figures, face" unit The unit mills the pocket defined by Q. In QK, select the machining operation (roughing/finishing) and the plunging strategy. Unit name: G84x_Fig_Stirn_C / Cycles: G845 (see page 370); G846 (see page 374) Figure form Q Type of figure QN X1 C1 Z1 P2 L 0: Full circle 1: Linear slot 2: Circular slot 3: Triangle 4: Rectangle, square 5: Polygon Number of polygon corners—only with Q=5 (polygon) Diameter of figure center Angle of figure center Milling top edge Depth of figure Edge length / width across flats B RE A Q2 L>0: Edge length L<0: Width across flats (inside diameter) for polygon Rectangle width Rounding radius Angle to X axis Rotational direction of slot—only if Q=2 (circular slot) W cw: In clockwise direction ccw: In counterclockwise direction Angle of slot end point—only if Q=2 (circular slot) Program only the parameters relevant to the selected figure type. Access to the technology database: Machining operation: Milling Affected parameters: F, S, FZ, P 142 smart.Turn units 2.9 Units—Milling, face Cycle form QK Machining operation and plunging strategy JT 0: Roughing 1: Finishing 2: Helical roughing, manual 3: Helical roughing, automatic 4: Reciprocating linear roughing, manual 5: Reciprocating linear roughing, automatic 6: Reciprocating circular roughing, manual 7: Reciprocating circular roughing, automatic 8: Plunge roughing at predrilling position 9: Finishing with 3-D approach arc Machining direction H 0: From the inside out (from the inside towards the outside) 1: From the outside in (from the outside towards the inside) Cutting direction P I K FZ E R WB EW NF U 0: Up-cut milling 1: Climb milling Maximum infeed Contour-parallel oversize Infeed-direction oversize Infeed rate Reduced feed rate Approach radius Plunging length Plunge angle Position mark (only if QK=8) Overlap factor (default: 0.5) "Global" form RB Retraction plane Further parameters: see page 64 Further forms: see page 60 HEIDENHAIN MANUALplus 620, CNC PILOT 640 143 2.9 Units—Milling, face "ICP pocket milling, face" unit The unit mills the pocket defined by Q. In QK, select the machining operation (roughing/finishing) and the plunging strategy. Unit name: G845_Tas_C_Stirn / Cycles: G845 (see page 370); G846 (see page 374) Contour form FK see page 62 NS Starting block no. of contour NE End block no. of contour Z1 Milling top edge P2 Depth of contour NF Position mark (only if QK=8) Cycle form QK Machining operation and plunging strategy JT 0: Roughing 1: Finishing 2: Helical roughing, manual 3: Helical roughing, automatic 4: Reciprocating linear roughing, manual 5: Reciprocating linear roughing, automatic 6: Reciprocating circular roughing, manual 7: Reciprocating circular roughing, automatic 8: Plunge roughing at predrilling position 9: Finishing with 3-D approach arc Machining direction H 0: From the inside out (from the inside towards the outside) 1: From the outside in (from the outside towards the inside) Cutting direction 0: Up-cut milling 1: Climb milling P Maximum infeed I Contour-parallel oversize K Infeed-direction oversize FZ Infeed rate E Reduced feed rate R Approach radius WB Plunging length EW Plunge angle U Overlap factor (default: 0.5) RB Retraction plane Further forms: see page 60 144 Access to the technology database: Machining operation: Milling Affected parameters: F, S, FZ, P smart.Turn units 2.9 Units—Milling, face "Engraving, face" unit The unit engraves character strings in linear or polar layout on the face of the workpiece. Diacritics and special characters that you cannot enter in the smart.Turn editor can be defined, character by character, in NF. If you program "Continue from last text" (Q=1), tool change and pre-positioning are suppressed. The technological data of the previous engraving cycle apply. Unit name: G801_GRA_STIRN_C / Cycle: G801 (see page 378) Character set: see page 376 Position form X, C Polar starting point XK, YK Cartesian starting point Z End point. Z position, infeed depth during milling. RB Retraction plane Cycle form TXT Text to be engraved NF Character number (character to be engraved) H Font height E Distance factor (for calculation see figure) W Inclination angle FZ Plunging feed rate factor (plunging feed rate = current feed rate * FZ) V Execution D Q 0: Linear 1: Arched above 2: Arched below Reference diameter Continue from last text 0 (No): Engraving starts at the starting point 1 (Yes): Engraving starts at the tool position Further forms: see page 60 Access to the technology database: Machining operation: Engraving Affected parameters: F, S HEIDENHAIN MANUALplus 620, CNC PILOT 640 145 2.9 Units—Milling, face "Deburring, face" unit The unit deburrs the contour defined with ICP on the face of the workpiece. Unit name: G840_ENT_C_STIRN / Cycle: G840 (see page 365) Contour form FK see page 62 NS Starting block no. of contour NE End block no. of contour Z1 Milling top edge Cycle form JK Cutter position H JK=0: On the contour JK=1, closed contour: Within the contour JK=1, open contour: Left of the contour JK=2, closed contour: Outside the contour JK=2, open contour: Right of the contour JK=3: Depending on H and MD Cutting direction 0: Up-cut milling 1: Climb milling BG Chamfer width JG Preparation diameter P Plunging depth (indicated as a negative value) I Contour-parallel oversize R Approach radius FZ Infeed rate E Reduced feed rate RB Retraction plane Further forms: see page 60 Access to the technology database: Machining operation: Deburring Affected parameters: F, S 146 smart.Turn units 2.10 Units—Milling, lateral surface 2.10 Units—Milling, lateral surface "Slot, lateral surface" unit The unit mills a slot from the starting position to the end point on the lateral surface. The slot width equals the diameter of the milling cutter. Unit name: G792_Nut_MANT_C / Cycle: G792 (see page 350) Cycle form X1 Milling top edge (diameter value) X2 Milling floor (diameter value) L Slot length A1 Angle to Z axis Z1, C1 Polar slot target point P Maximum infeed FZ Infeed rate Further forms: see page 60 Access to the technology database: Machining operation: Milling Affected parameters: F, S, FZ, P HEIDENHAIN MANUALplus 620, CNC PILOT 640 147 2.10 Units—Milling, lateral surface "Linear slot pattern, lateral surface" unit The unit machines a linear slot pattern in which the individual features are arranged at a regular spacing on the lateral surface. The starting points of the slots correspond to the pattern positions. You define the length and the position of the slots in the unit. The slot width equals the diameter of the milling cutter. Unit name: G792_Lin_Mant_C / Cycle: G792 (see page 350) Pattern form Q Number of slots Z1, C1 Starting point of pattern Wi Angle increment W End angle Z2 End point of pattern Cycle form X1 Milling top edge (diameter value) X2 Milling floor (diameter value) L Slot length A1 Angle to Z axis P Maximum infeed FZ Infeed rate Further forms: see page 60 Access to the technology database: Machining operation: Milling Affected parameters: F, S, FZ, P 148 smart.Turn units 2.10 Units—Milling, lateral surface "Circular slot pattern, lateral surface" unit The unit machines a circular slot pattern in which the individual features are arranged at a regular spacing on the lateral surface. The starting points of the slots correspond to the pattern positions. You define the length and the position of the slots in the unit. The slot width equals the diameter of the milling cutter. Unit name: G792_Cir_Mant_C / Cycle: G792 (see page 350) Pattern form Q Number of slots ZM, CM Center point of pattern A Starting angle Wi Angle increment K Pattern diameter W End angle V Rotation direction (default: 0) VD=0, without W: Figures are arranged on a full circle VD=0, with W: Figures are arranged on the longer circular arc VD=0, with Wi: The algebraic sign of Wi defines the direction (Wi<0: clockwise) VD=1, with W: Clockwise VD=1, with Wi: Clockwise (algebraic sign of Wi has no effect) VD=2, with W: Counterclockwise VD=2, with Wi: Counterclockwise (algebraic sign of Wi has no effect) Cycle form X1 Milling top edge (diameter value) X2 Milling floor (diameter value) L Slot length A1 Angle to Z axis P Maximum infeed FZ Infeed rate Further forms: see page 60 Access to the technology database: Machining operation: Milling Affected parameters: F, S, FZ, P HEIDENHAIN MANUALplus 620, CNC PILOT 640 149 2.10 Units—Milling, lateral surface "Helical slot milling" unit The unit mills a helical slot. The slot width equals the diameter of the milling cutter. Unit name: G798_Wendelnut_C / Cycle: G798 (see page 357) Position form X1 Thread diameter C1 Starting angle Z1 Starting point of thread Z2 End point of thread U Thread depth Cycle form F1 Thread pitch J Direction of thread: 0: Right-hand thread 1: Left-hand thread D No. of gears (threads per unit) P Run-in length K Run-out length I Maximum infeed E Cutting depth reduction Further forms: see page 60 Access to the technology database: Machining operation: Finish milling Affected parameters: F, S 150 smart.Turn units 2.10 Units—Milling, lateral surface "Contour milling, figures, lateral surface" unit The unit mills the contour defined by Q on the lateral surface. Unit name: G840_Fig_Mant_C / Cycle: G840 (see page 361) Figure form Q Type of figure QN Z1 C1 CY X1 P2 L 0: Full circle 1: Linear slot 2: Circular slot 3: Triangle 4: Rectangle, square 5: Polygon Number of polygon corners—only with Q=5 (polygon) Figure center Angle of figure center Figure center of unrolled lateral surface Milling top edge Depth of figure Edge length / width across flats B RE A Q2 L>0: Edge length L<0: Width across flats (inside diameter) for polygon Rectangle width Rounding radius Angle to Z axis Rotational direction of slot —only if Q=2 (circular slot) W cw: In clockwise direction ccw: In counterclockwise direction Angle of slot end point—only if Q=2 (circular slot) Program only the parameters relevant to the selected figure type. Access to the technology database: Machining operation: Milling Affected parameters: F, S, FZ, P HEIDENHAIN MANUALplus 620, CNC PILOT 640 151 2.10 Units—Milling, lateral surface Cycle form JK Cutter position H 0: On the contour 1: Within the contour 2: Outside the contour Cutting direction P I K FZ E R O 0: Up-cut milling 1: Climb milling Maximum infeed Infeed-direction oversize Contour-parallel oversize Infeed rate Reduced feed rate Approach radius Plunging behavior NF 0: Straight (vertical plunge)—The cycle moves the tool to the starting point; the tool plunges at feed rate and mills the contour. 1: In predrilling—The cycle positions the tool above the hole; the tool plunges and mills the contour. Position mark (only if O=1) "Global" form RB Retraction plane Further parameters: see page 64 Further forms: see page 60 152 smart.Turn units 2.10 Units—Milling, lateral surface "ICP contour milling, lateral surface" unit The unit mills the contour defined with ICP on the lateral surface. Unit name: G840_Kon_C_Mant / Cycle: G840 (see page 361) Contour form FK see page 62 NS Starting block no. of contour NE End block no. of contour X1 Milling top edge (diameter value) P2 Depth of contour (radius value) Cycle form JK Cutter position H 0: On the contour 1, closed contour: Within the contour 1, open contour: Left of the contour 2, closed contour: Outside the contour 2, open contour: Right of the contour 3: Depending on H and MD Cutting direction P I K FZ E R O 0: Up-cut milling 1: Climb milling Maximum infeed Contour-parallel oversize Infeed-direction oversize Infeed rate Reduced feed rate Approach radius Plunging behavior 0: Straight (vertical plunge)—The cycle moves the tool to the starting point; the tool plunges at feed rate and mills the contour. 1: In predrilling—The cycle positions the tool above the hole; the tool plunges and mills the contour. NF Position mark (only if O=1) RB Retraction plane (diameter value) Further forms: see page 60 Access to the technology database: Machining operation: Finish milling Affected parameters: F, S, FZ, P HEIDENHAIN MANUALplus 620, CNC PILOT 640 153 2.10 Units—Milling, lateral surface "Pocket milling, figures, lateral surface" unit The unit mills the pocket defined by Q. In QK, select the machining operation (roughing/finishing) and the plunging strategy. Unit name: G84x_Fig_Mant_C / Cycles: G845 (see page 370); G846 (see page 374) Figure form Q Type of figure QN Z1 C1 CY X1 P2 L 0: Full circle 1: Linear slot 2: Circular slot 3: Triangle 4: Rectangle, square 5: Polygon Number of polygon corners—only with Q=5 (polygon) Figure center Angle of figure center Figure center of unrolled lateral surface Milling top edge Depth of figure Edge length / width across flats B RE A Q2 L>0: Edge length L<0: Width across flats (inside diameter) for polygon Rectangle width Rounding radius Angle to Z axis Rotational direction of slot—only if Q=2 (circular slot) W cw: In clockwise direction ccw: In counterclockwise direction Angle of slot end point—only if Q=2 (circular slot) Program only the parameters relevant to the selected figure type. Access to the technology database: Machining operation: Milling Affected parameters: F, S, FZ, P 154 smart.Turn units 2.10 Units—Milling, lateral surface Cycle form QK Machining operation and plunging strategy JT 0: Roughing 1: Finishing 2: Helical roughing, manual 3: Helical roughing, automatic 4: Reciprocating linear roughing, manual 5: Reciprocating linear roughing, automatic 6: Reciprocating circular roughing, manual 7: Reciprocating circular roughing, automatic 8: Plunge roughing at predrilling position 9: Finishing with 3-D approach arc Machining direction: H 0: From the inside out (from the inside towards the outside) 1: From the outside in (from the outside towards the inside) Cutting direction P I K FZ E R WB EW NF U 0: Up-cut milling 1: Climb milling Maximum infeed Infeed-direction oversize Contour-parallel oversize Infeed rate Reduced feed rate Approach radius Plunging length Plunge angle Position mark (only if QK=8) Overlap factor (default: 0.5) "Global" form RB Retraction plane Further parameters: see page 64 Further forms: see page 60 HEIDENHAIN MANUALplus 620, CNC PILOT 640 155 2.10 Units—Milling, lateral surface "ICP pocket milling, lateral surface" unit The unit mills the pocket defined by Q. In QK, select the machining operation (roughing/finishing) and the plunging strategy. Unit name: G845_Tas_C_Mant / Cycles: G845 (see page 370); G846 (see page 374) Contour form FK see page 62 NS Starting block no. of contour NE End block no. of contour X1 Milling top edge (diameter value) P2 Depth of contour NF Position mark (only if QK=8) Cycle form QK Machining operation and plunging strategy JT 0: Roughing 1: Finishing 2: Helical roughing, manual 3: Helical roughing, automatic 4: Reciprocating linear roughing, manual 5: Reciprocating linear roughing, automatic 6: Reciprocating circular roughing, manual 7: Reciprocating circular roughing, automatic 8: Plunge roughing at predrilling position 9: Finishing with 3-D approach arc Machining direction H 0: From the inside out (from the inside towards the outside) 1: From the outside in (from the outside towards the inside) Cutting direction 0: Up-cut milling 1: Climb milling P Maximum infeed I Infeed-direction oversize K Contour-parallel oversize FZ Infeed factor E Reduced feed rate R Approach radius WB Plunging length EW Plunge angle U Overlap factor (default: 0.5) RB Retraction plane (diameter value) Further forms: see page 60 156 Access to the technology database: Machining operation: Milling Affected parameters: F, S, FZ, P smart.Turn units 2.10 Units—Milling, lateral surface "Engraving, lateral surface" unit The unit engraves character strings aligned linearly on the lateral surface. Diacritics and special characters that you cannot enter in the smart.Turn editor can be defined, character by character, in NF. If you program "Continue from last text" (Q=1), tool change and prepositioning are suppressed. The technological data of the previous engraving cycle apply. Unit name: G802_GRA_MANT_C / Cycle: G802 (see page 379) Character set: see page 376 Position form Z Starting point C Starting angle CY Starting point X End point (diameter). X position, infeed depth during milling. RB Retraction plane Cycle form TXT Text to be engraved NF Character number (character to be engraved) H Font height E Distance factor (for calculation see figure) W Inclination angle FZ Plunging feed rate factor (plunging feed rate = current feed rate * FZ) D Reference diameter Q Continue from last text 0 (No): Engraving starts at the starting point 1 (Yes): Engraving starts at the tool position Further forms: see page 60 Access to the technology database: Machining operation: Engraving Affected parameters: F, S HEIDENHAIN MANUALplus 620, CNC PILOT 640 157 2.10 Units—Milling, lateral surface "Deburring, lateral surface" unit The unit deburrs the contour defined with ICP on the lateral surface. Unit name: G840_ENT_C_MANT / Cycle: G840 (see page 365) Contour form FK see page 62 NS Starting block no. of contour NE End block no. of contour X1 Milling top edge (diameter value) Cycle form JK Cutter position H JK=0: On the contour JK=1, closed contour: Within the contour JK=1, open contour: Left of the contour JK=2, closed contour: Outside the contour JK=2, open contour: Right of the contour JK=3: Depending on H and MD Cutting direction 0: Up-cut milling 1: Climb milling BG Chamfer width JG Preparation diameter P Plunging depth (indicated as a negative value) K Contour-parallel oversize R Approach radius FZ Infeed rate E Reduced feed rate RB Retraction plane Further forms: see page 60 Access to the technology database: Machining operation: Deburring Affected parameters: F, S 158 smart.Turn units "Program beginning (START)" unit In the start unit, default values that are used in the following units are defined. The start unit is called once at the beginning of the machining section. You also directly specify the rotational speed limits, zero point shift and tool change point for the program. Unit name: Start / Called cycle: None "Limits" form S0 Maximum main spindle speed S1 Maximum rotational speed of driven tool Z Zero point shift (G59) "TC point" form (tool change point) WT1 Tool change point WX1 WZ1 WY1 Soft keys in the program beginning form Loads the zero point defined during setup Loads the tool-change point defined during setup No axis (do not approach the tool change point) 0: Simultaneous (X and Z axes depart diagonally) 1: First X, then Z 2: First Z, then X 3: Only X 4: Only Z 5: Only Y 6: Simultaneous with Y Tool change point in X (reference: distance of the slide position as radius value from the machine zero point) Tool change point in Z (reference: distance of the slide position from the machine zero point) Tool change point in Y (reference: distance of the slide position from the machine zero point) HEIDENHAIN MANUALplus 620, CNC PILOT 640 159 2.11 Units—Special operations 2.11 Units—Special operations 2.11 Units—Special operations "Defaults" form GWW Tool change point CLT No axis (do not approach the tool change point) 0: Simultaneous (X and Z axes depart diagonally) 1: First X, then Z 2: First Z, then X 3: Only X 4: Only Z 5: Only Y 6: Simultaneous with Y Coolant G60 0: Without 1: Circuit 1 on 2: Circuit 2 on Protection zone (default for drilling units) 0: Active 1: Inactive Cycle form L Subprogram name: Name of a subprogram that is called by the start unit "Global" form G47 Safety clearance SCK Safety clearance in infeed direction (drilling and milling) SCI Safety clearance in the working plane (milling) I, K Oversize in X, Z direction (X: diameter value) You can load the zero point shift and the tool change point by soft key (see soft-key table). The setting in the "TC point" form applies only within the current program. Position of tool change point (WX1, WZ1, WY1): If the tool change point is defined, you use G14 to move to this position. If the tool change point is not defined, you use G14 to move to the position defined in manual mode. If you call a subprogram using the start unit, you should set the subprogram with G65 Chuck selection with fixture D0. You should also move the C axes out, for example with M15 or M315. 160 smart.Turn units 2.11 Units—Special operations "C axis ON" unit The unit activates the SPI (spindle) C axis. Unit name: C_Axis_ON / Called cycle: None "C axis ON" form SPI Workpiece spindle number (0 to 3). Spindle that rotates the workpiece. C Approach position "C axis OFF" unit The unit deactivates the SPI (spindle) C axis. Unit name: C_Axis_OFF / Called cycle: None "C axis OFF" form SPI Workpiece spindle number (0 to 3). Spindle that rotates the workpiece. HEIDENHAIN MANUALplus 620, CNC PILOT 640 161 2.11 Units—Special operations "Subprogram call" unit The unit calls the subprogram defined in "L". Access to the technology database: Unit name: SUBPROG / Called cycle: Any subprogram Not possible Contour form L Subprogram name Q Number of repetitions LA-LF Transfer values LH Transfer value LN Transfer value—reference to a block number as contour reference. Is updated during block numbering. Cycle form LI-LK Transfer values LO Transfer value LP Transfer value LR Transfer value LS Transfer value LU Transfer value LW-LZ Transfer values Cycle form ID1 Transfer value—text variable (string) AT1 Transfer value—text variable (string) BS Transfer value BE Transfer value WS Transfer value AC Transfer value WC Transfer value RC Transfer value IC Transfer value KC Transfer value JC Transfer value The tool call is not a mandatory parameter in this unit! Instead of the text "transfer value," texts can be displayed that were defined in the subprogram. You can also define help graphics for every line of the subprogram (see page 427). 162 smart.Turn units 2.11 Units—Special operations "Program section repeat" unit Use the Repeat unit to program a program section repeat. The unit consists of two inseparable parts. Program the unit with the Start form immediately before the repeatable part, and the unit with the End form immediately behind the repeatable part. Be sure to use the same variable number here. Unit name: REPEAT / Called cycle: None "Start" form AE Repetition V NN QR 0: Start 1: End Variable number 1–30 (counting variable for the iteration loop) Number of repetitions Save workpiece blank 0: No 1: Yes K Comment "End" form AE Repetition: V Z C Q K 0: Start 1: End Variable number 1–30 (counting variable for the iteration loop) Additive zero point shift Incremental shift, C axis Number of the C axis Comment HEIDENHAIN MANUALplus 620, CNC PILOT 640 163 2.11 Units—Special operations "Program end" unit In every smart.Turn program, the end unit should be called once at the end of the machining section. Unit name: END / Called cycle: None "Program end" form ME Type of return jump NS G14 30: Without M30 restart 99: With M99 restart Block number for return jump Tool change point MFS MFE No axis (do not approach the tool change point) 0: Simultaneous (X and Z axes depart diagonally) 1: First X, then Z 2: First Z, then X 3: Only X 4: Only Z 5: Only Y 6: Simultaneous with Y M command at the start of the unit M command at the end of the unit 164 smart.Turn units 2.11 Units—Special operations "Tilt plane" unit The unit executes the following transformations and rotations: Shifts the coordinate system to the position I, K Rotates the coordinate system by the angle B; reference point: I, K Shifts, if programmed, the coordinate system by U and W in the rotated coordinate system Unit name: G16_ROTWORKPLAN / Called cycle: G16 (see page 522) "Tilt plane" form Q Tilt plane B I K U W 0: OFF (disable tilting) 1: ON (tilt working plane) Angle: Plane angle (reference: positive Z axis) Reference point: Plane reference in X direction (radius) Reference point: Plane reference in Z direction Shift in X: Shift in X direction Shift in Z: Shift in Z direction Please note: Q0 resets the working plane. The zero point and coordinate system defined before the unit are then in effect again. The positive Z axis is the reference axis for the "plane angle B." This also applies to a mirrored coordinate system. X is the infeed axis in a tilted coordinate system. X coordinates are entered as diameter coordinates. Other zero point shifts are not permitted while tilting is active. HEIDENHAIN MANUALplus 620, CNC PILOT 640 165 166 smart.Turn units 2.11 Units—Special operations smart.Turn units for the Y axis 3.1 Units—Drilling in the Y axis 3.1 Units—Drilling in the Y axis "ICP drilling, Y axis" unit The unit machines a single hole or a hole pattern in the XY or YZ plane. Using ICP, you define the holes as well as further details. Unit name: G74_ICP_Y / Cycle: G74 (see page 331) Parameters on the Pattern form FK see page 62 NS Starting block no. of contour Parameters on the Cycle form E Delay (dwell time at end of hole) (default: 0) D Retraction at V 0: Rapid traverse 1: Feed rate Feed rate reduction 0: Without reduction 1: At end of the hole 2: At start of the hole 3: At start and end of the hole AB Spot drilling / through drilling length (distance for feed rate reduction) P First hole depth IB Hole depth reduction value JB Minimum hole depth B Retraction distance RI Internal safety clearance: Distance for reapproach inside the hole (default: safety clearance SCK). RB Retraction plane (default: return to the starting position or to the safety clearance) Further forms: see page 60 Access to the technology database: Machining operation: Drilling Affected parameters: F, S 168 smart.Turn units for the Y axis 3.1 Units—Drilling in the Y axis "ICP tapping, Y axis" unit The unit machines a single tap hole or a hole pattern in the XY or YZ plane. Using ICP, you define the tap holes as well as further details. Unit name: G73_ICP_Y / Cycle: G73 (see page 328) Parameters on the Pattern form FK see page 62 NS Starting block no. of contour Parameters on the Cycle form F1 Thread pitch B Run-in length L Retraction length when using floating tap holders (default: 0) SR Retraction speed (default: Shaft speed for tapping) SP Chip breaking depth SI Retraction distance RB Retraction plane Further forms: see page 60 Retraction length L: Use this parameter for floating tap holders. The cycle calculates a new nominal pitch on the basis of the thread depth, the programmed pitch, and the "retraction length." The nominal pitch is somewhat smaller than the pitch of the tap. During tapping, the tap is pulled away from the chuck by the retraction length. With this method you can achieve higher service life from the taps. Access to the technology database: Machining operation: Tapping Affected parameters: S HEIDENHAIN MANUALplus 620, CNC PILOT 640 169 3.1 Units—Drilling in the Y axis "ICP boring/countersinking, Y axis" unit The unit machines a single hole or a hole pattern in the XY or YZ plane. Using ICP, you define the hole positions as well as further details for boring or countersinking. Unit name: G72_ICP_Y / Cycle: G72 (see page 327) Parameters on the Pattern form FK see page 62 NS Starting block no. of contour Parameters on the Cycle form E Delay (dwell time at end of hole) (default: 0) D Retraction at 0: Rapid traverse 1: Feed rate RB Retraction plane (default: return to the starting position or to the safety clearance) Further forms: see page 60 Access to the technology database: Machining operation: Drilling Affected parameters: F, S 170 smart.Turn units for the Y axis 3.2 Units—Predrilling in Y axis 3.2 Units—Predrilling in Y axis "Predrill, contour mill, ICP in XY plane" unit The unit determines the hole position and machines the hole. The subsequent milling cycle obtains the hole position from the reference stored in NF. If the milling contour consists of multiple sections, the unit machines a hole for each section. Unit name: DRILL_STI_840_Y / Cycles: G840 A1 (see page 359); G71 (see page 325) Parameters on the Contour form FK see page 62 NS Starting block no. of contour NE End block no. of contour Z1 Milling top edge P2 Depth of contour Parameters on the Cycle form JK Cutter position H 0: On the contour 1, closed contour: Within the contour 1, open contour: Left of the contour 2, closed contour: Outside the contour 2, open contour: Right of the contour 3: Depending on H and MD Cutting direction I K R WB NF E D 0: Up-cut milling 1: Climb milling Contour-parallel oversize Infeed-direction oversize Approach radius Cutter diameter Position mark Delay (dwell time at end of hole) (default: 0) Retraction at V 0: Rapid traverse 1: Feed rate Feed rate reduction Access to the technology database: Machining operation: Drilling Affected parameters: F, S 0: Without reduction 1: At end of the hole 2: At start of the hole 3: At start and end of the hole AB Spot drilling / through drilling length (distance for feed rate reduction) RB Retraction plane (default: return to the starting position or to the safety clearance) Further forms: see page 60 HEIDENHAIN MANUALplus 620, CNC PILOT 640 171 3.2 Units—Predrilling in Y axis "Predrill, pocket mill, ICP in XY plane" unit The unit determines the hole position and machines the hole. The subsequent milling cycle obtains the hole position from the reference stored in NF. If the pocket consists of multiple sections, the unit machines a hole for each section. Unit name: DRILL_STI_845_Y / Cycles: G845 A1 (see page 369); G71 (see page 325) Parameters on the Contour form FK see page 62 NS Starting block no. of contour NE End block no. of contour Z1 Milling top edge P2 Depth of contour Parameters on the Cycle form JT Machining direction: H 0: From the inside out (from the inside towards the outside) 1: From the outside in (from the outside towards the inside) Cutting direction I K U WB NF E D 0: Up-cut milling 1: Climb milling Contour-parallel oversize Infeed-direction oversize Overlap factor (default: 0.5) Cutter diameter Position mark Delay (dwell time at end of hole) (default: 0) Retraction at V 0: Rapid traverse 1: Feed rate Feed rate reduction 0: Without reduction 1: At end of the hole 2: At start of the hole 3: At start and end of the hole AB Spot drilling / through drilling length (distance for feed rate reduction) RB Retraction plane (default: return to the starting position or to the safety clearance) Further forms: see page 60 Access to the technology database: Machining operation: Drilling Affected parameters: F, S 172 smart.Turn units for the Y axis 3.2 Units—Predrilling in Y axis "Predrill, contour mill, ICP in YZ plane" unit The unit determines the hole position and machines the hole. The subsequent milling cycle obtains the hole position from the reference stored in NF. If the milling contour consists of multiple sections, the unit machines a hole for each section. Unit name: DRILL_MAN_840_Y / Cycles: G840 A1 (see page 359); G71 (see page 325) Parameters on the Contour form FK see page 62 NS Starting block no. of contour NE End block no. of contour X1 Milling top edge (diameter value) P2 Depth of contour (radius value) Parameters on the Cycle form JK Cutter position H JK=0: On the contour JK=1, closed contour: Within the contour JK=1, open contour: Left of the contour JK=2, closed contour: Outside the contour JK=2, open contour: Right of the contour JK=3: Depending on H and MD Cutting direction I K R WB NF E D 0: Up-cut milling 1: Climb milling Contour-parallel oversize Infeed-direction oversize Approach radius Cutter diameter Position mark Delay (dwell time at end of hole) (default: 0) Retraction at V 0: Rapid traverse 1: Feed rate Feed rate reduction 0: Without reduction 1: At end of the hole 2: At start of the hole 3: At start and end of the hole AB Spot drilling / through drilling length (distance for feed rate reduction) RB Retraction plane (diameter value) Further forms: see page 60 HEIDENHAIN MANUALplus 620, CNC PILOT 640 Access to the technology database: Machining operation: Drilling Affected parameters: F, S 173 3.2 Units—Predrilling in Y axis "Predrill, pocket mill, ICP in YZ plane" unit The unit determines the hole position and machines the hole. The subsequent milling cycle obtains the hole position from the reference stored in NF. If the pocket consists of multiple sections, the unit machines a hole for each section. Unit name: DRILL_MAN_845_Y / Cycles: G845 A1 (see page 369) Parameters on the Contour form FK see page 62 NS Starting block no. of contour NE End block no. of contour X1 Milling top edge (diameter value) P2 Depth of contour Parameters on the Cycle form JT Machining direction: H 0: From the inside out (from the inside towards the outside) 1: From the outside in (from the outside towards the inside) Cutting direction P I K U WB NF E D 0: Up-cut milling 1: Climb milling Maximum infeed Infeed-direction oversize Contour-parallel oversize Overlap factor (default: 0.5) Cutter diameter Position mark Delay (dwell time at end of hole) (default: 0) Retraction at V 0: Rapid traverse 1: Feed rate Feed rate reduction 0: Without reduction 1: At end of the hole 2: At start of the hole 3: At start and end of the hole AB Spot drilling / through drilling length (distance for feed rate reduction) RB Retraction plane (diameter value) Further forms: see page 60 Access to the technology database: Machining operation: Drilling Affected parameters: F, S 174 smart.Turn units for the Y axis 3.3 Units—Milling in Y axis 3.3 Units—Milling in Y axis "ICP contour milling in XY plane" unit The unit mills the contour defined with ICP in the XY plane. Unit name: G840_Kon_Y_Stirn / Cycle: G840 (see page 361) Parameters on the Contour form FK see page 62 NS Starting block no. of contour NE End block no. of contour Z1 Milling top edge P2 Depth of contour Parameters on the Cycle form JK Cutter position H JK=0: On the contour JK=1, closed contour: Within the contour JK=1, open contour: Left of the contour JK=2, closed contour: Outside the contour JK=2, open contour: Right of the contour JK=3: Depending on H and MD Cutting direction P I K FZ E R O 0: Up-cut milling 1: Climb milling Maximum infeed Contour-parallel oversize Infeed-direction oversize Infeed rate Reduced feed rate Approach radius Plunging behavior 0: Straight (vertical plunge)—The cycle moves the tool to the starting point; the tool plunges at feed rate and mills the contour. 1: In predrilling—The cycle positions the tool above the hole; the tool plunges and mills the contour. NF Position mark (only if O=1) RB Retraction plane Further forms: see page 60 Access to the technology database: Machining operation: Finish milling Affected parameters: F, S, FZ, P HEIDENHAIN MANUALplus 620, CNC PILOT 640 175 3.3 Units—Milling in Y axis "ICP pocket milling in XY plane" unit The unit mills the pocket defined with ICP in the XY plane. In QK (machining operation), select whether a roughing or finishing operation is to be executed. For roughing, define the plunging strategy. Unit name: G845_Tas_Y_Stirn / Cycles: G845 (see page 370); G846 (see page 374) Parameters on the Contour form FK see page 62 NF Position mark (only if QK=8) NS Starting block no. of contour Z1 Milling top edge P2 Depth of contour NE End block no. of contour Parameters on the Cycle form QK Machining operation and plunging strategy JT 0: Roughing 1: Finishing 2: Helical roughing, manual 3: Helical roughing, automatic 4: Reciprocating linear roughing, manual 5: Reciprocating linear roughing, automatic 6: Reciprocating circular roughing, manual 7: Reciprocating circular roughing, automatic 8: Plunge roughing at predrilling position 9: Finishing with 3-D approach arc Machining direction: H 0: From the inside out (from the inside towards the outside) 1: From the outside in (from the outside towards the inside) Cutting direction 0: Up-cut milling 1: Climb milling P Maximum infeed I Contour-parallel oversize K Infeed-direction oversize FZ Infeed rate E Reduced feed rate R Approach radius WB Plunging length EW Plunge angle U Overlap factor (default: 0.5) RB Retraction plane Further forms: see page 60 176 Access to the technology database: Machining operation: Milling Affected parameters: F, S, FZ, P smart.Turn units for the Y axis 3.3 Units—Milling in Y axis "Single-surface milling, XY plane" unit The unit mills a single surface defined with ICP in the XY plane. Unit name: G841_Y_STI / Cycles: G841 (see page 527); G842 (see page 528) Parameters on the Contour form FK see page 62 NS Starting block no. of contour Parameters on the Cycle form QK Machining operation: P I K H 0: Roughing 1: Finishing Maximum infeed Contour-parallel oversize Infeed-direction oversize Cutting direction 0: Up-cut milling 1: Climb milling U Overlap factor (default: 0.5) V Overrun factor FZ Infeed rate RB Retraction plane Further forms: see page 60 Access to the technology database: Machining operation: Milling Affected parameters: F, S, FZ, P HEIDENHAIN MANUALplus 620, CNC PILOT 640 177 3.3 Units—Milling in Y axis "Centric polygon milling, XY plane" unit The unit mills the centric polygon defined with ICP in the XY plane. Unit name: G843_Y_STI / Cycles: G843 (see page 529); G844 (see page 530) Parameters on the Contour form FK see page 62 NS Starting block no. of contour Parameters on the Cycle form QK Machining operation: P I K H 0: Roughing 1: Finishing Maximum infeed Contour-parallel oversize Infeed-direction oversize Cutting direction 0: Up-cut milling 1: Climb milling U Overlap factor (default: 0.5) V Overrun factor FZ Infeed rate RB Retraction plane Further forms: see page 60 Access to the technology database: Machining operation: Milling Affected parameters: F, S, FZ, P 178 smart.Turn units for the Y axis 3.3 Units—Milling in Y axis "Engraving in XY plane" unit The unit engraves character strings aligned linearly in the XY plane. Diacritics and special characters that you cannot enter in the smart.Turn editor can be defined, character by character, in NF. If you program "Continue from last text" (Q=1), tool change and prepositioning are suppressed. The technological data of the previous engraving cycle apply. Unit name: G803_GRA_Y_STIRN / Cycle: G803 (see page 539) Character set: see page 376 Parameters on the Position form X, Y Starting point Z End point. Z position, infeed depth during milling. RB Retraction plane APP Approach: see page 65 DEP Departure: see page 65 Parameters on the Cycle form TXT Text to be engraved NF Character number (character to be engraved) H Font height E Distance factor (for calculation see figure) W Inclination angle FZ Plunging feed rate factor (plunging feed rate = current feed rate * FZ) Q Continue from last text 0 (No): Engraving starts at the starting point 1 (Yes): Engraving starts at the tool position Further forms: see page 60 Access to the technology database: Machining operation: Engraving Affected parameters: F, S HEIDENHAIN MANUALplus 620, CNC PILOT 640 179 3.3 Units—Milling in Y axis "Deburring in XY plane" unit The unit deburrs the contour defined with ICP in the XY plane. Unit name: G840_ENT_Y_STIRN / Cycle: G840 (see page 365) Parameters on the Contour form FK see page 62 NS Starting block no. of contour NE End block no. of contour Z1 Milling top edge Parameters on the Cycle form JK Cutter position H JK=0: On the contour JK=1, closed contour: Within the contour JK=1, open contour: Left of the contour JK=2, closed contour: Outside the contour JK=2, open contour: Right of the contour JK=3: Depending on H and MD Cutting direction 0: Up-cut milling 1: Climb milling BG Chamfer width JG Preparation diameter P Plunging depth (indicated as a negative value) I Contour-parallel oversize R Approach radius FZ Infeed rate E Reduced feed rate RB Retraction plane Further forms: see page 60 Access to the technology database: Machining operation: Deburring Affected parameters: F, S 180 smart.Turn units for the Y axis 3.3 Units—Milling in Y axis "Thread milling in XY plane" unit The unit mills a thread in existing holes in the XY plane. Unit name: G800_GEW_Y_STIRN / Cycle: G800 (see page 541) Parameters on the Position form APP Approach see page 65 CS Approach position C Z1 Start point drill (starting point of hole) P2 Thread depth I Thread diameter F1 Thread pitch Parameters on the Cycle form J Direction of thread: H 0: Right-hand thread 1: Left-hand thread Cutting direction V 0: Up-cut milling 1: Climb milling Milling method 0: The thread is milled in a 360-degree helix 1: The thread is milled in several helical paths (singlepoint tool) R Approach radius Further forms: see page 60 Access to the technology database: Machining operation: Finish milling Affected parameters: F, S HEIDENHAIN MANUALplus 620, CNC PILOT 640 181 3.3 Units—Milling in Y axis "ICP contour milling in YZ plane" unit The unit mills the contour defined with ICP in the YZ plane. Unit name: G840_Kon_Y_Mant / Cycle: G840 (see page 361) Parameters on the Contour form FK see page 62 NS Starting block no. of contour NE End block no. of contour X1 Milling top edge (diameter value) P2 Depth of contour (radius value) Parameters on the Cycle form JK Cutter position H JK=0: On the contour JK=1, closed contour: Within the contour JK=1, open contour: Left of the contour JK=2, closed contour: Outside the contour JK=2, open contour: Right of the contour JK=3: Depending on H and MD Cutting direction P I K FZ E R O 0: Up-cut milling 1: Climb milling Maximum infeed Contour-parallel oversize Infeed-direction oversize Infeed rate Reduced feed rate Approach radius Plunging behavior 0: Straight (vertical plunge)—The cycle moves the tool to the starting point; the tool plunges at feed rate and mills the contour. 1: In predrilling—The cycle positions the tool above the hole; the tool plunges and mills the contour. NF Position mark (only if O=1) RB Retraction plane (diameter value) Further forms: see page 60 Access to the technology database: Machining operation: Finish milling Affected parameters: F, S, FZ, P 182 smart.Turn units for the Y axis 3.3 Units—Milling in Y axis "ICP pocket milling in YZ plane" unit The unit mills the pocket defined with ICP in the YZ plane. In QK (machining operation), select whether a roughing or finishing operation is to be executed. For roughing, define the plunging strategy. Unit name: G845_Tas_Y_Mant / Cycles: G845 (see page 370); G846 (see page 374) Parameters on the Contour form FK see page 62 NS Starting block no. of contour NE End block no. of contour X1 Milling top edge (diameter value) P2 Depth of contour NF Position mark (only if QK=8) Parameters on the Cycle form QK Machining operation and plunging strategy JT 0: Roughing 1: Finishing 2: Helical roughing, manual 3: Helical roughing, automatic 4: Reciprocating linear roughing, manual 5: Reciprocating linear roughing, automatic 6: Reciprocating circular roughing, manual 7: Reciprocating circular roughing, automatic 8: Plunge roughing at predrilling position 9: Finishing with 3-D approach arc Machining direction: H 0: From the inside out (from the inside towards the outside) 1: From the outside in (from the outside towards the inside) Cutting direction 0: Up-cut milling 1: Climb milling P Maximum infeed I Infeed-direction oversize K Contour-parallel oversize FZ Infeed rate E Reduced feed rate R Approach radius WB Plunging length EW Plunge angle U Overlap factor (default: 0.5) RB Retraction plane (diameter value) Further forms: see page 60 HEIDENHAIN MANUALplus 620, CNC PILOT 640 Access to the technology database: Machining operation: Milling Affected parameters: F, S, FZ, P 183 3.3 Units—Milling in Y axis "Single-surface milling, YZ plane" unit The unit mills a single surface defined with ICP in the YZ plane. Unit name: G841_Y_MANT / Cycles: G841 (see page 527), G842 (see page 528) Parameters on the Contour form FK see page 62 NS Starting block no. of contour Parameters on the Cycle form QK Machining operation: P I K H 0: Roughing 1: Finishing Maximum infeed Contour-parallel oversize Infeed-direction oversize Cutting direction 0: Up-cut milling 1: Climb milling U Overlap factor (default: 0.5) V Overrun factor FZ Infeed rate RB Retraction plane Further forms: see page 60 Access to the technology database: Machining operation: Milling Affected parameters: F, S, FZ, P 184 smart.Turn units for the Y axis 3.3 Units—Milling in Y axis "Centric polygon milling, YZ plane" unit The unit mills the centric polygon defined with ICP in the YZ plane. Unit name: G843_Y_MANT / Cycles: G843 (see page 529); G844 (see page 529) Parameters on the Contour form FK see page 62 NS Starting block no. of contour Parameters on the Cycle form QK Machining operation: P I K H 0: Roughing 1: Finishing Maximum infeed Contour-parallel oversize Infeed-direction oversize Cutting direction 0: Up-cut milling 1: Climb milling U Overlap factor (default: 0.5) V Overrun factor FZ Infeed rate RB Retraction plane Further forms: see page 60 Access to the technology database: Machining operation: Milling Affected parameters: F, S, FZ, P HEIDENHAIN MANUALplus 620, CNC PILOT 640 185 3.3 Units—Milling in Y axis "Engraving in YZ plane" unit The unit engraves character strings aligned linearly in the YZ plane. Diacritics and special characters that you cannot enter in the smart.Turn editor can be defined, character by character, in NF. If you program "Continue from last text" (Q=1), tool change and prepositioning are suppressed. The technological data of the previous engraving cycle apply. Unit name: G804_GRA_Y_MANT / Cycle: G804 (see page 540) Character set: see page 376 Parameters on the Position form Y, Z Starting point X End point (diameter). X position, infeed depth during milling. RB Retraction plane Parameters on the Cycle form TXT Text to be engraved NF Character number (character to be engraved) H Font height E Distance factor (for calculation see figure) W Inclination angle FZ Plunging feed rate factor (plunging feed rate = current feed rate * FZ) Q Continue from last text 0 (No): Engraving starts at the starting point 1 (Yes): Engraving starts at the tool position Further forms: see page 60 Access to the technology database: Machining operation: Engraving Affected parameters: F, S 186 smart.Turn units for the Y axis 3.3 Units—Milling in Y axis "Deburring in YZ plane" unit The unit deburrs the contour defined with ICP in the YZ plane. Unit name: G840_ENT_Y_MANT / Cycle: G840 (see page 365) Parameters on the Contour form FK see page 62 NS Starting block no. of contour NE End block no. of contour X1 Milling top edge (diameter value) Parameters on the Cycle form JK Cutter position H JK=0: On the contour JK=1, closed contour: Within the contour JK=1, open contour: Left of the contour JK=2, closed contour: Outside the contour JK=2, open contour: Right of the contour JK=3: Depending on H and MD Cutting direction 0: Up-cut milling 1: Climb milling BG Chamfer width JG Preparation diameter P Plunging depth (indicated as a negative value) K Contour-parallel oversize R Approach radius FZ Infeed rate E Reduced feed rate RB Retraction plane Further forms: see page 60 Access to the technology database: Machining operation: Deburring Affected parameters: F, S HEIDENHAIN MANUALplus 620, CNC PILOT 640 187 3.3 Units—Milling in Y axis "Thread milling in YZ plane" unit The unit mills a thread in existing holes in the YZ plane. Unit name: G806_GEW_Y_MANT / Cycle: G806 (see page 542) Parameters on the Position form APP Approach see page 65 CS Approach position C X1 Start point drill (starting point of hole) P2 Thread depth I Thread diameter F1 Thread pitch Parameters on the Cycle form J Direction of thread: H 0: Right-hand thread 1: Left-hand thread Cutting direction V 0: Up-cut milling 1: Climb milling Milling method 0: The thread is milled in a 360-degree helix 1: The thread is milled in several helical paths (singlepoint tool) R Approach radius Further forms: see page 60 Access to the technology database: Machining operation: Finish milling Affected parameters: F, S 188 smart.Turn units for the Y axis DIN Programming 4.1 Programming in DIN/ISO mode 4.1 Programming in DIN/ISO mode Geometry and machining commands The Steuerung also supports structured programming in DIN/ISO mode. The G commands are divided into: Geometry commands for describing the blank and finished part. Machining commands for the MACHINING section. Some G codes are used for blank/finished-part definition and in the MACHINING section. When copying or shifting NC blocks, keep in mind that "geometry" functions are used exclusively for describing a contour, while "machining" functions are used only in the MACHINING section. Beispiel: "Structured DINplus program" HEADER #MATERIAL Steel #MACHINE Automatic lathe #DRAWING 356_787.9 #CLAMP_PRESS. 20 #SLIDE $1 #COMPANY Turn & Co #MEASURE_UNITS METRIC TURRET 1 T1 ID"342-300.1" T2 ID"111-80-080.1" ... BLANK N1 G20 X120 Z120 K2 FINISHED N2 G0 X60 Z-115 N3 G1 Z-105 ... MACHINING N22 G59 Z282 N25 G14 Q0 [Predrilling 30 mm outside centric face] N26 T1 N27 G97 S1061 G95 F0.25 M4 ... END 190 DIN Programming 4.1 Programming in DIN/ISO mode Contour programming The "contour follow-up" function and contour-related turning cycles require the previous description of the blank and finished part. For milling and drilling, contour definition is a precondition if you wish to use fixed cycles. Use ICP (Interactive Contour Programming) for describing blank and finished parts. Contours for turning: Describe a continuous contour. The direction of the contour description is independent of the direction of machining. Contour descriptions must not extend beyond the turning center. The contour of the finished part must lie within the contour of the blank part. When machining bars, define only the required section as blank. Contour definitions apply to the entire NC program, even if the workpiece is rechucked for machining the rear face. In the fixed cycles, the defined contour is used to program "reference values." To describe workpiece blanks and auxiliary workpiece blanks, use G20 "Blank part macro" for standard parts (cylinder, hollow cylinder). G21 "Cast-part macro" for blank-part contours based on finished-part contours. G21 is only used for describing workpiece blanks. Individual contour elements (such as are used for finished-part contours) where use of G20 or G21 is not possible. To describe finished parts, use individual contour elements and form elements. The contour elements or the complete contour can be assigned attributes accounted for during the machining of the workpiece (example: oversizes, additive compensation, special feed rates, etc.). The Steuerung always uses paraxial elements to close finished parts. For intermediate machining steps, define auxiliary contours. Auxiliary contours are programmed in the same way as finished-part descriptions. One contour description is possible per AUXILIARY CONTOUR. An AUXILIARY CONTOUR is assigned a name (ID) that can be referenced by the cycles. Auxiliary contours are not closed automatically. HEIDENHAIN MANUALplus 620, CNC PILOT 640 191 4.1 Programming in DIN/ISO mode Contours for C-axis machining: Contours for C-axis machining are programmed within the FINISHED PART section. Identify the contours as FACE or LATERAL. You can use section codes more than once or program multiple contours within one section code. Block references: When editing G commands related to the contour (MACHINING section), load the block references from the displayed contour. Place the cursor in the input box (NS). Switch to the contour display. Place the cursor on the desired contour element. Switch to NE. Place the cursor on the desired contour element. Press the LOAD soft key to return to the dialog. NC blocks of the DIN program An NC block contains NC commands such as positioning, switching or organizational commands. Traversing and switching commands begin with G or M followed by a number (G1, G2, G81, M3, M30, ...) and the address parameters. Organizational commands consist of key words (WHILE, RETURN, etc.), or of a combination of letters/ numbers. You can also program NC blocks containing only variable calculations. You can program several NC commands in one NC block, provided they have different address letters and do not have opposing functions. Examples Permissible combination: N10 G1 X100 Z2 M8 Non-permissible combination: N10 G1 X100 Z2 G2 X100 Z2 R30 (same address letters are used more than once) or N10 M3 M4 (opposing functionality) NC address parameters The address parameters consist of 1 or 2 letter(s) followed by A value A mathematical expression A question mark—simplified geometry programming (VGP) A letter "i" to designate incremental address parameters (examples: Xi..., Ci..., XKi..., YKi..., etc.) A # variable A constant (_constname) 192 DIN Programming 4.1 Programming in DIN/ISO mode Examples: X20 [Absolute dimension] Zi–35.675 [Incremental dimension] X? [Simplified geometry programming] X#l1 [Variable programming] X(#g12+1) [Variable programming] X(37+2)*SIN(30) [Mathematical expression] X(20*_pi) [Expression with constant] Creating, editing and deleting NC blocks Make NC block: Press the INS key. The Steuerung creates a new NC block below the cursor position. Alternatively you can program the NC command directly. The Steuerung creates a new NC block or inserts the NC command in the existing NC block. Delete the NC block: Position the cursor on the NC block to be deleted. Press the DEL key. The Steuerung deletes the NC block. Add an NC element: Position the cursor on an element of the NC block (NC block number, G or M command, address parameter, etc.). Insert NC element (G, M, T function, etc.). Change NC element: Position the cursor on an element of the NC block (NC block number, G or M command, address parameter, etc.) or the section code. Press ENTER or double-click with the left mouse key. The Steuerung activates a dialog box which displays the block number, the number of the G or M function, or the address parameters, which can then be edited. Delete NC element: Position the cursor on an element of the NC block (NC block number, G or M command, address parameter, etc.). Press the DEL key. The NC element highlighted by the cursor and all the related elements are deleted. Example: If the cursor is located on a G command, the address parameters are also deleted. HEIDENHAIN MANUALplus 620, CNC PILOT 640 193 4.1 Programming in DIN/ISO mode Address parameters Coordinates can be programmed absolutely or incrementally. If you do not make any entry for X, Y, Z, XK, YK, C, the coordinates of the block previously executed will be retained (modal). The Steuerung calculates missing coordinates in the principal axes X, Y or Z if you program "?" (simplified geometry programming). The machining functions G0, G1, G2, G3, G12 and G13 are modal. This means that the Steuerung uses the previous G command if the address parameters X, Y, Z, I or K in the following block have been programmed without a G code. However, the address parameters must have been programmed as absolute values. The Steuerung supports the use of variables and mathematical expressions as address parameters. To edit address parameters: Call the dialog box. Position the cursor in the input field and enter/change the values, or Use the additional input options provided by the soft keys. Enter "?" (simplified geometry programming) Switch from incremental to absolute, or vice versa Activate variable input Load the contour reference You can use simplified geometry programming when target or center point coordinates are missing. Simplified geometry programming provides the following options: ?: The control calculates the value. ?>: The control calculates the value. If there are two possible solutions, the control uses the higher value. ?<: The control calculates the value. If there are two possible solutions, the control uses the lower value. 194 Soft key in the G dialog Alternately shows and hides the help graphics Opens the alphabetic keyboard for entering variables (GOTO key) Inserts the question mark for activating the simplified geometry programming Activates incremental programming for the current input parameter Allows transferring the contour references for NS and NE DIN Programming 4.1 Programming in DIN/ISO mode Fixed cycles HEIDENHAIN recommends programming a fixed cycle as follows: Insert the tool Define the cutting data Position the tool in front of the working area Define the safety clearance Cycle call Retract the tool Move to tool change point Danger of collision! Remember when omitting cycle programming steps during optimization: A special feed rate remains in effect until the next feed command (for example the finishing feed rate during recessing cycles). Some cycles traverse diagonally back to the starting point if you use the standard programming (for example roughing cycles). Typical structure of a fixed cycle ... MACHINING N.. G59 Z.. Zero point shift N.. G26 S.. Define the speed limit N.. G14 Q.. Move to tool change point ... N.. T.. Insert the tool N.. G96 S.. G95 F.. M4 Define the technology data N.. G0 X.. Z.. Pre-position N.. G47 P.. Define the safety clearance N.. G810 NS.. NE.. Cycle call N.. G0 X.. Z.. If necessary, retract N.. G14 Q0 Move to tool change point ... HEIDENHAIN MANUALplus 620, CNC PILOT 640 195 4.1 Programming in DIN/ISO mode Subprograms, expert programs Subprograms are used to program the contour or the machining process. In the subprogram, transfer parameters are available as variables. You can fix the designation of the transfer parameters and illustrate them in help graphics (See "Subprograms" on page 427.). In every subprogram, the local variables #l1 to #l30 are available for internal calculations. Subprograms can be nested up to six times. Nesting means that a subprogram calls a further subprogram, etc. If a subprogram is to be run repeatedly, enter the number of times the subprogram is to be repeated in the Q parameter. The Steuerung distinguishes between local and external subprograms. Local subprograms are in the file of the NC main program. Local subprograms can only be called in from their corresponding main programs. External subprograms are stored in separate NC files and can be called in from any NC main program or other NC subprograms. Expert programs An expert program is a subprogram that executes complex processes and is adapted to the machine configurations. Expert programs are usually provided by the machine tool builder. NC program conversion For programming and user communication, keep in mind that the Steuerung interprets the NC program up to the fixed word MACHINING in the program selection. The MACHINING section is not interpreted until you select Cycle on. 196 DIN Programming 4.1 Programming in DIN/ISO mode DIN/ISO programs of predecessor controls The DIN program formats of the predecessor controls MANUALplus 4110 and CNC PILOT 4290 differ from the format of the MANUALplus 620. However, you can use the program converter to adapt programs of the predecessor control to the new control. When opening an NC program, the Steuerung recognizes the programs of predecessor controls. The program concerned will be converted after a confirmation prompt. "CONV_..." will be prefixed to the program name. The converter is also part of the Transfer function (Organization mode of operation). DIN/ISO programs not only have new solutions for tool management, technology data, etc., but also for contour description and variable programming. Remember the following when converting DIN/ISO programs of the MANUALplus 4110: Tool call: The loading of the T number depends on whether the program is a "multifix program" (2-digit T number) or "turret program" (4-digit T number). 2-digit T number: The T number is loaded as "ID" and entered as the T number "T1". 4-digit T number (Tddpp): The first two digits of the T number (dd) are loaded as "ID" and the last two (pp) as "T". Workpiece-blank definition: A G20/G21 workpiece-blank definition of the 4110 becomes an AUXILIARY BLANK. Contour descriptions: In MANUALplus 4110 programs, the fixed cycles are followed by the contour description. During conversion the contour description is converted to an AUXILIARY CONTOUR. The associated cycle in the MACHINING section then refers to this auxiliary contour. Variable programming: Variable accesses to tool data, machine dimensions, D compensation values, parameter data and events cannot be converted. These program sequences have to be adapted. M functions are left unchanged. Inches or metric: The converter cannot detect the unit of measure of the MANUALplus 4110 program. Consequently, no unit of measure is entered in the target program. This has to be completed by the user. Remember the following when converting DIN programs of the CNC PILOT 4290: Tool call (T commands of the TURRET section): T commands containing a reference to the tool database are left unchanged (example: T1 ID"342-300.1"). T commands containing tool data cannot be converted. Variable programming: Variable accesses to tool data, machine dimensions, D compensation values, parameter data and events cannot be converted. These program sequences have to be adapted. HEIDENHAIN MANUALplus 620, CNC PILOT 640 197 4.1 Programming in DIN/ISO mode M functions are left unchanged. Names of external subprograms: When an external subprogram is called, the converter prefixes "CONV_..." to the name. If the DIN program contains nonconvertible elements, the corresponding NC block is saved as a comment. The word WARNING is inserted in front of this comment. Depending on the situation, the nonconvertible command is taken into the comment line, or the nonconvertible NC block follows the comment. HEIDENHAIN recommends adapting converted NC programs to the circumstances of the Steuerung and then testing them before using them for production. 198 DIN Programming 4.1 Programming in DIN/ISO mode "Geometry" pull-down menus The Geo(metry) pull-down menus contain functions for contour description. The pull-down menus are called by pressing the "Geo" menu in DIN/ISO mode. Overview of the functions: G: Direct entry of a G code Line: Direct entry of a line segment (G1) Circle: Description of a circular arc (G2, G3, G12, G13) Form: Description of form elements Front: Functions for contour descriptions on the front face Surface: Functions for contour descriptions on the lateral surface ICP, Extras, Graph.: See "Shared menu items" on page 41. Back to the DIN/ISO main menu "Machining" pull-down menus The "Mach(ining)" pull-down menus contain functions for programming the machining operation. The pull-down menus are called by pressing the "Mach" menu in DIN/ISO mode. Overview of the functions: G: Direct entry of a G code G menu: Pull-down menus for machining tasks M: Direct entry of an M function M menu: Pull-down menus for switching tasks T: Direct tool call F: Feed per revolution G95 S: Cutting speed G96 Extras, Graph.: See "Shared menu items" on page 41. Back to the DIN/ISO main menu HEIDENHAIN MANUALplus 620, CNC PILOT 640 199 4.2 Definition of workpiece blank 4.2 Definition of workpiece blank Chuck part bar/tube G20-Geo G20 defines the contour of a cylinder/hollow cylinder. Parameters X Cylinder/hollow cylinder diameter Diameter of circumference of a polygonal blank Z Length of the blank K Right edge (distance between workpiece zero point and right edge) I Inside diameter of hollow cylinders Beispiel: G20-Geo ... BLANK N1 G20 X80 Z100 K2 I30 [hollow cylinder] ... Cast part G21-Geo G21 generates the contour of the blank part from the contour of the finished part—plus the equidistant oversize P. Parameters P Equidistant oversize (reference: finished part contour) Q Bore hole Y/N (default: 0) 0: Without hole 1: With hole G21 cannot be used to describe an "auxiliary blank." Beispiel: G21-Geo ... BLANK N1 G21 P5 Q1 [cast blank] ... FINISHED N2 G0 X30 Z0 N3 G1 X50 BR-2 N4 G1 Z-40 N5 G1 X65 N6 G1 Z-70 ... 200 DIN Programming 4.3 Basic contour elements 4.3 Basic contour elements Starting point of turning contour G0-Geo G0 defines the starting point of a turning contour. Parameters X Starting point of contour (diameter value) Z Starting point of contour PZ Starting point of contour (polar radius) W Starting point of contour (polar angle) Beispiel: G0-Geo ... FINISHED N2 G0 X30 Z0 [starting point of contour] N3 G1 X50 BR-2 N4 G1 Z-40 N5 G1 X65 N6 G1 Z-70 ... Machining attributes for form elements All the basic contour elements contain the chamfer/rounding form element (BR). You can define machining attributes for this form element and for all the other form elements (recesses, undercuts). Parameters BE Special feed factor for the chamfer/rounding arc during the finishing cycle (default: 1) BF BD BP BH Special feed rate = active feed rate * BE Special feed rate for the chamfer/rounding arc during the finishing cycle (default: no special feed rate) Additive compensation number for the chamfer/rounding arc (901-916) Equidistant oversize (at constant distance) for the chamfer/ rounding arc Type of oversize for the chamfer/rounding arc 0: Absolute oversize 1: Additive oversize HEIDENHAIN MANUALplus 620, CNC PILOT 640 201 4.3 Basic contour elements Line segment in a contour G1-Geo G1 defines a line segment in a turning contour. Parameters X End point of contour element (diameter value) Z End point of contour element AN Angle to rotary axis (for angle direction see graphic support window) Q Point of intersection. End point if the line segment intersects a circular arc (default: 0): BR 0: Near point of intersection 1: Far point of intersection Chamfer/rounding. Defines the transition to the next contour element. When entering a chamfer/rounding, program the theoretical end point. No input: Tangential transition BR=0: No tangential transition BR>0: Radius of rounding BR<0: Width of chamfer PZ End point of contour element (polar radius; reference: workpiece zero point) W End point of contour element (polar angle; reference: workpiece zero point) AR Angle to rotary axis (AR corresponds to AN) R Line length (polar radius; reference: last contour point) BE, BF, BD, BP and BH (see „Machining attributes for form elements” on page 201) FP Do not machine element (only necessary for TURN PLUS): IC KC HC 0: Do not machine basic element (straight line) 1: Do not machine overlay element (e.g. chamfer or rounding) 2: Do not machine basic/overlay element Measuring cut oversize (measuring cut diameter) Length of measuring cut Measuring cut counter: Number of workpieces after which a measurement is performed Programming X, Z: Absolute, incremental, modal or "?" ANi: Angle to the subsequent element ARi: Angle to the previous element 202 DIN Programming 4.3 Basic contour elements Example: G1-Geo ... FINISHED N2 G0 X0 Z0 Starting point N3 G1 X50 BR-2 Vertical line with chamfer N4 G1 Z-20 BR2 Horizontal line with radius N5 G1 X70 Z-30 Oblique cut with absolute target coordinates N6 G1 Zi-5 Horizontal line segment, incremental N7 G1 Xi10 AN30 Incremental and angle N8 G1 X92 Zi-5 Incremental and absolute mixed N9 G1 X? Z-80 Calculate the X coordinate N10 G1 X100 Z-100 AN10 End point and angle with unknown starting point ... HEIDENHAIN MANUALplus 620, CNC PILOT 640 203 4.3 Basic contour elements Circular arc of turning contour G2/G3-Geo G2/G3 defines a circular arc in a contour with incremental center dimensioning. Direction of rotation (see help graphic): G2: In clockwise direction G3: In counterclockwise direction Parameters X End point of contour element (diameter value) Z End point of contour element R Radius I Center (distance from starting point to center as radius) K Center (distance from starting point to center) Q Point of intersection. End point if the circular arc intersects a line segment or another circular arc (default: 0): BR 0: Near point of intersection 1: Far point of intersection Chamfer/rounding. Defines the transition to the next contour element. When entering a chamfer/rounding, program the theoretical end point. No input: Tangential transition BR=0: No tangential transition BR>0: Radius of rounding BR<0: Width of chamfer BE, BF, BD, BP and BH (see „Machining attributes for form elements” on page 201) FP Do not machine element (only necessary for TURN PLUS): 0: Do not machine basic element (circle) 1: Do not machine overlay element (e.g. chamfer or rounding) 2: Do not machine basic/overlay element Programming X, Z: Absolute, incremental, modal or "?" Example: G2-, G3-Geo ... FINISHED N1 G0 X0 Z-10 N2 G3 X30 Z-30 R30 Target point and radius N3 G2 X50 Z-50 I19.8325 K-2.584 Target point and center, incremental N4 G3 Xi10 Zi-10 R10 Target point (incremental) and radius N5 G2 X100 Z? R20 Unknown target point coordinate N6 G1 Xi-2.5 Zi-15 ... 204 DIN Programming 4.3 Basic contour elements Circular arc of turning contour G12/G13-Geo G12/G13 defines a circular arc in a contour with absolute center dimensioning. Direction of rotation (see help graphic): G12: In clockwise direction G13: In counterclockwise direction Parameters X End point of contour element (diameter value) Z End point of contour element I Center (radius dimension) K Center R Radius Q Point of intersection. End point if the circular arc intersects a line segment or another circular arc (default: 0): BR 0: Near point of intersection 1: Far point of intersection Chamfer/rounding. Defines the transition to the next contour element. When entering a chamfer/rounding, program the theoretical end point. No input: Tangential transition BR=0: No tangential transition BR>0: Radius of rounding BR<0: Width of chamfer PZ End point of contour element (polar radius; reference: workpiece zero point) W End point of contour element (polar angle; reference: workpiece zero point) PM Center point (polar radius; reference: workpiece zero point) WM Center point (polar angle; reference: workpiece zero point) AR Starting angle (tangential angle to rotary axis) AN End angle (tangential angle to rotary axis) BE, BF, BD, BP and BH (see „Machining attributes for form elements” on page 201) FP Do not machine element (only necessary for TURN PLUS): 0: Do not machine basic element (straight line) 1: Do not machine overlay element (e.g. chamfer or rounding) 2: Do not machine basic/overlay element Programming X, Z: Absolute, incremental, modal or "?" ARi: Angle to the previous element ANi: Angle to the subsequent element HEIDENHAIN MANUALplus 620, CNC PILOT 640 205 4.3 Basic contour elements Example: G12-, G13-Geo ... FINISHED N1 G0 X0 Z-10 ... N7 G13 Xi-15 Zi15 R20 Target point (incremental) and radius N8 G12 X? Z? R15 Only the radius is known N9 G13 X25 Z-30 R30 BR10 Q1 Rounding arc in transition and selection of intersections N10 G13 X5 Z-10 I22.3325 K-12.584 Target point and center, absolute ... 206 DIN Programming 4.4 Contour form elements 4.4 Contour form elements Recess (standard) G22-Geo G22 defines a recess on the previously programmed paraxial reference element. Parameters X Starting point of recess on the face (diameter) Z Starting point of recess on the lateral surface I Inside corner (diameter value) K Recess on face: End point of the recess Recess on lateral surface: Recess base Inside corner Ii Recess on face: Recess base Recess on lateral surface: End point of the recess Inside corner—incremental (pay attention to algebraic sign!) Ki Recess on face: Recess width Recess on lateral surface: Recess depth Inside corner—incremental (pay attention to algebraic sign!) B Recess on face: Recess depth Recess on lateral surface: Recess width Outside radius/chamfer at both sides of the recess (default: 0) B>0: Radius of rounding B<0: Width of chamfer R Inside radius in both corners of recess (default: 0) BE, BF, BD, BP and BH (see „Machining attributes for form elements” on page 201) FP Do not machine element (only necessary for TURN PLUS): 1: Do not machine recess Program only X or Z. HEIDENHAIN MANUALplus 620, CNC PILOT 640 207 4.4 Contour form elements Example: G22-Geo FINISHED N1 G0 X40 Z0 N2 G1 X80 N3 G22 X60 I70 Ki-5 B-1 R0.2 Recess on face, depth is incremental N4 G1 Z-80 N5 G22 Z-20 I70 K-28 B1 R0.2 Longitudinal recess, width is absolute N6 G22 Z-50 Ii-8 Ki-12 B0.5 R0.3 Longitudinal recess, width is incremental N7 G1 X40 N8 G1 Z0 N9 G22 Z-38 Ii6 K-30 B0.5 R0.2 Longitudinal recess, inside ... 208 DIN Programming 4.4 Contour form elements Recess (general) G23-Geo G23 defines a recess on the previously programmed linear reference element. The reference element can also be oblique. Parameters H Type of recess (default: 0) X 0: Symmetrical recess 1: Relief turn Center point of recess on the face (diameter) Z No input: Position is calculated Center point of recess on the lateral surface I No input: Position is calculated Recess depth and recess position A I>0: Recess at the right of the reference element I<0: Recess at the left of the reference element Recess width (without chamfer/rounding arc) Recess diameter (diameter of recess base). Use U only if the reference element runs parallel to the Z axis Recess angle (default: 0) B H=0: Angle between recess edges (0° <= A < 180°) H=1: Angle between reference line and recess edge (0° < A <= 90°) Outside radius/chamfer at corner near the starting point (default: 0) K U P B>0: Radius of rounding B<0: Width of chamfer Outside radius/chamfer at corner far from the starting point (default: 0) P>0: Radius of rounding P<0: Width of chamfer R Inside radius in both corners of recess (default: 0) BE, BF, BD, BP and BH (see „Machining attributes for form elements” on page 201) FP Do not machine element (only necessary for TURN PLUS): 1: Do not machine recess The Steuerung refers the recess depth to the reference element. The recess base runs parallel to the reference element. HEIDENHAIN MANUALplus 620, CNC PILOT 640 209 4.4 Contour form elements Example: G23-Geo ... FINISHED N1 G0 X40 Z0 N2 G1 X80 N3 G23 H0 X60 I-5 K10 A20 B-1 P1 R0.2 Recess on face, depth is incremental N4 G1 Z-40 N5 G23 H1 Z-15 K12 U70 A60 B1 P-1 R0.2 Longitudinal recess, width is absolute N6 G1 Z-80 A45 N7 G23 H1 X120 Z-60 I-5 K16 A45 B1 P-2 R0.4 Longitudinal recess, width is incremental N8 G1 X40 N9 G1 Z0 N10 G23 H0 Z-38 I-6 K12 A37.5 B-0.5 R0.2 Longitudinal recess, inside ... 210 DIN Programming 4.4 Contour form elements Thread with undercut G24-Geo G24 defines a linear basic element with a longitudinal thread and subsequent thread undercut (DIN 76). The thread is an outside or inside thread (metric ISO fine-pitch thread DIN 13 Part 2, Series 1). Parameters F Thread pitch I Undercut depth (radius) K Width of undercut Z End point of the undercut BE, BF, BD, BP and BH (see „Machining attributes for form elements” on page 201) FP Do not machine element (only necessary for TURN PLUS): 1: Do not machine the element Program G24 only in closed contours. The thread is machined with G31. Example: G24-Geo ... FINISHED N1 G0 X40 Z0 N2 G1 X40 BR-1.5 Starting point for thread N3 G24 F2 I1.5 K6 Z-30 Thread with undercut N4 G1 X50 Next transverse element N5 G1 Z-40 ... HEIDENHAIN MANUALplus 620, CNC PILOT 640 211 4.4 Contour form elements Undercut contour G25-Geo G25 generates the undercut contours listed below. The undercuts are only possible in inside contour corners in which the transverse element is parallel to the X axis. Program G25 after the first element. You specify the undercut type in parameter H. Undercut type U (H=4) Parameters H Undercut type U: H=4 I Undercut depth (radius) K Width of undercut R Inside radius in both corners of recess (default: 0) P Outside radius/chamfer (default: 0) P>0: Radius of rounding P<0: Width of chamfer BE, BF, BD, BP and BH (see „Machining attributes for form elements” on page 201) FP Do not machine element (only necessary for TURN PLUS): 1: Do not machine undercut Beispiel: Call G25-Geo type U ... N.. G1 Z-15 [longitudinal element] N.. G25 H4 I2 K4 R0.4 P-0.5 [type U] N.. G1 X20 [transverse element] ... 212 DIN Programming 4.4 Contour form elements Undercut DIN 509 E (H=0.5) Parameters H Undercut type DIN 509 E: H=0 or H=5 I Undercut depth (radius) K Width of undercut R Undercut radius (in both corners of the undercut) W Undercut angle BE, BF, BD, BP and BH (see „Machining attributes for form elements” on page 201) The Steuerung uses the diameter to calculate the parameters that you do not define. Beispiel: Call G25-Geo DIN 509 E ... N.. G1 Z-15 [longitudinal element] N.. G25 H5 [DIN 509 E] N.. G1 X20 [transverse element] ... Undercut DIN 509 F (H=6) Parameters H Undercut type DIN 509 F: H=6 I Undercut depth (radius) K Width of undercut R Undercut radius (in both corners of the undercut) P Face depth W Undercut angle A Transverse angle BE, BF, BD, BP and BH (see „Machining attributes for form elements” on page 201) The Steuerung uses the diameter to calculate the parameters that you do not define. Beispiel: Call G25-Geo DIN 509 F ... N.. G1 Z-15 [longitudinal element] N.. G25 H6 [DIN 509 F] N.. G1 X20 [transverse element] ... HEIDENHAIN MANUALplus 620, CNC PILOT 640 213 4.4 Contour form elements Undercut DIN 76 (H=7) Program only FP. All the other values are automatically calculated from the thread pitch in the standard table if they are not defined. Parameters H Undercut type DIN 76: H=7 I Undercut depth (radius) K Width of undercut R Undercut radius in both corners of the undercut (default: R=0.6*I) W Undercut angle (default: 30°) FP Thread pitch BE, BF, BD, BP and BH (see „Machining attributes for form elements” on page 201) Beispiel: Call G25-Geo DIN 76 ... N.. G1 Z-15 [longitudinal element] N.. G25 H7 FP2 [DIN 76] N.. G1 X20 [transverse element] ... Undercut type H (H=8) If you do not enter W, the angle will be calculated on the basis of K and R. The end point of the undercut is then located at the "contour corner." Parameters H Undercut type H: H=8 K Width of undercut R Undercut radius—no input: The circular element is not machined W Plunge angle—no input: W is calculated BE, BF, BD, BP and BH (see „Machining attributes for form elements” on page 201) Beispiel: Call G25-Geo type H ... N.. G1 Z-15 [longitudinal element] N.. G25 H8 K4 R1 W30 [type H] N.. G1 X20 [transverse element] ... 214 DIN Programming 4.4 Contour form elements Undercut type K (H=9) Parameters H Undercut type K: H=9 I Undercut depth R Undercut radius—no input: The circular element is not machined W Undercut angle A Angle to longitudinal axis (default: 45°) BE, BF, BD, BP and BH (see „Machining attributes for form elements” on page 201) Beispiel: Call G25-Geo type K ... N.. G1 Z-15 [longitudinal element] N.. G25 H9 I1 R0.8 W40 [type K] N.. G1 X20 [transverse element] ... HEIDENHAIN MANUALplus 620, CNC PILOT 640 215 4.4 Contour form elements Thread (standard) G34-Geo G34 defines a simple or concatenated external or internal thread (metric ISO fine-pitch thread DIN 13 Series 1). The Steuerung calculates all the required values. Parameters F Thread pitch (default: pitch from the standard table) Threads are concatenated by programming several G1/G34 blocks after each other. You need to program a linear contour element as a reference before G34 or in the NC block containing G34. Machine the thread with G31. Beispiel: G34 ... FINISHED N1 G0 X0 Z0 N2 G1 X20 BR-2 N3 G1 Z-30 N4 G34 [metric ISO] N5 G25 H7 I1.7 K7 N6 G1 X30 BR-1.5 N7 G1 Z-40 N8 G34 F1.5 [metric ISO fine-pitch thread] N9 G25 H7 I1.5 K4 N10 G1 X40 N11 G1 Z-60 ... 216 DIN Programming 4.4 Contour form elements Thread (general) G37-Geo G37 defines the different types of thread. Multi-start threads and concatenated threads are possible. Threads are concatenated by programming several G01/G37 blocks after each other. Parameters Q Type of thread (default: 1) F 1: Metric ISO fine-pitch thread (DIN 13 Part 2, Series 1) 2: Metric ISO thread (DIN 13 Part 1, Series 1) 3: Metric ISO tapered thread (DIN 158) 4: Metric ISO tapered fine-pitch thread (DIN 158) 5: Metric ISO trapezoid thread (DIN 103 Part 2, Series 1) 6: Flat metric trapezoid thread (DIN 380 Part 2, Series 1) 7: Metric buttress thread (DIN 513 Part 2, Series 1) 8: Cylindrical round thread (DIN 405 Part 1, Series 1) 9: Cylindrical Whitworth thread (DIN 11) 10: Tapered Whitworth thread (DIN 2999) 11: Whitworth pipe thread (DIN 259) 12: Nonstandard thread 13: UNC US coarse thread 14: UNF US fine-pitch thread 15: UNEF US extra-fine-pitch thread 16: NPT US taper pipe thread 17: NPTF US taper dryseal pipe thread 18: NPSC US cylindrical pipe thread with lubricant 19: NPFS US cylindrical pipe thread without lubricant Thread pitch P K D Required for Q=1, 3 to 7, 12. For other thread types, F is calculated from the diameter if it was not programmed. Thread depth—enter only for Q=12 Run-out length for threads without undercut (default: 0) Reference point (default: 0) H A W R E 0: Runout of thread at the end of the reference element 1: Runout of thread at the beginning of the reference element Number of thread turns (default: 1) Thread angle at left—enter only for Q=12 Thread angle at right—enter only for Q=12 Thread width—enter only for Q=12 Variable pitch (default: 0) V Increase/decrease the pitch per revolution by E. Direction of thread 0: Right-hand thread 1: Left-hand thread Beispiel: G37 ... FINISHED N1 G0 X0 Z0 N2 G1 X20 BR-2 N3 G1 Z-30 N4 G37 Q2 [metric ISO] N5 G25 H7 I1.7 K7 N6 G1 X30 BR-1.5 N7 G1 Z-40 N8 G37 F1.5 [metric ISO fine-pitch thread] N9 G25 H7 FP1.5 N10 G1 X40 N11 G1 Z-60 ... HEIDENHAIN MANUALplus 620, CNC PILOT 640 217 4.4 Contour form elements Beispiel: G37 Concatenated Before G37, program a linear contour element as a reference. Machine the thread with G31. For standard threads, the parameters P, R, A and W are defined by the Steuerung. Use Q=12 if you wish to use individual parameters. ... AUXILIARY CONTOUR ID"G37_Concatenated" N37 G0 X0 Z0 N 38 G1 X20 N 39 G1 Z-30 N 40 G37 F2 [metric ISO] Danger of collision! The thread is generated to the length of the reference element. Another linear element without undercut is to be programmed as overrun. N 41 G1 X30 Z-40 N 42 G37 Q2 N 43 G1 Z-70 N 44 G37 F2 ... 218 DIN Programming 4.4 Contour form elements Bore hole (centric) G49-Geo G49 defines a single hole with countersink and thread at the turning center (front or rear face). The G49 hole is a form element, not part of the contour. Parameters Z Starting position for hole (reference point) B Hole diameter P Depth of hole (excluding point) W Point angle (default: 180°) R Sinking diameter U Sinking depth E Sinking angle I Thread diameter J Thread depth K Thread chamfer F Thread pitch V Left-hand or right-hand thread (default: 0) A 0: Right-hand thread 1: Left-hand thread Angle corresponding to the position of the hole (default: 0) O A=0°: Front face A=180°: Rear face Centering diameter Program G49 in the FINISHED section, not in AUXILIARY CONTOUR, FACE or REAR. Machine the G49 hole with G71...G74. HEIDENHAIN MANUALplus 620, CNC PILOT 640 219 4.5 Attributes for contour description 4.5 Attributes for contour description Overview of attributes for contour description G38 Special feed factor for basic elements and form elements—modal Page 220 G52 Equidistant oversize for basic elements and form elements—modal Page 222 G95 Finishing feed rate for basic elements and form elements—modal Page 223 G149 Additive compensation for basic elements and form elements—modal Page 223 Once programmed, G38-, G52-, G95- and G149-Geo remain in effect for all contour elements until the function is programmed again without defining parameters. For form elements, you can program different attributes directly in the definition of the form element (see „Machining attributes for form elements” on page 201). The attributes for contour description influence the finishing feed rate of the Cycles G869 and G890, not the finishing feed rate in recessing cycles. Feed rate reduction G38-Geo G38 activates the special feed rate for the finishing cycle G890. The special feed rate applies to basic contour elements and form elements. It is a modal function. Parameters E Special feed factor (default: 1) Special feed rate = active feed rate * E G38 is a modal function. Program G38 before the contour element for which it is intended. G38 replaces a special feed rate. To cancel the special feed factor, program G38 without parameters. 220 DIN Programming 4.5 Attributes for contour description Attributes for superimposed elements G39-Geo G39 influences the finishing feed rate of G890 with the form elements: Chamfers/rounding arcs (for connecting basic elements) Undercuts Recesses Affected machining: Special feed rate, surface roughness, additive D compensation, equidistant oversizes. Parameters F Feed per revolution V Type of surface roughness (see also DIN 4768) RH D P H 1: General surface roughness (profile depth) Rt1 2: Surface roughness Ra 3: Surface roughness Rz Surface roughness [µm, inch mode: µinch] Number of the additive compensation (901 <= D <= 916) Oversize (radius) P applies as an absolute or additive value (default: 0) E 0: P replaces G57/G58 oversizes 1: P is added to G57/G58 oversizes Special feed factor (default: 1) Special feed rate = active feed rate * E Use surface roughness (V, RH), finishing feed rate (F) and special feed rate ("E") alternately! G39 is a non-modal function. Program G39 before the contour element for which it is intended. G50 preceding a cycle (MACHINING section) cancels a finishing oversize programmed for that cycle with G39. Function G39 can be replaced by directly entering the attributes in the contour elements dialog. The function is necessary to execute imported programs correctly. HEIDENHAIN MANUALplus 620, CNC PILOT 640 221 4.5 Attributes for contour description Separation point G44 During automatic program creation with TURN PLUS, you can define the separation point for rechucking with function G44. Parameters D Location of separation point: 0: Start of the basic element as separation point 1: Target of the basic element as separation point If no separation point was defined, TURNplus uses the largest diameter as separation point for outside machining and the smallest diameter as separation point for inside machining. Oversize G52-Geo G52 defines an equidistant oversize that applies to basic contour elements and form elements and is taken into consideration in G810, G820, G830, G860 and G890. Parameters P Oversize (radius) H P applies as an absolute or additive value (default: 0) 0: P replaces G57/G58 oversizes 1: P is added to G57/G58 oversizes G52 is a modal function. Program G52 in the NC block for which it is intended. G50 preceding a cycle (MACHINING section) cancels an oversize programmed for that cycle with G52. 222 DIN Programming G95 influences the finishing feed rate of G890 for basic contour elements and form elements. Parameters F Feed per revolution The G95 finishing feed rate replaces a finishing feed rate defined in the machining section. G95 is a modal function. To cancel a finishing feed rate set with G95, program G95 without an input value. Beispiel: Attributes in contour description G95 ... FINISHED N1 G0 X0 Z0 N2 G1 X20 BR-1 N3 G1 Z-20 N4 G25 H5 I0.3 K2.5 R0.6 W15 N5 G1 X40 BR-1 N6 G95 F0.08 N7 G1 Z-40 N8 G25 H5 I0.3 K2.5 R0.6 W15 BF0 N9 G95 N10 G1 X58 BR-1 N11 G1 Z-60 ... Additive compensation G149-Geo G149 followed by a D number activates/deactivates an additive compensation function. The Steuerung manages the 16 toolindependent compensation values in an internal table. The compensation values are managed in the Program Run mode (see "Program Run mode" in the User's Manual). Parameters D Additive compensation (default: D900) D=900: Deactivates the additive compensation D=901 to 916: Activates the additive compensation D Note the direction of contour description. Additive compensation is effective from the block in which G149 is programmed. Additive compensation remains in effect up to: the next G149 D900, up to the end of the finished part description. Beispiel: Attributes in contour description G149 ... FINISHED N1 G0 X0 Z0 N2 G1 X20 BR-1 N3 G1 Z-20 N4 G25 H5 I0.3 K2.5 R0.6 W15 N5 G1 X40 BR-1 N6 G149 D901 N7 G1 Z-40 N8 G25 H5 I0.3 K2.5 R0.6 W15 BD900 N9 G149 D900 N10 G1 X58 BR-1 N 12 G1 Z-60 ... HEIDENHAIN MANUALplus 620, CNC PILOT 640 223 4.5 Attributes for contour description Feed per revolution G95-Geo 4.6 C-axis contours—Fundamentals 4.6 C-axis contours— Fundamentals Milling contour position Define the reference plane or the reference diameter in the section code. Specify the depth and position of a milling contour (pocket, island) in the contour definition: With depth P programmed in the previous G308 cycle. Alternatively on figures: Cycle parameter depth P. The algebraic sign of "P" defines the position of the milling contour: P<0: Pocket P>0: Island Position of milling contour Section P Surface Milling floor FACE_C P<0 Z Z+P P>0 Z+P Z P<0 Z Z–P P>0 Z–P Z P<0 X X+(P*2) P>0 X+(P*2) X REAR_C LATERAL_C X: Reference diameter from the section code Z: Reference plane from the section code P: Depth from G308 or from cycle parameter The area milling cycles mill the surface specified in the contour definition. Islands within this surface are not taken into consideration. Contours in more than one plane (hierarchically nested contours): A plane begins with G308 and ends with G309. G308 defines a new reference plane/reference diameter. The first G308 uses the reference plane defined in the section code. Each following G308 defines a new plane. Calculation: New reference plane = Reference plane + P (from previous G308). G309 switches back to the previous reference plane. 224 DIN Programming 4.6 C-axis contours—Fundamentals Beginning of pocket/island G308-Geo G308 defines a new reference plane / reference diameter in hierarchically nested contours. Parameters P Depth for pockets, height for islands ID Name of the contour for reference from units or cycles HC Milling/drilling attribute: Q 1: Contour milling 2: Pocket milling 3: Area milling 4: Deburring 5: Engraving 6: Contour milling and deburring 7: Pocket milling and deburring 14: Do not machine Milling location: H 0: On the contour 1: Inside/left 2: Outside/right Direction: D I W BR RB 0: Up-cut milling 1: Climb milling Cutter diameter Limit diameter Angle of the chamfer Chamfer width Retraction plane End of pocket/island G309-Geo G309 defines the end of a reference plane. Every reference plane defined with G308 must be ended with G309 (See "Milling contour position" on page 224.). HEIDENHAIN MANUALplus 620, CNC PILOT 640 225 4.6 C-axis contours—Fundamentals Example of G308/G309 ... FINISHED ... FACE_C Z0 Define reference plane N7 G308 P-5 ID"Rectangle" Beginning of rectangle with depth of –5 N8 G305 XK-5 YK-10 K50 B30 R3 A0 Rectangle N9 G308 P-10 ID"Circle" Beginning of "full circle in rectangle" with depth –10 N10 G304 XK-3 YK-5 R8 Full circle N11 G309 End of full circle N12 G309 End of rectangle LATERAL_C X100 Define reference diameter N13 G311 Z-10 C45 A0 K18 B8 P-5 Linear slot with depth –5 ... 226 DIN Programming 4.6 C-axis contours—Fundamentals Circular pattern with circular slots For circular slots in circular patterns you program the pattern positions, the center of curvature, the curvature radius and the position of the slots. The Steuerung positions the slots as follows: Slots are arranged at the distance of the pattern radius about the pattern center if Pattern center = center of curvature and Pattern radius = curvature radius Slots are arranged at the distance of the pattern radius + curvature radius about the pattern center if Pattern center <> center of curvature or Pattern radius <> curvature radius In addition, the position influences the arrangement of the slots: Normal position: The starting angle of the slot applies as a relative value to the pattern position. The starting angle is added to the pattern position. Original position: The starting angle of the slot applies as an absolute value. The following examples show the programming of a circular pattern with circular slots: HEIDENHAIN MANUALplus 620, CNC PILOT 640 227 4.6 C-axis contours—Fundamentals Slot centerline as reference and normal position Programming: Pattern center = center of curvature Pattern radius = curvature radius Normal position These commands arrange the slots at the distance of the pattern radius about the pattern center. Example: Slot centerline as reference, normal position N.. G402 Q4 K30 A0 XK0 YK0 H0 Circular pattern, normal position N.. G303 I0 J0 R15 A-20 W20 B3 P1 Circular slot Slot centerline as reference and original position Programming: Pattern center = center of curvature Pattern radius = curvature radius Original position These commands arrange all slot at the same position. Example: Slot centerline as reference, original position N.. G402 Q4 K30 A0 XK0 YK0 H1 Circular pattern, original position N.. G303 I0 J0 R15 A-20 W20 B3 P1 Circular slot 228 DIN Programming 4.6 C-axis contours—Fundamentals Center of curvature as reference and normal position Programming: Pattern center <> center of curvature Pattern radius = curvature radius Normal position These commands arrange the slots at the distance of the pattern radius plus curvature radius about the pattern center. Example: Center of curvature as reference, normal position N.. G402 Q4 K30 A0 XK5 YK5 H0 Circular pattern, normal position N.. G303 I0 J0 R15 A-20 W20 B3 P1 Circular slot Center of curvature as reference and original position Programming: Pattern center <> center of curvature Pattern radius = curvature radius Original position These commands arrange the slots at the distance of the pattern radius plus curvature radius about the pattern center while keeping the starting and ending angle. Example: Center of curvature as reference, original position N.. G402 Q4 K30 A0 XK5 YK5 H1 Circular pattern, original position N.. G303 I0 J0 R15 A-20 W20 B3 P1 Circular slot HEIDENHAIN MANUALplus 620, CNC PILOT 640 229 4.7 Front and rear face contours 4.7 Front and rear face contours Starting point of front/rear face contour G100-Geo G100 defines the starting point of a front or rear face contour. Parameters X Starting point in polar coordinates (diameter) C Starting point in polar coordinates (angular dimension) XK Starting point in Cartesian coordinates YK Starting point in Cartesian coordinates 230 DIN Programming 4.7 Front and rear face contours Line segment in front/rear face contour G101Geo G101 defines a line segment in a contour on the front face/rear face. Parameters X End point in polar coordinates (diameter) C End point in polar coordinates (angular dimension) XK End point in Cartesian coordinates YK End point in Cartesian coordinates AN Angle to positive XK axis Q Point of intersection. End point if the line segment intersects a circular arc (default: 0): BR AR R 0: Near point of intersection 1: Far point of intersection Chamfer/rounding. Defines the transition to the next contour element. When entering a chamfer/rounding, program the theoretical end point. No input: Tangential transition BR=0: No tangential transition BR>0: Radius of rounding BR<0: Width of chamfer Angle to positive XK axis (AR corresponds to AN) Length (polar radius; reference: last contour point) Programming X, XK, YX: Absolute, incremental, modal or "?" C: Absolute, incremental or modal ARi: Angle to the previous element ANi: Angle to the subsequent element HEIDENHAIN MANUALplus 620, CNC PILOT 640 231 4.7 Front and rear face contours Circular arc in front/rear face contour G102/ G103-Geo G102/G103 defines a circular arc in a front or rear face contour. Direction of rotation (see help graphic): G102: In clockwise direction G103: In counterclockwise direction Parameters X End point in polar coordinates (diameter) C End point in polar coordinates (angular dimension) XK End point in Cartesian coordinates YK End point in Cartesian coordinates R Radius I Center in Cartesian coordinates J Center in Cartesian coordinates Q Point of intersection. End point if the circular arc intersects a line segment or another circular arc (default: 0): BR 0: Near point of intersection 1: Far point of intersection Chamfer/rounding. Defines the transition to the next contour element. When entering a chamfer/rounding, program the theoretical end point. No input: Tangential transition BR=0: No tangential transition BR>0: Radius of rounding BR<0: Width of chamfer XM Center point (polar radius; reference: workpiece zero point) CM Center point (polar angle; reference: workpiece zero point) AR Starting angle (tangential angle to rotary axis) AN End angle (tangential angle to rotary axis) Programming X, XK, YX: Absolute, incremental, modal or "?" C: Absolute, incremental or modal I, J: Absolute or incremental XM, CM: Absolute or incremental ARi: Angle to the previous element ANi: Angle to the subsequent element End point must not be the starting point (no full circle). 232 DIN Programming 4.7 Front and rear face contours Bore hole on front/rear face G300-Geo G300 defines a hole with countersinking and thread in a front or rear face contour. Parameters XK Center in Cartesian coordinates YK Center in Cartesian coordinates B Hole diameter P Depth of hole (excluding point) W Point angle (default: 180°) R Sinking diameter U Sinking depth E Sinking angle I Thread diameter J Thread depth K Thread runout length F Thread pitch V Left-hand or right-hand thread (default: 0) A 0: Right-hand thread 1: Left-hand thread Angle to Z axis; angle of the hole O Range for front face: –90° < A < 90° (default: 0°) Range for rear face: 90° < A < 270° (default: 180°) Centering diameter Machine the G300 holes with G71...G74. HEIDENHAIN MANUALplus 620, CNC PILOT 640 233 4.7 Front and rear face contours Linear slot on front/rear face G301-Geo G301 defines a linear slot in a contour on the front or rear face. Parameters XK Center in Cartesian coordinates YK Center in Cartesian coordinates X Diameter (center point in polar coordinates) C Angle (center point in polar coordinates) A Angle to XK axis (default: 0°) K Slot length B Slot width P Depth/height (default: "P" from G308) P<0: Pocket P>0: Island Circular slot on front/rear face G302/G303-Geo G302/G303 defines a circular slot in a contour on the front face/rear face. G302: Circular slot clockwise G303: Circular slot counterclockwise Parameters I Center of curvature in Cartesian coordinates J Center of curvature in Cartesian coordinates X Diameter (center point in polar coordinates) C Angle (center point in polar coordinates) R Curvature radius (reference: center point path of the slot) A Starting angle; reference: XK axis (default: 0°) W End angle; reference: XK axis (default: 0°) B Slot width P Depth/height (default: "P" from G308) P<0: Pocket P>0: Island 234 DIN Programming 4.7 Front and rear face contours Full circle on front/rear face G304-Geo G304 defines a full circle in a contour on the front face/rear face. Parameters XK Center in Cartesian coordinates YK Center in Cartesian coordinates X Diameter (center point in polar coordinates) C Angle (center point in polar coordinates) R Radius P Depth/height (default: "P" from G308) P<0: Pocket P>0: Island Rectangle on front/rear face G305-Geo G305 defines a rectangle in a contour on the front face/rear face. Parameters XK Center in Cartesian coordinates YK Center in Cartesian coordinates X Diameter (center point in polar coordinates) C Angle (center point in polar coordinates) A Angle to XK axis (default: 0°) K Length B (Height) width R Chamfer/rounding (default: 0°) P R>0: Radius of rounding R<0: Width of chamfer Depth/height (default: "P" from G308) P<0: Pocket P>0: Island HEIDENHAIN MANUALplus 620, CNC PILOT 640 235 4.7 Front and rear face contours Eccentric polygon on front/rear face G307-Geo G307 defines a polygon in a contour on the front face/rear face. Parameters XK Center in Cartesian coordinates YK Center in Cartesian coordinates X Diameter (center point in polar coordinates) C Angle (center point in polar coordinates) A Angle of a polygon edge to XK axis (default: 0°) Q Number of edges (Q > 2) K Edge length R K>0: Edge length K<0: Inscribed circle diameter Chamfer/rounding (default: 0°) P R>0: Radius of rounding R<0: Width of chamfer Depth/height (default: "P" from G308) P<0: Pocket P>0: Island 236 DIN Programming 4.7 Front and rear face contours Linear pattern on front/rear face G401-Geo G401 defines a linear hole pattern or figure pattern on the front or rear face. G401 is effective for the hole/figure defined in the following block (G300 to 305, G307). Parameters Q Number of figures (default: 1) XK Starting point in Cartesian coordinates YK Starting point in Cartesian coordinates I End point in Cartesian coordinates J End point in Cartesian coordinates Ii Distance (XKi) between figures (pattern distance) Ji Distance (YKi) between figures (pattern distance) A Angle of longitudinal axis to XK axis (default: 0°) R Total length of pattern Ri Distance between figures (pattern distance) Program the hole/figure in the following block without a center. The milling cycle (MACHINING section) calls the hole/ figure in the following block—not the pattern definition. HEIDENHAIN MANUALplus 620, CNC PILOT 640 237 4.7 Front and rear face contours Circular pattern on front/rear face G402-Geo G402 defines a circular hole pattern or figure pattern on the front or rear face. G402 is effective for the hole/figure defined in the following block (G300 to 305, G307). Parameters Q Number of figures K Pattern diameter A Starting angle—position of the first figure; reference: XK axis (default: 0°) W End angle—position of the last figure; reference: XK axis (default: 360°) Wi Angle between figures V Direction—orientation (default: 0) V=0, without W: Figures are arranged on a full circle V=0, with W: Figures are arranged on the longer circular arc V=0, with Wi: The algebraic sign of Wi defines the direction (Wi<0: clockwise) V=1, with W: Clockwise V=1, with Wi: Clockwise (algebraic sign of Wi has no effect) V=2, with W: Counterclockwise V=2, with Wi: Counterclockwise (algebraic sign of Wi has no effect) XK Center in Cartesian coordinates YK Center in Cartesian coordinates H Position of the figures (default: 0) H=0: Normal position—the figures are rotated about the circle center (rotation) H=1: Original position—the position of the figures relative to the coordinate system remains unchanged (translation) Program the hole/figure in the following block without a center. Exception: circular slot: See "Circular pattern with circular slots" on page 227.. The milling cycle (MACHINING section) calls the hole/ figure in the following block—not the pattern definition. 238 DIN Programming 4.8 Lateral surface contours 4.8 Lateral surface contours Starting point of lateral surface contour G110-Geo G110 defines the starting point of a lateral-surface contour. Parameters Z Starting point C Starting point (starting angle or polar angle) CY Starting point as linear value; reference: unrolled reference diameter PZ Starting point (polar radius) Program either Z, C or Z, CY. HEIDENHAIN MANUALplus 620, CNC PILOT 640 239 4.8 Lateral surface contours Line segment in a lateral surface contour G111-Geo G111 defines a line segment in a lateral-surface contour. Parameters Z End point C End point (end angle or polar angle) CY End point as linear value; reference: unrolled reference diameter AN Angle to Z axis Q Point of intersection. End point if the line segment intersects a line (default: 0): BR PZ AR R Q=0: Near point of intersection Q=1: Far point of intersection Chamfer/rounding. Defines the transition to the next contour element. When entering a chamfer/rounding, program the theoretical end point. No input: Tangential transition BR=0: No tangential transition BR>0: Radius of rounding BR<0: Width of chamfer End point (polar radius) Angle to Z axis (AR corresponds to AN) Length (polar radius; reference: last contour point) Programming Z, CY: Absolute, incremental, modal or "?" C: Absolute, incremental or modal ARi: Angle to the previous element ANi: Angle to the subsequent element Program either Z, C or Z, CY. 240 DIN Programming 4.8 Lateral surface contours Circular arc in lateral surface contour G112/ G113-Geo G112/G113 defines a circular arc in a lateral-surface contour. Direction of rotation: See help graphic Parameters Z End point C End point (end angle or polar angle) CY End point as linear value; reference: unrolled reference diameter R Radius K Center point in Z direction J Angle of the center point as a linear value Q Point of intersection. End point if the circular arc intersects a line segment or another circular arc (default: 0): BR 0: Near point of intersection 1: Far point of intersection Chamfer/rounding. Defines the transition to the next contour element. When entering a chamfer/rounding, program the theoretical end point. No input: Tangential transition BR=0: No tangential transition BR>0: Radius of rounding BR<0: Width of chamfer PZ End point (polar radius) W Center point (polar angle; reference: workpiece zero point) PM Center point (polar radius; reference: workpiece zero point) AR Starting angle (tangential angle to rotary axis) AN End angle (tangential angle to rotary axis) Programming Z, CY: Absolute, incremental, modal or "?" C: Absolute, incremental or modal K, J: Absolute or incremental PZ, W, PM: Absolute or incremental ARi: Angle to the previous element ANi: Angle to the subsequent element Program either Z and C or Z and CY, and either K and W or K and J Program either center or radius For radius: Only arcs <= 180° are possible HEIDENHAIN MANUALplus 620, CNC PILOT 640 241 4.8 Lateral surface contours Hole on lateral surface G310-Geo G310 defines a hole with countersink and thread in a lateral surface contour. Parameters Z Center (Z position) CY Center as linear value; reference: unrolled reference diameter C Center (angle) B Hole diameter P Depth of hole (excluding point) W Point angle (default: 180°) R Sinking diameter U Sinking depth E Sinking angle I Thread diameter J Thread depth K Thread runout length F Thread pitch V Left-hand or right-hand thread (default: 0) A O V=0: Right-hand thread V=1: Left-hand thread Angle to Z axis; range: 0° < A < 180°; (default: 90° = vertical hole) Centering diameter Machine the G310 holes with G71...G74. 242 DIN Programming 4.8 Lateral surface contours Linear slot on lateral surface G311-Geo G311 defines a linear slot in a lateral-surface contour. Parameters Z Center (Z position) CY Center as linear value; reference: unrolled reference diameter C Center (angle) A Angle to Z axis (default: 0°) K Slot length B Slot width P Pocket depth (default: "P" from G308) Circular slot on lateral surface G312/G313-Geo G312/G313 defines a circular slot in a lateral-surface contour. G312: Circular slot clockwise G313: Circular slot counterclockwise Parameters Z Center CY Center as linear value; reference: unrolled reference diameter C Center (angle) R Radius; reference: center point path of the slot A Starting angle; reference: Z axis (default: 0°) W End angle; reference: Z axis B Slot width P Pocket depth (default: "P" from G308) HEIDENHAIN MANUALplus 620, CNC PILOT 640 243 4.8 Lateral surface contours Full circle on lateral surface G314-Geo G314 defines a full circle in a lateral-surface contour. Parameters Z Center CY Center as linear value; reference: unrolled reference diameter C Center (angle) R Radius P Pocket depth (default: "P" from G308) Rectangle on lateral surface G315-Geo G315 defines a rectangle in a lateral-surface contour. Parameters Z Center CY Center as linear value; reference: unrolled reference diameter C Center (angle) A Angle to Z axis (default: 0°) K Length B Width R Chamfer/rounding (default: 0°) P 244 R>0: Radius of rounding R<0: Width of chamfer Pocket depth (default: "P" from G308) DIN Programming 4.8 Lateral surface contours Eccentric polygon on lateral surface G317-Geo G317 defines a polygon in a lateral-surface contour. Parameters Z Center CY Center as linear value; reference: unrolled reference diameter C Center (angle) Q Number of edges (Q > 2) A Angle to Z axis (default: 0°) K Edge length R K>0: Edge length K<0: Inscribed circle diameter Chamfer/rounding (default: 0°) P R>0: Radius of rounding R<0: Width of chamfer Pocket depth (default: "P" from G308) HEIDENHAIN MANUALplus 620, CNC PILOT 640 245 4.8 Lateral surface contours Linear pattern on lateral surface G411-Geo G411 defines a linear hole or figure pattern on the lateral surface. G411 is effective for the hole/figure defined in the following block (G310 to 315, G317). Parameters Q Number of figures (default: 1) Z Starting point C Starting point (starting angle) CY Starting point as linear value; reference: unrolled reference diameter ZE End point ZEi Distance between figures in Z direction W End point (end angle) Wi Angular distance between figures A Angle to Z axis; (default: 0°) R Total length of pattern Ri Distance between figures (pattern distance) If you program Q, Z and C, the holes/figures are arranged at a regular spacing on the lateral surface. Program the hole/figure in the following block without a center. The milling cycle calls the hole/figure in the following block—not the pattern definition. 246 DIN Programming 4.8 Lateral surface contours Circular pattern on lateral surface G412-Geo G412 defines a circular hole or figure pattern on the lateral surface. G412 is effective for the hole/figure defined in the following block (G310 to 315, G317). Parameters Q Number of figures K Pattern diameter A Starting angle—position of the first figure; reference: Z axis; (default: 0°) W End angle—position of the last figure; reference: Z axis; (default: 360°) Wi Angle between figures V Direction—orientation (default: 0) Z C H V=0, without W: Figures are arranged on a full circle V=0, with W: Figures are arranged on the longer circular arc V=0, with Wi: The algebraic sign of Wi defines the direction (Wi<0: clockwise) V=1, with W: Clockwise V=1, with Wi: Clockwise (algebraic sign of Wi has no effect) V=2, with W: Counterclockwise V=2, with Wi: Counterclockwise (algebraic sign of Wi has no effect) Center of pattern Center of pattern (angle) Position of the figures (default: 0) H=0: Normal position—the figures are rotated about the circle center (rotation) H=1: Original position—the position of the figures relative to the coordinate system remains unchanged (translation) Program the hole/figure in the following block without a center. Exception: circular slot: See "Circular pattern with circular slots" on page 227.. The milling cycle (MACHINING section) calls the hole/ figure in the following block—not the pattern definition. HEIDENHAIN MANUALplus 620, CNC PILOT 640 247 4.9 Tool positioning 4.9 Tool positioning Rapid traverse G0 G0 moves at rapid traverse along the shortest path to the target point. Parameters X Target point (diameter) Z Target point Programming X, Z: Absolute, incremental or modal If more axes are available on your machine, additional input parameters will be displayed, e.g. parameter B for the B axis. Rapid traverse to machine coordinates G701 G701 moves at rapid traverse along the shortest path to the target point. Parameters X End point (diameter) Z End point X, Z refer to the machine zero point and the slide zero point. If more axes are available on your machine, additional input parameters will be displayed, e.g. parameter B for the B axis. 248 DIN Programming 4.9 Tool positioning Approach tool change point G14 G14 moves the slide at rapid traverse to the tool change position. In setup mode, define permanent coordinates for the tool change position. Parameters Q Sequence. Determines the course of traverse movements (default: 0) D 0: Diagonal path of traverse 1: First X, then Z direction 2: First Z, then X direction 3: Only X direction, Z remains unchanged 4: Only Z direction, X remains unchanged Number of the tool change position to be approached (0-2) (default =0, tool change position from parameters) Beispiel: G14 ... N1 G14 Q0 [Move to tool change point] N2 T3 G95 F0.25 G96 S200 M3 N3 G0 X0 Z2 ... Definition of tool-change point G140 G140 defines the position of the tool change point defined in D. This position can be approached with G14. Parameters D Number of the tool change point (1-2) X Diameter—Position of the tool change point Z Length—Position of the tool change point If X or Z parameters are missing, the values from the tool change point parameter are entered. Beispiel: G140 ... N1 G14 Q0 [Tool change position from parameter] N2 T3 G95 F0.25 G96 S200 M3 N3 G0 X40 Z10 N5 G140 D1 X100 Z100 [Set tool change pos. 1] N6 G14 Q0 D1 [Move to tool change pos. 1] N7 G140 D2 X150 [Set tool change pos. 2, use Z from parameters] N8 G14 Q0 D2 [Move to tool change pos. 2] ... HEIDENHAIN MANUALplus 620, CNC PILOT 640 249 4.10 Linear and circular movements 4.10 Linear and circular movements Linear movement G1 G1 moves the tool on a linear path at the feed rate to the "end point." Parameters X End point (diameter) Z End point AN Angle (angular direction: see help graphic) Q Point of intersection. End point if the line segment intersects a circular arc (default: 0): BR BE 0: Near point of intersection 1: Far point of intersection Chamfer/rounding. Defines the transition to the next contour element. When entering a chamfer/rounding, program the theoretical end point. No input: Tangential transition BR=0: No tangential transition BR>0: Radius of rounding BR<0: Width of chamfer Special feed factor for chamfer/rounding arc (default: 1) Special feed rate = active feed rate * BE (0 < BE <= 1) Programming X, Z: Absolute, incremental, modal or "?" If more axes are available on your machine, additional input parameters will be displayed, e.g. parameter B for the B axis. 250 DIN Programming 4.10 Linear and circular movements Circular path G2/G3 G2/G3 moves the tool in a circular arc at the feed rate to the "end point." The center dimensioning is incremental. Direction of rotation (see help graphic): G2: In clockwise direction G3: In counterclockwise direction Parameters X End point (diameter) Z End point R Radius (0 < R <= 200 000 mm) I Incremental center point (distance from starting point to center point; radius) K Incremental center point (distance from starting point to center point) Q Point of intersection. End point if the circular arc intersects a line segment or another circular arc (default: 0): BR BE 0: Near point of intersection 1: Far point of intersection Chamfer/rounding. Defines the transition to the next contour element. When entering a chamfer/rounding, program the theoretical end point. No input: Tangential transition BR=0: No tangential transition BR>0: Radius of rounding BR<0: Width of chamfer Special feed factor for chamfer/rounding arc (default: 1) Special feed rate = active feed rate * BE (0 < BE <= 1) Programming X, Z: Absolute, incremental, modal or "?" Beispiel: G2, G3 N1 T3 G95 F0.25 G96 S200 M3 N2 G0 X0 Z2 N3 G42 N4 G1 Z0 N5 G1 X15 B-0.5 E0.05 N6 G1 Z-25 B0 N7 G2 X45 Z-32 R36 B2 N8 G1 A0 N9 G2 X80 Z-80 R20 B5 N10 G1 Z-95 B0 N11 G3 X80 Z-135 R40 B0 N12 G1 Z-140 N13 G1 X82 G40 ... HEIDENHAIN MANUALplus 620, CNC PILOT 640 251 4.10 Linear and circular movements Circular path G12/G13 G12/G13 moves the tool in a circular arc at the feed rate to the "end point." The center dimensioning is absolute. Direction of rotation (see help graphic): G12: In clockwise direction G13: In counterclockwise direction Parameters X End point (diameter) Z End point R Radius (0 < R <= 200 000 mm) I Absolute center point (radius) K Absolute center point Q Point of intersection. End point if the circular arc intersects a line segment or another circular arc (default: 0): BR BE 0: Near point of intersection 1: Far point of intersection Chamfer/rounding. Defines the transition to the next contour element. When entering a chamfer/rounding, program the theoretical end point. No input: Tangential transition BR=0: No tangential transition BR>0: Radius of rounding BR<0: Width of chamfer Special feed factor for chamfer/rounding arc (default: 1) Special feed rate = active feed rate * BE (0 < BE <= 1) Programming X, Z: Absolute, incremental, modal or "?" 252 DIN Programming 4.11 Feed rate, shaft speed 4.11 Feed rate, shaft speed Speed limitation G26 G26: Main spindle; Gx26: Spindle x (x: 1 to 3) The speed limitation remains in effect until the end of the program or until a new value is programmed for G26/Gx26. Parameters S (Maximum) speed Beispiel: G26 ... N1 G14 Q0 N1 G26 S2000 [maximum speed] N2 T3 G95 F0.25 G96 S200 M3 If S > "absolute maximum speed" (machine parameter), the parameter value will apply. N3 G0 X0 Z2 ... Reduce rapid traverse G48 The reduction of the rapid traverse rate remains in effect until the end of the program or until G48 is programmed again without input values. Parameters F Max. feed rate in mm/min for linear axes or °/min for rotary axes D Number of the axis 1: X 2: Y 3: Z 4: U 5: V 6: W 7: A 8: B 9: C HEIDENHAIN MANUALplus 620, CNC PILOT 640 253 4.11 Feed rate, shaft speed Interrupted feed G64 G64 interrupts the programmed feed for a short period of time. G64 is a modal function. Parameters E Pause duration (0.01 s < E < 99.99 s) F Feed duration (0.01 s < E < 99.99 s) For switch-on, program G64 with E and F. For switch-off, program G64 without parameters. Beispiel: G64 ... N1 T3 G95 F0.25 G96 S200 M3 N2 G64 E0.1 F1 [Interrupted feed on] N3 G0 X0 Z2 N4 G42 N5 G1 Z0 N6 G1 X20 B-0.5 N7 G1 Z-12 N8 G1 Z-24 A20 N9 G1 X48 B6 N10 G1 Z-52 B8 N11 G1 X80 B4 E0.08 N12 G1 Z-60 N13 G1 X82 G40 N14 G64 [Interrupted feed off] ... Feed per tooth Gx93 Gx93 (x: spindle 1 to 3) defines the drive-dependent feed rate with respect to the number of teeth of the cutter. Parameters F Feed per tooth in mm/tooth or inch/tooth Beispiel: G193 ... N1 M5 N2 T1 G197 S1010 G193 F0.08 M104 The actual value display shows the feed rate in mm/rev. N3 M14 N4 G152 C30 N5 G110 C0 N6 G0 X122 Z-50 N7 G... N8 G... N9 M15 ... 254 DIN Programming 4.11 Feed rate, shaft speed Constant feed rate G94 (feed per minute) G94 defines the feed rate independent of drive. Parameters F Feed per minute in mm/min or in./min Beispiel: G94 ... N1 G14 Q0 N2 T3 G94 F2000 G97 S1000 M3 N3 G0 X100 Z2 N4 G1 Z-50 ... Feed per revolution Gx95 G95: Main spindle; Gx95: Spindle x (x: 1 to 3) Gx95 defines a drive-dependent feed rate. Parameters F Feed rate in mm/revolution or inch/revolution Beispiel: G95, Gx95 ... N1 G14 Q0 N2 T3 G95 F0.25 G96 S200 M3 N3 G0 X0 Z2 N5 G1 Z0 N6 G1 X20 B-0.5 ... HEIDENHAIN MANUALplus 620, CNC PILOT 640 255 4.11 Feed rate, shaft speed Constant surface speed Gx96 G96: Main spindle; Gx96: Spindle x (x: 1 to 3) The spindle speed is dependent on the X position of the tool tip or on the diameter of the drilling or milling tool. Parameters S Cutting speed in m/min or ft/min Beispiel: G96, G196 ... N1 T3 G195 F0.25 G196 S200 M3 N2 G0 X0 Z2 N3 G42 If you call a drilling tool while a constant cutting speed is active, the Steuerung automatically calculates the spindle speed from the programmed cutting speed and activates it with Gx97. To prevent inadvertent rotation of the spindle, program the spindle speed first and then T. N4 G1 Z0 N5 G1 X20 B-0.5 N6 G1 Z-12 N7 G1 Z-24 A20 N8 G1 X48 B6 N9 G1 Z-52 B8 N10 G1 X80 B4 E0.08 N11 G1 Z-60 N12 G1 X82 G40 ... Speed Gx97 G97: Main spindle; Gx97: Spindle x (x: 1 to 3) Constant spindle speed. Parameters S Speed in revolutions per minute Beispiel: G97, G197 ... N1 G14 Q0 N2 T3 G95 F0.25 G97 S1000 M3 G26/Gx26 limits the spindle speed. N3 G0 X0 Z2 N5 G1 Z0 N6 G1 X20 B-0.5 ... 256 DIN Programming 4.12 Tool-tip and cutter radius compensation 4.12 Tool-tip and cutter radius compensation Tool-tip radius compensation (TRC) If TRC is not used, the theoretical tool tip is the reference point for the paths of traverse. This might lead to inaccuracies when the tool moves along non-paraxial paths of traverse. The TRC function corrects programmed paths of traverse. The TRC (Q=0) reduces the feed rate for circular arcs if the shifted radius < the original radius. The TRC corrects the special feed rate when a rounding arc is machined as transition to the next contour element. Reduced feed rate = feed rate * (shifted radius / original radius) Milling cutter radius compensation (MCRC) When the MCRC function is not active, the system defines the center of the cutter as the reference point for the paths of traverse. With the MCRC function, the Steuerung accounts for the outside diameter of the tool when moving along the programmed paths of traverse. The recessing, roughing and milling cycles already include TRC/MCRC calls. The TRC/MCRC must be switched off when these cycles are called. If the tool radii are > than the contour radii, the TRC/ MCRC might cause tool path loops. Recommendation: Use the finishing cycle G890 or milling cycle G840. Never program the MCRC during a perpendicular approach to the machining plane. G40: Switch off TRC/MCRC G40 is used to deactivate TRC/MCRC. Please note: The TRC/MCRC remains in effect until a block with G40 is reached. The block containing G40, or the block after G40 only permits a linear path of traverse (G14 is not permissible). Function of the TRC/MCRC ... N.. G0 X10 Z10 N.. G41 Activate TRC to the left of the contour N.. G0 Z20 Path of traverse: from X10/Z10 to X10+TRC/ Z20+TRC N.. G1 X20 The path of traverse is "shifted" by the TRC N.. G40 G0 X30 Z30 Path of traverse from X20+TRC/Z20+TRC to X30/ Z30 ... HEIDENHAIN MANUALplus 620, CNC PILOT 640 257 4.12 Tool-tip and cutter radius compensation G41/G42: Switch on TRC/MCRC G41: Switch on TRC/MCRC—compensation of the tool-tip/cutter radius to the left of the contour in traverse direction. G42: Switch on TRC/MCRC—compensation of the tool-tip/cutter radius to the right of the contour in traverse direction. Parameters Q Plane (default: 0) Beispiel: G40, G41, G42 ... N1 T3 G95 F0.25 G96 S200 M3 N2 G0 X0 Z2 N3 G42 [TRC on, to the right of the contour] H 0: TRC on the turning plane (XZ plane) 1: MCRC on the front face (XC plane) 2: MCRC on the lateral surface (ZC plane) 3: MCRC on the front face (XY plane) 4: MCRC on the lateral surface (YZ plane) Output (only with MCRC)—(default: 0) N9 G1 Z-52 B8 O 0: Intersecting areas which are programmed in directly successive contour elements are not machined. 1: The complete contour is machined—even if certain areas are intersecting. Feed rate reduction (default: 0) 0: Feed rate reduction is active 1: No feed rate reduction ... N4 G1 Z0 N5 G1 X20 B-0.5 N6 G1 Z-12 N7 G1 Z-24 A20 N8 G1 X48 B6 N10 G1 X80 B4 E0.08 N11 G1 Z-60 N12 G1 X82 G4 [TRC off] Please note: Program G41/G42 in a separate NC block. Program a straight line segment (G0/G1) after the block containing G41/G42. The TRC/MCRC is taken into account from the next path of traverse. 258 DIN Programming 4.13 Zero point shifts 4.13 Zero point shifts You can program several zero point shifts in one NC program. The relationships of the coordinates (for blank/finished part, auxiliary contours) are retained by the zero offset description. G920 temporarily deactivates zero point shifts—G980 reactivates them. Overview of zero point shifts G51: Page 260 Relative shift Programmed shift Reference: Previously defined workpiece zero point G53/G54/G55: Page 261 Relative shift Shift defined in setup mode (offset) Reference: Previously defined workpiece zero point G56: Page 261 Additive shift Programmed shift Reference: Workpiece zero point defined at present G59: Page 262 Absolute shift Programmed shift Reference: Machine zero point HEIDENHAIN MANUALplus 620, CNC PILOT 640 259 4.13 Zero point shifts Zero point shift G51 G51 shifts the workpiece zero point by the defined value in the selected axis. The shift is referenced to the workpiece zero point defined in setup mode. Parameters X Shift (radius) Y Shift (machine-dependent) Z Shift U Shift (machine-dependent) V Shift (machine-dependent) W Shift (machine-dependent) Even if you shift the zero point several times with G51, it is always referenced to the workpiece zero point defined in setup mode. The zero point shift is valid until program end, or until it is canceled by other zero point shifts. Beispiel: G51 ... N1 T3 G95 F0.25 G96 S200 M3 N2 G0 X62 Z5 N3 G810 NS7 NE12 P5 I0.5 K0.2 N4 G51 Z-28 [zero point shift] N5 G0 X62 Z-15 N6 G810 NS7 NE12 P5 I0.5 K0.2 N7 G51 Z-56 [zero point shift] ... 260 DIN Programming 4.13 Zero point shifts Zero point offsets—Shift G53/G54/G55 G53, G54 and G55 shift the workpiece zero point by the offset values defined in setup mode. The shift is referenced to the workpiece zero point defined in setup mode, even if you shift the zero point several times with G53, G54 and G55. The shift remains in effect until the end of the program or until it is canceled by other zero point shifts. Before using zero point shifts with G53, G54 and G55, you need to define the offset values in setup mode (see "Defining offsets" in the User's Manual). A shift in X is entered as a radius. Additive zero point shift G56 G56 shifts the workpiece zero point by the defined value in the selected axis. The shift is referenced to the currently active workpiece zero point. Parameters X Shift (radius value)—(default: 0) Y Shift (machine-dependent) Z Shift U Shift (machine-dependent) V Shift (machine-dependent) W Shift (machine-dependent) If you shift the workpiece zero point more than once with G56, the shift is always added to the currently active zero point. Beispiel: G56 ... N1 T3 G95 F0.25 G96 S200 M3 N2 G0 X62 Z5 N3 G810 NS7 NE12 P5 I0.5 K0.2 N4 G56 Z-28 [zero point shift] N5 G0 X62 Z5 N6 G810 NS7 NE12 P5 I0.5 K0.2 N7 G56 Z-28 [zero point shift] ... HEIDENHAIN MANUALplus 620, CNC PILOT 640 261 4.13 Zero point shifts Absolute zero point shift G59 G59 sets the workpiece zero point to the defined value in the selected axis. The new workpiece zero point remains in effect to the end of the program. Parameters X Shift (radius) Y Shift (machine-dependent) Z Shift U Shift (machine-dependent) V Shift (machine-dependent) W Shift (machine-dependent) G59 cancels all previous zero point shifts (with G51, G56 or G59). Beispiel: G59 ... N1 G59 Z256 [zero point shift] N2 G14 Q0 N3 T3 G95 F0.25 G96 S200 M3 N4 G0 X62 Z2 ... 262 DIN Programming 4.14 Oversizes 4.14 Oversizes Switch off oversize G50 G50 switches off oversizes defined with G52-Geo for the following cycle. Program G50 before the cycle. To ensure compatibility, the G52 code is also supported for switching off the oversizes. HEIDENHAIN recommends using G50 for new NC programs. Axis-parallel oversize G57 G57 defines different oversizes for X and Z. Program G57 before the cycle call. Parameters X Oversize X (diameter value)—only positive values Z Oversize Z—only positive values G57 is effective in the following cycles. After cycle run, the oversizes are deleted: G810, G820, G830, G835, G860, G869, G890 not deleted: G81, G82, G83 If the oversizes are programmed with G57 and in the cycle itself, the cycle oversizes apply. Beispiel: G57 ... N1 T3 G95 F0.25 G96 S200 M3 N2 G0 X120 Z2 N3 G57 X0.2 Z0.5 [paraxial oversize] N4 G810 NS7 NE12 P5 ... HEIDENHAIN MANUALplus 620, CNC PILOT 640 263 4.14 Oversizes Contour-parallel oversize (equidistant) G58 G58 defines an equidistant oversize. Program G58 before the cycle call. A negative oversize during finishing is permitted with G890. Parameters P Oversize G58 is effective in the following cycles. After cycle run, the oversizes are deleted: G810, G820, G830, G835, G860, G869, G890 not deleted: G83 If an oversize is programmed with G58 and in the cycle, the oversize from the cycle is used. Beispiel: G58 ... N1 T3 G95 F0.25 G96 S200 M3 N2 G0 X120 Z2 N3 G58 P2 [contour-parallel oversize] N4 G810 NS7 NE12 P5 ... 264 DIN Programming 4.15 Safety clearances 4.15 Safety clearances Safety clearance G47 G47 defines the safety clearance for the turning cycles: G810, G820, G830, G835, G860, G869, G890. the drilling cycles G71, G72, G74. the milling cycles G840...G846. Parameters P Safety clearance G47 without parameters activates the parameter values defined in the "Safety clearance G47" user parameter. G47 replaces the safety clearance set in the machining parameters or that set in G147. Safety clearance G147 G147 defines the safety clearance for the milling cycles G840...G846. the drilling cycles G71, G72, G74. Parameters I Safety clearance to the milling plane (only for milling operations) K Safety clearance in approach direction (feed) G147 without parameters activates the parameter values defined in the "Safety clearance G147.." user parameter. G147 replaces the safety clearance set in the machining parameters or that set in G47. HEIDENHAIN MANUALplus 620, CNC PILOT 640 265 4.16 Tools, compensations 4.16 Tools, compensations Tool call T The Steuerung displays the tool assignment defined in the TURRET section. You can enter the T number directly or select it from the tool list (switch with the Tool list soft key). 266 DIN Programming 4.16 Tools, compensations Correction of cut (switching the tool edge compensation) G148 G148 defines the values compensating for wear. DX, DZ become effective after program start and after a T command. Parameters O Selection (default: 0) O=0: DX, DZ active—DS inactive O=1: DS, DZ active—DX inactive O=2: DX, DS active—DZ inactive The cycles G860, G869, G879, G870, G890 automatically take the "correct" wear compensation into account. Beispiel: G148 ... N1 T3 G95 F0.25 G96 S160 M3 N2 G0 X62 Z2 N3 G0 Z-29.8 N4 G1 X50.4 N5 G0 X62 N6 G150 N7 G1 Z-20.2 N8 G1 X50.4 N9 G0 X62 N10 G151 [recessing finishing] N11 G148 O0 [change compensation] N12 G0 X62 Z-30 N13 G1 X50 N14 G0 X62 N15 G150 N16 G148 O2 N17 G1 Z-20 N18 G1 X50 N19 G0 X62 ... HEIDENHAIN MANUALplus 620, CNC PILOT 640 267 4.16 Tools, compensations Additive compensation G149 The Steuerung manages 16 tool-independent compensation values. One G149 followed by a D number activates the additive compensation function. G149 D900 deactivates the additive compensation function. The compensation values are managed in the Program Run mode (see "Program Run mode" in the User's Manual). Parameters D Additive compensation (default: D900): D900: deactivates the additive compensation D901 to D916: activates the additive compensation Beispiel: G149 ... N1 T3 G96 S200 G95 F0.4 M4 N2 G0 X62 Z2 N3 G89 N4 G42 N5 G0 X27 Z0 Programming: N6 G1 X30 Z-1.5 The compensation becomes effective after the tool has moved in the compensation direction by the compensation value. Therefore, program G149 one block before the block containing the path of traverse to which the compensation is to apply. Additive compensation remains in effect up to: the next G149 D900 the next tool change End of program N7 G1 Z-25 The additive compensation is added to the tool compensation. N8 G149 D901 [activate compensation] N9 G1 X40 BR-1 N10 G1 Z-50 N11 G149 D902 N12 G1 X50 BR-1 N13 G1 Z-75 N14 G149 D900 [deactivate compensation] N15 G1 X60 B-1 N16 G1 Z-80 N17 G1 X62 N18 G80 ... 268 DIN Programming 4.16 Tools, compensations Compensation of right-hand tool tip G150 Compensation of left-hand tool tip G151 G150/G151 defines the tool reference point for recessing and button tools. G150: Reference point on right tip G151: Reference point on left tip G150/G151 is effective from the block in which it is programmed and remains in effect up to the next tool change program end. The displayed actual values always refer to the tool tip defined in the tool data. If you use TRC, after G150/G151 you must also adjust G41/G42. Beispiel: G150, G151 ... N1 T3 G95 F0.25 G96 S160 M3 N2 G0 X62 Z2 N3 G0 Z-29.8 N4 G1 X50.4 N5 G0 X62 N6 G150 N7 G1 Z-20.2 N8 G1 X50.4 N9 G0 X62 N10 G151 [recessing finishing] N11 G148 O0 N12 G0 X62 Z-30 N13 G1 X50 N14 G0 X62 N15 G150 N16 G148 O2 N17 G1 Z-20 N18 G1 X50 N19 G0 X62 ... HEIDENHAIN MANUALplus 620, CNC PILOT 640 269 4.17 Contour-based turning cycles 4.17 Contour-based turning cycles Working with contour-based cycles Possibilities of transferring the contour to be machined to the cycle: Beispiel: Contour-based cycles Transferring the contour reference in the start block number and the end block number. The contour area is machined in the direction "from NS to NE." Transferring the contour reference via the name of the auxiliary contour (ID). The complete auxiliary contour is machined in the direction of contour definition. Describing the contour with G80 in the block directly after the cycle (see „Cycle end / Simple contour G80” on page 294). Describing the contour with G0, G1, G2 and G3 blocks directly after the cycle. The contour is concluded by G80 without parameters. ... Possibilities of defining the workpiece blank for calculating the number of cutting passes: N7 G810 P3 [predefined contour description] Defining a global workpiece blank in the BLANK program section. Regeneration of the workpiece blank is automatically active. The cycle uses the specified workpiece blank. If no workpiece blank is defined, the cycle calculates the blank from the contour to be machined and the position of the tool during cycle call. Contour follow-up is not active. Finding the block references: Place cursor in NS or NE input field Press the soft key Select the contour element: Use the horizontal arrow keys to select the contour element N1 G810 NS7 NE12 P3 [block reference] N2 ... N3 G810 ID"007" P3 [name of auxiliary contour] N4 ... N5 G810 ID"007" NS9 NE7 P3 [combination] N6 ... N8 G80 XS60 ZS-2 XE90 ZE-50 AC10 WC10 BS3 BE-2 RC5 EC0 N9... N10 G810 P3 [direct contour description] N11 G0 X50 Z0 N12 G1 Z-62 BR4 N13 G1 X85 AN80 BR-2 N14 G1 Zi-5 N15 G80 N16 ... ... Use the vertical arrow keys to switch between contours (also face contours, etc.). Switch between NS and NE: Press the NS soft key 270 Press the NE soft key Press the soft key to confirm the block number and return to the dialog. DIN Programming 4.17 Contour-based turning cycles Cutting limits in X, Z The tool position before the cycle call determines the effect of a cutting limit. The Steuerung machines the area to the right or to the left of the cutting limit, depending on which side the tool has been positioned before the cycle is called. A cutting limit restricts the contour area that can be machined; it does not apply to the paths for approach and departure. HEIDENHAIN MANUALplus 620, CNC PILOT 640 271 4.17 Contour-based turning cycles Longitudinal roughing G810 G810 machines the defined contour area. The reference to the contour to be machined can be transferred in the cycle parameters, or the contour can be defined directly after the cycle call (see „Working with contour-based cycles” on page 270). The contour to be machined can contain various valleys. If required, the area to be machined is divided into several sections. Parameters ID Auxiliary contour—ID number of the contour to be machined NS Starting block number (beginning of contour section) NE End block number (end of contour section) P I K E NE not programmed: The contour element NS is machined in the direction of contour definition. NS=NE programmed: The contour element NS is machined opposite to the direction of contour definition. Maximum infeed Oversize in X direction (diameter value)—(default: 0) Oversize in Z direction (default: 0) Plunging behavior H E=0: Descending contours are not machined E>0: Plunging feed rate No input: Feed rate reduction depending on the plunge angle—maximum 50% Cutting limit in X direction (diameter value)—(default: no cutting limit) Cutting limit in Z direction (default: no cutting limit) Approach angle (reference: Z axis)—(default: 0°/180°; parallel to Z axis) Departure angle (reference: Z axis)—(default: 90°/270°; perpendicular to Z axis) Type of departure (default: 0) Q 0: With each cut (machine contour outline after each pass) 1: With the last cut (retracts at 45°; contour smoothing after last pass) 2: No smoothing (retracts at 45°; no contour smoothing) Type of retraction at cycle end (default: 0) X Z A W 0: Returns to starting point (first X, then Z direction) 1: Positions in front of the finished contour 2: Retracts to safety clearance and stops 272 DIN Programming 4.17 Contour-based turning cycles Parameters V Identifier beginning/end (default: 0). A chamfer/rounding arc is machined: D U 0: At beginning and end 1: At beginning 2: At end 3: No machining 4: Chamfer/rounding arc is machined—not the basic element (prerequisite: contour section with one element) Omit elements (see figure) Cut line on horizontal element (default: 0): O 0: No (regular proportioning of cuts) 1: Yes (may result in irregular proportioning of cuts) Hide undercutting: 0: Undercuts are machined 1: Undercuts are not machined B Slide lead with 4-axis machining (not yet implemented) XA, ZA Starting point of blank (only effective if no blank was programmed): XA, ZA not programmed: The workpiece blank contour is calculated from the tool position and the ICP contour. XA, ZA programmed: Definition of the corner point of the workpiece blank. HEIDENHAIN MANUALplus 620, CNC PILOT 640 273 4.17 Contour-based turning cycles The Steuerung uses the tool definition to distinguish between external and internal machining. The tool radius compensation is active. A G57 oversize enlarges the contour (also inside contours. A G58 oversize >0: Enlarges the contour <0: Is not offset G57/G58 oversizes are deleted after cycle end. Cycle run 1 Calculates the areas to be machined and the cutting segmentation. 2 Approaches workpiece for first pass from starting point, taking the safety clearance into account (first in Z direction, then in X). 3 Moves at feed rate to target point Z. 4 Depending on H: 5 6 7 8 9 H=0: Machines the contour outline H=1 or 2: Retracts at 45° Returns at rapid traverse and approaches for next pass. Repeats 3 to 5 until target point X has been reached. If required, repeats 2 to 6 until all areas have been machined. If H=1: Smoothes the contour Retracts as programmed in Q. 274 DIN Programming 4.17 Contour-based turning cycles Face roughing G820 G820 machines the defined contour area. The reference to the contour to be machined can be transferred in the cycle parameters, or the contour can be defined directly after the cycle call (see „Working with contour-based cycles” on page 270). The contour to be machined can contain various valleys. If required, the area to be machined is divided into several sections. Parameters ID Auxiliary contour—ID number of the contour to be machined NS Starting block number (beginning of contour section) NE End block number (end of contour section) P I K E NE not programmed: The contour element NS is machined in the direction of contour definition. NS=NE programmed: The contour element NS is machined opposite to the direction of contour definition. Maximum infeed Oversize in X direction (diameter value)—(default: 0) Oversize in Z direction (default: 0) Plunging behavior H E=0: Descending contours are not machined E>0: Plunging feed rate No input: Feed rate reduction depending on the plunge angle—maximum 50% Cutting limit in X direction (diameter value)—(default: no cutting limit) Cutting limit in Z direction (default: no cutting limit) Approach angle (reference: Z axis)—(default: 90°/270°; perpendicular to Z axis) Departure angle (reference: Z axis)—(default: 0°/180°; parallel to Z axis) Type of departure (default: 0) Q 0: With each cut (machine contour outline after each pass) 1: With the last cut (retracts at 45°; contour smoothing after last pass) 2: No smoothing (retracts at 45°; no contour smoothing) Type of retraction at cycle end (default: 0) X Z A W 0: Returns to starting point, first Z, then X direction 1: Positions in front of the finished contour 2: Retracts to safety clearance and stops HEIDENHAIN MANUALplus 620, CNC PILOT 640 275 4.17 Contour-based turning cycles Parameters V Identifier beginning/end (default: 0). A chamfer/rounding arc is machined: D U 0: At beginning and end 1: At beginning 2: At end 3: No machining 4: Chamfer/rounding arc is machined—not the basic element (prerequisite: contour section with one element) Omit elements (see figure) Cut line on vertical element (default: 0): O 0: No (regular proportioning of cuts) 1: Yes (may result in irregular proportioning of cuts) Hide undercutting: 0: Undercuts are machined 1: Undercuts are not machined B Slide lead with 4-axis machining (not yet implemented) XA, ZA Starting point of blank (only effective if no blank was programmed): XA, ZA not programmed: The workpiece blank contour is calculated from the tool position and the ICP contour. XA, ZA programmed: Definition of the corner point of the workpiece blank. The Steuerung uses the tool definition to distinguish between external and internal machining. The tool radius compensation is active. A G57 oversize enlarges the contour (also inside contours. A G58 oversize >0: Enlarges the contour <0: Is not offset G57/G58 oversizes are deleted after cycle end. 276 DIN Programming 4.17 Contour-based turning cycles Cycle run 1 Calculates the areas to be machined and the cutting segmentation. 2 Approaches workpiece for first pass from starting point, taking the safety clearance into account (first in X direction, then in Z). 3 Moves at feed rate to target point X. 4 Depending on H: 5 6 7 8 9 H=0: Machines the contour outline H=1 or 2: Retracts at 45° Returns at rapid traverse and approaches for next pass. Repeats 3 to 5 until target point Z has been reached. If required, repeats 2 to 6 until all areas have been machined. If H=1: Smoothes the contour Retracts as programmed in Q. HEIDENHAIN MANUALplus 620, CNC PILOT 640 277 4.17 Contour-based turning cycles Contour-parallel roughing G830 G830 machines the contour area defined in "ID", or by "NS, NE", parallel to the contour (see „Working with contour-based cycles” on page 270). The contour to be machined can contain various valleys. If required, the area to be machined is divided into several sections. Parameters ID Auxiliary contour—ID number of the contour to be machined NS Starting block number (beginning of contour section) NE End block number (end of contour section) P I K X Z A W Q NE not programmed: The contour element NS is machined in the direction of contour definition. NS=NE programmed: The contour element NS is machined opposite to the direction of contour definition. Maximum infeed Oversize in X direction (diameter value)—(default: 0) Oversize in Z direction (default: 0) Cutting limit in X direction (diameter value)—(default: no cutting limit) Cutting limit in Z direction (default: no cutting limit) Approach angle (reference: Z axis)—(default: 0°/180°, parallel to Z axis, or with facing tools: parallel to X axis) Departure angle (reference: Z axis)—(default: 90°/270°, perpendicular to Z axis, or with facing tools: perpendicular to X axis) Type of retraction at cycle end (default: 0) 0: Returns to starting point (first X, then Z direction) 1: Positions in front of the finished contour 2: Retracts to safety clearance and stops 278 DIN Programming 4.17 Contour-based turning cycles Parameters V Identifier beginning/end (default: 0). A chamfer/rounding arc is machined: B D J H 0: At beginning and end 1: At beginning 2: At end 3: No machining 4: Chamfer/rounding arc is machined—not the basic element (prerequisite: contour section with one element) Contour calculation 0: Automatic 1: Tool to the left (G41) 2: Tool to the right (G42) Omit elements (see figure) Workpiece blank oversize (radius value)—active only if no blank has been defined. Contour-parallel—Type of cutting paths: 0: Constant machining depth 1: Equidistant cut lines HR Specify primary machining direction XA, ZA Starting point of blank (only effective if no blank was programmed): XA, ZA not programmed: The workpiece blank contour is calculated from the tool position and the ICP contour. XA, ZA programmed: Definition of the corner point of the workpiece blank. The Steuerung uses the tool definition to distinguish between external and internal machining. The tool radius compensation is active. A G57 oversize enlarges the contour (also inside contours. A G58 oversize >0: Enlarges the contour <0: Is not offset G57/G58 oversizes are deleted after cycle end. HEIDENHAIN MANUALplus 620, CNC PILOT 640 279 4.17 Contour-based turning cycles Cycle run 1 Calculates the areas to be machined and the cutting segmentation. 2 Approaches workpiece for first pass from starting point, taking the safety clearance into account. 3 Executes the first cut (roughing). 4 Returns at rapid traverse and approaches for next pass. 5 Repeats 3 to 4 until the complete area has been machined. 6 If required, repeats 2 to 5 until all areas have been machined. 7 Retracts as programmed in Q. 280 DIN Programming 4.17 Contour-based turning cycles Contour cycle, bidirectional (contour-parallel with neutral tool) G835 G835 machines the contour area defined in "ID", or by "NS, NE", parallel to the contour and bidirectionally (see „Working with contour-based cycles” on page 270). The contour to be machined can contain various valleys. If required, the area to be machined is divided into several sections. Parameters ID Auxiliary contour—ID number of the contour to be machined NS Starting block number (beginning of contour section) NE End block number (end of contour section) P I K X Z A W Q V NE not programmed: The contour element NS is machined in the direction of contour definition. NS=NE programmed: The contour element NS is machined opposite to the direction of contour definition. Maximum infeed Oversize in X direction (diameter value)—(default: 0) Oversize in Z direction (default: 0) Cutting limit in X direction (diameter value)—(default: no cutting limit) Cutting limit in Z direction (default: no cutting limit) Approach angle (reference: Z axis)—(default: 0°/180°, parallel to Z axis, or with facing tools: parallel to X axis) Departure angle (reference: Z axis)—(default: 90°/270°, perpendicular to Z axis, or with facing tools: perpendicular to X axis) Type of retraction at cycle end (default: 0) 0: Returns to starting point (first X, then Z direction) 1: Positions in front of the finished contour 2: Retracts to safety clearance and stops Identifier beginning/end (default: 0). A chamfer/rounding arc is machined: 0: At beginning and end 1: At beginning 2: At end 3: No machining 4: Chamfer/rounding arc is machined—not the basic element (prerequisite: contour section with one element) HEIDENHAIN MANUALplus 620, CNC PILOT 640 281 4.17 Contour-based turning cycles Parameters B Contour calculation D J H 0: Automatic 1: Tool to the left (G41) 2: Tool to the right (G42) Omit elements (see figure) Workpiece blank oversize (radius value)—active only if no blank has been defined. Contour-parallel—Type of cutting paths: 0: Constant machining depth 1: Equidistant cut lines XA, ZA Starting point of blank (only effective if no blank was programmed): XA, ZA not programmed: The workpiece blank contour is calculated from the tool position and the ICP contour. XA, ZA programmed: Definition of the corner point of the workpiece blank. The Steuerung uses the tool definition to distinguish between external and internal machining. The tool radius compensation is active. A G57 oversize enlarges the contour (also inside contours. A G58 oversize >0: Enlarges the contour <0: Is not offset G57/G58 oversizes are deleted after cycle end. Cycle run 1 Calculates the areas to be machined and the cutting segmentation. 2 Approaches workpiece for first pass from starting point, taking the safety clearance into account. 3 Executes the first cut (roughing). 4 Approaches for the next pass and executes the next cut (roughing) in the opposite direction. 5 Repeats 3 to 4 until the complete area has been machined. 6 If required, repeats 2 to 5 until all areas have been machined. 7 Retracts as programmed in Q. 282 DIN Programming 4.17 Contour-based turning cycles Recessing G860 G860 machines the defined contour area. The reference to the contour to be machined can be transferred in the cycle parameters, or the contour can be defined directly after the cycle call (see „Working with contour-based cycles” on page 270). The contour to be machined can contain various valleys. If required, the area to be machined is divided into several sections. Parameters ID Auxiliary contour—ID number of the contour to be machined NS Start block number NE Beginning of the contour section, or Reference to a G22/G23-Geo recess End block number (end of contour section) I K Q NE not programmed: The contour element NS is machined in the direction of contour definition. NS=NE programmed: The contour element NS is machined opposite to the direction of contour definition. NE is inapplicable if the contour is defined by G22/G23-Geo Oversize in X direction (diameter value)—(default: 0) Oversize in Z direction (default: 0) Action (default: 0) X Z V E EC D 0: Roughing and finishing 1: Only roughing 2: Only finishing Cutting limit in X direction (diameter value)—(default: no cutting limit) Cutting limit in Z direction (default: no cutting limit) Identifier beginning/end (default: 0). A chamfer/rounding arc is machined: 0: At beginning and end 1: At beginning 2: At end 3: No machining Finishing feed rate (default: active feed rate) Dwell time Revolutions on recessing floor HEIDENHAIN MANUALplus 620, CNC PILOT 640 283 4.17 Contour-based turning cycles Parameters H Type of retraction at cycle end (default: 0) 0: Return to starting point Axial recess: First Z, then X direction Radial recess: First X, then Z direction B P O 1: Positions in front of the finished contour 2: Retracts to safety clearance and stops Recessing width Cutting depth by which one cut is fed. Roughing, lift-off U 0: Lift-up at rapid 1: Below 45° Finishing of floor element 0: Value from global parameter 1: Dividing 2: Complete The Steuerung uses the tool definition to distinguish between external and internal machining, or between radial and axial recesses. Contour cycle repeats can be programmed with G741 before the cycle call. The tool radius compensation is active. A G57 oversize enlarges the contour (also inside contours. A G58 oversize >0: Enlarges the contour <0: Is not offset G57/G58 oversizes are deleted after cycle end. Cycle run (where Q=0 or 1) 1 Calculates the areas to be machined and the cutting segmentation. 2 Approaches workpiece for first pass from starting point, taking the safety clearance into account. 3 4 5 6 7 Radial recess: First Z, then X direction Axial recess: First X, then Z direction Executes first cut (roughing). Returns at rapid traverse and approaches for next pass. Repeats 3 to 4 until the complete area has been machined. If required, repeats 2 to 5 until all areas have been machined. If Q=0: Finish-machines the contour. 284 DIN Programming 4.17 Contour-based turning cycles Repeat recessing cycle G740/G741 G740 and G741 are programmed before G860 to repeat the recessing contour defined in Cycle G860. Parameters X Starting point X (diameter value). Shifts the starting point of the recessing contour defined by G860 to this coordinate. Z Starting point Z. Shifts the starting point of the recessing contour defined by G860 to this coordinate. I Distance between the first and last recessing contour (X direction). K Distance between the first and last recessing contour (Z direction). Ii Distance between the recessing contours (X direction). Ki Distance between the recessing contours (Z direction). Q Number of recessing contours A Angle at which the recessing contours are arranged. R Length. Distance between the first and last recessing contour. Ri Length. Distance between the recessing contours. Beispiel: G740, G741 ... The following parameter combinations are allowed: AUXILIARY CONTOUR ID"recess" I, K Ii, Ki I, A K, A A, R N 47 G0 X50 Z0 G740 does not support the parameters A and R. MACHINING N 48 G1 Z-5 N 49 G1 X45 N 54 G1 Z-15 N 56 G1 Z-17 N 162 T4 N 163 G96 S150 G95 F0.2 M3 N 165 G0 X120 Z100 N 166 G47 P2 N 167 G741 K-50 Q3 A180 N 168 G860 I0.5 K0.2 E0.15 Q0 H0 N 172 G0 X50 Z0 N 173 G1 X40 N 174 G1 Z-9 N 175 G1 X50 N 169 G80 N 170 G14 Q0 ... HEIDENHAIN MANUALplus 620, CNC PILOT 640 285 4.17 Contour-based turning cycles Recess turning cycle G869 G869 machines the defined contour area. The reference to the contour to be machined can be transferred in the cycle parameters, or the contour can be defined directly after the cycle call (see „Working with contour-based cycles” on page 270). The workpiece is machined by alternate recessing and roughing movements. The machining process requires a minimum of retraction and infeed movements. The contour to be machined can contain various valleys. If required, the area to be machined is divided into several sections. Parameters ID Auxiliary contour—ID number of the contour to be machined NS Start block number NE Beginning of the contour section, or Reference to a G22/G23-Geo recess End block number (end of contour section) P R I K X Z A W Q NE not programmed: The contour element NS is machined in the direction of contour definition. NS=NE programmed: The contour element NS is machined opposite to the direction of contour definition. NE is inapplicable if the contour is defined by G22/G23-Geo Maximum infeed Turning depth compensation for finishing (default: 0) Oversize in X direction (diameter value)—(default: 0) Oversize in Z direction (default: 0) Cutting limit (diameter value)—(default: no cutting limit) Cutting limit (default: no cutting limit) Approach angle (default: opposite to recessing direction) Departure angle (default: opposite to recessing direction) Action (default: 0) U 0: Roughing and finishing 1: Only roughing 2: Only finishing Unidirectional turning (default: 0) 0: The roughing passes are bidirectional. 1: The roughing passes are unidirectional (from NS to NE) 286 DIN Programming 4.17 Contour-based turning cycles Parameters H Type of retraction at cycle end (default: 0) V O E B XA, ZA 0: Return to starting point (axial recess: first Z, then X direction; radial recess: first X, then Z direction) 1: Positions in front of the finished contour 2: Retracts to safety clearance and stops Identifier beginning/end (default: 0). A chamfer/rounding arc is machined: 0: At beginning and end 1: At beginning 2: At end 3: No machining Recessing feed rate (default: active feed rate) Finishing feed rate (default: active feed rate) Offset width (default: 0) Starting point of blank (only effective if no blank was programmed): XA, ZA not programmed: The workpiece blank contour is calculated from the tool position and the ICP contour. XA, ZA programmed: Definition of the corner point of the workpiece blank. The Steuerung uses the tool definition to distinguish between radial and axial recesses. Program at least one contour reference (e.g.: NS or NS, NE) and P. Turning depth compensation R: Depending on factors such as workpiece material or feed rate, the tool tip is displaced during a turning operation. You can correct the resulting infeed error with the turning depth compensation factor. The value is usually determined empirically. Offset width B: After the second infeed movement, during the transition from turning to recessing, the path to be machined is reduced by "offset width B." Each time the system switches on this side, the path is reduced by B—in addition to the previous offset. The total offset is limited to 80 % of the effective cutting width (effective cutting width = cutting width –2*cutting radius). If required, the Steuerung reduces the programmed offset width. After clearance roughing, the remaining material is removed with a single cut. The tool radius compensation is active. A G57 oversize enlarges the contour (also inside contours. A G58 oversize >0: Enlarges the contour <0: Is not offset G57/G58 oversizes are deleted after cycle end. HEIDENHAIN MANUALplus 620, CNC PILOT 640 287 4.17 Contour-based turning cycles Cycle run (where Q=0 or 1) 1 Calculates the areas to be machined and the cutting segmentation. 2 Approaches workpiece for first pass from starting point, taking the safety clearance into account. 3 4 5 6 7 Radial recess: First Z, then X direction Axial recess: First X, then Z direction Executes the first cut (recessing). Machines perpendicularly to recessing direction (turning). Repeats 3 to 4 until the complete area has been machined. If required, repeats 2 to 5 until all areas have been machined. If Q=0: Finish-machines the contour. Machining information: Transition from turning to recessing: Before the transition from turning to recessing, the Steuerung retracts the tool by 0.1 mm. Thus an offset cutting edge is adjusted for the recessing operation, independent of "offset width B." Inside radii and chamfers: Depending on the recessing width and the radii of rounding arcs, single cuts preventing a "fluid transition" from recessing to turning are executed before the rounding is machined. This prevents damage to the tool. Edges: Edges are recessed. This prevents residual rings. 288 DIN Programming 4.17 Contour-based turning cycles Recessing cycle G870 G870 generates a recess defined by G22-Geo. The Steuerung uses the tool definition to distinguish between external and internal machining, or between radial and axial recesses. Parameters ID Auxiliary contour—ID number of the contour to be machined NS Block number (reference to G22-Geo) I Oversize for roughing (default: 0) E I=0: Recess is made in one work step. I>0: The first operation is roughing, the second finishing. Dwell time (default: time for one spindle revolution) If I=0: For every recess If I>0: Only for finishing Calculation of cutting segmentation: Maximum offset = 0.8 * cutting width The tool radius compensation is active. An oversize is not taken into account. Cycle run 1 Calculates the number of cutting passes. 2 Approaches workpiece from starting point for first pass. 3 4 5 6 7 Radial recess: First Z, then X direction Axial recess: First X, then Z direction Executes the first cut according to I. Returns at rapid traverse and approaches for next pass. If I=0: Dwells for time E Repeats 3 to 4 until the complete recess has been machined. If I>0: Finish machines the contour HEIDENHAIN MANUALplus 620, CNC PILOT 640 289 4.17 Contour-based turning cycles Finish contour G890 G890 finishes the defined contour area in one pass. The reference to the contour to be machined can be transferred in the cycle parameters, or the contour can be defined directly after the cycle call (see „Working with contour-based cycles” on page 270). The contour to be machined can contain various valleys. If required, the area to be machined is divided into several sections. Parameters ID Auxiliary contour—ID number of the contour to be machined NS Starting block number (beginning of contour section) NE End block number (end of contour section) E V Q NE not programmed: The contour element NS is machined in the direction of contour definition. NS=NE programmed: The contour element NS is machined opposite to the direction of contour definition. Plunging behavior E=0: Descending contours are not machined E>0: Plunging feed rate No input: Descending contours are machined at programmed feed rate Identifier beginning/end (default: 0). A chamfer/rounding arc is machined: 0: At beginning and end 1: At beginning 2: At end 3: No machining 4: Chamfer/rounding arc is machined—not the basic element (prerequisite: contour section with one element) Type of approach (default: 0) 0: Automatic selection—the Steuerung checks: Diagonal approach First X, then Z direction Equidistant around the barrier Omission of the first contour elements if the starting position is inaccessible 1: First X, then Z direction 2: First Z, then X direction 3: No approach—tool is located near the starting point of the contour area. 290 DIN Programming 4.17 Contour-based turning cycles Parameters H Type of retraction (default: 3). Tool backs off at 45° against the machining direction and moves as follows to the position I, K: X Z D I K O U B 0: Diagonal 1: First X, then Z direction 2: First Z, then X direction 3: Stops at safety clearance 4: No retraction motion—tool remains on the end coordinate 5: Diagonally to the tool position before the cycle call 6: First in X, then in Z to the tool position before the cycle call 7: First in Z, then in X to the tool position before the cycle call Cutting limit (diameter value)—(default: no cutting limit) Cutting limit (default: no cutting limit) Omit elements (default: 1). Use the omit codes listed in the table at right to omit individual elements, or the omit codes listed in the table at the lower right to skip execution of recesses, undercuts and relief turns. End point that is approached at the end of the cycle (diameter value) End point that is approached at the end of the cycle Feed rate reduction for circular elements (default: 0) 0: Feed rate reduction is active 1: No feed rate reduction Cycle type—Required for generating the contour from the G80 parameters. (Default: 0) 0: Standard contour (longitudinal or transverse), recessing contour or ICP contour 1: Linear path without/with return 2: Circular arc CW, without/with return 3: Circular arc CCW, without/with return 4: Chamfer without/with return 5: Rounding arc without/with return Tool-tip radius compensation (default: 0) 0: Automatic determination 1: To the left of the contour 2: To the right of the contour 3: Automatic determination without taking the tool angle into account 4: To the left of the contour without taking the tool angle into account 5: To the right of the contour without taking the tool angle into account Codes for omitting recesses and undercuts G call Function D code G22 Recess for sealing ring 512 G22 Recess for guard ring 1.024 G23 H0 General recess 256 G23 H1 Relief turn 2.048 G25 H4 Undercut type U 32.768 G25 H5 Undercut type E 65.536 G25 H6 Undercut type F 131.072 G25 H7 Undercut type G 262.744 G25 H8 Undercut type H 524.288 G25 H9 Undercut type K 1.048.576 Add the codes if you want to hide several elements. HEIDENHAIN MANUALplus 620, CNC PILOT 640 291 4.17 Contour-based turning cycles Parameters HR Main cutting direction (default: 0) 0: Automatic 1: +Z 2: +X 3: -Z 4: -X The Steuerung uses the tool definition to distinguish between external and internal machining. Undercuts are machined if they are programmed and if tool geometry permits. Feed rate reduction For chamfers/rounding arcs, the following applies: Feed rate is programmed with G95-Geo: No automatic feed rate reduction. Feed rate is not programmed with G95-Geo: Automatic feed rate reduction. Each chamfer/rounding is therefore machined with at least three revolutions. For chamfers/rounding arcs which, as a result of their size, are machined with at least three revolutions, the feed rate is not reduced automatically. For circular elements, the following applies: For small circular elements, the feed rate is decreased until every element is machined with at least four spindle revolutions. You can switch this feed rate reduction off with O. The tool radius compensation (TRC) results under certain conditions in a feed rate reduction for circular elements (See "Tooltip and cutter radius compensation" on page 257.). You can switch this feed rate reduction off with O. A G57 oversize enlarges the contour (also inside contours. A G58 oversize >0: Enlarges the contour <0: Reduces the contour G57/G58 oversizes are deleted after cycle end. 292 DIN Programming 4.17 Contour-based turning cycles Measuring cut G809 Cycle G809 performs a cylindrical measuring cut with the length defined in the cycle, moves to the breakpoint for measuring and stops the program. After the program was stopped, you can manually measure the workpiece. Parameters X Starting point X Z Starting point Z R Measuring cut length P Measuring cut oversize I Breakpoint Xi for measuring: Incremental distance to starting point of measurement K Breakpoint Zi for measuring: Incremental distance to starting point of measurement ZS Workpiece blank starting point: Collision-free approach for inside machining XE Departing position X D Number of an additive compensation to be active during the measuring cut V Measuring cut counter: Number of workpieces after which a measurement is performed Q Machining direction EC 0: -Z 1: +Z Machining location WE 0: Outside 1: Inside Directions O 0: Simultaneously 1: First X, then Z 2: First Z, then X Approach angle: If an approach angle is entered, the cycle positions the tool over the starting point taking into account the safety clearance, and from there plunges at the specified angle to the diameter to be measured. HEIDENHAIN MANUALplus 620, CNC PILOT 640 293 4.18 Contour definitions in the machining section 4.18 Contour definitions in the machining section Cycle end / Simple contour G80 By programming G80 (with parameters), a turning contour consisting of more than one element can be defined in one NC block. G80 (without parameters) ends a contour definition directly after a cycle. Parameters XS Starting point of contour in X (diameter value) ZS Starting point of contour in Z XE Contour end point in X (diameter value) ZE Contour end point in Z AC Angle of 1st element (range: 0° <= AC < 90°) WC Angle of 2nd element (range: 0° <= AC <90°) BS Chamfer/rounding arc at starting point WS Angle for chamfer at starting point BE Chamfer/rounding arc at end point WE Angle for chamfer at end point RC Radius IC Chamfer width KC Chamfer width JC Execution (see cycle programming) EC 0: Simple contour 1: Expanded contour Plunging contour HC 0: Rising contour 1: Plunging contour Contour direction for finishing: 0: Longitudinal 1: Transverse "IC" and "KC" are used in the control to show the chamfer/rounding cycles. Beispiel: G80 N1 T3 G95 F0.25 G96 S200 M3 N2 G0 X120 Z2 N3 G810 P3 N4 G80 XS60 ZS-2 XE90 ZE-50 BS3 BE-2 RC5 N5 ... N6 G0 X85 Z2 N7 G810 P5 N8 G0 X0 Z0 N9 G1 X20 N10 G1 Z-40 N11 G80 294 DIN Programming 4.18 Contour definitions in the machining section Linear slot on front/rear face G301 G301 defines a linear slot in a contour on the front or rear face. Program this figure in conjunction with G840, G845 or G846. Parameters XK Center in Cartesian coordinates YK Center in Cartesian coordinates X Diameter (center point in polar coordinates) C Angle (center point in polar coordinates) A Angle to XK axis (default: 0°) K Slot length B Slot width P Depth/Height P<0: Pocket P>0: Island Circular slot on front/rear face G302/G303 G302/G303 defines a circular slot in a contour on the front face/rear face. Program this figure in conjunction with G840, G845 or G846. G302: Circular slot clockwise G303: Circular slot counterclockwise Parameters I Center of curvature in Cartesian coordinates J Center of curvature in Cartesian coordinates X Diameter (center point in polar coordinates) C Angle (center point in polar coordinates) R Curvature radius (reference: center point path of the slot) A Starting angle; reference: XK axis (default: 0°) W End angle; reference: XK axis (default: 0°) B Slot width P Depth/Height P<0: Pocket P>0: Island HEIDENHAIN MANUALplus 620, CNC PILOT 640 295 4.18 Contour definitions in the machining section Full circle on front/rear face G304 G304 defines a full circle in a contour on the front face/rear face. Program this figure in conjunction with G840, G845 or G846. Parameters XK Center in Cartesian coordinates YK Center in Cartesian coordinates X Diameter (center point in polar coordinates) C Angle (center point in polar coordinates) R Radius P Depth/Height P<0: Pocket P>0: Island Rectangle on front/rear face G305 G305 defines a rectangle in a contour on the front face/rear face. Program this figure in conjunction with G840, G845 or G846. Parameters XK Center in Cartesian coordinates YK Center in Cartesian coordinates X Diameter (center point in polar coordinates) C Angle (center point in polar coordinates) A Angle to XK axis (default: 0°) K Length B (Height) width R Chamfer/rounding (default: 0°) P R>0: Radius of rounding R<0: Width of chamfer Depth/Height P<0: Pocket P>0: Island 296 DIN Programming 4.18 Contour definitions in the machining section Eccentric polygon on front/rear face G307 G307 defines a polygon in a contour on the front face/rear face. Program this figure in conjunction with G840, G845 or G846. Parameters XK Center in Cartesian coordinates YK Center in Cartesian coordinates X Diameter (center point in polar coordinates) C Angle (center point in polar coordinates) A Angle of a polygon edge to XK axis (default: 0°) Q Number of edges (Q > 2) K Edge length R K>0: Edge length K<0: Inscribed circle diameter Chamfer/rounding (default: 0°) P R>0: Radius of rounding R<0: Width of chamfer Depth/Height P<0: Pocket P>0: Island Linear slot on lateral surface G311 G311 defines a linear slot in a lateral-surface contour. Program this figure in conjunction with G840, G845 or G846. Parameters Z Center (Z position) CY Center as linear value; reference: unrolled reference diameter C Center (angle) A Angle to Z axis (default: 0°) K Slot length B Slot width P Depth of pocket HEIDENHAIN MANUALplus 620, CNC PILOT 640 297 4.18 Contour definitions in the machining section Circular slot on lateral surface G312/G313 G312/G313 defines a circular slot in a lateral-surface contour. Program this figure in conjunction with G840, G845 or G846. G312: Circular slot clockwise G313: Circular slot counterclockwise Parameters Z Center CY Center as linear value; reference: unrolled reference diameter C Center (angle) R Radius; reference: center point path of the slot A Starting angle; reference: Z axis (default: 0°) W End angle; reference: Z axis B Slot width P Depth of pocket Full circle on lateral surface G314 G314 defines a full circle in a lateral-surface contour. Program this figure in conjunction with G840, G845 or G846. Parameters Z Center CY Center as linear value; reference: unrolled reference diameter C Center (angle) R Radius P Depth of pocket 298 DIN Programming 4.18 Contour definitions in the machining section Rectangle, lateral surface G315 G315 defines a rectangle in a lateral-surface contour. Program this figure in conjunction with G840, G845 or G846. Parameters Z Center CY Center as linear value; reference: unrolled reference diameter C Center (angle) A Angle to Z axis (default: 0°) K Length B Width R Chamfer/rounding (default: 0°) P R>0: Radius of rounding R<0: Width of chamfer Depth of pocket Eccentric polygon, lateral surface G317 G317 defines a polygon in a lateral-surface contour. Program this figure in conjunction with G840, G845 or G846. Parameters Z Center CY Center as linear value; reference: unrolled reference diameter C Center (angle) Q Number of edges (Q > 2) A Angle to Z axis (default: 0°) K Edge length R K>0: Edge length K<0: Inscribed circle diameter Chamfer/rounding (default: 0°) P R>0: Radius of rounding R<0: Width of chamfer Depth of pocket HEIDENHAIN MANUALplus 620, CNC PILOT 640 299 4.19 Thread cycles 4.19 Thread cycles Overview of threading cycles G31 machines single threads, successions of threads and multi-start threads defined with G24-Geo, G34-Geo or G37-Geo (FINISHED PART). G31 can also machine a threading contour defined directly after the cycle call and concluded by G80: See "Thread cycle G31" on page 303. G32 cuts a single thread in any desired direction and position: See "Single thread cycle G32" on page 307. G33 conducts a single thread cut. The direction of the single thread cut is as desired: See "Thread single path G33" on page 309. G35 cuts a simple cylindrical metric ISO thread without run-out: See "Metric ISO thread G35" on page 311. cuts a tapered API thread: See "Tapered API thread G352" on page 312. Handwheel superimposition If your machine features handwheel superimposition, you can overlap axis movements during thread cutting in a limited area: X direction: Maximum programmed thread depth depending on the current cutting depth Z direction: +/- a fourth of the thread pitch Machine and control must be specially prepared by the machine tool builder for use of this cycle. Refer to your machine manual. Remember that position changes resulting from handwheel superimposition are no longer effective after the cycle end or the "last cut" function. 300 DIN Programming 4.19 Thread cycles Parameter V: Type of infeed With the V parameter you define the type of infeed for thread cutting cycles. The following infeed types are available: 0: Constant mach. X-section The control reduces the cutting depth after each infeed to achieve a consistent chip cross section and removal rate. 1: Constant infeed The control uses the same cutting depth for each infeed without exceeding the maximum infeed I. 2: EPL with distribution of cuts The control uses the thread pitch F1 and the constant shaft speed S to calculate the cutting depth for a constant infeed. If the thread depth is not a multiple of the cutting depth, the control uses the depth of the remaining cut for the first infeed. With the "distribution of remaining cuts," the control divides the last cutting depth into four partial cuts. The first cut is half the calculated cutting depth, the second is a quarter and the third and fourth each are an eighth. 3: EPL without distribution of cuts The control uses the thread pitch F1 and the constant shaft speed S to calculate the cutting depth for a constant infeed. If the thread depth is not a multiple of the cutting depth, the control uses the depth of the remaining cut for the first infeed. All subsequent infeeds are constant and correspond to the calculated cutting depth. 4: MANUALplus 4110 The control performs the first infeed with the maximum infeed I. To determine the subsequent cutting depths, the control uses the formula gt = 2 * I * SQRT "current no. of cuts", where "gt" is the absolute depth. The cutting depth decreases with each infeed since the current number of cuts is incremented by 1 with each infeed. If, as a result, the remaining cut depth R falls below the value defined in R, the control uses the value from R as the new constant cutting depth! If the thread depth is not a multiple of the cutting depth, the control performs the last cut to the final depth. 5: Constant infeed (4290) The control uses the same cutting depth for each infeed; the cutting depth corresponds to the maximum infeed I. If the thread depth is not a multiple of the cutting depth, the control uses the depth of the remaining cut for the first infeed. HEIDENHAIN MANUALplus 620, CNC PILOT 640 301 4.19 Thread cycles 6: Constant infeed with remaining cutting (4290) The control uses the same cutting depth for each infeed; the cutting depth corresponds to the maximum infeed I. If the thread depth is not a multiple of the cutting depth, the control uses the depth of the remaining cut for the first infeed. With the "distribution of remaining cuts," the control divides the last cutting depth into four partial cuts. The first cut is half the calculated cutting depth, the second is a quarter and the third and fourth each are an eighth. 302 DIN Programming 4.19 Thread cycles Thread cycle G31 G31 machines single threads, successions of threads and multi-start threads defined with G24-, G34- or G37-Geo. G31 can also machine a threading contour defined directly after the cycle call and concluded by G80. Parameters ID Auxiliary contour—ID number of the contour to be machined NS Contour start block number (reference to basic element G1Geo; for successions of threads: block number of the first basic element) NE Contour end block number (reference to basic element G1Geo; for successions of threads: block number of the last basic element) O Identifier beginning/end (default: 0). A chamfer/rounding arc is machined: J 0: No machining 1: At beginning 2: At end 3: At beginning and end 4: Chamfer/rounding arc is machined—not the basic element (prerequisite: contour section with one element) Reference direction: I No input: The reference direction is determined from the first contour element. J=0: Longitudinal thread J=1: Transverse thread Maximum infeed IC No input and V=0 (constant chip cross section): I = 1/3 * F Number of cuts. The infeed is calculated from IC and U. Usable with: Beispiel: G31 ... B V=0 (constant chip cross section) V=1 (constant infeed) Run-in length N 2 G0 X16 Z0 N 3 G52 P2 H1 N 4 G95 F0.8 P No input: The run-in length is determined from the contour. If this is not possible, the value is calculated from the kinematic parameters. The thread contour is extended by the value B. Overrun length N 5 G1 Z-18 N 6 G25 H7 I1.15 K5.2 R0.8 W30 BF0 BP0 N 7 G37 Q12 F2 P0.8 A30 W30 A No input: The run-out length is determined from the contour. If this is not possible, the value is calculated. The thread contour is extended by the value P. Approach angle (angle of infeed) (default: 30°) N 8 G1 X20 BR-1 BF0 BP0 FINISHED N 9 G1 Z-23.8759 BR0 N 10 G52 G95 N 11 G3 Z-41.6241 I-14.5 BR0 N 12 G1 Z-45 HEIDENHAIN MANUALplus 620, CNC PILOT 640 303 4.19 Thread cycles Parameters V Type of infeed (default: 0); for details, see page 301 H 0: Constant cross section for all cuts 1: Constant infeed 2: W/ remaining cutting (with distribution of remaining cuts). First infeed = Remainder of the division of thread depth/ cutting depth. The last cut is divided into four partial cuts: 1/ 2, 1/4, 1/8 and 1/8. 3: Infeed is calculated from the pitch and spindle speed 4: Same as MANUALplus 4110 5: Constant infeed (same as 4290) 6: Constant with distribute. (same as 4290) Type of offset for smoothing the thread flanks (default: 0) BD 0: Without offset 1: Offset from the left 2: Offset from the right 3: Tool is offset alternately from the right and left Depth of remaining cuts—only in conjunction with approach type V=4 (same as MANUALplus 4110) Starting angle (thread start is defined with respect to rotationally nonsymmetrical contour elements)—(default: 0) External/internal thread (no meaning for closed contours) F U K 0: External thread 1: Internal thread Thread pitch Thread depth Run-out length R C K>0: Run-out K<0: Run-in D E Q The length K should be at least the value of the thread depth. Number of thread turns for multi-start thread Variable pitch (no effect at present) Number of no-load (air) cuts after the last cut (for reducing the cutting pressure in the thread base)—(default: 0) If a thread has been defined with G24-Geo, G34-Geo or G37-Geo, the parameters F, U, K and D are not relevant. Beispiel: G31, continued N 13 G1 X30 BR2 N 14 G1 Z-50 BR0 N 15 G2 X36 Z-71 I12 BR5 N 16 G1 X40 Z-80 N 17 G1 Z-99 N 18 G1 Z-100 [thread] N 19 G1 X50 N 20 G1 Z-120 N 21 G1 X0 [thread] N 22 G1 Z0 N 23 G1 X16 BR-1.5 ... AUXILIARY CONTOUR ID"thread" N 24 G0 X20 Z0 N 25 G1 Z-30 N 26 G1 X30 Z-60 N 27 G1 Z-100 MACHINING N 33 G14 Q0 M108 N 30 T9 G97 S1000 M3 N 34 G47 P2 N 35 G31 NS16 NE17 J0 IC5 B5 P0 V0 H1 BD0 F2 K10 N 36 G0 X110 Z20 N 38 G47 M109 [G80 contours can be inside or outside] N 43 G31 IC4 B4 P4 A30 V0 H2 C30 BD0 F6 U3 K-10 Q2 N 44 G0 X80 Z0 N 45 G1 Z-20 N 46 G1 X100 Z-40 Run-in length B: The slide requires a run-in distance at the start of thread in order to accelerate to the programmed contouring feed rate before starting the actual thread. Run-out length P: The slide needs an overtravel at the end of the thread to decelerate again. Remember that the paraxial line P needs overtravel even with an oblique thread run-out 304 N 47 G1 Z-60 N 48 G80 [External thread regardless of the value defined in BD] N 49 G0 X50 Z-30 DIN Programming Run-in length: B = 0.75 * (F*S)² / a * 0.66 + 0.15 Run-out length: P = 0.75 * (F*S)² / a * 0.66 + 0.15 F: Thread pitch in mm/revolution S: Speed in revolutions/second a: Acceleration in mm/s² (see axis data) Beispiel: G31, continued N 50 G31 NS16 NE17 O0 IC2 B4 P0 A30 V0 H1 C30 BD1 F2 U1 K10 N 51 N 52 Determination of external/internal thread: G31 with contour reference—closed contour: External or internal thread is defined by the contour. BD has no meaning. G31 with contour reference—open contour: External or internal thread is defined by "BD". If "BD" is not programmed, the contour is used to determine whether a thread is external or internal. If the thread contour is programmed directly after the cycle, "BD" determines whether the thread is an internal or external thread. If "BD" is not programmed, the algebraic sign of "U" is evaluated (as in the MANUALplus 4110). U>0: Internal thread U<0: External thread G0 Z10 X50 [AUXILIARY CONTOURS can be inside or outside if they are not closed contours] G0 X50 Z-30 N 53 G31 ID"thread" O0 IC2 B4 P0 A30 V0 H1 C30 BD1 F2 U1 K10 N 60 G0 Z10 X50 Starting angle C: At the end of the "run-in path B" the spindle is at the "starting angle C" position. Therefore, if the thread is to start exactly at the starting angle, position the tool by the run-in length—or by the runin length plus a multiple of the thread pitch—in front of the beginning of the thread. The individual thread cuts are calculated from the thread depth, maximum approach I and type of approach V. Cycle stop—the Steuerung retracts the tool from the thread groove and then stops all tool movements. (Liftoff distance: OEM configuration parameter: cfgGlobalProperties-threadliftoff) Feed rate override is not effective. Danger of collision! An excessive overrun length P might cause a collision. You can check the overrun length during the simulation. HEIDENHAIN MANUALplus 620, CNC PILOT 640 305 4.19 Thread cycles You can calculate the minimum run-in and run-out length with the following equation. 4.19 Thread cycles Cycle run 1 Calculates the number of cutting passes. 2 Moves diagonally to the internal starting point at rapid traverse. This point lies in front of the "starting point of thread" by the runin length B. With H=1 (or 2, 3) the current offset is taken into account for calculating the internal starting point. 3 4 5 6 7 8 9 306 The internal starting point is calculated on the basis of the tool tip. Accelerates to feed rate (line B). Executes a thread cut. Decelerates (line P). Retracts to safety clearance, returns at rapid traverse, and approaches for next pass. For multiple threads, the same rate of cut is used for each thread turn, before the next infeed motion is executed. Repeats 3 to 6 until the complete thread has been cut. Executes air cuts. Returns to starting point. DIN Programming 4.19 Thread cycles Single thread cycle G32 G32 cuts a single thread in any desired direction and position (longitudinal, tapered or transverse thread; internal or external thread). Parameters X End point of thread (diameter) Z End point of thread XS Starting point for thread (diameter) ZS Starting point for thread BD External/internal thread: F U 0: External thread 1: Internal thread Thread pitch Thread depth No input: The thread depth is calculated automatically: I IC External thread (0.6134 * F) Internal thread (0.5413 * F) Maximum cutting depth Number of cuts. The infeed is calculated from IC and U. Usable with: V V=0 (constant chip cross section) V=1 (constant infeed) Type of infeed (default: 0); for details, see page 301 H 0: Constant cross section for all cuts 1: Constant infeed 2: W/ remaining cutting (with distribution of remaining cuts). First infeed = Remainder of the division of thread depth/ cutting depth. The last cut is divided into four partial cuts: 1/ 2, 1/4, 1/8 and 1/8 3: Infeed is calculated from the pitch and spindle speed 4: Same as MANUALplus 4110 5: Constant infeed (same as 4290) 6: Constant with distribute. (same as 4290) Type of offset for smoothing the thread flanks (default: 0) WE 0: Without offset 1: Offset from the left 2: Offset from the right 3: Tool is offset alternately from the right and left Lift off method with K=0 (default: 0) K 0: G0 at end 1: Lift-off in thread Run-out length at thread end point (default: 0) HEIDENHAIN MANUALplus 620, CNC PILOT 640 307 4.19 Thread cycles Parameters W Taper angle (range: –45° < W < 45°)—(default: 0) Position of the taper thread with respect to longitudinal or transverse axis: W>0: Rising contour (in machining direction) W<0: Falling contour Parameters C Starting angle (thread start is defined with respect to rotationally nonsymmetrical contour elements)—(default: 0) A Approach angle (angle of infeed) (default: 30°) R Remainder cuts (default: 0) E Q D J 0: The last cut is divided into four partial cuts: 1/2, 1/4, 1/8 and 1/8. 1: W/o remaining cutting (without distribution of remaining cuts) Variable pitch (no effect at present) Number of no-load (air) cuts after the last cut (for reducing the cutting pressure in the thread base)—(default: 0) Number of thread turns for multi-start thread Reference direction: No input: The reference direction is determined from the first contour element. J=0: Longitudinal thread J=1: Transverse thread Beispiel: G32 ... N1 T4 G97 S800 M3 N2 G0 X16 Z4 N3 G32 X16 Z-29 F1.5 [thread] The cycle calculates the thread from the thread end point, thread depth and the tool position. ... First infeed = Remainder of the division of thread depth/cutting depth. Transverse threads: Use G31 with contour definition for cutting transverse threads. Cycle stop—the Steuerung retracts the tool from the thread groove and then stops all tool movements. (Liftoff distance: OEM configuration parameter: cfgGlobalProperties-threadliftoff) Feed rate override is not effective. Cycle run 1 Calculates the number of cutting passes. 2 Executes a thread cut. 3 Returns at rapid traverse and approaches for next pass. 4 Repeats 2 to 3 until the complete thread has been cut. 5 Executes air cuts. 6 Returns to starting point. 308 DIN Programming 4.19 Thread cycles Thread single path G33 G33 conducts a single thread cut. The direction of the single thread path is as desired (longitudinal, tapered or transverse threads; internal or external threads). You can make successive threads by programming G33 several times in succession. Position the tool in front of the thread by the run-in length B if the slide must accelerate to the feed rate. And remember the run-out length P before the end point of thread if the slide has to be decelerated. Parameters X End point of thread (diameter) Z End point of thread F Thread pitch B Slop. length (run-in length; length of the acceleration path) P Overflow length (run-out length; length of the deceleration path) C Starting angle (thread start is defined with respect to rotationally nonsymmetrical contour elements)—(default: 0) H Reference direction for thread pitch (default: 0) E I K 0: Feed rate on the Z axis (for longitudinal and taper threads up to a max. angle of +45°/–45° to the Z axis) 1: Feed rate on the X axis (for transverse and taper threads up to a max. angle of +45°/–45° to the X axis) 3: Contouring feed rate Variable pitch (default: 0)—(no effect at present) Retraction distance in X—retraction path for cycle stop in the thread, incremental value Retraction distance in Z—retraction path for cycle stop in the thread, incremental value Run-in length B: The slide requires a run-in distance at the start of thread in order to accelerate to the programmed feed rate before starting the actual thread. Beispiel: G33 ... Default: cfgAxisProperties/SafetyDist N1 T5 G97 S1100 G95 F0.5 M3 Run-out length P: The slide needs an overtravel at the end of the thread to decelerate again. Remember that the paraxial line P needs overtravel even with an oblique thread run-out N2 G0 X101.84 Z5 P=0: Start of a successive thread P>0: End of a successive thread Starting angle C: At the end of the "run-in path B" the spindle is at the "starting angle C" position. HEIDENHAIN MANUALplus 620, CNC PILOT 640 N3 G33 X120 Z-80 F1.5 P0 [thread single path] N4 G33 X140 Z-122.5 F1.5 N5 G0 X144 ... 309 4.19 Thread cycles Cycle stop—the Steuerung retracts the tool from the thread groove and then stops all tool movements. (Liftoff distance: OEM configuration parameter: cfgGlobalPrperties-threadliftoff) Feed rate override is not effective Create thread with G95 (feed rate per revolution) Cycle run 1 Accelerates to feed rate (line B). 2 Moves at feed rate to end point of thread –run-out length P. 3 Decelerates (line P) and stops at the end point of thread. Activating handwheel during G33 With the G923 function you can activate the handwheel in order to make compensations during a thread cut. In the G923 function you define limits within which traverse with the handwheel is possible. Parameters X Max. positive offset: Limit in +X Z Max. positive offset: Limit in +Z U Max. negative offset: Limit in –X W Max. negative offset: Limit in –Z H Reference direction: Q H=0: Longitudinal thread H=1: Transverse thread Thread type: Q=1: Right-hand thread Q=2: Left-hand thread 310 DIN Programming 4.19 Thread cycles Metric ISO thread G35 G35 cuts a longitudinal thread (internal or external thread). The thread starts at the current tool position and ends at the end point X, Z. From the tool position relative to the end point of the thread, the Steuerung automatically determines whether an internal or external thread is to be cut. Parameters X End point of thread (diameter) Z End point of thread F Thread pitch I Maximum infeed Q V No input: I is calculated from the thread pitch and the thread depth. Number of no-load (air) cuts after the last cut (for reducing the cutting pressure in the thread base)—(default: 0) Type of infeed (default: 0); for details, see page 301 0: Constant cross section for all cuts 1: Constant infeed 2: W/ remaining cutting (with distribution of remaining cuts). First infeed = Remainder of the division of thread depth/ cutting depth. The last cut is divided into four partial cuts: 1/ 2, 1/4, 1/8 and 1/8. 3: Infeed is calculated from the pitch and spindle speed 4: Same as MANUALplus 4110 5: Constant infeed (same as 4290) 6: Constant with distribute. (same as 4290) Cycle stop—the Steuerung retracts the tool from the thread groove and then stops all tool movements. (Liftoff distance: OEM configuration parameter: cfgGlobalPrperties-threadliftoff) If you are programming an internal thread, it is advisable to preset the thread pitch F since the diameter of the longitudinal element is not the thread diameter. If you have the Steuerung calculate the thread pitch automatically, slight deviations may occur. Cycle run 1 Calculates the number of cutting passes. 2 Executes a thread cut. 3 Returns at rapid traverse and approaches for next pass. 4 Repeats 2 to 3 until the complete thread has been cut. 5 Executes air cuts. 6 Returns to starting point. HEIDENHAIN MANUALplus 620, CNC PILOT 640 Beispiel: G35 %35.nc [G35] N1 T5 G97 S1500 M3 N2 G0 X16 Z4 N3 G35 X16 Z-29 F1.5 END 311 4.19 Thread cycles Tapered API thread G352 This cycle cuts a tapered single or multi-start API thread. The depth of thread decreases at the overrun at the end of thread. Parameters X End point of thread (diameter) Z End point of thread XS Starting point for thread (diameter) ZS Starting point for thread F Thread pitch U Thread depth V U>0: Internal thread U<=0: External thread (lateral surface or front face) U= +999 or –999: Thread depth is calculated Maximum approach (infeed) (default: I is calculated from the thread pitch and the thread depth) Type of infeed (default: 0); for details, see page 301 H 0: Constant cross section for all cuts 1: Constant infeed 2: W/ remaining cutting (with distribution of remaining cuts). First infeed = Remainder of the division of thread depth/ cutting depth. The last cut is divided into four partial cuts: 1/ 2, 1/4, 1/8 and 1/8 3: Infeed is calculated from the pitch and spindle speed 4: Same as MANUALplus 4110 Type of offset for smoothing the thread flanks (default: 0) A 0: Without offset 1: Offset from the left 2: Offset from the right 3: Tool is offset alternately from the right and left Approach (infeed) angle (range: -60° < A < 60°; default: 30°) I R W WE D Q C 312 A>0: Infeed on right thread flank A<0: Infeed on left thread flank Depth of remaining cuts—only in conjunction with approach type V=4 (same as MANUALplus 4110) Taper angle (range: –45° < W < 45°; default: 0°) Run-out angle (range: 0° < WE < 90°; default: 12°) Threads per unit (number of thread turns) for multi-start thread Number of no-load (air) cuts after the last cut (for reducing the cutting pressure in the thread base)—(default: 0) Starting angle (thread start is defined with respect to rotationally nonsymmetrical contour elements)—(default: 0) Beispiel: G352 %352.nc [G352] N1 T5 G97 S1500 M3 N2 G0 X13 Z4 N3 G352 X16 Z-28 XS13 ZS0 F1.5 U-999 WE12 END DIN Programming 4.19 Thread cycles Internal or external threads: See algebraic sign of "U." Number of cutting passes: The first cut is performed at the cutting depth defined for "I" and is reduced with each cut until the tool reaches the "remaining cutting depth R." Handwheel superposition (provided that your machine is equipped accordingly): The superposition is limited to the following range: X direction: Depending on the current cutting depth—without exceeding the starting and end points of the thread. Z direction: Maximal 1 thread groove—without exceeding the starting and end points of the thread. Definition of taper angle: XS/ZS, X/Z XS/ZS, Z, W ZS, X/Z, W Cycle stop—the Steuerung retracts the tool from the thread groove and then stops all tool movements. (Liftoff distance: OEM configuration parameter: cfgGlobalPrperties-threadliftoff) If you are programming an internal thread, it is advisable to preset the thread pitch F since the diameter of the longitudinal element is not the thread diameter. If you have the Steuerung calculate the thread pitch automatically, slight deviations may occur. Cycle run 1 Calculates the number of cutting passes. 2 Executes a thread cut. 3 Returns at rapid traverse and approaches for next pass. 4 Repeats 2 to 3 until the complete thread has been cut. 5 Executes air cuts. 6 Returns to starting point. HEIDENHAIN MANUALplus 620, CNC PILOT 640 313 4.19 Thread cycles Metric ISO thread G38 Cycle G38 creates a cylindrical thread whose form does not correspond to the tool form. Use a recessing or button tool for machining. Describe the contour of the thread turn as auxiliary contour. The position of the auxiliary contour must correspond to the start position of the thread cuts. You can select the entire auxiliary contour or just segments in the cycle. Parameters ID Name of the auxiliary contour NS Start block of the contour to be machined NE End block of the contour to be machined Q Thread depth X Z F I 0: Roughing: The contour is roughed out line by line at maximum infeed I and K. A programmed oversize (G58 or G57) is taken into account. 1: Finishing: The turn of the thread is created in individual cuts along the contour. Define the distances between the individual thread cuts on the contour with I and K. End point of thread X End point of thread Z Thread pitch Maximum infeed K If Q=0: Plunging depth If Q=1: Distance between the finishing cuts as arc length Maximum infeed J C O If Q=0: Offset width If Q=1: Distance between the finishing cuts on straight line Run-out length Starting angle Type of infeed 0: Rapid traverse 1: Feed rate Beispiel: G38 %352.nc [G38] N1 T5 G97 S1500 M3 N2 G0 X43 Z4 N3 G38 ID"123" NS3 NE5 X40 Z-30 F1.5 I0.8 K0.5 J3 C0 END 314 DIN Programming 4.20 Parting cycle 4.20 Parting cycle Cut-off cycle G859 Cycle G859 parts the workpiece. If programmed, a chamfer or rounding arc is machined on the outside diameter. At the end of cycle, the tool retracts and returns to the starting point. You can define a feed rate reduction, which becomes effective as soon as the position I is reached. Parameters X Cut-off (parting) diameter Z Cut-off (parting) position I Diameter for feed rate reduction XE E B D K SD U I is defined: The control switches to feed rate E after this position I is not defined: No feed rate reduction Inside diameter (pipe) Reduced feed rate Chamfer/rounding B>0: Radius of rounding B<0: Width of chamfer Speed limitation: Maximum speed during parting Retraction distance after parting: Lift off the tool laterally from the plane surface before retraction Speed limitation from the diameter I up Diameter from which the part catcher is activated (machinedependent function) Beispiel: G859 %859.nc [G859] N1 T3 G95 F0.23 G96 S248 M3 N2 G0 X60 Z-28 N3 G859 X50 Z-30 I10 XE8 E0.11 B1 END HEIDENHAIN MANUALplus 620, CNC PILOT 640 315 4.21 Undercut cycles 4.21 Undercut cycles Undercut cycle G85 With the function G85, you can machine undercuts according to DIN 509 E, DIN 509 F and DIN 76 (thread undercut). Parameters X Target point (diameter) Z Target point I Depth (radius) K E DIN 509 E, F: Grinding oversize (default: 0) DIN 76: Undercut depth Undercut width and type of undercut K—No input: DIN 509 E K=0: DIN 509 F K>0: Undercut width for DIN 76 Reduced feed for machining the undercut (default: active feed rate) G85 machines the adjoining cylinder if you position the tool to diameter X "in front of" the cylinder. The undercut rounding arcs are executed with the radius 0.6 * I. Parameters for undercut DIN 509 E Diameter I K R <= 18 0.25 2 0.6 > 18 – 80 0.35 2.5 0.6 > 80 0.45 4 1 Parameters for undercut DIN 509 F Diameter I K R P <= 18 0.25 2 0.6 0.1 > 18 – 80 0.35 2.5 0.6 0.2 > 80 0.45 4 1 0.3 I = undercut depth K = undercut width R = undercut radius P = face depth Undercut angle for undercuts according to DIN 509 E and F: 15° Transverse angle for an undercut according to DIN 509 F: 8° 316 DIN Programming The tool radius compensation is not active. Oversizes are not taken into account. 4.21 Undercut cycles Beispiel: G85 ... N1 T21 G95 F0.23 G96 S248 M3 N2 G0 X62 Z2 N3 G85 X60 Z-30 I0.3 N4 G1 X80 N5 G85 X80 Z-40 K0 N6 G1 X100 N7 G85 X100 Z-60 I1.2 K6 E0.11 N8 G1 X110 ... HEIDENHAIN MANUALplus 620, CNC PILOT 640 317 4.21 Undercut cycles Undercut according to DIN 509 E with cylinder machining G851 G851 machines the adjoining cylinder, the undercut, and finishes with the plane surface. It also machines a cylinder start chamfer when you enter at least one of the parameters Cut-in length (1st cut length) or Cut-in radius (1st cut radius). Parameters I Undercut depth (default: value from standard table) K Undercut length (default: value from standard table) W Undercut angle (default: value from standard table) R Undercut radius (default: value from standard table) B Cut-in length (1st cut length)—no input: No chamfer machined at start of cylinder RB Cut-in radius (1st cut radius)—no input: 1st cut radius is not machined WB 1st cut angle (default: 45 °) E Reduced feed for machining the undercut (default: active feed rate) H Type of departure (default: 0): U 0: Tool returns to the starting point 1: Tool remains at the end of the plane surface Grinding oversize for the area of the cylinder (default: 0) The Steuerung calculates unentered parameters from the diameter of the cylinder in the standard table (see “Undercut cycle G85” on page 316). Blocks following the cycle call N.. G851 I.. K.. W.. /Cycle call N.. G0 X.. Z.. N.. G1 Z.. /Corner point of cylinder start chamfer /Undercut corner Beispiel: G851 N.. G1 X.. /End point on plane surface %851.nc N.. G80 /End of contour definition [G851] N1 T2 G95 F0.23 G96 S248 M3 Undercuts can only be executed in orthogonal, paraxial contour corners along the longitudinal axis. Cutting radius compensation is active. Oversizes are not taken into account. N2 G0 X60 Z2 N3 G851 I3 K15 W30 R2 B5 RB2 WB30 E0.2 H1 N4 G0 X50 Z0 N5 G1 Z-30 N6 G1 X60 N7 G80 END 318 DIN Programming 4.21 Undercut cycles Undercut according to DIN 509 F with cylinder machining G852 G852 machines the adjoining cylinder, the undercut, and finishes with the plane surface. It also machines a cylinder start chamfer when you enter at least one of the parameters Cut-in length (1st cut length) or Cut-in radius (1st cut radius). Parameters I Undercut depth (default: value from standard table) K Undercut length (default: value from standard table) W Undercut angle (default: value from standard table) R Undercut radius (default: value from standard table) P Face depth (default: value from standard table) A Face angle (default: value from standard table) B Cut-in length (1st cut length)—no input: No chamfer machined at start of cylinder RB Cut-in radius (1st cut radius)—no input: 1st cut radius is not machined WB 1st cut angle (default: 45 °) E Reduced feed for machining the undercut (default: active feed rate) H Type of departure (default: 0): U 0: Tool returns to the starting point 1: Tool remains at the end of the plane surface Grinding oversize for the area of the cylinder (default: 0) The Steuerung calculates unentered parameters automatically from the diameter in the standard table (see “Undercut cycle G85” on page 316). Blocks following the cycle call N.. G852 I.. K.. W.. /Cycle call N.. G0 X.. Z.. /Corner point of cylinder start chamfer N.. G1 Z.. /Undercut corner N.. G1 X.. /End point on plane surface N.. G80 /End of contour definition Undercuts can only be executed in orthogonal, paraxial contour corners along the longitudinal axis. Cutting radius compensation is active. Oversizes are not taken into account. Beispiel: G852 %852.nc [G852] N1 T2 G95 F0.23 G96 S248 M3 N2 G0 X60 Z2 N3 G852 I3 K15 W30 R2 P0.2 A8 B5 RB2 WB30 E0.2 H1 N4 G0 X50 Z0 N5 G1 Z-30 N6 G1 X60 N7 G80 END HEIDENHAIN MANUALplus 620, CNC PILOT 640 319 4.21 Undercut cycles Undercut according to DIN 76 with cylinder machining G853 G853 machines the adjoining cylinder, the undercut, and finishes with the plane surface. It also machines a cylinder start chamfer when you enter at least one of the parameters Cut-in length (1st cut length) or Cut-in radius (1st cut radius). Parameters FP Thread pitch I Undercut depth (default: value from standard table) K Undercut length (default: value from standard table) W Undercut angle (default: value from standard table) R Undercut radius (default: value from standard table) P Oversize: B RB WB E H P is not defined: The undercut is machined in one pass P is defined: Division into pre-turning and finish-turning – P = longitudinal oversize; the transverse oversize is preset to 0.1 mm Cut-in length (1st cut length)—no input: No chamfer machined at start of cylinder Cut-in radius (1st cut radius)—no input: 1st cut radius is not machined 1st cut angle (default: 45 °) Reduced feed for machining the undercut (default: active feed rate) Type of departure (default: 0): 0: Tool returns to the starting point 1: Tool remains at the end of the plane surface Parameters that are not programmed are automatically calculated by the Steuerung from the standard table: FP from the diameter I, K, W, and R from FP (thread pitch) Blocks following the cycle call Beispiel: G853 %853.nc [G853] N.. G853 FP.. I.. K.. W.. /Cycle call N1 T2 G95 F0.23 G96 S248 M3 N.. G0 X.. Z.. /Corner point of cylinder start chamfer N2 G0 X60 Z2 N.. G1 Z.. /Undercut corner N3 G853 FP1.5 I47 K15 W30 R2 P1 B5 RB2 WB30 E0.2 H1 N.. G1 X.. /End point on plane surface N.. G80 /End of contour definition Undercuts can only be executed in orthogonal, paraxial contour corners along the longitudinal axis. Cutting radius compensation is active. Oversizes are not taken into account. 320 N4 G0 X50 Z0 N5 G1 Z-30 N6 G1 X60 N7 G80 END DIN Programming 4.21 Undercut cycles Undercut type U G856 G856 machines an undercut and finishes the adjoining plane surface. A chamfer or rounding (optional) can be machined. Tool position at the end of the cycle: Cycle start point Parameters I Undercut depth (default: value from standard table) K Undercut length (default: value from standard table) B Chamfer/rounding: B>0: Radius of rounding B<0: Width of chamfer Blocks following the cycle call N.. G856 I.. K.. /Cycle call N.. G0 X.. Z.. /Undercut corner N.. G1 X.. /End point on plane surface N.. G80 /End of contour definition Beispiel: G856 %856.nc [G856] Undercuts can only be executed in orthogonal, paraxial contour corners along the longitudinal axis. Cutting radius compensation is active. Oversizes are not taken into account. If the cutting width of the tool is not defined, the control assumes that the tool's cutting width equals K. N1 T3 G95 F0.23 G96 S248 M3 N2 G0 X60 Z2 N3 G856 I47 K7 B1 N4 G0 X50 Z-30 N5 G1 X60 N6 G80 END HEIDENHAIN MANUALplus 620, CNC PILOT 640 321 4.21 Undercut cycles Undercut type H G857 G857 machines an undercut. The end point is determined from the plunge angle in accordance with Undercut type H. Tool position at the end of the cycle: Cycle start point Parameters X Corner point of contour (diameter) Z Corner point of contour K Undercut length R Radius—no input: No circular element (tool radius = undercut radius) W Plunging angle—no input: W is calculated from K and R Undercuts can only be executed in orthogonal, paraxial contour corners along the longitudinal axis. Cutting radius compensation is active. Oversizes are not taken into account. Beispiel: G857 %857.nc [G857] N1 T2 G95 F0.23 G96 S248 M3 N2 G0 X60 Z2 N3 G857 X50 Z-30 K7 R2 W30 END 322 DIN Programming 4.21 Undercut cycles Undercut type K G858 G858 machines an undercut. This cycle performs only one linear cut at an angle of 45°. The resulting contour geometry therefore depends on the tool that is used. Tool position at the end of the cycle: Cycle start point Parameters X Corner point of contour (diameter) Z Corner point of contour I Undercut depth Undercuts can only be executed in orthogonal, paraxial contour corners along the longitudinal axis. Cutting radius compensation is active. Oversizes are not taken into account. Beispiel: G858 %858.nc [G858] N1 T9 G95 F0.23 G96 S248 M3 N2 G0 X60 Z2 N3 G858 X50 Z-30 I0.5 END HEIDENHAIN MANUALplus 620, CNC PILOT 640 323 4.22 Drilling cycles 4.22 Drilling cycles Overview of drilling and boring cycles and contour reference The drilling and boring cycles can be used with driven or stationary tools. Drilling and boring cycles: G71 Simple drilling: Page 325 G72 Boring/countersinking (only with contour reference (ID, NS): Page 327 G73 Tapping (not with G743 - G746): Page 334 G74 Deep-hole drilling: Page 331 G36 Tapping—single path (direct position input): Page 330 G799 Thread milling (direct position input): Page 338 Pattern definitions: G743 Linear pattern on face for drilling and milling cycles: Page 334 G744 Linear pattern on lateral surface for drilling and milling cycles: Page 336 G745 Circular pattern on face for drilling and milling cycles: Page 335 G746 Circular pattern on lateral surface for drilling and milling cycles: Page 337 Possibilities of defining a contour reference: Path definition directly in the cycle. Reference to a hole or pattern definition in the contour section (ID, NS) for machining on the front face or lateral surface. Centric hole in the turning contour (G49): Page 219 Pattern definition in the block before the cycle call (G743 - G746) 324 DIN Programming 4.22 Drilling cycles Drilling cycle G71 G71 is used for axial and radial bore holes using driven or stationary tools. Parameters ID Drilling contour—Name of the hole definition NS Block number of contour XS ZS XE ZE K A V RB E D BS BE H Reference to the contour of the hole (G49-Geo, G300-Geo or G310-Geo) No input: Single hole without contour description Starting point of radial hole (diameter value) Starting point of axial hole End point of radial hole (diameter value) End point of axial hole Boring depth (hole depth) (alternative to XE/ZE) Drilling lengths (default: 0) Bore (through-drilling) variant (feed rate reduction 50%)— (default: 0) 0: No feed rate reduction 1: Feed reduction for through-drilling 2: Feed reduction for pre-drilling 3: Feed reduction for pre-drilling and through-drilling Retraction plane (radial holes, holes in the YZ plane: diameter)—(default: return to the starting position or to the safety clearance) Period of dwell for chip breaking at end of hole (in seconds)— (default: 0) Retraction type (default: 0) 0: Rapid traverse 1: Feed rate Start element no. (number of the first hole to be machined in a pattern) End element no. (number of the last hole to be machined in a pattern) (Spindle) Brake off (default: 0) 0: Spindle brake on 1: Spindle brake off Beispiel: G71 ... N1 T5 G97 S1000 G95 F0.2 M3 N2 G0 X0 Z5 N3 G71 Z-25 A5 V2 [drilling] ... Single hole without contour description: Program XS or ZS as alternative. Hole with contour description: Do not program XS, ZS. Hole pattern: NS refers to the hole contour, and not the definition of the pattern. HEIDENHAIN MANUALplus 620, CNC PILOT 640 325 4.22 Drilling cycles Parameter combinations for single holes without contour description XS, XE ZS, ZE XS, K ZS, K XE, K ZE, K Feed rate reduction: Indexable insert drill and twist drill with 180° drilling angle A feed rate reduction is only effective if the parameter "Drilling length A" has been defined. Other drills Beginning of hole: Feed rate reduction as programmed in V End of hole: Reduction as of hole end point – length of first cut – safety clearance Length of first cut = tool tip Safety clearance: See user parameter or G47, G147 Cycle run 1 Hole without contour description: Tool is located at the starting point (safety distance from the bore hole). Hole with contour description: Tool moves at rapid traverse to the starting point: RB not programmed: Moves up to the safety clearance RB programmed: Moves to the position RB and then to the safety clearance 2 Spot drilling. Feed rate reduction depending on V 3 Drilling at feed rate. 4 Through drilling. Feed rate reduction depending on V 5 Retraction at rapid traverse or feed rate, depending on D. 6 Retraction position: RB not programmed: Retraction to the starting point RB programmed: Retraction to the position RB 326 DIN Programming 4.22 Drilling cycles Boring, countersinking G72 G72 is used for holes with contour definition (individual hole or hole pattern). Use G72 for the following axial and radial drilling functions using driven or stationary tools: Boring Countersinking Reaming NC drilling Centering Parameters ID Drilling contour—Name of the hole definition NS Block number of contour. Reference to the contour of the hole (G49-Geo, G300-Geo or G310-Geo) RB Retraction plane (radial holes, holes in the YZ plane: diameter)—(default: return to the starting position or to the safety clearance) E Period of dwell for chip breaking at end of hole (in seconds)— (default: 0) D Retraction type (default: 0) BS BE H 0: Rapid traverse 1: Feed rate Start element no. (number of the first hole to be machined in a pattern) End element no. (number of the last hole to be machined in a pattern) (Spindle) Brake off (default: 0) 0: Spindle brake on 1: Spindle brake off Cycle run 1 Moves to the starting point at rapid traverse, depending on RB: 2 3 4 5 RB not programmed: Moves up to the safety clearance RB programmed: Moves to the position RB and then to the safety clearance Drills at reduced feed rate (50%). Moves at feed rate to end of hole. Retraction at rapid traverse or feed rate, depending on D. Return position depends on RB: RB not programmed: Retraction to the starting point RB programmed: Retraction to the position RB Hole pattern: NS refers to the hole contour, and not the definition of the pattern. HEIDENHAIN MANUALplus 620, CNC PILOT 640 327 4.22 Drilling cycles Tapping G73 G73 cuts axial/radial threads using driven or stationary tools. Parameters ID Drilling contour—Name of the hole definition NS Block number of contour ZS Reference to the contour of the hole (G49-Geo, G300-Geo or G310-Geo) No input: Single hole without contour description Starting point of radial hole (diameter value)—single hole without contour description Starting point of axial hole XE Single hole without contour description End point of radial hole (diameter value) ZE Single hole without contour description End point of axial hole K Single hole without contour description Boring depth (hole depth) (alternative to XE/ZE) XS F B S J RB P I BS BE H Single hole without contour description Thread pitch (prevails over the contour description) Run-in length Retraction speed (default: Shaft speed for tapping) Retraction length when using floating tap holders (default: 0) Retraction plane (radial holes: diameter)—(default: return to the starting position or to the safety clearance) Chip breaking depth Retraction distance Start element no. (number of the first hole to be machined in a pattern) End element no. (number of the last hole to be machined in a pattern) (Spindle) Brake off (default: 0) 0: Spindle brake on 1: Spindle brake off The starting position is calculated from the safety clearance and the run-in (slope) length B. 328 DIN Programming 4.22 Drilling cycles Parameter combinations for single holes without contour description XS, XE ZS, ZE XS, K ZS, K XE, K ZE, K Retraction length J: Use this parameter for floating tap holders. The cycle calculates a new nominal pitch on the basis of the thread depth, the programmed pitch, and the "retraction length." The nominal pitch is somewhat smaller than the pitch of the tap. During tapping, the tap is pulled away from the chuck by the retraction length. With this method you can achieve higher service life from the taps. Hole pattern: NS refers to the hole contour, and not the definition of the pattern. Single hole without contour description: Program XS or ZS as alternative. Hole with contour description: Do not program XS, ZS. Cycle stop interrupts the tapping operation. Cycle start resumes the tapping operation. Use the feed rate override function for speed changes. Spindle override is not effective. Use a floating tap holder if the driven tool is not controlled, e.g. by a ROD encoder. Cycle run 1 Moves at rapid traverse to the starting point: 2 3 4 RB not programmed: Moves directly to the starting point RB programmed: Moves to the position RB and then to the starting point Moves along run-in length B at feed rate (synchronization of spindle and feed drives). Cuts the thread. Retracts with return speed S: RB not programmed: To the starting point RB programmed: To the position RB HEIDENHAIN MANUALplus 620, CNC PILOT 640 329 4.22 Drilling cycles Tapping G36—Single path G36 cuts axial/radial threads using driven or stationary tools. Depending on X/Z, G36 decides whether a radial or axial hole will be machined. Move to the starting point before G36. G36 returns to the starting position after having cut the thread. Parameters X End point of radial hole (diameter value) Z End point of axial hole F Feed per revolution (thread pitch) B Run-in length for synchronizing spindle and feed drive S Retraction speed (default: Shaft speed for tapping) P Chip breaking depth I Retraction distance Type of taps: Stationary tap: Main spindle and feed drive are synchronized. Driven tap: Driven tool and feed drive are synchronized. Cycle stop interrupts the tapping operation. Cycle start resumes the tapping operation. Use the feed rate override function for speed changes. Spindle override is not effective. Use a floating tap holder if the driven tool is not controlled, e.g. by a ROD encoder. Beispiel: G36 ... N1 T5 G97 S1000 G95 F0.2 M3 N2 G0 X0 Z5 N3 G71 Z-30 N4 G14 Q0 N5 T6 G97 S600 M3 N6 G0 X0 Z8 N7 G36 Z-25 F1.5 B3 [tapping] ... 330 DIN Programming 4.22 Drilling cycles Deep-hole drilling G74 G74 is used for axial and radial holes in several stages using driven or stationary tools. Parameters ID Drilling contour—Name of the hole definition NS Block number of contour XS ZS XE ZE K P I B J R A V RB E D BS BE H Reference to the contour of the hole (G49-Geo, G300-Geo or G310-Geo) No input: Single hole without contour description Starting point of radial hole (diameter value) Starting point of axial hole End point of radial hole (diameter value) End point of axial hole Boring depth (hole depth) (alternative to XE/ZE) First hole depth Reduction value (default: 0) Retraction distance (default: to starting point of hole) Minimum hole depth (default: 1/10 of P) Safety distance (inside) Drilling lengths—(default: 0) Bore (through-drilling) variant (feed rate reduction 50%)— (default: 0) 0: No feed rate reduction 1: Feed reduction for through-drilling 2: Feed reduction for pre-drilling 3: Feed reduction for pre-drilling and through-drilling Retraction plane (radial holes: diameter)—(default: return to the starting position or to the safety clearance) Period of dwell for chip breaking at end of hole (in seconds)— (default: 0) Retraction speed and infeed within the hole (default: 0) 0: Rapid traverse 1: Feed rate Start element no. (number of the first hole to be machined in a pattern) End element no. (number of the last hole to be machined in a pattern) (Spindle) Brake off (default: 0) 0: Spindle brake on 1: Spindle brake off Beispiel: G74 ... N1 M5 N2 T4 G197 S1000 G195 F0.2 M103 N3 M14 N4 G110 C0 N5 G0 X80 Z2 N6 G745 XK0 YK0 Z2 K80 Wi90 Q4 V2 N7 G74 Z-40 R2 P12 I2 B0 J8 [drilling] N8 M15 ... HEIDENHAIN MANUALplus 620, CNC PILOT 640 331 4.22 Drilling cycles Parameter combinations for single holes without contour description XS, XE ZS, ZE XS, K ZS, K XE, K ZE, K The cycle is used for: Single hole without contour description Hole with contour description (single hole or hole pattern) "1st hole depth P" is used for the first pass. The control then automatically reduces the drilling depth with each subsequent pass by the reduction value I, however, without falling below the minimum drilling depth J. After each pass, the tool is retracted either by retraction distance B or to the starting point of the hole. If the safety distance R is defined, the tool is positioned to this distance at rapid traverse inside the hole. Feed rate reduction: Indexable insert drill and twist drill with 180° drilling angle A feed rate reduction is only effective if the parameter "Drilling length A" has been defined. Other drills Beginning of hole: Feed rate reduction as programmed in V End of hole: Reduction as of hole end point – length of first cut – safety clearance Length of first cut = tool tip Safety clearance: See user parameter or G47, G147 Single hole without contour description: Program XS or ZS as alternative. Hole with contour description: Do not program XS, ZS. Hole pattern: NS refers to the hole contour, and not the definition of the pattern. A "feed rate reduction at end" goes into effect only at the last drilling stage. 332 DIN Programming 4.22 Drilling cycles Cycle run 1 Hole without contour description: Tool is located at the starting point (safety distance from the bore hole). Hole with contour description:: Tool moves at rapid traverse to the starting point: RB not programmed: Moves up to the safety clearance RB programmed: Moves to the position RB and then to the safety clearance 2 Spot drilling. Feed rate reduction depending on V 3 Drills the hole in several passes 4 Through drilling. Feed rate reduction depending on V 5 Retraction at rapid traverse or feed rate, depending on D. 6 Return position depends on RB: RB not programmed: Retraction to the starting point RB programmed: Retraction to the position RB HEIDENHAIN MANUALplus 620, CNC PILOT 640 333 4.22 Drilling cycles Linear pattern, face G743 Cycle G743 is used to machine linear drilling or milling patterns in which the individual features are arranged at a regular spacing on the face. If the Final point ZE has not been defined, the drilling/milling cycle of the next NC block is used as a reference. Using this principle, you can combine pattern definitions with Drilling cycles (G71, G74, G36) The milling cycle for a linear slot (G791) The contour milling cycle with "free contour" (G793) Parameters XK Starting point of pattern in Cartesian coordinates YK Starting point of pattern in Cartesian coordinates ZS Starting point of drilling/milling operation ZE Final point of drilling/milling operation X Diameter (starting point of pattern in polar coordinates) C Angle (starting point of pattern in polar coordinates) A Pattern angle I Final point of pattern (Cartesian) Ii (Final point) Pattern distance (Cartesian) J Final point of pattern (Cartesian) Ji (Final point) Pattern distance (Cartesian) R Length (distance between first and last position) Ri Length (distance to next position) Q Number of holes/figures—(default: 1) Beispiel: G743 %743.nc [G743] N1 T7 G197 S1200 G195 F0.2 M104 N2 M14 N3 G110 C0 N4 G0 X100 Z2 N5 G743 XK20 YK5 A45 Ri30 Q2 N6 G791 X50 C0 ZS0 ZE-5 P2 F0.15 Parameter combinations for defining the starting point and the pattern positions: Starting point of pattern: XK, YK X, C Pattern positions: I, J and Q Ii, Ji and Q R, A and Q Ri, Ai and Q N7 M15 END Beispiel: Sequence of commands [Simple drilling pattern] N.. G743 XK.. YK.. ZS.. ZE.. I.. J.. Q.. ... [Drilling pattern with deep-hole drilling] N.. G743 XK.. YK.. ZS.. I.. J.. Q.. N.. G74 ZE.. P.. I.. ... [Milling pattern with linear slot] N.. G743 XK.. YK.. ZS.. I.. J.. Q.. N.. G791 K.. A.. Z.. ... 334 DIN Programming 4.22 Drilling cycles Circular pattern, face G745 Cycle G745 is used to machine drilling or milling patterns in which the individual features are arranged at a regular spacing in a circle or circular arc on the face. If the Final point ZE has not been defined, the drilling/milling cycle of the next NC block is used as a reference. Using this principle, you can combine pattern definitions with Drilling cycles (G71, G74, G36) The milling cycle for a linear slot (G791) The contour milling cycle with "free contour" (G793) Parameters XK Center of pattern in Cartesian coordinates YK Center of pattern in Cartesian coordinates ZS Starting point of drilling/milling operation ZE Final point of drilling/milling operation X Diameter (center point of pattern in polar coordinates) C Angle (center point of pattern in polar coordinates) A Starting angle (position of first hole/figure) W Final angle (position of last hole/figure) Wi Final angle (distance to the next position) Q Number of holes/figures—(default: 1) V Rotation direction (default: 0) V=0, without W: Figures are arranged on a full circle V=0, with W: Figures are arranged on the longer circular arc V=0, with Wi: The algebraic sign of Wi defines the direction (Wi<0: clockwise) V=1, with W: Clockwise V=1, with Wi: Clockwise (algebraic sign of Wi has no effect) V=2, with W: Counterclockwise V=2, with Wi: Counterclockwise (algebraic sign of Wi has no effect) Beispiel: G745 %745.nc [G745] N1 T7 G197 S1200 G195 F0.2 M104 N2 M14 N3 G110 C0 N4 G0 X100 Z2 N5 G745 XK0 YK0 K50 A0 Q3 N6 G791 K30 A0 ZS0 ZE-5 P2 F0.15 N7 M15 END Beispiel: Sequence of commands [Simple drilling pattern] Parameter combinations for defining the center of the pattern and the pattern positions: N.. G745 XK.. YK.. ZS.. ZE.. A.. W.. Q.. Center of pattern: X, C XK, YK [Drilling pattern with deep-hole drilling] Pattern positions: A, W and Q A, Wi and Q ... N.. G745 XK.. YK.. ZS.. A.. W.. Q.. N.. G74 ZE.. P.. I.. ... [Milling pattern with linear slot] N.. G745 XK.. YK.. ZS.. ZE.. A.. W.. Q.. N.. G791 K.. A.. Z.. ... HEIDENHAIN MANUALplus 620, CNC PILOT 640 335 4.22 Drilling cycles Linear pattern, lateral surface G744 Cycle G744 is used to machine linear drilling patterns or milling patterns in which the individual features are arranged at a regular spacing on the lateral surface. Parameter combinations for defining the starting point and the pattern positions: Starting point of pattern: Z, C Pattern positions: W and Q Wi and Q If the Final point XE has not been defined, the drilling/milling cycle or the figure definition of the next NC block is used as a reference. Using this principle, you can combine pattern definitions with drilling cycles (G71, G74, G36) or milling cycles (figure definitions with G314, G315, G317). Parameters XS Starting point of drilling/milling operation (diameter value) Z Starting point of pattern in polar coordinates XE Final point of drilling/milling operation (diameter value) ZE Final point of pattern (default: Z) C Starting angle of pattern in polar coordinates W Final angle of pattern—no input: Holes/figures are arranged on the lateral surface at regular spacing Wi Final angle (angle increment), distance to the next position Q Number of holes/figures—(default: 1) A Angle (orientation angle of the pattern) R Length (distance between first and last position [mm], reference: unrolled lateral surface XS) Ri Length (distance from the next position [mm], reference: unrolled lateral surface XS) Beispiel: G744 %744.nc [G744] N1 T6 G197 S1200 G195 F0.2 M104 N2 M14 N3 G110 C0 N4 G0 X110 Z2 N5 G744 XS102 Z-10 ZE-35 C0 W270 Q5 N6 G71 XS102 K7 N7 M15 END Beispiel: Sequence of commands [Simple drilling pattern] N.. G744 Z.. C.. XS.. XE.. ZE.. W.. Q.. ... [Drilling pattern with deep-hole drilling] N.. G744 Z.. C.. XS.. XE.. ZE.. W.. Q.. N.. G74 XE.. P.. I.. ... [Milling pattern with linear slot] N.. G744 Z.. C.. XS.. XE.. ZE.. W.. Q.. N.. G792 K.. A.. XS.. ... 336 DIN Programming 4.22 Drilling cycles Circular pattern, lateral surface G746 Cycle G746 is used to machine drilling patterns or milling patterns in which the individual features are arranged at a regular spacing in a circle or circular arc on the lateral surface. Parameter combinations for defining the center of the pattern and the pattern positions: Center of pattern: Z, C Pattern positions: W and Q Wi and Q If the Final point XE has not been defined, the drilling/milling cycle or the figure definition of the next NC block is used as a reference. Using this principle, you can combine pattern definitions with drilling cycles (G71, G74, G36) or milling cycles (figure definitions with G314, G315, G317). Parameters Z Center of pattern in polar coordinates C Angle (center point of pattern in polar coordinates) XS Starting point of drilling/milling operation (diameter value) XE Final point of drilling/milling operation (diameter value) K (Pattern) diameter A Starting angle (position of first hole/figure) W Final angle (position of last hole/figure) Wi Final angle (angle increment), distance to the next position Q Number of holes/figures—(default: 1) V Rotation direction (default: 0) V=0, without W: Figures are arranged on a full circle V=0, with W: Figures are arranged on the longer circular arc V=0, with Wi: The algebraic sign of Wi defines the direction (Wi<0: clockwise) V=1, with W: Clockwise V=1, with Wi: Clockwise (algebraic sign of Wi has no effect) V=2, with W: Counterclockwise V=2, with Wi: Counterclockwise (algebraic sign of Wi has no effect) Beispiel: G746 %746.nc [G746] N1 T6 G197 S1200 G195 F0.2 M104 N2 M14 N3 G110 C0 N4 G0 X110 Z2 N5 G746 Z-40 C0 K40 Q8 N6 G71 XS102 K7 N7 M15 END Beispiel: Sequence of commands [Simple drilling pattern] N.. G746 Z.. C.. XS.. XE.. K.. A.. W.. Q.. ... [Drilling pattern with deep-hole drilling] N.. G746 Z.. C.. XS.. K.. A.. W.. Q.. N.. G74 XE.. P.. I.. ... [Milling pattern with linear slot] N.. G746 Z.. C.. XS.. K.. A.. W.. Q.. N.. G792 K.. A.. XS.. ... HEIDENHAIN MANUALplus 620, CNC PILOT 640 337 4.22 Drilling cycles Thread milling, axial G799 G799 mills a thread in existing holes. Place the tool on the center of the hole before calling G799. The cycle positions the tool on the end point of the thread within the hole. Then the tool approaches on "approaching radius R" and mills the thread. During this, the tool advances by the thread pitch F. Following that, the cycle retracts the tool and returns it to the starting point. With parameter V, you can program whether the thread is to be milled in one rotation or, with single-point tools, in several rotations. Parameters I Thread diameter Z Starting point Z K Thread depth R Approach radius F Thread pitch J Direction of thread (default: 0) H 0: Right-hand thread 1: Left-hand thread Cutting direction (default: 0) V 0: Up-cut milling 1: Climb milling Milling method 0: The thread is milled in a 360-degree helix 1: The thread is milled in several helical paths (single-point tool) Use thread-milling tools for cycle G799. Beispiel: G799 %799.nc Danger of collision! [G799] Be sure to consider the hole diameter and the diameter of the milling cutter when programming "approach radius R." N1 T9 G195 F0.2 G197 S800 N2 G0 X100 Z2 N3 M14 N4 G110 Z2 C45 X100 N5 G799 I12 Z0 K-20 F2 J0 H0 N6 M15 END 338 DIN Programming 4.23 C-axis commands 4.23 C-axis commands Reference diameter G120 G120 determines the reference diameter of the unrolled lateral surface. Program G120 if you use CY for G110 to G113. G120 is a modal function. Parameters X Diameter Beispiel: G120 ... N1 T7 G197 S1200 G195 F0.2 M104 N2 M14 N3 G120 X100 [reference diameter] N4 G110 C0 N5 G0 X110 Z5 N6 G41 Q2 H0 N7 G110 Z-20 CY0 N8 G111 Z-40 N9 G113 CY39.2699 K-40 J19.635 N10 G111 Z-20 N11 G113 CY0 K-20 J19.635 N12 G40 N13 G110 X105 N14 M15 ... Zero point shift, C axis G152 G152 defines an absolute zero point for the C axis (reference: reference point, C axis). The zero point is valid until the end of the program. Parameters C Angle: Spindle position of the new C-axis zero point Beispiel: G152 ... N1 M5 N2 T7 G197 S1010 G193 F0.08 M104 N3 M14 N4 G152 C30 [zero point of C axis] N5 G110 C0 N6 G0 X122 Z-50 N7 G71 X100 N8 M15 ... HEIDENHAIN MANUALplus 620, CNC PILOT 640 339 4.23 C-axis commands Standardize C axis G153 G153 resets a traverse angle >360° or <0° to the corresponding angle modulo 360°—without moving the C axis. G153 is only used for lateral-surface machining. An automatic modulo 360° function is carried out on the face. 340 DIN Programming 4.24 Front/rear-face machining 4.24 Front/rear-face machining Rapid traverse on front/rear face G100 G100 moves at rapid traverse along the shortest path to the end point. Parameters X End point (diameter) C End angle—for angle direction, see graphic support window XK End point (Cartesian) YK End point (Cartesian) Z End point (default: current Z position) Programming: X, C, XK, YK, Z: Absolute, incremental or modal Program either X–C or XK–YK Danger of collision! During G100 the tool moves on a linear path. To position the workpiece to a defined angle, use G110. Beispiel: G100 ... N1 T7 G197 S1200 G195 F0.2 M104 N2 M14 N3 G110 C0 N4 G0 X100 Z2 N6 G100 XK20 YK5 [rapid traverse on face] N7 G101 XK50 N8 G103 XK5 YK50 R50 N9 G101 XK5 YK20 N10 G102 XK20 YK5 R20 N11 G14 N12 M15 ... HEIDENHAIN MANUALplus 620, CNC PILOT 640 341 4.24 Front/rear-face machining Line segment on front/rear face G101 G101 moves the tool on a linear path at the feed rate to the "end point." Parameters X End point (diameter) C End angle—for angle direction, see graphic support window XK End point (Cartesian) YK End point (Cartesian) Z End point (default: current Z position) Parameters for contour description (G80) AN Angle to positive XK axis BR Chamfer/rounding. Defines the transition to the next contour element. When entering a chamfer/rounding, program the theoretical end point. Q No input: Tangential transition BR=0: No tangential transition BR>0: Radius of rounding BR<0: Width of chamfer Point of intersection. End point if the line segment intersects a circular arc (default: 0): Q=0: Near point of intersection Q=1: Far point of intersection Beispiel: G101 ... N1 T70 G197 S1200 G195 F0.2 M104 N2 M14 N3 G110 C0 N4 G0 X110 Z2 Programming: N5 G100 XK50 YK0 X, C, XK, YK, Z: Absolute, incremental or modal Program either X–C or XK–YK N6 G1 Z-5 N7 G42 Q1 N8 G101 XK40 [linear path on face] Using the parameters AN, BR and Q is only allowed if the contour description is concluded by G80 and used for a cycle. N9 G101 YK30 N10 G103 XK30 YK40 R10 N11 G101 XK-30 N12 G103 XK-40 YK30 R10 N13 G101 YK-30 N14 G103 XK-30 YK-40 R10 N15 G101 XK30 N16 G103 XK40 YK-30 R10 N17 G101 YK0 N18 G100 XK110 G40 N19 G0 X120 Z50 N20 M15 ... 342 DIN Programming 4.24 Front/rear-face machining Circular arc on front/rear face G102/G103 G102/G103 moves the tool in a circular arc at the feed rate to the "end point." The direction of rotation is shown in the graphic support window. Parameters X End point (diameter) C End angle—for angle direction, see graphic support window XK End point (Cartesian) YK End point (Cartesian) R Radius I Center point (Cartesian) J Center point (Cartesian) K Center point for H=2, 3 (Z direction) Z End point (default: current Z position) H Circular plane (working plane)—(default: 0) H=0, 1: Machining in XY plane (front face) H=2: Machining in YZ plane H=3: Machining in XZ plane Parameters for contour description (G80) AN Angle to positive XK axis BR Chamfer/rounding. Defines the transition to the next contour element. When entering a chamfer/rounding, program the theoretical end point. Q No input: Tangential transition BR=0: No tangential transition BR>0: Radius of rounding BR<0: Width of chamfer Point of intersection. End point if the line segment intersects a circular arc (default: 0): Q=0: Near point of intersection Q=1: Far point of intersection Beispiel: G102, G103 ... N1 T7 G197 S1200 G195 F0.2 M104 N2 M14 Using the parameters AN, BR and Q is only allowed if the contour description is concluded by G80 and used for a cycle. N3 G110 C0 N4 G0 X100 Z2 N6 G100 XK20 YK5 N7 G101 XK50 N8 G103 XK5 YK50 R50 [circular arc] N9 G101 XK5 YK20 N10 G102 XK20 YK5 R20 N12 M15 ... HEIDENHAIN MANUALplus 620, CNC PILOT 640 343 4.24 Front/rear-face machining If you program H=2 or H=3, you can machine linear slots with a circular base. If H=2: Define the circle center with I and K. H=3: Define the circle center with J and K. Programming: X, C, XK, YK, Z: Absolute, incremental or modal I, J, K: Absolute or incremental Program either X–C or XK–YK Program either center or radius For radius: Only arcs <= 180° are possible End point in the coordinate origin: Program XK=0 and YK=0. 344 DIN Programming 4.25 Lateral surface machining 4.25 Lateral surface machining Rapid traverse, lateral surface G110 G110 moves at rapid traverse along the shortest path to the end point. G110 is recommended for positioning the C axis to a defined angle (programming: N.. G110 C...). Parameters Z End point C End angle CY End point as linear value (reference: unrolled reference diameter G120) X End point (diameter) Programming: Z, C, CY: Absolute, incremental, or modal Program either Z–C or Z–CY Beispiel: G110 ... N1 T8 G197 S1200 G195 F0.2 M104 N2 M14 N3 G120 X100 N4 G110 C0 [rapid, lateral surface] N5 G0 X110 Z5 N6 G110 Z-20 CY0 N7 G111 Z-40 N8 G113 CY39.2699 K-40 J19.635 N9 G111 Z-20 N10 G113 CY0 K-20 J19.635 N11 M15 ... HEIDENHAIN MANUALplus 620, CNC PILOT 640 345 4.25 Lateral surface machining Line segment on lateral surface G111 G111 moves the tool on a linear path at the feed rate to the "end point." Parameters Z End point C End angle—for angle direction, see graphic support window CY End point as linear value (reference: unrolled reference diameter G120) X End point (diameter value)—(default: current X position) Parameters for contour description (G80) AN Angle to positive Z axis BR Chamfer/rounding. Defines the transition to the next contour element. When entering a chamfer/rounding, program the theoretical end point. Q No input: Tangential transition BR=0: No tangential transition BR>0: Radius of rounding BR<0: Width of chamfer Point of intersection. End point if the line segment intersects a circular arc (default: 0): Q=0: Near point of intersection Q=1: Far point of intersection Using the parameters AN, BR and Q is only allowed if the contour description is concluded by G80 and used for a cycle. Beispiel: G111 ... [G111, G120] N1 T8 G197 S1200 G195 F0.2 M104 N2 M14 N3 G120 X100 N4 G110 C0 N5 G0 X110 Z5 N6 G41 Q2 H0 N7 G110 Z-20 CY0 Programming: Z, C, CY: Absolute, incremental, or modal Program either Z–C or Z–CY N8 G111 Z-40 [linear path on lateral surface] N9 G113 CY39.2699 K-40 J19.635 N10 G111 Z-20 N11 G113 CY0 K-20 J19.635 N12 G40 N13 G110 X105 N14 M15 ... 346 DIN Programming 4.25 Lateral surface machining Circular arc on lateral surface G112/G113 G112/G113 moves the tool in a circular arc at the feed rate to the "end point." Parameters Z End point C End angle—for angle direction, see graphic support window CY End point as linear value (reference: unrolled reference diameter G120) R Radius K Center J Center point as linear value (referenced to unrolled G120 reference diameter) W Center of angle (for angle direction, see graphic support window) X End point (diameter value)—(default: current X position) Parameters for contour description (G80) AN Angle to positive Z axis BR Chamfer/rounding. Defines the transition to the next contour element. When entering a chamfer/rounding, program the theoretical end point. Q No input: Tangential transition BR=0: No tangential transition BR>0: Radius of rounding BR<0: Width of chamfer Point of intersection. End point if the line segment intersects a circular arc (default: 0): Q=0: Near point of intersection Q=1: Far point of intersection Beispiel: G112, G113 Using the parameters AN, BR and Q is only allowed if the contour description is concluded by G80 and used for a cycle. ... N1 T8 G197 S1200 G195 F0.2 M104 N2 M14 Programming: N3 G120 X100 Z, C, CY: Absolute, incremental, or modal K, W, J: Absolute or incremental Program either Z–C or Z–CY and K–J Program either center or radius For radius: Only arcs <= 180° are possible N4 G110 C0 N5 G0 X110 Z5 N7 G110 Z-20 CY0 N8 G111 Z-40 N9 G113 CY39.2699 K-40 J19.635 [circular arc] N10 G111 Z-20 N11 G112 CY0 K-20 J19.635 N13 M15 HEIDENHAIN MANUALplus 620, CNC PILOT 640 347 4.26 Milling cycles 4.26 Milling cycles Overview of milling cycles G791 Linear slot on the face. The position and length of the slot are defined directly in the cycle; slot width = cutter diameter: Page 349 G792 Linear slot on the lateral surface. The position and length of the slot are defined directly in the cycle; slot width = cutter diameter: Page 350 G793 Contour and figure milling cycle on the face. The contour is described directly after the cycle and concluded by G80 (compatibility cycle MANUALplus 4110): Page 351 G794 Contour and figure milling cycle on the lateral surface. The contour is described directly after the cycle and concluded by G80 (compatibility cycle MANUALplus 4110): Page 353 G797 Face milling. Mills figures (circles, polygons, individual surfaces, contours) as islands on the face: Page 355 G798 Helical slot milling. Mills a helical slot on the lateral surface; slot width = cutter diameter: Page 357 G840 Contour milling. Mills ICP contours and figures. Closed contours are machined inside/outside of the contour, or on the contour. Open contours are machined from the left/right of the contour, or on the contour. G840 is used on the face and lateral surface: Page 358 G845 Pocket milling—roughing. Roughs out closed ICP contours and figures on the face and lateral surface: Page 368 G846 Pocket milling—finishing. Finishes closed ICP contours and figures on the face and lateral surface: Page 374 Contour definitions in the MACHINING section (figures) Face G301 Linear slot: Page 234 G302/G303 Circular slot: Page 234 G304 Full circle: Page 235 G305 Rectangle: Page 235 G307 Eccentric polygon: Page 236 Lateral surface G311 Linear slot: Page 243 G312/G313 Circular slot: Page 243 G314 Full circle: Page 244 G315 Rectangle: Page 244 G317 Eccentric polygon: Page 245 348 DIN Programming 4.26 Milling cycles Linear slot on face G791 G791 mills a slot from the current tool position to the end point. The slot width equals the diameter of the milling cutter. Oversizes are not taken into account. Parameters X Final point of slot in polar coordinates (diameter) C Final angle. Final point of slot in polar coordinates (for angle direction, see help graphic) XK Final point of slot (Cartesian) YK Final point of slot (Cartesian) K Slot length referenced to center of cutter A Slot angle (reference: see help graphic) ZE Milling floor ZS Milling top edge J Milling depth P F J>0: Infeed direction –Z J<0: Infeed direction +Z Maximum approach (default: total depth in one infeed) Approach feed (infeed rate) (default: active feed rate) Parameter combinations for definition of the end point: see help graphic Parameter combinations for definition of the milling plane: Milling floor ZE, milling top edge ZS Milling floor ZE, milling depth J Milling top edge ZS, milling depth J Milling floor ZE Rotate the spindle to the desired angle position before calling G791. If you use a spindle positioning device (no C axis), an axial slot is machined centrically to the rotary axis. If J or ZS is defined, the tool approaches to safety clearance in Z and then mills the slot. If J and ZS are not defined, the milling cycle starts from the current tool position. Beispiel: G791 %791.nc [G791] N1 T7 G197 S1200 G195 F0.2 M104 N2 M14 N3 G110 C0 N4 G0 X100 Z2 N5 G100 XK20 YK5 N6 G791 XK30 YK5 ZE-5 J5 P2 N7 M15 END HEIDENHAIN MANUALplus 620, CNC PILOT 640 349 4.26 Milling cycles Linear slot on lateral surface G792 G792 mills a slot from the current tool position to the end point. The slot width equals the diameter of the milling cutter. Oversizes are not taken into account. Parameters Z Final point of slot C Final angle. Final point of slot (for angle direction, see help graphic) K Slot length referenced to center of cutter A Slot angle (reference: see help graphic) XE Milling floor XS Milling top edge J Milling depth P F J>0: Infeed direction –X J<0: Infeed direction +X Maximum approach (default: total depth in one infeed) Approach feed (infeed rate) (default: active feed rate) Parameter combinations for definition of the end point: see help graphic Parameter combinations for definition of the milling plane: Milling floor XE, milling top edge XS Milling floor XE, milling depth J Milling top edge XS, milling depth J Milling floor XE Rotate the spindle to the desired angle position before calling G792. If you use a spindle positioning device (no C axis), a radial slot is machined parallel to the Z axis. If J or XS is defined, the tool approaches to safety clearance in X and then mills the slot. If J and XS are not defined, the milling cycle starts from the current tool position. Beispiel: G792 %792.nc [G792] N1 T8 G197 S1200 G195 F0.2 M104 N2 M14 N3 G110 C0 N4 G0 X110 Z5 N5 G0 X102 Z-30 N6 G792 K25 A45 XE97 J3 P2 F0.15 N7 M15 END 350 DIN Programming 4.26 Milling cycles Contour and figure milling cycle, face G793 G793 mills figures or (open or closed) "free" contours. G793 is followed by: The figure to be milled with: Contour definition of the figure (G301 to G307)—See "Front and rear face contours" on page 230. Conclusion of milling contour (G80) The free contour with: Starting point of milling contour (G100) Milling contour (G101, G102, G103) Conclusion of milling contour (G80) Preferentially use ICP and the G840, G845 and G846 cycles to program the contour description in the geometry section. Parameters ZS Milling top edge ZE Milling floor P Maximum approach (default: total depth in one infeed) U Overlap factor—contour milling or pocket milling (default: 0) R I K F E H U=0: Contour milling U>0: Pocket milling—minimum overlap of milling paths = U*milling diameter Approach radius (radius of approaching/departing arc)— (default: 0) R=0: Contour element is approached directly; infeed to starting point above the milling plane—then vertical plunge R>0: Tool moves on approaching/departing arc that connects tangentially to the contour element R<0 for inside corners: Tool moves on approaching/ departing arc that connects tangentially to the contour element R<0 for outside corners: Length of linear approaching/ departing element; contour element is approached/departed tangentially Contour-parallel oversize Oversize Z Infeed rate Reduced feed rate for circular elements (default: current feed rate) Cutting direction (default: 0): The cutting direction can be changed with H and the direction of tool rotation. 0: Up-cut milling 1: Climb milling HEIDENHAIN MANUALplus 620, CNC PILOT 640 351 4.26 Milling cycles Parameters Q Cycle type (default: 0): Depending on U, the following applies: Contour milling (U=0) Q=0: Center of milling cutter on the contour Q=1, closed contour: Inside milling Q=1, open contour: Left in machining direction Q=2, closed contour: Outside milling Q=2, open contour: Right in machining direction Q=3, open contour: Milling location depends on "H" and the direction of tool rotation—see help graphic O Pocket milling (U>0) Q=0: From the inside toward the outside Q=1: From the outside toward the inside Roughing/finishing 0: Roughing. With each infeed, the complete surface is machined. 1: Finishing. The surface is machined with the last infeed. In all previous infeeds, the cycle machines only the contour. Milling depth: The cycle calculates the depth from the Milling top edge and the Milling floor—taking the oversizes into account. Milling cutter radius compensation: Effective (except for contour milling with Q=0). Approach and departure: For closed contours, the point of the surface normal from the tool position to the first contour element is the point of approach and departure. If no surface normal intersects the tool position, the starting point of the first element is the point of approach and departure. For contour milling and finishing (pocket milling), define with the Approach radius whether the tool is to approach directly or in an arc. G57/G58 oversizes are taken into account if the Oversizes I, K are not programmed: G57: Oversize in X and Z direction G58: The oversize "shifts" the milling contour as follows: – With inside milling and closed contour: The contour is contracted – With outside milling and closed contour: The contour is expanded – With open contour and Q=1: Left in machining direction – With open contour and Q=2: Right in machining direction 352 DIN Programming 4.26 Milling cycles Contour and figure milling cycle, lateral surface G794 G794 mills figures or (open or closed) "free" contours. G794 is followed by: The figure to be milled with: Contour definition of the figure (G311 to G317)—See "Lateral surface contours" on page 239. Conclusion of contour definition (G80) The free contour with: Starting point (G110) Contour definition (G111, G112, G113) Conclusion of contour definition (G80) Preferentially use ICP and the G840, G845 and G846 cycles to program the contour description in the geometry section. Parameters XS Milling top edge (diameter value) XE Milling floor (diameter value) P Maximum approach (default: total depth in one infeed) U Overlap factor—contour milling or pocket milling (default: 0) R I K F E H U=0: Contour milling U>0: Pocket milling—minimum overlap of milling paths = U*milling diameter Approach radius (radius of approaching/departing arc)— (default: 0) R=0: Contour element is approached directly; infeed to starting point above the milling plane—then vertical plunge R>0: Tool moves on approaching/departing arc that connects tangentially to the contour element R<0 for inside corners: Tool moves on approaching/ departing arc that connects tangentially to the contour element R<0 for outside corners: Length of linear approaching/ departing element; contour element is approached/departed tangentially Oversize X Contour-parallel oversize Infeed rate Reduced feed rate for circular elements (default: current feed rate) Cutting direction (default: 0): The cutting direction can be changed with H and the direction of tool rotation. 0: Up-cut milling 1: Climb milling HEIDENHAIN MANUALplus 620, CNC PILOT 640 Beispiel: G794 %314_G315.nc [G314 / G315] N1 T7 G197 S1200 G195 F0.2 M104 N2 M14 N3 G110 C0 N4 G0 X110 Z5 N5 G794 XS100 XE97 P2 U0.5 R0 K0.5 F0.15 N6 G314 Z-35 C0 R20 N7 G80 N8 M15 END 353 4.26 Milling cycles Parameters Q Cycle type (default: 0): Depending on U, the following applies: Contour milling (U=0) Q=0: Center of milling cutter on the contour Q=1, closed contour: Inside milling Q=1, open contour: Left in machining direction Q=2, closed contour: Outside milling Q=2, open contour: Right in machining direction Q=3, open contour: Milling location depends on "H" and the direction of tool rotation—see help graphic O Pocket milling (U>0) Q=0: From the inside toward the outside Q=1: From the outside toward the inside Roughing/finishing 0: Roughing. With each infeed, the complete surface is machined. 1: Finishing. The surface is machined with the last infeed. In all previous infeeds, the cycle machines only the contour. Milling depth: The cycle calculates the milling depth from the Milling top edge and the Milling floor— taking the oversizes into account. Milling cutter radius compensation: Effective (except for contour milling with Q=0). Approach and departure: For closed contours, the point of the surface normal from the tool position to the first contour element is the point of approach and departure. If no surface normal intersects the tool position, the starting point of the first element is the point of approach and departure. For contour milling and finishing (pocket milling), define with the Approach radius whether the tool is to approach directly or in an arc. G57/G58 oversizes are taken into account if the Oversizes I, K are not programmed: G57: Oversize in X and Z direction G58: The oversize "shifts" the milling contour as follows: – With inside milling and closed contour: The contour is contracted – With outside milling and closed contour: The contour is expanded – With open contour and Q=1: Left in machining direction – With open contour and Q=2: Right in machining direction 354 DIN Programming 4.26 Milling cycles Area milling, face G797 Depending on Q, G797 mills surfaces, a polygon, or the figure defined in the command following G797. Parameters ID Milling contour—name of the contour to be milled NS Block number—beginning of contour section X ZS ZE B V R A Q P U I K F E H Figures: Block number of the figure Free closed contour: First contour element (not starting point) Limit diameter Milling top edge Milling floor Width across flats (omit for Q=0): B defines the remaining material. For an even number of surfaces, you can program B as an alternative to V. Q=1: B=residual depth Q>=2: B=width across flats Edge length (omitted for Q=0) Chamfer/rounding Inclination angle (reference: see help graphic)—omitted for Q=0 Number of surfaces (default: 0): Range: 0 <= Q <= 127 Q=0: G797 is followed by a figure definition (G301.. G307, G80) or a closed contour definition (G100, G101 to G103, G80) Q=1: One surface Q=2: Two surfaces offset by 180° Q=3: Triangle Q=4: Rectangle, square Q>4: Polygon Maximum approach (default: total depth in one infeed) Overlap factor (default: 0.5): Minimum overlap of milling paths = U*milling diameter Contour-parallel oversize Oversize Z Infeed rate Reduced feed rate for circular elements (default: current feed rate) Cutting direction (default: 0): The cutting direction can be changed with H and the direction of tool rotation (see help graphic) 0: Up-cut milling 1: Climb milling HEIDENHAIN MANUALplus 620, CNC PILOT 640 355 4.26 Milling cycles Beispiel: G797 Parameters O Roughing/finishing J 0: Roughing. With each infeed, the complete surface is machined. 1: Finishing. The surface is machined with the last infeed. In all previous infeeds, the cycle machines only the contour. Milling direction. For polygons without chamfers/rounding arcs, J defines whether a unidirectional or bidirectional milling operation is to be executed (see help graphic). 0: Unidirectional 1: Bidirectional Programming notes: The cycle calculates the milling depth from ZS and ZE, taking the oversizes into account. Surfaces and figures defined with G797 (Q>0) are symmetric with respect to the center. A figure defined in the following command can be outside the center. G797 Q0 .. is followed by: %797.nc [G797] N1 T9 G197 S1200 G195 F0.2 M104 N2 M14 N3 G110 C0 N4 G0 X100 Z2 N5 G797 X100 Z0 ZE-5 B50 R2 A0 Q4 P2 U0.5 N6 G100 Z2 N7 M15 END Beispiel: G797/G304 %304_G305.nc [G304] N1 T7 G197 S1200 G195 F0.2 M104 The figure to be milled with: Contour definition of the figure (G301 to G307)—See "Front and rear face contours" on page 230. Conclusion of milling contour (G80) N2 M14 The free contour with: Starting point of milling contour (G100) Milling contour (G101, G102, G103) Conclusion of milling contour (G80) N6 G304 XK20 YK5 R20 N3 G110 C0 N4 G0 X100 Z2 N5 G797 X100 ZS0 ZE-5 Q0 P2 F0.15 N7 G80 N4 G0 X100 Z2 N5 G797 X100 ZS0 ZE-5 Q0 P2 F0.15 N6 G305 XK20 YK5 R6 B30 K45 A20 N7 G80 N8 M15 END 356 DIN Programming 4.26 Milling cycles Helical-slot milling G798 G798 mills a helical slot from the current tool position to the Final point X, Z. The slot width equals the diameter of the milling cutter. Parameters X Final point (diameter value)—(default: current X position) Z Final point of slot C Starting angle F Thread pitch: P K U I E D F positive: Right-hand thread F negative: Left-hand thread Slop. length (run-in length)—ramp at the beginning of the slot (default: 0) End. length (run-out length)—ramp at the end of the slot (default: 0) Thread depth Maximum approach (default: total depth in one infeed) Reduction value for infeed reduction (default: 1) No. of gears (threads per unit) Infeeds: Infeed I is used for the first infeed movement. The Steuerung calculates all subsequent infeed movements as follows: Current infeed = I * (1 – (n–1) * E) (n: nth infeed) The infeed movement is reduced down to >= 0.5 mm. Following that, each infeed movement will amount to 0.5 mm. You can mill a helical slot only from the outside. Beispiel: G798 %798.nc [G798] N1 T9 G197 S1200 G195 F0.2 M104 N2 M14 N3 G110 C0 N4 G0 X80 Z15 N5 G798 X80 Z-120 C0 F20 K20 U5 I1 N6 G100 Z2 N7 M15 END HEIDENHAIN MANUALplus 620, CNC PILOT 640 357 4.26 Milling cycles Contour milling G840 G840—Fundamentals G840 mills or deburrs open or closed contours (figures or "free contours"). Plunge strategies: Depending on the cutter you are using, select one of the following strategies: Vertical plunge: The cycle moves the tool to the starting point; the tool plunges and mills the contour. Calculate positions, predrill, mill. The machining process is performed in the following steps: Insert drill. Calculate hole positions with "G840 A1 ..". Predrill with "G71 NF .." Call cycle "G840 A0 ..". The cycle positions the tool above the hole; the tool plunges and mills the contour. Predrilling, milling. The machining process is performed in the following steps: Predrill with "G71 .." Position the cutter above the hole. Call cycle "G840 A0 ..". The cycle plunges and mills the contour or contour section. If the milling contour consists of multiple sections, G840 takes all the sections of the contour into account for predrilling and milling. Call "G840 A0 .." separately for each section when calculating the hole positions without "G840 A1 ..". Oversize: A G58 oversize "shifts" the contour to be milled in the direction given in cycle type Q. With inside milling and closed contour: Shifted inward With outside milling and closed contour: Shifted outward Open contour: Shifts to the left or right depending on Q If Q=0, oversizes are not taken into account. G57 and negative G58 oversizes are not taken into account. 358 DIN Programming 4.26 Milling cycles G840—Calculating hole positions "G840 A1 .." calculates the hole positions and stores them at the reference specified in "NF." Program only the parameters given in the following table. See also: G840—Fundamentals: Page 358 G840—Milling: Page 361 Parameters—Calculating hole positions Q Cycle type (= milling location) Open contour. If there is any overlapping, Q defines whether the first section (as of starting point) or the entire contour is to be machined. Q=0: Center of milling cutter on the contour (hole position = starting point) Q=1: Machining at the left of the contour. If there is any overlapping, only the first area of the contour is machined. Q=2: Machining at the right of the contour. If there is any overlapping, only the first area of the contour is machined. Q=3: Not allowed Q=4: Machining at the left of the contour. If there is any overlapping, the entire contour is machined. Q=5: Machining at the right of the contour. If there is any overlapping, the entire contour is machined. ID NS Closed contours Q=0: Center of milling cutter on the contour (hole position = starting point) Q=1: Inside milling Q=2: Outside milling Q=3 to 5: Not allowed Milling contour—name of the contour to be milled Contour start block number—beginning of contour section NE Figures: Block number of the figure Free closed contour: First contour element (not starting point) Open contour: First contour element (not starting point) Contour end block number—end of contour section Figures, free closed contour: No input Open contour: last contour element Contour consists of one element: No input: Machining in contour direction NS=NE programmed: Machining against the contour direction HEIDENHAIN MANUALplus 620, CNC PILOT 640 359 4.26 Milling cycles Parameters—Calculating hole positions D Starting element number for partial figures The direction of contour definition for figures is counterclockwise. The first contour element for figures: V A NF WB Circular slot: The larger arc Full circle: The upper semicircle Rectangles, polygons and linear slots: The orientation angle points to the first contour element. Ending element number for partial figures Sequence for "Calculate hole positions": A=1 Position mark—reference at which the cycle stores the hole positions [1 to 127]. Rework diameter—diameter of the milling cutter Program D and V to machine parts of a figure. The cycle takes the diameter of the active tool into account when calculating the hole positions. Therefore, you need to insert the drill before calling "G840 A1 ..". Program oversizes for calculating the hole positions and for milling. G840 overwrites any hole positions that may still be stored at the reference "NF." 360 DIN Programming 4.26 Milling cycles G840—Milling You can change the machining direction and the milling cutter radius compensation (MCRC) with the cycle type Q, the cutting direction H and the rotational direction of the tool (see table). Program only the parameters given in the following table. See also: G840—Fundamentals: Page 358 G840—Calculating hole positions: Page 359 Parameters—Milling Q Cycle type (= milling location). Open contour. If there is any overlapping, Q defines whether the first section (as of starting point) or the entire contour is to be machined. Q=0: Center of milling cutter on the contour (without MCRC) Q=1: Machining at the left of the contour. If there is any overlapping, G840 machines only the first section of the contour (starting point: 1st point of intersection). Q=2: Machining at the right of the contour. If there is any overlapping, G840 machines only the first section of the contour (starting point: 1st point of intersection). Q=3: The contour is machined to the left or right depending on H and the direction of cutter rotation (see table). If there is any overlapping, G840 machines only the first section of the contour (starting point: 1st point of intersection). Q=4: Machining at the left of the contour. If there is any overlapping, G840 machines the entire contour. Q=5: Machining at the right of the contour. If there is any overlapping, G840 machines the entire contour. ID NS Closed contours Q=0: Center of milling cutter on the contour (hole position = starting point) Q=1: Inside milling Q=2: Outside milling Q=3 to 5: Not allowed Milling contour—name of the contour to be milled Block number—beginning of contour section Figures: Block number of the figure Free open or closed contour: First contour element (not starting point) HEIDENHAIN MANUALplus 620, CNC PILOT 640 361 4.26 Milling cycles Parameters—Milling NE Block number—end of contour section H I F E R Figures, free closed contour: No input Free open contour: Last contour element Contour consists of one element: No input: Machining in contour direction NS=NE programmed: Machining against the contour direction Cutting direction (default: 0) 0: Up-cut milling 1: Climb milling (Maximum) infeed (default: milling in one infeed) Infeed rate (depth infeed)—(default: active feed rate) Reduced feed rate for circular elements (default: current feed rate) Radius of approaching/departing arc (default: 0) RB R=0: Contour element is approached directly; infeed to starting point above the milling plane, then vertical plunge. R>0: Tool moves on approaching/departing arc that connects tangentially to the contour element. R<0 for inside corners: Tool moves on approaching/ departing arc that connects tangentially to the contour element. R<0 for outside corners: Contour element is approached/ departed tangentially on a linear path Milling depth (default: depth from the contour description) Milling top edge—lateral surface (replaces the reference plane from the contour definition) Milling top edge—face (replaces the reference plane from the contour definition) Retraction plane (default: back to starting position) D V Front or rear face: Retraction position in Z direction Lateral surface: Retraction position in X direction (diameter) Starting element number when partial figures are machined. End element number when partial figures are machined. P XS ZS The direction of contour definition for figures is counterclockwise. The first contour element for figures: A NF 362 Circular slot: The larger arc Full circle: The upper semicircle Rectangles, polygons and linear slots: The orientation angle points to the first contour element. Sequence for "Milling, deburring": A=0 (default=0) Position mark—reference from which the cycle reads the hole positions [1 to 127]. DIN Programming 4.26 Milling cycles Parameters—Milling O Plunging behavior (default: 0) O=0: Vertical plunging O=1: With predrilling If NF is programmed: The cycle positions the milling cutter above the first hole position saved in NF, then plunges and mills the first section. If applicable, the cycle positions the tool to the next pre-drilled hole and mills the next section, etc. If NF is not programmed: The tool plunges at the current position and mills the section. If required, repeat this operation for the next section, etc. Approach and departure: For closed contours, the point of the surface normal from the tool position to the first contour element is the point of approach and departure. If no surface normal intersects the tool position, the starting point of the first element is the point of approach and departure. For figures, use D and V to select the approach/departure element. Cycle run for milling 1 Starting position (X, Z, C) is the position before the cycle begins. 2 Calculates the milling depth infeeds. 3 Approaches to safety clearance. 4 5 6 7 If O=0: Infeed to the first milling depth. If O=1: Plunges to the first milling depth. Mills the contour. For open contours and slots with slot width equal to the cutter diameter: Advances to the next milling depth, or plunges to the next milling depth and mills the contour in reverse direction. For closed contours and slots: Retracts by the safety clearance, returns and advances to the next milling depth, or plunges to the next milling depth. Repeats steps 4 and 5 until the complete contour is milled. Returns to retraction plane RB. HEIDENHAIN MANUALplus 620, CNC PILOT 640 363 4.26 Milling cycles You can change the machining direction and the milling cutter radius compensation (MCRC) with the cycle type Q, the cutting direction H and the rotational direction of the tool (see following table). Program only the parameters given in the following table. Contour milling G840 Cycle type Cutting direction Direction of tool rotation MCRC Direction of tool rotation MCRC Contour (Q=0) – Mx03 Up-cut milling (H=0) Mx04 Left Contour – Outside Climb milling (H=1) Mx03 Left Contour – Outside Climb milling (H=1) Mx04 Right Mx04 – Contour (Q=0) – Mx03 – Up-cut milling (H=0) Mx03 Right Contour – Mx04 – Inside Up-cut milling (H=0) Mx04 Left Right (Q=3) Up-cut milling (H=0) Mx03 Right Inside Climb milling (H=1) Mx03 Left Left (Q=3) Up-cut milling (H=0) Mx04 Left Inside Climb milling (H=1) Mx04 Right Left (Q=3) Climb milling (H=1) Mx03 Left Outside (Q=2) Up-cut milling (H=0) Mx03 Right Right (Q=3) Climb milling (H=1) Mx04 Right Cycle type Cutting direction – Outside Mx03 – – Mx04 Contour – Inside (Q=1) 364 Execution Execution DIN Programming 4.26 Milling cycles G840—Deburring G840 deburrs when you program chamfer width B. If there is any overlapping of the contour, specify with cycle type Q whether the first section (as of starting point) or the entire contour is to be machined. Program only the parameters given in the following table. Parameters—Deburring Q Cycle type (= milling location). Open contour. If there is any overlapping, Q defines whether the first section (as of starting point) or the entire contour is to be machined. Q=0: Center of milling cutter on the contour (without MCRC) Q=1: Machining at the left of the contour. If there is any overlapping, G840 machines only the first section of the contour (starting point: 1st point of intersection). Q=2: Machining at the right of the contour. If there is any overlapping, G840 machines only the first section of the contour (starting point: 1st point of intersection). Q=3: The contour is machined to the left or right depending on H and the direction of cutter rotation (see table). If there is any overlapping, G840 machines only the first section of the contour (starting point: 1st point of intersection). Q=4: Machining at the left of the contour. If there is any overlapping, G840 machines the entire contour. Q=5: Machining at the right of the contour. If there is any overlapping, G840 machines the entire contour. ID NS Closed contours Q=0: Center of milling cutter on the contour (hole position = starting point) Q=1: Inside milling Q=2: Outside milling Q=3 to 5: Not allowed Milling contour—name of the contour to be milled Block number—beginning of contour section NE Figures: Block number of the figure Free open or closed contour: First contour element (not starting point) Block number—end of contour section E Figures, free closed contour: No input Free open contour: Last contour element Contour consists of one element: No input: Machining in contour direction NS=NE programmed: Machining against the contour direction Reduced feed rate for circular elements (default: current feed rate) HEIDENHAIN MANUALplus 620, CNC PILOT 640 365 4.26 Milling cycles Parameters—Deburring R Radius of approaching/departing arc (default: 0) P XS ZS RB B J R=0: Contour element is approached directly; infeed to starting point above the milling plane, then vertical plunge. R>0: Tool moves on approaching/departing arc that connects tangentially to the contour element. R<0 for inside corners: Tool moves on approaching/ departing arc that connects tangentially to the contour element. R<0 for outside corners: Contour element is approached/ departed tangentially on a linear path Milling depth (indicated as a negative value) Milling top edge—lateral surface (replaces the reference plane from the contour definition) Milling top edge—face (replaces the reference plane from the contour definition) Retraction plane (default: back to starting position) Front or rear face: Retraction position in Z direction Lateral surface: Retraction position in X direction (diameter) Chamfer width when deburring the edges Preparation diameter. For open contours, the contour to be deburred is calculated from the programmed contour and J. Remember that: D V J programmed: The cycle deburrs both sides of the slot (see 1 in the illustration). J not programmed: The deburring tool is so wide that both sides of the slot are deburred in one pass (see 2 in the illustration). Starting element number when partial figures are machined. End element number when partial figures are machined. The direction of contour definition for figures is counterclockwise. The first contour element for figures: A 366 Circular slot: The larger arc Full circle: The upper semicircle Rectangles, polygons and linear slots: The orientation angle points to the first contour element. Sequence for "Milling, deburring": A=0 (default=0) DIN Programming 4.26 Milling cycles Approach and departure: For closed contours, the point of the surface normal from the tool position to the first contour element is the point of approach and departure. If no surface normal intersects the tool position, the starting point of the first element is the point of approach and departure. For figures, use D and V to select the approach/departure element. Cycle run for deburring 1 Starting position (X, Z, C) is the position before the cycle begins. 2 Moves to the safety clearance and infeed to the first milling depth. 3 J not programmed: Mills the programmed contour. J programmed, open contour: Calculates and mills the "new" contour. 4 Returns to retraction plane RB. HEIDENHAIN MANUALplus 620, CNC PILOT 640 367 4.26 Milling cycles Pocket milling, roughing G845 G840—Fundamentals G845 roughs closed contours. Choose one of the following plunge strategies, depending on the milling cutter you are using: Plunge vertically Plunge at a pre-drilled position Plunge in a reciprocating or helical motion When "plunging at a pre-drilled position," you have the following alternatives: Calculate positions, drill, mill. The machining process is performed in the following steps: Insert drill. Calculate hole positions with "G845 A1 ..." Predrill with "G71 NF .." Call cycle "G845 A0 ..." The cycle positions the tool above the hole; the tool plunges and mills the pocket. Drill, mill. The machining process is performed in the following steps: Drill a hole inside the pocket with "G71 ..." Position the milling cutter above the hole and call "G845 A0 ..." The tool plunges and mills the section. If the pocket consists of multiple sections, G845 takes all the sections of the pocket into account for drilling and milling. Call "G845 A0 .." separately for each section when calculating the hole positions without "G845 A1 ..". G845 takes the following oversizes into account: G57: Oversize in X and Z direction G58: Equidistant oversize in the milling plane Program oversizes for calculating the hole positions and for milling. 368 DIN Programming 4.26 Milling cycles G845—Calculating hole positions "G845 A1 .." calculates the hole positions and stores them at the reference specified in "NF." The cycle takes the diameter of the active tool into account when calculating the hole positions. Therefore, you need to insert the drill before calling "G845 A1 ..". Program only the parameters given in the following table. See also: G845—Fundamentals: Page 368 G845—Milling: Page 370 Parameters—Calculating hole positions ID Milling contour—name of the contour to be milled NS Starting block no. of contour B XS ZS I K Q A NF WB Figures: Block number of the figure Free closed contour: A contour element (not starting point) Milling depth (default: depth from the contour description) Milling top edge—lateral surface (replaces the reference plane from the contour definition) Milling top edge—face (replaces the reference plane from the contour definition) Oversize in X direction (radius) Oversize in Z direction Machining direction (default: 0) 0: From the inside out (from the inside towards the outside) 1: From the outside in (from the outside towards the inside) Sequence for "Calculate hole positions": A=1 Position mark—reference at which the cycle stores the hole positions [1 to 127]. Plunge length—diameter of the milling cutter G845 overwrites any hole positions that may still be stored at the reference "NF." The parameter "WB" is used both for calculating the hole positions and for milling. When calculating the hole positions, "WB" describes the diameter of the milling cutter. HEIDENHAIN MANUALplus 620, CNC PILOT 640 369 4.26 Milling cycles G845—Milling You can change the milling direction with the cutting direction H, the machining direction Q and the direction of tool rotation (see following table). Program only the parameters given in the following table. See also: G845—Fundamentals: Page 368 G845—Calculating hole positions: Page 369 Parameters—Milling ID Milling contour—name of the contour to be milled NS Starting block no. of contour B P XS ZS I K U V H Figures: Block number of the figure Free closed contour: A contour element (not starting point) Milling depth (default: depth from the contour description) (Maximum) infeed (default: milling in one infeed) Milling top edge—lateral surface (replaces the reference plane from the contour definition) Milling top edge—face (replaces the reference plane from the contour definition) Oversize in X direction (radius) Oversize in Z direction (Minimum) overlap factor. Defines the overlap of milling paths (default: 0.5). Overlap = U*milling diameter Overrun factor (no effect with C-axis machining) Cutting direction (default: 0) RB 0: Up-cut milling 1: Climb milling Feed rate for infeed (default: active feed rate) Reduced feed rate for circular elements (default: current feed rate) Retraction plane (default: back to starting position) Q Front or rear face: Retraction position in Z direction Lateral surface: Retraction position in X direction (diameter) Machining direction (default: 0) F E 0: From the inside out (from the inside towards the outside) 1: From the outside in (from the outside towards the inside) 370 DIN Programming 4.26 Milling cycles Parameters—Milling A Sequence for "Milling": A=0 (default=0) NF Position mark—reference from which the cycle reads the hole positions [1 to 127]. O Plunging behavior (default: 0) O=0 (vertical plunge): The cycle moves the tool to the starting point; the tool plunges at the feed rate for infeed and mills the pocket. O=1 (plunge at pre-drilled position): If "NF" is programmed: The cycle positions the milling cutter above the first pre-drilled hole; the tool plunges and mills the first area. If applicable, the cycle positions the tool to the next pre-drilled hole and mills the next area, etc. If "NF" is not programmed: The tool plunges at the current position and mills the area. If applicable, position the tool to the next pre-drilled hole and mill the next area, etc. O=2, 3 (helical plunge): The tool plunges at the angle "W" and mills full circles with the diameter "WB." As soon as it reaches the milling depth "P," the cycle switches to face milling. O=2—manually: The cycle plunges at the current position and machines the area that can be reached from this position. O=3—automatically: The cycle calculates the plunging position, plunges and machines this area. The plunging motion ends at the starting point of the first milling path, if possible. If the pocket consists of multiple areas, the cycle successively machines all the areas. O=4, 5 (reciprocating linear plunge): The tool plunges at the angle "W" and mills a linear path of the length "WB." You can define the orientation angle in "WE." The cycle then mills along this path in the opposite direction. As soon as it reaches the milling depth "P," the cycle switches to face milling. O=4—manually: The cycle plunges at the current position and machines the area that can be reached from this position. O=5—automatically: The cycle calculates the plunging position, plunges and machines this area. The plunging motion ends at the starting point of the first milling path, if possible. If the pocket consists of multiple areas, the cycle successively machines all the areas. The plunging position is determined from the type of figure and from "Q" as follows: HEIDENHAIN MANUALplus 620, CNC PILOT 640 371 4.26 Milling cycles Parameters—Milling Q0 (from the inside toward the outside): – Linear slot, rectangle, polygon: Reference point of the figure – Circle: Circle center – Circular slot, "free" contour: Starting point of the innermost milling path Q1 (from the outside toward the inside): – Linear slot: Starting point of the slot – Circular slot, circle: Not machined – Rectangle, polygon: Starting point of the first linear element – "Free" contour: Starting point of the first linear element (at least one linear element must exist) O=6, 7 (reciprocating circular plunge): The tool plunges at the plunging angle "W" and mills a circular arc of 90°. The cycle then mills along this path in the opposite direction. As soon as it reaches the milling depth "P," the cycle switches to face milling. "WE" defines the arc center, "WB" the arc radius. W WE O=6—manually: The tool position corresponds to the center of the circular arc. The tool moves to the arc starting point and plunges. O=7—automatically (only permitted for circular slots and circles): The cycle calculates the plunging position on the basis of "Q": Q0 (from the inside toward the outside): – Circular slot: The circular arc lies on the curvature radius of the slot – Circle: Not permitted Q1 (from the outside toward the inside): Circular slot, circle: The circular arc lies on the outermost milling path Plunging angle in infeed direction Orientation angle of the milling path/circular arc. Reference axis: Front or rear face: Positive XK axis Lateral surface: Positive Z axis Default orientation angle, depending on "O": WB 372 O=4: WE=0° O=5 and Linear slot, rectangle, polygon: WE= orientation angle of the figure Circular slot, circle: WE=0° "Free" contour and Q0 (from the inside toward the outside): WE=0° "Free" contour and Q1 (from the outside toward the inside): Orientation angle of the starting element Plunge length/plunge diameter (default: 1.5 * milling diameter) DIN Programming 4.26 Milling cycles For the machining direction Q=1 (from the outside toward the inside), please note: The contour must start with a linear element. If the starting element is < WB, WB is reduced to the length of the starting element. The length of the starting element must not be less than 1.5 times the diameter of the milling cutter. Cycle run 1 Starting position (X, Z, C) is the position before the cycle begins. 2 Calculates the number of cuts (infeeds to the milling planes, infeeds in the milling depths) and the plunging positions and paths for reciprocating or helical plunges. 3 Approaches to safety clearance and, depending on O, feeds to the first milling depth or approaches helically or on a reciprocating path. 4 Mills a plane. 5 Retracts by the safety clearance, returns and cuts to the next milling depth. 6 Repeats steps 4 and 5 until the complete surface is milled. 7 Returns to retraction plane RB. You can change the milling direction with the cutting direction H, the machining direction Q and the direction of tool rotation (see following table). Program only the parameters given in the following table. Pocket milling, roughing G845 Cutting direction Machining direction Up-cut milling (H=0) From inside (Q=0) Up-cut milling (H=0) Direction of tool rotation Direction of tool rotation Cutting direction Machining direction Mx03 Climb milling (H=1) From inside (Q=0) Mx03 From inside (Q=0) Mx04 Climb milling (H=1) From inside (Q=0) Mx04 Up-cut milling (H=0) From outside (Q=1) Mx03 Climb milling (H=1) From outside (Q=1) Mx03 Up-cut milling (H=0) From outside (Q=1) Mx04 Climb milling (H=1) From outside (Q=1) Mx04 Execution HEIDENHAIN MANUALplus 620, CNC PILOT 640 Execution 373 4.26 Milling cycles Pocket milling, finishing G846 G846 finish-machines closed contours. If the pocket consists of multiple sections, G846 takes all the sections of the pocket into account. You can change the milling direction with the cutting direction H, the machining direction Q and the direction of tool rotation (see following table). Parameters—finishing ID Milling contour—name of the contour to be milled NS Starting block no. of contour B P XS ZS R U V H F E RB Figures: Block number of the figure Free closed contour: A contour element (not starting point) Milling depth (default: depth from the contour description) (Maximum) infeed (default: milling in one infeed) Milling top edge—lateral surface (replaces the reference plane from the contour definition) Milling top edge—face (replaces the reference plane from the contour definition) Radius of approaching/departing arc (default: 0) R=0: Contour element is approached directly. Feed to the starting point above the milling plane, then vertical plunge. R>0: Tool moves on approaching/departing arc that connects tangentially to the contour element. (Minimum) overlap factor. Defines the overlap of milling paths (default: 0.5). Overlap = U*milling diameter Overrun factor—no effect with C-axis machining Cutting direction (default: 0) 0: Up-cut milling 1: Climb milling Feed rate for infeed (default: active feed rate) Reduced feed rate for circular elements (default: current feed rate) Retraction plane (default: back to starting position) Front or rear face: Retraction position in Z direction Lateral surface: Retraction position in X direction (diameter) 374 DIN Programming 4.26 Milling cycles Parameters—finishing Q Machining direction (default: 0) O 0: From the inside out (from the inside towards the outside) 1: From the outside in (from the outside towards the inside) Plunging behavior (default: 0) O=0 (vertical plunge): The cycle moves the tool to the starting point; the tool plunges and finishes the pocket. O=1 (approaching arc with depth feed): When machining the upper milling planes, the tool advances to the milling plane and then approaches on an arc. When machining the bottom milling plane, the tool plunges to the milling depth while moving on the approaching arc (three-dimensional approaching arc). You can use this approach behavior only in conjunction with an approaching arc "R" and when machining from the outside toward the inside (Q=1). Cycle run 1 Starting position (X, Z, C) is the position before the cycle begins. 2 Calculates the number of cutting passes (infeeds to the milling planes, infeeds in the milling depths). 3 Moves to the safety clearance and feeds to the first milling depth. 4 Mills a plane. 5 Retracts by the safety clearance, returns and cuts to the next milling depth. 6 Repeats steps 4 and 5 until the complete surface is milled. 7 Returns to retraction plane RB. You can change the milling direction with the cutting direction H, the machining direction Q and the direction of tool rotation (see following table). Pocket milling, finishing G846 Direction of tool Cutting direction rotation Execution Cutting direction Direction of tool rotation Up-cut milling (H=0) Mx03 Climb milling (H=1) Mx03 Up-cut milling (H=0) Mx04 Climb milling (H=1) Mx04 HEIDENHAIN MANUALplus 620, CNC PILOT 640 Execution 375 4.27 Engraving cycles 4.27 Engraving cycles Character set The Steuerung can realize the characters listed in the following table. The text to be engraved is entered as a character string. Diacritics and special characters that you cannot enter in the editor can be defined, character by character, in NF. If text is defined in "ID" and a character is defined in "NF," the text is engraved before the character. NF Character NF Character Numerals, diacritics NF Character 97 a 65 A 48 0 32 98 b 66 B 49 1 37 % Per cent sign 99 c 67 C 50 2 40 ( Opening parenthesis 100 d 68 D 51 3 41 ) Closing parenthesis 101 e 69 E 52 4 43 + Plus character 102 f 70 F 53 5 44 , Comma 103 g 71 G 54 6 45 – Minus sign 104 h 72 H 55 7 46 . Point 105 i 73 I 56 8 47 / Forward slash 106 j 74 J 57 9 58 : Colon 107 k 75 K 60 < Less than character 108 l 76 L 196 Ä 61 = Equal sign 109 m 77 M 214 Ö 62 > Greater than character 110 n 78 N 220 Ü 64 @ at 111 o 79 O 223 ß 91 [ Opening brackets 112 p 80 P 228 ä 93 ] Closing brackets 113 q 81 Q 246 ö 95 _ Underscore 114 r 82 R 252 ü 8364 115 s 83 S 181 µ Micro 116 t 84 T 186 ° Degrees 117 u 85 U 215 * Multiplication sign 118 v 86 V 33 ! Exclamation point Small letters 376 Capital letters Special characters NF Character Meaning Space Euro sign DIN Programming Capital letters Numerals, diacritics NF Character Special characters NF Character Meaning NF Character NF Character 119 w 87 W 38 & Ampersand and 120 x 88 X 63 ? Question mark 121 y 89 Y 174 ® Trademark 122 z 90 Z 216 Ø Diameter sign HEIDENHAIN MANUALplus 620, CNC PILOT 640 4.27 Engraving cycles Small letters 377 4.27 Engraving cycles Engraving on front face G801 G801 engraves character strings in linear or polar layout on the front face. For character set and more information, see page 376 The cycles start engraving from the starting position or from the current position, if no starting position is defined. Example: If a character string is engraved with several calls, define the starting position in the first call. All other calls are programmed without a starting position. Parameters X, C Polar starting point XK, YK Cartesian starting point Z End point. Z position, infeed depth during milling. RB Retraction plane. Z position retracted to for positioning. ID Text to be engraved NF Character number (character to be engraved) W Inclination angle. Example: 0° = Vertical characters: the characters are aligned in sequence in positive X direction H Font height E Distance factor (for calculation see figure) V Execution D F 378 0: Linear 1: Arched above 2: Arched below Reference diameter Plunging feed rate factor (plunging feed rate = current feed rate * F) DIN Programming 4.27 Engraving cycles Engraving on lateral surface G802 G802 engraves character strings aligned linearly on the lateral surface. For character set and more information, see page 376 The cycles start engraving from the starting position or from the current position, if no starting position is defined. Example: If a character string is engraved with several calls, define the starting position in the first call. All other calls are programmed without a starting position. Parameters Z Starting point C Starting angle CY Starting point X End point (diameter). X position, infeed depth during milling. RB Retraction plane. X position retracted to for positioning. ID Text to be engraved NF Character number. ASCII code of the character to be engraved W Inclination angle H Font height E Distance factor (for calculation see figure) D Reference diameter F Plunging feed rate factor (plunging feed rate = current feed rate * F) HEIDENHAIN MANUALplus 620, CNC PILOT 640 379 4.28 Contour follow-up 4.28 Contour follow-up Automatic contour follow-up is not possible with program branches or repetitions. In these cases you control the contour follow up with the following commands. Saving/loading contour follow-up G702 G702 saves the current contour or loads a saved contour. Parameters ID Workpiece blank contour—name of the auxiliary workpiece blank Q Save/load contour H V 0: Saves the current contour. The contour follow-up is not affected. 1: Loads the specified contour. The contour follow-up is continued with the loaded contour. 2: The following cycle uses the "internal workpiece blank." Memory number (0 .. 9) The following information is saved: 0: Everything (variable contents and workpiece blank contours) 1: Variable contents 2: Workpiece blank contours G702 Q=2 switches off the global contour follow-up for the following cycle. Once the cycle has been executed, the global contour follow-up is effective again. The affected cycle uses the "internal workpiece blank." The cycle determines the internal workpiece blank from the contour and the tool position. G702 Q2 must be programmed before the cycle. Contour follow-up on/off G703 G703 is used to deactivate/reactivate the contour follow-up. Parameters Q Contour follow-up on/off 0: Off 1: On 380 DIN Programming 4.29 Other G codes 4.29 Other G codes Chucking equipment in simulation G65 G65 displays the selected chucking equipment in the simulation graphics. Parameters H No. of clamping (no. of chuck) (always program H=0) D No. of spindle—No input: X Diameter of workpiece blank Z Start point—No input Q Chuck form B P V 4: Externally clamped 5: Internally clamped Clamping length (B+P = length of blank) Free length Delete chucking equipment Workpiece blank contour G67 (for graphics) G67 displays an auxiliary workpiece blank in the simulation graphics. Parameters ID ID of auxiliary workpiece blank NS Block number of contour Period of dwell G4 With G4, the Steuerung interrupts the program run for the time F or until the revolutions on the recess floor D have been completed before executing the next program block. If G4 is programmed together with a path of traverse in the same block, the dwell time or the number of revolutions on the recess floor only become effective after the path of traverse has been executed. Parameters F Dwell time [sec] (0 < F <= 999) D Revolutions on recessing floor Precision stop G7 G7 switches precision stop on. It is a modal function. With a precision stop, the Steuerung does not run the following block until the last point has been reached in the tolerance window for position. The tolerance window is a configuration parameter ("ParameterSets PX(PZ)/CfgControllerTol/posTolerance"). Precision stop affects single paths and cycles. The NC block containing G7 is also executed with a precision stop. HEIDENHAIN MANUALplus 620, CNC PILOT 640 381 4.29 Other G codes Precision stop off G8 G8 switches precision stop off. The block containing G8 is executed without a precision stop. Precision stop G9 G9 activates a precision stop for the NC block in which it is programmed. With a precision stop, the Steuerung does not run the following block until the last point has been reached in the tolerance window for position. The tolerance window is a configuration parameter ("ParameterSets PX / PZ > CfgControllerTol > posTolerance"). Switch off protection zone G60 G60 is used to cancel protection zone monitoring. G60 is programmed before the traversing command to be monitored or not monitored. Parameters Q Activate/Deactivate 0: Activate protection zone (modal) 1: Deactivate protection zone (modal) Application example: With G60, you can temporarily deactivate a programmed monitoring of the protection zone in order to machine a centric through hole. Beispiel: G60 ... N1 T4 G97 S1000 G95 F0.3 M3 N2 G0 X0 Z5 N3 G60 Q1 [Deactivate the protection zone] N4 G71 Z-60 K65 N5 G60 Q0 [Activate the protection zone] ... Actual values in variables G901 G901 transfers the actual values of all the axes of a slide into the variables for the interpolation information. See G904 Page 383. Zero-point shift in variables G902 G902 transfers the zero-point shifts into the variables for the interpolation information. See G904 Page 383. Lag error in variables G903 G903 transfers the current following error (distance by which the actual values lags the nominal value) into the variables for the interpolation information. See G904 Page 383. 382 DIN Programming 4.29 Other G codes Read interpolation information G904 G904 transfers all the current interpolation information on the current slide to the variable memory. Interpolation information #a0(Z,1) Zero-point shift of the Z axis of slide $1 #a1(Z,1) Actual position of the Z axis of slide $1 #a2(Z,1) Nominal position of the Z axis of slide $1 #a3(Z,1) Lag error of the Z axis of slide $1 #a4(Z,1) Distance to go in the Z axis of slide $1 #a5(Z,1) Logical axis number of the Z axis of slide $1 #a5(0,1) Logical axis number of the main spindle #a6(0,1) Rotational direction of main spindle $1 #a9(Z,1) Trigger position of the touch probe #a10(Z,1) IPO axis value Interpolation information syntax Syntax: #an(axis,channel) n = number of the information axis = name of the axis channel = slide number Feed rate override 100 % G908 G908 sets the feed override for traverse paths (G0, G1, G2, G3, G12, G13) block by block to 100 %. Program G908 and the traverse path in the same NC block. Interpreter stop G909 The Steuerung pre-interprets the NC blocks. If variables are assigned shortly before the evaluation, "old values" would be processed. G909 stops the pre-interpretation. The NC blocks are processed up to G909. Only after G909, are the subsequent NC blocks processed. Apart from G909, the NC block should only contain synchronous functions. (Some G codes generate an interpreter stop.) Spindle override 100 % G919 G919 is used to deactivate/activate the spindle speed override. Parameters Q Spindle number (default: 0) H Type of limit (default: 0) 0: Activate spindle speed override 1: Spindle override at 100 %—modal 2: Spindle override at 100 %—for the current NC block HEIDENHAIN MANUALplus 620, CNC PILOT 640 383 4.29 Other G codes Deactivate zero-point shifts G920 G920 deactivates the workpiece zero point and zero-point shifts. Traverse paths and position values are referenced to the distance tool tip—machine zero point. Deactivate zero-point shifts, tool lengths G921 G921 deactivates the workpiece zero point, zero-point shifts and tool dimensions. Traverse paths and position values are referenced to the slide reference point—machine zero point. End position of tool G922 With G922 you can position the active tool to a defined angle. Parameters C Angular position for tool orientation Fluctuating spindle speed G924 To reduce resonant vibrations you can use G924 to program a changing spindle speed. In G924 you define the time interval and the range for the speed change. The G924 function is automatically reset at the end of the program. You can also deactivate the function through another call with the setting H=0 (off). Parameters Q Spindle number (machine-dependent) K Repetition rate: Time interval in hertz (repetitions per second) I Change of spindle speed H Switch on/off the G924 function 0: Off 1: On 384 DIN Programming 4.29 Other G codes Convert lengths G927 Function G927 is used to convert the tool lengths at the current tool insert angle to the initial position of the tool (reference position in B axis = 0). The results can be interrogated in the variables #n927( X), #n927( Z), and #n927( Y). Parameters H Method of conversion: 0: Convert tool length to reference position (take I + K of the tool into account) 1: Convert tool length to reference position (do not take I + K of the tool into account) 2: Convert tool length from the reference position to the current work position (take I + K of the tool into account) 3: Convert tool length from the reference position to the current work position (do not take I + K of the tool into account) X, Y, Z Axis values (X value = radius). If nothing is entered, the value 0 is used. Calculate variables automatically G940 Use G940 to convert metric values to inch values. When you create a new program you can select between metric units and inches. Internally the control always calculates with metric values. If you read out variables in an "inch" program, the variables are always output as metric values. Use G940 to convert the variables to INCH values. Parameters H Switch on/off the G940 function 0: Unit conversion active 1: Values remain metric In inch programs, a conversion is required for variables that refer to a metric unit of measurement: Machine dimensions #m1(n) Machine dimensions of an axis, e.g. #m1(X) for machine dimensions of the X axis Reading tool data #wn(NL) Usable length (inside turning and drilling tools) #wn(RS) Cutting edge radius #wn(ZD) Stud diameter #wn(DF) Cutter diameter #wn(SD) Shank diameter HEIDENHAIN MANUALplus 620, CNC PILOT 640 385 4.29 Other G codes Reading tool data #wn(SB) Cutting width #wn(AL) Length of first cut #wn(FB) Cutter width #wn(ZL) Tool setting dimension in Z #wn(XL) Tool setting dimension in X #wn(YL) Tool setting dimension in Y #wn(I) Position of tool tip center in X #wn(K) Position of tool tip center in Z #wn(ZE) Distance between tool tip and slide zero point Z #wn(XE) Distance between tool tip and slide zero point X #wn(YE) Distance between tool tip and slide zero point Y Reading the current NC information #n0(Z) Last programmed position Z #n120(X) Reference diameter X for calculating CY #n57(X) Oversize in X #n57(Z) Oversize in Z #n58(P) Equidistant oversize #n150(X) Cutting width shifted in X by G150 #n95(F) Last programmed feed rate #n47(P) Current safety clearance #n147(I) Current safety clearance in working plane #n147(K) Current safety clearance in infeed direction Internal information for defining constants __n0_x 768 Last programmed position X __n0_y 769 Last programmed position Y __n0_z 770 Last programmed position Z __n120_x 787 Reference diameter X for calculating CY __n57_x 791 Oversize in X __n57_z 792 Oversize in Z 386 DIN Programming 4.29 Other G codes Internal information for defining constants __n58_p 793 Equidistant oversize __n150_x 794 Cutting width shifted in X by G150/G151 __n150_z 795 Cutting width shifted in Z by G150/G151 __n95_f 800 Last programmed feed rate Reading interpolation information G904 #a0(Z,1) Zero-point shift of the Z axis of slide $1 #a1(Z,1) Actual position of the Z axis of slide $1 #a2(Z,1) Nominal position of the Z axis of slide $1 #a3(Z,1) Lag error of the Z axis of slide $1 #a4(Z,1) Distance to go in the Z axis of slide $1 Misalignment compensation G976 With the G976 function (misalignment compensation) you can run the following operations on tapering contours (e.g. to counter a mechanical offset). The G976 function is automatically reset at the end of the program. You can also deactivate the function through another call with the setting H=0 (off). Parameters Z Starting point K Length I Incremental distance J Incremental distance H Switch on/off the G976 function 0: Off 1: On Activate zero-point shifts G980 G980 activates the workpiece zero point and all zero-point shifts. Traverse paths and position values are referenced to the distance of the tool tip to the workpiece zero point, while taking the zero point shifts into consideration. Activate zero-point shifts, tool lengths G981 G981 activates the workpiece zero point, all zero-point shifts and the tool dimensions. Traverse paths and position values are referenced to the distance of the tool tip to the workpiece zero point, while taking the zero point shifts into consideration. HEIDENHAIN MANUALplus 620, CNC PILOT 640 387 4.29 Other G codes Monitoring zone G995 G995 defines the monitoring zone and the axes to be monitored. The monitoring zone corresponds to the program section that is to be monitored by the control. To begin the monitoring zone, program G995 with the following parameters. To end the monitoring zone, program G995 without parameters. Parameters H No. of the zone (range: 1 to 99) ID Code for axes X: X axis Y: Y axis Z: Z axis 0: Spindle 1 (main spindle, C axis) 1: Spindle 2 2: Spindle 3 Beispiel: G995 ... N1 T4 N2 G995 H1 ID"X0" [Beginning of monitoring zone; monitoring of X axis and main spindle] . . . [Machining] G995 [End of monitoring zone] ... The monitoring zones must be unambiguously defined in the program. Use the H parameter to assign a unique number to each monitoring zone. If you would like to monitor more than one drive within a monitoring zone, enter the respective combination of individual parameters in the ID parameter. Please keep in mind, however, that the control can monitor a maximum of four drives per monitoring zone. To simultaneously monitor the Z axis and the main spindle, enter Z0 in the ID parameter. In addition to defining the monitoring zone with G995, you need to activate the load monitoring function (see „Load monitoring G996” on page 389). 388 DIN Programming G996 defines the type of load monitoring or deactivates the load monitoring temporarily. Parameters Q Lib. switch (type of activation): Monitoring (default: 0) Q 0: Off 1: G0 Off (do not monitor rapid traverse) 2: G0 On (monitor rapid traverse) Monitoring: Type of load monitoring (default: 0) 0: Utilization + Total utilization 1: Utilization only 2: Total utilization only Beispiel: G996 ... N1 G996 Q1 H1 [Activate load monitoring; do not monitor rapid traverse] N2 T4 N3 G995 H1 ID"X0" . . . [Machining] N9 G995 ... In addition to defining the type of load monitoring with G996, you need to specify the monitoring zone with G995 (see „Monitoring zone G995” on page 388). Before using the load monitoring feature, you also need to define limit values and perform reference machining (see User's Manual). Activate direct program-run continuation G999 With the G999 function, when running a program in Single Block mode, the following NC blocks are run with a single NC start to the end of the program. G999 is then deactivated by again calling the function with the setting Q=0 (off). Converting and mirroring G30 The G30 function converts G codes, M functions and spindle numbers. G30 mirrors traverse paths and tool dimensions and shifts the machine zero point about the "zero point offset" of the axis (machine parameter: Trans_Z1). Parameters H Table number of the conversion table (possible only if the machine tool builder has configured a conversion table). Q Spindle number Application: For full-surface machining, you describe the complete contour, machine the front face, rechuck the workpiece through an expert program and then machine the rear face. To enable you to HEIDENHAIN MANUALplus 620, CNC PILOT 640 389 4.29 Other G codes Load monitoring G996 4.29 Other G codes program rear-face machining in the same way as front-face machining (Z-axis orientation, arc rotational direction, etc.), the expert program includes commands for converting and mirroring. Danger of collision! In the transition from AUTOMATIC to MANUAL OPERATION, conversions and mirror images are retained Switch off the conversion/mirroring if you activate the front-face machining after rear-face machining (for example during program section repeats with M99) After a new program selection, the conversion/mirroring is switched off (example: transition from MANUAL to AUTOMATIC mode) 390 DIN Programming 4.29 Other G codes Transformations of contours G99 With the G99 function you can mirror contours, shift them and bring the workpiece to the desired machining position. Parameters Q Function is not yet supported. D Spindle number X Shift in X (diameter value) Z Shift in Z V Mirroring the Z axis of the coordinate system Q=0: Do not mirror Q=1: Mirror H Transformation type H=0: Contour shift, not mirroring H=1: Contour shift, mirroring and reversing the direction of the contour description K Length of workpiece shift: shift coordinate system in Z direction O Hide elements during transformation O=0: All contours are transformed O=1: Auxiliary contours are not transformed O=2: Face contours are not transformed O=4: Lateral contours are not transformed You can also add input values in order to combine various settings (e.g. O=3 Do not transform auxiliary contours or face contours) Program G99 again if the workpiece is transferred to another spindle and/or moves its position in the working space. HEIDENHAIN MANUALplus 620, CNC PILOT 640 391 4.29 Other G codes Spindle synchronization G720 Machine and control must be specially prepared by the machine tool builder for use of this cycle. Refer to your machine manual. G720 controls the workpiece transfer from the master to the slave spindle and synchronizes functions such as polygonal turning jobs. The function stays active until you deactivate G720 with the setting H0. If you would like to synchronize more than two spindles you can program G720 several times in succession. Parameters S Number of the master spindle H Number of the slave spindle—no input or H=0: Switches off the spindle synchronization C Offset angle [°] Q Master spindle speed factor Range: –100 <= Q <= 100 F Slave spindle speed factor Range: –100 <= F <= 100 Y Type of cycle Your machine manual provides more detailed information about machine-dependent functions. Program the speed of the master spindle with Gx97 S.. and define the speed ratio between the master spindle and the slave spindle with Q, F. If you enter a negative value for Q or F, the direction of rotation of the slave spindle will be reversed. Remember that: Q * master speed = F * slave speed Example: G720 ... N.. G397 S1500 M3 Spindle speed and direction of rotation of master spindle N.. G720 C180 S0 H1 Q2 F-1 Synchronization of master spindle and slave spindle. The slave spindle precedes the master spindle by 180°. Slave spindle: direction of rotation M4; spindle speed 750 N.. G1 X.. Z.. ... 392 DIN Programming 4.29 Other G codes C-angle offset G905 G905 measures the angular offset of workpiece transfer with rotating spindle. The sum of angle C and the angle offset goes into effect as the zero point shift of C axis. If you request the zero point shift of the current C-axis in the variable #a0 ( C,1) the sum of the programmed zero point shift and the measured offset angle is transferred. The zero offset is effective internally as a direct zero point shift for the respective C axis. The contents of the variables are retained even if the control has been switched off. You can also examine and reset the respectively active zero point shift of the C axis in the "Setup" menu in the "Set C-axis value" function. Parameters Q Number of the C axis C Angle of additional zero point shift for offset gripping (–360° <= C <= 360°)—(default: 0°) Danger of collision! For narrow workpieces the jaws have to grip at an offset. The zero point shift of the C axis remains in effect: After switch from Automatic to Manual mode After switch-off HEIDENHAIN MANUALplus 620, CNC PILOT 640 393 4.29 Other G codes Traversing to a fixed stop G916 The machine tool builder determines the scope of function and behavior of G916. The machine manual provides further information. G916 activates the monitoring function for the traversing path and moves to a fixed stop (example: transferring a premachined workpiece to a second traveling spindle if you do not know the exact position of the workpiece). The control stops the slide and saves the stop position. G916 generates an interpreter stop. Parameters H Clamping force in daNewtons (1 daNewton = 10 newtons) D Axis number (X=1, Y=2, Z=3, U=4, V=5, W=6, A=7, B=8, C=9) K Incremental distance R Return path of traverse V Type of departure V=0: Stay at fixed stop V=1: Return to start position V=2: Retract by return path R O Error evaluation O=0: Error evaluation in expert program O=1: The control issues an error message Lag error monitoring is not activated until the acceleration phase has been completed. The feed rate override is not effective during cycle execution. 394 DIN Programming 4.29 Other G codes Traversing to a fixed stop When traversing to a fixed stop, the control moves up to the fixed stop and stops as soon as the following error has been reached. The remaining path of traverse is deleted back to starting position back by the return traverse path Programming "traverse to a fixed stop": Position the slide at a sufficient distance before the fixed stop. Use a moderate feed rate (< 1000 mm/min) Example of traversing to a fixed stop: ... N.. G0 Z20 Pre-position slide 2 N.. G916 H100 D6 K-20 V0 O1 Activate monitoring, traverse to a fixed stop ... HEIDENHAIN MANUALplus 620, CNC PILOT 640 395 4.29 Other G codes Controlled parting using lag error monitoring G917 The machine tool builder determines the scope of function and behavior of G917. The machine manual provides further information. G917 "monitors" the path of traverse. The controlled parting function (cut-off control) prevents collisions caused by incomplete parting processes. The control stops the slide when the tensile force is too high and generates an "interpreter stop." Parameters H Tensile force D Axis number (X=1, Y=2, Z=3, U=4, V=5, W=6, A=7, B=8, C=9) K Incremental distance O Error evaluation O=0: Error evaluation in expert program O=1: The control issues an error message During parting control, the parted workpiece moves in the positive Z direction. If a following error occurs, the workpiece is considered unparted. The result is saved in the variable #i99: 0: Workpiece was not correctly cut off (following error detected) 1: Workpiece was correctly cut off (no following error detected) Lag error monitoring is not activated until the acceleration phase has been completed. The feed rate override is not effective during cycle execution. 396 DIN Programming 4.29 Other G codes Force reduction G925 The machine tool builder determines the scope of function and behavior of G925. The machine manual provides further information. G925 activates/deactivates the force reduction. When the monitoring is activated, the maximum contact force for one axis is defined. Force reduction can be activated for only one axis per NC channel. The G925 function limits the contact force for subsequent movements of the defined axis. G925 does not execute any traverse. Parameters H Contact force [dN]—The contact force is limited to the given value Q Axis number (X=1, Y=2, Z=3, U=4, V=5, W=6, A=7, B=8, C=9) Spindle number, e.g. spindle 0 = number 10 (0=10, 1=11, 2=12, 3=13, 4=14, 5=15) S Sleeve monitoring 0: Deactivate (the contact force is not monitored) 1: Activate (the contact force is monitored) Lag error monitoring is not activated until the acceleration phase has been completed. HEIDENHAIN MANUALplus 620, CNC PILOT 640 397 4.29 Other G codes Sleeve monitoring G930 The machine tool builder determines the scope of function and behavior of G930. The machine manual provides further information. G930 activates/deactivates the sleeve monitoring. When the monitoring is activated, the maximum contact force for one axis is defined. Sleeve monitoring can be activated for only one axis per NC channel. G930 moves the defined axis by the programmed distance D until the defined contact force H has been reached. Parameters H Contact force [dN]—The contact force is limited to the given value Q Axis number (X=1, Y=2, Z=3, U=4, V=5, W=6, A=7, B=8, C=9) D Incremental distance Application example: G930 is applied to use the opposing spindle as a mechatronic tailstock. In this case the opposing spindle is equipped with a dead center and the contact force is limited with G930. A prerequisite for this application is a PLC program from the machine tool builder that enables the user to operate the mechatronic tailstock in the Manual and Automatic operating mode. Lag error monitoring is not activated until the acceleration phase has been completed. Tailstock function With the tailstock function, the control moves up to the workpiece and stops as soon as the contact force has been reached. The remaining path of traverse is deleted. Example of tailstock function ... N.. G0 Z20 Pre-position slide 2 N.. G930 H250 D6 K-20 Activate the tailstock function—contact force 250 daN ... 398 DIN Programming 4.29 Other G codes Eccentric turning G725 G725 is used to machine turning contours outside the original turning center. The turning contours are programmed using separate turning cycles. Machine and control must be specially prepared by the machine tool builder for use of this cycle. Refer to your machine manual. Prerequisites: Software option Y-Axis Machining Software option Synchronizing Functions Parameters H Activate coupling H=0: Deactivate coupling H=1: Activate coupling Q Reference spindle: Number of the spindle that is coupled with the X and Y axes (machine-dependent) R Center offset: Distance between the eccentric center and the original turning center (radius value) C Position C: C-axis angle of the center offset F Maximum rapid traverse: Permissible rapid traverse for the X and Y axes while coupling is active V Direction reversal in Y (machine-dependent) V=0: The control uses the configured axis direction for Yaxis movements V=1: The control reverses the configured axis direction for Y-axis movements Please note while programming: Program a workpiece blank increased by the center offset in the radius if you are using turning cycles that are referenced to the workpiece-blank definition. Program a starting point increased by the center offset in the radius if you are using turning cycles that are not referenced to the workpiece-blank definition. Reduce the spindle speed if you increase the center offset. Reduce the maximum rapid traverse F if you increase the center offset. Use identical values for the parameter Q when activating and deactivating the coupling. HEIDENHAIN MANUALplus 620, CNC PILOT 640 399 4.29 Other G codes Programming sequence: Position the cursor in the MACHINING program section Program G725 with H=1 (activate coupling) Program turning cycles Program G725 with H=0 (deactivate coupling) Please note when executing the program: In the event of a program cancelation, the control automatically deactivates the coupling. 400 DIN Programming 4.29 Other G codes Transition to eccentric G726 G726 is used to machine turning contours outside the original turning center. In addition, G726 offers the possibility to continuously change the position of the turning center along a straight line or a curve. The turning contours are programmed using separate turning cycles. Machine and control must be specially prepared by the machine tool builder for use of this cycle. Refer to your machine manual. Prerequisites: Software option Y-Axis Machining Software option Synchronizing Functions Parameters H Activate coupling H=0: Deactivate coupling H=1: Activate coupling Q Reference spindle: Number of the spindle that is coupled with the X and Y axes (machine-dependent) R Center offset at Z start: Distance between the eccentric center and the original turning center (radius value) C C position at Z start: C-axis angle of the center offset F Maximum rapid traverse: Permissible rapid traverse for the X and Y axes while coupling is active V Direction reversal in Y (machine-dependent) V=0: The control uses the configured axis direction for Yaxis movements V=1: The control reverses the configured axis direction for Y-axis movements Z Z start: Reference value for the parameters R and C, as well as coordinate for tool pre-positioning K Z end: Reference value for the parameters W and U W Delta C [Z start – Z end]: Difference in C-axis angle between Z start and Z end U Center offset at Z end: Distance between the eccentric center and the original turning center (radius value) HEIDENHAIN MANUALplus 620, CNC PILOT 640 401 4.29 Other G codes Please note while programming: Program a workpiece blank increased by the center offset in the radius if you are using turning cycles that are referenced to the workpiece-blank definition. Program a starting point increased by the center offset in the radius if you are using turning cycles that are not referenced to the workpiece-blank definition. Reduce the spindle speed if you increase the center offset. Reduce the maximum rapid traverse F if you increase the center offset. Use identical values for the parameter Q when activating and deactivating the coupling. Programming sequence: Position the cursor in the MACHINING program section Program G726 with H=1 (activate coupling) Program turning cycles Program G726 with H=0 (deactivate coupling) Please note when executing the program: When the coupling is activated, the control positions the tool in the Z axis to the value of the parameter Z. In the event of a program cancelation, the control automatically deactivates the coupling. 402 DIN Programming 4.29 Other G codes Eccentric X G727 G727 is used to machine elliptical polygons. The turning contours are programmed using separate turning cycles. Machine and control must be specially prepared by the machine tool builder for use of this cycle. Refer to your machine manual. Requirement: Software option Synchronizing Functions Parameters H Activate coupling H=0: Deactivate coupling H=1: Activate coupling Q Reference spindle: Number of the spindle that is coupled with the X axis (machine-dependent) I X travel +/-: Half of the superimposed X-axis movement (radius value) C C position at Z start: C-axis angle of X travel F Maximum rapid traverse: Permissible rapid traverse for the X axis while coupling is active E Form factor: Number of X travels with respect to one spindle revolution Z Z start: Reference value for the parameter C W Delta C [°/mm Z]: Difference in C-axis angle with respect to a distance of 1 mm in the Z axis Please note while programming: Program a workpiece blank increased by the center offset in the radius if you are using turning cycles that are referenced to the workpiece-blank definition. Program a starting point increased by the center offset in the radius if you are using turning cycles that are not referenced to the workpiece-blank definition. Reduce the spindle speed if you increase the center offset. Reduce the maximum rapid traverse F if you increase the center offset. Use identical values for the parameter Q when activating and deactivating the coupling. HEIDENHAIN MANUALplus 620, CNC PILOT 640 403 4.29 Other G codes Programming sequence: Position the cursor in the MACHINING program section Program G727 with H=1 (activate coupling) Program turning cycles Program G727 with H=0 (deactivate coupling) Please note when executing the program: When the coupling is activated, the control positions the tool in the Z axis to the value of the parameter Z. In the event of a program cancelation, the control automatically deactivates the coupling. 404 DIN Programming 4.30 Data input and data output 4.30 Data input and data output "WINDOW"—Output window for variables WINDOW (x) opens an output window with x lines. The window is opened as a result of the first input/output. WINDOW (0) closes the window. Syntax: WINDOW(line number) (0 <= line number <= 20) The standard window comprises 3 lines. You do not need to program it. Beispiel: ... N 1 WINDOW(8) N 2 INPUT("query: ",#l1) N 3 #l2=17*#l1 N 4 PRINT("result: ",#l1,"*17 = ",#l2) ... "WINDOW"—Output file for variables The command WINDOW (x,"filename") saves the PRINT instruction in a file with the defined name and the extension .LOG, in the directory "V:\nc_prog\". The file is overwritten when the WINDOW command is run again. Syntax: WINDOW(line number,"filename") Beispiel: ... N 1 WINDOW(8) N 2 INPUT("query: ",#l1) N 3 #l2=17*#l1 N 4 PRINT("result: ",#l1,"*17 = ",#l2) ... "INPUT"—Input of variables Use INPUT to program the input of variables. Syntax: INPUT("text",variable) You define the input text and the number of the variable. The Steuerung stops the interpretation at INPUT, outputs the text and waits for input of the variable value. Instead of an input text, you can also program a string variable, such as #x1. The Steuerung displays the input after having completed the INPUT command. HEIDENHAIN MANUALplus 620, CNC PILOT 640 405 4.30 Data input and data output "PRINT"—Output of # variables PRINT can be used to output texts and variable values during program run. You can program a succession of several texts and variables. Syntax: PRINT("text",variable,"text",variable, ..) Example: PRINT("result: ",#l1,"*17 = ",#l2) 406 DIN Programming 4.31 Programming variables 4.31 Programming variables The Steuerung provides a variety of variable types. Syntax Operator functions The following rules apply to the use of variables: + Addition – Subtraction * Multiplication / Division () Parenthesizing = Equate function Syntax Arithmetic functions ABS(...) Absolute amount ROUND(...) Round SQRT(...) Square root SQRTA(.., ..) Square root of (a2+b2) SQRTS(.., ..) Square root of (a2–b2) INT(...) Truncate decimal places Syntax Trigonometric functions SIN(...) Sine (in degrees) COS(...) Cosine (in degrees) TAN(...) Tangent (in degrees) ASIN(...) Arc sine (in degrees) ACOS(...) Arc cosine (in degrees) ATAN(...) Arc tangent (in degrees) Syntax Other functions LOGN(...) Natural logarithm EXP(...) Exponential function ex BITSET(...) Bitset function STRING(...) String PARA(...) Configuration data Multiplication/division before addition/subtraction Up to 6 bracket levels Integer variables: Integer values between –32767 and +32768 Real variables: Floating point numbers with max. 10 integers and 7 decimal places Do not use any blank spaces when programming variables. The variable number itself and an index value, if applicable, can be described by another variable, e.g.: #g( #c2) See the table for the available functions The distinction made by CNCPILOT XXXX and MANUALplus X110 controls between variables that can be modified at runtime and those that cannot, does not apply any longer. The NC program is no longer compiled before the program run, but at runtime. Program NC blocks containing variable calculations with "slide code $.." if your lathe has more than one slide. Otherwise, the calculations are repeated. Positions and dimensions transferred into system variables are always indicated in metric form. This also applies when an NC program is run in inches. You can also program the listed functions by soft key. The soft-key row is available when the variable assignment function is active and the alphabetic keyboard is closed. HEIDENHAIN MANUALplus 620, CNC PILOT 640 407 4.31 Programming variables Variable types The Steuerung distinguishes the following variable types: Beispiel: General variables ... #l1 .. #l30 Channel-independent, local variables are effective within a main or a subprogram. #c1 .. #c30 Channel-dependent, global variables can be used for each slide (NC channel). Identical variable numbers on different slides are no problem. The variable content is provided globally by one channel; globally means that a variable described in a subprogram can be evaluated in the main program, and vice versa. #g1 .. #g199 Channel-independent, global REAL variables are provided once within the control. If the NC program changes a variable, it applies to all slides. The variables are retained even when the control is switched off, and can be evaluated again after powerup. #g200 .. #g299 Channel-independent, global INTEGER variables are provided once within the control. If the NC program changes a variable, it applies to all slides. The variables are retained even when the control is switched off, and can be evaluated again after powerup. #x1 .. #x20 Channel-dependent, local text variables are effective within a main or subprogram. They can only be read on the channel to which they were written. N.. #l1=#l1+1 N.. G1 X#c1 N.. G1 X(SQRT(3*(SIN(30))) N.. #g1=(ABS(#2+0.5)) ... N.. G1 Z#m(#l1)(Z) N.. #x1="Text" N.. #g2=#g1+#l1*(27/9*3.1415) ... If the variables are to be retained in the memory when the control is switched off, this feature must be activated by the machine tool builder (configuration parameter: "Channels/ChannelSettings/CH_NC1/CfgNcPgmParState/ persistent=TRUE"). If this feature is not activated, the variables values will always be "zero" after power-up. Machine dimensions #m1(n) .. #m99(n): "n" is the designation of the axis (X, Z, Y) for which the machine dimension is to be read or written. The variable calculation uses the table "mach_dim.hmd". Simulation: During the startup of the control, the table "mach_dim.hmd" is read by the simulation. The simulation function now uses the table of the simulation. Beispiel: Machine dimensions ... N.. G1 X(#m1(X)*2) N.. G1 Z#m3(Z) N.. #m4(Z)=350 ... 408 DIN Programming #dt(n): "n" is the compensation direction (X, Z, Y, S) and "t" is the turret pocket number assigned to the tool. The variable calculation uses the table "toolturn.htt". Simulation: When the program is selected, the table "toolturn.htt" is read by the simulation. The simulation function now uses the table of the simulation. Beispiel: Tool compensation ... N.. #d3(X)=0 N.. #d3(Z)=0.1 N.. #d3(S)=0.1 ... Tool information can also be interrogated directly via the ID number. This may be necessary, for example, if no turret pocket has been assigned. For this purpose, program a comma and the ID number of the tool after the desired identification, e.g. #l1 = #d1(Z, "001"). Event bits: Variable programming interrogates a bit of the event for 0 or 1. The meaning of the event is determined by the machine manufacturer. #en(key): "n" is the channel number and "key" is the event name. Used for reading external events set by the PLC. #e0(key[n].xxx): "n" is the channel number, "key" is the event name, and "xxx" is the name extension. Used for reading external events set by the PLC. Beispiel: Events ... N.. #g1 = #e1( "NP_DG_Achs_Modul_warten") N.. PRINT( "NP_DG_Achs_Modul_warten =",#g1) N.. #g2 = #e1( "DG_DATEN[1]") N.. PRINT( "DG_DATEN[1] =",#g2) N.. #g3 = #e1( "SPI[1].DG_TEST[1]") N.. PRINT( "SPI[1].DG_TEST[1] =",#g3) ... N.. IF #e1( "NP_DG_Achs_Modul_warten")==4 N.. THEN N.. G0 X40 Z40 N.. ELSE N.. G0 X60 Z60 N.. ENDIF ... HEIDENHAIN MANUALplus 620, CNC PILOT 640 409 4.31 Programming variables Tool compensation 4.31 Programming variables Reading tool data Use the following syntax to read tool data. You can only access tools that are entered in the turret list. If a sequence of exchange is defined, program the first tool of the sequence. The Steuerung determines the data of the active tool. Tool information can also be interrogated directly via the ID number. This may be necessary, for example, if no turret pocket has been assigned. For this purpose, program a comma and the ID number of the tool after the desired identification, e.g. #l1 = #w1(Z, "001"). If you only need information on the current tool, it is sufficient to program #w0(select). Access to tool data of turret Syntax: n = turret pocket number n = 0 for the current tool select = designates the information to be read Main machining direction #wn(HR) Tool ID number (assign in text variable (#xn)) #wn(PT) P key of the tool *10 (e.g.: 12.3 becomes 123) #wn(WT) Tool type (3-digit number) #wn(WTV) 1st position of tool type Primary machining directions: 0: Undefined 1: +Z 2: +X 3: –Z 4: –X 5: +/–Z 6: +/–X Identification codes for tool information #wn(ID) #wn(select) Execution #wn(WTH) 2nd position of tool type #wn(AS) Versions #wn(WTL) 3rd position of tool type #wn(NL) Usable length (inside turning and drilling tools) #wn(HR) Main machining direction (see table at right) Tool orientation #wn(NR) Secondary machining direction of turning tools #wn(WL) #wn(AS) Execution (see at right) #wn(ZZ) Number of teeth (milling tools) #wn(RS) Cutting edge radius #wn(ZD) Stud diameter #wn(DF) Cutter diameter #wn(SD) Shank diameter #wn(SB) Cutting width #wn(SL) Tooth length #wn(AL) Length of first cut #wn(FB) Cutter width #wn(WL) Tool orientation 410 1: Right-hand 2: Left-hand Tool orientation (reference: machining direction of tool): 0: On the contour 1: To the right of the contour – 1: To the left of the contour DIN Programming 4.31 Programming variables Identification codes for tool information #wn(ZL) Tool setting dimension in Z (from tool list) #wn(XL) Tool setting dimension in X (from tool list) #wn(YL) Tool setting dimension in Y (from tool list) #wn(TL) Tool status (tool locked) #wn(I) Position of tool tip center in X (see illustration) #wn(J) Position of tool tip center in Y #wn(K) Position of tool tip center in Z (see illustration) #wn(ZE) Length of the tool in the current insert position: Distance between tool tip and slide zero point Z #wn(XE) Length of the tool in the current insert position: Distance between tool tip and slide zero point X #wn(YE) Length of the tool in the current insert position: Distance between tool tip and slide zero point Y #wn(DN) Diameter of drilling and milling tools #wn(HW) Principal angle in the normalized system (0° to 360°) #wn(NW) Secondary angle in the normalized system (0° to 360°) #wn(EW) Tool angle #wn(SW) Point angle #wn(AW) 0: No driven tool 1: Driven tool #wn(MD) Direction of rotation: 3: M3 4: M4 #wn(CW) Tilting plane angle #wn(BW) Angular offset #wn(WTL) Orientation #wn(AC) Cutting-edge insert angle #wn(ZS) Maximum cutting depth #wn(GH) Thread pitch #wn(NE) Number of secondary cutting edges #wn(NS) Number of the secondary cutting edge HEIDENHAIN MANUALplus 620, CNC PILOT 640 411 4.31 Programming variables Identification codes for tool information #wn(FP) Tool type: 0 = normal tool, 1 = master tools, 2 = secondary cutting edge #wn(Q) Number of tool spindle #wn(AS) Execution left/right #wn(X) Setting dimension of holder in X #wn(Z) Setting dimension of holder in Z #wn(Y) Setting dimension of holder in Y #wn(DX) Compensation in X #wn(DY) Compensation in Y #wn(DZ) Compensation in Z #wn(DS) 2nd compensation 412 DIN Programming Use the following syntax to read diagnostic bits. You can access tools that are entered in the turret list. You can also read diagnostic bits for multifix tools. For this purpose, program a comma and the ID number of the tool after the desired identification code, e.g. #l1 = #t( 3, "001"). Access to turret data Syntax: #tn(select) n = turret pocket number n = 0 for the current tool select = designates the information to be read Identification codes for diagnostic bits #tn(1) Tool life expired/workpiece quantity reached #tn(2) Breakage according to load monitoring (limit 2 exceeded) #tn(3) Wear according to load monitoring (limit 1 exceeded) #tn(4) Wear according to load monitoring (total load limit) #tn(5) Wear determined by tool measurement #tn(6) Wear determined by in-process measurement of workpiece #tn(7) Wear determined by post-process measurement of workpiece #tn(8) Cutting edge new =1 / used = 0 HEIDENHAIN MANUALplus 620, CNC PILOT 640 413 4.31 Programming variables Reading diagnostic bits 4.31 Programming variables Reading the current NC information Use the following syntax to read NC information that was programmed with G codes. Identification codes for NC information Access to current NC information Syntax: #nx(select) x = G-code number select = designates the information to be read #n0(X) Last programmed position X #n0(Y) Last programmed position Y #n0(Z) Last programmed position Z #n0(A) Last programmed position A #n0(B) Last programmed position B #n0(C) Last programmed position C #n0(U) Last programmed position U #n0(V) Last programmed position V Active wear compensation #n0(W) Last programmed position W #n148(O) #n0(CW) Tool insert angle (0 or 180 degrees) #n40(G) Status of TRC (see table at right) #n148(O) Active wear compensation (see table at right) #n18(G) Active working plane (see table at right) #n120(X) Reference diameter X for calculating CY #n52(G) Oversize G52_Geo taken into account 0=no / 1=yes #n57(X) Oversize in X #n57(Z) Oversize in Z Pocket data of entered tool #n58(P) Equidistant oversize #n601(n) #n150(X) Cutting width shifted in X by G150/G151 #n150(Z) Cutting width shifted in Z by G150/G151 #n95(G) Programmed feed type (G93/G94/G95) #n95(Q) Spindle number of the last programmed feed rate #n95(F) Last programmed feed rate #n97(G) Programmed speed type (G96/G97) #n97(Q) Spindle number of the last programmed speed type #n97(S) Last programmed speed Status of TRC #n40(G) TRC/MCRC status: 40: G40 active 41: G41 active 42: G42 active Active wear compensation (G148): 0: DX, DZ 1: DS, DZ 2: DX, DS Active working plane 414 #n18(G) Active working plane: 17: XY plane (front or rear face) 18: XZ plane (turning view) 19: YZ plane (plan view/surface) Output in the format "SMppp": S: Tool edge number M: Magazine number ppp: Pocket number DIN Programming 4.31 Programming variables Identification codes for NC information #n47(P) Current safety clearance #n147(I) Current safety clearance in working plane #n147(K) Current safety clearance in infeed direction #n601(n) Pocket data of the tool entered in the magazine table (see table at right) #n610(H) Next free magazine pocket (see table at right) #n707(n, 1) Read minimum value of software limit switch of axis (see table at right) #n707(n, 2) Read maximum value of software limit switch of axis (see table at right) #n922(C) Insert angle of cutting edge (for B axis) #n922(H) Mirroring status of cutting edge (0 = normal position, 1 = 180 degrees) #n927(X) Result of conversion function G927 for tool length in X (for B axis) #n927(Z) Result of conversion function G927 for tool length in Z (for B axis) #n927(Y) Result of conversion function G927 for tool length in Y (for B axis) #n995(H) Query of current zone number for load monitoring Free magazine pocket #n610(H) Output in the format "Mppp": M: Magazine number ppp: Pocket number Software limit switches #n707(n,1) Identification code of axis: n: Axis X, Y, Z, U, V or W 1: Minimum value 2: Maximum value HEIDENHAIN MANUALplus 620, CNC PILOT 640 415 4.31 Programming variables Reading general NC information Use the following syntax to read general NC information. Identification codes for tool information #i1 Active operating mode (see table at right) #i2 Active unit of measure (inches/metric) #i3 Main spindle = 0 Counterspindle with mirroring Z = 1 Tool mirroring in Z = 2 Tool + path mirroring in Z = 3 Active operating mode #i1 2: Machine tool 3: Simulation 5: TSF menu Active unit of measure #i2 Active unit of measure: 0: Metric [mm] 1: Inches [in] #i4 G16 active = 1 (currently not used) #i5 Last programmed T number #i6 Start block search active = 1 Languages #i7 System is DataPilot = 1 #i8 #i8 Selected language #i9 If Y axis is configured = 1 #i10 If B axis is configured = 1 #i11 If the tool pocket in X is mirrored to the machine system = 1 #i12 If U axis is programmable = 1 #i13 If V axis is programmable = 1 #i14 If W axis is programmable = 1 #i15 If U axis is configured = 1 #i16 If V axis is configured = 1 #i17 If W axis is configured = 1 #i18 Zero point shift of the Z axis #i19 Zero point shift of the X axis #i20 Last programmed path function (G0, G1, G2...) #i21 Current quantity (workpiece counter) #i22 If U axis is coupled with X axis = 1 #i23 If V axis is coupled with Y axis = 1 #i24 If W axis is coupled with Z axis = 1 #i25 If magazine exists = 1 416 Active operating mode: Available languages: 0: ENGLISH 1: GERMAN 2: CZECH 3: FRENCH 4: ITALIAN 5: SPANISH 6: PORTUGUESE 7: SWEDISH 8: DANISH 9: FINNISH 10: DUTCH 11: POLISH 12: HUNGARIAN 14: RUSSIAN 15: CHINESE 16: CHINESE_TRAD 17: SLOVENIAN 19: KOREAN 21: NORWEGIAN 22: ROMANIAN 23: SLOVAK 24: TURKISH DIN Programming 4.31 Programming variables Identification codes for tool information #i26 P key of actual tool *10 from tool preselection #i27 P key of desired tool *10 from tool preselection #i28 Angle of Y wedge axis #i29 P key of the tool *10 that has reached the maximum tool life #i30 P key of the tool *10 that has reached the maximum workpiece quantity #i99 Return code of subprograms HEIDENHAIN MANUALplus 620, CNC PILOT 640 417 4.31 Programming variables Reading configuration data—PARA The PARA function is used to read configuration data. To do this, use the parameter designations from the configuration parameters. You also use the designations from the configuration parameters to read user parameters. Access to configuration data Syntax: PARA(key, entity, attribute, index) Key: Keyword Entity: Name of the configuration group Attribute: Element name Index: Array number if the attribute is from an array When you read optional parameters, check whether the return value is valid. Depending on the data type of the parameter (REAL/STRING), the value "0" or the text "_EMPTY" is returned when reading an optional attribute that has not been set. Example: PARA function ... N.. #l10=PARA("","CfgDisplayLanguage","ncLanguage") Reads the number of the currently selected language N.. #l1=PARA("","CfgGlobalTechPara","safetyDistWorkpOut") Reads the external safety clearance on the machined part (SAT) N.. #l1=PARA("Z1","CfgAxisProperties","threadSafetyDist") Reads the thread safety clearance for Z1 N.. #l1=PARA("","CfgCoordSystem","coordSystem") Reads the machine orientation number ... #x2=PARA("#x30","CfgCAxisProperties","relatedWpSpindle",0) Check whether the optional parameter is set IF #x2<>"_EMPTY" Evaluation: THEN [ The parameter "relatedWpSpindle" was set ] ELSE [ The parameter "relatedWpSpindle" was not set ] ENDIF 418 DIN Programming You activate the index search for an element by appending the name of the list element to the attribute, separated by a comma. Access to configuration data Example: Syntax: Determining the logical axis number of spindle S1 #c1 = PARA( "", "CfgAxes", "axisList,S1", 0) The function returns the index of the "S1" element in the "axisList" attribute of the "CfgAxes" entity. The index of element S1 equals the logical axis number in this example. Without the attribute extension "S1", the function would read the element located at the list index number 0. Since the element is a string in this example, the result has to be assigned to a string variable. PARA("key","entity","attribute,elem ent", index) Key: Keyword Entity: Name of the configuration group Attribute,name: Attribute name and element name Index: 0 (not required) #x1 = PARA( "", "CfgAxes", "axisList", 0) The function reads the string name of the element at list index number 0. HEIDENHAIN MANUALplus 620, CNC PILOT 640 419 4.31 Programming variables Determining the index of a parameter element— PARA 4.31 Programming variables Expanded variable syntax CONST – VAR By defining the key words CONST or VAR, you can assign names to variables. The key words can be used in the main program and subprogram. To use the definitions in a subprogram, you need to declare the constant or variable before the MACHINING section code. Rules for defining constants and variables: The names of constants and variables must be preceded by an underscore. They can comprise lower case letters, numbers and the underscore character. The maximum length must not exceed 20 characters. Variable names with VAR By assigning variable names, you make it easier to read an NC program. To do this, you must insert the program section VAR. In this program section, you assign the variable designations to the variables. Beispiel: Free-text variables %abc.nc VAR #_rohdm=#l1 [#_rohdm is a synonym of #l1] BLANK N.. FINISHED N.. MACHINING N.. ... Beispiel: Subprogram %SP1.ncS VAR #_wo = #c1 [tool orientation] MACHINING N.. #_wo = #w0(WTL) N.. G0 X(#_posx*2) N.. G0 X#_start_x ... 420 DIN Programming Direct assignment of values Internal interpreter information as constants Assignment of names to the transfer variables of subprograms Use the following internal information to define constants in the CONST section. 4.31 Programming variables Definition of constants—CONST Possibilities of defining constants: Beispiel: Main program %abc.nc CONST _square_root2 = 1.414213 [direct value assignment] Internal information for defining constants _square_root_2 = SQRT(2) [direct value assignment] __n0_x 768 Last programmed position X _posx = __n0_x __n0_y 769 Last programmed position Y __n0_z 770 Last programmed position Z __n0_c 771 Last programmed position C N.. __n40_g 774 Status of TRC FINISHED __n148_o 776 Active wear compensation __n18_g 778 Active working plane N.. __n120_x 787 Reference diameter X for calculating CY ... __n52_g 790 Oversize G52_Geo taken into account 0=no / 1=yes __n57_x 791 Oversize in X __n57_z 792 Oversize in Z __n58_p 793 Equidistant oversize _posx = __n0_x __n150_x 794 Cutting width shifted in X by G150/G151 VAR __n150_z 795 Cutting width shifted in Z by G150/G151 __n95_g 799 Programmed feed type _G93/G94/G95) N.. #_wo = #w0(WTL) __n95_q 796 Spindle number of the programmed feed rate N.. G0 X(#_posx*2) __n95_f 800 Last programmed feed rate N.. G0 X#_start_x __n97_g Programmed speed type _G96/G97) __n97_q 797 Spindle number of the programmed speed type __n97_s Last programmed speed __la-__z Subprogram transfer values [internal information] VAR ... BLANK N.. MACHINING Beispiel: Subprogram %SP1.ncS CONST _start_x=__la [subprogram transfer value] #_wo = #c1 [internal constant] [tool orientation] MACHINING ... The constant "_pi" is predefined to the value 3.1415926535989 and can be used directly in every NC program. HEIDENHAIN MANUALplus 620, CNC PILOT 640 421 4.32 Conditional block run 4.32 Conditional block run Program branching IF..THEN..ELSE..ENDIF A conditional branch consists of the elements: IF, followed by a condition. The condition includes a variable or mathematical expression on either side of the relational operator. THEN. If the condition is fulfilled, the THEN branch is executed. ELSE. If the condition is not fulfilled, the ELSE branch is executed. ENDIF concludes the conditional program branch. Interrogate bitset: You can also use the BITSET function as condition. The function returns 1 if the numerical value contains the requested bit. The function returns 0 if the numerical value does not contain the requested bit. Syntax: BITSET (x,y) x: Bit number (0 to 15) y: Numerical value (0 to 65535) The relationship between bit number and numerical value is shown in the table at right. You can also use variables for x, y. Relational operators < Less than <= Less than or equal to <> Not equal to > Greater than >= Greater than or equal to == Equal to Combining conditions: AND Logical AND operation OR Logical OR operation 0 which means numerical value 1 8 which means numerical value 256 1 2 9 512 2 4 10 1024 3 8 11 2048 4 16 12 4096 5 32 13 8192 6 64 14 16384 7 128 15 32768 Bit Programming: Select "Extras > DINplus word...". The Steuerung opens the "Insert DIN PLUS word" selection list. Select IF. Enter the condition. Insert NC blocks of the THEN branch. If required: Insert NC blocks of the ELSE branch. NC blocks with IF, THEN, ELSE, ENDIF can have no further commands. You can combine up to two conditions. Bit Beispiel: IF..THEN..ELSE..ENDIF N.. IF (#l1==1) AND (#g250>50) N.. THEN N.. G0 X100 Z100 N.. ELSE N.. G0 X0 Z0 N.. ENDIF ... N.. IF 1==BITSET(0,#l1) N.. THEN N.. PRINT("Bit 0: OK") ... 422 DIN Programming 4.32 Conditional block run Requesting variables and constants With the DEF, NDEF, and DVDEF elements you can inquire whether a valid value was assigned to a variable or a constant. For example, an undefined variable can return the value 0, just like a variable that has been assigned the value 0. You can prevent undesired program jumps by examining the variables. Programming: Select "Extras > DINplus word...". The Steuerung opens the "Insert DIN PLUS word" selection list Select the IF command Enter the required inquiry element (DEF, NDEF or DVDEF) Enter the name of a variable or a constant Beispiel: Requesting variable in subprogram N.. IF DEF(__la) N.. THEN N.. PRINT("Value:",#__la) N.. ELSE N.. PRINT("#__la is not defined") N.. ENDIF ... Beispiel: Requesting variable in subprogram Enter the variable name without the character "#", e.g. IF NDEF(__la). N.. IF NDEF(__lb) N.. THEN Inquiry elements of variables and constants: DEF: A value is assigned to a variable or constant NDEF: No value is assigned to a variable or constant DVDEF: Query of an internal constant N.. PRINT("#__lb is not defined") N.. ELSE N.. PRINT("Value:",#__lb) N.. ENDIF ... Beispiel: Requesting constants N.. IF DVDEF(__n97_s) N.. THEN N.. PRINT("__n97_s is defined",#__n97_s) N.. ELSE N.. PRINT("#__n97_s is not defined") N.. ENDIF ... HEIDENHAIN MANUALplus 620, CNC PILOT 640 423 4.32 Conditional block run WHILE..ENDWHILE program repeat A program repeat consists of the elements: WHILE, followed by a condition. The condition includes a variable or mathematical expression on either side of the relational operator. ENDWHILE concludes the conditional program repeat. NC blocks programmed between WHILE and ENDWHILE are executed repeatedly for as long as the condition is fulfilled. If the condition is not fulfilled, the Steuerung continues execution of the program with the block programmed after ENDWHILE. Interrogate bitset: You can also use the BITSET function as condition. The function returns 1 if the numerical value contains the requested bit. The function returns 0 if the numerical value does not contain the requested bit. Relational operators < Less than <= Less than or equal to <> Not equal to > Greater than >= Greater than or equal to == Equal to Combining conditions: Syntax: BITSET (x,y) x: Bit number (0 to 15) y: Numerical value (0 to 65535) AND Logical AND operation OR Logical OR operation The relationship between bit number and numerical value is shown in the table at right. You can also use variables for x, y. Programming: Select "Extras > DINplus word...". The Steuerung opens the "Insert DIN PLUS word" selection list. Select WHILE. Enter the condition. Insert NC blocks between WHILE and ENDWHILE. You can combine up to two conditions. If the condition you program in the WHILE command is always true, the program remains in an endless loop. This is one of the most frequent causes of error when working with program repeats. Bit which means numerical value Bit which means numerical value 0 1 8 256 1 2 9 512 2 4 10 1024 3 8 11 2048 4 16 12 4096 5 32 13 8192 6 64 14 16384 7 128 15 32768 Beispiel: WHILE..ENDWHILE ... N.. WHILE (#l4<10) AND (#l5>=0) N.. G0 Xi10 ... N.. ENDWHILE ... 424 DIN Programming 4.32 Conditional block run SWITCH..CASE—program branching The switch statement consists of the elements: SWITCH, followed by a variable. The content of the variable is interrogated in the following CASE statement. CASE x: The CASE branch is run with the variable value x. CASE can be programmed repeated times. DEFAULT: This branch is executed if no CASE statement matched the variable value. DEFAULT can be omitted. BREAK: Concludes the CASE branch or DEFAULT branch. Programming: Select "Extras > DINplus word...". The Steuerung opens the "Insert DIN PLUS word" selection list. Select SWITCH. Enter the switch variable. For each CASE branch: Select CASE (in "Extras > DINplus word..."). Enter the SWITCH condition (value of the variable) and Insert the NC blocks to be executed. For the DEFAULT branch: Insert the NC blocks to be executed. Example: SWITCH..CASE ... N.. SWITCH #g201 N.. N.. CASE 1 [executed if #g201=1] Executed if #g201=1 [executed if #g201=2] Executed if #g201=2 G0 Xi10 ... N.. BREAK N.. CASE 2 N.. G0 Xi20 ... N.. BREAK N.. DEFAULT N.. G0 Xi30 No CASE statement matched the variable value ... N.. BREAK N.. ENDSWITCH ... HEIDENHAIN MANUALplus 620, CNC PILOT 640 425 4.32 Conditional block run Skip level In the Program Run submode, you can set/activate skip levels. The next time the program is executed, the NC blocks defined by the set/ activated skip level will not be executed by the control (see User's Manual). Before you can set/activate skip levels, you need to define them in the program: Open the program in the smart.Turn operating mode. Position the cursor in the MACHINING program section on the NC block to be skipped. Select "Skip level..." in the Extras menu. Enter the number of the skip level in the "Deletion" parameter and press the OK soft key to confirm. You can assign more than one skip level to an NC block by entering a string of numerals in the "Deletion" parameter. The entry "159" corresponds to the skip levels 1, 5 and 9. To clear the defined skip levels, program the parameter without a value and press the OK soft key to confirm. 426 DIN Programming 4.33 Subprograms 4.33 Subprograms Subprogram call: L"xx" V1 The subprogram contains the following elements: L: Identification letter for subprogram call "xx": Name of the subprogram—file name for external subprograms (max. 16 letters or numbers) V1: Identification code for external subprograms—omitted for local subprograms Note on using subprograms: External subprograms are defined in a separate file. They can be called from any main program or other subprogram. Local subprograms are in the main program file. They can be called only from the main program. Subprograms can be nested up to 6 times. Nesting means that another subprogram is called from within a subprogram. Recursion should be avoided. You can program up to 29 transfer values in a subprogram call. Designations: LA to LF, LH, I, J, K, O, P, R, S, U, W, X, Y, Z, BS, BE, WS, AC, WC, RC, IC, KC and JC The identification code within the subprogram is "#__..", followed by the parameter designation in lowercase letters (for example: #__la). Use the transfer values when programming with variables within the subprogram. String variables: ID and AT The variables #l1 – #l30 are available in every subprogram as local variables. To transfer a variable to the main program, program the variable after the fixed word RETURN. In the main program, the information is available in #i99. If a subprogram is to be executed repeatedly, define in the "number of repeats" Q parameter the number of times the subprogram is to be repeated. A subprogram ends with RETURN. The parameter LN is reserved for the transfer of block numbers. This parameter may receive a new value when the NC program is renumbered. HEIDENHAIN MANUALplus 620, CNC PILOT 640 427 4.33 Subprograms Dialog texts in subprogram call You can define up to 30 parameter descriptions that precede/follow the input fields in an external subprogram. The units of measure are defined using code numbers. Depending on the setting "metric" or "inches," the Steuerung shows the designations (of the units of measure). When calling external subprograms that contain a parameter list, then parameters not contained in this list are omitted from the call dialog. pn: Parameter designations (la, lb, ...) n: Code number for units of measure 0: Non-dimensional 1: mm or inches 2: mm/rev or inch/rev 3: mm/min or inch/min 4: m/min or ft/min 5: Rev/min 6: Degrees (°) 7: µm or µinch The parameter descriptions can be positioned within the subprogram as desired. The control searches for subprograms in the sequence: current project, standard directory and then machine manufacturer directory. Parameter descriptions (see table at right): [//] – Beginning [pn=n; s=parameter text (up to 25 characters) ] Beispiel: [//] – End ... [//] [la=1; s=bar diameter] [lb=1; s=starting point in Z] [lc=1; s=chamfer/rounding arc (-/+)] ... [//] ... 428 DIN Programming 4.33 Subprograms Help graphics for subprogram calls With help graphics you illustrate the call parameters of subprograms. The Steuerung places the help graphics to the left next to the dialog box of the subprogram call. If you append an underscore "_" and the input field name in capital letters (beginning with L) to the name of the file, a separate graphic will be displayed for that input field. If no separate help graphic exists for an input field, the graphic for the subprogram will be displayed (if available). By default, the help window is displayed only if there is a graphic for the subprogram. Even if you want to use individual graphics for the address letters, you should define a graphic for the subprogram. Graphic format: BMP, PNG, JPG images Size 440x320 pixels You integrate help graphics for subprogram calls as follows: The subprogram name, entry field name and the appropriate extension (BMP, PNG, JPG) must be used as file name for the help graphic. Transfer the help graphic to the directory: \nc_prog\Pictures HEIDENHAIN MANUALplus 620, CNC PILOT 640 429 4.34 M commands 4.34 M commands M commands for program-run control The effect of machine commands depends on the configuration of your machine. On your lathe, other M commands may apply for the listed functions. Refer to your machine manual. Overview: M commands for program-run control M00 Program stop The program run stops. Cycle start resumes the program run. M01 Optional stop If the Continuous run soft key is not active in Automatic mode, the program run stops with M01. Cycle start resumes the program run. If Continuous run is active, the program continues without stopping. M18 Counting pulse M30 End of program M30 means "end of program" (you do not need to program M30). If you press Cycle start after M30, program execution is repeated from the start of the program. M417 Activate protection zone monitoring M418 Deactivate protection zone monitoring M99 NS.. Program end with restart M99 means end program and start again. Steuerung restarts program execution from: The start of program if no NS is entered The block number NS if a NS is entered Modal functions (feed rate, spindle speed, tool number, etc.) which are effective at the end of program remain in effect when the program is restarted. You should therefore reprogram the modal functions at the start of program or at the startup block (if M99 is used). 430 DIN Programming 4.34 M commands Machine commands The effect of machine commands depends on the configuration of your machine. The following table lists the M commands used on most machines. M commands as machine commands M03 Main spindle on (cw) M04 Main spindle on (ccw) M05 Main spindle stop M12 Lock main spindle brake M13 Release main spindle brake M14 C axis on M15 C axis off M19.. Spindle stop at position C M40 Shift gear to range 0 (neutral) M41 Shift gear to range 1 M42 Shift gear to range 2 M43 Shift gear to range 3 M44 Shift gear to range 4 Mx03 Spindle x on (cw) Mx04 Spindle x on (ccw) Mx05 Spindle x stop For more information on the M commands, refer to your machine manual. HEIDENHAIN MANUALplus 620, CNC PILOT 640 431 4.35 G codes from previous controls 4.35 G codes from previous controls The commands described in the following are supported to enable you to use NC programs from previous controls. HEIDENHAIN recommends against using these commands in new NC programs. Contour definitions in the machining section Undercut contour G25 G25 generates an undercut form element (DIN 509 E, DIN 509 F, DIN 76) that can be integrated in the contour description of roughing or finishing cycles. The help graphic illustrates the undercut parameters. Parameters H Undercut type (default: 0) I K R P W A FP U E H=0, 5: DIN 509 E H=6: DIN 509 F H=7: DIN 76 Undercut depth (default: value from standard table) Undercut width (default: value from standard table) Undercut radius (default: value from standard table) Face depth (default: value from standard table) Undercut angle (default: value from standard table) Face angle (default: value from standard table) Thread pitch—no value: Pitch calculated from thread diameter Grinding oversize (default: 0) Reduced feed for machining the undercut (default: active feed rate) If the parameters are not defined, the Steuerung determines the following values from the diameter or the thread pitch in the standard table: DIN 509 E: I, K, W, R DIN 509 F: I, K, W, R, P, A DIN 76: I, K, W, R (determined from the thread pitch) 432 DIN Programming All parameters that you enter will be accounted for— even if the standard table prescribes other values. If you are programming an internal thread, it is advisable to preset the thread pitch FP since the diameter of the longitudinal element is not the thread diameter. If you have the Steuerung calculate the thread pitch automatically, slight deviations may occur. 4.35 G codes from previous controls Beispiel: G25 %25.nc [G25] N1 T1 G95 F0.4 G96 S150 M3 N2 G0 X62 Z2 N3 G819 P4 H0 I0.3 K0.1 N4 G0 X13 Z0 N5 G1 X16 Z-1.5 N6 G1 Z-30 N7 G25 H7 I1.15 K5.2 R0.8 W30 FP1.5 N8 G1 X20 N9 G1 X40 Z-35 N10 G1 Z-55 B4 N11 G1 X55 B-2 N12 G1 Z-70 N13 G1 X60 N14 G80 END HEIDENHAIN MANUALplus 620, CNC PILOT 640 433 4.35 G codes from previous controls Simple turning cycles Simple longitudinal roughing G81 G81 roughs the contour area defined by the current tool position and X, Z. If you wish to machine an oblique cut, you can define the angle with I and K. Parameters X Starting point of contour in X (diameter value) Z Contour end point I Maximum infeed in X K Offset in Z direction (default: 0) Q G code for infeed (default: 0) V 0: Infeed with G0 (rapid traverse) 1: Infeed with G1 (feed rate) Type of retraction (default: 0) H 0: Return to cycle starting point in Z and last retraction diameter in X 1: Return to cycle starting point Type of departure (default: 0) 0: With each cut (machine contour outline after each pass) 2: No smoothing (retracts at 45°; no contour smoothing) The Steuerung uses the position of the target point to distinguish between external and internal machining. The number of cutting passes is calculated so that an abrasive cut is avoided and the calculated infeed distance is <= I. Programming X, Z: Absolute, incremental or modal The tool radius compensation is not active. Safety clearance after each pass: 1 mm A G57 oversize Is calculated with algebraic sign (oversizes are therefore impossible for inside contour machining) Remains effective after cycle end A G58 oversize is not taken into account. Beispiel: G81 ... N1 T3 G95 F0.25 G96 S200 M3 N2 G0 X120 Z2 N3 G81 X100 Z-70 I4 K4 Q0 N4 G0 X100 Z2 N5 G81 X80 Z-60 I-4 K2 Q1 N6 G0 X80 Z2 N7 G81 X50 Z-45 I4 Q1 ... 434 DIN Programming 4.35 G codes from previous controls Simple face roughing G82 G82 roughs the contour area defined by the current tool position and X, Z. If you wish to machine an oblique cut, you can define the angle with I and K. Parameters X Contour end point in X (diameter value) Z Contour starting point I Offset in X direction (default: 0) K Maximum infeed in Z Q G code for infeed (default: 0) V 0: Infeed with G0 (rapid traverse) 1: Infeed with G1 (feed rate) Type of retraction (default: 0) H 0: Return to cycle starting point in X and last retraction position in Z 1: Return to cycle starting point Type of departure (default: 0) 0: With each cut (machine contour outline after each pass) 2: No smoothing (retracts at 45°; no contour smoothing) The Steuerung uses the position of the target point to distinguish between external and internal machining. The number of cutting passes is calculated so that an abrasive cut is avoided and the calculated infeed distance is <= K. Programming X, Z: Absolute, incremental or modal The tool radius compensation is not active. Safety clearance after each pass: 1mm A G57 oversize Is calculated with algebraic sign (oversizes are therefore impossible for inside contour machining) Remains effective after cycle end A G58 oversize is not taken into account. Beispiel: G82 ... N1 T3 G95 F0.25 G96 S200 M3 N2 G0 X120 Z2 N3 G82 X20 Z-15 I4 K4 Q0 N4 G0 X120 Z-15 N5 G82 X50 Z-26 I2 K-4 Q1 N6 G0 X120 Z-26 N7 G82 X80 Z-45 K4 Q1 ... HEIDENHAIN MANUALplus 620, CNC PILOT 640 435 4.35 G codes from previous controls Simple contour repeat cycle G83 G83 carries out the functions programmed in the following blocks (simple traverses or cycles without a contour definition) more than once. G80 ends the machining cycle. Parameters X Contour target point (diameter)—(default: Load the last X coordinate) Z Contour target point (default: Load the last Z coordinate) I Maximum infeed in X direction (radius)—(default: 0) K Maximum infeed in Z direction (default: 0) If the number of infeeds differs for the X and Z axes, the tool first advances in both axes with the programmed values. The infeed is set to zero if the target value for one direction is reached. Programming: G83 is alone in the block G83 must not be nested, not even by calling subprograms The tool radius compensation is not active. You can program the TRC separately with G40 to G42. Safety clearance after each pass: 1mm A G57 oversize Is calculated with algebraic sign (oversizes are therefore impossible for inside contour machining) Remains effective after cycle end A G58 oversize Is taken into account if you work with TRC Remains effective after cycle end Beispiel: G83 ... N1 T3 G95 F0.25 G96 S200 M3 N2 G0 X120 Z2 N3 G83 X80 Z0 I4 K0.3 N4 G0 X80 Z0 N5 G1 Z-15 B-1 N6 G1 X102 B2 N7 G1 Z-22 N8 G1 X90 Zi-12 B1 N9 G1 Zi-6 Danger of collision! N10 G1 X100 A80 B-1 After each pass, the tool returns on a diagonal path before it advances for the next pass. If required, program an additional rapid traverse path to avoid a collision. N11 G1 Z-47 N12 G1 X110 N13 G0 Z2 N14 G80 436 DIN Programming 4.35 G codes from previous controls Recessing G86 G86 machines simple radial and axial recesses with chamfers. From the tool position, the Steuerung determines whether a radial or axial recess, or an inside or outside recess is to be machined. Parameters X Base corner point (diameter) Z Base corner point I Radial recess: Oversize I>0: Oversize (roughing and finishing) I=0: No finishing Axial recess: Recess width K I>0: Recess width No input: Recess width = tool width Radial recess: Recess width K>0: Recess width No input: Recess width = tool width Axial recess: Oversize E K>0: Oversize (roughing and finishing) K=0: No finishing Dwell time (for chip breaking)—(default: length of time for one revolution) With finishing oversize: Only for finishing Without finishing oversize: For every recess "Oversize" programmed: First roughing, then finishing Beispiel: G86 G86 machines chamfers at the sides of the recess. If you do not wish to cut the chamfers, you must position the tool at a sufficient distance from the workpiece. Calculate the starting position XS (diameter) as follows: ... XS = XK + 2 * (1.3 – b) XK: Contour diameter b: Chamfer width N3 G86 X54 Z-30 I0.2 K7 E2 [radial] The tool radius compensation is active. Oversizes are not taken into account. N1 T30 G95 F0.15 G96 S200 M3 N2 G0 X62 Z2 N4 G14 Q0 N5 T38 G95 F0.15 G96 S200 M3 N6 G0 X120 Z1 N7 G86 X102 Z-4 I7 K0.2 E1 [axial] ... HEIDENHAIN MANUALplus 620, CNC PILOT 640 437 4.35 G codes from previous controls Radius cycle G87 G87 machines transition radii at orthogonal, paraxial inside and outside corners. The direction is taken from the position/machining direction of the tool. Parameters X Corner point (diameter) Z Corner point B Radius E Reduced feed rate (default: active feed) A preceding longitudinal or transverse element is machined if the tool is located at the X or Z coordinate of the corner before the cycle is executed. The tool radius compensation is active. Oversizes are not taken into account. Beispiel: G87 ... N1 T3 G95 F0.25 G96 S200 M3 N2 G0 X70 Z2 N3 G1 Z0 N4 G87 X84 Z0 B2 [radius] Chamfer cycle G88 G88 machines chamfers at orthogonal, paraxial outside corners. The direction is taken from the position/machining direction of the tool. Parameters X Corner point (diameter) Z Corner point B Chamfer width E Reduced feed rate (default: active feed) A preceding longitudinal or transverse element is machined if the tool is located at the X or Z coordinate of the corner before the cycle is executed. The tool radius compensation is active. Oversizes are not taken into account. Beispiel: G88 ... N1 T3 G95 F0.25 G96 S200 M3 N2 G0 X70 Z2 N3 G1 Z0 N4 G88 X84 Z0 B2 [chamfer] 438 DIN Programming 4.35 G codes from previous controls Thread cycles (4110) Simple longitudinal single-start thread G350 G350 cuts a longitudinal thread (internal or external). The thread starts at the current tool position and ends at the end point Z. Parameters Z Corner point of thread F Thread pitch U Thread depth I U>0: Internal thread U<0: External thread U=+999 or –999: Thread depth is calculated Maximum infeed (no input: I is calculated from the thread pitch and the thread depth) Internal or external threads: See algebraic sign of "U." Handwheel superposition (provided that your machine is equipped accordingly): The superposition is limited to the following range: X direction: Depending on the current cutting depth without exceeding the starting and end points of the thread. Z direction: Maximal 1 thread groove, without exceeding the starting and end points of the thread. Cycle stop becomes effective at the end of a thread cut. The feed rate and spindle speed overrides are not effective during cycle run. Handwheel superimpositioning can be activated with a switch located on the machine operating panel if your machine is equipped accordingly. Feedforward control is switched off. HEIDENHAIN MANUALplus 620, CNC PILOT 640 439 4.35 G codes from previous controls Simple longitudinal multi-start thread G351 G351 machines a single or multi-start longitudinal thread (internal or external thread) with variable pitch. The thread starts at the current tool position and ends at the end point Z. Parameters Z Corner point of thread F Thread pitch U Thread depth I A D J E U>0: Internal thread U<0: External thread U=+999 or –999: Thread depth is calculated Maximum infeed (no input: I is calculated from the thread pitch and the thread depth) Approach angle (angle of infeed) (default: 30°; range: – 60°<A<60°) A>0: Infeed on right thread flank A<0: Infeed on left thread flank Threads per unit (default: 1) Remaining cutting depth (default: 1/100 mm) Variable pitch (default: 0) E>0: Increases the pitch per revolution by E E<=: Decreases the pitch per revolution by E Internal or external threads: See algebraic sign of "U." Number of cutting passes: "I" is used for the first pass. The cutting depth is reduced with each further pass until the "remaining cutting depth J" is reached. Handwheel superposition (provided that your machine is equipped accordingly): The superposition is limited to the following range: X direction: Depending on the current cutting depth without exceeding the starting and end points of the thread. Z direction: Maximal 1 thread groove, without exceeding the starting and end points of the thread. Cycle stop becomes effective at the end of a thread cut. The feed rate and spindle speed overrides are not effective during cycle run. Handwheel superimpositioning can be activated with a switch located on the machine operating panel if your machine is equipped accordingly. Feedforward control is switched off. 440 DIN Programming 4.36 DINplus program example 4.36 DINplus program example Example of a subprogram with contour repetitions Contour repetitions, including saving of the contour HEADER #SLIDE $1 TURRET 1 T2 ID "121-55-040.1" T3 ID "111-55.080.1" T4 ID "161-400.2" T8 ID "342-18.0-70" T12 ID "112-12-050.1" BLANK N1 G20 X100 Z120 K1 FINISHED N2 G0 X19.2 Z-10 N3 G1 Z-8.5 BR0.35 N4 G1 X38 BR3 N5 G1 Z-3.05 BR0.2 N6 G1 X42 BR0.5 N7 G1 Z0 BR0.2 N8 G1 X66 BR0.5 N9 G1 Z-10 BR0.5 N10 G1 X19.2 BR0.5 MACHINING N11 G26 S2500 N12 G14 Q0 N13 G702 Q0 H1 Save contour N14 L"1" V0 Q2 Qx = number of repetitions N15 M30 SUBPROGRAM "1" N16 M108 N17 G702 Q1 H1 HEIDENHAIN MANUALplus 620, CNC PILOT 640 Load saved contour 441 4.36 DINplus program example N18 G14 Q0 N19 T8 N20 G97 S2000 M3 N21 G95 F0.2 N22 G0 X0 Z4 N23 G147 K1 N24 G74 Z-15 P72 I8 B20 J36 E0.1 K0 N25 G14 Q0 N26 T3 N27 G96 S300 G95 F0.35 M4 N28 G0 X72 Z2 N29 G820 NS8 NE8 P2 K0.2 W270 V3 N30 G14 Q0 N31 T12 N32 G96 S250 G95 F0.22 N33 G810 NS7 NE3 P2 I0.2 K0.1 Z-12 H0 W180 Q0 N34 G14 Q2 N35 T2 N36 G96 S300 G95 F0.08 N37 G0 X69 Z2 N38 G47 P1 N39 G890 NS8 V3 H3 Z-40 D3 N40 G47 P1 N41 G890 NS9 V1 H0 Z-40 D1 I74 K0 N42 G14 Q0 N43 T12 N44 G0 X44 Z2 N45 G890 NS7 NE3 N46 G14 Q2 N47 T4 Insert parting tool N48 G96 S160 G95 F0.18 M4 N49 G0 X72 Z-14 N50 G150 Shift reference point to the right of the cutting edge N51 G1 X60 N52 G1 X72 N53 G0 Z-9 N54 G1 X66 G95 F0.18 N55 G42 442 Activate TRC DIN Programming 4.36 DINplus program example N56 G1 Z-10 B0.5 N57 G1 X17 N58 G0 X72 N59 G0 X80 Z-10 G40 Deactivate TRC N60 G14 Q0 N61 G56 Z-14.4 Incremental zero point shift RETURN END HEIDENHAIN MANUALplus 620, CNC PILOT 640 443 4.37 Connection between geometry and machining commands 4.37 Connection between geometry and machining commands Turning Operations Function Geometry Machining Individual elements G0..G3 G12/G13 G810 Longitudinal roughing cycle G820 Face roughing cycle G830 Contour-parallel roughing cycle G835 Contour-parallel with neutral tool G860 Universal recessing cycle G869 Recess turning cycle G890 Finishing cycle Recess G22 (standard) G860 Universal recessing cycle G870 Simple recessing cycle G869 Recess turning cycle Recess G23 G860 Universal recessing cycle G869 Recess turning cycle Thread with undercut G24 G810 Longitudinal roughing cycle G820 Face roughing cycle G830 Contour-parallel roughing cycle G890 Finishing cycle G31 Thread cycle Undercut G25 G810 Longitudinal roughing cycle G890 Finishing cycle Thread G34 (standard) G37 (general) G31Thread cycle Hole G49 (turning center) G71 Simple drilling cycle G72 Boring, countersinking, etc. G73 Tapping cycle G74 Deep-hole drilling cycle 444 DIN Programming 4.37 Connection between geometry and machining commands C-axis machining—front/rear face Function Geometry Machining Individual elements G100 to G103 G840 Contour milling G845/G846 Pocket milling, roughing/finishing Figures G301 Linear slot G302/G303 Circular slot G304 Full circle G305 Rectangle G307 Eccentric polygon G840 Contour milling G845/G846 Pocket milling, roughing/finishing Hole G300 G71 Simple drilling cycle G72 Boring, countersinking, etc. G73 Tapping cycle G74 Deep-hole drilling cycle C-axis machining—lateral surface Function Geometry Machining Individual elements G110 to G113 G840 Contour milling G845/G846 Pocket milling, roughing/finishing Figures G311 Linear slot G312/G313 Circular slot G314 Full circle G315 Rectangle G317 Eccentric polygon G840 Contour milling G845/G846 Pocket milling, roughing/finishing Hole G310 G71 Simple drilling cycle G72 Boring, countersinking, etc. G73 Tapping cycle G74 Deep-hole drilling cycle HEIDENHAIN MANUALplus 620, CNC PILOT 640 445 4.38 Full-surface machining 4.38 Full-surface machining Fundamentals of full-surface machining In "full-surface machining," the front and rear ends can be machined in one NC program. The control supports full-surface machining for all common machine designs. The features include angle-synchronous part transfer with rotating spindle, traversing to a stop, controlled parting, and coordinate transformation. This ensures efficient fullsurface machining and simple programming. You describe the turning contour, the contours for the C axis as well as full-surface machining functions in one NC program. Expert programs are available for configuring the lathe. You can also enjoy the benefits of full-surface machining on lathes with only one spindle. Rear-face contours with C axis: The XK axis and therefore also the C axis are oriented with respect to the workpiece, not to the spindle. Therefore, for the rear face: Orientation of the XK axis: To the left (front face: to the right) Orientation of the C axis: Clockwise Direction of rotation for circular arcs G102: Counterclockwise Direction of rotation for circular arcs G103: Clockwise Turning: The control supports full-surface machining with conversion and mirroring functions. This makes it possible to keep the usual directions of movement for rear-side machining as well. Program a positive value to depart the workpiece Program a negative value to approach the workpiece. The machine manufacturer can provide your lathe with suitable expert programs for workpiece transfer. Reference points and coordinate system: The position of the machine and workpiece zero points as well as the coordinate systems for the spindle and opposing spindle are illustrated in the figure at bottom. With this design of lathe it is recommended to mirror only the Z axis. Then, for either spindle, moving in positive direction will stand for motion away from the workpiece. Usually the expert program contains the mirroring of the Z axis and the zero-point shift by the dimension "NP-Offs." (Trans_Z1) 446 DIN Programming 4.38 Full-surface machining Programming of full-surface machining When programming a contour on the rear face, be sure to consider the orientation of the XK axis (or X axis) and rotational direction of arcs. Insofar as you use drilling and milling cycles, there are no special aspects to rear-face machining, since these cycles refer to predefined contours. For rear-face machining with the basic commands G100 to G103 the same conditions apply as for rear-face contours. Turning: The expert programs for rechucking contain converting and mirroring functions. The following principle applies for rear-face machining (2nd setup): + direction: Goes away from the workpiece – direction: Goes toward the workpiece G2/G12: Circular arc clockwise G3/G13: Circular arc counterclockwise Working without expert programs If you do not use the expert programs or the converting and mirroring functions, the following principle applies: + direction: Goes away from the main spindle – direction: Goes toward the main spindle G2/G12: Circular arc clockwise G3/G13: Circular arc counterclockwise HEIDENHAIN MANUALplus 620, CNC PILOT 640 447 4.38 Full-surface machining Full-surface machining with opposing spindle G30: The expert program switches the kinematics of the counterspindle. In addition, G30 activates the mirroring of the Z axis and converts other functions (e.g. circular arcs G2, G3). G99: The expert program shifts the contour and mirrors the coordinate system (Z axis). Further programming of G99 is normally not required for machining the rear face after rechucking. Example: The workpiece is machined on the front face, transferred to the opposing spindle through an expert program and machined on the rear face (see illustrations). The expert program is used for: Angle-synchronous workpiece transfer to the opposing spindle Mirroring traverse paths in the Z axis Activating a conversion list Mirroring the contour description and shifting for the 2nd setup Full-surface machining on machines with opposing spindles HEADER #MATERIAL #MEASURE_UNITS STEEL METRIC TURRET T1 ID "512-600.10" T2 ID "111-80-080.1" T102 ID "115-80-080.1" BLANK N1 G20 X100 Z100 K1 FINISHED ... FACE_C Z0 N 13 G308 ID"Line" P-1 N 14 G100 XK-15 YK10 N 15 G101 XK-10 YK12 BR2 N 16 G101 XK-4.0725 YK-12.6555 BR4 N 18 G101 XK10 N 19 G309 REAR_C Z-98 ... MACHINING 448 DIN Programming Zero point shift for 1st setup N28 G0 W#iS18 Counterspindle to machining position 4.38 Full-surface machining N27 G59 Z233 N30 G14 Q0 N31 G26 S2500 N32 T2 ... N63 M5 N64 T1 N65 G197 S1485 G193 F0.05 M103 C-axis machining in the main spindle N66 M14 N67 M107 N68 G0 X36.0555 Z3 N69 G110 C146.31 N70 G147 I2 K2 N71 G840 Q0 NS15 NE18 I0.5 R0 P1 N72 G0 X31.241 Z3 N73 G14 Q0 N74 M105 M109 N76 M15 Deactivate C axis N80 L"RECHUCK" V1 LA.. LB.. LC.. Expert prog. for part transfer with following functions: G720 Spindle synchronization G916 Traversing to a fixed stop G30 Switch the kinematics G99 Mirroring and shifting of the workpiece contour N90 G59 Z222 Zero point shift for 2nd setup ... N91 G14 Q0 N92 T102 N93 G396 S220 G395 F0.2 M304 Technology data for opposing spindle N94 M107 Turning in the counterspindle N95 G0 X120 Z3 N96 G810 .... Fixed cycles N97 G30 Q0 Switch off rear-face machining ... N129 M30 END HEIDENHAIN MANUALplus 620, CNC PILOT 640 449 4.38 Full-surface machining Full-surface machining with single spindle G30: Normally not required G99: The expert program mirrors the contour. Further programming of G99 is normally not required for machining the rear face after rechucking. Example: The front and rear face of the workpiece are machined using one NC program. The workpiece is first machined on the front face; then it is rechucked manually. The rear face is machined subsequently. The expert program mirrors and shifts the contour for the 2nd setup. Full-surface machining on machine with one spindle HEADER #MATERIAL #MEASURE_UNITS STEEL METRIC TURRET T1 ID "512-600.10" T2 ID "111-80-080.1" T4 ID "121-55-040.1" BLANK N1 G20 X100 Z100 K1 FINISHED ... FACE_C Z0 ... REAR_C Z-98 N20 G308 ID"R" P-1 N21 G100 XK5 YK-10 N22 G101 YK15 N23 G101 XK-5 N24 G103 XK-8 YK3.8038 R6 I-5 N25 G101 XK-12 YK-10 N26 G309 MACHINING 450 DIN Programming 4.38 Full-surface machining N27 G59 Z233 Zero point shift for 1st setup ... N82 M15 Prepare the rechucking N86 G99 H1 V0 K-98 Contour mirroring and shifting for manual rechucking N87 M0 Stop for rechucking N88 G59 Z222 Zero point shift for 2nd setup ... N125 M5 Milling – rear face N126 T1 N127 G197 S1485 G193 F0.05 M103 N128 M14 N130 M107 N131 G0 X22.3607 Z3 N132 G110 C-116.565 N134 G147 I2 K2 N135 G840 Q0 NS22 NE25 I0.5 R0 P1 N136 G0 X154 Z-95 N137 G0 X154 Z3 N138 G14 Q0 N139 M105 M109 N142 M15 N143 G30 Q0 Switch off rear-face machining N144 M30 END HEIDENHAIN MANUALplus 620, CNC PILOT 640 451 452 DIN Programming 4.38 Full-surface machining Touch probe cycles 5.1 General information on touch probe cycles (software option) 5.1 General information on touch probe cycles (software option) The control must be specially prepared by the machine tool builder for the use of a 3-D touch probe. The machine manual provides further information. Please note that HEIDENHAIN grants a warranty for the function of the touch probe cycles only if HEIDENHAIN touch probes are used! Principle of function of touch probe cycles When you run a touch probe cycle, the 3-D touch probe is prepositioned at positioning feed rate. The actual probing movement is then executed from there at probing feed rate. The machine tool builder determines the positioning feed rate for the touch probe in a machine parameter. You define the probing feed rate in the respective touch probe cycle. When the probe stylus contacts the workpiece, the 3-D touch probe transmits a signal to the control: the coordinates of the probed position are stored, the touch probe stops moving, and returns to the starting position of the probing procedure at positioning feed rate. If the stylus is not deflected within a defined distance, the control displays an error message. 454 Touch probe cycles 5.1 General information on touch probe cycles (software option) Touch probe cycles for automatic operation The control provides numerous touch probe cycles for various applications: Calibrating a touch trigger probe Measuring circles, circle segments, angle and position of the C axis Misalignment compensation Single-point and double-point measurement Finding a hole or stud Zero point setting in the Z or C axis Automatic tool measurement Touch probe cycles are programmed in DIN PLUS using G codes. Just like the fixed cycles, also the touch probe cycles use transfer parameters. To simplify programming, the control shows a graphic during cycle definition. The appropriate input parameters are displayed in the help graphic (see figure at right). The touch probe cycles save status information and measuring results in the variable #i99. Depending on the input parameters in the touch probe cycle you can interrogate the following values: Result #i99 Meaning < 999997 Measuring result 999999 Touch probe not deflected -999999 Invalid measuring axis programmed 999998 Maximum deviation WE exceeded 999997 Maximum compensation value E exceeded HEIDENHAIN MANUALplus 620, CNC PILOT 640 455 5.1 General information on touch probe cycles (software option) Programming the touch probe cycle in DIN PLUS Select DIN PLUS programming and place the cursor in the MACHINING program section Beispiel: Touch probe cycle in the DINplus program Select "Machining" pull-down menus HEADER Select "G menu" pull-down menus #MATERIAL Steel Select "Touch probe cycles" pull-down menus #MEASURE_UNITS METRIC Select measuring cycle group Select the cycle TURRET 1 T1 ID"342-300.1" Group of measuring cycles Page Single-point measurements Page 457 Double-point measurements Page 465 Calibration cycles Page 473 Probing Page 477 Search cycles Page 482 Circle measurement Page 490 N2 G0 X60 Z-115 Angle position Page 494 N3 G1 Z-105 In-process measurement Page 498 T2 ID"111-80-080.1" ... BLANK N1 G20 X120 Z120 K2 FINISHED ... MACHINING N19 T1 N19 G0 X0 Z5 N20 G771 R1 D0 K-30 AC0 BD2 Q0 P0 H0 N1 T2 G97 S1000 G95 F0.2 M3 N2 G0 X0 Z5 N3 G71 Z-25 A5 V2 [drilling] ... END 456 Touch probe cycles Single-point measurement for tool compensation G770 Cycle G770 measures with the programmed measuring axis in the specified direction. If the tolerance value defined in the cycle is exceeded, the cycle saves the measured deviation either as tool compensation or as an additive compensation. The result of the measurement is saved additionally in the variable #i99 (See "Touch probe cycles for automatic operation" on page 455.). Cycle run From the current position the touch probe moves along the defined measuring axis toward the measuring point. When the stylus touches the workpiece, the measured value is saved and the touch probe is positioned back to the starting point. The control outputs an error message if the touch probe does not reach any touch point within the defined measuring path. If a maximum deviation WE was programmed, the measuring point is approached twice and the mean value is saved as result. If the difference of the measurements is greater than the maximum deviation WE, the program run is interrupted and an error message is displayed. Parameters R Type of compensation: 1: Tool compensation DX/DZ for turning tool or additive compensation 2: Recessing tool Dx/DS 4: Milling tool DD D Measuring axis: Axis in which the measurement is to be made K Incremental measuring path with direction (signed): Maximum measuring path for probing. The algebraic sign determines the probing direction. AC Nominal value for target position: Touch point coordinate BD Tolerance +/-: Measurement result range in which no compensation is applied WT Compensation number T or G149: Beispiel: G770—Single-point measurement for tool compensation ... MACHINING N3 G770 R1 D0 K20 AC0 BD0.2 WT3 V1 O1 Q0 P0 H0 ... T: Tool at turret position T to compensate the difference to the nominal value G149: Additive compensation D9xx to compensate the difference to the nominal value (only possible with compensation type R =1) E Maximum compensation value for the tool compensation WE Maximum deviation: Probe twice and monitor the dispersion of the measured values HEIDENHAIN MANUALplus 620, CNC PILOT 640 457 5.2 Touch probe cycles for single-point measurement 5.2 Touch probe cycles for singlepoint measurement 5.2 Touch probe cycles for single-point measurement Parameters V Retraction type O 0: Without: Only position touch probe back to the starting point if the touch probe was deflected 1: Automatic: Always position touch probe back to the starting point Error evaluation P 0: Program: Do not interrupt program run, no error message 1: Automatic: Interrupt program run and output error message if touch probe is not deflected within measuring path Measuring feed rate: Feed rate for probing. If nothing is entered, the measuring feed rate from the touch probe table is used. If the entered measuring feed rate F is higher than the one in the touch probe table, the feed rate is reduced to the value from the touch probe table. Tool orientation: Orient the touch probe in the programmed probing direction before each probing operation (machinedependent function) PRINT outputs H 0: OFF: Do not display measuring results 1: ON: Display measuring results INPUT instead of measurement F Q 0: Default: Obtain measured values by probing 1: PC test: Simulate probing cycle on the programming station AN Log no.: Save measurement results in "TNC:\table\messpro.mep" table (line numbers 0–99; the table can be expanded if necessary) 458 Touch probe cycles Cycle G771 measures with the programmed measuring axis in the specified direction. If the tolerance value defined in the cycle is exceeded, the cycle saves the measured deviation as zero point shift. The result of the measurement is saved additionally in the variable #i99 (See "Touch probe cycles for automatic operation" on page 455.). Cycle run From the current position the touch probe moves along the defined measuring axis toward the measuring point. When the stylus touches the workpiece, the measured value is saved and the touch probe is positioned back to the starting point. The control outputs an error message if the touch probe does not reach any touch point within the defined measuring path. If a maximum deviation WE was programmed, the measuring point is approached twice and the mean value is saved as result. If the difference of the measurements is greater than the maximum deviation WE, the program run is interrupted and an error message is displayed. Parameters R Type of zero point shift: 1: Table and G59: Activate zero point shift and additionally save in zero point table. The zero-point shift also remains active after the program run. 2: Activate zero point shift with G59 for the further program run. Zero point shift no longer active after program run. D Measuring axis: Axis in which the measurement is to be made K Incremental measuring path with direction (signed): Maximum measuring path for probing. The algebraic sign determines the probing direction. AC Nominal value for target position: Touch point coordinate BD Tolerance +/-: Measurement result range in which no compensation is applied WE Maximum deviation: Probe twice and monitor the dispersion of the measured values F Measuring feed rate: Feed rate for probing. If nothing is entered, the measuring feed rate from the touch probe table is used. If the entered measuring feed rate F is higher than the one in the touch probe table, the feed rate is reduced to the value from the touch probe table. HEIDENHAIN MANUALplus 620, CNC PILOT 640 Beispiel: G771 Single-point measurement for tool compensation ... MACHINING N3 G771 R1 D0 K20 AC0 BD0.2 Q0 P0 H0 ... 459 5.2 Touch probe cycles for single-point measurement Single-point measurement for zero point G771 5.2 Touch probe cycles for single-point measurement Parameters Q Tool orientation: Orient the touch probe in the programmed probing direction before each probing operation (machinedependent function) P PRINT outputs H 0: OFF: Do not display measuring results 1: ON: Display measuring results INPUT instead of measurement 0: Default: Obtain measured values by probing 1: PC test: Simulate probing cycle on the programming station AN Log no.: Save measurement results in "TNC:\table\messpro.mep" table (line numbers 0–99; the table can be expanded if necessary) 460 Touch probe cycles Cycle G772 measures with the C axis in the specified direction. If the tolerance value defined in the cycle is exceeded, the cycle saves the measured deviation as zero point shift. The result of the measurement is saved additionally in the variable #i99 (See "Touch probe cycles for automatic operation" on page 455.). Cycle run From the current position, the element to be probed is moved toward the touch probe by a rotation of the C axis. When the workpiece touches the stylus, the measured value is saved and the workpiece is returned. The control outputs an error message if the touch probe does not reach any touch point within the defined measuring path. If a maximum deviation WE was programmed, the measuring point is approached twice and the mean value is saved as result. If the difference of the measurements is greater than the maximum deviation WE, the program run is interrupted and an error message is displayed. Parameters R Type of zero point shift: C AC BD KC WE F 1: Table and G152: Activate zero point shift and additionally save in zero point table. The zero-point shift also remains active after the program run. 2: Activate zero point shift with G152 for the further program run. Zero point shift no longer active after program run. Incremental measuring path with direction: Measuring path of the C axis (in degrees), starting from the current position. The algebraic sign determines the probing direction. Nominal value for target position: Absolute coordinate of touch point in degrees Tolerance +/-: Measurement result range (in degrees) in which no compensation is applied Compensation offset: Additional compensation value that is applied to the zero point result Maximum deviation: Probe twice and monitor the dispersion of the measured values Measuring feed rate: Feed rate for probing. If nothing is entered, the measuring feed rate from the touch probe table is used. If the entered measuring feed rate F is higher than the one in the touch probe table, the feed rate is reduced to the value from the touch probe table. HEIDENHAIN MANUALplus 620, CNC PILOT 640 Beispiel: G772—Single-point measurement zero point C axis ... MACHINING N3 G772 R1 C20 AC0 BD0.2 Q0 P0 H0 ... 461 5.2 Touch probe cycles for single-point measurement Zero point C axis, single-point measurement G772 5.2 Touch probe cycles for single-point measurement Parameters Q Tool orientation: Orient the touch probe in the programmed probing direction before each probing operation (machinedependent function) P PRINT outputs H 0: OFF: Do not display measuring results 1: ON: Display measuring results INPUT instead of measurement 0: Default: Obtain measured values by probing 1: PC test: Simulate probing cycle on the programming station AN Log no.: Save measurement results in "TNC:\table\messpro.mep" table (line numbers 0–99; the table can be expanded if necessary) 462 Touch probe cycles Cycle G773 measures an element with the C axis from two opposite sides and places the center of the element to a defined position. The result of the measurement is saved additionally in the variable #i99 (See "Touch probe cycles for automatic operation" on page 455.). Cycle run From the current position, the element to be probed is moved toward the touch probe by a rotation of the C axis. When the workpiece touches the stylus, the measured value is saved and the workpiece is returned. Then the touch probe is pre-positioned for the opposite probing procedure. When the second measured value has been determined, the cycle computes the mean value of the two measurements and applies a zero point shift in the C axis. The nominal position AC defined in the cycle is then in the center of the probed element. The control outputs an error message if the touch probe does not reach any touch point within the defined measuring path. If a maximum deviation WE was programmed, each measuring point is approached twice and the mean value is saved as result. If the difference of the measurements is greater than the maximum deviation WE, the program run is interrupted and an error message is displayed. Parameters R Type of zero point shift: C E RB RC AC BD KC WE F 1: Table and G152: Activate zero point shift and additionally save in zero point table. The zero-point shift also remains active after the program run. 2: Activate zero point shift with G152 for the further program run. Zero point shift no longer active after program run. Incremental measuring path with direction: Measuring path of the C axis (in degrees), starting from the current position. The algebraic sign determines the probing direction. Circumnavigation axis: Axis that is positioned back by RB in order to circumnavigate the element Circumnavigation direction offset: Retraction value in the circumnavigation axis E for pre-positioning for the next probing position C-angle offset: Difference in the C axis between the first and the second measuring position Nominal value for target position: Absolute coordinate of touch point in degrees Tolerance +/-: Measurement result range (in degrees) in which no compensation is applied Compensation offset: Additional compensation value that is applied to the zero point result Maximum deviation: Probe twice and monitor the dispersion of the measured values Measuring feed rate: Feed rate for probing. If nothing is entered, the measuring feed rate from the touch probe table is used. If the entered measuring feed rate F is higher than the one in the touch probe table, the feed rate is reduced to the value from the touch probe table. HEIDENHAIN MANUALplus 620, CNC PILOT 640 Beispiel: G773—Single-point measurement C-axis object center ... MACHINING N3 G773 R1 C20 E0 RB20 RC45 AC30 BD0.2 Q0 P0 H0 ... 463 5.2 Touch probe cycles for single-point measurement Zero point C-axis object center G773 5.2 Touch probe cycles for single-point measurement Parameters Q Tool orientation: Orient the touch probe in the programmed probing direction before each probing operation (machinedependent function) P PRINT outputs H 0: OFF: Do not display measuring results 1: ON: Display measuring results INPUT instead of measurement 0: Default: Obtain measured values by probing 1: PC test: Simulate probing cycle on the programming station AN Log no.: Save measurement results in "TNC:\table\messpro.mep" table (line numbers 0–99; the table can be expanded if necessary) 464 Touch probe cycles Two-point measurement G18 transverse G775 Cycle G775 measures two opposite points in the X/Z plane with the measuring axis X. If the tolerance values defined in the cycle are exceeded, the cycle saves the measured deviation either as tool compensation or as an additive compensation. The result of the measurement is saved additionally in the variable #i99 (See "Touch probe cycles for automatic operation" on page 455.). Cycle run From the current position the touch probe moves along the defined measuring axis toward the measuring point. When the stylus touches the workpiece, the measured value is saved and the touch probe is positioned back to the starting point. For the pre-positioning for the second measurement, the cycle first moves the touch probe by the offset in the circumnavigation direction RB and then by the offset in the measuring direction RC. The cycle executes the second probing operation in the opposite direction, saves the result and positions the touch probe back with the circumnavigation axis by the circumnavigation value. The control outputs an error message if the touch probe does not reach any touch point within the defined measuring path. If a maximum deviation WE was programmed, the measuring points are approached twice and the mean value is saved as result. If the difference of the measurements is greater than the maximum deviation WE, the program run is interrupted and an error message is displayed. Parameters R Type of compensation: K E RB RC XE BD Beispiel: G775—Two-point measurement for tool compensation ... MACHINING N3 G775 R1 K20 E1 XE30 BD0.2 X40 BE0.3 WT5 Q0 P0 H0 ... 1: Tool compensation DX/DZ for turning tool or additive compensation 2: Recessing tool Dx/DS 3: Milling tool DX/DD 4: Milling tool DD Incremental measuring path with direction (signed): Maximum measuring path for probing. The algebraic sign determines the probing direction. Circumnavigation axis: Selection of axis for retraction movement between the probing positions: 0: Z axis 2: Y axis Circumnavigation direction offset: Distance Offset in X: Distance for pre-positioning before the second measurement Nominal value for target position X: Absolute coordinate of touch point Tolerance +/-: Range for the first measurement result in which no compensation is applied HEIDENHAIN MANUALplus 620, CNC PILOT 640 465 5.3 Touch probe cycles for two-point measurement 5.3 Touch probe cycles for twopoint measurement 5.3 Touch probe cycles for two-point measurement Parameters X Nominal width in X: Coordinate for the second probing position BE Tolerance width +/-: Range for the second measurement result in which no compensation is applied WT Compensation number T or G149, first measured edge: T: Tool at turret position T to compensate the difference to the nominal value G149: Additive compensation D9xx to compensate the difference to the nominal value (only possible with compensation type R =1) AT Compensation number T or G149, second measured edge: T: Tool at turret position T to compensate the difference to the nominal value G149: Additive compensation D9xx to compensate the difference to the nominal value (only possible with compensation type R =1) FP Maximum permissible compensation WE Maximum deviation: Probe twice and monitor the dispersion of the measured values F Measuring feed rate: Feed rate for probing. If nothing is entered, the measuring feed rate from the touch probe table is used. If the entered measuring feed rate F is higher than the one in the touch probe table, the feed rate is reduced to the value from the touch probe table. Q Tool orientation: Orient the touch probe in the programmed probing direction before each probing operation (machinedependent function) P PRINT outputs H 0: OFF: Do not display measuring results 1: ON: Display measuring results INPUT instead of measurement 0: Default: Obtain measured values by probing 1: PC test: Simulate probing cycle on the programming station AN Log no.: Save measurement results in "TNC:\table\messpro.mep" table (line numbers 0–99; the table can be expanded if necessary) The cycle computes the compensation value WT from the result of the first measurement and the compensation value AT from the result of the second measurement. 466 Touch probe cycles Cycle G776 measures two opposite points in the X/Z plane with the measuring axis Z. If the tolerance values defined in the cycle are exceeded, the cycle saves the measured deviation either as tool compensation or as an additive compensation. The result of the measurement is saved additionally in the variable #i99 (See "Touch probe cycles for automatic operation" on page 455.). Cycle run From the current position the touch probe moves along the defined measuring axis toward the measuring point. When the stylus touches the workpiece, the measured value is saved and the touch probe is positioned back to the starting point. For the pre-positioning for the second measurement, the cycle first moves the touch probe by the offset in the circumnavigation direction RB and then by the offset in the measuring direction RC. The cycle executes the second probing operation in the opposite direction, saves the result and positions the touch probe back with the circumnavigation axis by the circumnavigation value. The control outputs an error message if the touch probe does not reach any touch point within the defined measuring path. If a maximum deviation WE was programmed, the measuring points are approached twice and the mean value is saved as result. If the difference of the measurements is greater than the maximum deviation WE, the program run is interrupted and an error message is displayed. Parameters R Type of compensation: K E RB RC ZE BD Z BE Beispiel: G776—Two-point measurement for tool compensation ... MACHINING N3 G776 R1 K20 E1 ZE30 BD0.2 Z40 BE0.3 WT5 Q0 P0 H0 ... 1: Tool compensation DX/DZ for turning tool or additive compensation 2: Recessing tool Dx/DS 3: Milling tool DX/DD 4: Milling tool DD Incremental measuring path with direction (signed): Maximum measuring path for probing. The algebraic sign determines the probing direction. Circumnavigation axis: Selection of axis for retraction movement between the probing positions: 0: X axis 2: Y axis Circumnavigation direction offset: Distance Offset in Z: Distance for pre-positioning before the second measurement Nominal value for target position Z: Absolute coordinate of touch point Tolerance +/-: Range for the first measurement result in which no compensation is applied Nominal width in Z: Coordinate for the second probing position Tolerance width +/-: Range for the second measurement result in which no compensation is applied HEIDENHAIN MANUALplus 620, CNC PILOT 640 467 5.3 Touch probe cycles for two-point measurement Two-point measurement G18 longitudinal G776 5.3 Touch probe cycles for two-point measurement Parameters WT Compensation number T or G149, first measured edge: T: Tool at turret position T to compensate the difference to the nominal value G149: Additive compensation D9xx to compensate the difference to the nominal value (only possible with compensation type R =1) AT Compensation number T or G149, second measured edge: T: Tool at turret position T to compensate the difference to the nominal value G149: Additive compensation D9xx to compensate the difference to the nominal value (only possible with compensation type R =1) FP Maximum permissible compensation WE Maximum deviation: Probe twice and monitor the dispersion of the measured values F Measuring feed rate: Feed rate for probing. If nothing is entered, the measuring feed rate from the touch probe table is used. If the entered measuring feed rate F is higher than the one in the touch probe table, the feed rate is reduced to the value from the touch probe table. Q Tool orientation: Orient the touch probe in the programmed probing direction before each probing operation (machinedependent function) P PRINT outputs H 0: OFF: Do not display measuring results 1: ON: Display measuring results INPUT instead of measurement 0: Default: Obtain measured values by probing 1: PC test: Simulate probing cycle on the programming station AN Log no.: Save measurement results in "TNC:\table\messpro.mep" table (line numbers 0–99; the table can be expanded if necessary) The cycle computes the compensation value WT from the result of the first measurement and the compensation value AT from the result of the second measurement. 468 Touch probe cycles Cycle G777 measures two opposite points in the X/Y plane with the measuring axis Y. If the tolerance values defined in the cycle are exceeded, the cycle saves the measured deviation either as tool compensation or as an additive compensation. The result of the measurement is saved additionally in the variable #i99 (See "Touch probe cycles for automatic operation" on page 455.). Cycle run From the current position the touch probe moves along the defined measuring axis toward the measuring point. When the stylus touches the workpiece, the measured value is saved and the touch probe is positioned back to the starting point. For the pre-positioning for the second measurement, the cycle first moves the touch probe by the offset in the circumnavigation direction RB and then by the offset in the measuring direction RC. The cycle executes the second probing operation in the opposite direction, saves the result and positions the touch probe back with the circumnavigation axis by the circumnavigation value. The control outputs an error message if the touch probe does not reach any touch point within the defined measuring path. If a maximum deviation WE was programmed, the measuring points are approached twice and the mean value is saved as result. If the difference of the measurements is greater than the maximum deviation WE, the program run is interrupted and an error message is displayed. Parameters R Type of compensation: K RB RC YE BD Y BE Beispiel: G777—Two-point measurement for tool compensation ... MACHINING N3 G777 R1 K20 YE10 BD0.2 Y40 BE0.3 WT5 Q0 P0 H0 ... 1: Tool compensation DX/DZ for turning tool or additive compensation 2: Recessing tool Dx/DS 3: Milling tool DX/DD 4: Milling tool DD Incremental measuring path with direction (signed): Maximum measuring path for probing. The algebraic sign determines the probing direction. Circumnavigation direction offset: Distance in circumnavigation direction X Offset in Z: Distance for pre-positioning before the second measurement Nominal value for target position Y: Absolute coordinate of touch point Tolerance +/-: Range for the first measurement result in which no compensation is applied Nominal width in Z: Coordinate for the second probing position Tolerance width +/-: Range for the second measurement result in which no compensation is applied HEIDENHAIN MANUALplus 620, CNC PILOT 640 469 5.3 Touch probe cycles for two-point measurement Two-point measurement G17 longitudinal G777 5.3 Touch probe cycles for two-point measurement Parameters WT Compensation number T or G149, first measured edge: T: Tool at turret position T to compensate the difference to the nominal value G149: Additive compensation D9xx to compensate the difference to the nominal value (only possible with compensation type R =1) AT Compensation number T or G149, second measured edge: T: Tool at turret position T to compensate the difference to the nominal value G149: Additive compensation D9xx to compensate the difference to the nominal value (only possible with compensation type R =1) FP Maximum permissible compensation WE Maximum deviation: Probe twice and monitor the dispersion of the measured values F Measuring feed rate: Feed rate for probing. If nothing is entered, the measuring feed rate from the touch probe table is used. If the entered measuring feed rate F is higher than the one in the touch probe table, the feed rate is reduced to the value from the touch probe table. Q Tool orientation: Orient the touch probe in the programmed probing direction before each probing operation (machinedependent function) P PRINT outputs H 0: OFF: Do not display measuring results 1: ON: Display measuring results INPUT instead of measurement 0: Default: Obtain measured values by probing 1: PC test: Simulate probing cycle on the programming station AN Log no.: Save measurement results in "TNC:\table\messpro.mep" table (line numbers 0–99; the table can be expanded if necessary) The cycle computes the compensation value WT from the result of the first measurement and the compensation value AT from the result of the second measurement. 470 Touch probe cycles Cycle G778 measures two opposite points in the Y/Z plane with the measuring axis Y. If the tolerance values defined in the cycle are exceeded, the cycle saves the measured deviation either as tool compensation or as an additive compensation. The result of the measurement is saved additionally in the variable #i99 (See "Touch probe cycles for automatic operation" on page 455.). Cycle run From the current position the touch probe moves along the defined measuring axis toward the measuring point. When the stylus touches the workpiece, the measured value is saved and the touch probe is positioned back to the starting point. For the pre-positioning for the second measurement, the cycle first moves the touch probe by the offset in the circumnavigation direction RB and then by the offset in the measuring direction RC. The cycle executes the second probing operation in the opposite direction, saves the result and positions the touch probe back with the circumnavigation axis by the circumnavigation value. The control outputs an error message if the touch probe does not reach any touch point within the defined measuring path. If a maximum deviation WE was programmed, the measuring points are approached twice and the mean value is saved as result. If the difference of the measurements is greater than the maximum deviation WE, the program run is interrupted and an error message is displayed. Parameters R Type of compensation: K RB RC ZE BD Z BE Beispiel: G778—Two-point measurement for tool compensation ... MACHINING N3 G778 R1 K20 YE30 BD0.2 Y40 BE0.3 WT5 Q0 P0 H0 ... 1: Tool compensation DX/DZ for turning tool or additive compensation 2: Recessing tool Dx/DS 3: Milling tool DX/DD 4: Milling tool DD Incremental measuring path with direction (signed): Maximum measuring path for probing. The algebraic sign determines the probing direction. Circumnavigation direction offset: Distance in circumnavigation direction X Offset in Y: Distance for pre-positioning before the second measurement Nominal value for target position Y: Absolute coordinate of touch point Tolerance +/-: Range for the first measurement result in which no compensation is applied Nominal width in Y: Coordinate for the second probing position Tolerance width +/-: Range for the second measurement result in which no compensation is applied HEIDENHAIN MANUALplus 620, CNC PILOT 640 471 5.3 Touch probe cycles for two-point measurement Two-point measurement G19 longitudinal G778 5.3 Touch probe cycles for two-point measurement Parameters WT Compensation number T or G149, first measured edge: T: Tool at turret position T to compensate the difference to the nominal value G149: Additive compensation D9xx to compensate the difference to the nominal value (only possible with compensation type R =1) AT Compensation number T or G149, second measured edge: T: Tool at turret position T to compensate the difference to the nominal value G149: Additive compensation D9xx to compensate the difference to the nominal value (only possible with compensation type R =1) FP Maximum permissible compensation WE Maximum deviation: Probe twice and monitor the dispersion of the measured values F Measuring feed rate: Feed rate for probing. If nothing is entered, the measuring feed rate from the touch probe table is used. If the entered measuring feed rate F is higher than the one in the touch probe table, the feed rate is reduced to the value from the touch probe table. Q Tool orientation: Orient the touch probe in the programmed probing direction before each probing operation (machinedependent function) P PRINT outputs H 0: OFF: Do not display measuring results 1: ON: Display measuring results INPUT instead of measurement 0: Default: Obtain measured values by probing 1: PC test: Simulate probing cycle on the programming station AN Log no.: Save measurement results in "TNC:\table\messpro.mep" table (line numbers 0–99; the table can be expanded if necessary) The cycle computes the compensation value WT from the result of the first measurement and the compensation value AT from the result of the second measurement. 472 Touch probe cycles 5.4 Calibrating the touch probe 5.4 Calibrating the touch probe Calibrate touch probe standard G747 Cycle G747 measures with the programmed axis and, depending on the selected calibration method, calculates the touch probe adjustment dimension or the ball diameter. If the tolerance values defined in the cycle are exceeded, the cycle corrects the touch probe data. The result of the measurement is saved additionally in the variable #i99 (See "Touch probe cycles for automatic operation" on page 455.). Cycle run From the current position the touch probe moves along the defined measuring axis toward the measuring point. When the stylus touches the workpiece, the measured value is saved and the touch probe is positioned back to the starting point. The control outputs an error message if the touch probe does not reach any touch point within the defined measuring path. If a maximum deviation WE was programmed, the measuring point is approached twice and the mean value is saved as result. If the difference of the measurements is greater than the maximum deviation WE, the program run is interrupted and an error message is displayed. Parameters R Calibration method: 0: Change ball diameter 1: Change adjustment dimension D Measuring axis: Axis in which the measurement is to be made K Incremental measuring path with direction (signed): Maximum measuring path for probing. The algebraic sign determines the probing direction. AC Nominal value for target position: Touch point coordinate BD Tolerance +/-: Measurement result range in which no compensation is applied WE Maximum deviation: Probe twice and monitor the dispersion of the measured values F Measuring feed rate: Feed rate for probing. If nothing is entered, the measuring feed rate from the touch probe table is used. If the entered measuring feed rate F is higher than the one in the touch probe table, the feed rate is reduced to the value from the touch probe table. HEIDENHAIN MANUALplus 620, CNC PILOT 640 Beispiel: G747 Calibrate touch probe ... MACHINING N3 G747 R1 K20 AC10 BD0.2 Q0 P0 H0 ... 473 5.4 Calibrating the touch probe Parameters Q Tool orientation: Orient the touch probe in the programmed probing direction before each probing operation (machinedependent function) P PRINT outputs H 0: OFF: Do not display measuring results 1: ON: Display measuring results INPUT instead of measurement 0: Default: Obtain measured values by probing 1: PC test: Simulate probing cycle on the programming station AN Log no.: Save measurement results in "TNC:\table\messpro.mep" table (line numbers 0–99; the table can be expanded if necessary) 474 Touch probe cycles 5.4 Calibrating the touch probe Calibrate touch probe via two points G748 Cycle G748 measures two opposite points and computes the touch probe adjustment dimension and the ball diameter. If the tolerance values defined in the cycle are exceeded, the cycle corrects the touch probe data. The result of the measurement is saved additionally in the variable #i99 (See "Touch probe cycles for automatic operation" on page 455.). Cycle run From the current position the touch probe moves along the defined measuring axis toward the measuring point. When the stylus touches the workpiece, the measured value is saved and the touch probe is positioned back to the starting point. For the pre-positioning for the second measurement, the cycle first moves the touch probe by the offset in the circumnavigation direction RB and then by the offset in the measuring direction RC. The cycle performs the second probing operation in the opposite direction and saves the result. The control outputs an error message if the touch probe does not reach any touch point within the defined measuring path. If a maximum deviation WE was programmed, the measuring points are approached twice and the mean value is saved as result. If the difference of the measurements is greater than the maximum deviation WE, the program run is interrupted and an error message is displayed. Parameters K Incremental measuring path with direction (signed): Maximum measuring path for probing. The algebraic sign determines the probing direction. RB Circumnavigation direction offset: Distance RC Measuring direction offset: Distance for pre-positioning before the second measurement AC Nominal value for target position: Absolute coordinate of touch point EC Nominal width: Coordinate for the second probing position BE Tolerance width +/-: Range for the second measurement result in which no compensation is applied WE Maximum deviation: Probe twice and monitor the dispersion of the measured values F Measuring feed rate: Feed rate for probing. If nothing is entered, the measuring feed rate from the touch probe table is used. If the entered measuring feed rate F is higher than the one in the touch probe table, the feed rate is reduced to the value from the touch probe table. Q Tool orientation: Orient the touch probe in the programmed probing direction before each probing operation (machinedependent function) P PRINT outputs Beispiel: G748 Calibrate touch probe via two points ... MACHINING N3 G748 K20 AC10 EC33 Q0 P0 H0 ... 0: OFF: Do not display measuring results 1: ON: Display measuring results HEIDENHAIN MANUALplus 620, CNC PILOT 640 475 5.4 Calibrating the touch probe Parameters H INPUT instead of measurement 0: Default: Obtain measured values by probing 1: PC test: Simulate probing cycle on the programming station AN Log no.: Save measurement results in "TNC:\table\messpro.mep" table (line numbers 0–99; the table can be expanded if necessary) 476 Touch probe cycles 5.5 Measuring with touch probe cycles 5.5 Measuring with touch probe cycles Paraxial probing G764 Cycle G764 measures with the programmed axis and displays the measured values on the control screen. The result of the measurement is saved additionally in the variable #i99 (See "Touch probe cycles for automatic operation" on page 455.). Cycle run From the current position the touch probe moves along the defined measuring axis toward the measuring point. When the stylus touches the workpiece, the measured value is saved and the touch probe is positioned back to the starting point. The control outputs an error message if the touch probe does not reach any touch point within the defined measuring path. Parameters D Measuring axis: Axis in which the measurement is to be made K Incremental measuring path with direction (signed): Maximum measuring path for probing. The algebraic sign determines the probing direction. V Retraction type O 0: Without: Only position touch probe back to the starting point if the touch probe was deflected 1: Automatic: Always position touch probe back to the starting point Error evaluation P 0: Program: Do not interrupt program run, no error message 1: Automatic: Interrupt program run and output error message if touch probe is not deflected within measuring path Measuring feed rate: Feed rate for probing. If nothing is entered, the measuring feed rate from the touch probe table is used. If the entered measuring feed rate F is higher than the one in the touch probe table, the feed rate is reduced to the value from the touch probe table. Tool orientation: Orient the touch probe in the programmed probing direction before each probing operation (machinedependent function) PRINT outputs H 0: OFF: Do not display measuring results 1: ON: Display measuring results INPUT instead of measurement F Q Beispiel: G764 Paraxial probing ... MACHINING N3 G764 D0 K20 V1 O1 Q0 P0 H0 ... 0: Default: Obtain measured values by probing 1: PC test: Simulate probing cycle on the programming station HEIDENHAIN MANUALplus 620, CNC PILOT 640 477 5.5 Measuring with touch probe cycles Probing in C axis G765 Cycle G765 measures with the C axis and displays the measured values on the control screen. The result of the measurement is saved additionally in the variable #i99 (See "Touch probe cycles for automatic operation" on page 455.). Cycle run From the current position, the element to be probed is moved toward the touch probe by a rotation of the C axis. When the workpiece touches the stylus, the measured value is saved and the workpiece is returned. The control outputs an error message if the touch probe does not reach any touch point within the defined measuring path. Parameters C Incremental measuring path with direction: Measuring path of the C axis (in degrees), starting from the current position. The algebraic sign determines the probing direction. V Retraction type O 0: Without: Only position touch probe back to the starting point if the touch probe was deflected 1: Automatic: Always position touch probe back to the starting point Error evaluation P 0: Program: Do not interrupt program run, no error message 1: Automatic: Interrupt program run and output error message if touch probe is not deflected within measuring path Measuring feed rate: Feed rate for probing. If nothing is entered, the measuring feed rate from the touch probe table is used. If the entered measuring feed rate F is higher than the one in the touch probe table, the feed rate is reduced to the value from the touch probe table. Tool orientation: Orient the touch probe in the programmed probing direction before each probing operation (machinedependent function) PRINT outputs H 0: OFF: Do not display measuring results 1: ON: Display measuring results INPUT instead of measurement F Q Beispiel: G765 Probing in C axis ... MACHINING N3 G765 C20 V1 O1 AC0 BD0.2 Q0 P0 H0 ... 0: Default: Obtain measured values by probing 1: PC test: Simulate probing cycle on the programming station 478 Touch probe cycles Cycle G766 measures the position programmed in the cycle in the X/ Z plane and displays the measured values on the control screen. In parameter NF you can additionally define the variables in which the measurement results should be saved. Cycle run The touch probe moves from the current position toward the measuring point. When the stylus touches the workpiece, the measured value is saved and the touch probe is positioned back to the starting point. The control outputs an error message if the touch probe does not reach any touch point within the defined measuring path. Parameters Z Target point Z: Z coordinate of measuring point X Target point X: X coordinate of measuring point V Retraction type O 0: Without: Only position touch probe back to the starting point if the touch probe was deflected 1: Automatic: Always position touch probe back to the starting point Error evaluation P 0: Program: Do not interrupt program run, no error message 1: Automatic: Interrupt program run and output error message if touch probe is not deflected within measuring path Measuring feed rate: Feed rate for probing. If nothing is entered, the measuring feed rate from the touch probe table is used. If the entered measuring feed rate F is higher than the one in the touch probe table, the feed rate is reduced to the value from the touch probe table. Tool orientation: Orient the touch probe in the programmed probing direction before each probing operation (machinedependent function) PRINT outputs H 0: OFF: Do not display measuring results 1: ON: Display measuring results INPUT instead of measurement F Q Beispiel: G766 Probing in two axes in X/Z plane ... MACHINING N3 G766 Z-5 X30 V1 O1 AC0 BD0.2 Q0 P0 H0 ... 0: Default: Obtain measured values by probing 1: PC test: Simulate probing cycle on the programming station HEIDENHAIN MANUALplus 620, CNC PILOT 640 479 5.5 Measuring with touch probe cycles Probing in two axes G766 5.5 Measuring with touch probe cycles Probing in two axes G768 Cycle G768 measures the position programmed in the cycle in the Z/ Y plane and displays the measured values on the control screen. In parameter NF you can additionally define the variables in which the measurement results should be saved. Cycle run The touch probe moves from the current position toward the measuring point. When the stylus touches the workpiece, the measured value is saved and the touch probe is positioned back to the starting point. The control outputs an error message if the touch probe does not reach any touch point within the defined measuring path. Parameters Z Target point Z: Z coordinate of measuring point Y Target point Y: Y coordinate of measuring point V Retraction type O 0: Without: Only position touch probe back to the starting point if the touch probe was deflected 1: Automatic: Always position touch probe back to the starting point Error evaluation 0: Program: Do not interrupt program run, no error message 1: Automatic: Interrupt program run and output error message if touch probe is not deflected within measuring path F Measuring feed rate: Feed rate for probing. If nothing is entered, the measuring feed rate from the touch probe table is used. If the entered measuring feed rate F is higher than the one in the touch probe table, the feed rate is reduced to the value from the touch probe table. Q Tool orientation: Orient the touch probe in the programmed probing direction before each probing operation (machinedependent function) NF Result variable no.: Number of the first global variable in which the result is saved (no entry = variable 810). The second measurement result is saved automatically under the next consecutive number. P PRINT outputs H Beispiel: G768 Probing in two axes in Z/Y plane ... MACHINING N3 G768 Z-5 Y10 V1 O1 AC0 BD0.2 Q0 P0 H0 ... 0: OFF: Do not display measuring results 1: ON: Display measuring results INPUT instead of measurement 0: Default: Obtain measured values by probing 1: PC test: Simulate probing cycle on the programming station 480 Touch probe cycles Cycle G769 measures the position programmed in the cycle in the X/ Y plane and displays the measured values on the control screen. In parameter NF you can additionally define the variables in which the measurement results should be saved. . Cycle run The touch probe moves from the current position toward the measuring point. When the stylus touches the workpiece, the measured value is saved and the touch probe is positioned back to the starting point. The control outputs an error message if the touch probe does not reach any touch point within the defined measuring path. Parameters X Target point X: X coordinate of measuring point Y Target point Y: Y coordinate of measuring point V Retraction type O 0: Without: Only position touch probe back to the starting point if the touch probe was deflected 1: Automatic: Always position touch probe back to the starting point Error evaluation 0: Program: Do not interrupt program run, no error message 1: Automatic: Interrupt program run and output error message if touch probe is not deflected within measuring path F Measuring feed rate: Feed rate for probing. If nothing is entered, the measuring feed rate from the touch probe table is used. If the entered measuring feed rate F is higher than the one in the touch probe table, the feed rate is reduced to the value from the touch probe table. Q Tool orientation: Orient the touch probe in the programmed probing direction before each probing operation (machinedependent function) NF Result variable no.: Number of the first global variable in which the result is saved (no entry = variable 810). The second measurement result is saved automatically under the next consecutive number. P PRINT outputs H Beispiel: G769 Probing in two axes in X/Y plane ... MACHINING N3 G769 X25 Y10 V1 O1 AC0 BD0.2 Q0 P0 H0 ... 0: OFF: Do not display measuring results 1: ON: Display measuring results INPUT instead of measurement 0: Default: Obtain measured values by probing 1: PC test: Simulate probing cycle on the programming station HEIDENHAIN MANUALplus 620, CNC PILOT 640 481 5.5 Measuring with touch probe cycles Probing in two axes G769 5.6 Search cycles 5.6 Search cycles Find hole in C face G780 Cycle G780 probes the workpiece face several times with the Z axis. Prior to each probing, the touch probe is shifted by a distance defined in the cycle until a hole is found. Optionally, the cycle determines the mean value by two probing operations in the hole. If the tolerance value defined in the cycle is exceeded, the cycle saves the measured deviation as zero point shift. The result of the measurement is saved additionally in the variable #i99. Result #i99 Meaning < 999997 Result of first measurement 999999 Deviation of probing operations was higher than programmed in Maximum Deviation parameter WE. Cycle run From the current position the touch probe moves along the measuring axis Z toward the measuring point. When the stylus touches the workpiece, the measured value is saved and the touch probe is positioned back to the starting point. Then the cycle rotates the C axis by the angle defined in the Search Grid parameter RC and probes again with the Z axis. This process is repeated until a hole is found. In the hole the cycle performs two probing operations with the C axis, calculates the center of the hole and places the zero point in the C axis. Beispiel: Find hole in C face G780 ... MACHINING N3 G780 R1 D1 K2 C0 RC10 IC20 AC0 BD0.2 Q0 P0 H0 ... The control outputs an error message if the touch probe does not reach any touch point within the defined measuring path. If a maximum deviation WE was programmed, the measuring point is approached twice and the mean value is saved as result. If the difference of the measurements is greater than the maximum deviation WE, the program run is interrupted and an error message is displayed. Parameters R Type of zero point shift: D K C 482 1: Activate table and G152 zero point shift and additionally save in zero point table. The zero-point shift also remains active after the program run. 2: Activate zero point shift with G152 for the further program run. Zero point shift no longer active after program run. Result: 1: Position: Set zero point without determining the hole center. No probing operation in the hole. 2: Object center: Before the zero point is set, determine hole center in two probing operations with the C axis Incremental measuring path Z (signed): Maximum measuring path for probing. The algebraic sign determines the probing direction. Starting position C: Position of the C axis for the first probing operation Touch probe cycles H 5.6 Search cycles Parameters RC Search grid Ci: Stepping angle of the C axis for the subsequent probing operations A Number of points: Maximum number of probing operations IC Measuring path in C: Measuring path of the C axis (in degrees), starting from the current position. The algebraic sign determines the probing direction. AC Nominal value for target position: Absolute coordinate of touch point in degrees BD Tolerance +/-: Measurement result range (in degrees) in which no compensation is applied KC Compensation offset: Additional compensation value that is applied to the zero point result WE Maximum deviation: Probe twice and monitor the dispersion of the measured values F Measuring feed rate: Feed rate for probing. If nothing is entered, the measuring feed rate from the touch probe table is used. If the entered measuring feed rate F is higher than the one in the touch probe table, the feed rate is reduced to the value from the touch probe table. Q Tool orientation: Orient the touch probe in the programmed probing direction before each probing operation (machinedependent function) NF Result variable no.: Number of the first global variable in which the result is saved (no entry = variable 810). The second measurement result is saved automatically under the next consecutive number. P PRINT outputs 0: OFF: Do not display measuring results 1: ON: Display measuring results INPUT instead of measurement 0: Default: Obtain measured values by probing 1: PC test: Simulate probing cycle on the programming station AN Log no.: Save measurement results in "TNC:\table\messpro.mep" table (line numbers 0–99; the table can be expanded if necessary) HEIDENHAIN MANUALplus 620, CNC PILOT 640 483 5.6 Search cycles Find hole in C lateral surface G781 Cycle G780 probes the lateral surface of a workpiece several times with the X axis. Prior to each probing, the C axis is rotated by a distance defined in the cycle until a hole is found. Optionally, the cycle determines the mean value by two probing operations in the hole. If the tolerance value defined in the cycle is exceeded, the cycle saves the measured deviation as zero point shift. The result of the measurement is saved additionally in the variable #i99. Result #i99 Meaning < 999997 Result of first measurement 999999 Deviation of probing operations was higher than programmed in Maximum Deviation parameter WE. Cycle run From the current position the touch probe moves along the measuring axis X toward the measuring point. When the stylus touches the workpiece, the measured value is saved and the touch probe is positioned back to the starting point. Then the cycle rotates the C axis by the angle defined in the Search Grid parameter RC and probes again with the X axis. This process is repeated until a hole is found. In the hole the cycle performs two probing operations with the C axis, calculates the center of the hole and sets the zero point in the C axis. Beispiel: G781 Find hole in C face ... MACHINING N3 G781 R1 D1 K2 C0 RC10 IC20 AC0 BD0.2 Q0 P0 H0 ... The control outputs an error message if the touch probe does not reach any touch point within the defined measuring path. If a maximum deviation WE was programmed, the measuring point is approached twice and the mean value is saved as result. If the difference of the measurements is greater than the maximum deviation WE, the program run is interrupted and an error message is displayed. Parameters R Type of zero point shift: D 1: Activate table and G152 zero point shift and additionally save in zero point table. The zero-point shift also remains active after the program run. 2: Activate zero point shift with G152 for the further program run. Zero point shift no longer active after program run. Result: 1: Position: Set zero point without determining the hole center. No probing operation in the hole. 2: Object center: Before the zero point is set, determine hole center in two probing operations with the C axis K Incremental measuring path X (signed): Maximum measuring path for probing. The algebraic sign determines the probing direction. C Starting position C: Position of the C axis for the first probing operation RC Search grid Ci: Stepping angle of the C axis for the subsequent probing operations A Number of points: Maximum number of probing operations 484 Touch probe cycles H 5.6 Search cycles Parameters IC Measuring path in C: Measuring path of the C axis (in degrees), starting from the current position. The algebraic sign determines the probing direction. AC Nominal value for target position: Absolute coordinate of touch point in degrees BD Tolerance +/-: Measurement result range (in degrees) in which no compensation is applied KC Compensation offset: Additional compensation value that is applied to the zero point result WE Maximum deviation: Probe twice and monitor the dispersion of the measured values F Measuring feed rate: Feed rate for probing. If nothing is entered, the measuring feed rate from the touch probe table is used. If the entered measuring feed rate F is higher than the one in the touch probe table, the feed rate is reduced to the value from the touch probe table. Q Tool orientation: Orient the touch probe in the programmed probing direction before each probing operation (machinedependent function) P PRINT outputs 0: OFF: Do not display measuring results 1: ON: Display measuring results INPUT instead of measurement 0: Default: Obtain measured values by probing 1: PC test: Simulate probing cycle on the programming station AN Log no.: Save measurement results in "TNC:\table\messpro.mep" table (line numbers 0–99; the table can be expanded if necessary) HEIDENHAIN MANUALplus 620, CNC PILOT 640 485 5.6 Search cycles Find stud in C face G782 Cycle G782 probes the workpiece face several times with the Z axis. Prior to each probing, the C axis is rotated by a distance defined in the cycle until a stud is found. Optionally, the cycle determines the mean value by two probing operations on the stud diameter. If the tolerance value defined in the cycle is exceeded, the cycle saves the measured deviation as zero point shift. The result of the measurement is saved additionally in the variable #i99. Result #i99 Meaning < 999997 Result of first measurement 999999 Deviation of probing operations was higher than programmed in Maximum Deviation parameter WE. Cycle run From the current position the touch probe moves along the measuring axis X toward the measuring point. When the stylus touches the workpiece, the measured value is saved and the touch probe is positioned back to the starting point. Then the cycle rotates the C axis by the angle defined in the Search Grid parameter RC and probes again with the X axis. This process is repeated until a stud is found. The cycle performs two probing operations on the stud diameter with the C axis, calculates the center of the hole and sets the zero point in the C axis. Beispiel: G782 Find stud in C face ... MACHINING N3 G782 R1 D1 K2 C0 RC10 IC20 AC0 BD0.2 Q0 P0 H0 ... The control outputs an error message if the touch probe does not reach any touch point within the defined measuring path. If a maximum deviation WE was programmed, the measuring point is approached twice and the mean value is saved as result. If the difference of the measurements is greater than the maximum deviation WE, the program run is interrupted and an error message is displayed. Parameters R Type of zero point shift: D 1: Activate table and G152 zero point shift and additionally save in zero point table. The zero-point shift also remains active after the program run. 2: Activate zero point shift with G152 for the further program run. Zero point shift no longer active after program run. Result: 1: Position: Set zero point without determining the stud center. The stud diameter is not probed. 2: Object center: Before the zero point is set, determine stud center in two probing operations with the C axis K Incremental measuring path X (signed): Maximum measuring path for probing. The algebraic sign determines the probing direction. C Starting position C: Position of the C axis for the first probing operation RC Search grid Ci: Stepping angle of the C axis for the subsequent probing operations 486 Touch probe cycles H 5.6 Search cycles Parameters A Number of points: Maximum number of probing operations IC Measuring path in C: Measuring path of the C axis (in degrees), starting from the current position. The algebraic sign determines the probing direction. AC Nominal value for target position: Absolute coordinate of touch point in degrees BD Tolerance +/-: Measurement result range (in degrees) in which no compensation is applied KC Compensation offset: Additional compensation value that is applied to the zero point result WE Maximum deviation: Probe twice and monitor the dispersion of the measured values F Measuring feed rate: Feed rate for probing. If nothing is entered, the measuring feed rate from the touch probe table is used. If the entered measuring feed rate F is higher than the one in the touch probe table, the feed rate is reduced to the value from the touch probe table. Q Tool orientation: Orient the touch probe in the programmed probing direction before each probing operation (machinedependent function) P PRINT outputs 0: OFF: Do not display measuring results 1: ON: Display measuring results INPUT instead of measurement 0: Default: Obtain measured values by probing 1: PC test: Simulate probing cycle on the programming station AN Log no.: Save measurement results in "TNC:\table\messpro.mep" table (line numbers 0–99; the table can be expanded if necessary) HEIDENHAIN MANUALplus 620, CNC PILOT 640 487 5.6 Search cycles Find stud in C lateral surface G783 Cycle G783 probes the workpiece face several times with the X axis. Prior to each probing, the touch probe is shifted by a distance defined in the cycle until a stud is found. Optionally, the cycle determines the mean value by two probing operations on the stud diameter. If the tolerance value defined in the cycle is exceeded, the cycle saves the measured deviation as zero point shift. The result of the measurement is saved additionally in the variable #i99. Result #i99 Meaning < 999997 Result of first measurement 999999 Deviation of probing operations was higher than programmed in Maximum Deviation parameter WE. Cycle run From the current position the touch probe moves along the measuring axis Z toward the measuring point. When the stylus touches the workpiece, the measured value is saved and the touch probe is positioned back to the starting point. Then the cycle rotates the C axis by the angle defined in the Search Grid parameter RC and probes again with the Z axis. This process is repeated until a stud is found. The cycle performs two probing operations on the stud diameter with the C axis, calculates the center of the hole and sets the zero point in the C axis. Beispiel: G783 Find stud in C lateral surface ... MACHINING N3 G783 R1 D1 K2 C0 RC10 IC20 AC0 BD0.2 Q0 P0 H0 ... The control outputs an error message if the touch probe does not reach any touch point within the defined measuring path. If a maximum deviation WE was programmed, the measuring point is approached twice and the mean value is saved as result. If the difference of the measurements is greater than the maximum deviation WE, the program run is interrupted and an error message is displayed. Parameters R Type of zero point shift: D 1: Activate table and G152 zero point shift and additionally save in zero point table. The zero-point shift also remains active after the program run. 2: Activate zero point shift with G152 for the further program run. Zero point shift no longer active after program run. Result: 1: Position: Set zero point without determining the stud center. The stud diameter is not probed. 2: Object center: Before the zero point is set, determine stud center in two probing operations with the C axis K Incremental measuring path Z (signed): Maximum measuring path for probing. The algebraic sign determines the probing direction. C Starting position C: Position of the C axis for the first probing operation RC Search grid Ci: Stepping angle of the C axis for the subsequent probing operations A Number of points: Maximum number of probing operations 488 Touch probe cycles H 5.6 Search cycles Parameters IC Measuring path in C: Measuring path of the C axis (in degrees), starting from the current position. The algebraic sign determines the probing direction. AC Nominal value for target position: Absolute coordinate of touch point in degrees BD Tolerance +/-: Measurement result range (in degrees) in which no compensation is applied KC Compensation offset: Additional compensation value that is applied to the zero point result WE Maximum deviation: Probe twice and monitor the dispersion of the measured values F Measuring feed rate: Feed rate for probing. If nothing is entered, the measuring feed rate from the touch probe table is used. If the entered measuring feed rate F is higher than the one in the touch probe table, the feed rate is reduced to the value from the touch probe table. Q Tool orientation: Orient the touch probe in the programmed probing direction before each probing operation (machinedependent function) P PRINT outputs 0: OFF: Do not display measuring results 1: ON: Display measuring results INPUT instead of measurement 0: Default: Obtain measured values by probing 1: PC test: Simulate probing cycle on the programming station AN Log no.: Save measurement results in "TNC:\table\messpro.mep" table (line numbers 0–99; the table can be expanded if necessary) HEIDENHAIN MANUALplus 620, CNC PILOT 640 489 5.7 Circular measurement 5.7 Circular measurement Circular measurement G785 Cycle G785 determines the circle center and diameter by probing three times in the programmed plane and shows the measured values on the control screen. The result of the measurement is saved additionally in the variable #i99 (See "Touch probe cycles for automatic operation" on page 455.). Cycle run From the current position the touch probe moves in the defined measuring plane toward the measuring point. When the stylus touches the workpiece, the measured value is saved and the touch probe is positioned back to the starting point. Another two probing operations are carried out with the defined stepping angle. If a starting diameter D was programmed, the cycle positions the touch probe on a circular path before the respective measuring process. The control outputs an error message if the touch probe does not reach any touch point within the defined measuring path. If a maximum deviation WE was programmed, the measuring point is approached twice and the mean value is saved as result. If the difference of the measurements is greater than the maximum deviation WE, the program run is interrupted and an error message is displayed. Parameters R Type of zero point shift: Beispiel: G785 Circular measurement ... MACHINING N3 G785 R0 BR0 K2 C0 RC60 I0 J0 Q0 P0 H0 ... 0: X/Y plane G17: Probe circle in X/Y plane 1: Z/X plane G18: Probe circle in Z/X plane 2: Y/Z plane G19: Probe circle in Y/Z plane BR Inside/outside: 0: Inside: Probe inside diameter 1: Outside: Probe outside diameter K Incremental measuring path (signed): Maximum measuring path for probing. The algebraic sign determines the probing direction. C Angle of 1st measurement: Angle for the first probing operation RC Incremental angle: Stepping angle for the subsequent probing operations D Starting diameter: Diameter on which the touch probe is prepositioned before the measurements. WB Position in infeed direction: Measuring height to which the touch probe is positioned before the measuring process. No input: The circle is probed from the current position. I Circle center in axis 1: Nominal position of the circle center in first axis J Circle center in axis 2: Nominal position of the circle center in second axis WE Maximum deviation: Probe twice and monitor the dispersion of the measured values 490 Touch probe cycles H 5.7 Circular measurement Parameters F Measuring feed rate: Feed rate for probing. If nothing is entered, the measuring feed rate from the touch probe table is used. If the entered measuring feed rate F is higher than the one in the touch probe table, the feed rate is reduced to the value from the touch probe table. Q Tool orientation: Orient the touch probe in the programmed probing direction before each probing operation (machinedependent function) NF Result variable no.: Number of the first global variable in which the result is saved (no entry = variable 810). The second measurement result is saved automatically under the next consecutive number. P PRINT outputs 0: OFF: Do not display measuring results 1: ON: Display measuring results INPUT instead of measurement 0: Default: Obtain measured values by probing 1: PC test: Simulate probing cycle on the programming station AN Log no.: Save measurement results in "TNC:\table\messpro.mep" table (line numbers 0–99; the table can be expanded if necessary) HEIDENHAIN MANUALplus 620, CNC PILOT 640 491 5.7 Circular measurement Determine pitch circle G786 Cycle G786 determines the center and diameter of a pitch circle by measuring three holes and shows the measured values on the control screen. The result of the measurement is saved additionally in the variable #i99 (See "Touch probe cycles for automatic operation" on page 455.). Cycle run From the current position the touch probe moves in the defined measuring plane toward the measuring point. When the stylus touches the workpiece, the measured value is saved and the touch probe is positioned back to the starting point. Another two probing operations are carried out with the defined stepping angle. If a starting diameter D was programmed, the cycle positions the touch probe on a circular path before the respective measuring process. The control outputs an error message if the touch probe does not reach any touch point within the defined measuring path. If a maximum deviation WE was programmed, the measuring point is approached twice and the mean value is saved as result. If the difference of the measurements is greater than the maximum deviation WE, the program run is interrupted and an error message is displayed. Parameters R Type of zero point shift: K C AC RC WB I J D WS WC BD BE WE 492 0: X/Y plane G17: Probe circle in X/Y plane 1: Z/X plane G18: Probe circle in Z/X plane 2: Y/Z plane G19: Probe circle in Y/Z plane Incremental measuring path: Maximum measuring path for measurement in the holes. Angle of 1st hole: Angle for the first probing operation Angle of 2nd hole: Angle for the second probing operation Angle of 3rd hole: Angle for the third probing operation Position in infeed direction: Measuring height to which the touch probe is positioned before the measuring process. No input: The hole is probed from the current position. Pitch circle center in axis 1: Nominal position of the pitch circle center in first axis Pitch circle center in axis 2: Nominal position of the pitch circle center in second axis Nominal diameter: Diameter on which the touch probe is prepositioned before the measurements. Max. diameter of pitch circle Min. diameter of pitch circle Tolerance for center in first axis Tolerance for center in second axis Maximum deviation: Probe twice and monitor the dispersion of the measured values Beispiel: G786 Determine pitch circle ... MACHINING N3 G786 R0 K8 I0 J0 D50 WS50.1 WC49.9 BD0.1 BE0.1 P0 H0 ... Touch probe cycles H 5.7 Circular measurement Parameters F Measuring feed rate: Feed rate for probing. If nothing is entered, the measuring feed rate from the touch probe table is used. If the entered measuring feed rate F is higher than the one in the touch probe table, the feed rate is reduced to the value from the touch probe table. Q Tool orientation: Orient the touch probe in the programmed probing direction before each probing operation (machinedependent function) NF Result variable no.: Number of the first global variable in which the result is saved (no entry = variable 810). The second measurement result is saved automatically under the next consecutive number. P PRINT outputs 0: OFF: Do not display measuring results 1: ON: Display measuring results INPUT instead of measurement 0: Default: Obtain measured values by probing 1: PC test: Simulate probing cycle on the programming station AN Log no.: Save measurement results in "TNC:\table\messpro.mep" table (line numbers 0–99; the table can be expanded if necessary) HEIDENHAIN MANUALplus 620, CNC PILOT 640 493 5.8 Angular measurement 5.8 Angular measurement Angular measurement G787 Cycle G787 probes twice in the programmed direction and computes the angle. If the tolerance value defined in the cycle is exceeded, the cycle saves the measured deviation for a subsequent misalignment compensation. Program Cycle G788 next in order to activate the misalignment compensation. The result of the measurement is saved additionally in the variable #i99 (See "Touch probe cycles for automatic operation" on page 455.). Cycle run From the current position the touch probe moves along the defined measuring axis toward the measuring point. When the stylus touches the workpiece, the measured value is saved and the touch probe is retracted. Then the touch probe is pre-positioned for the second measurement and the workpiece is probed. The control outputs an error message if the touch probe does not reach any touch point within the defined measuring path. If a maximum deviation WE was programmed, the measuring point is approached twice and the mean value is saved as result. If the difference of the measurements is greater than the maximum deviation WE, the program run is interrupted and an error message is displayed. Parameters R Evaluation: D K WS WC AC BE RC BD 494 1: Prepare tool compensation and misalignment compensation: 2: Prepare misalignment compensation: 3: Angle output: Directions: Beispiel: G787 Angular measurement ... MACHINING N3 G787 R1 D0 BR0 K2 WS-2 WC15 AC170 BE1 RC0 BD0.2 WT3 Q0 P0 H0 ... 0: X measurement, Z offset 1: Y measurement, Z offset 2: Z measurement, X offset 3: Y measurement, X offset 4: Z measurement, Y offset 5: X measurement, Y offset Incremental measuring path (signed): Maximum measuring path for probing. The algebraic sign determines the probing direction. Position of first measuring point Position of second measuring point Nominal angle of measured surface Angle tolerance +/-: Measurement result range (in degrees) in which no compensation is applied Target position of first measurement: Nominal value of first measuring point Tolerance of first measurement +/-: Measurement result range in which no compensation is applied Touch probe cycles 5.8 Angular measurement Parameters WT Compensation number T or G149, first measured edge: T: Tool at turret position T to compensate the difference to the nominal value G149: Additive compensation D9xx to compensate the difference to the nominal value (only possible with compensation type R =1) FP Maximum permissible compensation WE Maximum deviation: Probe twice and monitor the dispersion of the measured values F Measuring feed rate: Feed rate for probing. If nothing is entered, the measuring feed rate from the touch probe table is used. If the entered measuring feed rate F is higher than the one in the touch probe table, the feed rate is reduced to the value from the touch probe table. Q Tool orientation: Orient the touch probe in the programmed probing direction before each probing operation (machinedependent function) NF Result variable no.: Number of the first global variable in which the result is saved (no entry = variable 810). The second measurement result is saved automatically under the next consecutive number. P PRINT outputs H 0: OFF: Do not display measuring results 1: ON: Display measuring results INPUT instead of measurement 0: Default: Obtain measured values by probing 1: PC test: Simulate probing cycle on the programming station AN Log no.: Save measurement results in "TNC:\table\messpro.mep" table (line numbers 0–99; the table can be expanded if necessary) HEIDENHAIN MANUALplus 620, CNC PILOT 640 495 5.8 Angular measurement Misalignment compensation after angle measurement G788 Cycle G788 activates a misalignment compensation determined with Cycle G787 Angle Measurement. Parameters NF Result variable no.: Number of the first global variable in which the result is saved (no entry = variable 810). The second measurement result is saved automatically under the next consecutive number. P Compensation 0: OFF: Do not perform misalignment compensation 1: ON: Perform misalignment compensation Beispiel: G788 Misalignment compensation after angle measurement ... MACHINING N3 G788 NF1 P0 ... 496 Touch probe cycles 5.9 In-process measurement 5.9 In-process measurement Measure workpieces (option) In-process measurement is measurement at the workpiece with a touch probe located in a tool holder of the machine. In the tool list, enter your touch probe as a new tool. Use the tool type "length gauge." The following cycles for "in-process measurement" are basic cycles for probing functions that you can use to program individually adapted probing sequences. Switch on measurement G910 G910 activates the selected touch probe. Parameters H Measuring direction (no function) V Type of measurement 0: Touch probe (for workpiece measurement) 1: Table-mounted touch probe (for tool measurement) Beispiel: In-process measurement ... N1 G0 X105 Z-20 N2 G94 F500 N3 G910 H0 V0 N4 G911 V0 N4 G1 Xi-10 N5 G914 N4 G912 Q1 N4 G913 N4 G0 X115 N4 #l1=#a9(X,0) N4 IF NDEF(#l1) N4 THEN N4 PRINT("Probe not reached") N4 ELSE N4 PRINT ("Result of measurement:",#l1) N4 ENDIF ... HEIDENHAIN MANUALplus 620, CNC PILOT 640 497 5.9 In-process measurement Measuring path monitoring G911 G911 activates the measuring path monitoring. Then only a single feed path is permissible. Parameters V 0: Axes stay stationary with deflected touch probe 1: Axes automatically retract after deflection of the touch probe Measured value capture G912 G912 puts the positions at which the touch probe was deflected into the result variables. Parameters Q Error evaluation when the touch probe is not reached 0: Error message of NC, program stops 1: Error evaluation in the NC program, measuring results="NDEF" The measurement results are available in the following variables: Beispiel: Measurement results: ... N1 #l1=#a9(X,0) [X value of current channel] N2 #l2=#a9(Z,1) [Z value of channel 1 ] N3 #l3=#a9(Y,0) [Y value of current channel] N4 #l4=#a9(C,0) [C value of current channel] ... #a9(axis,channel) Axis=axis name Channel=channel number, 0=current channel End in-process measuring G913 G913 ends the measuring process. Switch off measuring-path monitoring G914 G914 deactivates the measuring-path monitoring. 498 Touch probe cycles 5.9 In-process measurement In-process measurement example: Measuring and compensating workpieces The Steuerung provides subprograms for the measurement of workpieces: measure_pos.ncs measure_pos_e.ncs (German dialog texts) (English dialog texts) The programs require a touch probe as a tool. Beginning from the current position or the defined starting position, the Steuerung moves along a measuring path in the entered axis direction. At the end it returns again to the previous position. The result of measurement can be included in error compensation. The following subprograms are used: measure_pos_move.ncs _Print_txt_lang.ncs Parameters LA Measurement starting point in X (diameter value)—no input, current position. LB Measurement starting point in Z (no input = current position). LC Type of approach to measurement starting point LD 0: Diagonal 1: First X, then Z 2: First Z, then X Measuring axis LJ LK 0: X axis 1: Z axis 2: Y axis Incremental measurement path. The algebraic sign defines the direction of traverse. Measuring feed rate in mm/min—no input, the measuring feed rate from the touch probe table is used. Nominal value of the target position Tolerance +/-. If the measured deviation lies within this tolerance, the entered compensation value is not changed. 1: The measurement result is output as PRINT. Number of the compensation value to be changed. LO 1-xx Turret pocket number of the tool to be compensated 901-916 Additive compensation Current tool number for touch probe calibration Number of measurements: LE LF LH LI >0: The measurements are evenly distributed on the circumference with M19. <0: The measurements are made at the same position. HEIDENHAIN MANUALplus 620, CNC PILOT 640 499 5.9 In-process measurement Parameters LP Maximum permissible difference between the measurement results at a position. The program stops if the limit is violated. LR Maximum permissible compensation value, <10 mm LS 1: Program runs on the PC. Measurement results are interrogated through INPUT. For test purposes. In-process measurement example: Measuring and compensating workpieces (measure_pos_move.ncs) For the program "measure_pos_move.ncs" you have to use a touch probe as tool. The control moves the touch probe from the actual position in the given axis direction. After reaching the contact position, it returns again to the previous position. The measurement result can then be used again. Parameters LA Measuring axis: LC LD 0: X axis 1: Z axis 2: Y axis 3: C axis Incremental measurement path. The algebraic sign defines the direction of traverse. Measuring feed rate in mm/min Retraction type LO 0: Return with G0 to starting point 1: Return automatically to starting point Error response from missing stylus deflection: LB LF LS 500 0: A PRINT output follows and the program does not stop. A further response in the program is possible. 1: The program stops with an NC error message. 1: The measurement result is output as PRINT. 1: Program runs on the PC. Measurement results are interrogated through INPUT. For test purposes. Touch probe cycles DIN programming for the Y axis HEIDENHAIN MANUALplus 620, CNC PILOT 640 501 6.1 Y-axis contours—Fundamentals 6.1 Y-axis contours— Fundamentals Position of milling contours Define the reference plane or the reference diameter in the section code. Specify the depth and position of a milling contour (pocket, island) in the contour definition: With depth P programmed in the previous G308 cycle Alternatively on figures: Cycle parameter depth P The algebraic sign of "P" defines the position of the milling contour: P<0: Pocket P>0: Island Position of milling contour Section P Surface Milling floor FACE P<0 Z Z+P P>0 Z+P Z P<0 Z Z–P P>0 Z–P Z P<0 X X+(P*2) P>0 X+(P*2) X REAR LATERAL X: Reference diameter from the section code Z: Reference plane from the section code P: Depth from G308 or from the figure definition The area milling cycles mill the surface specified in the contour definition. Islands within this surface are not taken into consideration. 502 DIN programming for the Y axis 6.1 Y-axis contours—Fundamentals Cutting limit If parts of the milling contour lie outside of the turning contour, you must limit the machining area with the area diameter X / reference diameter X (parameters of the section code or of the figure definition). HEIDENHAIN MANUALplus 620, CNC PILOT 640 503 6.2 Contours in the XY plane 6.2 Contours in the XY plane Starting point of contour in XY plane G170-Geo G170 defines the starting point of a contour in the XY plane. Parameters X Starting point of contour (radius) Y Starting point of contour PZ Starting point (polar radius) W Starting point (polar angle) Line segment in XY plane G171-Geo G171 defines a line segment in a contour of the XY plane. Parameters X End point (radius) Y End point AN Angle to X axis (for direction of angle, see help graphic) Q Point of intersection. End point if the line segment intersects a circular arc (default: 0): BR PZ W AR R 0: Near point of intersection 1: Far point of intersection Chamfer/rounding. Defines the transition to the next contour element. When entering a chamfer/rounding, program the theoretical end point. No entry: Tangential transition BR=0: No tangential transition BR>0: Radius of rounding BR<0: Width of chamfer End point (polar radius; reference: workpiece zero point) End point (polar angle; reference: workpiece zero point) Angle (AR corresponds to AN) Length (polar radius; reference: last contour point) Programming X, Y: Absolute, incremental, modal or "?" ANi: Angle to the subsequent element ARi: Angle to the previous element 504 DIN programming for the Y axis 6.2 Contours in the XY plane Circular arc in XY plane G172-Geo/G173-Geo G172/G173 defines a circular arc in a contour of the XY plane. Direction of rotation: See help graphic Parameters X End point (radius) Y End point R Radius I Center in X direction (radius) J Center in Y direction Q Point of intersection. End point if the circular arc intersects a line segment or another circular arc (default: 0): BR 0: Near point of intersection 1: Far point of intersection Chamfer/rounding. Defines the transition to the next contour element. When entering a chamfer/rounding, program the theoretical end point. No entry: Tangential transition BR=0: No tangential transition BR>0: Radius of rounding BR<0: Width of chamfer PZ End point (polar radius; reference: workpiece zero point) W End point (polar angle; reference: workpiece zero point) PM Center point (polar radius; reference: workpiece zero point) WM Center point (polar angle; reference: workpiece zero point) AR Starting angle (tangential angle to rotary axis) AN End angle (tangential angle to rotary axis) Programming X, Y: Absolute, incremental, modal or "?" I, J: Absolute or incremental PZ, W, PM, WM: Absolute or incremental ARi: Angle to the previous element ANi: Angle to the subsequent element End point must not be the starting point (no full circle). HEIDENHAIN MANUALplus 620, CNC PILOT 640 505 6.2 Contours in the XY plane Hole in XY plane G370-Geo G370 defines a hole with countersinking and thread in the XY plane. Parameters X Center of hole (radius) Y Center of hole B Hole diameter P Depth of hole (excluding point) W Point angle (default: 180°) R Sinking diameter U Sinking depth E Sinking angle I Thread diameter J Thread depth K Start of thread (runout length) F Thread pitch V Left-hand or right-hand thread (default: 0) A 0: Right-hand thread 1: Left-hand thread Angle to Z axis. Inclination of the hole O Front face (range: –90° < A < 90°; default: 0°) Rear face (range: 90° < A < 270°; default: 180°) Centering diameter 506 DIN programming for the Y axis 6.2 Contours in the XY plane Linear slot in XY plane G371-Geo G371 defines the contour of a linear slot in the XY plane. Parameters X Center of slot (radius) Y Center of slot K Slot length B Slot width A Position angle (reference: positive X axis; default: 0°) P Depth/height (default: "P" from G308) I P<0: Pocket P>0: Island Limit diameter (as cutting limit) No input: "X" from section code "I" overwrites "X" from section code HEIDENHAIN MANUALplus 620, CNC PILOT 640 507 6.2 Contours in the XY plane Circular slot in XY plane G372-Geo/G373-Geo G372/G373 defines a circular slot in the XY plane. G372: Circular slot clockwise G373: Circular slot counterclockwise Parameters X Center of slot curvature (radius) Y Center of slot curvature R Curvature radius (reference: center point path of the slot) A Starting angle (reference: positive X axis; default: 0°) W End angle (reference: positive X axis; default: 0°) B Slot width P Depth/height (default: "P" from G308) I P<0: Pocket P>0: Island Limit diameter (as cutting limit) No input: "X" from section code "I" overwrites "X" from section code Full circle in XY plane G374-Geo G374 defines a full circle in the XY plane. Parameters X Circle center (radius) Y Circle center R Circle radius P Depth/height (default: "P" from G308) I P<0: Pocket P>0: Island Limit diameter (as cutting limit) No input: "X" from section code "I" overwrites "X" from section code 508 DIN programming for the Y axis 6.2 Contours in the XY plane Rectangle in XY plane G375-Geo G375 defines a rectangle in the XY plane. Parameters X Center of rectangle (radius) Y Center of rectangle A Position angle (reference: positive X axis; default: 0°) K Length of rectangle B Width of rectangle R Chamfer/rounding (default: 0) P R>0: Radius of rounding R<0: Width of chamfer Depth/height (default: "P" from G308) I P<0: Pocket P>0: Island Limit diameter (as cutting limit) No input: "X" from section code "I" overwrites "X" from section code Eccentric polygon in XY plane G377-Geo G377 defines the contour of an eccentric polygon in the XY plane. Parameters X Center point of polygon (radius) Y Center point of polygon Q Number of corners (Q >= 3) A Position angle (reference: positive X axis; default: 0°) K Edge length / width across flats R K>0: Edge length K<0: Width across flats (inside diameter) Chamfer/rounding—default: 0 P R>0: Radius of rounding R<0: Width of chamfer Depth/height (default: "P" from G308) I P<0: Pocket P>0: Island Limit diameter (as cutting limit) No input: "X" from section code "I" overwrites "X" from section code HEIDENHAIN MANUALplus 620, CNC PILOT 640 509 6.2 Contours in the XY plane Linear pattern in XY plane G471-Geo G471 defines a linear pattern in the XY plane. G471 is effective for the hole or figure defined in the following block (G370 to G375, G377). Parameters Q Number of figures X 1st point of pattern (radius) Y 1st point of pattern I End point of pattern (X direction; radius) J End point of pattern (Y direction) Ii Distance in X direction between two figures Ji Distance in Y direction between two figures A Position angle of longitudinal axis of pattern (reference: positive X axis) R Length (overall length of pattern) Ri Pattern distance (distance between two figures) Programming notes Program the hole/figure in the following block without a center. The milling cycle (MACHINING section) calls the hole/ figure in the following block—not the pattern definition. 510 DIN programming for the Y axis 6.2 Contours in the XY plane Circular pattern in XY plane G472-Geo G472 defines a circular pattern in the XY plane. G472 is effective for the figure defined in the following block (G370 to G375, G377). Parameters Q Number of figures K Diameter (pattern diameter) A Starting angle—position of the first figure (reference: positive X axis; default: 0°) W End angle—position of the last figure (reference: positive X axis; default: 360°) Wi Angle between two figures V Direction—orientation (default: 0) X Y H V=0, without W: Figures are arranged on a full circle V=0, with W: Figures are arranged on the longer circular arc V=0, with Wi: The algebraic sign of Wi defines the direction (Wi<0: clockwise) V=1, with W: Clockwise V=1, with Wi: Clockwise (algebraic sign of Wi has no effect) V=2, with W: Counterclockwise V=2, with Wi: Counterclockwise (algebraic sign of Wi has no effect) Center of pattern (radius) Center of pattern Position of the figures (default: 0) 0: Normal position—the figures are rotated about the circle center (rotation) 1: Original position—the position of the figures relative to the coordinate system remains unchanged (translation) Program the hole/figure in the following block without a center. Exception: circular slot. The milling cycle (MACHINING section) calls the hole/ figure in the following block—not the pattern definition. HEIDENHAIN MANUALplus 620, CNC PILOT 640 511 6.2 Contours in the XY plane Single surface in XY plane G376-Geo G376 defines a surface in the XY plane. Parameters Z Reference edge (default: "Z" from section code) K Residual depth Ki Depth B Width (reference: reference edge Z) I B<0: Surface in negative Z direction B>0: Surface in positive Z direction Limit diameter (as cutting limit and as reference for K/Ki) C No input: "X" from section code "I" overwrites "X" from section code Spindle angle of surface normal (default: "C" from section code) Whether the surface lies on the front face or rear side has no effect on the evaluation of the algebraic sign for "width B." Centric polygon in XY plane G477-Geo G477 defines polygonal surfaces in the XY plane. Parameters Z Reference edge (default: "Z" from section code) K Width across flats (inscribed circle diameter) Ki Edge length B Width (reference: reference edge Z) C Q I B<0: Surface in negative Z direction B>0: Surface in positive Z direction Spindle angle of surface normal (default: "C" from section code) Number of sides (Q >= 2) Limit diameter (as cutting limit) No input: "X" from section code "I" overwrites "X" from section code Whether the surface lies on the front face or rear side has no effect on the evaluation of the algebraic sign for "width B." 512 DIN programming for the Y axis 6.3 Contours in the YZ plane 6.3 Contours in the YZ plane Starting point of contour in YZ plane G180-Geo G180 defines the starting point of a contour in the YZ plane. Parameters Y Starting point of contour Z Starting point of contour PZ Starting point of contour (polar radius) W Starting point of contour (polar angle) Line segment in YZ plane G181-Geo G181 defines a line segment in a contour of the YZ plane. Parameters Y End point Z End point AN Angle to positive Z axis Q Point of intersection. End point if the line segment intersects a circular arc (default: 0): BR PZ W AR R 0: Near point of intersection 1: Far point of intersection Chamfer/rounding. Defines the transition to the next contour element. When entering a chamfer/rounding, program the theoretical end point. No entry: Tangential transition BR=0: No tangential transition BR>0: Radius of rounding BR<0: Width of chamfer End point (polar radius; reference: workpiece zero point) End point (polar angle; reference: workpiece zero point) Angle to positive Z axis (AR corresponds to AN) Length (polar radius; reference: last contour point) Programming Y, Z: Absolute, incremental, modal or "?" ANi: Angle to the subsequent element ARi: Angle to the previous element HEIDENHAIN MANUALplus 620, CNC PILOT 640 513 6.3 Contours in the YZ plane Circular arc in YZ plane G182-Geo/G183-Geo G182/G183 defines a circular arc in a contour of the YZ plane. Direction of rotation: See help graphic Parameters Y End point (radius) Z End point R Radius J Center (Y direction) K Center (Z direction) Q Point of intersection. End point if the circular arc intersects a line segment or another circular arc (default: 0): BR 0: Near point of intersection 1: Far point of intersection Chamfer/rounding. Defines the transition to the next contour element. When entering a chamfer/rounding, program the theoretical end point. No entry: Tangential transition BR=0: No tangential transition BR>0: Radius of rounding BR<0: Width of chamfer PZ End point (polar radius; reference: workpiece zero point) W End point (polar angle; reference: workpiece zero point) PM Center point (polar radius; reference: workpiece zero point) WM Center point (polar angle; reference: workpiece zero point) AR Starting angle (tangential angle to rotary axis) AN End angle (tangential angle to rotary axis) Programming Y, Z: Absolute, incremental, modal or "?" J, K: Absolute or incremental PZ, W, PM, WM: Absolute or incremental ARi: Angle to the previous element ANi: Angle to the subsequent element End point must not be the starting point (no full circle). 514 DIN programming for the Y axis 6.3 Contours in the YZ plane Hole in YZ plane G380-Geo G380 defines a single hole with countersinking and thread in the YZ plane. Parameters Y Center of hole Z Center of hole B Hole diameter P Depth of hole (excluding point) W Point angle (default: 180°) R Sinking diameter U Sinking depth E Sinking angle I Thread diameter J Thread depth K Start of thread (runout length) F Thread pitch V Left-hand or right-hand thread (default: 0) A O 0: Right-hand thread 1: Left-hand thread Angle to X axis (range: –90° < A < 90°) Centering diameter Linear slot in YZ plane G381-Geo G381 defines the contour of a linear slot in the YZ plane. Parameters Y Center of slot Z Center of slot X Reference diameter A K B P No input: "X" from section code "X" overwrites "X" from section code Position angle (reference: positive Z axis; default: 0°) Slot length Slot width Pocket depth (default: "P" from G308) HEIDENHAIN MANUALplus 620, CNC PILOT 640 515 6.3 Contours in the YZ plane Circular slot in YZ plane G382-Geo/G383-Geo G382/G383 defines a circular slot in the YZ plane. G382: Circular slot clockwise G383: Circular slot counterclockwise Parameters Y Center of slot curvature Z Center of slot curvature X Reference diameter R A W B P No input: "X" from section code "X" overwrites "X" from section code Radius (reference: center point path of the slot) Starting angle (reference: X axis; default: 0°) End angle (reference: X axis; default: 0°) Slot width Pocket depth (default: "P" from G308) Full circle in YZ plane G384-Geo G384 defines a full circle in the YZ plane. Parameters Y Center of circle Z Center of circle X Reference diameter R P 516 No input: "X" from section code "X" overwrites "X" from section code Circle radius Pocket depth (default: "P" from G308) DIN programming for the Y axis 6.3 Contours in the YZ plane Rectangle in YZ plane G385-Geo G385 defines a rectangle in the YZ plane. Parameters Y Center of rectangle Z Center of rectangle X Reference diameter A K B R No input: "X" from section code "X" overwrites "X" from section code Position angle (reference: positive Z axis; default: 0°) Length of rectangle Width of rectangle Chamfer/rounding (default: 0) P R>0: Radius of rounding R<0: Width of chamfer Pocket depth (default: "P" from G308) Eccentric polygon in YZ plane G387-Geo G387 defines the contour of an eccentric polygon in the YZ plane. Parameters Y Center point of polygon Z Center point of polygon X Reference diameter Q A K No input: "X" from section code "X" overwrites "X" from section code Number of corners (Q >= 3) Position angle (reference: positive Z axis; default: 0°) Edge length / width across flats R K>0: Edge length K<0: Width across flats (inside diameter) Chamfer/rounding—default: 0 P R>0: Radius of rounding R<0: Width of chamfer Pocket depth (default: "P" from G308) HEIDENHAIN MANUALplus 620, CNC PILOT 640 517 6.3 Contours in the YZ plane Linear pattern in YZ plane G481-Geo G481 defines a linear pattern in the YZ plane. G481 is effective for the figure defined in the following block (G380 to G385, G387). Parameters Q Number of figures Y 1st point of pattern Z 1st point of pattern J End point of pattern (Y direction) K End point of pattern (Z direction) Ji Distance between two figures (in Y direction) Ki Distance between two figures (in Z direction) A Position angle of longitudinal axis of pattern (reference: positive Z axis) R Length (overall length of pattern) Ri Pattern distance (distance between two figures) Programming notes Program the hole/figure in the following block without a center. The milling cycle (MACHINING section) calls the hole/ figure in the following block—not the pattern definition. 518 DIN programming for the Y axis 6.3 Contours in the YZ plane Circular pattern in YZ plane G482-Geo G482 defines a circular pattern in the YZ plane. G482 is effective for the figure defined in the following block (G380 to G385, G387). Parameters Q Number of figures K Diameter (pattern diameter) A Starting angle—position of the first figure; reference: Z axis; (default: 0°) W End angle—position of the last figure; reference: Z axis; (default: 360°) Wi Angle between two figures V Direction—orientation (default: 0) Y Z H V=0, without W: Figures are arranged on a full circle V=0, with W: Figures are arranged on the longer circular arc V=0, with Wi: The algebraic sign of Wi defines the direction (Wi<0: clockwise) V=1, with W: Clockwise V=1, with Wi: Clockwise (algebraic sign of Wi has no effect) V=2, with W: Counterclockwise V=2, with Wi: Counterclockwise (algebraic sign of Wi has no effect) Center of pattern Center of pattern Position of the figures (default: 0) 0: Normal position—the figures are rotated about the circle center (rotation) 1: Original position—the position of the figures relative to the coordinate system remains unchanged (translation) Program the hole/figure in the following block without a center. Exception: circular slot. The milling cycle (MACHINING section) calls the hole/ figure in the following block—not the pattern definition. HEIDENHAIN MANUALplus 620, CNC PILOT 640 519 6.3 Contours in the YZ plane Single surface in YZ plane G386-Geo G386 defines a surface in the YZ plane. Parameters Z Reference edge K Residual depth Ki Depth B Width (reference: reference edge Z) X B<0: Surface in negative Z direction B>0: Surface in positive Z direction Reference diameter C No input: "X" from section code "X" overwrites "X" from section code Spindle angle of surface normal (default: "C" from section code) The reference diameter X limits the surface to be machined. Centric polygon in YZ plane G487-Geo G487 defines polygonal surfaces in the YZ plane. Parameters Z Reference edge K Width across flats (inscribed circle diameter) Ki Edge length B Width (reference: reference edge Z) X B<0: Surface in negative Z direction B>0: Surface in positive Z direction Reference diameter C Q No input: "X" from section code "X" overwrites "X" from section code Spindle angle of surface normal (default: "C" from section code) Number of sides (Q >= 2) The reference diameter X limits the surface to be machined. 520 DIN programming for the Y axis 6.4 Working planes 6.4 Working planes Y-axis machining When programming drilling or milling operations with the Y axis, you need to define the working plane. If no working plane is programmed, the Steuerung assumes a turning operation or a milling operation with the C axis (G18 XZ plane). G17 XY plane (front or rear face) Milling cycles are executed in the XY plane, with the depth feed for milling and drilling cycles in the Z direction. G18 XZ plane (turning) In the XZ plane, "normal turning operations" as well as drilling and milling operations are executed with the C axis. G19 YZ plane (lateral view / lateral surface) Milling cycles are executed in the YZ plane, with the depth feed for milling and drilling cycles in the X direction. HEIDENHAIN MANUALplus 620, CNC PILOT 640 521 6.4 Working planes Tilting the working plane G16 G16 executes the following transformations and rotations: X X Plane reference in X direction (radius) K Plane reference in Z direction U Shift in X direction W Shift in Z direction Q Enable/disable tilting the working plane W B Parameters B Plane angle; reference: positive Z axis I U, W B, I, K Shifts the coordinate system to the position I, K Rotates the coordinate system by the angle B; reference point: I, K Shifts, if programmed, the coordinate system by U and W in the rotated coordinate system U I Z Z K 0: Disable tilted working plane function 1: Tilt working plane 2: Restore previous G16 plane G16 Q0 resets the working plane. The zero point and coordinate system defined before G16 are then in effect again. X X B G16 Q2 restores the previous G16 plane. B Z The positive Z axis is the reference axis for the "plane angle B." This also applies to a mirrored coordinate system. Z Please note: X is the infeed axis in a tilted coordinate system. X coordinates are entered as diameter coordinates. Mirroring the coordinate system has no effect on the reference axis of the tilt angle ("B axis angle" of the tool call). Other zero point shifts are not permitted while G16 is active. Beispiel: "G16" ... MACHINING ... N.. G19 N.. G15 B130 N.. G16 B130 I59 K0 Q1 N.. G1 x.. Z.. Y.. N.. G16 Q0 ... 522 DIN programming for the Y axis 6.5 Tool positioning in the Y axis 6.5 Tool positioning in the Y axis Rapid traverse G0 G0 moves the tool at rapid traverse along the shortest path to the "target point X, Y, Z." Parameters X Diameter—target point Z Length—target point Y Length—target point Programming X, Y, Z: Absolute, incremental or modal Approach tool change point G14 G14 moves at rapid traverse to the tool change position. In setup mode, define permanent coordinates for the tool change position. Parameters Q Sequence (default: 0) 0: Move simultaneously in X and Z axes (diagonal path) 1: First X, then Z direction 2: First Z, then X direction 3: Only X direction, Z remains unchanged 4: Only Z direction, X remains unchanged 5: Only Y direction 6: Move simultaneously in X, Y and Z axes (diagonal path) If Q=0 to 4, the Y axis does not move. Rapid traverse to machine coordinates G701 G701 moves the tool at rapid traverse along the shortest path to the "target point X, Y, Z." Parameters X End point (diameter) Y End point Z End point "X, Y, Z" refer to the machine zero point and the slide reference point. HEIDENHAIN MANUALplus 620, CNC PILOT 640 523 6.6 Linear and circular movements in the Y axis 6.6 Linear and circular movements in the Y axis Milling: Linear movement G1 G1 moves the tool on a linear path at the feed rate to the "end point." The execution of G1 varies depending on the working plane: G17 Interpolation in the XY plane Infeed in Z direction Angle A—reference: positive X axis G18 Interpolation in the XZ plane Infeed in Y direction Angle A—reference: negative Z axis G19 Interpolation in the YZ plane Infeed in X direction Angle A—reference: positive Z axis Parameters X End point (diameter) Y End point Z End point AN Angle (reference: depends on the working plane) Q Point of intersection. End point if the circular arc intersects a line segment or another circular arc (default: 0): BR BE 0: Near point of intersection 1: Far point of intersection Chamfer/rounding. Defines the transition to the next contour element. When entering a chamfer/rounding, program the theoretical end point. No entry: Tangential transition BR=0: No tangential transition BR>0: Radius of rounding BR<0: Width of chamfer Special feed factor for chamfer/rounding arc (default: 1) Special feed rate = active feed rate * BE (0 < BE <= 1) Programming X, Y, Z: Absolute, incremental, modal or "?" 524 DIN programming for the Y axis 6.6 Linear and circular movements in the Y axis Milling: Circular movement G2, G3—incremental center coordinates G2/G3 moves the tool in a circular arc at the feed rate to the "end point." The execution of G2/G3 varies depending on the working plane: G17 Interpolation in the XY plane Infeed in Z direction Center definition: with I, J G18 Interpolation in the XZ plane Infeed in Y direction Center definition: with I, K G19 Interpolation in the YZ plane Infeed in X direction Center definition: with J, K Parameters X End point (diameter) Y End point Z End point I Incremental center point (radius) J Incremental center point K Incremental center point R Radius Q Point of intersection. End point if the circular arc intersects a line segment or another circular arc (default: 0): BR BE 0: Near point of intersection 1: Far point of intersection Chamfer/rounding. Defines the transition to the next contour element. When entering a chamfer/rounding, program the theoretical end point. No entry: Tangential transition BR=0: No tangential transition BR>0: Radius of rounding BR<0: Width of chamfer Special feed factor for chamfer/rounding arc (default: 1) Special feed rate = active feed rate * BE (0 < BE <= 1) If you do not program the center, the Steuerung automatically calculates the possible solutions for the center and chooses that point as the center which results in the shortest arc. Programming X, Y, Z: Absolute, incremental, modal or "?" HEIDENHAIN MANUALplus 620, CNC PILOT 640 525 6.6 Linear and circular movements in the Y axis Milling: Circular movement G12, G13—absolute center coordinates G12/G13 moves the tool in a circular arc at the feed rate to the "end point." The execution of G12/G13 varies depending on the working plane: G17 Interpolation in the XY plane Infeed in Z direction Center definition: with I, J G18 Interpolation in the XZ plane Infeed in Y direction Center definition: with I, K G19 Interpolation in the YZ plane Infeed in X direction Center definition: with J, K Parameters X End point (diameter) Y End point Z End point I Absolute center point (radius) J Absolute center point K Absolute center point R Radius Q Point of intersection. End point if the line segment intersects a circular arc (default: 0): B E Q=0: Near point of intersection Q=1: Far point of intersection Chamfer/rounding. Defines the transition to the next contour element. When entering a chamfer/rounding, program the theoretical end point. No entry: Tangential transition B=0: No tangential transition B>0: Radius of rounding B<0: Width of chamfer Special feed factor for the chamfer/rounding arc (default: 1) Special feed rate = active feed rate * E (0 < E <= 1) If you do not program the center, the Steuerung automatically calculates the possible solutions for the center and chooses that point as the center which results in the shortest arc. Programming X, Y, Z: Absolute, incremental, modal or "?" 526 DIN programming for the Y axis 6.7 Milling cycles for the Y axis 6.7 Milling cycles for the Y axis Area milling—roughing G841 G841 roughs surfaces defined with G376-Geo (XY plane) or with G386-Geo (YZ plane). The cycle mills from the outside toward the inside. The tool moves to the working plane outside of the workpiece material. Parameters ID Milling contour—name of the contour to be milled NS Block number—reference to the contour description P Milling depth (maximum infeed in the working plane) I Oversize in X direction K Oversize in Z direction U (Minimum) overlap factor. Defines the overlap of milling paths (default: 0.5). V F RB Overlap = U*milling diameter Overrun factor. Defines the distance by which the tool should pass the outside radius of the workpiece (default: 0.5). Overrun = V*milling diameter Feed rate for infeed (default: active feed rate) Retraction plane (default: back to starting position) XY plane: Retraction position in Z direction YZ plane: Retraction position in X direction (diameter) Oversizes are taken into account: G57: Oversize in X and Z direction G58: Equidistant oversize in the milling plane Cycle run 1 Starting position (X, Y, Z, C) is the position before the cycle begins. 2 Calculate the proportioning of cuts (infeeds to the milling planes, infeeds in the milling depths). 3 Move to the safety clearance and plunge to the first milling depth. 4 Mill the first plane. 5 Retract by the safety clearance, return and cut to the next milling depth. 6 Repeat steps 4 and 5 until the complete area is milled. 7 Return to retraction plane RB. HEIDENHAIN MANUALplus 620, CNC PILOT 640 527 6.7 Milling cycles for the Y axis Area milling—finishing G842 G842 finishes surfaces defined with G376-Geo (XY plane) or G386Geo (YZ plane). The cycle mills from the outside toward the inside. The tool moves to the working plane outside of the workpiece material. Parameters ID Milling contour—name of the contour to be milled NS Block number—reference to the contour description P Milling depth (maximum infeed in the working plane) H Cutting direction for side finishing (default: 0) U V F RB H=0: Up-cut milling H=1: Climb milling (Minimum) overlap factor. Defines the overlap of milling paths (default: 0.5). Overlap = U*milling diameter Overrun factor. Defines the distance by which the tool should pass the outside radius of the workpiece (default: 0.5). Overrun = V*milling diameter Feed rate for infeed (default: active feed rate) Retraction plane (default: back to starting position) XY plane: Retraction position in Z direction YZ plane: Retraction position in X direction (diameter) Cycle run 1 Starting position (X, Y, Z, C) is the position before the cycle begins. 2 Calculate the proportioning of cuts (infeeds to the milling planes, infeeds in the milling depths). 3 Move to the safety clearance and plunge to the first milling depth. 4 Mill the first plane. 5 Retract by the safety clearance, return and cut to the next milling depth. 6 Repeat steps 4 and 5 until the complete area is milled. 7 Return to retraction plane RB. 528 DIN programming for the Y axis 6.7 Milling cycles for the Y axis Centric polygon milling—roughing G843 G843 roughs centric polygons defined with G477-Geo (XY plane) or G487-Geo (YZ plane). The cycle mills from the outside toward the inside. The tool moves to the working plane outside of the workpiece material. Parameters ID Milling contour—name of the contour to be milled NS Block number—reference to the contour description P Milling depth (maximum infeed in the working plane) I Oversize in X direction K Oversize in Z direction U (Minimum) overlap factor. Defines the overlap of milling paths (default: 0.5). V F RB Overlap = U*milling diameter Overrun factor. Defines the distance by which the tool should pass the outside radius of the workpiece (default: 0.5). Overrun = V*milling diameter Feed rate for infeed (default: active feed rate) Retraction plane (default: back to starting position) XY plane: Retraction position in Z direction YZ plane: Retraction position in X direction (diameter) Oversizes are taken into account: G57: Oversize in X and Z direction G58: Equidistant oversize in the milling plane Cycle run 1 Starting position (X, Y, Z, C) is the position before the cycle begins. 2 Calculate the proportioning of cuts (infeeds to the milling planes, infeeds in the milling depths) and the spindle positions. 3 Spindle turns to the first position. The tool moves to the safety clearance and plunges to the first milling depth. 4 Mill the first plane. 5 Retract by the safety clearance, return and cut to the next milling depth. 6 Repeat steps 4 and 5 until the complete area is milled. 7 The tool returns to "retraction plane J." The spindle turns to the next position. The tool moves to the safety clearance and plunges to the first milling depth. 8 Repeat steps 4 to 7 until all polygonal surfaces are milled. 9 Return to retraction plane RB. HEIDENHAIN MANUALplus 620, CNC PILOT 640 529 6.7 Milling cycles for the Y axis Centric polygon milling—finishing G844 G844 finishes centric polygons defined with G477-Geo (XY plane) or with G487-Geo (YZ plane). The cycle mills from the outside toward the inside. The tool moves to the working plane outside of the workpiece material. Parameters ID Milling contour—name of the contour to be milled NS Block number – reference to contour description P Milling depth (maximum infeed in the working plane) H Cutting direction for side finishing (default: 0) U V F RB H=0: Up-cut milling H=1: Climb milling (Minimum) overlap factor. Defines the overlap of milling paths (default: 0.5). Overlap = U*milling diameter Overrun factor. Defines the distance by which the tool should pass the outside radius of the workpiece (default: 0.5). Overrun = V*milling diameter Feed rate for infeed (default: active feed rate) Retraction plane (default: back to starting position) XY plane: Retraction position in Z direction YZ plane: Retraction position in X direction (diameter) Cycle run 1 Starting position (X, Y, Z, C) is the position before the cycle begins. 2 Calculate the proportioning of cuts (infeeds to the milling planes, infeeds in the milling depths) and the spindle positions. 3 Spindle turns to the first position. The tool moves to the safety clearance and plunges to the first milling depth. 4 Mill the first plane. 5 Retract by the safety clearance, return and cut to the next milling depth. 6 Repeat steps 4 and 5 until the complete area is milled. 7 The tool returns to "retraction plane J." The spindle turns to the next position. The tool moves to the safety clearance and plunges to the first milling depth. 8 Repeat steps 4 to 7 until all polygonal surfaces are milled. 9 Return to retraction plane RB. 530 DIN programming for the Y axis 6.7 Milling cycles for the Y axis Pocket milling—roughing G845 (Y axis) G845 roughs closed contours that are defined in the XY or YZ plane in the program sections: FACE_Y REAR_Y LATERAL_Y Choose one of the following plunge strategies, depending on the milling cutter you are using: Plunge vertically Plunge at a pre-drilled position Plunge in a reciprocating or helical motion When "plunging at a pre-drilled position," you have the following alternatives: Calculate positions, drill, mill. The machining process is performed in the following steps: Insert drill. Calculate hole positions with "G845 A1 ..." Drill holes with "G71 NF ..." Call cycle "G845 A0 ..." The cycle positions the tool above the hole; the tool plunges and mills the pocket. Drill, mill. The machining process is performed in the following steps: Drill a hole inside the pocket with "G71 ..." Position the milling cutter above the hole and call "G845 A0 ..." The tool plunges and mills the section. If the pocket consists of multiple sections, G845 takes all the sections of the pocket into account for drilling and milling. Call "G845 A0 .." separately for each section when calculating the hole positions without "G845 A1 ..". G845 takes the following oversizes into account: G57: Oversize in X and Z direction G58: Equidistant oversize in the milling plane Program oversizes for calculating the hole positions and for milling. HEIDENHAIN MANUALplus 620, CNC PILOT 640 531 6.7 Milling cycles for the Y axis G845 (Y axis)—Calculating hole positions "G845 A1 .." calculates the hole positions and stores them at the reference specified in "NF." The cycle takes the diameter of the active tool into account when calculating the hole positions. Therefore, you need to insert the drill before calling "G845 A1 ..". Program only the parameters given in the following table. See also: G845—Fundamentals: Page 531 G845—Milling: Page 533 Parameters—Calculating hole positions ID Milling contour—name of the contour to be milled NS Starting block no. of contour B XS ZS I K Q A NF WB Figures: Block number of the figure Free closed contour: A contour element (not starting point) Milling depth (default: depth from the contour description) Milling top edge—lateral surface (replaces the reference plane from the contour definition) Milling top edge—face (replaces the reference plane from the contour definition) Oversize in X direction (radius) Oversize in Z direction Machining direction (default: 0) 0: From the inside out (from the inside towards the outside) 1: From the outside in (from the outside towards the inside) Sequence for "Calculate hole positions": A=1 Position mark—reference at which the cycle stores the hole positions [1 to 127]. (Plunging length) Diameter of the milling cutter G845 overwrites any hole positions that may still be stored at the reference "NF." The parameter "WB" is used both for calculating the hole positions and for milling. When calculating the hole positions, "WB" describes the diameter of the milling cutter. 532 DIN programming for the Y axis 6.7 Milling cycles for the Y axis G845 (Y axis)—Milling You can change the cutting direction with the "cutting direction H," the "machining direction Q" and the direction of tool rotation (see table G845 in the User's Manual). Program only the parameters given in the following table. See also: G845—Fundamentals: Page 531 G845—Calculating hole positions: Page 532 Parameters—Milling ID Milling contour—name of the contour to be milled NS Starting block no. of contour B P XS ZS I K U V H Figures: Block number of the figure Free closed contour: A contour element (not starting point) Milling depth (default: depth from the contour description) Maximum infeed (default: milling in one infeed) Milling top edge in YZ plane (replaces the reference diameter from the contour description) Milling top edge in XY plane (replaces the reference plane from the contour description) Oversize in X direction (radius) Oversize in Z direction (Minimum) overlap factor. Defines the overlap of milling paths (default: 0.5). Overlap = U*milling diameter Overrun factor (default: 0.5. Defines the distance by which the tool should pass the outside radius of the workpiece. 0: The defined contour is milled completely 0<V<=1: Overrun = V*milling diameter Cutting direction (default: 0) RB 0: Up-cut milling 1: Climb milling Feed rate for infeed (default: active feed rate) Reduced feed rate for circular elements (default: current feed rate) Retraction plane (default: back to starting position) Q XY plane: Retraction position in Z direction YZ plane: Retraction position in X direction (diameter) Machining direction (default: 0) F E A NF 0: From the inside out (from the inside towards the outside) 1: From the outside in (from the outside towards the inside) Sequence for "Milling": A=0 (default=0) Position mark—reference from which the cycle reads the hole positions [1 to 127]. HEIDENHAIN MANUALplus 620, CNC PILOT 640 533 6.7 Milling cycles for the Y axis Parameters—Milling O Plunging behavior (default: 0) O=0 (vertical plunge): The cycle moves the tool to the starting point; the tool plunges at the feed rate for infeed and mills the pocket. O=1 (plunge at pre-drilled position): If "NF" is programmed: The cycle positions the milling cutter above the first pre-drilled hole; the tool plunges and mills the first area. If applicable, the cycle positions the tool to the next pre-drilled hole and mills the next area, etc. If "NF" is not programmed: The tool plunges at the current position and mills the area. If applicable, position the tool to the next pre-drilled hole and mill the next area, etc. O=2, 3 (helical plunge): The tool plunges at the angle "W" and mills full circles with the diameter "WB." As soon as it reaches the milling depth "P," the cycle switches to face milling. O=2—manually: The cycle plunges at the current position and machines the area that can be reached from this position. O=3—automatically: The cycle calculates the plunging position, plunges and machines this area. The plunging motion ends at the starting point of the first milling path, if possible. If the pocket consists of multiple areas, the cycle successively machines all the areas. O=4, 5 (reciprocating linear plunge): The tool plunges at the angle "W" and mills a linear path of the length "WB." You can define the orientation angle in "WE." The cycle then mills along this path in the opposite direction. As soon as it reaches the milling depth "P," the cycle switches to face milling. O=4—manually: The cycle plunges at the current position and machines the area that can be reached from this position. O=5—automatically: The cycle calculates the plunging position, plunges and machines this area. The plunging motion ends at the starting point of the first milling path, if possible. If the pocket consists of multiple areas, the cycle successively machines all the areas. The plunging position is determined from the type of figure and from "Q" as follows: Q0 (from the inside toward the outside): – Linear slot, rectangle, polygon: Reference point of the figure – Circle: Circle center – Circular slot, "free" contour: Starting point of the innermost milling path Q1 (from the outside toward the inside): – Linear slot: Starting point of the slot – Circular slot, circle: Not machined – Rectangle, polygon: Starting point of the first linear element – "Free" contour: Starting point of the first linear element (at least one linear element must exist) 534 DIN programming for the Y axis W WE 6.7 Milling cycles for the Y axis Parameters—Milling O=6, 7 (reciprocating circular plunge): The tool plunges at the plunging angle "W" and mills a circular arc of 90°. The cycle then mills along this path in the opposite direction. As soon as it reaches the milling depth "P," the cycle switches to face milling. "WE" defines the arc center, "WB" the arc radius. O=6—manually: The tool position corresponds to the center of the circular arc. The tool moves to the arc starting point and plunges. O=7—automatically (only permitted for circular slots and circles): The cycle calculates the plunging position on the basis of "Q": Q0 (from the inside toward the outside): – Circular slot: The circular arc lies on the curvature radius of the slot – Circle: Not permitted Q1 (from the outside toward the inside): Circular slot, circle: The circular arc lies on the outermost milling path Plunging angle in infeed direction Orientation angle of the milling path/circular arc. Reference axis: Front or rear face: Positive XK axis Lateral surface: Positive Z axis Default orientation angle, depending on "O": WB O=4: WE=0° O=5 and Linear slot, rectangle, polygon: WE= orientation angle of the figure Circular slot, circle: WE=0° "Free" contour and Q0 (from the inside toward the outside): WE=0° "Free" contour and Q1 (from the outside toward the inside): Orientation angle of the starting element Plunge length/plunge diameter (default: 1.5 * milling diameter) HEIDENHAIN MANUALplus 620, CNC PILOT 640 535 6.7 Milling cycles for the Y axis For the cutting direction, machining direction and direction of tool rotation, please refer to table G845 in the User's Manual. For the machining direction Q=1 (from the outside toward the inside), please note: The contour must start with a linear element. If the starting element is < WB, WB is reduced to the length of the starting element. The length of the starting element must not be less than 1.5 times the diameter of the milling cutter. Cycle run 1 Starting position (X, Y, Z, C) is the position before the cycle begins. 2 Calculate the number of cuts (infeeds to the milling planes, infeeds in the milling depths) and the plunging positions and paths for reciprocating or helical plunges. 3 Approach to safety clearance and, depending on O, feed to the first milling depth or approach helically or on a reciprocating path. 4 Mill a plane. 5 Retract by the safety clearance, return and cut to the next milling depth. 6 Repeat steps 4 and 5 until the complete surface is milled. 7 Return to retraction plane RB. 536 DIN programming for the Y axis 6.7 Milling cycles for the Y axis Pocket milling—finishing G846 (Y axis) G846 finishes closed contours defined in the XY or YZ plane in the program sections: FACE_Y REAR_Y LATERAL_Y You can change the cutting direction with the "cutting direction H," the "machining direction Q" and the direction of tool rotation. Parameters—finishing ID Milling contour—name of the contour to be milled NS Starting block no. of contour B P XS ZS R U V H Figures: Block number of the figure Free closed contour: A contour element (not starting point) Milling depth (default: depth from the contour description) Maximum infeed (default: milling in one infeed) Milling top edge in YZ plane (replaces the reference diameter from the contour description) Milling top edge in XY plane (replaces the reference plane from the contour description) Radius of approaching/departing arc (default: 0) R=0: Contour element is approached directly. Feed to the starting point above the milling plane, then vertical plunge. R>0: Tool moves on approaching/departing arc that connects tangentially to the contour element. (Minimum) overlap factor. Defines the overlap of milling paths (default: 0.5). Overlap = U*milling diameter Overrun factor—no effect with C-axis machining Cutting direction (default: 0) RB 0: Up-cut milling 1: Climb milling Feed rate for infeed (default: active feed rate) Reduced feed rate for circular elements (default: current feed rate) Retraction plane (default: back to starting position) Q XY plane: Retraction position in Z direction YZ plane: Retraction position in X direction (diameter) Machining direction (default: 0) F E 0: From the inside out (from the inside towards the outside) 1: From the outside in (from the outside towards the inside) HEIDENHAIN MANUALplus 620, CNC PILOT 640 537 6.7 Milling cycles for the Y axis Parameters—finishing O Plunging behavior (default: 0) O=0 (vertical plunge): The cycle moves the tool to the starting point; the tool plunges and finishes the pocket. Q=1 (approaching arc with depth feed): When machining the upper milling planes, the tool advances to the milling plane and then approaches on an arc. When machining the bottom milling plane, the tool plunges to the milling depth while moving on the approaching arc (three-dimensional approaching arc). You can use this approach behavior only in conjunction with an approaching arc "R" and when machining from the outside toward the inside (Q=1). For the cutting direction, machining direction and direction of tool rotation, please refer to table G846 in the User's Manual. Cycle run 1 Starting position (X, Y, Z, C) is the position before the cycle begins. 2 Calculate the proportioning of cuts (infeeds to the milling planes, infeeds in the milling depths). 3 Move to the safety clearance and plunge to the first milling depth. 4 Mill the first plane. 5 Retract by the safety clearance, return and cut to the next milling depth. 6 Repeat steps 4 and 5 until the complete area is milled. 7 Return to "retraction plane J." 538 DIN programming for the Y axis 6.7 Milling cycles for the Y axis Engraving in XY plane G803 G803 engraves character strings aligned linearly in the XY plane. Character set: see page 376 The cycles start engraving from the starting position or from the current position, if no starting position is defined. Example: If a character string is engraved with several calls, define the starting position in the first call. All other calls are programmed without a starting position. Parameters X, Y Starting point Z End point. Z position, infeed depth during milling. RB Retraction plane. Z position retracted to for positioning. ID Text to be engraved NF Character number (character to be engraved) W Orientation angle of the character string. Example: 0° = Vertical characters: the characters are aligned in sequence in positive X direction H Font height E Distance factor (for calculation see figure) F Plunging feed rate factor (plunging feed rate = current feed rate * F) HEIDENHAIN MANUALplus 620, CNC PILOT 640 539 6.7 Milling cycles for the Y axis Engraving in the YZ plane G804 The cycles start engraving from the starting position or from the current position, if no starting position is defined. Example: If a character string is engraved with several calls, define the starting position in the first call. All other calls are programmed without a starting position. G804 engraves character strings aligned linearly in the YZ plane. Character set: see page 376 Parameters Y, Z Starting point X End point (diameter). X position, infeed depth during milling. RB Retraction plane. X position retracted to for positioning. ID Text to be engraved NF Character number. ASCII code of the character to be engraved H Font height E Distance factor (for calculation see figure) E Distance factor. The distance between the characters is calculated according to the following formula: H / 6 * E F Plunging feed rate factor (plunging feed rate = current feed rate * F) 540 DIN programming for the Y axis 6.7 Milling cycles for the Y axis Thread milling in XY plane G800 G800 mills a thread in existing holes. Place the tool on the center of the hole before calling G799. The cycle positions the tool on the end point of the thread within the hole. Then the tool approaches on "approach radius R" and mills the thread. During this, the tool advances by the thread pitch F. Following that, the cycle retracts the tool and returns it to the starting point. With parameter V, you can program whether the thread is to be milled in one rotation or, with single-point tools, in several rotations. Parameters I Thread diameter Z Starting point Z K Thread depth R Approach radius F Thread pitch J Direction of thread (default: 0) H 0: Right-hand thread 1: Left-hand thread Cutting direction (default: 0) V 0: Up-cut milling 1: Climb milling Milling method 0: The thread is milled in a 360-degree helix 1: The thread is milled in several helical paths (single-point tool) Use thread-milling tools for cycle G800. Danger of collision! Be sure to consider the hole diameter and the diameter of the milling cutter when programming "approach radius R." HEIDENHAIN MANUALplus 620, CNC PILOT 640 541 6.7 Milling cycles for the Y axis Thread milling in YZ plane G806 G806 mills a thread in existing holes. Place the tool on the center of the hole before calling G799. The cycle positions the tool on the end point of the thread within the hole. Then the tool approaches on "approach radius R" and mills the thread. During this, the tool advances by the thread pitch F. Following that, the cycle retracts the tool and returns it to the starting point. With parameter V, you can program whether the thread is to be milled in one rotation or, with single-point tools, in several rotations. Parameters I Thread diameter X Starting point in X K Thread depth R Approach radius F Thread pitch J Direction of thread (default: 0) H 0: Right-hand thread 1: Left-hand thread Cutting direction (default: 0) V 0: Up-cut milling 1: Climb milling Milling method 0: The thread is milled in a 360-degree helix 1: The thread is milled in several helical paths (single-point tool) Use thread-milling tools for cycle G806. Danger of collision! Be sure to consider the hole diameter and the diameter of the milling cutter when programming "approach radius R." 542 DIN programming for the Y axis 6.7 Milling cycles for the Y axis Hobbing G808 G808 mills a gear profile from the "starting point in Z" to the "end point K". In W you enter the angular position of the tool. If an oversize has been programmed, hobbing is split up in roughmachining and subsequent finishing. In parameters O, R and V you define the tool shift. Shifting by R ensures a uniform wear of the hob cutter. Parameters Z Starting point K End point C Angle (offset angle of the C axis) A Root circle diameter B Outside diameter J Number of workpiece teeth W Angular position S Surface speed [m/min] I Oversize D Direction of rotation of the workpiece 3: M3 4: M4 F Feed per revolution E Finishing feed rate P Maximum infeed O Shift starting position R Shift value V Number of shifts H Infeed axis 0: Tool infeed is performed in the X axis 1: Tool infeed is performed in the Y axis Q Workpiece spindle 0: Spindle no. 0 (main spindle) holds the workpiece 3: Spindle no. 3 (opposing spindle) holds the workpiece HEIDENHAIN MANUALplus 620, CNC PILOT 640 543 6.8 Example program 6.8 Example program Machining with the Y axis The milling and drilling contours are nested in the following NC program. A linear slot is machined on the single surface. On the same single surface, a hole pattern with two holes is machined both to the left and right of the slot. At first, the turning operation is performed, and then the single surface is milled. Following that, the linear slot is machined using the "Pocket milling, lateral surface Y" unit. Then the slot is deburred. Further units are used to center the hole patterns, then drill them and finally tap the holes. 544 DIN programming for the Y axis 6.8 Example program Example: "Y axis [BSP_Y.NC]" HEADER #MATERIAL Aluminum #WORKPIECE Example Y axis #MEASURE_UNITS Metric TURRET 1 T1 ID"Roughing 80 G." T2 ID"NC center drill" T3 ID"Finishing 35 G." T4 ID"Drill 5.2mm" T5 ID"Thread outside" T6 ID"Tapping M6" T8 ID"Mill D16mm" T10 ID"Mill D6mm" T12 ID"Deburring_m" BLANK N 1 G20 X70 Z97 K1 FINISHED N 2 G0 X0 Z0 N 3 G1 X30 BR-2 N 4 G1 Z-20 N 5 G25 H7 I1.5 K7 R1 W30 FP2 N 6 G1 X56 BR-1 N 7 G1 Z-60 N 8 G1 X64 BR-1 N 9 G1 Z-75 BR-1 [Undercut DIN 76] N 10 G1 X44 BR3 N 11 G1 Z-95 BR-1 N 12 G1 X0 N 13 G1 Z0 LATERAL_Y X56 C0 [Define YZ plane] N 14 G308 ID"Surface" N 15 G386 Z-55 Ki8 B30 X56 C0 N 16 G308 ID"Slot 10mm" P-2 N 17 G381 Z-40 Y0 A90 K50 B10 HEIDENHAIN MANUALplus 620, CNC PILOT 640 [Single surface] [Linear slot on single surface] 545 6.8 Example program N 18 G309 N 19 G308 ID"Hole_1 M6" P-15 N 20 G481 Q2 Z-30 Y15 K-30 J-15 [Linear pattern on single surface] N 21 G380 B5.2 P15 W118 I6 J10 F1 V0 o7 [Drilling, tapping, centering] N 22 G309 N 23 G308 ID"Hole_2 M6" P-15 N 24 G481 Q2 Z-50 Y15 K-50 J-15 [Linear pattern on single surface] N 25 G380 B5.2 P15 W118 I6 J10 F1 V0 O7 [Drilling, tapping, centering] N 26 G309 N 27 G309 MACHINING N 28 UNIT ID"START" N 30 G26 S3500 N 31 G126 S2000 N 32 G59 Z256 N 33 G140 D1 X400 Y0 Z500 N 34 G14 Q0 D1 [Start of program] N 35 END_OF_UNIT N 36 UNIT ID"G820_ICP" N 38 T1 N 39 G96 S220 G95 F0.35 M3 N 40 M8 N 41 G0 X72 Z2 N 42 G47 P2 N 43 G820 NS3 NE3 P2 I0 K0 H0 Q0 V3 D0 N 44 G47 M9 [G820 Transverse roughing, ICP] N 45 END_OF_UNIT N 46 UNIT ID"G810_ICP" N 48 T1 N 49 G96 S220 G95 F0.35 M3 N 50 M8 N 51 G0 X72 Z2 N 52 G47 P2 N 53 G810 NS4 NE9 P3 I0.5 K0.2 H0 Q0 V0 D0 N 54 G14 Q0 D1 546 [G810 Longitudinal roughing, ICP] DIN programming for the Y axis 6.8 Example program N 55 G47 M9 N 56 END_OF_UNIT N 57 UNIT ID"G890_ICP" N 59 T3 N 60 G96 S260 G95 F0.18 M4 N 61 M8 N 62 G0 X72 Z2 N 63 G47 P2 N 64 G890 NS4 NE9 V1 Q0 H3 O0 B0 N 65 G14 Q0 D1 N 66 G47 M9 [G890 Contouring in ICP] N 67 END_OF_UNIT N 68 UNIT ID"G32_MAN" N 70 [G32 Cylindrical thread, direct] T5 N 71 G97 S800 M3 N 72 M8 N 73 G0 X30 Z5 N 74 G47 P2 N 75 G32 X30 Z-19 F1.5 BD0 IC8 H0 V0 N 76 G14 Q0 D1 N 77 G47 M9 N 78 END_OF_UNIT N 79 UNIT ID"C_AXIS_ON" N 81 M14 N 82 G110 C0 [C axis on] N 83 END_OF_UNIT N 84 UNIT ID"G841_Y_MANT" N 86 [Single surface in Y axis, latrl.] T8 N 87 G197 S1200 G195 F0.25 M104 N 88 M8 N 89 G19 N 90 G110 C0 N 91 G0 Y0 N 92 G0 X74 Z10 HEIDENHAIN MANUALplus 620, CNC PILOT 640 547 6.8 Example program N 93 G147 K2 I2 N 94 G841 ID"Surface" P5 N 95 G47 M9 N 96 G14 Q0 D1 N 97 G18 [Mill a single surface] N 98 END_OF_UNIT N 99 UNIT ID"G845_TAS_Y_MANT" N 101 T10 N 102 G197 S1200 G195 F0.18 M104 N 103 G19 N 104 M8 N 105 G110 C0 N 106 G0 Y0 N 107 G0 X74 Z-40 N 108 G147 I2 K2 N 109 G845 ID"Slot 10 mm" Q0 H0 N 110 G47 M9 N 111 G14 Q0 D1 N 112 G18 [ICP pocket mill, lateral surf. Y] [Mill a slot on single surface] N 113 END_OF_UNIT N 114 UNIT ID"G840_ENT_Y_MANT" N 116 T12 N 117 G197 S800 G195 F0.12 M104 N 118 G19 N 119 M8 N 120 G110 C0 N 121 G0 Y0 N 122 G0 X74 Z-40 N 123 G147 I2 K2 N 124 G840 ID"Slot 10mm" Q1 H0 P0.8 B0.15 N 125 G47 M9 N 126 G14 Q0 D1 N 127 G18 [ICP deburring, lateral surf. Y] [Deburr slot on single surface] N 128 END_OF_UNIT N 129 UNIT ID"G72_ICP_Y" 548 [ICP boring, countersinking in Y] DIN programming for the Y axis T2 N 132 G197 S1000 G195 F0.22 M104 N 133 M8 N 134 G147 K2 N 135 G72 ID"Hole_1 M6" D0 N 136 G47 M9 6.8 Example program N 131 [Center the holes of the first pattern] N 137 END_OF_UNIT N 138 UNIT ID"G72_ICP_Y" N 140 T2 N 141 G197 S1000 G195 F0.22 M104 N 142 M8 N 143 G147 K2 N 144 G72 ID"Hole_2 M6" D0 N 145 G47 M9 N 146 G14 Q0 D1 [ICP boring, countersinking in Y] [Center the holes of the second pattern] N 147 END_OF_UNIT N 148 UNIT ID"G74_ICP_Y" N 150 T4 N 151 G197 S1200 G195 F0.24 M103 N 152 M8 N 153 G147 K2 N 154 G74 ID"Hole_1 M6" D0 V2 N 155 G47 M9 [ICP drilling in Y axis] [Holes of the first pattern] N 156 END_OF_UNIT N 157 UNIT ID"G74_ICP_Y" N 159 T4 N 160 G197 S1200 G195 F0.24 M103 N 161 M8 N 162 G147 K2 N 163 G74 ID"Hole_2 M6" D0 V2 N 164 G47 M9 N 165 G14 Q0 D1 [ICP drilling in Y axis] [Holes of the second pattern] N 166 END_OF_UNIT N 167 UNIT ID"G73_ICP_Y" HEIDENHAIN MANUALplus 620, CNC PILOT 640 [ICP tapping in Y axis] 549 6.8 Example program N 169 T6 N 170 G197 S800 M103 N 171 M8 N 172 G147 K2 N 173 G73 ID"Hole_1 M6" F1 N 174 G47 M9 [Tapping, first pattern] N 175 END_OF_UNIT N 176 UNIT ID"G73_ICP_Y" N 178 T6 N 179 G197 S800 M103 N 180 M8 N 181 G147 K2 N 182 G73 ID"Hole_2 M6" F1 N 183 G47 M9 N 184 G14 Q0 D1 [ICP tapping in Y axis] [Tapping, second pattern] N 185 END_OF_UNIT N 186 UNIT ID"C_AXIS_OFF" N 188 [C axis off] M15 N 189 END_OF_UNIT N 190 UNIT ID"END" N 192 [Program end] M30 N 193 END_OF_UNIT END 550 DIN programming for the Y axis TURN PLUS 7.1 TURN PLUS mode of operation 7.1 TURN PLUS mode of operation To create programs with TURN PLUS, you program the blank and finished part with the aid of interactive graphics. The working plan is then generated automatically. As a result you get a commented and structured NC program. With TURN PLUS you can create NC programs for the following applications: Turning operations Drilling and milling with the C axis Drilling and milling with the Y axis TURN PLUS concept The workpiece description is the basis for working plan generation. The strategy for generating the working plan is specified in the machining sequence. The machining parameters define details of machining. This allows you to adapt TURN PLUS to your individual needs. TURN PLUS generates the working plan, which takes technology attributes such as oversizes, tolerances, etc. into account. On the basis of the blank form update, TURN PLUS optimizes the paths for approach and avoids air cuts or collisions between workpiece and cutting edge. For tool selection, TURN PLUS uses the tools from the NC program or from the current turret assignment/magazine list, depending on the machine parameter settings. If there is no suitable tool in the turret assignment/magazine list, TURN PLUS looks for a suitable tool in the tool database. When clamping the workpiece, TURN PLUS can determine the cutting limitations and the zero point shift for the NC program, depending on the machine parameter settings. The technology database provides the cutting data to TURN PLUS. Before generating the working plan, please note: The default values for the machining parameters as well as general settings are defined in the machine parameters (see "List of user parameters" in the User's Manual). 552 TURN PLUS 7.2 Automatic working plan generation (AWG) 7.2 Automatic working plan generation (AWG) The AWG generates the work blocks of the working plan in the sequence defined in "Machining sequence." You define the machining details in the Machining Parameters input form. TURN PLUS automatically finds all the elements of a work block. Use the machining sequence editor to specify the machining sequence. A work block has the following content: Tool call Cutting values (technology data) Approach (may be omitted) Machining cycle Tool retraction (may be omitted) Moving to tool change point (may be omitted) You can change or supplement the generated work blocks subsequently. TURN PLUS simulates the machining in the AWG control graphic. You can set the sequence and representation of the control graphic via soft key (see "Graphic simulation" in the User's Manual). TURN PLUS outputs warnings during the contour analysis if certain areas cannot be machined at all or not completely. Check the respective sections after program creation and adapt them to your needs. Generating a working plan After generating the working plan, please note: If no chucking equipment has been defined in the program as yet, TURN PLUS defines the chucking equipment for a specific type of clamping/clamping length and adjusts the cutting limitation accordingly. Adapt the values in the finished NC program. Generating a working plan with TURN PLUS Select "TURN PLUS." TURN PLUS opens the most recently selected machining sequence. Select "AWG." TURN PLUS shows the contours of the blank and the finished part in the graphics window. Press the "AWG control graphic" soft key: The AWG control graphic and program generation are started. HEIDENHAIN MANUALplus 620, CNC PILOT 640 553 7.2 Automatic working plan generation (AWG) Press the "Back" soft key to return to the TURN PLUS menu. Press the "Back" soft key to switch to smart.Turn. Use the name of the current program without any changes and press the "Save" soft key to overwrite the current program. Enter a name for the program and confirm with the "Save" soft key. Machining sequence—Fundamentals TURN PLUS analyzes the contour in the sequence defined in "Machining sequence." In this process the areas to be machined and the tool parameters are ascertained. The AWG analyzes the contour using the machining parameters. TURN PLUS distinguishes between: Main machining operation (e.g. Undercutting) Submachining operation (e.g. type H, K, or U) Machining location (e.g. outside or inside) "Submachining" and "machining location" refine the machining specification. If you do not define the submachining operation or machining location, the AWG generates machining blocks for all submachining operations/machining locations. 554 TURN PLUS 7.2 Automatic working plan generation (AWG) The following factors additionally influence the working plan generation: Geometry of the contour Attributes of the contour Tool availability Machining parameters In the machining sequence you define the sequence in which the machining steps are carried out. If you only define the main machining operation in the sequence for a machining operation, all of the submachining operations comprised by it are executed in a specific sequence. However, you can also program the submachining operations and machining locations individually in any sequence. In this case you should define the associated main machining operation again after defining the submachining operations. This way you can ensure that all submachining operations and locations are taken into account. The machining sequence and the program can be displayed in a horizontal or vertical window layout. Press the "Change VIEW" soft key to switch between the two views. Press the "Change window" soft key to move the cursor between the Program and the Machining Sequence window. The AWG does not generate the work blocks if any required preparatory step is missing, or if the appropriate tool is not available, etc. TURN PLUS skips machining operations/machining sequences that do not make sense in the machining process. Organizing machining sequences: TURN PLUS always uses the current machining sequence. The current machining sequence can be edited or overwritten by loading another machining sequence. When you open TURN PLUS, the most recently used machining sequence is automatically displayed. Danger of collision! When executing drilling or milling operations, TURN PLUS does not check whether the turning operation has already been completed. Ensure that turning operations precede drilling or milling operations in the machining sequence. HEIDENHAIN MANUALplus 620, CNC PILOT 640 555 7.2 Automatic working plan generation (AWG) Editing and managing machining sequences TURN PLUS uses the currently active machining sequence. You can change the machining sequences and adapt them to your range of parts. Managing the machining sequence files: To open the machining sequence: Select "TURN PLUS > Machining sequence > Open." TURN PLUS opens the selection list with the machining sequence files. Select the desired file. To save the machining sequence: Select "TURN PLUS > Machining sequence > Save as." TURN PLUS opens the selection list with the machining sequence files. Enter a new file name or overwrite an existing file. To create a default machining sequence: Select "TURN PLUS > Machining sequence > Save HEIDENHAIN standard as..." TURN PLUS opens the selection list with the machining sequence files. Enter a file name under which you wish to store the HEIDENHAIN default machining sequence. Editing a machining sequence Position the cursor Select "TURN PLUS > Machining sequence > Line." Select the function. Inserting a new machining operation To insert a new machining operation before the cursor position, select "Insert above the line." To insert a new machining operation after the cursor position, select "Insert below the line." Moving a machining operation Select "Move line upwards" or "Move line downwards." 556 TURN PLUS Select "Edit line." "OK" confirms the new machining sequence. Deleting a machining operation "Delete line" deletes the selected machining sequence. Overview of machining sequences The following table lists the possible combinations of main machining operations with submachining operations and machining locations and explains the working method of the AWG. Machining sequence for predrilling Main machining Submachining Location Predrilling Execution Contour analysis: Determining the drilling steps Machining parameter: 3 – Centric predrilling All – Predrilling Location Execution Machining sequence for roughing Main machining Submachining Roughing Contour analysis: Dividing the contour into areas for longitudinal/ transverse outside machining and longitudinal/transverse inside machining according to the transverse/longitudinal ratio. Sequence: First outside, then inside machining Machining parameter: 4 – Roughing All – Transverse machining, longitudinal machining—outside and inside Longitudinal machining – Longitudinal machining—outside and inside Longitudinal machining Outside Longitudinal machining—outside Longitudinal machining Inside Longitudinal machining—inside Transverse machining – Transverse machining—outside and inside Transverse machining Outside Transverse machining—outside Transverse machining Inside Transverse machining—inside HEIDENHAIN MANUALplus 620, CNC PILOT 640 557 7.2 Automatic working plan generation (AWG) Editing the machining sequence 7.2 Automatic working plan generation (AWG) Main machining Submachining Location Execution Contour-parallel – Contour-parallel machining—outside and inside Contour-parallel Outside Contour-parallel machining—outside Contour-parallel Inside Contour-parallel machining—inside Machining sequence for finishing Main machining Submachining Location Finishing Execution Contour analysis: Dividing the contour into areas for outside and inside machining. Sequence: First outside, then inside machining Machining parameter: 5 – Finishing Contour-parallel – Outside/inside machining Contour-parallel Outside Outside machining Contour-parallel Inside Inside machining Location Execution Machining sequence for recess turning Main machining Submachining Recess turning Contour analysis: Without previous roughing operation: The complete contour, including recess areas (undefined recesses), is machined. With previous roughing: Recess areas (undefined recesses) are determined and machined according to the "inward copying angle (EKW)." Sequence: First outside, then inside machining Machining parameter: 1 Global parameters for finished parts All – Radial/axial machining—outside and inside Longitudinal machining Outside Radial machining—outside Longitudinal machining Inside Radial machining—inside Transverse machining Outside/ front Axial machining—outside Transverse machining Inside/front Axial machining—inside Recess turning and contour turning are used alternatively. 558 TURN PLUS Main machining Submachining Location Contour recessing Execution Contour analysis: Recess areas (recesses) are determined and machined according to the "inward copying angle (EKW)." Sequence: First outside, then inside machining Machining parameter: 1 Global parameters for finished parts All – Radial/axial machining—outside and inside Shaft machining: Axial machining on the outside is performed on front and back Longitudinal machining Outside Radial machining—outside Longitudinal machining Inside Radial machining—inside Transverse machining Outside/ front Axial machining—outside Transverse machining Inside/front Axial machining—inside Recess turning and contour turning are used alternatively. Machining sequence for recessing Main machining Submachining Location Recessing Execution Contour analysis: Determining the "Recess" form elements: Type S (guarding ring – recess type S) Type D (sealing ring – recess type D) Type A (recess general) Type FK (relief turn F) – FK is only machined using "Recessing" if the "inward copying angle (EKW) <= mtw." Sequence: First outside, then inside machining Machining parameter (with type FK): 1 Global parameters for finished parts All – All recess types; radial/axial machining; outside and inside Type S, D, A, FK – Radial/axial machining—outside and inside Type S, D, A, FK Outside Radial machining—outside Type S, D, A, FK Inside Radial machining—inside Type S, D, A, FK Outside/ front Axial machining—outside Type S, D, A, FK Inside/front Axial machining—inside HEIDENHAIN MANUALplus 620, CNC PILOT 640 559 7.2 Automatic working plan generation (AWG) Machining sequence for contour recessing 7.2 Automatic working plan generation (AWG) Machining sequence for undercuts Main machining Submachining Location Undercutting Execution Contour analysis/machining: Determining the "Undercuts" form elements: Type H – Machining using single paths of traverse; copying tool (type 22x) Type K – Machining using single paths of traverse; copying tool (type 22x) Type U – Machining using single paths of traverse; recessing tool (type 15x) Sequence: First outside, then inside machining; first radial, then axial machining 560 All – All recess types—outside and inside All Outside All recess types—outside All Inside All recess types—inside Type H, K, U – Radial/axial machining—outside and inside Type H, K, U Outside Machining—outside Type H, K, U Inside Machining—inside TURN PLUS Main machining Submachining Location Thread cutting Execution Contour analysis: Determining the "Thread" form elements Sequence: First outside, then inside machining; the elements are then machined according to the sequence of geometrical definition All – Machining cylindric (longitudinal), tapered and transverse threads on the outside and inside of a contour All Outside Machining cylindric (longitudinal), tapered and transverse threads on the outside of a contour All Inside Machining cylindric (longitudinal), tapered and transverse threads on the inside of a contour Cylinder – Machining cylindric outside and inside threads Cylinder Outside Machining cylindric outside threads Cylinder Inside Machining cylindric inside threads Transverse – Machining transverse threads on the outside and inside of the contour Transverse Outside Machining transverse threads on the outside Transverse Inside Machining transverse threads on the inside Taper – Machining taper threads on the outside and inside Taper Outside Machining taper threads on the outside. Taper Inside Machining taper threads on the inside. HEIDENHAIN MANUALplus 620, CNC PILOT 640 561 7.2 Automatic working plan generation (AWG) Machining sequence for thread cutting 7.2 Automatic working plan generation (AWG) Machining sequence for drilling Main machining Submachining Location Drilling Execution Contour analysis: Determining the "Hole" form elements. Sequence – Drilling operations/drilling combinations: Centering / Centering and countersinking Drilling Countersinking / Drilling and countersinking Reaming / Drilling with reaming Tapping / Drilling with thread Sequence – Location: Centric Front (also machines Y front) Lateral surface (also machines Y surface) – then the elements are machined according to the sequence of geometrical definition 562 All – All drilling/boring operations at all machining locations All Centric Centric machining of all drilling/boring operations All Face All drilling/boring operations on the front face All Lateral All drilling/boring operations on the lateral surface Centering, drilling, countersinking, reaming, tapping – Machining at all machining locations Centering, drilling, countersinking, reaming, tapping Centric Centric machining on the face Centering, drilling, countersinking, reaming, tapping Face Machining on the face Centering, drilling, countersinking, reaming, tapping Lateral Machining on the lateral surface TURN PLUS Main machining Submachining Location Milling Execution Contour analysis: Determining the milling contours. Sequence – Milling operation: Linear and circular slots Open contours Closed contours (pockets), single surfaces and centric polygons Sequence – Location: Front (also machines Y front) Lateral surface (also machines Y surface) – then the elements are machined according to the sequence of geometrical definition All – All milling operations at all machining locations Surface, contour, slot milling, pocket Face All milling operations on the front face Surface, contour, slot milling, pocket Lateral All milling operations on the lateral surface Surface, contour, slot milling, pocket – Milling at all machining locations Surface, contour, slot milling, pocket Face Milling the end face Surface, contour, slot milling, pocket Lateral Milling on the lateral surface Location Execution Machining sequence for deburring Main machining Submachining Deburring Contour analysis: Determining milling contours with "Deburring" attribute. Sequence – Location: Front (also machines Y front) Lateral surface (also machines Y surface) – then the elements are machined according to the sequence of geometrical definition All – All milling operations at all machining locations Contour, slot, pocket (*) Face Deburring of all milling operations on the front face Contour, slot, pocket (*) Lateral Deburring of all milling operations on the lateral surface HEIDENHAIN MANUALplus 620, CNC PILOT 640 563 7.2 Automatic working plan generation (AWG) Machining sequence for milling 7.2 Automatic working plan generation (AWG) Main machining Submachining Location Execution Contour, slot, pocket (*) – Deburr selected element at all machining locations Contour, slot, pocket (*) Face Deburr selected element on the face Contour, slot, pocket (*) Lateral Deburr selected element on the lateral surface *: Define the type of contour Machining sequence for milling and finishing Main machining Submachining Location Finish-milling Execution Contour analysis: Determining the milling contours. Sequence – Milling operation: Linear and circular slots Open contours Closed contours (pockets), single surfaces and centric polygons Sequence – Location: Front (also machines Y front) Lateral surface (also machines Y surface) – then the elements are machined according to the sequence of geometrical definition – – Finish-machine all elements at all machining locations – Face Finish-machine all elements on the front face – Lateral Finish-machine all elements on the lateral surface Contour, slot, pocket (*) – Finish selected element at all machining locations Contour, slot, pocket (*) Face Finish selected element on the face Contour, slot, pocket (*) Lateral Finish selected element on the lateral surface *: Define the milling operation Machining sequence for parting Main machining Submachining Location Execution Parting All – The workpiece is cut off Full-surface machining – The workpiece is cut off and rechucked 564 TURN PLUS 7.2 Automatic working plan generation (AWG) Machining sequence for rechucking Main machining Submachining Location Execution Rechucking Full-surface machining – The workpiece is rechucked. AWG control graphic When you create a program with the AWG, the programmed blank and finished part are displayed in the simulation window and in addition, all machining steps are simulated successively. The workpiece blank takes on a contour during machining. Setting the AWG control graphic When you start the automatic program creation with the AWG soft key, the control automatically opens the AWG control graphic. The simulation displays dialogs in which you get machining and tool information. After you have simulated the machining process, you can close the graphics window with the "Back" soft key. The "Save as" dialog box opens once you exit the TURN PLUS menu with the "Back" soft key. The name of the opened program is displayed in the "File name" dialog field. If you do not enter another file name, the opened program will be overwritten. Alternatively, you can save the machining operation in another program. The AWG control graphic is indicated in the soft-key symbol by a contour outlined in red. You can set the display of the tool paths and the simulation mode as usual (see "Graphic simulation" in the User's Manual). HEIDENHAIN MANUALplus 620, CNC PILOT 640 565 7.3 Machining information 7.3 Machining information Tool selection, turret assignment The tool selection is determined by: Machining direction Contour to be machined Machining sequence Machine parameter settings, e.g. "Type of tool access" (602001) If the ideal tool is not available, TURN PLUS First looks for a replacement tool, Then for an emergency tool. If necessary, TURN PLUS adapts the machining cycle to the requirements of the replacement or emergency tool. If more than one tool is suitable for a machining operation, TURN PLUS uses the optimal tool. If no tool is found by TURN PLUS, select the tools manually. The Mount type distinguishes between different tool holders (see "Tool editor" in the User's Manual). TURN PLUS checks whether the mount type in the tool holder description and the mount type in the turret pocket description are the same. Depending on the setting of the "Zero point shift" machine parameter (602022), TURN PLUS automatically calculates the required zero point shift for the workpiece and activates it with G59 (see "List of user parameters" in the User's Manual). To calculate the zero point shift, TURN PLUS takes the following values into account: Workpiece length Z (description of workpiece blank) Oversize K (description of workpiece blank) Edge of chuck Z (description of chucking equipment and machining parameters) Edge of chuck B (description of chucking equipment and machining parameters) Multipoint tools and manual tool change holders are used by AWG only if they are already entered in the turret list of the NC program. 566 TURN PLUS 7.3 Machining information Manual tool selection TURN PLUS selects the tools depending on the machining parameter Type of tool access WD. If TURN PLUS cannot find a suitable tool in the specified lists, select the tools manually. TURN PLUS automatically enters comparison parameters. With the soft keys, you can select the list in which you want to look for the tools. Select the "Tool list" soft key Select the "Turret list" soft key Choose a tool from the list. Press the "Take over" soft key to enter the tool in the tool selection. Press the "Take over" soft key to conclude the tool selection. HEIDENHAIN MANUALplus 620, CNC PILOT 640 567 7.3 Machining information Contour recessing, recess turning The cutting radius must be smaller than the smallest inside radius of the recess contour, but >= 0.2 mm. TURN PLUS determines the width of the recessing tool from the recess contour: Recess contour includes paraxial base elements with radii on both sides: SB <= b + 2*r (if radii differ: smallest radius). Recess contour includes paraxial base elements without radii or with a radius on one side: SB <= b Recess contour does not include paraxial base elements: The width of the recessing tool is determined from the recessing width divisor (machining parameter 6 – SBD). Abbreviations: SB: Recessing width b: Width of base element r: Radius Drilling Depending on the geometry of the bore hole, the AWG determines the appropriate tool. For centric bore holes, TURN PLUS uses stationary tools. 568 TURN PLUS 7.3 Machining information Cutting data, coolant To determine the cutting parameters, TURN PLUS uses the Workpiece material (program head) Cutting material (tool parameters) The machining operation (main operation in the machining sequence). The values determined are multiplied by the tool-dependent compensation factors (see "Tool data" in the User's Manual). Note for roughing and finishing operations: Main feed rate for use of the primary cutting edge Auxiliary feed rate for use of the secondary cutting edge Note for milling operations: Main feed rate for machining in the milling plane Auxiliary feed rate for infeed movements For threading, drilling and milling operations, the cutting speed is converted into rotational speed. Coolant: Depending on the workpiece material, cutting material and machining operation, define in the technology database whether coolant is used. The AWG activates the appropriate coolant circuits for the respective tool. If you have specified that coolant is to be used, the AWG activates the coolant circulation for the respective machining block. Inside contours TURN PLUS machines continuous inside contours up to the transition from the "deepest point" to a greater diameter. The end position for drilling, roughing and finishing operations depends on: Cutting limit, inside Overhang length, inside ULI (Processing machining parameter) Prerequisite: The usable tool length must be sufficient for the machining operation. If it is not, then this parameter defines the inside machining operation. The following examples explain the principle. Limits for internal machining operations Predrilling: SBI limits the drilling operation. Roughing: SBI or SU limit the roughing operation. SU = basic length of roughing cut (sbl) + overhang length, inside (ULI) To avoid residual rings during the machining process, TURN PLUS leaves an area of 5° in front of the roughing limit. Finishing: sbl limits the finishing operation. HEIDENHAIN MANUALplus 620, CNC PILOT 640 569 7.3 Machining information Roughing limit in front of cutting limit Example 1: The roughing limit (SU) is located in front of the cutting limit, inside (SBI). Abbreviations SBI: Cutting limit, inside SU: Roughing limitation (SU = sbl + ULI) sbl: Basic length of roughing cut ("deepest" point of inside contour) ULI: Overhang length, inside (machining parameter 4) nbl: Usable tool length (tool parameter) 570 TURN PLUS 7.3 Machining information Roughing limit behind cutting limit Example 2: The roughing limit (SU) is located behind the cutting limit, inside (SBI). Abbreviations SBI: Cutting limit, inside SU: Roughing limitation (SU = sbl + ULI) sbl: Basic length of roughing cut ("deepest" point of inside contour) ULI: Overhang length, inside (machining parameter 4) nbl: Usable tool length (tool parameter) HEIDENHAIN MANUALplus 620, CNC PILOT 640 571 7.3 Machining information Shaft machining For shafts, TURN PLUS supports rear-face machining of outside contours in addition to standard machining processes. This enables shafts to be completely machined using one setup. You can select the clamping type for the shaft machining (Shaft/chuck or Shaft/face driver) in the V input parameter in the chucking equipment dialog. TURN PLUS does not support retracting the tailstock and does not check the setup used. Precondition for shaft machining: The workpiece is clamped at spindle and tailstock. Danger of collision! TURN PLUS does not monitor for collisions during transverse machining or machining operations on the end face. Separation point (TR) The separation point (TR) divides the workpiece into front and rear area. If no separation point has been specified, TURN PLUS sets a separation point at the transition from the largest to a smaller diameter. Position the separation points on outside corners. Tools for machining the Area on front side: Main machining direction –Z; or primarily "left" recessing or tapping tools, etc. Area on rear side: Main machining direction +Z; or primarily "right" recessing or tapping tools, etc. Setting/changing the separation point: see "Separation point G44" on page 222. Protection zones for drilling and milling operations TURN PLUS machines drilling and milling contours on transverse surfaces (front/rear face) if: (Horizontal) distance to transverse surface > 5 mm, or Distance between chucking equipment and drilling/milling contour is > SAR (SAR: See user parameter). If jaws are used for clamping the shaft at the spindle, TURN PLUS accounts for the cutting limitation (O). 572 TURN PLUS 7.3 Machining information Machining information Chucking the workpiece at the spindle: Ensure that the area, where the blank part is chucked, is premachined. Otherwise, the cutting limitation might adversely affect the machining strategies. Machining of bars: TURN PLUS does not control the bar loader and does not move the tailstock and steady rest components. TURN PLUS does not support workpiece adjustment between collet and dead center during machining operations. Transverse machining Please note that the entries made in the machining sequence apply to the complete workpiece and thus also to the transverse machining of shaft ends. The AWG does not machine inside areas on the rear face. If jaws are used for clamping the shaft at the spindle, the rear face is not machined. Longitudinal machining: First the front area is machined, then the rear area. Collision prevention: If machining operations are not performed without collisions, you can do the following: Add a retraction of the tailstock, a positioning of the steady rest, etc. to the program. Add cutting limits to the program to avoid collisions. Disable automatic machining in the AWG by assigning the "Exclusion from machining" attribute or by defining a specific machining location in the machining sequence. Define an oversize=0 for the workpiece blank. As a consequence, the front area is not machined (e.g. shafts cut to length and centered shafts). HEIDENHAIN MANUALplus 620, CNC PILOT 640 573 7.4 Example 7.4 Example On the basis of the production drawing, the working steps for defining the contour of the blank and finished part, the setup procedures and automatic working plan generation are explained. Workpiece blank: Ø60 X 80; Material: Ck 45 Undefined chamfers: 1x45° Undefined radii: 1 mm Creating a program Select "Program > New > New DINplus Program." The control opens the "Save as" dialog box. Enter a program name and press the "Save" soft key. The control opens the "Program head (short)" dialog box. Select a material from the fixed-word list and press the "OK" soft key. Workpiece blank definition Select "ICP > Blank > Bar." TURN PLUS opens the "Bar" dialog box. Inputs: Diameter X = 60 mm Length Z = 80 mm Oversize K = 2 mm TURN PLUS displays the workpiece blank. Press the "Back" soft key to return to the main menu. 574 TURN PLUS 7.4 Example Defining the basic contour Select "ICP > Finished part (> Contour)." Enter start point of the contour X = 0; Z = 0 and end point of the element X = 16 Enter Z = –25 Enter X = 35 Enter Z = –43 Enter X = 58; W = 70 Enter Z = –76 Press the "Back" soft key to go back one menu level. Defining form elements Chamfer at corner of threaded shank: Select the form elements. Select "Form > Chamfer." Select the corner of the threaded shank. "Chamfer" dialog box: Chamfer width = 3 mm Rounding arcs: Select "Form > Rounding." Select the corners for the rounding arcs. "Rounding" dialog box: Rounding radius = 2 mm Select "Form > Undercut > Undercut type G." Select the corner for the undercut. "Undercut type DIN 76" dialog box Select "Form > Recess > Recess standard / G22." Select the basic element for the recess. "Recess standard / G22" dialog box: Undercut: Recess: Inside corner (Z) = 25 mm Inside corner (Ki) = –8 mm Recess diameter = 25 mm Outside radius/chamfer (B) = –1 mm HEIDENHAIN MANUALplus 620, CNC PILOT 640 575 7.4 Example Thread: Select "Form > Thread." Select the basic element for the thread. "Thread" dialog box: Select "ISO DIN 13" Press the "Back" soft key to return to the main menu. Preparing the machining process, chucking Depending on the "Zero point shift" machine parameter, TURN PLUS automatically calculates the required zero point shift for the workpiece and activates it with G59. To calculate the zero point shift, TURN PLUS takes the following values into account: Workpiece length Z (description of workpiece blank) Oversize K (description of workpiece blank) Edge of chuck Z (description of chucking equipment and machining parameters) Edge of chuck B (description of chucking equipment and machining parameters) Select "Head > Chucking equipment" Describe the chucking equipment: Select "AWG spindle number" Enter the edge of chuck Enter the chuck width Enter the cutting limitation (outside and inside) Enter the clamping diameter Enter the clamping length Define the clamping form Select "Shaft machining AWG" TURN PLUS takes the chucking equipment and cutting limitation into account for the program creation. Press the "Back" soft key to return to the main menu. 576 TURN PLUS 7.4 Example Generating and saving a working plan Generating a working plan Select "TURN PLUS > AWG." Start the AWG control graphic Save a program Press the "Back" soft key to return to the TURN PLUS menu. Press the "Back" soft key to return to the Program view Check/edit the file name and press the "Save" soft key TURN PLUS saves the NC program The AWG generates the work blocks according to the machining sequence and the settings of the machining parameters. HEIDENHAIN MANUALplus 620, CNC PILOT 640 577 7.5 Full-surface machining with TURN PLUS 7.5 Full-surface machining with TURN PLUS Rechucking the workpiece The control uses subprograms for rechucking, which are adapted by the machine tool builder. The functions and sequences described below are examples—the behavior of your machine may be different. Refer to your machine manual. TURN PLUS provides three full-surface machining variants: Rechucking the workpiece in the main spindle. Both setups are contained in one NC program. Transferring the workpiece from the main spindle to the opposing spindle (chuck part). Parting and picking-off the workpiece with the opposing spindle. TURN PLUS selects the required rechucking variant on the basis of the fixture and the machining sequence. For every rechucking variant, a separate subprogram that controls the rechucking sequence is defined in the user parameters (Processing/ExpertPrograms/Expert programs). 578 TURN PLUS The full-surface machining sequence is defined in the chuckingequipment dialog. You also define the zero points, pick-up position and cutting limits in this dialog. Example of first setup for full-surface machining: Parameters No. of clamping H CLAMPS 1 Spindle number AWG D 0: Main spindle Clamp type R 0: External clamping or 1: Internal clamping Chuck edge Z No entry (AWG uses the value from the user parameters) Chuck jaw reference B No entry (AWG uses the value from the user parameters) Clamping length or free Enter the clamping length or free length length J Cutting limit, outside O Is calculated by AWG (if external clamping is used) Cutting limit, inside I Is calculated by AWG (if internal clamping is used) Overlap K Overlap jaw/workpiece Chuck diameter X Clamping diameter of workpiece blank Chuck form Q 4: External or 5: Internal Shaft machining V Select the desired AWG strategy Beispiel: Defining the first chucking equipment Example of second setup for full-surface machining: Parameters No. of clamping H CLAMPS 2 Spindle number AWG D 0: Main spindle or 3: Opposing spindle (depending on type of rechucking) Clamp type R 0: External clamping or 1: Internal clamping Chuck edge Z No entry (AWG uses the value from the user parameters) Chuck jaw reference B No entry (AWG uses the value from the user parameters) Clamping length or free Enter the clamping length or free length length J Cutting limit, outside O Is calculated by AWG (if external clamping is used) Cutting limit, inside I Is calculated by AWG (if internal clamping is used) Overlap K Overlap jaw/workpiece Chuck diameter X Clamping diameter of workpiece blank Chuck form Q 4: External or 5: Internal Shaft machining V Select the desired AWG strategy Beispiel: Defining the second chucking equipment HEIDENHAIN MANUALplus 620, CNC PILOT 640 ... CLAMPS 1 H0 D0 R0 J100 K15 X120 Q4 V0 ... ... CLAMPS 2 H0 D3 R1 J15 K-15 X68 Q4 V0 ... 579 7.5 Full-surface machining with TURN PLUS Defining the chucking equipment for full-surface machining 7.5 Full-surface machining with TURN PLUS Automatic program creation for full-surface machining During automatic program creation (AWG) the machining steps for the first setup are created first. Then AWG opens a dialog window that requests the parameters for rechucking. Default values that were calculated by AWG from the defined workpiece contour are already entered in the parameters in the dialog window. You can use or change these values. After you have confirmed the values, AWG generates the machining sequence for the second setup. In the user parameters the machine manufacturer defines the input parameters to be displayed in the dialog windows during rechucking. You can also include further input parameters in the dialog windows. To do this, select the required parameters list (Processing/ExpertPrograms/Parameter lists for expert programs) in the user parameters. In the desired parameter enter a default value that is assigned to this parameter in the dialog window. Enter 9999999 to display the parameter without a default value. Rechucking the workpiece in the main spindle The subprogram for "rechucking in the main spindle" is defined in the user parameter Parameter list – manual rechucking (standard program: Rechuck_manual.ncs). At the end of the machining sequence, define a machining step with the rechucking main machining operation and the full-surface machining submachining operation. In parameter D of the chucking equipment description, select the main spindle for both pieces of chucking equipment. Beispiel: Defining the chucking equipment ... CLAMPS 1 H0 D0 R0 J80 K15 X120 Q4 V0 CLAMPS 2 H0 D0 R1 J15 K-15 X68 Q4 V0 ... Transferring the workpiece from the main spindle to the opposing spindle The subprogram for "transferring the workpiece from the main spindle to the opposing spindle" is defined in the user parameter Parameter list – complete rechucking (standard program: Rechuck_complete.ncs). Beispiel: Defining the chucking equipment ... CLAMPS 1 At the end of the machining sequence, define a machining step with the rechucking main machining operation and the full-surface machining submachining operation. H0 D0 R0 J80 K15 X120 Q4 V0 In parameter D of the chucking equipment description, select the main spindle for the first chucking equipment and the opposing spindle for the second chucking equipment. H0 D3 R1 J15 K-15 X68 Q4 V0 580 CLAMPS 2 ... TURN PLUS 7.5 Full-surface machining with TURN PLUS Parting and picking-off the workpiece with the opposing spindle The subprogram for "parting and picking-off with the opposing spindle" is defined in the user parameter Parameter list – rechucking, parting (standard program: Rechuck_complete.ncs). At the end of the machining sequence, define a machining step with the parting main machining operation and the full-surface machining submachining operation. In parameter D of the chucking equipment description, select the main spindle for the first chucking equipment and the opposing spindle for the second chucking equipment. HEIDENHAIN MANUALplus 620, CNC PILOT 640 Beispiel: Defining the chucking equipment ... CLAMPS 1 H0 D0 R0 J100 K15 X120 Q4 V0 CLAMPS 2 H0 D3 R1 J15 K-15 X68 Q4 V0 ... 581 582 TURN PLUS 7.5 Full-surface machining with TURN PLUS B axis 8.1 Fundamentals 8.1 Fundamentals Tilted working plane The machine tool builder determines the scope of function and behavior of the B axis. The machine manual provides further information. Tilted working plane The B axis makes it possible to drill, bore and mill in oblique planes. To make programming easy, the coordinate system is tilted in such a way that you can define the drilling patterns and milling contours in the YZ plane. The actual drilling or milling operation is then performed in the tilted plane (see „Tilting the working plane G16” on page 522). The separation of contour description and machining also applies to machining operations in tilted planes. Contour regeneration is not available. Contours in tilted planes are identified by the section code LATERAL_Y (see „LATERAL_Y section” on page 52). The control supports NC program creation with the B axis in DIN PLUS and smart.Turn. The graphical simulation shows the machining operation in a tilted working plane in the familiar lathe and front windows, as well as in the "side view (YZ)." If you are using a tool with an angled tool holder you can also use the tilted working plane without the B axis. Define the angle for the tool holder as angular offset RW in the tool description. 584 B axis BW 90 In this way, you need fewer tools and fewer tool changes. Tool data: All tools are described in the tool database by specifying the X, Z and Y dimensions as well as the compensation values. These dimensions are referenced to the tilt angle B=0° (reference position). 8.1 Fundamentals Tools for the B axis Another advantage of the B axis is that it allows flexible use of the tools during turning operations. By tilting the B axis and rotating the tool you can bring it into positions that enable you to use one and the same tool to machine in the longitudinal and transverse (or radial and axial) directions on the main and opposing spindles. BW 180 CW 0 BW 0 BW 90 Another parameter that is maintained in the tool database is the position angle CW. It defines the working positions of tools that are not driven tools (turning tools). The tilt angle of the B axis is not maintained with the tool data. This angle needs to be defined in the tool call or when inserting the tool. CW 1 Tool orientation and position display: For turning tools, the position of the tool tip is calculated based on the orientation of the cutting edge. The control calculates the tool orientation of lathe tools by means of the tool angle and point angle. HEIDENHAIN MANUALplus 620, CNC PILOT 640 585 8.1 Fundamentals Multipoint tools for the B axis If several tools are mounted on a tool holder, this is referred to as a "multipoint tool." Each cutting edge (tool) of a multipoint tool is assigned a separate ID number and description. The position angle, which is identified by "CW" in the figure, is included in the tool data.When a cutting edge (tool) of a multipoint tool is activated, the CNC PILOT will rotate the multipoint tool into the correct position. The position is determined from the position angle, to which the offset position angle from the tool change routine is added. This allows inserting the tool either in the "normal" attitude or "upside down." CW240 CW0 The photo shows a multipoint tool with three cutting edges. CW120 586 B axis 8.2 Compensation with the B axis 8.2 Compensation with the B axis Compensation during program run Tool compensation: Enter the compensation values determined in the tool compensation form. Also define further functions that were active while machining the measured surface: Tilt angle of the B axis BW Position angle of the tool CW Kinematics KM Plane G16 The control converts the measured data into dimensions referenced to the position B=0 and saves them in the tool database. Select the Tool/Add correct. soft key during program run. The control opens "Set the tool compensation" in the dialog box. Enter new values. Press the Save soft key. In the "T" box (machine display), the control indicates the compensation values referenced to the current B axis angle and the tool position angle. The control saves the tool compensation data in the tool database, together with the other tool data. If the B axis is tilted, the control takes the tool compensation data into account when calculating the tool tip position. Additive compensation values are independent of the tool data. The compensation values are effective in the X, Y and Z directions. Tilting the B axis has no influence on additive compensation values. HEIDENHAIN MANUALplus 620, CNC PILOT 640 587 8.3 Simulation 8.3 Simulation Simulation of the tilted plane 3-D view: The simulation correctly displays tilted Y planes as well as elements referenced to them (such as pockets, holes, patterns, etc.). Contour graphics: The simulation displays the YZ view of the workpiece and the contours of the tilted planes in the side view. To represent the drilling patterns and milling contours perpendicularly to the tilted plane, i.e. without distortion, the simulation ignores the rotation of the coordinate system and a shift within the rotated coordinate system. Beispiel: "Contour in tilted plane" ... FINISHED N2 G0 X0 Z0 N3 G1 X50 N4 G1 Z–50 With contour graphics for tilted planes, please note the following: N5 G1 X0 The parameter "K" of G16 or LATERAL_Y defines the "start" of the drilling pattern or milling contour in the Z direction. The drilling patterns and milling contours are drawn perpendicularly to the tilted plane. This results in a "shift" relative to the turning contour. N6 G1 Z0 Milling, drilling and boring operations: When you use the side view to display the tool paths in the tilted plane, the same rules apply as for the contour graphics. LATERAL_Y X50 C0 B20 I25 K-20 H1 LATERAL_Y X50 C0 B80 I25 K-10 H0 N7 G386 Z0 Ki10 B–30 X50 C0 [Single surface] N8 G384 Z–10 Y10 X50 R10 P5 [Full circle] ... When working in tilted planes, the front window shows the "outline" of the tool. The tool width is simulated true to scale. In this way, you can check the overlap of milling paths. The tool paths are also represented true to scale (in perspective view) as line graphics. In all "additional windows," the simulation shows the tool and the cutting path when the tool is perpendicular to the relevant plane. A tolerance of +/– 5° is taken into account. When the tool is not perpendicular to the plane, it is represented as a "light dot" and the tool path is depicted as a line. 588 B axis 8.3 Simulation Displaying the coordinate system The simulation can show the shifted/rotated coordinate system in the "lathe window," if required. To use this feature, you need to stop the simulation. Press the Plus/Minus key. The simulation displays the current coordinate system. The coordinate system disappears when the next command is simulated or when you press the Plus/Minus key once again. Position display with the B and Y axes The following boxes of the display cannot be edited: N: Block number of the NC source block X, Z, C: Position values (actual values) The other boxes can be set with the Split-Screen Layout key (three arrows arranged in a circle): Default settings (values of the selected slide): Y: Position value (actual value) T: Tool data with turret pocket (in "(..)") and ID number B axis settings: B: Tilt angle of the B axis G16/B: Angle of the tilted plane HEIDENHAIN MANUALplus 620, CNC PILOT 640 589 590 B axis 8.3 Simulation Overview of units 9.1 Units—"Turning" group 9.1 Units—"Turning" group "Roughing" group Unit Description Page G810_ICP G810 Longitudinal in ICP Page 67 Roughing an ICP contour longitudinally G820_ICP G820 Transverse in ICP Page 68 Roughing an ICP contour transversely G830_ICP G830 Contour parallel in ICP Page 69 Roughing parallel to the contour in ICP G835_ICP G835 Bidirectional in ICP Page 70 Roughing an ICP contour in two directions G810_G80 G810 Longitudinal, direct Page 71 Longitudinal roughing with direct contour input G820_G80 G820 Transverse, direct Page 72 Transverse roughing with direct contour input "Finishing" group Unit Description Page G890_ICP G890 Contouring in ICP Page 118 Finishing an ICP contour G890_G80_L G890 Contouring, direct longitdnl. Page 120 Longitudinal finishing with direct contour input G890_G80_P G890 Contouring, direct transverse Page 121 Transverse finishing with direct contour input G85x_DIN_E_F_G G890 Relief, type E, F, DIN76 Page 122 Finishing the undercuts according to DIN509 type E and F and the thread undercut DIN76 592 Overview of units 9.1 Units—"Turning" group "Recessing" group Unit Description Page G860_ICP G860 Contour recess in ICP Page 73 Recessing an ICP contour G869_ICP G869 Recess turning in ICP Page 74 Recess turning an ICP contour G860_G80 G860 Contour recess, direct Page 75 Contour recessing with direct contour input G869_G80 G869 Recess turning, direct Page 76 Recess turning with direct contour input G859_Cut_off G859 Parting Page 77 Parting a bar with direct position input G85x_Cut_H_K_U G85X Undercutting (H, K, U) Page 78 Make undercuts of type H, K and U "Thread" group Unit Description Page G32_MAN G32 Single thread Page 127 Thread with direct contour definition G31_ICP G31 ICP thread Page 128 Thread on any desired ICP contour G352_API G352 API thread Page 130 API thread with direct contour definition G32_KEG G32 Tapered thread Page 131 Tapered thread with direct contour definition HEIDENHAIN MANUALplus 620, CNC PILOT 640 593 9.2 Units—"Drilling" group 9.2 Units—"Drilling" group "Centric drilling" group Unit Description Page G74_Zentr G74 Centric drilling Page 80 Drilling and pecking with X=0 G73_Zentr G73 Centric tapping Page 82 Tapping with X=0 "ICP drilling, C axis" group Unit Description Page G74_ICP_C G74 ICP drilling, C axis Page 102 Drilling and pecking with ICP pattern G73_ICP_C G73 ICP tapping, C axis Page 104 Tapping with ICP pattern G72_ICP_C G72 ICP boring, countersinking in C axis Page 105 Tapping with ICP pattern "C-axis face drilling" group Unit Description Page G74_Bohr_Stirn_C G74 Single hole Page 84 Drilling and pecking a single hole G74_Lin_Stirn_C G74 Linear pattern drilling Page 86 Drilling and pecking a linear hole pattern G74_Cir_Stirn_C G74 Circ. pattern drilling Page 88 Drilling and pecking a circular hole pattern G73_Gew_Stirn_C G73 Tapping Page 90 Tapping a single hole G73_Lin_Stirn_C G73 Thread, linear pattern Page 91 Tapping a linear hole pattern G73_Cir_Stirn_C G73 Thread, circular pattern Page 92 Tapping a circular hole pattern 594 Overview of units 9.2 Units—"Drilling" group "C-axis lateral surface drilling" group Unit Description Page G74_Bohr_Mant_C G74 Single hole Page 93 Drilling and pecking a single hole G74_Lin_Mant_C G74 Linear pattern drilling Page 95 Drilling and pecking a linear hole pattern G74_Cir_Mant_C G74 Circ. pattern drilling Page 97 Drilling and pecking a circular hole pattern G73_Gew_Mant_C G73 Tapping Page 99 Tapping a single hole G73_Lin_Mant_C G73 Thread, linear pattern Page 100 Tapping a linear hole pattern G73_Cir_Mant_C G73 Thread, circular pattern Page 101 Tapping a circular hole pattern HEIDENHAIN MANUALplus 620, CNC PILOT 640 595 9.3 Units—"Predrilling in C axis" group 9.3 Units—"Predrilling in C axis" group "Predrilling in C-axis, face" group Unit Description Page DRILL_STI_KON_C G840 Predrill face, contour milling, figures Page 106 Determine the predrilling position and machine a hole DRILL_STI_840_C G840 Predrill face, ICP contour milling Page 108 Determine the predrilling position and machine a hole DRILL_STI_TASC G845 Predrill face, pocket milling, figures Page 109 Determine the predrilling position and machine a hole DRILL_STI_845_C G845 Predrill face, ICP pocket milling Page 111 Determine the predrilling position and machine a hole "Predrilling in C-axis, lateral surface" group Unit Description Page DRILL_MAN_KON_C G840 Predrill latrl., contour milling, figures Page 112 Determine the predrilling position and machine a hole DRILL_MAN_840_C G840 Predrill lateral surf., ICP contour milling Page 114 Determine the predrilling position and machine a hole DRILL_MAN_TAS_C G845 Predrill lateral surf., pocket milling, figures Page 115 Determine the predrilling position and machine a hole DRILL_MAN_845_C G845 Predrill lateral surf., ICP pocket milling Page 117 Determine the predrilling position and machine a hole 596 Overview of units 9.4 Units—"Milling in C axis" group 9.4 Units—"Milling in C axis" group "Milling in C-axis, face" group Unit Description Page G791_Nut_Stirn_C G791 Linear slot Page 133 Milling a linear slot G791_Lin_Stirn_C G791 Linear slot pattern Page 134 Milling of linear slots in a linear pattern G791_Cir_Stirn_C G791 Circular slot pattern Page 135 Milling of linear slots in a circular pattern G797_STIRNFR_C G797 Face milling Page 136 Milling various figures as islands G797_ICP G797 Face milling ICP Page 137 Milling closed contours as islands G799_GewindeFR_C G799 Thread milling Page 138 Inside thread milling in a single hole G840_FIG_STIRN_C G840 Contour milling, figures Page 139 Milling figures inside, outside and on the contour G84X_FIG_STIRN_C G84x Pocket milling, figures Page 142 Roughing out closed figures, inside G801_GRA_STIRN_C G801 Engraving Page 145 Engraving characters strings on the face "ICP milling in C axis, face" group Unit Description Page G840_Kon_C_STIRN G840 Contour milling, ICP Page 141 Machining ICP contours on the face inside, outside and on the contour G845_TAS_C_STIRN G845 Pocket milling, ICP Page 144 Inside rough-out of closed ICP contours on the face G840_ENT_C_STIRN G840 Deburring Page 146 Deburring ICP contours on the face HEIDENHAIN MANUALplus 620, CNC PILOT 640 597 9.4 Units—"Milling in C axis" group "C-axis lateral surface milling" group Unit Description Page G792_NUT_MANT_C G792 Linear slot Page 147 Milling a linear slot G792_LIN_MANT_C G792 Linear slot pattern Page 148 Milling of linear slots in a linear pattern G792_CIR_MANT_C G792 Circular slot pattern Page 149 Milling of linear slots in a circular pattern G798_Wendelnut_C G798 Helical slot milling Page 150 Milling a thread-shaped helical slot G840_FIG_MANT_C G840 Contour milling, figures Page 151 Milling figures inside, outside and on the contour G84x_FIG_MANT_C G84x Pocket milling, figures Page 154 Roughing out closed figures, inside G802_GRA_MANT_C G802 Engraving Page 157 Engraving characters strings on the lateral surface "ICP milling in C axis, lateral surface" group Unit Description Page G840_Kon_C_Mant G840 Contour milling, ICP Page 153 Machining ICP contours on the lateral surface inside, outside and on the contour G845_TAS_C_MANT G845 Pocket milling, ICP Page 156 Inside rough-out of closed ICP contours on the lateral surface G840_ENT_C_MANT G840 Deburring Page 158 Deburring ICP contours on the lateral surface 598 Overview of units 9.5 Units—"Drilling, predrilling in Y axis" group 9.5 Units—"Drilling, predrilling in Y axis" group "ICP drilling, Y axis" group Unit Description Page G74_ICP_Y G74 ICP drilling, Y axis Page 168 Drilling and pecking with ICP pattern G73_ICP_Y G73 ICP tapping, Y axis Page 169 Tapping with ICP pattern G72_ICP_Y G72 ICP boring, countersinking in Y axis Page 170 Tapping with ICP pattern "Predrilling in Y axis" group Unit Description Page DRILL_STI_840_Y G840 ICP predrilling, contour milling in XY plane Page 171 Determine the predrilling position and machine a hole DRILL_STI_845_Y G845 ICP predrilling, pocket milling in XY plane Page 172 Determine the predrilling position and machine a hole DRILL_MAN_840_Y G840 ICP predrilling, contour milling in YZ plane Page 173 Determine the predrilling position and machine a hole DRILL_MAN_845_Y G845 ICP predrilling, pocket milling in YZ plane Page 174 Determine the predrilling position and machine a hole HEIDENHAIN MANUALplus 620, CNC PILOT 640 599 9.6 Units—"Milling in Y axis" group 9.6 Units—"Milling in Y axis" group "Milling in front face" group (XY plane) Unit Description Page G840_Kon_Y_Stirn G840 Contour milling Page 175 Machining contours in the XY plane inside, outside and on the contour G845_Tas_Y_Stirn G845 Pocket milling Page 176 Inside rough-out of closed contours in the XY plane G840_ENT_Y_STIRN G840 Deburring Page 180 Deburring contours in the XY plane G801_GRA_STIRN_C G841 Single surface Page 177 Milling a single surface (flat) in the XY plane G840_Kon_C_STIRN G843 Centric polygon Page 178 Milling a centric polygon in the XY plane G803_GRA_Y_STIRN G803 Engraving Page 179 Engraving character strings in the XY plane G800_GEW_Y_STIRN G800 Thread milling Page 181 Milling a thread in an existing hole in the XY plane 600 Overview of units 9.6 Units—"Milling in Y axis" group "Milling in lateral surface" group (YZ plane) Unit Description Page G840_Kon_Y_Mant G840 Contour milling Page 182 Machining contours in the YZ plane inside, outside and on the contour G845_Tas_Y_Mant G845 Pocket milling Page 183 Inside rough-out of closed contours in the YZ plane G840_ENT_Y_MANT G840 Deburring Page 187 Deburring contours in the YZ plane G801_GRA_STIRN_C G841 Single surface Page 184 Milling a single surface (flat) in the YZ plane G840_Kon_C_STIRN G843 Centric polygon Page 185 Milling a centric polygon in the YZ plane G804_GRA_Y_MANT G803 Engraving Page 186 Engraving character strings in the YZ plane G806_GEW_Y_MANT G800 Thread milling Page 188 Milling a thread in an existing hole in the YZ plane HEIDENHAIN MANUALplus 620, CNC PILOT 640 601 9.7 Units—"Special units" group 9.7 Units—"Special units" group Unit Description Page START Program beginning (START) Page 159 For functions required at the beginning of the program C_AXIS_ON C axis on Page 161 Activate C-axis interpolation C_AXIS_OFF C axis off Page 161 Deactivate C-axis interpolation SUBPROG Subprogram call Page 162 Calling any desired subprogram REPEAT Process logic—repetition Page 163 Describing a WHILE loop to repeat parts of the program END Program end (END) Page 164 For functions required at the end of the program 602 Overview of units Overview of G codes 10.1 Section codes 10.1 Section codes Program section codes Program head Program section codes Y-axis contours PROGRAMMKOPF / HEADER Page 48 STIRN_Y / FACE_Y Page 51 REVOLVER / TURRET Page 50 RUECKSEITE_Y / REAR_Y Page 51 SPANNMITTEL / CLAMPS Page 49 MANTEL_Y / LATERAL_Y Page 52 Contour definition Workpiece machining ROHTEIL / BLANK Page 50 BEARBEITUNG / MACHINING Page 53 HILFSROHTEIL / AUXIL_BLANK Page 50 ENDE / END Page 53 FERTIGTEIL / FINISHED Page 50 HILFSKONTUR / AUXIL_CONTOUR Page 50 Subprograms UNTERPROGRAMM / SUBPROGRAM Page 53 C-axis contours 604 RETURN Page 53 Others STIRN / FACE_C Page 51 RUECKSEITE / REAR_C Page 51 CONST Page 54 MANTEL / LATERAL_C Page 51 VAR Page 54 Overview of G codes G commands for turning contours Turning contour Workpiece-blank definition Turning contour Contour form elements G20-Geo Chuck part, cylinder/tube Page 200 G22-Geo Recess (standard) Page 207 G21-Geo Cast part Page 200 G23-Geo Recess/relief turn Page 209 G24-Geo Thread with undercut Page 211 Basic contour elements G0-Geo Starting point of contour Page 201 G25-Geo Undercut contour Page 212 G1-Geo Line segment Page 202 G34-Geo Thread (standard) Page 216 G2-Geo Circular arc cw with incremental center dimensioning Page 204 G37-Geo Thread (general) Page 217 G3-Geo Circular arc ccw with incremental center dimensioning Page 204 G49-Geo Bore hole at turning center Page 219 G12-Geo Circular arc cw with absolute center Page 205 dimensioning Help commands for contour definition G13-Geo Circular arc ccw with absolute center dimensioning Overview: Attributes for contour description Page 220 G38-Geo Feed rate reduction Page 220 G44 Separation point Page 222 G52-Geo Oversize Page 222 G95-Geo Feed per revolution Page 223 Page 205 G149-Geo Additive compensation HEIDENHAIN MANUALplus 620, CNC PILOT 640 Page 223 605 10.2 Overview of G commands in the CONTOUR section 10.2 Overview of G commands in the CONTOUR section 10.2 Overview of G commands in the CONTOUR section G commands for C-axis contours C-axis contour Overlapping contours G308-Geo Beginning of pocket/island C-axis contour Overlapping contours Page 224 Front and rear face contours G309-Geo End of pocket/island Page 224 Lateral surface contours G100-Geo Starting point of contour, face Page 230 G110-Geo Starting point of lateral surface contour Page 239 G101-Geo Line segment, face Page 231 G111-Geo Line segment, lateral surface Page 240 G102-Geo Arc cw, face Page 232 G112-Geo Arc cw, lateral surface Page 241 G103-Geo Arc ccw, face Page 232 G113-Geo Arc ccw, lateral surface Page 241 G300-Geo Bore hole, face Page 233 G310-Geo Bore hole on lateral surface Page 242 G301-Geo Linear slot, face Page 234 G311-Geo Linear slot on lateral surface Page 243 G302-Geo Circular slot cw, face Page 234 G312-Geo Circular slot cw, lateral surface Page 243 G303-Geo Circular slot ccw, face Page 234 G313-Geo Circular slot ccw, lateral surface Page 243 G304-Geo Full circle, face Page 235 G314-Geo Full circle, lateral surface Page 244 G305-Geo Rectangle, face Page 235 G315-Geo Rectangle, lateral surface Page 244 G307-Geo Polygon, face Page 236 G317-Geo Polygon, lateral surface Page 245 G401-Geo Pattern linear, face Page 237 G411-Geo Pattern linear, lateral surface Page 246 G402-Geo Pattern circular, face Page 238 G412-Geo Pattern circular, lateral surface Page 247 G commands for Y-axis contours Y-axis contour XY plane Y-axis contour YZ plane G170-Geo Starting point of contour in XY plane Page 504 G180-Geo Starting point of contour in YZ plane Page 513 G171-Geo Line segment in XY plane Page 504 G181-Geo Line segment in YZ plane Page 513 G172-Geo Arc cw in XY plane Page 505 G182-Geo Arc cw in YZ plane Page 514 G173-Geo Arc ccw in XY plane Page 505 G183-Geo Arc ccw in YZ plane Page 514 G370-Geo Hole in XY plane Page 506 G380-Geo Hole in YZ plane Page 515 G371-Geo Linear slot in XY plane Page 507 G381-Geo Linear slot in YZ plane Page 515 G372-Geo Circular slot cw in XY plane Page 508 G382-Geo Circular slot cw in YZ plane Page 516 G373-Geo Circular slot ccw in XY plane Page 508 G383-Geo Circular slot ccw in YZ plane Page 516 G374-Geo Full circle in XY plane Page 508 G384-Geo Full circle in YZ plane Page 516 G375-Geo Rectangle in XY plane Page 509 G385-Geo Rectangle in YZ plane Page 517 G377-Geo Polygon in XY plane Page 509 G387-Geo Polygon in YZ plane Page 517 G471-Geo Pattern linear in XY plane Page 510 G481-Geo Pattern linear in YZ plane Page 518 G472-Geo Pattern circular in XY plane Page 511 G482-Geo Pattern circular in YZ plane Page 519 G376-Geo Single surface in XY plane Page 512 G386-Geo Single surface in XY plane Page 520 G477-Geo Centric polygon in XY plane Page 512 G487-Geo Centric polygon in XY plane Page 520 606 Overview of G codes G commands for turning Turning—Basic functions Tool positioning without machining Turning—Basic functions Zero point shifts G0 Positioning at rapid traverse Page 248 Overview: Zero point shifts Page 259 G14 Move to the tool change position Page 249 G51 Zero point shift Page 260 G140 Define the tool change position Page 249 G53/ G54/ G55 Zero point offsets Page 261 G701 Rapid traverse to machine coordinates Page 248 G56 Additive zero-point shift Page 261 G59 Absolute zero point shift Page 262 Simple linear and circular movements G1 Linear movement Page 250 G152 Zero point shift, C axis Page 339 G2 Circular movement cw with incremental center dimensioning Page 251 G920 Deactivate zero point shifts Page 384 G3 Circular movement ccw with incremental center dimensioning Page 251 G921 Deactivate zero point shift, tool dimensions Page 384 G12 Circular movement cw with absolute Page 252 center dimensioning G980 Activate zero point shift Page 387 G13 Circular movement ccw with absolute center dimensioning G981 Activate zero point shift, tool dimensions Page 387 Page 252 Feed rate and spindle speed Safety clearances Gx26 Speed limit * Page 253 G47 Set safety clearances Page 265 G64 Interrupted feed Page 254 G147 Safety clearance (milling) Page 265 G48 Reduce rapid traverse Page 253 Tool-tip radius compensation (TRC/MCRC) Gx93 Feed per tooth * Page 254 G40 Switch off TRC/MCRC Page 257 G94 Feed per minute Page 255 G41 TRC/MCRC, left Page 258 Gx95 Feed per revolution Page 255 G42 TRC/MCRC, right Page 258 Gx96 Constant surface speed Page 256 Tools, types of compensation Gx97 Speed Page 256 T Tool change Page 266 G148 (Changing the) cutter compensation Page 267 Oversizes G50 Switch off oversize Page 263 G149 Additive compensation Page 268 G52 Switch off oversize Page 263 G150 Compensate right tool tip Page 269 G57 Paraxial oversize Page 263 G151 Compensate left tool tip Page 269 G58 Contour-parallel oversize Page 264 HEIDENHAIN MANUALplus 620, CNC PILOT 640 607 10.3 Overview of G commands in the MACHINING section 10.3 Overview of G commands in the MACHINING section 10.3 Overview of G commands in the MACHINING section Cycles for turning Turning—Cycles Simple turning cycles Turning—Cycles Contour-based turning cycles G80 Cycle end / simple contours Page 294 G740 Contour repeat cycle Page 285 G81 Simple longitudinal roughing Page 434 G741 Contour repeat cycle Page 285 G82 Simple face roughing Page 435 G810 Longitudinal roughing cycle Page 272 G83 Contour repeat cycle Page 436 G820 Face roughing cycle Page 275 G86 Simple recessing cycle Page 437 G830 Contour-parallel roughing cycle Page 278 G87 Transition radii Page 438 G835 Contour-parallel with neutral tool Page 281 G88 Chamfers Page 438 G860 Universal recessing cycle Page 283 G869 Recess turning cycle Page 286 Drilling cycles G36 Tapping Page 330 G870 Simple recessing cycle G22 Page 289 G71 Simple drilling cycle Page 325 G890 Finishing cycle Page 290 G72 Boring, countersinking, etc. Page 327 Thread cycles G73 Tapping cycle Page 328 G31 Thread cycle Page 303 G74 Deep-hole drilling cycle Page 331 G32 Single thread cycle Page 307 G33 Single thread cut (Thread single path) Page 309 Undercuts G25 Undercut contour Page 212 G35 Metric ISO thread G85 Undercut Page 316 G350 Simple longitudinal thread G851 Undercut DIN 509 E, direct Page 318 G351 Simple longitudinal multi-start thread G852 Undercut DIN 509 F, direct Page 319 G352 Tapered API thread G853 Undercut DIN 76 thread, direct Page 320 G36 Tapping Page 330 G856 Undercut type U, direct Page 321 G38 Metric ISO thread Page 314 G857 Undercut type H, direct Page 322 Parting G858 Undercut type K, direct Page 323 G859 Parting cycle Page 315 608 Page 311 Page 312 Overview of G codes C-axis machining C axis C-axis machining G120 Reference diameter, lateral-surface machining Page 339 G152 Zero point shift, C axis Page 339 G153 Standardize C axis Page 340 Single path—Front/rear face machining Single path—Lateral-surface machining G100 Rapid traverse, face Page 341 G110 Rapid traverse, lateral surface Page 345 G101 Linear path, face Page 342 G111 Linear path, lateral surface Page 346 G102 Circular path cw, face Page 343 G112 Circular path cw, lateral surface Page 347 G103 Circular path ccw, face Page 343 G113 Circular path ccw, lateral surface Page 347 Figures—Front/rear face machining Figures—Lateral-surface machining G301 Linear slot, face Page 295 G311 Linear slot on lateral surface Page 297 G302 Circular slot cw, face Page 295 G312 Circular slot cw, lateral surface Page 298 G303 Circular slot ccw, face Page 295 G313 Circular slot ccw, lateral surface Page 298 G304 Full circle, face Page 296 G314 Full circle, lateral surface Page 298 G305 Rectangle, face Page 296 G315 Rectangle, lateral surface Page 299 G307 Polygon, face Page 296 G317 Polygon, lateral surface Page 299 Milling cycles, face Milling cycles, lateral surface G791 Linear slot, face Page 349 G792 Linear slot, lateral surface Page 350 G793 Contour milling, direct Page 351 G794 Contour milling, direct Page 353 G797 Area milling (face milling) Page 355 G798 Helical slot milling Page 357 G799 Thread milling Predrilling cycles Contour and pocket milling cycles G840 Predrilling, contour milling Page 359 G840 Contour milling Page 361 G845 Predrilling, pocket milling Page 369 G840 Deburring Page 365 G845 Pocket milling Page 370 Pocket milling, finishing Page 374 Engraving cycles G801 Engraving, face Page 378 G846 G802 Engraving, lateral surface Page 379 Engraving cycles Pattern G743 Pattern linear, face G745 Pattern circular, face G744 Pattern linear, lateral surface G746 Pattern circular, lateral surface HEIDENHAIN MANUALplus 620, CNC PILOT 640 G801 Engraving, face Page 378 G802 Engraving, lateral surface Page 379 Character set for engraving Page 376 609 10.3 Overview of G commands in the MACHINING section C-axis machining 10.3 Overview of G commands in the MACHINING section Y-axis machining Y-axis machining Working planes Y-axis machining Milling cycles G17 XY plane Page 521 G841 Area milling, roughing Page 527 G18 XZ plane (turning view) Page 521 G842 Area milling, finishing Page 528 G19 YZ plane Page 521 G843 Centric polygon milling, roughing Page 529 G844 Centric polygon milling, finishing Page 530 Tool positioning without machining G0 Positioning at rapid traverse Page 523 G845 Predrilling, pocket milling Page 532 G14 Move to the tool change position Page 523 G845 Pocket milling, roughing Page 533 G701 Rapid traverse to machine coordinates Page 523 G846 Pocket milling, finishing Page 537 G800 Thread milling in XY plane Page 541 Simple linear and circular movements G1 Linear movement Page 524 G806 Thread milling in YZ plane Page 542 G2 Circular movement cw with incremental center dimensioning Page 525 G808 Hobbing Page 543 G3 Circular movement ccw with incremental center dimensioning Page 525 Engraving cycles G12 Circular movement cw with absolute Page 526 center dimensioning G803 Engraving in XY plane Page 539 G13 Circular movement ccw with absolute center dimensioning G804 Engraving in YZ plane Page 540 Character set for engraving Page 376 Page 526 Variable programming, program branches Variable programming, program branches Programming with variables Variable programming, program branches Data input and data output # variables Variable types Page 408 INPUT Input (# variables) Page 405 PARA Read configuration data Page 418 WINDOW Open output window (# variables) Page 405 CONST Constant definition Page 421 PRINT Output (# variables) Page 406 VAR Variable definition Page 420 Program branches, program repeats Subprograms Subprogram call 610 Page 427 IF..THEN.. Program branching Page 422 WHILE.. Program repeat Page 424 SWITCH.. Program branching Page 425 Overview of G codes 10.3 Overview of G commands in the MACHINING section Other G codes Other G codes G4 Dwell time Page 381 Other G codes G909 Interpreter stop Page 383 G7 G8 Precision stop ON Page 381 G910 Switching measurement on/off Page 497 Precision stop OFF Page 382 G911 Activate measuring path monitoring Page 498 G9 Precision stop (blockwise) Page 382 G912 Actual position capture Page 498 G30 Converting and mirroring Page 389 G913 End in-process measurement Page 498 G44 Separation point Page 222 G914 Deactivate measuring path monitoring Page 498 G60 Deactivate protection zone Page 382 G916 Traversing to a fixed stop Page 394 G65 Display chucking equipment Page 381 G919 Spindle override 100 % Page 383 G67 Load blank-part contour (graphics) Page 381 G920 Deactivate zero point shift Page 384 G99 Transformations of contours Page 391 G921 Deactivate zero point shift, tool dimensions Page 384 G702 Storing/loading contour follow-up Page 380 G922 Tool end position Page 384 G703 Contour follow-up ON/OFF Page 380 G923 Handwheel offset in thread Page 125 G720 Spindle synchronization Page 392 G924 Fluctuating speed Page 384 G725 Eccentric turning Page 399 G925 Force reduction Page 397 G726 Transition to eccentric Page 401 G927 Convert tool lengths Page 385 G727 Eccentric X Page 403 G930 Sleeve monitoring Page 398 G901 Actual values in variables Page 382 G940 Automatically convert variables Page 385 G902 Zero point shift in variables Page 382 G980 Activate zero point shift Page 387 G903 Lag error in variables Page 382 G981 Activate zero point shift, tool dimensions Page 387 G904 Read interpolator information Page 383 G995 Monitoring zone Page 388 G905 C-angle offset Page 393 G996 Load monitoring Page 389 G908 Feed rate override 100 % Page 383 HEIDENHAIN MANUALplus 620, CNC PILOT 640 611 612 Overview of G codes 10.3 Overview of G commands in the MACHINING section SYMBOLS C C ? – Simplified geometry programming ... 194 "Configuration" pull-down menu ... 42 "Extras" pull-down menu ... 44 "Goto" pull-down menu ... 42 "Graphics" pull-down menu ... 45 "Head" pull-down menu (program head) ... 41 "ICP" pull-down menu ... 41 "Miscellaneous" pull-down menu ... 43 "Program management" pull-down menu ... 41 # variable output ... 406 C axis C-angle offset G905 ... 393 Calibrate touch probe standard G747 ... 473 Calibrate touch probe via two points G748 ... 475 Cast part G21-Geo ... 200 C-axis commands ... 339 C-axis contours—Fundamentals ... 224 Centric polygon in XY plane G477Geo ... 512 Centric polygon in YZ plane G487Geo ... 520 Centric polygon milling—finishing G844 ... 530 Centric polygon milling—roughing G843 ... 529 Chamfer DIN cycle G88 ... 438 Chamfer G88 ... 438 Character set ... 376 Chuck part bar/tube G20-Geo ... 200 Chucking equipment in simulation G65 ... 49, 381 Circular arc DIN PLUS Turning contour G2-, G3-, G12-, G13-Geo ... 204, 205 Circular arc in face contour G102/G103Geo ... 232 Circular arc in lateral surface contour G112/G113-Geo ... 241 Circular arc in XY plane G172-Geo/G173Geo ... 505 Circular arc in YZ plane G182-Geo/G183Geo ... 514 Circular arc of turning contour G12/G13Geo ... 205 Circular arc of turning contour G2/G3Geo ... 204 Circular arc on lateral surface G112/ G113 ... 347 Circular arc, face G102/G103 ... 343 Circular measurement ... 490 Circular measurement G785 ... 490 Circular movement G12, G13 (milling) ... 526 Circular movement G2, G3 (milling) ... 525 Circular path G12/G13 ... 252 Circular path G2/G3 ... 251 Circular pattern in XY plane G472Geo ... 511 Circular pattern in YZ plane G482Geo ... 519 Circular pattern on lateral surface G412Geo ... 247 Circular pattern with circular slots ... 227 Circular pattern, face G745 ... 335 Circular pattern, lateral surface G746 ... 337 Circular slot in XY plane G372-Geo/ G373-Geo ... 508 Circular slot in YZ plane G382-Geo/ G383-Geo ... 516 Circular slot on face G302/G303Geo ... 234 Circular slot on lateral surface G312/ G313-Geo ... 243 Codes, CONST ... 54 Codes, END ... 53 Codes, RETURN ... 53 Codes, VAR ... 54 Compensation of right/left-hand tool tip G150/G151 ... 269 Compensation, additive G149 ... 268 Compensation, additive G149Geo ... 223 Compensations ... 266 Conditional block run ... 422 Configuration data, reading...— PARA ... 418 Connection between geometry and machining commands ... 444 Connection between geometry and machining commands, C axis—front face ... 445 Connection between geometry and machining commands, C axis—lateral surface ... 445 Connection between geometry and machining commands, turning ... 444 CONST (section code) ... 54 Constant feed rate G94 ... 255 Constant surface speed Gx96 ... 256 Contour and figure milling cycle, face G793 ... 351 A Actual values in variable G901 ... 382 Additive compensation G149 ... 268 Additive compensation G149Geo ... 223 Address parameters ... 194 Angle offset C-angle offset G905 ... 393 Angular ... 494 Angular measurement ... 494 Angular measurement G787 ... 494 ANUALplus ... 1 API thread G352 ... 312 Approach, departure in smart.Turn ... 65 Area milling, face G797 ... 355 Attributes for contour description ... 220 Automatic working plan generation (TURN PLUS) ... 553 AWG ... 553 B B axis Flexible use of tools ... 585 Fundamentals ... 584 Multipoint tools ... 586 Basic contour elements ... 201 Beginning of pocket/island G308Geo ... 224 BLANK (section code) ... 50 Bore hole (centric) G49-Geo ... 219 Bore hole on face G300-Geo ... 233 Bore hole on lateral surface G310Geo ... 242 Boring G72 ... 327 Boring, countersinking G72 ... 327 HEIDENHAIN MANUALplus 620, CNC PILOT 640 613 C D F Contour and figure milling cycle, lateral surface G794 ... 353 Contour follow-up ... 34, 380 Contour follow-up on/off G703 ... 380 Contour follow-up, saving/loading... G702 ... 380 Contour form ... 62 Contour form elements ... 207 Contour milling G840 ... 358 Contour programming ... 191 Contour repeat cycle G83 ... 436 Contour thread ... 314 Contour, simple... G80 ... 294 Contour-based turning cycles ... 270 Contours in the XY plane ... 504 Contours in the YZ plane ... 513 Control graphics (TURN PLUS) ... 565 Controlled parting Using lag error monitoring G917 ... 396 Convert lengths G927 ... 385 Converting and mirroring G30 ... 389 Coolant TURN PLUS machining information ... 569 Countersinking G72 ... 327 Cut-off cycle G859 ... 315 Cutting data, determining (TURN PLUS) ... 569 Cutting limit ... 503 Cutting speed, constant Gx96 ... 256 Cycle end / Simple contour G80 ... 294 Cycle, chamfer G88 ... 438 Cycle, radius G87 ... 438 Drilling cycle G71 ... 325 Drilling cycles DIN programming ... 324 Drilling pattern, circular, face G745 ... 335 Drilling pattern, circular, lateral surface G746 ... 337 Drilling pattern, linear, face G743 ... 334 Drilling pattern, linear, lateral surface G744 ... 336 Drilling, deep-hole drilling G74 ... 331 Feed per revolution Gx95 ... 255 Feed per tooth Gx93 ... 254 Feed rate ... 253 Feed rate override 100 % G908 ... 383 Feed rate reduction G38Geo ... 220, 221 Feed rate, interrupted G64 ... 254 Figure milling cycle, face G793 ... 351 Figure milling cycle, lateral surface G794 ... 353 File organization, smart.Turn editor ... 46 Find hole in C face G780 ... 482 Find hole in C lateral surface G781 ... 484 Find stud in C face G782 ... 486 Find stud in C lateral surface G783 ... 488 Finish contour G890 ... 290 Finishing DIN PLUS Cycle G890 ... 290 Fixed cycle programming (DIN PLUS) ... 195 Fixed stop, traversing to G916 ... 394 Fluctuating spindle speed, reduce resonant vibrations G924 ... 384 Force reduction G925 ... 397 Front face contours ... 230 Front face machining ... 341 Full circle in XY plane G374-Geo ... 508 Full circle in YZ plane G384-Geo ... 516 Full circle on face G304-Geo ... 235 Full circle on lateral surface G314Geo ... 244 Full-surface machining In DIN PLUS ... 446 Full-surface machining with TURN PLUS ... 578 D Data input ... 405 Data output ... 405 Deburring G840 ... 365 Deep-hole drilling G74 ... 331 Detail, isolating TURN PLUS ... 565 Determine pitch circle G786 ... 492 Dialog texts for subprograms ... 428 DIN PLUS workpiece blank definition ... 200 DIN programs, converting ... 197 Direct program-run continuation ... 389 Drilling and boring cycles, overview and contour reference... ... 324 614 E Eccentric polygon in XY plane G377Geo ... 509 Eccentric polygon in YZ plane G387Geo ... 517 Eccentric polygon on front/rear face G307-Geo ... 236 Eccentric polygon on lateral surface G317-Geo ... 245 Eccentric turning G725 ... 399 Eccentric X G727 ... 403 Elements of a DIN program ... 37 END (section code) ... 53 End position of tool G922 ... 384 Engraving in the YZ plane G804 ... 540 Engraving in XY plane G803 ... 539 Engraving on front face G801 ... 378 Engraving on lateral surface G802 ... 379 Engraving, character set ... 376 Example Fixed cycle programming ... 195 Full-surface machining with opposing spindle ... 448 Full-surface machining with single spindle ... 450 Machining with the Y axis ... 544 Subprogram with contour repetitions ... 441 TURN PLUS ... 574 Expert programs ... 196 F Face roughing G820 ... 275 Face roughing, simple G82 ... 435 Feed per minute G94 ... 255 Feed per revolution G95 ... 255 Feed per revolution G95-Geo ... 223 G G codes for contour description G0 Starting point of turning contour ... 201 G1 Line segment in a contour ... 202 G100 Starting point of front/rear face contour ... 230 G101 Line segment in front/rear face contour ... 231 G102 Circular arc in front/rear face contour ... 232 G G G103 Circular arc in front/rear face contour ... 232 G110 Starting point of lateral surface contour ... 239 G111 Line segment in a lateral surface contour ... 240 G112 Circular arc in lateral surface contour ... 241 G113 Circular arc in lateral surface contour ... 241 G12 Circular arc of turning contour ... 205 G13 Circular arc of turning contour ... 205 G149 Additive compensation ... 223 G170 Starting point of contour in XY plane ... 504 G171 Line segment in XY plane ... 504 G172 Circular arc in XY plane ... 505 G173 Circular arc in XY plane ... 505 G180 Starting point of contour in YZ plane ... 513 G181 Line segment in YZ plane ... 513 G182 Circular arc in YZ plane ... 514 G183 Circular arc in YZ plane ... 514 G2 Circular arc of turning contour ... 204 G20 Chuck part bar/tube ... 200 G21 Cast part ... 200, 381 G22 recess (standard) ... 207 G23 recess (general) ... 209 G24 Thread with undercut ... 211 G25 Undercut contour ... 212, 432 G3 Circular arc of turning contour ... 204 G300 Bore hole on front/rear face ... 233 G301 Linear slot on front/rear face ... 234 G302 Circular slot on front/rear face ... 234 G303 Circular slot on front/rear face ... 234 G304 Full circle on front/rear face ... 235 G305 Rectangle on front/rear face ... 235 G307 Eccentric polygon on front/ rear face ... 236 G G308 Beginning of pocket/ island ... 224 G309 End of pocket/island ... 224 G310 Hole on lateral surface ... 242 G311 Linear slot on lateral surface ... 243 G312 Circular slot on lateral surface ... 243 G313 Circular slot on lateral surface ... 243 G314 Full circle on lateral surface ... 244 G315 Rectangle on lateral surface ... 244 G317 Eccentric polygon on lateral surface ... 245 G34 Thread (standard) ... 216 G37 Thread (general) ... 217 G370 Hole in XY plane ... 506 G371 Linear slot in XY plane ... 507 G372 Circular slot in XY plane ... 508 G373 Circular slot in XY plane ... 508 G374 Full circle in XY plane ... 508 G375 Rectangle in XY plane ... 509 G376 Single surface in XY plane ... 512 G377 Eccentric polygon in XY plane ... 509 G38 Feed rate reduction ... 220, 221 G380 Hole in YZ plane ... 515 G381 Linear slot in YZ plane ... 515 G382 Circular slot in YZ plane ... 516 G383 Circular slot in YZ plane ... 516 G384 Full circle in YZ plane ... 516 G385 Rectangle in YZ plane ... 517 G386 Single surface in YZ plane ... 520 G387 Eccentric polygon in YZ plane ... 517 G401 Linear pattern on front/rear face ... 237 G402 Circular pattern on front/rear face ... 238 G411 Linear pattern on lateral surface ... 246 G412 Circular pattern on lateral surface ... 247 G471 Linear pattern in XY plane ... 510 G472 Circular pattern in XY plane ... 511 HEIDENHAIN MANUALplus 620, CNC PILOT 640 G477 Centric polygon in XY plane ... 512 G481 Linear pattern in YZ plane ... 518 G482 Circular pattern in YZ plane ... 519 G487 Centric polygon in YZ plane ... 520 G49 Bore hole (centric) ... 219 G52 Blockwise oversize ... 222 G95 Feed per revolution ... 223 G codes for machining G0 Rapid traverse ... 248 G0 Rapid traverse (Y axis) ... 523 G1 Linear movement ... 250 G1 Linear movement (Y axis) ... 524 G100 Rapid traverse on front/rear face ... 341 G101 Line segment on front/rear face ... 342 G102 Circular arc on front/rear face ... 343 G103 Circular arc on front/rear face ... 343 G110 Rapid traverse, lateral surface ... 345 G111 Line segment on lateral surface ... 346 G112 Circular arc on lateral surface ... 347 G113 Circular arc on lateral surface ... 347 G12 Circular movement (Y axis) ... 526 G12 Circular path ... 252 G120 Reference diameter ... 339 G13 Circular movement (Y axis) ... 526 G13 Circular path ... 252 G14 Approach tool change point ... 249 G14 Approach tool change point (Y axis) ... 523 G140 Definition of tool-change point ... 249 G147 Safety clearance (milling cycles) ... 265 G148 Switching the tool edge compensation ... 267 G149 Additive compensation ... 268 615 G G G150 Compensation of right-hand tool tip ... 269 G151 Compensation of left-hand tool tip ... 269 G152 Zero point shift, C axis ... 339 G153 Standardize C axis ... 340 G16 Tilting the working plane ... 522 G17 XY plane ... 521 G18 XZ plane (turning) ... 521 G19 YZ plane ... 521 G2 Circular movement (Y axis) ... 525 G2 Circular path ... 251 G26 Speed limitation ... 253 G3 Circular movement (Y axis) ... 525 G3 Circular path ... 251 G30 Converting and mirroring ... 389 G301 Linear slot on face ... 295 G302 Circular slot on face ... 295 G303 Circular slot on face ... 295 G304 Full circle on face ... 296 G305 Rectangle on face ... 296 G307 Eccentric polygon on front/ rear face ... 297 G31 Thread cycle ... 303 G311 Linear slot on lateral surface ... 297 G312 Circular slot on lateral surface ... 298 G313 Circular slot on lateral surface ... 298 G314 Full circle on lateral surface ... 298 G315 Rectangle on lateral surface ... 299 G317 Eccentric polygon on lateral surface ... 299 G32 Single thread cycle ... 307 G33 Thread single path ... 309 G35 Metric ISO thread ... 311 G350 Simple longitudinal singlestart thread ... 439 G351 Simple longitudinal multi-start thread ... 440 G352 Tapered API thread ... 312 G36 Tapping ... 330 G38 Metric ISO thread ... 314 G4 Period of dwell ... 381 G40 Switch off TRC/MCRC ... 257 G41 Switch on TRC/MCRC ... 258 616 G G42 Switch on TRC/MCRC ... 258 G47 Safety clearance ... 265 G48 Reduce rapid traverse ... 253 G50 Switch off oversize ... 263 G51 Zero point shift ... 260 G53/G54/G55 Zero point offsets ... 261 G56 Additive zero point shift ... 261 G57 Axis-parallel oversize ... 263 G58 Contour-parallel oversize ... 264 G59 Absolute zero point shift ... 262 G60 Switch off protection zone ... 382 G64 Interrupted feed rate ... 254 G65 Chucking equipment ... 49, 381 G7 Precision stop on ... 381 G701 Rapid traverse to machine coordinates ... 248 G701 Rapid traverse to machine coordinates (Y axis) ... 523 G702 Saving/loading contour followup ... 380 G703 Contour follow-up ... 380 G71 Drilling cycle ... 325 G72 Boring, countersinking ... 327 G720 Spindle synchronization ... 392 G725 Eccentric turning ... 399 G726 Transition to eccentric ... 401 G727 Eccentric X ... 403 G73 Tapping ... 328 G74 Deep-hole drilling ... 331 G740 Repeat recessing cycle ... 285 G741 Repeat recessing cycle ... 285 G743 Linear pattern, face ... 334 G744 Linear pattern, lateral surface ... 336 G745 Circular pattern, face ... 335 G746 Circular pattern, lateral surface ... 337 G791 Linear slot on face ... 349 G792 Linear slot on lateral surface ... 350 G793 Contour and figure milling cycle, face ... 351 G794 Contour and figure milling cycle, lateral surface ... 353 G797 Area milling, face ... 355 G798 Helical-slot milling ... 357 G799 Thread milling, axial ... 338 G8 Precision stop off ... 382 G80 Cycle end / Simple contour ... 294 G800 Thread milling in XY plane ... 541 G801 Engraving on front face ... 378 G802 Engraving on lateral surface ... 379 G803 Engraving in XY plane ... 539 G804 Engraving in YZ plane ... 540 G806 Thread milling in YZ plane ... 542 G808 Hobbing ... 543 G809 Measuring cut ... 293 G81 Simple longitudinal roughing ... 434 G810 Longitudinal roughing ... 272 G82 Simple face roughing ... 435 G820 Face roughing ... 275 G83 Contour repeat cycle ... 436 G830 Contour-parallel roughing ... 278 G835 Contour-parallel with neutral tool ... 281 G840 Contour milling ... 358 G841 Area milling—roughing (Y axis) ... 527 G842 Area milling—finishing (Y axis) ... 528 G843 Centric polygon milling— roughing (Y axis) ... 529 G844 Centric polygon milling— finishing (Y axis) ... 530 G845 Pocket milling, roughing ... 368 G845 Pocket milling—roughing (Y axis) ... 531 G846 Pocket milling, finishing ... 374 G846 Pocket milling—finishing (Y axis) ... 537 G85 Undercut cycle ... 316 G851 Undercut according to DIN 509 E with cylinder machining ... 318 G852 Undercut according to DIN 509 F with cylinder machining ... 319 G853 Undercut according to DIN 76 with cylinder machining ... 320 G856 Undercut type U ... 321 G857 Undercut type H ... 322 G G858 Undercut type K ... 323 G859 Cut-off cycle ... 315 G86 Simple recessing cycle ... 437 G860 Contour-based recessing ... 283 G869 Recess turning cycle ... 286 G87 Line with radius ... 438 G870 Recessing cycle ... 289 G88 Line with chamfer ... 438 G890 Finish contour ... 290 G9 Precision stop ... 382 G901 Actual values in variables ... 382 G902 Zero-point shift in variables ... 382 G903 Lag error in variables ... 382 G904 Read interpolation information ... 383 G905 C-angle offset ... 393 G908 Feed rate override 100 % ... 383 G909 Interpreter stop ... 383 G916 Traversing to a fixed stop ... 394 G917 Controlled parting ... 396 G919 Spindle override 100 % ... 383 G920 Deactivate zero-point shifts ... 384 G921 Deactivate zero-point shifts, tool lengths ... 384 G924 Fluctuating spindle speed ... 384 G925 Force reduction ... 397 G93 Feed per tooth ... 254 G930 Sleeve monitoring ... 398 G94 Constant feed rate ... 255 G95 Feed per revolution ... 255 G96 Constant surface speed ... 256 G97 Speed ... 256 G976 Misalignment compensation ... 387 G980 Activate zero-point shifts ... 387 G981 Activate zero-point shifts, tool lengths ... 387 G99 Workpiece group ... 391 G995 Monitoring zone definition ... 388 G996 Type of load monitoring ... 389 G L G999 Direct program-run continuation ... 389 G840—Calculating hole positions ... 359 G840—Deburring ... 365 G840—Fundamentals ... 358 G840—Milling ... 361 G845—Calculating hole positions ... 369 G845—Fundamentals ... 368 G845—Milling ... 370 Geometry commands ... 190 Global form ... 64 Global variables (DIN programming) ... 408 Graphic, magnifying/reducing TURN PLUS ... 565 L call ... 427 Lag error in variables G903 ... 382 Lateral surface LATERAL_Y section ... 52 Lateral surface contours ... 239 LATERAL_Y—Section code ... 52 Lateral-surface machining ... 345 Line segment in a contour G1Geo ... 202 Line segment in a lateral surface contour G111-Geo ... 240 Line segment in face contour G101Geo ... 231 Line segment in XY plane G171Geo ... 504 Line segment in YZ plane G181Geo ... 513 Linear and circular movements ... 250 Linear and circular movements in the Y axis ... 524 Linear axes ... 36 Linear movement G1 ... 250 Linear movement G1 (milling) ... 524 Linear path, face G101 ... 342 Linear path, lateral surface G111 ... 346 Linear pattern in XY plane G471Geo ... 510 Linear pattern in YZ plane G481Geo ... 518 Linear pattern on lateral surface G411Geo ... 246 Linear pattern, face G743 ... 334 Linear pattern, lateral surface G744 ... 336 Linear slot in XY plane G371-Geo ... 507 Linear slot in YZ plane G381-Geo ... 515 Linear slot on face G301-Geo ... 234 Linear slot on face G791 ... 349 Linear slot on lateral surface G311Geo ... 243 Linear slot on lateral surface G792 ... 350 Local variables (DIN programming) ... 408 Longitudinal roughing G810 ... 272 Longitudinal roughing, simple G81 ... 434 H Handwheel superposition For G352 ... 313 Helical-slot milling G798 ... 357 Help commands for contour definition ... 220 Help graphics for subprogram calls ... 429 Hobbing G808 ... 543 Hole in XY plane G370-Geo ... 506 Hole in YZ plane G380-Geo ... 515 Hole positions, calculating, G840 ... 359 Hole positions, calculating... G845 (Y axis) ... 532 I IF.. Program branching ... 422 Inch conversion ... 385 Inch programming ... 36 Index of a parameter element, determining...—PARA ... 419 In-process measurement ... 497 INPUT (input of # variable) ... 405 Input of variables—"INPUT" ... 405 Inside contours TURN PLUS machining information ... 569 Integer variables ... 407 Interpreter stop G909 ... 383 Interrupted feed G64 ... 254 Island (DIN PLUS) ... 224 HEIDENHAIN MANUALplus 620, CNC PILOT 640 617 M M P M commands ... 430 M commands for program-run control ... 430 M commands, machine commands ... 431 Machine commands ... 431 Machining attributes for form elements ... 201 Machining commands ... 190 Machining information (TURN PLUS) ... 566 Machining sequence AWG Editing ... 556 General ... 554 List of machining sequences ... 557 Managing ... 556 Magazine tool Compensation in automatic mode ... 587 Mathematical functions ... 407 MCRC, switch off...G40 ... 257 MCRC, switch on... G41/G42 ... 258 Measuring cut G809 ... 293 Menu structure, smart.Turn editor ... 38 Metric ISO thread G35 ... 311 Metric ISO thread G38 ... 314 Milling contour position ... 224 Milling cutter radius compensation ... 257 Milling cycles for the Y axis ... 527 Milling cycles, overview... ... 348 Milling pattern, circular, face G745 ... 335 Milling pattern, circular, lateral surface G746 ... 337 Milling pattern, linear, face G743 ... 334 Milling pattern, linear, lateral surface G744 ... 336 Milling, area milling, face G797 ... 355 Milling, contour and figure milling cycle, face G793 ... 351 Milling, contour and figure milling cycle, lateral surface G794 ... 353 Milling, contour milling G840 ... 358 Milling, G840—Fundamentals ... 358 Milling, helical-slot milling G798 ... 357 Milling, linear slot on face G791 ... 349 Milling, linear slot, lateral surface G792 ... 350 Milling, pocket milling, finishing G846 ... 374 Milling, pocket milling, roughing G845 ... 368 Mirroring DIN PLUS Converting and mirroring G30 ... 389 Misalignment compensation G788 ... 496 Misalignment compensation, run tapering operations G976 ... 387 Monitoring zone definition G995 ... 388 Multipoint tools ... 56 Multipoint tools for the B axis ... 586 Precision stop G9 ... 382 Precision stop off G8 ... 382 PRINT (output of # variable) ... 406 Probing ... 477 Probing in C axis G765 ... 478 Probing in two axes G766 ... 479 Probing in two axes G768 ... 480 Probing in two axes G769 ... 481 Program branching, IF ... 422 Program branching, SWITCH ... 425 Program branching, WHILE ... 424 Program conversion ... 196 Program example ... 441 Program section codes ... 47 Programming in DIN/ISO mode ... 190 Programming with variables ... 407 Protection zone, switch-off, G60 ... 382 Pull-down menus "Geometry" ... 199 Pull-down menus, "Units" ... 60 618 N NC information, reading general... ... 416 NC information, reading the current... ... 414 NC program conversion ... 196 Nested contours ... 224 O Operating modes TURN PLUS ... 552 Output of # variables—"PRINT" ... 406 Output window for variables— "WINDOW" ... 405 Oversize G52-Geo ... 222 Oversize, axis-parallel... G57 ... 263 Oversize, contour-parallel (equidistant) G58 ... 264 Oversize, switch off... G50 ... 263 Oversizes ... 263 Overview form ... 61 P Parallel editing ... 39 Parameter description— subprograms ... 428 Paraxial probing G764 ... 477 Pattern, circular, on face G402Geo ... 238 Pattern, linear, on face G401Geo ... 237 Period of dwell G4 ... 381 Pocket milling, finishing G846 ... 374 Pocket milling, roughing G845 ... 368 Position of milling contours, Y axis ... 502 Precision stop G7 ... 381 R Radius G87 ... 438 Rapid traverse G0 ... 248 Rapid traverse G0, Y axis ... 523 Rapid traverse to machine coordinates G701 ... 248 Rapid traverse, front face G100 ... 341 Rapid traverse, lateral surface G110 ... 345 Rapid traverse, reducing... G48 ... 253 Reading diagnostic bits ... 413 Reading interpolation information G904 ... 383 Reading tool data ... 410 Real variables ... 407 Rear-face machining DIN PLUS Example of full-surface machining with opposing spindle ... 448 Example of full-surface machining with single spindle ... 450 Recess (general) G23-Geo ... 209 Recess (standard) G22-Geo ... 207 Recess turning cycle G869 ... 286 Recessing cycle G870 ... 289 Recessing G86 ... 437 Recessing G860 ... 283 Recessing, recessing cycle G870 ... 289 R S S Recessing, repeat recessing cycle G740/G741 ... 285 Rectangle in XY plane G375-Geo ... 509 Rectangle in YZ plane G385-Geo ... 517 Rectangle on face G305-Geo ... 235 Rectangle on lateral surface G315Geo ... 244 Reference diameter G120 ... 339 Reference plane LATERAL_Y section ... 52 Repeat recessing cycle G740/ G741 ... 285 Replacement tools ... 57 RETURN (section code) ... 53 Rotary axes ... 36 Roughing, contour-parallel G830 ... 278 Roughing, contour-parallel with neutral tool G835 ... 281 Roughing, face G820 ... 275 Roughing, longitudinal G810 ... 272 Run-out length (thread) ... 300 Shaft machining (TURN PLUS) Fundamentals ... 572 Simple turning cycles ... 434 Simplified geometry programming ... 194 Simulation TURN PLUS control graphics ... 565 Single surface in XY plane G376Geo ... 512 Single surface in YZ plane G386Geo ... 520 Single thread cycle G32 ... 307 Single-point measurement ... 457 Single-point measurement for zero point G771 ... 459 Single-point tool compensation G770 ... 457 Skip level ... 426 Sleeve monitoring G930 ... 398 Slot, circular, lateral surface G312/ G313-Geo ... 243 Slot, circular, on face G302/G303Geo ... 234 Slot, linear on lateral surface G792 ... 350 Slot, linear, face G791 ... 349 Slot, linear, lateral surface G311Geo ... 243 Slot, linear, on face G301-Geo ... 234 smart.Turn editor ... 38 Speed ... 253 Speed Gx97 ... 256 Speed limitation G26 ... 253 Spindle Spindle synchronization G720 ... 392 Spindle override 100 % G919 ... 383 Standardize C axis G153 ... 340 Starting length (thread) ... 300 Starting point of contour in XY plane G170-Geo ... 504 Starting point of contour in YZ plane G180-Geo ... 513 Starting point of face contour G100Geo ... 230 Starting point of lateral surface contour G110-Geo ... 239 Starting point of turning contour G0Geo ... 201 Structured NC program ... 35 Subprogram call L"xx" V1 ... 427 Subprogram, dialogs texts in subprogram call ... 428 Subprogram, help graphics for subprogram calls ... 429 Subprograms—Fundamentals ... 196 SWITCH..CASE—program branching ... 425 Synchronization Synchronization, spindle G720 ... 392 S Safety clearance, milling cycles, G147 ... 265 Safety clearance, turning cycles, G47 ... 265 Screen layout, smart.Turn editor ... 39 Search cycles ... 482 Section codes, CONST ... 54 Section codes, END ... 53 Section codes, RETURN ... 53 Section codes, VAR ... 54 Sections, AUXIL_BLANK ... 50 Sections, AUXIL_CONTOUR ... 50 Sections, BLANK ... 50 Sections, FACE_C ... 51 Sections, FACE_Y ... 51 Sections, FINISHED ... 50 Sections, HEADER ... 48 Sections, LATERAL_C ... 51 Sections, MACHINING ... 53 Sections, REAR_C ... 51 Sections, REAR_Y ... 51 Sections, SUBPROGRAM ... 53 Sections, TURRET ... 50 Separation point TURN PLUS machining information ... 572 Separation point G44 ... 222 HEIDENHAIN MANUALplus 620, CNC PILOT 640 T T command ... 266 T command, fundamentals ... 55 Tapered API thread G352 ... 312 Tapping G36—Single path ... 330 Tapping G73 ... 328 Thread (general) G37-Geo ... 217 Thread (standard) G34-Geo ... 216 Thread cycle G31 ... 303 Thread cycle, single G32 ... 307 Thread cycles ... 300 Thread milling in XY plane G800 ... 541 Thread milling in YZ plane G806 ... 542 Thread milling, axial G799 ... 338 Thread overrun ... 300 Thread single path G33 ... 309 Thread with undercut G24-Geo ... 211 Thread, metric ISO... G35 ... 311 Thread, tapered API... G352 ... 312 Tilted position of tool carrier ... 55 Tilted working plane— fundamentals ... 584 Tilting the working plane G16 ... 522 Tool call T ... 266 Tool change point, moving to...G14 ... 249 Tool commands ... 266 Tool edge compensation G148 ... 267 Tool edge compensation, switching G148 ... 267 Tool entries, editing ... 56 Tool form ... 61, 66 Tool list, setting up ... 55 Tool positioning ... 248 Tool positioning in the Y axis ... 523 Tool programming ... 55 619 T U U Tool selection TURN PLUS ... 566, 578 Tool-change point, definition...G140 ... 249 Tool-tip radius compensation ... 257 Touch probe calibration ... 473 Touch probe cycles ... 454 For automatic operation ... 456 Transition to eccentric G726 ... 401 TRC, switch off... G40 ... 257 TRC, switch on... G41/G42 ... 258 TURN PLUS AWG Editing and managing machining sequences ... 556 List of machining sequences ... 557 Machining sequence ... 554 Full-surface machining ... 578 General Control graphics ... 565 Example ... 574 Machining information ... 566 Operating mode ... 552 Machining information Cutting data ... 569 Inside contours ... 569 Shaft machining ... 572 Tool selection ... 566, 578 Turret assignment ... 566 Turning cycles, contour-based... ... 270 Turning cycles, simple... ... 434 Turret TURN PLUS turret assignment ... 566 Two-point measurement ... 465 Two-point measurement G17 G777 ... 469 Two-point measurement G18 longitudinal G776 ... 467 Two-point measurement G18 transverse G775 ... 465 Two-point measurement G19 G778 ... 471 Type of load monitoring G996 ... 389 Undercut according to DIN 76 with cylinder machining G853 ... 320 Undercut contour G25 ... 432 Undercut contour G25-Geo ... 212 Undercut cycle G85 ... 316 Undercut cycles ... 316 Undercut DIN 509 E ... 213 Undercut DIN 509 F ... 213 Undercut DIN 76 ... 214 Undercut G85 ... 316 Undercut type H ... 214 Undercut type H G857 ... 322 Undercut type K ... 215 Undercut type K G858 ... 323 Undercut type U ... 212 Undercut type U G856 ... 321 Unit "API thread" ... 130 Unit "Bidirectional roughing in ICP" ... 70 Unit "C axis OFF" ... 161 Unit "C axis ON" ... 161 Unit "Centric boring" ... 83 Unit "Centric drilling" ... 80 Unit "Centric polygon milling, XY plane" ... 178 Unit "Centric polygon milling, YZ plane" ... 185 Unit "Centric tapping" ... 82 Unit "Circular pattern drilling, face" ... 88 Unit "Circular pattern drilling, lateral surface" ... 97 Unit "Circular slot pattern, face" ... 135 Unit "Circular slot pattern, lateral surface" ... 149 Unit "Circular tapping pattern, face" ... 92 Unit "Circular tapping pattern, lateral surface" ... 101 Unit "Contour milling, figures, face" ... 139 Unit "Contour milling, figures, lateral surface" ... 151 Unit "Contour recessing with direct contour input" ... 75 Unit "Contour-parallel roughing in ICP" ... 69 Unit "Deburring in XY plane" ... 180 Unit "Deburring in YZ plane" ... 187 Unit "Deburring, face" ... 146 Unit "Deburring, lateral surface" ... 158 Unit "Engraving in XY plane" ... 179 Unit "Engraving in YZ plane" ... 186 Unit "Engraving, face" ... 145 Unit "Engraving, lateral surface" ... 157 Unit "Face milling ICP" ... 137 Unit "Face milling" ... 136 Unit "Helical slot milling" ... 150 Unit "ICP boring/countersinking, C axis" ... 105 Unit "ICP boring/countersinking, Y axis" ... 170 Unit "ICP contour finishing" ... 118 Unit "ICP contour milling in XY plane" ... 175 Unit "ICP contour milling in YZ plane" ... 182 Unit "ICP contour milling, face" ... 141 Unit "ICP contour milling, lateral surface" ... 153 Unit "ICP contour recessing" ... 73, 79 Unit "ICP drilling, C axis" ... 102 Unit "ICP drilling, Y axis" ... 168 Unit "ICP pocket milling in XY plane" ... 176 Unit "ICP pocket milling in YZ plane" ... 183 Unit "ICP pocket milling, face" ... 144 Unit "ICP pocket milling, lateral surface" ... 156 Unit "ICP recess turning" ... 74 Unit "ICP tapping, C axis" ... 104 Unit "ICP tapping, Y axis" ... 169 Unit "ICP thread" ... 128 Unit "Linear pattern drilling, face" ... 86 Unit "Linear pattern drilling, lateral surface" ... 95 Unit "Linear pattern tapping, front face" ... 91 Unit "Linear slot pattern, face" ... 134 Unit "Linear slot pattern, lateral surface" ... 148 Unit "Linear tapping pattern, lateral surface" ... 100 Unit "Longitudinal finishing with direct contour input" ... 120 Unit "Longitudinal roughing in ICP" ... 67 Unit "Longitudinal roughing with direct contour input" ... 71 Unit "Measuring cut" ... 124 Unit "Parting" ... 77 Unit "Pocket milling, figures, face" ... 142 U Undercut ... 432 Undercut according to DIN 509 E with cylinder machining G851 ... 318 Undercut according to DIN 509 F with cylinder machining G852 ... 319 620 U U Z Unit "Pocket milling, figures, lateral surface" ... 154 Unit "Predrill, contour mill, figures on face" ... 106 Unit "Predrill, contour mill, figures on lateral surface" ... 112 Unit "Predrill, contour mill, ICP in XY plane" ... 171 Unit "Predrill, contour mill, ICP in YZ plane" ... 173 Unit "Predrill, contour mill, ICP on face" ... 108 Unit "Predrill, contour mill, ICP on lateral surface" ... 114 Unit "Predrill, pocket mill, figures on face" ... 109 Unit "Predrill, pocket mill, figures on lateral surface" ... 115 Unit "Predrill, pocket mill, ICP in XY plane" ... 172 Unit "Predrill, pocket mill, ICP in YZ plane" ... 174 Unit "Predrill, pocket mill, ICP on face" ... 111 Unit "Predrill, pocket mill, ICP on lateral surface" ... 117 Unit "Program beginning" ... 159 Unit "Program end" ... 164 Unit "Program section repeat" ... 163 Unit "Recess turning with direct contour input" ... 76 Unit "Relief turns (undercut) type E, F, DIN76" ... 122 Unit "Single hole, face" ... 84 Unit "Single hole, lateral surface" ... 93 Unit "Single-surface milling, XY plane" ... 177 Unit "Single-surface milling, YZ plane" ... 184 Unit "Slot, face" ... 133 Unit "Slot, lateral surface" ... 147 Unit "Subprogram call" ... 162 Unit "Tap hole, lateral surface" ... 99 Unit "Tapered thread" ... 131 Unit "Tapping, face" ... 90 Unit "Thread milling in XY plane" ... 181 Unit "Thread milling" ... 138 Unit "Thread, direct" ... 127 Unit "Tilt plane" ... 165 Unit "Transverse finishing with direct contour input" ... 121 Unit "Transverse roughing in ICP" ... 68 Unit "Transverse roughing with direct contour input" ... 72 Unit "Undercutting (H, K, U)" ... 78 Units of measure ... 36 UNITS—Fundamentals ... 60 using NC Start in single-block mode to run NC blocks through to end of program, G999 ... 389 Zero point offsets G53/G54/G55 ... 261 Zero point shift G51 ... 260 Zero point shift, absolute G59 ... 262 Zero point shift, additive G56 ... 261 Zero point shift, C axis G152 ... 339 Zero point shifts, overview... ... 259 Zero-point shift in variables G902 ... 382 Zero-point shifts, activating... G980 ... 387 Zero-point shifts, deactivating, G920 ... 384 Zero-point shifts, tool lengths, activating... G981 ... 387 Zero-point shifts, tool lengths, deactivating, G921 ... 384 V VAR (section code) ... 54 Variable syntax, expanded... CONST – VAR ... 420 Variable types ... 408 Variables As address parameters ... 194 Variables, calculating automatically, G940 ... 385 W WHILE.. Program repeat ... 424 WINDOW (special output window) ... 405 Working plan generation (TURN PLUS) AWG ... 553 Working planes ... 521 Workpiece blank contour G67 (for graphics) ... 381 Workpiece group G99 ... 391 Workpiece transfer C-angle offset G905 ... 393 Controlled parting using lag error monitoring G917 ... 396 Spindle synchronization G720 ... 392 Traversing to a fixed stop G916 ... 394 X XY plane G17 (front or rear face) ... 521 XZ plane G18 (turning) ... 521 Y Y-axis contours—Fundamentals ... 502 YZ plane G19 (plan view/lateral surface) ... 521 HEIDENHAIN MANUALplus 620, CNC PILOT 640 621 1118606-20 · Ver00 · SW03 · 11/2014 · H · Printed in Germany *I_1118606-20*