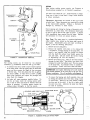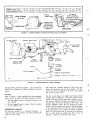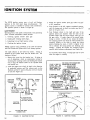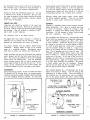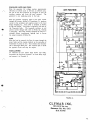
1
ELECTRIC G ERATING PLANTS MCCK 927·550 SERIES 4AC69 TABLE OF CONTENTS nrLE PAGE Introduction Specification s Table of Clearances and Torques Trouble Shooting Cooling System Fuel System Ignition System Governor Sy stem Valve Service 3 4 5 6 9 12 18 20 22 Engine Disassembly 24 Generator 29 Control Sy stem Wiring Diagrams 33 45 ONAN ELECTRIC GENERATING PLANTS MCCK 927-550 1 SERIES 4AC69 This manual contains information for the proper servicing of MCCK electric generating plants. For installation, preparation and operating instructions, refer to Operators Manual. Instructions for 60-cycle, l,800-rpm plants, also apply to 50-cycle, l,500-rpm plants except for current, frequency and operating speed. The engine end is designated as the front end of the plant. Left side and right side of the plant are determined by viewing from the front end. IMPORTANT ... RETURN WARRANTY CARD ATTACHED TO UNIT MEMORANDUM .~. INTRODUCTION ~. Instructions in this manual may refer to a specific model of generating plant. Identify the model by referring to the MODEL AND SPEC (specification) NO. as shown on the plant nameplate. Electrical characteristics are shawn on the lower portion of the plant nameplate. T Y PIC A L f'. How to read MODEL and SPEC· NO. ~05lrK.3,R /IA . ! !! 1 2 3" 1. Factory code for general identification. 2. Specific type: *A utomatic Demand Control A - AUTOMATIC type. series HA, is mounted on plant. E - ELECTRIC start type. Electric starting at the plant only. R - REMOTE type. Electric starting. For permanent installation, can be connected to optional accessory equipment for remote or automatic control of starting and stopping. 3. Factory code for optional equipment. 4. Specification (Spec) letter (advances when factory makes production modifications). * For service information, refer to HA series Automatic Demand Control Manual number 907.8. MOD E· L MANUFACTURER'S MC CK WARRANTY The Manufacturer warrants, to the original user, that each product oC its manufacture is free from defects in material and factory workmanship if properly installed, servieed and operated under normal conditions according to the Manu facturer's ins tructions. Manufacturer's obligation under this warranty is limited to correcting without charge at its factory any part or parts thereof which shall be returned to its f!lctory or one of its Authorized Service Stations, transportation charges prepa.ld, within one yea~ after being put into service by the original user, and which upon examination shaii disclose to the Manufacturer's satisfaction to have been originally defective. Correction of such defects by repair to, or supplying of replacements for defective parts, shaH constitute fuUHlment of all obligations to original user. This warranty shall not apply to any of th~ Manufacturer's products which must be replaced because of normal wear, which have been subject to misuse, negligence or accident or which shaH have been repaired or altered outside of the Manufacturer's factory unless authorized by the Manufacturer. Manufacturer shaH not be Hable for loss, damage or expense directly or indirectly from the use of its product or from any cause. The above warranty supersedes and is in lieu of all other warranties, expressed or implied, and of all other liabilities or obligations on part of ManufaCturer. No person, agent or dealer ill authorized to give any warrantiell on behalC of the Manufacturer nor to assume for the Manufacturer any other liabiUty in connection with any 01 its products unless made in ·writing and signed by an oUicer 01 the Manulacturer•. 3 SPECIFICATIONS ----------------------------------------------------------------------------~, Model Series Nominal dimension of plant (inches) Height ••.•.••••••...••..••.•....•• '. ~ .••••...•.••••••.•••..••.•.•.••• Width •••.••..•••.•.••...•....•••.•.•..•••...•..••...••...•••..•.... • Length ••.•..•••..•••....•••..••...•...•••..••.•...•..••.••••..•.•.... Number cylinders •.••....••.•..•••.••.•.....••...••.•.•••..••.••••..••••. Displacement (cubic inch) ....•.••....•..•.••..•••..•.•.•• '.' .•••..•.••...•.• Cylinder bore . . . . . . . . . . . . . . . . . . . . . . . . . . . . . . . . . . . . . . . . . . . . . . . . . . . . . . . . . . . . Piston stroke. • . . . . . • . . . . . • . . . . . . . . • . . • . . • • • • • • . . • . • • . • • . • . • • . • . • . . . •.•. RPM (for 60 cyCle) ••••••••.•.•..•.•.••..•••...•..•••.•••..•••...•.••..•••. RPM (for 50cycle) •••....••.••.•••••.•.•.•••••..•••.•••..•..• '.' ••• ; .•••..• Compression ratio ...•.•...•••.......•.•.......•..•••...•.••••.•••••.•••• Battery voltage •••...•••..•••••...••••.••.•.••.•••.•.•..•.•••...•.••••.. Battery size SAE group 1 H . • . • • • • • . . • • • •.. •• • • . . • • • • • • • • • • • • • • • • • • • • • • : • . • • • '. • • . . • • Amp/hr. SAE rating - 20hr. (nominal) •...•.•••..••••.••••..•..••••.••••••.•••• Battery charge rate amperes ...••..•..•..•....•...•.•.•••.•••••., '•...•••... '.• 4MCCK 605MCCK 24 22 *28 2 50 3-1/4 3 1800 1500 7:1 12V 24 22 33 2 50 3-1/4 3 1800 1500 7:1 12V two in series 105 2-3 Low 5·8 High two in series 105 2·3 Low 5·8 High Ventilation Required (cfm 1800rpm) , Generator .•.•••••... '••...•.•.••••..•..•••..•••..••••.••..•••.•••••.•• 75 Combustion •.•••..•••.•••.••••..•••...•.•..••••••.••••..•••...•.••. '•• 32 Output rated at unity power factor load ..•••.•.••...•••.•••••••••••....••.••••.. ,1 phase Rating (output in watts) 50 cycle AC Marine Service • . . • . . • . . . . . • . . . • . • • • . • . • . • • • . • • • • . . • •. . . • ••••. 3500 60 cycle AC Marine Service .••.••••••.•...•....••.•.••••.•.••••..•••..•••• 4000 AC- vol tage regulation in ± %. " • • • • • • •• • • • • • • • • • • • • • • • • • • • • • • • • • • • • • • • • • • • • • • 3 AC frequency regulation in % •••••••••••••••••••••••••••••••••••••••••••••••• 5 Revolving armature type generator ..•••.•.•..•••••..•••.•••••••••.•••.••••....•. Yes Yes 120/240 volt single phase model reconnectible •..•.•••••••••••.••••••••.•••.•.••.. Yes Rotating type exciter • • . • • . . •••.••••••••.••..••••••. ~ ••••.• ' .••..•.' •.•••• * 29-9/16 4 II for 4MCCK-3. 75 32 1 phase 5500 6500 3 5 Yes Yes Yes ,-Ii> (II TABLE OF CLEARANCES AND TORQUES TABLE OF CLEARANCES Maximum ~. \ j Tappets - at 70°F Valve Stem in Guide-intake Valve stem in Guide-exhaust Valve Seat Interference Width Valve Face Angle Valve Seat Angle Valve Interference Angle . Crankshaft Main Bearings Steel-Backed Aluminum. Crankshaft End Play· Camshaft Bearings Camshaft End Play Connecting Rod Bearing Connecting Rod End Play Timing Gear Backlash Oil Pump Gear Backlash Piston to Cylinder, Conformatic Type (Measured below oil controlling ring, 90° from pin) Piston Pin in Piston at 70°F Piston Pin in Rod at 70°F Piston Ring Gap in Cylinder Breaker Point Gap (Full Separation) Spark Plug Gap - For Gaseous Fuel Spark Plug Gap - For Gasoline Fuel Crankshaft Main Bearing Journal- Standard Size Crankshaft Rod Bearing Journal - Standard Size Cylinder Bore - Standard Size Ignition Timi ng Advance Cooling System Capacity (Ineluding Heat Exchanger) 0.013" 0.0025 " 0.004 " 3/64 " 0.0038" 0.012 " 0.0030" 0.0023 " 0.016" 0.003 . 0.005 " 0.0035" 0.0006" 0.023 " 2.000" 1.6260" 3.250" ASSEMBLY TORQUES Assembly torques require the use of a torque wrench. These torques assure proper tightness without danger of stripping the threads. TORQU E SP ECI FICATIONS (FT. LBS.) Rear Bearing Plate Nuts Connecting Rod Bolts Oil Pump Mounting Screws Oil Base Screws Generator Adapter Screws Timing Gear Cover Screws 20-25 27-29 7-9 43-48 20-25 15-20 Cylinder Head Bolts Fuel Pump Mounting Screws (ApproXimately) Flywheel MoUnting Screws Intake Manifold Screws Exhaust Manifold Screws Spark Plugs 29-31 10-15 35-40 15-20 15~20 25-30 5 TROUBLE SHOOTING REMEDY POSSIBLE CAUSE ENGINE CRANKS TOO STIFFLY Too heavy oil in crankcase. Engine seized. Drain and fill with lighter oil. Disassemble and repair. ENGINE CRANKS TOO SLOWLY WHEN or ENGINE RUNS BUT VOLTAGE DOES NOT BUILD UP Poor brush contact. Open circuit, short circuit, defective Replace rectifier. Corro.ded or loose battery terminals or connections. Brushes worn excessi vely or making poor con tact. Clean corroded terminals. Replace cable if necessary. Replace brushes and/or clean commutator. Short circuit in generator or load circuit .. Repair or replace parts necessary. Disconnect load. Dirty or corroded points in start solenoid switch. Replace swi tch. ENGINE WILL NOT START WHEN Out of fuel. CRANKED Residual magnetism lost. Magnetize the field. Direct short, or excessive load on AC circuit. Disconnect A. C. load. VOLTAGE UNSTEADY BUT ENGINE NOT MISFIRING Speed too low. Poor commutation or brush contact. Loose connections. Check fuel Fluctuating load. Faulty ignition. or faulty Clogged fuel filter. Cylinders flooded. Poor fueL Poor compression. Wrong ignition timing. 6 Check: Brush seating on commutator and collector rings; free in holders and not worn too short and have good spring tension. Refer to the Generator section of Maintenance Charge or replace. Faulty field rectifier. Lack of fuel carburetion. REMEDY CAUSE CRANKED ELECTRICALLY Discharged battery. .POSSIBLE Clean, adjust, or replace breaker points, spark plugs, condenser, etc., or time ignition. Check fuel system. Clean, adjust or replace parts as necessary. Replace. Ground spark plug cables. Crank engine with plugs removed. Drain. Fill with fresh fuel. Tighten cylinder head bolts and spark plugs. If still not corrected,· grind valves and/or replace piston rings. Re-set breaker points or time ignition. Adjust governor to correct speed. Refinish commutator or undercut mica if necessary. See that brushes seat well on commutator and collector rings, are free in holders, not worn too short, and have good spring tension. Tighten. Correct abnormal load con dition causing trouble. GENERATOR OVERHEATING Short in load circuit. Correct short circuit. Generator overloaded. Reduce load. Improper brush rig position. Adjust. ENGINE OVERHEATING Improper lubrication. Change to proper oil. Poor ventilation. Provide ample ventilation at all times. Insufficient water circula tion. Clogged. or restricted water cooling passages. Clean cooling system. Check pump and lines. Retarded ignition timing. Time ignition. Generator overloaded. Reduce load. iii' . tf,. POSSIBLE CAUSE REMEDY POSSIBLE CAUSE VOLTAGE DROPS UNDER HEAVY LOAD Engine lacks power. Poor compression. Faulty carburetion. Dirty flame arrester. Choke partially closed.. Carbon in cylinders or in carburetor venturi. Restricted exhaust line. See remedies under Engine Misfires at Heavy Load. Tighten cylinder head bolts and spark plugs. If still not corrected, grind the valves and/or replace' piston rings. Check fuel system. Clean, adjust or repair as needed. Clean. Choke plate must be wide open at operating temper ature. Drain, fill with proper oil. Repair or replace fuel pump. Oil too low. Add oil. Oil relief valve not seating. Badly worn bearings. Remove. and replace. Replace. Sludge on oil' screen. Remove and clean. Badly worn oil pump. Replace. Defective oil pressure gage. Replace. Clean. Spark plug gaps too narrow. Set gap. Faulty ignition. Clogged carburetor. .•!p: or HIGH OIL PRESSURE Oil too heavy. Drain, fill with proper oil. Clogged oil passage. Clean all lines and pass ages. Oil relief valve stuck. Remove and clean. Defective oil pressure gage. Replace. Tighten. Replace gaskets jf necessary. Clean, adjust, or replace breaker points, spark plugs, condenser, etc., or time ignition. ENGINE BACKFIRES AT CARBURETOR Lean fuel mixture. Clogged fuel filter. Air leak at intake manifold or carburetor flange. ENGINE MISFIRES AT HEAVY LOAD Defective spark plug. clean, . Clean or increase size. Carburetor idle jet clogged or improperly adjusted. Faulty ignition. LOW OIL PRESSURE Oil too light or diluted from leaking fuel pump diaphragm. Remove carbon. ENGINE MISFIRES AT LIGHT LOAD Intake air leak. REMEDY Replace. Clean, adjust, or replace '. breaker points, spark plugs, condenser, etc., or time ignition. Clean carburetor. Clogged fuel screen. Clean. Defective spark plug cable. Replace. Poor fuel. Spark advanced too far. Intake valve leaking. EXCESSIVE Clean carburetor. jets. Clean. Adjust Tighten mounting screws. Replace gaskets· as neces sary. Fill, with good, fresh fue1. Re-set breaker points or time ignition. Reface, seat or replace. OIL CONSUMPTION, LIGHT BLUE EXHAUST Poor compression .. Usually due to worn pistons, rings, or cylinders . Refinish cylinders. Install oversize pistons and rings. Fouled spark plug. Clean and adjust. Oil leaks from oil base or connections (does riot ~ause smoky exhaust). Replace gaskets. Tighten screws and· connections. Check breather valve.' Defective or wrong spark plug. Replace. Oil too light or diluted. Drain. Fill with proper oil. Leaking valves. Grind valves. Too large bearing clear ance. Replace bearings. Broken valve spring. Replace. Defective or improperly adjusted breaker points. Adjust or replace breaker points. ENGINE MISFIRES AT ALL LOADS Engine misfires. Refer to Engine Misfires at All Speeds. 7 POSSIBLE CAUSE • Faulty ignition. REMEDY Clean, adjust, or replace breaker points, spark plugs, condenser, etc., or time ignition. Drain excess oil. Too much oil. REMEDY POSSIBLE CAUSE Spark advanced too far .. Set breaker points or time ignition. Install correct spark plugs. Wrong spark plugs. Spark plug carboned. burned or Clean. Install new plug if necessary. BLACK, SMOKY EXHAUST, EXCESSIVE FUEL CONSUMP TION. FOULING OF SPARK PLUG WITH BLACK SOOT. Valves overheated. Adjust tappet clearance. Fuel stale or low octane. , Use fresh fuel. POSSIBLE LACK OF POWER UNDER HEAVY LOAD Fuel mixture too rich. See that choke opens pro perly. Adjust jets and ·float level. See that choke. opens pro perly. Clean. Choke not fully open. Dirty flame arrester. Lean fuel mixture. .Clean fuel system. Adjust carburetor jets. Check cooling system. Engine overheated. TAPPING SOUND Excessive crankcase pres sure. Valve clearance too great. Adjust to proper clearance. Broken valve spring. Install new spring. Clean breather valve. LIGHT POUNDING KNOCK Loose connecting rod. Adjust clearance or replace. HOLLOW CL r CKING SOUND WITH COOL ENGINE UNDER LOAD Add oil. Change if neces sary. Drain. Fill with proper oil. Low oil supply. Oil badly diluted. If noise is only slight and disappears when eng i n e warms up, no immediate attention needed. Other_ wise replace parts neces sary. Loose piston. See L.ow Oil· Pressure for remedies. . Low oil pressure. ENGINE STOPS UNEXPECTEDLY Empty fuel tank. Fill.. Check ignition system and repair or replace as needed. . Defective ignition system. VOLTAGE .LOW AT FAR END OF LINE BUT NORMAL NEAR PLANT Too small line wire used for load and distance. MOTORS RUN TOO Install larger or extra wires or reduce load• SLOWLY AND OVERHEAT AT FAR END OF LINE BUT OK NEAR THE PLANT Engine overheating. High water temp. cut out stops engine. Low oil pressure. Low oil pressure switch stops engine. DULL METALLIC Ti-tUD. IF NOT BAD. MAY DISAPPEAR AFTER FEW MINUTES OPERATION. IF BAD. INCREASES WITH LOAD Loose crankshaft bearing. SHARP METALLIC Replace unless one of the next two remedies per manently corrects the trouble. THUD. ESPECIALLY WHEN COLD Too small line wire used for load and distance. Install larger or extra wires or reduce load. NOISY BRUSHES High mica between bars of commutator. Undercut mica. EXCESSIVE ARCING OF BRUSHES Rough commutator or rings. Tum down. Dirty commutator or rings. Clean. Brushes not seating pro perly. Sand to a good seat or reduce load until worn-in. ENGINE FIRST STARTED 8 Low oil supply. Add oil. Open circuit in armature. Install a new armature. Oil badly diluted. Change oil. Brush rig out of position. Line up properly. Carbon in cylinders. Remove the carbon. COOLING SYSTEM for leaks, inspection of the rubber pump impeller and flushing and cleaning. . The MCCK cooling system is a pressure-circulating, open type system, that uses raw liquid coolant such as fresh water or sea water. NOT E: Factory-installed heat exchangers lor a closed type system are available as an optional Jeature. In a raw water cooling system, water enters the pump located on the front right side of the engine. The pump delivers water to the cylinder jacket and it flows through . the jacket and out openings in the cylinder heads controlled by thermostats. For engine warm-up, with thermostats closed, a by-pass from the cylinde~ block to the thermostat allows water flow. From the thermostat, water passes through the water cooled exhaust manifold and odt the engine cooling system. Figure 1 shows the cooling system operation. MAINTENANCE Cooling system maintenance includes periodic inspection The rubber 'impeller, because of continuous flexing, will, in time, need replacement. If the impeller fails after short service (usually under 500 hours), check for possible defects such as severe pitting, or abrasion caused by dirt in the cooling system. The cooling system must be kept clean to function properly. Scale reduces heat transfer and restricts water flow. Flush the system at least once a year and more often if operation indicates clogged passages, pump wear, or overheating. To flush the engine, remove the thermostats, Figure 2, and the water pump cover. Partially restrict the pump opening so the cylinder block fills with water. Attach the flushing gun nozzle to the thermostat opening and fill the block with water; then apply air pressure. Repeat the process . until water coming from the block is clean. HEAT EXCHANGER (INSIDE FITTING) TO HEAT EXCHANGER (REAR FITTING) HEAT E)(CHANGER PUMP _rl-Ir:O\j ERNOR ADJUSTMENT l"~_J:~r.:I01 E PUMP l PRESSURE GAGE l;JII.roi. .4-W:.....L. lOW Oil PRESSURE CUT-O.FF SWITCH RAWWATER_ FRESH WATER---+ FIGURE I. HEAT EXCHANGER PUMP ENGINE COOLING SYSTEM (HEAT EXCHANGER MODELS) 9 REPAIR When making cooling system repairs, use Permatex or thread~sealing compound on all threaded connections. ~~~ ~ --,~ ~ ~: THERMOSTAT HOUSING ()~. . . () «""-....... . ' \ : All water lines should be 1/2 n inside diameter or larger. Long runs of pipe or hose need a larger inside diameter to reduce resistance. U 0 , j , GASKET~ Thermostats: Thermostats are located on the top of each cylinder head. These thermostats are connected by tubing to the water-cooled manifold. Replace a thermostat if damaged by corrosion or other causes. THERMOSTAT--~-- Check opening and closing by placing a thermostat and a thermometer in a water bath. The thermostat should start to open at 145 OF and be fully open at 165 of. It should close immediately when removed from hot water. Replace the thermostat if it does not operate properly. ~~ A8B8 FIGURE 2. ~_-DRAIN PLUG THERMOSTAT REMOVAL TESTING The cooling system can be tested for two abnormal conditions: (1) insufficient water flow and (2) air leaks. 1. To measure water flow, install a tank of known capacity at the water outlet. Run the engine until the thermostat opens and then measure the length of time necessary to fill the tank. From this, obtain the flow in gallons per minute (GPM). If water flow is below 3.5 GPM, check pump operation and inspect the passages and water lines for clogging. 2. Air leaks will cause premature impeller failure. To test for air leaks, insert the cooling system outlet into a tank of water and watch for bubbles while the engine is operating. If bubbles appear, inspect the cooling system thoroughly to. find the sourCEl. Water Pump: The water pump is a positiveqdisplacement, rubber impeller type, located on the upper right corner of the engine. Disassemble pump and repair according to Figure 3 and the following instructions: 1. Remove the cover .and gasket. 2. Remove the impeller with pliers or by prying with a screwdriver, avoiding damage to the pump body. To install a new impeller, align the driving flat surface with the shaft flat surface; bend blades nearest the cam and insert. (Do not remove the factory coating of high-analine oil from the impeller.) 3. Remove the retaining ring. Then pry the seal assembly through the drain slots. The factory uses Never Seez compound to install the bellows seal. This may remain' in the pump body. An alternate sealer is suitable but not necessary. Install with faces clean and oiled. IMPORTANT: Use engine lubricating oil on the inside and outside diameter of the seat ring on the new seal before installation. The oil facilitates self-alignment. 4. To remove the bearing and shaft assembly, drive out by striking the impeller end of the shaft, using a brass or wood dowel. Install by the same method, striking the drive end of the shaft. If the fit is tight, strike the outer race only. Lubricate the pump bore lightly for ease of assembly. IMPELLER GASKET,COVER FIGURE 3. RUBBER IMPELLER WATER PUMP 10 01\1 AN I!!' 5. Torque screws 15 to 17 in. lbs. NOTE: This pump is not to be used in a closed system (fresh water) such as keel cooling. High Water Temperature Cut-off Switch: This normally closed switch (Figure 1) senses water temperature in the engine cooling jacket. The switch opens, breaking the circuit to the coil primary when the water temperature reaches approximately 200°F and closes when the temper ature drops below approximately 160°F. HEAT EXCHANGER COOLING (Optional, Figure 4) Onan heat exchanger cooling is available factory installed, . or as a kit for customer installation. A complete heat exchanger installation contains two water systems; a fresh water system and a raw water system. The fresh water system continuously re-circulates fresh water through the water jacket, exhaust manifold, centrifugal pump, and one side of the heat exchanger. The raw water system uses the engine-mounted rubber-impeller pump to draw and circulate sea water through the heat exchanger, and then disc~arges it. . ~ When planning to install a heat exchanger other than Onan-approved, or any keel cooler, consult the factory or an Onan distributor. To ensure an adequate installation, the engine cooling system must be modified. [email protected]'- FRESH WATER ... IN PRESSURE CAP Maintenance: Maintain the fresh water system the same as an automotive radiator cooling system.· Clean and flush once a year and use anti-freeze if there is danger of. freezing. Use a rust inhibitor in the closed water system. For raw water systems, check periodically for air leaks, rubber impeller wear, damage or restricted lines. Cleaning: To clean the fresh water system, drain and fill with radiator cleaner. When chemical cleaning is done, always flush the cooling system to wash out deposits loosened by the chemical cleaning. Flush the engine water jacket as \ previously discussed. First remove the water outlet hose from the engine water jacket to the heat exchanger. Flush both the fresh water side and the raw water side of the heat exchanger. Remove the rubber impeller pump cover to flush the raw water side. Also flush the water-cooled exhaust manifold. When flushing is completed, check the system thoroughly for leaks. Centrifugal Pump Repair: The centrifugal fresh water pump is mounted on the heat exchanger bracket. If it leaks, or the bearings require replacement, disassemble as follows and replace the worn components: L Remove the water inlet from the pump and the six screws holding the end cover to the pump. 2. UnScrew the impeller from the shaft (counterclockwise when facing the impeller). 3. Remove the pump body by unscrewing the single cap screw that clamps the pump body to the pedestal. 4. Remove the retaining ring and drive the bearing assembly from the pedestal. 5; To remove the water seal, drive it out of the pump body. Replace the worn components. When replacing the water seal, check the wear plate pressed into the impeller and replace it if necessary. To assemble the pump, reverse the disassembly procedure. After assembly, rotate pump shaft to see that impeller does not rub on pump body • .'q. RAW WATER OUT TO HEAT EXCHANGER PUMP FIGURE 4. HEAT EXCHANGER 11 FUELSYSTEM MCCK engines use a gasoline carburetor fuel system to deliver a fuel-air mixture to the combustion chamber. FUEL Use a regular grade of gasoline. One of the most important considerations is the fuel content of TetraEthyl Lead. Premium fuels contain more lead than regular, but the lead quantity also varies between brands of fuel. In constant~ speed operation, typical of generating plants, deposit build-up in combustion chambers is proportional to the amount of lead in the gasoline. More lead meanS more deposits and the need for more frequent head removal for cleaning. The interval between these cleanings can often be increased by changing fuel. MAINTENANCE Periodic maintenance should consist of cleaning or re placing the fuel strainer, flame arrester, carburetor and complete carburetor adjustment. To clean the fuel strainer, remove the fuel sediment bowl and screen (Figure 6) and thoroughly wash the screen. At the same. time, remove the carburetor float bowl and clean it. Assemble and check for leaks. FUEL PUMP AND FIL TER BODY If fuel is stored for any great length of time, it can oxidize and form gums; the fuel becomes stale. Dnan recommends changing stored fuel as often as every three months, especially where there is a great variation in temperatures. CARBURETOR (SILENCER REMOVED) FIGURE 6. FUEL STRAINER FUEL PUMP FUEL PUMP The fuel pump is located on the top of the engine. If fuel does not reach the carburetor, make the following checks: 1. Check fuel level in tank. 2. Be sur.e shut-off valve is open. FUEL FILTER 3. Remove fuel line from pump outlet and crank the engine over several times. Fuel should spurt out of the pump. If not, remove the pump for repair or replacement. A8B9 FIGURE 5. 12 FUEL SYSTEM Testing: If the fuel pump delivers fuel, test it with a pressure gauge or manometer. Perform these tests before removing the pump from the engine. Disconnect the pump outlet line and install the pressure gauge, Figure 7. .~. Pump Assembly: 1. Soak the diaphragm in fuel; then .insert the diaphragm spring and soaked diaphragm into the pump. body. FIGURE 7. TESTING FUEL PUMP Test the valves .and diaphragm by operating the pnmIng lever a few times while watching the pressure. It should not drop off rapidly after priming has stopped. 2. Insert the link and rocker arm into the body; hook it over the diaphragm pull rod. Align the rocker arm with the tacker arm pin hole; then drive in the pin. 3. Compress the rocker spring and install between the body and rocker arm. 4. Insert the valve cages, gaskets and valve cover plate. Position the inlet valve (with spring showing), and the outlet valve, with the spring in the cover recess. 5. Assemble the cover to the body with scribed marks aligned. Install screws but do not tighten. 6. Push the rocker arm to full stroke and hold in this position to flex the diaphragm. IMPORTANT: The diaphragm must ·be flexed, or it will deliver too much fuel pressure. Run the engine at governed speed (on the fuel remaining· in the carburetor) and measure the fuel pump pressure. Pressure should be between 2 and 3 psi with the gauge held 16" above the fuel pump. Tighten cover screws alternately and securely before releasing the rocker arm. 7. Install the pump and repeat pressure test. A low pressure reading indicates wear; overhaul or replace the pump. If the reading is above maximum, the diaphragm is probably too tight or the diaphragm sIlring too strong. Fuel seeping under the diaphragm retainer nut and between the diaphragm layers, causing a bulge in the diaphragm, may also cause high pressure. Overhaul the pump if this occurs. This choke uses a strip heating element and a heat-sen sitive bimetal spring to control the choke blade position. A solenoid, actuated during engine cranking, closes the choke all or. part way, depending on ambient temperature. The bimetal is factory- calibrated to position the choke to the proper opening under any ambient condition. Low pressure, with little or no pressure leak after pumping stops, indicates a weak or broken spring or worn linkage. In most cases the pUIl!P should be replaced. Removal and Repair: 1. Remove the pump inlet, outlet and the two cap screws holding the pump to the engine. Lift the pump from the engine. . 2. Notch the pump cover and body with a file so they can be assembled in the same .relative position. Then remove the screws holding them together. 3. Tap the body with a screwdriver to separate the two parts. Do not pry them apart; it will damage the diaphragm. 4. Remove the screws holding the valve plate to the cover and lift out the valve and cage assemblies. 5. Drive out the rocker arm hinge pin. 6. Remove the rocker arm, spring and link. 7. Lift out the diaphragm assembly and spring. 8. Fuel pump failure is usually due to a leaking dia phragm, valve, or valve gasket. A kit is available for replacement of these parts. Because the extent of wear cannot be easily detected, replace all parts in the kit. If the diaphragm is broken, or leaks, check for diluted crankcase oil. Occasionally, failure is due to a broken or weak spring or wear in the linkage. In this case, replace the worn parts or install a new pump. THERMO-MAGNETIC CHOKE Di 5as sembly and Repair: If the choke does not operate, or will not maintain its adjustment, disassemble it for repair. If it will not close, check for binding, incorrect adjustment, or incorrect assembly of the coil. If it will not open after the plant starts, check for heating. The choke should be warm to the touch within a minute or two of plant starting. Adjustment must be made with the bimetal at ambient temperature. Do not attempt adjustments until the engine has been shut down for at least one hour. Remove the flame arrester and adapter to expose the carburetor throat. Loosen the screw which secures the choke body assembly. Refer to Figure 8 for correct choke setting, according to temperature. Use a drill .or the shank of a drill bit to measure the choke opening. For a richer mixture, turn the choke body clockwise; to lean it, turn counterClockwise •. Tighten the screw that secures the choke body. Repair of Choke Heating: . If the choke will not heat properly, check for a broken heater wire, high- resistance connections or broken lead wires to the bimetal and heater assembly. With the element at room temperature, check· the heater resistance with an ohmmeter. The resistance should be about 30.6 to 37.4 ohms for a 12-volt system. If the heater is defective, install a new one. When the START button is engaged, the solenoid should cause the spring-loaded armature to contact the solenoid core. If this does .not occur,. check for broken lead wires or a defective solenoid coil. There must be slack in the lead wires between the choke body 13 AMBIENT TEMP. (oF) 100 CHOKE OP ENING (Inches) 1/4 rCHOKE OPENING 'J/ ~~4:-.- (See text) __ ...-. 4112 IN """ - ~ CHOKE PLAn HAND CHOKE AB3!:> FIGURE B. PLATE. CHOKE COVER THERMO-MAGNETIC CHOKE SETTING~ AND ADJUSTMENTS WASHER. INSULATOR PLATE. CHOKE MOUNTING I~\ BIMETAL AND HEATER ASSY, n I 1 (rLFRAME. ~ SOLENOID ~TERMINAL. LEAD. GROUN D / ' A876 ~ GROUND ~=~-:;;::;:::t!:lo.~-:,." WASHER. SHAKEPROOF NUT (51 16-IS") ~ WASHER (24/64I.D. x 9/16 O.D. x 1/16") FIGURE 9. THERMO-MAGNETIC CHOKE ASSEMBLY and the bimetal and heater assembly. The solenoid coil should have a resistance of 2.09 to 2.31 ohms in a 12-volt system. Assembly: Refer to Figure 9. When assembling the thermo-magnetic choke, connect the bimetal and heater assembly as follows: 1 .. The lead tagged G goes to the ground terminal on the coil solenoid. 2. The lead tagged H goes to either of the H1 terminals on the solenoid core. CARBURETOR, GASOLINE The gasoline carburetor is a horizonta ldraft-type~ It consists of three major sections: the bowl and float, idle circuit and load circuit. 14 Fuel enters the carburetor through the fuel inlet valve (Figure 10) and passes into the float chamber. The fuel level in the bowl is regulated by the float, which opens and closes the inlet valve. The idle circuit (Figure 11) supplies fuel during no~load operation and for light loads. The throttle plate is nearly closed at n~load, creating high intake manifold vacuum. The pressure difference between the manifold and float chamber causes fuel to flow through the idle circuit. The pressure difference draws fuel up through the hollow center of the idle transfer tube and then through passages in the carburetor body to the idle port, and is controlled by the idle needle. As the throttle is opened to increase power, the idle transfer port is uncovered and additional fuel is added during the transfer from idle to main jet operation. Figure 12 shows the load circuit. "'" '" FUEL INLET ~~~"~ V~~VEiSEAT FLOAT PIN . '~l . ~."~\ CAR.' BURETOR I )~!~rODY .I \ / i~FUEL INLET \-, U ~ ..,.\1 . CARBURETOR \lj ~==~~~=-CHOKE PLATE VALVE I::~~~~~-METERING FLOAT II WELL VENT . METERING WELL MAIN JET OPERATING FIGURE 10. CARBURETOR INLET VALVE IDLE METERING WELL MAIN JETOPERATIMG IDLE JET OPERATING FIGURE 12. CARBURETOR LOAD CIRCUIT During sudden increases in load, the main nozzle cannot immediately deliver the increased fuel because of .r.estric~ tion at the main adjusting needle. To prevent a lag when the load is suddenly increased, a by·pass around the outside of the nozzle delivers fuel until the main jet can catch up. with the increased demand. CHOK PLATE ---,+~~~ FLOAT METERING WELL IDLE JET OPERATIKG F~GURE II. CARBURETOR IDLE CIRCUIT When the load increases, the engine governor opens the throttle to maintain speed. With the throttle open, the manifold vacuum decreases and the idle circuit becomes less effective. As the ail- flow increases, a reduced pressure is created at the venturi (narrow section of the carburetor throat). The difference in pressure between the venturi and fuel bowl draws fuel up the main nozzle, where it mixes with air from nozzle bleed holes before entering the carburetor. The main adjusting needle controls fuel delivery. CHOKE (Gasoline Fuel System) Electric starting engines use an automatic electric choke (Figure 5); manual- starting engines use a hand choke (Figure 8 ). An electric element controls the automatic electric choke. Before the engine starts, the choke is partially closed. When the engine has started, the charging generator supplies current' to the heating element which heats the bimetal coil, opening the choke plate. Adjustment, E.lectric Choke: Under normal operation, adjust the choke so the distance measured between the choke plate and carbur.etor throat (Figure 8) is as shown in the table with the engine cold. Use the straight shank end of a drill bit to measure the gap.. The .upturned silencer must be removed for choke adjustment. To adjust the choke, loosen the screw on the choke body and rotate the cover assembly. 15 Adjustment, Gasoline Carburetor: The carburetor should be adjusted in' two steps- first the load adjustment and then the idle adjustment. See Figures 11 and 12. MAIN FUEL ADJUSTMENT THROTTLE STOP SCREW NOTE: If the carburetor is completely out of adjustment so the engine won't rlin, open both needle valves 1 to 1-1/2 turns off their seats to permit starting. Don't force the needle valves against their seats. This will bend the needle. Before adjusting the carburetor, be sure the ignition system is working properly and the governor is adjusted. Then allow the engine to warm up. 1. Apply a full load to the engine. Carefully turn the main adjustment in until speed drops slightly below normal. Then turn the needle out until speed returns to normal. 2. With no engine load, turn the idle adjustment out until the engine speed drops slightly below normal. Then turn the needle in until speed returns to normal. ALTERNATE METHOD; USE WHEN THERE IS NO LOAD ADJUSTMENT POSSIBLE 1. Start the engine and allow it to warm up. Push in on the governor mechanism to slow the engine down to about 400 to 500 rpm. 2. Set the idle adjustment screw for even operation (so the engine is firing on all cylinders arid running smoothly). 3. Release the governor mechanism to allow the engine to accelerate. The engine should accelerate evenly and without a .lag. If not, adjust the needle outward about 1/2 turn and again slow down the engine and release the mechanism. Continue until the engine accelerates evenly and without a lag after releasing the governor. With the carburetor and governor adjusted, and the engine running with no load (Figure 13), allow 1/32" clearance to the stop pin. This prevents excessive hunting when a large load is suddenly removed. i Remova,1 and Di sassembly: 1. Remove the fuel line, governor linkage and electric ch9ke wire. 2. Remove the two carburetor mounting nuts; remove the carburetor. I 3. Remove the silencer adapter and choke from the carburetor. 4. Remove the main fuel adjustment needle (begin Spec R) and the' float . bowl nut and pull off the bowl. Remove the float pin and float. 5. Lift out the float valve and unscrew its seat. 6. Remove the no-load adjusting needle. the load ad justing needle (Spec A only) and spring. ~ Check BEGIN SPEC B FIGURE 13. ADJUSTING GASOLINE CARBURETOR 7. Remove the throttle plate screws and the plate, and pull out the throttle shaft. 8. Remove the choke plate screws and plate and pull out the choke shaft. Remove the main nozzle (Spec A only). The main nozzle is not removable, beginning with Spec B. Cleaning and Repair: Soak all components thoroughly in a good carburetor cleaner, following the cleaner manufac turer's instructions. Clean all carbon from the carburetor bore, especially in the area of the throttle valve. Blow out the passages with compressed air. ' If possible, avoid using wire to clean out the passages. Check the adjusting needles and nozzle for damage. If the float is loaded with fuel or damaged, replace. The float should fit freely on its pin without binding. Invert the carburetor body and measure the float liwel (Figure 14). for burrs on throttle shaft and ~ choke shaft at screw attachment points. If rough, remove burrs before pulling shafts out. 16 THIS DISTANCE 1/32" AT NO LOAD To adjust float level, bend the small lip that the fuel inlet valve rides on. .r'\ Check the choke and throttle shafts for excessive side play and replace if necessary. Don't remove the coating on the throttle shaft. As sembly and In stallation: L Install the throttle shaft and valve, using new screws. Install as shown in Figure 12 with the bevel mated to the carburetor body. On valve plates marked with the "C", install with mark On side toward idle port when viewed from flange end of carburetor.. To center the valve, back off the stop screw, close the throttle lever and seat the valve by tapping it with a small screwdriver; then tighten the two screws. 2•. Install choke shaft and valve, Center the valve in the same manner as the throttle valve (Step 1). Always use new screws. 3. Install the main nozzle (Spec A only), making sure it seats in the body casting. 4. Install the fuel inlet valve seat and valve. 5. Install the float and float pin. Center the pin so the float bowl doesn't ride against it. 6. Check the float level with the carburetor casting inverted. See Figure 14. 7. Install the bowl ring gasket, bowl and bowl nut (and main jet begin Spec B). Make sure that the bowl is centered in the gasket and tighten the nut securely. 8. Install the load adjusting needle with its spring. Turn in until it seats, and back out 1 to 1-1/2 turns. 9. Install the idle adjusting screw finger tight. Then back out 1 to 1-1/2 turns. 10. Reinstall the choke and adjust. 11. Install the silencer assembly and gasket. 12. Install the carburetor on the engine and connect the gasoline inlet, governor mechanism breather hose and choke. 13. Install the silencer. THIS. DIMENSION SHOULD BE 11/64" '457 SPEC A BEND TAB TO ADJUST THIS DIMENSION f:-:....:==.....::=====I~~ SHOULD BE 1/16" (FROM G ASK ETn._....-f-I"'--r.....:I.....+:.LU,.J, TO FLOAn BEGIN SPEC B BOWL FLANGE GASKET HEAD OF PIN,WITH FULL WEIGHT OF FLOAT A913Rev. COMPRESSING INLET VALVE SPRING. FIGURE 14. SETTING FLOAT LEVEL 17 IGNITION SYSTEM The MCCK ignition system uses a 4-volt coil (battery ignition) to fire both spark plugs simultaneously.. The ignition system is shielded to prevent radio interference. The ignition system is shown 'in Figure 15. MAINTENAIoICE Operating with a weak spark is detrimental to the generating plant. Periodic maintenance should include: 1. Checking ignition breaker point gap. 2. Gapping and cleaning spark plugs. 3. Inspecting low and high tension cables. 4. Checking the ignition timing. Timing: Ignition timi~g procedure is the same for electric start and remote-start plants with 12 volt battery ignition. The spark adv,ance is 25 ° before top center. Timing is stamped on. the cylinder block near the breaker box. Set timing as follows: 1. Remove the cover from the breaker box. If timing is out of adjustment, attain an approximate setting by loosening the mounting screws and shifting the breaker box to E\1ign the witness marks on the cylinder block and breaker box. 2. Crank the engine over slowly by hand in the direction of crankshaft rotation until the witness mark on the _ flywheel and the TC mark on th.e gear cover are exactly in line (see Figure 16). 3. Adjust the ignition breaker point gap width to 0.020" at full separation. 4. Turn flywheel to the left, against crankshaft rotation, until the timing mark is about two inches past the 25 0 mark on the gear cover. 5. Turn flywheel slowly to the right and note if the ignition points just separate when the mark on. the flywheel aligns with the correct degree mark (25°) on the gear cover. If marks align as the points break, timing is correct. If they do not, loosen the breaker box mounting screws and shift the whole breaker box assembly slightly to the right to' retard the timing (points breaking too soon), or shift it slightly to the left to advance the timing (points not breaking soon enough). Tighten the breaker box mounting screws securely after making an adjustment (see Figure 16). To accurately check timing, a timing light may be used when the engine is running. PLACE A DROP OF LIGHT OIL ON BREAKER ARM PIVOT SHAFT EVERY 1200 OPERATING ,HOURS. FOR MODELS WITH BREAK'ER BOX F.ACING REAR OF ENGINE +-ADVANCE SPARK RETARO SPARK - ' To adjust gap. loosen s~ws@' 1 turn cam \.!) ~""'L..IV";t. t;:::::= ~~ ,' II " II II LDO'" THE 'C'E"~ I I : I I I I I - " L.t II --=====:::-:::;!--.. . . "'1""'1: I GN I TIO~ I TO ADJUST POSITION OF ~ BREAKER BOX REFERENCE MARK I '. . COIL I ~ HIGH WATER TEMPERATURE CUT-OFF SWITCH IGNITION RESISTOR A890 FIGURE 15. IGNITION SYSTEM 18 GEAR COVER TO CONTROL BOX CONNECTION FIGURE 16. IGNITION TIMING 1 To accurately check timing when not running the engine, connect a continuity test lamp across the ignition breaker points. Touch one test prod to the breaker box terminal (to which the coil lead is con~ nected) and touch the other test prod to a good ground on the engine. Turn the crankshaft against rotation (backwards) until the points close. Then slowly turn the crankshaft with rotation. The lamp should go out just as the points break. 6. Install the breaker box cover. spark indicates the coil is operating. Test the coil as follows: Using an ohmmeter, check the resistance of the coil windings. Normal resistance readings range from 5 to 2 ohms for the primary winding and from 4,000 to 10,000 ohms for the secondary winding. Extremely low resistance usually indicates a shorted Winding and ex~ tremely high resistance usually indicates an open in the winding. ~The 4-volt coils can be tested on a 6.v.olt tester. However, a 12-volt tester will destroy the coIl in a few seconds. Condenser: A .3 mfd. condenser mounted in the breaker box aids primary field breakdown when the points open, and prolongs the life of the breaker points by reducing the arc across them. A defective condenser causes a weak spark and rapid breaker point wear. Use a standard com mercial condenser tester to determine condenser leakage, opens or grounds. If no tester is available, check for shorts or defective leads. Replace the condenser, if in doubt. Coil: If spark is weak (or there is no spark) and the breaker points are clean and properly atiusted, test the coil for possible defects. As a general t st of the coil, disconnect the spark plug leads, ground one and hold the second lead 114" the eogioe. the eogioe. A good from j"mk Spark Plugs: MCCK generating plants use aviation-type spark plugs equipped to accept suppressed ignition leads. Fouled spark plugs indicate they are too cold. Consult the. plant parts catalog for the factory-recommended plug. Re~ove, clean and inspect the plugs at regular intervals. If they are in good shape, they can be cleaned on a commercial plug cleaner and regapped. The spark plug gap should be set at .025" for gasoline fuel. When spark plug electrodes become excessively worn, or if the plugs are damaged, replace them. When replacing or reinstalling spark plugs, always install new gaskets. r-\ 19 GOVERNOR SYSTEM GOVERNOR AND BOOSTER The governor and booster control engine speed. ~djustment requires adjusting both devices. A speed General: Before making governor adjustments, run the plant 15 minutes under light load to reach normal operating temperature. (If the governor is completely out of adjust~ ment, make a preliminary adjustment at nocload to attain ,a safe voltage operating range.) Engine speed determines voltage and frequency. Increasing the engine speed increases the generator voltage and frequency. Decreasing the engine speed lowers the gen erator voltage and frequency. An accurate voltmeter or frequency meter (preferably both) should be connected to the generator output in order to correctly adjust the governo'r of the AC plant. A small speed drop, not noticeable without instruments, will result in an objectionable voltage drop. Check engine speed with a tachometer. The governor arm is fastened to a shaft which extends from the gear cover, and is connected by a ball joint and link to the carburetor throttle arm. Flyballs behind the cup on the camshaft gear actuate the governor arm. If the carburetor has been removed, or the governor disassembled, it may be necessary to readjust the governor. THROTTLE STOP SCREW INTERNAL SPIUN'G-..... 1 BRACKET VACUUM BOOSTER o o CARBURETOR THROTTLE ARM A646 THIS DISTANCE DETeRMINES SENSITIVITY . GOVERNOR SHAFT ~---SPRING ADJUSTING STUD _ _ _ _ _ _ _ _ _ _.... A8SJ .. ~GOVERNOR II ADJUSTMENT FIGURE 17. GOVERNOR AND GOVERNOR ADJUSTMENTS 20 The vacuum booster is a separate auxiliary device which supplements the governor. The vacuum booster is adjusted to increase governor action which increases engine speed as the generator load is increased. This results in nearlyo constant voltage output. The booster is mounted on the intake manifold and is actuated by engine vacuum. When the plant is operating at half load or less, engine vacuum is sufficient to cause the diaphragm to overcome the internal booster spring tension. Under these conditions, there is no tension on the booster external spring and the booster does not affect governor operation. As the plant load increases, engine vacuum decreases and the booster internal spring tension overcomes the pull of the diaphragm and tension is put on the booster external spring. This tension helps the regular governor spring in its function by causing a slight increase in engine speed as the load is increased. A binding in the governor shaft bearings, ball joint or carburetor throttle assembly, will cause erratic governor action or alternate increase and decrease in speed (hunting). A lean carburetor adjustment may also cause hunting. Springs of all kinds have a tendency to lose their calibrated tension through fatigue after long usage. If all governor and carburetor adjustments are properly made and governor action is still erratic, install a new spring and adjust. ADJUSTMENT: 1. Adjust the carburetor main jet for best fuel mixture while operating the plant with a full rated load. 2. Adjust the carburetor idle needle under no load condition. 3. Adjust the length of governor linkage. 4. Check the governor linkage and throttle shaft for binding or excessive looseness. 5. Adjust the governor spring tension for rated speed at no-load operation with booster disconnected (or held inoperative). 6. Adjust the governor sensitivity. GOVERNOR The governor and speed-booster control engine speed (Figure 17). Rated speed and voltage appear on the nameplate. The engine speed on a 4 pole generating plant equals the frequency times 30. This means a 60·cycle plant must turn at 1800 rpm. The governor should not allow more than 2-1/2 cycles change from no-load to full-load. o Linkage: The length of the linkage connecting the governor arm of the throttle arm is adjusted by rotating the ball joint. Adjust length So that with t~e engine stopped and the governor arm held in the closed throttle position, the stop screw on the carburetor throttle lever is 1/32" from the stop pin. This setting allows immediate control by the governor after starting and synchronizes travel of the governor arm and throttle shaft. Speed Adj ustment: With the warmed-up plant operating. at no-load, and with .the booster external spring disconnected, adjust the governor spring tension. Turn the speed adjust ing nut to obtain a voltage and speed reading within the limits shown. . Sens itivity Adjustment: Check the voltage and speed with no load connected and then with a full load. Adjust the sensitivity to give the closest regulation (least speed and voltage difference between no-load and full-load) without causing a hunting condition. To increase sensitivity (closer regulation), move the gov ernor spring toward the governor shaft. Adjusting for too much sensitivity will ca)lse hunting. To decrease sensitivity, move the governor spring toward the outer end of the governor arm. Too little sensitivity will result in. too much difference in speed between no-load and full~load conditions. Any change in the sensitivity adjustment usually requires a compensating speed (spring tension) adjustment. NOTE: Make all final governor adjustments with the flame arrestor and resonator mounted on the carburetor. 7. Recheck the speed adjustment. 8. Set the carburetor throttle stop screw. 9. Set the vacuum speed-booster. 21 VALVE SERVICE Properly - seated valves are essential to good engine performance. The cylinder head is removable for valve servicing. Do not use a pry to loosen the cylinder head. Rap sharply on the edge with a soft~faced hammer. A conventional-type valve spring lifter may be used when removing the valve spring locks, which are of the split type. ,Clean all carbon deposits from the cylinder head, piston top, valves, guides, etc. If a valve face is burned or warped, or the stem worn, install a new valve. The valve face angle is 44°. The valve seat angle is 45°. This 1° interference angle results in a sharp seating surface between the valve and the seat. This interference angle minimizes face deposits and lengthens valve life. Valve seat face should be 1/32 to 3/64 of an inch wide. Grind only enough to assure proper seating. The valves should not be hand lapped, if at all avoidable, since the sharp contact may be destroyed. This is espe cially important where'stellite-faced valves and seats are used. Remove all grinding dust from engine parts and install each valve in its proper location. Check each valve for a tight seat using an air pressure testing tool. If such a tool is not available, make pencil marks at intervals across the valve face and observe if the marks Worn 'valve stem g\lides may be replaced from inside the chamber. Valve locks are the split, tapered-type, the smaller diameter facing toward the valve head. Tappets are replaceable from the valve chamber after ,the valve assemblies are removed. See Figure 18 for valve details . "v~lve .NOTE - USE A STANDARD AUTOMOTIVE TYPE WRENCH . TO ADJUST THE TAPPETS. J .L1I ~. ,." .'<t;t VALVE SEAT~\l NOTE - SEE VALVE TAPPET CLEARANCES IN TEXT- ~. .• VALVE RETAINER ~ VALVE SPRING INf:~~R:rd':' VALV~.:'~,~I~"~,,,~, .'~ r V ~t i~V E . " .Ij",~~,' r---~"--r-_-:::-_ _'--=_____ VALVE SEAT VALVE CLEARANCES INTAKE VALVES 0.0 11",0.013" EXHAUST VALVES WRONG ---- FIGURE 18. VALVE DETAILS AND €LEARANCES 22 rub off uniformly when the valve is rotated part of a turn against the seat. Lightly oil the valve stems and assemble. valve clearance. Adjust the The positive-type valve rotators serve to prolong valve life and lessen the need· for valve service. When function ing properly, the valve is rotated a fraction of a turn each time it opens. While at open position, the valve can be rotated freely, but in only one direction. If rotators are faulty, replace. TAPPET ADJUSTMENT These plants are equipped with adjustable tappets. To make a valve adjustment, remove the valve covers. Facing the flywheel, crank the engine over slowly by hand until the left intake valve opens and closes. Continue about 1/4 turn until the mark on: the flywheel and the TC mark on the gear cover are in line. This should place the left piston at the top of its compression stroke, the position it must be in to get proper valve adjustment for the left cylinder. Clearances are shown in Figure 18. For each valve, the thin!ler gauge (minimum) should pass freely between the valve stem and valve tappet but the thicker gauge (maximum) should not. To adjust valve clearance, turn adjusting screw as needed to obtain the right clearance. The screw is self-locking. To adjust the valves on the right cylinder, crank the engine over one complete revolution and again line up the mark on the flywheel and the TC mark on the gear cover. Then follow the adjustment given for the valves of the left cylinder. 23 ENGINE DISASSEMBLY GEAR COVER The camshaft center pin extends out 3/4" from the camshaft end. This provides an in-and-out travel of 7/32" for the governor cup (Figure 20). Hold the cup against the flyballs when measuring. If the distance is less, remove the center pin and press in a new pin. Otherwise, grind off the hub of the cup as required. The camshaft center pin cannot be pulled outward or removed without damage. If the center pin extends out too far, the cup will not hold the flyballs properly. After removing the mounting screws, tap the gear cover gently with a soft-faced hammer to loosen it. When in stalling the gear cover, make sure the pin in the gear cover engages the metal-lined (smoothest) hole in the governor cup. Turn the governor cup so the metal~lined hole is at 3 o'clock (Figure 19). The smooth side of the governor yoke must ride against the governor cup. Check that the bearing ball is in position (Figure 19). Turn the governor arm and shaft clockwise as far as possible, and hold in this position until the gear cover is installed flush against the crankcase. Be careful not to damage the gear cover oil seal. Adjust the roll (stop) pin to protrude to a point 3/4" from the cover mounting surface. WHeN GOVERNOR IS PROPERLY ASSEMBLED THE DIMENSION SHOWN ON DRAWING WILL BE AS INDICATED. . GOVERNOR CUP' With tlie gear cover removed, the governor cup can be taken off after removing the snap ring from the camshaft center pin. Catch the flyballs while sliding the cup off. 7/32" CE NTER PIN CAMSHAFT GEAR r~~~~,~;,;;~1\. SNAP Replace any flyballs having a grooved or flat spot, the ball spacer, if its arms are worn or damaged, and the governor eup, if the race surface is grooved or rough. The governor cup must be a free spinning fit on the cam shaft center pin without too much play. GOVERNOR CUP GOV ERNOR FLYBALL When installing the governor cup, tilt the engine so the gear is up, put the flyballs in place (equally-spaced) and install the cup and snap ring on the camshaft center pin. FIGURE 20. GOVERNOR CUP ......r- GOVERNOR =~"""' ARM GOVERNOR SHAFT V ~r ~AFT " '. GOVERNOR ( \, " ~ (Smooth YOK' Side Toward Cup) oj OIL SEAL IF FEELER WILL ENTER HOLE 1/2", BALL HAS . FALLEN' OUT ',FIGURE 19. GEAR COVER ASSEMBLY 24 'riMING GEARS If replacement of either the crankshaft gear or the camshaft gear becomes necessary, always install two new gears. To remove the crankshaft gear, first remove the snap ring, then attach the gear pulling ring (Onan tool no. 420A248) using two #10-32 screws. Tighten the screws alternately until both are tight. Attach a gear puller to the puller ring and proceed to remove the gear (Figure 21). The camshaft gear is pressed on and keyed to the camshaft. The camshaft and gear must be removed as an assembly, after first removing the crankshaft gear lock ring and washer. Before removing the camshaft and gear assembly, remove the cylinder head, valve assemblies and breaker point plunger. Remove the fuel pump and tappets. After removing the governor cup assembly from the gear, the camshaft may be pressed out of the gear by use of a hollow tool or pipe which will fit over the camshaft center pin. Do not press on the center pin. The governor ball spacer is a press fit to the camshaft gear. When pressing a camshaft gear onto the camshaft, be sure the gear is started straight and that the key is properly in place. Install the governor cup assembly before installing the camshaft and gear in the engine. Each timing gear is. stamped with an O-mark near the edge. The gear teeth must mesh so that these marks exactly coincide when the gears are installed in the engine. When installing the camshaft gear and shaft assembly, be sure that the thrust washer is properly in place behind the camshaft gear.. Then install the crankshaft retaining washer and lock ring. PISTONS AND RINGS Piston and connecting rod assemblies are removed from the top. The pistons have two compression rings and one oil control ring (with expander). Inspect each piston. Piston ring grooves should be cleaned of any carbon deposits, and the oil return. slots in the lower groove must be open. If pistons are badly scored, loose in the cylinders, have badly worn ring grooves and are loose on the piston pins so that .002" oversize piston pins will not correct it, install new pistons. Handle pistons carefully. Conformatic pistons are designed for a very close fit in the bore. A slot on opposite sides of the piston, behind the oil control ring, permits oil return and allows for expansion. The piston. is interchangeable as to which side should be nearer the oil base. Inspect rings carefully for fit in grooves, tension, and seating on cylinder walls. Install new rings where there is any doubt about the condition of the old rings. Figure 22 shows following step. Before installing new rings, check the ring gap by placing each ring squarely in its cylinder at a position correspond~ ing to the bottom travel. The gap should be as given in the Table of Clearances. Slightly oversize rings may be filed as necessary to obtain the correct gap, but do not use rings requiring too much filing. Standard size rings may be used on a .005" oversize piston. .010", .020", .030·" and .040 oversize rings are to be used on .010", .020", .030" and .040" oversize pistons, respectively. Tapered rings are usually marked top on one side, or, identified in some other manner. Rings must be installed with this mark toward the closed end of the piston. Space each ring gap 90° from the preceding one, with no gap in ·line with the piston pin. The bottom piston ring groove . should be fitted with an oil control ring plus expander, and the two upper grooves fitted' with compression rings. N PISTON RINC;; IN ,: " " ;)'""EO BORE :'·\~FEELER ~/. FIGURE 22. GAGE FITTING PISTON RINGS CRANKSHAFT GEAR GEAR ULLER RING 2-NO. 10.32 SCREWS FIGURE. 21. TIMING GEARS AND GEAR PULLER 25 If a chrome-faced ring is. used, it will be in the top groove. The oil-control ring is selected for best performance in regard to the correct unit pressure characteristics. Pistons are fitted with full-floating piston pins. The pin is retained by two eire lips in each boss. Be sure these lock rings are properly in place before installing the piston assembly. Correct piston-to-cylinder clearance appears in the Table of Clearances. b"",g ioLal 'anoo' be fitted with .. ,,,H,ble p""i'ioo type undetsize bearing, refinish it to the next undersize. If a worn. rod journal cannot be fitted by installing new bearing iriserts (forged rod), then refinish it to take the correspon4ing undersize rod or bearing insert available. Whenever . making major engine repairs, always inspect the drilled crankshaft passages. Clean out any foreign material to assure proper connecting rod lubrication. CONNECTING RODS BEARINGS Connecting rods should be serviced at the same time pistons or rings are serviced. Rods. must be removed with the piston. Rods are forged steel with replaceable bushings and bearings. They are available in standard or .002", .Oto", .020" or .030" undersize. Camshaft or crankshaft bearing removal requires complete engine disassembly. Use a press or suitable drive plug to remove the bearings. Support the casting to avoid distortion or bearing bore damage during removal and installation. Oil the bearings to reduce friction before and after installation. See Figure 24. For clearances, refer to the Repair section. On forged steel rods, proper clearance is obtained by replacing the pin bushing and the bearings. The rod bearings are precision-size and require. no reaming. The piston assembly must be properly aligned before installation. Aligning should be done on an accurate gauge by a competent operator. Misalignment causes rapid wear of piston, pin,cylinder and connecting rod. Install connecting rods and caps with raised lines (witness marks) aligned, and with the caps facing toward the oil base. The rod and cap numbered 2 fits on the crankshaft journal nearer the bearing plate. Coat the crankshaft journal bearing sur.faces with oil before installing rods. Crank engine by hand to see that rods are free. If nec essary, rap the connecting rod cap screws sharply with a soft-faced hammer to set the rod square on the journal. CRANKSHAFT Inspect the bearing journals. If they are scored and cannot be smoothed out by dressing down, the bearing journals should be refinished to nearest available undersize bearings, or a new crankshaft should be installed. If a worn main New crankshaft main bearings are. a precision-type which do not require line reaming or line boring after installation. They are available in standard .002", .010", .020" or .030" undersize. Expand the bearing bore by plaCing the casting in hot water or in an oven heated to 200°F. If a torch is used, apply only a little heat! If practical, cool the precision bearing to shrink it. Align the oil hole(s) in the bearing with the oil hole(s) in the bearing bore. The oil passage must be at least 1/2 open. The cold-oiled precision bearing should require only light taps to position it. Install the bearing flush with the inside end of the bore. If the head of the lock pin is damaged, use side cutters or an easy out tool to remove; then install new pin. Apply oil to thrust washer to hold it in place while installing the crankshaft. Oil grooves in thrust washers must face the crankshaft. Washers must be flat (not bent) with the two notches fitting over two lock pins to prevent riding on crankshaft. New camshaft bearings are a precision-type and do not require line reaming or boring. Coat the bearing with lubricating oil to reduce friction. Place the bearing on the crankcase over the bearing bore with the elongated hole in the proper position and narrow section facing PR~OC~~~OI7neTr:=! G)tj or bore. . 11'1 ~ iN-BEARING: ~-tJ -ALiGN REAR BEARING PLATE ....... H-OL"E WITH HOLE IN BEARING BORE 7/32" FROM OUT- SIDE CAMSHAFT BEARING I, I r LOCK PIN :,,,-r-I\i,-ALIGN BEARING OIL HOLES WITH I . ' ' '.. ;;;--~~''';', OIL HOLES IN BEARING BORE u,:.....ll..IlUKIIlUUIllIUluh,.. '. ~--·-MEASURE J0 ~----- ENDPLAY HERE (Refer to table of clearances) t')J\' ,fJl. /., /.4i...·.::,. I \ I· I /. \ I A ' \,I . I # THRUST ,WASHER I -,>-:'{~"' (J/! " (!1/ J'" l 'BEARING . LOCK PIN CRANKSHAFT FIGURE 23. CRANKSHAFT ENDPLAY 26 PRECISION TYPE Do not I ine ream or bore. BEARING FIGURE 24. CAMSHAFT AND CRANKSHAFT out (except bores without oil holes install with bearing groove at the top). Be sure to start the be,aring straight. Press the front bearing in flush with the outside end of the bearing bore. Press the rear bearing in flush with the bottom of the counterbore which receives the expansion plug. When installing the bearing plate oil seal, tap the seal into the bearing plate bore to Mttom against the shoulder in the plate bore. Use a seal expander, or place a piece of shim stock around the end of the crankshaft when replacing the bearing plate to avoid seal damage. Remove the shim stock as soon as the plate is in place. OIL SEALS (FIGURE 25) OIL PUMP The gear cover must be removed to replace oil seals. Drive out the oil seal from inside the gear cover. To remove the oil pump, it is necessary to detach the intake cup assembly, as shown in Figure 26. Inspect the pump thoroughly for worn parts and always prime it before installing. Except for gaskets, component parts are not available individually (suction cup is available). Install a new pump assembly if required. The bearing plate must be removed to replace its oil seal. Drive the oil seal out from the inside. Before installing seals, fill the space between lips with a fibrous grease or stiff cup grease. This will improve sealing. When installing the gear cover oil seal, tap the seal inward until it is 31/32 of an inch from the mounting face of the cover. Install the thin, open-face seal 1-7/64inch from the mounting face of the cover. "'THIN, OPEN-FACE SEAL DIMENSION IS 1-7164". GEAR OIL PRESSURE RELIEF VALVE ADJUSTMENT Oil pressure can be easily adjusted by means of the slotted stud and lock nut located just below the governor linkage. Oil pressure, at operating temperature should be' between' 25 and 40 pounds. To increase oil pressure, loosen the Use heavy fiber or ' cup grease in sp ace between seals to improve seal. COVER - REAR BEA~NG PLATE MOUNTING FACE OF GEAR COVER THIS SURFACE SHOULD BE CLEANED OF ALL OLD SEALING COM POUND BEFORE INSTAL LING SEAL. OIL SEAL TH~ SURFACE SHOULD BE CLEANED OF ALL OLD SEALING COM AS77 POUND BEFORE INSTALLING SEAL. SiEAR COVER OIL SEAL DRIVE OR PRESS OIL SEAL TO SHOULDER OF THE PLATE BORE REAR BEA~NG PLATE OIL SEAL FIGURE 25. GEAR COVER AND REAR BEARING PLATE OIL SEALS CRANKCASE TURNED!) ON L EFT SIDE - ----." AI7 FIGURE 26. OIL PUMP ASSEMBLY REFER TO INSTRUCTIONS FOR SETTING OF THE OIL PRESSURE VALVE ADJUSTMENT SCREW FIGURE 27. OIL PRESSURE RELIEF VALVE ADJUSTMENT 27 lock nut and turn the stud in; decrease pressure by 100sen~ ing the lock nut and turning the stud out. Always tighten the lock nut after making an adjustment. Low oil pressure may point to worn or poorly adjusted main or connecting rod bearings, weak or broken by-pass spring, defective gauge or a poor adjustment. Always check the oil pressure gauge before making other tests. CYLINDER The cylinder wears very little in normal service. If, through improper lubrication or accident the cy Hnder wall is scored or worn badly, the cylinder may be rebored and honed to accommodate an oversize piston and rings. Pistons are available in .010", .020", .030" and .040" PIS. Piston rings are available in .010", .020", .030" and .040" D/S. Use standard rings on a .005" oversize piston. If the cylinder is not being reconditioned, but new piston rings are being installed, remove any ridge which may have become formed at the top of piston ring travel in the cylinder bore. An engine may be fitted at the factory with .005" oversize pistons, and is so indicated by a letter E following the engine serial number stamped on the cylinder block and on the unit nameplate. The standard cy Under bore size appears in the Table of Clearances. a sharp E1ndwise blow on the head of the cap screw with a heavYfoft-faced hammer tei loosen. A suitable puller (with clafs or with bolts to agree with flywheel) may be used to Jjlull the flywheel. Al way s use a steel key for mounting the flywheel. CYLINDE~ HEADS Torque cylinder heads at room temperature according to Figure 28'f At some later time, after t\1e engine has been operated so it reaches normal hot temperature and cooled to room ~emperature, the cylinder head bolts should be retorqued to the original specified torque. This retightening should b~ done before the engine has been run fifty operating ihours. FlYWHEEL To remove the flywheel, turn the flywheel mounting screw outward about two turns. Use a screwdriver behind the flywheel to take up the crankshaft end play. Then strike 28 FIGURE 28. CYLINDER HEAD SOL T TORQU E SEQUENCE GENERATOR A revolving-armature generator is used in MCCK generating plants. It is a 4 pole, self-excited generator with inherent regulation. The. generator serves as a starting motor and furnishes DC current to recharge the batteries during operation. The generator field contains shunt windings and series windings (a few turns of heavy wire wound on the same forms as the shunt windings). The series windings act as the starting motor field. The shunt windings are the. working field, which produce the magnetic field in which the armature turns to produce useful output. A rectifier in series with the shunt field, mounted on the generator frame, provides increased engine cranking torque during plant starting. The generator armature contains both AC output windings and DC windings to supply the field and battery charging circuit.. The generator is mounted to the engirie through the engine to-generator adapter and the armature is directly connected (a tapered fit) to the crankshaft.· The outboard end of the ge nerator rides on a ball bearing housed in the end bell. Because of its construction, the generator cannot be . removed as a unit. Generator leads are marked with metal tags for identifi cation. Lead and terminal marking codes are noted on the plant wiring diagrams. Generators need little care other than a periodic check of brushes, commutator and collector rings. If a major gen erator repair becomes necessary, have the equipment checked by a competent electrician thoroughly familiar with its operation. Continuity tests may be performed without disassembly of the generator. DISASSEMBLY 1. The first step is to remove generator band and end bell cover. Remove all brush springs and lift the brushes from their holders. 2. Remove generator through-stud-nuts. Hold both the end bell and frame assembly, since they are separate parts, and remove them as One assembly from the adapter. Screwdriver slots in the adapter provide for prying the frame loose. Be careful not to let the frame assembly rest or drag on the armature. 3. Remove baffle ring from adapter. Turn armature through-stud nut out to the end of the through stud. While pulling the armature outward with one hand, strike a sharp endwise blow on the nut with a heavy soft-faced hammer to loosen the armature. If the armature does not come loose, strike the armature with a sharp downward blow in the center of the lamination .stack with a lead or plastic hammer. Rotate the armature and repeat. Be careful not to hit the collector rings, commutator, bearing or windings. 4. Upon disassembly, all parts should be wiped clean and visually inspected. BRUSHES AND SPRINGS Inspect brushes periodically. Replace if worn to 5/8". Replace springs. if damaged or if proper tension is ques tionable. Rapid brush wear may be caused from high mica between commutator bars, rough commutator or col lector rings, or from a deviation from neutral position in the adjustment of the brush rig. Never bend the constant pressure-type spring over the edge of its support. See Figure 29. INSTALL BRUSHES WITH BEVELLED TOP SLANTING DOWN . TOWARD SPRING HOLDER TO REMOVE BRUSH SPRING PRESS SPRING HOLDER DOWN AND OUT AS SHOWN IN BROKEN LINES. FIGURE 29. BRUSH REPLACEMENT BRUSH RIG ALIGNMENT The brush rig must be aligned in the neutral position. If it is not, sparking occurs. Normally, the neutral position is identified by a chisel mark on the brush rig (Figure 30). If the mark is lost or a new brush rig installed, follow· these instructions to find the neutral position: 1. With the generator end cover and band removed to allow access to the rig, connect a voltmeter across the DC terminals and start the unit and apply full rated load. 2. Loosen the brush rig mounting screws and rotate the rig to get the highest voltage. 3. Rotate the rig in one direction until the voltmeter reading starts to decrease. Mark this point. 4. Repeat Step 3 in the other direction. 5. Half the distance between the two marked points. is the neutral position. IMPORTANT: II a· voltmeter is not available, use the above procedure, but mark the point where arcing begins. 29 GENERATOR TESTING LOCATION OF REFERENCE MARK ~BRUSH RIG FIGURE 30. BRUSH RIG ALIGNMENT COLLECTOR RINGS If the collector rings become grooved or out-of-round, or the brush surface becomes pitted or rough so that good brush seating cannot be maintained, remove the armature and refinish the collector rings in a lathe. If the com mutator appears to be rough or scored, refinish it at the same time. Remove or adequately shield the ball bearing during refinishing. Windings: Before making any tests, lift all brushes from their holders and disconnect the load circuit wires from the plant. If the armature tests defective, the practical repair is to replace. it. If a field coil tests defective, replace the entire coil assembly unless the trouble is in one of the external leads. Then it can be repaired as the nature of the trouble requires. Armature Ground: Lift or remove brushes so that none contact the commutator or collector rings. Use a continuity test lamp set (Figure 32). Place one. test prod on the commutator, and the other test prod on a clean part of the armature shaft. The test prods must make good electrical contact. The test lamp should not glow. If the test lamp glows, the DC winding or the commutator is grounded. To test AC windings, place one test prod on one of the collector rings arid the other test prod on the armature shaft. If the test lamp glows, AC windings or a collector ring is grounded. Replace grounded armatures. Armature Open: Armature AC windings may be tested for an open circuit without removing the armature. Testing the DC winding requires removal and the use of an armature growler (Figure 32). COMMUTATOR To test AC windings, lift or remove all brushes. Use a test lamp set. Place one test prod on each of the collector rings. If the lamp does not glow, AC windings are open circuited. Commutator bars wear with usage so that the mica between them must be undercut. This should be done as Soon as the mica on any part of the commutator touches the brushes. A suitable undercutting tool can be made from a hack saw blade. Avoid injury to the surfaces of the copper bars. Leave no burrs along the edges of the bars. Undercut mica whenever the commutator is refinished. See Figure 31. To test the DC windings, place the armature in a growler. Then pass a smooth steel strip across the commutator segments. Repeat all around the commutator. At some pOint around the commutator, a spark should occur as the strip contacts two adjacent segments. Rotate the armature slightly and repeat the test. Continue until a spark is HACK SAW BLADLl ~L~DE ) • ·0 ••• • I' ... ~ICA...Ji RIGHT WAY . \ Q TO GRIND TEETH ~, WRONG WAY TO GRIND TEETH GRIND BLADE TO WIDTH OF MICA '-MICA PROp·ERLY UNDERCUT An COMMUTATOR BARS WORN BELOW LEVEL OF MICA SEPARATORS CAUSE SPARKING. JUMPING. NOISY BRUSHES FIGURE 3!. UNDERCUTTING COMMUTATOR MICA 30 obtained between all adjacent segments. If no spark is obtained at some point, an open circuit i~ indicated. Testing Field Windings for Open Circuit: To test a coil assembly for an open circuit, disconnect its external leads and touch one test prod to the terminal of one coil winding lead, and the other test prod to the other lead IMPORT ANT: A short circuit in the win<~ng might indicated (or leads) of that coil winding. If the lamp does not light, prevent sparking. This condition may also b€ by the short circuit test. the winding being tested is open. If the fault lies in a connection between coils, or in a coil lead, the connection Replace an open circuited armature with a new one. can be repaired. If it is inside the coil, replace the entire coil assembly with a new one. Armature Short: To test for a short circuit, place the armature in a growler- and hold a steel strip about 1/2" Boll Bearing: If the armature ball bearing needs replace ment, pull the bearing from the shaft with a suitable bearing above the armature laminations. Pass the strip back and puller. Do not damage the armature shaft - it must remain forth over the laminations. Cover as much of the lamination true to serve as a turning center when refinishing the area as possible. If the strip is magnetically attracted commutator or collector rings. Drive the bearing onto the to the armature at any point, a short circuit is indicated. shaft shoulder. Use a double-sealed prelubricated ball After testing in one position, rotate the armature slightly bearing. in the growler and repeat the test. Continue until a complete armature revolution in the growler has been made. Shunt Field Rectifier: Using a multimeter, check the Replace a short circuited armature with a new one. rectifier for an open circuit in one direction and a closed Field Windings: Use a test lamp set for all tests except circuit in the other direction. If the rectifier is defective in either direction, replace it. a short circuit. The field coils are saturated shunt wound, having a series field winding for cranking. When testing a field coil assembly, disconnect all of its external leads Assembly: from their terminals. Tag and mark each lead to assure 1. Clean and inspect all mating surfaces. Surfaces proper connections for assembling. should be free of nicks and dirt. 2. Coat mating area between the generator shaft and Testing Field Windings {or Grounds: To test a coil as the engine crankshaft with a thin film of lubricating sembly fO!: ground, disconnect its external leads and touch oil, Molycoat or equal. one test prod to the terminal of one of its leads and the 3. Assemble the armature through stud to the engine other test prod to the generator frame. If the lamp lights, crankshaft with required torque. the coil assembly being tested is grounded. The ground 4. Check to see that the key is in the crankshaft. may be in a coil, coil connection, Or coil lead. Repair or replace as needed. TEST LAMP - FOR TESTING FOR OPEN CIRCUITS AND GROUNDS USE 3 OR 4 CANDLEPOWER BULB COMMUTATOR A654 FIGURE 32. ARMATURE TESTING 31 5. Slide armature over the through stud and onto the crankshaft, being careful not to let the weight of the . armature rest ori the through stud. 6. Install baffle ring, when used. 7. Assemble generator through studs to' the adapter with required torque. ~ DO NOT tighten the armature or rotor ~ through stud before mounting the frame and bearing support. If this procedure is not followed, misalignment may occur, shortening the life of the rear mai.n and outboard. bearings. Also,cranking torque re quirements could be. doubled, resulting in damage to the commutator and DC brushes. 32 8. Install the frame and bearing support. to required torque . Tighten frame 9. NOW torque down the armature through-stud nut. Because you have tightened the frame and bearing support before tightening the armature, you have the armature and frame in alignment. 10. Tap the bearing support in the horizontal and vertical plane with a lead hammer to relieve stresses on the components and then recheck the torque. CONTROL SYSTEM The plant control system regulates starting, stopping, battery charging and provides a means of emergency automatic stopping. Control system defects can best be analyzed with the proper wiring diagram •. When using Onan wiring diagrams, remember these points. The views shown are modified pictorially. Components are shown in their actual positions. Normally, the top view of each component is shown for terminal location. Dotted lines show the edges of the control box and indicate . the direction from which it is being viewed, i.e. Top View. NOTE: For servicing information on optional automatic demand controls for older MCCK plants, refer to HA series Automatic Control manual number 907.8. All relays are shown in the de-energized position. If any control part fails, replace the defective part with a part of identical manufacture. No attempt should be made to repair such parts as meters, fuses, switches; relays, or receptacles. Check all electrical connections and contacts whenever servicing control equipment. .~ Always disconnect the battery to avoid ~ accidentally starting the plant • When disassembling controls, tag each lead that has to be removed and mark the connection point of the lead (on the tag) to assure correct connections for assembly. CONTROL-O-MATIC ~\. GENERAL DESCRIPTION The Control-O-Matic, standard on newer niodel MCCK plants, is an engine-control, an automatic-demand control and a bilge-blower control,all combined into one top mounted control box. The Control-O-Matic, with its switch in AUTOMATIC position, will monitor the AC load circuit to: a. Sense a load on the AC line. b.. Close the bilge blower circuit (when used). c. Open the bilge blower circuit. d. Start the electric plant. e. Sense when all load is removed. f. Stop the electric plant. A sheet metal enclosure approximately 12-5/8// wide, 7-5/8" deep, and 6" high houses the Control-O-Matic. The Control-o-Matic mounts on top of the electric plant with its front panel facing the generator end of the plant. The front panel holds the charge ammeter, emergency relay, and toggle switch. A unique hinge arrangement holds the front panel, cover and chassis together. The control box may be opened in a very limited space to expose all the relays for servicing. HOW CONTROL-O-MATIC WORKS (\ A three position toggle switch on the front panel selects one of three modes of operation; RUN; OFF; and AUTO MATIC. delays cranking while it closes a 12-volt, 5-amp circuit. to operate the bilge blower. When the three position toggle switch is moved to the RUN position, the Bilge-Blower Control goes thro~gh its control cycle before the electric plant cranks and runs. The electric plant stops when the three-position switch is moved to the OFF position. If the operator places the three-position switch in the AUTOMATIC position, the electric plant will crank and run on load demand after the Bilge-Blower Control cycles. The electric plant stops when all the load is removed . from the AC line. OPERATION OF CONTROL·O-MATIC Control-a-Matic operation is· explained on the following pages. Accompanying the description of each function is a schematic drawing, with 'Current flow shown as bold lines on the draWing. A pietorial wiring diagram apPears as Figure 33 on the next page. Throughout the text are references to various components (electrical devices), terminal positions, and current flow. When reading through' the text, follow current flow on the schematics and locate . relative positions of electrical devices and terminal pOSitions on Figure 33; 'This will provide a more conipre hensive understanding of the operation of the Control-o Matic. The Bilge-Blower Control circuit in the Control-O-Matic 33 M 613C I f5\ It>! rMt LOt> t-------------------------+ -----~~-----~-, II r--~- "::dIaI ~ 1.+11 Artl ItLAm!...11 II~~ I I I ~ __ )-l'S~Jf'.A\ r I .vv '---++0,--' __ __ RI C· 8 to r-~ _ _ _-..,._-i-_J.,-:;:,... ~_____~~_-+___ --------~-----------r_+_~-_H I 15_1__.... RUN 0 ~o --Gy>-------l FIGURE 33. 34 The control must operate with a negative ground. Connect battery with correct polarity. Switch S1 is a three-position switch. Center position is OFF. Moving the switch· handle to the RUN position bypasses Relay ~ contact (7-6) to energize the Bilge Blower Control which goes through its control cycle By moving before the electric plant cranks and runs. the S1 switch handle to AUTO, the Control-Q-Matic starts the plant, which will run as long as a load demand prevails. In this case, the load must be at least a 40-watt incandes cent lamp. Ct· LOAD DEMAND TO . BILGE BLOWER._ _ _ _ _ _ _ _. ._ . I2.V M50~~ MAl t..~R LOAD DEMAND When the plant is in AUTOMATIC Mode and a 40-watt lamp (or larger) turned on, a load demand exists. Battery current flows through Switch S1, Relay Coil ~ (2-3), K3 contacts, Load Terminal A; through the load. to ground, and· back to the battery to energize Relay ~. is ~-------~~~ ..-------@ FIGURE 34. CL YMAR II~C., N55 W13787 Oak Lane Mooomonee FaMs, Wise. 53051 (414) 781·0700 35 TRANSISTOR "ON" AND TIME DELAY When Relay K4 energizes, contacts (6-7) close the circuit from B+ to the run terminal on Switch S 1 and to Terminal 1 on Relay A2Kl (Bilge Blower Control). Current flows through the heater of Relay A2Kl to the ~1/4 ampere fuse, to ground and back to the battery. The heater on the five minute time delay begins its cycle. Simultaneously, as current flows through the heater on Time Delay A2Kl, it also flows through the dosed A2Kl contacts (1-2) through Resistor A2Rl to the base of the. transistor, through Re sistor A2R2, and through the fuse to ground. This switches Transistor A2Ql on. TRANSISTOR ON AND TIME DELAY TO 8IL~t~i°WE.R r - - - - - - - - - - - - . . , ltV SliMP MAl( .~. CRl ( A } - - - - - T O \.OtJ) - , - - - - - FIGURE 35. 36 BILGE BLOWER ON When Transistor A2Ql turns on, current flows from the B+ Terminal through the bilge blower, to Terminal BB on Terminal Block TB 1, through the transistor and through the fuse to ground. The bilge blower operates for five minutes to evacuate explosive vapors from the boat bilge. At the end of the five minute period, Time Delay A2 Kl operates to close contacts (l~3) and open contacts (1-2). Transistor A2Ql turns off to interrupt the power to the bilge blower. BILGE BLOWER .ON TO \lIL~~~~OWER , -_ _ _ _ _ _~---__, I2.V 5i1<MP IAAk Diode (CR3) between B+. and BB is a discharge diode to protect other components in the control from inductive voltage when the bilge blower is turned off. .~. KS I ... ( A } - - - - - T O \.ON) - - - - - FIGURE 36. 37 ENGINE CRANK CIRCUIT When Time Delay A2Kl contacts (1-3) close, Current flows to energize the Start-Stop Relay (Kl). The Kl contacts close the circuit through K2 contacts (1-4) to energize Start Solenoid Relay K6. The main contact of K6 closes to supply battery power to the cranking windings on the generator. ENGINE CRANK TO 8IL~~~iOWER r----,..-------.-'..-....---, ltV SliMP IAAl "'.... . CHOKE The auxiliary contact (BAT-I) of Start Solenoid K6 closes the circuit to the Solenoid (C 1~C:d on the thermo-magnetic choke mounted 011 the carburetor. KS = fv---,..----TO LON) - - - - - - FIGURE 37. 38 .~ CRANKING LIMITER When the Start Solenoid Relay K6 picks up, contact I closes to supply battery power through Diode CR2 through the Resistor R3, to the heater on the Time Delay Relay K7 (3208104 Emergency Relay). If the electric plant does not start within approximately 45 seconds, this relay opens its contacts to the control circuit and shuts the unit down. TO CRANKING LIMITER AND IGNITION 81LGE BLOWER I2.V ~o~~ MAlt ~--------t.:.-2-~-" Diode CR2 serves 'as a blocking- diode to prevent current flow to the choke control during a low oil-pressure condi tion. IGNITION • li!i When Relay Kl energizes, its contacts close to supply battery power to Relay Ks and the ignition circuits. Cur rent flows through the Ignition Resistor (RT 1), the High Water-Temperature Switch (S2), the primary of the ignition coil and through the breaker points (S3) to ground. This supplies ignition power to spark plugs El and E2. I 4 K3 = ( I \ } - - - - - T O U».O - - - - - FIGURE 38. 39 START DISCONNECT CHOKE HEATER AND BATTERY CHARGE START DISCONNECT, CHOKE HEATER AND BATTERY CHARGE . . . When the electric plant starts, power from the armature, supplied through Lead AI, energi zes Relay K2, which is the Start Disconnect Relay (307B642). Relay K2 contacts (1-4) open the Start Relay (K6) coil circuit. Relay KG de-energizes, opening its contacts to disconnect the cranking circuit and Choke Solenoid circuit. TO Relay K2 contacts (3-9) close the circuit to the Bi-metal Heater (HI-G) of the .thermo-magnetk choke. The Bi-metal heats to open the choke for normal running as the engine warms up. 811.~t~iOWER r---------~-__, IZV 5 AMP MAlI A'Z.QI Relay K2 contacts (3-9) also close the circuit to Time Delay Relay K7 through Low Oil Pressure Switch S4 and Resistor R4. If oil pressure switch S4 does not open, Time Delay Relay K7 operates to open the normally-closed contact to shut down the plant. Wait one minute; then push to reset. BA TTERY CHARGE When the giZ!nerator comes up to speed it supplies battery charge current through Lead S i to Start Solenoid Relay KG, and Terminal Sl to ResistorRl (charge reSistor). The resistor is divided with the upper Terminal C and the lowe{ Terminal A connected to the contact on the Voltage . Regulator Ks. This supplies the high charge rate for fast battery charging. Current flows from the terminal of Relay Ks through the Reverse Currept Diode (CRl), through the ammeter back to the battery for charging. When the battery reaches a preset charge level, the coil on Relay Ks is energized, opening the. contacts and dropping the charge to a low rate. I .. Resistor Rl is set at the factory for correct two rate charging. I SER.I--"'NV\-....--II I FLD. K3 (A)·-----TO \.OA.O - - - - FIGURE 39. 40 GENERATOR SUPPLYING POWER When the generator AC voltage reaches approximately 105 volts on l1S-volt units or 210 volts on 240-volt units, the coil on the Line Contactor K:3 energizes to open the The auxiliary contacts and close the main contacts. generator is now supplying power to the load. With the generator supplying power to .the load, current through the primary winding of Transformer Tl produces current in the secondary· and supplies power to the Load Sensor Amplifier At. This power is rectified by Diodes AtCRs and AtCR4. This power is applied to the base of the Transistor AIQl. The transistor switches on and passes current through both coils on Relay K4, keeping it energized. This relay remains energized as long as a minimum 40watt incandescent lighting load is across the output terminals of Relay K:3. . OFF POSITION TO BILit~tOWER __"""_IHHII____"""_ 1211 5"'MP MAl KS STOP When the load is removed, the flow of current through the power leads and the current produced in the secondary of Transformer Tl drops to zero. This switches the transistor off to de-energize Relay 14. The contacts open to break the ignition circuit and stop the engine. MISCElLANEOUS To eliminate the five minute bilge blower time delay, disconnect the lead from Terminal 1 on Time Delay A2 Kl and connect it to Terminal 3. FIGURE 40. CLYMAR INC. N55 W13787 Oak Lane Menomonee Fa~ls, Wise. 53051 (414) 781·0700 41 CONNECTING AUXILIARY RELAY TO CONTROL-a-MAliC This circuit allows a separate battery or power source tQ operate the bilge blower. It also permits use of larger blowers with running currents in excess of 5 amperes. The auxiliary relay should have a 12 VDC coil and contacts heavy enough to carry the current required by the bilge blower. I I I OPTIONAL BILGE BLOWER SWITCH I I I :L _______ JI I .1. OPTIONAL MANUAL SWITCH TO OPER. ATE AUX.RELAY BILGE BLOWER POWER SOURCE NEG.GROUND FIGURE 41. CONNECTING BILGE BLOWER TO CONTROL-O-MATIC The bilge blower operates on power from the electric plant cranking battery. The optional switch will run the bilge blower as long as the switch is closed. The bilge blower running current must not exceed 5 amperes. i--~----l I I I I I I I I I L _______ .-J i-= OPTIONAL MANUAL SWITCH TO RUN BILGE BLOWER NEG.GROUND FIGURE 42. 42 ,-_/ TROUBLE SHOOTlt-IG PROCEDURE FOR 120VOLT SINGLE PHASE, 12 VOLT DC COt-lTROL-O-MATIC ~\ . A 20,OOOOhmNolt VOM is needed for some of the following tests. The symptoms are listed by number and followed by test procedures. 1. Control switch is in RUN position, but electric plant does not crank after the usual 5 minute delay period. a. Check battery connections and battery voltage. b. Disable the bilge blower control Relay A2Kl by moving the lead wire from Terminal 1 to Terminal 3, Figure 33. If plant cranks with the bilge blower control disabled, the problem is in the bilge blower control circuit. Refer to Paragraph S. c. Check to see if the Start Solenoid KG picks up. If it doesn't, check for a faulty solenoid by connecting a jumper from the S terminal to ground. This bypasses contact Kl and K2. The start solenoid should pick up. If it pick s up, check, for proper operation of relay Kl and K2. 2. Electric plant will not start on load demand. a. Move the toggle switch to RUN position. Plant should crank after approximately a five minute delay. b. Apply some load (at least 100 watts) to load the Circuit. Move toggle switch to AUTO position. Plant should continue running. c. If plant stops with 100W load, move toggle switch to OFF position. Connect a jumper wire from terminal 8 of Relay K4 to the ground terminal in the Control-O-Matic. Move toggle switch to AUTO. Plant should start and run. If it does not, remove relay to check continuity of relay coil terminals 2-3 and 8 of 307A62. Resistance 2-3 equals approximately 1000hms; 2-8 equals approximately 1000 ohms. Apply 6 to 12 volts to terminals 2-8 to see if relay operates. When relay operates, contacts 4·6 open and contacts 6-7 close. d. If relay is good, check voltages as follows. The voltage measured from the chassis ground terminal to: .0 the B+ terminal on the Start Solenoid should equal battery voltage. terminal 2 of relay socket should equal battery voltage. - terminal 3 of Start-Run relay should be near zero if K3 contact is closed properly and sufficient load is connected to the Load circuit. e. Check voltages of load sensor amplifier with plant running under a minimum load of 100 watts. Start electric plant in AUTO position for this test by jumpering the outside terminals of Switch S1 Measure AC output voltage of Transformer T1 at terminals on load sensor amplifier. The voltage should read 2to 3 VAC. Use a 20,000 ohm Voltmeter to minimize error. Voltage from ground to the transistor side of Resistor AIR2 should measure 0.6 to 0.7 VDC. Voltage across Al CR1 should read 5 to 14 VDC. - Remove jumper from Switch Sl. 3. Control-O-Matic starts plant automatically under load, but slows down or stops as soon as contact or picks up. a. Recheck size and type of load. Minimum require ments area 40 watt incandescent lamp load or a 425 watt heater load. b. Recheck adjustment of contactor Pick-Up Re sistor R2. Apply a load and help contactor pick up and hold in as the plant starts. If this corrects the problem, reduce the resistance of R2. - Apply a load and hold the contactor to delay pickup. If this helps, increase the resistance setting of Resistor R2. c. Move toggle switch to the OFF position. Connect a jumper from Terminal 8 of Relay K4 to ground terminal. Move toggle switch to the AUTO position. The plant should start and run. d. Apply a load, such as a loOW lamp; then remove the jumper while the plant is running with the switch in the AUTO position. If the plant stops, place the toggle switch to OFF, jumper the two outside terminals of the toggle switch, and place in AUTO position to restart. While the plant is running with a 100 watt minimum load, measure . the voltage on the load sensor amplifier as follows: AC output voltage of Transformer T 1, measured at terminals on load sensor amplifier should be 2 to' 3 VAC. Voltage from ground to the transistor side of Resistor A].R2 should measure 0.6 to 0.7 VDC. Voltage across AICR6 should read less than 5 VDC. - Voltage across Diode AICR1 should readS to 14 VDC. 4. Plant won't stop with load removed. a. Move the toggle switch to the OFF position to stop the plant. If the plant does not stop, remove the battery lead and check for a faulty Start Sole noid. The contacts may have stuck closed. b. Remove the load from the load side of. the con tactor in the Control-O-Matic and reconnect battery. c. Put toggle switch in AUTO position. - If the plant does not crank, place the toggle switch in the RUN position t9 start the plant. Put the switch in AUTO position; the plant should stop. If the plant stops with the load lead removed from the load side of the con tactor, it indicates that there was sufficient load on the AC line to keep the Control-O-Matic energized. Recheck the load circuit. - If the plant cranks with the toggle switch in the AUTO position and the load lead discon nected, the Start-Run relay or Load Amplifier are malfunctioning. Remove the ground lead from battery. Remove the Start-Run relay. Check continuity from Terminal 6 to 7 of Relay 307A62.' This circuit should be open. Check continuity with t -1/2 volts or less from tube socket Pin 8 to ground. The circuit should 43 show a high resistance (approximately 20,000 ohms), with positive on Pin 8 and will show a low resistance (approximately 20 ohms) with negative to Pin 8. plant won't crank. a. Check heater element of thermal relay for an open circuit or a poor connection which may prevent relay from heating up enough to switch. If this check indicates continuity in both directions, unsolder one end of Zener Diode Ai CR6 and repeat same test. If resistance increases to the expected values, the zener diode has shorted. To verify this, check con tinuity in both directions on the zener diode itself. 7. Blower circuit is not energized, but plant starts after a 2" to 6-minute delay. a. Check the blower operation by placing a jumper from Terminal BB to ground. Check the transistor Turn-On circuit. Measure the voltage across Terminals (1-2) of A2Ki to ground. This voltage should be 0.7V or less while the bilge blower is energized. Measure the voltage from Terminal 2 of A2Ki to ground. This voltage should be equal to the battery voltage. Check the voltage across Resistor A2R2. This voltage should be 0.7 to 1.5 volts. If these tests are satisfactory, the transistor if defective. Replace it. If resistance does not increase with the zener diode disconnected, check the transistor for a short from the collector to the emitter. S. Bilge Blower Control circuit does not function at all. a. Check the 6-1/4 amp fuse AiFi. 6. Blower circuit is energized continuously and electric 44 WIRING DIAGRAMS The WIrIng diagrams on the following pages are typical, and apply only to standard MCCK series generating plants. Wiring diagrams for special models are available on request from the factory; send generator model, spec and serial numbers with the request. 45 H:> al ) ~ fI'J ~ ., "" ~ +- . ~ .. \ ONAN • T 1 <10 lMF'D co~o"s.-------" ACSUPR'''H'~ +~ cAl ') ..--' LOW OIl. PRI!:S;.vR~ SWITCH --' I -1 I i -.. __ -1 I II I :I ~;c;:;,~:;;'!f ---l r-I . ~ SIJPPRESSIO .. II.I.US"TRA"TIOIiIlW.... NI 13983$7 ENOPLAT£N!30tGZS91 CONT~OI. &OX t. ""NIH. 'ASSY, IH 30IC:tSZS CQH1''R.OL BOl< NIT.... \il.1I ...,.. /.I! '! 0 I SZ,,3Z COVE" H'! ;01 e 1<.4-4 I<I::$I$TO,," "'1''-;'. SOX ).j~ 301 aasza HEAr SINK N'! 30SA<:.54 --- r I 1>.. ",... LOW CH I R"SISTOfH'~ 3~:~£-!31 "I DIODe:. !'l~305e.'1S N! 304 ..... 0 .... y'£.Mc.a Rt=.S!. 1."14"""'" 'l.5w. n"~T 'TIl rr-llt~ I I ELECTRIC ettOl(1I -=' '141 TO LO"D OR AIJTOiotAT I (; • I , t ..........,!-I-;--t-!"-, ' 1 rH ·NtllS~""9az. N"334A74.s ioIARKER STRIP I--LJ~ w r.~~----~~ 9~:'O'~' . START 501. £1010 ID "307 &S4S . ' r I I . '\u: I ~ I-(:::~~- I I I I --4-1- I tl '"'F=- I ~ I :~ 1 N~za:!U04 RIi"'""Y .,.,.,,,- N'!':r.oaI' UI4 7 ':;WI"'CCti ---- r - J ::-_-:1 ~IIlI!RGoD.lc:.y - rl ~-OHM ;;;-w:;::;,. I I ~ ~I:$. N'-U"A~l I I I (~-- 1r:.l\iITION. !~ ) 611C732 'OJiAK 1305 MceK· 53R (lAo MCCK<3::;1/ 1.1S ""Fe. I<lOV.D.C. aOA. FEEe T....l'<U CO,,\). "'! 20'2 pal Il'::. II II I, ~~ .=J I l :--ill--I B"-e.AKER POINTS """ I 0" !' I.UFJ;I. COHD. 1.-CH""IOWA1T II.EIIo. WI. "04A lU7 START I I ':" IN~307Ba45 501.£>1010 I I I r .. + I ., 1 1e-RId''''''L SLacK Wfl 1I0',2oA 74.5 !dARKER STiU? "I.!!31.A'2oZ III'LL .. I I ~-" '" \ I' -.,"""TI SWITCH _.J I !; SUPPRESSIO,. II..I,;USTIt-,\TIO,. END PLATE N<! 30162591 COVER N'! 30 'C " LC:.NlTION Ii, M';:~~; ~d'" 611C697 MCCK-tR SPI!:CIA ,,01/01.,1 1~".'lWIRE 1;,0 .... -4~60S '.15",,,0, ,a.v,:),c, ZOA, FEEa T .....I,ICo .. J;I... !~\ap!l3 COn.. IGH\TfOH OfoilAM !i!?.JU!U(..eJ,.U<!o!o ---TO 4!.c.) 5 III ' II fi, _-:.I l!."E.A><ER POINTS aW\Tc:.W o Via. , "4'.1 31US357 CONTROL,BOX I. PANEl.. ASSY, N!30IcaS2oS CO!-lTRQI.. 80)< MTr.. &It.-.T. N!!?tO I 625'32 ...4 REli/'STOR "'T".50)< N~ :30' 52.$2.a HEAl' SINK N!! 30SAZS+ .". I --.l 1..0 .... OIL PRI!:5&UR£. _ _ _ _ _ ..1 I -r I I 1I:'$T£"' .....T"4>-1I: 1It£IioULATO.. M!10SIUI!I3 ' - - - - ----, ) II lot'''''' ..OW C ........GE. I R£SI5101>. .. ~ 30,\ ... 4113 ",,,0. CONO. ONAI'C !lEe",IC CHO" It 11011 TO "0""0 OR "U1'O"'ATI(' I II I 1~IZ.A57 I I I I I I I I I r--- ------ ,.:;ii