1
AN4700
Service Manual
16-00118-01
AN4700
Service Manual
16-00118-01 Rev 01
1
Introduction
1
Introduction.................................................................................................................... 1-1
1.1
Purpose and Scope ................................................................................................. 1-1
1.2
List of Field Replaceable Units (FRU) .................................................................. 1-1
1.3
Required Tools and Accessories............................................................................ 1-2
1.4
Symbols.................................................................................................................. 1-3
1.5
Book Plan............................................................................................................... 1-6
NOTE:
United States Federal Law restricts this device to sale by or
on the order of a physician.
1.1
Purpose and Scope
This manual provides information and procedures for servicing the
LIFEGARD ICG monitor. It includes:
1.2
•
troubleshooting procedures intended to isolate the probable cause of
a malfunctioning monitor down to a Field Replaceable Unit (FRU),
•
procedures for monitor disassembly and removal of the suspect FRU;
•
procedures for replacing the FRU and for reassembly of the monitor;
•
procedures for testing the reassembled monitor to ensure specified
operational performance and for conformance to relevant safety
regulations.
List of Field Replaceable Units (FRU)
The Field Replaceable Units for the LIFEGARD ICG monitor are listed in
Table 1-1. The table includes the part number, a brief descriptive TITLE of
the FRU. (Note that the FRU is a spare assembly and is shipped with its
components installed, except where it is described as a kit.)
Appendix D: Spares and Accessories contains a complete list of the FRU
assemblies and of their included parts.
Table 1-1. LIFEGARD ICG FRUs
Analogic Part
No.
10-62930-01
10-62931-01
10-62932-01
10-62933-01
10-62934-01
Descriptive Title
Small Parts Kit
Main PCB Assembly
Backlight Inverter
Backlight Inverter Cable
LCD Color Display
16-00118-01
Copyright © 2004 Analogic Corporation
All Rights Reserved
1-1
Introduction
LIFEGARD ICG Service Manual
Analogic Part
No.
10-62935-01
10-62936-01
10-32937-01
10-62938-01
10-62939-01
10-62940-01
10-62941-01
10-62942-01
10-62943-01
10-62944-01
10-62945-01
10-62946-01
10-62947-01
10-62948-01
10-62949-01
10-62950-01
1.3
Descriptive Title
Display Mounting Bracket
Keypad
Display Window
Front Case Assembly Kit
Speaker and Cable Assembly
Navigation Knob
Ground Cable
Rear Case Assembly
Pneumatic Parts Kit
6V Battery
Battery Bracket
Printer Bracket and Door
Thermal Printer
Printer Interface Board
Printer Cable Assembly
Printer Housing
Required Tools and Accessories
1.3.1 Special Tools
This paragraph lists special tools and fixtures that may be used in servicing
the LIFEGARD ICG monitor. They supplement those normally found in
standard tool kits
•
Eight (8) Alligator Clips
•
Four (4) #8 Machine Screws (at least 2-inches long)
•
Tweezers
•
BNC-to-BNC coaxial cable
•
Jewelers Screwdriver kit (including a Phillips-head
configuration)
•
Digital Multimeter; (HP 3458A DVM, or equivalent)
1.3.2 Accessories
A complete list of accessories may include those that are shown in the listing
of Appendix D Accessories And Spare.
1-2
16-00118-01
Copyright © 2004 Analogic Corporation
All Rights Reserved
LIFEGARD ICG Service Manual
1.4
Introduction
Symbols
Table 1-2 illustrates and defines symbols that may be encountered in/on the
monitor and packaging.
Table 1-2. Symbols and Abbreviations
Symbol
Description/Meaning
Reference Number
Serial Number
CE Marking on monitor
CE marking on Simulator
Humidity Limits 20% to 90%
Temperature Limits –20oC to 60oC
Keep Out of Sun
Keep Dry
Fragile
Keep Upright
16-00118-01
Copyright © 2004 Analogic Corporation
All Rights Reserved
1-3
Introduction
LIFEGARD ICG Service Manual
Symbol
Description/Meaning
AC Power LED
Battery Power LED
NIBP front-panel button
ON/STANDBY front-panel button
Defibrillator-proof type CF equipment
ECG
NIBP
Alarm Silence Front-Panel Button
Alarm Suspend
Parameter Alarm Enabled
Parameter Alarm Off
Parameter Alarm silenced (icon in parameter frame)
NIBP Automatic Interval Mode
Clock/Timer. Elapsed time since last NIBP measurement
Up Alarm Arrow Limit
Down Alarm Arrow Limit
Empty Battery
TFC Indicator
1-4
16-00118-01
Copyright © 2004 Analogic Corporation
All Rights Reserved
LIFEGARD ICG Service Manual
Symbol
Introduction
Description/Meaning
Heart Rate
Powering Down screen display
Heart Rate taken from ECG
Heart Rate taken from NIBP
NIBP Automatic Mode icon with initial cuff pressure
NIBP STAT Mode
ECG Size Bar
RF Interference
RS-232 I/O
!
Attention, consult accompanying documents
Alternating Current
Date of Manufacture (Y=year, X = month)
Drip-proof
ETL Mark
For use only when prescribed by physician
When box is checked, indicates the nominal ac voltage
value
Symbol used in illustration; identifying a ribbon cable
with one end a soldered connection (filled box) and the
16-00118-01
Copyright © 2004 Analogic Corporation
All Rights Reserved
1-5
Introduction
LIFEGARD ICG Service Manual
Symbol
Description/Meaning
other end a connector (open box)
Symbol used in drawing to indicate a twisted pair with
one end soldered (filled circle) and other end a connector
28
Symbol used on drawings to indicate a multi-lead cable
terminated at each end with a connector (open box). The
number of leads in the cable may be included in the
symbol
ESD (Electro-Static Discharge) symbol
High voltage danger
HR
Simulator Heart Rate
Z0
Simulator Base Impedance
TFC
VI
1.5
Simulator Thoracic Fluid Content
Simulator Velocity Index
Book Plan
This Service Manual contains seven (7) chapters and five (5) Appendices.
Each chapter and each appendix is introduced with table of contents of the
major paragraphs in that chapter.
Chapter 1 Introduction
Contains descriptions of the purpose and scope of this service
manual and a list of the Field Replaceable Units (FRU) that
determine the scope of the remaining chapters and Appendices, Also
includes a summary table of symbols that may be found in the
manual or on the equipment.
Chapter 2 Safety
Contains a description of the types of precautions that should be
observed when servicing the monitor. Also includes general
precautions as well as copies of WARNINGS and CAUTIONS that
appear in other chapters of the manual.
Chapter 3 Monitor Description
1-6
16-00118-01
Copyright © 2004 Analogic Corporation
All Rights Reserved
LIFEGARD ICG Service Manual
Introduction
Provides information to assist in the troubleshooting, removal, and
repair procedures detailed in Chapters 4 and 5. Contains a
description of the principles of operation of the monitor’s
instrumentation. Also includes copies of assembly breakdown
drawings to illustrate the mechanical architecture of the monitor.
Chapter 4 Troubleshooting Diagnostics
Provides a guide for qualified service personnel and assistance in the
troubleshooting of monitors that are returned for repair and
maintenance. Contains diagnostic flow charts and step-by-step
instructions to aid in the isolation of malfunctioning FRU items.
Chapter 5 FRU Removal and Replacement
Provides illustrated step-by-step instructions for disassembly to the
FRU level of monitor subassemblies. Includes descriptions of
precautions in both the removal and the replacement of FRU
assemblies or kitted parts.
Chapter 6 Post Servicing Tests
Provides step-by-step procedures for testing the functionality and the
safety of monitors that have been repaired or maintained. Includes
the use of accessories that simulate input signals and power
conditions that stress the monitor to specified limits.
Chapter 7 Maintenance
Provides illustrated step-by-step procedures for authorized qualified
servicing personnel to change the language of the monitor and to
replace the FRU 6V battery. This information supplements the
routine maintenance procedures contained in the AN4700 Operator’s
Manual.
Appendix A Specifications
Provides specifications for hardware and electrical monitor
instrumentation, environmental specifications for both the monitor
and accessory operation, and functionality performance of ECG,
ICG, and NIBP monitoring, Also includes summary tables of alarm
types and limit-settings and display configurations. Note that these
are duplicated in the Operator’s Manual.
Appendix B Defaults
Includes tabular listing of the factory-set defaults, identifies those
that may be changed by operators and those that may be changed by
16-00118-01
Copyright © 2004 Analogic Corporation
All Rights Reserved
1-7
Introduction
LIFEGARD ICG Service Manual
qualified service personnel via password-protected login codes.
Includes the range of settable default values and whether they are
retained through power cycling.
Appendix C Error Messages
Provides a copy of the messages that may appear during monitoring
operations as an aid to post-servicing evaluations. Includes
description of the error codes (hex coded) that may have been logged
during monitor operation.
Appendix D Accessories and Spares
Provides a list of spares and accessories available for sale for
servicing operations. Includes monitor parts and accessory
simulators.
Appendix E Technical Service and Support
Provides instructions for telephone, e-mail, or fax access to Analogic
technical assistance and support. Includes instructions to obtain
Return Material Authorization (RMA) for equipment servicing and
repair.
Password codes required to obtain the Power Up Defaults Menu,
Service Menu, and Demo Mode are defined in this Appendix.
1-8
16-00118-01
Copyright © 2004 Analogic Corporation
All Rights Reserved
2
SAFETY
2
SAFETY ........................................................................................................................ 2-1
2.1.
Purpose and Scope ................................................................................................. 2-1
2.2.
Warnings, Cautions, and Notes.............................................................................. 2-1
2.3.
Servicing Site Preparation...................................................................................... 2-4
!
2.1.
CAUTION:
Only qualified service personnel should attempt to service the
LIFEGARD ICG monitor.
Purpose and Scope
Chapter 2 contains information and procedures that must be followed by
service personnel to ensure personal safety (WARNINGS) and precautions
that ensure equipment integrity and accurate interpretation of test results
(CAUTIONS).
Major Paragraphs of the chapter include:
2.2.
•
Definitions and descriptions of symbols used in the text to highlight
WARNINGS, CAUTIONS, and NOTES:
•
Servicing Site Preparation: and
•
Copies of the WARNINGS and CAUTIONS that appear in other
chapters of this manual.
Warnings, Cautions, and Notes
The precautions are grouped into two (2) main categories, each with an
identifying symbol:
WARNINGS, and
CAUTIONS.
In addition, the manual highlights NOTES of significant information
relevant to servicing procedure described in the text.
General safety information and guidelines are indicated in the items that
follow. They are not specific for any one servicing action, and may not
appear elsewhere in the manual.
Definitions of Warnings, Cautions, and Notes and the symbol associated with
each, are shown below.
A WARNING advises against certain actions or situations
that could result in personal injury or death.
16-00118-01
2-1
Copyright © 2004 Analogic Corporation
All Rights Reserved
LIFEGARD ICG Service Manual
!
Safety
A CAUTION advises against actions or situations that could
damage equipment, produce inaccurate data, or invalidate a
procedure.
A NOTE provides useful information regarding a function
or procedure.
A WARNING for ESD sensitivity
A WARNING for high voltage danger
2.2.1. WARNINGS
This subparagraph contains copies of the WARNINGS that appear in other
chapters of the Service Manual as well as general precautions to avoid
possible injury or death to personnel.
WARNING:
Follow local governing ordinances and recycling plans
regarding disposal or recycling batteries and other device
components.
WARNING:
If the battery shows signs of damage or signs of leakage,
replace it immediately. Do not use a faulty battery in the
monitor.
WARNING:
Never use a monitor that is monitoring a patient to perform
battery conditioning.
2-2
16-00118-01
Copyright © 2004 Analogic Corporation
All Rights Reserved
Safety
LIFEGARD ICG Service Manual
2.2.2. CAUTIONS
This subparagraph contains copies of the CAUTIONS that appear in other
chapters of the Service Manual.
!
!
!
CAUTION:
Do not immerse the monitor in liquid or use caustic or
abrasive cleaners.
CAUTION:
Do not spray or pour any liquid on the monitor or its
accessories.
CAUTION:
Do not allow any liquid to penetrate connectors or
openings in the monitor’s chassis.
2-3
16-00118-01
Copyright © 2004 Analogic Corporation
All Rights Reserved
LIFEGARD ICG Service Manual
2.3.
Safety
Servicing Site Preparation
WARNING:
All servicing personnel should understand and become familiar with
these precautions before assignment to servicing activities.
WARNING:
Avoid contaminating or infecting the service environment or other
equipment.
Ensure that equipment that has been used before has been
appropriately disinfected and decontaminated.
WARNING:
Operation of the monitor front-panel ON/STANDBY button does
not disconnect power from a battery eliminator connected to the
monitor.
Ensure that power is removed by disconnecting the battery
eliminator power cord from the mains supply.
WARNING:
Accessory equipment connected to the monitor must be certified
according to IEC Standard 60950 for data-processing equipment or
IEC Standard 60601-1 for electromedical equipment. All
combinations of equipment must be compliant with IEC Standard
60601-1-1 system requirements.
WARNING:
Explosion Hazard. The monitor is not suitable for use in the
presence of a flammable anesthetic mixture with air, or with oxygen,
or nitrous oxide.
WARNING:
Observe ESD (electrostatic discharge) precautions when
working within the unit. Make sure you are wearing ESD
protection, and that you are working in a grounded
environment.
2-4
16-00118-01
Copyright © 2004 Analogic Corporation
All Rights Reserved
Safety
LIFEGARD ICG Service Manual
CAUTION:
!
!
Ensure that the servicing environment is reasonably free from dust,
vibration, corrosive or explosive gases, and is within temperature
and humidity range specifications. Refer to Appendix A
Specifications.
CAUTION:
Ensure that the power sourcing system meets the electrical
requirements contained in the specifications of Appendix A.
NOTE:
Refer to Chapter 1 for descriptions of special tools and accessories
that may be used to service the monitor.
NOTE:
If returning to the factory for servicing, do not return sensors, patient
cables, or NIBP tubing and cuff.
2-5
16-00118-01
Copyright © 2004 Analogic Corporation
All Rights Reserved
LIFEGARD ICG Service Manual
Safety
2-6
16-00118-01
Copyright © 2004 Analogic Corporation
All Rights Reserved
3
MONITOR DESCRIPTION
3
MONITOR DESCRIPTION.......................................................................................... 3-1
3.1
General................................................................................................................... 3-1
3.2
Functional Block Diagram..................................................................................... 3-1
3.3
System Overview ................................................................................................... 3-3
3.4
Isolated Signal Processing ..................................................................................... 3-3
3.5
Non-Isolated Signal Processing ............................................................................. 3-6
3.6
Mechanical Architecture........................................................................................ 3-9
3.7
AN4700 Bill of Materials (10-61216-01) ............................................................ 3-15
3.1
General
Chapter 3 provides information about LIFEGARD ICG monitor operation
that supports effective and efficient troubleshooting and replacement of
malfunctioning FRU assemblies and components.
The chapter includes descriptions of functional, electrical, and mechanical
subsystems emphasizing the roles assigned to FRU items in these
subsystems. Simplified block diagrams, schematics, and assembly drawings
are used to support the text descriptions.
3.2
Functional Block Diagram
Figure 3-1 illustrates the major functional blocks that are configured to
perform the monitor’s measuring and displaying functions.
Keypad
6V
Battery
Battery Eliminator
Patient
Cuff and
NIBPCable
Air Tubing
Main PCB
µ Processor
and Memory
Control Circuitry
LCD Color
Display
Printer I/O Board
Printer
Assembly
Power Supply
System
Valve 1
Valve 2
Backlight Inverter
A/D Processing
Speaker
Assembly
NIBP Pump
Isolated
Power
Supply
ICG Patient Cable
Isolated
Serial
Interface
ICG and ECG
Processing
A/D Processing
Isolated Front End
Figure 3-1. LIFEGARD ICG Functional Block Diagram
3-1
16-00118-01
Copyright © 2004 Analogic Corporation
All Rights Reserved
Monitor Description
LIFEGARD ICG Service Manual
The assemblies outlined in solid lines are FRU items. Other assemblies
boxed in broken lines are either accessories (Battery Eliminator, for example)
or functional blocks of other FRU items. Chapter 1 includes a list of all FRU
items.
Figure 3-1 also contains several representations of cables and their
connectors. All of them are FRU assemblies, and they are included in the
listing of Chapter 1. Table 3-1 illustrates the drawing conventions used to
define frequently used types of cable assemblies. The other types are
identified as part of the circuit functional description.
Table 3-1. Drawing Conventions for Cable Assemblies
Dwg Symbol
Definition
A flat ribbon cable with several leads with a connector
(open, clear, box) at one end a filled box at the other.
Usually covered with a clear plastic for visibility.
The clear box at the end of the cable indicates that the
cable’s connector is mated with its mating connector. In
most cases, the symbol for the mating connector is shown
in the drawing.
The filled box indicates that the leads of the cable assembly
are fixed (soldered) to the FRU within which it is drawn.
The flat ribbon cable is not a FRU, but is incorporated in
the FRU in which it is soldered,
A cable with two leads (usually a twisted pair).
One cable end has a spade lug attached to each lead for
insertion with the receptacle of the battery.
The other end (a filled circle) indicates a permanent
connection
28
A cable assembly with a clear-box connector symbol at
each end. In some applications, the number of active leads
within the assembly is indicated as shown in column 1 of
the table, indicating that there are 28, for example, active
leads in this cable symbol.
3-2
16-00118-01
Copyright © 2004 Analogic Corporation
All Rights Reserved
LIFEGARD ICG
3.3
Monitor Description
System Overview
Qualified service personnel should acquire a thorough understanding of the
operation of the monitor. A complete description of the LIFEGARD ICG
modes of operation is contained in the AN4700 Operator’s Manual, Part
Number 912-82542Vxx.
In general, the configuration shown in Figure 3-1 parallels the operational
modes of the monitor, and the subparagraphs that follow describe the
function of the FRU items in instrumenting these modes.
3.4
Isolated Signal Processing
3.4.1
ICG Processing
Instrumentation of the ICG and ECG monitoring utilizes strongly isolated
circuitry on the Main PCB (Figure 3-1 and Figure 3-2). The patient
connections electronics are powered by an isolated supply that receives its
power from the +5 volts on the board. Communication between the isolated
and non-isolated circuitry is accomplished by optoisolated serial interfaces.
Figure 3-2. LIFEGARD ICG Isolated Signal Processing Functional
Block Diagram
Input signals for the ICG and ECG processing are obtained from dual
electrode pads placed at the right and left sides of the neck and thorax of the
16-00118-01
3-3
Copyright © 2004 Analogic Corporation
All Rights Reserved
Monitor Description
LIFEGARD ICG Service Manual
patient. As shown in Figure 3-3, upper electrode at each side of the neck is
used to drive a current from the neck to the lower electrode at each side of
the thorax (current return). The sense electrodes at the lower end of each
side of the neck and at the upper end of each side of the thorax are used to
configure a 4-wire measurement of the thoracic impedance. The impedance
variations are digitized in the 11-channel A/D converter and transferred via
the optoisolated serial interface to the microprocessor. The resulting
waveform is analyzed to generate the non-invasive measurement of blood
flow.
Note that the Main PCB is a FRU; the subassemblies mounted on the board
are part of that FRU.
Left Upper Neck
Left Lower Neck
Right Upper Neck
Right Lower Neck
Left Upper Thorax
Right Upper Thorax
Left Lower Thorax
Right Lower Thorax
Figure 3-3. Placement of Electrode Pairs on Patient Neck and Thorax
3.4.2
ECG Processing
The ECG section of the instrumentation uses a three-lead patient
configuration methodology derived from the sense electrodes placement
described in paragraph 3.4.1. The ground return paths of the two drive
electrodes produce the reference electrode for the analog input signal derived
from the sense electrodes.
Features of this circuitry include the following:
•
Protection against defibrillation pulses and static electricity
•
Filter protection against EMI pulses
•
ECG Lead-Off Detection
•
ICG Lead-Off Detection
•
Pacemaker Detection
3-4
16-00118-01
Copyright © 2004 Analogic Corporation
All Rights Reserved
LIFEGARD ICG
3.4.3
Monitor Description
A/D Conversion
The signals developed in the isolated front-end of the Main PCB are digitized
in the 12-bit A/D converter and identified in Table 3-2. The signal
description in Table 3-2 also includes the troubleshooting significance of the
reported value of the signal.
Table 3-2. Digitized Isolated Front-End Signals
A/D INPUT
CH
SIGNAL
AIN0
ECG
Output of the ECG Channel
AIN1
PM
Pacemaker pulse detection; logical signal of “1” indicates
pacemaker pulse detected.
AIN2
IMP
Pulsatile impedance output of the ICG-channel
AIN3
GIMP
SIGNAL DESCRIPTION
Output of the ICG-base IMP Channel
AIN4
Leads-Off detect signal. Voltage greater than 3.5 volts
ECG_LOFF1 indicates the ECG leads are off or the ECG signal is out of
range.
AIN5
Leads-Off detect signal. Voltage greater than 3.5 volts or
ECG_LOFF2 less than 0.5 volts indicates the ECG leads are off or the ECG
signal is out of range.
AIN6
ISO_VDD
½ of the Isolated +5V voltage supply level.
AIN7
ISO_VEE
¾ of the Isolated +5V supply minus ¼ of the Isolated -5V
supply line.
AIN8
DRY_ELEC
AIN9
GND
Ground
AIN10
GND
Ground
Dry Electrode. When the electrode voltage is greater than
3.5V, the ICG electrodes are not connected or the electrode
has dried out and should be replaced.
16-00118-01
3-5
Copyright © 2004 Analogic Corporation
All Rights Reserved
Monitor Description
3.5
LIFEGARD ICG Service Manual
Non-Isolated Signal Processing
As shown in the FRU level Functional Block Diagram of Figure 3-1, the
non-isolated portion of the Main PCB circuitry responds to signals from the
operator keypad action to instrument the functions listed below.
• Measuring Patient blood pressure
• Processing digitized ECG and ICG patient data signals
received via the optoisolated interface
• Generating and configuring display information
• Generating and formatting printer information
• Driving speaker output
• Developing required voltage power levels
from the rechargeable battery source
3.5.1
NIBP Signal Processing
The microprocessor responds to the operator’s command to obtain a single
blood pressure measurement (manual mode), or to take measurements
automatically at an operator-selectable time interval (automatic mode).
The NIBP Pneumatic system installed in the monitor is shown within a
dashed-line box. It includes a NIBP Pump, two valves (one with a restricted
orifice), and an air tubing harness assembly that is connected to a pressure
sensing element on the Main PCB, to the two valves, to the pump, and to a
pneumatic plug fitting mounted in the rear case.
$
NOTE:
The components of the installed pneumatic system are available
as a FRU kit of such parts. The several subassemblies are not
FRU items.
An accessory NIBP hose is used to connect the accessory patient cuff to the
pneumatic plug fitting of the monitor.
Under microprocessor control, the pump is activated until the sensed initial
pressure reaches the operator-selectable (or default) value in units of mmHg.
If the initial pressure is insufficient to obstruct blood flow, the initial blood
pressure is automatically increased in 20-mmHg steps until the monitor
senses the obstruction of blood flow. Cuff pressure is displayed on the
monitor; maximum is 300 mmHg.
Under microprocessor control, the cuff pressure is reduced in steps while the
oscillometric technique is used by the microprocessor to obtain measures of
systolic, diastolic, and mean arterial pressures. These values are used in
display screens.
3-6
16-00118-01
Copyright © 2004 Analogic Corporation
All Rights Reserved
LIFEGARD ICG
Monitor Description
3.5.2
ICG and ECG Signal Processing
Digitized patient data signals received from the isolated front end are
processed by the microprocessor to develop numeric and graphic display
formats. The information for various operator-selectable displays includes
derived as well as base parameters. (Refer to the Operator’s Manual for
details.)
3.5.3
Controlling the Printer
The operator may initiate a print command via the front-panel keypad that
results in a “snapshot” of the operator-selectable display screen. The print
format is adapted to the printer capabilities and tabular data that may be
scrolled vertically on the screen is presented in successive horizontally
positioned segments on the printed output.
The operator may also select an automatic printing mode, in which the
microprocessor will initiate a print when an out-of-range condition is
detected. The printout begins with a tabulation of parameter values at the
time of the sensed out-of-range event. The waveform displayed in the
printout begins 8 seconds prior to the detected event.
The Printer I/O Board interfaces the microprocessor and the printer. It is a
separate FRU item, as indicated. The Printer Assembly, however, is built up
of several FRU items. Monitor mechanical architecture drawings in this
chapter and illustrations in Chapter 6 include details of the assembly
structure.
3.5.4
Driving the Speaker
The microprocessor initiates driver commands for the speaker assembly. An
on-board Codec controlled by the microprocessor produces unique tone
sequences. Such patterns include:
• Overture and Finale when turning the monitor ON
or returning to STANDBY, respectively
• Detected heart beats
• Alarm priorities
• Navigation knob pressures
The Operator may also suspend audio alarms for a preset time interval and
can control the audible level by front-panel keypad action.
16-00118-01
3-7
Copyright © 2004 Analogic Corporation
All Rights Reserved
Monitor Description
3.5.5
LIFEGARD ICG Service Manual
Power Supply System
A FRU 6V battery that is housed in the rear case assembly powers the
monitor (Figure 3-1). One end of a twisted-pair cable assembly is soldered
to the Main PCB. The other end is terminated in “spade” connectors that
meet with battery terminals. One battery terminal is identified with a red dot,
and the insulation of the corresponding lead of the battery cable is similarly
colored red.
An accessory Battery Eliminator, powered from either 120Vac or 220Vac
mains, delivers 15Vac connected directly to a connector mounted on the
Main PCB, as indicated in Figure 3-1. AC to DC converters develop voltage
levels of +3.3V and +5V to power the on-board circuitry and to charge the
battery. The +5V is also connected to the Isolated Power Supply that
develops +/-5V for the isolated-board circuitry.
Front-panel LEDs indicate whether the monitor is powered by the battery or
whether the Battery Eliminator is connected.
3.5.6
Non-Isolated A/D Conversion
This non-isolated 11-channel, 12-bit A/D Converter is used to monitor the
various power supplies used in the system. The digitized values are coupled
with those from the isolated converter and connected to the microprocessor
for subsequent reporting via the Service Menu (access code required).
Table 5-3 lists the A/D channels, description of the outputs, and a
relationship to the input voltage. For example, VCC is a nominal 5.0V.
However, the input is scaled so that the A/D output is ½ of the input.
Similarly, the battery’s charge state is indicated by a voltage that scales the
nominal 6-volt value (fully charged) to 2.2V.
Table 5-3. Monitored Non-Isolated Signals
A/D Input
Signal
Nominal Value / Description
Channel
AIN2
VDD (3.3V)
3.3V / Supply, measured with respect to ground
AIN3
VCC (5.0V)
2.50V / Input to converter is a resistor-network
scaled value of the sensed voltage
AIN4
NIBP_PWR
2.00V / Input to converter is a resistor network is
a scaled value of the sensed voltage
AIN5
CHRGST
2.V / Scaled at ratio of 2.2 to 6.0
Some of the supply voltages require a voltage divider to place the input
voltage at the converter’s mid range. All other inputs are grounded.
3-8
16-00118-01
Copyright © 2004 Analogic Corporation
All Rights Reserved
LIFEGARD ICG
3.6
Monitor Description
Mechanical Architecture
The mechanical design is illustrated in a series of exploded-view drawings
that follow. Breakdown drawings are shown in the approximate sequence in
which they would be disassembled. Component parts in each drawing are
identified by circled reference numbers that are defined in the Bill of
Materials reproduced in paragraph 3.7 of this chapter.
Refer to Appendix D Accessories and Spares in which the circled item
numbers are described, along with their relationship to the FRU assembly.
3.6.1
Printer Housing and Printer Assemblies
16-00118-01
3-9
Copyright © 2004 Analogic Corporation
All Rights Reserved
Monitor Description
3.6.2
LIFEGARD ICG Service Manual
Separating Battery and Front and Rear Assemblies
3-10
16-00118-01
Copyright © 2004 Analogic Corporation
All Rights Reserved
LIFEGARD ICG
3.6.3
Monitor Description
Breakdown Drawing of Printer Assembly
16-00118-01
3-11
Copyright © 2004 Analogic Corporation
All Rights Reserved
Monitor Description
3.6.4
LIFEGARD ICG Service Manual
The Pneumatic System Part 1
The Pneumatic Tubing Harness Assembly Component Tubing Parts
Case-Mounted components
3-12
16-00118-01
Copyright © 2004 Analogic Corporation
All Rights Reserved
LIFEGARD ICG
3.6.5
Monitor Description
The Pneumatic System Part 2
Pneumatic Pump (Reproductions are Not to Scale.)
16-00118-01
3-13
Copyright © 2004 Analogic Corporation
All Rights Reserved
Monitor Description
3.6.6
LIFEGARD ICG Service Manual
Main PCB and Display Assemblies
3-14
16-00118-01
Copyright © 2004 Analogic Corporation
All Rights Reserved
LIFEGARD ICG
3.7
Monitor Description
AN4700 Bill of Materials (10-61216-01)
Item No
Part Number
TOP ASSEMBLY,
10-61216-01
AN4700
1
10-60958-01
2
15-000397
3
10-61624-01
5
10-61219-01
7
15-720004
10
6-19061-63
11
21-00520-01
12
6-60726-01
13
15-000330
14
6-60727-01
20
10-60827-01
21
6-60728-01
22
6-60729-01
23
15-770128
30
6-19063
31
15-780061
100
6-19060-62
105
6-61112-01
106
6-61112-02
109
15-600131
110
6-18801
111
6-60739-01
112
6-18810-001
113
6-18810-002
114
6-60735-01
115
21-615100
120
15-680059
125
6-60732-01
126
11-60125
131
11-60091
140
15-301641
150
6-60736-01
151
10-61082-01
152
21-00118-01
154
15-000325
155
10-60830-01
160
21-M18000
161
152-000374
162
15-890092
163
15-870062
164
15-770071
Description
3
ASSEMBLY-MAIN PCB, AN4700
INVRTR CCFL 5VDC TO AC 5-8MA 6W
ASSY-CABLE, BACKLIGHT INVERTER, CGL
ASSY-CABLE, GROUND, LIFEGARD ICG
TIE CABLE .10WX4"L
CASE FRONT, PRINTED, LIFEGARD ICG
KEYPAD, AN4700
WINDOW DISPLAY-AN4700
DSPLY LCD COLOR 320X240 5IN
BRACKET-DISPLAY MOUNTING
ASSEMBLY- CABLE, SPEAKER
PLATE-SPEAKER MOUNTNG
FOAM-SPEAKER MOUNTING
CLMP CBL NY .125D
KNOB
RING COMP .366 HUB OD
CASE REAR, PRINTED, AN4700
PLUG RECT, CASE REAR
PLUG RND, CASE REAR
BONDER ADHV LOCTITE 414
FOOT CUSHION
PAD-BATTERY
PAD BATT RT
PAD BATT LF
SHIELD-ICG I/O
GSKT TUBING TRANSLUCENT
BATT 6V 4AH LEAD ACID SEALED
BRACKET BATTERY
LABEL-POSITIVE TERMINAL, BATT
LABEL REAR- AN4700
CONN D HSG 9P MTL SHL SN
BRACKET-PUMP AND VALVE
ASSY-CABLE, PNEUMATIC VALVE
RESTRICTOR VALVE ORIFICE .010ID BLK NY
PUMP AIR ROLLING 2 CYL 6VDC
ASSEMBLY-CABLE, PUMP MOTOR
PNEUMATIC FTG (NIBP PLUG)
FTG ELBOW 3/32 TUBE 10-32 THD WHT NY
SEALANT THD TEF 1OZ
FTG T 3/32 TBG WHT NY
CLMP CBL .25D PVC ADHV BACK
16-00118-01
3-15
Copyright © 2004 Analogic Corporation
All Rights Reserved
Monitor Description
Item No
165
166
167
168
200
201
210
Part Number
21-00483-01
152-000200
152-000201
15-720002
6-60721-01
6-60722-01
158-000028
211
10-62473-01
215
216
217
218
225
227
301
302
305
310
311
312
320
321
322
323
325
326
330
340
341
342
343
350
351
352
370
380
381
6-61408-01
6-60734-01
6-61418-01
6-60738-01
10-61213-01
152-000146
24-060118
24-050208
24-060122
24-050306
24-050314
24-050325
18-1C1D04
18-1C1D05
18-1C1D07
18-1A1D04
18-900107
18-900128
18-800237
24-640200
24-620300
24-640300
24-642500
18-900119
18-9K1D00
18-9M1D00
21-00413-01
152-000341
152-000366
LIFEGARD ICG Service Manual
Description
MANIFOLD, PNEUMATIC
TBG TYGON 3350 SILICONE 1/16ID 3/16OD NAT
TBG TYGON 3350 SILICONE 3/32ID 7/32OD NAT
TIE CBL .14W X 5.5L NY
PRINTER HOUSING
PAPER DOOR
PTR THRM SEIKO LPTH245A 5V 8 DOTS/MM
MODIFIED SEIKO PRINTER INTFC PARALLEL COMM
SETUP
BRACKET-PRINTER
PAPER CUTTER
SHIELD-PTR LEVER
INSULATOR-PRINTER BRACKET
CBL ASSY, PRINTER T0 CGL
CBL TIE 5L .10W .04T #4 SCR MT NAT NY
M SCR M2X4 DIN912 SS
M SCR M2X8 DIN7985 SS
M SCR M2.5X6 DIN7500C SS
M SCR M3X6 DIN7985 SS
M SCR M3X14 DIN7985 SS
M SCR M3X25 DIN7985 SS
SCR MCH SEMS PHCR 4-40X1/4 SS
SCR MCH SEMS PHCR 4-40X5/16 SS
SCR MCH SEMS PHCR 4-40X7/16 SS
SCR MCH HX SKT 4-40X1/4 SS
SCR MCH PH CR 2-56X1/4 NY
SCR MCH FH82 8-32X5/8 ISOPLAST
SCR TRI-LOB PHCR 4X3/8 ZNC
M WSHR M2 DIN127B SS
M WSHR M3 DIN433 SS
M WSHR M3 DIN127B SS
M WSHR M2.5 DIN127B SS
WSHR FL .186OD .098ID .03T NY
WSHR FL NO. 4 SS
WSHR LK SPLIT NO. 4 SS
SPCR .25 RND .14 ID X .167L SS
STOFF .187HX 2-56 X 5/8L NY
STOFF M/F 4.5MMHX M3X.5 9L SS
3-16
16-00118-01
Copyright © 2004 Analogic Corporation
All Rights Reserved
4
TROUBLESHOOTING DIAGNOSTICS
4
TROUBLESHOOTING DIAGNOSTICS ..................................................................... 4-1
4.1
General................................................................................................................... 4-1
4.2
Reviewing The Monitor’s History ......................................................................... 4-2
4.3
Visual Inspection ................................................................................................... 4-2
4.4
Diagnostic Flow Chart ........................................................................................... 4-3
4.5
Closed-Case Troubleshooting................................................................................ 4-4
4.6
Monitor Power-Up Screen ..................................................................................... 4-4
4.7
Checking Battery Charge Status ............................................................................ 4-5
4.8
Replace or Condition the Battery, (Figure 4-1) ..................................................... 4-6
4.9
Analyzing the Display Condition, (Figure 4-1) ..................................................... 4-8
4.10 Printing A Blank Screen Snapshot......................................................................... 4-9
4.11 Troubleshooting an Operable LIFEGARD ICG Monitor.................................... 4-10
4.12 Checking Monitoring Performance, Step 6 (Figure 4-1) ..................................... 4-14
WARNING:
Do not attempt to troubleshoot the monitor if there is any sign
of prior burning or smoke deposits on the monitor,
4.1
General
Chapter 4 provides a guide to the diagnosis of problems of reported AN4700
malfunction.
The goal is to use the diagnostic tools of this chapter, along with the skills,
knowledge, and experience of service personnel to identify the most likely
cause of the malfunction. It is assumed that there has been no domino effect.
That is, failure of one FRU did not cause a second, third, etc. failure.
At least as important, is the goal of identifying the circuitry that appears to be
performing as specified, and thereby to avoid unnecessary removal and
replacement of properly performing circuitry. It has long been known
that the Mean Time To Failure (MTTF) before the next malfunction is
shortened by the normal actions during repair and disassembly.
The diagnostic flow charts in this chapter have been constructed to support
these goals. For example, a unique graphic symbol is used to “box” a FRU
item that appears to be performing as specified and should not be removed
unless other evidence to the contrary is confirmed.
This chapter contains information to troubleshoot without opening the
monitor’s case assemblies. Simulators are used to provide patient input
signals for test purposes. These procedures are usually sufficient to isolate
problems to one of the FRU assemblies.
16-00118-01
4-1
Copyright © 2004 Analogic Corporation
All Rights Reserved
Troubleshooting Diagnostics
LIFEGARD ICG Service Manual
It is strongly recommended that a traveler structured document be opened at
the beginning of the servicing, and that it provide for recording of significant
servicing actions, such as results of visual inspections, performance tests,
removals, replacements, and final testing.
4.2
Reviewing The Monitor’s History
As a first step, review the conditions reported in the Facility Service
documentation or Return Material Authorization (RMA). Refer to Appendix
E. The documentation should include a description of the performance that
occasioned the return for maintenance. If possible, confirm the
circumstances and events as reported in the documentation. (Might it have
been operator error or misinterpretation?)
4.3
Visual Inspection
Examine the front and rear case covers for signs of damage (fractures,
abrasions, etc.),
Examine the pads at the bottom of the monitor for excessive wear or other
conditions that would impair their function to maintain the monitor’s use on
horizontal or sloping surfaces. Replace, as required. Refer to the AN4700
spares listing in Appendix D.
4-2
16-00118-01
Copyright © 2004 Analogic Corporation
All Rights Reserved
LIFEGARD ICG Service Manual
4.4
Troubleshooting Diagnostics
Diagnostic Flow Chart
Figure 4-1 illustrates a sequence of tests that may be used as a guide to
isolate trouble to a FRU assembly. Each procedural step is numbered, and
refers to a tabular description of the actions and responses for that procedure.
Start
1
Power-Up
No
2
3
Replace or
Condition
Battery
Yes
OK?
Yes
6
Battery
Eliminator
Operation
OK?
Monitoring
Performance
No
4
Gray
Display
Condition
?
Black
Good Backlight
Inverter
5
Yes
Print a
Screen
Snapshot
OK?
No
Good Print
System
Complete
Figure 4-1. Troubleshooting Diagnostic Flow Chart
16-00118-01
Copyright © 2004 Analogic Corporation
All Rights Reserved
4-3
Troubleshooting Diagnostics
4.5
LIFEGARD ICG Service Manual
Closed-Case Troubleshooting
In addition to the visual inspections described above, a number of
performance checks can be made without opening the case to troubleshoot
the monitor.
NOTE:
Observe the difference between a numeral designation that is
used to identify a diagnostic action called out in the flow chart,
and a letter designation that is used to identify a step in the
sequence of actions in a diagnostic step.
4.6
Monitor Power-Up Screen
Table 4-1. Power-Up Performance: Diagnostic Step 1 (Figure 4-1)
Action
Action
Response (Photo/Comment, Note,
Letter
etc.))
Remove the Battery Eliminator
connection to the monitor (if
connected).
Press On/Standby button to turn the
power on.
On/Standby button
A
Check the LED light at the bottom
of the front panel.
B
C
If no light appears, go to Step 2
Check for audio 3-tone Overture
followed by the display change to
the opening screen containing the
Analogic logo, the product name,
the version of software installed,
and the copyright information
The LED above the battery symbol
should be lit.
Opening Screen
If the display is blank (no screens),
go to Step 2. Else, go to next
action in this step.
Check to see that the opening
screen is replaced after a few
seconds by the Patient Data menu
screen
If no Patient Data menu screen is
displayed, or if the display is blank,
go to Step 2.
4-4
16-00118-01
Copyright © 2004 Analogic Corporation
All Rights Reserved
LIFEGARD ICG Service Manual
4.7
Troubleshooting Diagnostics
Checking Battery Charge Status
Table 4-2. Battery Eliminator Operation: Diagnostic Step 2 (Figure 4-1)
Action
Action
Response (Photo/Comment, Note,
Letter
etc.))
Press On/Standby button to turn the
power off
A
Connect the Battery Eliminator
output to the monitor.
Check the LED light at the bottom
of the front panel.
On/Standby button
The LED above the ac connector
symbol
should be lit.
If no light appears, go to Step 6
Press On/Standby button to turn the
power on.
B
If the monitor now appears to
respond correctly when the Battery
Eliminator is used, (after failure
when using the battery), the battery
may respond to recharging,
conditioning, or must be replaced.
Go to Chapter 6 Post-Servicing Tests
for procedures to verify proper
performance.
Performance failures usually require
replacement of the Main PCB.
To check the battery status with
respect to recharging capability, go
to Step 3.
16-00118-01
Copyright © 2004 Analogic Corporation
All Rights Reserved
4-5
Troubleshooting Diagnostics
4.8
LIFEGARD ICG Service Manual
Replace or Condition the Battery
The 6V battery is specified to supply power for 200 deep discharges before
conditioning is required.
Table 4-3. Checking Battery Capacity Step 3, (Figure 4-1)
Action
Letter
Action
Response (Photo/Comment, Note, etc.)
Press the On/Standby button to turn
power off (Standby).
A
Allow at least 4 hours of nonmonitoring time to recharge the battery.
The LED above the ac connector symbol
should be lit.
Disconnect the Battery Eliminator from
the monitor.
Press On/Standby button to turn the
power on.
Check the LED over the front-panel
battery symbol.
B
The LED above the battery symbol
Check the Status Frame in the Patient
Data.
If the battery is unable to maintain a
charge, the battery symbol bars may be
colored red.
Replace the FRU battery.
should be lit.
If the display appears normal, and
battery charge is more than half (3 or
more battery bars are green), go to
Action C to resolve the issue of
replacing with “new” or “conditioning
old”.
C
4-6
If the screen remains blank, go to Step 4
Connect the Battery Eliminator to the
monitor.
Select the Reuse Last Patient Data
option in the Patient Data Screen
Note: This action is required in order to
access the Service Menu.
Refer to Chapter 5 for battery removal
procedures.
16-00118-01
Copyright © 2004 Analogic Corporation
All Rights Reserved
LIFEGARD ICG Service Manual
Action
Letter
D
Troubleshooting Diagnostics
Action
Response (Photo/Comment, Note, etc.)
Select the Status Frame in the
monitoring display
Status Frame
E
Select Setup Menu option in the
Status Menu
F
Select Service Menu option in the
Setup Menu
G
Enter the 3-digit code for access
(Appendix E)
Select Login
H
Select System Information in the
Service Menu
16-00118-01
Copyright © 2004 Analogic Corporation
All Rights Reserved
4-7
Troubleshooting Diagnostics
Action
Letter
LIFEGARD ICG Service Manual
Action
Response (Photo/Comment, Note, etc.)
Obtain System Information
Review the number of Deep
Discharges logged by this monitor.
I
If greater than 190 of 200 of the deep
discharges specification, go to Chapter
7 Maintenance for procedure to
condition the battery.
4.9
Analyzing the Display Condition
The procedure in Table 4-4 may be used to determine whether a display
problem is caused by the failure of the FRU Backlight Inverter or the FRU
LCD Color Display. It may be used at any time that the display is blank
during the diagnostic actions.
Table 4-4. Backlight Inverter or LCD Color Display Step 4 (Figure 4-1)
Action
Action
Response (Photo/Comment, Note, etc.)
Letter
Perform a monitor power-up cycle.
Apply power to the monitor
If the audio “Overture” is heard, but no
screen is displayed, check the
appearance of the blank display screen,
A
If the screen is black (no change to any
shade of gray) replace the FRU
Backlight Inverter.
If the screen lightens, but does not
display the opening displays, go to Step
5.
4-8
The blank screen may indicate a
malfunctioning FRU Display or FRU
Backlight Inverter, or no output from the
processor on the FRU Main PCB.
See Chapter 5 Removal and Replacement.
The Backlight Inverter is functioning. Do
not replace.
16-00118-01
Copyright © 2004 Analogic Corporation
All Rights Reserved
LIFEGARD ICG Service Manual
Troubleshooting Diagnostics
4.10 Printing A Blank Screen Snapshot
The procedure of Table 4-5 is designed to identify the probable cause of a
blank display in a gray screen.
Table 4-5. Analyzing A Print Of An Apparent Blank Display (Step 5)
Action
Action
Response (Photo/Comment, Note, etc.))
Letter
A
Very carefully rotate the Navigation
Knob counterclockwise for 1 detent
click.
Press the knob. Ensure that the knob
does not rotate during the pressure
action.
Although not visible (blank display
screen), this action should Reuse Last
Patient data, as in normal use.
Very carefully rotate the knob
clockwise for a 1-detent click.
B
Press the knob. Ensure that the knob
does not rotate during the pressure
action.
This action should display a formatted
Main Display screen ---- if visible,
Wait at least 10 seconds.
Press the print button on the monitor.
Blank Screen Printout
Obtain the printer output.
Examine the printed record.
C
If the printout is blank, the probable
malfunction is in the processing
function.
Replace the FRU Main Board.
If the printout contains the appropriate
headers, time axis values, and
waveform vertical parameters, the
components of the printing system are
good. Do not replace.
For removal procedures, see Chapter 5,
Removal and Replacement
The probable malfunction is in the FRU
Main PCB.
16-00118-01
Copyright © 2004 Analogic Corporation
All Rights Reserved
4-9
Troubleshooting Diagnostics
LIFEGARD ICG Service Manual
4.11 Troubleshooting an Operable LIFEGARD ICG Monitor
4.11.1 The Service Menu
The LIFEGARD ICG monitor provides service technicians with a number of
informational tools via the Service Menu. As shown in Figure 4-2, the
menu, provides for four (4) categories of information: Note that the
illustrations include a screen photo and a line drawing to clarify the text in
the photo.
The RETURN OPTION is highlighted (yellow fill) permitting simple return
without having to make any selection.
SERVICE MENU
Error Log
System Information
A/D Values
NIBP Test
RETURN
Figure 4-2. Service Menu Screen
4.11.2 Accessing the Error Log (Figure 4-3)
To display the Error Log, use the knob to select (Rotate and Press) the Error
Log frame.
Error Codes
1.
2.
3.
4.
5.
6.
7.
8.
9.
10.
Error Code
0x00000001
0xC23F3211
0x00000030
0x0000086A
0x018A47C6
0x0006366C
0x00000095
0x396636A1
0x00002165
0x0000021F
Occurence
1
19
2
1
1
1
1
6
1
1
Date Time
10/15/01 09:07:23
8/09/01 23:07:42
6/30/01 03:07:45
6/01/01 22:07:55
5/25/01 07:07:23
4/23/01 14:04:27
3/16/01 11:07:23
2/13/01 16:07:14
1/11/01 08:07:23
12/22/00 02:07:12
RETURN
Figure 4-3. Displaying the ERROR LOG Screen.
The Error Log screen) displays the 10 most recent error code types, logged
by the ICG. (Codes are coded in hexadecimal format.) After 10 error code
types have been logged, the oldest error code type is deleted as new error
4-10
16-00118-01
Copyright © 2004 Analogic Corporation
All Rights Reserved
LIFEGARD ICG Service Manual
Troubleshooting Diagnostics
code types are added. Adjacent to each error code is an entry that is the
number of occurrences of that error. This means that if there are many
occurrences of one type of error code, that one error code won’t “overwrite”
the other 9 error codes. Next to the occurrence field is the time and date of
the most recent occurrence of the error code.
Error codes may not be changed or reset in this screen. When in the Error
Code screen, the “Return” item is always highlighted; a press of the knob
will return the user to the Service Menu. Rotating the knob while in the
Error Code screen will have no effect.
Refer to Appendix C Error Messages for a description of the Error Codes,
and their significance. The appearance of any coded message usually
indicates a malfunction that requires replacement of the FRU Main PCB.
4.11.3 Accessing the System Information (Figure 4-4)
After returning to the Service Menu screen, use the knob to select the System
Information option in that screen.
System Information
Monitor On-Time
1563
Backlight On-Time
871
Battery Deep Discharges
152
NIBP Pump On Count
Application
Bootcode
NIBP Code
2251
J00.19
V1.00
LM3.386
RETURN
Figure 4-4 The System Information Service Menu
The earlier paragraphs 4.8 and 4.9 illustrated a way in which the System
Information menu may be used for troubleshooting and diagnosing problems
with the Battery, LCD Display, and Backlight Inverter FRU items.
This screen displays several system-related items:
Note: The first three data items will be lost when the board is replaced. It is
recommended that the values be recorded on the service log.
•
Monitor On-time: Displays the number of hours, rounded to the
nearest hour, that the Main PCB has been operational. This value
may not be reset. (Note that this value is stored in non-volatile
memory, so when a new Main PCB is installed, this value will be
set at zero automatically.)
•
Backlight On-time: Displays the number of hours, rounded to the
nearest hour, that the TFT COLOR DISPLAY Backlight has been
operational. This value may be reset to zero, for instance at the
time when a technician changes the backlight or installs a new TFT
COLOR DISPLAY.
16-00118-01
Copyright © 2004 Analogic Corporation
All Rights Reserved
4-11
Troubleshooting Diagnostics
LIFEGARD ICG Service Manual
•
Battery Deep Discharges: Displays the number of charge/deepdischarge cycles seen by the battery (where the charge/deepdischarge cycle is defined in the Power Supply Specification
document). This value may be reset to zero, for instance at the
time when a technician installs a new battery.
•
NIBP Pump On Count: Displays the number of times the NIBP
pump has been activated. This value may be reset to zero, for
instance at the time when a technician installs a new pump.
•
System software version: Displays the revision level of the system
software. (Note that this revision level is also momentarily shown
on the TFT COLOR DISPLAY as part of the Copyright Screen.)
This value may not be changed by the user.
When in the System Information screen, the knob may be rotated to select
any of the “changeable” items. If one of those items is selected, a press of
the knob will cause a pop-up menu to appear. The first item in the pop-up
will read Make no change; the second item in the pop-up will read Reset to
zero. Exiting the screen is accomplished in the normal manner, by selecting
Return.
4.11.4 Accessing the NIBP Test (Figure 4-5)
After returning to the Service Menu screen, use the knob to select the NIBP
Test option in that screen.
NIBP Test
Pressure:
(mmHg)
179
Proportional Valve: OPEN
Safety Valve: OPEN
Press "NIBP" to activate pump; release to stop pump.
Press "Alarm Silence" to open proportional valve and deflate
at 3 mmHg/sec; release to close valve.
Press "Volume" to open both valves; release to close valves.
Press "Scroll" to perform offset adjust.
RETURN
Figure 4-5. Displaying the NIBP Test Information
The LIFEGARD ICG NIBP Test mode facilitates trouble-shooting problems
and performing compliance testing for the NIBP sub-system. Typically,
when these tests are performed, the pneumatic system is connected to an
external pressure-reading device and a closed reference volume. The NIBP
Test mode provides a real-time numeric display of the pressure in the
pneumatic system, means for controlling the pump and valve, and a display
indicating whether the valve is open or closed. These elements are described
below:
•
4-12
Pressure Display: The real-time value of the system pneumatic
pressure is displayed in mmHg. The value is updated at the rate of
16-00118-01
Copyright © 2004 Analogic Corporation
All Rights Reserved
LIFEGARD ICG Service Manual
Troubleshooting Diagnostics
approximately two times per second. The value is displayed using
the bold font.
•
Valve Display: The display indicates whether the valve is open or
closed.
•
Activate pump: For as long as the monitor front-panel NIBP button
is pressed, the pump will run. If system pressure reaches
the hardware overpressure protection point (</= 330 mmHg), the
safety valve will open, and the pump will be disabled until the
pressure falls below the safety threshold.
•
Deflate: For as long as the monitor front-panel Alarm Silence
is pressed, the valve will open and bleed off pressure
button
at the rate of 3 ± 1 mmHg/sec.
•
Open Valve: For as long as the monitor front-panel Volume button
is pressed, the valve opens to maximum and remains so for as
long as the button is pressed.
•
Offset Adjust: A momentary press of the monitor front-panel Scroll
button
will invoke the “zero calibration” routine that is
performed immediately prior to each blood pressure measurement.
This routine looks at the pressure in the system, and if the pressure is
non-zero, an offset is applied which causes the system pressure to be
displayed as “zero”.
When in the NIBP Test screen, the Return item is always highlighted; a
press of the knob will return the user to the Service Menu. Rotating the
knob while in the NIBP Test screen will have no effect.
16-00118-01
Copyright © 2004 Analogic Corporation
All Rights Reserved
4-13
Troubleshooting Diagnostics
LIFEGARD ICG Service Manual
4.12 Checking Monitoring Performance
[Reference : Step 6 (Figure 4-1)]
Upon completion of any tests of the powering, displaying, and/or printing
functions, the tests identified in this paragraph are intended to check the three
basic monitoring modes:
•
Cardiac Output
•
ECG
•
NIBP
Because these tests are required to ensure that the repaired/maintained
monitor meets all functional performance and safety specifications and
requirements, they have all been placed in a separate chapter, Chapter 6. The
testing described in Chapter 6 is a requirement to complete the servicing
operation.
You will find step-by-step instructions for performing the tests described in
Chapter 6 and, as shown in Figure 4-1, they are part of this guide to
troubleshooting.
Analysis of the results of the sequence of NIBP tests is designed to isolate a
malfunction to one of the parts included in the FRU Pneumatics Kit. You
will find a coil of plastic tubing in the FRU Pneumatics Kit. A specified
length may be cut to replace a segment of the tubing harness described in the
breakdown drawings of paragraph 3.6 in Chapter 3 Monitor Description. A
diagnosed failure of the microcomputer processing of the sensed pressures
requires removal and replacement of the FRU Main PCB.
4-14
16-00118-01
Copyright © 2004 Analogic Corporation
All Rights Reserved
5
FRU REMOVAL AND REPLACEMENT
5
FRU REMOVAL AND REPLACEMENT ................................................................... 5-1
5.1
5.2
5.3
5.4
5.5
5.6
5.7
5.8
5.9
5.10
5.11
5.1
GENERAL ................................................................................................................ 5-1
SAFETY PRECAUTIONS ............................................................................................ 5-2
OVERVIEW OF THE REMOVAL PROCEDURES ........................................................... 5-2
REMOVAL OF NAVIGATION KNOB ASSEMBLY (10-62940-01) ................................ 5-4
REMOVING FRU BATTERY (10-62944-01) ............................................................. 5-5
PRINTER HOUSING ASSEMBLY AND PRINTER SUB ASSEMBLIES .............................. 5-8
SEPARATING THE CASE ASSEMBLIES .................................................................... 5-11
REAR CASE ASSEMBLIES ...................................................................................... 5-12
REMOVING FRONT-CASE ASSEMBLIES.................................................................. 5-19
MAIN PCB ASSEMBLY .......................................................................................... 5-21
LCD COLOR DISPLAY ASSEMBLY ........................................................................ 5-23
General
Chapter 5 provides step-by-step procedure to locate and to remove the
suspect component. The instructions also may contain details of the
assembled components.
NOTE:
Replacement FRU assemblies are furnished as a complete
spare. That is, no additional subassembly or adjustment work is
required prior to reinstallation in the monitor.
NOTE:
Retain all washers and fasteners for subsequent replacement
actions.
NOTE:
Provide a clean, padded surface on which to place the monitor
front case when disassembling.
Removal and Replacement procedures for each FRU assembly are contained
in a single subparagraph of this chapter. Components that may be required
as replacements for faulty parts within an assembly may be furnished in a
spares kit.
Appropriate special tools and/or accessories are described within the relevant
paragraph as required in use.
16-00118-01
5-1
Copyright© 2004 Analogic Corporation
All rights reserved
FRU Removal and Replacement
LIFEGARD ICG Operator’s Manual
In general, replacement procedures are performed in the reverse order of the
removal process, and are not otherwise described. However, where special
handling or safety precautions are required in the reassembly, they are
included in the relevant chapter.
5.2
Safety Precautions
WARNING:
Review the precautions in Chapter 2 Safety, and pay particular attention
to those that are relevant to removal and/or replacement of FRU items.
WARNING:
Observe ESD (electrostatic discharge) precautions when working
within the unit. Before you remove any module, make sure you are
wearing ESD protection and you are working in a grounded
environment.
WARNING:
If the internal battery cable has been disconnected, pay particular
attention to the polarity of the power leads before reattaching. If the
battery cable polarity is reversed, it is likely that circuit damage will
occur.
5.3
Overview of the Removal Procedures
5.3.1
General
As shown in Figure 5-1, front and rear case assemblies are parts of a
clamshell architecture. The rear case assembly includes an add-on Housing,
within which are the 6-volt Battery and the Printer assembly. The rear case
includes the Pneumatic Subsystem of the NIBP function. Within the front
case are the Main PCB, (with its Backlight Inverter daughter board, and the
LCD color display. Mounted on the front panel of the front case assembly
are the speaker assembly (inside) and the keypad assembly (outside). Cables
accomplish interconnections of power and signals between assemblies. The
FRU Navigation Knob is accessible without disassembly of the two
clamshell case assemblies. However, the knob shaft and sensing
mechanisms are mounted on the internal FRU Main PCB assembly.
Complete disassembly to the lowest FRU level within an assembly is
described in this chapter.
5-2
16-00118-01
Copyright© 2004 Analogic Corporation
All rights reserved
LIFEGARD ICG Operator’s Manual
FRU Removal and Replacement
Figure 5-1. LIFEGARD ICG Clam-Shell Architecture
5.3.2
Disassembly Narrative
A major objective of the disassembly and replacement actions is to minimize
the interaction with assemblies that need not be removed.
Removal and replacement of the Navigation Knob, for example, can be
accomplished without additional disassembly procedures. Removal and
replacement of Printer assemblies can be accomplished after removal of the
Printer Housing and disconnecting two interface cables. Further disassembly
may be required to access the suspect FRU within the Printer group, but no
further interaction with the assemblies within the clamshell is required.
Removal and replacement of the battery can be accomplished after the printer
group of assemblies (without further disassembly) is removed and after the
power leads are disconnected from the battery terminals.
Removal of the leads to the battery and disconnecting the printer I/O cable
from the printer assembly provides the needed slack to separate the front and
rear clamshell case assemblies. Separation is then accomplished by
removing the attaching screws in the four corners of the case.
Removal of FRU subassemblies from the FRU Main PCB is relatively
independent, requiring the removal of attaching hardware and disconnecting
cables specific to the FRU being removed. Removal of the FRU Main PCB,
however, requires removal of all connections and attachments of FRU
subassemblies.
16-00118-01
5-3
Copyright© 2004 Analogic Corporation
All rights reserved
FRU Removal and Replacement
5.4
LIFEGARD ICG Operator’s Manual
Removal of Navigation Knob Assembly (10-62940-01)
The Knob assembly includes the knob and compression ring, as shown in the
partial exploded view drawing of Figure 5-1. Figure 5-1 also includes a
photograph of the case mold and of the knob to illustrate the hole in th0e
molded front panel through which the knob shaft slides. The compression
ring compresses the knob’s split shaft to clamp the knob securely to the
subassembly on the Main PCB shown in Figure 5-2.
Split
sides
Knob
Main
PCB
Compression
Ring
Compression
Ring
Figure 5-2. Molded Navigation Knob and Front Panel
Navigation
Encoder
Assembly
Navigation
Sense Shaft
Figure 5-3. Navigation Shaft Encoder Subassembly on Main PCB
WARNING:
High Voltage is developed within the monitor to power the display
backlight inverter.
Remove the battery before separating front and rear case
assemblies.
5-4
16-00118-01
Copyright© 2004 Analogic Corporation
All rights reserved
LIFEGARD ICG Operator’s Manual
5.5
Removing FRU Battery (10-62944-01)
Step Action
1
2
3
Remove all power
connections to the
monitor.
Check to see that the
front-panel powerindicating LED’s are
OFF.
FRU Removal and Replacement
Illustration, Notes/Comments
Power LEDs Not Lit
Using the appropriate
size flat-head
screwdriver, remove the
two plastic screws
fastening the housing to
the rear case.
Remove the housing.
Retain the screws for
reassembly.
]
16-00118-01
5-5
Copyright© 2004 Analogic Corporation
All rights reserved
FRU Removal and Replacement
Step
4
LIFEGARD ICG Operator’s Manual
Action
Illustration, Notes/Comments
Disconnect the Printer
I/O Cable Assembly
from the FRU Printer
Interface Board.
Printer I/O Cable
5
Using the appropriate
size Phillips-head
screwdriver, remove the
four screws fastening the
Battery Bracket to the
rear case.
Note that the illustrated screwdriver is first unfastening
the screw that attaches the grounding strap from the
Main PCB to the metal Battery Bracket.
Printer Housing
6
Remove the Printer
Assembly.
Retain the removed
attaching screws and
washers for reassembly.
Printer Assembly
Battery Bracket
5-6
16-00118-01
Copyright© 2004 Analogic Corporation
All rights reserved
LIFEGARD ICG Operator’s Manual
Step
Action
7.
The battery space
provides a very snug fit
for the battery, the
battery cables, and the
Printer I/O Cable. It may
be necessary to insert a
screwdriver through the
hole beneath the battery
and lift the battery up out
of its space enough to
grasp it.
8
Lift the battery from the
case assembly.
9
Carefully disconnect the
power leads from the
battery terminals. The
other end of the battery
cable is connected to the
Main PCB, and is part of
the Main PCB FRU
assembly.
FRU Removal and Replacement
Illustration, Notes/Comments
Note there is a red dot placed on the battery to identify
the red-colored battery lead to be connected to that
terminal.
16-00118-01
5-7
Copyright© 2004 Analogic Corporation
All rights reserved
FRU Removal and Replacement
5.6
LIFEGARD ICG Operator’s Manual
Printer Housing Assembly and Printer Sub assemblies
5.6.1
FRU Printer Housing (10-62950-01)
This FRU contains the Printer Housing, Paper Cutter, and Rear Label.
The housing was removed in the process of replacing the battery. Refer to
the previous paragraph.
5.6.2
Printer FRU Assemblies
At its top-level, this assembly contains subassemblies and components listed
below and shown in Figure 5-4.
Fig.
Ref. #
1
2
Description
FRU Paper Door Assembly
FRU Printer Interface Board Assembly () and connector
for its attached cable,
FRU #
10-62948-01
10-62948-01
FRU Cable Assembly
10-62949-01
3
FRU Thermal Printer Assembly, including Lever Shield
10-62947-01
4
FRU Printer and Door Bracket Assembly
10-62946-01
5
FRU Battery Bracket Assembly
10-62945-01
Figure 5-4. LIFEGARD ICG Printer Assemblies
5-8
16-00118-01
Copyright© 2004 Analogic Corporation
All rights reserved
LIFEGARD ICG Operator’s Manual
5.6.3
Step
1
2
FRU Removal and Replacement
Disassembling the Printer Assembly
Action
Illustration, Notes/Comments
Remove the four
screws that attach the
printer assembly from
the FRU Battery
Bracket.
Lift Printer assemblies
from Battery Bracket.
3
Turn over to obtain
access to the FRU
Printer Interface board.
4
Use appropriate-size
Phillips-head
screwdriver to remove
the screw fastening the
tie wrap to the Interface
Board and board
mounting.
16-00118-01
5-9
Copyright© 2004 Analogic Corporation
All rights reserved
FRU Removal and Replacement
LIFEGARD ICG Operator’s Manual
Warning: Observe all
ESD precautions in this
action.
Carefully disengage the
ribbon-cable connector
from the board mount.
Do not remove entirely,
This should permit the
ribbon cable to be lifted
from its pressure
connector.
5
Disengage the ribbon
cable from its
connector.
Using the appropriatesize Phillips head
screwdriver, remove the
remaining three screws
that fasten the Interface
Board to the assembly.
The FRU Printer
Interface Board may
now be removed for
replacement
6
To remove the thermal
printer: turn the printer
assembly over.
7
Use appropriate size
Phillips-head screwdriver
to remove the four screws
fastening the Printer
Bracket to the Battery
Cover.
5-10
16-00118-01
Copyright© 2004 Analogic Corporation
All rights reserved
LIFEGARD ICG Operator’s Manual
5.7
8
Using a small jeweler’s
screwdriver, remove the
three plastic screws
attaching the printer to the
Printer Bracket Insulator
9
Separate the FRU Thermal
Printer from the Insulator
Board.
FRU Removal and Replacement
Separating the Case Assemblies
•
Complete the steps to remove the 6V Battery, as described in paragraph 5.5.
•
Disconnect the Printer Cable from the Printer Interface Board.
•
The front and rear case assemblies are attached by a long screw at each corner
of the case assembly. Using an appropriate size Phillips-head screwdriver,
remove the four screws attaching the front and rear case assemblies.
Figure 5-5. Separating Case Assemblies
16-00118-01
5-11
Copyright© 2004 Analogic Corporation
All rights reserved
FRU Removal and Replacement
5.8
LIFEGARD ICG Operator’s Manual
Rear Case Assemblies
•
•
Place the monitor face down on a clean surface.
Carefully lift the rear-case assembly and place it so that it is
supported just behind the remaining assembly.
Figure 5-6 illustrates some of the connections that retain the Main PCB
attached to the rear-case assemblies
NIBP Pump
Power, Valve
Control Cables
Battery
Power
Cable
Plastic Air
Tubing
Ground
Strap
Printer I/O
Cable
.\
Figure 5-6. Connecting the Main PCB to Rear-Case Assemblies.
Figure 5-7 is an exploded-view drawing of the Front and Rear Case
Assemblies after the battery leads, the ground-strap spade terminal, and
Printer Cable have been disconnected from the Main PCB, and the FRU 6V
Battery has been removed. Their connectors on the Main PCB are identified
as indicated in the drawing and in the table that follows:
5-12
16-00118-01
Copyright© 2004 Analogic Corporation
All rights reserved
LIFEGARD ICG Operator’s Manual
FRU Removal and Replacement
Table 5-1. MAIN PCB Connectors for Rear Case Cable
Assemblies
Fig.
Ref.
1
2
3
Connector Description
Battery Spade Terminals
Power Leads soldered to Main PCB
Printer Cable Connector
Printer Cable Assembly
Ground Strap Connector
Ground Cable Assembly
FRU#
10-62944-01
(Battery)
(Main PCB)
10-62949-01
(Main PCB)
10-62941
2
3
1
Figure 5-7. Main PCB Connectors for Rear Case I/O Cables
16-00118-01
5-13
Copyright© 2004 Analogic Corporation
All rights reserved
FRU Removal and Replacement
LIFEGARD ICG Operator’s Manual
Figure 5-8 illustrates the connections of cables that power the NIBP pump
motor and cables for control of the air valves.
Disconnect them in order to continue the removal of rear-case FRU
assemblies. See Figure 5-9
Pump
Power
Connector
Air Valve
Connectors
Figure 5-8. Air Pump and Valve Connectors
Air Pump
Power
Connector
Air Valve
Connectors
Air Tubing
Figure 5-9. Rear Case Assembly, Pneumatic Connectors Removed
5-14
16-00118-01
Copyright© 2004 Analogic Corporation
All rights reserved
LIFEGARD ICG Operator’s Manual
5.8.1
FRU Removal and Replacement
Removal/Replacement of Pneumatic Tubing
There is no single FRU of the assembled components comprising the
Pneumatic Assembly. However, the components, less the tubing, are
contained in FRU Pneumatic Kit 10-62943-01. A roll of tubing is contained
in FRU Small Parts Kit 10-62930-01.
Action
Illustration, Notes/Comments
Exit of
Air Pump
Elbow
Fitting
Start with the
disassembled state of
the Rear Case
Assembly shown in
Figure 5-9.
Observe the
precaution
described below.
Remove the air
tubing connections
to the valves, to the
exit at the top of the
pump, and to the
elbow fitting.
Valves
CAUTION:
The left valve (facing the assembly) has a very small orifice restrictor
inserted in its orifice. The restrictor may become lodged in the tubing
as it is removed. If so, retrieve the restrictor and reinsert into the left
valve. The size of the restrictor is indicated by comparison with a
penny (U.S.) shown below.
A spare Orifice Restrictor is included in the Pneumatics Kit.
16-00118-01
5-15
Copyright© 2004 Analogic Corporation
All rights reserved
FRU Removal and Replacement
•
LIFEGARD ICG Operator’s Manual
Remove the suspect tubing segment. Refer to Figure 5-9 for identification of
the tubing segments in the assembled harness illustrated in Step 1.
•
Locate the coil of tubing in the FRU Small Parts Kit.
•
Refer to the table of tubing lengths shown in Figure 5-10.
•
Cut the required length of tubing from the spare coil.
•
Replace in the “harness”.
•
Reconnect the tubing in the rear-case assembly.
Figure 5-10. Tubing Harness Segments
5.8.2
Pneumatic Pump Assembly
The 2-cylinder rolling air pump and the two valves (V1 and V2) of the FRU
Pneumatic Kit comprise an assembly that is fastened to the pump and valve
bracket by a tie wrap. The bracket-mounted assembly is fastened to one of
the two bosses on the rear case by attaching parts (screw and washer). The
circular cutout of the bracket fits over the second boss on the case. The
attaching screw mates with a threaded insert of the boss. The screw is of
sufficient length to extend through the case to provide one of the mounting
posts for the printer assembly bracket.
Figure 5-11 illustrates the state after the bracket-mounted assembly has been
removed. Figure 5-12 is a composite that includes an exploded view of the
assembly and a photograph of the removed assembly.
5-16
16-00118-01
Copyright© 2004 Analogic Corporation
All rights reserved
LIFEGARD ICG Operator’s Manual
FRU Removal and Replacement
Attaching
Hardware
Upper Boss
Bracketmounted
Components
Figure 5-11. Removed Bracket-Mounted Pump Assemblies
Mounting
Bracket
Valves
2-Cylinder
Pump
16-00118-01
5-17
Copyright© 2004 Analogic Corporation
All rights reserved
FRU Removal and Replacement
LIFEGARD ICG Operator’s Manual
Figure 5. 12. Bracket-Mounted Assembly
5.8.3
Pneumatic NIBP Fittings
The exploded-view drawing of Figure 5-13 (two views) illustrates the
mounting of the NIBP hose fitting in the side of the rear case.
NIBP Plug
Elbow
Fitting
Figure 5-13. NIBP Fitting
5-18
16-00118-01
Copyright© 2004 Analogic Corporation
All rights reserved
LIFEGARD ICG Operator’s Manual
5.9
FRU Removal and Replacement
Removing Front-Case Assemblies
5.9.1
Location and Identification
A partial exploded-parts drawing (Figure 5-14) illustrates the FRU
assemblies within the Front-Case Assembly. They are listed in the table that
follows.
Table 5-2. Front Case FRU Assemblies
Fig.
Ref.
#
Description
FRU Part #
1
Main PCB
10-62931-01
2
Backlight Inverter
10-62933-01
3
Display Mounting Bracket
10-62935-01
4
LCD Color Display
10-62934-01
5
Display Window
10-62937-01
6
Keypad
10-62938-01
7
Navigator Knob
1062940-01
8
Speaker and Cable Assembly
10-62939-01
6
5
4
3
7
2
8
1
Figure 5-14. Front Case FRU Assemblies
16-00118-01
5-19
Copyright© 2004 Analogic Corporation
All rights reserved
FRU Removal and Replacement
5.9.2
LIFEGARD ICG Operator’s Manual
FRU Speaker Assembly (19-62939-01)
The FRU Speaker Assembly includes the speaker with attached cable,
mounting plate, and mounting foam. The assembly is mounted on the inner
of the front case, as illustrated in Figure 5-15.
Figure 5-15. ICG Speaker Assembly Mounted to Front Case (Inner)
To remove the Speaker Assembly:
Disconnect the Speaker Cable
from its connector on the
Main PCB.
1
Using appropriate-size
Phillips head screwdriver,
remove the three screws
attaching the Speaker
Assembly to the front panel.
Remove the Speaker
Assembly and Mounting
Foam.
5-20
16-00118-01
Copyright© 2004 Analogic Corporation
All rights reserved
LIFEGARD ICG Operator’s Manual
FRU Removal and Replacement
Remove the screw at the
vertex of the triangular
Mounting Plate.
2
Loosen, but do not remove,
the other two screws
retaining the mounting plate
to the front panel.
Slide the Speaker out from
under the two loosened
screws.
The Mounting Foam is included in the FRU Speaker Assembly (for
replacement, if needed).
5.10 Main PCB Assembly
The ICG Main PCB Assembly includes the following FRU Assemblies:
•
The FRU Main PCB with attached Power Cable (10-629-031-01),
•
The FRU Backlight Inverter Assembly ((10-62935-01)
•
•
5.10.1
FRU Cable Assembly, connecting input power to the Backlight
Inverter from the Main PCB (10-62933-01)
FRU LCD Color Display Assembly (10-62934-01)
Removal of Backlight Inverter Assembly (10-62935-01)
The Backlight Inverter Assembly is mounted on standoffs that attach to the
Main PCB.
Two cables are connected to the Inverter. One supplying power from the
Main PCB, and one supplying high voltage generated by the circuit to the
backlight of the LCD display.
Disassembly involves removing the attaching screws and disconnecting the
cable assemblies from each end of the board.
16-00118-01
5-21
Copyright© 2004 Analogic Corporation
All rights reserved
FRU Removal and Replacement
Step
LIFEGARD ICG Operator’s Manual
Action
Illustration, Notes/Comments
Disconnect the cable
assemblies at the input
and output ends of the
Inverter Board.
1.
2
The input cable
assembly is a separate
FRU (10-62933-01).
The output end is
attached to the
Backlight of the LCD
Display.
Input
Connector
FRU Cable
Output
Connector
To Backlight
Inverter
Using a small
jeweler’s screwdriver,
remove the plastic
attaching screws.
A tie wrap may have
been used to keep the
standoff with the FRU
cable.
CAUTION:
!
When replacing the Backlight Inverter assembly, use caution
when attaching the FRU assembly to the plastic standoffs.
Excessive torque may “decapitate” the plastic screw head and
leave the remaining portion of the screw in the standoff.
Spare plastic components are included in the AN4700 Small
Parts Kit 10-62930-01.
5-22
16-00118-01
Copyright© 2004 Analogic Corporation
All rights reserved
LIFEGARD ICG Operator’s Manual
3
FRU Removal and Replacement
Lift the FRU
Backlight Inverter
from the Main PCB.
Disconnect the PCBend of the FRU Cable
Assembly, if required.
5.11 LCD Color Display Assembly
The FRU LCD Color Display (10-62934-01) and the FRU Display Mounting
Bracket (10-62935-01) to which the LCD Display is attached comprise the
LCD Color Display Assembly.
Figure 5-16. The LCD Display Assembly
The disassembly procedure includes removing the assembly from the Main
PCB, and then separating the display from its mounting board.
16-00118-01
5-23
Copyright© 2004 Analogic Corporation
All rights reserved
FRU Removal and Replacement
5.11.1
Step
LIFEGARD ICG Operator’s Manual
Removal of LCD Color Display
Action
Illustration, Notes/Comments
Disconnect the speaker
cable from the Main PC.
1
Speaker
Cable
Connector
Mounting
Bracket
The Mounting Bracket
provides for three
attachments to the Main
PCB and one
(illustrated) attachment
to the Front Case
Assembly.
LCD Bracket
Attaching
Screws
Separate the Main PCB
from the Front Case
Assembly.
2
Locate and unfasten the
three screws fastening
the bracket to the PCB.
Pass-through
for Case
Attachment
5-24
16-00118-01
Copyright© 2004 Analogic Corporation
All rights reserved
LIFEGARD ICG Operator’s Manual
Step
3
4
Action
FRU Removal and Replacement
Illustration, Notes/Comments
Carefully lift the
assembly from the
board. This action
should disconnect the
LCD’s connector from
its mate on the PCB.
Connectors
for Main
PCB to LCD
Display
FRUs
Push the Backlight
Inverter Cable through
the slot in the Main PCB
to free the LCD
Assembly from the
board.
16-00118-01
5-25
Copyright© 2004 Analogic Corporation
All rights reserved
FRU Removal and Replacement
5
5.11.2
LIFEGARD ICG Operator’s Manual
Remove the four screws
that attach the two FRU
assemblies.
FRU LCD Color Display Replacement
When reassembling the spare FRU, refer to Chapter 3 Monitor Description,
paragraph 3-6 Mechanical Architecture, for guidance. Use components from
the Small Parts Kit, as needed, for fastening hardware.
5-26
16-00118-01
Copyright© 2004 Analogic Corporation
All rights reserved
6
Post-Servicing Tests
6
Post-Servicing Tests....................................................................................................... 6-1
6.1
General................................................................................................................... 6-1
6.2
Testing Safety Considerations ............................................................................... 6-2
6.3
Functionality Tests................................................................................................. 6-3
6.4
NIBP Tests ............................................................................................................. 6-4
6.5
Monitor Functionality Tests................................................................................. 6-11
6.6
Safety Tests.......................................................................................................... 6-14
6.1
General
This chapter provides instructions for two servicing functions: Diagnosing
suspected operational malfunctions (Step 6 of Figure 4-1), and Testing for
operational readiness after servicing actions.
There are two types of tests to be performed before a serviced monitor is
returned to operation. They are:
•
Functionality Tests
•
Safety Tests
Before attempting the full complement of functionality and safety tests, it is
recommended that the serviced monitor be tested to evaluate the specific
servicing that was performed.
Table 6-1 lists the tests that should be performed when accomplishing
specific servicing events.
Table 6-1. Post-Servicing Tests
Service Event (When performing...)
Test Block Required (...complete
these tests)
Installation
• Visual •Power On
Monitor exchange
• Visual •Power On
• Power On Pneumatic Leakage
• Test
• All Safety tests
• Power On Battery Performance
• All Safety tests
•
• Power On Pneumatic Leakage
• Test
• All Safety tests
• Power On Pneumatic Leakage
• Test
• All Safety tests
Monitor opened
Battery replacement
Speaker replacement
NIBP pump replacement
6-1
16-00118-01
Copyright © 2004 Analogic Corporation
All Rights Reserved
Troubleshooting Diagnostics
6.2
LIFEGARD ICG Service Manual
Testing Safety Considerations
!
CAUTION:
Perform all leakage tests after the monitor has been serviced.
NOTE:
The monitor must be placed in NIBP Test mode of the Service
Menu, with the NIBP test screen active for each of the NIBP tests.
NOTE:
Before beginning the Battery Performance test, ensure that the
monitor is disconnected from the Battery Eliminator.
6-2
16-00118-01
Copyright © 2004 Analogic Corporation
All Rights Reserved
LIFEGARD ICG Service Manual
6.3
Troubleshooting Diagnostics
Functionality Tests
6.3.1
Power-On-Self-Test (POST)
Do not connect any patient monitoring input connectors or cables to the
monitor.
If there are any such connections, disconnect them.
Step
1
2
3
Action
Connect the Battery Eliminator to
the mains and to the Monitor.
Verify that appropriate front-panel
LED indicator is lit.
Illustration/Comments/Notes
The LED above the ac connector symbol
should be lit.
If the monitor is Off, press the
ON/STANDBY button.
Verify that the monitor response is
correct.
The monitor must perform the following
sequence:
a. The screen backlight illuminates.
b. Three consecutively higher pitched
"chimes" sound while the version
numbers of the boot and operational
software display.
c. The screen displays a short-time
array of vertical color bars to
indicate the capability of the
monitor to produce color-coded
displays when commanded.
d. After successful completion, the
main monitoring screen displays no
vital sign numeric values or
waveforms display.
e. If any error codes are displayed, or
the screen remains blank, refer to
Chapter 4 Troubleshooting
Diagnostics.
16-00118-01
Copyright © 2004 Analogic Corporation
All Rights Reserved
6-3
Troubleshooting Diagnostics
6.4
LIFEGARD ICG Service Manual
NIBP Tests
NOTE:
T
h
e
The pneumatic system includes an over-pressure safety limit
function and a safety period time-out function. These safety
functions may interfere with NIBP tests described in this section.
In order to avoid activating these safety functions, do not pressurize
the system above 260 mmHg (36 kPa) and do not pressurize the
system for time periods that exceed 150 seconds.
N
I
B
The NIBP functionality tests include the following tests of Pneumatic System
Functionality that must be conducted in the sequence shown.
1. Pressure Transducer Accuracy
2. Pneumatic Leakage
3. Inflation Rate
4. Over-Pressure
5. Deflation Rate
Required Accessories, Materials, and Documentation\
NIBP Simulator: Bio-Tek BP Pump 2, or equivalent
Stopwatch: Manual or Electronic
NIBP Hose
Setup
At the Monitor:
•
Power ON the monitor
•
Access the Setup Menu (Appendix E)
•
Enter the code for Service Menu (Appendix E)
• In the Service Menu, select NIBP Test
The NIBP Test screen displays test parameter values as the test
proceeds.
At the Simulator
6-4
16-00118-01
Copyright © 2004 Analogic Corporation
All Rights Reserved
LIFEGARD ICG Service Manual
Step
Troubleshooting Diagnostics
Action
1
Turn the NIBP simulator On.
2
Perform the following sequence:
a. Press the Home button
b. Press the Pressure Tests button
c. Press the Pressure Leak Test button
d. Press the Setup button.
e. Press 2, 5, 0, and then Enter
f. Set the Cuff to Internal
3
Connect the simulator tubing to the NIBP patient monitoring input
connector.
If the Simulator does not display a 0 before starting the test, perform
the zeroing function that follows.
1. Disconnect the hose from the simulator, if connected.
2. Press Home.
3. Press SETUP.
4. Press MORE.
5. Press MORE again
6. Press ZERO PRESSURE.
7. Press ZERO.
8. Press Home to return to main menu.
9. Reconnect the hose
6.4.1
Pressure Transducer Accuracy Test
Step
Action
1
Confirm that the simulator displays "Leak Test"
2
Press the Volume button to ensure that both valves are closed.
3
Perform an offset adjustment so that the simulator and monitor
both display a pressure of 0 mmHg or kPa.
If needed, zero the simulator
4
Press Start on the simulator.
16-00118-01
Copyright © 2004 Analogic Corporation
All Rights Reserved
6-5
Troubleshooting Diagnostics
Step
5
6.4.2
LIFEGARD ICG Service Manual
Action
Allow 15-20 seconds for the pressure to stabilize. The pressure
displayed on the monitor and on the simulator should be within 5
mmHg (0.7 kPa) of one another. Document the difference between
the simulator value and the monitor value (X1).
6
Press the Stop button on the simulator to stop the test.
7
Press and hold the Volume button until the monitor displays a
pressure of 0 mmHg or kPa.
8
If no further NIBP tests are to be conducted, turn the monitor
Standby. Normal monitoring operation returns the next time the
monitor is turned On.
Pneumatic Leakage Test
Step Action
1
Turn the simulator on.
2
Perform the following sequence at the simulator:
a. Press the Home button.
b. Press the Pressure Tests button.
c. Press the Pressure Leak Test button.
d. Press the Setup button.
e. Press 3, 0, 0, then Enter.
f. f. Set the Cuff to Internal.
3
Confirm that the simulator test screen is active and displays "Leak
Test".
4
Press the Volume button at the monitor front-panel to ensure that
both valves are closed.
5
At the monitor, perform an offset adjustment so that the simulator
and monitor both display a pressure of 0 mmHg or kPa by doing
the following:
If needed, zero the simulator.
6
Press the NIBP button on the monitor’s front panel to activate the
pump. Hold the button until the monitor displays a pressure of
approximately 250 mmHg (33.3 kPa).
7
Allow 15-20 seconds for the pressure to stabilize. Record the
pressure displayed on the monitor (P1).
8
Start a one-minute timer. After one minute, record the pressure
displayed again (P2). The pressure should drop by no more than 6
mmHg (0.8 kPa) during the one-minute period. Calculate (P1 P2) and document the leakage test value (X2).
6-6
16-00118-01
Copyright © 2004 Analogic Corporation
All Rights Reserved
LIFEGARD ICG Service Manual
6.4.3
Troubleshooting Diagnostics
Inflation Rate Test
Step
1
2
3
4
Action
Turn the simulator on.
Perform the following sequence:
a.
b.
c.
d.
e.
f.
Press the Home button.
Press the Pressure Tests button.
Press the Pressure Leak Test button.
Press the Setup button.
Press 3, 0, 0, and then Enter.
Set the Cuff to Internal.
Press the monitor Volume button to ensure that both valves are
closed.
Perform an offset adjustment so that the simulator and monitor
both display a pressure of 0 mmHg or kPa by doing the following:
If needed, zero the simulator.
5
Press the NIBP button on the monitor’s front panel to activate the
pump, and simultaneously start the timer.
Hold the button until the monitor displays a pressure of 250
mmHg (33.3 kPa), and then stop the timer.
The inflation rate should be between 1 and 6 seconds.
Document the number of seconds (X3).
6
Press and hold the Volume button until the monitor displays a
pressure of 0 mmHg or kPa.
7
If no further NIBP tests are to be conducted, turn the monitor to
STANDBY. Normal monitoring operation returns the next time
the monitor is turned ON.
16-00118-01
Copyright © 2004 Analogic Corporation
All Rights Reserved
6-7
Troubleshooting Diagnostics
6.4.4
LIFEGARD ICG Service Manual
Over-Pressure Test
Step
1
Action
Turn the simulator on.
Perform the following sequence:
2
a. Press the Home button.
b. Press the Pressure Tests button.
c. Press the Pressure Relief button.
d. Press the Setup button.
e. Press 3, 3, 5, then Enter.
3
Confirm that the simulator is active and displays "Relief Valve
Test".
4
At the monitor, press the Volume button to ensure that both
valves are closed.
5
At the monitor, perform an offset adjustment so that the simulator
and monitor both display a pressure of 0 mmHg or kPa by doing
the following:
If needed, zero the simulator (see earlier description of procedure)
6
Press the Start button on the simulator. The peak value (X4)
shown on the simulator should be between 270 mmHg and 330
mmHg (35.9 kPa and 43.9 kPa). The pressure should return to 0
automatically on the monitor and simulator). Both conditions
should be true for the monitor to pass this test.
7
If no further NIBP tests are to be conducted, turn the monitor Off.
Normal monitoring operation returns the next time the monitor is
turned On.
6-8
16-00118-01
Copyright © 2004 Analogic Corporation
All Rights Reserved
LIFEGARD ICG Service Manual
6.4.5
Troubleshooting Diagnostics
Deflation-Rate Test
Step
Action
1
Turn the simulator on.
2
Perform the following sequence:
a. Press the Home button.
b. Press the Pressure Tests button.
c. Press the Pressure Leak Test button.
d. Set the Cuff to Internal.
3
4
Confirm that the simulator is active and displays "Leak Test".
Press the Volume button to ensure that both valves are closed.
Perform an offset adjustment so that the simulator and monitor
both display a pressure of 0 mmHg or kPa by doing the following:
5
a. Press the Contrast button on the monitor’s front panel.
b. If needed, zero the simulator.
Note—Complete steps 6-9 within 150 seconds.
6
Press and hold the NIBP button on the monitor’s front panel and
inflate to 250 ±10. Don’t go over 260, or safety deflation may
occur. (Slow the inflation rate by pulsing the button when the
pressure is over 200).
7
Allow 15-20 seconds for the pressure to stabilize. Record the
pressure displayed on the monitor (P1).
8
Press and hold the "Alarm off" button on the monitor to release
the pressure in steps of 3 mmHg (.4 kPa). Simultaneously, start
the timer.
9
Stop the timer when the pressure drops below 150 mmHg (20
kPa). Calculate the deflation rate (X5): (starting pressure - 150)/#
of seconds. The deflation rate should be <6 mmHg/s (0.80 kPa/s
10
Press and hold the Volume button until the monitor displays a
pressure of 0 mmHg or kPa.
11
If no further NIBP tests are to be conducted, turn the monitor to
Standby. Normal monitoring operation returns the next time the
monitor is turned On
16-00118-01
Copyright © 2004 Analogic Corporation
All Rights Reserved
6-9
Troubleshooting Diagnostics
6.4.6
LIFEGARD ICG Service Manual
Basic Pneumatic-Leakage (BPL) Test
Step
Action
1
Attach the NIBP cuff to the NIBP hose and the hose to the NIBP
patient monitoring input connector.
2
Wrap the cuff around itself and place it on a table for the test. DO
NOT place the cuff on your arm.
3
Turn the monitor On and enter the NIBP test screen located within
Diagnostic Mode.
4
5
Press the Volume button to close valves.
a. Press and hold the NIBP Start/Stop switch until the monitor’s
screen reads "250 mmHg" or "33.3 kPa"
b. Wait 15-20 seconds to allow the pressure to stabilize.
6
a. Note the value on the screen (P1), then start a timer.
b. After one minute, note the value on the screen (P2).
c. Calculate the difference between the two values (P1 - P2). The
value should be less than or equal to 6 mmHg (0.8 kPa).
7
Press and hold the Volume button until the screen shows the
pressure has released and the value is 0 mmHg or kPa.
8
Turn the monitor Off.
NOTE:
If the test fails, ensure the integrity of the cuff and
hose, and then repeat the test. If the test fails again,
verify the integrity of all the pneumatic tubing inside
the monitor.
6-10
16-00118-01
Copyright © 2004 Analogic Corporation
All Rights Reserved
LIFEGARD ICG Service Manual
6.5
Troubleshooting Diagnostics
Monitor Functionality Tests
The tests in this paragraph check the monitor’s performance in calculating
and displaying four parameters derived from simulated analog patient input
signals: HR, Z0, TFC, and VI. (Refer to Chapter 1 for definitions of the
parameter abbreviations.)
6.5.1
Required Accessories
• LIFEGARD ICG Patient Cable (Figure 6-1)
•
Analogic ICG Simulator or equivalent simulator (Figure 6-2)
Figure 6-1. ICG Patient Cable
Figure 6-2. ICG Simulator (Front and Back Labels)
16-00118-01
Copyright © 2004 Analogic Corporation
All Rights Reserved
6-11
Troubleshooting Diagnostics
6.5.2
LIFEGARD ICG Service Manual
4-Parameter Test
Examine the label on the rear of the LIFEGARD ICG Simulator. Note and
record the values of four (4) parameters for each position of the simulator
selector switch. Actual values are printed on the label at the time the
simulator was calibrated. Nominal values for the four (4) parameters are
shown in Table 6-2 below for information only.
CAUTION;
!
Evaluate monitor performance with respect
to the calibrated (label) values only.
Table 6-2. ICG Simulator Nominal Values
Switch
Position
1
2
Step
1
HR
Z0
TFC
VI
71
68
32.0
32.1
392
31.1
349
65.6
Action
Connect the ICG Patient Cable leads to the appropriate jacks on
the ECG simulator. Match the color coding of leads and
Simulator label.
2
Connect the ICG cable to the monitor rear input connector.
3
Set the ICG simulator selector switch to position #1.
4
Set the monitor as follows:
(Refer to the AN4700 Operator’s Manual, 912-82542V00
for detailed instructions.)
a. Power the monitor to ON.
b. Set the Display mode to All-Data Display screen.
c. Display the All-Data screen.
d. In the All-Data Menu (Select 8) replace one of the
default parameters with the VI parameter.
5
6
After the power-up sequence, and after the value has stabilized,
verify that the values of the parameters are within the specified
tolerances of the label values as shown below.
a. HR: ±5 bpm
b. TFC: ±1 1/kohm
c. VI: ±2 1/1000sec
Set the ECG simulator selector switch to position #2. After at
least five heartbeats, verify that the monitor displays values within
the specified tolerances of the label values as shown in the
previous step.
6-12
16-00118-01
Copyright © 2004 Analogic Corporation
All Rights Reserved
LIFEGARD ICG Service Manual
6.5.3
Troubleshooting Diagnostics
Alarm Test
This test uses the previous setup (Simulator switch position 2), and modifies
the monitor’s alarm limits so as to establish an alarm condition. The test
sequence also includes a verification of the monitor’s responses to pressing
the Alarm-silence button on its front-panel and the audio volume adjust
button on the front panel.
Step
1
2
3
4
5
6
7
8
9
10
11
Action
At the monitor,
(Refer to the AN4700 Operator’s Manual, 912-82542V00 for
detailed instructions.)
a. Set the display to the Main Screen.
b. Select the heart rate frame.
c. In the HR Menu, set the upper alarm limit to 60.
Verify that the audible alarm is activated, and that the Heart Rate
frame flashes, indicating that the heart rate is above the upper
alarm limit.
At the monitor front panel, press the audio volume adjust button.
Verify that the audio beep tone is changed in volume.
In the HR Menu, disable the alarm.
Verify that the audible alarm is silenced, and that the alarm-off
symbol appears in the HR frame.
In the HR Menu, enable the alarm.
Verify that the audible alarm is reactivated, and that the alarm-off
symbol is removed from the HR frame.
At the monitor front panel, press the Alarm Silence button
momentarily.
Verify that the audible alarm is silenced and the symbol for that
state appears in the flashing HR frame.
Press the monitor front-panel Alarm Silence button for less than1
second.
Verify that the audible signal is reactivated, and the alarm-silence
symbol is removed from the HR frame.
Press the Alarm Silence button for at least 2 seconds.
Verify that the Alarm Suspend screen replaces the HR Menu
screen in the display frame.
Press the Alarm Silence button for less than 1 second.
Verify that the HR Menu replaces the Alarm Suspend screen,
and that the audible alarm and flashing HR frame recur.
In the HR Menu reset the upper alarm limit to 170. Set the lower
limit to 80.
Repeat the procedure of steps 2 through 8 above.
16-00118-01
Copyright © 2004 Analogic Corporation
All Rights Reserved
6-13
Troubleshooting Diagnostics
6.6
LIFEGARD ICG Service Manual
Safety Tests
The procedure in this paragraph tests the amplitude of the ac and dc
components of the ICG patient cable current drivers.
6.6.1
ICG Drive Current, Test Setup
Required accessories, tools, etc.
• Patient Cable AN4700-AC030 (Figure 6-3)
• Digital Multimeter; (HP 3458A DVM, or equivalent)
• BNC-to-BNC coaxial cable
• Four (4) #8 Machine Screws (at least 2-inches long)
• Eight (8) Alligator Clips
G1
G2
G3
G4
G5
G6
G7
G8
Figure 6-3. ICG Patient Cable AN4700-AC030
Figure 6-3 illustrates the relative arrangement of the 8 leads of the Patient
Cable that are maintained in their relative configuration by the cable
organizer.
The leads are terminated in colored grippers, and are identified in Fig. 6-3 as
G1 through G8. The table that follows indicates the length of each lead,
from cable organizer to the gripper, as well as the color of the gripper and
location of the electrode to which it is connected (by the gripper) when used
in patient monitoring.
Lead ID
Fig. 6-3
Color
Length
(mm)
G1
G2
G3
Blue
Red
Red
180
130
180
Electrode Location
Left upper neck
Left lower neck
Left upper thorax
6-14
16-00118-01
Copyright © 2004 Analogic Corporation
All Rights Reserved
LIFEGARD ICG Service Manual
Troubleshooting Diagnostics
G4
G5
G6
G7
G8
6.6.2
Violet
Red
Violet
Blue
Red
130
180
130
180
130
Left lower thorax
Right upper thorax
Right lower thorax
Right upper neck
Right lower neck
ICG Driver Test Procedure
Assemble a test fixture as shown in Figure 6-4. Note that the “Monitor”
block includes the Battery Eliminator, connected to both the Mains and the
monitor.
G1
Alligator Clip
G7
ICG Patient Cable
DVM
Converter
ICG Monitor
G4
Alligator Clip
G6
Figure 6-4. Setup to Check ICG Drive Current
Step
1
2
3
4
5
6
7
Action
Refer to Figure 6-4.
Connect the BNC output of the test circuit to the Multimeter ac
input through a converter, if needed by the DVM.
Connect the ICG Patient Cable to the ICG Monitor.
Refer to Figure 6-3 for gripper identification.
Connect the designated grippers to the machine screws.
At the meter, select the ac current measurement mode; select
the 0 to 1 mA range scale.
At the monitor, use front-panel button to turn power on.
Verify that the measured ac component of the drive
current is within the values shown in the accompanying
table.
At the monitor, turn power to STANDBY (Off).
AC Drive Current
DC Drive Current
mA rms
µA dc
0.90 ≤ Amplitude ≤ 1.10
≤1.00
16-00118-01
Copyright © 2004 Analogic Corporation
All Rights Reserved
6-15
Troubleshooting Diagnostics
6.6.3
LIFEGARD ICG Service Manual
ICG/ECG Sense Test Setup
Refer to Figure 6-5.
Assemble a new test fixture, or use the fixture of paragraph 6.6.3 and remove
the grippers used in the ICG Drive Current test.
G2
Alligator Clip
G8
ICG Patient Cable
DVM
Converter
ICG Monitor
G3
Alligator Clip
G5
Figure 6-5. Setup to Check ICG/ECG Sense Circuit
Assemble a test fixture as shown in Figure 6-5.
Using the Digital Voltmeter, perform the setups and measurements shown in
the table that follows.
Verify the specified performance values.
6-16
16-00118-01
Copyright © 2004 Analogic Corporation
All Rights Reserved
LIFEGARD ICG Service Manual
Troubleshooting Diagnostics
Step
1
2
3
4
5
6
7
Action
Refer to Figure 6-5.
Connect the BNC output of the test circuit to the Multimeter dc
input.
(A converter may be needed to interface the BNC connector to
a connector to be used as input to the DVM.)
Connect the ICG Patient Cable to the ICG Monitor.
Refer to Figure 6-3 for gripper identification.
Connect the designated grippers to the machine screws.
At the meter, select the dc current measurement mode; select
the 0 to 1 mA range scale.
At the monitor, use front-panel button to turn power ON.
Verify that the measured dc component of the sense
circuit current is within the values shown in the previous
table.
At the monitor, turn power to STANDBY (Off).
16-00118-01
Copyright © 2004 Analogic Corporation
All Rights Reserved
6-17
Troubleshooting Diagnostics
6.6.4
LIFEGARD ICG Service Manual
ICG/ECG Leakage Tests
There are two additional leakage tests (Test #1 and Test #2) to be performed
as part of the patient safety test prior to release for operational use. Figures
6-6 and 6-7 provide necessary guides for the setups required to perform these
tests,
Leakage Test #1
Complete the setup shown in Figure 6-6.
Using the DVM, measure the current.
Verify that it is less than the specified maximum of 100 nA (100 nanoamps.)
G5
Alligator Clip
G3
ICG Patient Cable
DVM
Converter
ICG Monitor
G1
G7
Alligator Clip
G4
G6
Figure 6-6. Leakage Test #1 Setup
6-18
16-00118-01
Copyright © 2004 Analogic Corporation
All Rights Reserved
LIFEGARD ICG Service Manual
Troubleshooting Diagnostics
Leakage Test #2
Complete the setup shown in Figure 6-7.
Using the DVM, measure the current.
Verify that it is less than the specified maximum of 100 nA (100 nanoamps.)
Figure 6-7. Leakage Test #2 Test Setup
G8
Alligator Clip
G2
ICG Patient Cable
DVM
Converter
ICG Monitor
G1
G7
Alligator Clip
G4
G6
16-00118-01
Copyright © 2004 Analogic Corporation
All Rights Reserved
6-19
Troubleshooting Diagnostics
LIFEGARD ICG Service Manual
6-20
16-00118-01
Copyright © 2004 Analogic Corporation
All Rights Reserved
7
MAINTENANCE
7
MAINTENANCE .......................................................................................................... 7-1
7.1
General................................................................................................................... 7-1
7.2
Selecting A Language ............................................................................................ 7-2
7.3
Conditioning the Battery........................................................................................ 7-6
7.1
General
Chapter 7 provides instructions for performing maintenance tasks in addition
to the routine maintenance described in the AN4700 Operator’s Manual.
Qualified service personnel who are authorized to access the Service Menu
of the LIFEGARD ICG AN4700 Patient Monitor may perform the tasks
described in this chapter. Refer to Appendix E for password codes to access
the menus provided for qualified service personnel.
The two tasks described in this chapter are:
•
Selecting a language other than the one currently in use, and
•
Conditioning the 6V battery.
WARNING:
Prior patient data is deleted when a new language is selected.
Make a backup copy of the patient data you wish to use after a
new language is set up. That data will have to be reinserted
manually into the monitor after the new language has been
selected.
7-1
16-00118-01
Copyright © 2004 Analogic Corporation
All Rights Reserved
Maintenance
7.2
LIFEGARD ICG Service Manual
Selecting A Language
The first time that power is applied to the LIFEGARD ICG monitor, the
operator will see a pop-up screen in the opening display. At that time, the
operator may select any of the languages available in the monitor.
First Language frame in pop-up box
Last Language frame in pop-up box.
Thereafter, that language remains the default through every ON/STANDBY
powering cycle unless changed by qualified service personnel.
7.2.1
Using Menus to Change Language
Table 7-1 includes the actions required to change the default language when
using a service-available menu.
Step
1
Table 7-1. Selecting Language via Menu Actions
Action
Illustration/Note/Comment
At the monitor front panel,
turn monitor power on
On / Standby button.
2
7-2
Select Reuse Last Patient
Select Return
16-00118-01
Copyright © 2004 Analogic Corporation
All Rights Reserved
LIFEGARD ICG Service Manual
Step
Maintenance
Action
Illustration/Note/Comment
3
Select Status Frame;
display screen is
Status Menu.
Select Setup Menu
4
Select Power Up Defaults
Menu
Enter the Power Up
Defaults Menu Password
code.
Select Login
16-00118-01
Copyright © 2004 Analogic Corporation
All Rights Reserved
7-3
Maintenance
LIFEGARD ICG Service Manual
Step
Action
Illustration/Note/Comment
Select Factory Reset
5
Select Yes to confirm the
selection
Use front-panel button to
power the monitor to
Standby in order to perform
the directed action.
6
The opening display now
contains the pop-up box for
language selection
(Paragraph 7.2)
7.2.2
Using The Keypad To Change Language
WARNING:
Prior patient data is deleted when a new language is
selected.
Make a backup copy of the patient data you wish to use
after a new language is set up. That data will have to be
reinserted manually into the monitor after the new language
has been selected.
7-4
16-00118-01
Copyright © 2004 Analogic Corporation
All Rights Reserved
LIFEGARD ICG Service Manual
Maintenance
A shortcut that may be used to display an opening display with the language
pop-up box is available through the front-panel keypad.
•
With two fingers of the right hand, press the two right-hand keypad
buttons (Scroll and Print). Keep buttons depressed.
•
With the left hand, press the On/Standby button.
•
At the start of the opening audio overture, you may release
pressure on the buttons.
The opening screen appears as though the power is applied to this monitor
for the very first time. Use the knob to scroll the available languages. Press
the knob to select.
16-00118-01
Copyright © 2004 Analogic Corporation
All Rights Reserved
7-5
Maintenance
7.3
LIFEGARD ICG Service Manual
Conditioning the Battery
7.3.1
General
Battery conditioning re-calibrates the battery to ensure that it has accurate
information on the actual battery capacity.
WARNING:
Follow local governing ordinances and recycling plans
regarding disposal or recycling batteries and other device
components.
WARNING:
If the battery shows signs of damage or signs of leakage,
replace it immediately. Do not use a faulty battery in the
monitor.
WARNING:
Never use a monitor that is monitoring a patient to perform
battery conditioning.
The 6V rechargeable battery installed in the AN4700 LIFEGARD ICG
Patient Monitor is designed to source the power requirements of the monitor
for 200 deep-discharge cycles. The chapter describes the condition (other
than use) that reduces the battery capacity, and may require recharge cycles
to maintain the battery’s useful charge.
The monitor maintains a record of the number of battery deep discharge
cycles since placed in initial operation or since last conditioned.
7.3.2
Maintaining the Battery Charge
Storing the monitor for a long period of time without charging the battery can
degrade the battery capacity. A complete battery recharge (>90%) requires 8
hours in standby mode or 14 hours in operational mode.
It is recommended that the battery be kept charged once it has been activated.
If kept in storage for any length of time, the battery should be recharged
every 3 to 4 months.
The monitor will initiate an audible alarm, will place a message in the Status
Frame, and will change the color of the charge status indicators in the Battery
Icon Frame when less than 15 minutes of time remaining before the program
will terminate patient monitoring and turn the monitor to Standby state.
$
7-6
NOTE:
The battery will have sufficient charge after it detects a need
to shut power Off (Standby) to sound the audible alarm.
16-00118-01
Copyright © 2004 Analogic Corporation
All Rights Reserved
LIFEGARD ICG Service Manual
Maintenance
To recharge the battery, connect the input of the Battery Eliminator to the
appropriate ac power source (100-120 or 220-240 volts), as indicated on the
Battery Eliminator label. Connect the battery eliminator output to the
connector at the rear panel of the monitor.
A rechargeable battery must be conditioned at regular intervals to prepare it
for further charge/discharge cycles. Conditioning a battery refers to the
complete discharge of a charged battery by allowing it to die out while in
non-critical use. The empty battery may then be recharged and put back into
use.
It is recommended that the battery discharge performance be checked no less
often than every two years.
7.3.3
Battery Charge Status
The charge status of the battery is one of the items of system information
provided to the qualified service technician who is authorized to access the
Service Menu. The procedure for obtaining this information is included in
Chapter 4 Troubleshooting Diagnostics, and is duplicated in the table that
follows.
$
Step
1
NOTE:
The action of “selecting” is a two-step process of (1) Rotating the
knob, and (2) Pressing the knob.
Table 7-1. Accessing Deep Discharges in System Information
Action
Illustration/Comment/Note
If the monitor is
not ON, press the
front-panel
ON/STANDBY
button to turn the
monitor ON.
Select the Reuse
Last Patient Data
option in the
Patient Data
Screen
16-00118-01
Copyright © 2004 Analogic Corporation
All Rights Reserved
7-7
Maintenance
Step
2
LIFEGARD ICG Service Manual
Action
Illustration/Comment/Note
Select the Status
Frame in the
monitoring display
Status Frame
7-8
3
Select Setup
Menu option in the
Status Menu
4
Select Service
Menu option in the
Setup Menu
5
Enter the 3-digit
code for access
(Appendix E)
Select Login
16-00118-01
Copyright © 2004 Analogic Corporation
All Rights Reserved
LIFEGARD ICG Service Manual
Step
Action
6
Select System
Information in the
Service Menu
7
Obtain System
Information
Maintenance
Illustration/Comment/Note
16-00118-01
Copyright © 2004 Analogic Corporation
All Rights Reserved
7-9
Maintenance
7-10
LIFEGARD ICG Service Manual
16-00118-01
Copyright © 2004 Analogic Corporation
All Rights Reserved
A
SPECIFICATIONS
A
SPECIFICATIONS ................................................................................................................A-1
A.1
A.2
A.3
A.4
A.5
A.6
A.7
A.8
A.9
A.10
HARDWARE SPECIFICATIONS .............................................................................. A-1
COMPLIANCE AND APPROVALS ........................................................................... A-2
ELECTRICAL ........................................................................................................ A-2
ENVIRONMENTAL (MONITOR AND BATTERY ELIMINATOR) ................................ A-3
ECG PERFORMANCE ........................................................................................... A-3
ICG PERFORMANCE ............................................................................................ A-4
NON-INVASIVE BLOOD PRESSURE ...................................................................... A-5
TRENDS ............................................................................................................... A-5
INDICATORS ........................................................................................................ A-6
CONNECTORS ...................................................................................................... A-7
A.1 Hardware Specifications
Parameter
Size
Width
Specification
Height
6.5 in (16.5 cm)
Depth
Weight
Recorder
Type
Paper Width
6.5 in (16.5 cm)
≤5 pounds (2.37 kg)
Report Types
9.3 in (23.6 cm)
Thermal
58 mm
Print-On-Alarm: Operator enabled.
Printed when alarm condition is
detected.
Reports printed when Operator
activated:
ICG/ECG Snapshot
All-Data Report
Tabular Trend Report
Graphical Trend Report
A-1
16-00118-01
Copyright© 2004 Analogic Corporation
All Rights Reserved
Appendix A: Specifications
LIFEGARD ICG Service Manual
A.2 Compliance and Approvals
Parameter
Specification
United States Federal Law restricts this device to sale by or on the
order of a physician.
CE per 93/42/EEC
IEC60601-1, UL 60601-1, CAN/CSA C22 No. 601.1-M90,
EN 60601-1, IEC 60601-2-27, IEC 60601-2-30, IEC60601-2-49
Electromagnetic Compatibility: EN 60601-1-2, Class B
Degree of Protection
Type CF
Mode of Operation
Continuous
A.3 Electrical
Parameter
Specification
Display
Type
Backlight
Display Format
Active Area
Screen Diagonal
Dot Pitch
Weight
Contrast Ratio
Viewing Angle
TFT Color
Cold Cathode Fluorescent
76,800 pixels
320 W x RGB x 240 H dots
3.99 W x 2.94 H in
4.96 in
4.15 W x 12.26 mils
6 oz
100 (optimal)
Optimized for 6 o’clock direction
Powering
Internal Battery
Battery Eliminator
Monitor Power Input
Sealed lead-acid
Operating Time: 2 hours typ. (fully charged
battery) at 25°C, based on one NIBP
measurement per 15 Min.
(100 to 120 (±10%) Vac, 50 to 60 Hz, 0.15A),
or
(220 to 240 (±10%) Vac, 50 to 60 Hz, 0.08A).
15V~, 1 A, 50/60 Hz.
A-2
16-00118-01
Copyright© 2004 Analogic Corporation
All Rights Reserved
LIFEGARD ICG Service Manual
Appendix A: Specifications
A.4 Environmental (Monitor and Battery Eliminator)
Parameter
Temperature
Operating Temperature
Storage
Transit
Relative Humidity
Operating/Storage
Water Resistance:
Mechanical Shock:
Operating Altitude
Operating Pressure
Storage Pressure
Sine Vibration
Random Vibration
Drop
Shock/Vibration
Altitude
Specification
10° to 45°C
-20° to 60°C
20° to 60°C
5 to 90%, non-condensing
IEC 60529 Class IPX1
IEC 60068-2-27
0 m to 3,048 m (0 ft to 10,000 ft)
1013 hPA to 696 hPA
1060 hPA to 500 hPA
IEC 60068-2-6
IEC60068-2-36
IEC 60068-2-32
ISTA Project 2A
IEC 60068-2-13
A.5 ECG Performance
Parameter
Specification
Leads
Single lead
Heart Rate Range:
20 to 250 bpm
Heart Rate Accuracy:
± 5 bpm
Bandwidth:
0.5 Hz to 40 Hz
Lead Off detection with display indicator.
Display Sweep Speeds:
12.5 and 25 mm/sec
ECG Size (sensitivity):
0.5, 1, 2, 4 mV/cm
Indicator on waveform display, user
Pacemaker Detection Mode:
selectable
Standards: ANSI/AAMI EC13-2002
Differential input impedance:
> 2.5 MΩ at 60 Hz
Common mode rejection ratio: > 90 dB at 50 or 60 Hz
Input dynamic range:
± 5 mV AC , ± 300 mV DC
Defibrillator discharge:
< 5 sec. according to IEC60601-2-27
< 8 sec. according to AAMI EC13Defibrillation artifact recovery
2002. Waveform display recovery
time:
time < 16 sec.
16-00118-01
A-3
Copyright© 2004 Analogic Corporation
All Rights Reserved
Appendix A: Specifications
LIFEGARD ICG Service Manual
NOTE:
$
The processing of the ICG signal requires that the waveform have the respiration
component of resistance change removed before further processing. This results in an
8-second delay before the waveform can be displayed. As the ECG waveform must be
presented synchronously with ICG, it also has an 8-second delay from real time.
Therefore the waveform recovery on the screen will have this added to the recovery of
the ECG waveform display.
A.6 ICG Performance
Parameter
Specification
Measurement principle: Rheography (Impedance-Plethsmography)
Number of Electrode Pairs:
4
Excitation Current:
0.9-4.0 mA rms
Excitation Frequency:
Basic Thoracic Impedance
Range:
Base Impedance Measurement
Bandwidth:
Impedance Variation Range:
70-100 kHz
0-60 Ohm
0-10 Hz
±1 Ohm
< 1 mOhm rms at 50 Ohm basic
Impedance Noise:
impedance
Derived Cardiovascular Parameters
Cardiac Output (CO):
1/min
Cardiac Index (CI):
1/min/m2
Systemic Vascular Resistance
dyn s/cm5
(SVR):
Systemic Vascular Resistance
dyn s m2/cm5
Index (SVRI):
Stroke Volume (SV):
ml
Stroke Index (SI):
ml/m2
Thoracic Fluid Content (TFC): 1/kohm
Acceleration Index (ACI):
1/100 sec2
Left Cardiac Work Index
kgm/m2
(LCWI):
Pre Ejection Period (PEP):
msec
Left Ventricular Ejection Time
msec
(LVET):
Velocity Index (VI):
1/1000sec
Systolic Time Ratio (STR):
%
A-4
16-00118-01
Copyright© 2004 Analogic Corporation
All Rights Reserved
LIFEGARD ICG Service Manual
Appendix A: Specifications
A.7 Non-Invasive Blood Pressure
Parameter
Technique: Oscillometric
Blood Pressure Measurement
Range:
Measurement Modes:
Cuff pressure display:
Selectable Initial Inflate
Pressure Range:
Pulse rate range:
Blood Pressure Accuracy:
Overpressure threshold
Time Out period
Accuracy
Specification
Systolic: 40 to 260 mmHg
Diastolic: 25 to 200 mmHg
Mean Arterial: 45 to 235 mmHg
Manual: Single measurement
Auto: Automatic intervals of 1, 3, 5,
10, 15, 30, 60 and 90 minutes
STAT: Consecutive measurements for
5 minutes
10 to 300 mmHg
120 to 260 mmHg
40 to 200 bpm
ANSI/AAMI SP10-1992
280 mmHg. +/- 20 mmHg.
180 sec.
± 2 bpm or ± 2%
A.8 Trends
Parameter
Specification
Trend Memory
Memory Storage Time:
12 Hrs.
Data Interval Time:
20 Sec.
Display Range:
12 Hours scrollable
Stored Records per patient
100 records max or 12 hours max
Tabular Format
Table:
Graphical Format
Display:
One table for all variables
(Time vs. 8 vital signs selectable from
17)
Time vs. 2 vital signs selectable from
15
16-00118-01
A-5
Copyright© 2004 Analogic Corporation
All Rights Reserved
Appendix A: Specifications
LIFEGARD ICG Service Manual
A.9 Indicators
A.9.1
Audible Tones
Table A-1summarizes the characteristics of the various audible tones
produced by the ICG. Note that some of the tones in the table are not
described elsewhere:
Table A-1 Audible Tone Table
Pitch
(Hz, ±30)
Pulse-On
Time
(msec, ±20)
(4)
(6)
FAV
FAV
FAV
FV1
FV1
932
752
500
800
300
255
400
400
30
50
PV
3276±400
Amplitude
Audible Indicator
(1)
High Priority Alarm
Medium Priority Alarm
Low Priority Alarm
Valid Key Press
Invalid Key Press
Loss of monitoring
Alarm
Power On
FV2
Power Standby (Off)
FV2
ECG Pulse Tone
ABV
494, 523,
587
(2)
587, 523,
494
(2)
800
Pulse
Repetition
Interval
(PRI)
(msec, ±20)
Repetitions
15
15
15
10
10
320
700
3600
N/A
N/A
continually
continually
continually
1
1
infinite
unknown
N/A
N/A
100
10
150
3
100
10
150
3
50
10
N/A
1
Rise/Fall
Time
(msec, ±1)
(5)
(1) Volume Level Key:
ABV - Adjustable Blip Volume: (45 dB(A) minimum to 85dB(A) maximum in 8 steps of
approximately 5 dB(A) )
FAV - Fixed Alarm Volume: 45 dB(A) to 85 dB(A) as set by the power-on default value
FV1 - Fixed Volume 1: 60 ± 5 dB(A) peak at one meter
FV2 - Fixed Volume 2: 55 ± 5 dB(A) peak at one meter
PV - Loss of Monitoring Alarm Volume: 85dB(A) maximum at one meter
(2) Multi-Pitch Indicator - Each pitch is sounded once, sequentially, in order listed.
(4) All audible tones will be square waves with 55% duty cycle (±1%), to generate both odd and
even harmonics and thus improve user’s ability to localize the sound source in a room with
other sound-generating devices.
(5) Rise and fall of tone burst amplitude will be stair-case approximations of linear ramps,
consisting of between 4 steps (for lowest volume) and 64 steps for highest volume.
(6) “On time” includes rise and fall time.
A.9.2
Heart Rate Tone
In the presence of a valid primary heart rate source, the ICG can produce a
short (duration of approximately 100 msec.) audible beep with each
detected pulse. The volume range for the beeps is 45 dB (A) to at least 85
dB (A) at one meter, or they may be disabled entirely (volume OFF).
Volume is controlled by the front-panel Volume button.
A-6
16-00118-01
Copyright© 2004 Analogic Corporation
All Rights Reserved
LIFEGARD ICG Service Manual
•
•
A.9.3
Appendix A: Specifications
The audible beep is synchronized to the peak of the R-wave of the
QRS complex when the pulse rate beep source is the heart rate
signal from the ECG module.
The pitch frequency of ECG-derived pulse beeps will be fixed at
800 Hz.
Battery Charge Indicators
Parameter
Battery level status
Indicated by icon:
AC power LED
Green LED:
Specification
Analog charge level
On when unit is plugged into the
Battery Eliminator
Battery power LED
Green LED:
On when unit is operating on battery
power
Charge Timing
Fully Charged
Recharge to Full
Supports 2 hours of operation from
fully charged battery, plus audible and
visual indication to alert operator a
minimum of 15 minutes prior to
automatic shut down
Monitor ON: 14 hours max.
Monitor STANDBY: 8 hours max.
A.10 Connectors
Parameter
Power Module Input
Connector type:
RS232 service port
Connector type:
Patient cable input
Connector type:
NIBP hose connector
Hose type:
Specification
4 Pin DIN
Male DB-9
14 pin Mini-D
Rectus Hose Connector
WARNING:
The RS232 service port is for use by trained service personnel
and should not be used while monitoring patients
16-00118-01
A-7
Copyright© 2004 Analogic Corporation
All Rights Reserved
Appendix A: Specifications
LIFEGARD ICG Service Manual
$
NOTE:
The range of values over which the Alarm Limits can
be set does not necessarily span the monitor’s
measurement range (Table A-2).
Table A-2. Measurement Range and Alarm Limit Range
Measurement
Parameter
Alarm Limit Range
Range
20 – 250
30 – 250
Heart Rate (HR)
NIBP
Systolic Pressure (SYS):
Mean Arterial Pressure (MAP):
Diastolic Pressure (DIAS):
CARDIAC OUTPUT (CO)
$
40 – 260
45 - 235
25 - 200
60 - 240
45 - 200
40 - 180
None
1.0-12
NOTE:
The range of values over which the Alarm Limits can
be set does not necessarily span the monitor’s
measurement range. In those cases the Limit Range
covers “normal ranges”.
A-8
16-00118-01
Copyright© 2004 Analogic Corporation
All Rights Reserved
B
DEFAULTS
B.1
General
This appendix identifies the parameter values set at the factory and whether
any changes for clinical operations are retained through successive power
ON/STANDBY cycles. The information is presented in Table B-1, FactoryDefault Settings, and range of values available to the operator for modification.
Values of the parameters listed in Table B-1 are set at the factory prior to
shipment. Using the Navigation Knob and appropriate menus, the operator
may change these values to suit the monitoring situation.
$
NOTE:
Only qualified personnel may change settable parameters marked
“No” in the last column in order to save them through power cycles.
The fourth column in Table B-1 (Saved Through Power Cycle) identifies
those changed settings with a Yes in the column that will be retained through
any power ON/STANDBY recycling. Those identified with a No will be
restored to the factory default value after a power cycle.
Parameter
Language
Patient ID
Table B-1. Factory-Default Settings and Range of Settable Values
Saved
Range of Values
Factory Default
Through
Power Cycle
19 languages, identified in the
alphabet of the language.
24 characters max, 0-9, A-Z, #,
and -
Gender
Male or Female
Weight
67 to 350 lbs (30 to 159 kg)
Height
48 to 90 in. (122 to 229 cm)
Age
CVP
PAOP
1 to 110 years
0 to 100 mmHg
0 to 100 mmHg
Patient Data
Units
US or Metric
None, user configures at
first boot
Yes
None (display blank)
Male (blank displayed
initially)
150 lbs or 68 kg (blank
displayed initially)
70 inches or 178 cm (blank
displayed initially)
50
3
7
US if English is initially
selected as language at first
power up. Metric
otherwise. Selection can be
modified from the Power
Up Defaults menu.
Yes
Can be restored
to last patient
used
No
B-1
16-00118-01
Copyright© 2004 Analogic Corporation
All Rights Reserved
Appendix B: Defaults
Parameter
NIBP
Automatic
Mode Interval
NIBP Initial
Inflation
Pressure
ECG/ICG
Sweep Speed
ECG/ICG Size
(Scaling)
Pacer Detect
Trend Sample
Rate
Print On Alarm
Alarm Silence
Silence Period
Alarm Suspend
Graphical
Display Interval
$
LIFEGARD ICG Service Manual
Range of Values
Factory Default
Saved
Through
Power Cycle
Off, (1,2,3,5,10,15,30,60,90) min
OFF
No
120,140,160,180,200,220,240,260
160
No
12.5 or 25 mm/sec
25
No
0.5, 1.0, 2.0 or 4.0 mV/cm
waveform gain
On/Off
1.0
No
OFF
No
60 sec or 15 min
60 sec
No
On/Off
Enabled/Disabled
30 sec, 60 sec, 90 sec, 120 sec
Enabled/Disabled
Off
Enabled
120 sec
Enabled
No
No
No
No
30 min, 2 hours, 4 hours
30 min
No
NOTE:
Only qualified personnel may change settable parameters marked “No” in the
last column in order to save them through power cycles. Access requires a
coded password.
B-2
16-00118-01
Copyright© 2004 Analogic Corporation
All Rights Reserved
C
ERROR MESSAGES
C
Error Messages ........................................................................................................................... 1
C.1
C.2
Monitoring Mode Error Messages......................................................................... 1
Coded Error Messages (Hex Code) ....................................................................... 2
C.1 Monitoring Mode Error Messages
Error messages that may appear in the Status Frame during monitoring operation
are listed in Table C-1.
Table C-1. Error Messages During Monitoring Modes
Message
Comment
ICG Leads Off
Appears only after a valid reading has been
obtained
Low Battery
Appears at same time that alarm is initiated;
indicates 15 minutes of battery-driven
operation remaining at start of alarm
NIBP - No Cuff
NIBP - Blocked Hose
NIBP - Artifact
NIBP - Time-Out
NIBP Overpressure
Check Printer
Low ICG Amplitude
No pressure detected when air is pumped
Usually a kink in hose
Failure to acquire a valid measurement
Mode operation exceeds limit of 180
seconds without measurable result
Pressure not achieved in allowable time
Door may be open; no paper available
Questionable computed result; value may
not be reliable
TFC Out of Range
Reported hemodynamic parameters are
questionable
ICG Artifact
Cardiac output results are questionable
because of inconsistencies in waveforms
C-1
16-00118-01
Copyright© 2004 Analogic Corporation
All rights reserved
Appendix C: Error Messages
LIFEGARD ICG Operator’s Manual
C.2 Coded Error Messages (Hex Code)
Coded error messages may be displayed for a brief interval during
monitoring operation. The message is displayed in a full screen format,
replacing the display that may be active at the time that an event is
detected. For example, the coded error message that appears when a
Power-On-Self-Test results in a detected malfunction is illustrated in the
figure that follows.
Error 0x10003456
Refer to service manual
Coded Error Messages may be grouped in two categories:
• Four messages that include instructions for operator corrective
action,
• The remaining codes that require reinstallation/upgrade of
software or replacement of the FRU Main PCB.
Messages in the first category (operator action) are listed in Table C-2
Error Code
0x00000002
0x00000022
0x2100001A
0x26000024
Table C-2. Operator-Action Codes
Description
Corrective Action
Abnormal shutdown; appears at power-up after
Cycle power to monitor
an abnormal POST
Connect unit to Battery
Unit shutdown, Low Battery
Eliminator to charge battery
Unit must be reconfigured for
Institutional configuration corrupted; factory
institutional defaults. Service
defaults will be used
may be required.
Check connection with vuelink
Vuelink Bad Count (unknown request)
module. Service may be
required
C-2
16-00118-01
Copyright© 2004 Analogic Corporation
All Rights Reserved
D
ACCESSSORIES AND SPARES
D
ACCESSSORIES AND SPARES ................................................................................ D-1
D.1
Accessories ........................................................................................................... D-1
D.2
FRU’s.................................................................................................................... D-2
D.3
Spare Kitted Parts ................................................................................................. D-4
General
Table D-1 lists accessories available for use with LIFEGARD ICG monitor.
These may be shipped as part of the initial order, or may be purchased from any
distributor of Analogic Life Care Systems.
Table D-2 lists the AN4700 Spares Assemblies, including the component parts
and their Analogic part numbers. Note that some spares assemblies are furnished
in kit form, and the kitted parts are further identified with respective Analogic part
numbers in Table D-3.
D.1
Accessories
Table D-1. LIFEGARD ICG Accessories
Name
LIFEGARD ICG
Roll Stand
Description
Order Code
Provides mobile use of
monitor
Domestic use (100-120V~)
Includes Line Cord
International use (220-240V~)
Includes line cord
Adult
Adult Plus
Small
BAT-ELIM-B
NIBP Hose
Latex
Air Hose, 9 ft (3m)
AN4K-AC015
NIBP Cuff
Non-Latex
Adult
Adult Plus
Small
AN4K-AC017
AN4K-AC016
AN4K-AC018
Air Hose, 9 ft (3m)
AN4K-AC019
Connects Patient Dual
Electrodes to monitor
AN4700-AC030
LIFEGARD ICG
Battery Eliminator
NIBP Cuff
Latex
NIBP Hose
Non-Latex
LIFEGARD ICG
Patient Cable
AN4700-AC080
BAT-ELIM-A
AN4K-AC012
AN4K-AC011
AN4K-AC013
16-00118-01
D-1
Copyright © 2004 Analogic Corporation
All Rights Reserved
LIFEGARD ICG Service Manual
Name
LIFEGARD ICG
Dual Electrodes
LIFEGARD ICG
Printer Paper
LIFEGARD ICG
Simulator
LIFEGARD ICG
Operator’s Manual
D.2
Appendix D Accessories and Spares
Description
Pair of electrodes to be
attached to patient
Box of 10 sets of 4
LIFEGARD ICG Dual
Electrodes
Box of 20 rolls of Printer
Paper
Creates an Impedance
Cardiographic and ECG
waveform
Multi language, Disk
Order Code
AN4700-AC031
AN4700-AC060
AN4700-AC001
AN4700-AC101
FRU’s
Table D-2. LIFEGARD ICG FRU’s
NOTE:
Item Numbers identify the parts in the Mechanical Breakdown
Drawings of Chapter 3.
FRU Number
10-62930-01
10-62931-01
10-62932-01
10-62933-01
10-62934-01
10-62935-01
10-62936-01
10-62937-01
10-62938-0
Description
Small Parts Kit)
Main PCB
Main PCB Assembly
High Voltage Symbol Label
I/O Shield-ICG
Battery Cable
Backlight Inverter
5V dc to 6W ac CCFL Inverter Assembly
Cable Tie
Backlight Inverter Cable
Backlight Inverter Cable Assembly
Display, LCD Color,
DSPLY LCD COLOR 320X240 5IN
TIE CABLE .10WX4"
Bracket, Display Mounting
BRACKET-DISPLAY MOUNTING
TIE CABLE .10WX4"L
Keypad
KEYPAD, AN4700
Window Display
WINDOW DISPLAY-AN4700
Front Case Assy Kit
CASE FRONT, PRINTED, LIFEGARD ICG
D-2
Item
#
1
6
114
2
7
3
13
7
14
7
11
12
10
16-00118-01
Copyright © 2004 Analogic Corporation
All Rights Reserved
Appendix D Accessories And Spares
FRU Number
10-62939-01
10-62940-01
10-62941-01
10-62942-01
10-62943-01
10-62944-01
10-62945-01
10-62946-01
10-62947-01
10-62948-01
10-62949-01
10-62950-01
10-62951-01
7-62100
LIFEGARD ICG Service Manual
Description
KEYPAD, AN4700
WINDOW DISPLAY-AN4700
Speaker & Cable Assy
ASSEMBLY- CABLE, SPEAKER
PLATE-SPEAKER MOUNTNG
FOAM-SPEAKER MOUNTING
Knob
KNOB
RING COMP .366 HUB OD
Assy-Cable, Ground
ASSY-CABLE GROUND
Rear Case Assy Kit Table D-3)
Pneumatics’ Kit (Table D-3)
Battery, 6V
BATT 6V 4AH LEAD ACID SEALED
LABEL-POSITIVE TERMINAL, BATT
Bracket, Battery
BRACKET BATTERY
PAD-BATTERY
Bracket, Printer and Door
BRACKET-PRINTER
INSULAOTR-PRINTER BRACKET
Printer, Thermal
PTR THRM SEIKO LPTH245 5V 8 DOTS/MM
SHIELD-PTR LEVER
CBL TIE 5L .10W .04T #4 SCR MT NAT NY
Board, Printer Interface
BD INTFC PTR SEIKO IFH001-01B 5V
ASSY-CABLE, PTR, CG
Cable Assy, Printer,
ASSY-CALE PTR. CGL
Printer Housing
PRINTER HOUSING
PAPER CUTTER
LABEL, REAR
Paper Door
PAPER DOOR
LABEL, BLANK 0.50 X 1.85
LABEL, REAR
Instructions, Shipping
16-00118-01
Item
#
11
12
20
21
22
30
31
5
120
126
125
111
215
218
210
217
227
211
227
200
216
131
201
130
131
D-3
Copyright© 2004 Analogic Corporation
All Rights Reserved
LIFEGARD ICG Service Manual
D.3
Appendix D Accessories and Spares
Spare Kitted Parts
Spare Kit
Number
Table D-3. LIFEGARD ICG Spare Kitted Parts
Item
Description
Qty
*
1
10-62930-01
Small Parts Kit
CLMP CBL NY .125D
CONN D HSG 9P MTL SHL SN
M SCR M2X4 DIN912 SS
M SCR M2X8 DIN7985 SS
M SCR M2.5X6 DIN7500C SS
M SCR M3X6 DIN7985 SS
M SCR M3X14 DIN7985 SS
M SCR M3X25 DIN7985 SS
SCR MCH SEMS PHCR 4-40X1/4 SS
SCR MCH SEMS PHCR 4-40X5/16 SS
SCR MCH SEMS PHCR 4-40X7/16 SS
SCR MCH HX SKT 4-40X1/4 SS
SCR MCH PH CR 2-56X1/4 NY
SCR MCH FH82 8-32X5/8 ISOPLAST
SCR TRI-LOB PHCR 4X3/8 ZNC
M WSHR M2 DIN127B SS
CLMP CBL NY .125D
CONN D HSG 9P MTL SHL SN
M SCR M2X4 DIN912 SS
CLMP CBL NY .125D
CONN D HSG 9P MTL SHL SN
M SCR M2X4 DIN912 SS
M SCR M2X8 DIN7985 SS
M SCR M2.5X6 DIN7500C SS
M SCR M3X6 DIN7985 SS
M SCR M3X14 DIN7985 SS
23
140
301
302
305
310
311
312
320
321
322
323
325
326
330
340
341
342
343
350
351
352
370
380
381
382
1
1
2
3
4
4
2
4
7
4
3
2
4
2
4
5
5
10
4
4
8
2
3
2
2
2
10-62942-01
Rear Case Assembly Kit
REAR CASE
PLUG RECT, CASE REAR
PLUG RND, CASE REAR
FOOT CUSHION
PAD-BATTERY
PAD BATT RT
PAD BATT LF
GSKT TUBINGVTRANSLUCENT
LABEL, BLANK 0.50 X 1.85
BONDER ADHV LOCTITE 414
100
105
106
110
111
112
113
115
130
109
1
1
1
2
1
1
1
2.5
1
0.03
D-4
16-00118-01
Copyright © 2004 Analogic Corporation
All Rights Reserved
Appendix D Accessories And Spares
10-62943-01
Pneumatics Kit
BRACKET PUMP AND VALVE
ASSEMBLY-CABLE, PNEUMATIC VALVE
RESTRICTOR VALVE ORIFICE .010ID BLK NY
PUMP AIR ROLLING 2 CYL 6VDC
ASSEMBLY-CABLE, PUMP MOTOR
PNUEMATIC FTG (NIBP PLUG)
FTG ELBOW 3/32 TUBE 10-32 THD WHT NY
FTG T 3/32 TBG WHT NY
CLMP CBL .25D PVC ADHV BACK
MANIFOLD, PNUEMATIC
TBG TYGON 3350 SILICONE 1/16ID 3/16OD NAT
TBG TYGON 3350 SILICONE 3/32ID 7/32OD NAT
TIE CBL .14W X 5.5L NY
16-00118-01
LIFEGARD ICG Service Manual
150
151
152
154
155
160
161
163
164
165
166
167
168
D-5
Copyright© 2004 Analogic Corporation
All Rights Reserved
LIFEGARD ICG Service Manual
Appendix D Accessories and Spares
D-6
16-00118-01
Copyright © 2004 Analogic Corporation
All Rights Reserved
E
TECHNICAL SERVICES AND SUPPORT
E
TECHNICAL SERVICES AND SUPPORT..........................................................E-1
E.1
E.2
E.3
GENERAL ..........................................................................................................E-1
OBTAINING TECHNICAL ASSISTANCE................................................................E-1
RETURN MATERIAL PROCEDURE ......................................................................E-2
E.1 General
Appendix E includes instructions for obtaining technical assistance and
for returning the ICG monitor for repairs. It also includes the password
codes to enable qualified personnel to access the demo mode and the
servicing menus.
E.2 Obtaining Technical Assistance
The Life Care Systems Support Group is the resource for providing
installation, preventative and corrective maintenance, technical and
operator support, and parts, and documentation provisioning for
Analogic-supplied products.
To Contact the Life Care Systems Support Group:
Call: +1-978-977-3000 (MA and International)
Spare Parts Ext. 4700
Repairs
Ext.4700
Fax: +1-978-977-6854
email: [email protected]
16-00118-01
E-1
Copyright© 2004 Analogic Corporation
All Rights Reserved
Appendix E: Technical Services and Support
LIFEGARD ICG Service Manual
E.3 Return Material Procedure
To return a defective product to Analogic, you will need to obtain a
Return Material Authorization (RMA) number from our Life Care
Systems Support Group. Please contact a Service Coordinator at:
Call:
+1-978-977-3000
Ext. 4700
Fax: +1-978-977-6854
email: [email protected]
You will need to supply the Service Coordinator with the following
information:
• The Model number(s) and Serial number(s) of the product,
• The quantity of items,
• The "Bill to" address for invoice purposes,
• The "Ship to" address,
• A Purchase Order number, and
• Details of the reported failure.
The Service Coordinator will then inform you of:
• The Return Material Authorization (RMA) number,
• The warranty or non-warranty status of the units being returned,
• Any repair charge.
E-2
16-00118-01
Copyright© 2004 Analogic Corporation
All Rights Reserved
LIFEGARD ICG Operator’s Manual
Appendix E: Technical Services and Support
All returned material must be shipped “PREPAID” to the following address:
Analogic Corporation
Life Care Systems
8 Centennial Drive
Peabody, MA 01960
Attn: Receiving Dock B
RMA#:______________
Important:
Please reference your RMA number on both your purchase order
and the shipping label.
16-00118-01
Copyright© 2004 Analogic Corporation
All Rights Reserved
E-3
Appendix E: Technical Services and Support
LIFEGARD ICG Service Manual
E.4 Password Protected Codes
Table E-1 identifies the required codes that enable qualified personnel to
access the Demo Mode and the Servicing Menus.
Table E-1. Accessing Password Codes
Step
Action
1
Using the Navigation Knob, highlight the Status Frame.
Press the knob to obtain the Status Menu.
2
Highlight and select the Setup Menu.
3
a) For Power Up Defaults Menu, enter 215.
b) For Service Menu, enter 829.
c) For Demo Mode, enter 222.
E-4
16-00118-01
Copyright© 2004 Analogic Corporation
All Rights Reserved
Analogic Corporation
Life Care Systems Division
8 Centennial Drive
Peabody, MA 01960, U.S.A.
Tel: (978) 977-3000
www.analogic.com
16-00118-01 rev 01


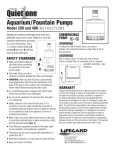


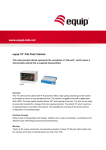


![Antares SB-GSM User`s Manual [FW5.21]](http://vs1.manualzilla.com/store/data/005969322_1-cafecc5f2ef16fdcdd0cbc825ff9e000-150x150.png)