1
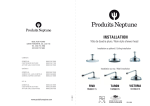
INSTALLATION
6835, RUE PICARD
SAINT-HYACINTHE, QC, J2S 1H3
TEL. 450 773 7058
FAX 450 773 5063
C ANADA
G E NE R AL
C U S TO ME R S E R V ICE
AF T E R S ALE S S E R V ICE
888 226 7099
888 226 7199
888 226 7599
TARON
QUÉBEC
G É NÉ R AL
S E R V IC E À L A C L I E N T È L E
S E R V IC E A P R È S -V E N T E
888 366 7058
888 226 6899
888 223 1899
TAR990360
U .S .A .
888 226 7899
888 226 9099
888 226 9199
www.produitsneptune.com
11 / 2011
G E NE R AL
C U S T O M E R S E R V IC E
A F T E R S A L E S S E R V IC E
Valve thermostatique /
Thermostatic valve
AT 105911
***
REV: 0000
PIÈCES / PARTS
OPERATION
liste ci-dessous. Si certaines pièces sont manquantes, contactez votre revendeur
immédiatement.
Follow the t
res below. If any items are missing, contact your dealer at once.
P ièc e / P art
L ’e n s e m b le d u c o rp s p rin c ip a l / Ma in b o d y g ro u p
No.
Q té / Q ty
(1)
(2)
(3)
1
1
1
ATTENTION
P oignée /
Handle
C orps principal /
Main body
1.
P laque / P late
2.
INSTALLATION
3.
1/4" (.7cm)
3 3/8"
(8.5cm)
2
7 1/4" (18.5cm)
1.
2" (5cm)
3/4
3/4
3/4
3 1/8" (8cm)
2"
3 1/8"
(5.1cm 7.8cm)
2 1/8"
(5.5cm)
1"
(2.4cm)
6" (15.2cm)
2.
3.
La cartouche dans le corps principal a été examinée et ajustée à l’usine.
Ne démontez pas la cartouche!
As s urez-vous de ne oyer le tuyau d’approvis ionnement d‘eau avant l’ins talla on pour
éviter le colmatage.
R accordez l’eau chaude s ur le côté gauche et l‘eau froide s ur le côté droit.
D ébit de pres s ion :
min : 0.05 MP a
max : 1.60 MP a
P res s ion recommandée :
0.1 MP a
à
0.8 MP a
L es traitements extérieurs du produit peuvent changer, et ce s ans préavis du
manufacturier.
T he cartridge in the main body has been tested and adjusted at the factory.
D o not take the cartridge apart!
E ns ure to clean the water s upply pipe before ins talla on to avoid blockage.
C onnect the hot water s upply on the l and the cold water s upply on the right.
P res s ure F low:
Min: 0.05MP a
Max: 1.60MP a
R ecommended pres s ure:
0.1MP a
to
0.8MP a
e from the company.
P roduct s urface treatments may change without prior n
INSTALLATION
Lire complètement et attentivement le manuel d‘ins tallation avant de procéder
afin d’éviter les erreurs .
P leas e read the ins tructions carefully in order to avoid ins tallation errors .
1
Raccordement valve d’arrêt
E ntrée d’eau
chaude/
Hot water
inlet
Raccordement valve d’arrêt
Sliding bar with hand shower
Tête de douche pluie
Rain-style shower head
Valve déviatrice
Diverter valve
E ntrée d’eau
froide /
C old water
inlet
Water outlet
Jets de corps / Body jets
2
2
3
ou / or
1
Valve d’arrêt
valve
4
Bec de bain
Bathtub spout
5
Après avoir ins tallé le corps principal, lire les indications de pos itionnement s ur la
hous s e de protection et confirmer le bon pos itionnement d‘ins tallation. Continuer
la finition du mur.
Eau chaude
Hot water
Eau froide
Cold water
Eau mixée
Mixed water
After ins talling the main body, read the pos ition indications on the protective cover
and confirm the correct ins tallation pos ition. C ontinue by finis hing the wall treatment.
*Unused water outlets of the diverter valve have to be blocked with a cap.
ouvrir l’arrivée d’eau et laisser couler le temps que l’eau chaude parvienne bien à la douche
la température de l’eau, tourner dans le sens des aiguilles d’une montre pour une eau plus froide
et dans le sens contraire des aiguilles d’une montre pour
tenir la
Le rayon du 3/4”-14NPT du raccordement ne devrait pas être moins de Ø 3/4” (1.2cm).
The radius of the 3/4"-14NPT connection pipe should not be less than Ø 3/4‘’ (1.2cm).
Lire les schémas d‘installation et confirmer le bon positionnement d’installation.
Read the Installation figure and confirm the correct installation position.
Ouvrir les sorties d‘eau, fermer la cartouche en céramique et valider qu’il n‘y ait pas de fuite
d’eau. Ouvrir la cartouche en céramique et vérifier que le début d‘eau coule bien. Faire la
finition du mur. E nlevez la housse de protection et installez la plaque et la poignée.
temperature, and adjust it by turning clockwise for cooler water and counterclockwise for warmer
Open the water supply pipes, close the ceramic cartridge and verify for leaks. Open the cartridge and verify for smooth water flow. Finish the wall surface treatment. Remove the protection cover. Install the plate and the handle.
Liste des pièces / Parts list
Vue éclatée / Exploded view
11
12
13
14
15
16
17
18
01
B ouchon / P lug
P T T B 0017
1
02
J oint d’étanchéité / O-ring
P T R R 0057
1
03
C orps principal / Main body
P T Y B 0413
1
04
T ige d’ajus tement / S etting pin
P T B T 0034
1
05
V alve de s écurité / S ecurity valve
C T ZQ0006
2
C ouvert / C over
P T C B 0262
1
07
V is d’ajus tement / Adjus ting s crew
P T S B 0071
2
08
J oint d’étanchéité / O-ring
P T R R 0064
2
J oint d’étanchéité / O-ring
P T R R 0005
2
10
V is d’ajus tement / Adjus ting s crew
P T S B 0070
2
11
P oignée / Handle
P T HB 0181
1
24
12
V is Hexagonale / Hex s crew
P T S T 0006
1
25
13
V is Hexagonale / Hex s crew
P T S T 0029
1
14
C apuchon décoratif pour poignée /
Decorative handle cover
P T HZ0100
1
P T B T 0020
P T C B 0237
1
P T MB 0231
1
19
06
21
22
09
23
9
Qté
Qty
Pièce / Part
20
10
Code
No.
8
15
R es s ort / S pring
7
16
6
17
B ouchon / P lug
T ige / R od
18
P laque / P late
P T C B 0301
1
19
J oint d’étanchéité auto-collant /
S elf adhes ive gas ket
P T QG 0001
1
P T R R 0041
1
P T R B 0004
1
26
30
1
5
20
4
21
J oint d’étanchéité / O-ring
Anneau d’ajus tement / S etting ring
22
Anneau de protection / P rotective s leeve
P T C P 0029
1
23
É crou de fixation / F as tening nut
P T NB 0045
1
24
C artouche / C artridge
V is à tête étoile / P hilip s crew
C T AQ0039
1
P T S T 0011
1
26
Hous s e de protection / Protective cover
P T C P 0035
1
27
Index / Index
P ZF F 000300
1
28
V is à tête étoile / P hilip s crew
P T S T 0042
2
29
C heville / W all plugs
P T MP 0006
2
30
F iltre / F ilter
P T K T 0006
2
31
Adapteur 3/4" à 1/2" / 3/4" to 1/2" Adaptor
P T MB 0523
3
3
27
2
1
C haud
Hot
F roid
C old
28
29
31
25