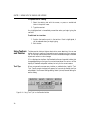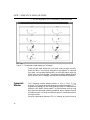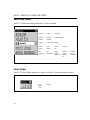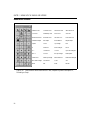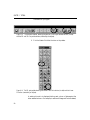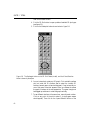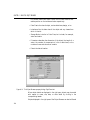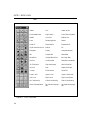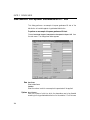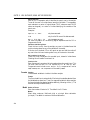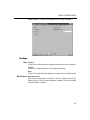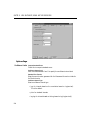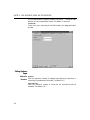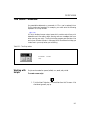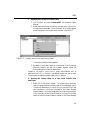
1
MathSoft
S-PLUS
User’s Guide
Version 4.5
March 1998
Data Analysis Products Division
MathSoft, Inc.
Seattle, Washington
i
Proprietary
Notice
MathSoft, Inc. owns both this software program and its documentation.
Both the program and documentation are copyrighted with all rights
reserved by MathSoft.
The correct bibliographical reference for this document is as follows:
S-PLUS User’s Guide, Data Analysis Products Division, MathSoft, Seattle,
WA.
Printed in the United States.
Copyright
Notice
Copyright © 1997-1998 MathSoft, Inc. All Rights Reserved.
Acknowledgments
S-PLUS would not exist without the pioneering research of the Bell Labs S
team at AT&T (now Lucent Technologies): Richard A. Becker, John M.
Chambers, Allan R. Wilks, William S. Cleveland, and colleagues.
This release of S-PLUS includes specific work from a number of scientists:
The cluster library was written by Mia Hubert, Peter Rousseeuw and Anja
Struyf (University of Antwerp).
Updates to functions provided to this and earlier releases of S-PLUS were
provided by Brian Ripley (Oxford University) and Terry Therneau (Mayo
Clinic, Rochester).
ii
USER’S GUIDE CONTENTS OVERVIEW
Introduction
Chapter 1 Welcome to S-PLUS
15
Chapter 2 Working with the Graphical User Interface
27
Chapter 3 Tutorial
55
Data Management
Chapter 4 Using Data Windows
85
Chapter 5 Importing and Exporting Data
117
Chapter 6 Using The Object Browser
141
Chapter 7 Exchanging Objects with Other Applications
159
Graphics Environment
Chapter 8 Creating a Graph
173
Chapter 9 Working with Trellis Graphics
207
Chapter 10 Formatting a Graph
227
Chapter 11 Working with Graph Objects
281
Chapter 12 Editing Plot Properties
295
Chapter 13 Exporting graphs, Printing, and Sending Mail
337
iii
CONTENTS OVERIVEW
Statistical Analysis
Chapter 14 Using the Statistics Menus and Dialogs
341
Chapter 15 Creating and Manipulating Data
347
Chapter 16 Summarizing and Exploring Data
361
Chapter 17 Comparing Samples
379
Chapter 18 Fitting Statistical Models
413
Chapter 19 Using Multivariate, Survival and
Time Series Models
487
Chapter 20 Building Formulas
535
Session Environment
Index
iv
Chapter 21 Working With Script, Commands and
Report Windows
545
Chapter 22 Customizing The User Interface
567
Chapter 23 Customizing Your S-PLUS Session
597
605
CONTENTS
Chapter 1 Welcome to S-PLUS
Introduction
Installation
System Requirements
Help, Support, and Learning Resources
Getting Help
What’s New in S-PLUS
New Features
Chapter 2 Working with the Graphical User Interface
User Interface
Using Menus, Dialog Boxes, and Toolbars
Using the Mouse
Using the Keyboard
Using Windows
Using Main Menus
Using Shortcut (Right-Click) Menus
Specifying Options in Dialogs
Using Toolbars and Palettes
S-PLUS Windows
Object Browser
Data Window
Graph Sheet
Commands Window
Script Window
Report Window
S-PLUS Menus
S-PLUS Dialogs
S-PLUS Palettes and Toolbars
Chapter 3 Tutorial
Introduction
Quick Tour
In-Depth Tour
The Object Browser
Inserting a New Column
15
15
16
18
19
19
23
23
27
28
29
29
30
31
35
35
36
38
40
40
40
41
42
43
44
45
47
48
55
55
57
65
65
66
v
CONTENTS
Creating a 2D Graph
Creating 3D Graphs
Using Trellis Graphics for Multipanel Conditioning
Applying Statistics Models
The Commands Window
Creating PowerPoint Slides Automatically
Chapter 4 Using Data Windows
Working with Data Windows
Creating a New Data Window
Data Objects
Editing a Data Set
The Current Data Window
Selecting Cells, Columns, and Rows
Selecting Cells
Extending the Cell Selection
Selecting Columns
Selecting Rows
Using Keyboard and Mouse Shortcuts
Using the Go To Cell Option
Column Names and Column Numbers
Column Lists in the Data Window
Entering Data
Entering Data from the Keyboard
Entering Data from Other Sources
Editing Data
Editing Time Series Data
Moving and Copying Data
Inserting and Deleting Cells, Rows and Columns
Inserting Columns and Rows
Deleting Data
Sorting Data
Undoing Actions
Formatting Data Windows
To Format Columns
Chapter 5 Importing and Exporting Data
Importing Data Files
The Data Import Dialogs
vi
67
70
74
77
81
83
85
86
87
87
89
89
90
90
90
90
91
92
93
94
95
96
96
97
97
98
100
102
102
103
106
108
111
112
117
117
119
CONTENTS
Filter Page
Notes on Importing Files
Notes on Importing ASCII (Delimited ASCII) Files
Notes on Importing Excel Files
Notes on Importing Files with Multiple Tables
Notes on Importing Lotus Files
Notes on Importing dBase Files
Notes on Importing and Exporting Access Files
Notes on Importing FASCII (Formatted ASCII) Files
Importing ODBC Tables
Exporting Data Sets
Exporting ODBC Files
Chapter 6 Using The Object Browser
Overview of the Object Browser
The Right Pane Versus the Left Pane
Filtering Objects and Databases
The Browser Page Versus the Object Browser
Organization of Objects
The Default Object Browser
The Examples Object Browser
To Find S-PLUS Objects
Shortcut keys
Customizing the Object Browser
Customizing the Right Pane Display
Customizing Object Browser Pages
Using Folders to Organize Work
Editing Objects and Data Manipulation
Object Creation
Modifying Data Objects
Moving and Copying Objects
Copying Data from One Database to Another Database
Deleting Objects
Modifying Object Properties
Selecting Objects
Chapter 7 Exchanging Objects with Other Applications
Overview
Embedding Objects from Other Applications
123
126
126
127
127
127
128
128
128
130
135
138
141
141
142
143
144
144
146
146
146
147
148
149
151
153
155
155
155
156
156
156
157
157
159
159
161
vii
CONTENTS
Creating and Editing Embedded Objects
Importing Graphic Images
Linking Data from Other Applications
Embedding S-PLUS Graphics Within Other Applications
Updating Embedded Graphs
Creating a PowerPoint Presentation
Chapter 8 Creating a Graph
S-PLUS graphs
Creating a Graph Sheet
Opening an Existing Graph Sheet
Methods for Creating a Graph
Viewing Graph Sheets
Adding a Plot to a Graph
Hiding, Unhiding and Deleting a Plot
Editing Data Specifications
Adding or Replacing Data in the Plot
Changing Columns and Data Sets
Placing Multiple Graphs on a Graph Sheet
Adding a Graph to an Existing Graph Sheet
Combining Graphs from Multiple Graph Sheets
Arranging Graphs on the Graph Sheet
Preparing Data for Graphing
Projecting a 2D Plot onto a 3D Plane
Combining Multiple 2D Plots in 3D Space
Combining 2D and 3D Plots on One Graph
Brush and Spin
Highlighting and Downlighting Points
Brush Symbols and Size Control
More Brushing Options
Spinning Data
Chapter 9 Working with Trellis Graphics
Creating Trellis Graphs
Plots on Trellis Graphs
Formatting Plots within Panels
Formating Panels
Formatting Panel Strips
Trellis Examples
viii
162
164
166
168
168
170
173
174
175
175
177
182
183
186
187
187
188
190
190
191
192
194
201
201
203
204
204
205
205
206
207
209
210
212
212
214
216
CONTENTS
References
Chapter 10 Formatting a Graph
Formatting a Graph Sheet
Formatting a Graph
Formatting the Graph Area
Formatting the Plot Area
Formatting Panels
Formatting 2D Axes
Formatting 2D Axis Labels
Formatting and Rotating 3D Axes
Formatting 3D Axes Labels
Formatting 3D Planes
Rotating a 3D Graph
Displaying 3D Multipanel Graphs
Displaying 3D Sliced Graphs
Formatting Polar Axes
Adding Multi-line Text
Adding Special Characters and Formatting Text
Adding Titles and Legends
Adding 2D Axis Titles
Adding 3D Axes Titles
Adding a Date and Time Stamp
Adding a Legend
Formatting the Legend Items
Adding Labels for Points
Adding a Curve Fit Equation
Adding Lines, Shapes and Symbols
Summary of the Annotation Palette
Chapter 11 Working with Graph Objects
Graphic Objects
Selecting Objects
Summary of Format and View Menus
Moving and Copying Objects
Using Drag-and-Drop
Using Cut, Copy, and Paste Options
Sizing Objects
Editing Objects
226
227
228
233
233
234
238
239
244
249
250
251
254
256
257
259
261
265
267
268
268
269
270
271
273
274
275
277
281
281
282
284
288
288
288
289
290
ix
CONTENTS
Arranging Objects on the Graph
Overlapping Objects
Aligning Objects
Aligning Objects Using Snap-to-Grid
Distributing Objects
Chapter 12 Editing Plot Properties
Plot Types
Changing the Plot Type
Plot Properties
Common Plot Properties
Area Charts
Bar Charts, Vertical and Horizontal (2D)
Box Plots
Comment Plots
Contour/Level Plots (2D)
Curve Fitting (Regression)
Error Bar Plots
High-Low-Close Plots
Histograms and Density Plots
Line & Scatter Plots (2D)
Pie Charts
Polar Plots
Vector Plots
Scatterplot Matrix
Contour Plots (3D)
Line & Scatter Plots (3D)
Surface Plots
292
292
292
293
293
295
295
295
299
300
303
304
307
309
311
313
316
317
318
319
325
326
327
328
330
330
332
Chapter 13 Exporting graphs, Printing, and Sending Mail
337
Printing Sheets and Scripts
Sending Electronic Mail
Exporting Graph Sheets to Different File Formats
337
338
339
Chapter 14 Using the Statistics Menus and Dialogs
Introduction to Statistics Menus and Dialogs
Dialog Fields
Plotting from the Statistics Dialogs
Saving Results From an Analysis
x
341
341
342
343
343
CONTENTS
S-PLUS Functions Called by Statistics Dialogs
Modifying the Statistics Dialogs
Chapter 15 Creating and Manipulating Data
Introduction
New Data Object
Tabulate
Merge Two Data Frames
Random Sample Generation
Density, Cumulative Probability, or Quantile
Random Number Generation
Chapter 16 Summarizing and Exploring Data
Summary Statistics
Contingency Table
Correlations and Covariances
Local Regression (LOESS) Smoothing
Supersmoother
Kernel Smoother
Spline Smoother
Chapter 17 Comparing Samples
One-Sample t Test
One-Sample Wilcoxon Test
One-Sample Kolmogorov-Smirnov Test
One-Sample Chi-Square Goodness-of-Fit Test
Two-Sample t Test
Two-Sample Wilcoxon Test
Two-Sample Kolmogorov-Smirnov Test
One-Way Analysis of Variance
Kruskal-Wallis Rank Sum Test
Friedman Rank Sum Test
Exact Binomial Test
Proportions Test
Fisher’s Exact Test
McNemar's Chi-Square Test
Mantel-Haenszel Chi-Square Test
Pearson's Chi-Square Test
344
345
347
347
348
349
351
353
355
358
361
362
365
368
370
372
374
377
379
380
382
384
386
388
390
392
394
396
398
400
402
404
406
408
410
xi
CONTENTS
Chapter 18 Fitting Statistical Models
Introduction
Linear Regression
Nonlinear Least Squares Regression
Logistic Regression
Log-linear Regression
Robust LTS Regression
Local Regression
Stepwise Linear Regression
Fixed Effects Analysis of Variance
Random Effects Analysis of Variance
Generalized Linear Models
Generalized Additive Models
Tree Models
Multiple Comparisons
Compare Models
Chapter 19 Using Multivariate, Survival and Time Series Models
Introduction
Multivariate Analysis of Variance
Factor Analysis
Principal Components Analysis
Nonparametric Survival
Cox Proportional Hazards
Parametric Survival
ACF Autocovariance Function
ARIMA Modeling
Chapter 20 Building Formulas
Overview
Linear Regression
Transformation
Cox Proportional Hazards
413
413
414
421
426
427
428
433
440
444
450
456
465
473
480
485
487
487
488
493
500
506
513
521
526
528
535
535
536
538
541
Chapter 21 Working With Script, Commands and Report Windows 545
Overview
The Script Window
Working with Scripts
xii
545
547
547
CONTENTS
Using Find and Replace
Hiding and Unhiding Scripts
Context Sensitive Help
Using the Right Button Menu
Show Dialog
Time Saving Tips for Using Scripts in S-plus
History Log
Dragging Graph Objects into a Script Window
Dragging Function Objects into a Script Window
The Commands Window
The Report Window
Chapter 22 Customizing The User Interface
Overview
Toolbars and Palettes
Creating Toolbars
Creating and Modifying Buttons
Modifying Toolbars
Displaying Toolbars
Manipulating Toolbars
Saving and Opening Toolbars
Dialogs
Creating Dialogs
Modifying Dialogs
Displaying Dialogs
Example: The Contingency Table Dialog
Menus
Creating Menu Items
Modifying Menu Items
Displaying Menu Items
Manipulating Menu Items
Saving and Opening Menus
Example: Customizing the Context Menu
Using the ClassInfo Object
Properties of the ClassInfo Object
Creating and Modifying a ClassInfo Object
Chapter 23 Customizing Your S-PLUS Session
Overview
552
554
555
555
556
558
558
560
560
561
563
567
567
568
568
569
572
574
575
575
576
577
582
582
582
586
586
589
590
590
591
591
595
595
596
597
597
xiii
CONTENTS
Changing Defaults and Settings
Saving Object Defaults
Specifying General Settings
Specifying Command Window Settings
Specifying Undo & History Options
Specifying Text Output Window Settings
Specifying Graph Options
Specifying Graph Styles
Specifying Color Schemes
Redrawing Plots Automatically
598
598
598
600
600
601
601
602
603
604
Chapter 24 Index
605
Trademarks
617
xiv
WELCOME TO S-PLUS
Introduction
1
Introduction
Installation
Network Installation
System Requirements
15
16
17
18
Help, Support, and Learning Resources
Getting Help
19
19
What’s New in S-Plus
New Features
23
23
Welcome to S-PLUS Version 4, which integrates the power and functionality
of the S-PLUS data analysis system and object-oriented programming
language with a Microsoft Office compatible user interface that is intuitive
and fully customizable. Because it offers unparalleled power and flexibility,
S-PLUS allows you to create innovative, cutting edge analyses. Now all the
power of S-PLUS is available in an intuitive interface, so users of all levels can
access advanced statistical methods and revealing graphics.
In S-PLUS, data can be imported from virtually any source and can be viewed
and edited in the Data window. Point-and-click control over the details of
your graphics makes it easy to produce stunning publication quality output.
Whether your task is simple or complex, S-PLUS can lead you to more
insightful analysis and new discoveries.
S-PLUS is the premier solution for exploratory data analysis and statistical
data mining. At the core of S-PLUS is the "S" language developed at Lucent
Technologies. It is the only language created specifically for data visualization
and exploration, statistical modeling, and programming with data. S provides
a rich, object oriented environment designed for interactive data discovery.
As the exclusive licensee of the S language, MathSoft has molded the S
technology into the most powerful data analysis product available today. The
S-PLUS object-oriented environment delivers benefits that traditional
language analysis programs simply can’t match. With S-PLUS every data set,
function, or analysis model is treated as an object, which makes it easy to
15
CHAPTER 1 WELCOME TO S-PLUS
examine and visually explore data, run functions one step at a time, and
visually compare models for fit.
S-PLUS gives you immediate feedback because it runs functions one at a time.
With S-PLUS, you’ve got control over every step of your analysis. Visually
compare different models for fit, re-explore your data for outliers or other
factors that might influence a result, and document every analysis function.
Because S-PLUS puts you in control, you’ll have complete confidence in the
quality of your results.
Now, standard analysis functions are conveniently available through menus,
toolbars and dialogs, putting powerful S-PLUS techniques at your fingertips.
With point-and-click ease, you can import your data, select your statistical
functions and display your results. As always, when your analysis requires a
new method or approach, you can modify existing methods or develop new
ones with the programming language. By tapping into the power, flexibility
and extensibility of S-PLUS, you can take your analysis to a new level.
Installation
To install the software:
1. Insert the CD-ROM into your CD-ROM drive.
2. If your operating system supports AutoPlay (e.g., Windows 95 or
NT 4.0), installation will proceed automatically. If not run
setup.exe in the root directory of the CD-ROM. Use the default
settings for installation.
It is a good idea to turn off other applications, in particular virus checkers,
while installing S-PLUS, because of known problems with the installation
software InstallShield.
If you are running a 16-bit operating system such as Windows 3.1 or
Windows for Workgroups 3.11 you will need to have version 1.30.172 or
higher of the Win32s subsystem on your machine, before you can install
S-PLUS.
Win32s is included in the Win32s directory on the CD-ROM and may be
installed by running setup.exe in the Win32s\disk1 directory. Be sure to
install Win32s before installing S-PLUS.
16
INSTALLATION
Note
Installing and running S-PLUS under Win32s will require approximately 50MB of combined RAM and
swap file space. If you encounter the message “S_apiSyncConnect Failure” several times during start-up, try
increasing the swap file size to 40MB in the virtual memory settings accessed through the 386 Enhanced
icon in the control panel.
Network
Installation
This version of S-PLUS may not be installed on a network server. If you want
to run S-PLUS on a network server, contact your sales representative for a
network license.
17
CHAPTER 1 WELCOME TO S-PLUS
System
Requirements
• Minimum platform configuration: 486 IBM compatible PC
(Pentium recommended), running at 66 MHz or more, with 32MB
of memory, and math coprocessor
• Hard disk space required: 40MB (Typical installation), 108MB (Full
installation)
• Microsoft Windows 95, Windows NT, or Windows 3.1x
• VGA, Super VGA, or most other Windows compatible graphics
cards and monitors
• One CD-ROM drive, local or networked
• Microsoft Mouse, or other Windows compatible pointing device
• Windows compatible printers are supported
18
HELP, SUPPORT, AND LEARNING RESOURCES
HELP, SUPPORT, AND LEARNING RESOURCES
Getting Help
There are a variety of ways to accelerate your progress with S-P LUS, and to
build upon the work of others. This section describes the learning and
support resources available to S-PLUS users.
Online Help
S-PLUS offers an online help system to make learning and using S-PLUS
easier. Under the Help menu, you will find options for Using S-PLUS (how to
use the graphical user interface), Language Reference (details on each
function in the S-PLUS language), Questions and Answers (some common
difficulties, and proposed solutions), Online Manuals (see below), and Visual
Demonstrations.
There is also context-sensitive help, accessed by clicking on the Help buttons
in the various dialogs, or by clicking on the context-sensitive Help button on
the toolbars.
There is also Language Reference help available through the S-PLUS
Commands window by typing help() at the S-PLUS prompt, or by pressing
the F1 key while S-PLUS is active.
Printed and
Online Manuals
The S-PLUS Programmer’s Guide, the Guide to Statistics, and the S-PLUS User’s
Guide are all available online as well as in print. To view a manual online,
select Online Manuals from the S-PLUS Help menu and choose the desired
title.
Notes on Online versions of the Guides
The Online manuals are viewed using Acrobat Reader, which can be installed as an option during the
installation process. While using Acrobat Reader, it is generally useful to turn on bookmarks (under the
View entry of the menu bar), rather than rely on the contents at the start of the guides. Bookmarks are
always visible and can be expanded to include section headings, or collapsed to show just chapter titles.
Online Demo
The S-PLUS Online Demos help users of all levels familiarize themselves with
the new features of S-PLUS. Take a look at the user interface, learn more
about common S-PLUS tasks, or show a colleague the various capabilities of
S-PLUS.
Guided Tours of
S-PLUS
S-PLUS User’s Guide contains a tutorial, and many chapters have examples
using S-PLUS. These examples extend the techniques illustrated in the online
demos.
19
CHAPTER 1 WELCOME TO S-PLUS
Add-On Modules
Add-on modules that offer analytical functionality beyond that of the base
S-PLUS product include:
S+DOX: helps in designing and analyzing industrial experiments, especially
fractional factorial experiments, response surface experiments, and robust
design experiments.
S+GARCH: provides an essential suite of tools designed for univariate and
multivariate GARCH modeling of financial time series data.
S+SPATIALSTATS: provides a comprehensive set of tools for statistical
analysis of spatial data, including tools for hexagonal binning, variogram
estimation and kriging, autoregressive and moving average modeling, and
testing for spatial randomness.
S+WAVELETS: offers a visual data analysis approach to a whole range of
signal-processing techniques, such as wavelet packets, local cosine analysis,
and matching pursuits.
StatLib
StatLib is a system for distributing statistical software, data sets, and
information by electronic mail, FTP and the World Wide Web. It contains a
wealth of user-contributed S-PLUS functions.
• To access StatLib by FTP, open a connection to: lib.stat.cmu.edu.
Login as anonymous and send your e-mail address as your password.
The FAQ (frequently asked questions) is in /S/FAQ, or in HTML
format at http://www.stat.math.ethz.ch/S-FAQ.
• To access StatLib with a web browser, visit http://lib.stat.cmu.edu/.
• To access StatLib by e-mail, send the message: send index from S to
[email protected]. You can then request any item in StatLib
with the request send item from S where item is the name of the
item.
S-News
S-news is an electronic mailing list by which S-PLUS users can ask questions
and share information with other users. To get on this list, send the message
subscribe to [email protected] . To get off this list, send the
message unsubscribe to the same address.
Once enrolled on the list, you will begin to receive e-mail. To send a message
to the S-news mailing list, send it to: [email protected].
Training Courses
20
MathSoft Educational Services offers a variety of courses designed to quickly
make you efficient and effective at analyzing data with S-PLUS. The courses
are taught by professional statisticians and leaders in statistical fields. Courses
feature a hands-on approach to learning, dividing class time between lecture
HELP, SUPPORT, AND LEARNING RESOURCES
and online exercises. All participants receive the educational materials used in
the course, including lecture notes, supplementary materials, and exercise
data on diskette.
S-Press
S-Press is a free quarterly newsletter about S-PLUS mailed to primary users of
S-PLUS. S-Press features stories by S-PLUS users in industry and academia, a
technical support column and provides new product announcements and
other information from MathSoft.
Technical
Support
In North America, to contact technical support, call
(206) 283-8802 ext. 235
or fax to
(206) 283-6310
or send e-mail to
[email protected].
In Europe, Asia, Australia, Africa and South America, call
+44 1276 452299
or fax to
+44 1276 451224
or email to
[email protected]
Books on Data
Analysis Using
S-PLUS
General
Becker, R. A., Chambers, J. M., and Wilks, A. R. (1988). The New S
Language. Wadsworth & Brooks/Cole, Pacific Grove, CA.
Spector, P. (1994). An Introduction to S and S-PLUS. Duxbury Press, Belmont,
CA.
Data Analysis
Bruce, A. and Gao, H.-Y. (1996). Applied Wavelet Analysis with S-PLUS.
Springer-Verlag, New York.
Chambers, J. M., and Hastie, T. J. (1992). Statistical Models in S. Wadsworth
& Brooks/Cole, Pacific Grove, CA.
Everitt, B. (1994). A Handbook of Statistical Analyses Using S-PLUS.
Chapman & Hall, London.
21
CHAPTER 1 WELCOME TO S-PLUS
Härdle, W. (1991). Smoothing Techniques with Implementation in S. SpringerVerlag, New York.
Kaluzny, S. P., Vega, S. C., Cardoso, T. P., and Shelly, A. A. (1997).
S+SPATIALSTATS User’s Manual. Springer-Verlag, New York.
Marazzi, A. (1992). Algorithms, Routines and S Functions for Robust Statistics.
Wadsworth & Brooks/Cole, Pacific Grove, CA.
Venables, W. N., and Ripley, B. D. (1994). Modern Applied Statistics with
S-PLUS. Springer-Verlag, New York.
Graphical Techniques
Chambers, J. M., Cleveland, W. S., Kleiner, B., and Tukey, P. A. (1983).
Graphical Techniques for Data Analysis. Duxbury Press, Belmont, CA.
Cleveland, W. S. (1993). Visualizing Data. Hobart Press, Summit, NJ.
Cleveland, W. S. (1985). The Elements of Graphing Data. Hobart Press,
Summit, NJ.
22
WHAT’S NEW IN S-PLUS
WHAT’S NEW IN S-PLUS
The following is a summary of new features in S-PLUS. Users of S-PLUS 3.3
for Windows can browse the rest of this User’s Guide to further acquaint
themselves with the graphical user interface.
New Features
New features and techniques include:
Statistics
• Bootstrap and jackknife estimation
• Linear mixed effect models
• Nonlinear mixed effects
• Multiple comparisons
• Crisp and fuzzy clustering
• Monothetic clustering
• Divisive and agglomerative methods
Graphics
• Multiple simultaneous 3D rotation views
• 2D projections in 3D space
• Multiple graphs per page with auto-formatting
• Interactive 3D view angle specification
• Drag-and-drop creation of Trellis graphics
• Point-and-click editable graphics
• Flexible page layout
23
CHAPTER 1 WELCOME TO S-PLUS
• Multiple axis breaks
• Multiple-line text annotation
• Superscripts, subscripts, Greek letters and symbols
• Automatic creation of code to produce editable graphics
• Support for international ASCII character set
User Interface
• 32-bit application with full Windows 95 compatibility (also
compatible with Windows NT and 3.1x running Win 32s)
• Microsoft Office compatible user interface
• Statistical menus and dialogs
• Editable graphics
• Customizable toolbars, menus and dialogs
• Tooltips, online help and tutorial
• Data windows for spreadsheet editing and display of data
• Multi-page Graph sheets
• Object Browser to organize data, graphs, functions and other objects
• Script editor for scripting and programming
• Report windows for easy handling of output
Import and Export
• Import SAS, SPSS, Excel and other file formats
• DDE, OLE client and server, graph documents
24
WHAT’S NEW IN S-PLUS
• Export graphs as .BMP, .TIFF, .EPS, .WMF, or other file formats
• Link data from Excel or other OLE spreadsheets
• Embed S-PLUS graphics in Microsoft Word and edit in place
• Create PowerPoint slides from S-PLUS graphics automatically
Programming
• Validation suite of test cases to confirm accuracy of S-PLUS output
• OLE Automation client and server
• Edit and run scripts
25
CHAPTER 1 WELCOME TO S-PLUS
26
WORKING WITH THE
GRAPHICAL USER INTERFACE
2
Using Menus, Dialog Boxes, and Toolbars
Using the Mouse
Using the Keyboard
Using Windows
Using Main Menus
Using Shortcut (Right-Click) Menus
Specifying Options in Dialogs
Using Toolbars and Palettes
29
29
30
31
35
35
36
38
S-PLUS Windows
Object Browser
Data Window
Graph Sheet
Commands Window
Script Window
Report Window
40
40
40
41
42
43
44
S-PLUS Menus
45
S-PLUS Dialogs
47
S-PLUS Palettes and Toolbars
Standard Toolbar
Graph Toolbar
Data Frame Toolbar
Script Toolbar
Object Browser Toolbar
Report Window Toolbar
Commands Window Toolbar
Plots2D Palette
Plots3D Palette
Annotation Palette
48
48
49
50
50
51
51
51
52
53
54
27
CHAPTER 2 WORKING WITH THE GRAPHICAL USER INTERFACE
User Interface
S-PLUS is a full-featured Windows application designed for easy, intuitive
analysis and visualization of data. The Microsoft Office compatible user
interface is completely customizable, allowing you to tailor the look of
S-PLUS to suit your working style. This chapter gives an overview of the
menus, windows, and toolbars that are the backbone of the product.
Figure 2.1: S-PLUS in action; note the Graph sheet (top left) with the 3D plot palette, the Object
Browser (top right), a Data window (below left), and Report window (below right). The three
variables (columns) of the data set ethanol have been selected in the Data window, and are highlighted, and the resulting 3D scatter plot is shown in the Graph sheet GS1.
28
USING MENUS, DIALOG BOXES, AND TOOLBARS
USING MENUS, DIALOG BOXES, AND TOOLBARS
S-PLUS menus, dialogs and toolbars contain all the options you need to
manipulate data, create stunning graphs, and write S-PLUS scripts. You can
use your mouse or your keyboard to access S-P LUS's menus. Dialogs can be
accessed be selecting menu options or by double-clicking on objects. Mouse,
keyboard and window terms used throughout this User's Guide are defined
below.
Using the
Mouse
Throughout this User's Guide, the following conventions are used to describe
mouse operations:
Pointing Moving the mouse to position the pointer over an object. When
pointing and holding down the mouse button on menu options and when
moving the mouse over toolbar buttons, the status bar at the bottom of the
window describes the function of the menu option or button.
Clicking Pointing at an object and quickly pressing and releasing the left
mouse button. Some tasks in S-PLUS require a double-click (quickly pressing
and releasing the left mouse button twice).
Right-Clicking Pointing at a selected object and quickly pressing and
releasing the right mouse button. This brings up a shortcut menu for the
selected object.
Dragging Pointing at the object, then holding down the left mouse button
while moving the mouse. Releasing the left mouse button "drops" the object
in the new location.
Mouse Pointers
The mouse pointer changes shape to indicate what action is taking place. The
following table shows the different mouse pointer shapes and the significance
of each.
29
CHAPTER 2 WORKING WITH THE GRAPHICAL USER INTERFACE
Table 2.1: Different shapes of the mouse pointer.
Pointer
Mouse Action
Selection mouse pointer.
Text indicator, slanted pointer indicates italic text.
Crosshair for precise positioning of graph objects.
The symbol to the lower right shows the object to be drawn (a filled
circle, for example).
Select a Data window cell or drag a block of cells.
Column width indicator appears when mouse is positioned between
two columns. Drag left to increase column width, drag right to decrease
column width.
Access context sensitive online help.
Displayed when Move or Size is selected from the Control menu; allows
the window to be moved or resized.
Change the size of the window vertically or horizontally when
positioned on a window border.
Change the size of two sides of the window when positioned on the
corner of a window border.
Indicates that a command is being processed; you should wait for a
different mouse pointer before going on to other tasks.
The current command is being processed and cannot be interrupted.
A drag is in process and the object cannot be dropped successfully in the
current position. You must move to another position to drop the object.
Using the
Keyboard
30
Throughout this User's Guide, the following conventions are used to
reference keys. Key names appear in all uppercase letters. For example, the
USING MENUS, DIALOG BOXES, AND TOOLBARS
Shift key will appear as SHIFT.
When more than one key must be pressed simultaneously, the two key names
will appear with a plus (+) between them. For example, the key combination
of SHIFT and F1 will appear as SHIFT+F1.
The up, down, left, and right direction keys (represented on the keyboard by
arrows) are useful for moving objects around the page. They will be referred
to as the UP direction key, the DOWN direction key, the LEFT direction key, and
the RIGHT direction key.
Using Windows
In S-PLUS you can operate on multiple windows, making it easy to edit data,
run scripts, and create graphs. S-PLUS windows have the same elements as
most Windows based software.
The Control-menu box is always in the upper-left corner of the window.
Click once on the Control-menu box for a list of commands that control the
size, shape, and other attributes of the window. Click twice on the Controlmenu box to close the window.
The title bar displays the name of the window. If more than one window is
open, the title bar of the current (or active) window is a different color or
intensity than other title bars.
The minimize button is represented by a horizontal bar, and, when clicked,
reduces the window to an icon.
The maximize button is represented by a square and, when clicked, enlarges
an application window to fill the entire desktop, or will enlarge a sheet
window to fill the entire application window.
31
CHAPTER 2 WORKING WITH THE GRAPHICAL USER INTERFACE
Figure 2.2: The opening main window of S-PLUS brings up the default Object Browser window.
Notice that both windows have a control-menu box (top left), and minimize, maximize and close
buttons (top right). The Object Browser window can be sized and moved, but only within the
confines of the main window.
The restore button replaces the maximize button when the window is
maximized. The restore button contains two interlocking squares and will
return the window to its previous size.
The menu bar is a list of the available menus. Each menu contains a list of
commands or actions.
The scroll bars let you scroll up and down through a window.
The window border surrounds the entire window. You can lengthen or
shorten any side of the border by dragging it with the mouse.
The window corner can be used to drag any two sides of the window.
The mouse pointer is displayed if you have a mouse installed. The mouse is
usually in the form of an arrow, an I, or a crosshair (+). For more
information, see the section titled Mouse Pointers earlier in this chapter.
32
USING MENUS, DIALOG BOXES, AND TOOLBARS
Switching to a
At any time you can have many windows open simultaneously in S-PLUS.
Different Window The number of windows is limited only by your system's memory resources.
To switch from one window to another window
w
Moving and
Sizing Windows
Click on any portion of the preferred window that is visible; or select
the preferred window from the list at the bottom of the Window
menu.
A maximized window cannot be moved or resized. A smaller window can be
moved or resized within the confines of the application window. Note that
not all windows can be resized.
To move a window or dialog
1. Click in the window or dialog to make it active.
2. Click and drag the title bar until the window or dialog is in the
desired location.
To resize a window
1. Click in the window to make it active.
2. Position the mouse over one of the four window borders.
3. The mouse will change to a double-headed arrow when it is over the
border.
4. Click and drag the border to the desired size.
To expand a window to maximum size
1. Click in the window to make it active.
2. Click the maximize button on the title bar, or double-click the title
bar.
The maximize button will change to the restore button.
To save defaults for a window
Right-click the mouse inside the window and choose the Save as Default
option from the shortcut menu. You can specify window size defaults
independently for the Object Browser, Graph sheets, Data windows,
Commands window, Script windows, and Report windows.
33
CHAPTER 2 WORKING WITH THE GRAPHICAL USER INTERFACE
Arranging Icons
This option provides a convenient way to organize your minimized
document icons automatically, when using Windows 3.1.
To arrange minimized document icons
w
Viewing Multiple
Windows
From the Window menu, choose Arrange Icons. All minimized
document icons are arranged automatically on the screen.
In S-PLUS, each different type of object, such as a Graph sheet, data set, or
script, is displayed in a separate window. You can also have multiple windows
of the same sheet or script open at the same time.
You can create a new window on your Data window, for example, by
choosing New Window from the Windows menu. The title bar of the
original window will have ":1" appended to it and the second window will
have ":2" appended to the window title. Duplicate windows let you focus on
different parts of a sheet at the same time. Any changes made to the duplicate
window will also be made to the original sheet window. There is no limit to
the number of times a window can be duplicated.
You have several options for viewing multiple windows.
To view the windows one on top of the other with only the title bar
visible
w
From the Window menu, choose Cascade
To view the windows one on top of the other with the window visible
w
From the Window menu, choose Tile Horizontal
To view the windows side by side
w
Closing Windows
From the Window menu, choose Tile Vertical
To close a window
w
From the File menu, choose Close or double-click the Control-menu
box in the upper-left corner of the window. You will be prompted to
save any changes, if you have not already done so.
To close all open windows
w
34
From the File menu, choose Close All. You will be prompted to save
USING MENUS, DIALOG BOXES, AND TOOLBARS
each sheet or script if you have not already saved your changes.
Using Main
Menus
S-PLUS menus change depending on the type of window you are working on.
For example, if the active window (the highlighted window) contains an
S-PLUS Data window, the menus will display options useful for operating on
Data windows. Graph sheet and programming options will be absent or
dimmed.
When you choose one of the main menu options, a list of additional options
will drop down. You can choose any of the active options in the list. Dimmed
options are not available until you select the appropriate object in the
appropriate window.
Menu options with a c symbol at the end of the line display a submenu
when selected. Menu commands with an ellipsis (...) after the command will
display a dialog box when selected.
For more information on customizing S-PLUS's menus, see Chapter 22,
Customizing the User Interface.
To choose a menu option
Point to the desired menu option and click the left mouse button
or
Press the ALT key to access the menu bar, and then press the underlined key in the desired menu option.
To cancel a menu, click outside the menu or press ESC.
Using Shortcut
(Right-Click)
Menus
When you click the right mouse button, a shortcut menu for the selected
object is displayed. Shortcut menus contain options specific to the selected
object. The shortcut menu appears to the right or left of the mouse pointer.
To close a shortcut menu without choosing an option, click outside the menu
or press ESC.
35
CHAPTER 2 WORKING WITH THE GRAPHICAL USER INTERFACE
Specifying
Options in
Dialogs
Sometimes choosing a menu option or clicking the mouse displays a dialog.
You can use dialogs to specify information about a particular action. In
S-PLUS there are two types of dialogs: action dialogs and property dialogs.
Action dialogs carry out commands such as copying a column. Property
dialogs display and allow you to modify the properties (characteristics) of the
selected object.
Dialogs can contain multiple, tabbed pages of options. To see the options on
a different page of the dialog, click the page name, or press CTRL+TAB to move
from page to page. When you choose OK or Apply (or press ENTER), any
changes made on any of the tabbed pages are applied to the selected object.
Most of S-PLUS's dialogs are modeless. They can be moved around on the
screen and they remain open until you choose to close them. This means you
can make changes in a dialog and see the effect without closing the dialog.
This is useful when you are experimenting with changes to an object and
want to see the effect of each change. The Apply button (or CTRL+ENTER) can
be used to apply changes without closing the dialog. When you are ready to
close the dialog, you can choose Cancel (press ENTER or ESC), or just doubleclick the Close box on the dialog.
Note
Choosing OK will close the dialog and execute the command specified in the Dialog. If you do not wish
the command to execute after the dialog closes, perhaps because you have already clicked on Apply, choose
Cancel instead of OK.
The OK, Cancel,
and Apply
Buttons
When you are finished setting options in a dialog box, you can choose the
OK, Cancel or Apply button.
OK Choose the OK button or press ENTER to close the dialog box and carry
out the action. For example, choosing the OK button in the Box Properties
dialog will close the dialog box and accept the changes specified in the dialog.
Cancel Choose the Cancel button or press ESC to close the dialog box and
discard any of the changes you have made in the dialog. Sometimes changes
cannot be canceled (for example, when changes have made with Apply, or
when changes have been made outside of the dialog with the mouse).
Apply Most of S-PLUS's dialogs have an Apply button. The Apply button
acts much like an OK button except it does not close the dialog box. You can
specify changes in the dialog box and then choose the Apply button or press
CTRL+ENTER to see your changes, keeping the dialog open so that you can
make more changes without having to re-select the dialog. If no changes have
been made to the dialog since it was last opened or "applied", the Apply
button is dimmed.
36
USING MENUS, DIALOG BOXES, AND TOOLBARS
The Dialog
Rollback Buttons
Dialog Rollback The Dialog Rollback buttons let you restore a dialog to a
prior state. You can scroll back through each of the prior states until you find
the set of values you want. Then you can modify any of these values and
choose Apply or OK to accept the entire current state of the dialog (that is, to
change the corresponding object or issue the corresponding command,
depending upon the type of dialog). One use of Dialog Rollback is to restore
an object to a previous state. This is different from "undo" in that rollback
can be applied selectively to individual objects.
Typing and
Editing in Dialog
Boxes
The following tasks can be performed in dialog boxes using the special keys
listed below.
Figure 2.3: Shortcut keys when using dialog boxes.
Action
Special Keys
Move to the next option in the dialog
Tab
Move to the previous option in the dialog
Shift+Tab
Move between pages in a multi-page dialog
CTRL+tab
Move to a specific option and select it
ALT+underlined letter in the option name. Press
again to move to additional options with the same
underlined letter.
Display a drop-down list
ALT+DOWN direction key
Select an item from a list
UP or DOWN direction keys to move,
ALT+DOWN direction key to close the list
Close a list without selecting any items
ALT+DOWN direction key
Many dialogs contain text edit boxes. Text boxes allow you to type in
information such as a file name or a graph title.
37
CHAPTER 2 WORKING WITH THE GRAPHICAL USER INTERFACE
To replace text in a dialog
1. Select the existing text with the mouse, or press
letter in the option name.
ALT+underlined
2. Type the new text.
Any highlighted text is immediately overwritten when you begin typing the
new text.
To edit text in a text box
1. Position the insertion point in the text box. If text is highlighted, it
will be replaced when you begin typing.
2. Edit the text.
Using Toolbars
and Palettes
Toolbars contain buttons that are shortcuts to menu selections. You can use
toolbar buttons to perform file operations such as opening a file or saving a
file. You can also use toolbar buttons to make immediate changes to selected
objects such as font or color changes.
S-PLUS displays two toolbars: the Standard toolbar and a special toolbar that
changes depending on the type of current active window. You can turn off the
display of Standard and special toolbars, but only for the current session.
Tool Tips
When you pause the mouse over a toolbar or palette button, helpful “Tool
Tips”, (small prompt windows) will appear. You can control whether tool tips
are enabled in the General Settings dialog. Select Options/General Settings to
see the dialog.
Figure 2.4: Using "Tool Tips" on the Standard toolbar.
38
USING MENUS, DIALOG BOXES, AND TOOLBARS
Using Toolbar
Buttons
To select a toolbar button, position the mouse pointer over the desired
button and click. For example, you can save your current Graph sheet or
script just by clicking on the Save button. Or, you can open a palette of plot
types by choosing one of the 2D or 3D Plots buttons.
When you position the mouse pointer over a toolbar button, a description
appears at the bottom of the screen in the status bar. Like menu options,
some toolbar buttons may not be available at all times. Inactive toolbar
buttons are dimmed (for example, the Undo button is dimmed if there is
nothing to undo.)
Displaying
Palette Buttons
Several buttons display a palette of options when selected. For example, the
2D Plots button will display a palette of 2D plot types. Tool palettes remain
in view until you click the toolbar button again, or click the palette's Close
box. Leaving a tool palette in view is convenient when you are experimenting
with different options.
39
CHAPTER 2 WORKING WITH THE GRAPHICAL USER INTERFACE
S-PLUS WINDOWS
The S-PLUS user interface contains six types of windows: the Object Browser,
Data window, Graph sheet, Commands window, Script window, and Report
window. These windows allow you to easily organize your work session, work
with data, scripts and graphs simultaneously and automate repetitive tasks.
Object Browser
The Object Browser provides a detailed map of S-PLUS. This two-paned
window displays the data sets, graphs, functions, and other objects in your
S-PLUS session. The left pane shows a hierarchical tree view of the objects in
the current session. Branches of the tree may be expanded and collapsed to
show any level of detail. The right pane displays the objects which are
contained in a left pane selection—just as in the Windows 95 Explorer. By
using the Object Browser, you can easily select data, functions, and objects to
simplify the preparation of your analysis.
Figure 2.5: An Object Browser window: several can be open simultaneously.
Data Window
The Data window displays data sets in an editable spreadsheet format. It
handles data in a column-oriented manner. Data can be edited within the
Data window. Columns can also be copied or moved from one Data window
to another. This allows you to easily manipulate your data for a wide variety
of operations and analyses.
In look and feel, the S-PLUS Data window is very similar to standard
spreadsheets. However, the Data window has additional features which make
it easy for you to create a graph, explore your data and perform advanced
40
S-PLUS WINDOWS
statistical analysis and modeling. S-PLUS imports and exports data in all
popular formats, including SAS, SPSS, Excel, and ASCII, as well as from any
ODBC compliant application.
Once selected in the Data window, columns of data may be plotted simply by
clicking one of the many 2D and 3D plot palette buttons.
Figure 2.6: The Data window, with one column (variable) highlighted.
Graph Sheet
Every plot of data in S-PLUS is displayed in a fully customizable Graph sheet.
Each Graph sheet can contain one or more graphs, and you can work with
multiple Graph sheets. Graphs are object-oriented, meaning elements can be
selected and edited to create publication-quality output.
There are various ways to create a Graph sheet:
1. By selecting data displayed in the Data window and clicking in a
plot palette.
2. By selecting columns of data from the Object Browser and clicking
in a plot palette.
3. By selecting graphing options from the menus.
4. By calling functions from the Commands window.
41
CHAPTER 2 WORKING WITH THE GRAPHICAL USER INTERFACE
5. By running scripts of S-PLUS commands in the Script window.
Figure 2.7: A Graph sheet window displaying a Trellis graph.
To edit a Graph sheet, double-click on the plot object you wish to modify.
Specify the edits in the Property dialog which now appears. To customize
your graph, you can select objects directly on the Graph sheet or select the
objects from the Object Browser. The appropriate dialog appears allowing
you to edit text, color, line weight and many more similar plotting features.
Commands
Window
The Commands window behaves similarly to that in S-PLUS 3.3 for
Windows. The Commands window allows you to access the powerful S-PLUS
programming language, you can modify existing functions or create new ones
tailored to your specific analysis needs. The new Bootstrap routines, along
with some other advanced modeling procedures, are not available through
the Statistics menu, but can be launched through the Commands window or
the Script window.
Using the customization features of S-PLUS, however, any function may be
42
S-PLUS WINDOWS
executed from a dialog that is invoked by a menu item or toolbar button.
Figure 2.8: The Commands window will be familiar to users of earlier versions of S-PLUS.
Script Window
The Script window is designed for creating, modifying, and running scripts
of S-PLUS commands. Like data sets and Graph sheets, scripts can be created,
edited, opened, saved and printed. You can type commands directly, use
commands generated in the History Log, or copy graph objects into the
Script window to create script files. Script files can be used to create toolbar
buttons, menus and dialogs, and to automate repetitive tasks.
Each script window has two panes. The upper pane is the "program" pane in
which you can enter or copy commands. The lower pane is for script output.
When you run your script, all output, such as Print commands and warnings
and errors, appears in this pane. You cannot enter information into this pane,
43
CHAPTER 2 WORKING WITH THE GRAPHICAL USER INTERFACE
but you can copy output into the clipboard.
Figure 2.9: The Script window is split into program and output panes.
Report
Window
When the Commands window is closed and a dialog is launched, output is
directed to the Report window. Text in the Report window can be formatted
before cutting and pasting it into another application.
Figure 2.10: A Report window is an option for holding textual output.
44
S-PLUS WINDOWS
The Report window is similar to the Script window. They both are primarily
text windows which can be opened and saved via the File menu and are
editable. Unlike the script window, the report window does not deal with
programs or scripts. The report window is a place-holder for the text output
resulting from any operation in S-PLUS.
Error messages and warnings are sometimes placed in a Report window.
S-PLUS Menus
S-PLUS menus change depending on which window type is active. When you
choose one of the main menu options, a list of additional options will drop
down. You can choose from any of the active options in the list. Menu
options with a c symbol at the end of the line display submenus when
selected. Menu items with an ellipsis (...) after the command will display a
dialog. To access shortcut menus for a selected object, simply right-click the
mouse. Shortcut menus contain options specific to the selected object.
Table 2.2: The main menu.
Main menu
Notes
File
File/New and File/Open create or open documents and windows. Use Open, for
example, to open up the Examples Object Browser (Examples.SBF).
Edit
Editing options, such as cut, copy and paste.
View
Standard options such as whether the status bar and toolbars are visible.
Insert
When a Graph sheet is open there are many options for adding graphs, annotation and
so on, see chapters starting with Creating a Graph. Can be used to insert folders, and
browser pages when the Object Browser is open.
Format
Options related to the formatting of objects. There are many options available if a
Graph sheet is active, see chapters starting with Creating a Graph.
Data
Data editing options. See the Statistics section of this guide.
Statistics
See the Statistics section of this guide.
Graph
See chapters starting with Creating a Graph.
45
CHAPTER 2 WORKING WITH THE GRAPHICAL USER INTERFACE
Table 2.2: The main menu.
Main menu
Notes
Options
General settings for options, styles, and color schemes. See chapter on Customizing
Your S-PLUS Session.
Window
Standard windows controls such as Cascade and Tile.
Help
Gives online access to this User’s Guide and the other manuals, common questions and
answers, and visual demonstrations.
46
S-PLUS WINDOWS
S-PLUS Dialogs
In S-PLUS, user-defined dialogs can be linked to S-PLUS functions. The
controls in the dialog are mapped to the arguments of the function. The
function can be displayed in the Object Browser, and can be invoked by
double-clicking on it there. It is also possible to access a user-defined dialog
from a menu item or from a toolbar button.
Dialogs can contain multiple tabbed pages of options. To see the options on a
different page of the dialog, check the page name. When you choose OK or
Apply, any changes made on any of the tabbed pages are applied to the
selected objects.
Figure 2.11: An S-PLUS dialog - in this case for performing multiple comparisons.
47
CHAPTER 2 WORKING WITH THE GRAPHICAL USER INTERFACE
S-PLUS PALETTES AND TOOLBARS
There are ten main toolbars built into S-PLUS. Toolbars contain buttons that
are shortcuts to menu selections. You can use toolbar buttons to perform
standard file operations such as opening a file or saving a file, or operations
highly specific to S-PLUS, such as making immediate changes to selected plot
properties, such as text font and color changes.
Every toolbar can be dragged into an open window as a floating palette.
When you pause the mouse over a toolbar button, "ToolTips" will appear
indicating the function of the button. The following is a complete gallery of
the ten toolbars:
Standard Toolbar
Table 2.3: The Standard toolbar; for the Undo/Redo, Commands and History log options see chapter 21,
Working with Script, Commands and Report windows. For details on the Restore data object and New
data frame buttons, see chapter 4, Using Data Windows. See the graphics section, starting with chapter 8,
Creating a Graph, for full descriptions of the graphical options.
48
New
Open
Save
Print
Cut
Copy
Paste
Undo
Undo list
Redo
Redo list
Restore
data object
New Data
Frame
New
Browser
Display the
History log
Commands
window
Commands
history
2D Plot
palette
3D Plot
palette
Conditioning mode
Number of conditioning
variables
Draft mode
PowerPoint presentation
Turn on
context
help
S-PLUS PALETTES AND TOOLBARS
Graph Toolbar
Table 2.4: The Graph toolbar; see graphics section, starting with chapter 8, Creating a Graph.
Set font
Set text size
Bold text
Italic text
Underline
Superscript
Subscript
Send to
back
Bring to
front
Fill color
Line/
Symbol
color
Pattern
Line style
Line weight
Auto legend
Annotation
palette
Send graph
to other
application
49
CHAPTER 2 WORKING WITH THE GRAPHICAL USER INTERFACE
Data Frame Toolbar
Table 2.5: The DataFrame toolbar; see chapter 4, Using Data windows.
Align left
Center
Align right
Increase
precision
Decrease
precision
Change data type
Insert col.
Column type to insert
Remove
column
Clear
column
Remove
row
Clear row
Sort
ascending
Sort
descending
Adjust
column
width to fit
Increase
column
width by
one
Decrease
column
with by one
Script Toolbar
Table 2.6: The Script toolbar; see chapter 21, Working with Script, Commands and Report windows.
Run
selected
script
50
Find text
S-PLUS PALETTES AND TOOLBARS
Object Browser Toolbar
Table 2.7: The Object Browser toolbar; see chapter 6, Using the Object Browser.
Create Object
Browser page
Expand
item
Collapse
item
Find
S-PLUS
objects
Report Window Toolbar
Table 2.8: The Report window toolbar; see chapter 21, Working with Script, Commands and Report
windows.
Turn on
context
help
Commands Window Toolbar
Table 2.9: The Commands window toolbar; see chapter 21, Working with Script, Commands and Report
windows.
Create object oriented
(editable) graphs
51
CHAPTER 2 WORKING WITH THE GRAPHICAL USER INTERFACE
Plots2D Palette
Scatter
Line
Scatter w/Line
Line/Isolated Points
High Density
Line w/Text as Symbols
Bubble
Color Plot
Bubble Color
Loess
Smoothing Spline
Robust Fit
Linear Fit
Polynomial Fit
Exponential Fit
QQ Normal Plot w/Line
BoxPlot
Pie
Histogram
Density
Histogram/Density
Bar
Grouped Bar
Stacked Bar
Bar w/Error
Grouped Bar w/Error
Bar Origin Base
Dot Plot
Horizontal Bar
Stacked Horizontal Bar
2D Time Serie
High-low Average
Vertical Error Bar
QQ Plot
Area
Scatter Plot Matrix
Contour
Filled Contour
Levels Plot
Lower X Axis
Upper X Axis
Upper X with Frame
Left Y Axis
Right Y Axis
Right Y with Frame
No Conditioning
4 Panel Conditioning
9 Panel Conditioning
Plots in Separate Panels
Sep. Panels w/Varying Y-axis
Sep. Panels w/Varying X-axis
Figure 2.12: The 2D Plot Palette; see graphics section starting with chapter 8, Creating a
Graph.
52
S-PLUS PALETTES AND TOOLBARS
Plots3D Palette
Scatter
Line
Line with Scatter
Drop Line Scatter
Regression
Regression with Symbols
Coarse Surface
Data Grid Surface
Spline Surface
Coarse Filled Surface
Data Grid Filled Surface
Filled Spline Surface
8 Color Draped Surface
16 Color Draped Surface
32 Color Draped Surface
Bar
Contour
Filled Contour
XY Plane Z Min
XZ Plane Y Min
YZ Plane X Min
XY Plane Z Max
XZ Plane Y Max
YZ Plane X Max
2 Panel Rotation
4 Panel Rotation
6 Panel Rotation
Condition on X
Condition on Y
Condition on Z
No Conditioning
4 Panel Conditioning
6 Panel Conditioning
Figure 2.13: The 3D Plot Palette; see section on graphics starting with chapter 8, Creating a
Graph.
53
CHAPTER 2 WORKING WITH THE GRAPHICAL USER INTERFACE
Annotation Palette
Selection Tool
Comment Tool
Label Point Tool
Select Row Tool
Line Tool
Data Stamp Tool
Arrow Tool
Arcs Tool
Radial Lines Tool
Error Bars Tool
Vert. Ref. Line
Horiz. Ref Line
Filled Box Shape
Box Shape
Rounded Box
Ellipse Shape
Square
Circle
Up triangle
Plus
X
Diamond
Down triangle
Box X
X+
+ Diamond
+ Circle
Up Down triangles
Box +
X Circle
Box up triangle
Filled square
Filled circle
Filled up triangle
Filled diamond
Filled down triangle
Box down triangle
X Diamond
Cross
Ant
Dash
Bar
Male
Female
Figure 2.14: The Annotation toolbar has buttons for Tools, Shapes and Symbols. See chapter 10,
Formatting a Graph.
54
TUTORIAL
Introduction
3
Quick Tour
57
In-Depth Tour
The Object Browser
Inserting a New Column
Creating a 2D Graph
Creating 3D Graphs
Using Trellis Graphics for Multipanel Conditioning
Applying Statistics Models
The Commands Window
Creating PowerPoint Slides Automatically
65
65
66
67
70
74
77
81
83
S-PLUS is designed to work seamlessly with the software you already use. You
can import and export data from many sources including spreadsheets like
Excel and Lotus, analytical software such as SAS and SPSS, and databases.
You can also access networked databases via ODBC. Once you have accessed
your data you can analyze and explore it. Let’s walk through a sample session
using some data to help you decide which new car you should buy.
Figure 3.1: The Find button on the Object Browser toolbar.
A note on using example data
In this tutorial, example data sets will be put in a folder in the default Object
Browser as they are needed. This is done using the Find option available on
the Object Browser toolbar (see figure 3.1). Alternatively, if you would like to
55
CHAPTER 3 TUTORIAL
browse through all of the example data sets, you can load the example Object
Browser. To do this, close the default Object Browser that appears at start-up.
Choose File/Open from the Standard toolbar, select Examples.SBF, and click
Open. To see a list of all the example data frames, go to the left pane of the
example Object Browser, and click on the “+” in front of data.frame to
expand the list. If you are going to use this option, ignore references in the
examples to using the Find button.
56
QUICK TOUR
QUICK TOUR
Figure 3.2: The Example Object Browser, with data.frame highlighted in the left pane.
First let’s open the data in a convenient Data window.
1. Click on the Find button in the Object Browser toolbar. Type in
fuel.frame for the Pattern, and click OK.
2. Go to the left pane of the Object Browser and click on the “+” in
front of Found Objects to expand the list.
3. Double-click on fuel.frame to open a Data window. Maximize the
Data window.
4. Select all the columns of fuel.frame (from “Weight” to “Type”) by
dragging the mouse across the column headers.
•
Weight:
automobile weight
•
Disp.:
engine displacement (6 liter, 8 liter etc.)
•
Mileage:
mileage in miles per gallon
•
Fuel:
100/mileage
•
Type:
category of vehicle (Large, Medium, Small,
Compact, Sporty, Vans)
5. Click the 2D Plot button on the Standard toolbar to open a palette
57
CHAPTER 3 TUTORIAL
of available 2D plot types.
Figure 3.3: The Standard toolbar, showing the position of the Object Browser button (circled)
and the 2D and 3D Plot palette buttons (marked by the ellipse).
6. Click the Scatter Plot Matrix button on the palette.
Figure 3.4: The 2D plot palette showing the Scatter Plot Matrix button (circled) and the Linear
Fit button (marked by an ellipse).
A scatter plot matrix is displayed plotting each column of data against the
other selected columns. For example, to see how Mileage and Fuel are related,
58
QUICK TOUR
read across from Mileage and above Fuel to see the plot. The plot shows that
Mileage and Fuel are directly related. You can also see a strong relationship
between Mileage and Weight - heavier cars have lower mileage.
16
21
26
31
36
1
2
3
4
5
6
Weight
300
250
200
150
100
50
Disp.
Mileage
5.5
5.0
4.5
4.0
3.5
3.0
2.5
Fuel
Type
50 100 150 200 250 300
2.5 3.0 3.5 4.0 4.5 5.0 5.5
Figure 3.5: The Scatterplot matrix shows a number of strong relationships.
Linear Regression Now that you’re familiar with your data, let’s examine the relationship
between Weight and Mileage a bit more extensively.
of Weight vs.
Mileage
1. Close the window containing the scatter plot matrix so you can see
Conditioned by
the Data window again.
Type
CTRL CLICK
2. Click on the header of Weight and then
of Mileage in the Data window.
-
on the header
3. Click on the Linear Fit button (see figure 3.4) on the 2D plot
palette. This linear fit shows an obvious relationship between an
increase in Weight and a decrease in Mileage.
To examine how Vans or Compact cars fit into this example, you can use
the exclusive Trellis graphics in S-PLUS to condition Weight and Mileage
59
CHAPTER 3 TUTORIAL
on a third variable, Type.
4. Minimize any windows you have open, except the Data window and
Graph sheet (you may need to Cascade the windows first using
CTRL-shift-C). Press CTRL -SHIFT-V to vertically tile your graph and
Data windows side by side.
5. Select the Type column by clicking on its header. Then position the
mouse somewhere within the data so that the pointer arrow appears
(not the down arrow of the column header), and drag and drop it on
the target area (a rectangle marked by dashed lines) that will appear
at the top of your graph.
6. Maximize the graph window. The data are divided into subsamples
and conditioned by Type. Now you can see additional relationships:
•
Sporty cars, normally assumed to be gas guzzlers,
actually have among the highest mileage along with
Small cars.
•
Compact and Medium cars, often touted for higher
mileage, get gas mileage similar to Large cars.
Figure 3.6: The Annotations button on the Graph toolbar.
Identifying and
Labeling Data
Points
Now we can identify which are the best and worst mileage cars by labeling
the data points.
1. Click on the Annotations toolbar button (see figure 3.6) on the
Graph toolbar (use View/Toolbars/Graph to show the Graph
toolbar, if it is not already in view). On the Annotations palette, click
on the Label Point button, see figure 3.7.
2. Click on the data point you wish to label. The data point is labeled
with the car description.
60
QUICK TOUR
3. Close the Annotations palette.
Figure 3.7: The Label Point button in the Annotations toolbar.
Editing the
Graph
Now imagine that you wanted to include your graph in a report or
presentation. You might want to modify its attributes further.
In S-PLUS the graphics are object-oriented, which means you have complete
control over every detail. You can easily modify graph objects using shortcut
menus, dialogs, or the toolbar.
1. Shift-click on each axis title on the graph to select them. Change the
font size to “20” using the graph toolbar.
2. Click on any data point to select the plots. A single green square at
the bottom center will appear. Change the plot color to Red using
the drop down Color menu, by clicking on the Line Color button
on the graph toolbar, see figure 3.8.
Figure 3.8: The Line Color button on the Graph toolbar changes text as well as line colors
Creating a 3D
Graph
S-PLUS offers a variety of 3D plot types for powerful data visualization. First
let’s select some 3D data. Before we begin, close all of your Graph sheets and
Data windows, and open the Object Browser.
1. Use the Find button on the Object Browser toolbar to find the
galaxy data frame.
2. Go to the Object Browser and click once on the galaxy data frame in
the left pane. The columns of this data frame will appear in the right
pane.
3. Select the data columns east.west, north.south and velocity, by a
61
CHAPTER 3 TUTORIAL
CTRL-click
on each column.
4. Click the 3D Plot button to open a palette of available 3D plot types
(see figure 3.3).
5. Click on the Scatterplot button shown below in figure 3.9.
Figure 3.9: The Scatterplot button on the 3D Plot Palette (circled), and the 4 Panel Rotation
button is shown by the ellipse.
6. You can interactively rotate your 3D graph. Click outside the surface
plot but inside the 3D workbox area to select the invisible 3D
workbox (several green circles should appear). Drag horizontally on
one of the green circles that appears. When you release the mouse
the graph is redrawn at the new perspective. The green triangle can
be dragged up and down to rotate the graph vertically.
7. To see different rotations at the same time, use multipanel rotation.
Click on any point of the plot to select it (a single green square
should appear). Then click on the 4 panel Rotation button on the
62
QUICK TOUR
3D Plot palette (see figure 3.9). To adjust the starting rotation
angles, you can interactively rotate the graph in the bottom-left
panel.
Figure 3.10: Four panel rotation; four circles and a triangle used for controlling the rotation will
appear in the lower left plot.
Calculating a Tree S-PLUS offers a wide variety of statistical techniques including regression
analyses, analysis of variance, tree models and more. Now let’s fit a tree based
Based Model
model.
1. Close all Data windows and Graph sheets, and restore the Object
Browser window.
2. Click once on fuel.frame in the left pane of the Object Browser,
then select the Mileage column for the response variable (simply by
clicking on it). Then CTRL-CLICK to select Weight, Disp. and Type
as the predictor variables.
63
CHAPTER 3 TUTORIAL
3. Choose Statistics/Tree Models. The Tree Regression dialog appears
with the Data Frame field filled in. The response and predictor
variables are written out in the Formula field.
4. Click OK.
A tree based model appears in a Graph sheet, and summary statistics for the
model are displayed in the Report window. We see that Displacement is the
most important predictor of Mileage followed by Weight and Type.
Figure 3.11: The Tree Regression dialog; note in particular the filled in Formula box.
Summary
64
With S-PLUS you can interactively explore, analyze, and visualize your data
with unsurpassed ease of use and flexibility.
IN-DEPTH TOUR
IN-DEPTH TOUR
S-PLUS lets you import and export data from many popular programs,
including SAS, SPSS, and Excel. You can then transform, manipulate and
analyze your data using over 2,000 robust modern and classical functions.
In this example, we will import data from the SAS file Exenvirn.sd2.
Importing a File
To import Exenvirn.sd2:
1. From the File menu select Import Data/From File. S-PLUS lists the
files in the current directory.
2. Under Files of type, choose SAS Files (*.sd2).
3. Navigate to your HOME directory (this is your own, named,
directory that contains your _data and _prefs sub-directories). Select
Exenvirn.sd2.
4. Choose Open to load the file into a window.
The Object
Browser
S-PLUS objects can be displayed in the Object Browser. To open the default
Object Browser, select the Object Browser button on the Standard toolbar.
Figure 3.12: The Standard toolbar, showing the position of the Object Browser button (circled)
and the 2D and 3D Plot palette buttons (marked by the ellipse).
The default page shows the data frames, lists, matrices and vectors in the
working directory, any open Graph sheets, and any open folders. Select the
data.frame icon. Note that the Exenvirn data frame that we imported is
listed. To view a data frame, double click on its icon.
Pages can be added to the Object Browser. Each page can list a certain type of
S-PLUS object, or a combination of objects. Selecting tabs at the bottom of
the window will switch the page viewed.
65
CHAPTER 3 TUTORIAL
Editing Variable
Names
Note that the imported SAS file has variable names all in uppercase and at
most eight characters long. In S-PLUS, variable names are highly flexible, so
let us modify the variable names before creating a graph.
1. In the right pane of the Object Browser, double-click on the column
name for “RADIATIO” and change it to “RADIATION” (you can
use lower case or mixed upper and lower if you prefer).
2. Double-click on the column name for column 3 and change
“TEMPERAT” to “TEMPERATURE”.
Inserting a
New Column
Figure 3.13: The Insert Columns dialog.
To create a new column, right-click inside the data frame on one of the cells,
and choose Insert Column... from the pop-up menu (or choose
Insert\Column.. from the main menu), and fill out the dialog. For instance,
to create a new column LWind which is the log of WIND and to insert it at
the end of Exenvirn:
1. In the Name(s) field, type LWind.
2. In the Fill Expression field, type log(WIND).
3. Leave the other fields at their defaults, and click OK to create the
new column.
66
IN-DEPTH TOUR
Creating a 2D
Graph
In S-PLUS there are several methods for creating graphs. You can select data
in a Data window or in the right pane of the Object Browser. Then you can
click a plot palette button, or you can drag-and-drop plot buttons onto
graphs and then drag data onto the plot buttons, or you can use the Graph
option on the Insert menu. For this example, we will create a graph using the
plot buttons.
The 2D and 3D Plots buttons are available on the standard toolbar for
creating graphs quickly, see figure 3.12. When you click on the 2D or 3D
Plot buttons, a palette of plot buttons appears. For a description of each plot,
move the mouse cursor over each button in the palette. A text description of
the plot appears in the status bar at the bottom of your screen, in addition to
the tooltip.
When a new graph is created using a plot button, a Graph sheet is
automatically opened in a new window. To create a 2D graph using a plot
button and the data frame Exenvirn:
1. Import the data set Exenvirn.sd2 if you have not already done so.
Minimize or close the Object Browser if it is open.
2. In the Data window, select the data columns for OZONE and
RADIATION by dragging across the column headers. The order in
which columns are selected determines their default plotting order.
The first column will be X data and the second Y. Note that you can
CTRL-CLICK on column headers to select discontiguous columns, or
to select columns in a specific order.
3. Click the 2D Plots button to open a palette of available 2D plot
types.
4. Click the Loess fit button on the palette (see figure 3.14). A locallyweighted least squares regression is calculated and the plot is created.
Figure 3.14: The 2D plot palette showing the Loess button.
67
CHAPTER 3 TUTORIAL
5. Click on the Maximize button in the upper right corner of the
Graph sheet.
6. Right-click on a data point on the plot to access the plot’s short cut
menu. Select Smooth/Sort to try different levels of smoothing. Enter
values between 0 and 1 in the Span field, and click on Apply or OK.
7. Close the 2D plot palette.
Changing Graph
Features
S-PLUS gives you unparalleled control over customizing every detail of your
graph—right down to the thickness of your tick marks. You can control all
individual line thicknesses, symbol sizes, fonts, colors, titles, tick marks and
axes labels. Additionally, you can create multiple lines of text for comments,
titles and tick labels. Superscript and subscript options are conveniently
located on a toolbar for quick access, so editing any text or equation is easy.
Now we will change some of the features of the loess plot created in the
previous section. Go to the Windows menu and choose the Graph sheet
GSn, where n is the highest number you see, to bring the window containing
the 2D loess plot to the front of your screen. Maximize the window.
Axis and Labels
1. Right-click on the y-axis to get a shortcut menu. Choose Display/
Scale.
2. In the Display/Scale page, specify Color: Lt. Gray and Frame: No
ticks.
3. Click on the Grids/Ticks tab. Under Major Ticks, specify Weight: 1
and Tick Position: In.
4. Click OK. Then repeat steps 1 to 4 for the x-axis.
5. Change the x axis title by clicking once to select the axis label and
once more to get an in-place edit box.
6. In the text edit box, type “Ozone Concentration”. Click outside the
box to make the change. Change the Y axis title to “Solar
Radiation”.
Plot Properties
1. Double-click on a point in the plot to display the Line/Scatter Plot
dialog.
2. On the Line page, specify the Line Color as Lt. Blue and the Weight
as 2. On the Symbol page, specify Diamond, Solid as the Symbol
Style and Red as the Symbol Color. Click OK.
68
IN-DEPTH TOUR
Legends
1. To add a legend to our graph, click on the Auto Legend button,
located on the Graph sheet toolbar. The legend will appear.
Figure 3.15: The Line Color button (circled) on the Graph toolbar changes text as well as line
colors; the Auto Legend button is marked with an ellipse.
Titles
1. Now, we can insert a main title at the top of our graph. From the
Insert menu, choose Titles, and then Main.
2. Type “The Relationship Between Radiation and Ozone” into the
text box that appears. Click outside the title to close the text box.
3. Select your Main Title and use the toolbar to set a font size of 20.
Use the Line Color button to change the text color to Magenta.
Minimize the Graph sheet and Data window.
Figure 3.16: After making all the changes to our graph, it now looks like this.
69
CHAPTER 3 TUTORIAL
Creating 3D
Graphs
Now, we will use the data frame ethanol to create a 3D plot.
1. Use the Find button on the Object Browser toolbar to find the
ethanol data frame.
2. In the Object Browser, click on the ethanol data frame in the left
pane.
3. Click on the column C, in the right pane of the browser, then CTRLclick on E and NOx.
4. Click the 3D Plots button to open a palette of available 3D plot
types.
Figure 3.17: The Spline button on the 3D Plot Palette (circled).
5. Click the 3D Spline Plot button on the palette (see figure 3.17). The
70
IN-DEPTH TOUR
graph will appear.
Figure 3.18: 3D Spline plot.
Adding Color
Draping
Now we will add color draping to the spline plot.
6. Click on the maximize button in the upper right corner of the
Graph sheet.
Figure 3.19: The 32 Color Draped Surface button on the 3D Plot Palette (circled).
7. Click on the mesh of the surface plot to select it. On the 3D Plot
71
CHAPTER 3 TUTORIAL
palette, click the 32 Color Draped Surface button (see figure 3.19).
The graph will redraw with the new format.
Figure 3.20: Color draping can be done with up to 32 colors using the 3D Plot palette, or up to
64 colors using the Surface Plot dialog (obtained by right-clicking or double-clicking on the
surface).
Rotating 3D Plots Now we will rotate the plot to explore the different features of our data.
8. Click on the surface of the plot to select itOn the 3D plot palette,
click the Data Grid Surface plot button (see figure 3.21) to draw a
wireframe plot.
9. Click inside the plot area (not on the wireframe). Four circles and
one triangle appear.
10. The circles allow you to rotate your graph horizontally. The triangle
rotates vertically. Drag a triangle or a circle and try it for yourself.
11. We can also select a 4 panel rotation view of our graph. Click on the
wireframe plot to select it. Then, click on the 4 Panel Rotation
button on the 3D palette (see figure 3.21). This view allows you to
compare the surface plot from four different angles simultaneously.
12. Additionally, you can click near the surface plot in the lower left and
the green circles and triangle will appear. Now you can rotate this
graph and watch the others rotate as well.
72
IN-DEPTH TOUR
13. Close the 3D graph window and the Data window..
Figure 3.21: The Data Grid Surface button on the 3D Plot Palette (circled), and the 4 Panel
Rotation button (marked by an ellipse).
73
CHAPTER 3 TUTORIAL
Using Trellis
Graphics for
Multipanel
Conditioning
Suppose you have a data set with multiple variables and you want to see how
plots of two variables change with variations in one or more conditioning
variables. Exclusive to S-PLUS, Trellis graphics are designed to display your
data in a series of panels using conditioning options. Each panel contains a
subset of the original data corresponding to intervals of the conditioning
variables.
In S-PLUS, most graphs can be conditioned. The data columns used for each
plot and for the conditioning variable(s) must be of equal length. The axes
specifications and panel display attributes (for example, fill color) are
identical for each panel.
Now we will apply multipanel conditioning to our previously created loess
plot.
1. Make sure the window containing the Exenvirn data is open, and
that the loess graph showing the relationship between radiation and
ozone is open. Minimize the Object Browser. Select Tile Vertical in
the Windows menu. The loess plot and the data should be in the
main window.
2. In the Data window, select both TEMPERATURE and WIND.
3. Click and hold the mouse over the data in the columns (not the
headers) until the rectangular shadow appears, then drag them over
and drop on the rectangular drop target (the long bar) which will
74
IN-DEPTH TOUR
appear at the top of the graph.
Figure 3.22: Highlight the TEMPERATURE and WIND columns, and drag them to the
rectangular drop target at the top of the graph.
The Trellis graph in figure 3.23 shows the relationship between Ozone and
75
CHAPTER 3 TUTORIAL
Solar Radiation, conditioned on both Wind Speed and Temperature.
Figure 3.23: Ozone and Solar Radiation: notice that the relationship is strongest when
Temperature is high and Wind Speed is low.
4. Select the plot by clicking on the line or symbols in any one of the
panels. Open the 2D Plot palette, and click on the Linear Fit button.
A linear regression line will replace the loess curve in each panel.
5. Save the multi-panel plot as mpanel.sgr, using File/Save As, and
76
IN-DEPTH TOUR
Close the Data window, Graph sheet, and 2D Plot palette.
Figure 3.24: A linear regression has replaced the loess curve in each panel.
Applying
Statistics
Models
S-PLUS provides a vast array of statistical techniques with the most widely
used techniques accessible through dialogs launched from the Data and
Statistics menus.
All techniques are available through the S language. Commands may be
issued interactively in the Commands window or as a script in a Script
window.
In the course of an analysis the user may begin by fitting a model through a
convenient dialog, then proceed to analyze the model and perform
diagnostics through the flexible and powerful S language.
In this section we will fit linear regression models to predict Ozone using
Temperature, Radiation, and Wind.
77
CHAPTER 3 TUTORIAL
Summaries
First we will look at summaries of the data in the Exenvirn data frame.
1. Use the Find button on the Object Browser to find the Exenvirn
data frame.
2. Select Statistics/Data Summaries/Summary Statistics.
3. In the Data field type Exenvirn, or alternatively use the drop down
list. Click OK.
4. Summaries for the columns will appear.
5. Click on the Object Browser.
6. Click on the data.frame icon.
7. Select Exenvirn.
8. Select Statistics/Data Summaries/Correlations.
9. The Correlations and Covariances dialog will appear with Exenvirn
selected as the data frame. Click OK.
Correlations for the columns will appear in the Report window.
Linear model
Next we will use the Linear Regression dialog to fit a linear model predicting
Ozone from the other variables.
Simple model from a dialog
1. Select Statistics/Regression/Linear. The Linear Regression dialog will
open.
2. In the Data Frame field, type environmental or select it from the
drop down list.
3. In the formula field, type ozone~radiation+temperature+wind or
press Create Formula to launch the Formula Builder dialog.
The Formula Builder lets you describe complex regression models by
selecting variables and indicating how they are used in the model.
To use the formula builder:
• Select Ozone in the Choose Variable(s) list. Click once on the Add
Response button to change focus and once more to enter Ozone as
the response.
78
IN-DEPTH TOUR
• Select Radiation, Temperature, and Wind in the variable list. Click
on Add Main Effect(s) to include these as predictors.
• Press OK to exit the Formula Builder dialog. The formula you
generated will be placed in the Formula field of the Linear
Regression dialog. Click OK.
By default, a brief summary of the model will appear in a Report window,
and a four-page Graph sheet will appear. The model will be saved as last.lm.
More detailed results
1. Select Statistics/Regression/Linear.
2. Use the history rollback button at the bottom center of the page (to
the right of Apply), to select the previous dialog state. The previous
values for “data” and “formula” will be filled in.
3. On the Results page check the ANOVA Table check box. This will
provide an analysis of variance table for the linear model.
4. Click OK. The ANOVA table for the fit will appear in the Report
window.
5. Close the Graph sheet window when you are finished looking at the
results.
79
CHAPTER 3 TUTORIAL
Figure 3.25: If on the Plot Page you check Residuals vs. Fit and Response vs. Fit, you get the
multi-page plot shown above. Click the Page tabs on the bottom of the graphs to select different
pages.
80
IN-DEPTH TOUR
The Commands
Window
For some analyses it is more convenient to work with an interactive data
analysis language than to maneuver through a series of dialogs. We will use
the Commands window to fit another linear model and perform some
diagnostics. If it is not already open, open the Commands window using the
Commands window button on the Standard toolbar.
Figure 3.26: The Commands window button on the Standard toolbar.
Figure 3.27: The Commands window, “>” prompt and vertical bar cursor.
The Commands window uses a “>” prompt. In this document text starting
with “>” is to be typed at this prompt (do not type the “>”).
Listing S-PLUS
Objects
1. To list S-PLUS objects available in the working directory, type:
> objects()
2. Recall that the default option in our linear model dialog was to save
the model as last.lm. Note that such an object does indeed exist.
To see the brief summary for the model, type:
> last.lm
81
CHAPTER 3 TUTORIAL
Fitting a Linear
Model
We noticed in the Trellis graphic that there appears to be an interaction
between temperature and radiation in determining ozone level. We will fit a
model containing interactions and explore whether the interactions are
significant.
1. To fit a linear model with all two-way interactions, type:
> fit.int <- lm(ozone ~ (wind + temperature +
radiation) ^ 2, environmental)
2. For a brief summary of the fit:
> fit.int
3. For a detailed summary:
> summary(fit.int)
4. For an F-test comparing this model to the model we fit through the
dialogs:
> anova(last.lm, fit.int)
Creating Plots
from the
Commands
Window
One of the major benefits of having a model object is that we may then
obtain quantities such as residuals, fitted values, and predicted values at will.
We can use standard S language functions to produce a plot of the density of
the residuals as one way to assess the normality of the residuals. When we are
ready to edit the plot, we will transform it into an editable object.
1. Extract the residuals:
> resid.int <- resid(fit.int)
2. Compute and plot the density estimate:
> plot(density(resid.int), type =”line”)
Editing a Graph
We will edit our density plot.
1. Right-click on the density line. Choose Convert to Objects from the
menu.
2. Select the X axis title with a single click. Then click it again to
activate the in-place editor. Replace the label with “Residuals”. Click
outside of the in-place editor when you are finished.
3. Click on the plotted density. Use the Line Color button on the
toolbar to change the line color to Magenta.
82
IN-DEPTH TOUR
Creating
PowerPoint
Slides
Automatically
In S-PLUS you can automatically create a PowerPoint 7.0 presentation from
your graphs. We will use the graphs we have created during this
demonstration to create a PowerPoint presentation (assuming you have
PowerPoint installed).
1. Click on the PowerPoint Presentation button on the Standard
toolbar. You will see the Welcome screen of the PowerPoint
Presentation Wizard. Click Next.
2. You can now add your graphs to the PowerPoint presentation. Click
the Add Graph button to find your S-PLUS graphs and add them to
the list for your presentation, or from the standard File/Open dialog,
select one or more graphs to add to the presentation. Click Next to
move to the next page of the wizard.
3. Click Finish. PowerPoint is started and the graphs you chose are
inserted as slides in a new PowerPoint presentation. They are
inserted in the order you specified in the presentation list in the
wizard.
83
CHAPTER 3 TUTORIAL
84
USING DATA WINDOWS
4
Working with Data Windows
Creating a New Data Window
Data Objects
Data Frames
Matrices
Vectors
Lists
Editing a Data Set
The Current Data Window
86
87
87
87
88
88
88
89
89
Selecting Cells, Columns, and Rows
Selecting Cells
Extending the Cell Selection
Selecting Columns
Selecting Rows
Using Keyboard and Mouse Shortcuts
Using the Go To Cell Option
Column Names and Column Numbers
Column Lists in the Data Window
90
90
90
90
91
92
93
94
95
Entering Data
Entering Data from the Keyboard
Entering Data from Other Sources
Editing Data
Editing Time Series Data
96
96
97
97
98
Moving and Copying Data
100
Inserting and Deleting Cells, Rows and Columns
Inserting Columns and Rows
Deleting Data
102
102
103
Sorting Data
106
Undoing Actions
108
85
CHAPTER 4 USING DATA WINDOWS
Formatting Data Windows
To Format Columns
Working with
Data Windows
111
112
S-PLUS lets you edit your data sets as columns of information that can be
displayed in Data windows. You can have many different Data windows, each
displaying a different data set. You can refer to columns in separate data sets
by specifying the name of the data set along with the column name, separated
by a dollar sign (for example, test1$x).
An S-PLUS Data window is similar to a spreadsheet, but is column-oriented
rather than cell-oriented. Data windows provide access to powerful features
for editing and transforming data. These features include:
• Column, row, and block operations as well as individual cell
operations.
• Both simple and advanced statistical analysis.
Data sets can contain more information than can be viewed on the screen at
one time. Data windows allow you to look at portions of data. Simply scroll
to the parts of the data you want to view using the scroll bars or cursor keys,
or use the Go To Cell option to move quickly to any row or column in the
data. Data windows can be duplicated to allow concurrent views of many
different sections of the data.
You can have as many Data windows as you want. The Window menu
displays a partial list of all data sets currently in windows. If you have more
than nine windows open, you can view all data sets currently in windows by
selecting More Windows from the Window menu. All windows currently
open in S-PLUS will be listed. Click on any window to make it the active
window.
You can move the active window by dragging the title bar. You can resize the
active window by dragging its frame. Maximized or minimized windows
must be restored to their actual size before they can be moved or resized. To
restore a window to its original size and position, click the window's restore
button. S-PLUS also gives you control over column widths and row height,
column names and descriptions, and row numbers. You can specify data type
86
CREATING A NEW DATA WINDOW
and numeric formats and precision.
Table 4.1: The DataFrame toolbar.
Creating a New
Data Window
Align left
Align center
Align right
Increase
precision
Decrease
precision
Change data
type
Insert
column
Column type
to insert
Remove
column
Clear
column
Remove row
Clear row
Sort
ascending
Sort
descending
Adjust
column
width to fit
Increase
column
width by one
Decrease
column
width by one
To create a new Data window
1. From the Data menu choose New Data Object.
2. The New Data Object dialog box will appear, allowing you to select
Data Frame, Matrix or Vector.
or
w
To create a new data frame, click on the New Data Frame button on
the Standard toolbar (to the left of the Object Browser button).
Data Objects
S-PLUS has four basic types of data objects for organizing data and
computational results. These are data frames, matrices, vectors, and lists.
Data Frames
The data frame is the most common structure used for data analysis in
S-PLUS. It is a table of data in rows and columns which allows different kinds
87
CHAPTER 4 USING DATA WINDOWS
of data in the different columns. Typically, the rows correspond to
observations and the columns correspond to variables.
The data frame is the preferred structure for storing data.
The example data frame kyphosis has 81 rows of data on 81 children who
have had corrective spinal surgery. It has four columns, representing the
variables Kyphosis, Age, Number, and Start. Kyphosis is a two-level factor
telling whether a postoperative deformity (kyphosis) is “present” or “absent”.
The other three variables are numeric vectors. Age is the age of the child in
months. Number is the number of vertebrae involved in the operation. Start
is the beginning of the range of vertebrae involved in the operation.
For an extensive discussion of data frames, and their uses, see the chapter on
Data Frames in the Programmer’s Guide.
Matrices
Matrices in S-PLUS are similar to data frames, except that all elements of a
matrix must contain data of the same mode. Commonly used modes are
character, numeric, complex, and logical. Matrices can have both row and
column names. Matrices may be used to store data, but the user is more likely
to encounter them as the results of some computation.
The example matrix cereal.attitude gives the percentage of people
agreeing with 11 statements, such as “Reasonably Priced”, about 8 brands of
cereals. It has 11 rows and 8 columns.
For an extensive discussion of matrices and their uses, see the chapter on
Data Objects in the Programmer’s Guide.
Vectors
In S-PLUS, a vector is an ordered set of elements having the same mode.
Commonly used modes are character, numeric, complex, and logical. Like
the rows and columns of matrices and data frames, the elements of a vector
can have names. Each column in a data frame is a vector. The user will also
encounter vectors as the result of some computations.
The example vector ozone.median gives 41 median ozone readings taken
over time.
For an extensive discussion of vectors and their uses, see the chapter on Data
Objects in the Programmer’s Guide.
Lists
Lists are collections of other objects. Their components can be data frames,
matrices, vectors, other lists, functions, or any other S-PLUS objects. Lists are
used to contain related data objects such as computational results from a
linear regression fit.
The example list evap has a component x which is a matrix of independent
variables and a component y which is a vector of daily evaporation amounts.
88
EDITING A DATA SET
For an extensive discussion of lists and their uses, see the chapter on Data
Objects in the Programmer’s Guide.
Editing a Data
Set
To edit a data set in a Data window
1. Open the Browser.
2. Filter for the data type you are interested in. Refer to the chapter on
the Object Browser for more details.
3. Double click on the data set you wish to edit to view it in a Data
window.
The Current
Data Window
The data set that last had the focus in the Object Browser or in a Data
window is called the current data set. It is also the default data set which is
used when no data set is explicitly referenced in an operation.
To change the current data set, click on the data set you wish to make current
or select it from the list in the Window menu.
89
CHAPTER 4 USING DATA WINDOWS
SELECTING CELLS, COLUMNS, AND ROWS
In S-PLUS, you can select a single cell or a group of cells in a Data window.
You can select blocks of cells, rows, or columns by clicking and dragging the
mouse.
Selecting Cells
To select a single cell
w
Click in the single cell to make it active.
To select a block of cells
1. Position the mouse over the first cell you want to select.
2. Hold down the left mouse button and drag the cursor, increasing or
decreasing the size of the block. The blocked area is highlighted.
When the desired area is highlighted, release the left mouse button
to select the block.
Extending the
Cell Selection
You can extend the cell selection of a block by holding down the SHIFT key
while pressing the direction keys. For example, if you have already selected a
block but want to add one more column, hold down the SHIFT key and press
the RIGHT direction key.
To select the entire Data window
w
Selecting
Columns
90
Click in the upper left hand corner of the Data window, to the left of
the column headers.
You can limit the scope of some menu options by first selecting the
appropriate columns in a Data window. Most menu options will take effect
on the selected columns. For example, if you select a column, then choose
Edit, then Clear, the data in the selected columns are removed. If you select
columns and choose an action dialog (for example, Copy), the selected
columns will automatically be filled in for the source column field.
SELECTING CELLS, COLUMNS, AND ROWS
To select a single column
w
Click in the column number or row header to select the entire
column or row. All of the cells in the column or row are highlighted.
To select multiple columns or rows, hold down the left mouse
button and drag the mouse across the headers for the desired
columns or rows.
To select all columns in the Data window
w
Click the upper left-hand corner of the Data window.
To select a range of contiguous columns
w
Drag the mouse across the desired column numbers.
To select a range of discontiguous columns
w
Selecting Rows
CTRL-click
in the column header for each column.
You can select rows or blocks in a Data window before choosing menu
options.
To select one row
w
Click the row number.
To select a range of contiguous rows
w
Drag the mouse across the desired row numbers.
To select a range of discontiguous rows
w
CTRL-click
in the row number for each row.
To modify the row name
w
Double-click on a cell of the right grey column.
91
CHAPTER 4 USING DATA WINDOWS
Using
Keyboard and
Mouse
Shortcuts
The following table outlines the effect of the direction keys and mouse
movements in S-PLUS Data windows.
Table 4.2: Keyboard and mouse shortcuts
Keyboard
Action
Mouse
Right Arrow
Selects the cell to the right.
Click the cell to the right.
Left Arrow
Selects the cell to the left.
Click the cell to the left.
Up Arrow
Selects the cell above.
Click the cell above.
Down Arrow
Selects the cell below.
Click the cell below.
Page Up
Moves the screen up.
Click up scroll bar arrow.
Page Down
Moves the screen down.
Click down scroll bar arrow.
CTRL-Left
Moves the screen left.
Click left scroll bar arrow.
CTRL-Right
Moves the screen right.
Click right scroll bar arrow.
CTRL-Home
Moves to first column, first row.
Drag sliders to up and left arrows.
CTRL-End
Moves to last column, last row.
Drag sliders to down and right
arrows.
Home
Moves to first column, same row.
Drag horizontal slider to left
arrow.
End
Moves to last column, same row.
Drag horizontal slider to right
arrow.
CTRL-Page
Up
Moves to first row, current
column.
Drag vertical slider to top arrow.
CTRL-Page
Down
Moves to last row, current
column.
Drag vertical slider to bottom
arrow.
Selects a column.
Click the column header.
CTRL-Spacebar
92
SELECTING CELLS, COLUMNS, AND ROWS
Table 4.2: Keyboard and mouse shortcuts
SHIFT-Spacebar
Selects a row.
Click the row number.
CTRL-SHIFT-Spacebar
Selects the entire Data window.
Click the upper left-hand corner
of the Data window.
SHIFT-Arrow
Puts cursor in selection mode.
Move cursor to make block
selection.
Drag the mouse across cells.
F1
Displays on-line help.
Click the Help button.
F5
Displays Go To Cell dialog (when
a Data window is selected).
Choose View/Go To Cell.
F9
Edits the column name (when a
Data window is selected).
Double-click in the column name
portion of the header.
Keys
When entering data, you can use the mouse, scroll bars, direction keys, or the
Go To Cell option to move from cell to cell in a Data window. The cell that
the cursor occupies is always highlighted with a box around it. Use the
BACKSPACE and DELETE keys to erase typing errors and the mouse or RIGHT
and LEFT direction keys to move around in the entry. To cancel an entry when
typing, press ESC.
You can press ENTER, UP, or DOWN, to enter the data value in the highlighted
cell. If you press ENTER, the value is entered in the cell and the cursor moves
to the next cell. S-PLUS's “smart cursor” feature moves the cursor in the
direction of the last movement. (You can turn off S-PLUS's “smart cursor”
using the General Settings dialog under Options.) If you press UP or DOWN,
the data is entered and the cursor moves in the appropriate direction. The
LEFT and RIGHT direction keys enter the value and move in the appropriate
direction if pressed when the cursor is at the far left or far right of the
contents of the cell. If you begin typing in a cell that already contains a value,
the old value is overwritten.
Using the Go
To Cell Option
You can use this option to go to a specific cell location in a Data window.
To use the Go To Cell option
1. From the View menu select Go To Cell.
93
CHAPTER 4 USING DATA WINDOWS
2. Specify the column name (or column number) and row number of
the cell to go to.
3. Choose OK.
The cursor will be positioned at the specified cell location.
If you want to extend your selection from the active cell to the location
entered in the Go To Cell dialog, hold down the SHIFT key while choosing
OK. For example, if column 1, row 5 is the active cell, and you specify
column 5, row 5 in the Go To Cell dialog and press SHIFT-OK, the selection is
extended from column 1, row 5 to column 5, row 5.
Figure 4.1: The Go To Cell dialog.
Column Names
and Column
Numbers
A column is a vertical group of data cells, typically containing the data for a
given variable. S-PLUS is column-oriented, meaning that most of the
operations work on columns as units.
Each column in a Data window has a number. This number is displayed at
the top of the column and shows the column's position in the Data window.
Columns can also have names. To add or edit a column name, double-click
in the column’s header.
Columns can be referred to by either their column names or column
numbers. It is usually wise to use column names, because some operations
can cause columns to be renumbered. For example, if you insert a column
between columns 5 and 6, all columns to the right of column 5 are
renumbered. If you were using numbers to refer to these columns, you would
have to use the new numbers for subsequent operations.
94
SELECTING CELLS, COLUMNS, AND ROWS
Column Lists
in the Data
Window
A column list is a list of column names or numbers used to specify a column
or sequence of columns to be operated on. You can refer to columns by their
names, or numbers, or both. Here are sample column lists:
AGE, AMOUNT
3:7
An entry can be a name, a number, two numbers separated by a colon, a
sequence of names separated by commas, or the special key word ALL. The
sample column lists above refers to columns AGE and AMOUNT, or the
columns 3 through 7. Column names cannot be used to specify a sequence.
Selecting
Columns from a
Menu List
When prompted for a column list in a dialog field, you do not have to type in
the column names, just click the arrow next to the field for a menu list of
available column names. Select the column you want placed in the column
list field. Press TAB to move to another item in the dialog, or press ENTER to
close the dialog and execute the command.
Note
Only column names are displayed in the field menu lists, not column numbers. If your columns are not
named, you will need to specify the column number instead.
95
CHAPTER 4 USING DATA WINDOWS
ENTERING DATA
When you open a new Data window it is formatted using default settings.
The cell that the cursor is in is highlighted. Numeric data is the default data
type for the initial columns. To enter other types of data you need to insert
columns of the appropriate type, or convert numeric columns to character.
Entering Data
from the
Keyboard
To set a right margin
When entering or editing data, you can set the right margin for cursor
wrapping in the Data window.
1. Position your mouse in the desired column and right-click to display
the Column shortcut menu.
2. From the shortcut menu, choose Set Right Margin.
If you are in column 5 when you set the margin, column 5 becomes the new
right margin. As soon as you enter data in column 5 and press ENTER, the
cursor wraps to column 1 in the following row.
You can have a different margin setting for different views on the same data
set. Margin settings are retained until you close the Data window or exit
S-PLUS.
To enter data
1. Click in the cell in which you want to enter data.
2. Type in the data value, using the BACKSPACE and DELETE keys to erase
typing errors, and the mouse or RIGHT and LEFT direction keys to
move around in the entry. To cancel an entry when typing, press ESC.
Note that for factor data, there is the option of selecting the factor
level from a drop-down list (if it has been entered or specified
previously).
3. Press ENTER, UP, or DOWN to enter the data in the cell.
If you press a direction key, the cell cursor moves in the appropriate direction.
The LEFT direction key accepts and enters the value in the cell if pressed when
the cursor is at the far left of the entry and the RIGHT direction key accepts
and enters the value in the cell if pressed when the cursor is at the far right of
the entry. If you begin typing in a cell that already contains a value, the old
value is overwritten.
96
ENTERING DATA
Entering Data
from Other
Sources
There are other methods of entering data into S-PLUS besides typing it in
from the keyboard. The easiest way to enter data is to import it from another
source. You can import Excel, Lotus, SAS, ASCII, and dBase files, among
others. See the chapter Importing and Exporting data for detailed
information on importing data.
Data can also be entered by using options in the Data menu. You can use
Copy and Move to get data from other columns into the current Data
window.
You can also write formulas in the Commands window that enter data into
specified columns. For example, you could write an expression that adds
columns one and two together and then places the results in column three.
For more information on this option, see the Programmer’s Guide.
Editing Data
When you want to edit a data cell, you can double-click on it, or go to the
cell and press ENTER to go into Edit mode or just start typing to overwrite the
current data in the cell.
In Edit mode:
• The RIGHT and LEFT direction keys move the cursor character by
character within the entry.
• The BACKSPACE key deletes the character to the left of the cursor.
• The DELETE key deletes the character the cursor is on.
• The ESC key throws away all changes and exits Edit mode.
When you want to overwrite the contents of a cell, type the new entry in the
cell without entering Edit mode. To erase the contents of a cell, highlight the
data in the cell with the mouse (or by pressing ENTER) and then press DELETE.
The deleted cell is replaced with an “NA” which denotes a missing value. To
erase the contents of one or more columns, highlight those columns and
press Delete, or select Clear from the Edit shortcut menu.
To edit existing data in a cell
1. Double-click the cell; or select the cell and press ENTER.
2. Use the direction keys to move among the data characters; use
BACKSPACE and DELETE to remove data characters and add any desired
characters.
97
CHAPTER 4 USING DATA WINDOWS
3. Press the ENTER, UP, or DOWN key to accept the new data.
To undo an edit in a data cell
w
Editing Time
Series Data
Type CTRL-Z or click the Undo button to undo the last cell edit.
Time series objects are displayed in the same way as standard vectors,
matrices or data frames, but contain time series information instead of row
names in the row names labels column. If there is a ‘units’ attribute (such as
seconds, years, or milli-seconds) associated with the time series, it will appear
at the top to this time series column.
Figure 4.2: Sample time series data.
98
ENTERING DATA
To edit time series data sets
1. Double click on the top of the time series column. This will bring up
a dialog which allows you to edit the particular type of time series
data currently in view.
2. After changing the properties using this dialog and clicking OK, the
information in the time series column will update to reflect the
changes.
Figure 4.3: Time series properties dialog.
Editing individual time series elements
The individual elements of regular time series (those created with the ts,
or cts functions—see the Programmer’s Guide for more details) are
determined by the parameters of the time series and cannot be edited directly.
The elements of irregular time series (created with the its function) can be
edited in the same way as row names, by double clicking on the cell in the
time series column and entering new data.
rts,
99
CHAPTER 4 USING DATA WINDOWS
MOVING AND COPYING DATA
You can move and copy data cells within a data set, across data sets, and into
Graph sheets. See the chapter Creating a Graph for information on adding
data to graphs. See section Selecting Cells, Columns, and Rows (page 90)
for more information on selecting items in a Data window.
In S-PLUS there are three ways to move and copy data cells in Data windows:
1. Dragging selected data cells.
2. Using the Cut, Copy, and Paste options.
3. Using the Data menu options.
To Move or Copy
Cells
To move or copy cells by dragging
1. Select the cells you want to move or copy. Use
discontiguous columns or rows.
CTRL-click
to select
2. Position the mouse pointer within the selected cells. The mouse
pointer changes to an arrow.
3. To move cells, hold down the left mouse button and drag the
selected cells to the new location.
4. Release the left mouse button to move the selected cells to the new
location (paste area). To copy the cells, hold down the CTRL key
while releasing the mouse button.
This will work when copying or moving between Data windows, as long
as you arrange your Data windows so you can see both the source and
target cell locations.
To move or copy cells using Cut, Copy, and Paste
1. Select the cells you want to move or copy.
2. From the Edit or shortcut menu, choose Cut to move cells or Copy
to copy cells. Or use the keyboard equivalents (CTRL-C copy, CTRLX, cut, CTRL-V paste).
3. Click the mouse in the desired location in the Data window (paste
area).
4. From the Edit or shortcut menu, choose Paste. If the paste area
already contains data the cells will overwrite the existing data cells.
100
MOVING AND COPYING DATA
To Move or Copy
Columns and
Rows
You can use the Copy or Move options on the Data menu to move or copy
columns and rows within or across Data windows. In the dialogs you can
specify the source and target locations for the columns or rows you wish to
move.
To move or copy one or more rows or columns
1. Select the rows or columns you want to move or copy.
2. From the Data menu, choose Move or Copy. Choose Row or
Column from the submenu.
3. The selected rows or columns are automatically filled in for the
source specification. Specify the target location, including the Data
window (if different from the source), in the Move or Copy dialog.
4. Choose OK.
Figure 4.4: The Move and Copy Columns dialogs. Move and Copy Rows are very similar.
101
CHAPTER 4 USING DATA WINDOWS
INSERTING AND DELETING CELLS, ROWS AND COLUMNS
In S-PLUS, you can insert columns and rows between existing columns and
rows in your data sets. When you insert columns, existing columns are
shifted to the right to make room for the new column. When you insert
rows, existing rows are shifted down to make room for the new rows. When
you insert blocks, existing rows and columns are shifted down and to the
right to make room for the new cells.
Inserting
Columns and
Rows
To insert a column
1. Select the column you want to have shifted to the right to make
room for the new column.
2. Choose the data type for the new column, from the drop down list
next to the Insert Column button (see figure 4.5).
3. Click the Insert Column button.
You can also specify formatting information when inserting a new column or
row by using the Insert dialogs. The Insert dialogs are accessed through the
Insert pull down menu in the main menu bar.
Specific to inserting columns, the Fill Expression field allows you to fill the
column with some form of initial values. For example, to fill all the column
with zero’s, simply enter 0 in this field. To enter random numbers from a
standard normal distribution in a column of length 100, you could enter
rnorm(100). If the column is of length 200, then this sequence of random
numbers would be repeated. But note that if you wish this sort of repetition,
the expression used must divide exactly into the column length (that is,
rnorm(100) would not repeat 50 items into a column of length 150).
For further information on specific formatting options, see section
Formatting Data Windows (page 111).
102
INSERTING AND DELETING CELLS, ROWS AND COLUMNS
Figure 4.5: The Insert Column button, drop down list (above) and dialog (below).
To insert rows
1. Select the row you want to have shifted to make room for the new
cells. If you want to insert multiple rows, select the same number of
rows as you want to insert.
2. Choose Row from the Insert menu and click OK in the Insert Rows
dialog.
Figure 4.6: The Insert Rows dialog.
Deleting Data
To delete data in a cell
w
Move the cursor to the cell and press DELETE. The deleted cell is
replaced with an “NA” which denotes a missing value.
103
CHAPTER 4 USING DATA WINDOWS
To delete data in an entire Data window
1. Click in the upper left-hand corner of the Data window to select all
data.
Press the DELETE key, or choose Clear from the Edit or shortcut menu.
To remove a column
1. Select the columns you want to remove.
2. Click the Remove Column button. Or, from the Data menu, choose
Remove, then Column. Or, from the Column Remove dialog choose
OK.
Figure 4.7: The Clear Columns and Remove Columns dialogs. Clearing leaves the cells empty,
removing a column will delete it and shrink the size of the data set.
When you clear a column, the data are deleted and replaced with NAs. The
column's position, name, and formatting information remain in the Data
window.
You can also use the Clear option on the Data menu. The Clear Column
dialog lets you specify complex column lists (for example, 1, 3, 5..8) and
104
INSERTING AND DELETING CELLS, ROWS AND COLUMNS
different Data windows.
Note
When you use the Clear command on the Edit menu the data are not placed in the clipboard. Use the Cut
command if you want to erase data and place it in the clipboard.
To remove rows
1. Select the rows you want to delete.
2. From the Data menu, choose Remove, then Row. Or from the
Remove Rows dialog choose OK.
Figure 4.8: The Clear Rows and Remove Rows dialogs.
105
CHAPTER 4 USING DATA WINDOWS
SORTING DATA
S-PLUS's Sort option lets you sort one or more data columns numerically or
alphabetically. Your columns can be sorted according to the data in other
specified columns.
The Sort option sorts data in ascending or descending order. You can specify
the columns to sort, where to put the results (in the same or a different Data
window), and the columns to sort by.
To sort data using the toolbar
1. Select the data columns you wish to sort by. All columns are sorted.
2. Click the Ascending Sort button or the Descending Sort button.
The data columns are sorted in ascending order or descending order starting
with the last column that was selected.
To sort data using the Sort Columns dialog
From the Data menu, choose Sort.
Figure 4.9: The Sort Columns dialog.
In the Sort dialog you have the following options:
Sort Column(s)
Specify the names or numbers of the columns to be sorted and the
appropriate data set. To sort all of the columns in a data set, enter ALL.
Sort By Column(s)
Enter the name or column number of the columns to sort by (for example,
GENDER, AGE). If you list more than one column, the data in the specified
106
SORTING DATA
columns will first be ranked according to the first column specified. Then, in
the case of equivalent data, the second column will determine the ranking,
and then the third column, and so on.
The columns listed here do not have to be the same as the columns being
sorted. For example, you can sort INCOME and AGE by GENDER. Also,
these columns need not be in the same data set.
Ascending
Check this box for ascending order, otherwise the sort is in descending order.
Target
You have the option of specifying a target Data window and column for
storing your sorted data. If you do not specify anything in these fields, sorting
will be done in place and your original data will be overwritten. Thus, it is
usually a good idea to specify a target data column so you always retain a
copy of your original data. Note also that if you sort in place and you sort
only some of the columns in a data set, these columns may be mismatched
with respect to the unsorted columns.
If more than one column is being sorted, the sorted columns are placed
starting at the specified target column.
Data entered after sorting must be entered in the sorted order.
Powerful sorting capabilities are also available using S-PLUS's functions from
within the Commands window.
107
CHAPTER 4 USING DATA WINDOWS
UNDOING ACTIONS
To Undo Actions
and Changes
You can undo most changes to objects. For data objects, you can usually
undo your last change. The same is true for text changes in the Script
window. For most other objects, multiple undo’s are possible.
Figure 4.10: The Undo, Undo List, Redo, Redo List, and Restore Data Object buttons on the
Standard toolbar.
To undo the most recent action
w
Click the Undo button on the Standard toolbar, or, from the Edit
menu, choose Undo, or press the hot key CTRL+Z.
To undo multiple actions
w
Click on the Undo List button on the Standard toolbar, and select
the action from which you want to start undoing.
There is no multiple undo available for data objects. However, the Restore
Data Object option on the Standard toolbar allows you to restore the object
to its initial state at the beginning of the session.
To redo an action
w
Click on the Redo or Redo List buttons to redo actions.
For data objects and for script edits clicking on undo for a second time will
redo a change.
To do selective undos using dialog rollback
1. Display the dialog that you used to make the change you wish to
undo.
108
UNDOING ACTIONS
2. Click once on the left Rollback button at the bottom of the dialog.
The fields will change to reflect the previous state of the dialog, and
the Rollback display will show which of the recorded previous states
has been selected.
3. Choose Apply or OK.
You can click on the left Rollback button as many times as desired to go back
to previous edits. When you have reached the desired edit, choose Apply or
OK to revert back. If you go back too far, use the right rollback button to
move forward in the History log to the desired edit and choose Apply or OK.
If you only wish to examine previous states you can use the right Rollback
button to bring the dialog back to its current settings, or simply Cancel the
dialog.
Dialog Rollback just fills in the fields of the dialog for you with previous
values. It has no effect on an object until you choose Apply or OK.
Dialog Rollback is closely tied to the History log. If you have modified an
object in any way (visually, or through a dialog), the corresponding
command will appear in the History log (if the appropriate History log
options were chosen). Dialog Rollback lets you scroll through all of these
commands (as long as they are still in the History log) and to view them in
the dialog. In Dialog Rollback, you scroll from the most recent changes back
through the older changes.
To Undo and
Redo Using the
History Log
S-PLUS keeps a continuous record, or History log, of nearly all operations.
The History log contains the program commands invoked by each menu and
toolbar selection, by dialogs, and by commands issued in the Commands
window.
The History log can be displayed in a Script window that can be viewed,
edited, and executed.
You can use the History log to undo erroneous commands by directly editing
the command in the script and re-executing it. However, this assumes that
you have not cleared the History log and that you can restore your data to the
format it had at the beginning of the script.
1. Click the History button on the Standard toolbar, or choose
History/Display, from the Window menu. The History log is
displayed in a script window.
2. Edit the History script, removing any erroneous commands (for
example, remove the Remove Column command if you wish to
undo a column deletion).
109
CHAPTER 4 USING DATA WINDOWS
3. Click the Run button on the Script toolbar, or choose Run from the
Script menu. The commands in the History log are re-executed,
restoring your Data windows and Graph sheets to their state prior to
the erroneous command.
You can selectively undo or redo commands for a selected object. To do this,
select the object before choosing History/Display. Then, in the Display
dialog choose the Selected Object option and choose OK. The History log
displays only the commands for the selected object.
If you want to redo a portion of a script you can select the desired commands
before running the script. Only the selected commands will be executed.
For more information on using the History log, see section Working with
Scripts (page 547).
110
FORMATTING DATA WINDOWS
FORMATTING DATA WINDOWS
To format a Data window
1. Double-click in the top cell in the upper left-hand corner of the
Data window.
2. Make any desired changes and choose OK.
Data Window
Properties
Name Specify the desired name for the Data window. This option is a
convenient way to rename your Data objects.
Default Column Type Specify the default column type for all empty
columns in the Data window. This option will not change the column type
of existing columns. Use the Change Data Type button on the Data toolbar
to change existing columns.
Font/Size/Color Choose a font type, size and color for the Data window.
Bold/Italics Choose if you want the Data window font to be bold or italic.
To Set Data
You can set Data window defaults (name, row height, and default column
Window Defaults type). You can also set column defaults (justification, width, and precision).
Column defaults are discussed in the following section.
To set Data window defaults
1. Double-click in the upper left-hand corner of the Data window; or
choose Window from the Format menu. Specify the desired settings
in the dialog.
2. Right-click in the upper left-hand corner of the Data window and
choose Save Object Properties as Default from the shortcut menu; or
choose Options, then Save Window Size/Properties as the Default.
111
CHAPTER 4 USING DATA WINDOWS
To Format
Columns
To format a column
1. Double-click in the column header, or select the column and choose
Selected Object from the Format menu. The Column dialog
appears. Figure 4.11 shows an example.
2. Make the desired changes within the Column dialog. Choose OK.
Figure 4.11: The Double Precision Column dialog.
Within the Column dialog, you can modify the column name, description,
justification, display format type, width and precision of your data.
Note
You can also right-click in a column to display a shortcut menu of options.
To Change the
Column Width
To change column width by dragging columns
1. Position the mouse on the line to the right of the column heading
for the column you want to change.
2. When positioned between the two columns, the mouse pointer will
become a resize tool.
3. Drag the resize tool left to make the column smaller, or right to
make the column larger.
You can also specify the exact column width (according to the number of
characters in the default font and point size) in the Column dialog.
112
FORMATTING DATA WINDOWS
To change column width with the toolbar
1. Select the data columns you wish to resize.
2. Click the Increase Column Width or Decrease Column Width
buttons. Each click increases or decreases the column width by one
character.
To adjust column width to the widest cell
1. Select the data columns you wish to resize.
2. Click the Column Width to Fit button.
Changing a
Column or Row
Name or
Description
Column names are used to refer to data for graphing or data manipulations.
It is good practice to start column names with a letter, and the names may
contain any combination of letters, numbers, or periods (“.”).
The same name cannot be used twice within a data set. If you do not specify
a column name, the column can still be referred to by its number. S-PLUS
function names and other reserved words cannot be used as column names.
Column names are automatically used as the default axes titles and legend
text in graphs. If you specify a column description, it is used for axes titles
and legend text instead. If no column names or descriptions are specified, the
column number is used for the legend text, along with the Data window
name (for example, DF1$1).
A column description can contain up to 75 characters and can be any
combination of letters, numbers, symbols, or spaces. The column description
is used as the default axis title in your graph. For example, if your Y column
has a description (for example, Rates of Change), it is used for the y-axis title.
You may leave the description blank. If there are no column names or
descriptions, S-PLUS uses the column numbers for the default legend text.
To change a column name or description
1. Select the column and choose Selected Object from the Format
menu.
113
CHAPTER 4 USING DATA WINDOWS
2. Type the desired name in the Column Name field and, optionally,
type a Description in the Column Description field.
3. Choose OK.
To edit a column name
1. Double-click in the column name portion of the column header; or
press F9.
2. Type the desired name or make any desired modifications to an
existing name.
3. Press ENTER or click elsewhere in the Data window to accept the
changes.
To Change the
Data Type of
Columns
In S-PLUS there are several data types. You can easily convert between the
data types using the Change Data Type button or the change option on the
Data menu.
To change a column type
1. Select the column.
2. Click the Change Data Type button (see Table 4.1: The DataFrame
toolbar); or choose Change Data Type from the Data menu.
To Change
Display Format
and Precision of
a Numeric
Column
There are several types of formats for numeric column data including Mixed,
Decimal, Scientific, Currency, Financial, Date, Date & Time, Time and
Elapsed Time H:M:S.
To change the display format of numeric data
1. Double-click in the column header; or select the column and choose
Selected Object from the Format menu.
2. Choose a new display format (for example, Currency).
3. Choose OK.
You can change the precision for a numeric column by specifying the number
of digits to be displayed after the decimal. The maximum number allowed is
seventeen. This only affects the way numbers are displayed, and has no effect
on internal computations, which always use the maximum available
precision.
114
FORMATTING DATA WINDOWS
To change column display precision
w
To increase the precision, click on the Increase Precision button
until you see the desired precision.
w
To decrease precision, click on the Decrease Precision button
.
or
1. Double-click in the column header; or select the column and choose
Selected Column from the Format menu.
2. Type in the desired number in the Precision field.
3. Choose OK.
To Set Column
Defaults
You can set column defaults (justification, precision, width etc.). You could,
for example, have a different default width for numeric columns than for
character columns.
To set column defaults
1. Double-click in the column header; or choose Selected Object from
the Format menu. Specify the desired settings in the dialog.
2. Right-click in the column and choose Save... as Default from the
shortcut menu.
115
CHAPTER 4 USING DATA WINDOWS
116
IMPORTING AND
EXPORTING DATA
Importing
Data Files
5
Importing Data Files
The Data Import Dialogs
117
119
Filter Page
123
Notes on Importing Files
Notes on Importing ASCII (Delimited ASCII) Files
Notes on Importing Excel Files
Notes on Importing Files with Multiple Tables
Notes on Importing Lotus Files
Notes on Importing dBase Files
Notes on Importing and Exporting Access Files
Notes on Importing FASCII (Formatted ASCII) Files
126
126
127
127
127
128
128
128
Importing ODBC Tables
130
Exporting Data Sets
135
Exporting ODBC Files
138
One easy method of getting data into S-PLUS for plotting and analysis is to
import the data file.
S-PLUS also allows you to export your data sets and graphs to many file
formats for printing and for use in other applications.
Data Import
Filters
In addition to ASCII and Formatted ASCII (FASCII) data file types, you can
select from the following file types to import into S-P LUS:
• Microsoft Excel (versions 2.1 through Excel ‘97 .XLS* files)
• Quattro Pro Worksheets (.WQ1)
• Paradox Databases (.DB)
117
CHAPTER 5 IMPORTING AND EXPORTING DATA
• Lotus Worksheets (.WKS,.WK1,.WK3,.WK4 and.WRK)
• dBase files (.DBF II, II+, III, IV files)
• FoxPro files (use same import filter as dBase files above)
• Systat files (double or single precision .SYS files)
• SigmaPlot files (.JNB)
• SPSS files (.SAV)
• SAS files (.SD2)
• SAS Transport files (version 6.x. TPT). Some special export options
may need to be specified in your SAS program. We suggest using the
SAS Xport engine (not PROC CPORT) to read and write these files.
• Microsoft Access files (.MDB)
• Matlab (.MAT)
• SPSS Export files (.POR)
• S-PLUS Transport Files (.SDD)
• STATA files (.DTA Versions 2.0 and higher)
• Gauss (.DAT files - automatically reads the related DHT file)
To import a data file
1. From the File menu, choose Import Data, then From File...
2. In the File name box, type or select the name, and optionally the
path, of the file you want to import.
3. In the Files of type box, select the type of the file to import.
4. In the Import To box, specify the target data frame, starting column,
and whether you want to preview the imported file first.
118
THE DATA IMPORT DIALOGS
5. Click Open to import the file
Note
If a file extension is inappropriate, an error may appear indicating an unrecognized format or the data file
may be converted incorrectly.
The Data
Import Dialogs
When you are importing most file types, typically you only need to specify
the file name and file type and the file will be imported into a new data
frame, and opened in a Data window, using default settings. You can specify
your own settings on the Options and Filter pages of the Import Data dialog.
All three pages share a common lower section. These controls are described
below:
File Name Specify the file name, and optionally the path of the file
containing data to import.
Files of type Select the format of the file you wish to import.
Within the Import To group are the following options:
Data Frame
Specify the data frame to contain the imported data. You can specify the
name of an existing data frame or a new data frame. If the specified data
frame does not already exist, S-PLUS automatically creates it. If the specified
data frame does exist, you will be warned that you could overwrite data. By
default, the imported data will automatically be displayed in a Data window.
You can choose to turn this automatic display feature off using the Display in
Grid option in the Options/General Settings/Data Import menu.
Target Start Col
Specify the starting column for the imported data. The start column can be
any column in an existing data frame or a new data frame.
Preview Only
Choose Preview Only to have the data read entirely as character columns into
a data frame called PREVIEW. This lets you view all of your data regardless
of the data types. When you are ready to import the data, simply deselect
Preview Only and choose OK. If no Name Row (see Options page in
Figure 5.1) is specified when previewing a spreadsheet file, then spreadsheet
119
CHAPTER 5 IMPORTING AND EXPORTING DATA
style letters (e.g. A, AB) will automatically be created and used as column
names.
Data Specs Page
In the Import Data dialog, the Data Specs page has an upper section that
allows you to navigate, using the standard Explorer interface, to a particular
directory and file to be imported.
Figure 5.1: The Import Data dialog, Data Specs page (above) Options page (below).
120
THE DATA IMPORT DIALOGS
Figure 5.1: The Import Data dialog, Data Specs page (above) Options page (below).
Options Page
In the Import Data dialog, the Options page has the following options:
Name Row
If the file you are importing contains names for the columns of data, S-PLUS
can use these names as column names. In the Name Row field, specify which
row number (in the file being imported) contains the column names. If you
do not specify a named row, S-PLUS strives to locate column names from the
first row of the file. Specify Row 0 to have S-PLUS not search for a name row.
In a delimited ASCII file, the name row must come before the first data rows
to be read in (the start row).
Start Column
Specify the location in the file of the column to begin reading from. For
example, if you specify 5, S-PLUS reads the columns beginning with column
5 and places them in the new data frame beginning at the Target Start
Column. Spreadsheet-style letters (e.g., A, AB) can be used to specify the
start and end columns to import (this works for any file type).
End Column
Specify the location of the last column in the file to read. Specify END if you
wish to copy all columns after the starting column.
121
CHAPTER 5 IMPORTING AND EXPORTING DATA
Start Row
Specify which row in the data file to begin reading from. For example, if you
specify row 10, S-PLUS reads the rows beginning with row 10 and places
them in the new data frame beginning at row 1.
End Row
Specify the location of the last row to read. Type END if you wish to copy all
rows after the starting row.
Delimiter
Specify all characters (e.g. commas, spaces, periods) used to separate elements
in an ASCII file. Commas, spaces, and tabs (denoted by \t) are the default
delimiters. If you replace the default delimiters with another delimiter, any
column names or format strings you specify must be separated by the
specified delimiter (see the section Notes on Importing ASCII (Delimited
ASCII) Files (page 126)). Carriage returns or line feeds are not allowed
because they must terminate each row.
Note
All controls on the Options page and in the “Import to” group are ignored for files of type S-PLUS
Transport.
122
FILTER PAGE
FILTER PAGE
Figure 5.2: The Data Import dialog, Filter page.
The Filter page allows you to subset the data you import. By specifying a
query, or filter, you gain additional functionality, such as taking a random
sampling of the data. Use the following examples and explanation of the filter
syntax to create your statement. A blank filter is the default and results in all
data being imported.
Note
The Filter Page for the File Import dialog is ignored if the File of Type field is set to ASCII, formatted
ASCII, and S-PLUS Transport.
Case Selection
You can select cases by entering a case-selection statement in the Filter
Information box in the Filter dialog. The case-selection or where statement
has the following form:
where
variable expression relational operator condition
123
CHAPTER 5 IMPORTING AND EXPORTING DATA
Variable Expressions
You can specify a single variable or an expression involving several variables.
All of the usual arithmetic operators ( + - / * () ) are available for use in
variable expressions.
Relational Operators
The following relational operators are available:
Operator
=
equals
!=
not equal
<
less than
>
greater than
<=
less than or equal
>=
greater than or equal
&
and
|
or
!
not
Examples
Examples of selection conditions given by “where” expressions are:
where
where
where
where
where
sex = 1 & age < 50
(income + benefits) / famsize < 4500
income1 >=20000 or income2 >= 20000
income1 >=20000 & income2 >= 20000
dept = "auto loan"
Note that strings used in case-selection expressions need not be enclosed in
quotes unless they contain embedded blanks.
Wildcards * or ? are available to select subgroups of string variables. For
example:
where account = ????22
where id = 3*
124
FILTER PAGE
The first statement will select any accounts that have 2s as the 5th and 6th
characters in the string, while the second statement will select strings of any
length that begin with 3.
The comma operator is used to list different values of the same variable name
that will be used as selection criteria. It allows you to bypass lengthy OR
expressions when giving lists of conditional values, for example:
where state = CA,WA,OR,AZ,NV
where caseid != 22*,30??,4?00
Missing Variables
You can test to see that any variable is missing by comparing it to the special,
internal variable, _missing. For example:
where income != _missing & age != _missing
Sampling Functions
Three functions are available for sampling.
The first, samp_rand(prop) allows for simple random sampling. Each case
is selected with a probability equal to prop.
The second, samp_fixed(sample_size,total_observations) selects a
random sample of fixed size. The first case is drawn with a probability of
sample_size/total_observations, and the succeeding ith case is drawn with a
probability of (sample_size - hits) / (total_observations - i).
Finally, a third function samp_syst(n) performs a systematic sample of
every nth case after a random start.
Expressions are evaluated from left to right, so you can sample from a subset
of your cases by subsetting them first and then sampling. For instance to take
a random half of high school graduates use:
where schooling >= 12 & samp_rand(.5)
125
CHAPTER 5 IMPORTING AND EXPORTING DATA
NOTES ON IMPORTING FILES
Notes on
Importing
ASCII
(Delimited
ASCII) Files
When importing ASCII files you have the option of specifying column
names and data types for imported columns. This can be useful if you want
to name columns or if you wish to skip over one or more columns when
importing. If columns are specified one by one here, the END Column
specification is ignored.
In the Import Data dialog, the Options page has the following ASCII
options.
Column Names
Enter a list of column names for the data columns to import, (separated by
any of the delimiters specified in the Delimiters field). Specify one column
name for each imported column (e.g. Apples, Oranges, Pears). You can use an
asterisk (*) to denote a missing name (e.g. Apples, *, Pears).
Format String
Specify the data types of the imported columns. For each column you need to
specify a % sign and then the data type. Dates may automatically be
imported as numbers. After importing, you can change the column format
type to a dates format. One of the delimiters specified in the Delimiters field
must separate each specification in the string. Here is an example ASCII
format string:
%s, %f, %*, %f
The "s" denotes a string data type, "f " denotes a float data type, and the
asterisk (*) denotes a "skipped" column.
If you do not specify the data type of each column, S-PLUS looks at the Start
Row and uses the contents of this row to determine the data type of each
column. A row of data must always end with a new line.
Note that field width specifications are irrelevant for ASCII files and are
ignored.
Multiple delimiter characters are not grouped and treated the same as a single
delimiter. For example, if the comma is a delimiter, two commas are
interpreted as a missing field.
Double quotes (") are treated specially. They are always treated as an
"enclosure" marker, and must always come in pairs. Any data contained
126
NOTES ON IMPORTING FILES
between double quotes are read as a single unit of character data. Thus,
spaces and commas can be used as delimiters, and spaces and commas can
still be used within a character field as long as that field is enclosed within
double quotes. Double quotes cannot be used as standard delimiters.
If a variable is specified to be numeric, and if the value of any cell cannot be
interpreted as a number, that cell is filled in with a missing value. Incomplete
rows are also filled in with missing values.
Notes on
Importing
Excel Files
If your Excel worksheet contains only numeric data in a rectangular block,
starting in the first row and column of the worksheet, then all you need to
specify is the file name and file type. If a row contains names, specify the
number of that row at the Name Row prompt (it does not have to be the first
row). You can select a rectangular subset of your worksheet by specifying
starting and ending columns and rows. Excel-style column names (e.g. A,
AB) can be used to specify the starting and ending columns.
Notes on
Importing Files
with Multiple
Tables
An application that can support multiple tables or data sets (such as Access,
SigmaPlot, SYBASE, Oracle, Informix, Microsoft SQL Server, SAS) will
support exporting multiple tables or data sets to a file. S-PLUS currently only
supports importing the first table from the file, unless the file type is ODBC.
Notes on
Importing
Lotus Files
If your Lotus-type worksheet contains numeric data only in a rectangular
block, starting in the first row and column of the worksheet, then all you
need to specify is the file name and file type. If a row contains names, specify
the number of that row at the Name Row prompt (it does not have to be the
first row). You can select a rectangular subset of your worksheet by specifying
starting and ending columns and rows. Lotus-style column names (e.g. A,
AB) can be used to specify the starting and ending columns.
The row specified as the starting row is always read first to find out the data
types of the columns. Therefore, there cannot be any blank cells in this row.
In other rows, blank cells are filled in with missing values.
127
CHAPTER 5 IMPORTING AND EXPORTING DATA
Notes on
Importing
dBase Files
S-PLUS imports dBase and dBase-compatible files. The file name and file
type are often the only things you need specify for dBase-type files. Column
names and data types are obtained from the dBase file. However, you can
select a rectangular subset of your data by specifying starting and ending
columns and rows.
Notes on
Importing and
Exporting
Access Files
All imports from, and exports to, Access are done using ODBC, so the
various ODBC components must be properly installed.
Notes on
Importing
FASCII
(Formatted
ASCII) Files
You can use FASCII import to specify how each character in your imported
file should be treated. For example, you must use FASCII for fixed width
columns not separated by delimiters, if the rows in your file are not separated
by line feeds or if your file splits each row of data into two or more lines.
For FASCII import, you need to specify the file name and the file type. In
addition, because FASCII files are assumed to be non-delimited (e.g. there
are no commas or spaces separating fields), you also need to specify each
column's field width and data type in the Format String. This tells S-PLUS
where to separate the columns. Each column must be listed along with its
data type: character or numeric and its field width. If you want to name the
columns, specify a list of names in the Column Names field. (Column names
cannot be read from the FASCII data file).
When importing FASCII files you need to specify the following options in
the Options page.
Column Names
Enter a list of column names for the imported data columns (separated by
spaces or commas). Specify one column name for each imported column
(e.g. Apple, Oranges, Pears). You can use an asterisk (*) to denote a missing
name (e.g. Apples, *, Pears).
Format String
Specify the data types and field widths of the imported columns. For each
column you need to specify a % sign, then the field width, and then the data
type. Commas or spaces must separate each specification in the string. The
format string is necessary because formatted ASCII files do not have
128
NOTES ON IMPORTING FILES
delimiters (such as commas or spaces) separating each column of data. Here
is an example format string:
%10s, %12f, %5*, %10f
The numbers denote the column widths, "s" denotes a string data type, "f"
denotes a float data type, and the asterisk (*) denotes a "skip". You may need
to skip characters when you want to avoid importing some characters in the
file. For example, you may want to skip blank characters or even certain parts
of the data.
If Preview Only is specified for a formatted ASCII file, but no format is
given, S-PLUS still tries to display the data in a readable way. The field width
is set equal to the default column width, and all columns are left-justified.
On the screen the file appears as it would in an ASCII editor. If there is a line
feed at the end of the start row (up to a maximum length of 4096 characters),
the length of the row is set equal to the actual value, thus determining the
number of columns to read in.
If you wish to import only some of the rows, specify a starting and ending
row.
If each row ends with a new line, S-PLUS will treat it as a single characterwide variable that is to be skipped.
129
CHAPTER 5 IMPORTING AND EXPORTING DATA
IMPORTING ODBC TABLES
The ODBC dialog controls the import of tables from databases and
applications that support the Open DataBase Connectivity specification. You
may use a Filter specification to subset the data to be imported. By default, an
entire table is imported to an S-PLUS data frame.
Introduction to
ODBC
Applications such as Microsoft Access and Excel, as well as most commercial
databases (generically known as data sources), support the Open DataBase
Connectivity (ODBC) standard. Designed to provide a unified, standard way
to exchange data between databases, ODBC has become widely supported.
Each application typically has an ODBC driver that allows the application to
accept or distribute data via the ODBC interface. S-PLUS supports ODBC
versions 2.0 and 3.0.
Installing ODBC
You may already have the ODBC Data Source Administrator (hereafter
referred to as the Administrator) installed on your personal computer. You
can verify this by opening the Program Manager (Windows 3.x and
Windows NT 3.51). For more recent versions of Windows select Settings,
then Control Panel from the Start Menu. Open the Control Panel and see if
it contains an ODBC applet. If so, you can skip the rest of this section unless
you want to upgrade from version 2.0 to version 3.0 of the Administrator
(you may still need to install ODBC drivers however).
The S-PLUS CD includes everything necessary to install version 3.0 of the
ODBC Administrator on all current Microsoft Windows platforms.
MathSoft does not distribute any drivers, so you will need to provide your
own drivers to access the data source you wish to connect to. Contact the
vendor of your database to learn what drivers they provide, or contact other
third party vendors who sell ODBC drivers. For instance, for Microsoft
Office 97, select the Database Drivers option in the Data Access component
during set-up. Microsoft Access users may also need to install the DataAccess
Pack, located in the Valupack/Dataacc directory of the Access CD.
To install the ODBC Administrator, simply insert the S-PLUS CD and select
Install ODBC in the dialog that starts up. (If you are using Windows 3.x,
Windows For Workgroups, or Windows NT 3.51, you will need to run
SETUP.EXE in the root directory of the setup media to initiate the dialog.)
S-PLUS automatically is installed with an ODBC driver that connects to
S-PLUS. With this and the ODBC Administrator, you only need a database
or other application and the corresponding driver that connects that
application to the ODBC interface. Consult your database ODBC driver
vendor for instructions on how to install their driver and database or other
application.
130
IMPORTING ODBC TABLES
Figure 5.3: The ODBC import dialog, ODBC page (above), Filter page (below).
131
CHAPTER 5 IMPORTING AND EXPORTING DATA
Importing Tables
from an External
ODBC Data
Source
1. From the File menu, choose Import Data, then From ODBC
Connection...
2. From the ODBC page, select the data source from the Data Source
dropdown list. If the desired data source is not available, or the list is
blank, you may create a data source by selecting the button (labeled
“…”) to the right of the ODBC Data Source list box.
3. Once you have selected a data source, the Table Name drop down
list will be initialized and you can select a Table to import.
4. Click OK to import the table.
Details on the dialog fields follow.
ODBC Data Source
Once you have installed the ODBC Administrator and drivers that connect
to the external database, you may need to configure one or more ODBC
Data Sources if one has not already been set up for the data source you wish
to connect to.
A Data Source consists of the data you wish to access, the application that has
the data, and the computer and network connections necessary to reach the
data. Configuring this can be done either using the ODBC applet from the
control panel, or within S-PLUS by selecting the button labeled “…” in the
ODBC Import and ODBC Export dialogs.
Configuring an
ODBC Data
Source
If this applet does not exist or selecting the “...” button fails, you need to refer
to the section Installing ODBC (page 130) for details on installing the
ODBC Administrator.
ODBC
If you are running ODBC Administrator 3.0 you can then select a tab that
corresponds with the type of DSN (Data Source Name) you wish to create:
User DSN, System DSN, or File DSN. The type of DSN controls access to
the Data Source you are creating. Specific descriptions of the DSN types can
be found on each page of the applet.
After selecting the proper tab, select the Add... button, then select the driver
that will export the data from the database to ODBC and select the Finish
button. If the list of drivers is empty or does not contain a driver for your
database or application, you need to install the database or its ODBC driver.
Contact your database vendor for specifics on this. At this point a driver
specific dialog should appear asking database and driver specific information
required to connect to the database.
132
IMPORTING ODBC TABLES
32bit ODBC
If you are running ODBC Administrator 2.0 you can create a User DSN
(Data Source Name) by selecting the Add... button from the initial dialog.
Or, to create a System DSN, select that button, and then the Add... button
on the subsequent dialog. File DSNs are only available with ODBC 3.0. The
type of DSN controls access to the Data Source you are creating.
Descriptions of the DSN types are available by selecting the Help button
from the initial and System DSN dialogs.
Once you have selected either of the Add... buttons, select the driver that will
export the data from the database to ODBC and select the OK button. If the
list of drivers is empty or does not contain a driver for your database or
application, you need to install the database or its ODBC driver. Contact
your database vendor for specifics on this. At this point a driver specific
dialog should appear asking database and driver specific information required
to connect to the database.
Whether you are running ODBC 2.0 or 3.0, the new Data Source should be
visible the next time the Import ODBC... or Export ODBC... dialogs are
selected from the file menu.
S-PLUS has been tested with both ODBC 2.0 and ODBC 3.0.
Table Name
Once a data source has been selected, the tables in the data source can be
determined and the list of table names is initialized. The table name defaults
to the first table in the data source.
When a table name is selected, a default SQL Query and a default data frame
name to import the data into are generated.
SQL Query
Structured Query Language (SQL) is a powerful, flexible and standardized
language for extracting data from databases. Any legal SQL statement can be
entered in this box. The default query is generated when you select a table
name. It selects for import all the data from the table.
Within the Import To group are the following options:
Data Frame
Specify the data frame to contain the imported data. You can specify the
name of an existing data frame or a new data frame. If the specified data
frame does not already exist, S-PLUS automatically creates it. If the specified
data frame does exist, you will warned that you could overwrite data.
133
CHAPTER 5 IMPORTING AND EXPORTING DATA
Target Start Col
Specify the starting column for the imported data. The start column can be
any column in an existing data frame or a new data frame. The default start
column is 1, meaning the data are imported into the specified data frame
starting at the first column.
Preview Only
Choose Preview Only to have the data read entirely as character columns into
a data frame called PREVIEW. This lets you view all of your data regardless
of the data types. When you are ready to import the data, simply de-select
Preview Only and choose OK.
The Filter page works exactly as described in the Import File section above.
134
EXPORTING DATA SETS
EXPORTING DATA SETS
When you are exporting to most file types, typically you only need to specify
the data set, file name and file type and the data will be exported into a new
data file using default settings. You can specify your own settings on the
Options page of the Export Data dialog.
All formats that can be imported from can be exported to with the exception
of Sigma plot (*.jnb) files. Formatted ASCII export is available to the extent
that fixed width non-delimited, columns may be output by specifying a null,
or empty, delimiter with the ASCII export option.
Both the Data Specs and Options pages share a common lower section.
These controls are described below:
File name
Specify the file name, and optionally the path of the file you wish to create
upon export.
Save as type
Select the type of file you wish to create.
Within the Export From group are the following options:
Data Set
Specify the name of the data set containing the columns and rows to be
exported.
Columns and Rows
Specify a subset of columns and rows to be exported. If no columns or rows
are specified, or the keyword ALL is specified, all columns and rows in the
135
CHAPTER 5 IMPORTING AND EXPORTING DATA
data set will be included in the file.
Figure 5.4: The Export Data dialog, Data Specs page (above), Options (below).
In the Export Data dialog, the Data Specs page has the following options:
Data Specs page
In the Export Data dialog, the Data Specs page has an upper section that
allows you to navigate, using the standard Explorer interface, to a particular
directory and file to be exported. If the file already exists you will be warned
and have an opportunity to overwrite it or cancel the export.
Exporting data
to ASCII files
You can export your S-PLUS data set as an ASCII file. ASCII files can be read
by most applications.
To export a data sheet as an ASCII file
• From the File menu, choose Export Data, then To File…. Specify a
file name for the exported data and the data set to export, then
choose OK.
136
EXPORTING DATA SETS
Options page
In the Export Data dialog, the Options page has the following options:
Delimiter
Choose a default delimiter to separate fields. Specify a comma, tab (\t), a
space, or enter your own delimiter. User-defined delimiters must contain 8 or
fewer characters. If you leave the field empty (""), the data is exported with
fixed length lines; see the Line Length field below. Each field is formatted
using column formatting information from the data set to determine the
width and alignment and is blank filled.
Column Names
Choose whether to include column names in the file.
Quote Char Data
Choose whether to have quotation marks used to enclose character data in
the file (e.g. "List 1").
Line Length
The standard line length is 80 characters per line (based on 8.5-by-11 inch
paper). A new line is started after 80 characters have been printed. If you
increase the line length, characters may run off the page when printed or
viewed in a text editor. The line length specification is only used when
nothing is specified for the Delimiter.
137
CHAPTER 5 IMPORTING AND EXPORTING DATA
EXPORTING ODBC FILES
The ODBC dialog controls the export of data sets to ODBC databases and
applications that support the Open DataBase Connectivity specification. By
default, an entire data set is exported to an ODBC table.
Exporting Data
Sets to an
External ODBC
Data Source
1. From the File menu, choose Export Data, then To ODBC
Connection.
2. From the ODBC Data Source dropdown list, select the data source
to which you wish to export a data set. If the desired data source is
not available, or the list is blank, you may create a data source by
selecting the button (labeled “…”) to the right of the ODBC Data
Source list box.
3. Select the name of the data set you wish to export in the Export
From group. A default table name will appear in the Table Name
field.
4. Click OK to export the data set and create a table.
Figure 5.5: The ODBC export dialog.
Details on the dialog fields follows.
ODBC Data Source
If the database required is not available from the drop down list, use the
button to the right of it to configure a new data source.
138
EXPORTING ODBC FILES
Table Name
This identifies the name of the table that will be written to in the selected
data source. If the table already exists, you will be asked if you wish to
overwrite the existing table or specify a different name.
Within the Export From group are the following options:
Data Set
Specify the name of an existing data set whose data are be exported.
Columns and Rows
Specify a subset of columns and rows to be exported. If no columns or rows
are specified, or the keyword ALL is specified, all columns and rows in the
data set will be included in the file.
139
CHAPTER 5 IMPORTING AND EXPORTING DATA
140
.
USING THE OBJECT
BROWSER
Overview of
the Object
Browser
6
Overview of the Object Browser
The Right Pane Versus the Left Pane
Filtering Objects and Databases
The Browser Page Versus the Object Browser
Organization of Objects
The Default Object Browser
The Examples Object Browser
To Find S-PLUS Objects
Shortcut keys
141
142
143
144
144
146
146
146
147
Customizing the Object Browser
Customizing the Right Pane Display
Customizing Object Browser Pages
Using Folders to Organize Work
148
149
151
153
Editing Objects and Data Manipulation
Object Creation
Modifying Data Objects
Moving and Copying Objects
Copying Data from One Database to Another Database
Deleting Objects
Modifying Object Properties
Selecting Objects
155
155
155
156
156
156
157
157
The S-PLUS environment is object-oriented in that all items are distinct,
editable objects. This includes not only data objects and functions, but also
graph objects, and interface objects such as menus, dialogs, toolbars, and
toolbar buttons. The Object Browser is a simple and powerful interface
through which to select, view, and edit objects created and used by S-PLUS. It
141
CHAPTER 6 USING THE OBJECT BROWSER
operates similarly to Windows Explorer.
Table 6.1: The Object Browser toolbar.
Create Browser
Page
The Right Pane
Versus the Left
Pane
Expand Item
Collapse
Item
Find
S-PLUS
objects
The Object Browser window is split into two panes that provide different
views of the objects, their sub-components, and attributes. The left pane is a
hierarchical display of objects. For example, an S-PLUS list is a generalized
vector consisting of one or more components, any of which could be another
list. This nesting of lists within lists can go on to any desired depth. The
Object Browser left pane allows the user to ‘drill down’ to all underlying
objects in a nested list. A node representing an object can be expanded (or
collapsed) to expose or hide the contents of an object and, in turn, the subobjects can be expanded (or collapsed).
To open the Object Browser
Figure 6.1: The Object Browser is opened by default at the start of a session, but if it has been
closed, it can be opened with the Browser button (circled) on the Standard toolbar.
Expanding a node
• Click the plus symbol to the left of the node.
Collapsing a node
• Click the minus symbol to the left of the node.
142
FILTERING OBJECTS AND DATABASES
The right pane displays objects in a linear list. When an object is selected in
the left pane, the right pane lists its immediate children and displays their
object attributes in a column fashion. You can modify the right pane to
display specific object attributes of interest, such as the object data class,
dimension, or the date it was last modified. Only single selection is
permissible in the left pane, but multiple selection is supported in the right
pane.
Figure 6.2: The list last.glm is selected in the left pane, and the right pane shows the contents of
the list.
Filtering
Objects and
Databases
The number of objects in S-PLUS is immense and many are not of direct
interest. The Object Browser allows you to filter a selected set of the objects
you wish to see. As an example, data objects and functions in S-PLUS are
stored in various databases and, generally, you will only be interested in
viewing your own data and functions kept in the working database.
Alternatively, you may filter for object classes in a large S-PLUS database or
multiple databases.
Filtering for objects is done through the Browser Page.
143
CHAPTER 6 USING THE OBJECT BROWSER
The Browser
Page Versus
the Object
Browser
The left pane of the Object Browser displays the active Browser Page. A single
Object Browser window can have multiple Browser Pages, each with its own
filter specification, and is associated with a tab located on the bottom left
hand side of the window frame.
The Browser Page and the Object Browser window both have distinct
dialogs. The Object Browser dialog contains the properties specific to the
Object Browser and display characteristics of the right pane. The Browser
Page dialog contains properties specific to the filtering characteristics of that
page.
Both the Object Browser and the Browser Page have a context menu: the
Object Browser context menu is accessible by right clicking on the white
space of the right pane and the active Browser Page’s context menu is
accessible by right clicking on the white space of the left pane. The Object
Browser context menu contains menu items for creating a Browser Page,
saving the Object Browser, closing the Object Browser and access to its
properties dialog. The Browser Page context menu contains menu items for
creating a Browser Page, inserting a folder into the page (or into the selected
folder), pasting a folder into the page (or into the selected folder), deleting
the Browser Page, and access to its property dialog.
Organization
of Objects
In the Object Browser, S-PLUS data objects are grouped into four broad
categories: data frames, lists, matrices and vectors. Each category is
represented by a root node object with the name data.frame, list, matrix, and
vector, respectively. All data objects displayed in the Object Browser will be
found under these root nodes. For example, an object of data class design is
derived from a data.frame object so it would be found under the data.frame
root node.
All S-PLUS functions displayed in the Object Browser are listed under the
function root node.
The interface objects of S-PLUS will have a root node with the same class as
the object that is labeled with the class name. For example, menu items are
found under the MenuItem root node and the search path is found under the
SearchPath node.
The objects located at the root node are the class default objects. These
objects determine the default properties of objects created with the same
144
ORGANIZATION OF OBJECTS
class. The class default properties can be modified.
Table 6.2: S-PLUS objects manipulated by the Object Browser.
Parent
Child class type
Example Child Classes
data.frame, matrix,
vector
columns
character, complex, dates, double, factor,
integer, itspar.dat, itspar.numeric, logical,
rtspar, single
GraphSheet
graphs
CompositeObject, Graph2D, Graph3D,
GraphSheetPage
Graph2D
2D plots, 2D axes, panel strip
LinePlot, LinearCFPlot, AreaPlot, BarPlot,
BoxPlot, CommentPlot, ContourPlot,
ErrorBarPlot, GraphMatrix, Histogram,
PiePlot, QQPlot, Axis2dX, Axis2dY,
PanelStrip
Graph3D
3D plots, 3D axis, panel strip
ContourPlot, Line3DPlot, SurfacePlot,
Axis3D, PanelStrip
Axis2dX, Axis2dY
axis label and title
Axis2DLabelX, Axis2DLabelY, AxisTitle
2D plots and 3D
plots
Trellis panels
GraphSheetPage**
page items
GraphSheetPageItem
Folder**
folder items
FolderItem
SearchPath
database
DataBase
MenuItem*
menu items
MenuItem
Toolbar
toolbar buttons
ToolbarButton
*
An object of class MenuItem becomes a parent for other MenuItems by
setting its Type property to Menu.
145
CHAPTER 6 USING THE OBJECT BROWSER
**
The Default
Object Browser
The GraphSheetPageItem and FolderItem objects are shortcuts to objects.
A default Object Browser is provided and is opened by selecting the toolbar
button of the Standard toolbar. The tool tips can aid in finding the
appropriate toolbar button. Generally, the default Object Browser is created
when S-PLUS is started, but can be disabled in the Startup tab of the General
Settings dialog that can be activated by the Options/General Settings menu
item.
The default browser configuration file is named Default.SBF and is found in
your _Prefs directory. The Object Browser toolbar button is linked to the
Default.SBF file.
The Examples
Object Browser
Packaged with S-PLUS are various example data sets. To easily view some of
these data sets in an Object Browser, an examples Object Browser
configuration file is provided in your working directory named
Examples.SBF. To open the examples Object Browser select the File/Open
menu item. In the Open File Dialog make sure you are listing Files of type
Object Browser in your working directory. Select the file Examples.SBF.
To Find S-PLUS
Objects
The Find S-PLUS Objects option on the toolbar is a powerful searching tool.
The dialog takes as input a pattern, entered through a drop-down list, and
produces a folder containing references to all objects that match the given
pattern. Patterns from previous searches are saved, and can be recalled using
the drop-down list.
The search goes through all attached S-PLUS databases, putting the references
in a standard Object Browser folder (enabling you to search the resulting
folder just as you would any other folder).
This dialog implements the find.objects function of S-PLUS, and will only
find legitimate S-PLUS objects, not other items such as files.
146
TO FIND S-PLUS OBJECTS
Shortcut keys
Table 6.3: Object Browser shortcut keys.
Short cut
Left pane
Right pane
Page Up
scroll up
scroll up
Page Down
scroll down
scroll down
Up arrow
move up to next tree item
move up to next list item
Down arrow
move down to next tree item
move down to next list item
Left arrow
collapse selected tree node
--
Right arrow
expand selected tree node
--
Home
go to first element in tree
go to the first element of the list
End
go to the last element in the tree
go to the last element of the list
Tab
make the right pane active
make the left pane active
Shift Tab
activate the next tab
activate the next tab
Return
same as double-click action of
selected object
same as double-click action of
selected object
Ctrl-C
copy selected object
copy selected object(s)
Ctrl-V
paste selected object
paste selected object(s)
Delete
delete selected object
delete selected object(s)
147
CHAPTER 6 USING THE OBJECT BROWSER
CUSTOMIZING THE OBJECT BROWSER
The Object Browser may be customized to contain multiple Browser Pages
each filtering on different S-PLUS data bases and object classes. Moreover, the
right pane of the Object Browser can be modified to display various object
characteristics. Once a desired configuration is found, it can be saved to a file.
The file extension used for the Object Browser configuration files is .SBF.
To create an empty Object Browser use the File/New menu item and select
Object Browser from the New dialog. An empty Object Browser will be
created. To modify an existing Object Browser, select the Format/Object
Browser menu item or right-click in the right pane of the Object Browser and
choose Browser from the context menu. By either method, the Object
Browser property dialog is displayed with the Browser tab active.
An
example is seen in Figure 6.3. A description of the properties of the Browser
tab of the Object Browser dialog are listed below.
Name Enter a name for the Object Browser window. This name will appear
at the top of the window, as seen in Figure 6.3.
Description Enter a convenient description.
Bitmap Tab Bar Check this to display icons on the page tabs. Leave this box
unchecked to label the tabs with text.
File This field displays the external file, if any, to which the browser has been
saved.
148
CUSTOMIZING THE OBJECT BROWSER
Figure 6.3: The Browser tab of the Object Browser property dialog.
Customizing
the Right Pane
Display
The right Pane tab of the Object Browser dialog is shown in figure 6.4. The
properties it contains are described below.
View Select the radio button giving the desired view of objects in the right
pane.
Page Size Enter the number of items which can be accessed by scrolling in a
right pane page. Some databases contain more than 1000 objects. Restricting
the number of objects displayed in the right pane list improves display
performance. When a large number of items must be viewed in the right
pane, they are organized on different pages within the pane. Use the paging
buttons
to navigate between these pages.
Object Details Check the detail options which will be listed for objects in
the right pane. This is enabled when the List Details radio button is selected.
• Position: For S-PLUS objects, it is the database position in the search
list where the object resides. For columns of matrices and elements
of lists and data frames, it is their position within the parent object.
149
CHAPTER 6 USING THE OBJECT BROWSER
For toolbar buttons and menu items, the Pos field contains their
relative position on the toolbar and menu respectively.
• Data Class is the class of object, such as data.frame, design, or lm.
• Inheritance lists the data class of the object and any classes from
which it inherits.
• Storage Mode is similar to Data Class, but includes, for example,
vector and matrix.
• Dimensions describes the dimension of the object; the length of a
vector, the number of components of a list or data frame, or the
numbers of rows and columns of a matrix.
• Date is the date of creation.
Figure 6.4: The Object Browser property dialog, Right Pane tab.
When object details are displayed in the right pane, objects may be sorted
with respect to name, size, date, or other detail by clicking in the
corresponding header.
Objects displayed in the right pane of the Object Browser can also be filtered
150
CUSTOMIZING THE OBJECT BROWSER
by string pattern matching. Found on the top left of the Object Browser
frame is a drop down list with an edit control. To filter objects using a string
pattern enter the pattern in the edit control and select the Match button to
the left of the edit control. Wildcards such as single character (?), multiple
character (*) and (ALL), are acceptable. The (ALL) wildcard denotes all
objects are accepted, and is the default. This is the string match setting of the
Object Browser shown in Figure 6.2. Each string pattern entered is saved (up
to a maximum of 20 entries) in the drop-down list and can be recovered. The
pattern matching only applies to objects that are direct children of the root
node in the left pane.
Customizing
Object Browser
Pages
The different pages of an Object Browser window can be made to display
different classes of objects, such as graph sheets, data frames, and functions.
This is done by specifying an object filter for that page.
To create a new Browser Page first make sure the target Object Browser is
active. Select the Create Browser Page toolbar button on the Object Browser
toolbar. The Browser Page dialog will be displayed with the Filtering tab
active. A new Browser Page can also be created by the Insert/BrowserPage
menu item, or by selecting the Create BrowserPage shortcut menu item
(right-click on the white space of the left pane to bring this into view).
Alternately, a Browser Page can be dragged from one Object Browser to
another by dragging the tab of the source Browser Page and dropping it on
the left pane of the target Object Browser. A Browser Page can also be
dragged onto the toolbar and dropped to create a toolbar button that will
recreate the Browser Page.
To modify the filter on an existing Browser Page select the Format/Browser
Page menu item or right-click in the white space of the left pane of the
Object Browser and select the Filter menu item from the context menu.
The filtering options found on the Filter tab of the Browser Page dialog are
outlined below. An example is shown in Figure 6.5.
Show Only Folders Check this to display only folders and their contents in
the Object browser. Other objects will not be displayed.
Interface Classes Select the interface classes which should be displayed in the
Object Browser page. Interface classes include the following: Automation
Client, ClassInfo, FunctionInfo, GraphSheet, MenuItem, ObjectDefault,
Property, Script, SearchPath, and Toolbar. Use the CTRL key to make
multiple selections, or the shift key to make group selections.
Databases Select the database directories or attached objects which should be
searched for objects to display in the Object Browser page. Only objects
151
CHAPTER 6 USING THE OBJECT BROWSER
which are found in these locations will be displayed.
Classes Select the S-PLUS object classes which should be displayed. Use the
CTRL or shift keys to make multiple or group selections. User-defined classes
may be specified by typing the name of the class in Classes. For more
information on object classes, see the data.class command in the on-line
help. Object classes include the following: aov,
coxph,
cts,
data.frame, dates, design, factor,
glm, htest, its, list, lm, lme,
manova, matrix, multicomp, nlme,
raov, rts, smooth.spline, survfit,
ts, vector.
factanal, function, gam,
lmsreg, loess, ltsreg,
nls, ordered, princomp,
survreg, tree, trellis,
Include Derived Classes Check this to display not only objects having the
specified classes, but also objects which inherit from the specified classes. See
the class command in the on-line Language Reference.
String The object name filter string for the right pane. Wildcards such as
single character (?), multiple character (*) and (ALL), are acceptable. The
(ALL) wildcard denotes all objects are accepted, and is the default.
Case Sensitive Check this to impose case sensitivity on the string match.
Figure 6.5: Specifying an object filter for a Browser Page.
Below, the properties contained in the Page Info tab of the Browser Page
dialog are discussed. These can also be seen in Figure 6.6.
Name Specify a name for the Object Browser page. This will appear on the
tab for the Object Browser page when the Object Browser window is set up
to display text labels instead of icons on the tabs. A default name is generated
if one is not provided.
152
CUSTOMIZING THE OBJECT BROWSER
ToolTip Specify a tooltip for the Object Browser page. When the pointer is
held over the tab for this page, the tooltip text will appear, describing the
page. A default tooltip is generated based on the class filter if one is not
provided.
Image FileName Enter the complete path and filename for a bitmap file to
be used to display an icon on the tab for this page. Click the Browse button
to navigate to the file. A default image is selected if no bitmap file is given.
Figure 6.6: The Page Info tab of the Browser Page properties dialog.
Using Folders
to Organize
Work
Folders contain shortcuts to objects of all types. Through the shortcuts, the
objects may be modified and used in data analysis. Folders may contain
shortcuts to data sets, functions, model objects, graph sheets, customized
dialogs—any object that can be viewed in the Object Browser will admit a
shortcut in a folder. Folders offer an extremely flexible way to organize work.
Creating a Folder
To create a new folder, right-click in the left pane of the Object Browser
window and select Insert Folder from the context menu, or select Insert
Folder from the main menu. A folder is inserted with its default name in an
active edit control. Enter a name for the folder or accept the default name.
If a folder is selected when a new folder is inserted, the new folder will be
placed inside the first folder. Folders are owned by the Browser Page.
To add an object to a folder, simply drag the icon of an object onto the folder
or use copy and paste. A shortcut to the object is created. This allows data,
functions, and other objects to be conveniently placed in a central location.
153
CHAPTER 6 USING THE OBJECT BROWSER
The context menu for the shortcut contains the items in the context menu of
the object itself, plus the item Delete Short Cut. Selecting Delete Short Cut
will delete only the shortcut and not the object itself. Selecting Delete will
delete both the shortcut and the object itself.
• To move a folder from one folder to another in the same Object
Browser window, simply drag its icon to the other folder.
• To copy instead of moving, press
the other folder.
CTRL
while dragging the icon to
• To copy a folder from one folder to another in a different Object
Browser window, simply drag its icon to the other folder.
• To move instead of copying, press ALT while dragging the icon to the
other folder.
• To delete a folder, right-click on the folder and press Delete.
Warning
The folder merely provides a link to objects. If the database where these objects reside is detached, then the
objects will not appear in the folder.
154
EDITING OBJECTS AND DATA MANIPULATION
EDITING OBJECTS AND DATA MANIPULATION
The Object Browser gives users access to existing objects so that they can be
modified or copied among S-PLUS databases. New objects can also be created
from the Object Browser.
Object
Creation
Empty graph sheets, data frames, matrices, vectors, and lists can be created
from the Object Browser. The newly created S-PLUS objects are placed in the
working database (database 1). For the object to appear immediately, make
sure the Browser Page that initiated the creation is currently filtering on the
working database.
The context menus for the root node objects labeled GraphSheet, data.frame,
matrix, vector and list each have a Create menu item that will create an object
of the same class. The S-PLUS data objects are labeled SPx and the
GraphSheets are labeled GSx, where x is an integer that makes the name
unique.
Moreover, all Interface objects can be created from the context menu of any
Interface of the same class in the Object Browser. The exceptions are the
object classes ObjectDefault, SearchPath, and S-PLUS functions.
Modifying Data
Objects
Columns of data can be deleted from a data frame or matrix object. First
select the object in the left pane, then select one or more columns contained
in the object in the right pane. (Multiple selection is done by holding down
the CTRL key, and block selection by holding down the SHIFT key.) To delete
a column, right click on one of the columns selected and select the Delete
menu item, or press the Delete key.
Columns of data can be copied from one data frame or matrix to another
using the data column’s context menu or by drag drop. In order for the
receiving object to accept the column(s), the number of rows in the receiving
object must be a multiple of the length of the column(s).
Data frames, matrices, and vectors can be copied into a list object via a copy
and paste operation or by drag drop. When pasting or dropping an object
into a list, a new instance of the object will be appended to the end of the list.
This operation is not valid for sub-lists of lists. Elements of a list can be
deleted in the same manner as that for columns of data frames. This only
applies to the first level of elements of a list. More sophisticated operations on
lists must be performed using the S-PLUS command language.
155
CHAPTER 6 USING THE OBJECT BROWSER
The data editor for S-PLUS data objects is opened by double clicking on the
object in the Object Browser. Moreover, S-PLUS functions can be edited by
selecting the Edit menu verb of the function context menu. This activates a
script editor containing the function code.
Finally, object names can be changed by selecting the name in either the left
or right pane and holding the mouse over the text. As a result, an edit control
is activated. To save the changes, press the ENTER key or click outside the edit
control. To cancel any changes, press the ESC key. Names of objects that are
components of lists are not editable.
Moving and
Copying
Objects
Graph objects on the same Object Browser page are moved or copied by
dragging their icons. For instance, to copy a graph object from one Graph
Sheet to another, drag the icon and drop it onto the icon for the other Graph
Sheet. To move the graph object, hold down the ALT key while dragging. The
same operation can be performed through the objects context menu
commands copy and paste or accelerator keys CTRL+C and CTRL+V.
Copying Data
from One
Database to
Another
Database
Typically, a researcher will keep a backup copy of their data in a database that
is in a position greater than the working database. By doing so, the researcher
can modify the data in the working database and retain a backup in case any
undesirable modifications are made to the working data.
Deleting
Objects
Deleting objects is simple through the Object Browser; this is particularly
useful when deleting multiple objects of the same type, since like objects are
grouped together in the hierarchy. For instance, when deleting all the arrows
on a plot, it is much easier to select them in the Object Browser than directly
on the graph.
The databases used by S-PLUS are viewable in the Object Browser in a
Browser Page that filters on the interface class SearchPath. The single search
path object will be found under the SearchPath root node in this Browser
Page. Expand the contents of the SearchPath root node to view the
SearchPath object. Select the SearchPath object to view the databases used in
S-PLUS listed in the right pane. The context menu of each DataBase object
has a Paste menu item that will paste objects copied from another database.
Hold down the CTRL key to select multiple discontinuous objects, and use
SHIFT-click to select all objects in a block. Press Delete to remove the selected
156
EDITING OBJECTS AND DATA MANIPULATION
objects.
Note
The Object Browser can delete objects only from Database 1. This prevents you from accidentally deleting
system functions and data sets.
Modifying
Object
Properties
Objects can be modified in the browser by accessing their properties dialog
either by double-clicking on an object to open its property dialog, or rightclicking on an object and selecting Properties from the shortcut menu.
Changes made through the Object Browser are reflected immediately in the
object.
Different behavior can be observed when double-clicking on objects of
different classes. For example, the Data window for S-PLUS objects, such as
data frames matrices, or vector objects is initiated by double-clicking on the
object in the Object Browser. Moreover, ClassInfo objects define the doubleclick action for objects of specific classes. Typically, the double-click action
defined in a ClassInfo object executes an S-PLUS function.
Selecting
Objects
The Object Browser can be used to select objects that are difficult to select in
other views, such as overlaid graphical elements in a Graph sheet. When
graph objects are selected in the right pane of the Object Browser they are
also selected in the Graph sheet in which they reside. Moreover, if a data
object is visible in the data editor, selecting columns of that object in the
right pane of the Object Browser will select them in the Data window for
that object.
157
CHAPTER 6 USING THE OBJECT BROWSER
158
EXCHANGING OBJECTS WITH
OTHER APPLICATIONS
Overview
7
Overview
159
Embedding Objects from Other Applications
Creating and Editing Embedded Objects
Importing Graphic Images
Linking Data from Other Applications
161
162
164
166
Embedding S-PLUS Graphics Within Other Applications
Updating Embedded Graphs
168
168
Creating a PowerPoint Presentation
170
S-PLUS supports linking and embedding capabilities so you can use data or
objects created in other applications in your S-PLUS Graph sheets. In S-PLUS,
you can link an S-PLUS plot to data from another application and have it
retain a connection to the source data. Plots linked to data are updated
automatically when the data changes. See the Programmer’s Guide for more
details on DDE and Automation.
You should link S-PLUS plots to data when:
• the data is likely to change,
• you need the most current version of the data in your S-PLUS plot,
or
• the source document is available at all times and updating is
necessary.
You can embed data or a graphic from another application (for example,
Excel) into S-PLUS Graph sheets. Embedded objects become part of the
S-PLUS Graph sheet.
159
CHAPTER 7 EXCHANGING OBJECTS WITH OTHER APPLICATIONS
You should embed data or graphics when:
• the embedded information is not likely to change,
• the embedded information does not need to be used in more than
one document, or
• the source document is not available for updating if it is linked.
Note
In order to use links or embedding, the source application must support object linking and embedding
(OLE). For example, Excel 5.0 data can be embedded or linked in an S-PLUS Graph sheet because Excel 5.0
supports OLE.
160
EMBEDDING OBJECTS FROM OTHER APPLICATIONS
EMBEDDING OBJECTS FROM OTHER APPLICATIONS
Embedding
Objects Using
Cut, Copy, and
Paste
When you use cut and copy to move data, S-PLUS temporarily stores the data
on the Clipboard. You can paste the data into another location in the same
document, into another document created with S-PLUS, or into a document
created with another application. You can also paste data, graphic objects or
pictures created in other applications directly into S-PLUS.
When you copy and paste a graphic object created in another application
into S-PLUS, it is embedded as an object.
When you copy text from another application and paste it into S-PLUS:
• if you are in a data frame, the text is pasted as column data, or
• if you are in a script, the text replaces currently selected text.
If you get unexpected results when pasting, use the Undo option on the Edit
menu.
Embedding
Objects Using
Drag-and-Drop
You can drag data between S-PLUS and other applications that support OLE
2 (object linking and embedding version 2).
To drag data from another application into an S-PLUS graph
1. Start the source application and load the desired file.
2. Start S-PLUS.
3. From the File menu choose New. Choose GraphSheet and click OK.
4. Click on the 2D or 3D Plots button on the standard toolbar. A
palette of available plot types appears.
5. Drag the desired plot button from the palette and drop it inside the
Graph sheet. Default axes are drawn and the plot icon is drawn on
the graph.
Now you need to drop the source application data onto the plot icon to
draw the plot.
6. Tile the windows vertically to display the source application and
S-PLUS side by side in windows.
7. Highlight the source data with the mouse. Drag and drop the data
on the plot icon on the S-PLUS graph. The icon is replaced with a
plot using the source application's data.
161
CHAPTER 7 EXCHANGING OBJECTS WITH OTHER APPLICATIONS
Creating and
Editing
Embedded
Objects
You can embed OLE objects directly in an S-PLUS Graph sheet without
leaving S-PLUS. The embedded object can be created as a new object, or can
be initialized from an existing file. The embedded object becomes part of the
S-PLUS Graph sheet, increasing the file size of the entire Graph sheet.
Creating and
Editing In-Place
Some applications support in-place activation, meaning that when you
double-click on the embedded object to edit it, the S-PLUS Graph sheet
remains visible around the object. When you embed an object from an
application that supports in-place activation, a hatched border surrounds the
embedded object and the application name in the title bar changes from
S-PLUS to the name of the object's source application. In addition, all the
menus except File and Window change to use the source application's
menus, and the toolbars change to use the source application's toolbars.
To embed a new object
1. With a Graph sheet in focus, choose Object from the Insert menu.
2. To create and embed a new object, choose the Create New button
and select the type of object. Choose OK.
Now you can create and activate the new object.
3. When you are finished editing the object, click outside the object to
deactivate it.
The embedded object is displayed in your Graph sheet.
To edit the embedded object in-place
1. In your S-PLUS Graph sheet, double-click the embedded object; or
select the object, choose Object from the Edit menu, then choose
Edit.
2. The embedded object remains in the S-PLUS Graph sheet but the
menus and toolbars change to those of the source application. Edit
the object using the source application's menus and toolbars.
3. When finished, click anywhere outside the embedded object to
return to S-PLUS's menus and toolbars.
Creating and
Editing in the
Server Program
162
When the server program (source application) for the embedded object does
not support in-place activation, the object is created, edited, and displayed in
the server program.
EMBEDDING OBJECTS FROM OTHER APPLICATIONS
To edit the embedded object in the server program
1. In your S-PLUS Graph sheet, double-click the embedded object; or
select the object, choose Object from the Edit menu, then choose
Open.
2. A separate window opens within the server program. Create and edit
the object using the source application's menus and toolbars.
3. When finished, choose Exit and Return from the server application's
File menu. If you want to update the embedded object in the S-PLUS
graph, choose Update from the File menu.
Creating from
Existing Files
You can embed existing files as objects in your S-PLUS Graph sheets. The
original file does not remain linked to the embedded file. You can edit the
embedded file without changing the original file.
To create an embedded object from an existing file
1. With a Graph sheet in focus, choose Object from the Insert menu.
2. To embed an existing file, choose the Create from File button and
select the file name.
3. Choose OK to embed the file.
In S-PLUS you can also insert pictures into your Graph sheets using the
Insert/Picture option.
Displaying as
Icons
You can display an embedded object as an icon in your S-PLUS Graph sheet.
To display an embedded object as an icon
1. Select the embedded object.
2. From the Edit menu, choose Object. Choose Convert from the
submenu.
3. In the Object dialog, choose the Display as Icon option and choose
OK.
Formatting and
Placement
You can specify the formatting and position for the box containing the
embedded object. You can specify the fill pattern, fill color, and pattern color
in addition to the border line style, color, and weight.
To format an embedded object
1. Select the embedded object.
163
CHAPTER 7 EXCHANGING OBJECTS WITH OTHER APPLICATIONS
2. From the Format menu, choose Selected Object. A property dialog
appears.
3. Make any desired formatting changes and choose OK.
Converting to a
Different Format
If your Graph sheet contains an embedded object whose source application is
not installed on your computer, you can convert the object to another format
to use with an application you do have installed. For example, if your Graph
sheet contains an embedded table from Word, but you do not have Word
installed, you can convert the embedded table to another word processing
format.
To convert an embedded object to a different format
1. Select the object.
2. From the Edit menu, choose Object. Choose Convert from the
submenu.
3. Click the Convert To button to have S-PLUS convert the embedded
object to the format specified for the Object Type; or click the
Activate As button to have S-PLUS open all embedded objects in the
proper application for the format you specify for the object type.
4. Choose OK to convert the object.
If an embedded object was created in an older version of an application
currently installed on your system, you will need to convert it to match the
current version of the application. Some applications will convert existing
files to the new format during installation of a newer version. You may be
able to run the application's Setup program to convert existing files.
Converting to a
Picture
You can convert embedded objects to a simple picture graphic. Converting
embedded objects to pictures sometimes reduces the size of your Graph sheet.
However, you will not be able to edit the picture after converting it. To
convert an embedded object to a picture, see the instructions in the previous
section Converting to a Different Format and choose Picture for the Object
Type.
Importing
Graphic
Images
You can import graphics created in a variety of other applications into an
S-PLUS Graph sheet. These graphics are embedded as "pictures" in the Graph
sheet. This is different from an embedded object. These pictures are smaller
in size. They cannot be converted back to embedded objects for further
editing and they cannot be edited from within S-PLUS.
164
EMBEDDING OBJECTS FROM OTHER APPLICATIONS
You can import graphics using the Insert Picture option (see below) or from a
script using the guiCreate command. See the S-PLUS Programmer’s Guide
for more information on guiCreate.
To import a graphic image file
1. With a Graph sheet in focus, choose Picture from the Insert menu.
2. In the File name box, type or select the name of the file you want to
import.
3. In the Files of type box, select the type of the file being imported.
Choose Open to import the file.
To change formatting for the inserted image
w
Right-click on the image to display its shortcut menu, or doubleclick on the object, or select the image and choose Selected Insert
Picture from the Format menu. Make the desired changes and
choose OK.
Fill/Border
You can specify standard fill attributes (fill color, fill pattern, and pattern
color), and standard line attributes (style, color, and weight) for the graph
area.
Position Page
In the Picture dialog, the Position page has the following options:
X, Y Specify the location for the lower-left hand corner of the image.
Width/Height Specify the width and height for the imported image in
document units (e.g. inches). If either value is set to zero S-PLUS will use the
default width and height for the object itself (e.g. the default size of a
bitmap).
Use Axes Units Choose to position the picture relative to an axes pair on the
graph. If you choose this option, your x and y data values are interpreted just
like x and y data points on the graph. Otherwise, your x and y data values are
interpreted in document units instead of axes units. For example, an x,y
location of 1,2 positions the associated picture one inch up from the bottom
of the sheet and two inches from the left side of the Graph sheet.
X Axis/Y Axis # Choose which x-axis and y-axis to scale the picture to. By
165
CHAPTER 7 EXCHANGING OBJECTS WITH OTHER APPLICATIONS
default, the plot is scaled to the first x-axis and y-axis on the graph.
Note
When the property dialog for the inserted picture is displayed, the default size of the picture is always
displayed in the Original Width and Original Height fields. These fields are for information purposes; they
are not editable.
Linking Data
from Other
Applications
You can link data from other applications directly to your S-PLUS plots. This
is useful if the source data is likely to change; your S-PLUS plot can update
automatically to reflect the changes. You can control whether to update the
graph automatically or manually.
To link data from another application to an S-PLUS plot
1. Select the data in the source application (e.g. Microsoft Excel).
2. Copy the data to the clipboard using Copy from the Edit menu.
3. With your S-PLUS plot selected and in focus, choose Paste from the
Edit menu.
or
w
Editing Links
Use the drag and drop method by selecting the data from an
application and dragging it to the S-PLUS plot.
You can control each link in your S-PLUS Graph sheets. By default, data are
linked to plots with automatic updating. You can change this to manual
updating in the Links dialog.
To edit links
1. From the Edit menu, choose Links.
2. In the Links dialog, select the link you want to edit.
3. Choose Automatic or Manual linking.
If you choose Manual updating, S-PLUS only updates the link when you
choose the Update Now button from the Links dialog.
166
EMBEDDING OBJECTS FROM OTHER APPLICATIONS
Reconnecting or
Changing Links
If you rename or move the source file you need to reestablish the link. In the
Links dialog you need to rename the source file, or specify the new location
of the source file.
To re-establish or change a link
1. From the Edit menu, choose Links.
2. Change the name of the linked source file or specify a different file
name. Choose OK.
167
CHAPTER 7 EXCHANGING OBJECTS WITH OTHER APPLICATIONS
EMBEDDING S-PLUS GRAPHICS WITHIN OTHER
APPLICATIONS
Because S-PLUS supports object linking and embedding, you can embed
S-PLUS Graph sheets within other applications such as PowerPoint and
Word.
To embed an S-PLUS Graph sheet
1. Load the client application (e.g. Word) and choose Object from the
client application's Insert menu.
2. Choose the Create New button and select S-PLUS GraphSheet.
Choose OK.
Now you can create and activate the new Graph sheet.
3. When you are finished editing the Graph sheet, click outside the
Graph sheet to deactivate it.
The embedded Graph sheet is displayed in your document.
To edit the embedded Graph sheet in-place
1. In your client application document, double-click the embedded
S-PLUS Graph sheet; or select the Graph sheet, choose Object from
the Edit menu, then choose Edit. The embedded Graph sheet
remains in the client application but the menus and toolbars change
to those used by S-PLUS.
2. Edit the Graph sheet using the S-PLUS menus and toolbars.
3. When finished, click anywhere outside the embedded object to
return to the client application's menus and toolbars.
Updating
Embedded
Graphs
168
You can update changes to an embedded S-PLUS Graph sheet without leaving
the current S-PLUS session, when you have opened an embedded S-PLUS
graphsheet.
EMBEDDING S-PLUS GRAPHICS WITHIN OTHER APPLICATIONS
To update the embedded Graph sheet
w
Click the Update button (this button replaces the Save button when
editing an embedded Graph sheet in S-PLUS). The Update button
updates the embedded graph in the client application document
where it is embedded.
or
w
Select the Save Copy As option on the File menu. Save the
embedded graph to a new Graph sheet file (*.SGR file) on disk.
Copying Graphics S-PLUS has a Send Graph button that copies the current Graph sheet to the
clipboard, then switches automatically into a specified application (e.g.
Using the Send
Word) for pasting. You just specify the location of the application's .EXE file
Graph Button
in the Send Graph toolbar button or menu item dialog.
You can make copies of this button and use it as a template to specify
additional applications.
To specify the target application
1. Right-click on the Send Graph button.
2. Choose Property Dialog from the shortcut menu.
3. On the Command page, specify the complete path name to the
target application's .EXE file. Use the Browse button to locate the
file.
To use the Send Graph button
1. With your Graph sheet in focus, click on the Send Graph button.
The contents of the Graph sheet are copied to the clipboard, the
target application is launched, and a message appears indicating the
Graph sheet is ready for pasting.
2. Paste the Graph sheet in the desired location.
If the target application is already open, S-PLUS will copy the Graph sheet to
the clipboard and switch into the application automatically.
169
CHAPTER 7 EXCHANGING OBJECTS WITH OTHER APPLICATIONS
CREATING A POWERPOINT PRESENTATION
You can automatically create a Microsoft PowerPoint presentation using your
S-PLUS Graph sheets that have been saved to disk. This option is enabled if
you choose to install the PowerPoint Link option during setup.
This feature only works for PowerPoint 7.0 and higher.
To create a PowerPoint presentation
1. Click the PowerPoint Presentation button on the standard toolbar or
select Create PowerPoint Presentation from the File menu in S-PLUS.
2. You will see the Welcome screen of the PowerPoint Presentation
Wizard. Click Next.
3. Several options are available on this page. You can:
• Click the Add Graph button to find S-PLUS graphs on your system
that you would like to add to the list for this presentation.
• Click the Load List button to load a previously saved presentation
list of graphs.
• Click Save List to save the current presentation list.
• Click Clear List to reset the contents of the current presentation list.
• To rearrange items in the list, select a graph in the list and click the
Up or Down button to move it up or down through the list.
• To remove a graph from the list, select it, and click on the Remove
Graph button.
4. Click Next to move to the next page of the wizard.
5. Click Finish. PowerPoint is started and the graphs you chose are
inserted in slides in a new PowerPoint presentation, in the order you
specified in the presentation list in the wizard.
While the graphs are inserted, status information appears in a box in the
wizard that tells you what is going on. After the presentation is complete, it
will be automatically saved to disk with the name you gave the presentation
list in the wizard.
170
CREATING A POWERPOINT PRESENTATION
If you did not save the presentation list in the wizard and the Presentation
Name is “Untitled”, then PowerPoint will not save the presentation when the
wizard is finished preparing it. You will need to explicitly save it in
PowerPoint.
171
CHAPTER 7 EXCHANGING OBJECTS WITH OTHER APPLICATIONS
172
CREATING A GRAPH
8
S-PLUS graphs
Creating a Graph Sheet
Opening an Existing Graph Sheet
174
175
175
Methods for Creating a Graph
177
Viewing Graph Sheets
Adding a Plot to a Graph
Hiding, Unhiding and Deleting a Plot
182
183
186
Editing Data Specifications
Adding or Replacing Data in the Plot
Changing Columns and Data Sets
187
187
188
Placing Multiple Graphs on a Graph Sheet
Adding a Graph to an Existing Graph Sheet
Combining Graphs from Multiple Graph Sheets
Arranging Graphs on the Graph Sheet
190
190
191
192
Preparing Data for Graphing
194
Projecting a 2D Plot onto a 3D Plane
Combining Multiple 2D Plots in 3D Space
Combining 2D and 3D Plots on One Graph
201
201
203
Brush and Spin
Highlighting and Downlighting Points
Brush Symbols and Size Control
More Brushing Options
Spinning Data
204
204
205
205
206
173
CHAPTER 8 CREATING A GRAPH
S-PLUS GRAPHS
An S-PLUS graph consists of one or more plots. S-PLUS offers a wide variety
of plot types which you can combine into multiple plots on one graph or on
one page. You can create graphs from data in S-PLUS Data windows, or from
data imported from a number of applications, including Excel, Lotus, dBase,
SAS, SPSS, and text (ASCII) files. See the chapter Importing and Exporting
data for detailed information on importing data.
In S-PLUS, graphs are stored in Graph sheets. You can place one or more
graphs on a Graph sheet, and you can work with multiple Graph sheets.
A page on a Graph sheet represents a piece of paper on a desktop. Graphical
objects can be placed on the Graph sheet or anywhere on the desktop and are
saved when the Graph sheet is saved to disk. However, only objects on the
Graph sheet are printed. The desktop area is useful for storing objects that
may be needed in the future.
When you save an S-PLUS Graph sheet, all graphs and graphical objects you
have placed in the Graph sheet are saved to a file (extension .SGR). Graph
specifications including plot type, data references, and any formatting
specifications are also saved. The actual data, however, are typically not stored
within the graph; if you remove the data set the plot cannot be redrawn.
S-PLUS is structured this way so you can create multiple graphs that reference
the same data, without saving a copy of the data with each graph. See the
section Changing Columns and Data Sets (page 188) for information on
storing data with a graph.
Graph sheets may be exported to a variety of different image file formats,
including Windows Metafile (.WMF), Windows Bitmap (.BMP), and
Tagged Image File Format (.TIFF). These exported files can be imported into
other applications. You can save your Graph sheet in as many different file
formats as you wish.
You must save your Graph sheet as an S-PLUS graph file if you wish to edit it
again in S-PLUS.
Note
In order to edit or manipulate traditional graphs created using the Commands window, or the Statistics
menus and dialogs, you must first convert these graphs to object-oriented graphs. This is done by right
clicking on any line, point, or text in the graph, then selecting Convert to Objects.
174
S-PLUS GRAPHS
Table 8.1: The Graph toolbar.
Set font
Set text size
Creating a
Graph Sheet
Bold text
Italic text
Underline
Superscript
Subscript
Send to back
Bring to
front
Fill color
Line/Symbol
color
Pattern
Line style
Line weight
Auto legend
Annotations
palette
Send graph
to other
application
To create a Graph sheet
1. Click the New button; or choose New from the File menu.
2. Select GraphSheet from the list of available document types.
3. Choose OK to create the Graph sheet.
Opening an
Existing Graph
Sheet
Graph sheets can be saved as files and then opened again at any time.
To open an existing Graph sheet
1. Click the Open button, or choose Open from the File menu. S-PLUS
lists the files in the current directory.
175
CHAPTER 8 CREATING A GRAPH
2. In the File Name box, type the file name, or select the file you want
to open.
3. To list other files, you can change the drive or directory, or select the
specific file type in the List Files of Type box. This displays a list of
all files of one type such as Graph sheets.
4. Choose OK to load the file into a window.
176
METHODS FOR CREATING A GRAPH
METHODS FOR CREATING A GRAPH
In S-PLUS there are several methods for creating graphs. You can select data
and click a plot palette button; you can drag-and-drop plot buttons onto
graphs and then drag data onto the plot buttons; or you can use the Graph
option on the Insert menu.
Creating a Graph The 2D and 3D Plots buttons are available on the standard toolbar for
creating graphs quickly. When you click the 2D or 3D Plots button, a palette
Using Plot
of plot buttons appears. For a description of each plot, move the mouse
Buttons
cursor over each button in the palette. A text description of the plot appears
in the status bar at the bottom of your screen.
When a new graph is created using a plot button, a new Graph sheet is
automatically opened in a new window.
To create a graph using a plot button
1. Click the 2D or 3D Plots button on the toolbar to open a palette of
available plot types.
Figure 8.1: The Plot2D and Plot3D buttons on the Standard toolbar.
2. Open a Data window or Object Browser containing the data to plot.
3. Select the data columns you want to plot. Use CTRL-click to select
discontiguous columns. The order in which columns are selected
determines their default plotting order.
4. Click the desired plot button on the palette. If you have added your
own palette buttons using S-PLUS's customizable options, your plot
palettes may look different than the ones shown in Figure 8.2 and
Figure 8.3.
5. A new Graph sheet is opened and the graph is drawn on the Graph
177
CHAPTER 8 CREATING A GRAPH
sheet.
Scatter
Line
Scatter w/Line
Line/Isolated Points
High Density
Line w/Text as Symbols
Bubble
Color Plot
Bubble Color
Loess
Smoothing Spline
Robust
Linear Fit
Polynomial Fit
Exponential Fit
QQ Normal Plot w/Line
BoxPlot
Pie
Histogram
Density
Histogram/Density
Bar
Grouped Bar
Stacked Bar
Bar w/Error
Grouped Bar w/Error
Bar Origin Base
Dot Plot
Horizontal Bar
Stacked Horizontal Bar
2D Time Series
High-low Average
Vertical Error Bar
QQ Plot
Area
Scatter Plot Matrix
Contour
Filled Contour
Levels Plot
Lower X Axis
Upper X Axis
Upper X with Frame
Left Y Axis
Right Y Axis
Right Y with Frame
No Conditioning
4 Panel Conditioning
9 Panel Conditioning
Plots in Separate Panels
Sep. Panels w/Varying Yaxis
Sep. Panels w/Varying Xaxis
Figure 8.2: The 2D Plot Palette.
178
METHODS FOR CREATING A GRAPH
Scatter
Line
Line with Scatter
Drop Line Scatter
Regression
Regression with Symbols
Coarse Surface
Data Grid Surface
Spline
Coarse Filled Surface
Data Grid Filled Surface
Filled Spline Surface
8 Color Draped Surface
16 Color Draped Surface
32 Color Draped Surface
Bar
Contour
Filled Contour
XY Plane Z Min
XZ Plane Y Min
YZ Plane X Min
XY Plane Z Max
XZ Plane Y Max
YZ Plane X Max
2 Panel Rotation
4 Panel Rotation
6 Panel Rotation
Condition on X
Condition on Y
Condition on Z
No Conditioning
4 Panel Conditioning
6 Panel Conditioning
Figure 8.3: The 3D Plot Palette.
Creating a Graph You can also create a graph by dragging and dropping each component of a
Using Drag-and- graph onto a Graph sheet.
Drop
To create a graph using drag-and-drop
1. Open a Data window or Object Browser containing the data to plot.
2. Create a new Graph sheet, or open an existing Graph sheet.
3. From the Window menu, choose Tile Vertical. Now you can see the
data and Graph sheet simultaneously. Select the Graph sheet window
by clicking in its title bar.
4. Click the 2D or 3D Plots button on the toolbar. A palette of
179
CHAPTER 8 CREATING A GRAPH
available plot buttons appears.
5. Drag the desired plot button from the palette and drop it inside the
Graph sheet. Default axes are drawn and a plot icon is drawn on the
graph.
6. Select the data columns you want to plot. Use
discontiguous columns.
CTRL-click
to select
7. Position the mouse within the selected region (not in the column
header) until the cursor changes to an arrow. Pressing the left mouse
button, drag the data and move it over a plot icon. When the plot
icon changes color, release the mouse button to drop the data and
generate the plot.
8. The plot icon is replaced by an actual plot of the data columns.
Figure 8.4: An S-PLUS plot, in this case a Linear Fit.
Creating a Graph To create a graph using the Graph option
Using the Menus
1. Choose 2D Plot or 3D Plot from the Graph menu. Or, if you wish
180
METHODS FOR CREATING A GRAPH
to create a multipanel plot of any type, choose Multipanel.
2. Choose 2D, 3D, Matrix, Pie, or Polar from the Graph Type list.
Select the desired plot from the Plot Type list.
3. In the Graph Sheet field, specify the name of the Graph sheet in
which you want to insert the graph. You can insert the graph on an
existing Graph sheet or a new Graph sheet. If you specify the name
of a Graph sheet that does not exist it will be created automatically.
Click OK.
4. A plot property dialog will appear. Specify columns of data to plot
on the Data to Plot page.
Note
If you selected data before choosing Insert/Graph, the graph is generated at this point. You can open the
plot property dialog by double-clicking on the plot.
5. Make any other desired changes to the plot specifications and choose
OK.
6. If you selected the Multipanel option, a graph property dialog will
appear. Specify your conditions or other multipanel options here.
Click OK.
Creating a Graph See the Programmer’s Guide for information on creating editable plots using
using Scripts or scripts or the Commands window.
the Commands
Window
181
CHAPTER 8 CREATING A GRAPH
VIEWING GRAPH SHEETS
Zooming a Graph You can zoom your S-PLUS Graph sheets to focus on a particular area.
Sheet
To zoom a Graph sheet
1. From the View menu, choose Zoom.
2. From the Zoom menu, choose the desired zoom percentage. You can
use all normal editing and formatting options on the zoomed Graph
sheet.
3. When you are finished, choose Fit in Window from the Zoom menu
to return the Graph sheet to its original size.
4. Graph sheets are always printed at 100% size, even if they are
zoomed.
Viewing in Draft
Mode
Use Draft mode to increase the display speed of Graph sheets. You can toggle
this option on and off.
To view a Graph sheet in Draft mode
w
From the View menu, choose Draft or click on the Set Draft Mode
toolbar button.
Draft mode only affects screen resolution; all output will be publicationquality.
Note
You can change the default settings for Draft mode in the Options/Graph Options dialog.
Viewing Full
Screen
You can view Graph sheets at full screen size without the menu bar, window
title bar, or toolbars.
To view a Graph sheet Full Screen
1. Press F2 or choose Full Screen from the View menu.
2. Click the mouse or any keyboard button to return to the original
view.
182
VIEWING GRAPH SHEETS
Adding a Plot
to a Graph
Plots can be added to an existing graph using the plot buttons or the menus.
30
Treatment α
Treatment β
200
180
160
120
100
80
10
Treatment β
Treatment α
140
20
60
40
0
20
19
1970
1971
1972
1973
1974
1975
1976
1977
1978
1979
1980
1981
1982
1983
1984
1985
1986
1987
1988
89
0
Date
Figure 8.5: Multiple plots on a single graph.
Each plot on a graph represents one or more columns of data from a data
sheet. The plots can all be of the same plot type (for example, line plots), or
be a combination of different plot types (for example, line, scatter, and bar
plots).
Combined plots must have the same type of axes. For example, both a line
plot and a bar chart have XY axes and can be combined on one graph.
However, a box plot and surface plot cannot be combined on the same graph
because they have different types of axes. A 2D graph and a 3D graph can
both be placed on the same Graph sheet, but will not be on the same graph.
See the section Adding a Graph to an Existing Graph Sheet (page 190) for
details. In addition, 2D plots can be projected onto 3D planes. See section
Projecting a 2D Plot onto a 3D Plane (page 201) later in this chapter.
Adding a Plot
Using a Plot
Button
You can easily add plots to an existing graph by selecting the graph, selecting
the data, and SHIFT-clicking on plot buttons.
183
CHAPTER 8 CREATING A GRAPH
To add a plot using a plot button
1. Select the graph to which you want to add the plot.
2. Open a Data window containing the data to plot, or select the data
set in the Object Browser so that the columns appear in the right
pane.
3. From the Window menu, choose Tile Vertical. Now you can see the
data and Graph sheet simultaneously.
4. Select the data columns you want to plot. Use
discontiguous columns.
CTRL-click
to select
5. Click the 2D or 3D Plots button on the toolbar. A palette of
available plot buttons appears.
6.
SHIFT-click
the desired plot button on the palette.
The plot is added to the selected graph using the selected data columns. If no
graph was selected before SHIFT-clicking, a new graph will be added to the
current Graph sheet.
Adding a Plot
Using Drag-andDrop
184
When you drag plot buttons from the palette and move them over a 2D
graph, axes targets appear at the intersections of axes pairs, indicating the pair
of axes the new plot is to be associated with. In the following example there
are two sets of axes so there are four possible axes combinations. When you
drag a plot button over an axes target, the target box enlarges. If there is only
one set of axes, dropping a plot button anywhere in the graph will add a plot
VIEWING GRAPH SHEETS
to that axes pair.
Drop plot buttons onto
"axes targets"
Figure 8.6: Dragging and dropping onto an existing graph.
To add a plot using drag-and-drop
1. Click the 2D or 3D Plots button to open a plot palette.
2. Drag a plot button from the palette onto an axes target (at the
intersection of the axes) and release the mouse.
3. A plot icon representing the dropped plot is drawn on the graph.
4. Select the data columns you wish to plot. Use
discontiguous columns.
CTRL-click
to select
5. Position the mouse within the selected region (not in the column
header) until the cursor changes to an arrow. Pressing the left mouse
button, drag the data from the Data window or Object Browser, and
move it over the plot icon. When the plot icon changes color, release
the mouse button to drop the data and generate the plot.
For information on adding axes, see Chapter 10, Formatting a Graph.
Adding a Plot
Using the Menus
To add a plot using the Insert/Plot option
1. If you have more than one graph on the Graph sheet, select the
graph you want to add a plot to by clicking outside the axes or on
the graph border.
185
CHAPTER 8 CREATING A GRAPH
2. From the Insert menu, select Plot.
3. Select the desired plot from the Plot Type list. Choose OK to close
the dialog and continue. The plot property dialog appears.
4. Specify the columns of data to plot on the Data to Plot page of the
dialog.
5. Make any other desired changes to the plot specifications and choose
OK.
Hiding,
Unhiding and
Deleting a Plot
You may want to hide a plot temporarily instead of deleting it from the
graph. You can hide the plot and still retain all of its specifications. This can
be useful if you want to edit parts of a graph containing a complicated plot
type that takes a long time to redraw.
To hide a plot
1. Double-click the plot; or select the plot and choose Selected Plot
from the Format menu or right-click on the plot and choose data to
plot from the shortcut menu.
2. On the Data to Plot page, choose the Hide option and choose OK.
The plot appears in its iconized form in the upper left-hand corner of the
graph. The iconized plot will not appear in the printed output.
To unhide a plot
1. Double-click the iconized plot; or select the iconized plot and choose
Selected Plot from the Format menu, or right-click on the plot and
choose Data to Plot from the shortcut menu.
2. On the Data to Plot page, choose the Hide option and choose OK.
To delete a plot
1. Select the plot to be deleted. If the plot is difficult to select, you may
want to use the Object Browser to select it.
2. Press the DELETE key; or from the Edit menu, select Clear.
186
EDITING DATA SPECIFICATIONS
EDITING DATA SPECIFICATIONS
Adding or
Replacing Data
in the Plot
You can drop data onto a plot icon or directly on a plot. When you drag the
mouse directly over a plot icon or a plot, it changes color to indicate that it is
the active target. When you drop data columns onto a plot icon, the plot
icon is replaced by a plot of the dragged data. When you drop data columns
onto an existing plot, the plot is redrawn using the new data columns.
To add data to a plot icon using drag-and-drop
1. Choose Tile Vertical from the Window menu so you can see your
data and Graph sheet simultaneously.
2. Select the data columns. Use
columns.
CTRL-click
to select discontiguous
3. Position the mouse within the selected region (not in the column
header) until the cursor changes to an arrow. Pressing the left mouse
button, drag the data and move it over a plot icon. When the plot
icon changes color, release the mouse button to drop the data and
generate the plot.
The new plot is drawn on the graph using the dropped data. If the data is not
appropriate for the plot type, or if there is insufficient data to draw the plot
(for example, you drag two columns of data onto a contour plot icon), an
error message appears.
To add data to a plot icon using the plot property dialog
1. Double-click the plot icon to display the plot dialog or right-click on
the plot icon and select data to plot from the shortcut menu.
2. In the Data to Plot page, specify the data columns to be plotted.
3. Make any other desired changes in the dialog and choose OK.
The new plot is drawn on the graph using the specified data.
To replace data in an existing plot using drag-and-drop
1. Choose Tile Vertical from the Window menu so you can see your
data and Graph sheet simultaneously.
2. Select the data columns. Use
columns.
CTRL-click
to select discontiguous
187
CHAPTER 8 CREATING A GRAPH
3. Position the mouse in the selected columns until the cursor changes
into an arrow. Pressing the left mouse button, drag the data from the
Data window or Object Browser, and move it over a plot. When the
plot changes color, release the mouse button to drop the data and
generate the plot.
The plot is redrawn using the new data. If only one column is dropped on a
plot requiring two columns of data, it replaces the Y column of data. If
multiple columns are dropped, multiple plots of the same type are created.
Changing
Columns and
Data Sets
For all plots, you must specify one or more columns of data to be used when
plotting. If you select data columns before choosing a plot from the palette or
before choosing Graph from the Insert menu, the column names and data set
name are filled in for you in the plot property dialog. Otherwise, you can use
this dialog to specify the data set and desired columns. Alternatively, you can
enter an equal (=) sign with an S-PLUS expression resulting in a vector. See
section Selecting Cells, Columns, and Rows (page 90) for information on
selecting columns of data.
To edit data specifications for a plot
1. Double-click on the plot or plot icon; or select the plot and choose
Selected Plot from the Format menu; or right-click on the plot and
select Data to Plot from the menu that appears. A plot property
dialog will appear.
2. On the Data to Plot page, specify the columns necessary for that
particular plot type. See Table 8.2: in the section Preparing Data
for Graphing (page 194) to determine which columns need to be
specified for a particular plot type.
Data Set
The data frame, list, matrix or vectors containing the data columns to be
plotted. Click the down arrow button for a list of data sets.
X Column, Y Column, Z Column, W Column
Specify the names of the columns to be graphed. If you are graphing elements
of a data frame, list, or matrix, you can specify the position number within
the data set instead of the name.
Note that only the references to the data will be stored if you save the Graph
sheet.
188
EDITING DATA SPECIFICATIONS
To graph the result of an S-PLUS expression, or to have the data stored with
the graph, use an equal (=) sign as the first character in the field (for example
X Column(s): = log(x)). The expression will be evaluated the first time
that it is used. From that point on the computed data will be stored within
the plot. The data will be recalculated only if the expression is changed.
You can refer to columns in separate data sets by specifying the name of the
data set along with the column or number, separated by a $ (for example,
fuel.frame$Mileage). Whenever a data set name is supplied along with
the column name, that data set overrides the current data set in the Data Set
field.
Subset Rows with
You can graph only a portion of the rows in the specified columns by
specifying an S-PLUS expression which identifies the rows to use in the
analysis. To use all rows in the data set, enter ALL in this field. The
expression must evaluate to a vector of logical values (TRUE values are used,
FALSE values are dropped), or a vector of indices identifying the numbers of
the rows to use. For example:
Species == bear
1:20
Age >= 13 & Age < 20
# use only bears
# use only the first 20 rows
# use only teenagers
To edit data specifications for multiple plots
1. Double-click in the graph area to display the Graph dialog or rightclick on the graph area and select Plot Summary Page or right-click
on the graph area and choose Select Objects from the Format menu.
2. In the lower portion of the plot summary page of the graph dialog,
select the plot you want to edit.
3. Make any desired changes in the fields in the upper portion of the
dialog.
4. Repeat steps #3 and #4 for each plot you want to modify and choose
OK.
If you choose the Select All button in the Plot Summary page, any
specifications made in the upper portion of the dialog will take effect on all
plots in the graph. This could be useful, for example, if you wanted to specify
the same X column for all of your plots.
189
CHAPTER 8 CREATING A GRAPH
PLACING MULTIPLE GRAPHS ON A GRAPH SHEET
Graphs can be added to an existing Graph sheet using the plot buttons, the
menus or drag-and-drop.
(cpm x 10-3)
[3H]-Thymidine Uptake
A
B
30
Medium
PMA
Cl Anti-CD28
30
20
20
10
10
0
0
0
31.3
62.5
125
A23187 (ng/ml)
0
78
312
Calphostin C (nM)
Figure 8.7: Multiple graphs on a page.
Adding a
Graph to an
Existing Graph
Sheet
To add a graph by SHIFT-clicking on a plot button
1. Open the Graph sheet in which you wish to add a graph. Make sure
nothing on the Graph sheet is selected. If a graph is selected this
procedure will add a plot to the selected graph instead of adding a
new graph.
2. Open a Data window containing the data to plot, or view it in the
Object Browser.
3. From the Window menu, choose Tile Vertical. Now you can see the
data and Graph sheet simultaneously.
4. In the Data window, select the data columns you want to plot. Use
CTRL-click to select discontiguous columns.
5. Click the 2D or 3D Plots button on the toolbar. A palette of
available plot buttons appears.
6.
190
SHIFT-click
the desired plot button on the palette.
PLACING MULTIPLE GRAPHS ON A GRAPH SHEET
The graph is added to the current Graph sheet and a plot is placed on the
graph using the selected data columns.
To add a graph using the Insert/Graph option
1. From the Insert menu, select Graph.
2. Specify the desired graph and plot from the Graph Type and Plot
Type lists.
3. Specify the name of the Graph sheet to which you wish to add a new
graph from the Graph Sheet list. Choose OK to close the dialog. The
graph appears.
To add a graph using drag-and-drop
1. Open a Data window containing the data to plot or view it in the
Object Browser.
2. Open the Graph sheet in which you wish to add a graph.
3. From the Window menu, choose Tile Vertical. Now you can see the
data and Graph sheet simultaneously. Select the Graph sheet window
by clicking in its title bar.
4. Click the 2D or 3D Plots button on the toolbar. A palette of
available plot buttons appears.
5. Drag the desired plot button from the palette and drop it inside the
Graph sheet. Default axes are drawn and a plot icon is drawn on the
graph.
6. Select the data columns you want to plot. Use
discontiguous columns.
CTRL-click
to select
7. Position the mouse within the selected columns until the cursor
changes into an arrow. Pressing the left mouse button, drag the data
and move it over a plot icon. When the plot icon changes color,
release the mouse button to drop the data and generate the plot.
Combining
Graphs from
Multiple Graph
Sheets
You can easily combine graphs from different Graph sheets onto one Graph
sheet. S-PLUS arranges them on the page automatically using a default
Arrange Graphs setting. See the following section for more information on
arranging graphs after they are combined on one Graph sheet.
191
CHAPTER 8 CREATING A GRAPH
To combine graphs from different Graph sheets on to one Graph
sheet
Load the Graph sheets containing the graphs you wish to combine.
1. Click the New button and choose GraphSheet to create an empty
Graph sheet.
2. Choose Tile Vertical from the Window menu.
3. Select one of the Graph sheet windows by clicking in its title bar.
4. From the Edit menu, choose Copy GraphSheet. This copies all
objects in the current Graph sheet to the clipboard.
5. Select the empty (target) Graph sheet window.
6. From the Edit menu, choose Paste. The contents of the copied
Graph sheet will be pasted into the target Graph sheet window.
7. Repeat steps #4 through #7 for each Graph sheet you wish to
combine with the target Graph sheet. Each time you add a graph,
existing graphs will be automatically arranged to accommodate it.
To add an additional page to your Graph sheet, right-click on the page tab
bar at the bottom of the Graph sheet, and select Add Page.
Arranging
Graphs on the
Graph Sheet
If you have already created some graphs, you can use S-PLUS's Arrange
Graphs feature to position them on the Graph sheet. When you choose a
layout style, S-PLUS positions and sizes your graphs on the Graph sheet
automatically.
To arrange existing graphs
1. From the Format menu, choose Arrange Graphs.
2. From the Arrange Graphs submenu, choose the desired layout style:
Default Size/Position, One Across, Two Across, Three Across, Four
Across, or Overlaid.
3. This determines the number of graphs to place horizontally before
"wrapping" graphs to the next row.
To specify the order in which the graphs are laid out you can select them in
the desired order before using Arrange Graphs. Use SHIFT-click to select
multiple graphs and then choose a graph layout. Be sure to select the entire
graph area when selecting graphs.
192
PLACING MULTIPLE GRAPHS ON A GRAPH SHEET
You can use Arrange Graphs as many times as you wish to experiment with
different layouts and to rearrange the graph order.
Note
The default layout and the margins for the Graph sheet and the horizontal and vertical spacing between the
graphs can be changed in the Format/Sheet dialog. You can specify whether to automatically resize fonts
and symbols when graphs are resized in the Options/Graphs Options dialog.
To exchange two existing graphs
1. Select the two graphs you wish to exchange using SHIFT-click to select
multiple objects.
2. From the Format menu, choose Exchange Graphs.
To arrange new graphs automatically
1. Open a new Graph sheet.
2. From the Format menu, choose Sheet.
3. In the Auto Arrange field, specify the desired layout style: None,
One Across, Two Across, Three Across, Four Across, or Overlaid.
4. This determines the number of graphs to place horizontally before
"wrapping" graphs to the next row.
5. Choose OK.
Each time you add a graph to the page, it will be automatically arranged
according the selected layout style. For example, if you choose One Across,
the first graph you add will be full size. If you add a second graph, the first
graph will be automatically resized and positioned to accommodate the
second graph. For more information on the Auto Arrange field, see section
Formatting a Graph Sheet (page 228).
193
CHAPTER 8 CREATING A GRAPH
PREPARING DATA FOR GRAPHING
Some plot types require data to be in a particular format. Special data formats
required in S-PLUS are explained in the following section.
The following table lists each plot type and the required columns.
Table 8.2: Required columns for different plot types:
Plot Type
Area Chart
Bar Chart
Bar—Grouped
Bar—Stacked
Bar with Base at Zero
Bar with Error
Bar with Error—Grouped
Bar, Horizontal
Bar, Horizontal—Grouped
Bar, Horizontal—Stacked
Bar Chart—3D
Box Plot
Bubble Plot
Bubble Color Plot
Color Plot
Comment
Contour Plot
Contour Plot—3D
194
required, optional.
X
Y
(multiple)
(multiple)
(multiple)
(multiple)
(multiple)
(multiple)
Z
W
(text)
PREPARING DATA FOR GRAPHING
Table 8.2: Required columns for different plot types:
Contour—Filled
Contour—3D Filled
Density Plot
Dot Plot
Error Bar Horiz
Error Bar Vertical
Fit—Exponential Curvefit
Fit—Linear Curvefit
Fit—Log 10 Curvefit
Fit—Log e Curvefit
Fit—Polynomial Curvefit
Fit—Power
High-Density Line Plot
High Density—Y Zero
High Density—Horiz.
High Low Plot
Histogram
Histogram with Density Line
Levels Plot
Line Plot
Line with Isolated Points
Line with Scatter
Line with Text as Symbols
(multiple x)
required, optional.
(multiple y) (high)
(low)
195
CHAPTER 8 CREATING A GRAPH
Table 8.2: Required columns for different plot types:
Line 3D
Line with Scatter 3D
Pie
Polar
Projections 3D
Quantile-Quantile Plot (y1,y2)
QQ Normal with Line (y)
Regression—3D
Regression and Scatter—3D
Robust Least Trimmed Squares
Robust MM
Scatter Plot
Scatter—3D
Smoothing—Friedman Super
Smoothing—Kernel
Smoothing—Loess
Smoothing—Spline Plot
Step Plot—Horizontal
Step Plot—Vertical
Surface—Coarse Grid
Surface—Data Grid
Surface—Spline (Fine Grid)
Surface—Filled, Coarse Grid
196
(radius)
required, optional.
(angle)
PREPARING DATA FOR GRAPHING
Table 8.2: Required columns for different plot types:
Surface—Filled, Data Grid
Surface—Filled, Spline (Fine
Grid)
Surface—8 Color Draping
Surface—16 Color Draping
Surface—32 Color Draping
Time Series (y1..yn)
Vector
Specifying
Multiple Data
Columns
required, optional.
Multiple columns can be specified in a list (for example, Y1, Y2, Y3) or in a
sequence (for example, Sample1:Sample5). Each column must have the same
length. For example, multiple columns can be specified for the Y column for
grouped or stacked bar charts, area charts, or for the Z column for contour or
surface plots.
Table 8.3: A data frame is an example multiple column data set.
Levels
X
Sample1
Sample2
Sample3
Sample4
Sample5
High
1
0.45
0.69
0.66
0.66
0.19
Medium
2
0.89
0.12
0.41
0.89
0.78
Low
3
0.42
0.61
0.37
0.29
0.44
Specifying Matrix In a gridded surface or contour plot the Z values represent the height of each
intersection in a grid. If the Z data are specified in a series of columns in a
Form Data
data frame or in a matrix, the dimensions of the grid are defined by the
number of rows (X grids) and columns (Y grids) of the Z data. For example,
if your Z data consists of 4 columns each containing 5 Z values, the number
of X grids is 5 and the number of Y grids is 4.
Specifying
Stacked Form
Data
In a gridded surface or contour plot, the Z values represent the height of each
intersection in a grid. If the Z data are “stacked” in one long column, S-PLUS
will need more information to determine the dimensions of the grid. You can
do this by specifying either the X and Y data columns (if the number of X
and Y Data Grids are set to Auto) or the number of data grids.
197
CHAPTER 8 CREATING A GRAPH
If you specify the X and Y data columns, S-PLUS uses the minimum and
maximum data values to determine the position of the contour along the x
and y-axis. For example, if the X column has a minimum value of 2 and a
maximum value of 9, the plot will be drawn between 2 and 9 on the x-axis. If
X and Y are not specified, or if the X and Y columns contain character data,
S-PLUS assumes that the grid values in the X and Y direction are a series of
integers. If character data are specified, they will be used to label the X and Y
tick marks.
If you specify the number of data grids, the number of X grids times the
number of Y grids must be equal to the number of rows in the Z column. For
example, if your Z column contains 875 values, it might represent a grid with
35 X values (the number of X grids) and 25 Y values (the number of Y grids).
Short form stacked data
The X and Y data can be specified in a short or long form. In the short form,
each X and Y value is listed only once. Both columns must have values that
are in ascending order. The Z values do not correspond to the X and Y values
in the same row. S-PLUS assumes that the X values vary faster in determining
the X,Y coordinates that correspond to each Z value. For example, Table 8.4
represents a list containing vectors X, Y and Z.
Table 8.4:Sample stacked data: short form.
X
Y
Z
1.2
10
0.60
2.2
20
0.67
3.2
30
0.67
4.2
0.69
5.2
0.71
0.59
0.62
0.65
0.66
0.67
198
PREPARING DATA FOR GRAPHING
Table 8.4:Sample stacked data: short form.
0.55
0.58
0.62
0.66
0.73
Long form stacked data
In the long form, the X, Y, and Z columns are of equal length and can be
stored in a data frame. They contain every combination of the X and Y values
and their corresponding Z value. The X values are an ascending sequence,
and the sequence is repeated for each Y value. The Y values are also
ascending, with each value repeated for each X value. This is the format that
should be used for creating multipanel graphs.
Table 8.5: Sample stacked data: long form.
X
Y
Z
1.2
10
0.60
2.2
10
0.65
3.2
10
0.67
4.2
10
0.69
5.2
10
0.71
1.2
20
0.59
2.2
20
0.62
3.2
20
0.65
4.2
20
0.66
5.2
20
0.67
199
CHAPTER 8 CREATING A GRAPH
Table 8.5: Sample stacked data: long form.
Specifying
Irregular Form
Data
1.2
30
0.55
2.2
30
0.58
3.2
30
0.62
4.2
30
0.66
5.2
30
0.73
For an irregular surface or contour plot you must specify three columns of
equal length for X, Y, and Z. The data can be in any order, and the spacing
between X values and Y values may be random. Each X,Y,Z triplet defines a
position in 3D space. S-PLUS first estimates a set of gridded data, and then
plots the data as it does a gridded surface or contour plot. You will get better
results if the data are distributed fairly uniformly in X and Y and do not
contain sharp "spikes" or "drops" in Z.
Table 8.6: Irregular data for surface or contour plot
200
X
Y
Z
1.1
51.0
0.60
2.3
11.9
0.65
3.2
35.8
0.67
3.4
29.0
0.69
4.5
21.6
0.71
5.1
43.2
0.59
5.2
10.3
0.62
PROJECTING A 2D PLOT ONTO A 3D PLANE
PROJECTING A 2D PLOT ONTO A 3D PLANE
Combining
Multiple 2D
Plots in 3D
Space
Most of the 2D plot types can be projected onto a 3D plane. This can be
useful if you want to combine multiple 2D plots in 3D space and then rotate
the results. You can drag-and-drop a 2D plot button onto a 3D plane, or you
can select Graph from the Insert menu to create a projected 2D plot.
Figure 8.1: Multiple 2D plots in 3D space.
To project a 2D plot using drag-and-drop
1. Create a new Graph sheet.
2. Click the 3D Plots button on the toolbar to display the plot palette.
3. There are six 3D plane combinations near the center of the 3D plot
palette. Drag one of the 3D plane buttons off the plot palette and
drop it onto the Graph sheet. A 3D graph is drawn and the plane is
added automatically to the graph. The plane is automatically
positioned at the minimum or maximum position depending on
which plane button you choose. You can drag-and-drop additional
3D planes as desired.
201
CHAPTER 8 CREATING A GRAPH
4. Click the 2D Plots button on the toolbar to display the plot palette.
5. Drag-and-drop a 2D plot button onto the desired 3D plane. As you
drag the plot over a 3D plane, the plane becomes highlighted
(because it is an active drop target).
6. The plot icon is now linked to the 3D plane. You can double-click
the plot icon to specify your data columns; or you can drag-anddrop data columns directly from your data.
When you have specified the data, the 2D plot is drawn on the specified 3D
plane.
To project a 2D plot using the menus
1. Choose Graph from the Insert menu.
2. Choose 3D for the Graph Type, then choose one of the Projected
2D options for the Plot Type. Choose OK.
3. A new Graph sheet and a dialog for the selected plot appear.
4. Specify the columns of data to plot on the Data to Plot page.
Note
If you selected data before choosing Insert/Graph, the graph is generated at this point.
5. Make any desired changes to the plot specifications and choose OK.
6. A 3D graph is drawn with a 2D plot projected onto a default 3D
grid plane.
7. Double-click the grid plane or select the plane and choose Selected
Object from the Format menu to change the plane's position or
formatting characteristics.
To project a 2D plot onto an existing 3D graph
1. Click the 2D Plots button to display the plot palette.
2. Drag-and-drop one of the 2D plot buttons onto your 3D graph. A
2D plot icon will appear on the graph.
3. Double-click the plot icon to specify the data columns; or drag-anddrop data columns directly onto the plot icon. When the plot is
drawn, it will be placed on a default 3D plane.
202
PROJECTING A 2D PLOT ONTO A 3D PLANE
For more information on adding and formatting 3D planes, see section
Formatting 3D Planes (page 251).
Combining 2D
and 3D Plots
on One Graph
You can combine 2D and 3D plots on one graph by attaching a 2D plot to a
3D plane on a 3D graph. For instance, you can create a flat map of your 3D
surface plot by attaching a 2D contour plot to a 3D plane on the same graph.
To add a projection plane, you can drag-and-drop one from the 3D Plot
Palette, or add one through the Insert menu. A 2D plot can be attached to
the projection plane.
To project a 3D plot onto a plane
1. Create a 3D surface plot.
2. From the Insert menu, choose 3D Planes. Choose an option from
the submenu. The 3D Plane dialog appears. Click OK.
3. From the Plots 2D palette, click and drag a 2D Contour Plot button
to a point immediately above the projection plane. Release the
mouse button to drop it. A plot icon appears in the upper left corner
of the Graph sheet.
4. Double-click on the plot icon and fill in the appropriate fields on the
Data to Plot page of the Contour Plot dialog. Click OK. 2D
contours are drawn on the attached plane.
5. For a better view of the contour lines select the 3D workbox by
clicking on the graph, and rotate the graph using the green
triangular knob.
203
CHAPTER 8 CREATING A GRAPH
BRUSH AND SPIN
The brush and spin window allows you to select points in one box in a scatter
plot matrix and have them highlighted in all of the boxes. In addition,
histograms can be drawn to reflect the highlighted and non-highlighted
points for each variable. If you are examining three or more variables, you can
use the spin option to spin a 3D point cloud projection.
To use brush and spin select Brush and Spin from the Graph menu. A dialog
appears with the following options:
Data Set Specify the name of the data set containing your data.
Columns Specify the names (or column numbers if in a data frame) of the
data you wish to examine.
Draw Histogram Choose whether to have histograms shown on the display.
Spin Window Choose whether to have a spin window shown on the display.
If you are examining fewer than three variables, no spin window will be
shown.
Display options for font and color for Brush and Spin can be found in the
Options/Graph dialog. For more information on the use of Brush and Spin
see the on-line documentation for the function brush.
Quitting Brush
and Spin
A button labeled “Quit” appears near the middle of the right column of the
window, just under the bottom of the “Spin” window. Click on the “Quit”
button or choose Close from the Control menu to exit Brush and Spin.
Highlighting
and
Downlighting
Points
Inside the Brush window, the mouse cursor appears with a box, called the
brush, when it passes inside of any of the scatter plots.
1. Move the mouse cursor into one of the scatter plots so the brush
covers some data points, and click the left mouse button. S-PLUS
highlights all of the points under the brush. Simultaneously the
points belonging to the same cases are highlighted in all of the scatter
plots.
2. Now, without moving the mouse, click the right mouse button-the
highlighted points downlight back to their original state.
3. Highlight additional points with the left mouse button and watch
the row of histograms. Each histogram represents the variable whose
label appears below it. The non-highlighted points make up the
204
BRUSH AND SPIN
positive mass in the histogram. The probability mass representing
highlighted points appears as negative mass (that is, points
downward) on the histogram plot.
4. You can brush all the points representing one bar in any histogram
plot. Move the mouse cursor over a bar in a histogram. (Note that
only the mouse cursor, not the brush, appears in the histogram
plots.)
5. Click the left mouse button to highlight all the data points
represented in that histogram.
6. Click on the right mouse button on the bar to downlight this point.
Searching for
Cases
You can access the data by its row name or number. To the right of the scatter
plots, there is a list box containing the row names or numbers.
1. Left click on a name in the list box to highlight the points
representing that row.
2. Click again to downlight.
Brush Symbols
and Size
Control
Above the rectangle containing the case names is a row of four highlighting
symbols. A small square is around your current highlighting symbol.
1. Click on another symbol to change the highlighting symbol.
2. To adjust the size and shape of the brush, move the mouse cursor
into the background area of the “Brush” window, then press down
on the left mouse button. The brush appears with the mouse cursor
pointing at the lower right corner.
3. While holding down the left button, move the cursor until the
desired size and shape brush is drawn, then release the button.
More Brushing
Options
Big Points Click on the box marked Big Points to use a larger plotting
symbol. To return to smaller symbols, click on this option again.
Labels Click on the box to have points within the brush area labeled with
their row label. When you move the brush with any mouse button down,
labels for points no longer within the brush area will disappear. If you move
the brush with no button pressed, labels will persist until you press any
button.
205
CHAPTER 8 CREATING A GRAPH
Persistence By default Persistence is on. Click on the box to turn it off. With
the option off, your next highlighting operation highlights only those points
within the brush, and downlights all previously highlighted points that are
not currently within the brush.
Spinning Data
If you selected the Spin Window option, you should have a Spin sub-window
in the upper right of your screen. It contains a cloud of points with three axes
labeled with the names of the first three variables.
Using the Spin Buttons Use the five buttons marked with arrows to spin the
data cloud. When you press and hold the left mouse button on any of the
direction buttons, the data will spin in the appropriate direction.
Reset Click on the Reset button to reset the axes and the point cloud to their
original positions.
Speed Use the horizontal scroll bar marked Speed to adjust the speed of the
spinning.
Scale Use the horizontal scroll bar marked Scale to adjust the overall size of
the data cloud.
Choosing Variables Use the fields labeled x, y, and z. Select from the list box
in each field to identify the variable to use for each axis.
206
WORKING WITH TRELLIS
GRAPHICS
9
Creating Trellis Graphs
209
Plots on Trellis Graphs
210
Formatting Plots within Panels
212
Formatting Plots within Panels
212
Formatting Panel Strips
214
Trellis Examples
References
216
226
Trellis graphs allow you to view relationships between different variables in
your data set through conditioning.
Suppose you have a data set based on multiple variables and you want to see
how plots of two variables change with variations in a third "conditioning"
variable. By using Trellis graphics you can view your data in a series of panels
where each panel contains a subset of the original data divided into intervals
of the conditioning variable.
For example, a data set contains information on the high school graduation
rate per year and average income per household per year for all 50 states. You
could plot income against graduation for different regions of the USA, for
instance, South, North, East and West to determine if the relationship varies
geographically. In this case, the regions of the USA would be the
207
CHAPTER 9 WORKING WITH TRELLIS GRAPHICS
conditioning variable.
0 0 0 0 0 0 0 0 0 0 0 0 0
00 00 00 00 00 00 00 00 00 00 00 00 00
13 14 15 16 17 18 19 20 21 22 23 24 25
Percent High School Graduates
Northeast
Midwest
88
86
84
82
80
78
76
74
72
70
68
66
64
South
West
88
86
84
82
80
78
76
74
72
70
68
66
64
0 0 0 0 0 0 0 0 0 0 0 0 0
00 00 00 00 00 00 00 00 00 00 00 00 00
13 14 15 16 17 18 19 20 21 22 23 24 25
Per Capita Income
Figure 9.1: A Trellis graph.
In S-PLUS, all graphs can be conditioned using Trellis graphics. The data
columns used for the plot and for the conditioning variables must be of equal
length. The axes specifications and panel display attributes (for example, fill
color) are identical for each panel, although axis ranges may be allowed to
vary. The border and fill attributes for the panels can be specified on the Fill/
Border page of the Graph Properties dialog.
208
CREATING TRELLIS GRAPHS
CREATING TRELLIS GRAPHS
To create Trellis graphs using the Graph Properties dialog
1. Create a graph.
2. Open the Graph Properties dialog by double clicking on the empty
space within the graph area. Place conditioned plots in separate
panels by setting Panel Type to Condition and choosing a
conditioning variable from the Column List. Click OK.
To create Trellis graphs using plot buttons
1. Press the Conditioning Mode button on the Standard toolbar and
make sure that the desired plot palette is open. Notice that the plot
buttons now have rectangular strips across the tops of them to
denote that you are in conditioning mode. On the toolbar, set the
number of conditioning variables to the desired number.
Figure 9.2: The Conditioning Mode button, and drop-down number of conditioning variables
list, on the Standard toolbar.
2. Select the x and y columns you wish to plot, followed by the
conditioning variable(s). Click on the plot type on the plot palette.
To create Trellis graphs using drag-and-drop
1. Create a graph.
2. Drag a column of conditioning data onto the graph and drop it in
the highlighted rectangle at the top of the graph (the highlighted
rectangle is shown in the figure above).
3. If the conditioning data are continuous, you can use the
209
CHAPTER 9 WORKING WITH TRELLIS GRAPHICS
conditioning buttons to change the number of panels.
Figure 9.3: Dragging and dropping conditioning data.
To create Trellis graphs using Shift-click
1. Create a graph and select the graph area.
2. Select the conditioning data column(s) in the Data window or
Object Browser.
3.
Plots on Trellis
Graphs
SHIFT-click
one of the conditioning buttons on the plot palette.
Plots on Trellis graphs behave very much the way they do on standard graphs.
You can:
1. Double-click or right-click to change the data specifications or any
other attributes. When plot specifications change, all of the panels
are modified.
2. Change the plot type by selecting the plots and clicking on the plot
palette.
3. Drag new data onto them.
4. Add additional plots.
By default each plot uses the same conditioning variables specified in the
multipanel page of the graph to determine which rows of the data set will be
210
CREATING TRELLIS GRAPHS
used in each panel. This is appropriate when all the plots on the graph are
using the same data set, so that the data columns are all of equal length.
It is sometimes desirable to combine plots from different data sets on the
same Trellis graph. You can do this by overriding the conditioning
specifications for a single plot. For example, suppose that you have data from
two samples on salt intake, blood pressure, and age. You would like to create
a Trellis graph of blood pressure versus salt intake conditional on age for the
first sample, and then overlay a plot of the second sample conditioned on the
same age ranges.
To create a Trellis graph containing plots from two different samples:
1. Turn on conditioning mode by pressing the button on the Standard
toolbar.
2. Select the x, y, and conditioning data columns to plot for the first
sample, and click on the desired plot button. A Trellis graph is
created.
3. Keep conditioning mode on. Select the x, y, and conditioning data
columns for the second sample. Select the Trellis graph, then shiftclick on the plot button. The plot of the second sample will be
added. Since conditioning mode was on, the last column(s) selected
were used to override the conditioning variable(s) for the second
plot.
The plot-specific conditioning specifications are on the plot’s Data to Plot
page (right-click on the plot to bring this up).
Type Select Auto to use the conditioning variables specified on the graph’s
multipanel page. Select None to use the full data set for this plot in each
panel (no conditioning is used). This is useful if you would like to draw a
reference plot in each panel. Select Specified Columns if you would like to
override the specifications for the conditioning variables for this plot.
Data Set If Type is set to Specified Columns, specify the name of the data set
containing the column to use for conditioning.
Column(s) If Type is set to Specified Columns, specify the variable name to
use for conditioning.
Draw in Panels Select All to have the plot drawn in all panels, or select a
panel number to have the plot drawn only in a single panel.
211
CHAPTER 9 WORKING WITH TRELLIS GRAPHICS
Formatting
Plots within
Panels
Whenever a plot is placed on a Trellis graph, a plot panel object is created for
each panel. They are contained by the plot in the Object Browser and their
properties can be changed by right-clicking on their icon. These panel objects
have display attributes of their own that can be used to override the plot’s
display attributes. For example, you might want to set the line color of the
plot to green in the third panel, and to blue in the rest of the panels.
To edit individual panels
1. Open the object browser. Right-click in the window and select
GraphSheet.
2. Expand the branches until you see the panels appear as individual
objects.
3. Double-click on the panel you wish to edit to open its property
dialog. Make the desired changes and click OK.
Formating
Panels
Fill/Border Page
You can specify standard fill attributes (fill color, highlight color, fill pattern,
and pattern color), and standard line attributes (style, color, and weight) for
the panel area on the Fill/Border page of the Graph Properties dialog.
Multipanel Page
The Graph Properties dialog, the Multipanel page has the following options:
Panel Type Multipanel graphs allow you to view relationships between
different variables in you data set. In S-PLUS the multipanel feature can be
used for standard Trellis graphics, to view related data series in a series of
panels (2D graphs only), or to view a 3D plot at a series of view angles (3D
graphs only).
Column List Specify the column(s) to use as conditioning variable(s).
Data Set Specify the data set containing the conditioning variable.
Type Choose from Auto, Discrete or Continuous. If the Discrete, one panel
will be created for each value. If Continuous is selected, the number of panels
is set to the value in the Number of Panel field. If Auto is specified, S-PLUS
will try to determine an appropriate setting.
Order Type Determines the order of your panels. Specify Data to order
panels in the order that the values appear in the conditioning column.
Choose Alphabetical to arrange them in alphabetic order of column names.
212
CREATING TRELLIS GRAPHS
Choose Median of X, Y, Z or W to arrange panels by median values of the
subsamples in each panel of these data columns. Choose Mean of X, Y, Z or
W to arrange panels by mean values of the subsamples in each panel of these
data columns.
Number of Columns/Rows/Pages Control the layout of the panels by
specifying the number of columns, rows and pages. Choose Auto for
automatic calculation.
Vertical/Horizontal Margin Specify the vertical and horizontal spacing
between the panels in document units.
Panel Order Choose from Graph Order or Table Order. Graph Order begins
drawing panels in the bottom left corner of the graph, to the right and up.
Table Order begins drawing panels in the upper left corner and continues
right.
Draw Strip Choose this option to draw a title strip on each panel for each
condition.
Rotate 3D Axes (Available for 3D graphs only) Select this option to show
the plots rotated in 3D space in different panels. See the 3D Workbox page
to control the degree of rotation.
Number of Panels If the data are continuous, the number of panels will be
determined by the number specified in this field.
Fraction of Shared Points Create overlapping intervals by specifying the
fraction of data points that are shared across two panels.
Interval Type Choose from Equal Counts, Equal Ranges or Columns of
Ranges. Equal Counts places an equal number of data points in each plot.
Equal Ranges makes the interval widths all equal. Columns of Ranges allows
you to specify your own ranges in a Data window column.
Lower/Upper Range Column Specify columns of lower and upper bounds.
Skip Column Specify panels to be skipped or drawn as a column of 0s and 1s
in the Data window (for example, to specify a column of four panels that
skips the third one, enter = c(1, 1, 0, 1) into a Data window column).
Vertical/Horizontal Margin Column Specify column of numbers to use as
variable vertical and horizontal margins between panels.
Panel Order Column Specify a column of numbers to use as the order of the
panels. For example, a column containing =c(2, 4, 1, 3) would draw the
first panel in the second position, the second panel in the fourth position,
and so on.
213
CHAPTER 9 WORKING WITH TRELLIS GRAPHICS
Formatting
Panel Strips
You can have a strip drawn at the top of each panel representing each
conditioning variable. If the panel is discrete, the strip indicates the value of
the conditioning variable. If the panel is continuous, it gives the name of the
variable.
In both cases a shaded band can be used to indicate the relative value or range
of the conditioning variable. If you do not want shading in your panel strips,
make the fill color and highlight color the same.
Default values for the colors used in the strip labels can be modified on the
Fill Color page of the Options/Graph Styles dialogs..
0 0 0 0 0 0 0 0 0 0 0 0 0
00 00 00 00 00 00 00 00 00 00 00 00 00
13 14 15 16 17 18 19 20 21 22 23 24 25
Percent High School Graduates
Northeast
Midwest
88
86
84
82
80
78
76
74
72
70
68
66
64
South
West
88
86
84
82
80
78
76
74
72
70
68
66
64
0 0 0 0 0 0 0 0 0 0 0 0 0
00 00 00 00 00 00 00 00 00 00 00 00 00
13 14 15 16 17 18 19 20 21 22 23 24 25
Per Capita Income
Figure 9.4: Panel strips on a multipanel plot.
To remove panel strips
w
Uncheck the Draw Strip check box on the Multipanel page of the
Graph Properties dialog.
To edit panel strips
1. Double-click on the panel strip.
2. Change the attributes on the pages of the Panel Strips dialog and
214
CREATING TRELLIS GRAPHS
click OK.
Fills Page
On the Fills page you can specify the fill and border properties for the panel
strips.
Highlight Color Specify a color to be used to represent the range or value of
the conditioning variable for that panel.
Labels Page
Label Type Choose from None, Values and Column. If Column is selected,
you must specify a Column name and Data set in the following fields.
Label Position Choose from Centered, On Highlight and Label All Values.
Format Type Choose from Decimal, Scientific, Mixed and Auto. See section
Formatting 2D Axis Labels (page 244) for information on options.
Precision Specify the number of decimal places to display after the decimal.
Fonts Page
On the Font page you can specify the font, size, color, and styles for the panel
strips.
215
CHAPTER 9 WORKING WITH TRELLIS GRAPHICS
TRELLIS EXAMPLES
Example 1:
Pollutants in
Automobile
Exhaust
Data were collected to analyze oxides of nitrogen in automobile exhaust. An
experiment was done on a one-cylinder engine fueled by ethanol. Two engine
factors were studied: the equivalence ratio (E), a measure of the richness of
the air and fuel mixture, and the compression ratio to which the engine is set
(C). There were 88 runs of the experiment. Here we will examine the
relationship between the oxides of nitrogen and the compression ratio.
Creating a Loess plot and adjusting the smoothing parameter
1. Load the Example Object Browser, or use the Find button on your
Object Browser to put the ethanol data frame in a folder.
2. Select the ethanol data frame in the left pane of the Object Browser.
In the right pane select C, then CTRL-click to select NOx. Open the
2D plot palette, and make sure that conditioning mode is off. Click
on the Loess plot button.
3. Make sure that all windows other than the new Graph sheet and the
Object Browser are closed or minimized. Then choose Window/
Tile/Vertical from the main menu.
4. Right click on any symbol or the plotted loess line to get the shortcut menu for the loess plot. Select Smooth/Sort. Change the Span
parameter to 1. Click OK. An increase in the span parameter will
result in a smoother line.
There appears to be little dependence of the oxides of nitrogen on the
compression ratio. However, hidden from this scatter plot is the fact that E is
varying as we move from point to point. The next step is to condition the
plot on E to further examine the relationship.
Conditioning on the Equivalence Ratio
5. Select E on the right pane of the Object Browser, and drag it to the
top of your graph. As your cursor passes over the top of the graph a
rectangular drop target will appear. Release the mouse button when
within the rectangle. The graph will be redrawn in panels
representing different levels of E (see figure 9.5).
6. Right click on an empty space within the graph to get a short-cut
menu for the graph. Select Multipanel. Under Continuous
Conditioning, set the # of Panels to 9, and the Fraction of Shared
Points to 0.25. Under Layout, set the # of Rows to 2.
216
TRELLIS EXAMPLES
7. Click on the Position/Size tab of the dialog. Set the Aspect Ratio to
2.5. Click OK.
The Trellis graph now has nine panels in two rows, and each panel has an
aspect ratio of 2.5. The range of E used for each panel is determined using
the default equal-count method with a 25% overlap. The algorithm picks
interval endpoints that are values of the data; the left endpoint of the lowest
interval is the minimum of the data, and the right endpoint of the highest
interval is the maximum of the data. The endpoints are chosen to make the
counts of points in the intervals as nearly equal as possible, and the fractions
of points shared by successive intervals as close to the target fraction as
possible. Overlapping ranges typically provide greater sensitivity in detecting
nonhomogeneity than non-overlapping ranges.
The conditioned plot shows a clear positive relationship between the oxides
of nitrogen and the compression ratio for low values of E. For high values of
E, the slope is close to zero. In each panel, the pattern appears linear.
Changing the plot type
Since the patterns appear to be linear, let’s redraw the Trellis graph using a
least squares fit.
8. Click on any symbol in the plot to select it. Now click on the Linear
Fit plot button on the 2D plot palette. The graph will be redrawn
217
CHAPTER 9 WORKING WITH TRELLIS GRAPHICS
using a linear fit.
Figure 9.5: Examining pollutants in automobile exhaust.
Example 2:
Barley Yields By
Site and Year.
This example shows a Trellis display of data from an agricultural field trial to
study the crop barley. At six sites in Minnesota, ten varieties of barley were
grown in each of two years. The data are the yields for all combinations of
site, variety, and year, so there are 6 x 10 x 2 = 120 observations. The barley
experiment was run in the 1930’s. The data first appeared in a 1934 report
published by the experimenters. Since then, the data have been analyzed and
re-analyzed. R. A. Fisher presented the data for five of the sites in his classic
book, The Design of Experiments. Publication in the book made the data
famous, and many others subsequently analyzed them.
Then in the early 1990’s, the data were visualized by Trellis Graphics. The
result was a big surprise. Through 50 years and many analyses, an important
happening in the data had gone undetected. The basic analysis follows:
Creating the Trellis graph
1. Select the barley data frame in the left pane of the Object Browser.
In the right pane click on yield, then CTRL-click on yield, variety,
year and site. The order of the variables selected determines how
they will be used in the color plot. The first variable (yield) will be
used as x, the second (variety) as y, and the third (year) will be used
218
TRELLIS EXAMPLES
to determine the color of the symbols. The last (site) is used as the
conditioning variable.
2. Open the 2D plot palette. Turn conditioning mode on by pressing
the conditioning mode button in on the Standard toolbar, and make
sure that the number of conditioning variables on the Standard
toolbar is set to one. Notice that there are now yellow strip labels at
the top of each of the plot icons.
3. Click on the Color Plot icon (see the palette in section Methods for
Creating a Graph (page 177)). A Trellis graph will appear showing
barley yield for each variety, conditioned on the site. The yields for
1931 and 1932 appear in different colors.
4. Turn conditioning mode off, maximize the new Graph sheet, and
close the 2D plot palette.
Formatting the panels
To make it easier to compare yields across sites we will make three changes to
the layout of the panels: stack them in one column, reorder them according
to the median of the yield data shown in each panel, and set the aspect ratio
of each panel to 0.5.
5. Right click in a blank area inside of the graph to get the shortcut
menu for the graph properties. Choose Multipanel.
6. Under Conditioning Columns set the Order Type to Median of X.
Under Layout, set the # of Columns to 1. Click on the Position/Size
tab of the dialog. Set the Aspect Ratio to 0.5. Click OK.
Adding a legend and editing the plot
Now add some final touches to your plot: add a legend, and vary the symbol
styles as well as the symbol colors for the two years.
7. Click on the legend button of the graph toolbar. A legend will be
automatically created and placed on your graph. Select the legend by
clicking just inside the border of the legend. Drag it to the desired
location.
8. Right click on any symbol on your plot to access its short cut menu.
Choose Vary Symbols. On the Vary Symbols page, set Vary Style By
z Column so that both the color and symbol styles will vary by year.
(If you would like to change the symbols and colors used, they are
specified under Options/Graph Styles/Color). Press OK. Notice that
219
CHAPTER 9 WORKING WITH TRELLIS GRAPHICS
the legend has been updated to the new symbol styles.
Now examine your graph to find the undetected happening. It appears in the
Morris panel. For all other sites, 1931 produced a significantly higher overall
yield than 1932. The reverse is true at Morris. But most importantly, the
amount by which 1932 exceeds 1931 at Morris is similar to the amounts by
which 1931 exceeds 1932 at the other sites. Either an extraordinary natural
event, such as disease or a local weather anomaly, produced a strange
coincidence, or the years for Morris were inadvertently reversed. More Trellis
graphics, a statistical modeling of the data, and some background checks on
the experiment led to the conclusion that the data are in error. But it was a
Trellis graphic, such as that created Figure 9.6, that provided the “Aha!”
220
TRELLIS EXAMPLES
which led to the conclusion.
1932
1931
Waseca
Trebi
Wisconsin No. 38
No. 457
Glabron
Peatland
Velvet
No. 475
Manchuria
No. 462
Svansota
Crookston
Trebi
Wisconsin No. 38
No. 457
Glabron
Peatland
Velvet
No. 475
Manchuria
No. 462
Svansota
variety
Morris
Trebi
Wisconsin No. 38
No. 457
Glabron
Peatland
Velvet
No. 475
Manchuria
No. 462
Svansota
University Farm
Trebi
Wisconsin No. 38
No. 457
Glabron
Peatland
Velvet
No. 475
Manchuria
No. 462
Svansota
Duluth
Trebi
Wisconsin No. 38
No. 457
Glabron
Peatland
Velvet
No. 475
Manchuria
No. 462
Svansota
Grand Rapids
Trebi
Wisconsin No. 38
No. 457
Glabron
Peatland
Velvet
No. 475
Manchuria
No. 462
Svansota
20
40
yield
60
Figure 9.6: Trellis graphics were used to pinpoint an error in Barley yield data.
221
CHAPTER 9 WORKING WITH TRELLIS GRAPHICS
Example 3: 3D
Plots of Galaxy
Velocity
The data frame galaxy contains measurements on the velocity of NGC 7531,
a spiral galaxy in the Southern Hemisphere. There is substantial variation in
the velocity at different locations, measured by east-west and south-north
positions which are measured in arc seconds. In this example we will examine
how the velocity measurements vary over the measurement region.
Creating a 3D scatter plot and surface plot
1. Select the galaxy data frame in the left pane of the Object Browser.
Click on east.west, then CTRL-click on north.south and velocity to
select the three variables. Click on the 3D plot palette button on the
Standard toolbar to open the palette. Click on the 3D scatter plot
icon to create a 3D scatter plot of the data.
2. Maximize the Graph sheet.
Rotating the graph in panels
3. Click anywhere inside the graph to select it. Then click on the 4
Panel Rotation button on the 3D plot palette. The graph will be
redrawn 4 times in different panels at different rotation angles.
Adjusting the shape of the workbox
4. Right-click on a blank area within the graph to get the short-cut
menu. Select 3D Workbox. Under Workbox Shape, set X Size Ratio
to 0.5, Y Size Ratio to 1.0, and the Z Size Ratio to 1.0. Under
Workbox Attributes, set the Style to a solid line. Click OK. The plot
should look similar to figure 9.7.
Adjusting the angle of rotation
5. Click inside the workbox of the first panel. Rotation handles will
appear. Drag one of the round handles counter-clockwise. The
workbox will redraw in the new position. The angle of rotation for
all of the other panels will update to result in a complete rotation of
222
TRELLIS EXAMPLES
360 degrees.
Figure 9.7: The galaxy data rotated in 4 panels.
Vary the symbol color with velocity
6. Right-click on any symbol in the plot to get the short-cut menu.
Select Vary Symbols. Set Vary Symbol Color to z Column. Under
Vary Colors set the First Color to Blue, and the Last Color to Light
Cyan. Click on the Symbol tab. Set the symbol height to 0.05. Click
OK.
Now with higher values of velocity a lighter-colored symbol will be used.
Customizing the order of the panels
We can use the customization options of the multipanel plot to skip the
center panel, and re-order the contents of the panels so that they rotate
around the center of the graph.
7. Right-click on a blank area within the graph to get the short-cut
menu. Select Multipanel. Under Layout, set # of Columns to 3 and
# of Rows to 3. Under Continuous Conditioning, set # of Panels to
223
CHAPTER 9 WORKING WITH TRELLIS GRAPHICS
8.
Under
Customization,
set
Skip
Column
to
The fifth panel on the graph will be
skipped when drawing into the panels. Panels are counted beginning
with the lower left hand corner because the default order is set to
Graph Order. Under Customization, set Panel Order to
=c(1,2,3,5,8,7,6,4). This will rearrange the order of the
contents of the panels actually used. For example, what would
normally be drawn in the fourth panel (middle row, left column),
will now be drawn in the last panel (top row, right column). Click
OK.
=c(F,F,F,F,T,F,F,F,F).
Add annotation to the middle panel
8. Open the Annotation palette and click on the Comment tool. Left
click on the position in the middle panel where you would like to
start your text, then drag up and right until you have defined the
approximate size of your text. Click on the selection button on the
Annotation tool, then click on the new text. Edit the contents to say
Velocity of Galaxy NGC 7531. Click outside of the text to end the
editing.
Changing the plot type
Depth perception is typically better with a 3D mesh than with a 3D scatter
plot. Let’s change the plot type to a surface plot to further examine the data.
9. Click on any of the points in the scatter plot to select it. Now click
on the Data Grid Surface plot icon on the 3D plot palette. The 3D
scatter plot will be changed to a mesh plot. Because the data are not
gridded (i.e. the data points are a series of triplets), a gridding
algorithm is used to grid the data before plotting the surface.
Example 4: Using
a User-Defined
Function to Add
Lines at the
Means
It is possible to create a wide variety of specialized plots by using the userdefined function property in line plot objects. If a user function is specified
on the Smooth/Sort page of the line plot, the results computed by the
function will be used when drawing the line instead of the original x and y
data. All of the properties of the plot related to line drawing will be used
when drawing the transformed data.
For example, the function crosshairs computes the mean and 95%
confidence intervals of the x and y variables and places the computations in a
list. We can use this to draw crosshairs showing the means and 95%
confidence intervals for the Weight and Mileage of automobiles.
224
TRELLIS EXAMPLES
Create a scatter plot with crosshairs
1. Select the fuel.frame data frame in the left pane of the Object
Browser. In the right pane, select Weight then CTRL-click to select
Mileage. Open the 2D plot palette and click on the scatter plot
button. A scatter plot will appear.
2. Right-click on any symbol to get the short-cut menu. Select
Smooth/Sort. Specify the Smoothing Type as User. Type
crosshairs for the function name.
3. Click on the Line tab of the dialog. Set the Line Style to solid. Click
OK.
Create a panel for each automobile type
In a conditioned Trellis graph, the computations will be repeated for the data
in each panel.
4. Press CTRL-shift-V to tile the windows. Select Type from the right
pane of the Object Browser, and drag it to the top part of the graph.
A rectangular drop target will appear. Drop it inside of the rectangle.
The graph will be drawn with a different panel for each automobile
type.
5. Change the line style of the crosshairs using the toolbar. Click on
any crosshair or symbol to select the plot. Click on the Line Style
button on the graph toolbar. Select the dashed line. The crosshairs
will be redrawn in each panel using a dashed line.
Redrawing the graph with different variables
6. Select Weight, then
Browser.
CTRL -click
to select Fuel from the Object
7. Drag the selected columns over to the graph. As you hover over a
point on the scatter plot, the points will change color. Drop the data
on the scatter plot. The plot will be recalculated and redrawn using
the Weight and Fuel Consumption data. The plot should now look
225
CHAPTER 9 WORKING WITH TRELLIS GRAPHICS
similar to that in figure 9.8.
Figure 9.8: The resulting Trellis plot for Example 4.
References
Becker, R. A., Cleveland, W. S., and Shyu, M., (1996), “The Visual Design
and Control of Trellis Display”, Journal of Computational and Graphical
Statistics, 6, pp. 123-155.
Cleveland, William S., (1993), “Visualizing Data”, ATT Bell Laboratories,
Murray Hill, NJ.
226
FORMATTING A GRAPH
10
Formatting a Graph Sheet
228
Formatting a Graph
Formatting the Graph Area
Formatting the Plot Area
233
233
234
Formatting Panels
238
Formatting 2D Axes
Formatting 2D Axis Labels
239
244
Formatting and Rotating 3D Axes
Formatting 3D Axes Labels
Formatting 3D Planes
249
250
251
Rotating a 3D Graph
254
Displaying 3D Multipanel Graphs
256
Formatting Polar Axes
259
Adding Multi-line Text
261
Adding Special Characters and Formatting Text
265
Adding Titles and Legends
Adding 2D Axis Titles
Adding 3D Axes Titles
Adding a Date and Time Stamp
Adding a Legend
Formatting the Legend Items
267
268
268
269
270
271
Adding Labels for Points
273
Adding a Curve Fit Equation
274
Adding Lines, Shapes and Symbols
275
Summary of the Annotation Palette
277
227
CHAPTER 10 FORMATTING A GRAPH
FORMATTING A GRAPH SHEET
In S-PLUS you have complete control over the format of your graph
including axes, plots, titles, and comments. See chapter Creating a Graph
for step-by-step instructions for creating graphs.
Once you have created a graph, you can take advantage of S-PLUS's many
editing options.
The rectangular page in the window is the Graph sheet.
To format the Graph sheet
1. With the Graph sheet in focus, choose Sheet from the Format menu.
The Graph Sheet Properties dialog appears, or right click outside of
the page to bring up the shortcut menu.
2. Make the desired formatting changes to the Graph sheet.
3. Choose OK.
Layout Page
In the Graph Sheet Properties dialog, the Layout page has the following
options:
Name Use this option to rename your Graph sheet. You can also rename
Graph sheets using the Save As option from the File menu.
Orientation Choose Landscape or Portrait orientation for the page. This
overrides the page orientation specified under Print Setup.
Units Specify the unit of measure to be used when creating graph objects on
the Graph sheet (these are the "document units"). Choose from INCH
(inches), CM (centimeters), MM (millimeters) and POINT (type setting
point size).
Width Specify the width of the Graph sheet. If you choose Printer, the width
will automatically be set to the printer's paper width (with respect to the
orientation specified above).
Height Specify the height of the Graph sheet. If you choose Printer, the
height will automatically be set to the printer's paper width (with respect to
the orientation specified above).
Display Margins Choose whether to display the page margins on the Graph
sheet. Page margins are represented with dotted lines. If the margins are set to
0, no margin lines will appear on the Graph sheet. If you choose Printer for
your margins, you can use the dotted lines as guidelines to make sure you
place graph objects within the print area defined by the printer.
228
FORMATTING A GRAPH SHEET
Top Margin Specify the top page margin for your Graph sheet. Choose
Printer to have the top margin set to the printer's top margin.
Bottom Margin Specify the bottom page margin for your Graph sheet.
Choose Printer to have the bottom margin set to the printer's bottom
margin.
Left Margin Specify the left page margin for your Graph sheet. Choose
Printer to have the left margin set to the printer's left margin.
Right Margin Specify the right page margin for your Graph sheet. Choose
Printer to have the right margin set to the printer's right margin.
In the Graph Sheet dialog you can also specify the default positioning of your
graphs. The following offset values are measured from the lower-left hand
margin setting:
Top Offset Specify the distance between the top of your graph(s) and the top
edge of the Graph sheet.
Bottom Offset Specify the distance between the bottom of your graph(s) and
the bottom edge of the Graph sheet.
Left Offset Specify the distance between the left-most side of your graph(s)
and the left edge of the Graph sheet.
Right Offset Specify the distance between the right-most side of your
graph(s) and the right edge of the Graph sheet.
Horizontal Spacing Specify the amount of horizontal space to have between
multiple graphs side-by-side on the sheet. This value is used only when you
use S-PLUS's automatic Arrange Graphs feature to arrange multiple graphs.
Vertical Spacing Specify the amount of vertical space to have between
multiple graphs stacked vertically on the sheet. This value is used only when
you use S-PLUS's automatic arrange graphs feature to arrange multiple
graphs.
Auto Arrange Specify the desired layout style for new graphs placed on the
Graph sheet. Choose None to have all graphs set to the size and position of
the default graph. Choose Overlaid to have each new graph created full size
on the Graph sheet using the offsets specified above. If you choose One
Across, Two Across, Three Across, or Four Across, the first graph is created at
full size. When you add additional graphs, all graphs (including the first one)
will be resized and positioned automatically into the selected layout style (for
example, Two Across).
For more information on Arranging Graphs, see the section Arranging
Graphs on the Graph Sheet (page 192).
229
CHAPTER 10 FORMATTING A GRAPH
Options Page
In the Graph Sheet dialog, the Options page has the following options:
Mode Many commands in the S-PLUS language draw plots using primitives
such as lines() and points(). These plots can be put into a Graph sheet in two
different ways. If the mode is set to “Fast”, a single composite object will be
created. It will draw quickly on the screen, but its contents cannot be directly
edited. Alternatively, if the mode is set to “Editable” a series of editable
graphical objects will be created such as lines, axes, and plots. If the mode is
set to “Auto”, the mode set from the Options/Graphs dialog (which also can
be changed via the command line toolbar) will be used. Composites objects
can be converted to editable objects by right-clicking on the plot and
selecting Convert to Objects from the shortcut menu.
Page Creation If a command or series of plotting commands are issued,
additional pages of a Graph sheet can be automatically created. If page
creation is set to “None”, the first page will be overwritten when a new plot is
created. If it is set to “Page per Graph”, a new page will be created for each
new plot. If it is set to “Page Per Command”, a command consisting of a
series of plots will create multiple pages. When a new high level command is
issued from the command line, it will overwrite beginning with page 1. If
“Auto” is selected, page creation will follow the choice in Options/Graph.
This option has no impact on graphs created using the guiCreate
commands.
Height Multiplier When using in-text codes for super- and subscripting,
each level of super- or subscripting is made smaller by this factor (numbers
ranging from 0 to 4). The default is 0.75. If you enter x[2] in text, it would
appear as x2. Note that the 2 would be 75% of the size of the x. If there was
an additional level of superscripting, the additional character would be 75%
of the size of the 2.
Shift Multiplier When using in-text codes for super- and subscripting, each
level of super- or subscripting is raised or lowered by the font height
multiplied by the number specified here (ranging from 0 to 4). The default is
0.6. The larger the specified shift multiplier number, the higher and lower
the super- and subscripts.
Font #1, #2, #3, #4 Specify the four default fonts to be used with in-text
codes in title, legend, comment, and date stamp text. In-text codes allow you
to change the font, color, and super- and subscripting within a line of text.
Auto Redraw Plots Choose this option to have plots redrawn automatically
whenever changes are made. If this option is not chosen, plots will only
redraw when you choose Redraw Plots Now from the View menu. This
option is useful when you want to make multiple changes without waiting
for plots to redraw after each change. The Auto Redraw Plots option can also
be toggled on and off from the View menu.
230
FORMATTING A GRAPH SHEET
Colors Page
Background Color Specify the background color for your Graph sheet.
Print Background Specify whether you want the background color to print
when you print your Graph sheet. You may want to turn this option on when
creating slides or using a color printer.
Edit Colors Click the Edit Colors button to access the Color Palette. You
can use the Color Palette to define 16 of your own colors. Custom colors will
then appear in the Color menus for the current Graph sheet. You can save
these custom colors to be used for all subsequent Graph sheets by rightclicking in the Graph sheet and choosing Save Graph Sheet Properties as
Default from the shortcut menu.
User Colors Click the User Colors button to access a color palette. You can
use the color palette to edit 16 of your own colors. These user colors appear
in the Color menus for objects in the Graph sheet. The user colors specified
when the Graph sheet is created are determined by the Style and Color
Scheme definitions in Options. To modify user colors for all subsequent
Graph sheets you should edit the Color Schemes in Options/Color Schemes.
Number of Colors Image colors are a series of fill colors that can be used for
draped surfaces, flooded contours, and levels plots. The specification of
image colors consists of up to sixteen core colors, and a list defining the
number of shades or color gradations between each core color. Number of
image colors indicates how many core colors are used in the image colors
definition.
Number of Shades A list of numbers separated by commas indicating how
many shades should be used between each core color. For example, if there
are three core colors: black, red, and white, and number of shades is specified
as 5,15, then a total of 23 colors will be used for the image color scheme: 5
shades between black and red, 15 shades between red and white, and the
three core colors.
Image Colors Click on the Image Colors button to access and edit a color
palette of the core image colors. Only the number of colors specified by the #
of Colors prompt will be used in the image color scheme.
Saving Graph
Sheet Defaults
You can save the settings from your Graph sheet so they will be used as
defaults when you create new Graph sheets. This is convenient if you intend
to create many Graph sheets with similar properties.
To save the settings from the active Graph sheet as the defaults
1. Load a Graph sheet, or create a Graph sheet with the desired
formatting specifications.
2. Click in a blank area of the Graph sheet, outside of any graphs.
231
CHAPTER 10 FORMATTING A GRAPH
3. From the Standard menu, choose Options.
4. Choose Save Properties as Default.
The settings from the current Graph sheet (including window size and
position) are saved as the default settings. You can also right-click on the
Graph sheet and choose the “Save Properties as Default” menu option.
232
FORMATTING A GRAPH
FORMATTING A GRAPH
Formatting the
Graph Area
You can select the graph area to change its size or formatting.
Figure 10.1: The graph area (gray) is selected
To select the graph area
w
Click anywhere outside the axes but inside the graph boundary.
When selected green knobs appear on all sides and all four corners.
To change the size of the graph area
w
Select the graph area and drag the corner resize knobs to the desired
size, or
w
double-click inside the graph area, but not on another object, to
display the Graph Properties dialog. Alternatively, you can rightclick and select Position/Size from the shortcut menu. To change the
graph area size specify the Height and Width on the Position/Size
page and choose OK.
To move the graph area
w
Select the graph area and drag it to a new location, or
233
CHAPTER 10 FORMATTING A GRAPH
w
Double-click inside the graph area to display the Graph Properties
dialog. Click on the Position/Size page. For the Graph Position,
specify the Horizontal and Vertical position and choose OK.
To format the graph area
1. Double-click inside the graph area to display the Graph Properties
dialog.
2. Click on the Fill/Border page. Make the desired formatting changes
to the graph area.
3. Choose OK.
Formatting the
Plot Area
You can select the plot area to change its size or formatting. In a 2D graph the
plot area is bounded by the axes.
Figure 10.2: The plot area (gray) is selected
To select the plot area
w
Click anywhere inside the region bounded by the axes. When
selected, the plot area has knobs on all sides and all four corners.
To change the size of the plot area
w
234
Select the plot area and drag the corner resize knobs to the desired
size, or
FORMATTING A GRAPH
w
double-click inside the graph to display the Graph Properties dialog.
Click on the Position/Size page. For Plot Display Size, specify the
Height and Width and choose OK, or
w
select the plot area, right-click and select Position/Size. For Plot
Display Size, specify the Height and Width and choose OK.
To move the plot area
w
Select the plot area and drag it to a new location, or
w
double-click inside the graph to display the Graph Properties dialog.
Click on the Position/Size page. For Plot Origin Position, specify X
and Y values and choose OK.
To format the plot area
1. Double-click inside the graph to display the Graph Properties dialog.
2. Click on the Fill/Border page. Make the desired formatting changes
to the plot area border and fill.
3. Choose OK.
Position/Size
Page
In the Graph Properties dialog, the Position/Size page has the following
options:
Graph Position The graph area is positioned according to the horizontal and
vertical specifications entered here. The distance is measured from the
bottom left-hand corner of the page area to the lower left-hand corner of the
graph area.
Graph Size Specify the horizontal and vertical lengths of the graph area.
Graph Interior Margin Specify a margin for automatic plot area calculations
within the graph area border. To the extent possible, axes labels will not be
drawn within this area.
Plot Origin Position The plot area is positioned according to the horizontal
and vertical specifications entered here. The distance is measured from the
lower left-hand corner of the graph area to the lower left-hand corner of the
plot area. If Auto is specified the plot area will be repositioned to allow room
for axes labels.
Plot Display Size Specify the horizontal and vertical lengths of the plot area.
If Auto is specified the plot area will be resized to allow room for axes labels.
235
CHAPTER 10 FORMATTING A GRAPH
Aspect Ratio This group controls the size of the axes area within the
designated plot area. Choose Auto to have the aspect ratio calculated
automatically. Choose Fill Plot Area to use the full extent of the plot area for
the axes. Choose Banking to have the aspect ratio adjusted to normalize the
average slope of all line segments of all appropriate plots in all panels to the
value specified in the Ratio Value field. The Ratio Value is interpreted in
degrees and may be specified as Auto. Choose Proportional Units to force an
aspect ratio that causes the units for both axes to be in proportion to one
another by a ratio specified in the Ratio Value field. For example a value of 1
will cause the units of both axes to be interpreted as equal. Choose Ray From
Origin to cause the aspect ratio to be adjusted such that a ray from the axes
origin through the point specified by the X Value and Y Value fields will pass
through the point defined by the axes maximums. Choose Ray From (0,0) to
cause the aspect ratio to be adjusted such that a ray from the point (0,0)
through the point specified by the X Value and Y Value fields will pass
through the point defined by the axes maximums.
Plots that are used in the automatic aspect ratio calculations contain a Use for
Aspect Ratio check box on their Data To Plot pages. These plot types include
Line/Scatter, Smoothing, and Curve Fitting.
Hide Choose whether to hide or display the graph area.
Fill/Border Page
You can specify standard fill attributes (fill color, fill pattern, and pattern
color), and standard line attributes (style, color, and weight) for the graph
area.
Plot Summary
Page
This page of the Graph Properties dialog displays the name of the data
window, the selected columns, the hide option and the scale to options for
the selected plot. Within this dialog you can edit the data specification
options for individual plots or for all plots on the graph at once. For details,
see section Preparing Data for Graphing (page 194). For more information
on editing multiple plots at once, see section Editing Data Specifications
(page 187).
Fill/Border Page
You can specify standard fill attributes (fill color, fill pattern, and pattern
color), and standard line attributes (style, color, and weight) for the panel
area on the Fill/Border page of the Graph Properties dialog.
Multipanel Page
See the chapter on Trellis graphs for details of multipanel conditioning.
Suppose you have a data set based on multiple variables and you are
interested in comparing data series. It is often convenient to view these data
series in a series of panels keeping the x axis and/or y axis ranges constant.
This is done by using the “By Plot” option on the Multipanel page of a
graph.
236
FORMATTING A GRAPH
For example, suppose you have data on GNP, the unemployment rate, and
the inflation rate over time. To graph these series in a single panel simply
select the columns and click on the time series plot button. However, in the
graph created it very difficult to see variations in the unemployment and in
the inflation rate because the axis scale is inappropriate. Adding one or more
right y axes can solve the problem, but then the graph becomes cluttered with
three possibly overlapping lines. An alternative is to use the By Plot option.
Select the graph and click on the button in the middle of the last row of the
2D Plot palette to get separate panels with varying y ranges. Each series will
be plotted in separate panel. The x axis range is held constant across panels,
but the y axis range is allowed to vary. This is done by setting the Vary Axis
Range property of the y axis.
You can also use multipanel graphs to display 3D plots rotated at various
angles and "sliced" along axes. Each panel shows a different view or section of
the original surface. For more information, see section Displaying 3D
Multipanel Graphs (page 256) later in this chapter.
237
CHAPTER 10 FORMATTING A GRAPH
FORMATTING PANELS
Whenever a plot is placed on a multipanel graph, a plot panel object is
created for each panel. They are contained by the plot in the Object Browser
and their properties can be changed by right-clicking on their icon.
These panel objects have display attributes of their own that can be used to
override the plot’s display attributes. For example, you might want to set the
line color of the plot to green in the third panel, and to blue in the rest of the
panels.
To edit plots in individual panels
1. In the left pane of the Object Browser, select GraphSheet.
2. Expand the branches until you see the plot panels appear as
individual objects.
3. Double-click on the panel you wish to edit to open its property
dialog. Make the desired changes and click OK.
238
FORMATTING 2D AXES
FORMATTING 2D AXES
Adding an Additional Axis
You can add additional axes to your 2D graph. You can drag-and-drop them
from the 2D plot palette or you can use the Axis option on the Insert menu.
To add an additional axis
Figure 10.3: The extra axis buttons on the 2D plot palette
1. Drag one of the extra axes off the 2D plot palette and drop it inside
the graph area. An extra axis is added to the selected graph. If an axis
already exists in that position the new axis is automatically offset
slightly from the original axis.
or
1. Select the graph.
2. From the Insert menu, choose Axis.
3. From the Axis submenu, choose Upper X Axis, Lower X Axis, Left Yaxis, or Right Y-axis. The Axis dialog appears.
4. Specify the position and formatting attributes for the new axis and
choose OK. The extra axis is added to the selected graph.
To add an axis with a frame
1. Drag one of the axes with frames off the 2D plot palette and drop it
inside the graph area. An axis and frame are added. The frame is not
a true axis, it is a mirror of the opposite axis, and always has identical
scaling.
or
1. Select the graph.
2. From the Insert menu, choose Axis.
3. From the Axis submenu, choose X Axis with Frame or Y Axis with
Frame. The Axis dialog appears.
239
CHAPTER 10 FORMATTING A GRAPH
4. Specify the position and formatting attributes for the new axis and
choose OK. The axis and frame are added to the selected graph.
Formatting a 2D
Axis
To select an axis
w
Click inside the tick area of the axis. When the axis is selected it will
have a square green knob in the center of the axis. If you see a
triangular green knob you have selected the axis labels, not the axis.
To move an axis and offset it from the plotting area
w
Select the axis. A knob appears in the center of the axis. Drag the
knob until the axis is in the desired position.
or
w
Double-click the axis; or select the axis and choose Selected Axis
from the Format menu. Choose the Display/Scale page and specify a
value in the Axis Offset field. Choose OK.
To format an axis
1. Double-click the axis; or select the axis and choose Selected Object
from the Format menu.
2. From the Axis dialog, choose the desired page: Display/Scale, Range,
Grids/Ticks or Axis Breaks. Make the changes and choose OK.
Alternatively, you can access pages of the property dialog by selecting the
axis, right-clicking and selecting a page from the shortcut menu.
Display/Scale
Page
In the Axis dialog, the Display/Scale page has the following options:
Axis Display Specify the style, color, and line weight of the lines used to
draw the axis.
Scaling Choose from Linear, Log, Natural Log (ln), or Probability scaling for
the axis.
Choose Probability to use a scale with data expressed as percentages and a
scale range is between 0.001 and 99.999. Data with a true Gaussian
distribution (sigmoidally-shaped) curve will plot as a straight line.
240
FORMATTING 2D AXES
Hide Choose whether to hide or display the axis.
Cross Axis Choose whether to have the axis cross another specified axis at the
origin. Plot(s) will be drawn in the same location with either option. The
selected axis will intersect with the axis specified in the Axis to Cross field at
the origin (if the origin is included within the axes range), and all four
quadrants will be available for plotting. If this option is not chosen, the axes
will meet in the lower left-hand corner regardless of the axes range.
Axis to Cross Specify the axis number of the x-axis or y-axis you wish to
cross at the origin. The axis number appears in the title bar of the property
dialog.
Placement Choose Left/Lower to have a y-axis snap to the left edge of the
plot area. An x-axis will snap to the bottom edge of the plot area. Choose
Right/Upper to have a y-axis snap to the right edge of the plot area. An x-axis
will snap to the upper edge of the plot area.
Axis Offset Specify the offset of the axis from its position at the edges of the
plot area (or from origin if crossed). The default value is 0, meaning that the
horizontal and vertical axes meet. When an offset is specified, the plot(s) will
be drawn in the same location, but the axis itself will be shifted by the
specified amount. This feature is especially useful when you are adding
multiple axes to the graph.
Frame Choose whether to have a frame, or mirrored axis, on the opposite
edge of the plotting area. Choose from None, No ticks, With ticks or With
labels & ticks.
Panel Frames Choose whether to have a frame, or mirrored axis, on the
opposite edge of the panel when you have a multipanel page. Choose from
Auto, No Frame, Alternate Sides with Labels, Outer Sides with Ticks, Outer
Sides with Labels or Frame Outer Sides.
Vary Axis Range Allow the range of the axis to differ between panels of a
Trellis plot.
Range Page
In the Axis dialog, the Range page has the following options:
Axis Range Specify the minimum and maximum values of each axis in axes
units or the units of the data in the plot. Axes units are interpreted just like x
and y data points on the graph. The default, Auto, produces a range outside
the data values, and typically produces a small margin at both ends of the
axis.
DataMin and DataMax specify that the minimum or maximum data value
be used for the axis. For example, if you specify DataMin for the Axis
Minimum and DataMax for the Axis Maximum, your axis range will be the
same as the range of your data.
241
CHAPTER 10 FORMATTING A GRAPH
You can also specify the values for the beginning and end of the axis by
entering a number in this field. For example, if you specify an axis minimum
of 1 and an axis maximum of 10, data points with the values of 1 and 10 will
be positioned at the beginning and end of the axis, respectively.
Major Tick Placement Interval For the Interval, you can enter a number, a
range of numbers, or choose from the following options: Auto, Data, and
Categorical. Enter a number to specify the exact number of intervals between
ticks. For example, if you specify beginning and ending tick marks at 0 and
100 respectively (see Tick Range), and you specify 5 for the number of tick
intervals, then ticks will be placed at 0, 20, 40, 60, 80, and 100. If you
specify a size of 20 with beginning and ending ticks at 0 and 100,
respectively, ticks will be placed at 0, 20, 40, 60, 80, and 100 as in the
example above.
You can also specify a lower and upper bound for the number of ticks drawn
separated with a colon (for example, 8:14). For example, if you specify 8 as
the lower bound and 14 as the upper bound, S-PLUS may produce 10 ticks,
depending on what is most suitable for your data. Ranges are only valid if the
Interval Type is Numbers.
If you choose Auto, S-PLUS will draw between 3 and 12 ticks, depending on
your data (for most 2D plots). This is equivalent to specifying a range of 3 to
12 for the number of tick intervals. For histograms and box plots, ticks will
be drawn at an interval equal to the smallest data interval (see Data below).
For bar charts, ticks are placed at equal intervals with the x data used as labels
(see Categorical below).
If you choose Data, S-PLUS calculates the smallest interval between data
points and uses this interval for tick placement. For example, if your X data is
1.0, 1.25, 1.75, 2.0, and 3.0, the width of the tick interval will be set at the
smallest interval between data points (0.25). Data will produce a tick mark at
each data point when your data is regularly spaced.
If you choose Categorical, ticks are placed at equal intervals along the axis,
and the column of data specified in the Data to Plot page (including string
data) is used as tick labels.
Minor Tick Placement Interval When specifying minor tick marks you can
specify either the number of tick mark intervals or an interval size (in axes
units). Specify the number of minor tick intervals between major tick marks
for each axis. A value of 2 will place one minor tick between each major tick.
A value of 1 will remove all minor ticks. Minor tick specifications are only
available for 2D and Polar Axes.
Major/Minor Interval Type Choose Numbers to specify the number of tick
mark intervals. Choose Size to specify the interval size (in axes units). Choose
Auto to use the default interval type. Choose Column to use a specified
242
FORMATTING 2D AXES
column of numbers for variable interval widths. Choose Factor-10 to place
ticks at intervals of powers of 10 (for example, 1, 10, 100, 1000). Choose
Factor-e to place ticks at intervals of powers of e.
Tick Range Specify the positions of the major First Tick and Last Tick.
Specify numbers (in axis units) to choose particular values for the first and/or
last major tick marks.
Select Auto to place the first and last ticks either outside of, or on the first
and last data point. Select Axis to place first and/or last tick marks at the axis
endpoints. Select Data to place first and last ticks at the first and last data
points. Select InsideData or OutsideData to place the first and/or last tick
mark inside or outside the data range, respectively.
Grids/Ticks Page
A grid is a set of lines that extend from the tick marks across the graph. In the
Axis dialog, the Grid/Ticks page has the following options:
Major and Minor Grid Attributes Specify the style, color, and weight for
the major and minor grids. To turn the grids on or off, use the State option.
Tick Length and Tick Weight Specify the length and weight of the tick
marks. The length is measured in relative inches/cm, depending on which
you specified.
Tick Position Specify the orientation of the tick marks. Specify whether to
have ticks drawn from the axis In, from the axis Out, to have ticks Cross the
axis or not drawn at all (Off).
Panel Tick Position Specify the orientation of the tick marks on the panels.
Specify whether to have ticks drawn from the axis In, from the axis Out, to
have ticks Cross the axis or not drawn at all (Off). This option is used only
when you have a multipanel graph.
Axis Breaks Page
Axis breaks allow you to remove selected portions of your axis, and to scale
portions of your axis differently. This is useful in displaying outlying data
points in your plot without sacrificing detail in the rest of your graph. Broken
axes can be created by using options on the Breaks page of the Axis dialog.
Break Axis Choose whether to break the axis.
Start Values Specify a starting value. For multiple breaks, specify a list
delimited by commas.
End Values Specify an ending value. For multiple breaks, specify a list
delimited by commas.
Positions (% axis) Specify where to position the break along the axis as a
percentage of the total axis length (100%). For multiple breaks, specify a list
delineated by commas.
243
CHAPTER 10 FORMATTING A GRAPH
Post-Intervals Specify the interval to place labels and ticks after each axis
break. For multiple breaks, specify a list delineated by commas. Auto can be
used to automatically scale intervals.
Post-First Ticks Specify the value to place the first tick after each axis break.
For multiple breaks, specify a list delineated by commas. Auto can be used to
automatically calculate first ticks.
Post-Scaling Specify a scaling type to be used after the axis break. For
multiple breaks, specify a list of scaling types delineated by commas. Auto
can be used to specify the same scaling type on all axis segments.
Style Choose a style for the break lines from None, Perpendicular, 45
Degrees or Wavy.
Break Length Specify a length for the break lines.
Gap Width Specify a width for the gap between the break lines.
Color Choose from a list of colors for the break lines.
Line Weight Choose from a list of line thicknesses for the break lines.
Formatting 2D
Axis Labels
To select 2D axis label
w
Click anywhere on the labels to select them. You will see a triangular
selection knob.
To move 2D axis labels
1. Select the axis labels.
2. Drag the labels inside or outside the axes by dragging the triangular
selection knob.
or
3. Double-click the labels, or select the labels and choose Selected Axis
from the Format menu. Choose the Position page and specify values
in the Horizontal and Vertical Offset fields. Choose OK.
To format 2D axis labels
1. Double-click the labels; or select the labels and choose Selected
Object from the Format menu.
244
FORMATTING 2D AXES
2. From the Axis Labels dialog, choose the desired page: Type, Position,
or Font. Make the desired changes and choose OK.
Major (Label 1/
Label 2) and
Minor Tick Labels
Pages
You can specify two rows of major labels in S-PLUS using the Label 1 and
Label 2 pages of the Axis Label dialog. Use the Minor Labels page to specify
labels for minor ticks. The options on all three pages are the same.
Label Type Choose from the options listed in the table below to specify the
label type.
The currency type and the language for month and day series options are
specified in Regional Settings in the Control Panel.
Table 10.1: Axis label types
Label Type
Definition
None
No tick labels drawn.
Column
Choose to use a column of label names.
Auto
S-PLUS chooses the optimal display format for the labels based on the data.
Decimal
Choose to specify your labels in decimal format.
Scientific (Upper)
Choose to specify your labels in exponential form with a capital E (for example,
10E-007).
Scientific (Lower)
Choose to specify your labels in exponential form with a lowercase e (for example,
10e-007).
Mixed
Choose to use a mix of decimal and scientific formats for data with a large data range
(for example, data ranging from 0.1 (decimal) to 10e+007 (scientific)).
Percent
Choose to specify your labels as percentages (for example, 100.0%).
Min Precision
Specify that all data has the same number of decimal places as the least precise value.
Base/Exponent
Choose to show the base and exponent (for example, 10^3).
Exponent Only
Choose to show the exponent only (for example, 3 for 10^3).
Currency
Specify that the labels be in units of currency.
245
CHAPTER 10 FORMATTING A GRAPH
Table 10.1: Axis label types
Financial
Specify that the labels be in financial format.
Month Series
Specify a month name in the Start field and an interval number in the Interval field
(for example, January and 2).
Day Series
Specify a day name in the Start field and an interval number in the Interval field (for
example, Sunday and 2).
Year Series
Specify a year in the Start field and an interval number in the Interval field (for
example, 1981 and 2).
Long Date
Converts column of numbers to day of the week, month, day, year.
Short Date
Converts column of numbers to mm/dd/yy format.
Long Date/Time
Converts column of numbers to day of the week, month, day, year, hh:mm:ss.
Short Date/Time
Converts column of numbers to mm/dd/yy, hh:mm:ss format.
Time
Converts column of numbers to hh:mm:ss format.
Elapsed
M:S
H:M:S/
Choose to specify data in either hh:mm:ss or mm:ss format.
Precision (for Decimal, Scientific, or Mixed only) Specify the number of
decimal places to display after the decimal.
Start Value (for Month, Day, Year Series only) Specify a starting value for the
series.
Series Increment (for Month, Day, Year Series only) Specify an increment
value for the series.
Column (For Column labels only) Specify the name of a column containing
the labels. The first row in the column is used to mark the first major tick
mark, the second row the second tick mark, and so on. You can leave any
number of rows blank. For example, if you want labeling to begin at the
second tick mark, leave the first row in the column blank and enter your
labels starting with the second row.
Data Set Specify the name of the data set containing the labels column.
Prefix/Suffix Add text or in-text formatting to the beginning or end of each
246
FORMATTING 2D AXES
label. In-text formatting codes which begin in the prefix and end in the suffix
will operate on the entire column of text. For instance, typing "a[ " in the
prefix field and " ]" in the suffix field causes a column of numbers (1, 2, 3,...)
to appear on labels as a1, a2, a3, etc.
Position Page
In the Axis Labels dialog, the Position page has the following options:
Overlap Options If your tick labels are overlapping, you can choose to Skip,
Stagger, or Truncate the labels.
If you choose Auto, S-PLUS automatically skips and then truncates, unless
you have column labels. With column labels, S-PLUS staggers and then
truncates. Categorical labels, however, are shrunk, staggered, then skipped.
Choose Skip to have tick labels omitted at regular intervals. You need to
specify the number of tick labels to skip before writing another label in the
Number field. For example, if you specify 1, every other major tick is labeled.
If you specify 2, every third major tick is labeled. If Auto is specified, tick
labels are only skipped if they are still overlapping after being reduced by the
specified Shrink Factor (see the discussion of Shrink Factor in this section).
Choose Stagger to have your tick labels shifted up and down alternately
(zigzagged) along the axis. You need to specify the depth of staggering in the
Number field. For example, if you specify 2, your tick labels are staggered
two levels. Auto will choose the amount of staggering required to prevent
overlapping.
Choose Truncate to have your tick labels cropped (abbreviated) to avoid
overlapping.
Choose None to turn off all placement options. Labels may overwrite each
other.
Number Specify the number of labels you want to skip or the depth of
staggering. Choose Auto to allow S-PLUS to determine skip or stagger details
to avoid overlap.
Adjust Numeric Labels Enables or Disables shrinking of labels.
If shrinking the labels causes other labels on that axis to overlap, S-PLUS will
shift or skip the labels according to your specifications (see Overlap Handling
in this section).
Shrink Factor The shrink factor specifies the amount tick labels can be
reduced to prevent overlapping. A value of 1 (representing 100%) specifies
that labels are to be drawn at their specified height, even if they overrun one
another. The default value of 0.8, or 80%, allows S-PLUS to shrink the labels
up to 20% of their specified height so they will not overlap, i.e. labels will be
drawn at least to 80% of the specified height, and will be drawn larger if
possible. If you specify 0, the labels will be reduced until they no longer
247
CHAPTER 10 FORMATTING A GRAPH
overlap. When labels overlap, S-PLUS first shrinks them to the amount
specified to accommodate them. If labels still overlap, refer to Overlap
Handling in this section.
Horizontal and Vertical Justification Specify the justification of labels
relative to the tick marks. Horizontal positioning includes Auto, Left, Right,
Center, and Corner; vertical positioning includes Auto, Up, Down, Center,
and Corner. For example, if Left is selected for the horizontal position for the
x-axis, all x-axis labels will be written to the left of the corresponding tick
mark. Corner is most useful for angled labels and will align the closest corner
of the label with the tick mark.
Horizontal and Vertical Offset Specify the width of the gap between tick
labels and tick marks. Auto will position the tick labels relative to the axis
position and tick mark length. The offset value is measured in relative inches/
cm, and the label position is measured from the tick mark. For example, if
you specify a vertical offset of 0.25 for the x-axis, the top of the x-axis labels
will be positioned 0.25 inches below the bottom of the tick marks. Labels can
be shifted by a positive or negative amount.
Font Page
On the Font page you can specify the font, size, color, and styles for the axis
labels.
Rotation Specify the angle at which to draw your tick labels. The default
angle is 0, meaning the tick labels are drawn parallel to the horizontal axis.
You can specify any angle between 0 and 360 degrees, and labels are angled
counter-clockwise accordingly. For example, if you specify 90 for the angle, the
tick labels will parallel the vertical axis.
Minor Height Ratio Specify the height of the minor ticks as a ratio of the
height of the major ticks (a value in the range of 0 to 1).
248
FORMATTING AND ROTATING 3D AXES
FORMATTING AND ROTATING 3D AXES
Formatting 3D
Axes
To select the axes
w
Click the x, y, or z-axis to select the axes.
To format the axes
1. Double-click the axes; or select the axes and choose Selected 3D Axes
from the Format menu.
2. From the 3D Axes dialog, choose the desired page: Display/Font,
Ranges, X Text, Y Text, or Z Text. Make the desired changes and
choose OK.
Alternatively, you can access pages of the property dialog by selecting the
axis, right-clicking and selecting a page from the shortcut menu.
Display/Font Page In the 3D Axes dialog, the Display/Font page has the following options:
Axis Display Specify the style, color, and weight of the lines used to draw the
axis.
Tick Position Specify the orientation of the tick marks. Specify whether to
have ticks drawn from the axis In, from the axis Out, to have ticks Cross the
axis or not drawn at all (Off).
Tick Length and Tick Weight Specify the length and weight of the tick
marks. The length is measured in relative inches/cm, depending on which
you specified.
Font Options You can specify standard font attributes for the axes title text
(see section Adding 3D Axes Titles (page 268)). Specifications made here
apply to the entire line of title text. If you want to make specifications on a
character-by-character basis you can use in-text formatting codes when
editing your text in the Text field.
Ranges Page
Axis Minimum and Maximum Specify the minimum and maximum values
for the x, y, and z-axis. Choose Auto to have the minimum and maximum set
equal to the minimum and maximum values in the data.
Tick Interval Specify the tick interval between tick marks.
Number/Size Specify whether the tick interval should be interpreted as the
number of ticks, or the distance between ticks.
249
CHAPTER 10 FORMATTING A GRAPH
Formatting 3D
Axes Labels
The formatting for the X, Y, and Z axes labels can be specified in the 3D Axes
dialog.
X Text, Y Text,
and Z Text
In the 3D Axes dialog, the X Text, Y Text, and Z Text pages have the
following labeling options for each 3D axis:
Label Type See the table of Label Types in section Formatting 2D Axis
Labels (page 244) for a complete list of display type options.
Precision Specify the number of decimal places to display after the decimal
for numeric labels.
Column If you choose Column for the Label Type, specify the name of a
column containing the labels here. The first row in the column is used to
mark the first major tick mark, the second row the second tick mark, and so
on. You can leave any number of rows blank. For example, if you want
labeling to begin at the second tick mark, leave the first row in the column
blank and enter your labels starting with the second row.
Data Set Specify the name of the data set containing the label column.
Plane Specify whether to draw the tick labels on the XY, XZ, or YZ plane.
Skip First Label, Skip Last Label Specify whether you want S-PLUS to skip
drawing the first tick label, the last tick label, neither tick label or both labels.
These options are useful if you have overlapping tick labels at axis
intersections.
250
FORMATTING 3D PLANES
FORMATTING 3D PLANES
To select a 3D planes
w
Click anywhere on the grid plane.
To add a 3D plane
Figure 10.4: The 3D plane combinations from the 3D plot palette
w
There are six 3D plane combinations at the bottom of the 3D plot
palette. Drag one of the 3D plane buttons off the 3D plot palette
and drop it inside the graph area. A 3D plane is drawn on the
selected graph. The plane is automatically positioned at the
minimum or maximum position. Or,
1. select the graph.
2. From the Insert menu, choose 3D Planes.
3. From the 3D Planes submenu, choose XY Min, XY Max, XZ Min,
XZ Max, YZ Min, or YZ Max. A 3D plane is added to the selected
graph.
To create a 3D graph with a plane
w
Drag one of the 3D plane buttons off the 3D plot palette and drop it
onto a blank area of a Graph sheet. A 3D graph is automatically
created on the Graph sheet, and a 3D plane is drawn. The plane is
automatically positioned at the minimum or maximum position on
the plane, or
1. from the Insert menu, choose 3D Planes.
2. From the 3D Planes submenu, choose the desired plane.
3. Make any desired formatting specifications in the 3D Planes dialog
and choose OK.
251
CHAPTER 10 FORMATTING A GRAPH
Changing the
Plane
In S-PLUS, you can switch between different 3D planes using the plot
palettes or the 3D Plane dialog. If any 2D plots are projected onto the plane,
they will move with the plane.
To change the plane using the palette
1. Select the 3D plane you wish to change.
2. Click the 3D Plots button on the standard toolbar. A palette of 3D
plot types and 3D planes appears.
3. Click the desired 3D plane. The selected plane is redrawn using the
new plane.
To format a 3D plane
w
Double-click the 3D plane.
or
w
Position Page
Select the plane and choose Selected 3D Plane from the Format
menu.
In the 3D Plane dialog, the Position page has the following options:
Projection Plane Specify whether to draw the grid on the XY, XZ, or YZ
plane.
Position Specify the position of the projection plane within the 3D workbox
in axes units. For example, if you specify 1 for the position of the XY plane,
the XY plane will be placed at the position where z=1. Enter Min to have the
plane placed at the axis minimum, or Max to place it at the axis maximum.
Draw in Panel(s) For a multipanel graph, specify the panels in which you
would like your plane to appear or All to have it drawn in all panels.
Plane Labels Choose whether to have labels along the plane. The numbers
along the corresponding axes are used for the labels.
Hide Choose whether to hide or display the axes.
Grids Page
In the 3D Plane dialog, the Grids page has the following options:
# Subdivisions Horizontal and vertical grid lines can be drawn at every
major tick and at intervals between the ticks. Specify the number of
subdivisions between tick marks to use for drawing the grid. For example, if
you specify a value of 1, there will be an extra grid line drawn between each
tick mark.
252
FORMATTING 3D PLANES
You can specify the line style, color, and weight for the grid lines in each
direction. Specify none for the line style to have no grid drawn in that
direction.
Fill/Border Page
You can specify standard fill attributes (fill color, fill pattern, and pattern
color), and standard line attributes (style, color, and weight) for the 3D
planes.
253
CHAPTER 10 FORMATTING A GRAPH
ROTATING A 3D GRAPH
You can change the angle at which you are viewing your 3D graph. When
specifying the rotation in the dialog, you are specifying the position of an
"observer" of the graph. To rotate the 3D graph you must rotate the
"workbox", which is a 3D box surrounding the graph.
To rotate a 3D graph interactively
1. Click the workbox to select it. Horizontal rotation knobs (round
green knobs) and a vertical rotation knob (a green triangle) appear
on the workbox.
2. Drag on any of the knobs to rotate the workbox.
3. When you release the rotation knob, the graph is redrawn at the new
workbox orientation.
Figure 10.5: Rotating a 3D plot
The circular knobs rotate the workbox horizontally (around the z-axis). The
triangular knob rotates the workbox vertically (around the x-axis).
In a multipanel 3D graph, you can interactively rotate the workbox in the
first panel. All panels will be updated.
To rotate a 3D graph using the dialog
1. Double-click outside the plot area but inside the graph area to
display the Graph dialog.
2. Choose the 3D Workbox page.
254
ROTATING A 3D GRAPH
3. Specify the Angle to Z-axis, Angle to X-axis, and Distance and
choose OK.
The observer's viewpoint is specified in spherical units. The viewpoint must
be outside the workbox, and should be above the XY plane and not directly
facing any of the sides of the workbox. If the specified viewpoint is below the
XY plane, the labels are displayed backward.
3D Workbox Page In the Graph dialog, the 3D Workbox page has the following options. Note
that the 3D Workbox page is only available when you are editing a 3D graph.
Angle to Z-axis Specify the angle (between 0 and 360 degrees) measured
from an imaginary line that runs parallel to the z-axis through the center of
the workbox.
Angle to X-axis Specify the angle (between 0 and 360 degrees) measured
from the x-axis in the XY plane. A value of 0 gives a viewpoint with the x-axis
pointing toward you.
Distance Specify the distance from the center of the workbox to the
viewpoint ("observer") in workbox units. The number must be greater than
zero and should generally not be too small to avoid distortion. As the
distance increases, the size of the graph does not change; only the perspective
changes.
For example, to position the viewpoint directly behind the graph, and
centered from top to bottom, you would specify 120 degrees for the angle to
the z-axis, 45 degrees for the angle from the x-axis, and 10 for the distance to
the center (assuming the workbox x specification is 1.0).
Workbox Shape Specify the relative dimensions of the workbox by
specifying the X, Y, and Z size ratios. The workbox, whether drawn or not,
determines the relative sizes of the x, y, and z dimensions of the graph. Only
relative values are important. For example, specifying 1.0, 1.0, 1.0 results in
the x, y, and z dimensions being the same length; the workbox is a cube.
Specifying 2.0, 2.0, 2.0 has the same result. The workbox shape cannot be
changed interactively with the mouse.
Workbox Attributes and Fill Select the style, color, and weight for the frame
around the workbox and the fill inside the workbox.
255
CHAPTER 10 FORMATTING A GRAPH
DISPLAYING 3D MULTIPANEL GRAPHS
Displaying 3D Rotation Graphs
Use multiple panels to display your 3D graph from different viewing angles.
X Angle = 10
X Angle = 100
X Angle = 190
X Angle = 280
Figure 10.6: 3D surface plot viewed from different angles.
To rotate a 3D graph in multiple panels
1. Create a 3D plot.
2. Select the graph area and click one of the Panel Rotation buttons on
the plot palette. Or,
256
DISPLAYING 3D MULTIPANEL GRAPHS
w
Double-click on the graph area to open the Graph Properties dialog.
On the Multipanel page, check the Rotate 3D Axes checkbox and
specify the number of panels.
You can specify the amount of rotation to be used across all of the panels in
the Rotate Panel Options fields on the 3D Workbox page.
Displaying 3D
Sliced Graphs
You can use multiple panels to show your 3D graph sliced along one axes.
Z: -0.1 to 2.1
Z: 2.1 to 7.1
Z: -7.8 to -1.9
Z: -1.9 to -0.1
Figure 10.7: The previous figure sliced along the z axis
257
CHAPTER 10 FORMATTING A GRAPH
To slice a 3D graph in multiple panels
1. Create a 3D plot.
2. Select the graph area and click one of the Panel Slicing buttons on
the plot palette. Or,
w
258
Double-click on the graph area to open the Graph Properties dialog.
On the Multipanel page, specify one of the columns of data to be
used as the conditioning variable in the Column List field.
FORMATTING POLAR AXES
FORMATTING POLAR AXES
To select the axes
w
Click the horizontal axis.
To format the axes
1. Double-click the horizontal axis; or select the axis and choose
Selected Axis from the Format menu.
2. From the Polar dialog, choose the desired page: Display, Ranges/
Ticks, Labels or Font. Make the desired changes and choose OK.
Alternatively, you can access pages of the property dialog by selecting the
axis, right-clicking and selecting a page from the shortcut menu.
Display Page
In the Polar Axes dialog, the Display page has the following options:
Axis Display You can specify line style, color, and weight for the polar axes
(the line around the outside perimeter of the polar plot).
Hide Choose whether to hide or display the axes.
Circle/Spoke Grids You can specify the line style, color and weight for both
the circular and spoke grids on a polar plot.
Circular grids are the concentric circles that radiate out from the center of the
plot. The larger the number of circular lines, the denser the grid. You can
either specify the number of circular grids or the distance between grids.
Spoke grids are the radial lines crossing through the circular grids. The higher
the number of spokes, the denser the grid. You can specify either the number
of spokes or the distance between spokes. To avoid crowding at the origin,
S-PLUS draws only half the number of spokes in the innermost circle. If you
specify the distance between the spokes in degrees S-PLUS will round the
specified degrees to ensure equal distances between the spokes.
Ranges/Ticks
Page
In the Polar Axes dialog, the Ranges/Ticks page has the following options:
Tick Interval Specify the tick interval between circular grids and spoke grids.
Number/Size Choose from Numbers, Size, Auto, Column, Factor-10 or
Factor-e. Choose Numbers to specify the number of spokes or grids. Choose
Size to specify the interval size (in axes units) between spokes or grids.
Axis Minimum and Maximum Range Specify the minimum and maximum
values along the axis. Choose Auto to have the minimum and maximum of
259
CHAPTER 10 FORMATTING A GRAPH
the radius set equal to the minimum and maximum values in the data
plotted. The minimum value is ignored (and set to 0) if the Data Type
specified is Linear.
Data Type Specify the type of data to be plotted: dB (decibel), Log, or
Linear.
Labels Page
In the Polar Axes dialog, the Labels page has the following options:
Label Type See Table 10.1: in the section Formatting 2D Axis Labels (page
244) for a complete list of display type options.
Precision Specify the number of decimal places to display for numeric labels.
Column Specify the name of a column containing the labels. The first row in
the column is used to mark the first major tick mark, the second row the
second tick mark, and so on. You can leave any number of rows blank. For
example, if you want labeling to begin at the second tick mark, leave the first
row in the column blank and enter your labels starting with the second row.
Data Sheet Specify the name of the Data window containing the label
column.
Font Page
260
On the Font page you can specify standard font attributes for the polar axes
labels.
ADDING MULTI-LINE TEXT
ADDING MULTI-LINE TEXT
In S-PLUS you can add an unlimited amount of multi-line text to your graph
in the form of text (comments), main or subtitles, axis titles, and date & time
stamps.
To add multi-line text
1. Choose Text from the Insert menu. A text edit box will open. Other
types of text (for example, Titles) are also available from the Insert
menu.
or
1. Open the Annotation palette and drag-and-drop the Comment icon
(see section Summary of the Annotation Palette (page 277) onto
the Graph sheet. Click on the selected text to open the edit box.
or
1. Open the Annotation palette and click the Comment icon. The
cursor changes to the Comment Tool.
2. On the Graph sheet, click and drag the cursor. Release the mouse
button. Default text the size of the box is added to the graph.
3. Click on the selected text to open the edit box.
Type the desired text. Press ENTER to create a new line. To end editing
and save results, click outside the edit box. Alternatively, you can press
F10 or press CTRL + ENTER. To exit without saving, press the ESC key.
To edit existing text in-place
1. Right-click on the text and select Edit In-place from the menu.
or
1. Click on the text to select it, then click again.
2. Make changes to the text in the edit box. Press ENTER to create a new
line. To end editing and save results, click outside the edit box.
Alternatively, you can press F10 or press CTRL + ENTER. To exit without
saving, press the ESC key.
To move text
1. Select the text. Green selection knobs appear on the outline of the
261
CHAPTER 10 FORMATTING A GRAPH
text box.
2. Click inside the selected region and drag the box to a new location.
You can also move the text by changing the X and Y position on the Position page of the property dialog, available from the shortcut menu.
To resize text
1. Select the text. Green selection knobs appear on the outline around
the text box.
2. Drag one of the square green knobs to increase or decrease the size of
the box. The proportions of the text (ratio of height to width)
remain constant.
To rotate text
1. Select the text. Green selection knobs appear on the outline of the
text box. A round green knob appears at the bottom of the selected
text.
2. Drag the rotation knob up or down. The position of the lower lefthand corner of the text box remains fixed.
You can also rotate the text by specifying a rotation angle on the Position
page of the property dialog, available from the shortcut menu.
To format text in-place
1. Open the text edit box and select the text.
2. Choose a Graph Sheet Toolbar option (Font type and size listboxes,
Bold, Italic, Underline, Superscript, and Subscript buttons) to
change the format of the text. You can change the font and point
size, and choose whether to bold, italicize, or underline the selected
text.
or
1. Right-click on the text to display the shortcut menu. Choose
Superscript and Subscript to format the text. Choose Symbol to
open a dialog to add or edit symbols and Greek characters. Choose
Font to open a dialog to edit font type.
or
1. Select Font from the Format menu to open the default Font dialog.
262
ADDING MULTI-LINE TEXT
For more information, see section Adding Special Characters and Formatting Text (page 265).
To align text
1. Select the "anchor" text. This text will be used to align other text.
2.
SHIFT-click
the text you wish to align.
3. From the Format menu, choose Align.
4. Choose the desired alignment from the submenu.
To delete text
1. Select the text.
2. Press the DELETE key. Alternatively, you can select Clear from the
Edit menu or you can right-click and select Cut.
Date Stamp
Use Date Select this option to add a date stamp to the text.
Use Time Select this option to add a time stamp to the text.
Position Page
On the Position page the following options appear:
X Position and Y Position The positions of the text are determined by
specifying the distance from the bottom left-hand corner of the graph area to
the bottom left-hand corner of the text box. Selecting Auto will center the
text.
Rotation Specify the angle at which to display the text (0-360 degrees). You
can also rotate the text manually, see To rotate text earlier in this section.
Hide Choose whether to hide or display the text. If you want to unhide the
text once you have closed the Comment dialog, you can reopen the dialog
from the Object Browser.
Use Axes Units Choose whether the position specification should be
interpreted in document units or axes units.
X-Axis # and Y-Axis # If you choose Use Axes Units, these options become
available. If you have more than one x or y-axis on the graph, these options
let you specify which x-axis and which y-axis you want used for determining
the axes units.
Draw in Panels For a multipanel graph, specify the panels in which you
would like your text to appear.
Font Page
On the Font page you can specify standard font attributes for the text.
263
CHAPTER 10 FORMATTING A GRAPH
Specifications made on the Font page apply to the entire specified text.
Box Page
On the Box page you can specify standard line and fill attributes for the box
around the text. You can also specify the following options:
Vertical and Horizontal Margin Specify the distance between the box
border and the text.
264
ADDING SPECIAL CHARACTERS AND FORMATTING TEXT
ADDING SPECIAL CHARACTERS AND FORMATTING TEXT
Specifying a Text
Font
To specify a text font
1. Open a text edit box and add text.
2. Highlight the text to be formatted.
3. Choose a font from the toolbar’s font dropdown list.
Specifying Text
Size
To specify a text size
1. Open a text edit box and add text.
2. Highlight the text to be formatted.
3. Choose a font size from the toolbar’s font size dropdown list.
Formatting Text To format text as bold, italic, or underline
as Bold, Italic, or
1. Open a text edit box and add text.
Underline
2. Highlight the text to be formatted.
3. Click the Bold, Italic, or Underline toolbar button.
Formatting
Superscripts and
Subscripts
To format text as superscript or subscript
1. Open a text edit box and add text.
2. Highlight the text to be formatted.
3. Click the Superscript or Subscript toolbar button.
or
4. Right-click on the edit box and select Superscript or Subscript from
the menu.
Adding Special
Characters Using
a Dialog
You can specify text in Symbol font, Greek and Extended ASCII characters
using the Symbol dialog.
To insert special characters using the Symbol dialog
1. Open a text edit box.
2. Right-click on the edit box and select Symbol from the menu.
Special characters are available in the Symbol dialog.
265
CHAPTER 10 FORMATTING A GRAPH
3. Click on a symbol to select it and click Insert to add the symbol to
the edit box without closing the dialog. To close the dialog, select
Close.
266
ADDING TITLES AND LEGENDS
ADDING TITLES AND LEGENDS
Inserting a title is different from inserting regular text because a title is
positioned automatically. See section Adding Multi-line Text (page 261) for
information on editing and formatting titles.
To add a main title or a subtitle
1. From the Insert menu, select Titles.
2. From the Titles submenu, choose Main or Subtitle. S-PLUS opens an
edit box for you to enter text.
3. Type the desired text. Press ENTER to create a new line. To end
editing and save results, click outside the edit box. Alternatively, you
can press F10 or press CTRL + ENTER. To exit without saving, press the
ESC key.
You can either type in some text, or choose from one of several automatic
titling options. If an automatic titling option is entered, text is taken from
the description, name, or column number assigned in the Data window.
These are automatically updated when changes are made to the Data
window.
(which is the default) may be specified in the title text field. @Auto
cannot be combined with any other characters within a title field. For
example, if you type @AutoXYZ, the XYZ text is ignored. The @ sign is
ignored if it is not the first character typed within a title field. For example, if
you type `@Auto` , the word Auto is displayed (and is skewed).
@Auto
Table 10.2: Automatic titling options
Option
Description
@Auto
S-PLUS uses the X, Y, or Z column description if one was specified. If no
column description is found, S-PLUS uses the column name if one was
specified. If neither a description or name is found, S-PLUS uses the data set
name followed by the column number. The only exception to this is in the
case of grouped bar charts with multiple columns of Y data, when by default
the y-axis is left untitled.
@Description
S-PLUS uses a column description if one was specified; otherwise the title is
left blank.
267
CHAPTER 10 FORMATTING A GRAPH
Table 10.2: Automatic titling options
@Name
S-PLUS uses a column name if one was specified; otherwise the field is left
blank.
@Column
S-PLUS uses the Data window name followed by the column number.
@Spec
S-PLUS uses the column name or number specified in the Data to Plot page.
For example, if you entered AGE for the x-axis in the plot dialog, S-PLUS
would print AGE for the title.
If you wish to use the @ symbol as part of your title, you must type it in twice. For example, typing
@@JANUARY 12 results in the title @JANUARY 12.
Adding 2D Axis
Titles
In S-PLUS you can place axis titles on your graph. Axis titles are convenient
because they are positioned automatically.
See section Adding Multi-line Text (page 261) for information on editing
and formatting axis titles.
To add a 2D axis title
1. Select the axis to which you want to add a title.
2. From the Insert menu, select Titles.
3. From the Titles submenu, choose Axis. S-PLUS opens an edit box for
you to enter text.
4. Type the desired text. Press ENTER to create a new line. To end
editing and save results, click outside the edit box. Alternatively, you
can press F10 or press CTRL + ENTER. To exit without saving, press the
ESC key.
Adding 3D
Axes Titles
268
3D axes titles are different from 2D axis titles. They cannot be moved and
sized interactively. The text for 3D axes titles is specified from within the 3D
Axes dialog and cannot be multi-line. However, you can add multi-line text
to 3D graphs in the form of comments and titles.
ADDING TITLES AND LEGENDS
To add 3D axes titles
1. Double-click the axes; or select the axes and choose Selected 3D Axes
from the Format menu.
2. From the 3D Axes dialog, choose the X Text, Y Text, or Z Text page.
Make the desired changes for the Text, Font, Size, and Color fields
and choose OK.
or
1. From the Insert menu, choose Title, then Axis.
2. The 3D Axes dialog appears for editing.
See section Adding Special Characters and Formatting Text (page 265) for
more information on specifying text.
Adding a Date
and Time
Stamp
A date & time stamp lets you display the date and time along with specified
text. You can format the text using the in-text codes described in the section
Adding Special Characters and Formatting Text (page 265).
See section Adding Multi-line Text (page 261) for information on editing
and formatting existing text.
To add a date stamp
1. Click the Date Stamp tool on the Annotation Palette. The mouse
pointer will change to represent the Date Stamp tool.
2. In the Graph sheet, click and drag the Date Stamp tool until you
have a text box of the desired size. Release the mouse button. A
default date stamp is placed on the graph. The text box will
automatically expand if the text starts extending beyond the box
boundary.
or
1. Choose Date Stamp from the Insert/Annotation menu. S-PLUS
opens an edit box for you to enter text.
2. Type the desired text. Press ENTER to create a new line. To end
editing and save results, click outside the edit box. Alternatively, you
can press F10 or press CTRL + ENTER. To exit without saving, press the
269
CHAPTER 10 FORMATTING A GRAPH
ESC key.
Note
The date stamp is identical to the text boxes you can create with the Text tool. The only difference is that
the date & time stamp options in the property dialog are turned on.
Adding a
Legend
A legend is a combination of text and graphics that explain the different plots
on the graph. In a multipanel graph, the legend only appears in one panel.
To add a legend
w
Click the Legend button on the Graph toolbar; or choose Legend
from the Insert menu. If you have more than one graph on the
Graph sheet, select the desired graph before choosing Legend from
the Insert menu.
To remove the legend, click again on the Legend button.
To format the legend box
w
Position/Size
Page
Double-click the legend margin, outside of the legend items; or
select the legend and choose Selected Object from the Format menu.
In the Legend dialog you can specify the legend position and
formatting for the legend box. Alternatively, you can right-click on
the legend and select pages of the Legend dialog from the shortcut
menu.
In the Legend Box dialog, the Position page has the following options:
Number of Items Specify the number of legend items you want to have. If
you leave this field at Auto, the number of legend items is determined by the
number of plots on the graph, and will change as you add and delete plots.
Font Size Specify the font size to be used for all legend items.
x Position and y Position The legend position is determined by specifying
the distance from the bottom left-hand corner of the graph area to the upper
left-hand corner of the legend box.
270
ADDING TITLES AND LEGENDS
Hide Choose whether to display the legend.
Use Axes Units Choose whether the position specification should be
interpreted in document units or axes units.
X-Axis # and Y-Axis # If you choose Use Axes Units, these options become
available. If you have more than one x or y-axis on the graph, these options
let you specify which x-axis and which y-axis you want used for determining
the axes units.
Fill/Border Page
You can specify standard fill attributes (fill color, fill pattern, and pattern
color), and standard line attributes (style, color, and weight) for the box
containing the legend items.
Box Specs Page
In the Legend dialog, the Box Specs page has the following options:
Sample Length Specify the length of the sample line, symbol, or pattern in
document units.
Vertical Spacing Specify the distance between the bottom of each line of
legend information as a proportion of the text height. For example, a value of
2 produces a vertical space that is twice the text height.
Middle Spacing Specify the distance between the sample and the associated
legend text in document units.
Vertical and Horizontal Margin Specify the distance between the legend
contents and the legend box in document units.
Round Corners Choose whether to have rounded box corners.
Horizontal and Vertical Radius Specify the degree of rounding for the box
corners. The larger the value specified here, the more rounded the corners
appear.
Formatting the
Legend Items
In S-PLUS you have complete control over the formatting of each item in the
legend.
To edit a legend item
w
Double-click the legend item; or select the legend item and choose
Selected Object from the Format menu. In the Legend Item dialog
you can specify the item text, and the formatting attributes of the
legend sample.
271
CHAPTER 10 FORMATTING A GRAPH
Text Page
In the Legend Item dialog, the Text page has the following options:
Text Enter the text description for each legend item. @Auto is the default for
the legend text fields. The @Auto specification uses the column name or the
column number from the data column(s) specified for Y for most 2D plots
and Z for most 3D plots. A separate legend item is created for each bar in a
standard bar chart, each group in a grouped bar chart, each slice in a pie
chart, each area in an area chart, and each contour level in a contour plot. An
@Auto can be placed in the text field by entering an @.
For information on specifying special characters in the text field, see section
Adding Special Characters and Formatting Text (page 265) earlier in this
chapter.
Hide Choose whether to display the legend item.
Line/Symbol Page Override Auto Legend Item Specs Choose this option to specify custom
line and symbol attributes for the legend item. When you click on this check
box, the line and symbol attribute fields become enabled. You can specify
standard line attributes (style, color, and weight) and symbol attributes (style,
color, and weight) for the sample.
If you do not have this option selected, the legend item will be updated
automatically when changes are made to the associated plot's properties. To
prevent the legend item from being deleted when the associated plot is
deleted, explicitly specify the number of legend items in the Legend dialog.
Fill/Border Page
Override Auto Legend Item Specs Choose this option to specify custom fill
and border attributes for the legend item. When you click on this check box,
the fill and border attribute fields become enabled. You can specify standard
fill attributes (fill color, fill pattern, and pattern color), and standard line
attributes (style, color, and weight) for the pattern sample.
If you do not have this option selected, the legend item will be updated
automatically when changes are made to the associated plot's properties. To
prevent the legend item from being deleted when the associated plot is
deleted, explicitly specify the number of legend items in the Legend dialog.
Font Page
272
On the Font page you can specify standard font attributes for the legend item
text. Specifications made on the Font page apply to all of the legend item
text.
ADDING LABELS FOR POINTS
ADDING LABELS FOR POINTS
If you have a 2D scatter plot on your graph, you can automatically display
labels (determined by row names) for selected points.
To label points
1. If you have more than one scatter plot on your Graph sheet, select
the scatter plot you want to use.
2. Click on the Label Points button in the middle of the top row of the
Annotation Palette.
3. Click on a data point in your scatter plot. A label will appear. The
label can be moved or edited as any other comment can.
4. To replace the label with a label for a different point, click on
another data point. The first label will be removed and a new label
will appear for the newly selected data point.
5. To add a label for another point, shift-click on another data point.
Another label will appear.
Identifying Points in a Data View
If you have a 2D scatter plot on your graph, you can select rows in a data
view in clicking on points in your scatter plot.
To select a row of data corresponding to a point on your graph
1. If you have more than one scatter plot on your graph, select the
scatter plot you want to use.
2. Open a view on the data used for the x and y columns in the scatter
plot. Use Window/Tile/Vertical to show your data and graph side by
side
3. Click on the Select Point in Data View button in the top right of the
Annotation palette.
4. Click on a data point in your scatter plot. The corresponding row in
the data view will become selected.
5. To select a different row, click on a different point in the scatter plot
6. To add a row to the selection, shift-click on another data point.
273
CHAPTER 10 FORMATTING A GRAPH
ADDING A CURVE FIT EQUATION
If you have a curve fit plot on your graph, you can automatically display the
equation for the line.
To insert a curve fit equation
1. Select the desired curve fit plot (if there is more than one plot on the
graph).
2. From the Insert menu, choose Curve Fit Equation. The equation of
the line is displayed in the Comment dialog. The equation is placed
here so you have complete control over its formatting by using intext codes.
3. Specify the position for the equation and any desired formatting and
choose OK.
To edit an existing curve fit equation
w
Double-click the equation; or select the equation and choose
Selected Comment from the Format menu. For more information
on formatting the equation, see section Adding Multi-line Text
(page 261) in this chapter.
The Curve Fit Equation option is only available when you have at least one
curve fit plot on the graph. If you have multiple curve fit plots, you can select
each one and get the equation describing the line automatically.
274
ADDING LINES, SHAPES AND SYMBOLS
ADDING LINES, SHAPES AND SYMBOLS
You can add extra items to your graph such as text, lines, shapes, and
symbols. These drawing objects can be added by using the Annotation
palette, or by using the Annotation option on the Insert menu. A short
description of each drawing object is shown later in this section.
Adding
Annotations
Using the Menus
You can add drawing objects to a graph by using the Annotation option on
the Insert menu. This allows you to specify both the property attributes of an
object and its position on the graph within the same dialog.
To add an annotation using the Insert/Annotation option
1. From the Insert menu, choose Annotation. A submenu appears
listing the drawing objects.
2. Choose the object you wish to draw on the graph. The property
dialog for the object will appear. Specify the desired properties,
including the x,y position for the object.
3. Choose OK. The object is drawn on the Graph sheet.
Adding
Annotations
Using the
Annotation
Palette
You must have the Graph toolbar displayed to access the Annotation palette.
You can add a drawing object to a plot in two different ways:
1. Drag-and-drop a drawing object icon from the Annotation palette
onto the graph.
2. Click a drawing object button to turn the mouse into a drawing tool.
The object to be drawn appears as a small symbol on the lower right
side of the mouse pointer. Place this tool on the plot and click and
drag to insert a drawing object of a specified size.
Figure 10.8: The mouse pointer as a drawing tool to add a filled circle.
To add an object from the Annotation palette
1. Click the Annotation button on the Graph sheet toolbar. A palette
of drawing objects is displayed.
275
CHAPTER 10 FORMATTING A GRAPH
2. Drag-and-drop the desired object onto the graph. The object
remains selected until you draw another object or click somewhere
else on the sheet.
3. Resize the object by selecting it and dragging on one of the corner
selection knobs. Move the object by selecting and dragging in the
center of the object.
To edit other properties of the object, double-click on it to open the
property dialog or right-click and select the relevant page of the dialog
from the menu.
276
ADDING LINES, SHAPES AND SYMBOLS
Summary of
the Annotation
Palette
Selection Tool
Comment Tool
Label Point Tool
Line Tool
Data Stamp Tool Arrow Tool
Select Row Tool
Arcs Tool
Radial Lines Tool Error Bars Tool
Vert. Ref. Line
Horiz. Ref Line
Filled Box Shape
Box Shape
Rounded Box
Ellipse Shape
Square
Circle
Up triangle
Plus
X
Diamond
Down triangle
Box X
X+
+ Diamond
+ Circle
Up Down triangles
Box +
X Circle
Box up triangle
Filled square
Filled circle
Filled up triangle Filled diamond
Filled dwn triangle
Box down triangle X Diamond
Cross
Ant
Dash
Male
Female
Bar
Figure 10.9: The Annotation toolbar has buttons for Tools, Shapes and Symbols.
Drawing Objects
You can use the mouse as a drawing tool to add drawing objects to your
graphs, or you can drag annotation objects from the palette onto your graph.
Selection
Use the Selection tool to deselect a drawing object and return to the selection
mouse pointer.
Comment
Use the Comment tool anywhere on your graph. You can also use the Text
option on the Insert menu to add text to your graph. For a more detailed
277
CHAPTER 10 FORMATTING A GRAPH
discussion of adding and editing text, see the section Adding Multi-line Text
(page 261).
Date Stamp
Use the Date Stamp tool from the Annotation palette to place a default date
stamp on your graph. The date stamp contains default text and the current
date and time. Double-click the date stamp to edit its text or font
specifications. For more information on date stamps see section Adding a
Date and Time Stamp (page 269).
Arrows
Use the Arrow tool from the Annotation palette to draw arrows. The starting
point represents the "tail" of the arrow. The point where you release the
mouse button is where the "head" of the arrow is placed.
Lines
Use the Line tool to draw straight lines.
Arcs
Use the Arc drawing object to draw all or part of a circle. Arcs will draw
proportionally to an invisible center point; therefore, the closer you move in
toward the center, the smaller the arc will be. Conversely, the farther you
move out, the larger the arc.
Radial Lines
Use the Radial Line tool to draw lines at an angle. A radial line rotates around
a fixed center point, acting as a radius for an invisible circle. The starting
point will act as the center point.
Error Bars
Use the Error Bar tool to draw and size error bars on your graph. Error bars
are initially drawn so that the bars expand symmetrically from all sides. After
they have been drawn on the graph, you can select parts of the error bars and
manipulate them individually.
Reference Lines
You can use a reference line to highlight a particular x or y value. A reference
line’s position is set in axes units. To add a reference line, you can drag it from
the annotation palette.
278
ADDING LINES, SHAPES AND SYMBOLS
Shapes
Use the Shape drawing tools to draw rectangles, rounded rectangles, or
ellipses of any size or proportion. A shape can be clear or opaque.
Symbols
Use any of the Symbol drawing tools to place extra symbols on your Graph.
These are the same symbols used to represent data points on plots. The 28
symbol types appear in blue on the palette. Symbols, unlike Shapes, always
retain their original proportions when resized.
279
CHAPTER 10 FORMATTING A GRAPH
280
WORKING WITH GRAPH
OBJECTS
Graphic
Objects
11
Graphic Objects
Selecting Objects
281
282
Summary of Format and View Menus
284
Moving and Copying Objects
Using Drag-and-Drop
Using Cut, Copy, and Paste Options
Sizing Objects
288
288
288
289
Editing Objects
Editing a Single Object
Editing Multiple Objects
290
290
291
Arranging Objects on the Graph
Overlapping Objects
Aligning Objects
Aligning Objects Using Snap-to-Grid
Distributing Objects
292
292
292
293
293
All objects on a Graph sheet are considered graph objects. When working with
graph objects, you can:
• Change the shape, size, and color of objects
• Layer objects
• Copy and move objects
• Align objects
Once an object has been added to your graph, you can move, copy, size, or
edit the properties of the object.
281
CHAPTER 11 WORKING WITH GRAPH OBJECTS
You can also use the Object Browser to select, edit and format objects. The
Object Browser allows you to see all of the objects in your current session in a
hierarchical view. It can also be used to select and edit objects that are
difficult to select in other views (for example, overlapping objects). For more
information, see chapter 6, Using the Object Browser.
Selecting
Objects
To select an object, the mouse pointer must appear as an arrow. If the pointer
is not an arrow, click on the Selection tool on the Annotation palette.
When a drawing object is selected, small green selection knobs appear on an
outline around the object. For a box, the outline is the same as the border
around the box; for arcs, ellipses, and extra symbols, the outline is an invisible
rectangle surrounding the object. For lines, radial lines, and arrows, the green
selection knobs appear only at the ends of the line. For error bars, the
selection knobs appear at the ends of each bar.
To select a single object
w
Click on the object with the mouse pointer.
Green selection knobs appear on the outline around the object. If they do not
appear, the object is not selected. Try to select it again by clicking on the
Selection (arrow) tool on the Annotation palette, placing the mouse pointer
over the object and clicking again.
To select multiple objects
1. Click on the object.
2. Hold down the SHIFT key or CTRL key and click on another object.
3. Repeat step 2 until all the desired objects have been selected.
or
1. Position the mouse pointer in one corner of the area surrounding the
objects you wish to select.
2. Click and drag until the selection box encompasses all the objects
you want to select. Objects must be entirely within the selection box
282
SELECTING OBJECTS
in order to be selected.
Note
If you press CTRL while dragging, the selection box will select everything it touches as well as objects inside
the box.
When the mouse button is released, all the objects within the selection box
have green selection knobs displayed on their outline. To cancel the selection,
just click the mouse pointer in a blank area of the Graph sheet. Selecting
multiple objects is convenient when you wish to move or edit a number of
objects.
To select all objects
All drawing objects can be selected in two ways:
1. From the Edit menu, choose the Select All command.
or
1. Position the mouse pointer in one corner of the Graph sheet.
2. Click and drag until the selection box encompasses all objects on the
Graph sheet.
All objects are selected and have green selection knobs displayed on their
outline.
To select all objects of the same type
A number of objects of specific types can be selected using the Edit menu.
1. From the Edit menu, choose the Select command. A list of available
object types will appear.
2. Select from the list, for example, All Plots. All plots on the Graph
sheet will be selected.
283
CHAPTER 11 WORKING WITH GRAPH OBJECTS
SUMMARY OF FORMAT AND VIEW MENUS
Figure 11.1: The Format menu when a Graph sheet is active.
Table 11.1: The Format menu options.
Option
Purpose
Font
Set the font when editing text.
Selected Objects
Modify the properties of all the selected objects.
Change plot types
Convert from one plot type to another (for example: scatter to bar)
284
SUMMARY OF FORMAT AND VIEW MENUS
Table 11.1: The Format menu options.
Option
Purpose
Sheet
Modify the properties of the Graph sheet
Apply Style
Color or Black and White: applies the style settings specified under
Options/Graph Styles to your graph.
Align
Align all of the selected objects to the first selection.
Distribute
Place three or more objects equal distances apart on the Graph sheet.
Snap to Grid
Move select objects to the nearest horizontal or vertical grid.
Plot Summary
Modify the data specifications for the plots on the graph.
Arrange Graphs
Resize and reposition the graphs or your Graph sheet.
Exchange Graphs
Exchange the sizes and position of the two selected graphs.
Bring to Front
Bring the selected object in front of other object on the graph.
Send to Back
Send the selected object behind the other objects on the graph.
Bring Forward
Bring the selected object forward by one level.
Send Backward
Send the selected object back by one level.
285
CHAPTER 11 WORKING WITH GRAPH OBJECTS
Figure 11.2: The View menu when a Graph sheet is active.
286
SUMMARY OF FORMAT AND VIEW MENUS
Table 11.2: The View menu options.
Option
Purpose
Draft
Sets the drawing mode on the screen to draft to increase display
speed. Only affects the screen drawing, and only speeds up certain
line drawing.
Status Bar
Turn on the status bar at the bottom of the Graph sheet window.
Toolbars
Allows you to select toolbars to be visible.
Full Screen
Displays your Graph sheet using the full screen without menu bar,
title bar or toolbars.
Zoom
Enlarge a section of your Graph sheet to focus on a particular area.
Auto Plot Redraw
Redraw plots automatically after each change is made.
Redraw Now
Redraw all graph objects.
Commands Window
Show the Commands window.
287
CHAPTER 11 WORKING WITH GRAPH OBJECTS
MOVING AND COPYING OBJECTS
Using Dragand-Drop
An object can be moved or copied on a graph by dragging the object.
To move or copy objects using drag-and-drop
1. Select the object or objects you wish to move or copy.
2. To move the object(s), click and drag the object(s) to the new
position. To copy an object, press CTRL while you click and drag.
To move or copy objects between Graph sheets using drag-and-drop
1. From the Window menu, choose Tile Vertical or Tile Horizontal so
you can see both the source and target Graph sheets.
2. Select the object or objects you wish to move or copy.
3. To move the object(s) into the target Graph sheet, press CTRL while
you click and drag the object. To copy an object, click and drag the
object into the target Graph sheet.
Note
If you are dragging multiple, dissimilar objects, the group of objects can only be dropped on a Graph sheet.
If you are dragging a collection of objects of the same type, you can drop the objects on any target area
appropriate for that object type. For example, if you are dragging several line plots, they can be dropped on
an axes target on the target Graph sheet. However, if you are dragging several line plots and a symbol, they
cannot be dropped on an axes target; they can only be dropped on a Graph sheet.
Using Cut,
Copy, and
Paste Options
Objects can also be moved by cutting or copying them and pasting them in a
new position. When you cut or copy an object, it is placed on the Clipboard,
and can be placed in another Graph sheet or another application.
To move or copy objects using the menus
1. Select the object or objects you want to move or copy. If more than
one object is selected, the objects will keep the same relative
positions when placed in their new location.
288
MOVING AND COPYING OBJECTS
2. Choose either the Cut or Copy button from the standard toolbar, or
from the Edit menu choose the Cut or Copy command.
3. Position the mouse pointer in the target Graph sheet or another
application (for example, Word).
4. Choose the Paste button from the standard toolbar, or from the Edit
menu choose Paste or click on the right mouse button and choose
Paste from the shortcut menu.
Sizing Objects
Drawn objects can be sized by dragging the green selection knobs that appear
on the object when it is selected.
To resize objects
1. Select the object or objects you wish to size.
2. Position the mouse pointer over a knob.
3. Click and drag the handle to draw the object to the size you wish.
A dashed outline traces the new dimensions of the object.
To size an object horizontally or vertically, drag the green selection knobs on
the sides of the object. To size an object in both dimensions at once, drag the
green selection knobs on the corners of the object.
289
CHAPTER 11 WORKING WITH GRAPH OBJECTS
EDITING OBJECTS
Editing a Single
Object
Any graphic object can be edited by:
1. Choosing the appropriate formatting options from the toolbars or
menus.
2. Selecting the object and then choosing Selected Object from the
Format menu.
3. Double-clicking on the object to display its property dialog.
4. Right-clicking the object to display its shortcut menu and choosing
options.
To edit using the toolbars
1. Select the object you wish to edit.
2. Click on the appropriate button to change the object to the attribute
selected (for example, the Line Color button).
To edit using the Selected Objects
1. Select the object you wish to edit.
2. From the Format menu choose Selected Object. The option name
changes to reflect the type of selected object (for example, Selected
Arrow). When the dialog appears, edit the properties you wish to
change. Choose OK.
To edit the object directly
1. Double-click on the object you wish to edit. The property dialog for
the object appears.
2. Edit the properties you wish to change. Choose OK.
To edit the object using its shortcut menu
1. Right-click on the object you wish to edit. The shortcut menu for
the object appears.
2. Choose the desired option from the shortcut menu.
290
EDITING OBJECTS
To edit the contents of a composite object
Many commands can create composite graph objects. To edit their contents,
you can convert them into multiple objects.
1. Right click on the composite object.
2. Select Convert to Objects from the shortcut menu.
For a further discussion of the properties of graphic objects such as color and
line properties, see section Common Plot Properties (page 300).
Editing Multiple
Objects
Multiple graphic objects can be edited by
1. Choosing the appropriate formatting options from the toolbars or
menus, or
2. Selecting the objects and then choosing Selected Objects from the
Format menu.
To edit multiple objects using the toolbars
1.
SHIFT-click
or CTRL-click to select the objects you wish to edit.
2. Click on the appropriate toolbar button to change the selected
objects to the attribute selected (for example, the Line Color
button).
To edit multiple objects using the Selected Objects option
1.
SHIFT-click
or CTRL-click to select the objects you wish to edit.
2. From the Format menu choose Selected Objects. When the dialog
appears you can specify values for the properties you wish to change.
If the selected objects are all of the same type, the changes will take
effect on all of the objects.
3. If you have multiple dissimilar objects selected, the dialog will
contain properties for only the first object selected. However,
modifications made in this dialog will affect the other dissimilar
selected objects if they also have the property. For example, if you
have selected several arrows and then a line plot, the dialog will
contain arrow properties. However, if you change the arrow line
color here, the line color used for the plot will also be affected
because line plots and arrows have the Line Color property in
common. Choose OK.
291
CHAPTER 11 WORKING WITH GRAPH OBJECTS
ARRANGING OBJECTS ON THE GRAPH
Overlapping
Objects
If objects overlap, some objects may be completely or partially covered by
others. You can change the order of overlapped objects by bringing certain
objects to the front, or sending others to the back.
To use Bring to Front
1. Select the object or objects you wish to bring to front or send to the
back.
Bring to Front
Send to Back
2. Click on the Bring to Front or Send to Back buttons on the toolbar,
or from the Format menu, choose Bring to Front or Send to Back.
To bring objects forward or backward by single increments (one level
at a time), choose the Bring Forward or Send Backward options from
the Format menu.
Aligning
Objects
You can align selected graph objects automatically using S-PLUS Align and
Snap to Grid options. Snap to Grid lets you align your objects to a grid.
S-PLUS's grid is made up of a series of invisible horizontal and vertical
gridlines. By default there are 12 invisible gridlines per inch, and 5 per
centimeter (you can change the default under Options/Graph Options). As
you move an object it will "snap" to the closest intersection of the invisible
horizontal and vertical gridlines.
To align objects using Align
1. Select the "anchor" object. This object's position will be used to
align other objects.
2.
SHIFT-click
or CTRL-click to select the objects you wish to align.
3. From the Format menu, choose Align.
4. Choose the desired alignment from the Align menu.
292
ARRANGING OBJECTS ON THE GRAPH
You can use Align to align your graphs on the Graph sheet. Alternatively, you
can use S-PLUS automatic graph layout feature (Arrange Graphs) to position
multiple graphs on the Graph sheet.
Aligning
Objects Using
Snap-to-Grid
To align objects using Snap to Grid
1. From the Format menu, choose Snap to Grid.
2. Select the object you wish to move.
3. Drag the object slowly to the desired position. The object will snap
to the nearest horizontal and vertical gridline automatically.
Distributing
Objects
You can use the Distribute option to place three or more objects equal
distances apart on the Graph sheet. The two outermost selected objects
determine the size of the area in which to distribute the selected objects. This
option is useful when you have multiple objects (for example, comments)
that you want to have evenly spaced on the Graph sheet. You can use Align to
line up your objects, then use Distribute to space them evenly.
To distribute objects
1. Select three or more objects to be distributed.
2. From the Format menu, choose Distribute.
3. From the Distribute menu, choose Vertical or Horizontal.
The selected objects are placed equal distances apart on the Graph sheet,
between the two outermost selected objects.
Saving Defaults
Saving graph object defaults is useful if you need to create multiple objects
with similar properties.
To save the defaults for the selected object
1. Right-click on the object.
2. From the shortcut menu, choose Save Object as Default.
3. You could also go to the Options menu and select Save Object As
Default.
When you save the current settings as defaults, the new defaults will affect all
293
CHAPTER 11 WORKING WITH GRAPH OBJECTS
new objects of that type created from that point on in the current session and
in future S-PLUS sessions. Objects created using previously defined defaults
will not be affected by the default changes.
Deleting Objects
Objects can be deleted from a graph at any time.
To delete an object
1. Select the object or objects you wish to delete.
2. From the Edit menu, choose Clear or press the DELETE key.
Once an object is deleted, you may undo the deletion immediately. From the
Edit menu choose Undo, and the item is restored, or click on the Undo
button.
Objects can be removed from the Graph sheet but not permanently deleted
by using the Cut command. The object is placed on the Clipboard so that it
can be pasted in another location on the current Graph sheet or in another
document.
294
EDITING PLOT PROPERTIES
12
Plot Types
Changing the Plot Type
295
295
Plot Properties
Common Plot Properties
Area Charts
Bar Charts, Vertical and Horizontal (2D)
Box Plots
Comment Plots
Contour/Level Plots (2D)
Curve Fitting (Regression)
Error Bar Plots
High-Low-Close Plots
Histograms and Density Plots
Line & Scatter Plots (2D)
Pie Charts
Polar Plots
Vector Plots
Scatterplot Matrix
Contour Plots (3D)
Line & Scatter Plots (3D)
Surface Plots
299
300
303
304
307
309
311
313
316
317
318
319
325
326
327
328
330
330
332
Plot Types
This chapter describes the detailed changes that can be made to modify the
appearance of your plots. See section S-PLUS graphs (page 174) for a
discussion of the plot palettes.
Changing the
Plot Type
In S-PLUS, you can switch between different plot types using the plot palettes
or the Change Plot Type option on the Format menu. If you choose a plot
type that is incompatible with your data selection, you will need to change
295
CHAPTER 12 EDITING PLOT PROPERTIES
your data specifications. If you change the plot type to one with a different
axis system, you will be prompted before the graph is converted. Under these
circumstances you will lose axes specifications and other contents of the
original graph.
To change the plot type using a plot palette
1. Select the plot you wish to change.
2. Click the 2D or 3D Plots button. A palette of available 2D or 3D
plot types appears.
3. Click the desired plot button. The selected plot is redrawn using the
new type.
4. If your data are not appropriate for the chosen plot type, the plot
appears on the graph in an iconized form.
To close the palette, click the close box or click the plots button on the
standard toolbar again.
To change the plot type using a dialog
1. Select the plot and choose Change Plot Type from the Format menu.
2. In the Change Plot Type dialog, choose from the list of plot types
available for the current axes type (for example, 2D). As you click
through the list of plot types, sample plots are displayed in the
dialog.
3. Choose OK. The plot is redrawn using the new plot type.
Table 12.1 outlines the allowed plot types:
296
CHANGING THE PLOT TYPE
Table 12.1: Legal plot types
Plot Type
2D Axes
Area
!
Bar
!
Bar—Horiz
!
3D Axes
Matrix Axes
Polar Axes
Text Axes
!
!
!
Bar 3D
Box
!
Bubble
!
(P)
Bubble Color
!
(P)
Color
!
(P)
Comment
!
!
Contour
!
(P)
!
Contour 3D
Density
!
Dot
!
(P)
Error Bar
!
(P)
Error Bar—Horiz.
!
(P)
Fit—Exponential
!
(P)
Fit—Linear
!
(P)
Fit—Log 10
!
(P)
Fit—Log e
!
(P)
Fit—Polynomial
!
(P)
Fit—Power
!
(P)
High Density
!
(P)
297
CHAPTER 12 EDITING PLOT PROPERTIES
Table 12.1: Legal plot types
High Low Plot
!
Histogram
!
Levels Plot
!
(P)
Line
!
(P)
(P)
!
!
Line 3D
Pie
!
QQ Plot
!
!
(P)
!
Regression 3D
Robust Line
!
(P)
Scatter
!
(P)
!
!
Scatter 3D
!
Scatter Plot Matrix
Smoothing—Friedman
Super
!
(P)
Smoothing—Kernel
!
(P)
Smoothing—Loess
!
(P)
Smoothing—Spline
!
(P)
Step Plot
!
(P)
!
Surface
Time Series
!
Vector
!
(P)
! Plot type can be plotted on the respective axes type.
(P) A projection of the 2D plot into 3D space.
298
PLOT PROPERTIES
PLOT PROPERTIES
Formatting Plot
Properties
You can change the properties of your plot using a dialog or the toolbar
buttons. You can specify line, border, and fill attributes, data handling
information, cropping information, and much more.
To change plot properties using a dialog
The title of the plot property dialog varies depending on the plot type (for
example, "Line/Scatter" for line and scatter plots). You can access the plot
property dialog in the following ways:
1. Double-click on the plot, or
2. Select a plot and choose Selected Plot from the Format menu, or
3. Right-click on the plot to display its shortcut menu, or
4. Expand the Object Browser object GraphSheet until you see the plot
icon. Double-click on the icon or right-click and select Property
Dialog from the shortcut menu.
5. Edit the desired properties in the dialog and choose OK.
To change plot properties using the toolbar
1. Select the plot to change.
2. From the Graph toolbar, select the desired button (for example,
Color).
3. Choose a new color for the plot.
Note
If you have a line plot with symbols both the lines and symbols will change color. You can specify the
symbol and line color independently in the plot property dialog.
To change plot properties using the shortcut menu
1. Place the mouse cursor on the plot and click the right mouse button.
The shortcut menu appears to the right or left of the mouse pointer.
2. From the shortcut menu, choose the desired option to display its
dialog.
299
CHAPTER 12 EDITING PLOT PROPERTIES
3. Edit the desired properties and choose OK.
Formatting
Multiple Plots
You can format several plots at once using the toolbar buttons.
To format multiple plots
1. Select the plots you want to change. You can do this by SHIFTclicking on each plot or selecting Edit/Select All/Plots from the
menu.
2. Choose the desired option from the Graph toolbar.
For example, you can select all your line plots and change them to the same
color using the Line Color button on the toolbar.
Common Plot
Properties
S-PLUS gives you complete control over all properties of your plots. S-PLUS
uses defaults for all plot attribute options, and can automatically alternate (or
“cycle”) line and symbol styles, or fill pattern and color if you have multiple
plots within a graph. You can reset the cycling defaults at any time by
selecting Graph Styles from the Options menu.
Different plot types share some common plot options, while other are unique
to a specific plot type. For example, line style, color, and weight are options
for a line plot, while bar type, base, and grouping are options for a bar chart.
The following topics are plot attributes common to many plot types in
S-PLUS which appear on various pages of the plot property dialogs. Variations
from the options shown below will be discussed in the specific sections for
each plot type.
Scaling to Axes
X-Axis/Y-Axis # If you have multiple axes pairs on your graph, use the Scale
to options to choose which x-axis and y-axis to be use for scaling the plot.
Specify the number of the desired x-axis and y-axis. By default S-PLUS scales
the plot to the first x-axis and y-axis on the graph.
Note
If you specify an axis number that does not exist it will be added automatically. For example, if you specify
#2 for the Y axis # and you currently have only one y-axis, a second y-axis is added and the plot is scaled to
it automatically.
This option is available only for 2D plots; all 3D plots are scaled to only one
set of available axes (X, Y, and Z).
300
PLOT PROPERTIES
For information on adding axes to a graph, see the chapter Formatting a
Graph.
Plane # Many of the 2D plot types can be projected onto a 3D plane. To
project a 2D plot, put the 2D plot on a 3D graph and specify the projection
plane next to Plane #. For information on projecting 2D plots see section
Projecting a 2D Plot onto a 3D Plane (page 201).
Cropping
Check the Crop option to have your 2D plots cropped at the edges of the
plot area. Leave the checkbox empty to permit the plot to extend beyond the
plot area. If cropping is on, any data, lines, or symbols extending beyond the
plot area are not plotted.
Hiding
Check the Hide option to temporarily prevent a plot from displaying on a
graph. When you hide a plot, all of the plot specifications are retained. A plot
button remains on the graph representing the hidden plot. You can unhide a
hidden plot by double-clicking on its plot icon and deselecting the Hide
checkbox.
Subset Rows with You can also specify a subset of rows for graphing in the Subset Rows with
field. Enter an S-PLUS expression which identifies the rows to use in the
analysis. The expression must evaluate to a vector of logical values (TRUE
values are used, FALSE values are dropped), or a vector of indices identifying
the numbers of rows to use (for example, 1:20 or Age >=13).
Lines attributes
Line Style Specify the line style (for example, dotted, dashed etc.) to be used,
or None to have no line drawn.
Line Color Specify the color for a line. Choose from 16 preset colors or your
own custom colors.
Line Weight Specify the line weight in points.
Connect Type Choose from a list of line connection types.
Break Line at Missings Choose whether to break the plot line when it
encounters a missing value. If this option is not selected, the plot line
connects all data points, ignoring missing values.
Break Line at Symbols Choose whether to break the plot line when it
encounters a data point symbol. This is useful when you do not want the plot
line to bisect the symbol. If this option is not selected, the plot line is drawn
through each symbol.
Symbols
attributes
Symbol Style Specify the symbol style to be used for plot symbols and extra
symbols.
Symbol Color Specify the color for symbols.
301
CHAPTER 12 EDITING PLOT PROPERTIES
Symbol Height Specify the height of a symbol, in inches/cm.
Symbol Line Weight Specify the line weight for outlining symbols.
Symbol Frequency Specify how frequently symbols will be displayed on data
points. To place a symbol at each data point, enter a 1; a value of 3 indicates
that every third point will be plotted with the symbol. If you choose 0, no
symbols will be plotted.
Jitter Symbols Specify to introduce random ‘noise’ in a particular direction
to the data plotted.
Jitter Factor Specify the magnitude of ‘noise’ introduced to the data plotted.
Fills
You can choose a solid color for each item to be filled, fill the item with a
series of shades determined by a range of colors, or specify new colors for the
filled regions using the standard color dialog.
Fill Type Choose By "Item" (the title of the By "Item" option varies
depending on the plot type) to use the fill colors from the By "Item" page of
the dialog; otherwise they are ignored. Choose one of the Color Range
options to have S-PLUS interpolate between the specified colors. Choose
Special Colors to specify custom colors in a dialog.
Start/Middle/End Color Specify the boundary colors for the shading range.
A maximum of 64 colors are available for the color range choice.
Special Colors Specify custom colors in the standard Color dialog. A
maximum of 16 user-defined colors are available.
By Item (Fill and The title of this page varies by plot type. It is available for Area Charts, Bar
Charts, Contour Plots and Pie Charts.
Border
Specifications)
You can specify standard fill attributes (color, pattern, and background) and
border attributes (color, style, and weight) for each item.
Fill Color Specify the color to use for the filled region. When you are
choosing colors for your graph, make sure that there is plenty of contrast in
the colors you assign to each aspect of the graph. If colors are too similar,
some parts of the graph will be difficult or impossible to see.
Fill Pattern Choose a pattern for the fill.
Pattern Color Choose a color for your pattern.
Border Style Specify the line style to be used for borders around filled items,
or None to have no borders drawn.
Border Color Specify the color for the border around a filled item.
Border Weight Specify a line weight for the border around a filled item.
302
PLOT PROPERTIES
To change the border and fill attributes for each item
1. Double-click on the plot to display the plot property dialog and
choose the By Item page.
2. Select the region you want to format in the lower section of the
dialog. The current specifications for the selected area are filled into
the fields in the upper section of the dialog.
3. Make changes to one or more of the fields. As you change the values
in the fields, the specifications are updated automatically in the
lower section of the dialog.
4. Click Apply or OK to apply the changes to the plot.
To format more than one item at a time, CTRL-click on the specifications for
each item you want to format. The fields in the upper section of the dialog go
blank if the current values in the fields are not the same for each item. As you
make changes to the fields, all selected items will update automatically. Use
the Select All button to select all items for editing and set an attribute for all
items at once.
Area Charts
Data to Plot
Specify the names or column numbers of an x and y column of data. If a
single y column is specified, an x,y curve is drawn, and the area beneath the
curve is filled. If multiple y columns (or a stacked y column) are specified, a
curve is drawn for each set of values, and the area beneath each curve is filled.
Specifying Multiple Y Columns
If your y data are arranged in multiple columns you can specify the label
column for X and multiple Y columns for the Y data specifications (for
example, Sample1:Sample5). Each column must have the same length. See
section Preparing Data for Graphing (page 194) for an example of multiple
column data.
Specifying Stacked Y Data
If your y data are stacked, the number of areas will be equal to the number of
rows in column Y divided by the number of rows in column X. The first y
value will correspond to the first x, the second y to the second x, and so on,
repeating throughout the y column. See section Preparing Data for
Graphing (page 194) for an example of stacked data.
303
CHAPTER 12 EDITING PLOT PROPERTIES
Options area
charts
Fill Direction Choose Under data to fill below the curve, to the x-axis.
Choose Above data to fill above the curve, to the top edge of the y-axis.
Choose Left of data to fill to the left of the curve, to the left y-axis. Choose
Right of data to fill to the right of the curve, to the right edge of the x-axis.
Choose Inside data to fill within the area defined by the data.
Y Values Choose Additive to have the first row of y data plotted along the xaxis with subsequent rows of y data "stacked" on top of previous rows. The
points graphed represent the total of all values below them. Choose
Individual to have each row of y values plotted independently (on top of each
other) along the x-axis.
Fills
For area charts you can choose a solid color for each area, fill the area chart
with a series of shades determined by a range of colors, or specify new colors
for the filled areas using the standard color dialog.
See the information on fills in the section Common Plot Properties (page
300) for details on fill and color attributes.
By Area
For area charts you can specify standard fill attributes (color, pattern, and
background) and border attributes (color, style, and weight) for each area.
Bar Charts,
Vertical and
Horizontal
(2D)
You can create vertical and horizontal bar charts in S-PLUS by selecting data
and choosing buttons on the plot palette. You can change the direction of the
bars on your plot by selecting it and clicking a new button or by changing the
Direction option on the Position/Fills page of the plot property dialog.
Data to Plot
Standard bar charts
For a standard bar chart, specify the names or column numbers of your X and
Y columns. If you specify only one column of data (X or Y), S-PLUS will use
an integer sequence [1,n] for the missing column of data.
Grouped and stacked bar charts
For a vertical grouped bar chart, grouped bar charts specify the names or
column numbers of your X and Y columns. Each series of bars (for example,
the first bar in each grouping as you move across the Graph sheet) must have
a y value corresponding to each x value. Thus the total number of y values
must be the number of x values multiplied by the number of bars in each
grouping. These y values can be specified with multiple y columns, or with
one long column.
304
PLOT PROPERTIES
For a horizontal grouped or stacked bar chart, the x and y data specifications
are reversed.
Multiple data columns
If your y data are arranged in multiple columns, you can specify the label
column for X and multiple Y columns for the Y data specification. Multiple
Y columns can be specified in a list (for example, Y1, Y2, Y3) or in a
sequence (for example, Sample1:Sample5). Each column must have the same
length. See section Preparing Data for Graphing (page 194) for an example
of multiple column data.
The x and y specifications are reversed for horizontal bar charts.
Stacked databar charts
If your y data are stacked, the number of bars in each grouping is equal to the
number of rows in column Y divided by the number of rows in column X.
The first y value will correspond to the first x, the second y to the second x,
and so on, repeating throughout the y column. See section Preparing Data
for Graphing (page 194) for an example of short form stacked data.
The x and y specifications are reversed for horizontal bar charts.
Standard bar chart with error bars
For a standard bar chart with error bars, specify the names or column
numbers of your X and Y data column(s). You must have more than one Y
data column to have vertical error bars computed automatically. The mean
and standard error are automatically computed, and a bar is plotted at the
mean. If you already have a column containing the size of the error, you can
specify the column under Z. This column is then used to draw the error bars,
and the y values are used to determine the height of the standard bars.
The x and y data specifications are reversed for horizontal bar charts.
Grouped bar chart with error bars
For a grouped vertical bar chart with error bars, specify the names or column
numbers of your X, Y, and Z columns. The X column determines the
position of the groups along the x-axis. Each series of bars (for example, the
first bar in each grouping as you move across the Graph sheet) must have a y
value corresponding to each x value. Thus the total number of y values must
be the same number of x values multiplied by the number of bars in each
grouping. These y values can be specified with multiple y columns, or with
one long column. The Z column should contain the standard error data and
should have the same dimensions as your Y column(s). Error bars cannot be
305
CHAPTER 12 EDITING PLOT PROPERTIES
automatically calculated for grouped bar charts. Error bars cannot be
displayed in a stacked bar chart.
The x and y data specifications are reversed for horizontal bar charts.
Position/Fills
Direction of bar charts Specify the bar direction as Vertical or Horizontal.
Bar Grouping Specify Standard, Stacked, or Grouped.
Bar Width Specify the width of the bar as a fraction of the X interval (Y
interval for horizontal bar charts), as determined by the number of ticks or
intervals. For grouped bar charts, the bar width refers to the width for the
whole group and not each individual bar.
Bar Offset (Grouped Bar Charts Only) Specify the amount of offset
between the bars. The amount of offset is a fraction of a single bar width.
The default offset value of 1 places the bars side by side and touching one
another; an offset value of 0 places the bars on top of each other.
Bar Base Specify whether to position the base of each bar at zero, or at the
minimum value on the y-axis.
For bar charts, you can choose a solid color for each bar, fill the bar with a
series of shades determined by a range of colors, or specify new colors for the
filled bars using the standard color dialog. See the section Common Plot
Properties (page 300) for details on fill and color attributes.
Error Bars
Automatic error bar calculation
For automatic vertical error bar calculations, you need a single X column and
a group of Y columns. The X column determines the positions of the bars
along the x-axis. The Y data are used to compute the mean and size of the
error bar. The height of the bar will be the mean of the corresponding y
values. A series of Y columns can be specified either in a list (for example, Y1,
Y2, Y3) or in a sequence (for example, Y1:Y3). The mean and error value for
each error bar are automatically calculated using each row of y values
(corresponding to each x). A bar is plotted at the mean, and an error bar is
drawn above the bar.
The x and y data specifications are reversed for horizontal barcharts.
No error bar calculation
If you already have a column containing the standard error for your data, you
can specify the column under Z, and the Z data will automatically be used to
draw the error bars (no additional calculations will be done).
Draw Error Bars Specify whether to display error bars on each bar in the
chart.
306
PLOT PROPERTIES
Auto Errors Bars Specify the method to use for computing the error bars:
Standard deviation, Standard error, Confidence Level, or None. These results
are automatically computed using the row of y values at each x position.
Specify None to have no error bars drawn; only a bar will be plotted at the
mean. If you choose Confidence Level you need to specify a numeric value in
the Confidence Level field.
Confidence Level If you chose Confidence Level for Auto Errors, specify a
numeric value here.
Auto Means Specify the method to use for computing the mean (i.e. the data
point): Arithmetic, Median, Geometric (only if log axes are being used) or
None. If you choose Geometric, first the y data are logged, then the mean is
computed, and then the data are unlogged and plotted. These results are
automatically computed using the row of y values at each x position.
Cap Width Specify the width of the bar or "cap" drawn on each end of the
error bars in inches/cm.
By Bar
Specify the border and fill attributes for each bar. You can make color or style
changes to all bars at once, or specify properties for individual bars. See the
section Common Plot Properties (page 300) for details on changing fill and
border attributes.
Box Plots
This plot produces side by side box plots from a number of vectors. The box
plots can be made to display the variability of the median and can have
variable widths to represent differences in sample sizes. This plot uses the
function boxplot for the underlying computations.
Data to Plot
Single box plot
Specify the name or column number of your Y column (no X column is
specified). A description of the data values in the Y column are displayed in a
single box plot. The X position defaults to 1, but can be changed.
Grouped box plot
Specify the names or column numbers of your X and Y columns. The X
column is a numeric column that assigns each Y value to a group. The data in
the X column also determines the placement of the boxes along the x-axis.
Data in the X column should be integers; any-non-integer values are
truncated. The Y column contains the data values to be used in
computations.
307
CHAPTER 12 EDITING PLOT PROPERTIES
Specifying data using a long X and long Y column
In the long form, the X column is a numeric column that assigns each Y
value to a group. The data in the X column also determines the placement of
the boxes along the x-axis. Data in the X column should be integers; any
non-integer values are truncated. The Y column contains the data values to
be used in the computations. In this example, three boxes would be plotted
and placed one interval apart on the x-axis.
Table 12.2: Long form data
X
Y
1
0.25
1
0.45
1
0.98
2
0.32
2
0.10
3
0.05
3
0.78
3
0.34
3
0.29
Specifying multiple Y data columns
If your grouped box plot are arranged in multiple y data columns, you can
specify the grouping column levels for X and multiple Y columns for the Y
data specification (for example, Sample1.Sample5). See section Preparing
Data for Graphing (page 194) for an example of multiple column data.
Specifying stacked Y data
If your grouped box plot data are stacked, the number of rows in column Y
must be evenly divisible by the number of rows in column X in order for the
data to be arranged in groups. The number of rows in X determines the
number of groups (boxes). See section Preparing Data for Graphing (page
194) for an example of short form stacked data.
308
PLOT PROPERTIES
Box Specs
For box plot options you can specify standard line attributes (style, color and
weight) as well as fill attributes (color, pattern and pattern color) for the box.
For the median line standard line attributes and symbol attributes (style,
color, weight and line weight) apply.
Other Specs
For other options you can specify standard fill attributes (color, pattern and
pattern color) for the confidence bounds. For the whiskers standard line
attributes are available. For whisker caps and outliers standard line attributes
(style, color and weight) and symbol attributes (style, color, weight and line
weight) apply. Additional options are:
Draw Conf. Bounds If enabled, confidence intervals are shown. If the
confidence intervals on two boxes do not overlap, this indicates a difference
in location at a rough 5% significance level.
Notched Boxes If enabled, confidence intervals will be notched.
Comment
Plots
Comment plots can be created using the Graph menu on the Standard
toolbar.
Data to Plot
Specify the names or column numbers of your X, Y, and Z columns. The X
column specifies the X position of each comment, the Y column the Y
position of each comment, and the Z column contains the comment text. If
no Z column is specified, the X,Y coordinates are displayed on the graph (for
example, (10,2)).
Table 12.3: Sample data for a comment plot
X
Y
TEXT
1.0
1.62
Monday
2.0
2.65
Tuesday
3.0
1.98
Wednesday
4.0
4.52
Thursday
5.0
1.76
Friday
Use Axes Units Choose to position the comments relative to an axes pair on
the graph (2D and Polar axes only). If you choose this option, your x and y
data values are interpreted just like x and y data points on the graph.
Otherwise, your x and y data values are interpreted in document units
309
CHAPTER 12 EDITING PLOT PROPERTIES
instead of axes units. For example, an x,y location of 1,2 positions the
associated comment one inch up from the bottom of the sheet and two
inches from the left side of the Graph sheet.
If you specify 3D axes types or have no axes, this option is not available. Your
x and y data are automatically interpreted in document units, with each
comment's position measured from the lower left-hand corner of the Graph
sheet.
X Axis/Y Axis # Choose which x-axis and y-axis to scale the comment plot
to. By default, the plot is scaled to the first x-axis and y-axis on the graph.
Position
Horizontal Justification Specify the horizontal justification for your
comment text in relation to the x,y position: left, right, center, corner. For
example, selecting "left" places the comment text to the left of the data point.
The default horizontal justification is center.
Vertical Justification Specify the vertical justification for your comment text
in relation to the x,y position: up, down, center, corner. For example,
selecting "up" places the text above the data point. The default vertical
justification is center.
Horizontal/Vertical Offset Specify the distance in inches/cm between the
comment text and the position defined by x and y.
Format If your Z column is numeric or blank, specify the display format:
decimal, scientific, mixed, or auto.
Precision Specify the number of digits to display after the decimal.
Box
For plot options, you can specify standard fill attributes (color, fill and
background) and border attributes (style, color, and weight) for the box
drawn around the comments. Additional options include:
Horizontal/Vertical Margin Specify the vertical and horizontal distance
between the comment text and the box around the text.
Font styles
Specify the desired font for your comments, as well as color, size, and styles.
Rotation Specify the angle at which to draw your comments. The default
angle is 0, meaning the comments are drawn parallel to the horizontal axis.
You can specify any angle between 0 and 360 degrees, and labels are angled
counter-clockwise accordingly.
310
PLOT PROPERTIES
Contour/Level
Plots (2D)
Data to Plot
(Gridded and
Irregular Data)
Contour and level plots can use gridded and irregular data. Gridded data can
be specified in rectangular matrix form or “stacked” where the Z data is given
in one long column, and X, Y and Z values are given in ascending order.
Irregular data is specified in a rectangular matrix form. You will get better
results if the data are distributed fairly uniformly in X and Y and do not
contain sharp “spikes” or “drops” in Z. If only X and Y are specified and they
are of equal lengths, a 2D histogram will be computed for the Z values.
See section Preparing Data for Graphing (page 194) for details on
specifying gridded and irregular data.
Gridding
#X and #Y Data Grids Specify the actual number of X and Y grids. If you
choose Auto, S-PLUS determines the number of grids from the number of
rows and columns in Z, or by the number of X and Y values. If the X and Y
data specifications are left blank and the Z data are in one long column, the
number of X and Y grids corresponding to the Z data must be specified here.
# Output Grids Specify the desired number of X and Y grids. The finer the
mesh you specify (that is, the greater the number of specified output points),
the more difficult it may be for the algorithm to obtain reasonable estimates
of the contour levels at the grid points. However, the coarser the grid you
specify, the cruder will be the approximation to the contour. Thus, some care
should be taken in specifying the number of output points.
X and Y Minimum and Maximum Specify the range of X and Y for which
you want the contour drawn. When Auto is specified, the minimum and
maximum values in the source X and Y columns are used.
Grid Data Specify No if your data columns are already gridded. Specify Yes if
your data columns are irregular. If you choose Auto, S-PLUS will try to
determine if the data are gridded or irregular. If the data are irregular, S-PLUS
will grid the data automatically. If your data are gridded and in the long
format, it is recommended that you specify No instead of Auto in this field.
Algorithm Bivariate uses the interp function to compute a bivariate
interpolation for irregular grids. The triangulation scheme used by interp
works well if x and y have similar scales, but will appear stretched if they have
very different scales. The spreads of x and y must be within four orders of
magnitude of each other for interp to work. Internal uses a cell search
algorithm internal to the graphics. It essentially searches for the three points
nearest to each grid point, and then finds where the plane through these
points intersects the vertical line that goes through the grid point (that is, the
line perpendicular to the x-y plane at the grid point). This intersection is
311
CHAPTER 12 EDITING PLOT PROPERTIES
used as the estimate of the height of the surface at this point.
Weighted Average Used only for the internal algorithm. S-PLUS will
calculated a weighted average of all points that lie within each grid cell before
interpolating the grid height. If your irregular data has many irregularities,
using the weighted average method may smooth them out within each grid
cell. As a result, the weighted average method slows down plotting, but
produces a smoother contour. If the average number of data points within
each cell is less than three, there is not likely to be any advantage to using
weighted averaging.
Extrapolate Used only for the bivariate algorithm. If checked, data points
will be extrapolated outside of the convex hull determined by the data points
filling the entire computed grid. If not checked, only the area of the plot
corresponding to the convex hull of the original data will be drawn. The
internal algorithm always extrapolates.
%Pts Partial Der. Used only for the bivariate algorithm. Percentage of
additional points to be used in computing partial derivatives at each data
point. If set to zero, partial derivatives are not used. The implied number of
data points must be at least 2 but smaller than the number of input data
points.
Labels
You can specify the desired font, color, size and styles for your contour labels.
These specifications are ignored for level plots. You can also specify the
following options:
Use Contour Colors Choose this option to have your contour labels use the
contour line color. For example, if you have a red contour line the contour
label will also be red. When you change a contour color the contour label
color will also change automatically.
Label Frequency Specify the frequency at which the levels are labeled. For
example, a value of 3 indicates that every third level is labeled. To place a
label at each level, enter 1; if you choose 0, no contours are labeled.
Occasionally, S-PLUS simply cannot find a good place on the contour to put a
label. The success rate of the labeling can depend on the curvature of the data
and on the number of grids specified.
Format Display Specify the display format type for the labels: Decimal,
Scientific, Mixed, or Auto. If you choose Auto, S-PLUS chooses the optimal
display format for the labels (based on the data).
Precision Specify the number of digits to display after the decimal for the
contour labels. You can increase the precision to get more accurate labels for
contour levels.
312
PLOT PROPERTIES
Contour/Fills
Minimum and Maximum Level Specify the minimum and maximum
values of the contour levels. This information is used to set the range (in the
units of your Z data) that the contours should represent. If Auto is specified,
the minimum and maximum values of Z data are used for the range.
Contour labeling is improved if the number of contours divides evenly into
the difference between the minimum and maximum levels.
Number of Levels Specify the number of contours.
Use Levels Column Choose whether to use a levels column for determining
the contour levels.
Levels Column (optional) Specify the name of a column containing specific,
non-uniform levels (in the units of your Z data) to be drawn. The values
should be in ascending order. The levels column specification is used in place
of specifying the minimum, maximum, and number of contour levels; if all
are specified, the levels column specification takes priority and is used to
create the grid levels.
Data Set Specify the name of the data set containing the levels column.
Draw Lines Choose whether to draw the contour lines. If this option is not
selected, the line color, style, and weight specifications (on the By Contour
page) for each contour will be ignored.
Fill Style Select None to not fill the contours with color. Select Contour to
have the fill areas defined by the contours. Select Grids to create a level plot,
where each rectangle defined by the visual grid is filled with a color. Contour
will create a smoother plot, while Grids typically draws faster. If None is
selected, the fill type specifications for each contour will be ignored.
Fill Type You can choose a solid color for each contour, image colors to use
the color scheme specified on the colors page of the Graph sheet dialog, fill
the contour plot with a series of shades determined by a range of colors, or
specify new colors for the filled contours using the standard color dialog.
See the information on fills in the section Common Plot Properties (page
300) for details on fill and color attributes.
By Contour
Specify the border and fill attributes for each contour. You can make color or
style changes to all contours at once, or specify properties for individual
contours.
Curve Fitting
(Regression)
You can choose from the following types of curve fittings:
1. Linear
313
CHAPTER 12 EDITING PLOT PROPERTIES
2. Polynomial
3. Log Base 10
4. Log Base e
5. Exponential
6. Power
S-PLUS performs a standard linear regression, displaying a regression line
with a scatter plot of the associated data points. Regression lines are generated
using an ordinary least-squares (OLS) analysis to calculate y values for given
values of x. For curve fits, all statistics are adjusted appropriately.
Data to Plot
For curve fitting plots, specify the names or column numbers of your X
column and Y column(s). The X column should contain the dependent
variable. The Y column should contain the independent variable (regressor).
Line/Symbol
For curve fitting plots you can specify standard symbol attributes (style, color,
height, line weight and frequency) and line attributes (style, color, and
weight).
Curve Fitting
Curve Fit Type Specify the type of regression curve: Linear, Exponential, Log
10, Log base e, or Power. The Curve Fit Type and Polynomial Regression
Order can both be specified independently; therefore these curve types can be
combined. For example, you can specify a log curve type with a polynomial
order of 3. The following table lists the equation that results from the
combination of Polynomial with other curve types:
Table 12.4: Resulting equations from combining polynomials
Combining Polynomial with Other Curve Types
Exponential
y=a*exp(b*x+c*(x^^2)+...)
Log base 10
y=a+b*log(x)+c*(log(x)^^2)+...
Log base e
y=a+b*ln(x)+c*(ln(x)^^2)+...
Power
y=a*x^^(b+c*ln(x) +...
Omit Constant Choose whether to omit a constant term from the model.
For example, if you choose this option with a linear curve, the fitted curve
will be forced through the origin.
314
PLOT PROPERTIES
Polynomial Regression Order Specify a positive value here to specify the
order of regression of the dependent variable upon the independent variable.
Any value in the range of 0 to 88 (limited by the number of data points) is
allowed here, but values above 9 are likely to result in numerical overflow
problems.
Results
Number of Predicted Values Specify how many predicted values you want
S-PLUS to generate. Choose Data if you want to have this value equal the
number of valid observations in your data.
Predicted Value Minimum and Maximum Specify the range of X values
over which you want the curve evaluated, or choose Data to use the
minimum and maximum of the X data to determine the range. If you specify
minimum and maximum value(s) and the number of predicted values,
Increment must be set to Auto.
Increment Specify an increment value or Auto. For example, if you have
specified 1 for the minimum, 100 for the maximum, and 1 for the
increment, then Number of Predicted Values must be set to Auto (it will be
equal to 100).
The regression is computed by forming and solving the normal equations. All
computations are done in extended (10 byte) and double (8 byte) precision.
A separate algorithm is used for polynomial regressions for computational
efficiency.
By Confidence
Bounds
On the By Confidence Bounds page you can specify up to eight pairs of
confidence bounds. They are defined automatically for your convenience. By
default, each pair have their line styles set to None.
To specify on one or more pairs of confidence bounds
1. In the lower portion of the dialog, select one of the default
confidence bounds specifications.
2. In the Level field, edit the confidence level if desired (the value must
be between 0 and 1; for example, 0.95, 0.99).
3. Specify the line color, style, and weight for the confidence bound
lines.
4. Repeat steps #1 through #3 for each confidence level.
5. Choose OK.
A pair of confidence bounds is computed and drawn for each percentage
specified. To have no confidence bounds drawn, leave the Line Style field set
to None for each pair of confidence bounds.
315
CHAPTER 12 EDITING PLOT PROPERTIES
Error Bar Plots
Data to Plot
For error bar plots, specify the names or column numbers of your X
column(s) and Y column(s). S-PLUS automatically computes the mean and
standard error and plots a symbol at the mean, unless you already have an
error column (see No error bar calculation below for details).
Automatic error bar calculation
For vertical error bars you need a single X column and a group of Y columns
for automatic error bar calculation. The X column determines the positions
of the bars along the x-axis. The Y data are used to compute the mean and
size of the error bar. A series of Y columns can be specified either in a list (for
example, Y1, Y2, Y3) or in a sequence (for example, Y1:Y3). The mean and
error value for each error bar are automatically calculated using each row of y
values (corresponding to each x). A symbol is plotted at the mean, and an
error bar is drawn at that point.
For horizontal error bars you need a single Y column and multiple X columns
for automatic error bar calculation.
No error bar calculation
If you already have a column containing the standard error for your data, you
can specify the column under Z, and the Z data will automatically be used to
draw the error bars (no additional calculations will be done).
Asymmetrical error bars
If you wish to draw asymmetrical error bars, specify a column containing the
values above the mean under Z, and a column containing the values below
the mean under W.
Line/Symbol
For error bar plots you can specify standard symbol attributes (style, color,
height, line weight and frequency) and line attributes (style, color, and
weight). Additional error bar options are:
Bar Style, Color, Height and Line Weight Specify the line style, color,
height and line weight for the vertical or horizontal error bars.
Cap Width Specify the width of the bar or "cap" drawn on each end of the
error bars in inches/cm.
Options
Specify whether to draw the error bars vertically or horizontally.
Direction Specify the direction(s) for the error bars: Positive or Negative. If
your error bars are oriented vertically and you choose both Positive and
316
PLOT PROPERTIES
Negative, the error bar is drawn above and below the mean (data point).
Select Positive to have only the upper portion of the error bar drawn,
Negative to have only the lower portion drawn. Select neither to have only
the mean plotted.
If your error bars are oriented horizontally and you choose both Positive and
Negative, the error bar is drawn to the left and right of the mean (data point).
Select Positive to have only the right side of the error bar drawn, Negative to
have only the left side drawn. Select neither to have only the mean plotted.
Auto Errors Specify the method to use for computing the error bars:
Standard Deviation, Standard Error, Confidence Level, or None. These
results are automatically computed using the row of y values at each x
position. Specify None to have no error bars drawn; only a symbol will be
plotted at the mean. If you choose Confidence Level you need to specify a
numeric value in the Confidence Level field.
Confidence Level If you specified Confidence Level for Auto Errors, specify
a numeric value here.
Auto Means Specify the method to use for computing the mean (i.e. the data
point): Arithmetic, Median, Geometric (only if log axes are being used), or
None. If you choose Geometric, first the y data are logged, then the mean is
computed, and then the data are unlogged and plotted. Choose None to have
only the error bars plotted, and not the mean. These results are automatically
computed using the row of y values at each x position.
High-Low-Close
Plots
Data to Plot
Specify the names or column high-low-close plots: data specifications
numbers of your X, Y, Z, and W columns. The Y column should contain the
average or closing data values, Z should contain the high data values, and W
should contain the low data values.
Line/Symbol
For high-low-close plots you can specify standard symbol attributes (style,
color, line weight, height, and frequency) and line attributes (style, color, and
weight). Additional options are:
High-Low Bar Attributes Specify line color and line weight for the highlow-average bars.
317
CHAPTER 12 EDITING PLOT PROPERTIES
Histograms
and Density
Plots
These plots display the distribution of a single set of data using bars or lines.
The hist function is used for the histogram calculation, and the density
function for the density line calculation.
Data to Plot
Specify a single X vector of data for the distribution.
Options
Contin./Integer Specify Integer if your data are exclusively integers and
Continuous if they are not. If Integer is specified for non-integer data, the
data values are truncated to integers.
Output Type Specify the output type.
Choose Counts to have the heights of the bars determined by the number of
data points falling into each interval. The sum of the heights of all of the bars
equals the number of observations in the data vector.
Choose Density to have the height if the bars determined by the relative
concentration of data points within each interval. The sum of the area
beneath the bars is equal to one. The general shape of the distribution is
independent of the number of bars specified. This output type is necessary
for density lines to be drawn correctly.
Choose Frequency to have the height of the bars determined by the fraction
of data that falls within each interval. The sum of the heights of all of the bars
is equal to one.
Choose Percent to have the height of the bars determined by the percent of
data that falls within the interval. The sum of the height of all of the bars is
equal to 100%.
Lower and Upper Bounds Specify the lower bound (minimum) and upper
bound (maximum) for the data you wish to use. The default, Auto
(automatic calculation), uses the minimum and maximum values in the data
provided.
Interval Width Specify the interval of the x-axis for each bar of the
histogram. If the number of bars is specified, the interval is computed
automatically. The result will depend on whether Continuous or Integer has
been selected. For example, suppose your data ranges from 1 to 10 and the
interval width is specified as 1. With integer data, a bar is drawn for each
integer value from 1 to 10; 10 bars are drawn. With continuous data, a bar is
drawn for each interval of length 1 between 1 and 10; 9 bars are drawn.
Number of Bars Specify the number of bars instead of specifying the interval
of each bar. The width of the interval is then determined by the number of
bars and the range of the data. The higher the specified number of bars, the
narrower the interval width.
318
PLOT PROPERTIES
Window Specify the type of window used in the computations.
Number of Output Points Specify the number of equally spaced points at
which to calculate the density.
Window Width Specify the width of the window used in the computations.
The default is calculated using the formula: log(length(x%, base=2) + 1. The
standard error for a Gaussian window is width/4. For the other windows
width is the width of the interval on which the window is non-zero.
From and To Specify the lower bound (minimum) and upper bound
(maximum) for the data you wish to use. The default, Auto (automatic
calculation), uses the minimum and maximum values in the data provided.
Cut Specify the fraction of the window width that the x values are to be
extended by. The default is 0.75 for the Gaussian window and 0.5 for the
other windows.
Remove NA’s Specify whether missing values should be removed before
estimation or not.
Histogram Bars
For histograms you can specify the standard fill attributes (color, pattern and
background) and border attributes (style, color and weight).
Draw Bars Specify whether to draw borders for the individual bars of the
histogram.
Draw Histograms Specify whether to draw histogram. Disable this to draw
only the density line.
Density Line
For density lines you can specify the standard line attributes (style, color and
weight).
Draw Line Specify whether to draw the density line. Disable this to draw
only the histogram.
Line & Scatter
Plots (2D)
Data to Plot
Specify the names or column numbers of your X and Y columns. If you
specify only one column of data (X or Y), an integer sequence will be used for
the missing column of data.
Line
For line and scatter plots, you can specify standard line attributes (style, color,
and weight) and line break options. The line style is set to None for scatter
plots.
319
CHAPTER 12 EDITING PLOT PROPERTIES
Connect Type Choose an option to select a method to connect isolated
points. Choose Direct to create a standard line plot. Choose Isolated Points
to allow space between line and symbols.
Several options allow you to create Step plots. Select Vert First to have the
first line drawn be vertical. Choose Horiz First to have the first line drawn be
horizontal. Choose Half Vert First to create a step plot with divided vertical
lines. Choose Half Horiz First to create a step plot with divided horizontal
lines. Choose Vert Only to draw only vertical lines. Choose Horiz Only to
draw only horizontal lines. Choose Draw Horiz. Grid Lines to draw
horizontal gridlines at major ticks to create a dot plot.
Other options allow you to create High-density plots. Choose To X Axis Min
to have vertical lines drawn from points to the X axis. Choose To Y Axis Min
to have horizontal lines drawn from points to the Y axis. Choose To X = 0 to
have vertical lines drawn from points to x = 0. Choose To Y = 0 to have
horizontal lines drawn from points to y = 0.
Symbol style
For line and scatter plots you can specify standard symbol attributes (style,
color, height, line weight and frequency).
Use Text as Symbol Choose whether to use a user-specified string or column
of text in any font as plotting symbols.
Text to Use Choose from Specified Text, x, y, z, w or Other Column. Choose
Specified Text to type text into the Symbol Text box and use it for every
symbol on the graph. Choose one of the column options to use a column of
text as symbols.
Symbol Text Specify the text to be used as a symbol.
Column Specify a column of text to use.
Data Set Specify the data set containing the column of text.
Font Choose a font type for the text.
Bold, Italics, Underline Specify text formatting options.
Vary Symbols
You can add extra dimensions to line and scatter plots by varying symbol
sizes.
The relative size of the symbol is determined by the relative value of a third
column. For example, if x is the gas mileage of a car and y is a measure of
safety, symbol size could vary depending on price. The third column can be
put in the z or w column on the Data To Plot page, or specified here.
Vary Size By Choose from None, x, y, z, w or Other Column.
Minimum Height Specify the minimum size for the symbol.
320
PLOT PROPERTIES
Maximum Height Specify the maximum size for the symbol.
Column Choose a column from the list.
Data Set Choose a data set from the list.
You can also show an extra dimension of data by varying symbol colors. As
with varying size, the color of the symbols is determined by the relative value
of a third column. If the third column is a factor, the colors will vary
according to the colors on the symbols page of the Options/Graph Styles
dialogs. The colors are specified as a range, or as a list of special colors.
Vary Color By Choose from None, x, y, z, w or Other Column.
Colors To Use Choose from Range or Special (used only if the third column
has numeric data).
Minimum Color Minimum color in the shading range.
Maximum Color Maximum color in the shading range.
Column Choose a column from the list.
Data Set Choose a data set from the list.
Special Colors Specify custom colors.
You can also show an extra dimension of data by varying symbol styles. This
is appropriate when the vary symbol styles column is a factor. As with vary
color, the symbol style will be determined by mapping the factor level to the
varying symbol styles on the Symbols page of the Options/Graph Styles
dialogs.
Vary Style By Choose from None, x, y, z, w or Other Column.
Column Choose a column from the list.
Data Set Choose a data set from the list.
Smooth/Sort
On the Smooth/Sort page of the plot property dialog you have the following
smoothing options:
Pre-Sort Data Choose from "None", "X,Y on X", "X,Y on Y", "X only" and
"Y only".
If a sorting option is selected, data is sorted before any smoothing or
rendering of the line is done.
Smoothing Type Choose from None, Least Squares, Robust, Kernel, Loess,
Spline, Friedman’s Super.
None uses no smoothing.
Least squares uses the lm function to perform a least squares linear fit.
321
CHAPTER 12 EDITING PLOT PROPERTIES
Robust uses the ltsreg function to perform a least trimmed squares robust
regression. This regression estimate minimizes the sum of the smallest half of
the squared residuals.
Kernel uses the ksmooth function to perform a kernel smooth, which is a
generalization of local average smoothing.
Loess uses the loess function to fit a local regression.
Spline uses the smooth.spline function and the predict.smooth.spline
function to calculate predictions from a cubic B-spline. The regression is fit
by penalized least squares between knots. For small data vectors (n < 50), a
knot is placed at every distinct point. For larger data sets the number of knots
is chosen judiciously in order to keep the computation time manageable.
Friedman’s Super uses the supsmu function to compute Friedman’s variable
span smoother. It uses a symmetric k-nearest neighbor linear least squares
fitting procedure. The algorithm is fast, and by default uses cross validation
to pick the span. This allows the user to specify a smoothing function.
Number of Output Points Specify the number of points to be produced by
the smoothing. If Auto is selected, the number of output points is set to the
maximum of 100 and the length of the input vectors.
For Loess/
Friedman
Span Fraction of observations in the smoothing window. If Auto is selected,
then automatic (variable) span selection is done by means of cross validation.
Reasonable span values are from 0.3 to 0.5. For small samples (n < 50), or if
there are substantial serial correlations between observations close in x-value,
a prespecified fixed span smoother should be used.
For Loess
Degree Overall degree of locally-fitted polynomial. One is a locally-linear
fitting and two is locally-quadratic fitting.
Family The assumed distribution of the errors. The default is “Guassian”. If
“Symmetric” is selected a robust fitting procedure is used.
For Spline
Deg. of Freedom The degrees of freedom should be between 1 and the
number of input data points -1. The lower the degrees of freedom, the
smoother the line. If Auto is selected cross-validation is used.
For Kernel
Bandwidth The kernel bandwidth smoothing parameter. All kernels are
scaled so the upper and lower quartiles of the kernel (viewed as a probability
density) area +/- 0.25 when bandwidth is 1. Larger values of bandwidth make
smoother estimates.
Kernel The choices are Box, Triangle (a box convolved with itself), Parzen
function (a box convolved with a triangle), and Normal (the Gaussian
density function).
322
PLOT PROPERTIES
For User-Defined
Function Name The name of the function to use for smoothing. It’s first
arguments must be:
x: vector of x data
y: vector of y data
z: vector of z data (can be NULL)
w: vector of w data (can be NULL)
subscripts: vector of row indices
panelnum: panel number if conditioned
It must return a list containing the following components:
x: a vector of x data for line drawing
y: a vector of y data for line drawing
Other Arguments For any of the smoothing types, any of the optional
arguments can be specified here. For example, if Friedman’s supersmoother is
used, the underlying supsmu function is called. If bass=5 is put into the
Other Arguments field, this will be passed down to the supsmu function
when calculated.
Output Object Each underlying smoothing function returns an output
object. If you would like to save this object, specify the name for the output
object here.
Bubble Plots (2D) You can add an extra dimension to line and scatter plots by varying the
symbol sizes. You can create a bubble plot by selecting data and choosing one
of the bubble plot buttons on the plot palette.
Clicking one of these buttons uses a third column of data to specify the
relative size of symbols on the Vary Symbols page of the Line/Scatter Plot
dialog. For example, if x is the gas mileage of a car and y is a measure of
safety, symbol size could vary depending on price. The third column can be
put in the z or w column on the Data To Plot page, or specified on the Vary
Symbols page.
Color Plots (2D)
You can add an extra dimension to line and scatter plots by varying the
symbol colors. You can create a color plot by selecting data and choosing one
of the color plot buttons on the plot palette.
As with varying size, clicking one of these buttons uses a third column of data
to specify the relative colors of symbols on the Vary Symbols page of the
Line/Scatter Plot dialog. The colors are specified as a range, or as a list of
special colors if the third column is numeric. If it is a factor, colors will be
used in the order specified in Options/Graph Styles.
323
CHAPTER 12 EDITING PLOT PROPERTIES
Dot Plots (2D)
Dot Plots plot independent data against categorical dependent data using
gridlines to mark the dependent levels. This behavior is controlled by the
Draw Gridline Property on the Line page of the plot dialog. It is also
necessary for the y axis State property for grids to be set on Auto.
Step Plots (2D)
A step plot uses alternating horizontal and vertical lines to connect data in
“steps”. You can create a step plot by selecting data and choosing one of the
step plot buttons on the Plots 2D palette.
Clicking one of these buttons specifies the line connection type on the Line
page of the plot property dialog as Vert First, Horiz First, Half Vert First,
Half Horiz First, Vert Only or Horiz Only. For details, see the description of
the Line page of the plot property dialog.
High-Density
Plots (2D)
High-density plots draw a line between each data point and a specified axis.
You can create a high-density plot by selecting data and choosing one of the
high-density plot buttons on the Plots 2D palette.
Clicking one of these buttons specifies the Connect Type on the Line page of
the plot property dialog as To X Axis Min, To Y Axis Min, To X = 0 or To Y
= 0. For details, see the description of the Line page of the plot property
dialog.
Text as Symbols
Plots (2D)
You can specify a string or column of text to be used as plotting symbols (this
option also exists for 3D line and scatter plots and polar plots). You can
create a plot using a column of text as symbols by selecting data and choosing
a Text as Symbol button on the plot palette.
Clicking this button specifies that the text appearing in the z column of the
Data to Plot page of the property dialog is used to label each data point. You
can select two columns of numbers, one column of text and click the Text as
Symbol button to create the plot automatically. You can open the property
dialog and edit options on the Symbol page to change the plot properties.
Note
Unlike a Comment plot, you cannot put a box around the text or move the location of the text relative to
the plotting point. Comment plots also use the position of the data point as the text if no z column is
specified.
For more information, see the description of the Symbols page of the Plot
Property dialog.
324
PLOT PROPERTIES
Pie Charts
Data to Plot
Specify the name or column number of your data under the X column. The
column should contain only positive values; if negative values are
encountered, the absolute value of the negative numbers is used in calculating
the size of each pie slice.
Comment plots can be combined with pie charts; see the discussion of
comment plots earlier in this chapter.
Specs/Fills
Plot Margin
Start Angle Specify the starting angle (in degrees) of the first pie slice. The
default angle is 0, which means the first slice is positioned starting at an
imaginary horizontal line drawn from the pie's center to the right edge of the
pie. The remaining pie slices are positioned after the first slice in a counterclockwise fashion. A starting angle of 90 positions the first pie slice at the top
of the pie.
For pie charts you can choose a solid color for each slice, fill the pie with a
series of shades determined by a range of colors, or specify new colors for the
filled slices using the standard color dialog.
See the information on fills in the section Common Plot Properties (page
300) for details on fill and color attributes.
Labels
You can have one or two labels for each slice of your pie charts, or choose to
have no labels at all.
Label 1 and Label 2 Type For the pie labels you can specify the label style.
If you choose Decimal, Scientific (e), Scientific (E) or Mixed, the data values
are used as labels.
If you choose Decimal%, Scientific%, or Mixed%, the percentage of the pie
represented by the slice is used.
If you select Column you need to specify the column containing the pie
labels. The column may contain either character or numeric data.
If you select None, no labels are drawn.
See the section Formatting 2D Axis Labels (page 244) for information on
other label type options.
Precision Specify the number of displayed digits after the decimal.
Column If Column was chosen for the Label style, specify the name of the
column containing the slice labels.
Data Set Specify the name of the data set containing the column of labels.
325
CHAPTER 12 EDITING PLOT PROPERTIES
Stacked Choose this option to have the two labels stacked vertically (Label 1
on top). If this option is not selected, the two labels will be placed side-byside (Label 1 first). Label 2 is automatically enclosed in parentheses if the
label is a number.
Offset Specify the amount of offset between the labels and the center of the
pie. Negative numbers will move the labels toward the center of the pie;
positive numbers will move them farther away from the center of the pie. A
negative offset produces the best results when pie slices are large and fairly
evenly spaced.
Justification Specify the justification (Auto, Right, Left, Corner and Center)
for stacked labels.
Font
For all labels, you may specify font, color, size, and styles.
By Slice
Specify the border and fill attributes for each slice. You can make color or
style changes to all slices at once, or specify properties for individual slices.
See the section Common Plot Properties (page 300) for details on changing
fill and border attributes. Other options include:
Explode (in/cm) Specify the amount (in inches/cm) of offset from the center
for each pie slice. The default is 0, for no explosion.
Polar Plots
Polar plots can be created using the Graph menu on the Standard toolbar.
Data to Plot
Polar plots display data in polar coordinates (radii lengths and angles). You
can create a polar plot by choosing either Polar Scatter Plot or Polar Line
Plot, and specifying the names or column numbers of your X and Y columns.
The X and Y columns must be the same length; the X column should contain
the radii and the Y column should contain the angles (in radians). If your Y
column data is in degrees, you can select Convert from the Data menu to use
the degtorad function to translate the data into radians.
Line
For polar lines you can specify standard line attributes (style, color, and
weight). The line style is set to None for polar scatter plots.
You can also choose to break lines at missing values or at symbols.
Symbol
For polar line and scatter plots you can specify standard symbol attributes
(style, color, height, line weight and frequency).
Use Text as Symbols Specify a string of text in any font to be used as a
symbol for a line/scatter plot.
Symbol Text Specify the text to be used as a symbol.
326
PLOT PROPERTIES
Font Choose a font type for the text.
Bold, Italics, Underline Specify text formatting options.
See section Formatting Polar Axes (page 259) for information about polar
axes specifications.
Quantile/Quantile This plot compares the distributions of two data sets by graphing the
quantiles of one data set against the quantiles of a second data set. This plot
Plot
uses the function qq for its computations.
Data to Plot
Specify a single vector to be compared to a theoretical distribution or X and Y
vectors to compare against one another.
Line/Symbol You can specify all of the same attributes as a 2D Line/Scatter
plot.
Distribution You can specify the standard line attributes (style, color and
weight) for the distribution line.
Function Specify the function for a theoretical distribution. The fields
following the function field are the input parameters for the available
functions. The appropriate parameter fields will activate as each function is
selected.
Vary Symbols You can specify all of the same attributes as a 2D Line/Scatter
plot.
Smooth/Sort You can specify all of the same attributes as a 2D Line/Scatter
plot.
Vector Plots
Vector plots can be created using the Graph menu on the Standard toolbar.
Data to Plot
For vector plots, you need to specify the names or column numbers of your
X, Y, Z, and W columns.
Arrow
For vector plots, you can specify standard line attributes (color, style, and
weight) and arrowhead attributes.
Vector Options
Data Type Specify whether your vector data contains the beginning and
ending points for each vector, or contains the vector position, angle, and
magnitude.
If you choose Begin/End, you need to specify a beginning and ending x,y
position for each vector. Specify a column of x starting values under X, a
column of y starting values under Y, a column of x ending values under Z,
and a column of y ending values under W.
327
CHAPTER 12 EDITING PLOT PROPERTIES
If you choose Angle/Magnitude, you need to specify an x,y position for the
vector, the angle at which to draw the vector, and the magnitude (or length)
of each vector. Specify the x data under X, the y data under Y, a column of
angle data under Z, and a column of magnitude data under W.
Vector Position Choose whether the x,y data should be used to define the
Midpoint, Head, or Tail of the vectors.
Angle Units Specify whether the angle data should be interpreted in Degrees
or Radians.
Magnitude Multiplier Specify a value to proportionally increase or decrease
the length of the vectors. For example, if you specify a value of 0.5, the
vectors are drawn at half their original magnitude (or length). The default
value is 1, which means the magnitude data determines the length of the
vectors.
Scatterplot
Matrix
A scatterplot matrix is an array of pairwise scatter plots showing the
relationship between any pair of variables in a multivariate data set. To
customize the layout of your scatterplot matrix see section Matrix Graph
(page 329). To customize the axes and labeling see section Matrix Plot Axes
(page 328).
Data to Plot
Specify the names or column numbers of the variables to use for the
scatterplots as the X data.
Line/Histogram
You can specify the standard line attributes (style, color, and weight) that will
be used if you select to draw a smoothed line through the points. Click on
the Draw Histogram option to have histograms drawn on the diagonal. The
standard fill options are available for the histograms (fill color, pattern,
pattern color and line style, color, and weight).
Symbol and Vary You can specify all of the options available in 2D line plots for symbol
attributes, using text as symbols, and for varying symbol color, sizes, and
Symbol and
styles according to an additional variable. In addition, all of the smoothing
Smoothing
types available for 2D line plots are available for scatterplot matrices.
Matrix Plot Axes
Formatting Matrix Plot Axes
To select the axes Click on a horizontal label, tick label, or tick mark.
To format the axes
1. Double-click on any part of the axes (as described above); or select
328
PLOT PROPERTIES
the axes and choose Selected Matrix Plot Axes from the Format
Menu.
2. From the Matrix Plot Axes dialog, choose the desired tab: Display,
Ticks, Variable Labels. Make the desired changes and choose OK.
Display
Axis Display You can specify line style, color, and line weight for the matrix
plot axes.
Horizontal/Vertical Grids You can specify the line style, color, and line
weight for horizontal and/or vertical grids. These will be drawn for each tick
mark.
Number of Ticks Minimum and Maximum The number of ticks drawn for
each variable will be computed within the range specified here.
Major Ticks Specify the length and the line weight of the ticks.
Position If Out is selected, the ticks will be drawn pointing out from the
outer rectangle. If In is selected, the ticks will be drawn inside of the diagonal
rectangles. If Off is selected no ticks or tick labels will be drawn.
Tick Labels Specify the font, font size, and font color for the tick labels.
Variable Labels Specify the font, font size, font color, and special attributes
of the variable labels shown in the center of the diagonal rectangles. An
option to use a column of label names is available.
Matrix Graph
Matrix Borders/Fills Specify the fill color, pattern, and pattern color and
border line style, color, and weight for each of the rectangles off of the
diagonal.
Box Margins Specify the horizontal and vertical margins between the
rectangles in document units.
Diagonal Borders/Fills Specify the fill color, pattern, pattern color and
border line style, color, and weight for each of the rectangles off of the diagonal.
Box Order Choose Table Order to have the first variable in the upper left
corner, with the diagonal boxes moving towards the lower right. Choose
Graph Order to have the first variable in the lower left corner, with the
diagonal boxes moving towards the upper right.
Bottom Triangle Choose whether to have only the bottom triangle of the
matrix plot drawn.
329
CHAPTER 12 EDITING PLOT PROPERTIES
Contour Plots
(3D)
3D contour plots are identical to 2D contour plots except that the contours
are drawn in 3D space at the level that they represent. See section Contour/
Level Plots (2D) (page 311) for plot property details.
Data to Plot
(Gridded or
Irregular)
Contour plots can use gridded and irregular data. Gridded data can be
specified in rectangular matrix form or “stacked” where the Z data is given in
one long column, and X, Y and Z values are given in ascending order.
Irregular data is specified in a rectangular matrix form. You will get better
results if the data are distributed fairly uniformly in X and Y and do not
contain sharp “spikes” or “drops” in Z.
See section Preparing Data for Graphing (page 194) for details on
specifying gridded and irregular data.
Stack 3D Contour Choose this option to have the contour plot stacked in
3D space. If this option is not selected, contours are drawn in 2D space.
Line & Scatter
Plots (3D)
Data to Plot
For 3D line plots, specify the names or column numbers of your X, Y, and Z
columns; all columns must be the same length.
Line
For 3D line and scatter plots, you can specify standard line attributes (color,
style, and weight) and break options.
Pre-Sort Dataline plots Choose from "None", "X,Y, Z on X", "X,Y, Z on Y"
and "X,Y, Z on Z" to pre-sort the data before drawing.
Drop Line Attributes Specify whether to have lines drawn from each data
point to a specified plane, and specify standard line attributes (color, style,
and weight). Specify None for the Line Style to have no drop lines drawn.
Drop lines help viewers distinguish which points lie above the specified
plane, and which lie below.
Base Line Level Specify the Z level of the drop line plane. For example, if
your Z data ranged from -10 to 10, you could specify a baseline level of zero
to see how many data points lie above and below the zero plane.
The dropped line for each data point is drawn to a length that reaches the
specified base line level. Drop lines are automatically drawn to the specified
plane.
Symbol
330
For 3D line and scatter plots, you can specify standard symbol attributes
(style, color, height, line weight, and frequency).
PLOT PROPERTIES
Use Text as Symbol Choose whether to use a user-specified string or column
of text in any font as plotting symbols.
Text to Use Choose from Specified Text, x, y, z, w or Other Column. Choose
Specified Text to type text into the Symbol Text box and use it for every
symbol on the graph. Choose one of the column options to use a column of
text as symbols.
Symbol Text Specify the text to be used as a symbol.
Column Specify a column of text to use.
Data Set Specify the data set containing the column of text.
Font Choose a font type for the text.
Bold, Italics, Underline Specify text formatting options.
Vary Symbols
You can add extra dimensions to line and scatter plots by varying symbol sizes
and colors.
Vary Size By Choose from None, x, y, z, w or Other Column.
Minimum Height Specify the minimum size for the symbol.
Maximum Height Specify the maximum size for the symbol.
Column Choose a column from the list.
Data Set Choose a data set from the list.
You can also show an extra dimension of data by varying symbol colors. As
with varying size, the color of the symbols is determined by the relative value
of a third column. The colors are specified as a range, or as a list of special
colors.
Vary Color By Choose from None, x, y, z, w or Other Column.
Colors To Use Choose from Range or Special.
Minimum Color Minimum color in the shading range.
Maximum Color Maximum color in the shading range.
Column Choose a column from the list.
Data Set Choose a data set from the list.
Special Colors Specify custom colors.
Regression
Draw Plane Choose whether to display a regression plane.
#X and #Y Grids Specify the number of X and Y grid lines. The density for
the regression plane grid depend on the values specified here. The higher the
values, the denser the grid.
331
CHAPTER 12 EDITING PLOT PROPERTIES
Plane Attributes Specify the line color, style, and weight for the lines used to
draw the regression plane.
Regression Plots
(3D)
Regression plots are a special case of 3D line and scatter plots. You can
automatically create a regression plot by selecting data and choosing one of
the Regression buttons on the plot palette. Clicking one of these buttons
specifies the Draw Plane option on the Regression page of the plot property
dialog.
Typically the Line and Symbol Styles are set to None when a regression plane
is being drawn.
Surface Plots
Data to Plot
(Gridded and
Irregular Data)
Surface plots can use gridded and irregular data. Gridded data can be
specified in rectangular matrix form or “stacked” where the Z data is given in
one long column, and X, Y and Z values are given in ascending order.
Irregular data is specified in a rectangular matrix form. You will get better
results if the data are distributed fairly uniformly in X and Y and do not
contain sharp “spikes” or “drops” in Z. If only X and Y are specified and they
are of equal lengths, a 2D histogram will be computed for the Z values.
See section Preparing Data for Graphing (page 194) for details on
specifying gridded and irregular data.
Lines
For 3D surface plots, you can specify line style and weight, and cropping
information. Additional options are:
Draw Mesh Choose whether to draw the surface mesh. This is useful when
you want a color-filled surface without a mesh drawn.
Mesh Attributes Specify the line style, top color, bottom color, and line
weight for the surface mesh. The bottom is the underside of the surface; the
top is the upper side of the surface.
Draw Bottom, Draw Top Specify whether to draw the bottom and top of
the 3D surface. The bottom is the underside of the surface; the top is the
upper side of the surface.
Hidden Line Removal Specify whether to have hidden line removal. If you
choose No, overlapping portions of the surface are transparent instead of
opaque.
Base Style, Color, Weight Specify the line style, color, and weight of the base
of the surface. The base is the foundation of the surface. If no base is drawn,
the surface appears to be floating in mid-air.
332
PLOT PROPERTIES
Fills
You can specify color draping options for bands or grids on a surface plot.
You can let S-PLUS interpolate shading between two specified colors or you
can use a column of colors from a Data window. You can create a surface plot
with color draping automatically by selecting data and choosing one of the
surface draping buttons on the Plots 3D palette.
You can specify your own color draping options by creating a surface plot and
specifying the following options on the Fills page of the plot property dialog.
Fill Surface Choose this option to have the surface mesh filled with one or
more colors.
Fill Type Choose a method to specify the colors. Choose Solid to specify a
single color. Choose image colors to use the color scheme specified on the
colors page of the Graph sheet property dialog. Choose one of the Color
Range options to have S-PLUS shade the surface between the specified colors.
Choose Special Colors to specify customized colors in the Special Colors
dialog. Choose Color Numbers Column to specify a column of color
numbers in a Data window.
Choose Color Numbers Column to specify a column of colors in a data set.
For example, if you have three color numbers specified in your color column
(for example, 1, 5, 7), the surface will be drawn in the three different colors
according to height. The lowest third will be drawn in the first color (blue),
the next highest third will be drawn in the second color (magenta), and the
highest third will be drawn in the third color (white).
The IBM color numbers range from 0 to 15. You can also specify 16
additional custom colors and shades between 5 colors (4 intervals) for a total
of 64 colors. To specify custom colors choose Sheet from the Format menu,
click on the Color page, and click on the Edit Colors button. Custom colors
specified here will appear in all color lists for the current Graph sheet. To save
the custom colors for use with all subsequent Graph sheets you can save the
Graph sheet defaults. Right-click on the Graph sheet and choose Save Graph
Sheet Properties as Default from the shortcut menu.
Fill Color For a solid fill type, specify a single color for filling the 3D surface
mesh.
Data to Vary Colors By The colors in the surface are varied by the column
of data specified here. Choose to vary the colors by the X, Y, Z, or W data
columns, or specify Other Column to select a column not being plotted. If
you choose Other Column, specify the name and data set below.
Column Specify the column to determine the variation of colors.
Data Set Specify the data set containing the data column.
Number of Colors Specify the number of color intervals to be used in the
fill. A maximum of 64 colors are available for the color range choices.
333
CHAPTER 12 EDITING PLOT PROPERTIES
Increment Multiple Specify a multiplier for the increment in a color range.
A multiplier greater than one results in greater variation in the color bands
the higher the Z value. For example, for a multiplier of 1.1, your surface will
be shaded more heavily with the start color and less with the end color.
Fill Method Choose to fill the surface in Bands (contours) or Grids.
Start/Middle/End Color Specify the boundary colors for the shading ranges.
S-PLUS interpolates shading between the specified colors.
Special Colors If the Fill Type is set to Custom Colors you can specify
custom colors in the standard Color dialog. A maximum of 16 special colors
are available. Specify the number of custom colors to use in the Number of
Colors field.
Color Column Specify a column of color numbers.
Data Set Choose a data set containing the color numbers.
Grids
#X and #Y Data Grids Specify the actual number of X and Y grids. If you
choose Auto, S-PLUS determines the number of grids from the number of
rows and columns in Z, or by the number of X and Y values. If the X and Y
data specifications are left blank and the data are in one long column, the
number of X and Y grids corresponding to the Z data must be specified here.
# Output Grids Specify the desired number of X and Y grids to be displayed
on the surface. If the number of output grids exceeds the number of data
grids, a 3D spline will be used.
X and Y Minimum and Maximum Specify the range of X and Y for which
you want the surface drawn. When Auto is specified, the minimum and
maximum values in the source X and Y columns are used.
Z Minimum and Maximum Specify the range of Z for which you want the
surface drawn. When Auto is specified, the minimum and maximum values
in the source Z column are used. Specify a smaller range of Z to draw a
subsample of the data.
Grid Data Specify No if your data columns are already gridded. Specify Yes if
your data columns are irregular. If you choose Auto, S-PLUS will determine if
the data are gridded or irregular. If the data are irregular, S-PLUS will grid the
data automatically.
Algorithm Bivariate uses the interp function to compute a bivariate
interpolation for irregular grids. The triangulation scheme used by interp
works well if x and y have similar scales, but will appear stretched if they have
very different scales. The spreads of x and y must be within four orders of
magnitude of each other for interp to work. It uses a cell search algorithm
internal to the graphics. It essentially searches for the three points nearest to
each grid point, and then finds where the plane through these points
334
PLOT PROPERTIES
intersects the vertical line that goes through the grid point (that is, the line
perpendicular to the x-y plane at the grid point). This intersection is used as
the estimate of the height of the surface at this point.
Weighted Average Used only for the internal algorithm. S-PLUS will
calculated a weighted average of all points that lie within each grid cell before
interpolating the grid height. If your irregular data has many irregularities,
using the weighted average method may smooth them out within each grid
cell. As a result, the weighted average method slows down plotting, but
produces a smoother contour. If the average number of data points within
each cell is less than three, there is not likely to be any advantage to using
weighted averaging.
Extrapolate Used only for the bivariate algorithm. If checked, data points
will be extrapolated outside of the convex hull determined by the data points
filling the entire computed grid. If not checked, only the area of the plot
corresponding to the convex hull of the original data will be drawn. The
internal algorithm always extrapolates.
%Pts Partial Der. Used only for the bivariate algorithm. Percentage of
additional points to be used in computing partial derivatives at each data
point. If set to 0, partial derivatives are not used. The implied number of data
points must be at least 2 but smaller than the number of input data points.
3D Bars
Draw Bars Choose whether to draw 3D bars. If this option is not selected, a
3D surface plot is drawn.
X and Y Bar Width Specify the width of the X and Y bars as a fraction of the
grid interval. For example, an X bar width of 0.75 specifies that the bars
should occupy 3/4 of each grid interval in the X dimension with a gap
between bars of 1/4 of the interval.
Bar Charts (3D)
3D bar charts are constructed just like 3D surface plots except that they have
bars drawn straight down from the grids. As a result, there are no By Bar
specifications available for 3D bar charts.
You can create a 3D bar chart by selecting data and choosing the 3D Bar
Chart button on the Plots 3D palette. This automatically specifies the Draw
Bars and X and Y Bar Width options on the 3D Bars page of the property
dialog. If these are not specified, a surface plot is drawn.
Spline Plots (3D) 3D spline plots are surface plots that are smoothed using cubic spline
interpolation.
You can create a 3D Spline by selecting data and choosing the Spline button
on the Plots 3D palette. This automatically specifies the desired number of X
and Y Data Grids to be displayed on the surface. A spline plot is created if the
# Output Grids exceeds the number of Data Grids.
335
CHAPTER 12 EDITING PLOT PROPERTIES
336
EXPORTING GRAPHS,
PRINTING, AND SENDING
MAIL
Selecting a
Printer
13
Printing Sheets and Scripts
337
Sending Electronic Mail
338
Exporting Graph Sheets to Different File Formats
339
Before you can print your graphs in S-P LUS, you must specify the printer or
plotter your system will be using (your printer selection can be changed at
any time). First use the Windows Control Panel to install a printer or number
of printers. Once a printer is installed, you can change printers easily with
Print Setup in S-PLUS. For more information on installing printers, see your
Windows documentation. S-PLUS uses standard Windows Print Setup and
Print dialogs.
To select a printer
1. From the File menu, choose Print Setup.
2. Select a printer from the list of printers installed on your system.
3. Choose the OK button to save your printer selection and exit Print
Setup.
Selecting a
Plotter
In order to print to a plotter, the plotter driver must first be installed using
the Windows Control Panel, using the same method as installing a printer
driver. To change specific plotter specifications, choose Print Setup and click
on the Options button.
Printing Sheets
and Scripts
You can print S-PLUS Graph sheets, Data windows, Report files, and scripts
using the Print button or the Print dialog.
337
CHAPTER 13 EXPORTING GRAPHS, PRINTING, AND SENDING MAIL
Using the Print Button
w
Click on the Print button on the Standard toolbar. S-PLUS will
immediately print the currently selected window using the current
settings in Print Setup.
To print using the Print Dialog
1. From the File menu, choose Print.
2. In the Print dialog choose the options that you want.
3. Choose OK to start printing.
To cancel printing, click on the Cancel button or press ESC.
Graph Sheet
Printing Options
Print to File Choose this option to have your Graph sheet printed to a file
instead of directly to a printer. When you accept the Print dialog, you will be
prompted to specify a file name.
Data Window
Printing Options
Margins Specify the margins for the data window on the output page.
Print Column Headings Choose whether to have column headings printed
on each page of your Data window. Column headings are printed at the top
of each page.
Print Row Headings Choose whether to have row headings printed on each
page of your Data window, on the left side.
Print Grid Lines Choose whether to print grid lines on each page of your
Data window.
Sending
Electronic Mail
System Requirements
To use document mailing, you need one of the following:
• Microsoft Exchange (or other mail system compatible with the
Messaging Application Programming Interface [MAPI].
• Lotus cc:Mail (or other mail system compatible with Vendor
338
EXPORTING GRAPH SHEETS TO DIFFERENT FILE FORMATS
Independent Messaging [VIM].
Note
Document mailing may not work across electronic mail gateways.
To Mail a Document
1. From the File menu, choose Send.
2. Complete the message information in your mail system, and then
send the message.
For more information, refer to the documentation for your specific mail
application.
Troubleshooting
The Send command does not appear on the File menu
• Make sure you have installed Microsoft Exchange on your system or
any mail system compatible with the Messaging Application
Programming Interface [MAPI], or Lotus cc:Mail or any mail system
compatible with Vendor Independent Messaging [VIM].
• If you have installed Microsoft Exchange or a compatible mail
system, on Windows 3.1, make sure the WIN.INI file contains the
following lines, or add them:
[MAIL]
MAPI=1
• If you have installed Lotus cc:Mail or a compatible mail system,
make sure MAPIVI32.DLL and MAPIVITK.DLL are in the
Windows System folder.
Exporting
Graph Sheets
to Different
File Formats
You can export your Graph sheets to a variety of file formats for use in other
applications. See the chapter Exchanging Objects with Other Applications for
more information on S-PLUS's OLE capabilities.
To export a Graph sheet to a different file format
1. Make sure the Graph sheet you want to export is the current Graph
339
CHAPTER 13 EXPORTING GRAPHS, PRINTING, AND SENDING MAIL
sheet (its title bar is highlighted).
2. From the File menu, choose Export Graph. Choose the desired file
type in the Save as Type box and type a file name in the File Name
box.
3. Choose Save to save the sheet.
Exporting to
Encapsulated
PostScript Files
Two options for exporting graphs to EPS files
• The first EPS option in the export list uses a traditional export filter
and includes a TIFF representation of the graph. It is listed as “EPS
w/ TIF Header (*.EPS)”. The TIFF representation allows you to see
the graph when you place it in other Windows applications but will
increase the file size substantially. The TIFF representation is used
only for screen viewing; the graph will be printed using
Encapsulated PostScript resolution.
• The second EPS export option in the export list uses a traditional
export filter and is listed as “EPS (*.EPS)”. It does not include a
TIFF representation of the graph so it produces smaller EPS files.
Restrictions
340
You can print only one page of a multi-page document at a time.
USING THE STATISTICS
MENUS AND DIALOGS
Introduction to Statistics Menus and Dialogs
Dialog Fields
Plotting from the Statistics Dialogs
Saving Results From an Analysis
S-PLUS Functions Called by Statistics Dialogs
Modifying the Statistics Dialogs
Introduction
to Statistics
Menus and
Dialogs
14
341
342
343
343
344
345
Much of the statistical functionality of S-PLUS can be accessed through the
Data and Statistics options on the main menu. The Data menu includes
dialogs for tabulating data, calculating distribution functions, and generating
random samples and random numbers. The Statistics menu includes dialogs
for creating data summaries, performing hypothesis tests, and fitting
statistical models. Many of the dialogs consist of tabbed pages that allow for a
complete analysis, including model fitting, plotting, and prediction. Each
dialog has a corresponding function that is executed using dialog inputs as
values for function arguments. Usually it is only necessary to fill in the first
page of a tabbed dialog to launch a function call. There are several common
controls that govern dialog execution:
OK button
Click here to accept the current state of the dialog, execute its corresponding
function, and dismiss the dialog.
Cancel button
Click here to dismiss the dialog without executing its corresponding
function. The state of the dialog is not saved.
Apply button
Click here to accept the current state of the dialog, execute its corresponding
function, and keep the dialog open.
Rollback arrows
Click these to move through previous states of the dialog which were saved
when OK or Apply were clicked. These states are not saved between sessions.
341
CHAPTER 14 USING THE STATISTICS MENUS AND DIALOGS
Help button
Click here to open a help page for the dialog. To get help for functions the
dialog calls, see the help files for the functions listed at the end of dialog help.
Dialog Fields
Each dialog is composed of fields that correspond to arguments in an S-PLUS
function. Dialog fields consist of a variety of control types, including edit
boxes, drop-down lists, multi-select lists, check boxes, and radio buttons.
Some fields are required while others are optional. Fields corresponding to
optional arguments generally contain appropriate defaults; these may be
modified. Some of the fields common to many dialogs are described in the
following paragraphs.
Many dialogs include a Data Frame field. This will be automatically filled
with the name of the data frame you have selected in the object browser or, if
you have a data editor window open and have selected any values in it, the
name of that data frame. To specify another data frame select another one
from the drop down list; the listed data frames are limited to those that have
been filtered by an object browser. Alternatively, directly type the name of a
data frame or any S-PLUS expression that evaluates to a data frame in the
field.
Some dialogs have a Variables field. This will be automatically filled with the
names of the columns of the data frame you have selected in the object
browser or data editor.
Some dialogs require a Formula. This will be automatically filled if you have
selected columns of a data frame in the object browser or data editor. The
first selected column is the response and the remaining columns are the
predictors. Some dialogs, such as Survival and Nonlinear Regression, require
a special formula and are not automatically filled in. If you do not want the
formula that automatically appears, you can type a different formula or use
the Create Formula button to bring up a Formula Builder that will build a
formula for you. See the chapter on the Formula Builders for details.
Most dialogs have a Save As field that corresponds to the name of the S-P LUS
object in which the results of the function call are saved. For most dialogs,
such as those for model fitting, the Save As name defaults to last.*, where * is
related to the type of model. In some dialogs, the Save As field is blank; by
default results are not saved.
Many of the modeling dialogs also have one or more Save In fields. The Save
In field corresponds to the name of a data frame in which model output is
saved. Examples include fitted values, residuals, predictions, and standard
errors.
342
PLOTTING FROM THE STATISTICS DIALOGS
Plotting from
the Statistics
Dialogs
Most of the statistics dialogs produce default plots that are appropriate for
the analysis. Many have several plot options, usually on a separate Plot tab.
By default, these plots are created using traditional S-PLUS graphics and as
such, they are not editable. To create editable plots, right-click on the data
part of the graph and choose Convert to Objects from the context menu. A
global option to create editable graphics by default can be set via the Options
menu. Select Options c Graph Options and check the Create Editable
Objects box. Editable graphics, however, generally take longer to render than
the traditional style graphics.
Each execution of a dialog will produce a new Graph sheet device by default.
This facilitates comparison of plots generated from multiple calls to a dialog,
or from calls to multiple dialogs. To override this action, select
Options c Graph Options from the main menu, and clear the Create New
Graphsheet check box in the Statistical Dialogs Plots group. Deselecting the
new graphsheet option prevents graphsheet proliferation.
If multiple plots are requested from within a dialog, each plot will be created
on a separate page of the graphsheet. To add subsequent plots from multiple
dialog calls, as pages of the current graphsheet, select Options c Graph
Options from the main menu then select Each Graph from the Auto Pages
drop-down list in conjunction with deselecting the Create New Graphsheet
check box.
Saving Results
From an
Analysis
On completion of the execution of a dialog function, the default or usernamed Save As object shows up in the Object Browser. For model objects,
such as the results from a linear regression, right-click context menus are
available. Right-click on the model object in the Object Browser to display
the related menu. Most menu choices correspond to the tabbed pages from
the dialog. This allows you to go back and do plotting and prediction for a
model without re-launching the entire dialog. An example for an lm (linear
343
CHAPTER 14 USING THE STATISTICS MENUS AND DIALOGS
model) object is shown in figure 14.1.
Figure 14.1: The right-click context menu shown for an lm object.
This context menu implementation allows for application of a diverse range
of functions to specific objects by right clicking on them, maximizing the
flexibility of the object-oriented environment of S-PLUS.
To create context menus, or to modify existing ones by adding more options,
refer to the chapter on Programming the User Interface in the S-PLUS
Programmer’s Guide.
S-PLUS
Functions
Called by
Statistics
Dialogs
344
The dialogs described in the following chapters correspond to calls to
individual S-PLUS functions. Most of them have a corresponding on-line
help file, which can be consulted for better understanding of their structure
and valid inputs for field entries.
Most of these functions act as wrappers to other S-PLUS functions which
embody a particular type of analysis. For example the Linear Regression
dialog allows the user to fit, plot, summarize, and do predictions from one
dialog, with calls to several key S-PLUS functions including lm, print.lm,
summary.lm, plot.lm, and predict.lm.
Modifying the
Statistics
Dialogs
The existing statistics dialogs can be modified, or new ones can be written.
Refer to the chapter on Programming the User Interface in the S-PLUS
Programmer’s Guide for details.
345
CHAPTER 14 USING THE STATISTICS MENUS AND DIALOGS
346
CREATING AND
MANIPULATING DATA
Introduction
15
New Data Object
348
Tabulate
349
Merge Two Data Frames
351
Random Sample Generation
353
Density, Cumulative Probability, or Quantile
355
Random Number Generation
358
In S-PLUS, data management and generation can be performed through the
default data menu. In this chapter each of the data menu items is described in
detail.
Refer to chapter 14, Using the Statistics Menus and Dialogs, for an
explanation of features common to most dialogs.
347
CHAPTER 15 CREATING AND MANIPULATING DATA
NEW DATA OBJECT
This dialog creates a new data frame, matrix, or vector. See the chapter on
Using Data windows for an explanation of the differences between these
three; generally data frames are recommended.
To create a new data frame, matrix, or vector:
Choose Data c New Data Object from the main menu. The dialog shown
below appears.
Select from the list and click OK. A Data window will open. Enter the data
for the new object.
348
TABULATE
TABULATE
This dialog creates a tabular summary of data from a data frame. Selected
columns of the data frame are identified as variables and the count of each
combination of variable values is returned. Numerical data can be optionally
binned before the counting occurs.
The table of the counts can be printed and also returned in a data frame that
is suitable for multi-panel conditioning plots. To obtain statistics and other
summary information, choose Statistics c Data Summaries c Crosstabulations
from the main menu.
To tabulate data:
Choose Data c Tabulate from the main menu. The dialog shown below
appears.
Data Data Frame
Select the data frame from which to select variables.
Variables
Select the variables to be tabulated. The counts of each combination of values
among the selected variables will be calculated.
c Tip…
Leave the Data Frame field blank and just type in the names of vectors in the Variables field for data
that is not in a data frame.
Options Maximum Unique Numeric Values
349
CHAPTER 15 CREATING AND MANIPULATING DATA
Enter a number. Numeric variables having more distinct values than this
number will be binned.
Number of Bins for Numeric Values
Enter a number. If a numeric variable is to be binned, it will be binned into
this many bins, each of equal width.
Results Print Results
Check here to display the table of counts in the designated output window.
Save As
Enter the name for the object in which to save the results of the analysis. If an
object with this name already exists, its contents will be overwritten.
This must be a valid S-PLUS object name—any combination of
alphanumeric characters that starts with an alpha character is allowed. The
only non-alphanumeric character allowed is the period “.”. Names are casesensitive, so X and x are different names. The default is last.table.
The number of columns in the data frame will be one more than the number
of variables selected in the Variables field. The number of rows will be the
number of unique combinations of values of the variables. The last column
will be named count and will contain the count of the observations having
the specified combination of variable values.
Related programming language functions:
table
350
MERGE TWO DATA FRAMES
MERGE TWO DATA FRAMES
This dialog combines data from two data frames into a single data frame.
To merge two data frames:
Choose Data c Merge from the main menu. The dialog shown below appears.
Data Frames Data Frame 1
Select the first data frame from the Data Frame 1 list box.
Data Frame 2
Select the second data frame from the Data Frame 2 list box.
Row Matching Match by
Select the method to use for matching rows. If "All Common Cols" is
selected, rows containing identical values on all columns with the same name
in both data frames will be merged. If "Row Names" is selected, rows with
identical row names in both data frames will be merged. If "Specified Cols"
is selected the Columns in D.F. 1 and Columns in D.F. 2 fields may be used
to specify columns to use for matching.
Columns in D.F. 1
Specify the names of the columns in Data Frame 1 to use for matching rows.
Columns in D.F. 2
Specify the names of the columns in Data Frame 2 to use for matching rows.
These column names must be ordered in parallel to the names in Columns in
D.F. 1 in order to specify which specified column in Data Frame 2 to match
351
CHAPTER 15 CREATING AND MANIPULATING DATA
against each specified column in Data Frame 1.
Include Non- Data Frame 1
Matched Rows in Check here to include rows unique to the first data frame.
Data Frame 2
Check here to include rows unique to the second data set.
If neither of the above boxes are checked, then the resulting data frame will
only contain rows common to both data frames. If just Data Frame 1 is
checked, then the result will contain common rows and those unique to the
first data frame. Similarly for the second check box. If both boxes are checked
then both common rows and unique rows will be included in the result.
Suffix for Non- By default, the suffixes“.1” and “.2” are used for common variables not used
Matching Common as matching variables in the first and second data frames, respectively. To
Cols change these defaults, enter new suffixes in D ata Frame 1 and Data Frame 2.
Results Save As
Enter the name for the object in which to save the results of the analysis. If an
object with this name already exists, its contents will be overwritten.
This must be a valid S-PLUS object name—any combination of
alphanumeric characters that starts with an alpha character is allowed. The
only non-alphanumeric character allowed is the period “.”. Names are casesensitive, so X and x are different names. Where appropriate, Save As defaults
to a name that starts with “last”. For example, “last.merge” is the most recent
merged data frame.
Show in Data Window
Check this box to display the new data frame in a Data Window.
Related programming language functions:
merge.data.frame, data.frame, cbind, rbind, match
352
RANDOM SAMPLE GENERATION
RANDOM SAMPLE GENERATION
This dialog generates random samples or permutes the observations held in a
data frame or vector.
To perform random sample generation:
Choose Data c Random Sample from the main menu. The dialog shown
below appears.
Sampling Data
Select a data frame from the drop down box, or enter an expression for a
vector. For example, enter either 100 or 1:100 to sample from the integers 1
through 100.
Sampling Prob.
Select the variable containing sampling probabilities or type in an expression
for a vector of probabilities. The default is equal probability.
Sample Size
Enter the size of sample. The default is the length of the vector, or the number
of rows in the data frame. To perform a random permutation of the data, use
this default and uncheck the Sample with Replacement field.
Options Sample with Replacement
Check here to sample with replacement. If this box is unchecked, once a value
has been sampled, it will not appear again. If it is checked the same value can
be selected twice.
Set Seed with
353
CHAPTER 15 CREATING AND MANIPULATING DATA
Enter a random number seed used in the random generation algorithm. When
this field has a value, rerunning the dialog in the same state will reproduce the
same data.
Results Save As
Enter the name for the object in which to save the results of the analysis. If an
object with this name already exists, its contents will be overwritten.
This must be a valid S-PLUS object name—any combination of
alphanumeric characters that starts with an alpha character is allowed. The
only non-alphanumeric character allowed is the period “.”. Names are casesensitive, so X and x are different names. Where appropriate, Save As defaults
to a name that starts with “last”. For example, “last.sample” is the most recent
sampling result.
Print Results
Check here to print results in the designated output window. The default is
not to print output to the screen, since output is typically somewhat long.
Related programming language functions:
sample, set.seed, .Random.seed
354
DENSITY, CUMULATIVE PROBABILITY, OR QUANTILE
DENSITY, CUMULATIVE PROBABILITY, OR QUANTILE
This dialog computes density values, cumulative probabilities, or quantiles
from a specified distribution.
To generate density, cumulative probability, or quantile:
Choose Data c Distribution Functions from the main menu. The dialog shown
below appears.
c Tip…
The dialog can take two input formats. One is to use a column in an existing data frame. The other is
to get density, probability, or quantile using a sequence of numbers.
355
CHAPTER 15 CREATING AND MANIPULATING DATA
Data Choose Use Data Frame when the input is from a data frame. Choose Create
Sequence to create a sequence of numbers with equal spaces.
Data Frame
Select a data frame from the drop down box. Its columns will be displayed in
the Variable drop down box.
Variable
Select the column of the data frame for which density, cumulative
probability, or quantile are calculated.
Starting Value
Enter the starting value of the sequence.
Ending Value
Enter the ending value of the sequence.
Number of values
Enter the number of points in the sequence.
Probability or Density
Quantile Check here to calculate the densities corresponding to the values of the
column chosen in Variable or the points of the sequence.
Cumulative Probability
Check here to calculate cumulative probabilities corresponding to the values
of the column chosen in Variable or the points in the sequence.
Quantile
Check here to calculate the quantiles corresponding to the values of the
column chosen in Variable or the points in the sequence.
c Tip…
When the data contain values of a random variable, check Density and/or Cumulative Probability.
When the data are probability values, check Quantile to compute quantiles that are random variates.
When Quantile is checked, both Density and Cumulative Probability are disabled. Similarly, Quantile
is disabled when either of the other two is checked.
Distribution
Select the distribution for the variable.
Parameters of the When a distribution is chosen, fields for those parameters associated with the
Selected distribution are enabled.
Distribution Enter the parameters of the hypothesized distribution. For example, if the
Cauchy distribution is chosen from the Distribution drop down box, the
Location and Scale are enabled.
356
DENSITY, CUMULATIVE PROBABILITY, OR QUANTILE
Results Save As
Enter the name for the object in which to save the results of the analysis. If an
object with this name already exists, its contents will be overwritten.
This must be a valid S-PLUS object name—any combination of
alphanumeric characters that starts with an alpha character is allowed. The
only non-alphanumeric character allowed is the period “.”. Names are casesensitive, so X and x are different names. Where appropriate, Save As defaults
to a name that starts with “last”. The default is “last.pdist”.
Print Results
Check here to print output in the designated output window.
Related programming language functions:
punif, dunif, qunif, pnorm, dnorm, qnorm
357
CHAPTER 15 CREATING AND MANIPULATING DATA
RANDOM NUMBER GENERATION
This dialog generates random numbers from a specified distribution.
To generate random numbers:
Choose Data c Random Numbers from the main menu. The dialog shown
below appears.
Sample Size
Enter the sample size.
Set Seed with
Enter a random number seed used in the random generation algorithm.
When this field has a value, re-running the dialog in the same state will
reproduce the same data.
Distribution
Select the distribution from which to generate the random sample.
358
RANDOM NUMBER GENERATION
Parameters of the Enter the parameters of the hypothesized distribution. For example, if the
Selected Cauchy distribution is chosen from the Distribution drop down box,
Distribution Location and Scale are highlighted. Enter the location and scale parameters
of the Cauchy distribution.
Results Save As
Enter the name for the object in which to save the results of the analysis. If an
object with this name already exists, its contents will be overwritten.
This must be a valid S-PLUS object name—any combination of
alphanumeric characters that starts with an alpha character is allowed. The
only non-alphanumeric character allowed is the period “.”. Names are casesensitive, so X and x are different names. Where appropriate, Save As defaults
to a name that starts with “last”. The default is “last.rdist”.
Print Results
Check here to print results in the designated output window.
Related programming language functions:
runif, rnorm, rexp
359
CHAPTER 15 CREATING AND MANIPULATING DATA
360
SUMMARIZING AND
EXPLORING DATA
16
Data Summaries
Summary Statistics
Contingency Table
Correlations and Covariances
362
365
368
Smoothing
Local Regression (LOESS) Smoothing
Supersmoother
Kernel Smoother
Spline Smoother
370
372
374
377
This chapter describes some dialogs to summarize data. These include dialogs
for computing mean, standard deviation, correlation, contingency tables and
so on. Users can plot data and get smooth curves to visualize relationships
between variables.
Refer to chapter 14, Using the Statistics Menus and Dialogs, for an
explanation of features common to most dialogs.
361
CHAPTER 16 SUMMARIZING AND EXPLORING DATA
SUMMARY STATISTICS
This dialog provides basic summary statistics for a data frame, matrix, or vector of data.
To generate summary statistics:
Choose Statistics c Data Summaries c Summary Statistics from the main
menu. The dialog shown below appears.
Data Data Frame
Select a data frame.
Variables
Select the columns of the data frame for which summary statistics will be
generated. To generate summary statistics for all columns, select (All
Variables). Making no selection has the same effect.
c Tip…
You can type into the Data Frame edit box the name of another S-PLUS object such as a vector or a
matrix. In the case of a matrix, the summary statistics will be computed for the columns.
Statistics Minimum
362
SUMMARY STATISTICS
Check this to generate the minimum value for each numeric column of the
data frame.
First Quantile
Check this to generate the first quantile value for each numeric column of the
data frame.
Mean
Check this to generate the mean value for each numeric column of the data
frame.
Median
Check this to generate the median value for each numeric column of the data
frame.
Third Quantile
Check this to generate the third quantile value for each numeric column of
the data frame.
Maximum
Check this to generate the maximum value for each numeric column of the
data frame.
Number of Rows
Check this to generate the number of rows value for each numeric column of
the data frame.
Number of Missing Rows
Check this to generate the number of missing values (NAs) in each numeric
column of the data frame.
Variance
Check this to generate the variance estimate for each numeric column of the
data frame.
Std. Deviation
Check this to generate the standard deviation value for each numeric column
of the data frame.
Total Sum
Check this to generate the sum of all numeric values in each column of the
data frame.
Summarize Categorical Variables
Check this to include summaries of the categorical variables (factors) in the
data frame. The corresponding summaries will be the factor levels and a
count of how many values in each level are in the factor column.
Summaries by Grouping Variables
Group Specify the names of grouping variables to calculate summaries by group.
Subgroups of data will be formed for each possible combination of the
363
CHAPTER 16 SUMMARIZING AND EXPLORING DATA
grouping variables.
Maximum Unique Numeric Values
Enter a number. Numeric grouping variables having more distinct values
than this number will be binned. Otherwise, one group will be formed for
each distinct value of the numeric variable.
Number of Bins for Numeric Values
Enter a number. If a numeric grouping variable is to be binned, it will be
binned into this many bins, each of equal width.
Results Print Results
Check here to display the table of counts in the designated output window.
Save As
Enter the name for the object in which to save the results of the analysis. If an
object with this name already exists, its contents will be overwritten.
This must be a valid S-PLUS object name—any combination of alphanumeric characters that starts with an alpha character is allowed. The only nonalphanumeric character allowed is the period “.”. Names are case-sensitive, so
X and x are different names.
If there are any columns of class factor in the data frame, then this object is
a list with two components, each of class “table”. If no columns are of class
“factor”, or if factor summaries were not requested, then this object is a list
with one component.
If grouping variables are specified, the result will be a list of class “by”, with
one component for each combination of grouping variables. The structure of
each component is determine by whether factors are present, as indicated in
the previous paragraph.
Related S-PLUS language functions:
by, min, median, mean, summary, var, max, print.table
364
CONTINGENCY TABLE
CONTINGENCY TABLE
This dialog performs a crosstabulation of a collection of factor variables held
in columns of a data frame.
To generate a contingency table:
Choose Statistics c Data Summaries c Crosstabulations from the main menu.
The dialog shown below appears.
Data Data Frame
Select a data frame.
Subset Rows with
Enter an S-PLUS expression which identifies the rows to use in the analysis.
To use all the rows in the data frame, leave this field blank. The expression
must evaluate to a vector of logical values (TRUE values are used, FALSE
values are dropped), or a vector of indices identifying the numbers of the
rows to use.
Examples:
Species == 'bear'only bears are used.
1:20 only the first 20 rows of the data are used.
Age >= 13 & Age < 20 only teenagers are used.
For more information on constructing logical expressions see the S-PLUS
Programmer’s Guide.
Treat Missing with
365
CHAPTER 16 SUMMARIZING AND EXPLORING DATA
Select an option to handle missing data:
• na.fail
If any missing values are encountered, the procedure
fails with an error.
• na.omit
Cases with NAs in any of the variables to be crosstabulated are omitted from the crosstabulation.
• na.include
The level NA is added to each factor before the
crosstabulation is performed.
It is also possible to enter a user-defined function here. If there are any missing values in the data to be crosstabulated, the data will be put into a data
frame and passed to this function.
Formula Factors
Select one or more columns to be used in the crosstabulation.
Counts Variable
Use this only if each row represents multiple observations. Select the column
which specifies the number of replications corresponding to each row.
Formula
When Factor or Counts Variable is updated, this field is automatically
updated. By default, all variables are used in the crosstabulation and each row
is taken as one observation. This is indicated by “~.” in Formula. This field
can also be edited manually.
c Tip …
If a data frame is open and active, then by default this data frame is used in the crosstabulation. If some
of its columns are highlighted, then by default these columns are used in the crosstabulation. If none of
its columns are highlighted, then by default all of its columns are used in the crosstabulation.
Results Save As
Enter the name for the object in which to save the results of the analysis. If an
object with this name already exists, its contents will be overwritten. This
object is of class crosstabs .
This must be a valid S-PLUS object name—any combination of
alphanumeric characters that starts with an alpha character is allowed. The
only non-alphanumeric character allowed is the period “.”. Names are casesensitive, so X and x are different names. Where appropriate, Save As defaults
to a name that starts with “last”. For example, “last.lm” is the most recent
linear regression model fit.
366
CONTINGENCY TABLE
Print Results
Check this to print the results in the designated output window.
Drop Unused Levels
Check this to suppress the display of any unused factor level in the
contingency table.
Show Cell Proportions
Check this to display in each cell the count as a proportion of the row total,
the column total, and the grand total.
Show Marginal Totals
Check this to display the row and column totals with the contingency table.
Run Chi-Square Test
Check this to perform a Chi-Square test.
Decimal Places
Enter the number of decimal places with which to display each proportion.
Related S-PLUS language functions:
crosstabs, print.crosstabs
367
CHAPTER 16 SUMMARIZING AND EXPLORING DATA
CORRELATIONS AND COVARIANCES
This dialog provides an easy way to compute correlations and covariance
matrices for numeric columns of a data frame or matrix.
To compute correlations and covariances matrices:
Choose Statistics c Data Summary c Correlations from the main menu. The
dialog shown below appears
Data Data Frame
Select a data frame.
c Tip …
You can type into the Data Frame edit box the name of another S-PLUS object such as a matrix. In that
case, estimates for the columns will be computed.
Variables
Select the columns for which correlations or covariance estimates will be
generated. To use all columns, either select (All Variables) or make no
selection.
Method to Handle Missing Values
Select from fail, omit, include, and available. See the helpfile for the S-PLUS
function cor for a detailed explanation of each selection.
Variance/Covariance
Check this to generate variances and covariances.
Correlation
Check this to generate correlations.
368
CORRELATIONS AND COVARIANCES
Fraction to Trim
Enter a number between 0 and 0.5, which is the proportion of cases to trim
before calculation of the correlations.
Results Save As
Enter the name for the object in which to save the results of the analysis. If an
object with this name already exists, its contents will be overwritten.
This must be a valid S-PLUS object name—any combination of
alphanumeric characters that starts with an alpha character is allowed. The
only non-alphanumeric character allowed is the period “.”. Names are casesensitive, so X and x are different names.
Print Results
Check this to print the results in the designated output window.
Related S-PLUS language functions:
cor, var
369
CHAPTER 16 SUMMARIZING AND EXPLORING DATA
LOCAL REGRESSION (LOESS) SMOOTHING
This dialog performs a locally-weighted regression smooth using k nearestneighbors at each iteration.
To perform loess smoothing:
Choose Statistics c Smoothing c Local Regression (loess) from the main
menu. The dialog shown below appears.
Data Data Frame
Select or enter the name of a data frame.
c Tip…
You can type into the Data Frame edit box any expression which evaluates to a data frame.
x Variable
Select the x variable.
y Variable
Select the y variable.
370
CORRELATIONS AND COVARIANCES
Options Smoothing (Span) Parameter
Select a number between 0 and 1 that will be used to control the amount of
smoothing. Smaller values result in less smoothing. Very small values close to
0 are not recommended.
Degree of Locally-fitted Polynomial
Select the overall degree of the locally-fitted polynomial; a 1 is locally-linear
fitting, and 2 is locally-quadratic fitting.
Family
Select either symmetric or gaussian. The symmetric option combines localfitting with a robustness feature that guards against distortion by outliers.
The gaussian option strictly employs local-fitting methods.
No. of Values Evaluated
Enter the number of points at which to evaluate the loess curve.
Results Save As
Enter the name for the object in which to save the results of the analysis. If an
object with this name already exists, its contents will be overwritten.
This must be a valid S-PLUS object name—any combination of
alphanumeric characters that starts with an alpha character is allowed. The
only non-alphanumeric character allowed is the period “.”. Names are casesensitive, so X and x are different names.
This object will be saved as a list with components named x and y.
Plot Loess Curve
Check this to generate a scatterplot with a corresponding loess curve.
Related S-PLUS language functions:
loess, loess.smooth, panel.smooth, scatter.smooth
371
CHAPTER 16 SUMMARIZING AND EXPLORING DATA
SUPERSMOOTHER
This dialog produces a smooth curve through the input data, using a
nonlinear, variable span smoother.
To perform scatterplot smoothing using the supersmoother:
Choose Statistics c Smoothing c Supersmoother from the main menu. The
dialog shown below appears.
Data Data Frame
Select or enter the name of a data frame.
c Tip…
You can type into the Data Frame edit box any expression which evaluates to a data frame.
x Variable
Select the x variable.
x Variable is periodic
Check this if the values of x Variable are in the range [0.0, 1.0] and have a
period of 1.
y Variable
Select the y variable.
Weights
Select a column in the data frame to specify weights to be applied to all
372
CORRELATIONS AND COVARIANCES
observations used in the smoothing. To weight all rows equally, leave this
blank.
Options Use Cross Validation to Set Span
Check this to specify that cross validation is to be used to automatically select
the variable spans used in the smoothing. Uncheck this box to allow setting
of the Smoothing Parameter.
Smoothing Span
Select a numeric value between 0 and 1 here to bypass automatic span
selection. This field is enabled only when Use Cross Validation to Set Span is
unchecked.
Bass Frequency
Enter a numeric value here to control the low frequency emphasis when
using cross validation. The larger the value (up to 10), the smoother the fit
from automatic span selection. Values less than 0 or greater than 10 are
essentially the same as 0.
Results Save As
Enter the name for the object in which to save the results of the analysis. If an
object with this name already exists, its contents will be overwritten. This
object will be saved as a list with components named x and y.
This must be a valid S-PLUS object name—any combination of
alphanumeric characters that starts with an alpha character is allowed. The
only non-alphanumeric character allowed is the period “.”. Names are casesensitive, so X and x are different names. Where appropriate, Save As defaults
to a name that starts with “last”. For example, “last.lm” is the most recent
linear regression model fit.
Plot Smooth
Check this to display a scatterplot with the smoothed curve.
Related S-PLUS language functions:
supsmu, lowess
373
CHAPTER 16 SUMMARIZING AND EXPLORING DATA
KERNEL SMOOTHER
This dialog estimates a probability density or performs scatterplot smoothing
using kernel estimates.
To perform kernel smoothing:
Choose Statistics c Smoothing c Kernel Smoother from the main menu. The
dialog shown below appears.
Data Data Frame
Select or enter the name of a data frame.
c Tip…
You can type into the Data Frame edit box any expression which evaluates to a data frame.
x Variable
Select the x variable.
y Variable
Select the y variable.
Smoothing Kernel
Options Select a smoothing kernel. Kernel specifications include:
374
CORRELATIONS AND COVARIANCES
• box
a rectangular box
• triangle
a box convolved with itself
• parzen
the parzen function (a box convolved with a triangle)
• normal
a gaussian density function.
The default smoothing kernel is box.
Bandwidth
Enter a numeric value for the kernel bandwidth smoothing parameter. All
kernels are scaled so the upper and lower quartiles of the kernel are 0.25 and
-0.25 when the bandwidth is 1. Larger values of bandwidth make smoother
estimates, while smaller values make less smooth estimates. The default
bandwidth is 0.5.
Points at Which to Minimum x
Compute Enter the minimum value of x at which to compute the estimate. The default
Estimates is the minimum x value.
Maximum x
Enter the maximum value of x to which to compute the estimate. The default
is the maximum x value.
Number of Points
Enter the number of points to smooth in the interval [Minimum x,
Maximum x]. The default is the number of points in Variable x.
Use Specified Values for Estimation
Check this to allow specification of a vector of x values. When this is
checked, the Vector of x’s edit box is enabled and the Minimum x, Maximum
x, and Number of Points edit boxes are disabled.
Vector of x Values
Enter the name of a vector to specify where the kernel estimate is computed.
For density estimates, the default is a sequence the length of Number of
Points, ranging from Minimum x to Maximum x. The default for regression
estimates is x. This field is enabled only when Use Specified Values for
Estimation is checked.
Results Save As
Enter the name for the object in which to save the results of the analysis. If an
object with this name already exists, its contents will be overwritten. This
object will be saved as a list with components named x and y.
This must be a valid S-PLUS object name—any combination of
375
CHAPTER 16 SUMMARIZING AND EXPLORING DATA
alphanumeric characters that starts with an alpha character is allowed. The
only non-alphanumeric character allowed is the period “.”. Names are casesensitive, so X and x are different names. Where appropriate, Save As defaults
to a name that starts with “last”. For example, “last.lm” is the most recent
linear regression model fit.
Plot Smooth
Check this to display a scatterplot with the kernel smooth.
Related S-PLUS language functions:
ksmooth, density, loess, smooth, supsmu
376
CORRELATIONS AND COVARIANCES
SPLINE SMOOTHER
This dialog fits a cubic B-spline smooth to the input data.
To perform spline smoothing:
Choose Statistics c Smoothing c Spline Smoother from the main menu. The
dialog shown below appears.
Data Data Frame
Select or enter the name of a data frame.
c Tip…
You can type into the Data Frame edit box any expression which evaluates to a data frame.
x Variable
Select the x variable.
y Variable
Select the y variable.
Weights
Select a column in the data frame to specify weights to be applied to all
observations used in the smoothing. To weight all rows equally, leave this
blank.
Options Deg. of Freedom
377
CHAPTER 16 SUMMARIZING AND EXPLORING DATA
Enter a number for the degrees of freedom = trace(S), where S is the
implicit smoother matrix. If both Degrees of Freedom and Smoothing
Parameter (spar) are specified, Smoothing Parameter (spar) is used unless it is
0, in which case Degrees of Freedom is used.
Smoothing Parameter (lamda)
Enter a numeric value for the coefficient of the integrated second squared
derivative penalty function. If the value of spar is greater than 0, it is used as
the smoothing parameter. By default, spar is 0 and Degrees of Freedom is
used to control the smoothing. If Degrees of Freedom is missing, crossvalidation is used to automatically select spar.
Cross Valid. Score
Choose either generalized or ordinary cross validation score. By default, the
generalized cross validation score is computed.
Use Unique x Values for Knots
Check this to use the unique values of x as knots. By default, a suitable fine
grid of knots is chosen, usually less in number than the number of unique
values of x.
Results Save As
Enter the name for the object in which to save the results of the analysis. If an
object with this name already exists, its contents will be overwritten.
This must be a valid S-PLUS object name—any combination of
alphanumeric characters that starts with an alpha character is allowed. The
only non-alphanumeric character allowed is the period “.”. Names are casesensitive, so X and x are different names.
It will be saved as a list consisting of the fitted smoothing spline evaluated at
the supplied data, some fitting criteria and constants, and a structure that
contains the essential information for computing the spline and its
derivatives for any values of x.
Plot Smooth
Check this to display a scatterplot with the Spline smooth.
Related S-PLUS language functions:
smooth.spline, predict.smooth.spline, print.smooth.spline
378
COMPARING SAMPLES
17
One Sample
One-Sample t Test
One-Sample Wilcoxon Test
One-Sample Kolmogorov-Smirnov Test
One-Sample Chi-Square Goodness-of-Fit Test
380
382
384
386
Two Samples
Two-Sample t Test
Two-Sample Wilcoxon Test
Two-Sample Kolmogorov-Smirnov Test
388
390
392
k Samples
One-Way Analysis of Variance
Kruskal-Wallis Rank Sum Test
Friedman Rank Sum Test
394
396
398
Counts and Proportions
Exact Binomial Test
Proportions Test
Fisher’s Exact Test
McNemar's Chi-Square Test
Mantel-Haenszel Chi-Square Test
Pearson's Chi-Square Test
Introduction
400
402
404
406
408
410
This chapter describes some dialogs to test hypotheses involving one sample
problems, two sample problems, k sample problems, and distributional
goodness-of-fit. These include dialogs for parametric and non-parametric
tests for continuous as well as discrete data.
Refer to chapter 14, Using the Statistics Menus and Dialogs, for an
explanation of features common to most dialogs.
379
CHAPTER 17 COMPARING SAMPLES
ONE-SAMPLE T TEST
This dialog performs a one-sample t test on data held in a data frame.
To perform one-sample t test:
Choose Statistics c Compare Samples c One Sample c t Test. The dialog
shown below appears.
Data Data Frame
Select a data frame.
Variable
Select the column to which the one-sample t test will be applied.
Hypotheses Null Hypoth.: Mean
Enter the assumed population mean of Variable.
Alternative Hypoth.
Select the alternative hypothesis. For example, to perform a one-sided test
against the alternative hypothesis that the mean of Variable is greater than the
null hypothesis mean, select greater.
Confidence Confidence Level
Interval Enter a number between 0 and 1 to be used as the confidence level.
Results Save As
Enter the name for the object in which to save the results of the analysis. If an
object with this name already exists, its contents will be overwritten.
This must be a valid S-PLUS object name—any combination of
380
ONE-SAMPLE T TEST
alphanumeric characters that starts with an alpha character is allowed. The
only non-alphanumeric character allowed is the period “.”. Names are casesensitive, so X and x are different names. Where appropriate, Save As defaults
to a name that starts with “last”. For example, “last.lm” is the most recent
linear regression model fit.
Print Results
Check this to print the results of the one-sample t test in the designated
output window.
Related S-PLUS language functions:
t.test
381
CHAPTER 17 COMPARING SAMPLES
ONE-SAMPLE WILCOXON TEST
This dialog performs a one-sample Wilcoxon Signed Rank test.
To perform a one-sample Wilcoxon test:
Choose Statistics c Compare Samples c One Sample c Wilcoxon Signed Rank
Test from the main menu. The dialog shown below appears.
Data Data Frame
Select a data frame.
Variable
Select the column to which the one-sample Wilcoxon test will be applied.
Hypotheses Null Hypoth.: Mean
Enter the assumed population mean of Variable.
Alternative Hypoth.
Select the alternative hypothesis. For example, to perform a one-sided test
against the alternative hypothesis that the mean of Variable is greater than the
null hypothesis mean, select greater.
Options Use Exact Distribution
Check this to use the exact distribution of the test statistic to compute the
p-value.
Continuity Correction
Check this to use a continuity correction in the normal approximation to the
distribution of the test statistics.
Results Save As
382
ONE-SAMPLE WILCOXON TEST
Enter the name for the object in which to save the results of the analysis. If an
object with this name already exists, its contents will be overwritten.
This must be a valid S-PLUS object name—any combination of
alphanumeric characters that starts with an alpha character is allowed. The
only non-alphanumeric character allowed is the period “.”. Names are casesensitive, so X and x are different names. Where appropriate, Save As defaults
to a name that starts with “last”. For example, “last.lm” is the most recent
linear regression model fit.
Print Results
Check this to print the results of the Wilcoxon test in the designated output
window.
Related S-PLUS language functions:
wilcox.test, t.test
383
CHAPTER 17 COMPARING SAMPLES
ONE-SAMPLE KOLMOGOROV-SMIRNOV TEST
This dialog performs a one-sample Kolmogorov-Smirnov Goodness-of-Fit
test of the empirical distribution against a hypothesized distribution.
To perform one-sample Kolmogorov-Smirnov test:
Choose
Statistics c Compare Samples c One Sample c Kolmogorov-Smirnov GOF from
the main menu. The dialog shown below appears.
Data Data Frame
Select a data frame.
Variable
Select the column for which the one-sample Kolmogorov-Smirnov test will
be applied.
Hypotheses Alternative Hypoth.
Select the alternative hypothesis. For example, to perform a one-sided test
384
ONE-SAMPLE KOLMOGOROV-SMIRNOV TEST
against the alternative hypothesis that the hypothesized distribution is greater
than the true distribution of the variable, select greater from the list box.
Hypothesized Dist.:
Select the hypothesized distribution for the variable.
Parameters of the When a hypothesized distribution is chosen, the parameters associated with
Selected the distribution are enabled. For example, if the Cauchy distribution is
Distribution chosen, the Location and Scale are enabled. Enter the location and scale
parameters of the Cauchy distribution.
Results Save As
Enter the name for the object in which to save the results of the analysis. If an
object with this name already exists, its contents will be overwritten.
This must be a valid S-PLUS object name—any combination of
alphanumeric characters that starts with an alpha character is allowed. The
only non-alphanumeric character allowed is the period “.”. Names are casesensitive, so X and x are different names. Where appropriate, Save As defaults
to a name that starts with “last”. For example, “last.lm” is the most recent
linear regression model fit.
Print Results
Check this to print the results of the Kolmogorov-Smirnov test in the
designated output window.
Related S-PLUS language functions:
ks.gof, chisq.gof, qqplot
385
CHAPTER 17 COMPARING SAMPLES
ONE-SAMPLE CHI-SQUARE GOODNESS-OF-FIT TEST
This dialog performs a one-sample chi-square goodness-of-fit test of the
distribution of a variable against a hypothesized distribution.
To perform a one-sample chi-square goodness-of-fit test:
Choose Statistics c Compare Samples c One Sample c Chi-Square GOF from
the main menu. The dialog shown below appears.
Data Data Frame
Select a data frame.
Variables
Select the column to which a one-sample chi-square test will be applied.
Options No. of Classes:
Enter the number of cells into which the observations are to be allocated
according to the hypothesized distribution for the variable. If Cut Points are
386
ONE-SAMPLE CHI-SQUARE GOODNESS-OF-FIT TEST
supplied, No. of Classes is set to the number of cut points minus 1.
Cut Points
Enter a vector of cut points for the cells.
No. of Par. Est.
Enter the number of parameters to be estimated from the data. This will
affect the number of degrees of freedom associated to the test statistic.
Hypotheses Hypothesized Dist.:
Select the hypothesized distribution for the variable.
Parameters of the When a hypothesized distribution is chosen, the parameters associated with
Selected the distribution are enabled. For example, if the Cauchy distribution is
Distribution chosen, the Location and Scale are enabled. Enter the location and scale
parameters of the Cauchy distribution.
Results Save As
Enter the name for the object in which to save the results of the analysis. If an
object with this name already exists, its contents will be overwritten.
This must be a valid S-PLUS object name—any combination of
alphanumeric characters that starts with an alpha character is allowed. The
only non-alphanumeric character allowed is the period “.”. Names are casesensitive, so X and x are different names. Where appropriate, Save As defaults
to a name that starts with “last”. For example, “last.lm” is the most recent
linear regression model fit.
Print Results
Check this to print the results of the chi-square goodness-of-fit test in the
designated output window.
Related S-PLUS language functions:
chisq.gof, ks.gof, qqplot
387
CHAPTER 17 COMPARING SAMPLES
TWO-SAMPLE T TEST
This dialog performs a two-sample t test on data held in a data frame.
To perform two-sample t test:
Choose Statistics c Compare Samples c Two Samples c t test from the main
menu. The dialog shown below appears.
Data Data Has a Grouping Variable
Check this if one column in the data frame is a grouping indicator that
categorizes cases into two groups. In this case, select the response from
Response Variable and the indicator from Grouping Variable.
Data Frame
Select a data frame.
x Variable
Select a column as the first sample, when the data frame does not have a
grouping indicator.
y Variable
Select another column as the second sample, when the data frame does not
388
TWO-SAMPLE T TEST
have a grouping indicator.
c Tip…
You can have a data frame containing a response variable and a grouping variable, or a data frame
with two samples in two columns.
Test Type of t Test
Choose Paired t for a paired t test; choose Two-sample t for an unpaired t
test.
Equal variances
This is enabled only when Two sample t is chosen. Check here if the two
samples are assumed to come from populations with equal variances.
Hypotheses In Null Hypoth.: Mean
Enter the difference between the assumed population means of Variable x
and Variable y.
Alternative Hypoth.
Select the alternative hypothesis. For example, to perform a one-sided test
against the alternative hypothesis that the mean of Variable x is greater than
the mean of Variable y, select greater from the list box.
Confidence Confidence Level
Interval Enter a number between 0 and 1 to be used as the confidence level.
Results Save As
Enter the name for the object in which to save the results of the analysis. If an
object with this name already exists, its contents will be overwritten.
This must be a valid S-PLUS object name—any combination of
alphanumeric characters that starts with an alpha character is allowed. The
only non-alphanumeric character allowed is the period “.”. Names are casesensitive, so X and x are different names. Where appropriate, Save As defaults
to a name that starts with “last”. For example, “last.lm” is the most recent
linear regression model fit.
Print Results
Check this to print the results of the two-sample t test in the designated
output window.
Related S-PLUS language functions:
t.test
389
CHAPTER 17 COMPARING SAMPLES
TWO-SAMPLE WILCOXON TEST
This dialog performs a two-sample Wilcoxon Rank Sum test, or a Wilcoxon
Signed Rank test.
To perform two-sample Wilcoxon test:
Choose Statistics c Compare Samples c Two Samples c Wilcoxon Rank Test
from the main menu. The dialog shown below appears.
Data Data Has a Grouping Variable
Check this if one column in the data frame is a grouping indicator that
categorizes cases into two groups. In this case, select the response from
Response Variable and the indicator from Grouping Variable.
Data Frame
Select a data frame.
x Variable
Select a column as the first sample, when the data frame does not have a
grouping indicator.
y Variable
Select another column as the second sample, when the data frame does not
390
TWO-SAMPLE WILCOXON TEST
have a grouping indicator.
c Tip…
You can have a data frame containing a response variable and a grouping variable, or a data frame
with two samples in two columns.
Test Type of Rank Test
Chose between Rank Sum and Signed Rank. The Signed Rank test is not
available when Data Has a Groups Variable is checked.
Hypotheses Null Hypoth.: Mean
Enter the difference between the assumed population means of Variable x
and Variable y.
Alternative Hypoth.
Select the alternative hypothesis. For example, to perform a one-sided test
against the alternative hypothesis that the mean of Variable x is greater than
the mean of Variable y, select greater from the list box.
Options Use Exact Distribution
Check this to use the exact distribution of the test statistic to compute the
p-value.
Continuity Correction
Check this to use a continuity correction in the normal approximation to the
distribution of the test statistics.
Results Save As
Enter the name for the object in which to save the results of the analysis. If an
object with this name already exists, its contents will be overwritten.
This must be a valid S-PLUS object name—any combination of
alphanumeric characters that starts with an alpha character is allowed. The
only non-alphanumeric character allowed is the period “.”. Names are casesensitive, so X and x are different names. Where appropriate, Save As defaults
to a name that starts with “last”. For example, “last.lm” is the most recent
linear regression model fit.
Print Results
Check this to print the results of the Wilcoxon test in the designated output
window.
Related S-PLUS language functions:
wilcox.test, t.test
391
CHAPTER 17 COMPARING SAMPLES
TWO-SAMPLE KOLMOGOROV-SMIRNOV TEST
This dialog performs a two-sample Kolmogorov-Smirnov goodness-of-fit test
of two distributions.
To perform a two-sample Kolmogorov-Smirnov test:
Choose
Statistics c Compare Samples c Two Samples c Kolmogorov-Smirnov GOF from
the main menu. The dialog shown below appears.
Data Data Has a Grouping Variable
Check this if one column in the data frame is a grouping indicator that
categorizes cases into two groups. In this case, select the response from
Response Variable and the indicator from Grouping Variable.
Data Frame
Select a data frame.
x Variable
Select a column as the first sample, when the data frame does not have a
grouping indicator.
y Variable
Select another column as the second sample, when the data frame does not
have a grouping indicator.
c Tip…
You can have a data frame containing a response variable and a grouping variable, or a data frame
with two samples in two columns.
392
TWO-SAMPLE KOLMOGOROV-SMIRNOV TEST
Results Save As
Enter the name for the object in which to save the results of the analysis. If an
object with this name already exists, its contents will be overwritten.
This must be a valid S-PLUS object name—any combination of
alphanumeric characters that starts with an alpha character is allowed. The
only non-alphanumeric character allowed is the period “.”. Names are casesensitive, so X and x are different names. Where appropriate, Save As defaults
to a name that starts with “last”. For example, “last.lm” is the most recent
linear regression model fit.
Print Results
Check this to print the results of the Kolmogorov-Smirnov test in the
designated output window.
Related S-PLUS language functions:
ks.gof, chisq.gof, qqplot
393
CHAPTER 17 COMPARING SAMPLES
ONE-WAY ANALYSIS OF VARIANCE
This dialog generates a simple analysis of variance table when there is a
grouping variable available for the data and this grouping variable defines
separate k-samples of data. No interactions are assumed among the main
effects; that is, the k samples are considered independent.
To perform a one-way analysis of variance:
Choose
Statistics c Compare Samples c k Samples c One-way ANOVA from the main
menu. The dialog shown below appears.
Data Data Frame
Select a data frame.
Response Variable
Select the column that contains the response variable. This must be numeric.
Grouping Variable
Select the column that indicates group membership for the response above.
This is usually a factor variable with k levels.
Results Save As
Enter the name for the object in which to save the results of the analysis. If an
object with this name already exists, its contents will be overwritten. The
saved object will have class aov.
This must be a valid S-PLUS object name—any combination of
alphanumeric characters that starts with an alpha character is allowed. The
only non-alphanumeric character allowed is the period “.”. Names are casesensitive, so X and x are different names.
Print Results
394
ONE-WAY ANALYSIS OF VARIANCE
Check this to print the results in the designated output window.
Related S-PLUS language functions:
aov, lm, menuOneway
395
CHAPTER 17 COMPARING SAMPLES
KRUSKAL-WALLIS RANK SUM TEST
This dialog performs a Kruskal-Wallis rank sum test on data following a oneway layout. This is a non-parametric alternative to a one-way analysis of
variance. See the on-line help for kruskal.test for details on the form of
the statistic used and assumptions of the test.
To perform a Kruskal-Wallis rank sum test:
Choose
Statistics c Compare Samples c k Samples c Kruskal-Wallis rank sum from the
main menu. The dialog shown below appears.
Data Data Frame
Select a data frame.
Response Variable
Select the column that contains the response variable. This must be numeric.
Grouping Variable
Select the column that indicates group membership for the response above.
This is usually a factor with k levels.
Results Save As
Enter the name for the object in which to save the results of the analysis. If an
object with this name already exists, its contents will be overwritten. The
saved object will have class htest.
This must be a valid S-PLUS object name—any combination of
alphanumeric characters that starts with an alpha character is allowed. The
only non-alphanumeric character allowed is the period “.”. Names are casesensitive, so X and x are different names.
Print Results
396
KRUSKAL-WALLIS RANK SUM TEST
Check this to print the results in the designated output window.
Related S-PLUS language functions:
kruskal.test, menuKruskal
397
CHAPTER 17 COMPARING SAMPLES
FRIEDMAN RANK SUM TEST
This dialog performs a Friedman rank sum test on unreplicated blocked data.
Data must be in the form of a two-way layout with factor variables for
"groups" and for "blocks" in a data frame. See the on-line help for
friedman.test for information on assumptions of the test and the null
hypothesis.
To perform a Friedman rank sum test:
Choose Statistics c Compare Samples c k Samples c Friedman rank sum from
the main menu. The dialog shown below appears.
Data Data Frame
Select a data frame.
Response Variable
Select the column that contains the response variable. This must be numeric.
Grouping Variable
Select the column that indicates group membership for the response above.
This must be a factor variable.
Blocking Variable
Select the factor column that indicates block membership for each response
value. This must be a factor variable.
Results Save As
Enter the name for the object in which to save the results of the analysis. If an
object with this name already exists, its contents will be overwritten. The
saved object will have class htest.
This must be a valid S-PLUS object name—any combination of
398
FRIEDMAN RANK SUM TEST
alphanumeric characters that starts with an alpha character is allowed. The
only non-alphanumeric character allowed is the period “.”. Names are casesensitive, so X and x are different names.
Print Results
Check this to print the results in the designated output window.
Related S-PLUS language functions:
friedman.test, print.htest, menuFriedman
399
CHAPTER 17 COMPARING SAMPLES
EXACT BINOMIAL TEST
This dialog tests hypotheses about the parameter p in a binomial model,
given the number of successes and the number of trials in the generating
experiment.
To perform an exact binomial test:
Choose Statistics c Compare Samples c Counts and Proportions c Binomial Test
from the main menu. The dialog shown below appears.
Data No. of Successes
Enter the number of observed successes.
No. of Trials
Enter the number of trials.
Test Hypotheses Hypothesized p
Enter the probability of success to be tested; the default is 0.5.
Alternative Hypoth.
Select the alternative hypothesis.
• two.sided
true parameter is not equal to p (default)
• less
true parameter is smaller than p
• greater
true parameter is greater than p.
Results Save As
400
EXACT BINOMIAL TEST
Enter the name for the object in which to save the results of the analysis. If an
object with this name already exists, its contents will be overwritten. The
saved object will have class htest.
This must be a valid S-PLUS object name—any combination of
alphanumeric characters that starts with an alpha character is allowed. The
only non-alphanumeric character allowed is the period “.”. Names are casesensitive, so X and x are different names
Print Results
Check this to print the results in the designated output window.
Related S-PLUS language functions:
binom.test, print.htest, menuBinom
401
CHAPTER 17 COMPARING SAMPLES
PROPORTIONS TEST
This dialog compares sample proportions against hypothesized values using
Pearson’s chi-square test statistic. See the on-line help for prop.test for
details on the assumptions of this test. Data can be but need not be in a data
frame.
To perform a test of proportions:
Choose Statistics c Compare Samples c Counts and Proportions c Proportions
Parameters from the main menu. The dialog shown below appears.
Data Data Frame
Select a data frame, although this is not required (see options below).
Successes Variable
Select the variable that contains the observed counts of successes. This
column must contain only nonnegative integers. This could also be a vector
or an S-PLUS expression that evaluates to a vector of integers.
Trials Variable
Select the variable that contains the corresponding number of trials. This
column must contain only positive integers. This could also be a vector or an
S-PLUS expression that evaluates to a vector of integers.
Hyp. p Variable
Select the variable that contains the hypothesized values for p, the
probabilities of success. This is not required and it will default to 0.5 for one
group. If more than one group the Null hypothesis is that the true probability
of success p is the same for all groups.
Alternative Hypoth.
402
PROPORTIONS TEST
Select the alternative hypothesis.
• two.sided
true parameter is not equal to p (default)
• less
true parameter is smaller than p
• greater
true parameter is greater than p.
Confidence Level
Enter the confidence level desired for the returned confidence interval. The
default of 0.95 yields a 95% confidence interval.
Apply Yates' Continuity Correction
Check this to correct for continuity. See the on-line help for prop.test for
an algebraic definition of the continuity correction.
Results Save As
Enter the name for the object in which to save the results of the analysis. If an
object with this name already exists, its contents will be overwritten. The
saved object will have class htest.
This must be a valid S-PLUS object name—any combination of
alphanumeric characters that starts with an alpha character is allowed. The
only non-alphanumeric character allowed is the period “.”. Names are casesensitive, so X and x are different names.
Print Results
Check this to print the results in the designated output window.
Related S-PLUS language functions:
prop.test, print.htest, menuProp
403
CHAPTER 17 COMPARING SAMPLES
FISHER’S EXACT TEST
This dialog tests the independence between the row and column variables of
a two-dimensional contingency table. The table is determined by two
classification variables in a data frame.
To perform Fisher’s exact test:
Choose Statistics c Compare Samples c Counts and Proportions c Fisher’s Exact
from the main menu. The dialog shown below appears.
Data Data Frame
Select a data frame.
Classification Variable One
Select the column from the data frame which offers the first classification or
grouping variable. This must be a factor or category.
Classification Variable Two
Select the column from the data frame which offers the second classification
or grouping variable. This must be a factor or category.
Results Save As
Enter the name for the object in which to save the results of the analysis. If an
object with this name already exists, its contents will be overwritten. The
saved object will have class htest.
This must be a valid S-PLUS object name—any combination of
alphanumeric characters that starts with an alpha character is allowed. The
only non-alphanumeric character allowed is the period “.”. Names are casesensitive, so X and x are different names.
404
FISHER’S EXACT TEST
Print Results
Check this to print the results in the designated output window.
Related S-PLUS Language Functions
fisher.test, print.htest, menuFisher
405
CHAPTER 17 COMPARING SAMPLES
MCNEMAR'S CHI-SQUARE TEST
This dialog performs McNemar's chi-square test on a two-dimensional
contingency table defined by two classification variables in a data frame.
To perform McNemar’s chi-square test:
Choose Statistics c Compare Samples c Counts and Proportions c McNemar’s
Chi-Square from the main menu. The dialog shown below appears.
Data Data Frame
Select a data frame.
Classification Variable One
Select the factor column that contains the first classification variable. It must
have at least 2 levels.
Classification Variable Two
Select the factor column that contains the other classification variable. This
variable must have the same number of levels as the first classification
variable.
Apply Continuity Correction
Check this to apply a correction for continuity. See the on-line help for
mcnemar.test for an algebraic definition of the continuity correction.
Results Save As
Enter the name for the object in which to save the results of the analysis. If an
object with this name already exists, its contents will be overwritten. The
saved object will have class htest.
This must be a valid S-PLUS object name—any combination of
406
MCNEMAR'S CHI-SQUARE TEST
alphanumeric characters that starts with an alpha character is allowed. The
only non-alphanumeric character allowed is the period “.”. Names are casesensitive, so X and x are different names.
Print Results
Check this to print the results in the designated output window.
Related S-PLUS language functions:
mcnemar.test, print.htest, menuMcnemar
407
CHAPTER 17 COMPARING SAMPLES
MANTEL-HAENSZEL CHI-SQUARE TEST
This dialog performs a Mantel-Haenszel chi-square test on a threedimensional contingency table defined by three classification variables in a
data frame. See on-line help for mantelhaen.test for more details.
To perform a Mantel-Haenszel chi-square test:
Choose Statistics c Compare Samples c Counts and Proportions c MantelHaenszel Chi-Square from the main menu. The dialog shown below appears.
Data Data Frame
Select a data frame.
Classification Variable One
Select the factor column that contains the first classification variable. This
variable must have exactly two levels.
Classification Variable Two
Select the factor column that contains the second classification variable. This
variable must also have exactly two levels.
Classification Variable Three
Select the factor column that contains the third classification variable.
Apply Continuity Correction
Check this if the results to apply a correction for continuity. See the on-line
help for mantelhaen.test for an algebraic definition of the continuity
correction.
408
MANTEL-HAENSZEL CHI-SQUARE TEST
Results Save As
Enter the name for the object in which to save the results of the analysis. If an
object with this name already exists, its contents will be overwritten. The
saved object will have class htest.
This must be a valid S-PLUS object name—any combination of
alphanumeric characters that starts with an alpha character is allowed. The
only non-alphanumeric character allowed is the period “.”. Names are casesensitive, so X and x are different names.
Print Results
Check this to print the results in the designated output window.
Related S-PLUS language functions:
mantelhaen.test, print.htest, menuMantelhaen
409
CHAPTER 17 COMPARING SAMPLES
PEARSON'S CHI-SQUARE TEST
This dialog performs Pearson's chi-square test on a two-dimensional
contingency table. See the on-line help for chisq.test for details on the
assumptions of the test and the null hypothesis.
To perform Pearson’s chi-square test:
Choose Statistics c Compare Samples c Counts and Proportions c Chi-Square
Test from the main menu. The dialog shown below appears.
Data Data Frame
Select a data frame.
Classification Variable One
Select the factor column that contains the first classification variable. It must
have at least two levels.
Classification Variable Two
Select the factor column that contains the second classification variable. This
variable must have at least two levels.
Apply Yates' Continuity Correction
Check this if the results to apply Yates’ correction for continuity. See the online help for chisq.test for an algebraic definition of the continuity
correction.
Results Save As
Enter the name for the object in which to save the results of the analysis. If an
object with this name already exists, its contents will be overwritten. The
saved object will have class htest.
410
PEARSON'S CHI-SQUARE TEST
This must be a valid S-PLUS object name—any combination of
alphanumeric characters that starts with an alpha character is allowed. The
only non-alphanumeric character allowed is the period “.”. Names are casesensitive, so X and x are different names.
Print Results
Check this to print the results in the designated output window.
Related S-PLUS language functions:
chisq.test, print.htest, menuChisquare
411
CHAPTER 17 COMPARING SAMPLES
412
FITTING STATISTICAL
MODELS
18
Regression
Linear Regression
Nonlinear Least Squares Regression
Logistic Regression
Log-linear Regression
Robust LTS Regression
Local Regression
Stepwise Linear Regression
414
421
426
427
428
433
440
Analysis of Variance
Fixed Effects Analysis of Variance
Random Effects Analysis of Variance
444
450
Advanced Models
Generalized Linear Models
Generalized Additive Models
Tree Models
456
465
473
Other Methods
Multiple Comparisons
Compare Models
Introduction
480
485
S-PLUS has many functions to fit statistical models. This chapter describes
dialogs to run linear models, non-linear models, generalized linear models,
and many other robust and non-parametric approaches for modeling. There
are also dialogs to compare models and to perform mulitple comparisons.
Refer to chapter 14, Using the Statistics Menus and Dialogs, for an
explanation of common features, and also to chapter 20, Building Formulas.
413
CHAPTER 18 FITTING STATISTICAL MODELS
LINEAR REGRESSION
This dialog fits linear regression models via least squares. It calls the lm
function and its print, summary, plot and predict methods.
To perform linear regression:
Choose Statistics c Regression c Linear from the main menu. The dialog
shown below appears.
Model Page
Data Data Frame
Select a data frame.
c Tip…
You can type into the Data Frame edit box any expression which evaluates to a data frame.
Weights
Enter the column that specifies weights to be applied to all observations used
in the linear regression. To weigh all rows equally, leave this blank.
Subset Rows with
414
LINEAR REGRESSION
Enter an S-PLUS expression which identifies the rows to use in the analysis.
To use all the rows in the data frame, leave this field blank. The expression
must evaluate to a vector of logical values (TRUE values are used, FALSE
values are dropped), or a vector of indices identifying the numbers of the
rows to use.
Examples:
Species == 'bear'
only bears are used.
1:20
only the first 20 rows of the data are used.
only teenagers are used.
For more information on constructing logical expressions see the S-PLUS
Programmer’s Guide.
Age >= 13 & Age < 20
Omit Rows with Missing Values
Check this box to omit from the analysis any rows in the data frame that
contain missing values for any of the variables in the model.
If this box is not checked, S-PLUS will report an error and halt the routine if
any row is found to have a missing value in any of the terms in the model.
Formula Formula
Enter a formula specifying the desired model. The formula specifies which
regression model is to be fit. In its simplest form a formula consists of the
response variable, a tilde (~), and a list of predictor variables separated by
“+”s. An intercept is automatically included by default. For example: Fuel ~
Weight + Disp. fits a regression model with Fuel as the response and
Weight and Disp. as predictors.
For more information on formulas see the chapter on Building Formulas.
Create Formula
Click this to open a formula builder dialog used to construct a formula
specifying the desired model. See the chapter Building Formulas for more
information.
Save Model Object Save As
Enter the name for the object in which to save the results of the analysis. If an
object with this name already exists, its contents will be overwritten.
This must be a valid S-PLUS object name—any combination of
alphanumeric characters that starts with an alpha character is allowed. The
only non-alphanumeric character allowed is the period “.”. Names are casesensitive, so X and x are different names. The default is “last.lm”.
The saved object will have class “lm”. See the on-line help for lm.object for
415
CHAPTER 18 FITTING STATISTICAL MODELS
more information about the saved object.
Results Page
Printed Results Short Output
Check here to display a short summary of the model fit. This includes the
model formula, the regression coefficients, the residual standard error and the
degrees of freedom.
Long Output
Check here to display a detailed summary of the model fit. This includes the
model formula; a five number summary of the residuals; the coefficients;
their standard errors, t-statistics and p-values; the residual standard error and
the degrees of freedom; the multiple R-Squared value; and the F test for the
overall model with its degrees of freedom and p-value.
ANOVA Table
Check here to display an analysis of variance table. The sums-of-squares in
the table are for the terms added sequentially (Type I sums-of-squares).
Correlation Matrix of Estimates
Check here to display the correlation matrix of the regression coefficients.
This is only available if the Long Output is selected.
Saved Results Save In
Enter the name of an S-PLUS data frame in which fitted values and residuals
of the analysis are to be saved. If an object with the name you enter does not
already exist (in database 1), then it will be created. If you enter the name of a
data frame that already exists (in database 1) and this data frame has the same
416
LINEAR REGRESSION
number of rows as the number of observations used in the model fit, then the
saved values are appended to this data frame. This allows you to keep fitted
values from a model with the original data or to keep the residuals from a
number of different models for the same data in one data frame. If you give
the name of an existing S-PLUS object that is not a data frame or is not the
appropriate size, then a warning is issued and a modified name is used.
c Tip…
You may want to specify the same data frame as on the Model page. This allows easy plotting of the
fitted values or residuals with the original data.
Fitted Values
Check this to save the fitted values from the model in the object specified in
Save In.
Residuals
Check this to save the residuals from the model in the object specified in Save
In. These are the ordinary residuals; the response minus the fitted value.
Plot Page
Plots Residuals vs Fit
Check this to display a plot of the residuals versus the fitted values.
Sqrt Abs Residuals vs Fit
Check this to display a plot of the square root of the absolute values of the
417
CHAPTER 18 FITTING STATISTICAL MODELS
residuals versus the fitted values. This plot is useful for checking for the
constant variance assumption of the model.
Response vs Fit
Check this to display a plot of the response variable versus the fitted values.
The line y = x is also drawn on the graph.
Residuals Normal QQ
Check this to display a Normal quantile-quantile plot of the residuals.
Residual-Fit Spread
Check this to display a residual-fit spread plot. This is a visual analog of the
multiple R-squared statistic. It compares the spread of the fitted values to the
spread of the residuals.
Cook’s Distance
Check this to display a plot of Cook’s distance values versus the observation
number.
Options Include Smooth
Check this to display a smooth curve, computed with loess.smooth, on
the Residuals vs Fit, Sqrt Abs Residuals vs Fit, and Response vs Fit plots. See
the on-line help for loess.smooth for details.
Include Rugplot
Check this to display a rugplot on the Residuals vs Fit, Sqrt Abs Residuals vs
Fit, and Response vs Fit plots. A rugplot is a sequence of vertical bars along
the x-axis that mark the “observed” x values.
Number of Extreme Points to Identify
Enter the number of extreme points that will be identified on the Residuals
vs Fit, Sqrt Abs Residuals vs Fit, Residuals Normal QQ, and Cook’s Distance
plots. The row names from the data frame specified on the model page will
be used to identify the points.
Partial Residual Plot Partial Residuals
Plots Check this to display partial residual plots for all the terms in the model. A
partial residual plot is a plot of ri + b kxik versus xik were ri is the ordinary
residual for the i-th observation, xik is the i-th observation of the k-th
predictor and bk is the regression coefficient estimate for the k-th predictor.
Include Partial Fit
Check this to include the partial fit for the term on the plot.
Include Rugplot
Check this to display rugplots on the partial residual plots. A rugplot is a
sequence of vertical bars along the x-axis that mark the “observed” x values.
Common Y-axis Scale
Check this to give all the partial residual plots the same vertical units. This is
418
LINEAR REGRESSION
essential for comparing the importance of fitted terms in additive models.
Predict Page New Data
Enter the name of a data frame to use for computing predictions. It must
contain the same names as the terms in the right side of the formula for the
model. If omitted, the original data are used for computing predictions.
Save Save In
Enter the name of an S-PLUS data frame in which predictions, confidence
intervals and standard errors are to be saved. If an object with the name you
enter does not already exist (in database 1), then it will be created. If you
enter the name of a data frame that already exists (in database 1) and this data
frame has the same number of rows as the number of observations used in the
model fit, then the saved values are appended to this data frame. This allows
you to keep predicted values from a model with the original data or to keep
the residuals from a number of different models for the same data in one data
frame. If you give the name of an existing S-PLUS object that is not a data
frame or is not the appropriate size, then a warning is issued and a modified
name is used.
Predictions
Check this to save the predictions in the data frame specified in Save In.
Confidence Intervals
Check this to store lower and upper confidence limits in the object specified
in Save In. The column names will be “N% L.C.L.” and “N% U.C.L.” where
N is 100 times the value specified in Confidence Level. These confidence
limits for the mean response are computed as the prediction plus or minus t419
CHAPTER 18 FITTING STATISTICAL MODELS
value times standard error.
Standard Errors
Check this to store the pointwise standard errors for the predictions in the
object specified in Save In.
Options Confidence Level
Enter the confidence level to use when computing confidence intervals. This
value should be less than 1 and greater than 0.
S-PLUS language functions related to Linear Models:
lm, plot.lm, predict.lm, print.lm, summary.lm
Other related S-PLUS language functions:
aov, gam, glm, loess, nls
420
NONLINEAR LEAST SQUARES REGRESSION
NONLINEAR LEAST SQUARES REGRESSION
This dialog fits nonlinear regression models via least squares.
To perform nonlinear regression:
Choose Statistics c Regression c Non-Linear from the main menu. The dialog
shown below appears.
Model page
Data Data Frame
Select a data frame containing the data for the nonlinear regression.
c Tip…
You can type into the Data Frame edit box any expression which evaluates to a data frame.
Model Formula
Enter an expression in the S-PLUS language specifying the nonlinear
regression model. The variables used in the formula are the columns of the
data frame, the parameters to be estimated, and S-PLUS functions. The
response variable appears first, followed by a tilde “~”, and then the function
to be minimized. For example:
y ~ b0 * exp(b1 * x)
421
CHAPTER 18 FITTING STATISTICAL MODELS
For details on specifying formulas, see the chapter on Nonlinear Models in
the Guide to Statistics.
Parameters (name=value)
Enter a comma-separated list of the parameters in the formula that are to be
estimated along with their initial values, each given in the form name=value.
Every parameter to be estimated must appear both here and in Formula. For
example:
b0=1, b1=1
Save Model Object Save As
Enter the name for the object in which to save the results of the analysis. If an
object with this name already exists, its contents will be overwritten.
This must be a valid S-PLUS object name—any combination of
alphanumeric characters that starts with an alpha character is allowed. The
only non-alphanumeric character allowed is the period “.”. Names are casesensitive, so X and x are different names. The default is “last.nls”. The saved
object will be of class “nls”. See the on-line help for nls.object for more
information about the saved object.
Options page Use the Options page, shown above, to control the way in which the
nonlinear least squares regression is carried out.
Optimization Maximum Iteration
Parameters Enter the maximum number of iterations to allow during fitting.
Convergence Tolerance
Enter a positive number used as the tolerance for the convergence criterion in
the algorithm. This relative offset criterion measures the numerical
imprecision in the parameter estimates compared to the statistical variability.
422
NONLINEAR LEAST SQUARES REGRESSION
Smaller values of Convergence Tolerance will require more iterations while
larger values will result in convergence being declared earlier.
Min. Scale for Step Shrinkage
Enter the minimum factor by which to shrink the default step size in an
attempt to decrease the sum of squares.
Print Iteration Trace
Check here to print a summary of each iteration.
Use Partial Linear Algorithm
Check this to use the Golub-Pereyra algorithm for partially linear leastsquares models.
Results page
Printed Results Short Output
Check here to produce a short summary of the nonlinear fit. The summary
includes the residual sum-of-squares, the parameter estimates, the model
formula, and the number of observations
Long Output
Check here to produce a detailed summary of the nonlinear fit. This
summary includes the model formula, the parameter estimates, their
standard errors and t-statistics, the residual sum-of-squares and degrees of
freedom, and the correlation matrix of the parameter estimates
Saved Results Save In
Enter the name of an S-PLUS data frame in which fitted values and residuals,
of the analysis are saved. If an object with the name you enter does not
already exist (in database 1), then it will be created. If you enter the name of a
data frame that already exists (in database 1) and this data frame has the same
423
CHAPTER 18 FITTING STATISTICAL MODELS
number of rows as the number of observations used in the model fit, then the
saved values are appended to this data frame. This allows you to keep
predicted values from a model with the original data or to keep the residuals
from a number of different models for the same data in one data frame. If
you give the name of an existing S-PLUS object that is not a data frame or is
not the appropriate size, a warning is issued and a modified name is used.
Fitted Values
Check here to store fitted values in the object specified in Save In.
Working Residuals
Check here to store the working residuals in the object specified in Save In.
The working residuals are the response minus the fitted value.
Predict page New Data (Optional)
Enter the name of a data frame to use for computing predictions. It must
contain the same names as the terms in the right side of the formula for the
model. If omitted, the predictions for the original data are computed.
Save Save In
Enter the name of an S-PLUS data frame in which predictions, confidence
intervals and standard errors are saved. If an object with the name you enter
does not already exist (in database 1), then it will be created. If you enter the
name of a data frame that already exists (in database 1) and this data frame
has the same number of rows as the number of observations used in the
model fit, then the saved values are appended to this data frame. This allows
you to keep predicted values from a model with the original data or to keep
the residuals from a number of different models for the same data in one data
frame. If you give the name of an existing S-PLUS object that is not a data
frame or is not the appropriate size, then a warning is issued and a modified
name is used.
424
NONLINEAR LEAST SQUARES REGRESSION
Predictions
Check here to store the predictions in the object specified in Save In.
Confidence Intervals
Check here to store lower and upper confidence limits in the object specified
in Save In. The column names will be "N% L.C.L." and "N% U.C.L.",
where N is 100 times the value specified in Confidence Level.
Standard Errors
Check here to store the pointwise standard errors for the predictions in the
object specified in Save In.
Options Confidence Level
Enter the confidence level to use when computing confidence intervals. This
value should be less than 1 and greater than 0.
S-PLUS language functions related to Nonlinear Least Squares
Regression:
nls, print.nls, predict.nls, summary.nls
Other related S-PLUS language functions:
ms, nlminb, nlregb
425
CHAPTER 18 FITTING STATISTICAL MODELS
LOGISTIC REGRESSION
The Logistic Regression dialog fits logistic regression models using a
generalized linear model. It calls the same functions as the Generalized Linear
Model dialog, with the family restricted to Binomial and the default link set
to logit. See page 456 for details.
To perform logistic regression:
Choose Statistics c Regression c Logistic from the main menu.
426
LOG-LINEAR REGRESSION
LOG-LINEAR REGRESSION
The Log-linear Regression dialog fits log-linear regression models using a
generalized linear model. It calls the same functions as the Generalized Linear
Model dialog, with the family restricted to Poisson and the default link set to
log. See page 456 for details.
To perform log-linear regression:
Choose Statistics c Regression c Log-linear from the main menu.
427
CHAPTER 18 FITTING STATISTICAL MODELS
ROBUST LTS REGRESSION
This dialog fits robust linear regression models via least trimmed squares
(LTS). It calls the ltsreg function and its print, summary and plot
methods.
To perform robust regression:
Choose Statistics c Regression c Robust LTS from the main menu. The dialog
shown below appears.
Model Page
Data Data Frame
Select a data frame.
c Tip…
You can type into the Data Frame edit box any expression which evaluates to a data frame.
Weights
Enter the column that specifies weights to be applied to all observations used
in the linear regression. To weigh all rows equally, leave this blank.
Subset Rows with
Enter an S-PLUS expression which identifies the rows to use in the analysis.
428
ROBUST LTS REGRESSION
To use all the rows in the data frame, leave this field blank. The expression
must evaluate to a vector of logical values (TRUE values are used, FALSE
values are dropped), or a vector of indices identifying the numbers of the
rows to use.
Examples:
Species == 'bear'
only bears are used.
1:20
only the first 20 rows of the data are used.
only teenagers are used.
For more information on constructing logical expressions see the S-PLUS
Programmer’s Guide.
Age >= 13 & Age < 20
Omit Rows with Missing Values
Check this box to omit from the analysis any rows in the data frame that
contain missing values for any of the variables in the model.
If this box is not checked, S-PLUS will report an error and halt the routine if
any row is found to have a missing value in any of the terms in the model.
Formula Formula
Enter a formula specifying the desired model. The formula specifies which
regression model is to be fit. In its simplest form a formula consists of the
response variable, a tilde (~), and a list of predictor variables separated by
“+”s. An intercept is automatically included by default. For example: Fuel ~
Weight + Disp. fits a regression model with Fuel as the response and
Weight and Disp. as predictors.
For more information on formulas see the chapter on Building Formulas.
Create Formula
Click this to open a formula builder dialog used to construct a formula
specifying the desired model. See the chapter Building Formulas for more
information.
Save Model Object Save As
Enter the name for the object in which to save the results of the analysis. If an
object with this name already exists, its contents will be overwritten.
This must be a valid S-PLUS object name—any combination of
alphanumeric characters that starts with an alpha character is allowed. The
only non-alphanumeric character allowed is the period “.”. Names are casesensitive, so X and x are different names. The default is “last.ltsreg”.
The saved object will have class “lts”. See the on-line help for lts.object
429
CHAPTER 18 FITTING STATISTICAL MODELS
for more information about the saved object.
Options Page Number of Residuals in SS to Minimize
Enter the number of squared residuals whose sum will be minimized. The
default is floor((n+p+1)/2) where n is the number of observations and p
is the number of predictors in the model.
Results Page
Printed Results Short Output
Check this to display a short summary of the model fit in the designated
output window.
430
ROBUST LTS REGRESSION
Long Output
Check this to display a more detailed summary of the model fit in the
designated output window.
Saved Results Save In
Enter the name of an S-PLUS data frame in which fitted values, weights and
residuals are is saved. If an object with the name you enter does not already
exist (in database 1), then it will be created. If you enter the name of a data
frame that already exists (in database 1) and this data frame has the same
number of rows as the number of observations used in the model fit, then the
saved values are appended to this data frame. This allows you to keep
predicted values from a model with the original data or to keep the residuals
from a number of different models for the same data in one data frame. If
you give the name of an existing S-PLUS object that is not a data frame or is
not the appropriate size, then a warning is issued and a modified name is
used.
Fitted Values
Check this to save the fitted values from the model in the object specified in
Save In.
Residuals
Check this to save the residuals values from the model in the object specified
in Save In.
LTS Weights (0's, 1's)
Check this to save weights with a value of 1 for observations having
reasonably small residuals and a value of 0 for observations having large
residuals. These weights can later be used in an ordinary least squares
regression.
431
CHAPTER 18 FITTING STATISTICAL MODELS
Plot Page
Plots Residuals vs Fit
Check this to display a plot of the residuals versus the fitted values.
Residuals vs Index
Check this to display a plot of the standardized residuals versus the index of
the observations.
Residuals Normal QQ
Check this to display a Normal quantile-quantile plot of the LTS residuals.
Residuals vs Robust Distance
Check this to display a plot of the LTS residuals versus Robust Distances of
‘x'-rows.
Options Number of Extreme Points to Identify
Enter the number of extreme points that will be identified on the Residuals
vs Fit and Residuals Normal QQ. The row names from the data frame
specified on the model page will be used to identify the points.
S-PLUS language functions related to Least Trimmed Squares Robust
Regression:
ltsreg, ltsreg.formula, ltsreg.default, plot.lts, summary.lts
Other related S-PLUS language functions:
lm, lmsreg, rreg
432
LOCAL REGRESSION
LOCAL REGRESSION
This dialog fits a locally-weighted regression to a response surface.
To perform local regression:
Choose Statistics c Regression c Local from the main menu. The dialog shown
below appears.
Model Page
Data Data Frame
Select a data frame.
c Tip…
You can type into the Data Frame edit box any expression which evaluates to a data frame.
Weights
Enter the column that specifies weights to be applied to all observations used
433
CHAPTER 18 FITTING STATISTICAL MODELS
in the local regression. To weigh all rows equally, leave this blank.
Subset Rows with
Enter an S-PLUS expression which identifies the rows to use in the analysis.
To use all the rows in the data frame, leave this field blank. The expression
must evaluate to a vector of logical values (TRUE values are used, FALSE
values are dropped), or a vector of indices identifying the numbers of the
rows to use.
Examples:
Species == 'bear'
only bears are used.
1:20
only the first 20 rows of the data are used.
only teenagers are used.
For more information on constructing logical expressions see the S-PLUS
Programmer’s Guide.
Age >= 13 & Age < 20
Omit Rows with Missing Values
Check this box to omit from the analysis any rows in the data frame that
contain missing values for any of the variables in the model.
If this box is not checked, S-PLUS will report an error and halt the routine if
any row is found to have a missing value in any of the terms in the model.
Normalize Numeric Predictors
Check this to use the standard normalized values of numeric predictors as
predictors in the model.
Local Smoothness Span
Select or enter a number between 0 and 1 to set the smoothness parameter. A
larger fraction generates a smoother curve.
No. of Par.
Enter a number, analogous to the number of parameters in the model, to
specify smoothness.
Model Family
Choose either gaussian or symmetric as the distribution for the error term.
Add Quadratic Term in Local Fitting
Check this to use locally-quadratic fitting. Uncheck this to use locally-linear
fitting.
Drop Quad. Term(s)
Select the variables for which locally-linear fitting will be used.
Cond. Parametric in
Select the associated predictors in the case that a portion of the model is of
parametric approach.
434
LOCAL REGRESSION
Save Model Object Save As
Enter the name for the object in which to save the results of the analysis. If an
object with this name already exists, its contents will be overwritten.
This must be a valid S-PLUS object name—any combination of
alphanumeric characters that starts with an alpha character is allowed. The
only non-alphanumeric character allowed is the period “.”. Names are casesensitive, so X and x are different names. Where appropriate, Save As defaults
to a name that starts with “last”. For example, “last.loess” is the most recent
local regression model fit.
Formula Formula
Enter a formula specifying the desired model.
Create Formula
Click this to open a formula builder dialog used to construct a formula
specifying the desired model. See the chapter Building Formulas for more
information.
Options Page
Control Surface Fitting
Parameters Choose direct to use observed responses directly in the surface fitting. By
default, interpolated points are used in the fitting.
Cell Size
435
CHAPTER 18 FITTING STATISTICAL MODELS
Enter the number of cells used in locally fitting. This field is enabled only
when interpolation is chosen above.
No. of Iterations
Enter the number of iterations. This field is enabled only when Family is
specified as symmetric on the model page.
c Tip…
Most users don’t need to set the control parameters, since the default provides very satisfactory
performance in most of the cases. Changing these parameters can substantially burden the computation
for large data sets.
Results Page
Saved Results Print Results
Check this to print the results of the fitted local regression in the designated
output window.
Save In
Enter the name of an S-PLUS data frame in which fitted values and residuals
are to be saved. If an object with the name you enter does not already exist (in
database 1), then it will be created. If you enter the name of a data frame that
already exists (in database 1) and this data frame has the same number of
436
LOCAL REGRESSION
rows as the number of observations used in the model fit, then the saved
values are appended to this data frame. This allows you to keep fitted values
from a model with the original data or to keep the residuals from a number of
different models for the same data in one data frame. If you give the name of
an existing S-PLUS object that is not a data frame or is not the appropriate
size, then a warning is issued and a modified name is used.
Plot Page
Plots Residuals vs Fit
Check this to display a plot of the residuals versus the fitted values.
Sqrt Abs Residuals vs Fit
Check this to display a plot of the square root of the absolute values of the
residuals versus the fitted values. This plot is useful for checking for the
constant variance assumption of the model.
Response vs Fit
Check this to display a plot of the response variable versus the fitted values.
The line y = x is also drawn on the graph.
Residuals Normal QQ
Check this to display a Normal quantile-quantile plot of the residuals.
Residual-Fit Spread
Check this to display a residual-fit spread plot. This is a visual analog of the
multiple R-squared statistic. It compares the spread of the fitted values to the
437
CHAPTER 18 FITTING STATISTICAL MODELS
spread of the residuals.
Cond. Plots of Fitted vs Predictors
Check this to display the conditional plots of fitted values versus predictors.
Options Include Smooth
Check this to display a smooth curve.
Include Rugplot
Check this to display a rugplot on the Residuals vs Fit, Sqrt Abs Residuals vs
Fit, and Response vs Fit plots. A rugplot is a sequence of vertical bars along
the x-axis that mark the “observed” x values.
Number of Extreme Points to Identify
Enter the number of extreme points that will be identified on the Residuals
vs Fit, Sqrt Abs Residuals vs Fit, Residuals Normal QQ, and Cook’s Distance
plots. The row names from the data frame specified on the model page will
be used to identify the points.
New Data
Enter the name of a data frame to use for computing predictions. It must
contain the same names as the terms in the right side of the formula for the
model. If omitted, the original data are used for computing predictions.
Save Save In
Enter the name of an S-PLUS data frame in which a part, such as predictions
438
LOCAL REGRESSION
and residuals, of the analysis is saved. If an object with the name you enter
does not already exist (in database 1), then it will be created. If you enter the
name of a data frame that already exists (in database 1) and this data frame
has the same number of rows as the number of observations used in the
model fit, then the saved values are appended to this data frame. This allows
you to keep predicted values from a model with the original data or to keep
the residuals from a number of different models for the same data in one data
frame. If you give the name of an existing S-PLUS object that is not a data
frame or is not the appropriate size, then a warning is issued and a modified
name is used.
Predictions
Check this to save the predictions in the data frame specified in Save In.
Standard Errors
Check this to store the pointwise standard errors for the predictions in the
object specified in Save In.
Related S-PLUS language functions:
loess, loess.control, anova.loess, predict.loess, plot.loess
439
CHAPTER 18 FITTING STATISTICAL MODELS
STEPWISE LINEAR REGRESSION
This dialog is used to fit linear models in a stepwise fashion to data in a data
frame.
To perform stepwise linear regression:
Choose Statistics c Regression c Stepwise Linear from the main menu. The
dialog shown below appears.
Model Page
Data Data Frame
Select a data frame.
c Tip…
You can type into the Data Frame edit box any expression which evaluates to a data frame.
Weights
Enter the column that specifies weights to be applied to all observations used
in each linear regression. To weigh all rows equally, leave this blank.
Subset Rows with
Enter an S-PLUS expression which identifies the rows to use in each analysis.
440
STEPWISE LINEAR REGRESSION
To use all the rows in the data frame, leave this field blank. The expression
must evaluate to a vector of logical values (TRUE values are used, FALSE
values are dropped), or a vector of indices identifying the numbers of the
rows to use.
Examples:
Species == 'bear'
only bears are used.
1:20
only the first 20 rows of the data are used.
only teenagers are used.
For more information on constructing logical expressions see the S-PLUS
Programmer’s Guide. Also see the on-line help for the function step.
Age >= 13 & Age < 20
Omit Rows with Missing Values
Check this box to omit from the analysis any rows in the data frame that
contain missing values for any of the variables in the model.
If this box is not checked, S-PLUS will report an error and halt the routine if
any row is found to have a missing value in any of the terms in the model.
Models Scope These fields determine the range of models examined in the stepwise search.
Upper Formula
Enter the upper formula (with the most terms) that defines an upper limit for
all the models to be tried in the model search.
Lower Formula
Enter the lower formula (with the fewest terms) that defines a lower limit for
all the models to be tried in the model search. The default is the NULL
model.
Create Formula
Click this to open a formula builder dialog used to construct a formula for
either Upper Formula or Lower Formula. See the chapter Building Formulas
for more information.
Stepping Options Stepping Direction
Select the mode of stepwise search: “both”, “backward”, or “forward”.
Print a Trace of All Fits
Check this to print information for all the fits in the stepwise search.
Save Model Object Save As
Enter the name for the object in which to save the results of the chosen linear
model. If an object with this name already exists, its contents will be
overwritten.
This must be a valid S-PLUS object name—any combination of
alphanumeric characters that starts with an alpha character is allowed. The
441
CHAPTER 18 FITTING STATISTICAL MODELS
only non-alphanumeric character allowed is the period “.”. Names are casesensitive, so X and x are different names. The default is “last.step”.
The saved object will have class “lm”. See the on-line help for lm.object for
more information about the saved object.
Results page
Printed Results Short Output
Check this to display a short summary of the model fit. This includes the
model formula, the regression coefficients, the residual standard error and the
degrees of freedom.
Long Output
Check this to display a more detailed summary of the model fit. This
includes the model formula, five number summary of the residuals, the
coefficients, their standard errors, t-statistics and p-values, the residual
standard error and the degrees of freedom, the multiple R-Squared value, and
the F-test for the overall model with its degrees of freedom and p-value.
ANOVA Table
Check this to display an analysis of variance table. The sums of squares in the
table are for the terms added sequentially (Type I sums of squares).
Correlation Matrix of Estimates
Check this to display the correlation matrix of the regression coefficients.
This is available only when Long Output is checked.
442
STEPWISE LINEAR REGRESSION
Related S-PLUS language functions:
lm, step, add1, drop1, menuStep
443
CHAPTER 18 FITTING STATISTICAL MODELS
FIXED EFFECTS ANALYSIS OF VARIANCE
This dialog performs classical fixed effects analysis of variance and generates
plots related to assumptions and results of the procedure. The analysis of
variance model makes several assumptions about the data; for information
about the model assumptions, see the Guide to Statistics.
To perform fixed effects analysis of variance:
Choose Statistics c Analysis of Variance c Fixed Effects from the main menu.
The dialog shown below appears.
Model page
Data Data Frame
Select a data frame.
c Tip…
You can type into the Data Frame edit box any expression which evaluates to a data frame.
Weights
Enter the column that specifies weights to be applied to all observations used
444
FIXED EFFECTS ANALYSIS OF VARIANCE
in the analysis of variance. To weigh all rows equally, leave this blank.
Subset Rows with
Enter an S-PLUS expression which identifies the rows to use in the analysis.
To use all the rows in the data frame, leave this field blank. The expression
must evaluate to a vector of logical values (TRUE values are used, FALSE
values are dropped), or a vector of indices identifying the numbers of the
rows to use.
Examples:
Species == 'bear'
only bears are used.
1:20
only the first 20 rows of the data are used.
only teenagers are used.
For more information on constructing logical expressions see the S-PLUS
Programmer’s Guide.
Age >= 13 & Age < 20
Omit Rows with Missing Values
Check this box to omit from the analysis any rows in the data frame that
contain missing values for any of the variables in the model.
If this box is not checked, S-PLUS will report an error and halt the routine if
any row is found to have a missing value in any of the terms in the model.
Formula Formula
Enter a formula specifying the desired model.
Create Formula
Click this to open a formula builder dialog used to construct a formula
specifying the desired model. See the chapter Building Formulas for more
information.
Save Model Object Save As
Enter the name for the object in which to save the results of the analysis. If an
object with this name already exists, its contents will be overwritten.
This must be a valid S-PLUS object name—any combination of
alphanumeric characters that starts with an alpha character is allowed. The
only non-alphanumeric character allowed is the period “.”. Names are casesensitive, so X and x are different names. Where appropriate, Save As defaults
to a name that starts with “last”. The default is “last.aov”.
The saved object will have class “aov”, “maov”, or “aovlist”. See the on-
445
CHAPTER 18 FITTING STATISTICAL MODELS
line help for aov.object for more information about the saved object.
Options page
Contrasts Assign Contrast
Choose contrasts for the factors; by default, the Helmert contrasts are
assigned to unordered factors and polynomial contrasts are assigned to
ordered factors.
to Variable(s)
Select one or more variables to which the selected contrast in Assign Contrast
will be assigned.
Contrasts
This field displays the selection and assignment chosen in Assign Contrast
and to Variable(s).
446
FIXED EFFECTS ANALYSIS OF VARIANCE
Results page
Printed Results Short Output
Check this to print a short summary of the model fit. This includes the
model formula, the ANOVA table for the model, and the residual standard
error.
ANOVA Table
Check this to print an ANOVA table for each effect.
Estimated Coefficients
Check this to print the estimated coefficients. There are K-1 such coefficients
for each K-level factor.
Estimated K Coef. for K-level Factor
Check this to print K coefficients for each K-level factor.
Saved Results Fitted Values
Check this to save the fitted values.
Residuals
Check this to save the residuals.
Save In
Enter the name of an S-PLUS data frame in which fitted values and residuals
are to be saved. If an object with the name you enter does not already exist (in
database 1), then it will be created. If you enter the name of a data frame that
already exists (in database 1) and this data frame has the same number of
447
CHAPTER 18 FITTING STATISTICAL MODELS
rows as the number of observations used in the model fit, then the saved
values are appended to this data frame. This allows you to keep fitted values
from a model with the original data or to keep the residuals from a number of
different models for the same data in one data frame. If you give the name of
an existing S-PLUS object that is not a data frame or is not the appropriate
size, then a warning is issued and a modified name is used.
Plot page
Plots Residuals vs Fit
Check this to display a plot of the residuals versus the fitted values.
Sqrt Abs Residuals vs Fit
Check this to display a plot of the square root of the absolute values of the
residuals versus the fitted values. This plot is useful for checking for the
constant variance assumption of the model.
Response vs Fit
Check this to display a plot of the response variable versus the fitted values.
The line y = x is also drawn on the graph.
Residuals Normal QQ
Check this to display a Normal quantile-quantile plot of the residuals.
Residual-Fit Spread
Check this to display a residual-fit spread plot. This is a visual analog of the
multiple R-squared statistic. It compares the spread of the fitted values to the
spread of the residuals.
Cond. Plots of Fitted vs Predictors
448
FIXED EFFECTS ANALYSIS OF VARIANCE
Check this to display the conditional plots of fitted values versus predictors.
Options Include Smooth
Check this to display a smooth curve, computed with loess.smooth, on
the Residuals vs Fit, Sqrt Abs Residuals vs Fit, and Response vs Fit plots. See
the on-line help for loess.smooth for details.
Include Rugplot
Check this to display a rugplot on the Residuals vs Fit, Sqrt Abs Residuals vs
Fit, and Response vs Fit plots. A rugplot is a sequence of vertical bars along
the x-axis that mark the “observed” x values.
Number of Extreme Points to Identify
Enter the number of extreme points that will be identified on the Residuals
vs Fit, Sqrt Abs Residuals vs Fit, Residuals Normal QQ, and Cook’s Distance
plots. The row names from the data frame specified on the model page will
be used to identify the points.
Partial Residual Plot Partial Residuals
Plots Check this to display partial residual plots for all the terms in the model.
Include Partial Fit
Check this to display the partial fit for the term.
Include Rugplot
Check this to display rugplots on the partial residual plots.
Common Y-axis Scale
Check this to give all the partial residual plots the same vertical units. This is
essential for comparing the importance of fitted terms in additive models.
S-PLUS language functions related to Analysis of Variance:
aov, summary.aov, plot.lm, coef, dummy.coef
Other related S-PLUS language functions:
lm, manova, raov, multicomp
449
CHAPTER 18 FITTING STATISTICAL MODELS
RANDOM EFFECTS ANALYSIS OF VARIANCE
This dialog tests if the variations among different factors are the same. The
effects of factors are assumed to be random.
To perform random effects analysis of variance:
Choose Statistics c Analysis of Variance c Random Effects from the main
menu. The dialog shown below appears.
Model page
Data Data Frame
Select a data frame.
c Tip…
You can type into the Data Frame edit box any expression which evaluates to a data frame.
Weights
Enter the column that specifies weights to be applied to all observations used
in the analysis of variance. To weigh all rows equally, leave this blank.
Subset Rows with
450
RANDOM EFFECTS ANALYSIS OF VARIANCE
Enter an S-PLUS expression which identifies the rows to use in the analysis.
To use all the rows in the data frame, leave this field blank. The expression
must evaluate to a vector of logical values (TRUE values are used, FALSE
values are dropped), or a vector of indices identifying the numbers of the
rows to use.
Examples:
Species == 'bear'
only bears are used.
1:20
only the first 20 rows of the data are used.
only teenagers are used.
For more information on constructing logical expressions see the S-PLUS
Programmer’s Guide.
Age >= 13 & Age < 20
Omit Rows with Missing Values
Check this box to omit from the analysis any rows in the data frame that
contain missing values for any of the variables in the model.
If this box is not checked, S-PLUS will report an error and halt the routine if
any row is found to have a missing value in any of the terms in the model.
Formula Formula
Enter a formula specifying the desired model.
Create Formula
Click this to open a formula builder dialog used to construct a formula
specifying the desired model. See the chapter Building Formulas for more
information.
Save Model Object Save As
Enter the name for the object in which to save the results of the analysis. If an
object with this name already exists, its contents will be overwritten.
This must be a valid S-PLUS object name—any combination of
alphanumeric characters that starts with an alpha character is allowed. The
only non-alphanumeric character allowed is the period “.”. Names are casesensitive, so X and x are different names. The default is “last.raov”.
See the on-line help for aov.object for more information about the saved
object.
451
CHAPTER 18 FITTING STATISTICAL MODELS
Options page
Contrasts Assign Contrast
Choose contrasts for the factors; by default, the Helmert contrasts are
assigned to unordered factors and polynomial contrasts are assigned to
ordered factors.
to Variable(s)
Select one or more variables to which the selected contrast in Assign Contrast
will be assigned.
Contrasts
This field displays the selection and assignment chosen in Assign Contrast
and to Variable(s).
452
RANDOM EFFECTS ANALYSIS OF VARIANCE
Results page
Printed Results Short Output
Check this to print a short summary of the model fit. This includes the
model formula, the ANOVA table for the model, and the residual standard
error.
ANOVA Table
Check this to print an ANOVA table for each effect.
Estimated Coefficients
Check this to print the estimated coefficients. There are K-1 such coefficients
for each K-level factor.
Estimated K Coef. for K-level Factor
Check this to print K coefficients for each K-level factor.
Saved Results Fitted Values
Check this to save the fitted values.
Residuals
Check this to save the residuals.
Save In
Enter the name of an S-PLUS data frame in which fitted values and residuals
are to be saved. If an object with the name you enter does not already exist (in
database 1), then it will be created. If you enter the name of a data frame that
453
CHAPTER 18 FITTING STATISTICAL MODELS
already exists (in database 1) and this data frame has the same number of
rows as the number of observations used in the model fit, then the saved
values are appended to this data frame. This allows you to keep fitted values
from a model with the original data or to keep the residuals from a number of
different models for the same data in one data frame. If you give the name of
an existing S-PLUS object that is not a data frame or is not the appropriate
size, then a warning is issued and a modified name is used.
Plot page
Plots Residuals vs Fit
Check this to display a plot of the residuals versus the fitted values.
Sqrt Abs Residuals vs Fit
Check this to display a plot of the square root of the absolute values of the
residuals versus the fitted values. This plot is useful for checking for the
constant variance assumption of the model.
Response vs Fit
Check this to display a plot of the response variable versus the fitted values.
The line y = x is also drawn on the graph.
Residuals Normal QQ
Check this to display a Normal quantile-quantile plot of the residuals.
Residual-Fit Spread
Check this to display a residual-fit spread plot. This is a visual analog of the
multiple R-squared statistic. It compares the spread of the fitted values to the
spread of the residuals.
454
RANDOM EFFECTS ANALYSIS OF VARIANCE
Cond. Plots of Fitted vs Predictors
Check this to display the conditional plots of fitted values versus predictors.
Options Include Smooth
Check this to display a smooth curve, computed with loess.smooth, on
the Residuals vs Fit, Sqrt Abs Residuals vs Fit, and Response vs Fit plots. See
the on-line help for loess.smooth for details.
Include Rugplot
Check this to display a rugplot on the Residuals vs Fit, Sqrt Abs Residuals vs
Fit, and Response vs Fit plots. A rugplot is a sequence of vertical bars along
the x-axis that mark the “observed” x values.
Number of Extreme Points to Identify
Enter the number of extreme points that will be identified on the Residuals
vs Fit, Sqrt Abs Residuals vs Fit, Residuals Normal QQ, and Cook’s Distance
plots. The row names from the data frame specified on the model page will
be used to identify the points.
Partial Residual Plot Partial Residuals
Plots Check this to display partial residual plots for all the terms in the model.
Include Partial Fit
Check this to display the partial fit for the term.
Include Rugplot
Check this to display rugplots on the partial residual plots.
Common Y-axis Scale
Check this to give all the partial residual plots the same vertical units. This is
essential for comparing the importance of fitted terms in additive models.
S-PLUS language functions related to Analysis of Variance:
aov, summary.aov, plot.lm, coef, dummy.coef, raov
Other related S-PLUS functions:
lm, manova, multicomp
455
CHAPTER 18 FITTING STATISTICAL MODELS
GENERALIZED LINEAR MODELS
This dialog fits generalized linear models. It calls the glm function and its
print, summary, plot and predict methods. The class of generalized linear
models includes many standard statistical models including ordinary linear
regression, logistic regression and log-linear models. The specification of the
family and link function determine which type of model is fit.
To fit a generalized linear model:
Choose Statistics c Generalized Linear Models from the main menu. The
dialog shown below appears.
Model Page
Data Data Frame
Select a data frame.
c Tip…
You can type into the Data Frame edit box any expression which evaluates to a data frame.
Weights
456
GENERALIZED LINEAR MODELS
Enter the column that specifies weights to be applied to all observations used
in the linear regression. To weigh all rows equally, leave this blank.
Subset Rows with
Enter an S-PLUS expression which identifies the rows to use in the analysis.
To use all the rows in the data frame, leave this field blank. The expression
must evaluate to a vector of logical values (TRUE values are used, FALSE
values are dropped), or a vector of indices identifying the numbers of the
rows to use.
Examples:
Species == 'bear'
only bears are used.
1:20
only the first 20 rows of the data are used.
only teenagers are used.
For more information on constructing logical expressions see the S-PLUS
Programmer’s Guide.
Age >= 13 & Age < 20
Omit Rows with Missing Values
Check this box to omit from the analysis any rows in the data frame that
contain missing values for any of the variables in the model.
If this box is not checked, S-PLUS will report an error and halt the routine if
any row is found to have a missing value in any of the terms in the model.
Formula Formula
Enter a formula specifying the desired model. The formula specifies which
regression model is to be fit. In its simplest form a formula consists of the
response variable, a tilde (~), and a list of predictor variables separated by
“+”s. An intercept is automatically included by default. For example: Fuel ~
Weight + Disp. fits a regression model with Fuel as the response and
Weight and Disp. as predictors.
For more information on formulas see the chapter on Building Formulas.
Create Formula
Click this to open a formula builder dialog used to construct a formula
specifying the desired model. See the chapter Building Formulas for more
information.
Model Family
457
CHAPTER 18 FITTING STATISTICAL MODELS
Select a distribution family for the model.
Table 18.1: Certain combinations of Family and Link specify standard statistical models
Family
Link
Model
gaussian
identity
ordinary least squares regression
binomial
logit
logistic regression
poisson
log
log-linear regression
Link
Select the link function for the model. The link function of the response is
modeled as the sum of linear terms. The possible link functions depend on
the family.
Variance
For the quasi family a variance function can be selected.
Save Model Object Save As
Enter the name for the object in which to save the results of the analysis. If an
object with this name already exists, its contents will be overwritten.
This must be a valid S-PLUS object name—any combination of
alphanumeric characters that starts with an alpha character is allowed. The
only non-alphanumeric character allowed is the period “.”. Names are casesensitive, so X and x are different names. The default is “last.glm”.
The saved object is of class glm. See the on-line help for glm.object for
458
GENERALIZED LINEAR MODELS
more information on the saved object.
Options Page
Optimization Maximum Iteration
Parameters Enter a number specifying the maximum number of iterations. If
convergence has not been reached after this number of iterations, the
procedure will stop.
Convergence Tolerance
Enter a number specifying the convergence tolerance. Iteration will continue
until the relative change in the log-likelihood is less than this number.
Print Iteration Trace
459
CHAPTER 18 FITTING STATISTICAL MODELS
Check this to print iteration details while the model is being fitted.
Results Page
Printed Results Short Output
Check this to display a short summary of the model fit to the designated
output window. This includes the model call, the degrees of freedom and the
residual deviance.
Long Output
Check this to display a detailed summary of the model fit to the designated
output window. This includes the model call, a five number summary of the
deviance residuals, the null and residual deviance values along with their
degrees of freedom, and the degrees of freedom for each term in the model.
ANOVA Table
Check this to display an analysis of variance table. The sums-of-squares in the
table are for the terms added sequentially (Type I sums-of-squares).
Correlation Matrix of Estimates
Check this to display the correlation matrix of the regression coefficients.
This is available only if Long Output is selected.
Saved Results Save In
Enter the name of an S-PLUS data frame in which fitted values and residuals
are to be saved. If an object with the name you enter does not already exist (in
database 1), then it will be created. If you enter the name of a data frame that
already exists (in database 1) and this data frame has the same number of
460
GENERALIZED LINEAR MODELS
rows as the number of observations used in the model fit, then the saved
values are appended to this data frame. This allows you to keep fitted values
from a model with the original data or to keep the residuals from a number of
different models for the same data in one data frame. If you give the name of
an existing S-PLUS object that is not a data frame or is not the appropriate
size, then a warning is issued and a modified name is used.
Fitted Values
Check this to save the fitted values from the model in the object specified in
Save In.
Working Residuals
Check this to save the residuals from the final additive fit.
Pearson Residuals
Check this to save the pearson residuals. These are standardized residuals on
the scale of the response.
Deviance Residuals
Check this to save the deviance residuals. The sum of squares of these add up
to the deviance.
Response Residuals
Check this to save the response residuals. These are the response minus the
fitted value.
461
CHAPTER 18 FITTING STATISTICAL MODELS
Plot Page
Plots Residuals vs Fit
Check this to plot the deviance residuals versus the fitted values.
Sqrt Abs Residuals vs Fit
Check this to plot the square root of the absolute values of the deviance
residuals versus the fitted values. This plot is useful for checking for the
constant variance assumption of the model.
Response vs Fit
Check this to plot the response variable versus the fitted values. The line y= x
is also drawn on the graph.
Residuals Normal QQ
Check this to create a Normal quantile-quantile plot of the pearson residuals.
Options Include Smooth
Check this to display a smooth curve, computed with loess.smooth, on
the Residuals vs Fit, Sqrt Abs Residuals vs Fit, and Response vs Fit plots. See
the on-line help for loess.smooth for details.
Include Rugplot
Check this to display a rugplot on the Residuals vs Fit, Sqrt Abs Residuals vs
Fit, and Response vs Fit plots. A rugplot is a sequence of vertical bars along
the x-axis that mark the “observed” x values.
Number of Extreme Points to Identify
Enter the number of extreme points that will be identified on the Residuals
vs Fit, Sqrt Abs Residuals vs Fit, Residuals Normal QQ, and Cook’s Distance
plots. The row names from the data frame specified on the model page will
be used to identify the points.
Partial Residual Plot Partial Residuals
Plots Check this to display partial residual plots for all the terms in the model.
Include Partial Fit
Check this to display the partial fit for the term.
Include Rugplot
Check this to display rugplots on the partial residual plots. A rugplot is a
sequence of vertical bars along the x-axis that mark the “observed” x values.7
Common Y-axis Scale
Check this to give all the partial residual plots the same vertical units. This is
462
GENERALIZED LINEAR MODELS
essential for comparing the importance of fitted terms in additive models.
Predict Page New Data
Enter the name of a data frame to use for computing predictions. It must
contain the same names as the terms in the right side of the formula for the
model. If omitted, the original data are used for computing predictions.
Save Save In
Enter the name of an S-PLUS data frame in which predictions and standard
errors are to be saved. If an object with the name you enter does not already
exist (in database 1), then it will be created. If you enter the name of a data
frame that already exists (in database 1) and this data frame has the same
number of rows as the number of observations used in the model fit, then the
saved values are appended to this data frame. This allows you to keep
predicted values from a model with the original data or to keep the residuals
from a number of different models for the same data in one data frame. If
you give the name of an existing S-PLUS object that is not a data frame or is
not the appropriate size, then a warning is issued and a modified name is
used.
Predictions
Check this to save the predictions in the data frame specified in Save In.
Standard Errors
Check this to store the pointwise standard errors for the predictions in the
object specified in Save In.
Options Prediction Type
463
CHAPTER 18 FITTING STATISTICAL MODELS
Select the type of prediction to be saved:
• link
predictions are on the additive predictor (link) scale
• response
predictions are on the response scale using the
inverse link function
• terms
a matrix of predictions is produced, one for each
term in the model.
S-PLUS language functions related to Generalized Linear Models:
glm, plot.glm, predict.glm, summary.glm
Other related S-PLUS language functions:
gam, lm, loess
464
GENERALIZED ADDITIVE MODELS
GENERALIZED ADDITIVE MODELS
This dialog fits generalized additive models. It calls the gam function and its
print, summary, plot and predict methods. Generalized additive models are
an extension of generalized linear models. They use scatterplot smoothers to
nonparametrically model predictor terms allowing the data to suggest
nonlinearities in the terms.
To fit a generalized additive model:
Choose Statistics c Generalized Additive Models from the main menu. The
dialog shown below appears.
Model Page
Data Data Frame
Select a data frame.
c Tip…
You can type into the Data Frame edit box any expression which evaluates to a data frame.
465
CHAPTER 18 FITTING STATISTICAL MODELS
Weights
Enter the column that specifies weights to be applied to all observations used
in the linear regression. To weigh all rows equally, leave this blank.
Subset Rows with
Enter an S-PLUS expression which identifies the rows to use in the analysis.
To use all the rows in the data frame, leave this field blank. The expression
must evaluate to a vector of logical values (TRUE values are used, FALSE
values are dropped), or a vector of indices identifying the numbers of the
rows to use. For example:
Species == 'bear'
only bears are used.
1:20
only the first 20 rows of the data are used.
only teenagers are used.
For more information on constructing logical expressions see the S-PLUS
Programmer’s Guide.
Age >= 13 & Age < 20
Omit Rows with Missing Values
Check this box to omit from the analysis any rows in the data frame that
contain missing values for any of the variables in the model.
If this box is not checked, S-PLUS will report an error and halt the routine if
any row is found to have a missing value in any of the terms in the model.
Formula Formula
Enter a formula specifying the desired model. The formula specifies which
model is to be fitted. In its simplest form a formula consists of the response
variable, a tilde (~), and a list of predictor variables separated by “+”s. The
difference between the formula for a generalized additive model and a
generalized linear model is that the additive model formula, typically has
smoothing functions applied to the predictors. For example, NOx~C+S(E)
fits a generalized additive model with NOx as the response, C as a linear
predictor term and E as a spline smooth term.
For more information on formulas, see the chapter Building Formulas.
Create Formula
Click this to open a formula builder dialog used to construct a formula
specifying the desired model. See chapter 20, Building Formulas.
Model Family
Select a distribution family for the model.
Link
Select the link function for the model. The link function of the response is
modeled as the sum of additive terms. The possible link functions depend on
the family.
466
GENERALIZED ADDITIVE MODELS
Variance
For the quasi family a variance function can be selected.
Save Model Object Save As
Enter the name for the object in which to save the results of the analysis. If an
object with this name already exists, its contents will be overwritten.
This must be a valid S-PLUS object name—any combination of
alphanumeric characters that starts with an alpha character is allowed. The
only non-alphanumeric character allowed is the period “.”. Names are casesensitive, so X and x are different names. The default is “last.gam”.
The saved object is of class gam. See the on-line help for gam.object for
more information on the saved object.
Options Page Optimization Parameters Maximum Iteration
Enter the maximum number of local scoring iterations.
Convergence Tolerance
Enter the convergence threshold for local scoring iterations.
Maximum Backfitting Iterations
Enter the maximum number of backfitting iterations.
Backfitting Convergence Tolerance
Enter the convergence threshold for backfitting iterations.
Print Iteration Trace
Check this to print iteration details while the model is being fitted.
467
CHAPTER 18 FITTING STATISTICAL MODELS
Results Page
Printed Results Short Output
Check this to display a short summary of the model fit to the designated
output window. This includes the model call, the degrees of freedom and the
residual deviance.
Long Output
Check this to display a detailed summary of the model fit to the designated
output window. This includes the model call, a five number summary of the
deviance residuals, the null and residual deviance values along with their
degrees of freedom, and the degrees of freedom for each term in the model.
Saved Results Save In
Enter the name of an S-PLUS data frame in which fitted values and residuals
are to be saved. If an object with the name you enter does not already exist (in
database 1), then it will be created. If you enter the name of a data frame that
already exists (in database 1) and this data frame has the same number of
rows as the number of observations used in the model fit, then the saved
values are appended to this data frame. This allows you to keep fitted values
from a model with the original data or to keep the residuals from a number of
different models for the same data in one data frame. If you give the name of
an existing S-PLUS object that is not a data frame or is not the appropriate
size, then a warning is issued and a modified name is used.
468
GENERALIZED ADDITIVE MODELS
Fitted Values
Check this to save the fitted values from the model in the object specified in
Save In.
Working Residuals
Check this to save the residuals from the final additive fit.
Pearson Residuals
Check this to save the pearson residuals. These are standardized residuals on
the scale of the response.
Deviance Residuals
Check this to save the deviance residuals. The sum of squares of these add up
to the deviance.
Response Residuals
Check this to save the response residuals. These are the response minus the
fitted value.
Plot Page
Plots Residuals vs Fit
Check this to plot the deviance residuals versus the fitted values.
Sqrt Abs Residuals vs Fit
Check this to plot the square root of the absolute values of the deviance
residuals versus the fitted values. This plot is useful for checking for the
constant variance assumption of the model.
469
CHAPTER 18 FITTING STATISTICAL MODELS
Response vs Fit
Check this to plot the response variable versus the fitted values. The line y= x
is also drawn on the graph.
Residuals Normal QQ
Check this to create a Normal quantile-quantile plot of the pearson residuals.
Options Include Smooth
Check this to display a smooth curve, computed with loess.smooth, on
the Residuals vs Fit, Sqrt Abs Residuals vs Fit, and Response vs Fit plots. See
the on-line help for loess.smooth for details.
Include Rugplot
Check this to display a rugplot on the Residuals vs Fit, Sqrt Abs Residuals vs
Fit, and Response vs Fit plots. A rugplot is a sequence of vertical bars along
the x-axis that mark the “observed” x values.
Number of Extreme Points to Identify
Enter the number of extreme points that will be identified on the Residuals
vs Fit, Sqrt Abs Residuals vs Fit, Residuals Normal QQ, and Cook’s Distance
plots. The row names from the data frame specified on the model page will
be used to identify the points.
Partial Residual Plot Partial Residuals
Plots Check this to display partial residual plots for all the terms in the model.
Include Partial Fit
Check this to display the partial fit for the term.
Include Rugplot
Check this to display rugplots on the partial residual plots. A rugplot is a
sequence of vertical bars along the x-axis that mark the “observed” x values.
Common Y-axis Scale
Check this to give all the partial residual plots the same vertical units. This is
essential for comparing the importance of fitted terms in additive models.
470
GENERALIZED ADDITIVE MODELS
Predict Page New Data
Enter the name of a data frame to use for computing predictions. It must
contain the same names as the terms in the right side of the formula for the
model. If omitted, the original data are used for computing predictions.
Save Save In
Enter the name of an S-PLUS data frame in which predictions and standard
errors are to be saved. If an object with the name you enter does not already
exist (in database 1), then it will be created. If you enter the name of a data
frame that already exists (in database 1) and this data frame has the same
number of rows as the number of observations used in the model fit, then the
saved values are appended to this data frame. This allows you to keep
predicted values from a model with the original data or to keep the residuals
from a number of different models for the same data in one data frame. If
you give the name of an existing S-PLUS object that is not a data frame or is
not the appropriate size, then a warning is issued and a modified name is
used.
Predictions
Check this to save the predictions in the data frame specified in Save In.
Standard Errors
Check this to store the pointwise standard errors for the predictions in the
object specified in Save In.
471
CHAPTER 18 FITTING STATISTICAL MODELS
Options Prediction Type
Select the type of prediction to be saved:
• link
predictions are on the additive predictor (link) scale
• response
predictions are on the response scale using the
inverse link function
• terms
a matrix of predictions is produced, one for each
term in the model.
S-PLUS language functions related to Generalized Additive Models:
gam, plot.gam, plot.glm, predict.gam, summary.gam
Other related S-PLUS language functions:
glm, loess, ace, avas
472
TREE MODELS
TREE MODELS
This dialog can be used to fit classification and regression trees to data in a
data frame. See also chapter 10, Classification and Regression Trees, in the
Guide to Statistics. See also on-line help for the tree function.
To perform tree regression:
Choose Statistics c Tree Models from the main menu. The dialog shown
below appears.
Model page
Data Data Frame
Select a data frame.
c Tip…
You can type into the Data Frame edit box any expression which evaluates to a data frame.
Weights
Enter the column that specifies weights to be applied to all observations used
in fitting the tree. To weigh all rows equally, leave this blank.
473
CHAPTER 18 FITTING STATISTICAL MODELS
Subset Rows with
Enter an S-PLUS expression which identifies the rows to use in fitting the
tree. To use all the rows in the data frame, leave this field blank. The
expression must evaluate to a vector of logical values (TRUE values are used,
FALSE values are dropped), or a vector of indices identifying the numbers of
the rows to use.
Examples:
Species == 'bear'
only bears are used.
1:20
only the first 20 rows of the data are used.
only teenagers are used.
For more information on constructing logical expressions see the S-PLUS
Programmer’s Guide.
Age >= 13 & Age < 20
Omit Rows with Missing Values
Check this box to omit from the analysis any rows in the data frame that
contain missing values for any of the variables in the model.
If this box is not checked, S-PLUS will report an error and halt the routine if
any row is found to have a missing value in any of the terms in the model.
Formula Formula
Enter a formula specifying the desired model. A valid formula has the
following form:
response ~ predictor1 + predictor2 + ...
Create Formula
Click this to open a formula builder dialog used to construct a formula
specifying the desired model. See the chapter Building Formulas for more
information.
Fitting Options These fields control the algorithm used by the S-PLUS function tree to fit
the tree models. See the on-line help for tree.control for details.
Min. No. of Obs. Before Split
Enter the minimum number of observations to include before the first cut on
a variable. The default is 5.
Min. Node Size
Enter the minimum node size at which the last split is performed. The
default of 10 means that growing continues if there are at least 10
observations in a node.
Min. Node Deviance
Enter the minimum node deviance before growing stops.
474
TREE MODELS
Save Model Object Save As
Enter the name for the object in which to save the results of the analysis. If an
object with this name already exists, its contents will be overwritten.
This must be a valid S-PLUS object name—any combination of
alphanumeric characters that starts with an alpha character is allowed. The
only non-alphanumeric character allowed is the period “.”. The default is
“last.tree”.
Results page
Printed Results Summary Description
Check this for a short description of the fitted model.
Full Tree
Check this to print the fitted tree with all its branches and leaves. This can
lead to a large amount of output.
Saved Results Several results that are not in the tree model object can be saved in an S-PLUS
object.
Save In
Enter the name of an S-PLUS data frame in which a part, such as predictions
and residuals, of the analysis is saved. If an object with the name you enter
does not already exist (in database 1), then it will be created. If you enter the
name of a data frame that already exists (in database 1) and this data frame
has the same number of rows as the number of observations used in the
model fit, then the saved values are appended to this data frame. This allows
475
CHAPTER 18 FITTING STATISTICAL MODELS
you to keep predicted values from a model with the original data or to keep
the residuals from a number of different models for the same data in one data
frame. If you give the name of an existing S-PLUS object that is not a data
frame or is not the appropriate size, then a warning is issued and a modified
name is used.
Misclassification Errors
Check this to save misclassification errors. See the on-line help for
residuals.tree for details.
Pearson Residuals
Check this to save Pearson Residuals. See the on-line help for
residuals.tree for details.
Deviance Residuals
Check this to save deviance residuals. See the on-line help for
residuals.tree for details.
Plot page
Branch Size Proportional to Node Deviance
Check this to size branches in the plotted tree roughly proportionally to the
deviance of the node.
Uniformly Sized
Check this to plot all branches with uniform size.
476
TREE MODELS
Branch Text Add Text Labels
Check this to create and add text labels to the tree plot.
Labels
Select the type of label to be used. Choose from Response-Value, Node-Size,
and Node-Deviance. See the on-line help for text.tree for more details.
Prune/Shrink Use the Prune/Shrink page to manage either pruning or shrinking of trees. It
page is not possible to specify both pruning and shrinking at once. By default
neither pruning nor shrinking is applied unless explicitly requested.
Prune See the on-line help for prune.tree for more details on this operation and
the parameters mentioned here.
Cost Complexity Pruning
Check this to specify pruning of the fitted tree.
Cost Complexity Parameter
Enter a scalar for a specific subtree of the fitted object, or a vector, to return a
sequence of subtrees minimizing the cost complexity measure so represented.
The default is to compute this parameter algorithmically.
Size of Returned Tree (Optional)
Enter an integer specifying the desired size of the returned tree; that is, the
desired number of terminal nodes. The best tree of that size in the cost
complexity sequence will be returned.
Pruning Method
Select either “deviance” or “misclass” to determine the measure of node
477
CHAPTER 18 FITTING STATISTICAL MODELS
heterogeneity used to guide the pruning. For regression trees this is ignored.
Shrink See the on-line help for shrink.tree for more details on this operation and
its parameters.
Optimal Recursive Shrinking
Check this to specify shrinking the fitted tree.
Shrinkage Parameter
Enter a vector of numbers between 0 and 1. A sequence of shrunken trees
will be determined by optimal shrinking for each value in the vector. By
default the vector (1/20, 2/19, 3/18, …, 10/11) is used. This vector is
expressed in the S-PLUS command syntax as (1:10)/(20:11).
Plot Result
Check this to generate a plot of the resulting pruned or shrunken tree or tree
sequence.
New Data (Optional)
Enter or select a data frame at which the optimal pruned or shrunken tree is
evaluated. This new data will be used in the pruning and shrinking
operations.
Save As
Enter the name for the object in which to save the results of the analysis. If an
object with this name already exists, its contents will be overwritten.
This must be a valid S-PLUS object name—any combination of
alphanumeric characters that starts with an alpha character is allowed. The
only non-alphanumeric character allowed is the period “.”. Names are casesensitive, so X and x are different names.
When pruning, the default name is "last.pruned". When shrinking, the
default name is "last.shrunken".
478
TREE MODELS
Predict page New Data
Enter the name of a data frame containing data at which predictions will be
computed. Column names must be those that appear in the formula of the
tree model fitted on the Model page. By default, predictions will be
computed at the data used to fit the original tree.
Prediction Type
Select one of “vector”, “tree”, or “class”. See the help file for the S-PLUS
function predict.tree for a detailed description of these options.
Save Save As
Enter the name for the object in which to save the results of the analysis. If an
object with this name already exists, its contents will be overwritten.
This must be a valid S-PLUS object name—any combination of
alphanumeric characters that starts with an alpha character is allowed. The
only non-alphanumeric character allowed is the period “.”. Names are casesensitive, so X and x are different names. If no value is entered no predictions
will be returned.
Related S-PLUS language functions:
tree, tree.control, plot.tree, text.tree, summary.tree,
print.tree, prune.tree, shrink.tree, plot.tree.sequence,
predict.tree, menuTree
479
CHAPTER 18 FITTING STATISTICAL MODELS
MULTIPLE COMPARISONS
This dialog calculates simultaneous or non-simultaneous confidence intervals
or bounds for any number of estimable linear combinations of the
parameters of a fixed-effects linear model. It calls the multicomp function
and its print and plot methods.
To perform multiple comparisons:
Choose Statistics c Multiple Comparisons from the main menu. The dialog
shown below appears.
Model Page
Model Selection Model Object
Select the model object on which to perform multiple comparisons.
Name String Match
Enter a pattern used to restrict the list shown in the Model Object dropdown list. The symbol "*" matches any character. For example, to view all
objects that begin with “last”, enter last*. Use "[ ]" to denote a list of
character options. For example, “model1”, “model2”, and “model3” match
model[123], but “model4” does not.
480
MULTIPLE COMPARISONS
Variable Selection Compare Levels Of
Select the term in the model to which comparisons will be made. This list
will be empty until a selection has been made in Model Object.
Compare To Level
Select the factor level to which all other levels will be compared. This field is
available only when Comparisons is set to mcc.
Method Options Comparisons
Select the type of comparisons to be made among the adjusted means.
• mca
all pairwise differences
• mcc
all pairwise differences between all adjusted means and
the adjusted means for the factor level specified in
Compare To Level
• none
if the adjusted means themselves are of interest without
further differencing.
Method
Select the method to use for critical point calculation.
• best
for the smallest critical point choosing from all valid
methods
• best.fast
for the smallest critical point choosing from all valid
methods except Simulation
• Bonferroni
for the Bonferroni method
• Dunnett
for Dunnett's method
• Fisher.lsd
for Fisher's unprotected least significant difference
method
• Scheffe
for Scheffe's method
• Sidak
for Sidak's method
• Simulation
for an approximate critical point using simulationbased methods
481
CHAPTER 18 FITTING STATISTICAL MODELS
• Tukey
for Tukey's studentized-range method
See the on-line help for multicomp or the chapter Multiple Comparisons in
the Guide to Statistics for further description of these methods.
Error Specification Confidence Level
Enter the joint confidence level desired. This value should be less than 1 and
greater than 0.
Bounds
Select upper.and.lower for confidence intervals. For one-sided confidence
bounds, select either upper or lower.
Error Type
Select the error rate type. If family-wise is selected, the probability that all
bounds hold is the level specified in Confidence Level. If comparison-wise is
selected, the probability that any one pre-selected bound holds is the level
specified in the Confidence Level.
Results Save As
Enter the name for the object in which to save the results of the analysis. If an
object with this name already exists, its contents will be overwritten.
This must be a valid S-PLUS object name—any combination of
alphanumeric characters that starts with an alpha character is allowed. The
only non-alphanumeric character allowed is the period “.”. Names are casesensitive, so X and x are different names. The default is “last.multicomp”.
The saved object is of class multicomp. See the on-line help for
multicomp for more information on objects of this type.
Print
Check this to display results in the designated output window. These include
estimates of the linear combinations, their standard error and the confidence
limits or bounds.
Plot Intervals
Check this for a graphical representation of the intervals.
482
MULTIPLE COMPARISONS
Options Page Contrast Matrix
Enter the name of a contrast matrix. Each column specifies a linear
combination to be estimated under the textbook parameterization of the
linear model. See the on-line help for multicomp or the chapter Multiple
Comparisons in the Guide to Statistics for more information.
Critical Point
Enter a value for the critical point used in the confidence intervals/bounds.
Use this if none of the methods are suitable.
Simulation Size
Enter the size of the simulation to use. This is available when Method is
Simulation or Best. The default value provides intervals or bounds whose
actual family-wise error rate is within 10% of the requested rate.
Validity Check
Check this to check the validity of the specified critical point calculation
method for the desired comparisons. If the validity check fails, processing will
stop with an error message.
Estimability Check
Check this to check estimability of the desired linear combinations. If the
estimability condition fails, processing will stop with an error message.
S-PLUS language functions related to Multiple Comparisons:
multicomp, multicomp.default,
483
CHAPTER 18 FITTING STATISTICAL MODELS
multicomp.lm, print.multicomp, plot. multicomp
Other related S-PLUS language functions:
aov, lm
484
COMPARE MODELS
COMPARE MODELS
This dialog compares models using analysis of variance type methods. It calls
the anova function, which will call the appropriate method function for the
class of models being compared. For example, anova.lm for comparing lm
(linear model) objects.
Model objects being compared must all have the same class and the same
response variable. The comparisons only make sense if the models are
"nested"; one model is a subset of the other.
To compare models:
Choose Statistics c Compare Models from the main menu. The dialog shown
below appears.
Model Page
Select Model Model Objects
Select the model objects for comparison. An arbitrary number of models can
be selected.
Name String Match
Enter a pattern used to restrict the list shown in the Model Objects dropdown list. The symbol "*" matches any character. For example, to view all
objects that begin with “last”, enter last*. Use "[ ]" to denote a list of
character options. For example, “model1”, “model2”, and “model3” match
model[123], but “model4” does not.
485
CHAPTER 18 FITTING STATISTICAL MODELS
Model Class
Select the class of models you want to do comparisons with. All models being
compared must be from the same class.
Test Statistic
Select the test statistic to use for the model comparison. Note that the
available test statistics will vary based upon the class of the models being
compared.
Results Save As
Enter the name for the object in which to save the results of the analysis. If an
object with this name already exists, its contents will be overwritten.
This must be a valid S-PLUS object name—any combination of
alphanumeric characters that starts with an alpha character is allowed. The
only non-alphanumeric character allowed is the period “.”. Names are casesensitive, so X and x are different names. The default is “last.anova”.
The saved object is of class “anova”. See the on-line help for anova for
more information on objects of this type.
Print Results
Check this to print the analysis of variance table for the model comparisons
in the designated output window.
S-PLUS language functions related to Model Comparisons:
anova, print.anova
Other related S-PLUS language functions:
aov, coxph,
survreg
486
gam,
glm,
lm,
lmRobMM,
lme,
loess,
nls,
USING MULTIVARIATE,
SURVIVAL AND TIME SERIES
MODELS
19
Multivariate
Multivariate Analysis of Variance
Factor Analysis
Principal Components Analysis
488
493
500
Survival
Nonparametric Survival
Cox Proportional Hazards
Parametric Survival
506
513
521
Time Series
ACF Autocovariance Function
ARIMA Modeling
Introduction
526
528
This chapter describes some dialogs to model multivariate data, survival data,
and time series data. These include multivariate ANOVA, Factor Analysis,
Cox Regression, and ARIMA models.
Refer to chapter 14, Using the Statistics Menus and Dialogs, for an
explanation of features common to most dialogs.
487
CHAPTER 19 USING MULTIVARIATE, SURVIVAL AND TIME SERIES MODELS
MULTIVARIATE ANALYSIS OF VARIANCE
This dialog performs multivariate analysis of variance, the extension of
analysis of variance techniques to multiple responses.
To perform multivariate analysis of variance:
Choose Statistics c Multivariate c MANOVA from the main menu. The dialog
shown below appears.
Model Page
Data Data Frame
Select a data frame.
c Tip…
You can type into the Data Frame edit box any expression which evaluates to a data frame.
Weights
Enter the column that specifies weights to be applied to all observations used
in the analysis. To weight all rows equally, leave this blank.
Subset Rows with
Enter an S-PLUS expression which identifies the rows to use in the analysis.
To use all the rows in the data frame, leave this field blank. The expression
488
MULTIVARIATE ANALYSIS OF VARIANCE
must evaluate to a vector of logical values (TRUE values are used, FALSE
values are dropped), or a vector of indices identifying the numbers of the
rows to use.
Examples:
Species == 'bear'
only bears are used.
1:20
only the first 20 rows of the data are used.
only teenagers are used.
For more information on constructing logical expressions see the S-PLUS
Programmer’s Guide.
Age >= 13 & Age < 20
Omit Rows with Missing Values
Check this box to omit from the analysis any rows in the data frame that
contain missing values for any of the variables in the model.
If this box is not checked, S-PLUS will report an error and halt the routine if
any row is found to have a missing value in any of the terms in the model.
Formula Formula
Enter a formula specifying the desired model.
Create Formula
Click this to open a formula builder dialog used to construct a formula
specifying the desired model. See the chapter on Building Formulas for more
information.
Save Model Object Save As
Enter the name for the object in which to save the results of the analysis. If an
object with this name already exists, its contents will be overwritten.
This must be a valid S-PLUS object name—any combination of
alphanumeric characters that starts with an alpha character is allowed. The
only non-alphanumeric character allowed is the period “.”. Names are casesensitive, so X and x are different names. Where appropriate, Save As defaults
to a name that starts with “last”. For example, “last.manova” is the most
recent multivariate analysis of variance model fit.
489
CHAPTER 19 USING MULTIVARIATE, SURVIVAL AND TIME SERIES MODELS
Options page
Contrasts Assign Contrast
Choose contrasts for the factors; by default, the Helmert contrasts are
assigned to unordered factors and polynomial contrasts are assigned to
ordered factors.
to Variable(s)
Select one or more variables to which the selected contrast in Assign Contrast
will be assigned.
Contrasts
This field displays the selection and assignment chosen in Assign Contrast
and to Variable(s).
490
MULTIVARIATE ANALYSIS OF VARIANCE
Results page
Printed Results Short Output
Check this to print the call to the S-PLUS function maov, the sums of squares
and degrees of freedom for factors and residuals, and the residual standard
error.
ANOVA Table
Check this to print an ANOVA table.
Testing with
Select the type of test used in the ANOVA table.
Estimated Coefficients
Check this to print the estimated coefficients. There are K-1 such coefficients
for each K-level factor.
Estimated K Coef. for K-level Factor
Check this to print K coefficients for each K-level factor.
Saved Results Fitted Values
Check this to save the fitted values.
Residuals
Check this to save the residuals.
Save In
Enter the name of an S-PLUS data frame in which a part, such as fitted values
and residuals, of the analysis is saved. If an object with the name you enter
does not already exist (in database 1), then it will be created. If you enter the
491
CHAPTER 19 USING MULTIVARIATE, SURVIVAL AND TIME SERIES MODELS
name of a data frame that already exists (in database 1) and this data frame
has the same number of rows as the number of observations used in the
model fit, then the saved values are appended to this data frame. This allows
you to keep fitted values from a model with the original data or to keep the
residuals from a number of different models for the same data in one data
frame. If you give the name of an existing S-PLUS object that is not a data
frame or is not the appropriate size, then a warning is issued and a modified
name is used.
Related S-PLUS language functions:
manova, summary.manova, coef, dummy.coef, aov, raov, lm
492
FACTOR ANALYSIS
FACTOR ANALYSIS
This dialog performs a factor analysis on a set of observations of many
variables. See also chapter 17 of the Guide to Statistics (page 483).
To perform factor analysis:
Choose Statistics c Multivariate c Factor Analysis from the main menu. The
dialog shown below appears.
Model Page
Data Data Frame
Select a data frame.
c Tip…
You can type into the Data Frame edit box any expression which evaluates to a data frame.
493
CHAPTER 19 USING MULTIVARIATE, SURVIVAL AND TIME SERIES MODELS
Subset Rows with
Enter an S-PLUS expression which identifies the rows to use in the analysis.
To use all the rows in the data frame, leave this field blank. The expression
must evaluate to a vector of logical values (TRUE values are used, FALSE
values are dropped), or a vector of indices identifying the numbers of the
rows to use.
Examples:
Species == 'bear'
only bears are used.
1:20
only the first 20 rows of the data are used.
only teenagers are used.
For more information on constructing logical expressions see the S-PLUS
Programmer’s Guide.
Age >= 13 & Age < 20
Omit Rows with Missing Values
Check this box to omit from the analysis any rows in the data frame that
contain missing values for any of the variables in the model.
If this box is not checked, S-PLUS will report an error and halt the routine if
any row is found to have a missing value in any of the terms in the model.
Use Covariance List as Input
Check this to use a covariance list as model input, instead of a data frame.
Checking this will enable Covariance List.
Covariance List
Enter the name of a covariance list to be used as alternative model input. This
list must have the form of a list returned by cov.wt and cov.mve.
Components must include center and cov. A cor component will not be
used; however, an n.obs component will be used if present.
Formula Variables
Choose several variables to include in the factor analysis.
Formula
The Formula edit box is automatically filled using the variables selected from
the Variables drop down box. There is no response variable for factor analysis;
the formula shows the selected variables additively, following a tilde (~). The
formula field may be edited directly.
Model Number of Factors
Enter the number of factors to fit. The default is to fit 1 factor.
Method
Select either maximum likelihood (mle) or principal factor estimation
(principal). The default is maximum likelihood estimation.
494
FACTOR ANALYSIS
Rotation
Select a rotation to use; the default is varimax rotation.
Save Model Save As
Enter the name for the object in which to save the results of the analysis. If an
object with this name already exists, its contents will be overwritten.
This must be a valid S-PLUS object name—any combination of
alphanumeric characters that starts with an alpha character is allowed. The
only non-alphanumeric character allowed is the period “.”. Names are casesensitive, so X and x are different names. Where appropriate, Save As defaults
to a name that starts with “last”. For example, “last.factanal” is the most
recent factor analysis model fit.
Include Scores
Check this to have the factor scores returned as a component of the fitted
model.
Model Options Type of Score
Select the type of factor score to compute; the default is regression.
Starting Values
Enter the name of a matrix of starting values for the maximum likelihood
estimation procedure.
495
CHAPTER 19 USING MULTIVARIATE, SURVIVAL AND TIME SERIES MODELS
Maximum Iteration
Enter a numeric value specifying the maximum number of iterations to
perform for the maximum likelihood estimation procedure. The default is 20
iterations.
Uniqueness Tolerance
Enter a positive number giving the tolerance for the change in uniqueness. If
no uniqueness changes by more than this value from one iteration to the
next, convergence is declared. The default is 0.0001.
Results Page
Printed Results Short Output
Check this to print a summary of the model results in the designated output
window. Printed results include sums of squares of the factor loadings, the
size of the data, the names of the components in the fitted model object, and
the call that created the model object.
Component Importance
Check this to include the importance of each factor in the printed results.
Loadings
Check this to include the loadings matrix with the printed results.
Loading Options Cutoff Loading Value
Enter a number giving the cutoff for printing the loadings. Elements of the
496
FACTOR ANALYSIS
loadings matrix whose absolute value is smaller than the cutoff value will
appear as blanks. This field is only enabled when Loadings is checked.
Plots Page
Plot Loadings
Check this to display a barplot of the factor loadings for each factor.
Biplot
Check this to produce a biplot between two factors of the fitted model. The
biplot shows the relation of the factors to both the original variables and the
original data. This field is enabled only when the number of factors to be
fitted is greater than one.
Biplot Options Biplot Which Scores
Enter the two factors to be plotted in the form c(factor1, factor2). By default,
a biplot of the first two factors is created. This field is enabled only when
Biplot is checked.
497
CHAPTER 19 USING MULTIVARIATE, SURVIVAL AND TIME SERIES MODELS
Predict Page New Data
Enter the name of a matrix or data frame containing columns with the same
names as those used in the original analysis.
Save Save In
Enter the name of an S-PLUS data frame in which predictions from the
analysis are saved. If an object with the name you enter does not already exist
(in database 1), then it will be created. If you enter the name of a data frame
that already exists (in database 1) and this data frame has the same number of
rows as the number of observations used in the model fit, then the saved
values are appended to this data frame. This allows you to keep predicted
values from a model with the original data or to keep the predictions from a
number of different models for the same data in one data frame. If you give
the name of an existing S-PLUS object that is not a data frame or is not the
appropriate size, then a warning is issued and a modified name is used.
Predictions
Check this to save predictions to the data frame specified in Save In.
Related S-PLUS language functions for Factor Analysis:
factanal, factanal.object, factanal.fit.mle,
498
FACTOR ANALYSIS
factanal.fit.principal, factanal.mle.control,
factanal.start.mle, predict.factanal, fitted.factanal,
rotate.factanal, biplot.factanal
Other related S-PLUS language functions:
princomp
499
CHAPTER 19 USING MULTIVARIATE, SURVIVAL AND TIME SERIES MODELS
PRINCIPAL COMPONENTS ANALYSIS
This dialog calculates the principal components of sets of observations of
multiple variables. See also the chapter Principal Component Analysis in the
Guide to Statistics (page 463).
To perform principal components analysis:
Choose Statistics c Multivariate c Principal Components Analysis from the main
menu. The dialog shown below appears.
Data Data Frame
Select a data frame.
c Tip…
You can type into the Data Frame edit box any expression which evaluates to a data frame.
Subset Rows with
Enter an S-PLUS expression which identifies the rows to use in the analysis.
To use all the rows in the data frame, leave this field blank. The expression
must evaluate to a vector of logical values (TRUE values are used, FALSE
500
PRINCIPAL COMPONENTS ANALYSIS
values are dropped), or a vector of indices identifying the numbers of the
rows to use.
Examples:
Species == 'bear'
only bears are used.
1:20
only the first 20 rows of the data are used.
only teenagers are used.
For more information on constructing logical expressions see the S-PLUS
Programmer’s Guide.
Age >= 13 & Age < 20
Omit Rows with Missing Values
Check this box to omit from the analysis any rows in the data frame that
contain missing values for any of the variables in the model.
If this box is not checked, S-PLUS will report an error and halt the routine if
any row is found to have a missing value in any of the terms in the model.
Use Covariance List as Input
Check this to use a covariance list as model input, instead of a data frame.
Checking this will enable Covariance List.
Covariance List
Enter the name of a covariance list to be used as alternative model input. This
list must have the form of a list returned by cov.wt and cov.mve.
Components must include center and cov. A cor component will not be
used; however, an n.obs component will be used if present.
Formula Variables
Choose several variables to include in the principal components analysis.
Formula
The Formula edit box is automatically filled using the variables selected from
the Variables drop down box. There is no response variable for principal
component analysis; the formula shows the selected variables additively,
following a tilde (~). The formula field may be edited directly.
Model Scaling
Choose either Covariance Matrix (unscaled) or Correlation Matrix (scaled to
have unit variance) to define the scaling on which the computation of
principal components is based on. The default is Covariance Matrix.
Save Model Save As
Enter the name for the object in which to save the results of the analysis. If an
object with this name already exists, its contents will be overwritten.
This must be a valid S-PLUS object name—any combination of
alphanumeric characters that starts with an alpha character is allowed. The
only non-alphanumeric character allowed is the period “.”. Names are case501
CHAPTER 19 USING MULTIVARIATE, SURVIVAL AND TIME SERIES MODELS
sensitive, so X and x are different names. Where appropriate, Save As defaults
to a name that starts with “last”. For example, “last.princomp” is the most
recent principal components analysis model fit.
Include Scores
Check this to have the factor scores returned as a component of the fitted
model.
Results Page
Printed Results Short Output
Check this to print a summary of the model results in the designated output
window. Printed results include sums of squares of the component loadings,
the size of the data, the names of the components in the fitted model object,
and the call that created the model object.
Component Importance
Check this to include the importance of each component in the printed
results.
Loadings
Check this to include the loadings matrix with the printed results.
Loading Options Cutoff Loading Value
Enter a number giving the cutoff for printing the loadings. Elements of the
loadings matrix whose absolute value is smaller than the cutoff value will
502
PRINCIPAL COMPONENTS ANALYSIS
appear as blanks. This field is only enabled when Loadings is checked.
Plot Page
Plots Screeplot
Check this to produce a barplot of eigenvalues for each principal component.
Loadings
Check this to produce a barplot of the component loadings.
Biplot
Check this to produce a biplot between two components of the fitted model.
Biplot Options Biplot Which Scores
Enter the two components to be plotted in the form c(factor1, factor2). By
default, a biplot of the first two components is created. This field is enabled
only when Biplot is checked.
503
CHAPTER 19 USING MULTIVARIATE, SURVIVAL AND TIME SERIES MODELS
Predict Page New Data
Enter the name of a matrix or data frame containing columns with the same
names as those used in the original analysis.
Save Save In
Enter the name of an S-PLUS data frame in which the predictions of the
analysis are saved. If an object with the name you enter does not already exist
(in database 1), then it will be created. If you enter the name of a data frame
that already exists (in database 1) and this data frame has the same number of
rows as the number of observations used in the model fit, then the saved
values are appended to this data frame. This allows you to keep predicted
values from a model with the original data or to keep the predictions from a
number of different models for the same data in one data frame. If you give
the name of an existing S-PLUS object that is not a data frame or is not the
appropriate size, then a warning is issued and a modified name is used.
Predictions
Check this to save predictions to the data frame specified in Save In.
Related S-PLUS language functions for Principal Components Analysis:
princomp, princomp.object,
screeplot, plot.loadings,
504
loadings,
biplot.princomp,
PRINCIPAL COMPONENTS ANALYSIS
Other related S-PLUS language functions:
svd, cancor, factanal
505
CHAPTER 19 USING MULTIVARIATE, SURVIVAL AND TIME SERIES MODELS
NONPARAMETRIC SURVIVAL
This dialog computes the estimate of a survival curve for censored data using
either the Kaplan-Meier or the Fleming-Harrington method. See also chapter
22 Overview of Survival Analysis, and chapter 23 Estimating Survival in the
Guide to Statistics.
To perform nonparametric survival modeling:
Choose Statistics c Survival c Kaplan-Meier from the main menu. The dialog
shown below appears.
Model Page
Data Data Frame
Select a data frame.
c Tip…
You can type into the Data Frame edit box any expression which evaluates to a data frame.
506
NONPARAMETRIC SURVIVAL
Weights
Enter the column that specifies weights to be applied to all observations used
in the survival model. To weight all rows equally, leave this blank.
Subset Rows with
Enter an S-PLUS expression which identifies the rows to use in the analysis.
To use all the rows in the data frame, leave this field blank. The expression
must evaluate to a vector of logical values (TRUE values are used, FALSE
values are dropped), or a vector of indices identifying the numbers of the
rows to use.
Examples:
Species == 'bear'
only bears are used.
1:20
only the first 20 rows of the data are used.
only teenagers are used.
For more information on constructing logical expressions see the S-PLUS
Programmer’s Guide.
Age >= 13 & Age < 20
Omit Rows with Missing Values
Check this box to omit from the analysis any rows in the data frame that
contain missing values for any of the variables in the model.
If this box is not checked, S-PLUS will report an error and halt the routine if
any row is found to have a missing value in any of the terms in the model.
Formula Formula
Enter a formula specifying the desired model.
Create Formula
Click this to open a formula builder dialog used to construct a formula
specifying the desired model. See the chapter on Building Formulas for more
information.
Model Curve Type
Select a type of survival curve: kaplan-meier, fleming-harrington, or fh2. The
default is kaplan-meier.
Save Model Object Save As
Enter the name for the object in which to save the results of the analysis. If an
object with this name already exists, its contents will be overwritten.
This must be a valid S-PLUS object name—any combination of
alphanumeric characters that starts with an alpha character is allowed. The
only non-alphanumeric character allowed is the period “.”. Names are casesensitive, so X and x are different names. Where appropriate, Save As defaults
to a name that starts with “last”. For example, “last.survfit” is the most recent
nonparametric survival model fit.
507
CHAPTER 19 USING MULTIVARIATE, SURVIVAL AND TIME SERIES MODELS
Options Page
Confidence Limits Compute Standard Errors
Check this to compute standard errors.
Confidence Interval Level
Enter a number between 0 and 1 to specify the confidence interval level.
Standard Error Formula
Select the error formula: greenwood for the Greenwood formula or tsiatis for
the Tsiatis formula.
Confidence Interval Type
Select a confidence interval type.
• log: for intervals based on the cumulative hazard or log(survival).
This is the default.
• plain: for standard intervals.
• log-log: for intervals based on the log hazard or log(-log(survival)).
508
NONPARAMETRIC SURVIVAL
Lower Limits
Select a specification for the modified lower limits to the curves: usual, peto,
or modified. The upper limits remain unchanged.
Results Page
Printed Results Short Output
Check this to print a short summary of the model results in the designated
output window. This includes the number of observations, number of events,
the mean survival and its standard error, and the median survival with
confidence limits for the median.
Long Output
Check this to print a long summary of the model results in the designated
output window. This produces tabled output including columns for the
survival estimates, the standard errors of the estimates and confidence bounds
for the estimates.
Summary Options Include Censoring Times
Check this to include censoring times in the output. This field is ignored if a
vector is specified in New Times.
New Times
Enter a vector of times, listed in increasing order and having no missing
509
CHAPTER 19 USING MULTIVARIATE, SURVIVAL AND TIME SERIES MODELS
values. If Include Censoring Times is checked, the default is the vector of all
unique times in the fitted model. Otherwise, the default is the vector of event
(death) times.
Scaling Factor
Enter a number used to rescale the survival time. For example, if the input
data is in days, enter 365.25 to rescale to years.
Plot Page
Plots Survival Curves
Check this to plot survival curves for the current nonparametric survival
model.
Confidence Show Confidence Intervals
Intervals Check this to plot two-sided confidence intervals. The confidence interval
level can be set on the Options page.
Curve Options Line Color(s)
Enter a list of integers using either the name of an existing S-PLUS vector or a
comma-delimited list. If the number of curves to be plotted is greater than
the length of the list, the line colors will cycle through the list.
510
NONPARAMETRIC SURVIVAL
Line Type(s)
Enter a list of integers using either the name of an existing S-PLUS vector or a
comma-delimited list. If the number of curves to be plotted is greater than
the length of the list, the line types will cycle through the list.
Line Width(s)
Enter a list of integers using either the name of an existing S-PLUS vector or a
comma-delimited list. If the number of curves to be plotted is greater than
the length of the list, the line widths will cycle through the list.
Censoring Marks Mark Censoring Times
Check this to mark curves at the censoring times.
Censoring Mark Symbol
Enter a list of characters or integers specifying special symbols used to mark
the curves. Use either the name of an existing S-PLUS vector or a comma
delimited list such as 1, 2, 3 or “+”, “*”. The default is to use “+” at the
censored values.
Size of Marks
Enter a positive number used to control the character size of the censor
marks. Values less than 1 will produce smaller marks, while values greater
than 1 result in larger marks.
Axis Options Log Axis for Y
Check this to plot the y-axis on the log scale.
X-Axis Style
Select the x-axis style.
• standard
scale or extend the maximum survival time, creating
an axis with extended labels on the right side of the
plot. This is the default.
• tight
create an axis labeled internal to the data values.
• extended
create an axis whose numeric labels are more extreme
than any data values.
Scale Factor for X-Axis Tick Label
Enter a number used to multiply the labels on the x-axis. For example, a
value of 365.25 will give labels in years instead of the original days.
Scale Factor for Y-Axis Tick Label
Enter a number used to multiply the labels on the y-axis. For example a value
of 100 yields a percent scale.
511
CHAPTER 19 USING MULTIVARIATE, SURVIVAL AND TIME SERIES MODELS
X-Axis Label
Enter a label for the x-axis.
Y-Axis Label
Enter a label for the y-axis.
Related S-PLUS language functions for Nonparametric Survival:
survfit, print.survfit, plot.survfit, points.survfit,
lines.survfit, summary.survfit, survfit.km
Other related S-PLUS language functions:
coxph, Surv, strata
512
COX PROPORTIONAL HAZARDS
COX PROPORTIONAL HAZARDS
This dialog fits a Cox Proportional Hazards regression model to survival data.
Time-dependent variables, time-dependent strata, multiple events per
subject, and other extensions are incorporated using the counting process
formulation of Andersen and Gill. See also the chapter 22, The Cox
Proportional Hazards Model in the Guide to Statistics.
To perform Cox regression modeling:
Choose Statistics c Survival c Cox Proportional Hazards from the main menu.
The dialog shown below appears.
Model Page
Data Data Frame
513
CHAPTER 19 USING MULTIVARIATE, SURVIVAL AND TIME SERIES MODELS
Select a data frame.
c Tip…
You can type into the Data Frame edit box any expression which evaluates to a data frame.
Weights
Enter the column that specifies weights to be applied to all observations used
in the regression. To weight all rows equally, leave this blank.
Subset Rows with
Enter an S-PLUS expression which identifies the rows to use in the analysis.
To use all the rows in the data frame, leave this field blank. The expression
must evaluate to a vector of logical values (TRUE values are used, FALSE
values are dropped), or a vector of indices identifying the numbers of the
rows to use.
Examples:
Species == 'bear'
only bears are used.
1:20
only the first 20 rows of the data are used.
only teenagers are used.
For more information on constructing logical expressions see the S-PLUS
Programmer’s Guide.
Age >= 13 & Age < 20
Omit Rows with Missing Values
Check this box to omit from the analysis any rows in the data frame that
contain missing values for any of the variables in the model.
If this box is not checked, S-PLUS will report an error and halt the routine if
any row is found to have a missing value in any of the terms in the model.
Formula Formula
Enter a formula specifying the desired model.
Create Formula
Click this to open a formula builder dialog used to construct a formula
specifying the desired model. See the chapter on Building Formulas for more
information.
Model Type of Censoring
Select the type of censoring: right, left, or counting.
Save Model Object Save As
Enter the name for the object in which to save the results of the analysis. If an
object with this name already exists, its contents will be overwritten.
This must be a valid S-PLUS object name—any combination of
514
COX PROPORTIONAL HAZARDS
alphanumeric characters that starts with an alpha character is allowed. The
only non-alphanumeric character allowed is the period “.”. Names are casesensitive, so X and x are different names. Where appropriate, Save As defaults
to a name that starts with “last”. For example, “last.coxph” is the most recent
Cox model fit.
Options Page
Optimization Convergence Tolerance
Parameters Enter a number specifying the convergence tolerance. Iteration will continue
until the relative change in the log-likelihood is less than this number.
Initial Parameter Values
Enter a vector of initial values. If this is left blank, zero will be used for each
variable.
Maximum Iteration
Enter a number specifying the maximum number of iterations. If
convergence has not been reached after this number of iterations, the
procedure will stop.
Allow Collinearity
Check this to allow for collinearity in the model matrix; columns that are
linear combinations of earlier columns will be skipped. Coefficients for such
columns will be missing (NA) and the variance matrix will contain zeroes.
515
CHAPTER 19 USING MULTIVARIATE, SURVIVAL AND TIME SERIES MODELS
Missing coefficients are treated as zeros for ancillary calculations.
Model Options Method for Ties
Select a method for handling ties: efron, breslow, and exact. The exact
method computes the exact partial likelihood, which is equivalent to a
conditional logistic model.
Robust Variance Estimate
Check this to calculate a robust variance estimate. This is the default, if the
model, as defined in the Formula field, contains a cluster operative.
Results Page
Printed Results Short Output
Check this to print a short summary of the fit.
Long Output
Check this to print a long summary of the fit. This includes the call, model
coefficients, standards errors of the estimates, a confidence interval for the
relative risk of each coefficient, a likelihood ratio test, Wald’s test, and the
efficient score test.
516
COX PROPORTIONAL HAZARDS
Predict Page New Data
Enter the name of a data frame containing the specification of future
covariate history for the patients in question. The columns of the data frame
must have the same names as those used in the model formula.
Save Save In
Enter the name of an S-PLUS data frame in which a part, such as predictions
and standard errors, of the analysis is saved. If an object with the name you
enter does not already exist (in database 1), then it will be created. If you
enter the name of a data frame that already exists (in database 1) and this data
frame has the same number of rows as the number of observations used in the
model fit, then the saved values are appended to this data frame. This allows
you to keep predicted values from a model with the original data or to keep
the predictions from a number of different models for the same data in one
data frame. If you give the name of an existing S-PLUS object that is not a
data frame or is not the appropriate size, then a warning is issued and a
modified name is used.
Predictions
Check this to save predictions.
517
CHAPTER 19 USING MULTIVARIATE, SURVIVAL AND TIME SERIES MODELS
Standard Errors
Check this to save standard errors.
Type
Select the type of model predictions: lp (linear preditors), risk, expected, or
terms.
Variable Over Which to Collapse
Enter the name of a grouping variable over which to collapse the predictions.
The program will sum the predictions for each level of this variable.
Survival Curves Use the Survival Curves page to plot the predicted survivor function for a
Cox proportional hazards model.
Plots Survival Curve
Check this to create plots of survival curves for the current cox regression
object.
Curve Type
Select the type of survival estimate: aalen or kaplan-meier. The Aalen
estimate of survival, which is equivalent to the Tsiatis estimate, is used by
default.
New Data Data Frame
Enter the name of a data frame with the same variable names as those that
518
COX PROPORTIONAL HAZARDS
appear in the formula on the model page. The curves produced will be
representative of a cohort whose covariates correspond to the values in this
data frame. If left blank, the survival curves will be based on the mean of the
covariates used in the cox regression fit.
Only One Individual
Check this to indicate that Data Frame represents different time epochs for
only one individual. When checked, only one curve will be produced. By
default, multiple rows indicate multiple individuals and there will be one
curve generated per row in Data Frame.
Confidence Show Confidence Intervals
Intervals Check this to plot confidence intervals.
Confidence Interval Level
Enter a number between 0 and 1 to specify the confidence interval level.
Confidence Interval Type
Select a confidence interval type: log, plain, or log-log.
• log
for intervals based on the cumulative hazard or
log(survival). This is the default.
• plain
for standard intervals
• log-log
for intervals based on the log hazard or log(-log(survival))
Curve Options Line Color(s)
Enter a list of integers using either the name of an existing S-PLUS vector or a
comma-delimited list. If the number of curves to be plotted is greater than
the length of the list, the line colors will cycle through the list.
Line Type(s)
Enter a list of integers using either the name of an existing S-PLUS vector or a
comma-delimited list. If the number of curves to be plotted is greater than
the length of the list, the line types will cycle through the list.
Line Width(s)
Enter a list of integers using either the name of an existing S-PLUS vector or a
comma-delimited list. If the number of curves to be plotted is greater than
the length of the list, the line widths will cycle through the list.
Axis Options Log Axis for Y
Check this to plot the y-axis on the log scale.
X-Axis Style
Select the x-axis style.
519
CHAPTER 19 USING MULTIVARIATE, SURVIVAL AND TIME SERIES MODELS
• standard
scale or extend the maximum survival time, creating
an axis with extended labels on the right side of the
plot. This is the default.
• tight
create an axis labeled internal to the data values.
• extended
create an axis whose numeric labels are more extreme
than any data values.
Scale Factor for X-Axis Tick Label
Enter a number used to multiply the labels on the x-axis. For example, a
value of 365.25 will give labels in years instead of the original days.
Scale Factor for Y-Axis Tick Label
Enter a number used to multiply the labels on the y-axis. For example a value
of 100 yields a percent scale.
X-Axis Label
Enter a label for the x-axis.
Y-Axis Label
Enter a label for the y-axis.
Related S-PLUS language functions for Cox regression:
coxph, print.coxph, plot.coxph, predict.coxph, coxph.fit,
residuals.coxph, summary.coxph, survfit.coxph
Other related S-PLUS language functions:
cluster, strata, Surv, survfit
520
PARAMETRIC SURVIVAL
PARAMETRIC SURVIVAL
This dialog fits a regression model to survival data. See also chapter 22,
Overview of Survival Analysis, and chapter 25, Parametric Regression in
Survival Models, in the Guide to Statistics.
To perform parametric survival modeling:
Choose Statistics c Survival c Parametric Survival from the main menu. The
dialog shown below appears.
Model Page
Data Data Frame
Select a data frame.
c Tip…
You can type into the Data Frame edit box any expression which evaluates to a data frame.
Weights
Enter the column that specifies weights to be applied to all observations used
in the regression. To weight all rows equally, leave this blank.
521
CHAPTER 19 USING MULTIVARIATE, SURVIVAL AND TIME SERIES MODELS
Subset Rows with
Enter an S-PLUS expression which identifies the rows to use in the analysis.
To use all the rows in the data frame, leave this field blank. The expression
must evaluate to a vector of logical values (TRUE values are used, FALSE
values are dropped), or a vector of indices identifying the numbers of the
rows to use.
Examples:
Species == 'bear'
only bears are used.
1:20
only the first 20 rows of the data are used.
only teenagers are used.
For more information on constructing logical expressions see the S-PLUS
Programmer’s Guide.
Age >= 13 & Age < 20
Omit Rows with Missing Values
Check this box to omit from the analysis any rows in the data frame that
contain missing values for any of the variables in the model.
If this box is not checked, S-PLUS will report an error and halt the routine if
any row is found to have a missing value in any of the terms in the model.
Formula Formula
Enter a formula specifying the desired model.
Create Formula
Click this to open a formula builder dialog used to construct a formula
specifying the desired model. See the chapter on Building Formulas for more
information.
Model Distribution
Select the assumed distribution for the transformed response variable.
Link
Select the transformation to be used on the response.
Fixed Parameters
Enter a comma delimited list of fixed distribution parameters. This is most
often just the scale, for example, scale = 1.
Type of Censoring
Specify the type of censoring: right, left, counting, interval, or interval2.
Save Model Object Save As
Enter the name for the object in which to save the results of the analysis. If an
object with this name already exists, its contents will be overwritten.
This must be a valid S-PLUS object name—any combination of
alphanumeric characters that starts with an alpha character is allowed. The
522
PARAMETRIC SURVIVAL
only non-alphanumeric character allowed is the period “.”. Names are casesensitive, so X and x are different names. Where appropriate, Save As defaults
to a name that starts with “last”. For example, “last.survreg” is the most
recent parametric survival model fit.
Options Page Use the Options page to define optimization parameters for model
computations.
Optimization Convergence Tolerance
Parameters Enter a number specifying the convergence tolerance. Iteration will continue
until the relative change in deviance is less than this number.
Initial Parameter Values
Enter a vector of initial values. If this is left blank, zero will be used for each
variable.
Maximum Iteration
Enter a number specifying the maximum number of iterations. If
convergence has not been reached after this number of iterations, the
procedure will stop.
523
CHAPTER 19 USING MULTIVARIATE, SURVIVAL AND TIME SERIES MODELS
Results Page
Printed Results Short Output
Check this to print a summary of the model results in the designated output
window. This includes estimates of the coefficients, dispersion (scale), degrees
of freedom, and -2*loglikelihood.
Long Output
Check this to print a long summary of the model results in the designated
output window. This includes summary statistics for the deviance residuals,
standard errors and z-values for the coefficients, number of iterations, and
correlation of coefficients.
Saved Results Save In
Enter the name of an S-PLUS data frame in which a part, such as fitted values
and residuals, of the analysis is saved. If an object with the name you enter
does not already exist (in database 1), then it will be created. If you enter the
name of a data frame that already exists (in database 1) and this data frame
has the same number of rows as the number of observations used in the
model fit, then the saved values are appended to this data frame. This allows
you to keep fitted values from a model with the original data or to keep the
residuals from a number of different models for the same data in one data
frame. If you give the name of an existing S-PLUS object that is not a data
frame or is not the appropriate size, then a warning is issued and a modified
name is used.
524
PARAMETRIC SURVIVAL
Fitted Values
Check this to save the fitted values from the model in the object specified in
Save In.
Deviance Residuals
Check this to save the deviance residuals. The sum of squares of these add up
to the deviance.
Pearson Residuals
Check this to save the pearson residuals. These are standardized residuals on
the scale of the response.
Working Residuals
Check this to save the residuals from the final IRLS fit.
Matrix Residuals
Check this to save the matrix residuals.
Related S-PLUS language functions for Parametric Survival:
survreg, print.survreg, predict.survreg, summary.survreg,
residuals.survreg,
survreg.control,
survreg.fit,
survreg.distributions, anova.survreg
Other related S-PLUS language functions:
formula, lm, solve, Surv
525
CHAPTER 19 USING MULTIVARIATE, SURVIVAL AND TIME SERIES MODELS
ACF AUTOCOVARIANCE FUNCTION
This dialog estimates and displays the autocovariance, autocorrelation, or
partial autocorrelation for a time series. See the on-line help for acf for
computational details. See also chapter 20, Creating and Viewing Time
Series, and chapter 21, Analyzing Time Series, in the Guide to Statistics.
To estimate autocovariance or autocorrelation:
Choose Statistics c Time Series c Auto Covariance/Correlation from the main
menu. The dialog shown below appears.
Time Series Data Data Frame
Select or enter the name of a data frame having time series as columns.
Time Series
Select the column containing the time series to be analyzed.
c Tip…
You can enter the name of a time series object directly in Time Series. For example, enter lynx to
compute the correlogram for the lynx time series.
Options Estimate Type:
Select an estimate type.
• autocorrelation
526
to estimate the autocorrelation function (the
default)
ACF AUTOCOVARIANCE FUNCTION
• autocovariance
to estimate the autocovariance function
• partial autocorrelation to estimate the partial autocorrelation.
Change Maximum Lag Default
Check this to give a value for the maximum number of lags at which
estimates will be calculated.
Maximum Lag
Enter the desired maximum number of lags at which to estimate the
autocovariance or autocorrelation function.
Results Save As
Enter the name for the object in which to save the results of the analysis. If an
object with this name already exists, its contents will be overwritten.
This must be a valid S-PLUS object name—any combination of
alphanumeric characters that starts with an alpha character is allowed. The
only non-alphanumeric character allowed is the period “.”. Names are casesensitive, so X and x are different names. The default is “last.acf”.
This will be saved as a list object. See the on-line help for acf for more
details on the returned object.
Plot ACF Results
Check this to display a plot of the estimates of covariance or correlation
against their corresponding lags. A 95% confidence interval around the zero
line will be included.
Related S-PLUS language functions:
acf, lag, acf.plot, ar, menuAcf
527
CHAPTER 19 USING MULTIVARIATE, SURVIVAL AND TIME SERIES MODELS
ARIMA MODELING
This dialog fits univariate Autoregressive Integrated Moving Average
(ARIMA) models estimated by gaussian maximum likelihood. See the online help for arima.mle for details on the algorithm and returned values.
To fit an ARIMA model:
Choose Statistics c Time Series c ARIMA Models from the main menu. The
dialog shown below appears.
Model Page
Time Series Data Data Frame
Select or enter the name of a data frame having time series as columns.
Time Series
528
ARIMA MODELING
Select the column containing the time series to be modeled.
c Tip…
You can enter the name of a univariate time series object directly in Time Series.
ARIMA Model Autoregressive (p)
Order Enter an integer giving the order of the autoregressive operator.
Difference (d)
Enter an integer giving the number of differences.
Moving Average (q)
Enter an integer giving the order of the moving average.
ARIMA Model Seasonality
Periodicity Select the period of the seasonal operator.
Period
Select the period of the seasonal operator of the ARIMA model. This field is
needed if Seasonality is Other.
Initial Parameters Enter Initial Parameter Values
(Optional) Check this to enable the input of initial AR coefficients and MA coefficients.
AR coefficients
Enter the vector of initial values for the AR coefficients to be used by the
optimizer. This must have length equal to p, the order of the autoregressive
operator. The default is zero for initial values.
MA coefficients
Enter the vector of initial values for the MA coefficients to be used by the
optimizer. This must have length equal to q, the order of the autoregressive
operator. The default is zero for initial values.
Other Predictors Add a Time Series Covariate
Check this to include other covariates in the model.
Time Series
Enter the name or expression for a univariate or multivariate time series or a
vector or matrix. These will be used as additive regression variables.
Results Save As
Enter the name for the object in which to save the results of the analysis. If an
object with this name already exists, its contents will be overwritten.
This must be a valid S-PLUS object name—any combination of
alphanumeric characters that starts with an alpha character is allowed. The
529
CHAPTER 19 USING MULTIVARIATE, SURVIVAL AND TIME SERIES MODELS
only non-alphanumeric character allowed is the period “.”. Names are casesensitive, so X and x are different names. The default is “last.arima”.
Print Results
Check this to print a summary of the fitted model in the designated output
window.
Fitting Options
Page
Maximum Iterations
Numbers Enter the maximum number of iterations permitted by the optimizer in
computing the parameters of the model. The default is 15.
Likelihood Evals
Enter the maximum number of times that the likelihood should be
evaluated. The default is 30.
530
ARIMA MODELING
Diagnostics
Page
Save Save As
Enter the name for the object in which to save the results of the analysis. See
the on-line help for arima.diag to find out more about the contents of this
object. If an object with this name already exists, its contents will be
overwritten.
This must be a valid S-PLUS object name—any combination of
alphanumeric characters that starts with an alpha character is allowed. The
only non-alphanumeric character allowed is the period “.”. Names are casesensitive, so X and x are different names.
Autocorrelation of Residuals
Check this to save the autocorrelation of the residuals.
Portmanteau Statistic
Check this to save a list representing the Portmanteau goodness of fit statistic.
Residuals
Check this to save residuals.
531
CHAPTER 19 USING MULTIVARIATE, SURVIVAL AND TIME SERIES MODELS
Standardized Residuals
Check this to save the standardized residuals.
Plot Diagnostics
Check this to generate a standard plot of diagnostics. See the on-line help for
arima.diag.plot for details on the different plot components.
Forecast Page
Parameters Time Periods To Forecast
Enter the number of time periods to forecast beyond the end of the series.
The default is 5.
Innovations variance (Optional)
Enter the estimated innovations variance if different than the concentrated
prediction error variance computed from the model.
Plot Including Standard Errors
Check this if a plot is desired.
Save As
Enter the name for the object in which to save the results of the analysis. If an
object with this name already exists, its contents will be overwritten.
This must be a valid S-PLUS object name—any combination of
532
ARIMA MODELING
alphanumeric characters that starts with an alpha character is allowed. The
only non-alphanumeric character allowed is the period “.”. Names are casesensitive, so X and x are different names.
The saved object will be a list with two components: the estimated mean of
the forecasts, and the approximate forecast error. This is only saved when a
string is entered in the Save As field.
Related S-PLUS language functions:
acf,
ar,
arima.mle,
arima.forecast, menuArima
arima.diag,
arima.diag.plot,
533
CHAPTER 19 USING MULTIVARIATE, SURVIVAL AND TIME SERIES MODELS
534
BUILDING FORMULAS
Overview
20
Linear Regression
536
Transformation
538
Cox Proportional Hazards
541
Many of the statistical functions in the previous chapters have the option of
building formulas. Formulas are required for modeling and defining the
response and explanatory variables as well as defining the structure of the
model. For example, if you expect a curvilinear relationship between the
response and explanatory variable you can specify the polynomial term in the
formula. In S-PLUS there is a specific structure to the formulas, the main
feature is the presence of a tilde (“~”) which separates the listing of the
response from the listing of the explanatory variables. Using the formula
builders described in this chapter, you can construct a formula without
knowing the details of the formula syntax of the S-PLUS language.
Use the Transformation dialog to manage the transformation of variables
when building a formula. When the Transformation dialog is active, the
model dialog which opened the formula dialog, and the formula dialog itself,
are unavailable. After performing transformations, click OK and the new
variable list will be sent back to the Formula dialog, which will be active once
more.
Two formula builders are described in the following sections. Many of the
statistical dialogs use formula builders with a slightly different range of
options, however the options are present in the two builders described here.
Hint
Refer to the Programmer’s Guide for details of the syntax of formulas, should you need them, and to the
Guide to Statistics for many examples of formulas used in a wide range of statistical models.
535
CHAPTER 20 BUILDING FORMULAS
LINEAR REGRESSION
Use the Create Formula button from the model page of the Linear Regression
dialog to open up the Formula page.
Figure 20.1: Formula page for the Linear Regression dialog.
Tip...
A data frame is required to open the formula page. When the formula page is up, the Data Frame and
the Formula group in the model page are disabled until OK or Cancel is clicked. If a formula is
composed and OK or Apply is clicked, the formula is sent back to the model page.
Variable Choose Variables
Variables of the Data Frame selected in the model page are displayed in the
multiple selection box Choose Variable(s). When it is appropriate, you may
press on the CTRL key to select more than one variable. After selecting
variables, assign the selection as response or predictors to complete the
formula. If you want to do transformations on some variables, click on
Transformation.
536
LINEAR REGRESSION
Add Click on Response to assign the selection as the response. Click Main Effect
to assign the selection as a main effect. Click on Interaction to assign the
selection as an interaction term. Click on Main+Interact to assign the
selection as main effects and interaction terms. Click on Quadratic to assign
the selection as a quadratic item. Click on Cubic to assign the selection as a
cubic item.
Special Term After selecting variables from Choose Variable(s), click on the list box Term
Category to assign the selection as a special term. For example, all cross terms
give you all possible main effects and interaction terms to an order. Some
special terms have options listed in the box Option. The syntax of the default
option is shown in box Format. Click on button Add to enter the term in the
formula.
Remove Check Remove Intercept, if you don’t want an intercept in the formula.
When predictors are added to the formula, they are listed as options in the
box Term. If you decide to delete some terms, select the term first then click
on Remove. The term is removed from the formula and the option list in
Term.
Formula
The wide string box Formula shows the formula you are building. You may
edit the box directly or right click on the box and then click on zoom for
further editing.
537
CHAPTER 20 BUILDING FORMULAS
TRANSFORMATION
Use the Transformation button in the Formula page to open the
Transformation dialog.
Figure 20.2: The Transformation dialog.
Tip...
A list of variables in the formula dialog is required to open the transformation dialog. When the
transformation dialog is up, the model and the Formula dialogs are disabled until OK or Cancel is
clicked. Select variable(s), select a function, then add the new variable to the list. The new variables list
will be sent back to the formula dialog after you click on OK.
Variable Variables listed in the formula dialog are displayed in the multiple selection
box Choose Variable(s). When it is appropriate, hold down the CTRL key to
select more than one variable. After variable selection, select a function to
apply to the selection. The transformed variables are displayed in the box
New Variable(s). Click on Add to add the transformed variables to the
variable list in Choose Variable(s).
Function Click on a button in this group to apply a transformation to the selected
variables. The eight buttons perform the transformations, Absolute: abs(x)
for absolute value, Exp: exp(x) for exponential, Log: log(x) for natural log,
Log10: log10(x) for log base 10, Sq. Root: sqrt(x) for square root, Reciprocal:
x^(-1) for reciprocal, Quadratic: x^2 for quadratic, Cubic: x^3 for cubic.
538
TRANSFORMATION
Function with Select an option from the list box Function to do a linear or power
Constant transformation. Enter a number in the Constant box, then click on the Do
button to perform the transformation.
Example
To create a formula for the linear regression dialog, the user has to select a
data frame from the Data Frame drop down list box in the Model page. The
user can either type in the formula in the wide string box Formula or open a
formula builder to do this. For example, you want to use the data frame
fuel.frame and run a linear regression. The intention is to regress Fuel on
Weight and Mileage.
1. Open the formula page. After opening the Linear Regression dialog,
you choose the fuel.frame from the Data Frame drop down list box
and click on the button Create Formula. A formula page is open for
building the formula.
2. Select a variable. On the formula page, the variable names of the data
frame fuel.frame are listed in the list box Choose Variable(s). To set
the response of the model, select Fuel from the Choose Variable(s)
list box.
3. Set the response. Click on the button Response to set the chosen
variable as the response. “Fuel~” is automatically placed in the wide
string box Formula.
4. Select more than one variable. To set the main and interaction effect
of Weight and Mileage as predictors, you need to press and hold the
CTRL while clicking on Weight and Mileage. Two variables are
selected.
5. Set the predictor. Click on the button Main+Interact. to include
Weight and Mileage as the main effects and interactions in the
model. You will see “Fuel~Weight*Mileage” in the wide string box
Formula.
6. Define a special term. There are some special terms available in the
drop down list box Term Category. For example, if you want to set
all second order interactions among Weight, Disp., and Mileage as
predictors, instead of main effects and interactions on Weight and
Mileage, select Weight, Disp., and Mileage as described in Step 4.
Now select the all cross terms from the Term Category and then
click on the button Add. The term is added to the formula. You will
see”Fuel~(Weight+Disp.+Mileage)^2” in the Formula box.
7. Remove a term. To remove the intercept from the model, click on
the check box Remove Intercept. A (-1) is added to the formula. To
539
CHAPTER 20 BUILDING FORMULAS
remove a term, for example Weight, from the formula, select Weight
from the drop down list box Term and click on the Remove button.
The term Weight is removed from the formula.
8. Perform a transformation. If you want to apply a log transformation
on Fuel as the response, you can select the variable Fuel from the
Choose Variable(s) and click on the button Transformation. The
transformation dialog is opened. Click on the button Log: log(x), to
display log(Fuel) in the New Variable(s) box. Click on the button
Add, the new variable log(Fuel) is added to the Choose Variable(s)
list box. Click on the OK button to close the transformation dialog.
Click on the button Response, as in Step 3, to add “log(Fuel)~” as
the response to the formula. Similarly, you may use a transformed
variable from the Choose Variable(s) list box as an explanatory
variable.
9. Accept the formula. To pass the formula back to the Linear
Regression dialog you can either click on the OK or Apply button. If
you click on the OK button, the formula dialog is closed and the
formula “Fuel~Weight*Mileage” is shown in the Formula of the
Linear Regression dialog. You can now continue the Linear
Regression dialog. If you click on the Apply button, the formula
“Fuel~Weight*Mileage” is passed to the Linear Regression dialog,
while keeping the Formula dialog open. In this case you cannot edit
the Data Frame and the Formula group in the Model page of the
Linear Regression dialog.
Similar Formula Builders
The following statistical models use the same Formula Builder as Linear
Regression: Logistic Regression, Log-Linear Regression, Robust Regression,
Generalized Linear Models, and Generalized Additive Models.
The following use the Linear Regression Formula Builder with minor
differences: Fixed Effects ANOVA, Random Effects ANOVA, MANOVA,
Tree models, Local Regression, and Stepwise Linear Regression.
The following use a much simplified version: Crosstabulations, Factor
Analysis and Principal Components.
540
COX PROPORTIONAL HAZARDS
COX PROPORTIONAL HAZARDS
Use the Create Formula button from the Model page of the Cox Proportional
Hazards dialog to open the Formula page.
Figure 20.3: Cox Proportional Hazards dialog, Formula page.
Tip...
A data frame is required to open the formula page. When the formula page is up, the Data Frame, Type
of Censoring, and Formula group in the model page are disabled until the OK or Cancel button in the
formula page is clicked. If a formula is composed and the Apply button is clicked, the formula is sent
back to the model page. You may repeatedly enter formulas and apply them to the model page. A
formula can be autogenerated using the variable list in conjunction with the available buttons. The
Formula field can also be edited directly.
Variables Variables belonging to the Data Frame selected in the model page are
displayed in the Choose Variable(s) multiple selection box. Use the CTRL key
to select multiple variables, if appropriate. The variables list is used to define
the survival response and model predictors. To perform transformations on
selected variables, click on the Transformation button.
541
CHAPTER 20 BUILDING FORMULAS
Survival Response The fields necessary to define the survival response will vary depending on
the type of censoring for the problem at hand. The Time 2 and Origin for
Hazard fields will only be enabled for a counting process. Choose a time
variable from the variable list (Survival Times or Start Time) and click on the
Time 1 button. Similarly select a variable representing the Censoring
Indicator (event). If appropriate, select a variable for Time 2 (Ending Time).
After all required variables have been selected, click on the Add Response
button to place the survival response in the formula.
Add Term(s) Choose one or more variables from the Choose Variable(s) drop-down list
and then click Main Effects, or Main+Interact. button. The appropriate main
effect and/or interaction terms will be added to the formula. Click on the
Cluster, Strata, or Offset button to define clustering, stratifying or offset
variables, respectively. The appropriate term will be added to the formula.
Remove Term As predictors are added to the formula, they are listed as options in the Term
list box. To delete a given term, select a term from the list, then click on the
Remove button.
Formula
The wide string Formula box shows the formula you are building. You may
edit the box directly or right click on the box and then click on zoom for
further editing.
Examples
Example 1: A simple case using the Ovarian data frame
This example creates a formula to model survival as a function of age and
extent of residual disease (residual.dz). The variables futime and
fustat contain the time and event information, respectively. In the formula
field, the survival response appears as a call to the Surv function. The
arguments to Surv are the variables selected for Time 1, Time 2 (if
applicable), Censoring Indicator, and Origin (if applicable). The variable
selected as the Censoring Indicator call can be coded using 0 = alive, 1 =
dead. Other choices include 1/2 or T/F, where T or 2 indicates death. For
interval censored data (Parametric Survival only) 0 = right censored, 1 = event
(death), 2 = left censored, and 3 = interval censored. See the help file on Surv
for more details.
1. Choose Statistics/Survival/Cox Proportional Hazards from the main
menu.
2. In the Data Frame field enter or select ovarian, then click the Create
Formula button.
3. Create the Survival Response by selecting futime from the Choose
Variable(s) list and click the Time 1 button. Then select fustat from
542
COX PROPORTIONAL HAZARDS
the Choose Variable(s) list and click the Censoring Indicator button.
Click the Add Response button.
4. Define explanatory terms by holding down the CTRL key and
simultaneously select age and residual.dz from the Choose
Variable(s) list. Then click the main effects button from the Add
Term(s) group.
5. A basic survival formula is now created. Click the OK button to
accept the formula and return to the Cox Regression dialog.
Example 2: A stratified model using the Lung data frame
This example creates a formula to model survival as a function of age, ECOG
performance score (ph.ecog), Karnofsky score (ph.Karno), calories
consumed at meals (meal.cal), and weight loss(wt.loss), stratified by sex.
The variables time and status contain the survival times and event
indicator, respectively.
1. Choose Statistics/Survival/Cox Proportional Hazards from the main
menu.
2. In the Data Frame field enter or select lung, then click the Create
Formula button.
3. Create the Survival Response by selecting time from the Choose
Variable(s) list and click the Time 1 button. Select status from the
Choose Variable(s) list and click the Censoring Indicator button.
Click the Add Response button.
4. Define explanatory terms by selecting sex from the Choose
Variable(s) list and click on the Strata button from the Add Term(s)
group. While holding down the CTRL key, select age, ph.ecog,
ph.karno, meal.cal, and wt.loss from the Choose Variable(s) list.
Click the Main Effects button from the Add Term(s) group.
5. A survival formula defining a model based on all the variables,
stratified by sex, is now created. Click the OK button to accept the
formula and return to the Cox Regression dialog.
Example 3: A counting process model using the Heart data frame
This example creates a formula to model survival as a function of age of
acceptance and transplant event. Variables start and stop mark the time
interval and the variable event is the event indicator for the stop time.
543
CHAPTER 20 BUILDING FORMULAS
1. Choose Statistics/Survival/Cox Proportional Hazards from the main
menu.
2. In the Data Frame field enter or select heart.
3. Select counting from the Type of Censoring drop down list.
4. Click the Create Formula button.
5. Create the Survival Response by selecting start from the Choose
Variable(s) list and click the Time 1 button. Select stop from the
Choose Variable(s) list and click the Time 2 button. Select event
from the Choose Variable(s) list and click the Censoring Indicator
button. Click the Add Response button.
6. Define explanatory terms by holding down the CTRL key, while
selecting age and transplant from the Choose Variable(s) list. Then
click on the Main+Interact. button from the Add Term(s) group.
Select year and surgery from the Choose Variable(s) list. Click the
Main Effects button from the Add Term(s) group.
7. A survival formula using two variables which mark the time interval
is now created. Click the OK button to accept the formula and
return to the Cox Regression dialog.
Similar Formula Builders
The following statistical models use a similar Formula Builder as that for Cox
Proportional Hazards: Parametric Survival, Nonparametric Survival.
544
WORKING WITH SCRIPT,
COMMANDS AND REPORT
WINDOWS
Overview
21
Overview
545
The Script Window
Working with Scripts
Using Find and Replace
Hiding and Unhiding Scripts
Context Sensitive Help
Using the Right Button Menu
Show Dialog
547
547
552
554
555
555
556
Time Saving Tips for Using Scripts in S-plus
History Log
Dragging Graph Objects into a Script Window
Dragging Function Objects into a Script Window
558
558
560
560
The Commands Window
561
The Report Window
563
With the Script window, scripts (arbitrary S-PLUS commands) can be written
to automate the more repetitive aspects of analyzing data and creating graphs.
Each Script window has an output pane that displays output from the
running script and a program pane that is used to type in the commands that
make up the script. Scripts allow you to access S-PLUS's programming
language to write and commands to be executed to import or export data,
transform the data, run analyses, create, modify, or print graphs, etc.
You can execute scripts from within S-PLUS, or from another application (via
DDE or by calling S-PLUS and passing the script name on the command
line).
Script windows are an alternative to the Commands window. The
Commands window is interactive, and commands typed in the window are
immediately evaluated through the interpreter with the output shown below
545
CHAPTER 21 WORKING WITH SCRIPT, COMMANDS AND REPORT WINDOWS
each command. The Script window on the other hand, lets you type a set of
commands and functions, and will only evaluate them on demand. The
script can be executed by clicking on the Run button. If a section of the script
is selected (highlighted), only that selection will be executed. The output is
shown in the output pane and not below each command. The Commands
window is preferable for the user doing interactive exploratory data analysis
at the prompt, while the Script window is useful for writing longer functions.
Figure 21.1: A Script window, showing the program pane (top) and output pane (below).
546
THE SCRIPT WINDOW
THE SCRIPT WINDOW
Any executable statements or commands in S-PLUS can be entered into a
Script window and executed. For example, you could enter the following
expression in a Script window:
objects()
All Script windows have an output pane which contains output from print
statements and information about warning and error messages that occur
when running your script. The Script window program pane contains a line
and column number indicator in the upper left of the window that helps you
locate lines in your script when you are editing.
Table 21.1: The Script toolbar.
Run selected
script
Working with
Scripts
Find text
Scripts can be created or opened, edited, run, saved, and printed.
To create a new script
1. Click the New File button, or choose New from the File menu. A list
of window types will pop up.
547
CHAPTER 21 WORKING WITH SCRIPT, COMMANDS AND REPORT WINDOWS
2. Select Script File and click OK.
Figure 21.2: Open/New can be used to create many file types, including a Script file.
A new script is created and displayed in a window. New scripts are given
temporary default names.
To edit a script into a Script Window
You can type commands directly into a Script window program pane using
commands and expressions in the S-PLUS Language.
When you click the mouse in the upper pane, the caption (or title) of the
window changes to the name of the script followed by "- program". As you
type in this pane, the line and column number indicators change to reflect
where you are editing.
The lower pane is used for script output. When you run your script, all
output, such as that from the print function, calls commands in your script
and any warnings or errors, normally appear in this output pane (this can be
changed through the Options menu). When you click the mouse in this
pane, the caption of the Script window changes to the name of the script
followed by "- output". You can copy text out of this output pane into the
clipboard, but you cannot enter text.
To open an existing script file
w
Click the Open button on the standard toolbar. Or,
w
From the File menu, choose Open. Or,
1. In the Object Browser, select the type of files to be S-PLUS Script
Files (*.ssc).
2. Use the Browser to navigate to the folder of your choice and select
the script file, for instance my_script.ssc.
548
THE SCRIPT WINDOW
3. Click on Open to create a new Script window named my_script.ssc.
Figure 21.3: Opening a script file.
To run a script
from a Script
window
You can use the Run button or the Run menu option to execute your scripts.
To run a script
w
Click the Run button on the Script toolbar, or
w
From the Script menu, choose Run.
To run a portion of a script
1. Select the lines in the script that you want to run.
2. Click the Run button on the Script toolbar, or choose Run from the
Script menu.
When you run your script file, the Script window title changes to the name
of the script followed by "running". When the script is stopped or has ended
execution, the title changes back to "program".
To save a script into a script file
1. Click the Save button on the standard toolbar, or, from the File
549
CHAPTER 21 WORKING WITH SCRIPT, COMMANDS AND REPORT WINDOWS
menu, choose Save or Save As menu items, or type CTRL+S.
2. If you chose Save As, or if the Script window had never been saved
before, a browser window will appear.
3. Use the browser to navigate to the folder of your choice and change
the File name text field to the file name of your choice, for instance
savetrees.ssc.
4. Click on Save to create a new script file named savetrees.ssc.
Figure 21.4: Saving a Script file.
To print a script
file
You can print the content of a Script window.
1. Select the Script window to print.
2. From the File menu, choose Print Script...
3. Use the common Print dialog to specify your print options and click
OK (the actual Print dialog you see will depend on which platform
you use and which default printer is currently in use). Or
1. Click on the Print button on the standard toolbar
2. A dialog will show up to confirm which Script window you want to
print:
550
THE SCRIPT WINDOW
3. Click Yes to print (using the default printer and default settings), No
to abort printing.
Stopping a Script While running a script or a selected portion of a script, you can usually stop
it using the
further.
Interpreting
Errors and
Warnings
ESC
key. This will prevent the script from being evaluated any
If S-PLUS encounters a problem with an expression or a command you enter
in a script file, it will display an error or warning in the output pane of the
Script window. The warning or error message explains the problem and, in
some cases, likely causes of the problem. You can then move to this line and
edit the script to correct the problem and re-run the script.
Warnings are not considered as serious as errors. Typically, warnings will not
stop script execution, whereas errors will.
Selecting text in
a Script window
You can select all text in the Script window by selecting Select All from the
Edit menu, or by pressing the CTRL-A key.
Clearing, Cutting,
Copying, and
Pasting text in a
Script window
You can move text within a Script window using the Cut, Copy, and Paste
commands in the Edit menu, or the Cut, Copy, and Paste buttons on the
standard toolbar, or the CTRL+X, CTRL+C and CTRL+V keys. You can use
these commands to move and copy text within the same Script window, to
another open Script window, or between S-PLUS and other applications.
Text that you cut or copy is placed on the Clipboard. An item placed on the
Clipboard will remain there until either the Cut or Copy command are
chosen. You can paste text from the Clipboard into a Script window as many
times as you wish.
The same techniques used to move and copy text are used within S-PLUS to
move and copy any item or character.
You can use the Clear command in the Edit menu (or Delete key) to delete
text from the Script window without keeping a copy of the text on the
clipboard.
551
CHAPTER 21 WORKING WITH SCRIPT, COMMANDS AND REPORT WINDOWS
To move or copy texts in scripts
1. Select the text.
2. Click the Cut or Copy button on the standard toolbar, or choose
Cut (CTRL+X) or Copy (CTRL+C) from the Edit menu. This places
the text on the Clipboard.
3. Position the insertion point in a new location in the Script window.
Click the Paste button on the standard toolbar, or choose Paste from
the Edit menu (CTRL+V).
Using Undo in a
Script Window
The Script Window has its own Undo capability, which is separate from the
Undo used while you work with Graph sheets and Data windows. While you
edit a script, you cannot undo or redo any actions for Graph sheets and data
objects. While editing scripts, you can undo your typing changes by choosing
Edit/Undo from the menus. As soon as you leave the Script window, your
Undo queue for Graph sheets or Data windows is restored.
To undo the last change made in a Script window
w
Click the Undo button on the standard toolbar, or choose Undo
from the Edit menu, or type CTRL+Z.
The last change you made will be undone. If you need to restore the Script
window to its previous state before your last undo, you can Undo again and
the change you just undid will be restored.
Using Find and
Replace
To review or change text in a Script window, use the Find or Replace options.
You can use Find to locate specific occurrences of text in your script. You can
use Replace to locate the text and replace it throughout your script. Find and
Replace can be used for certain words, phrases, or sequences of characters,
such as whole commands.
S-PLUS will replace specified text throughout a script unless you select a part
of the script. It is a good idea to save your script before you use Replace so
that if you do not like the results, you can close the Script window without
saving the changes. You can also use Undo to undo the last replacement made
to the script.
552
THE SCRIPT WINDOW
To find text
1. Click the Find button on the Script toolbar, or choose Find from the
Edit menu, or click on CTRL+F. The Find dialog will pop up.
2. In the Find What box, type the text you're searching for.
Figure 21.5: The Find dialog will find a string of up to 255 characters, the text will scroll horizontally as you type.
If you used Find or Replace in your current work session, the text you
last searched for is selected in the Find What box. Type over the text to
find different text.
3. Choose the Find Next button to begin searching.
The Find dialog has the options in Table 21.2:
Table 21.2: Check box options in the Find and Replace dialogs.
Option
Purpose
Match whole word only
Choose this option to find whole words, not substrings.
Match case
Choose this option to find only words having the specified pattern of
uppercase and lowercase letters.
To find and replace text
1. From the Edit menu, choose Replace, or type CTRL+H. The Replace
dialog will pop up.
2. In the Find What box, type the text you're searching for.
553
CHAPTER 21 WORKING WITH SCRIPT, COMMANDS AND REPORT WINDOWS
3. If you used Find or Replace in your current work session, the text
you last searched for is selected in the Find What box. Type over the
text to find different text.
Figure 21.6: The Replace dialog has the same text length limits as the Find dialog.
4. In the Replace With box, type the replacement text.
As with the Find What box, if you used Replace With in your current
work session, the replacement characters you last specified are selected in
the Replace With box. Type over the text to specify different replacement
characters.
• Choose the Find Next to move the cursor to the next occurrence of
the word in Find What.
• Choose Replace to replace the current occurrence of the word in
Find What with the word in Replace With.
• Choose Replace All to replace all occurrences of the word in Find
What with the word in Replace With, with no confirmation dialog.
You can also delete text with the Replace option. Follow the steps above, but
leave the Replace With box blank.
Hiding and
Unhiding
Scripts
554
You can hide scripts to reduce the number of windows on your screen.
Hidden scripts can still be accessed through dialogs and other scripts, but
cannot be edited directly until they are made visible.
THE SCRIPT WINDOW
To hide a script
w
From the Window menu, choose Hide.
To unhide a script
1. From the Window menu, choose Unhide. A list of hidden Script
windows will pop up.
2. Double-click the script you wish to unhide, or select one and click
OK.
Figure 21.7: Unhiding a script.
Context
Sensitive Help
If the cursor is at the beginning, in the middle or at the end of a word in a
Script window, typing the F1 key will pop up help for this word. Specifically,
if the word is the name of an S-PLUS function, help will be shown for this
function.
Using the
Right Button
Menu
Right clicking in a Script window will show the following pop up menu. The
Cut/Copy/Paste/Clear options may be enabled or disabled depending on the
555
CHAPTER 21 WORKING WITH SCRIPT, COMMANDS AND REPORT WINDOWS
existence of a selection in the window.
Figure 21.8: The Context menu in the Script window.
Show Dialog
If you do not remember the arguments of a function, Show Dialog will
present you with a dialog box where you can easily fill in the arguments and
get on-line help. Type the name of the function, double-click on it to select
it, then right-click and select Show Dialog from the pop up menu. The
dialog for the function will appear. Fill it in, click OK, and your function call
is inserted automatically for you in the Script window.
A similar feature is available to access the dialogs for the object-oriented
graphics of S-PLUS. If you need help to generate a line plot from a Script
window, type the class of graphics that you need, for instance LinePlot or
Histogram. Select the class (by double clicking on its name), right click and
select Show Dialog from the pop up menu. The dialog for the line plot or
histogram will appear. Fill it in, click OK, and your call using the guiCreate
function is inserted automatically for you in the Script window.
The class name to use for particular plots and operations is available in the
documentation for each plot or operation. It is also possible to generate the
plot from the user interface, and look at the History log for the class name
that was used. The list of available class names can be obtained interactively
by using guiGetClassNames in the Commands window or from a Script
window. The list of possible arguments for guiCreate or guiModify for the
particular class name is available by calling guiGetArgumentNames(
556
THE SCRIPT WINDOW
your.classname ).
To get the dialog for an S-PLUS object, select the object (by double clicking
on its name), right click and select Show Dialog from the pop up menu. The
dialog for the object will appear. Fill it in, click OK, and your changes for this
object will take effect immediately.
Expand Inplace
If you need to get the body of a function in your Script window, select the
function name (double click on the function name), right click, select
Expand Inplace and the function body is inserted automatically for you in
the Script window.
Font
If the font of the Script window is too small or too large, right click in the
Script window, select Font, and the common font chooser dialog will let you
select the font of your choice.
Help
You can get help for any documented S-PLUS function by right clicking on
the function name and selecting Help. The help viewer will open up at the
given topic.
557
CHAPTER 21 WORKING WITH SCRIPT, COMMANDS AND REPORT WINDOWS
TIME SAVING TIPS FOR USING SCRIPTS IN S-PLUS
S-PLUS provides several methods for writing scripts. The easiest is to open a
new Script window and type in commands and execute them. Other ways to
generate S-PLUS scripts include using the History log and the menus, or
dragging objects into a Script window to record the commands that create or
modify these objects. This section discusses how to view the History log, how
to generate a given plot using S-PLUS commands, and how to edit an S-PLUS
function’s definition, using a Script window. You can drag and drop other
object types from the Object Browser to a Script window. Of particular
interest are dragging toolbars, menu items, ClassInfo and FunctionInfo
objects (respectively) as examples of how to change which toolbar is showing,
modify the menu structure of S-PLUS and create or modify dialogs in S-PLUS
(respectively).
History Log
S-PLUS keeps a continuous record, or history, of menu, toolbar and dialog
operations. Visual edits, such as changing cells in data windows or
repositioning an object on a Graph sheet, are also recorded, as are commands
issued in the Commands window. The S-PLUS programming language
equivalents of these operations are recorded in the History log.
You can view the History log in a Script window.
In order to record dialog operations in the History log you must use the OK
or Apply buttons in the dialog to accept your changes. If you choose Cancel
or press ESC from the dialog, the command which corresponds to the dialog
is not recorded in the History log.
You can edit lines in the History log just as you would any other script. These
edits do not modify the History log itself; they only modify the copy in this
Script window. You can cut and paste parts of the script into other scripts,
execute portions of it, or the entire script, and save the script to a file.
The maximum size of the History log (the total number of operations
recorded) can be specified in the History Entries field of the Undo and
History dialog available through the Options menu.
You should clear the History log before you start recording steps. This will
save editing time later and make it clearer what commands were generated by
the actions you made in menus and dialogs.
To view the current History log in a Script window
1. Click the History Log button to display the History log with default
558
TIME SAVING TIPS FOR USING SCRIPTS IN S-PLUS
settings; or from the Window menu, choose History then Display.
The Display History Log dialog appears.
2. Specify any desired display options.
3. Choose OK to display the History log.
Table 21.3: Options in the Display History dialog.
Option
Purpose
Script Name
Specify a name for the script that will contain the History log. This is
optional; the default script name is HISTORY.
Start with Entry, End with Entry
Specify the starting and ending entry numbers to be displayed in the
History log. This lets you control the number of History entries, and
which entries, get placed in the History log.
Selected Object Only
Choose to have the script contain History entries for the selected
object only. This is useful when you want to focus on the commands
for a specific object. For example, if you select a symbol, the script
will contain all the entries related to creating and modifying the
symbol.
Reverse Order
Choose to display the History entries in the reverse order in which
they were generated. You will see the command executed most
recently at the top of the script.
To execute recorded commands in the History log:
1. Use the mouse to highlight History entries you wish to execute.
2. Click the Run button on the script toolbar or choose Run from the
Script menu.
You can also cut, paste and save these commands to another script file.
To clear the History log
You should clear the History log before you start recording steps. This will
save editing time later and make it clearer what commands were generated by
the actions you made in menus and dialogs.
w
From the Window menu, choose History, then choose Clear from
the submenu.
559
CHAPTER 21 WORKING WITH SCRIPT, COMMANDS AND REPORT WINDOWS
Dragging
Graph Objects
into a Script
Window
Another way to create scripts is to drag objects from a graph, like plots or
extra symbols, into a Script window. If you want to know which S-PLUS
commands are used to create or modify a particular plot, you can drag it into
the Script window and the S-PLUS command to create it will be written there
automatically. You can then run the generated script to create or modify the
plot. This is an alternative to using menu options and dialogs to create or
modify.
To drag graph objects into a Script window
1. Open a previously saved Graph sheet or create a new Graph sheet
containing the objects for which you want commands.
2. Open a previously saved script or create a new Script window by
choosing New from the File menu.
3. You may wish to vertically tile the Script window and the Graph
sheet window. This makes it easier to select and drag objects between
the Graph sheet window and the script. To do this, choose Tile
Vertical from the Window menu.
4. Select the objects from the graph and drag them into the upper pane
(the program pane) of the Script window.
Dragging the mouse
As you drag the mouse, the cursor changes into a "drop" cursor. When the mouse is inside the program
pane, you will see a gray vertical marker line at the left-most edge of the line you are over. This indicates
where the commands will be inserted in the script when you release the mouse. When you release the
mouse the commands will be written into the Script window, starting at the line where you dropped the
objects.
Dragging
Function
Objects into a
Script Window
560
If you drag an S-PLUS function object from a Browser window onto a Script
window, the function definition is expanded in the Script window. This is a
very convenient shortcut to edit a function’s body. If you want to test your
changes select Run in the Script menu, or click on the Run button, and the
new function definition is automatically sent to the S-PLUS interpreter.
THE COMMANDS WINDOW
THE COMMANDS WINDOW
The Commands window enables access to the S-PLUS language, and provides
backward compatibility for users of earlier versions of S-PLUS. There are
some statistical and analytic techniques that are only available through the
Commands or Script windows. This section is a basic introduction to the
Commands window. The Programmer’s Guide and the Guide to Statistics
discuss the use and features of this powerful tool in detail.
To open the Commands window click on the button shown in Figure 21.9:
Figure 21.9: The Commands window button on the Standard toolbar.
Unlike other windows, only one Commands window can be open.
Users of earlier versions of S-PLUS will see the familiar “>” prompt. This is
the prompt for an S-PLUS command line.
Table 21.4: The Commands window toolbar.
Create object oriented
(editable) graphs
Using a
Command Line
The command line works in an interpretive fashion. That is, whatever you
type in, S-PLUS will attempt to interpret and act on. For example, it can be
used as a calculator:
>3 + 7
[1] 10
Note in the above example that spaces are redundant, there can be an
arbitrary amount of white space between the “+” and the “7”. The output
from any S-PLUS command is itself an S-PLUS object, in order that it can be
used as input to a further command. The [1] above simply means that the
561
CHAPTER 21 WORKING WITH SCRIPT, COMMANDS AND REPORT WINDOWS
following output starts at position 1 in the output object.
The key operation in S-PLUS is an assignment, which basically names the
output in such a way that it can be used in the future. It is extremely
important to note that S-PLUS stores a permanent copy, on disk, of any
objects created in this way. Assignment is carried out with the “<-” operation.
For example:
> x <- 3+7
assigns 10 to x. This is of course, a trivial example. Assignments can be made
to any S-PLUS data object, such as data frames, vectors, matrices and lists.
A few characteristics of the S-PLUS language are:
• It is case sensitive: the object X is not the same as object x.
• Commands are ended by typing RETURN, but if the statement is not
correctly terminated a continuation prompt “+” is used reminding
you that more input is necessary. This can be useful when entering
long statements.
• Use meaningful names for assignment; confusion can reign if single
letter names are used. For example, T is reserved for logical true, and
t is the transpose function.
• The Up and Down arrows can be used to scroll backward and
forward through the list of commands. So a typing error can be
easily corrected, or a new similar command entered without
completely retyping it. Other editing commands are described in the
first chapter of the Programmer’s Guide.
• All commands entered into the Commands window will appear in
the History log.
• To get help on any S-PLUS function, just type it in preceded by a
question mark. For example:
> ?aov
will give a help file for the analysis of variants function.
Exiting the
Commands
window
562
Clicking on the close window box closes the Commands window, or to quit
S-PLUS entirely, type q() at the prompt.
THE REPORT WINDOW
THE REPORT WINDOW
The Report window is similar to the Script window. They both are primarily
text windows which can be opened and saved via the File menu and are
editable. Unlike the Script window, the Report window does not deal with
programs or scripts. The Report window is a place-holder for the text output
resulting from any operation in S-PLUS.
However, the user must select it as the preference for the text output. See
sections below on redirecting text output on how to set this option. The
Report window supports most basic editing features such as cut, copy, paste
and so on. Character formatting is also supported in the Report window.
Operations
The Report window supports the following operations.
• Typing from the keyboard, point-and-click, highlight-drag-anddrop, etc.
• Undo, Cut, Copy, Paste, Find, Replace, and so on, are supported via
the Edit menu and context-sensitive menu (right-click).
• Pasting from the clipboard (including graphics and other OLE
objects) are supported for RTF files only. In particular, if you
attempt to save the Report window as a text file and have graphical
images pasted in it, the graphics will not be saved and you will not
get an error message.
• Fonts are supported via the context-sensitive menu (right-click) and
the Format menu. Fonts are supported in RTF mode only.
• User input via the keyboard may go through the Report window
(trickling input).
Report window
operations
The Report window may be saved in one of two file formats: Plain text
format(.txt); and Rich Text Format (.rtf). Plain text can be used with the
widest variety of programs and is relatively fast; RTF has more capability but
RTF files are bigger and slower than their plain text counterparts.
How to save the Report window
1. From the File Menu: While the Report window is in focus: Choose
Save or Save As.
563
CHAPTER 21 WORKING WITH SCRIPT, COMMANDS AND REPORT WINDOWS
2. From the Command line: call the guiSave("Report",
function. For example,
..)
guiSave("Report", Name="Report", FileName =
"C:\\temp\\report2.rtf")
will save the default report in the file C:\\temp\\report2.rtf.
To create a new Report window
1. From the File Menu: choose New. A scroll box will open. Select
Report file.
2. From the command line: call the guiCreate("Report",
function. For example
..)
guiCreate("Report",Name="ShortReport")
will create a new Report window called ShortReport. The function call
menuDescribe(data = FuelFrame, min.p = T, first.quant.p =
T, mean.p = T, median.p = T, third.quant.p = T, max.p = T,
nobs.p = T, valid.n.p = T, var.p = F, stdev.p = T, sum.p =
F, factors.too.p = T, print.p = T)
will populate the newly opened Report window with some text from the
data frame FuelFrame.
How to Open a file in the Report window
1. File Menu: choose Open and select a file with an .rtf extension
2. Command line: guiOpen("Report", ..) For example, to open a
text file in a Report window:
guiOpen("Report",FileName="C:/temp/report1.txt")
To open an .RTF file report2.rtf in a Report window:
guiOpen("Report",FileName="C:/temp/report1.rtf")
How to set preferences for the Report window
1. From the Options Menu: Select Text output window to display a
dialog box with radio buttons. Select the Report button.
564
THE REPORT WINDOW
2. From
the
Command
guiSetOutputWindowPreference
line:
call
function. For example
the
guiSetOutputWindowPreference(choice = "Report")
will change the default output to be the Report window, and
guiSetOutputWindowPreference(choice="Default")
will change the default output back to the default.
The default behavior for sending the text output is:
1. Operations in the Commands window: append to output in the
Commands window.
2. Operations in the Script window: append to the output pane.
3. Other operations including Menu/dialog: append to the Report
window.
Error/Warning
messages
By default, most error/warning messages go wherever the text output goes.
Some error/warnings for operations on GUI objects go to the message
window.
Trickling Input
Some old S functions such as readline, inspect, and so on need user input
via keyboard. We refer to this as trickling input, and it is handled as follows:
1. Operations in the Commands window: enter at the Commands
window.
2. Other operations: launch the dialog prompting for input.
565
CHAPTER 21 WORKING WITH SCRIPT, COMMANDS AND REPORT WINDOWS
566
CUSTOMIZING THE USER
INTERFACE
Overview
22
Toolbars and Palettes
Creating Toolbars
Modifying Toolbars
Displaying Toolbars
Manipulating Toolbars
Saving and Opening Toolbars
568
568
572
574
575
575
Dialogs
Creating Dialogs
Modifying Dialogs
Displaying Dialogs
Example: The Contingency Table Dialog
576
577
582
582
582
Menus
Creating Menu Items
Modifying Menu Items
Displaying Menu Items
Manipulating Menu Items
Saving and Opening Menus
Example: Customizing the Context Menu
586
586
589
590
590
591
591
Using the ClassInfo Object
Properties of the ClassInfo Object
Creating and Modifying a ClassInfo Object
595
595
596
In S-PLUS, it is easy to modify the appearance of the dialogs found in the user
interface. The user can also create customized dialogs and invoke them with
toolbar buttons and menu items. Similarly, menus, toolbars, and palettes can
be created and modified by the user. This chapter describes in detail how to
use the S-PLUS user interface to create and modify the dialogs, menus,
toolbars, and palettes which make up the interface.
567
CHAPTER 22 CUSTOMIZING THE USER INTERFACE
TOOLBARS AND PALETTES
In S-PLUS, toolbars and palettes represent the same type of object. When a
toolbar is dragged into the client area below the other toolbars, it is displayed
there as a palette. When a palette is dragged to the non-client area, close to a
toolbar or menu bar, it “docks” there as a toolbar.
Toolbars are represented in the Object Browser as Toolbar objects. These
contain ToolbarButton objects which represent their buttons. This section
shows how to work with toolbars through the user interface.
While it is not hard to create or modify toolbars through the user interface, as
shown in this section, it is sometimes easier to work with toolbars using the
S-PLUS programming language. As you work with toolbars by the methods in
this section, take an occasional moment to review the program code
generated in the history log. See the S-PLUS Programmer’s Guide for a
systematic explanation of the program code.
Creating
Toolbars
To create a Toolbar object, first open the Object Browser and filter by
“Toolbar” to see the toolbars and toolbar buttons. To create a new toolbar,
right-click on the default object icon, labeled “Toolbar,” in the left pane of
the Object Browser. Select New Toolbar from the context menu.
(Alternatively, right-click in the S-PLUS application window, outside of any
open document window, and choose New Toolbar from the context menu.)
The New Toolbar dialog appears, as shown in figure 22.1.
Figure 22.1: The New Toolbar dialog.
568
TOOLBARS AND PALETTES
To modify the default settings that appear in this property dialog in the
future, right-click on the default object icon, choose Properties from the
context menu, fill out the dialog with the desired defaults, and click OK.
Toolbar Name Enter a name for the new toolbar.
Make Toolbar for this Folder Enter a path for a folder (directory). The new
toolbar will contain a toolbar button for each file in the indicated folder. Use
the Browse button, if desired, to identify the folder. If no folder is specified,
the toolbar will contain a single button with the ToolbarButton defaults.
Document Type Select the document types which will, when in focus, allow
the toolbar to be visible.
Click OK and a new Toolbar object appears in the Object Browser.
Creating and
Modifying
Buttons
To add a button to an existing toolbar, right-click on the corresponding
Toolbar object in the Object Browser and select New Button from the
context menu. The ToolbarButton property dialog appears, as in figure 22.2.
Figure 22.2: The ToolbarButton property dialog.
Name Enter a name for the new button.
Type Select BUTTON to create a button, or select SEPARATOR to create a
gap between buttons in the toolbar.
Action This applies to ToolbarButton objects of type BUTTON.
• NONE. No action is performed when the button is clicked.
569
CHAPTER 22 CUSTOMIZING THE USER INTERFACE
• BUILTIN. One of the actions associated with the default menus or
toolbars is performed when the item is selected. These are listed on
the Command page in the Built-In Operation drop down box. This
option allows you to use in a customized toolbar any of the
"intrinsic" menu or toolbar actions, such as Window/Cascade.
• FUNCTION. Under this option, an S-PLUS function is executed
when the button is clicked. Optionally, the dialog for the function
can be made to appear.
• OPEN. The file specified on the Command page is opened when
the button is clicked. The file will be opened by the application
associated to it by the operating system.
• PRINT. The file specified on the Command page is printed when
the button is clicked. The file will be printed by the application
currently associated to it by the operating system.
• RUN. The file specified on the Command page is opened and run as
a script by S-PLUS when the button is clicked.
Tip Text Enter tool tip text for the button.
Hide Check this to make the button invisible. When the item is hidden, its
icon in the Object Browser appears grayed out. This can also be specified
through the context menu.
Deletable Check this to allow the item to be deleted.
Move to the Command page of the dialog.
Built-In Operation Select from the list of actions associated to the built-in
S-PLUS menus and toolbars. It is not possible to (easily) modify this list.
Command Enter the name of an S-PLUS function, or path and filename.
This field is enabled when Action is set to FUNCTION, OPEN, PRINT, or
RUN on the button page. Use the Browse button to identify the folder.
Parameters Edit the text in this field to specify the arguments for the
function which will execute when the button is clicked. The easiest way to
specify these arguments is to work through the Customize dialog available
through the context menu for the item in the Object Browser.
Show Dialog On Run This is relevant when Action is set to FUNCTION.
Check this to cause the dialog associated to the function to open when the
item is selected.
570
TOOLBARS AND PALETTES
Always Use Defaults This is relevant when Action is set to FUNCTION.
Check this to force the use of the default values when the function executes.
This can also be specified through the context menu.
S-PLUS makes a distinction between the default argument values for a
function as defined in the function’s dialog (via the FunctionInfo object)
and as defined by the function itself. Always Use Defaults refers to the dialog
defaults. Table 22.1: below summarizes how Show Dialog On Run and
Always Use Defaults work together. In it, “function” refers to the S-PLUS
Table 22.1: Summary of Show Dialog On Run and Always Use Defaults.
Show Dialog On
Run
Always Use
Defaults
checked
checked
The dialog always opens in its default state when the menu
item is selected. Changes are accepted, but do not persist as
dialog defaults.
checked
unchecked
The dialog always opens when the menu item is selected.
Changes are accepted and persist as dialog defaults.
unchecked
checked
The dialog does not appear and the function executes using
the current dialog defaults.
unchecked
unchecked
The dialog will appear once; either when the menu item is
selected or when Customize is selected from the menu
item’s context menu in the Object Browser. After that, the
dialog does not appear and the function executes using the
current dialog defaults.
Action when the menu item is selected.
function associated to the menu item, and “dialog” refers to the dialog
associated to that function.
Move to the Image page of the dialog.
Image FileName Enter the path and filename of a bitmap file whose image
will be displayed on the toolbar button. Use the Browse button, if desired, to
identify the file.
To modify a ToolbarButton object, use either the ToolbarButton property
dialog described above or the context menu, described below.
571
CHAPTER 22 CUSTOMIZING THE USER INTERFACE
Using the Context Menu
Insert Button Select this to insert a new toolbar button next to the current
one.
Hide Select this to hide the toolbar button.
Delete Select this to delete the toolbar button.
Edit Image Select this to open the bitmap file, using the operating systems
default bitmap editor, which contains the icon image of the toolbar button.
Button. Select this to open the Button page of the property dialog for the
toolbar button.
Command Select this to open the Command page of the property dialog for
the toolbar button.
Image Select this to open the Image page of the property dialog for the
toolbar button.
Save ToolbarButton Object as default Select this to save a copy of the
ToolbarButton object as the default ToolbarButton object.
Help Select this to open a help page on toolbar buttons.
Modifying
Toolbars
Toolbars can be modified using their property dialogs or their context menus.
Using the Property Dialog
Right-click on a Toolbar object and select Properties from the context menu.
The Toolbar property dialog appears as in figure 22.3.
Figure 22.3: The Toolbar Property dialog.
Document Type Depending on the type of document window—Graph
Sheet, Commands window, etc.--which has the focus, a toolbar may or may
572
TOOLBARS AND PALETTES
not be visible. Select the document types for which the toolbar should be
visible. The choice "All Documents" causes the toolbar to be always visible.
The choice "No Documents" ensures that the toolbar will be visible when no
document window has the focus; for example, when no window is open.
ColorButtons Check this to display button images in color.
ToolTips Check this to enable tool tips for the toolbar.
LargeButtons Check this to display large-sized buttons.
Hide Check this to hide the toolbar. This is also available through the
Toolbar object context menu.
Deletable Check this to allow permanent deletion of the toolbar.
Docked To Select the side of the S-PLUS window to which the toolbar will
be docked, or select NONE to float the toolbar as a palette.
Toolbar Top Enter the top coordinate of the toolbar in pixels.
Toolbar Left Enter the left coordinate of the toolbar in pixels.
Button Rows Enter the number of rows of buttons in the toolbar.
Using the Property Dialog
Right-click on the Toolbar object in the Object Browser.
New Toolbar Select this to open a new toolbar.
New Button Select this to add a new button to the toolbar.
Hide Select this to hide the toolbar.
Delete Select this to delete the toolbar.
Open Select this to open a toolbar that has been saved in an external file.
Save Select this to save a toolbar to its external file, when one exists.
Save As Select this to save a toolbar to an external file.
Unload Select this to unload a toolbar from memory. The toolbar is no
longer available for display. To reload a built-in toolbar, restart S-PLUS. To
reload a toolbar that has been saved to an external file, open that file.
Restore Default Toolbar Select this to restore a built-in toolbar to its default
state after it has been modified.
Properties Select this to display the property dialog for the Toolbar object.
Buttons Select this to display a dialog used for displaying or hiding different
buttons on the toolbar.
573
CHAPTER 22 CUSTOMIZING THE USER INTERFACE
Refresh Icons Select this to refresh the icon images on the toolbar buttons
after they may have been modified.
Save Toolbar Object as default Save a modified version of a toolbar as the
default for that toolbar.
Help Select this to display a help page on toolbars.
Displaying
Toolbars
To hide (or unhide) a toolbar, right-click on the Toolbar object and select
Hide (or Unhide) from the context menu. To selectively hide or display
toolbars, right-click outside of any open windows or toolbars and select
Toolbars from the context menu. A dialog like that shown in figure 22.4
Figure 22.4: The Toolbars dialog.
appears. Use the checkboxes to specify which toolbars will be visible.
To hide (or unhide) a toolbar button, right-click on the ToolbarButton object
and select Hide (or Unhide) from the context menu. To selectively hide or
display the buttons in a toolbar, right-click the Toolbar object and select
Buttons from the context menu. A dialog like that shown in figure 22.5
appears. Use the checkboxes to specify which buttons will be visible in the
574
TOOLBARS AND PALETTES
toolbar.
Figure 22.5: The Buttons dialog.
Manipulating
Toolbars
Toolbar buttons are easily copied, moved, and deleted through the Object
Browser.
Saving and
Opening
Toolbars
To save a toolbar to an external file, right-click on the Toolbar object in the
Object Browser and select Save As in the context menu. Enter a filename in
the Save As dialog and click OK. The extension .STB is added to the
filename.
To open a toolbar which has been saved in an external file, right-click on the
default Toolbar object and select Open from the context menu. In the Open
dialog, navigate to the desired file, select it, and click OK. The new toolbar is
visible in the Object Browser. Its name is the name of the external file,
without the extension .STB.
575
CHAPTER 22 CUSTOMIZING THE USER INTERFACE
DIALOGS
In S-PLUS, virtually every dialog has an associated object such as BoxPlot,
XAxisTitle, function, and so on. However, all customizable dialogs are
associated with functions, and they are known as function dialogs. Think of a
function dialog as the visual version of some S-PLUS function. For every
function dialog there is one S-PLUS function, and for every S-PLUS function
there is a dialog. The dialog controls in the dialog correspond to arguments
in the function, and vice versa. However, all function dialogs are displayed
with OK, Cancel, Apply (modeless) buttons that do not have any
corresponding arguments in the functions. When the OK or Apply button is
clicked on, the function is executed with argument values taken from the
current values of dialog controls. The characteristics of the controls in the
dialog are defined by property objects. Filter by “Property” in the Object
Browser (figure 22.6) to see objects of this type.
Figure 22.6: The Object Browser showing all Property objects.
The relationship between the function, the properties, and the dialog is
defined by a FunctionInfo object. A FunctionInfo object is a simplified
dialog template but contains the map of the properties and function
arguments. In addition, a FunctionInfo can be used to override some
characteristics of the specified property objects. Filter by “FunctionInfo” in
576
DIALOGS
the Object Browser (figure 22.7) to see objects of this type.
Figure 22.7: The Object Browser showing all FunctionInfo objects.
While it is not hard to create or modify dialogs through the user interface, as
shown in this section, it is easier to work with dialogs using the S-PLUS
programming language. As you work with dialogs by the methods in this
section, take an occasional moment to review the program code generated in
the History log. Most commands in the history log have the same argument
names as the prompts of dialog boxes that created them, except for any
spaces. See the Programmer’s Guide for an explanation of the program code.
Creating
Dialogs
To create a dialog in S-PLUS, follow these steps:
1. Identify the S-PLUS function which will be called by the dialog. This
can be either a built-in or a user-created function.
2. Create the “Property” objects, such as pages, group boxes, list boxes,
and check boxes, which will populate the dialog.
3. Create a “FunctionInfo” object having the same name as the
function in step 1. The FunctionInfo object holds the layout
information of the dialog, associates the values of the Property
objects in the dialog with values for the arguments of the S-PLUS
function, and causes the S-PLUS function to execute.
Creating Property objects
To create a Property object, open the Object Browser to a page with filtering
set to “Property.” Right-click on the default object, labeled “Property,” in the
577
CHAPTER 22 CUSTOMIZING THE USER INTERFACE
left pane and choose Create Property from the context menu. The property
dialog shown in figure 22.8 appears.
Figure 22.8: The property dialog for a Property object.
To modify the default settings that appear in this property dialog in the
future, right-click on the default object icon, choose Properties from the
context menu, fill out the dialog with the desired default values, and click
OK.
Name Enter a name for the Property object. To create a Property object, a
name must be specified.
Type Select Group or WideGroup to create a group box. Select Page to
create a tabbed page. Select Normal to create any other type of Property
object.
Default Value Enter a default value for the Property object. This will be
displayed when the dialog opens.
Parent Property Enter the name of a parent property, if any. This is used by
certain internal Property objects.
Dialog Prompt Enter text for the label which will appear next to the control
in the dialog.
Dialog Control Choose the type of Property object. Examples are Button,
Check Box, List Box, and Combo Box.
Range Enter the range of acceptable values for the function argument
associated with this property. For instance, if the values must be between 1
and 10, enter 1:10.
578
DIALOGS
Option List Enter a comma-separated list. The elements of the list are used,
for example, as the labels of Radio Buttons or as the choices in the drop down
box of a String List Box. A property may have either a range or an option list,
but not both. Ranges are appropriate for continuous variables. Option lists
are appropriate where there is a finite list of allowable values.
Property List Enter a comma-separated list of the Property objects included
in the Group box or on the Page. This applies to Property objects having
Type Page or Group.
Tip...
A Property object may only be called once by a given FunctionInfo object.
Copy From Enter the name of a Property object to be used as a template.
The current Property object will differ from the template only where
specified in the property dialog. See the section Internal Resources, below, for
a list of internal Property objects that can be used in dialogs via Copy From.
Is Required Check here to require the Property object to have a value when
OK or Apply is clicked in the dialog.
Use Quotes Check here to force quotes to be placed around the value of the
Property object when the value is passed to the S-PLUS function.
No Quotes Check here to prohibit quotes from being placed around the
value of the Property object when the value is passed to the S-PLUS function.
This option is ignored when Is List (described below) is not checked.
Is List Check here to cause a multiple selection in a drop-down list to be
passed as an S-PLUS list object to the S-PLUS function.
No Function Arg Check here if the value of this Property object is not
passed as the argument to the S-PLUS function. The Property object must
still be referenced by the FunctionInfo object.
Disable Check here to cause the Property object to be disabled when the
dialog starts up.
Help String Enter the text of a tool tip for this Property object.
Is ReadOnly Check here if the corresponding control is for read only.
Option List Delim Specify a character used as the delimiter for Option List,
such as comma, colon or semi-colon. Comma is the default.
Creating FunctionInfo objects
Open the Object Browser to a page with filtering set to “FunctionInfo.”
579
CHAPTER 22 CUSTOMIZING THE USER INTERFACE
Right-click on the default object, labeled “FunctionInfo,” in the left pane
and choose Create FunctionInfo from the context menu. The property dialog
shown in figure 22.9 appears.
Figure 22.9: The dialog for a FunctionInfo object.
To modify the default settings that appear in this dialog in the future, rightclick on the default object icon, choose Properties from the context menu, fill
out the dialog with the desired default values, and click OK.
Function Name Enter the name of the S-PLUS function which will execute
when OK or Apply is clicked in the dialog. This is also the name of the
FunctionInfo object.
Dialog Header Enter the text that will appear at the top of the dialog.
Property List Enter a comma-separated list of Property objects to be
displayed in the dialog. A given Property object can only occur once in this
list. If pages or group boxes are specified, it is not necessary to specify the
Property objects that they comprise. Property objects in the list will be
displayed in two columns, moving in order from top to bottom, first in the
left-hand column and next in the right-hand column.
Argument List Enter a comma-separated list in the form #0 = PropName1,
#1 = PropName2, … . Here PropName1, PropName2, …, are names of
Property objects, not including page and group objects, and #1, …, refer in
order to the arguments of the function indicated in Function Name. The
argument names may used in place of #1, #2, … . The first item, #0, refers to
the returned value of the function. Use Argument List if the order of the
Property objects in the dialog differs from the order of the corresponding
arguments of the S-PLUS function.
Prompt List Enter a comma-separated list of labels for the Property objects
580
DIALOGS
in the dialog. These will override the default labels. The syntax for this list is
the same as that for Argument List.
Default Value List Enter a comma-separated list of default values for the
Property objects. These will override the default values of the Property
objects. The syntax for this list is the same as that for Argument List.
CallBack Function Enter the name of a function which will be executed on
exit of any Property object in the dialog.
Help Command Enter command to be executed when the Help button is
pushed.
Write Argument Names Check this to have argument names written when
the function call is made.
Display Check this to cause information about the FunctionInfo object to
be written in a message window (or in the output pane of a script window
when the dialog is launched by a script). This debugging tool is turned off
after OK or Apply is clicked in the dialog.
Internal Resources
Here are several internal property objects that can be used in dialogs either
alone or by means of Copy From.
TXPROP_DataFrames
This Property object displays a drop down box listing all data frames filtered
to be displayed in any browser.
TXPROP_DataFrameColumns
This Property object displays a drop down box listing all columns in the data
frame selected in TXPROP_DataFrames. If no selection in
TXPROP_DataFrames has been made, default values are supplied.
TXPROP_DataFrameColumnsND
This Property object displays a drop down box of all columns in the data
frame selected in TXPROP_DataFrames. If no selection in
TXPROP_DataFrames has been made, default values are not supplied.
TXPROP_SplusFormula
This Property object causes an S-PLUS formula to be written into an edit field
when columns in a data sheet view are selected. The response variable is the
first column selected, and the predictor variables are the other columns.
TXPROP_WideSplusFormula
This Property object differs from TXPROP_SplusFormula only in that the
formula is displayed in an edit field which spans two columns of the dialog,
instead of one column.
581
CHAPTER 22 CUSTOMIZING THE USER INTERFACE
Modifying
Dialogs
Property objects and FunctionInfo objects may be modified through the
same dialogs which are used to create them.
To modify a Property object, open the Object Browser to a page with filtering
set to “Property.” Right click on the Property object’s icon in the right pane
and choose Properties from the context menu. Refer to the previous sections
for details on using the property dialog.
To modify a FunctionInfo object, open the Object Browser to a page with
filtering set to “FunctionInfo.” Right click on the FunctionInfo object’s
icon in the right pane and choose Properties from the context menu. Refer to
the previous sections for details on using the dialog.
Displaying
Dialogs
There are several ways to display a dialog in S-PLUS.
• Locate the associated function in the Object Browser and doubleclick on its icon. If a function is not associated with a FunctionInfo
object, then double-clicking on its icon will cause a default dialog to
be displayed.
• Click on a toolbar button which is linked to the associated function.
• Select a menu item which is linked to the associated function. This is
described in the section Menus.
• Use the function guiDisplayDialog in a Script or Commands window.
This is described in the S-PLUS Programmer’s Guide.
• Write the name of the function in a script window, double-click on
the name to select it, right-click to get a menu, and choose Show
Dialog.
Example: The
Contingency
Table Dialog
582
This example looks into the structure behind the Contingency Table dialog.
The Contingency Table dialog in S-PLUS (figure 22.10) is found under
Statistics
Data Summaries Crosstabulations.
DIALOGS
Figure 22.10: The Contingency Table dialog.
It has two tabbed pages, named Model and Options. On the Model page are
three group boxes, named Data, Formula, and Results.
The FunctionInfo object for this dialog is called menuCrosstabs; its
property dialog is shown in figure 22.11 and is described below.
Figure 22.11: The property dialog for the FunctionInfo object menuCrosstabs.
Function Name. Notice that this value is also menuCrosstabs; the S-PLUS
function associated with this dialog has the same name as the FunctionInfo
object. To look at the code behind the function menuCrosstabs, type
menuCrosstabs, or page(menuCrosstabs) at the prompt in the
Commands window.
Dialog Header This is the header which appears at the top of the
Contingency Table dialog. Try changing this and opening the dialog. The
dialog will reflect the change. This change persists when S-PLUS is exited and
restarted.
583
CHAPTER 22 CUSTOMIZING THE USER INTERFACE
Status String This is currently empty. Try entering text here (do not forget
to click Apply or OK) and opening the dialog.
Property List This shows only the Property objects for the two tabbed
pages: SPropCrosstabsDataPage and SPropCrosstabsOptionsPage. To
more easily see these values, right-click in the edit field and select Zoom. The
zoom box shown in figure 22.12 appears.
Figure 22.12: The zoom box shows the Property List.
Using the Object Browser, open the property dialog for the first of these.
This is shown in figure 22.13.
Figure 22.13: The Property dialog for the SPropCrosstabsDataPage Property object.
Argument List Use zoom, if desired, to view the assignments of Property
object values to arguments of the function menuCrosstabs. Notice in
figure 22.11 that the return value is set to SPropSaveObj. This has been done
consistently throughout the user interface.
584
DIALOGS
Prompt List Since this is empty, fields in the dialog will have their default
prompts (labels) as specified in their corresponding property objects.
Default Value List Since this is empty, fields in the dialog will have the
default values as specified in their corresponding property objects.
Call Back Function The S-PLUS function backCrosstabs is executed each
time a control in the dialog is exited. To look at the code behind the
function, type
page(backCrosstabs)
at the prompt in the Commands window. A Notepad window opens, as is
shown in figure 22.14. The highlighted section contains commands which
Figure 22.14: A look at the code behind the callback function backCrosstabs.
execute when (All Variables) is chosen from the Factors drop down box:
• The formula “~.” is placed in the Formula edit field.
• The Response edit field is disabled.
• The default value of the Response edit field is set to the empty
string.
Write Arg Names This is currently empty.
Display This is not checked, so debugging messages will not be shown when
the dialog is displayed.
585
CHAPTER 22 CUSTOMIZING THE USER INTERFACE
MENUS
Menus are represented in the Object Browser as a hierarchy of three types of
MenuItem objects. This section shows how to work with menus through the
user interface.
While it is not hard to create or modify menus through the user interface, as
shown in this section, it is sometimes easier to work with menus using the
S-PLUS programming language. As you work with menus by the methods in
this section, take an occasional moment to review the program code
generated in the history log. See the S-PLUS Programmer’s Guide for a
systematic explanation of the program code.
Creating Menu
Items
To create a menu item, first open the Object Browser and filter by
“MenuItem” to see the hierarchy of menu items. Navigate to the menu item
above which the new menu item should appear. Right-click on this menu
item, and select Insert MenuItem from the context menu. The property
dialog shown in figure 22.15 appears.
Figure 22.15: The property dialog for a MenuItem object, MenuItem page.
To modify the default settings that appear in this property dialog in the
future, right-click on the default object icon, labeled “MenuItem,” choose
MenuItem or Command from the context menu, fill out the dialog with the
desired default values, and click OK.
Name Enter the name of the MenuItem object.
586
MENUS
Type Select the type of MenuItem object.
• Menu creates a submenu.
• MenuItem causes an action to occur when selected.
• Separator displays a horizontal bar in the menu, visually separating
two group of menu items.
Document Type Depending on the type of document window type—
Graph Sheet, Commands window, etc.—which has the focus, the item may
or may not be visible. Select the document types for which the item should
be visible in the menu system. The choice “All Documents” causes the item
to be always visible. The choice “No Documents” ensures that the item will
be visible when no document window has the focus; for example, when no
document window is open.
Action This applies to MenuItem objects of type MenuItem.
• NONE. No action is performed when the item is selected. This is
useful when designing a menu system. It is not necessary to specify
commands to execute when the type is set to NONE.
• BUILTIN. One of the actions associated with the default menus or
toolbars is performed when the item is selected. These are listed on
the Command page in the Built-In Operation drop down box. This
option allows you to use in a customized dialog any of the “intrinsic”
menu actions, such as Window/Cascade.
• FUNCTION. Under this option, an S-PLUS function, either builtin or user-created, is executed when the item is selected.
• OPEN. The file specified on the Command page is opened when
this item is selected. The file will be opened by the application
associated to it by the operating system.
• PRINT. The file specified on the Command page is printed when
this item is selected. The file will be printed from the application
currently associated to it by the operating system.
• RUN. The file specified on the Command page is opened and run as
a script by S-PLUS when this item is selected.
587
CHAPTER 22 CUSTOMIZING THE USER INTERFACE
MenuItem Text Enter the text which will represent the item in the menu
system. This does not apply to Separator items.
StatusBar Text Enter the text which will appear in the status bar when the
item has the focus in the menu.
Hide Check this to make the item invisible. When the item is hidden, its
icon in the Object Browser appears grayed out. This can also be specified
through the context menu.
Deletable Check this to allow the item to be deleted.
The rest of the fields are found on the Command page, seen in figure 22.16.
Figure 22.16: The property dialog for a MenuItem object, Command page.
Built-In Operation Select from the list of actions associated to the built-in
S-PLUS menus and toolbars. It is not possible to (easily) modify this list. This
field is enabled when the Action is set to BUILTIN.
Command Enter the name of an S-PLUS function, or a path and filename.
This field is enabled when Action is set to FUNCTION, OPEN, PRINT, or
RUN on the MenuItem page. Use the Object Browser to identify the folder.
Parameters Edit the text in this field to specify the arguments for the
function which will execute when the item is selected. The easiest way to
specify these arguments is to work through the Customize dialog available
through the context menu for the item in the Object Browser. For details on
doing this, see the section Using the Context Menu (page 589) below.
Show Dialog On Run This is relevant when Action is set to FUNCTION
on the Command page. Check this to cause the dialog associated to the
function to open when the item is selected. This can also be specified
through the context menu.
588
MENUS
Always Use Defaults This is relevant when Action is set to FUNCTION on
the Command page. Check this to force the use of the default values when
the function executes. This can also be specified through the context menu.
S-PLUS makes a distinction between the default argument values for a
function as defined in the function’s dialog (via the FunctionInfo object)
and as defined by the function itself. Always Use Defaults refers to the
“dialog” defaults. Table 22.1: summarizes how Show Dialog On Run and
Always Use Defaults work together.
Modifying
Menu Items
MenuItem objects can be modified using either their property dialogs or their
context menus.
Using the
Property Dialog
MenuItem objects can be modified through the same property dialogs which
are used to create them. To modify a MenuItem object, open the Object
Browser to a page with filtering set to “MenuItem.” Right-click on the
MenuItem object’s icon in the right pane and choose MenuItem from the
context menu. See the previous sections for details on using the property
dialog.
Using the
Context Menu
MenuItem objects can be modified with their context menus which are
accessible through the Object Browser. The following choices appear after
right-clicking on a MenuItem object in the Object Browser.
Insert MenuItem Select this to create a new MenuItem object.
Customize This appears when Action is set to FUNCTION. Select this to
open the dialog associated to the function. Any changes to the dialog persist
as dialog defaults.
Show Dialog On Run This appears when Action is set to FUNCTION.
Check this to cause the dialog associated to the function to open when the
item is selected. See Table 22.1: for details.
Always Use Defaults This appears when Action is set to FUNCTION.
Check this to force the use of the default values when the function executes.
See Table 22.1: for details. S-PLUS makes a distinction between the default
argument values for a function as defined in the function’s dialog (via the
FunctionInfo object) and as defined by the function itself. Always Use
Defaults refers to the “dialog” defaults.
Hide Select this to hide the menu item. It will not appear in the menu
system and the MenuItem object icon will appear grayed out.
Delete Select this to delete the MenuItem object. The menu item will no
longer be available.
589
CHAPTER 22 CUSTOMIZING THE USER INTERFACE
Save Select this to save the MenuItem object, and any other MenuItem it
contains in the menu hierarchy, to a file.
Save As Similar to Save, but this allows you to save a copy of the MenuItem
object to a different filename.
MenuItem Select this to access the MenuItem page of the MeunItem
object’s property dialog.
Command Select this to access the Command page of the MeunItem
object’s property dialog.
Show Menu In S-PLUS Select this to cause the menu to be displayed in the
main S-PLUS menu bar. This choice is available only for MenuItem objects
having Type Menu.
Restore Default Menus Select this to restore the default S-PLUS menus in
the main menu bar. For example, this will undo the effect of selecting Show
Menu In S-PLUS. This choice is available only for MenuItem objects having
Type Menu.
Save MenuItem Object as default Select this to make the MenuItem object
the default. When a new MenuItem object is created, its property dialog will
initially resemble that of the default object, except in the Name field.
Help Select this to open a help page describing MenuItem objects.
Displaying
Menu Items
After creating a menu system, in the Object Browser right-click on the
MenuItem object which you want used as the main menu. Select Show Menu
In S-PLUS from the context menu to display the menu system.
To restore the default S-PLUS menus, select Restore Default Menus in the
context menu for that same MenuItem object. Alternatively, select Show
Menu In S-PLUS in the context menu for the MenuItem object which
represents the default S-PLUS menus.
Manipulating
Menu Items
Menu items are easily copied, moved, and deleted through the Object
Browser.
Moving Menu Items
To move a menu item into a different menu, locate the menu item icon in
the Object Browser. Select the icon, hold down the ALT key, and drag it onto
the menu to which it is to be added.
To move the menu item within its current menu, hold down the
and drag the menu item icon to the desired location.
590
SHIFT
key
MENUS
Copying Menu Items
To copy a menu item into a different menu, hold down the
drag its icon onto the menu to which it is to be added.
CTRL
To copy a menu item within its current menu, hold down the
CTRL keys and drag the menu item icon to the desired location.
key and
SHIFT
and
Deleting Menu Items
To delete a menu item, right-click on the menu item in the Object Browser
and select Delete from the context menu.
Saving and
Opening Menus
To save a menu to an external file, right-click on the MenuItem object in the
Object Browser and select Save As in the context menu. Enter a filename in
the Save As dialog and click OK. The extension .SMN is added to the
filename.
To open a menu which has been saved in an external file, right-click on the
default MenuItem object and select Open from the context menu. In the
Open dialog, navigate to the desired file, select it, and click OK. The new
menu is visible in the Object Browser. Its name is the name of the external
file, without the extension .SMN .
Example:
Customizing
the Context
Menu
This example shows how to add to the context menu for objects of class
data.frame displayed in the Object Browser. The new item automatically
computes summary statistics for the selected data frame. To begin, open an
Object Browser page and filter by ClassInfo and MenuItem.
1. Creating a ClassInfo object for the Class data.frame
1. Right-click on ClassInfo default object and select Create ClassInfo in
its context menu.
2. Enter “data.frame” in the Name field. This represents the name of
the object class in which objects will have the context menu item
specified below.
3. Enter dfMenu in the Context Menu field. This will be the name of
the context menu.
4. Click OK.
591
CHAPTER 22 CUSTOMIZING THE USER INTERFACE
2. Creating the Context Menu
1. Right-click on the MenuItem default object and select Insert
MenuItem from its context menu.
2. Enter dfMenu in the Name field. This corresponds to the Context
Menu name given in to the ClassInfo object above.
3. Enter Menu in the Type field.
4. Click OK.
5. Right-click on dfMenu in the left pane and select Insert MenuItem
from the context menu.
6. Enter desc in the Name field. This name is not important, as long as
it does not conflict with that of an existing object.
7. Select MenuItem from the Type field.
8. Enter data.frame in the Document Type field; do not choose from
the drop down box selections. This corresponds to the object class
which will have this context menu.
9. Select FUNCTION from the Action field.
10. Enter the text “Summary….” in the MenuItem Text field. This text
will appear in the context menu.
11. Move to the Command page of the dialog.
Tip...
A FunctionInfo object must exist for the function which is called by the context menu item. Otherwise, the
default dialog for that function will not appear.
12. Enter menuDescribe in the Command field. This is the function
which is executed by the dialog which appears with Statistics/Data
Summaries/Summary Statistics. There is a built-in FunctionInfo
object by the same name.
13. Show Dialog On Run. This should be checked.
14. The MenuItem object desc is now found alongside dfMenu in the
MenuItem tree. To move it underneath dfMenu, hold down the Alt
key and drag the desc icon onto the dfMenu icon. To see the desc
MenuItem object in its new position, click on the dfMenu icon in
the left pane and look in the right pane.
592
MENUS
3. Displaying and Testing the Context Menu
1. Use File/Open and select Examples.SBF, the examples Object
Browser.
2. When data frame objects are visible in the right pane, right-click on
the data frame named air. Choose Summary, which should appear
under Properties in the context menu, as shown in figure 22.17.
Figure 22.17: A context menu with the item Summary added.
The Summary Statistics dialog appears.
3. By default, Data Frame is set to air in that dialog. Click OK and the
Summary Statistics are sent to a Report window, unless the
Command window is open to receive them.
Instead of the built-in FunctionInfo object menuDescribe and its
associated built-in S-PLUS function, user-defined objects can also be used.
The procedure for adding a context menu option is identical.
4. Applying the Context Menu to a Class which Inherits from
data.frame
1. Right-click on the object “catalyst”. The context option Summary
does not appear, because the object catalyst has class design, which
inherits from data.frame. To confirm this, you can check Data Class
and Inheritance in the Right Pane page of the Object Browser
property dialog, if this is not already done, and view the information
in the right pane of the Object Browser, as in figure 22.18. Make
sure that Include Derived Classes is checked in the Object Browser
593
CHAPTER 22 CUSTOMIZING THE USER INTERFACE
property dialog.
Figure 22.18: The Object Browser showing the class and inheritance of the data object catalyst.
2. To enable the context menu for objects in the class design, open the
property dialog for the MenuItem desc.
3. Enter data.frame,design in the Document Type field.
4. Click OK.
5. Return to the page showing data frames and right-click on the object
catalyst. The context menu now contains Summary.
594
USING THE CLASSINFO OBJECT
USING THE CLASSINFO OBJECT
Overview
A ClassInfo object allows information to be specified about both userdefined and interface objects. It is similar to the FunctionInfo object, which
allows information to be specified for functions (primarily for the purpose of
defining function dialogs).
There are three main uses of the ClassInfo object:
1. Defining a context menu (right click menu) for objects.
2. Defining the double click action for objects. That is, you can use it
to specify what will happen when the user double clicks or right
clicks on an object in the Object Browser.
3. It allows the dialog header and dialog prompts for interface objects
to be overridden.
Properties of
the ClassInfo
Object
The subcommand names of the properties are:
• Name – this must be the name of the associated class. For instance,
to specify information for the “lm” class, use this as the name. This
also becomes the name of this instance of the ClassInfo object.
• ContextMenu – this contains the name of the MenuItem object that
defines the context menu (right click menu) for this object in the
browser. This is the name of a MenuItem of type “Menu”, which
must have been defined in the standard way for menus.
• DoubleClickAction – this contains the name of a MenuItem of
type “MenuItem” (that is, it is a single item instead of an entire
menu) or a function. This specifies the action that will happen when
the user double clicks on the object in the browser. It allows a
function to be called when the user double clicks.
• Show Dialog On Run - if enabled the dialog for the MenuItem or
function will be displayed before execution.
• DialogHeader – this allows the dialog header for the associated
object to be defined. This is only useful for interface objects.
595
CHAPTER 22 CUSTOMIZING THE USER INTERFACE
• PromptList – this allows dialog prompts to be specified (and
overridden). The syntax is the same as it is for the corresponding
property of FunctionInfo objects: #0=”&My
Prompt:”,
#2=”Another &Prompt:”,
Prompt:”. That is, it is a list
PropertySubcommandName=”L&ast
of assignments, in which the left-hand
side denotes the property whose prompt is going to be overridden,
and the right-hand side denotes the new prompt. There are two ways
of denoting the property: by position, starting with 0, with the
number preceded by a #; and by property subcommand name. (In
the example above, “#0” denotes the 0th property of the object;
“PropertySubcommandName“ is the subcommand name of the
property to change.) To find out the names of the properties of an
object,
you
can
use
the
following
script:
guiGetPropertyNames(“classname”).
Note that all objects have two properties that may or may not be
displayed on the dialog: TXPROP_ObjectName (subcommand name:
NewName, always in position #0, but usually not displayed in a
dialog) TXPROP_ObjectPosIndex (subcommand name: NewIndex,
always in position #1, but usually not displayed in a dialog). To find
out the argument names of the properties of an object, you can use
the following script:
guiGetArgumentNames(“classname”).
The argument names are usually very similar to the corresponding
prompts, so that figuring out which dialog field corresponds to
which property should not be a problem.
Creating and
Modifying a
ClassInfo
Object
ClassInfo objects can be created and modified either using a script or
interactively in the browser. An example of an script for creating a
ClassInfo object is:
Create ClassInfo Name = "$$lm",
ContextMenu = "lm",
DoubleClickAction = "tabSummary.lm",
DialogHeader = "Linear Model Object",
PromptList = {#0="Object Name"};
To create a ClassInfo object in the Browser, first create a page that displays
these objects. Then right click on the ClassInfo root node in the left pane of
the Object Browser, and choose “Create ClassInfo”.
596
CUSTOMIZING YOUR S-PLUS
SESSION
Overview
Changing Defaults and Settings
Saving Object Defaults
Specifying General Settings
Specifying Command Window Settings
Specifying Undo & History Options
Specifying Text Output Window Settings
Specifying Graph Options
Specifying Graph Styles
Specifying Color Schemes
Redrawing Plots Automatically
Overview
23
597
598
598
598
600
600
601
601
602
603
604
In S-PLUS you have many options for customizing your workspace. You can
specify the defaults for any object, choose whether to display toolbars, and set
graph redraw options. In addition, you can create a default project with Data
windows, Graph sheets, and scripts. You can further customize entire work
sessions using customizable menus and toolbars (see the previous chapter,
Customizing the User Interface).
597
CHAPTER 23 CUSTOMIZING YOUR S-PLUS SESSION
CHANGING DEFAULTS AND SETTINGS
Saving Object
Defaults
In S-PLUS you can specify the defaults for any object, including symbols,
plots, titles, graph sheets, and data objects.
To save the defaults for an object
1. Create the object using the exact specifications you want to save as
the default. For example, create a symbol and specify the fill color
and size you want to use as the default.
2. Select the object if it is not already selected.
3. From the Options menu, choose Save Object as Default. The name
of the selected object will replace the word "Object" in the menu
option. For example, if a symbol is selected the option will be "Save
Symbol Properties as Default".
The properties of the selected object are now saved as the default values. The
next time you create a symbol it will use these new defaults.
Specifying
General
Settings
To specify general settings, select General Settings from the Options menu.
General Page
Display in Grid Choose whether to have S-PLUS automatically open a data
window after importing data.
Respond to DDE Requests Choose whether S-PLUS responds to Dynamic
Data Exchange queries. See the chapter on DDE in the Programmer’s Guide.
Old Format for DDE Requests Choose whether S-PLUS uses text
formatting style from earlier versions of S-P LUS when responding to
Dynamic Data Exchange queries.
Enable Smart Cursor Choose this option to have the cursor always move in
the direction of the last movement when the ENTER key is pressed while
entering data in cells.
Enable Tool Tips Choose whether to have yellow prompt windows, or "tool
tips", displayed when you pause the mouse over a toolbar or palette button.
598
CHANGING DEFAULTS AND SETTINGS
Color Toolbar Show the toolbars in color or black and white.
Large Buttons Choose whether to show large or small toolbar buttons.
Dialog Field Tool Tips Choose whether to enable having yellow prompt
windows, or "tool tips", displayed when you pause the mouse over a dialog
field.
Dialog Field Status Bar Choose whether to enable having short descriptions
displayed on the status bar when you pause the mouse over a dialog field.
Show Commit Dialog on Exit Choose this option to have S-PLUS always
prompt you to save or cancel changes made upon ending an S-PLUS session.
Startup Page
Open at Startup Choose whether to have S-PLUS always open the Object
Browser, the Commands window, or both at startup.
Computations
Page
System Debug Mode If checked, S-PLUS performs various internal checks
during evaluation. This provides more information about warning messages
and reloading, and may help track down mysterious bugs (such as S-PLUS
terminating abnormally). Evaluation will be substantially slower with this
option turned on, and at times introduces strange behavior.
Error Action Specify the function (with no arguments) to be called when an
error or interrupt occurs. S-PLUS provides dump.calls and dump.frames to
dump the outstanding function calls or the entire associated frames. See the
on-line documentation for these functions for details. Setting the function to
NULL eliminates all error actions.
Warning Action Specify the level of warnings that you would like reported:
no warnings, collect warnings and report them at the end of the evaluation,
report warnings as they occur, or convert warnings into errors to terminate
the evaluation of the expression.
Max. Recursions Specify the maximum depth to which expressions can be
nested. This exists primarily to catch runaway recursive calls of a function to
itself, directly or indirectly.
Print Digits The number of significant digits to use in print (and therefore
in automatic printing). Setting this to 17 will give the full length of double
precision numbers.
Time Series Eps Specify the time series comparison tolerance. This small
number is used throughout the time series functions for comparison of their
frequencies. Frequencies are considered equal if they differ in absolute value
by less than the number specified here.
Editor Specify the default text editor command used by the edit function.
Whatever editor you choose will be invoked in the style of Notepad.; that is,
599
CHAPTER 23 CUSTOMIZING YOUR S-PLUS SESSION
by a command of the form Notepad filename, followed by the reading of
editing commands. Do not supply editors that expect a different invocation
or a different form of user interaction.
Pager Specify the default pager program to be used in the help and page
functions. Whatever pager you choose will be invoked as pager filename
and should read from filename.
Specifying
Command
Window
Settings
To specify the Commands window settings, choose Commands window
under the Options menu. The Command window settings dialog will appear.
Font
Specify the font, font size, color, and styles used in the Commands window.
In order to have proper alignment of output, we recommend a fixed-width
font, such as Letter Gothic or Courier.
Options Page
Background Color Specify the background color for the Commands
window.
Echo If checked, each complete expression will be echoed before it is
evaluated.
Length Specify the length (in lines) of an output page.
Main Prompt The string to be printed to prompt for an expression (default
is “>”).
Continue Prompt The string to be printed to prompt for the continuation
of an expression (default is “+”).
Specifying
Undo &
History
Options
To specify Undo and History options, choose Undo & History from the
Options menu. The Undo & History dialog will appear.
# of Undos Specify the maximum number of undos to be saved in the undo
queue (this does not apply to undoing changes to data objects, nor to text
edits in scripts). The higher the number of undos, the more memory is used.
History Entries Specify the maximum number of entries to be saved in the
history log. The higher the number of entries, the more memory is used.
600
CHANGING DEFAULTS AND SETTINGS
Specifying Text
Output
Window
Settings
Output Window Preference Choose whether to have S-PLUS use its default
settings when redirecting all output, or use the Commands window, the
Report window, the Script program window, or the Script output window.
Specifying
Graph Options
To specify graph options, select Options/Graph Options from the menu bar.
The Graph Options dialog will appear.
Options Page
Default to Draft Mode Choose whether to have your graphs displayed
onscreen in draft mode. You can also toggle this option on and off in the
View menu. Using draft mode will speed up redraw time dramatically. Draft
mode only affects screen resolution; printed output will always be
publication-quality.
To specify text output settings, select Options/Text Output from the menu
bar. The Output window preference dialog will appear.
Condition Mode On Conditioning mode affects how selected data is used in
creating a plot with a plot button. When conditioning mode is on, the last
column(s) selected are used as conditioning variables for a multipanel graph.
See the chapter on Trellis Graphics. The number of columns used for
conditioning is defined by the # of Conditioning Variables below.
Conditioning mode can also be turned on and off by using the conditioning
mode button on the main toolbar.
# of Conditioning Variables Specify the number of columns to use as
conditioning columns when conditioning mode. This number can also be set
using the drop down list of numbers on the main toolbar.
Snap to Grid (Per Inch) Specify the number of invisible gridlines to use for
the Snap to Grid option. The default is 12 gridlines per inch or 5 gridlines
per centimeter. When Snap to Grid is enabled, objects will "snap" to the
closest intersection of the invisible horizontal and vertical gridlines.
Create New Graph Sheet Check this box to have a new Graph sheet created
when plots are created using a statistics dialog.
Resize Fonts with Graph Choose whether titles, comments and other text in
a graph will resize when you resize the graph. The default is to not resize text.
Resize Symbols with Graph Choose whether symbols are resized when you
resize the graph.
Set both of the above options to have text and symbols in your graph
601
CHAPTER 23 CUSTOMIZING YOUR S-PLUS SESSION
automatically resized when you resize the graph.
Tip...
Shapes such as the open rectangle, filled rectangle, oval, etc. will always resize regardless of the setting of the
Resize Symbols with Graph option.
Auto Add Pages Choose whether to have pages automatically added when a
series of plots are created within an S-PLUS function by default. This can be
overridden in the graph sheet property dialog.
Create Editable Graphics Choose whether to have plots created within
S-PLUS functions translated into editable graphical objects when placed in a
graph sheet. When this option is on, creation of graphs can be very slow. If
this option is off, a composite graph object will be placed in the graph sheet.
It can be converted to editable graphical objects at any time by right-clicking
and selecting from the short cut menu.
Brush and Spin
Page
Specify the font, font size, background color, and foreground color used in
the Brush and Spin window.
Specifying
Graph Styles
To specify graph styles, selection Options/Graph Styles from the main menu.
Two graph styles can be defined: Color and Black and White. These styles are
used to initialize properties of a new graph sheet. These properties can be
changed in the graph sheet property dialog. You can also use the Format/
Apply Style menu option for graph sheets to modify your graph sheet and
plots to match a style specification.
If you choose color, the Color Styles dialog appears.
Options Page
Basic Colors Specify the User Colors scheme, and the Image Colors scheme
to be used for the style. See Options/Color Schemes to edit the color palettes
used in these color schemes.
Line Auto Change Choose whether to have the line style and/or color
change each time you add a line plot to the same graph. Line styles and colors
will rotate in the order specified on the Lines page in this dialog.
Symbol Auto Change Choose whether to have the symbol style and/or color
change each time you add a plot with symbols to the same graph. Symbol
styles and colors will rotate in the order specified on the Symbols page in this
dialog. If no rotating is specified, the first symbol style and first color
specified will be used for the default.
602
CHANGING DEFAULTS AND SETTINGS
Pie and Area Auto Change Choose whether to have the pattern style,
pattern color, or fill color change for each pie or area in a newly created pie or
area chart. Pattern styles, colors, and fill colors will rotate in the order
specified on the Pattern/Color and Fill Color pages in this dialog. If no
rotating is specified, the first pattern style, pattern color, and fill color
specified will be used for the default.
Standard Bars Auto Change Choose whether to have the pattern style,
pattern color, and/or fill color change for each bar in a newly created standard
bar chart. Pattern styles, colors, and fill colors will rotate in the order
specified on the Pattern/Color and Fill Color pages in this dialog. If no
rotating is specified, the first pattern style, pattern color, and fill color
specified will be used for the default.
Grouped Bars Auto Change Choose whether to have the pattern style,
pattern color, and/or fill color change for each bar in each group in a newly
created grouped bar charts. Pattern styles, colors, and fill colors will rotate in
the order specified on the Pattern/Color and Fill Color pages in this dialog. If
no rotating is specified, the first pattern style, pattern color, and fill color
specified will be used for the default.
Lines Page
The Lines page has ten color and ten style fields. Enter the colors and styles
in the order in which you want them to cycle.
Symbols Page
The Symbols page has ten color and ten style fields. Enter the colors and
styles in the order in which you want them to cycle.
Pattern/Color
Page
The Pattern/Color page has ten pattern style fields and ten pattern color
fields. Enter the pattern styles and colors in the order in which you want
them to cycle.
Fill Color Page
The Fill Color page has ten fill color fields. Enter the fill colors in the order in
which you want them to cycle. There are an additional ten colors used for
strip labels in multipanel plots.
Specifying
Color Schemes
To specify color schemes, select Color Schemes from the Options menu. The
Color Schemes dialog appears.
There are eight available color schemes for User Colors and Image Colors.
These are used when defining graph styles in the Options/Graph Styles
menu.
User Colors Page
Set the background color for each color scheme. To edit the User Colors for a
color scheme, click on the Edit Colors button and use the color dialog to
603
CHAPTER 23 CUSTOMIZING YOUR S-PLUS SESSION
modify the colors. The user color scheme specified in the Options/Graph
Styles of the default Graph Style will be used to set the user colors in any
newly created graph sheet. These colors will appear in the color lists for all of
the graphical objects within the graph sheet as User1, User2, etc.
Image Colors
Page
# of Colors Image colors are a series of fill colors that can be used for draped
surfaces, flooded contours, and levels plots. The specification of image colors
consists of up to sixteen core colors, and a list defining the number of shades
or color gradations between each core color. Number of image colors
indicates how many core colors are used in the image colors definition.
# of Shades is defined by a list of numbers separated by commas indicating
how many shades should be used between each core color. For example, if
there are three core colors: black, red, and white, and number of shades is
specified as 5,15, a total of 23 colors will be used for the image color scheme:
black, 5 shades between black and red, 15 shades between red and white.
Edit Colors Click on the Edit Colors button to access and edit a color palette
of the core image colors. Only the number of colors specified by the # of
Colors prompt will be used in the image color scheme.
Redrawing
Plots
Automatically
In S-PLUS you can choose to have plots redrawn automatically after each
change made to the graph. You may want to turn this feature off to save
redraw time for computationally intensive, or complicated plots.
To redraw plots automatically
w
From the View menu, select Auto Plot Redraw.
To redraw plots manually
1. From the View menu, deselect Auto Plot Redraw.
2. When you want to redraw the plots, choose Redraw Plots Now from
the View menu.
604
INDEX
INDEX
Numerics
2D Plot Palette 178
3D bar charts 335
3D bars 335
3D Plot Palette 179
3D spline plots 335
A
Access files 128
adding
graphs
using drag-and-drop 191
using Insert/Graph 191
add-on modules 20
alternative hypothesis 380, 382, 384, 389, 400,
403
analysis of variance
one-way 396
analysis of variance table 394, 416,
angle
vector plots 328
angle units
vector plots 328
Annotation toolbar 277
area charts
additive y values 304
by area 304
colors 304
data specifications 303
fill direction 304
individual y values 304
multiple column data 303
plot options 304
stacked data 303
ARIMA model 528
442
arranging
existing graphs 192
Ascending Sort button 106
ASCII files 126
ASCII:specifying a format string 126
ASCII:specifying column names 126
asymmetrical error bars 316
auto errors
bar charts 307
error bar plots 317
auto means
bar charts 307
error bar plots 317
autocorrelation 526
autocovariance 526
automatic span selection 373
automatically filled dialog fields 342
B
bar base 306
bar charts 304–??
auto errors 307
auto means 307
bar base 306
bar width 306
colors 306
confidence level 307
data specifications
standard 304
error bar calculations 306
error bar cap width 307
grouped
offset 306
horizontal 304
multiple y data columns
stacked y data 305
305
605
INDEX
bar charts, 3D
bar width 335
bar direction
bar charts 306
error bar plots 316
bar grouping 306
bar offset
bar charts 306
bar width
3D bar charts 335
bar charts 306
barley data frame 218
begin/end, vector plots 327
binomial model 400
biplot 497
blocks
deleting 105
inserting 103
borders
changing for each item 303
style 302
Box Plots 307–??
box plots
data specifications 307
grouped 308
break at missings 301
break at symbols 301
Browser Page 144
brush and spin 204
Brush and Spin window 602
buttons
modifying 569
C
cap width
bar charts with error bars
error bar plots 316
cell selection 90
Chi-Square test 367
chi-square test 386
606
307
color range 302
surface plots 334
Color Schemes dialog 603
Color Styles dialog 602
colors
line 301
symbols 301
column data type
changing 114
column display precision 115
column list 95
column names 113
editing 113
editing interactively 114
column numbers 94
column selection 91
column width 112, 113
columns
adjusting width to widest cell 113
changing width
by dragging 112
with the toolbar 113
deleting 104
description
editing 113
display format 114
formatting 112
moving 101
overview 94
precision 115
saving defaults 115
selecting from lists 95
specifying multiple 197
using for pie chart labels 325
combining
existing graphs 192
multiple 2D plots in 3D space
combining 2D and 3D plots 203
Commands window
overview 561
Commands window example 81
Commands window settings 600
201
INDEX
comment plots 309–??
box margin 310
font styles 310
justification 310
offsetting text 310
plot options 310
rotating comment text 310
text display format 310
text display precision 310
units 309
compare models 485
comparisons 481
conditioning columns 601
conditioning mode 601
Conditioning Mode button 209
confidence interval type 508, 519
confidence level 380, 389
error bar plots 317
confidence limits 425
connect type 301
contour levels 313
contour lines 313
contour plot labels
colors 312
display format 312
frequency 312
precision 312
contour plots 311–??
by contour 313
colors 313
contour lines 313
data grids 311
data range 311
data specifications 311
grid data 311
irregular data 200
levels column 313
levels range 313
number of contours 313
output grids 311
contour plots, 3D 330–??
stacked 330
convergence criterion 422
Convert to Character
data menu 114
Convert to Objects 343
Convert to String button 114
converting
data types 114
converting column types 114
converting embedded objects 164
Copy 100
copying
cells
using the clipboard 100
text in scripts 552
copying data 156
correlation matrix 416, 442, 460
correlations 368
correlations and covariance matrices
count column 350
covariance list 501
Cox proportional hazards 513
creating
graphs
368
using menus 180
new script 547
new scripts 547
creating and modify toolbars 568
creating and modifying buttons 569
critical point calculation 481
cross validation score 378
crosstabulation 365
cubic B-spline smoother 377
cumulative probabilities 355
current data set 89
curve fitting plots 313 –??
curve type 314
data specifications 314
omit constant 314
plot options 314
predicted values 315
curve type
curve fitting plots 314
customizing your workspace 597
Cut 100
607
INDEX
D
data
adding to plots using drag-and-drop 187
formatting 111
from different data sheets 197
pre-sorting 321
data frame 87
Data Frame field 342
data frames
merging 351
data grids, contour plots 311
Data menu 341
data range, contour plots 311
data sheets
formatting 111
saving defaults 111
smart cursor 599
data sheets:exporting 136
data specifications
editing for multiple plots 189
data types
changing 114
numeric formats 114
vector plots 327
Data window
defaults 111
entering data 96
Data windows 86
formatting 111
DataFrame toolbar 87
dBase files 128
DDE requests 598
decimal places
displaying 115
default Object Browser 55, 146
defaults
for columns 115
saving data sheet 111
degrees of freedom 378
608
deleting
blocks 105
columns 104
plots 186
rows 105
deleting objects 156
delimiters:exporting 137
density values 355
description
columns 113
dialog execution
common controls 341
dialog fields 342
automatically filled 342
dialog rollback
selective undos 108
display format
changing 114
comment plot text 310
contour labels 312
Display History dialog 559
displaying
decimal places 115
draft mode viewing. 601
drag-and-drop
adding plots with 184
creating a graph 179
drop lines
3D regression 330
E
editable graphical objects 602
editable graphics 343
editing data 97
embedding objects 161
end column, when importing 121
end row, when importing 122
ending entry, history log 559
environmental data frame 78
EPS
exporting to 340
error bar calculations
bar charts 306
INDEX
error bar plots 316–??
asymmetrical bars 316
auto errors 317
auto means 317
bar direction 316
cap width 316
confidence level 317
data specifications 316
error calculations 316
horizontal bars 316
plot options 316
user-defined 316
vertical bars 316
error bars
automatic 306
bar charts 305
ethanol data frame 70, 216
exact binomial test 400
exact distribution 382
example data sets 55
example Object Browser 56
examples
Commands window 81
environmental 78
ethanol 70
exenvirn 65
fuel.frame 57
galaxy 61
Powerpoint presentation 83
examples Object Browser 146
Excel files 127
exenvirn data frame 65
explode amount, pie slices 326
Export Data dialog
Data Specs page 136
Options page 137
exporting data 135
exporting:column names 137
exporting:specifying line length 137
F
factor analysis 493
FASCII files 128
FASCII importing:specifying a format string 128
files:importing 117
fill
color 302
color, surface plots 333
direction, area charts 304
method, surface plots 334
pattern 302
type, plot properties 302
fill color styles 603
Fill Expression field 102
fills
shading and colors 333
filtering in the Object Browser 143
filtering options 151
Find button 553
Find S-Plus Objects option 146
first quantile value 363
Fisher’s exact test 404
fixed effects analysis of variance 444
fixed-effects linear model 480
folders 153
formats
numeric columns 114
formatting
columns 112
data sheets 111
formula builders 535
formula building example 78
formula dialog 535
formulas
Add group box 537
Cox proportional haxards 541
Heart data frame example 543
linear regression example 539
ovarian data frame example 542
Remove group box 537
Special Term group box 537
Survival Response group box 542
transformation 538
transformation Function group box 538
transformation Function with Constant group
box 539
transformation Variable group box 538
Variable group box 536
609
INDEX
frequency
symbol 302
Friedman test 398
fuel.frame data frame
57, 225
G
galaxy data frame 61, 222
General Settings dialog 598
generalized additive model 465
generalized linear model 456
Go To Cell dialog 94
graph objects
dragging into scripts 560
zooming 182
Graph Options dialog 601
graph sheets
opening existing 175
overview 174
Graph toolbar 175
graphics
importing 164
graphs
exchanging 193
multipanel 210
overview 174
preparing data 194
gridded contour plots 311
grids 334
grouped bar charts 304, 603
offset 306
grouped box plot 308
grouping indicator 388, 390, 392
H
handling missing data 366
height
symbol 302
Help system
On-line Demos 19
on-line help 19
On-Line Manuals 19
training courses 20
610
hiding
plots 186
highlighting
brush and spin 204
high-low-average plots 317–??
data specifications 317
plot options 317
histograms 318–??
History log 558
entries 600
undoing actions 109
history log
clearing 559
executing commands 559
size 558
History options 600
history rollback 109
horizontal error bars 316
hypothesized distribution 356,
359, 385
I
image colors 604
Import Data dialog 119
Data Specs page 120
Filter page 123
Options page 121
importing data 117
importing graphics 164
importing:dBase files 128
importing:Lotus files 127
Increase Precision button 115
increment multiple 334
in-place activation 162
Insert Picture option 165
inserting
blocks 103
graphs 190
rows 103
inserting columns and rows 102
installing on a network 17
installing the software 16
irregular form data 200
INDEX
J
justifying
comment plot text 310
pie chart labels 326
K
kernel bandwidth 375
kernel smoother 374
kernel specifications 374
keyboard and mouse shortcuts 92
knots 378
Kolmogorov-Smirnov test 384
two sample 392
Kruskal-Wallis test 396
L
label display format, pie charts 325
label frequency, contours 312
labels, contour plots contour plot labels See
labels, pie chart slices pie chart labels See
levels column 313
levels, contour 313
line color 301
line plots 319–??
lines 319
pre-sorting data 321
line plots, 3D
colors 331
data specifications 330
plot options 330
pre-sorting data 330
symbols 330
line style 301
line styles 603
line weight 301
linear regression 414
data specifications 313
formula building 536
Linear Regression dialog 78
link function 458
linking data 166
Links dialog 167
lists 88
locally-fitted polynomial 371
locally-weighted regression 370,
logistic regression 426
log-linear regression 427
long form stacked data 199
Lotus files 127
low frequency emphasis 373
433
M
magnitude, vector plots 328
Mantel-Haenszel chi-square test 408
margins
comment plots 310
pie charts 325
matrix 88
maximum value 363
McNemar's chi-square test 406
mean value 363
median value 363
menus
adding a plot with 185
merging data frames 351
modifying data 155
modules
add-on 20
multipanel graphs
data format 199
multiple comparisons 480
multivariate analysis of variance 488
N
naming
columns formatting columns See
new data frame, matrix, or vector 348
New Toolbar dialog 568
nonlinear cf plots 324–??
nonlinear regression 421
nonparametric survival modeling 506
normal approximation 382
number of decimal places 115
611
INDEX
numeric column formats
114
one-sample Wilcoxon test 382
one-way analysis of variance 394
on-line help 19
output grids
contour plots 311
output window Preference 601
O
Object Browser 141
configuration files 148
copying data 156
default 146
default and example 56
deleting objects 156
dialog 148
examples 146
filtering 143
filtering options 151
folders 153
left and right panes 142
modifying data 155
object creation 155
shortcut keys 147
toolbar 142
tutorial 65
object defaults
modifying 598
objects
saving defaults 598
ODBC
configuring a data source 132
exporting files 138
files and tables 130
installation 130
offsetting
pie chart labels 326
text in comment plots 310
OLE objects 162
omit constant
curve fitting 314
one-sample chi-square test 386
one-sample Kolmogorov-Smirnov test
one-sample t test 380
612
P
384
parametric survival modeling 521
partial residual plots 418
partial scripts
running 549
Paste 100, 552
pattern styles 603
Pearson's chi-square test 410
permuting observations 353
Picture dialog 165
pie chart labels 325
column of labels 325
justifying 326
offseting 326
precision 325
stacking 326
pie charts 325–??
colors 325
explode amount 326
font options 326
labels pie chart labels See
margin 325
slice options 326
start angle 325
plane number 301
planes
inserting 201
plot buttons
adding plots 183
creating graphs with 177
INDEX
plot properties
axes numbers 300
borders 302
break at missings 301
break at symbols 301
common 300
connection type 301
cropping 301
dialog 299
fill attributes 302
fills 302
line attributes 301
plane number 301
row range 301
scaling 300
special colors 302
symbol attributes 301
plot property dialog 299
plot type
changing with a dialog 296
plots
adding data using a dialog 187
by axis type 296
formatting multiple 300
replacing data using drag-and-drop
unhiding 186
polar plots
data specifications 326
lines 326
symbol 326
text as symbol 326
polynomial regression order
curve fitting 315
PowerPoint presentation
example 83
PowerPoint presentations 170
precision
changing 115
comment plot text 310
contour labels 312
pie chart labels 325
predicted values
curve fitting 315
prediction type 463
predictions 425
pre-sorting data
2D 321
3D 330
principal components 500
projecting
onto existing 3D graph 202
using the menus 202
projecting plots 201
projecting plots onto a plane 203
proportions test 402
Q
quantile-quantile plot
quantiles 355
418
R
187
random effects analysis of variance
random number generation 358
random number seed 354
random samples 353
range
shading 302
redrawing
automatic 604
manual 604
regression plots 313–??
regression plots, 3D
base line level 330
Report window 563
operations 563
residual-fit spread plot 418
resizing
fonts with graph 601
symbols with graph 601
robust linear regression 428
rotating
comment plot text 310
row selection 91
Row(s) or if () 301
rows
deleting 105
inserting 103
450
613
INDEX
rugplot 418, 449
Run Script button 549
S
sample size
random 358
sampling probabilities 353
Save As field 342
Save In field 342
saving
to different formats exporting See
saving defaults
columns 115
data sheets 111
scatter plots 319–??
data specifications 319
lines 319
pre-sorting data 321
symbol color 320
text as symbol 320
scatter plots, 3D
colors 331
data specifications 330
plot options 330
pre-sorting data 330
regression 331
symbols 330
vary symbols 331
Script 555
script files 548
script window 547
Script windows 545
context menus 555
dragging objects into 560
Expand Inplace 557
font 557
output pane 547
program pane 547
614
scripts
editing 548
errors 551
find and replace 552
hiding 555
hiding and unhiding 554
printing 550
running 549
saving 549
stopping 551
undoing edits 552
unhiding 555
using history log 558
selecting columns 90
selecting rows 91
selective undos
using dialog rollback 108
setting defaults saving defaults See
setup.exe 16
shading range 302
short form stacked data 198
Show Dialog option 556
smart cursor 598
Smith charts 326 –??
smooth curves 372
smoothing 371
data 321
smoothing parameter 378
Snap to Grid 601
S-news mailing list 20
sorting 106
special colors 302
Spin Window 206
spline smoother 377
S-Plus objects 145
S-Press newsletter 21
SQL queries 133
stacked 3D contour 330
stacking
pie chart labels 326
standard bar charts
data specifications 304
standard deviation 363
standard errors 420
start angle, pie charts 325
INDEX
start column, when importing 121
start row, when importing 122
Statistics menu 341
StatLib 20
stepwise linear regression 440
sum of all numeric values 363
summaries of the categorical variables
summary statistics 362
supersmoother 372
surface plots 332–??
color range 334
fill color 333
fill surface 333
fill type 333
gridded matrix data 197
increment multiple 334
long form data 199
number of colors 333
plot options 332
special colors 334
stacked data 197
survival curves 518
symbol
color 301
formatting 320
frequency 302
height 302
style 301
using text 320
weight 302
symbol style 301, 320
symbols styles 603
system requirements 18
T
t test 388
tabular summary 349
technical support 21
third quantile value 363
time series 526
estimate type 526
forecasts 532
time series data 98
363
tool tips
disabling 598, 599
Toolbar property dialog 572
ToolbarButton dialog
Image page 571
ToolbarButton property dialog 569
toolbars
color 599
hiding and unhiding 572
toolbars and palettes
customizing 568
training courses 20
transformation 538
tree models 63, 473
pruning or shrinking 477
tree regression 473
Trellis graphics 59
Trellis graphs 210
examples 216
formating panels 212
Multipanel page 212
panel strips 214
trickling input 565
trouble-shooting
plot redraw is slow 604
two-sample Kolmogorov-Smirnov test
two-sample t test 388
two-sample Wilcoxon test 390
392
U
undo
actions 108
selective 108
Undo button 108
Undo options 600
undoing 108
user defined colors 603
V
variable spans 373
Variables field 342
variance estimate 363
615
INDEX
vector 88
vector plots 327 –??
angle units 328
angle/magnitude 328
begin/end 327
data specifications 327
data type 327
magnitude multiplier 328
plot options 327
vector position 328
vertical error bars 316
viewing
in draft mode 182
weighted averaging 335
Wilcoxon test 382, 390
Win32s 16
Windows 3.1 16
Windows for Workgroups 3.11
workbox
defined 254
16
X
x-axis style
511, 519
Y
W
weight
line 301
symbol 302
616
Yates' Continuity Correction
403
Trademarks
• S-PLUS is a registered trademark, and StatServer, S+INTERFACE,
S+SPATIALSTATS, S+GISLINK, S+DOX, S+WAVELETS, and AXUM are
trademarks of MathSoft Inc.
• S and New S are trademarks of Lucent Technologies, Inc.
• Intel is a registered trademark and 486, SX and Pentium are
trademarks of Intel Corporation.
• Microsoft, Windows, MS-DOS, and Excel are registered trademarks
and Windows NT is a trademark of Microsoft Corporation.
• SAS is a trademark of the SAS Institute, Inc.
• SPSS is a registered trademark of SPSS, Inc.
• All other trademarks are acknowledged.
License Agreement and Limited Warranty
I. Notice
A. IMPORTANT: Before starting the installation process, you will be asked to accept
the terms of this Agreement. Read this Agreement carefully before completing the
installation process. BY COMPLETING THE INSTALLATION PROCESS, OR
BY HAVING AN AGENT SUCH AS A COMPUTER TECHNICIAN DO SO
FOR YOU, YOU ARE AGREEING TO BE BOUND BY THE TERMS OF THIS
AGREEMENT. This Agreement is a legal contract which specifies the terms of the
license and limited warranty between you (“Licensee”) and Mathsoft, Inc.
(“MathSoft”), for the MathSoft S-PLUS software (“the Software”) and the
associated documentation (software and documentation collectively referred to as
“the Licensed Works”). If you do not agree to the terms of this Agreement, promptly
return all copies of the Licensed Works to MathSoft.
617
LICENSE AGREEMENT AND LIMITED WARRANTY
II. License Grant
A. MathSoft grants to Licensee a personal, non-exclusive and non-transferable
license to make one copy of the Software for use solely for the purposes described in
this Agreement, and make one copy of the Software for archival purposes.
B. If a single-user license has been purchased this license is limited to loading and
using the Software on a single physical workstation.
C. If a network or server-based license has been purchased the number of
simultaneous users of the Software must not exceed the number of software licenses
purchased by the Licensee.
D. The Licensee will not transfer the Software to any other party except with written
authorization from MathSoft.
III. Ownership of
the Software
A. It is expressly understood and agreed that all right, title and interest in and to the
Software and any other material furnished to Licensee under this Agreement vest
solely and exclusively in MathSoft, and Licensee shall neither derive nor assert any
title or interest in or to such items except for the rights and licenses granted under
this Agreement.
B. Under this Agreement, Licensee does not receive any rights to patents, copyrights,
trade secrets, trademarks or any other rights or licenses to the Software beyond those
expressly granted in this Agreement.
IV. Warranty and A. MathSoft warrants that the physical software media and the documentation will
Remedies
be free from defects in materials and workmanship. MathSoft also warrants that the
Software will be free from significant defects that prevent the Software from
performing substantially in accordance with the accompanying documentation for a
period of ninety (90) days from the date of purchase. At MathSoft’s option,
MathSoft will replace defective media, and documentation, fix significant defects in
the Software without charge, or refund the licensee fee paid to MathSoft by
Licensee; provided that the defective item is returned to MathSoft within ninety
(90) days of the date of purchase. Any replacement software will be warranted for the
remainder of the original warranty period, or thirty (30) days, whichever is longer.
THESE REMEDIES ARE THE SOLE AND EXCLUSIVE REMEDIES
AVAILABLE FOR BREACH OF EXPRESS AND IMPLIED WARRANTIES.
B. THE FOREGOING WARRANTIES ARE IN LIEU OF ALL OTHER
WARRANTIES, EXPRESS OR IMPLIED, INCLUDING BUT NOT LIMITED
TO ANY WARRANT OF NON-INFRINGEMENT, MERCHANTABILITY OR
618
LICENSE AGREEMENT AND LIMITED WARRANTY
FITNESS FOR A PARTICULAR PURPOSE, IN ADDITION, THE REMEDIES
SET FORTH ABOVE WITH RESPECT TO A BREACH OF WARRANTY OR
INFRINGEMENT SHALL BE THE EXCLUSIVE REMEDIES FOR ANY
BREACH OF WARRANTY OR INFRINGEMENT HEREUNDER. The sole
purpose of such remedies is to provide Licensee with the repair or replacement of the
purchased software, or at MathSoft’s option, to refund the amount paid by Licensee
hereunder. These remedies shall not be deemed to have failed of their essential
purpose as along as MathSoft is willing to take one of those actions.
V. Limitation on
Liability
A. The warranties are being provided only to the original Licensee, no warranties of
any kind are provided to any other parties.
B. The warranties do not cover damage or defects caused by or related to misuse,
accident, negligence or misapplication. Because programs such as this are inherently
complex, MathSoft does not warrant that the Software is error-free, or will operate
without termination. Furthermore, MathSoft does not warrant that the Software
will work with any given database, network or network application.
C. MathSoft hereby warns Licensee that due to the complexity of the Software, it is
possible that use of the Software unintentionally could lead to the loss or corruption
of data. Licensee assumes all risk for such data loss or corruption; the warranties
provided hereunder do not cover any damage or losses resulting therefrom.
D. IN NO CASE SHALL MATHSOFT BE LIABLE FOR ANY INCIDENTAL,
SPECIAL OR CONSEQUENTIAL DAMAGES OR LOSS, INCLUDING,
WITHOUT LIMITATION, LOST PROFITS OR THE INABILITY TO USE
EQUIPMENT OR ACCESS DATA, WHETHER SUCH DAMAGES ARE
BASED UPON A BREACH OF EXPRESS OR IMPLIED WARRANTIES,
BREACH OF CONTRACT, NEGLIGENCE, STRICT TORT, OR ANY OTHER
LEGAL THEORY. THIS IS TRUE EVEN IF MATHSOFT IS ADVISED OF
THE POSSIBILITY OF SUCH DAMAGES. IN NO CASE WILL
MATHSOFT ’S LIABILITY EXCEED THE AMOUNT OF THE LICENSE FEE
ACTUALLY PAID BY LICENSEE TO MATHSOFT.
E. SOME STATES DO NOT ALLOW THE EXCLUSION OF IMPLIED
WARRANTIES SO THIS LANGUAGE MAY NOT APPLY. IN SUCH CASE,
MATHSOFT LIABILITIES WILL BE LIMITED BY THE ABOVE
LIMITATION OF REMEDIES PROVISION.
F. Lucent Technologies does not warrant the Software, does not assume any liability
619
LICENSE AGREEMENT AND LIMITED WARRANTY
regarding the Software and does not undertake to furnish any support or information
regarding the Software.
VI. Indemnity by
Licensee to
MathSoft
A. Licensee indemnifies and holds harmless MathSoft from any and all claims,
demands, or actions based on or relating to Clients or to services offered by Licensee
involving use of the Software or Clients, or based on representations or statements
made by Licensee or its agents, or other actions of Licensee or its agents.
VII. Termination
A. The license granted under Articles II shall remain in force unless Licensee
breaches any material term of this Agreement, in which case MathSoft shall have
the right to terminate these licenses. Regardless of whether these licenses expire or are
terminated, all other articles of this Agreement shall survive perpetually.
B. Upon the termination or expiration of the licenses granted under Articles II, all
rights granted to Licensee will terminate and revert to MathSoft, and Licensee
promptly must delete and destroy all copies of the Software and return the Licensed
Works to MathSoft.
VIII.
Miscellaneous
A. Licensee may not translate, decompile, disassemble, or reverse engineer the
Software.
B. Licensee agrees that because of the unique nature of the Software, irreparable
harm will be caused by a breach by the Licensee of its obligations hereunder, that
monetary damages will be inadequate to compensate for such harm, and that
MathSoft is entitled to injunctive relief to enforce this Agreement. MathSoft’s
right to obtain injunctive relief shall not limit its right to seek further remedies.
C. Licensee shall take all steps necessary to preserve and protect the propriety and
confidential nature of MathSoft’s software.
D. The license and the warranties provided herein are extended to the original
purchaser only and are not transferable.
E. The licensee will not export or re-export any part of the Licensed Works without
the appropriate United States and/or foreign government licenses.
620