1
RFID TRANSPONDER TECHNOLOGY
DOC. 378-R1-ENG
EK20-IDPAYM USER MANUAL
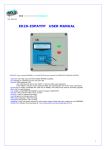
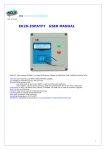
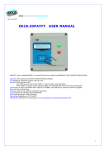
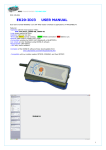
EK20-IDPAYM (here named READER) is a mobile RFID device oriented to PAYMENT applications.
-Exec all the operations of payment on High Security RFID CARDS.
-Use only 4 keys with the relative simplicity of use and less chance of errors.
-Any CARD support 15 independent ACCOUNTS each of them configurable as:
PREPAID FIDELITY can be used only in subtract
FREE FIDELITY can be used as in add as in subtract.
BONUS GIFT contains a not modifiable credit value.
SUBSCRIPTION verify only the expiry date
SUPERVISOR/OPERATOR to users access verification.
-Calculates by numerical values or by a price list.
-Records all the transactions, also in format .csv per Excel.
-Wireless RADIO UHF (range 200mt) for real time Log transfer.
-USB connection available for Firmware upgrade, deferred Logs transfer and Configuration.
Two system configurations available:
LOCAL PC using our program IDONE-PAY.
CLOUD INTERNET SERVICE through an our Microserver connected to your ADSL modem.
IDONE-PAY
1
INDEX
1.0
2.0
2.1
2.2
3.0
4.0
5.0
6.0
7.0
8.0
9.0
9.1
10.0
11.0
12.0
13.0
14.0
READ MODE
HOW TO WORK WITH THE READER
WORKING AREA
SETTINGS AREA
FIRST INSTALL IDONE-PAY
HOW TO OPERATE ON IDONE-PAY
HOW TO CREATE A CONFIGURATION USING IDONE-PAY
PRICE LIST MODE
LOG MANAGEMENT
HOW TO CREATE A CUSTOMER DATABASE
CREATE FIDELITY, BONUS, SUBSCRIPTION CARDS
CREATE OPERATOR AND SUPERVISOR CARDS
BATTERY
AVAILABLE MODELS
TECHNICAL SPECIFICATION
HOW TO REDUCE IDONE-PAY
HOW TO UPGRADE THE FIRMWARE AND TEXT LANGUAGE ON THE READER
1.0
READ MODE
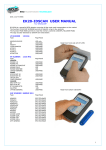
- Approach the CARD to the front of the READER.
- Click the OK button.
- Wait for the acoustic signal and the visualization on the display.
- Remove the CARD.
Reading Distance
Tip 30 mm
2.0
HOW TO WORK WITH THE READER
At power-up for 2 seconds appears:
- The installed version (ex. IDPAYM1.3NR)
- The number of the device N:(ex.06).
- The current date and time.
Then appear the menu of the configured active APPLICATIONS.
Ex. Fidelity and Bonus Gift APPLICATIONS are active.
Use the arrows to scroll the list and press OK on the APPLICATION you have to operate.
You enter the WORKING AREA.
PAYM1.3NR
29/11/12
N:06
15:36
Fidelity
BonusGift
R
The READER supports two operational areas:
-WORKING AREA (#2.1)
Here you can make all the activities of payment on CARDS.
The READER can be configured to perform calculations in two mode:
-MODE NUMBERS
-MODE LIST
-SETTINGS AREA (#2.2)
Here are performed some useful settings avoiding to connect to the PC.
To change from WORK AREA to SETTINGS AREA and vice versa, hold down the ESC key for 3 seconds.
USING OPERATORS
--------------------------------------------------------------------------------------------------------If the OPERATOR MODE is active, appears:
Place the CARD and press OK.
--------------------------------------------------------------------------------------------------------The name of the operator appear for 3 seconds.
The operator is registered in the LOG.
---------------------------------------------------------------------------------------------------------
READ OPERATOR
Paul Smith
2
2.1
WORKING AREA
The READER is ready to read the CARD.
If appears a symbol R means the READER is communicating with the RADIO UHF on the PC.
--------------------------------------------------------------------------------------------------------Pressing OK starts the read cycle of the CARD.
A bar in the last row indicates the read advance.
---------------------------------------------------------------------------------------------------------MODE NUMBERS
Depending on the type of the read CARD will start different procedures:
--------------------------------------------------------------------------------------------------------PREPAID CARD
--------------------------------------------------------------------------------------------------------Only performs subtraction (- sign).
The cursor moves to the first digit of the Amount to enter.
--------------------------------------------------------------------------------------------------------Use the arrows to increase or decrease the digit from 0 to 9.
Press OK to go to the next digit.
In case of an error by pressing ESC returns to the previous digit.
--------------------------------------------------------------------------------------------------------Pressing OK on the last digit appears the confirm request:
The first row shows the total initial followed by the total current calculated.
--------------------------------------------------------------------------------------------------------If you confirm, place the CARD on the front of READER and press OK to start the write cycle.
Keep the CARD until the end writing.
--------------------------------------------------------------------------------------------------------The new total is written into the CARD and registered in the LOG.
FIDELITY
R
READ CARD
R
---------------------
FIDELITY
Amount:
-
1322
000
FIDELITY
Amount:
-
1322
124
1322
->
1198
Are you sure? - 124
WRITE CARD
---------------WRITE CARD
Data saved
--------------------------------------------------------------------------------------------------------FREE CARD
--------------------------------------------------------------------------------------------------------Appears "Choose + -" and the sign set in DEFAULT F (see SETTINGS AREA).
Use the arrows to choose + or -.
Now follow the same method as in PREPAID.
This type permits the RECHARGE of a CARD. Registered in the LOG.
FIDELITY
1322
Choose +- : + 124
--------------------------------------------------------------------------------------------------------BONUS CARD
--------------------------------------------------------------------------------------------------------WITHDRAWAL AND CANCELLATION
If the BONUS is valid, it appears his value for 3 seconds. Appear “You want to cancel?”.
Press OK to cancel the BONUS. Press ESC to return to the stage of reading
--------------------------------------------------------------------------------------------------------If you confirm ”Are you sure?”, place the CARD on the front of READER.
Press OK to start the cancellation write cycle.
BONUS
10
You want to cancel?
--------------------------------------------------------------------------------------------------------REACTIVATION
If the BONUS was canceled appears for 3 seconds:
--------------------------------------------------------------------------------------------------------Then appears the activation request with the new expiry date.
Press OK to reactivates the BONUS. Press ESC to refuse.
All the above operations are registered in the LOG.
--------------------------------------------------------------------------------------------------------SUBSCRIPTION CARD
-------------------------------------------------------------------------------------------------------Appears the text written in the CARD (Ex. Seat and Row at theatre) and the expiry date.
Press OK to validate. Press ESC to exit.
Registered in the LOG.
1322
->
1446
Are you sure?+ 124
BONUS
Are you sure?
10
BONUS
Card not valid
10
BONUS
10
Activate?20-12-2016
SEAT:21 ROW:L
20-12-2015
3
MODE LIST
Operate by the “SERVICE LIST” item/price created by the program IDONE-PAY.
As a CARD has read, shows the Total init, the Amount init and the 1st item in the “service list”.
Use the arrows to scroll through the items on the “service list” till the desired item.
--------------------------------------------------------------------------------------------------------When you press OK, the cursor moves on the quantity. (ex. COKE=4 points each)
Use the arrows to enter the desired Quantity.(ex. 3 pieces).
--------------------------------------------------------------------------------------------------------Press OK to confirm the Quantity and calculate the partial Amount.
--------------------------------------------------------------------------------------------------------Use the arrows to choose another item and repeat the previous sequence.
(Ex.2 x PIZZA=8 points each). The partial Amount become 28.0 points.
--------------------------------------------------------------------------------------------------------When you decide to close your account you press ESC to enter the “ordered list”.
This list shows the ordered items.
--------------------------------------------------------------------------------------------------------You can scroll and verify the list by arrows.
--------------------------------------------------------------------------------------------------------or to correct a Quantity
(ex.COKE from 3 to 2)
-------------------------------------------------------------------------------------------------------or press ESC for 2 seconds to return to the “service list” and add a new entry
(ex.STEACK=12.5 points) (Tot prevoius 22.0+12.5=37.5 points)
--------------------------------------------------------------------------------------------------------Pressing ESC appears the confirm request end the new total to write in the CARD.
By pressing OK the new total is written into the CARD and registered in the LOG.
--------------------------------------------------------------------------------------------------------2.2
SETTINGS AREA
--------------------------------------------------------------------------------------------------------The SUPERVISOR CARD is required for access to the SETTINGS AREA of READER even if the
OPERATOR MODE is not active. Place the CARD and press OK.
132.2
COKE
--
0
132.2
COKE
--
0
3
132.2
COKE
--
12.0
3
132.2
PIZZA
--
28.0
2
132.2
COKE
--
28.0
3
132.2
COKE
--
24.0
2
134.2
-STEACK
36.5
1
132.2
-Are you sure?
36.5
95.7
Read Supervisor
The name of the Supervisor appear for 3 seconds.
The Supervisor is registered in the LOG.
--------------------------------------------------------------------------------------------------------DIGITS: 1 2 3 4
Sets the number of digits of the AMOUNT to be used in operations in MODE:NUMBER.
When you press OK, the cursor moves on the selections and stores the value.
Pressing ESC you come back to the menu scrolling.
After choosing a selection you can continue the menu scrolling.
--------------------------------------------------------------------------------------------------COMMA: YES NO
Allows you to insert a comma before the last digit in transactions with Fidelity cards.
Same procedure as before.
--------------------------------------------------------------------------------------------------MODE:NUMBER/LIST
For any APPLICATION installed on your READER set if operate in MODE NUMBERS or in
MODE LIST.
Pressing OK you enter the first APPLICATION. The cursor show the current status.
G. March
Scroll the list to the desired APPLICATION.(Ex.SnackBar)
Press OK to move the cursor on the desired MODE: N(NUMBERS) L(LIST).
Continue the scroll to the set completion. Pressing ESC you come back to the menu scrolling.
--------------------------------------------------------------------------------------------------------DEFAULT F : + Set the value of the default sign in transactions on cards FREE.
Same procedure as before.
--------------------------------------------------------------------------------------------------------RECHARGE:YES NO
Permit to a PREPAID CARD(only -) to be used as a FREE CARD (+/-).
So you can RECHARGE a PREPAID card.
--------------------------------------------------------------------------------------------------------DEVICE NUMBER
Set the DEVICE NUMBER as you need. (from 00 to 99).
--------------------------------------------------------------------------------------------------------D:DD/MM/YY HH:MM
Update the current date.
Press OK to move the cursor on the first item.
To change the value use the arrows. Press OK to the next item.
Continue to the last item. Pressing OK the new Date is saved.
MODE:NUMBER/LIST
SnackBar
N L
DIGITS:
1 2 3 4
COMMA: YES
NO
MODE:NUMBER LIST
Fidelity
N L
DEFAULT F: +
-
RECHARGE: YES NO
DEVICE NUMBER:00
D:12/10/14 09:36
4
--------------------------------------------------------------------------------------------------------OPERAT: 24H ALL
If the OPERATOR MODE is active, set the mode of request:
24H The USER CARD request is made only at the first start after midnight. One time per day.
ALL The USER CARD request is made at any restart of READER.
--------------------------------------------------------------------------------------------------------SID-CH:000 000
Set the SID(System Identifier) and the CH(RF channel)into the READER RADIO.
Use the arrows to increase or decrease the digit from 0 to 9.
Press OK to go to the next digit.
In case of an error by pressing ESC come back to the menu scrolling.
---------------------------------------------------------------------------------------------------------
OPERAT: 24H
ALL
SID-CH: 001-007
3.0
FIRST INSTALL IDONE-PAY
Copy our folder IDPAYM_CD into your PC.
INSTALL USB DRIVER
1) Copy into the PC the folder [MCP2200WindowsDriver].
2) In folder [DriverInstallationTool] select the folder [X64] for 64Bit or [X86] for 32bit.
Launch “MCP2200DriverIstallationTool.exe”. Press “Install” and wait to the end of drivers installation.
INSTALL USB ON PC
1) Turn off the READER. Insert the USB plug and turn on.
2) The PC begin the new device install. Wait for the complete install of the assigned COM PORT.
INSTALL RADIO-PEN-UHF ON PC
1) Insert the RADIO PEN UHF into the USB connector of the PC.
2) The PC begin the new device install. Wait for the complete install of the assigned COM PORT.
INSTALL IDONE-PAY ON PC
Dowload the IDONE_PAY setup from the site:www.zetanetweb...............................
Launch “IDONE_PAY_40x_Setup” and follow the instructions to end.
Into your PC (WINDOWS7) will be created by default this specific folder:
- C:/ProgramData/ZETANET/IDONE-PAY/Database Files/idone-pay.mdb. The application Database.
IMPORTANT: Don’t erase or rename this file.
Will be created an icon on your desktop.
5
4.0
HOW TO OPERATE ON IDONE-PAY
If you want to operate by USB:
-Connect the USB plugs.
-Turn on the READER and wait for “USB Connected” on LCD.
If you want to operate by RADIO:
-Turn on the READER.
Now launch the IDONE-PAY program.
Open the “PROGRAM OPTIONS” window.
Click the “LANGUAGE” to change the CURRENT LANGUAGE.
Click “ENABLE COMMUNICATION AT START-UP”. The connection go active at any IDONE-PAY restart.
Click “ENABLE CUSTOMER MANAGEMENT” if you want to create a CUSTOMERS DATABASE.
CARDS DEFAULT TEXT
Modify or use the default texts in “CARDS DEFAULT TEXT”.
These texts will be written into the CARDS in “CREATE CARD” operations.
6
APPLICATION PASSWORD
If you want protect the access to IDONE-PAY set the access PASSWORD.
-Select “APPLICATION PASSWORD”.
-Write the “USERNAME”.
-Select “ADMINISTRATOR”
-Write and confirm the PASSWORD (at least 8chars) and press “SAVE”.
At any restart of IDONE-PAY will appear the “LOGIN” window.
5.0
HOW TO CREATE A CONFIGURATION USING IDONE-PAY
CONFIGURATION BY USB
-Uncheck “SCAN MODE ”.
-Select the USB COM PORT.
-Turn off the READER. Insert the USB plug and turn on the READER. Click “CONNECT”.
CONFIGURATION BY RADIO
-Uncheck “SCAN MODE ”.
-Make attention that no other READER with the same DEVICE NUMBER=0 is turned on.
In the main window click “READER SETTINGS”
7
“DEVICE NUMERBER”
Set the DEVICE NUMBER from 0 to 99. Press the button to send to the READER.
“DATE & TIME”
Press the button to send the actual “DATE & TIME” to the READER.
“DEFAULT KEY”
The DEFAULT KEY is preset with the code (FF-FF-FF-FF-FF-FF). Do not change.
Press the button to send it to the READER.
“SECRET KEY”
The “SECRET KEY” protects your CARDS against fraud and duplication.
Enter 12 digits with numbers from 0 to 9 and letters from A to F. Example: 3C-26-D9-67-FA-59.
For safety reasons, the “SECRET KEY” will not appear again, you will see always FF-FF-FF-FF-FF-FF.
Press the button to send it to the READER.
IMPORTANT: Write this code and keep it in a safe place.
“USE OPERATORS”
Enable / Disable the use of OPERATOR CARDS.
“USE SUPERVISOR”
Enable / Disable the use of SUPERVISOR CARDS.
CARD RECHARGE LIMIT
Set a limit to the value that can be recharged on CARDS.
“EXPIRY DATE” (MONTH)
Set the value in the expiration months from today's date.
“SEND”
Click “SEND” to transmit the configuration parameters to the READER.
You will see a progress bar.
Click “APPLICATION LIST”.
-Insert the name of the APPLICATIONS you do think to operate on your READER.
Attention: BONUS occupies always the APPLICATION 15.
-Click “SAVE” to memorize.
-Click “SEND”. Will appear the window “SEND APPLICATION LIST”.
-Check the applications to be transferred to the READER and click “SEND”. A bar indicates the good transfer.
8
6.0
PRICE LIST MODE
Allows you to create a 50 items PRICE LIST.
-Click “ADD”.
-Insert one item name (ex. COFFEE) and insert the unit price (ex.001,0).
-Press “SAVE”.
-Repeat the operation for all the requested items.
At the end click “SEND” to transfer the PRICE LIST to the READER.
7.0
LOG MANAGEMENT
They are two way to visualize the LOG:
CURRENT LOG MANAGEMENT
-By this way can be visualized all the LOG tranferred from the READERS in real time.
-The LOG are recorded in the current LOG file and can be saved into an EXCEL ARCHIVE.
LOG ARCHIVE MANAGEMENT
-By this way can be visualized the LOG present in the EXCEL ARCHIVE.
All this operations don’t interact anyway with the CURRENT LOG MANAGEMENT activities that normally flow.
Check if there is a current LOG file written in red in the “LOG MANAGEMENT” window.
If it does not, press “OPEN FILE” to open an existing file or “CREATE NEW LOG FILE” to create a new one.
9
They are two way to get the LOG from the READERS:
POINT TO POINT
By this way the LOG are transferred from a READER one at time by USB or RADIO UHF.
-Uncheck “SCAN MODE” in the window “PROGRAM OPTIONS”.
-Connect the USB COM PORT or the RADIO UHF COM PORT.
-Press “READ LOG” in the window “CURRENT LOG MANAGEMENT”.
-The LOG will be transferred from the connected READER.
SCANNER RADIO UHF
By this way the LOG will be transferred from 1 to max 8 READERS in real time only by RADIO UHF.
-Check “SCAN MODE” and check the READERS to be connected starting from READER0. (Ex. READER0-1-2)
-Connect the RADIO UHF COM PORT.
-IDONE-PAY via the RADIO PEN UHF starts a continuous scan of the set READERS.
Don’t need to exec any read command, the LOG will be automatically transferred from the reachable READERS
and visualized in the LOG window.
-On the main window will be visualized by LEDS the READERS status:
GREY
DISCONNECTED or NOT REACHABLE.
GREEN CONNECTED.
YELLOW LOG transfer running.
Any record displays the following fields:
APPLICATION
The application related to the LOG.
DATE-TIME
DAY-MONTH-YEAR HOURS-MINUTES-SECONDS of the recorded LOG.
READER
DEVICE NUMBER of the READER.
CUSTOMER
CUSTOMER associated to the CARD.
OPERATION
Type of operation made on the CARD. Ex. +,-,NULL,CREATE,…
CARD TYPE
PREPAYED, FREE, BONUS, OPERATOR, SUPERVISOR.
ACT VALUE
The value present in the CARD after the operation.
PREV VALUE
The value present in the CARD before the operation.
EXPIRY DATE
The date actually written in the CARD.
TAG UID
The CODE UID detected on the CARD.
8.0
HOW TO CREATE A CUSTOMER DATABASE
Check “ENABLE CUSTOMER MANAGEMENT” in the “PROGRAM OPTIONS” window.
To assign a CARD to a specific CUSTOMER follow this procedure:
-Connect the READER in POINT TO POINT mode. Uncheck “SCAN MODE”.
-Select “CUSTOMER MANAGEMENT” and press “NEW”.
-Insert the CUSTOMERS data in the boxes and press “SAVE”.
-Repeat for all the CUSTOMER to be inserted.
-Press “EXIT”.
Other functions:
-FIND USER FROM CARD
-VIEW CUSTOMER CARD STATUS
-MODIFY, DELETE a CUSTOMER record.
10
-Press “CREATE CARD” in IDONE-PAY window.
-Press “SELECT CUSTOMER”
-Check the CUSTOMER that will be swon in the CUSTOMER box.
-Create a Card as detailed in #3.2.
Exec CREATE CARD as explained in #9.0
8.1
HOW TO CREATE A BLACK LIST
Is possible to send to READER a BLACK LIST of CARDS to avoid a misuse of them.
11
9.0
HOW TO CREATE FIDELITY, BONUS, SUBSCRIPTION CARDS
Select “CREATE CARD”.
-Mark “NEW CARD?” if you want to write on a CARD that is never been written.(NOT PROTECTED).
-Select FREE or PREPAID or POSTPAID or BONUS or SUBSCRIPTION.
You can change the default text with a new one with a max length of 11 characters.
-Insert the desired VALUE and the EXPIRY DATE (month) from the actual date.
-To write, place the CARD in front of READER and press CREATE CARD.
At the end of the writing appears WRITE SUCCESSFULL otherwise appears WRITE ERROR.
9.1
HOW TO CREATE OPERATOR AND SUPERVISOR CARDS
Press “CREATE CARD”.
Select “OPERATOR CARD”.
- Check “NEW CARD” if you want to write on a CARD that is never been written.(NOT PROTECTED)
- Click OPERATOR or SUPERVISOR.
- Insert the USER NAME (max. 16 characters) that will be written on the card along with expiry date.
- To write, place the CARD in front of READER and click “CREATE CARD”.
At the end of the writing appears WRITE SUCCESSFULL otherwise appears WRITE ERROR.
12
10.0
BATTERY
The READER operates from a rechargeable LIPO battery (400mah).
The recharge is made through the USB cable.
When the battery is charging a RED LED is lighted.
When is charged the RED LED is off.
11.0
AVAILABLE MODELS
EK20-IDPAYM
Model with USB and RADIO UHF.
For other option: BLUETOOTH-WIFI contact us.
RADIO PEN UHF
The RADIO PEN UHF is quoted a part.
12.0
TECHNICAL SPECIFICATION
RFID FREQUENCY
13.56Mhz MIFARE 1K-ISO14443A
LOG MEMORY
Circular buffer of 2500 records
DISPLAY LCD
2 row x 16 chars
ACOUSTIC WARNINGS
Buzzer
BATTERY
LIPO 400mah rechargeable via USB (5VDC)
White-Blue
Full recharge in 4 hours.
DATA TRANSMISSION 19200-8-N-1
USB2.0 , RADIO UHF
DIMENSIONS
125mm x 70mm x 23mm
WEIGHT
170 grammi
OPERATING TEMPERATURE
-20’C to +65’C
13
13.0
HOW TO REDUCE IDONE-PAY
Normally the end user application don’t use all the functions available on IDONE-PAY.
For this reason the user can use a reduced version named IDONE-PAY-CLIENT that use the Database created using
IDONE-PAY.
To install this reduced version on the PC of your CUSTOMER follow this procedure:
Copy our folder IDPAYM_CD into your PC.
INSTALL USB DRIVER
1) Copy into the PC the folder [MCP2200WindowsDriver].
2) In folder [DriverInstallationTool] select the folder [X64] for 64Bit or [X86] for 32bit.
Launch “MCP2200DriverIstallationTool.exe”. Press “Install” and wait to the end of drivers installation.
INSTALL USB ON PC
1) Turn off the READER. Insert the USB plug and turn on.
2) The PC begin the new device install. Wait for the complete install of the assigned COM PORT.
INSTALL RADIO-PEN-UHF ON PC
1) Insert the RADIO PEN UHF into the USB connector of the PC.
2) The PC begin the new device install. Wait for the complete install of the assigned COM PORT.
INSTALL IDONE-PAY ON PC
Dowload the IDONE_PAY_CLIENT setup from the site:www.zetanetweb...............................
Launch “IDONE_PAY_CLIENT_40x_Setup” and follow the instructions to end.
Into your PC (WINDOWS7) will be created by default this specific folder:
- C:/ProgramData/ZETANET/IDONE-PAY-CLIENT/Database Files/idone-pay-client.mdb. The application Database.
IMPORTANT: Don’t erase or rename this file.
Will be created an icon on your desktop.
To operate with this version need to replace the application Database created by the IDONE-PAY-CLIENT
installation (idone-pay-client.mdb) with that create developing the application by IDONE-PAY (ex.)
14
14.0
HOW TO UPGRADE THE FIRMWARE AND LANGUAGE ON READER
- Connect the USB cable to the READER.
- Turn on the READER.
- Wait for:
USB Connected
Operate from PC
-
Click on the icon
of the program EK20-UPLOADER found in the folder “IDPAYM_CD”.
Select the RADIO COM PORT and the bitrate at 19200.
Click “UPLOAD PROGRAM”.
Take the file IDPAYM*.BIN
Select the READER address.
Click START and wait the end of programming “Upload OK”.
Turn off the READER.
To upgrade the LANGUAGE repeat the same procedure but click “UPLOAD LANGUAGE” and taken the file IDPAYM*.txt.
IDONE_CLOUD
Another solution is to collect the LOG by RADIO in real time and transmit them by INTERNET CLOUD.
- LOG transmitted to the SERVICE CENTER in your Personal Area.
- Offer a full protected access by a personal Password.
This operation need an Internet Access Point in your location and a Microserver to collect the Logs from the READERS
INOUT RFID s.r.l
Phone:+39 02.95138.139
Email: [email protected]
Via Milano,14/H 20064-Gorgonzola (ITALY)
Fax:+39 02.95.158.694
Web: www.inoutsrl.it
15