1
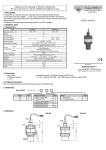
Touch-Magnet Programming is only possible if the EasyTREK receives valid echo i.e.
“ECHO” LED is lit! Is the “ECHO” LED blinking the search for echo is in process.
Green LED
Red LED
In case of EasyTREK with HART communication (SCA - 3 - 4) Touch-Magnet Programming
is only possible if the transmitter is in the “LEV" measuring mode (factory default).
magnet
U
Programming:
Open up the supplied screwdriver to access the magnet.
When programming, put the magnetic part to one of the symbols:
U
Thus the relay switching difference between “ON” and “OFF” must be greater than 20 mm.
Interpretation of LED statuses:
= LED is on,
= LED is blinking ,
= LED is off
= LEDs are blinking alternatively
The left-side LED symbol in the programming table below corresponds to the GREEN LED,
while the right-side LED corresponds to the RED LED of the device.
A
B
screwdriver
A or
B according to the programming sequence
described below and check the LEDs for their status.
Make sure that after programming, the unit will not be exposed to a strong magnetic field!
Minimum level, 0%, empty tank (assignment to 4 mA)
Place the EasyTREK at a distance from the target corresponding to the required minimum level.
Action
LED indication
1) Check for valid echo
= Valid echo received, transmitter programmable
2) Place magnet to the symbol “A”
= EasyTREK in programming mode
3) Hold magnet in place
= Distance assigned to 4 mA
4) Remove magnet when all LEDs are off
= Programming completed
E
Use level in tank or a fix target e.g. the wall
Maximum level, 100%, full tank (assignment to 20 mA)
Place the EasyTREK at a distance from the target corresponding to the required minimum distance/maximum level. (Do not forget to check for valid Echo!)
Action
LED indication
1) Place magnet to the symbol “B”
= EasyTREK in programming mode
2) Hold magnet in place
= Distance assigned to 20 mA
3) Remove magnet when all LEDs are off
F
= Programming completed
Use level in tank or a fix target e.g. the wall.
Programming relay switch-on point (the level where the relay becomes energized)
Place the EasyTREK at a distance from the target corresponding to the required switch-on point. (Do not forget to check for valid Echo!)
Action
LED indication
1) Place magnet to the symbol “A”
= EasyTREK in programming mode
2) Place magnet to the symbol “B”
= Programming in progress
3) Hold magnet to symbol “B”
= Programming in progress
4) Place magnet to the symbol “A”
= Programming of the switch-on point
5) Remove magnet when all LEDs are off
= Programming completed
Use level in tank or a fix target e.g. the wall.
Programming relay switch-off point (the level where the relay becomes de-energized)
Place the EasyTREK at a distance from the target corresponding to the required switch-off point. (Do not forget to check for valid Echo!)
Action
LED indication
1) Place magnet to the symbol “A”
= EasyTREK in programming mode
2) Place magnet to the symbol “B”
= Programming in progress
3) Hold magnet to symbol “B”
= Programming in progress
4) Keep holding magnet to “B”
= Programming of the switch-off point
5) Remove magnet when all LEDs are off
= Programming completed
Use level in tank or a fix target e.g. the wall.
Note: To re-configure the relay for indication of ECHO LOSS, perform a RESET (see later) that will reset all parameters to default.
Programming “Error indication” by the current output
Place the EasyTREK against a target to obtain valid Echo required for programming!