1
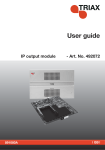
User guide
HDMI module AV module
891078C
- Art. No. 492030
- Art. No. 492080
| GB |
Contents
Contents
Disposal................................................................................................................................... 3
Box content............................................................................................................................. 3
HDMI module.......................................................................................................................... 3
Labels................................................................................................................................... 4
Cover removal....................................................................................................................... 4
Module installation................................................................................................................ 4
Module removal.................................................................................................................... 5
Input cable installation.......................................................................................................... 6
Status LED’s......................................................................................................................... 6
Log in....................................................................................................................................... 7
Input window.......................................................................................................................... 8
Configuration of HDMI input module.................................................................................... 9
Status information............................................................................................................... 12
Delete setup........................................................................................................................ 13
HDMI configuration.............................................................................................................. 14
Update MPEG encoder module ......................................................................................... 15
Manufacturer........................................................................................................................ 17
Your notes............................................................................................................................. 18
2
Introduction
Disposal
Box content
HDMI
HDMI and AV
module
492030
Within in the European Union this label indicates that the product
cannot be disposed of with the general household waste. Neither
the headend nor the input and output modules can be disposed
of with the general household waste.
For proper treatment and recycling of old products, please take
them to designated collection points in accordance with your
national legislation.
A new input module is wrapped in antistatic bubble wrap and packed in a
cardboard box when you receive it.
Included in the box is a user guide instructing you how to use the TDX Service Tool to configure the module
The HDMI- and AV modules are some of the input modules that you can
install in the input section of your TDX headend unit.
You can use the HDMI- and AV modules to connect:
• an analogue surveillance camera (AV only).
• a computer running a presentation.
• a set-top box (connected to a satellite disc, antenna or cable TV network)
with a decryption card.
• a DVD player.
A/V
492080
Edge connector
Printed circuit
board (PCB)
MPEG encoder
module
Fastener
Input connector
Status
LED
Front cover
Label
Screw
locks
Input
connector
SD card slot on the
bottom of the HDMI
and AV modules
- only for update MPEG
encoder module
3
Basics
Labels
A label is placed on the front of the input module where you can write the
information regarding the configuration of the module.
Besides the information that you write on the label, the module type and
part number are also displayed on the label.
Note
The coloured part at the top of the label informs you of the module
type. Each type of module is allocated a unique coloured label.
HDMI
9
492030
A/V
6
Label with
user added
information
492080
On the bottom of the module you will find a label with the bar code and a
serial number printed on it.
Cover removal
Before you can install a module in the input section you have to remove the
cover that protects the module slot.
1. Press the fastener
downwards
2. Pull the cover
outwards to
remove it
You do not need tools to remove the covers, just use your fingers.
For EMC and cooling reasons only remove covers from the module
slots that you want to insert modules into.
Module
installation
It is optional in which slots you place the individual input modules in the
input section. For convenience each slot has been given a number, and
an overview of the slot numbers has been placed on the inside of the
door of each unit.
Note
Slot no. 1 is placed in the top left-hand corner of the input
section when you face the front of the unit.
4
Basics
You install an input module by sliding the module into a module slot in the
input section of the headend unit and push it till the module clicks into place.
1 Slide the module
into a slot
2 Push the module
untill the fastener
clicks into place
Note
Module removal
You can use hot swapping when you insert an input module into
or remove an input module from the TDX system.
It is possible to remove an input module from a module slot without using
any tools, just use your fingers to press the fastener downwards and then
pull the module outwards to remove it from the module slot.
1)Press the fastener downwards
2)Pull the module outwards to remove it
from the module slot
5
Basics
Input cable
installation
When all the required input modules have been installed you can connect the
input signal cables one by one to the input modules.
When you connect the cable to the input connector on the module, remember
to tighten the screws connecting the AV plug to the connector.
Status LED
There is a status LED on the front of each module. The LED indicates whether
the module has locked on to a frequency or needs to be configured.
Green - flashing
The module has not been configured yet.
Green
No error, MPEG encoding valid.
Red
Module has been configured but no service has been detected.
No colour
Power has not been switched on.
HDMI
9
492030
A/V
6
Status LED
492080
6
Basics
When you update the software of a module the status LED provides you with
information about the updating process.
Log in
Orange
Boot loader state.
Temporary off
Initiation of the software update.
Temporary green
Every time the modules receives a valid data package.
Repeated until the update is completed without errors.
Red
Software update failed.
When you have loaded the TDX Service Tool from the TDX headend system
to your laptop/computer the Login window of TDX Service Tool is displayed.
When you have pressed the Log in button the System window is displayed.
7
TDX Service Tool
Input window
Click the Input tab in the TDX Service Tool to display the Input window.
The first time you display the Input window in a new configuration the
module list only displays the number and type of input modules that you
have inserted in the main and subunits.
You have to configure the input modules individually.
To display the Configuration window, click the Setup button of the
HDMI- and AV- input module you want to configure.
Note HDMI module requires the software 1.14.1.xxx
Please be sure that the right software is installed or make a update of
the main unit before you install the HDMI module!
The actual software you will find at: http://www.triax.com
8
TDX Service Tool
Configuration
of input module
Tabs
Buttons
Back button
Select/
deselect
buttons
Unit and slot ID
Configuration fields
Update button
Service list
area
Submit button
Reset button
Status information
area
The first time the TDX Service Tool displays the Configuration window
for an input module in a new configuration, the fields will display default
values and the list of services will be empty.
Bitrate
To select the required bitrate, click the arrow to the
right of the Bitrate field to open the drop-down list with
the bitrates you can choose from.
Select the bitrate that matches the type of service you
want to route to the TDX-pool.
Video codec
To select the required video codec, click the arrow to
the right of the Video codec field to open the dropdown list with the codecs you can choose from.
Select the codec you want to use.
1. Select bitrate
2. Select video codec
3. Click the
Update button
9
TDX Service Tool
Click the Update button to enter the information into the headend system.
As a result a service is displayed in the service list area.
(providing you connected/applied a source to the input)
Note
From the instance you apply a valid source until it will appear
- you should expect up to 1 min.
The name of the service listed in the service list area does not provide you
with any information about which type of service it is. The name only states
the position of the HDMI- and AV- input module in the TDX system.
HDMI or AV module
To select the service you can either click the All button at the top of the
list or select the service by clicking the square to the right of the service.
10
TDX Service Tool
Click the All button
to select the service
in the list
or
Click the square to
select the service
When you have selected the service, click the Submit button to enter this
information into the headend system and return to the Input window.
On any frontend
module you can
power cycle the
module by clicking
this “Reset input”
button
Click the Submit
button to save
your selections
Now the selected services are available in the TDX service pool.
Remember to click the Apply button in the upper right-hand corner to save
new settings in the configuration.
Note
When you display the Configuration window for an input module
that has been configured, all fields are filled in and services have
been selected.
If you want to change the existing bitrate and video codec just
follow the same procedure as when you configure an input
module for the very first time.
11
TDX Service Tool
Settings
In the setup window you can set your Bitrate and Video codec in the drop
down menus
You can choose
bitrate setting in
steps of 1 Mbps
Select MPEG
setting
Status
information
Status information is placed at the bottom of the Configuration window.
The information displayed in the configuration window of a HDMI- or AV
module includes the status of the module and revision of software.
Information
Status
Informs you whether the input module is locked or not.
SW revision
Displays the software version of the input module.
12
TDX Service Tool
Errors
In case of errors you can read the cause in the Status information line at
the bottom of the Configuration window.
1 No source
2 Not a valid resolution, e.g. 1080p
Note
The HDMI module complies with the HDCP standard. This
means protected content is not allowed for broadcast and
the result is a black picture!
1 No source
2 To high
resolution
for MPEG 2
encoding
13
TDX Service Tool
Status
information
When you return to the Input window the configuration of the input module is
displayed in the module list.
Now you can continue to configure the other input modules one by one,
following the procedure described on the previous pages.
Delete setup
If you want to remove an HDMI input module and the associated configuration
you can use the Delete button of the module in question in the Input window.
Click the Delete button of the input module you want to remove.
A message window is displayed asking you to confirm that you want to
remove the input module.
14
TDX Service Tool
Until you have removed the input module physically from the headend unit
the module list will display a line with the writing in red.
Save
configuration
An important button when you change your configuration of the headend
system is the Apply button placed in the upper right-hand corner of the TDX
Service Tool window.
Apply
Whenever you have made changes in your configuration,
“Apply” on the Apply button turns red, to tell you that you
have unsaved changes that need to be saved.
Click the Apply button to save the changes. When changes
have been saved the “Apply” text loses the red colour.
15
TDX Service Tool
Update
MPEG
encoder
module
In very rare instances you will have to update the MPEG encoder module on
the PCB of the HDMI module.
If the MPEG encoder module needs to be updated you will receive an SD
card containing the update files from Triax.
To update the MPEG encoder module follow the procedure below:
• Remove the HDMI module from its slot in the TDX unit while power is on.
• Slide the SD card into the SD slot at the back of the HDMI module.
• Insert the input module into the slot in the TDX unit while power is on.
Slide the SD card into the slot
at the bottom of the modules
for easy update of the modules
The colour of the LED on the input module indicates how the update process
is progressing:
Red - fast flashing The MPEG encoder module is now being updated.
Green - fast flashing The update of the MPEG encoder module is completed.
No colour
Power has not been switched on.
Proceed as follows (when update has completed)
1. Remove the input module from the slot in the TDX unit.
2. Remove the SD card from the slot at the back of the input module.
3. Reinsert the input module into its slot in the TDX unit.
If the update of the MPEG encoder module requires that the TDX system is
updated as well, the colour of the LED on the input module and the System
LED on the TDX unit will turn red and you will get an error message in the
System information window.
16
TDX Service Tool
The illustration below displays the error message you will receive if the
TDX system needs to be updated after the MPEG encoder module has
been updated.
17
Technical data
Type
TDX - HDMI frontend encoder module
Description
The HDMI encoder module converts digital audio and video signals from a
set top box, a DVD player, a camera, laptop or other sources, into a MPEG4
or MPEG2 data stream. This data stream is then available in the TDX pool
and can be sent out on all TDX output modules.
Features
HDMI input (HDCP compliant)
HDMI to IP
State of the art real time MPEG4 or MPEG2 encoder
Hot swap service in TDX system
Selectable encoder output bandwidth (TDX GUI)
Technical data
HDMI encoder module
Product
Art. No.
492030
HDMI input
HDMI (HDCP compliant (see Note 1)
Connector
1 x HDMI female (Type A)
Video formats
480i; 480p; 576i; 576p; 720P; 1080i
Audio format type 1
ks/s
Audio format type 2
LPCM (32; 44.1; 48.0)
AC3 pass thru
Output
Output format
MPEG transport stream (LVDS)
Connector
Edge connector for PCIe x1
Video Coding option 1 (GUI)
MPEG-2 (Embedded audio type 1)
Video Coding option 2 (GUI)
MPEG-4 (Embedded audio type 2)
Embedded audio type 1 (Auto)
ks/s
Embedded audio type 2 (Auto)
ks/s
Bandwidth options (GUI)
MP2 (48.0 kHz)
AAC (48.0 kHz)
Mbps
2..12 in steps of 1Mb/s (see Note 2)
V/mA
12 / <220
Temperature, operating
°C
-10…+50
Temperature, storage
°C
-20…+70
Environment
Voltage/current
Mechanical data
Dimensions, product
mm
126 x 53 x 29
Dimensions, in carton
mm
183 x 266 x 55
Weight, net/gross
g
Audio/Video input connector
50/250
HDMI
System connector
Edge connector 2X18P
Use high quality 3D HDMI cable only
- art. no. 153420 HDMI cable - 2m
Remarks
Note 1
Will NOT allow Protected content.
Note 2
Bandwidth covers video, audio, and
overhead for streaming fluctuations.
Equivalent video bandwidth will be
approximately 25% below selected bandwidth.
18
Technical data
Type
TDX - AV frontend encoder module
Description
1 Channel SD A/V MPEG-2 encoder, 2 channel audio, Teletext
Features
CVBS input only.
Stereo audio input
Colour standards PAL, SECAM, (NTSC)
Teletext.
System interface compatible with “TDX FrontEnd”.
(Comprising “Hot swap” among other features).
Selectable encoder output bandwidth (TDX-GUI)
Remote update via TDX system interface
Technical data
AV encoder module
Product
Art. No.
492080
Video input
1 x AV-signal
Video level
Video impedance
Return loss
Video S/N ratio
Physical input
Scan resolution
Colour standards
VBI data slicer
Input aspect ratio
Vpp
Ohm
dB
dB
p
Audio input
1.0
75
> 26
> 53
CVBS
525, 625
PAL, Secam, NTSC
Teletext
4:3, 16:9
Audio input level
Audio impedance
S/N ratio
Input frequency range (- 3 dB)
Max. harmonic distorsion
Vpp
kOhm
dB
Hz
%
Output
< 2.4
10 ±1
> 55
50-20.000
< 1.0
Output format
Video codec
Video codec settings (CBR)
Embedded audio - MPEG2/MPEG4
Audio bitrrate, fixed
Mb
kHz
kB
Power/Environment
Serial MPEG transport stream (LVDS)
MPEG-2, MPEG-4
1, 2.5, 5.0, 10.0 (MPEG-2, MPEG-4)
MPEG2L1, 44.1/ AAC, 48.0
192
Voltage/current
Temperature, operating
Temperature, storage
V/mA
°C
°C
Mechanical data
12 / <220
-10…+50
-20…+70
Dimensions, product
Dimensions, in carton
Weight, net/gross
Audio/Video input connector
System connector
Remarks
mm
mm
g
19
126 x 53 x 29
183 x 266 x 55
50/250
D-Sub type 15p HD (DE15)
Edge connector 2X18P
15pol Sub-D/3xRCA cable - art. no. 300745
Dear Customer,
Should you require technical assistance in the event that your
expert dealer is unable to help you, please contact us at:
Triax A/S
Bjørnkærvej 3
8783 Hornsyld
Denmark
Tel.: +45 76 82 22 00
mail:[email protected]
web:www.triax.dk
DECLARATION OF CONFORMITY
TRIAX confirms that the product conforms to relevant EEC harmonised standards and
consequently can carry the CE-mark.
Relevant harmonised standards:
DE/EN 60728-2 2010, DS/EN 60728-11 2010 and DS/EN 50083-2 2006
This document is only valid with the signature of the person responsible for CE-marking by Triax
Date: October 2012
Signature:
10 - 2012