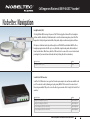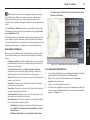
1
Nobeltec MAX Pro ® ™ Nobeltec Navigation Software User's Guide Call Jeppesen Marine at 800-946-2877 to order! Nobeltec Navigation InSight Radar 2 (IR2) The InSight Radar (IR2) leverages the power of the PC to bring together the world’s best navigation software with the familiarity of traditional radar to create the ultimate navigation system. IR2 offers unparalleled chart plotting and radar abilities that provide higher resolution and greater confidence. IR2 surpasses traditional radar systems through its use of VNS MAX Pro and Admiral MAX Pro. These navigation programs make the IR2 easy-to-use, affordable to update and provide functionality not found on other radars. What’s more, Nobeltec’s IR2 models can be connected to a vessel-wide network providing all of your nav stations with radar and chart plotting data for true redundancy. Nobeltec Product Part # InSight Radar 2 (IR2) Call Serial Port to USB Converter Serial Port to USB Converters are a great tool for when your computer does not have an available serial port. The converters work by allowing you to plug in any NMEA 0183 device into the converter and then using an available USB port to receive the data. Jeppesen marine offers a Single-Port and a 4-Port converter. Nobeltec Product Part # Single Port Adapter (RS232) Single Port Adapter (RS422) 2-Port Adapter (RS232 or RS422) 4-Port Adapter (RS232 or RS422) RALXX00013 RALXX00012 RALXX00010 RALXX00009 Additional product information inside back cover! Welcome iii Welcome Thank you for purchasing Jeppesen Marine's Nobeltec® Navigation Software! This User's Guide is written for an audience assumed to have a mid-level, pre-existing knowledge of computer usage and the principles of marine navigation. Do not use this document and software to replace actual navigation training and experience, but as a valuable navigational aid. Do You Have Everything? WARNING: Nautical navigation is a serious undertaking and should only be engaged in by persons trained and experienced in such navigation. WARNING: Do not insert the Hardware Key until you have installed Nobeltec Navigation Software and completely rebooted. Failure to do so can disrupt system functionality. If you have inserted the Hardware Key before installation, remove the device and restart your computer before continuing. ©2008 Jeppesen Marine, Inc. All rights reserved. System Requirements Minimum System Requirements - higher system requirements may be appropriate if multiple advanced features are used concurrently: • Microsoft® Windows® XP Home/Professional or Vista™ (latest Service Pack may be required for Technical Support troubleshooting) NOTE: Networking support is only available for XP and limited Vista™ versions: Ultimate, Business, or Enterprise. • CPU: 1 GHz • Memory: 1 GB RAM • Hard Drive Space: Hard Drive Space: 5 to 50 GB (depending upon the number and size of the MAX Pro data regions purchased). • Display: 1024x768 resolution, 32-bit color video • Video Card: 64 MB RAM • DVD Drive • Serial or USB Input Ports for any directly connected instruments, such as GPS, Radar, etc. • USB port : At least 1 (for Hardware Key) The following system upgrades from the minimum system requirements are recommended to support optimum software performance and additional features such as 3D, Video, Radar, Sounder etc: • CPU: 2 GHz or faster, dual-core processor • Memory: 2 GB RAM (more if multiple features are used concurrently) • Hard Drive Space: 50 GB • For Bathy Recorder: 2-4 GB additional hard drive space • Graphics: Video Card: 256 MB RAM and OpenGL for each monitor Before installing the software, make sure you have received the following: • Nobeltec Software DVD • MAX Pro Charts DVDs • Hardware Key • User’s Guide (this book) Please fill out the My Nobeltec Program and Chart Information table located inside the back cover with your Hardware Key number. Product Support If you have a question about your Nobeltec Navigation Software, please first review this User’s Guide. If you cannot find the answer you are looking for, please contact Jeppesen Marine Customer Support. NOTE: Technical Support is free of charge for registered users. For enhanced Technical Support, contact any one of our sales or technical support representatives about becoming a Jeppesen Marine VIP Member (North America only) or send an e-mail to [email protected]. Registering Your Software REGISTER YOUR PRODUCT to receive free product support! Visit the Nobeltec website, contact Jeppesen Marine Customer Support or contact your Nobeltec distributor to register your software. iv Nobeltec® Navigation Software User’s Guide How to Contact Jeppesen Marine (www.Nobeltec.com) : 1 2 North and South America Jeppesen Marine 15160 NW Laidlaw Road, Suite 100 Portland OR 97229 USA Support: E-Mail: [email protected] USA: +1 800 732 2800 All Other Locations: +1 303 328 6983 Hours: 6 AM - 7PM MT Sales: E-Mail: [email protected] Phone: +1 800 946 2877 Fax: +1 503 579 1304 Hours: 8AM - 5PM PT Europe, Middle East, Africa Jeppesen Marine GMBH Frankfurter Str. 233 63263 Neu-Isenburg Germany All Locations: 3 +49 6102 50 8171 Hours: 8 AM - 5 PM CET Phone: Fax: Hours: +44 1293 842674 +1 503 579 1304 8AM - 5PM CET Asia, Pacific, Australia Jeppesen Marine – Australia Pty. Ltd. PO Box 342 Gladesville NSW 2111 Australia [email protected] All Locations: +61 2 9808 6200 Hours: 8:30AM - 5:30 PM AET [email protected] Phone: +61 2 9808 6200 Fax: +61 2 9808 6233 Hours: 8:30AM - 5:30 PM AET Table of Contents Table of Contents 1 - Introduction Nobeltec Navigation Software How Navigation Systems Work Navigation Software Plus Packs Bathy Recorder Raster Fleet Manager Tender Tracker (Admiral MAX Pro only) Weather 2 - Installation Setting Up Nobeltec Navigation Software 1 1 2 2 2 2 2 2 3 3 Run GPS and Radar Setup Wizards, instructing the software to recognize external marine hardware. 3 Step 1. Install Nobeltec Navigation Software 3 3 Step 2. Run Nobeltec Navigation Software 3 4 Step 3. Install Charts and Data 4 4 The Hardware Key The Software License Agreement Max Pro Charts MAX Pro Additional Data Layers, Perspective and Aerial Photos: Additional Marine Data not in MAX Pro: Install MAX Pro Charts and Data Step 4. Install Plus Packs Install Plus Pack Unlock Codes Raster Chart Plus Pack Install Non-Nobeltec Charts To install third-party charts: Updating MAX Pro Charts and Data Uninstalling Charts and Data 7 7 7 Upgrading from Previous NNS Versions 7 To Uninstall Chart Regions To Uninstall Raster Charts, Photos and Data 1 4 4 4 5 5 5 5 6 6 v 3 - Hardware Device Setup General Hardware Setup GPS Setup Using a GPS Receiver The Limits of GPS-Based Electronic Navigation Electrical Connection: GPS to Computer Identifying the Wires - RS232 GPS Settings Connecting the Wires Connecting the Nobeltec Cable to Your Computer Multiple Input Devices 4 - Configure Data Ports 9 9 9 9 9 9 9 10 10 10 10 11 Step 1. GPS/Port Setup Wizard 11 11 Step 2. Radar Setup Wizard 11 11 11 12 Manual Device Settings 13 13 13 14 14 14 Using the GPS/Port Setup Wizard A Note About Radar Setup Installing Your Radar Solution Setting Up Your Radar Port Types To Configure Input COM Ports Other Options on the Ports: Configure Tab Port Priorities To Set the Priority NMEA and Other Device Support Testing the Connection How to Log Data Creating a Planning Station on your Home or Office 14 17 17 vi Nobeltec® Navigation Software User’s Guide computer Exporting Data to Portable Media: Removing a Virtual Planning Station: 5 - Getting Started Open Nobeltec Navigation Software Locate Your Boat Zoom In and Out Plan Your Route To Display Supplementary Data Layers To View Extended Chart Information Chart Management 26 26 26 The PlanBook 26 26 28 28 28 28 19 Tides and Currents 19 19 19 28 30 3D Navigator 30 30 32 Wind and Weather NavInfo Window 32 18 18 18 19 19 19 Create a Route 20 20 The Console Check Weather for your Route Use the ETA Calculator 20 Activate a Waypoint 6 - Basic Screens PlanView Primary Screen Elements Title Bar Main Menu ToolBars Console Display Chart Window Pane The NavBar Info Tab MOB Tab Weather Tab Status Messages Tab Active Mark Tab T&C (Tides & Currents) Tab Targets Tab Search Tab GPS/Trip Tab 20 20 Displaying Different Chart Types Modifying MAX Pro Charts Displaying the PlanBook Routes Marks Tracks Boundaries ETA Calculator 3D Navigator Modes 3D Navigator Controls on the ToolBar To Customize the NavInfo Window To Customize a NavInfo Sub panel NavView (Admiral MAX Pro Only) Primary Screen Elements 23 23 23 23 23 23 23 23 23 25 25 25 25 25 25 25 25 NavView Menu InfoBar Buttons NavView ToolBar NavView InfoBar To Use NavView To Return to PlanView View Manager To Configure Views and Layouts in NavView 32 33 33 33 33 33 35 35 35 35 35 35 35 Right-Click Mouse Menus 36 7 - Charts and Data 37 Types of Charts Chart Scales Chart Type Controls To Change Depth/Length Units 37 37 37 37 Table of Contents The Power of MAX Pro Charts MAX Pro Chart Options ToolBar To Display Supplementary Data Layers To View Extended Chart Information The Chart Table Opening Charts Chart Objects To Show or Hide Objects On the Screen Creating New Folders Dragging Objects Into a Folder Locating an Object Install Uninstall Chart Quilting To Remove Raster Charts from the Quilt Removing Raster Charts From Quilting (From An Open Chart) Removing All Skewed Raster Charts From Quilting Closing Charts 8 - Basic Skills Navigating Charts Multiple Chart Windows Zooming/Overzooming Scrolling/Panning Autoscroll Modes 37 37 39 39 39 41 41 41 41 41 41 42 42 42 42 42 42 42 43 43 43 43 43 43 Chart Orientation and Marking 44 44 44 44 44 Objects 44 44 44 44 44 44 44 North Up Course Up Leg Up Bookmark User-Created Objects Connected Objects Manipulating Objects on the Chart To Place an Object To Move an Object To Delete an Object Marks Event Mark Annotations Man Overboard Instant Waypoint Range/Bearing Lines Route To Create a Route Boundaries To Create a Closed or Line Boundary Tracks Track Line Coloring (Admiral MAX Pro/Sailing Plus Pack Only) Track Point Management (Admiral MAX Pro/Sailing Plus Pack Only) Track Line Legend (Admiral MAX Pro/Sailing Plus Pack Only) Saving Objects Changing the Appearance of Objects Show/Hide Mark Names Hide Range/Bearing Information Changing a Waypoint Icon Changing the Color of a Route Locking Objects Locking Objects With Multiple Points Locking Single Point Objects Undo/Redo Function 9 - Advanced Routes vii 45 45 45 45 45 45 46 46 46 46 46 46 47 47 47 47 48 48 48 48 48 48 48 48 49 Routes and Waypoints 49 49 49 49 49 50 50 50 50 50 50 Adding New Waypoints to a Route 51 51 Activating a Route Activating a Waypoint Waypoint Arrival Setting a Waypoint Arrival Alarm Splitting a Route Joining Two Routes Great Circle Route Builder Creating a Route From a Track Remove From Route(s) Deleting Routes and Waypoints Appending Waypoints to a Route Nobeltec® Navigation Software User’s Guide viii Inserting Waypoints Using Existing Marks During Route Creation Sharing Waypoints Reversing a Route Route Wizard 51 51 51 51 52 To Create a Depth-based Route Using the Route Wizard 52 To Create a Windvantage Weather Route Using the Route Wizard (Sailing Plus Pack Only) 53 10 - Properties & Options Mark Properties Menu General Tab Description Tab Icon Tab Range Circle Tab Weather Tab Route Properties Menu Boat Properties Menu General Tab Deviation Table and Master Heading Correction Log Tab Automatic Logging Manual Logging Viewing Logfiles Dead Reckoning Tab Calculating Speed and Heading for Dead Reckoning Calculating Set and Drift for Dead Reckoning Calculating SOG and COG for Dead Reckoning Track Tab Enable Boat Track Recording Enable Wake Alarms Tab Waypoint Arrival Alarm Boundary Alarm(s) Shallow Water Alarm Cross Track Error (XTE) Tender Alarms (Admiral MAX Pro Only) 55 55 55 55 55 55 55 55 55 56 56 56 56 56 56 56 57 57 57 57 57 57 58 58 58 58 58 59 Stats Tab Display Tab Range Circle Tab Tools | Options Menu Ports: Configure Tab Data Output Port Priorities Tab To Add a Device to Port Priorities Radar Tab Weather Tab Console Tab Units Tab Misc. Tab Other Features of the Misc. Tab Colors Tab To Change Default Line Colors 3D Coloring Settings Audio Tab 3D/Bathy Tab Depth Tab Contours Tab Custom Contour Options Water Contour Options Custom Contours Tab (Bathy Recorder Plus Pack Only) Targets Tab Target Tracking GlassBridge Network Tab (Admiral MAX Pro Only) Advanced Networking Options Data Sharing Tab Sounder Tab Sailing Tab (Plus Pack) Polar Display Settings Polar Values Tab Video Tab Video Pause 11 - Customizing PlanView The Difference Between a Tool and a ToolBar Customizing the ToolBar 59 59 60 60 60 60 60 61 61 62 63 63 63 64 64 64 65 65 65 67 67 68 68 68 69 69 71 71 72 72 73 74 76 76 77 79 79 79 Table of Contents Changing ToolBar Button Size Moving Tools and ToolBars ToolBar Buttons The Console Available Console Panels Panel Properties Floating and Docked The Helmsman Display Screen Intensity Display Modes Help Tips Managing Windows Window List Copy Window Tile Vertically/Horizontally Cascade Save and Load User Interface Commands 12 - NavView (Admiral MAX Pro Only) 79 79 80 87 87 88 88 88 88 88 88 88 88 88 88 89 91 Menu Buttons 91 91 91 91 NavView InfoBar 92 92 93 Quick Tips Menu Button Auto Hide Tool Buttons GPS/Trip Tab of the InfoBar GPS Strength Window On-Chart Warning Indicators View Manager NavIn fo NavInfo Right-Click Options To Customize the NavInfo Window To Customize a NavInfo Sub panel Strip Charts Tracking Data For Strip Charts Saving Strip Chart Data 93 93 94 95 95 96 96 96 96 ix PlanBook Switching Configurations Making Changes in NavView 96 Multiple Monitor Support Video Cards Using Multiple Monitors 97 97 97 Screen Intensity Modes 97 The Tools | Options Dialog Menus Right Mouse Menus 13 - PlanBook Opening the PlanBook The Routes Tab Selecting a Route to Edit Setting the Boat Speed for the Entire Route Setting the Boat Speed for an Individual Leg Estimating Arrival Time Layovers New Route Adding a Waypoint to an Existing Route Editing Waypoints Deleting Routes and Waypoints Changing the Waypoint Order Fuel Consumption The Marks Tab Editing and Deleting Marks To Delete a Mark Calculating Range and Bearing to Marks Display Route Marks (Waypoints) 97 97 97 97 97 99 99 99 99 99 99 100 100 100 101 101 101 101 101 102 102 102 102 103 The Tracks Tab 103 103 104 The Boundaries Tab Changing Route Detail and Marks Tab Column 104 Deleting Tracks Creating a Route from a Track x Nobeltec® Navigation Software User’s Guide Appearance 104 105 Importing and Exporting Data 105 105 Changing Visible Columns Importing and Exporting Data Using the PlanBook 14 - Tides & Currents 107 Displaying Tide Bars 107 107 Displaying Current Arrows 107 107 108 Interpreting Tide Bars Interpreting Current Arrows Adjusting Arrow Size Tide and Current Time ToolBar 108 108 Displaying Tides and Currents Details 108 109 109 109 109 109 Using the Tide and Current Time ToolBar The Tides & Currents ToolBar The Tides & Currents Graph Weekly View and Daily Table Changing the Date Multiple Windows in Tides and Currents Tides and Currents on the NavBar ETA Calculator Calculating Best Departure Time Calculating Transit Time Calculating Speed 15 - 3D Navigator 3D Bathymetric Charts Opening the 3D Navigator Window The 3D ToolBar Mode Terrain Exaggeration Depth Marker Vessel Exaggeration 110 110 111 111 112 113 113 113 113 113 113 113 113 Elements of the 3D Navigator Window 3D Locator The Status Bar 3D Color Legend Data Resolution Screen Resolution Predicted Depth At Boat Track Line Predictor Line 3D Vessel Keel Marker Depth Indicator Changing the 3D Landscape (Terrain, Sky and Water) Shaded Relief Using the 3D Window 113 113 113 113 114 114 114 114 114 114 114 114 114 114 Adjusting BottomLock Height 114 114 115 115 115 116 116 Favorite Boat/Explore Views Bathy Recorder 116 Center On Boat Mode Zooming and Panning In Center On Boat Mode Explore Mode Zooming and Panning In Explore Mode BottomLock 16 - Wind and Weather Wind Conditions At Cursor Weather 116 117 117 117 117 Tools | Options | Weather 117 GRIB Weather Data 118 Getting GRIB Weather Data (VNS MAX Pro and Admiral MAX Pro) 118 Getting OCENS® WeatherNet Data (Admiral MAX Pro) 118 GRIB Weather Options 118 GRIB Weather at Route (OCENS® WeatherNet / Admiral MAX Pro only) 119 Table of Contents Windvantage™ Weather Routing Weather Plus Pack XM Weather Data Getting XM Weather Data XM/WxWorx Weather Layers XM/WxWorx Weather Legend XM Marine Statements and Warnings Sirius Weather Data Getting Sirius Weather Data Sirius Weather Layers Sirius Weather Legend Tropical Statements and Warnings SkyMate Weather Data Select SkyMate During Installation Getting SkyMate Weather Data 17 - Autopilot 119 119 119 119 119 120 120 120 120 121 122 122 122 122 122 125 Autopilot Connections 125 125 125 125 Using the Autopilot On the Water 126 126 126 Wiring Settings Definitions Of Autopilot Setting Options How to Use the Autopilot - Active Mark How to Use the Autopilot - Active Route Arrival Circle and Crossing the Perpendicular Setting Arrival Distance for Existing Marks Changing the Default Arrival Distance 18 - Networking 126 126 126 127 General Benefits GlassBridge Network (Admiral MAX Pro Only) 127 Shared Information 127 127 127 127 Tools | Options GlassBridge Network Tab Data Sharing NMEA Data Sharing Sounder Sharing (GlassBridge Network Only) 127 127 Radar Sharing Configurations of GlassBridge Networking Example 1 Example 2 xi 127 127 127 128 Setting Up the GlassBridge Network 128 129 Setting Up Example 2 129 Setting Up the Navigation Inputs On the Client Computer 129 Configuring the GlassBridge Network Options 129 Behavior of Example 2 129 Behavior of Example 1 More Information About Data Sharing Processed NMEA Data Raw NMEA Data Sharing Send NMEA Data Listen to NMEA Data Advanced Networking Settings Sharing Radar Sharing Radar Targets Sharing Sounder Sharing Active Routes, Marks and Waypoints Troubleshooting Test the Cabling Test the Glass Bridge Network How to Use the Glass Bridge Network Test Utility. Setting Up Chart Sharing on Multiple Computers Setting up a Vista Ultimate machine for networking: 19 - Target Tracking Targets Onscreen Prior to Setting Up Target Tracking Setting Up Target Tracking Configuring Nobeltec Software to Receive AIS Data Changing Target Appearance Using the DSC Directory Using the Tender Directory 130 130 130 130 130 130 130 130 130 131 131 131 131 131 131 132 133 133 133 134 134 134 135 135 xii Nobeltec® Navigation Software User’s Guide Targets NavBar and Targets InfoBar 135 135 135 Enhanced AIS Filtering Changing Alarm Settings How Targets Appear in NNS 135 136 137 Naming Conventions for Targets What Is AIS? Types of AIS Broadcasts 137 Locating a Target Onscreen Information Listed on the NavBar and InfoBar Class A Class B AIS Base Station Received Text Messages Type of Ship/Cargo DSC-Equipped Marine Radio Support Tender Tracking Unlocking Tender Tracker 20 - Radar Usage Radar Functionality The InSight Radar 2 (IR2) What are the Benefits of Using an IR2? How Does the IR2 Work? Important Notice Regarding 2kW Dome Models 137 137 138 138 139 139 139 139 140 141 141 142 142 142 142 142 142 The InSight Radar 2 - Black Box (IR2-BB) 144 144 144 The InSight Radar Window Pane 144 144 144 144 145 What is the IR2-BB? How Does the IR2-BB Work? Opening the Radar Window Pane Transmit/Standby Radar Right-Click and Radar Menu (PlanView) Ghost Cursor Radar/Chart Overlay Routes, Marks and Boundaries in Radar Window 145 145 ARPA & MARPA 145 146 Nobeltec Radar Overlay and MARPA 146 146 Radar ToolBars 146 146 146 Initial Radar Setup 147 147 147 148 148 149 ARPA Radar Connection (Admiral MAX Pro Only) How It Works The Radar Control ToolBar Radar Advanced ToolBar (Admiral MAX Pro Only) Setting the Trigger Delay Adjusting the Radar Heading Line Rotation Compass Settings Adjusting the Compass Master Heading Correction Creating a Compass Deviation Table Setting IR2 Radar Presets (4kW Models and Above) Auto Tune Gain Auto Gain (4kW and Higher IR2 Radars) Sea Clutter (SEA) Auto SEA (4kW and Higher IR2 Radars) STC Curve (IR2 Radars only) Range Auto Range Radar Range ToolBars Rain Interference Rejection (IR) Range and Bearing to Target Range Rings Variable Range Marker (VRM) Electronic Bearing Line (EBL) Guard Zones Pulse Length (4kW and Higher) 149 149 150 150 150 150 151 151 152 152 152 153 153 153 153 153 154 154 154 Radar Orientation (rotation) (4kW and Higher) Off-Centering the Radar (Shifting) (4kW and Higher IR2 and all IR2-BB radars) 155 Recording the Radar 155 Decluttering the Radar 155 Table of Contents Re-sizing the Radar Image Admiral MAX Pro - Advanced Radar Features NavView’s Multiple Monitor Support Full Screen Radar Console NavView ToolBars Target Tracking Point and Click Radar (MARPA) Acquiring MARPA Targets MARPA Symbology Setting a Target Alarm Target Tracking Terms and Acronyms Radar Configuration Options Understanding Radar How to Interpret the Radar Picture Vector State Normal Echoes False Echoes False echoes caused by reflection False echoes caused by multiple reflection Shadow and dead angle False Echoes Caused by Side Lobes Radar Horizon Radar Horizon and Natural Anomalies Sub-refraction Super-refraction Ducting Minimum Detectable Range Height of Transceiver Transmission Pulse Width Range Resolution Bearing Resolution Radar Troubleshooting Troubleshooting Direct Connections Test the Connection without the Radar Wizard Troubleshooting Network Connections Test the Connection without the Radar Wizard Frequently Asked Questions 156 156 156 156 158 158 159 159 159 160 160 160 160 160 161 161 161 161 161 162 162 162 162 162 162 163 163 163 163 163 163 163 163 163 164 164 166 21 - Sounder Usage Starting the InSight Sounder Understanding the Sounder Display Sounder ToolBars The Right-Click Menu The Sounder Menu Operation Modes Adjusting the Sounder Image Gain Clutter Signal Level Noise Colors Additional Color Options xiii 168 168 168 169 169 169 169 169 169 170 170 170 170 170 Key Sounder Features 170 170 171 171 171 172 172 172 173 173 173 173 Advanced Sounder Features 174 174 174 174 174 175 175 175 175 Configuring the InSight Sounder 176 Changing Frequencies Adjusting the Range Auto Range Adjusting the Shift Split Views Bottom Zoom Custom Zoom Bottom Lock Sea Floor Discrimination Dual Frequency Shallow Water Alarm Temperature and Temperature Graph Speed Through Water Display Dropping A Mark or an Event Mark Instant Waypoint Ghost Cursor Night and Twilight Mode Demo Mode Record and Playback xiv Nobeltec® Navigation Software User’s Guide Sounder NMEA Data 176 176 176 Polar Display Settings Sounder in NavView (Admiral MAX Pro Only) 176 176 Sounder and Fishfinder Basics 176 176 177 177 177 177 Editing a Polar File Creating a New Polar File Saving the Polar File NMEA Data Input NMEA Data Output ToolBar in NavView How It Works Frequency of Sound Waves The Information On Your Screen Impact of Beam Angle Strength of Electrical Pulse Troubleshooting Sounder 22 - Bathy Recorder Unlocking Bathy Recorder Plus Pack Upon Install The Benefits of Bathy Recorder Transducer Offset Settings Using a Sounder or Depth Finder Bathy Recorder Indicator Locating, Deleting and Saving Bathy Files Compressing Bathy Recorder Files Tools | Bathy Recorder Tools | Options | 3D/Bathy Custom Contours 23 - Sailing Plus Pack Terminology Unlocking Sailing Plus Pack The Polar Display To Open an Existing Polar 178 180 180 180 180 181 181 181 182 182 182 183 183 184 184 184 184 185 Display Settings Tab. Polar Values Tab Managing Polar Files 185 185 186 187 187 187 187 Lay Lines and On Screen Indicators 188 188 188 189 Additional Features 189 189 189 190 190 190 To Configure Wind Indicators and Lay Lines Lay Line Calculation Set and Drift Effect on Lay Lines Ockam® and B&G® Instrument Support Listening for Ockam or B&G Protocols Adding a Polar Diagram to NavView To Add a Polar Diagram to a NavView Windvantage™ Weather Routing 24 - Tender Tracker (Admiral MAX Pro)192 What is Tender Tracker? Unlocking Tender Tracker Setting Up Tender Tracker Configuring the Tender Directory Changing Target Appearance Locating a Tender Onscreen Tender Tracker Alarms Seetrac Alert "Tender Out of Range" Alarm 25 - Printing Print Wizard Printing Tides and Currents Information 192 192 192 193 193 193 194 194 194 196 196 196 Table of Contents 26 - Upload/Download xv 198 214 Special Notice Regarding Data Backup Glossary 198 198 Index 225 Upload/Download Basic Terms Wiring Your GPS For Upload/Download Proprietary Protocols Uploading to a GPS Downloading from a GPS Setting the Computer Clock 198 Product Features 230 198 Hot Keys 231 198 My Nobeltec Program & Chart Information 233 How to Restore an Archived Backup 27 - On the Water 198 199 199 200 Sea Trials 200 200 200 200 200 Putting It All Together 201 201 201 202 202 203 203 203 203 203 SOFTWARE LICENSE AGREEMENT & WARRANTY Warranty 204 Turning On the System - Avoiding a Wayward Mouse GPS Test Autopilot Test Heading Sensor Test Check the Weather Create a Route Calculate Your ETA Input into the PlanBook Printouts Upload the Route Commence Navigation Arrival At Your First Destination Complete Your Voyage 206 Chapter 1 - Introduction 1 - Introduction This User's Guide covers information about Jeppesen Marine's two industryleading software packages: Nobeltec® Admiral MAX Pro™ and Nobeltec VNS MAX Pro™. How Navigation Systems Work Nobeltec Navigation Software is an important part of a complete onboard navigation system, which should include your computer, navigation software, digital nautical charts and a Global Positioning System (GPS) receiver. VNS MAX Pro is a feature-rich program that includes GPS and autopilot support, a full version of our award winning Tides & Currents software, limited target tracking and much more. Admiral MAX Pro is our most complete package. Admiral MAX Pro has all of the power and benefits of VNS MAX Pro, but with advanced features such as Multiple-Monitor support, comprehensive target tracking, GlassBridge Network support, and the exclusive NavView user interface mode. Figure 1.2 - How Navigation Systems Work MAX Pro Charts MAX Pro Charts take electronic charting to new dimensions, guaranteeing an exclusive navigation experience to even the most demanding navigators. The MAX Pro chart database contains over 30,000 charts. These charts are based on global Hydrographic Offices' paper charts, providing the most complete, accurate, and up-to-date portfolio. Additionally, MAX Pro comes with comprehensive supplementary data, such as Streets and Roads, Ports Database, worldwide aerial photographs, perspective photos, a global bathymetric database, and much more. MAX Pro is not a chart-by-chart database. Our cartographers have merged together multiple charts of similar scale, carefully creating a beautifully seamless and consistent set of charts that, when drawn on the screen using our sophisticated chart presentation library, appear to scale in and out without flaws. Figure 1.1 - Nobeltec Navigation Software Screen Both of these industry-leading navigation programs can provide you with unparalleled awareness of your nautical environment, interfacing Jeppesen Marine's MAX Pro digital cartography with other navigation tools, such as a Global Positioning System (GPS), radar, depth sounder, onboard camera and a DSC radio. MAX Pro is ideal for anyone who takes navigation seriously and wants the best tools for the job. Equally suitable for leisure, fishing or light commercial vessels, MAX Pro provides a powerful and dynamic 3D display mode with informative views of the chart data above and below the water line. Full land elevation data and satellite imagery are integrated within MAX Pro to create a truly stunning display that graphically illustrates the geographical nature of the coastline and sea floor. At the heart of MAX Pro is our unique Quick Sync updating technology, which allows navigators to check the status of their electronic charts and supplementary data. Updates can be quickly downloaded and automatically applied at the convenience of the navigator. 1 - Introduction Nobeltec Navigation Software 1 2 Nobeltec® Navigation Software User’s Guide 1 - Introduction Navigation Software Plus Packs Jeppesen Marine provides a number of product "Plus Packs" to use in conjunction with specific marine hardware, such as Depth Sounders, Seetrac® Tender Tracking System, XM satellite radio, and so forth. Bathy Recorder The Bathy Recorder, sold as a Plus Pack for Admiral MAX Pro, enables you to record sea floor topographic information using your Sounder/Depth Finder and VNS MAX Pro device to incorporate that data into your 3D display. When you use Bathy Recorder to customize your sea floor charts, those charts will constantly improve with repeat trips over the same areas, enabling you to have a perfect picture of important sea floor terrain, as well as your favorite fishing and diving spots. Raster Raster Chart Plus Pack enables you to display third-party charts, such as BSB Charts, including Place Names and Coast Pilot, NosGeo Charts and Maptech Photos. With this Plus Pack, you can install and view these third-party charts, MapTech Charts, and Photos within Nobeltec Navigation Software. NOTE: Coast Pilot cannot be viewed if you are using Windows Vista unless the "Windows Help program (WinHlp32.exe) for Windows Vista" update is downloaded from the Microsoft Download Center (www.microsoft.com/downloads). Fleet Manager Fleet Manager interfaces with SkyMate® satellite hardware to provide you with the ability to track multiple vessels, plot vessel positions on vector charts, examine past tracks on each vessel and quickly send e-mail to any ship in your fleet. This tool is ideally used in a central location on shore, such as a fleet office. Each fleet vessel must be equipped with SkyMate® hardware. NOTE: As of the publication of this Users Guide. Skymate does not support Microsoft Vista. Nobeltec will continue to monitor the availability of a new version of SkyMate that works with MS Vista and will issue a new release when that software is available. Sailing The Sailing Plus Pack is an upgrade package available for Jeppesen Marine's VNS MAX Pro and Admiral MAX Pro. Sailing Plus Pack is ideal for both cruising and performance sailboats because it provides customizable polar diagrams and computer-calculated lay lines that help sailors achieve the ultimate sailing advantage. The Polars provided in this Plus Pack are delivered through a partnership with US Sailing® and are designed to provide you with that organization's highquality official polar data. Another great advantage of the Sailing Plus Pack is Windvantage™Weather Routing. When you select Windvantage™Weather Routing in the Route Wizard, the program combines your boats polar performance characteristics with GRIB weather to create the best possible route. Tender Tracker (Admiral MAX Pro only) Tender Tracker Plus Pack is as an upgrade package available to users of Admiral MAX Pro who are equipped with a Seetrac Tender Tracking System. Seetrac's Tender Tracking System is a stand-alone radio frequency transmission system for secure transmission of key assets that can be interfaced with your computer through a standard COM port connection. When properly configured, Tender Tracker provides onscreen, up-to-the-minute tracking data about smaller affiliate watercraft (called "Tenders"), including smaller boats, jet skis, wave runners or even passengers carrying a wireless Seetrac Tender Unit (STU). Tenders can be viewed onscreen using your Admiral MAX Pro target tracking capabilities. Tender Tracker can greatly improve security and safety of your Tenders and passengers, keeping you constantly aware of their movements. Weather Weather Plus Pack integrates real-time satellite data from XM or Sirius Weather satellites. In order to use the Weather Plus Pack, you must have an XM or Sirius-compatible satellite receiver connected to your computer and you must be subscribed to the Sirius or XM weather data service. These weather providers stream a continuous weather feed that overlays real-time weather data on your Nobeltec Navigation Software, directly over your vector charts and planned routes. Chapter 2 - Software, Chart and Data Installation 2 - Installation Setting Up Nobeltec Navigation Software 8. 3 After your computer completely reboots, insert the Hardware Key. Your system should identify the Hardware Key as a new component and authenticate it. Once you receive the system prompt that the Hardware Key is installed and ready for use, launch Nobeltec Navigation Software. Setting up Nobeltec Navigation Software takes four steps. 1. Install Nobeltec Navigation Software. 2. Install Charts, Data and Plus Packs. 3. Connect all peripheral hardware to your computer. WARNING: Do not insert the Hardware Key until you have installed Nobeltec Navigation Software and completely rebooted. Failure to do so can disrupt system functionality. If you have inserted the Hardware Key before installation, remove the device and restart your computer before continuing. Run GPS and Radar Setup Wizards, instructing the software to recognize external marine hardware. The Hardware Key To install Nobeltec Navigation Software: 1. Start your computer and, if possible, connect to the Internet. Close all open programs, including any anti-virus software 2. Insert the Nobeltec Navigation Software DVD into the DVD drive. 3. The installer should automatically launch the setup wizard. Alternatively, you can open the DVD files by going to My Computer and doubleclicking on setupvns.exe. 4. The Setup Wizard will verify that your system has all components needed to run Nobeltec Navigation Software. If the setup wizard detects that you need additional components, you will be prompted to install those components via the setup wizard before continuing. 5. 6. 7. If the setup wizard detects that you need more memory, shut down the installation and adjust your system memory before continuing with the setup. Once the setup wizard has verified that your system is ready, click Next. In the subsequent setup wizard screens, you can select some basic setup options, including Program Files folder and User Guide language. It is recommended that you accept the default program locations and setup options. This software installation will also install your Hardware Key authentication solution and Hardware Key drivers. Click Next to continue. Installation may take several minutes. When the installation is complete, you must reboot your computer to continue, then close the installer by clicking Finish. ATTENTION: At the start of software installation, make sure the Hardware Key is not plugged into a USB port. After you have installed the software and rebooted your computer, plug your Hardware Key into an available USB port. Linked to your Hardware Key is a Serial Number, which you will use only if you need customer support. When you receive this number, please write it down in the My Nobeltec Program and Chart table inside the back cover of this guide. Step 2. Run Nobeltec Navigation Software To run Nobeltec Navigation Software, you must install Nobeltec Navigation Software, reboot your computer and insert your Hardware Key. NOTE: Your computer should recognize the Hardware Key as a new device and provide a status message that the Hardware Key is ready to use before you continue with MAX Pro Chart installation. 1. Double-click on the Nobeltec Navigation icon on your desktop. 2. The Software License Agreement will display. You must click I Agree to use the software and continue. 3. The software will open to a Planning Chart. For harbor-level details, you must next install MAX Pro Charts and Data. 2 - Installation Step 1. Install Nobeltec Navigation Software The Hardware Key is a security-based USB device that functions similarly to a Serial Number or other user-identifying data. While the software is in use, the Hardware Key is plugged into an available USB port on every computer running Nobeltec Navigation Software and authenticates that computer to the software, allowing you to view all charts and Plus Packs you have purchased and access data transmitting across Serial Ports. 4 Nobeltec® Navigation Software User’s Guide The Software License Agreement Additional Marine Data not in MAX Pro: ATTENTION: You may not use this product unless you agree to the terms of the Software License Agreement. Nobeltec software still allows you to display Raster Charts from other providers and legacy Nobeltec Passport Deluxe Photos. These data products must be installed separately from the MAX Pro data. 2 - Installation When you first launch Nobeltec Navigation Software, a digital copy of the Software License Agreement will display. By clicking I Agree, you and all users of your copy of Nobeltec Navigation Software agree to be bound by the terms of the Software License Agreement and to release and hold Jeppesen Marine harmless from and against any and all claims, obligations and liabilities with respect to the product, except those specifically reserved in the License Agreement. If you do not agree with the terms of the Software License Agreement, click I Do Not Agree and the program will close. If you choose this option you may return the program to the original place of purchase within thirty (30) days of the purchase date. Charts and data (once unlocked) are not returnable. Step 3. Install Charts and Data Max Pro Charts MAX Pro Charts are high-quality digital vector charts and supplementary data created by experienced cartographers worldwide, and divided into regions available for purchase. Each region contains multiple charts for seamless zoom and redundancy at all scales. MAX Pro Charts are delivered to you on MAX Pro Chart DVD(s). Once you purchase a Region Permit, use the Chart Manager to unlock that region and install the purchased charts. Install MAX Pro Charts and Data Before you install MAX Pro Charts and Data, you must purchase Region Permits for all MAX Pro Chart region(s) that you wish to use from Jeppesen Marine or any authorized Nobeltec product retailer. 1. Install Nobeltec Navigation Software 2. Restart your computer 3. Insert your Hardware Key. 4. Open Nobeltec Navigation Software. 5. Insert the MAX Pro Charts disc into your DVD drive. 6. Open Nobeltec Navigation Software and click Tools | Manage MAX Pro Charts. The Chart Manager tool will open. Click Data Manager. 7. 8. Additionally, updates can be performed in real-time, which allows you to verify the current status of your electronic charts and request updates of regions you are licensed to view. Updates can be downloaded and automatically applied at your convenience. Click Install Region Permits. From this window you can manually enter your Region Permits or browse to a license file, if you were provided one. 9. Input all of the Region Permits you have purchased, clicking Add to List after each one has been input. Click OK to return to the Data Manager window. MAX Pro Additional Data Layers, Perspective and Aerial Photos: 10. The Data Manager will list regions for which you have purchased a Region Permit. MAX Pro contains a rich collection of supplementary data layers in addition to the core digital vector charts. These include place name marks, marine facilities, perspective and aerial photos to supplement the already rich content of MAX Pro Charts, allowing you to see more details at a glance. These additional layers come installed with your MAX Pro Charts by default and no extra steps are necessary for you to get the benefit of these data layers. They will be installed at the same time that your MAX Pro Charts are installed. 11. Place a check-mark next to each Collection (Region) listed in the available Region Permits table or click Select All. 12. Click Install Region Data. A verification window will pop-up, asking you to confirm your choice to install all charts. Chapter 2 - Software, Chart and Data Installation Figure 2.2 - Chart Manager Prompt 13. Click Yes to confirm and open the Database Location window. 5 Figure 2.3 - Plus Pack Installation Confirmation 6. A prompt, telling you to close Nobeltec Navigation Software and restart it, will appear. Click OK to close this prompt, then click Done to close the Chart Table. 15. Installing Charts may take several minutes. When all charts install, you will be returned to the Data Manager window. 16. Click Close and then Exit to close MAX Pro Chart Manager. Step 4. Install Plus Packs Install Plus Pack Unlock Codes Plus Pack Unlock Codes unlock supplemental features sold separately, such as Bathy Recorder, Raster and Photo data, Sounder, Weather, and so forth. Whenever you purchase new Plus Packs, use the following steps to release the Plus Pack features: 1. Open Nobeltec Navigation Software. 2. Click File | Chart Table and select the Install Tab. 3. From the drop-down menu, select Plus Pack Unlock Codes. 4. Input the 20-digit Unlock Code(s) in the Enter Unlock Code field. 5. The Plus Pack will install. When installation has completed, a confirmation window will appear (see Figure 2.3). Click OK to close the confirmation window. Figure 2.4 - Plus Pack Exit and Restart Prompt 7. Close Nobeltec Navigation Software and relaunch. Plus Packs that you released are immediately available upon relaunch of the software. NOTE: You must have installed the appropriate hardware for all Plus Packs you purchase in order for them to work properly. For example, XM or Sirius weather will only display if you have installed the appropriate satellite receiver and successfully connected the receiver to your PC. Raster Chart Plus Pack Raster Chart Plus Pack enables you to display third-party charts, such as BSB Charts, including Place Names and Coast Pilot, NosGeo Charts and Maptech Photos. With this Plus Pack, you can install and view MapTech Charts and Photos within Nobeltec Navigation Software. NOTE: Coast Pilot cannot be viewed if you are using Windows Vista unless the "Windows Help program (WinHlp32.exe) for Windows Vista" update is downloaded from the Microsoft Download Center (www.microsoft.com/downloads). Install Non-Nobeltec Charts Purchase of the Raster Chart Plus Pack allows you to display the following types of Raster charts and photos: • BSB Charts • MapTech Charts and Photos. • NosGeo Charts 2 - Installation 14. Browse to the MAX Pro Charts disc in your DVD drive, or to the MAX Pro Chart files if you have downloaded them into a folder on your PC or network, then click Open. Charts will install automatically. 6 To install third-party charts: Updating MAX Pro Charts and Data 1. Updating Charts and Data with Quick Sync 2. 3. 4. 5. 6. 2 - Installation Nobeltec® Navigation Software User’s Guide 7. 8. 9. Purchase the Raster Chart Plus Pack from Jeppesen Marine or a Nobeltec Product Dealer. Install the Raster Chart Plus Pack Unlock Code and restart Nobeltec Navigation Software. Insert the third-party chart disc into your DVD drive. Click File | Chart Table and click on the Install Tab. From the Install Type drop-down menu, select Raster & Photo Charts. Click Browse to open a browser window. Browse to the third-party file location (DVD drive or local drive if you have installed the DVD locally prior to installation). Nobeltec Navigation Software will scan the available data types - if it recognizes the chart format, it will automatically list the charts available. Select the individual charts you wish to install or click Select All. Click Install to complete installation. Click Yes to overwrite files. If you have several chart discs, repeat steps 1 - 6 for each disc. Charts can be updated in real time. During your subscription period you may use Quick Sync to keep all of your charts up-to-date. 1. Open MAX Pro Chart Manager. 2. Click Data Manager. The Data Manager will list regions for which you have purchased a Region Permit. 3. Click Manage Delta Updates. A table will display containing all of the Region Permits you own. 4. If you have Internet connection, select Check for Updates, select the regions you wish to recieve updates for, then click Next. The Quick Sync service will transfer all available Notice To Mariner (NTM) advisories issued by official maritime agencies since your last update. A Download log will display, showing the progress of your Quick Sync update. If you receive your updates via DVD, insert the disc into your DVD drive, then select Load Updates from File then click Next to open a Database Location window where you can browse to the DVD. 5. When all of your charts and data are updated, click Close and then Exit to close MAX Pro Chart Manager. Updating Charts and Data via Email In addition to the Quick Sync process, you can update your charts via email. 1. Open the MAX Pro Chart manager. 2. Click the Data Manager button. 3. Select the region that you want to update by placing a check next to that region. 4. Click Manage Updates. 5. When that screen opens, select the Generate Update Request File option, and click Next. 6. Files will now be created on your hard disk that need to be emailed to the following e-mail address: [email protected]. 7. Copy those files that were created on your hard disk to some form of removable media (i.e., 'thumbdrive'). 8. Take those files to a computer that is running an email client and has access to the internet. 9. The MAX Pro Quick Sync email process may take a few minutes to Chapter 2 - Software, Chart and Data Installation 10. 11. 12. 13. 14. 15. 16. Uninstalling Charts and Data To Uninstall Chart Regions 1. 2. 3. 4. 5. 6. Open MAX Pro Chart Manager. Click Data Manager. The Data Manager will list regions for which you have purchased a Region Permit. Place a check-mark next to each Collection (Region) listed in the available Region Permits table or click Select All. Click Uninstall Region Data to uninstall all Charts and Data for the selected regions. A verification window will pop-up, asking you to confirm your choice. When the chart region(s) you wish to uninstall have been removed, click Close to close this window and then click Exit Chart Manager. To Uninstall Raster Charts, Photos and Data 1. 2. 3. 4. 5. Click File | Chart Table and select the Uninstall Tab. Select Extra Nav Data, Perspective Photos or Raster & Photo Charts from the drop-down menu Select one or more charts to uninstall. Click Uninstall. The selected data will immediately uninstall. THIS CANNOT BE UNDONE - you must re-install any uninstalled data, raster charts or photos. When you have completed uninstalling the selected charts, photos or data, close the Chart Table by clicking Done. Upgrading from Previous NNS Versions Upgrading to Nobeltec MAX Pro Software from NNS 9.x or previous involves a dramatic change in charting capabilities. MAX Pro Charts are completely unique in their real-time capabilities and rich, multiple layers of detail. Upgrading to the MAX Pro versions means purchasing new Charts and Chart Region Permits. See your Nobeltec product dealer or contact Nobeltec Sales for information on how to upgrade your existing copy of Nobeltec Navigation Software and charts and take advantage of this powerful change in charting capabilities. 2 - Installation 17. generate your database updates. Please be patient and allow the system at least 15 minutes to deliver your update files. After 15 minutes you will receive your Update Files via return email. Copy the Update Files from your email to your navagation computer and; Access the MAX Pro Chart Manager - Data Manager. Select the region that you want to update by placing a check next to that region. Select the Manage Updates button, Select the Load Updates From File option. When prompted, browse to the Update Files that you copied to your navagation computer. Your database update will now be complete. 7 2 - Installation 8 Nobeltec® Navigation Software User’s Guide Chapter 3 - Hardware Setup 3 - Hardware Device Setup General Hardware Setup There are three steps required to connect a GPS, Autopilot or other peripheral (marine electronic) device to your computer. 1. Ensure your computer has an available serial port or that a SeaLevel® USB/Serial Port Adapter is being used and connect the device to your computer. 2. Make the physical electrical connection to the device using a 9-pin connector and power on the device. 3. Run the GPS/Port Setup Wizard to instruct Nobeltec Navigation Software to recognize output sentences transmitted by the device. technology has limits. A prudent navigator will understand these limitations and how they possibly affect the safety of the boat and crew. NOTE: NMEA 0183 1.0/1.5 only supports 2 digits of Latitude and Longitude precision (approximately 60 feet/18.2 meters). NMEA 0183 2.0 and higher supports 3 digits of Latitude/Longitude precision (approximately 6 feet/1.8 meters). Another limitation to complete accuracy is the accuracy of your digital charts. Electronic charts are made by skilled cartographers, however, some cartographic surveys upon which digital charts are based were made over 50 years ago. Therefore, it is possible for errors to occur in the final products. Electrical Connection: GPS to Computer When you run the GPS/Port Setup Wizard, much of the setup is performed automatically. The Wizard is designed to intuitively recognize your hardware device and connect it to the software correctly. However, you must already have the device wired and transmitting data to an available serial port. Connection Type - RS232 (Typical Computer COM Port) NOTE: If your NMEA device uses an RS422 connection standard, consult your device manufacturer for wiring instructions, or contact Jeppesen Marine for an RS422 interface device. If your device wiring pins are labeled "Transmit/Receive +" or "Transmit/Receive -", it is most likely RS422 standard. GPS devices require some special instructions. Read the following closely to ensure that you will correctly connect your GPS to your computer and instruct NNS to recognize output from that GPS. Using a GPS Receiver A GPS Receiver uses information from GPS satellite signals to calculate your position. Position information, along with speed and direction, is transmitted to the computer, where charting software translates that signal into a graphic display of your location on a digital nautical chart. The Limits of GPS-Based Electronic Navigation Seasoned navigators know not to rely on a single method of navigation when determining their position. Two or more methods should be used to guard against errors placing you or your vessel in a dangerous situation. GPSbased electronic navigation can provide a finely-tuned focus on your boat and surrounding navigational obstacles, however, like all technologies, GPS Pin # Signal Ground (Ground) 5 Receive Data (Data In) 2 Transmit Data (Data Out) 3 Table 3.1 - Pinouts For The 9-Pin Nobeltec Serial Data Cable Most GPS models have differing, proprietary connectors for data access. For this reason, the 9-pin data cable provided by Jeppesen Marine is unfinished on one end. You will also need a connector cable, which may have been packaged with your GPS originally or may need to be purchased from your GPS retailer or manufacturer. Identifying the Wires - RS232 The serial port connector supplied by Jeppesen Marine has a label which identifies the wires to be used which are Data In (Receive), Data Out (Transmit) and Ground. These are three of the nine wires on the 9-pin serial connector. It is possible that your GPS cable will have more than three wires showing. Since there is no industry standard other than pin numbers, you will need to refer to your GPS User's Guide to determine which wires to use. 3 - Hardware Setup GPS Setup 9 Nobeltec® Navigation Software User’s Guide 10 GPS Ground Ground Transmit Transmit Receive Receive Connecting the Nobeltec Cable to Your Computer PC Computer COM Port This wire is only required for Upload/Download Figure 3.1 - Standard GPS to PC Connection GPS Ground Ground Transmit Transmit Receive Receive Multiple Input Devices PC Computer COM Port Ground Autopilot Transmit Receive Figure 3.2 - GPS and Autopilot Integration 3 - Hardware Setup Jeppesen Marine can supply a standard 9-pin "D" connector (DB9) for a small charge. Or you can get one from your local Marine Electronics Dealer. After this cable has been wired to your GPS, plug it into an available 9-pin serial port on your PC. If your computer does not have a 9-pin serial port you may need to use a SeaLevel® Serial-to-USB adapter. GPS Settings Many GPS devices must be specifically configured to output data. Check your GPS User's Guide to determine if your GPS is outputting data or not and follow the instructions to turn NMEA output on. NOTE: These settings assume that the GPS will output information in the WGS84 Datum. Connecting the Wires After you have identified the wires, you can connect them. The Data Out (NMEA Out) wire from your GPS should be connected to the Data In wire in your computer cable. The Data In (NMEA In) wire from your GPS should be connected to the Data Out wire in your computer cable. The Ground (or Data - or Return) wire from your GPS should be connected to the Ground wire in the computer cable. You can select multiple COM ports for input. For example, a GPS on COM port 1 and a depth sounder on COM port 2. If you connect two devices which supply the same type of data, such as two GPS units, you must set up port priorities to tell the program how to handle multiple sets of similar data. (See Port Priorities in Chapter 4 - Configure Data Ports). Chapter 4 - Configure Data Ports 4 - Configure Data Ports Step 2. Radar Setup Wizard Once your hardware devices are connected, you need to run the Setup Wizards that instruct Nobeltec Navigation Software to recognize device output. A Note About Radar Setup Step 1. GPS/Port Setup Wizard The first time you launch Nobeltec Navigation Software, a dialog box will display, asking if you'd like to start the GPS/Port Setup Wizard. Connect all of the NMEA peripherals to the computer, including GPS, compass and autopilot. These devices use Serial and/or USB ports. If your computer does not have Serial ports, Nobeltec recommends that you use SeaLevel® Serial-to-USB port adapters (available from a Nobeltec retailer) to connect to the external devices. Make sure the GPS is installed, powered on and connected to the network or PC before commencing setup. Use Windows HyperTerminal to verify that the GPS is sending data to your PC. For more information about connecting your GPS and wiring peripheral devices see Chapter 3 - Hardware Device Setup. NOTE: HyperTerminal is not available with Windows Vista. Using the GPS/Port Setup Wizard Nobeltec Navigation Software is designed to receive input from a Nobeltec InSight Radar 2 (IR2)™ or input from a Nobeltec InSight Radar 2 - Black Box (IR2-BB)™, which will digitize radar output from most industry-standard radars. Admiral MAX Pro and VNS MAX Pro supports input from up to two (2) IR2 Radars. The IR2 or IR2-BB Installation Guide(s) instruct you how to physically connect these radar products with your PC. Nobeltec Navigation Software will establish an interface with your hardware using the Radar Setup Wizard. When you run the Radar Setup Wizard, all radars must be installed, powered on and connected to the network or PC. The IR2-BB (for non-Nobeltec radars) must also be connected and powered on. The Radar Setup Wizard will detect accessible radar units and walk you through setup of each. Users of Admiral MAX Pro and VNS MAX Pro can toggle between radar units by right-clicking on the radar display and clicking Select Radar. Installing Your Radar Solution Included with your IR2 or IR2-BB radar solution are installation and wiring instructions. The majority of technical support issues revolve around incorrect installation. Jeppesen Marine strongly recommends using a qualified marine technician to install all radar hardware. If you install the hardware components yourself, be sure to completely test and verify your wiring and connections. Depending on which radar solution you own, your radar may integrate to the computer using the USB (Universal Serial Bus) port or an Ethernet Network port. Instructions for each of these connections is documented in the IR2 or IR2-BB Radar Installation Guide. NOTE: The IR2-BB requires a separate driver installation prior to setting up your Radar. 4 - Configure Data Ports TIP: If the GPS/Port Setup Wizard does not start automatically, select Tools | Options | Ports: Configure from the Main Menu. Click GPS/Port Setup Wizard. 1. When the Nobeltec GPS/Port Setup Wizard pop-up appears, click Next. 2. GPS/Port Setup Wizard searches all available Serial Ports for devices. 3. If you have connected a device to the computer on a specific port and GPS/Port Setup Wizard does not recognize the data, click the View button next to that port. If the data is garbled or unreadable, contact Jeppesen Marine Technical Support to troubleshoot your issue. 4. Follow the remaining onscreen instructions to complete setup. 11 12 Nobeltec® Navigation Software User’s Guide Setting Up Your Radar This section assumes that you have correctly installed an IR2 Radar or the IR2-BB and that it is functioning properly. Once your radar or black box is installed, you can then integrate the radar feed into the software. To integrate Radar features into Nobeltec Navigation Software, you must first use the Radar Unlock Code provided to you with your IR2 or IR2-BB purchase (see Chapter 2 - Installing Plus Pack Unlock Codes). Once you have unlocked Radar functionality, you will need to run the Radar Setup Wizard to establish radar settings. NOTE: Make sure your radar and IR2-BB (if applicable) are powered on and connected to your PC prior to running the Radar Setup Wizard. To launch the Radar Setup Wizard 1. Click Start | Programs | Nobeltec | Radar Setup Wizard. 2. Once the opening "splash" screen appears, click Next. Figure 4.2 - Radar Setup Wizard - Searching for Radars 6. You may need to wait up to 30 seconds while the radar warms up. Once the radar is warmed up and transmitting data, the Radar Setup Wizard will show you a small view of what your radar output will look like. Click Adjust to open a Radar Control window. Use this window to modify your radar settings and improve radar viewing onscreen. a. It may take a few minutes for the changes to be applied before you can verify changes made to your radar output in the small view. b. Continue making incremental adjustments until you are satisfied with the radar output. 4 - Configure Data Ports Figure 4.1 - Radar Setup Wizard - Port Configuration 3. 4. 5. Verify that you have accomplished all of the requirements as outlined by the bullet points shown in Figure 4.1 and then click Next. The Radar Setup Wizard will search your available serial and Ethernet ports for incoming information, including GPS and heading sensor data. Once your IR2 or IR2-BB is detected, click Next. After your radar is located by the Radar Setup Wizard, you may rename your radar to an identifying name such as radar model. Click Next. Figure 4.3 - Radar Setup Wizard - Adjust Radar Image NOTE: Changes made to radar settings through an IR2-BB may not accurately display changes when shown in the small view. If this is the case, you may need to adjust the image based only on the full-size radar display. Chapter 4 - Configure Data Ports TIP: It is possible you will need to cycle the power to your radar for the Radar Viewer image to appear. 4. 5. 6. 13 To fine-tune your settings, you may wish to include or exclude sentences specific to the device connected to each COM port. See Tables 4.1-4.10 for sentences recognized by Nobeltec Navigation Software. Use the Protocol drop-down menu to select format (NMEA, Ockam or B&G). If your device operates at a Port Speed (or baud rate) greater than 4800, set the correct Port Speed in the Comx Input Configuration window. Click the OK or Apply button to save your changes. NOTE: See this chapter for information on automatic GPS/Port Setup Wizard usage. 7. 8. Figure 4.4 - Radar Control Window Once you are satisfied with how the radar image appears, click Next. Radar Setup Wizard has now completed. At this point you may configure another Radar or click Finish to exit the radar setup wizard. Manual Device Settings You can manually set up Nobeltec Navigation Software to recognize NMEA sentences from your peripheral hardware devices using the GPS/Port Setup Wizard. To configure how NNS sees and uses the data from a hardware device, select Tools | Options | Ports: Configure Tab. Port Types Figure 4.5 - Tools | Options - Ports: Configure Tab Input Ports: Designates COM ports that will receive data from other devices. Output/Autopilot Ports: Designates ports to which data will be sent. To Configure Input COM Ports 1. Select Tools | Options and then the Ports: Configure Tab. 2. In the Input Ports list, select the COM port(s) to use. A Warning Indicator will let you know if the port is unavailable or improperly configured. 3. Select a COM port and then Configure This Input Port... beneath the list box to restrict the type of incoming data (see Figure 4.5). Figure 4.6 - COM Port Input Configuration NOTE: To configure autopilot ports see Chapter 17 - Autopilot. 4 - Configure Data Ports From this screen, you can include or exclude specific data sentences or entire device sentence streams. Click on the More Info button for more examples TIP: You can select the same COM port in two or more columns. If you select the same COM port for both Input and Output/Autopilot, then data can both come into and be sent from the COM Port (this is fairly common). 14 Nobeltec® Navigation Software User’s Guide Other Options on the Ports: Configure Tab This tab also contains settings for several other options, including: Require Valid Checksums On All Sentences: If this option is enabled, the software will ignore any data that does not contain a valid checksum (used to verify the validity of incoming data). Equipment conforming to previous versions of NMEA 0183 specifications do not always use checksums in all data sentences. Require Checksums To Be Valid if Present: Verifies validity of sentences which contain checksums, but accepts sentences which do not contain checksums. Report Checksum Discrepancies: Alerts if a checksum error is found. Detect GPS MOB and MOB Hardware: Used to detect MOB sentences from some GPS units, or to connect to external MOB devices such as the Emerald Marine® Alert 2™. 3. 4. Choose (or input) the COM port, Device and Data Type and enter a timeout value. Prioritize each position device in the same manner. Multiple devices may connect to the same port if they have different NMEA Talker ID’s. TIP: If your Talker ID is not displayed, type the ID # into the Device field. Log All Input and Log All Output: Used for debugging and problem solving. Sometimes a Nobeltec product support provider will ask you to record input or output for diagnostic purposes (see the end of this chapter). 5. Configure Autopilot: Opens the Configure Autopilot Settings dialog. NMEA and Other Device Support View Data: A red light indicates no data flow. A yellow light indicates some data problem(s), such as a miswired device, too much data being sent or bad, unshielded or twisted wiring. Green indicates mostly good data. This device will "listen" to the data before showing green. Jeppesen Marine products support devices that conform to the National Marine Electronics Association (NMEA) 0183 standard. Jeppesen Marine also supports some device-specific sentences, such as B&G® and Ockam®. Port Priorities Port Priorities are used to resolve conflicts occurring when two or more devices send redundant information. Different position-indicating devices (GPS, LORAN, etc). may send slightly variant Lat/Lon values. Without prioritized inputs, the boat icon repositions with each valid position string. 4 - Configure Data Ports Figure 4.7 - Add Device Dialog Box Click the up or down arrows to place device entries in order, with the highest priority device at the top of the list. The following tables contain all data sentences supported by Nobeltec Navigation Software: Heading Information HCC Compass Heading HCD Heading and Deviation Data from the highest-prioritized device is used first. If the primary device stops sending position information (for a user-specified period of time), the software automatically switches to the next prioritized device. If no valid position is received, it will switch to Dead Reckoning mode (see Chapter 10 Properties & Options). HDG Heading, Deviation and Variation HDT True Heading To Set the Priority 1. Select Tools | Options and then the Port Priorities Tab. 2. Click Add. The Add Device dialog box (Figure 4.7) will display. HVM Magnetic Variation, Manually Set HDM Magnetic Heading HVD Magnetic Variation, Automatic Table 4.1 - Heading Information Chapter 4 - Configure Data Ports Radar Information Positioning and Tracking Information TLL Target Lat/Lon GGA Global Positioning System Fix Data TTM Tracked Target Message GLA LORAN-C Past Position and Time GLF LORAN-C Predicted or Estimated Waypoint Positions and Times GLL Geographic Position - Latitude/Longitude Table 4.2 - Radar Information Target Tracking Information* GLP LORAN-C Present Position and Time DSC Digital Selective Calling Information GSA GPS DOP and Active Satellites DSE Extended DSC Sentence GSV Satellites in View VDM UAIS VHF Data-link Message (Target Ship Data) GXF TRANSIT Predicted or Estimated Waypoint Positions and Times VDO GXP TRANSIT Present Position and Time * Proprietary Seetrac® Tender Tracking™ System Sentences also supported RMA Recommended Minimum Specific LORAN-C Data Table 4.3 - Target Tracking Information RMC Recommended Minimum Specific GPS/TRANSIT Data RTE Routes TTM Tracked Target Message VTG Course Over Ground and Ground Speed WPT Waypoint ZDA Time and Date - GPS UAIS VHF Data-link Own-vessel report Water Depth Information DBK Depth Below the Keel DBS Depth Below the Surface DBT Depth Below the Transducer DPT Transducer Depth and Offset Table 4.6 - Positioning and Tracking Information Table 4.4 - Water Depth Information Wind and Water Speed and Direction Information Water Temperature MWD Surface Wind Direction and Velocity MWV Wind Speed and Angle VBW Ground and Water Speed VDR Set and Drift VHW Water Speed and Heading VWR Relative Wind Speed and Angle VWT True/Theoretical Speed and Angle Table 4.5 - Wind and Water Speed and Direction Information Supported Device Output AAM Waypoint Arrival Alarm APA Autopilot Sentence "A" APB Autopilot Sentence "B" BEC Bearing & Distance to Waypoint - Dead Reckoning BOD Bearing - Origin to Destination BPI Bearing & Distance to Point of Interest BWC Bearing & Distance to Waypoint (Great Circle) BWR Bearing & Distance to Waypoint (Rhumb Line) BWW Bearing - Waypoint to Waypoint 4 - Configure Data Ports MTW 15 4 - Configure Data Ports 16 Nobeltec® Navigation Software User’s Guide Device Identifiers DBT Depth Below Transducer (Sounder) GLL Geographic Position - Latitude/Longitude AP Autopilot HDG Heading, Deviation and Variation DE DECCA Navigation HDM Magnetic Heading EC Electronic Chart Display HDT True Heading GP Global Positioning System HSC Heading Steering Command HC Heading Control MTW Water Temperature (Sounder) II Integrated Instrument PBGTLAY Distance and Time to Lay Lines (Sailing Plus Pack) LA Loran A PBGTTBS Polar Speed and Polar Performance (Sailing Plus Pack) LC Loran C PBGTVMG Best VMG (Sailing Plus Pack) OM Omega Navigation System RMA Recommended Minimum Specific LORAN-C Data SN Electronic Positioning System RMB Recommended Minimum Navigation Information RMC Recommended Minimum Specific GPS/Transit Data TLL Target Lat/Lon for Targets acquired in NNS (Radar) TTM Tracked Target Message for Targets acquired in NNS (Radar) VHW Water Speed and Heading VTG COG/SOG WCV Waypoint Closure Velocity WDC Distance to Waypoint WDR Waypoint Distance, Rhumb Line WNC Distance - Waypoint to Waypoint WNR Waypoint to Waypoint Distance, Rhumb Line WPL Waypoint Location XTE Cross Track Error, Measured XTR Cross Track Error - Dead Reckoning ZDA Time & Date Table 4.7 - Supported Device Output Table 4.8 - Hardware Device Identifications B&G Format 0 Heel 1 Boatspeed 3 Heading 10 Windspeed Apparent 11 Depth Below Surface 12 Windspeed True 13 Wind Angle Apparent 14 Wind Angle True 15 True Wind Direction 17 (RC) COG 19 (RC) VMC/SOG 20 (RC) VMG 23 Leeway 26 (RC) Latitude 27 Sea Temperature Chapter 4 - Configure Data Ports 27 (RC) Longitude 28 (RC) Current Set 29 (RC) Current Drift 30 (RC) Timer X' 17 Latitude Table 4.10 - OCKAM Format Testing the Connection Table 4.9 - B&G Format OCKAM Format Windspeed Apparent a Windspeed True B Boatspeed b VMG C Heading c Wind Direction D Wind Angle Apparent d Wind Angle True F Current Set f VMC/SOG F' Current Drift f' COG G Temperature (#1) G' Temperature (#2) H Heel h Leeway o Magnetic Variation W Depth Below Surface w Depth Below Keel T Time t Stopwatch X Longitude Since many computers have more than 4 COM ports (using a Serial-to-USB adapter), use the Tools | Options | Ports Configure: View Data button to verify which data is being received. How to Log Data Sometimes it may be necessary to log a large amount of hardware data input or output so that it can be manually analyzed for problems. 1. Click on Tools | Options | Ports Configure 2. Click the Log All Input check box or the Log All Output check box Data is saved in a file named comx-in.log (where x is a number corresponding to the COM port used), located in C:\Program Files\Nobeltec\ Visual Series. 4 - Configure Data Ports A When you have connected one or more input and/or output devices to your computer, test the connections to verify that they are working correctly. Nobeltec provides a tool called "Port Test". (Start | All Programs | Nobeltec | Port Test). There are 4 links in Port Test that are used to attempt to connect to COM Ports 1-4 using Window's HyperTerminal program. 18 Nobeltec® Navigation Software User’s Guide Creating a Planning Station on your Home or Office computer 1. 2. 3. 4. 5. 6. 7. 8. 9. 10. 11. 12. 13. Install Nobeltec Software on your home or office computer by following the instructions found on page 3 of this guide, “To install Nobeltec Navigation Software…" After installation is complete, close all windows in which Nobeltec software is running and reboot your computer. Insert the hardware key. Begin at the Start menu and choose ‘Nobeltec.’ Next, Run ‘MAX Pro Chart Manager’. Click the ‘Utilities’ button. Then, choose ‘Create/Remove Virtual Key’ A pop-up dialog box will ask, “Would you like to create a virtual key?” Answer ‘YES’. Next, a notification box, “Creating a virtual key... Please wait" will appear. At the next dialog box, click “OK”. Your Planning Station is now installed on your computer. Remove the hardware key from USB port and return it to your primary navigational system. Install any charts and Plus Packs you have purchased 4 - Configure Data Ports Important! If you have multiple hardware keys because you have purchased more than one copy of Nobeltec navigation software, you should note which hardware key you used to install the planning station. If you do not replace your ORIGINAL hardware key BEFORE beginning your uninstall, one of your five licenses will be lost. For more information see, “Removing a Planning Station” below. PLEASE NOTE: Jeppesen Marine/Nobeltec* is not responsible for lost licenses or hardware keys, please insure your key against loss or damage. Your planning station operates exactly as your navigational system does EXCEPT that all the input/output ports will be disabled. You are now in planning mode. Your system will not accept any navigational data inputs. It also will not process navigational data (such as autopilot.) Exporting Data to Portable Media: Please see Page 105, Importing and Exporting Data Removing a Virtual Planning Station: With your purchase of Nobeltec software Jeppesen Marine* includes five Planning Station licenses. NOTE: If you do not replace your ORIGINAL hardware key BEFORE beginning your uninstall of your planning station, one of your five licenses will be lost. You can retain all five permissions by always ensuring that the hardware key originally used to install your virtual planning station is placed in the USB port before you begin the un-install the virtual software. If you do not place the original hardware key you will lose one of your five licenses. You will still have four licenses left, but you will not be able to restore the one that was lost. PLEASE NOTE: Jeppesen Marine/Nobeltec* is not responsible for lost licenses or for lost hardware keys; please insure your key against loss or damage. To remove A PLANNING STATION: 1. Place the SAME hardware key that you used to install the virtual planning station in the USB port 2. 3. 4. 5. 6. 7. 8. 9. 10. Begin at the Start menu and choose ‘Nobeltec.’ Next, Run ‘MAX Pro Chart Manager’ Click the ‘Utilities’ button. Click, 'Create/Remove Virtual Key' Answer, ‘Yes’ In the notification box, “Removing virtual key…” will appear At the next dialog box, click “OK”. Remove the hardware key Your removal of virtual software is now complete. Return the hardware key to your primary navigational system Chapter 5 - Getting Started 5 - Getting Started Once you have installed Nobeltec Navigation Software, Charts and Data, connected and powered on all hardware peripherals, and run the GPS and Radar Setup Wizards, make sure you have inserted your Hardware Key before launching the program. Locate Your Boat Center on Boat. Quickly centers view on the boat position. The easiest way to locate your boat is to use the Center on Boat Toolbar button. Once you have located your boat, you can use the Boat Properties Menu to verify your location against your actual GPS Lat/Lon coordinates. See Chapter 10 - Properties and Options. and Safety System areas. Display Search and Rescue Regions. Places an icon on the chart wherever search and rescue regions are available. To Display Supplementary Data Layers 1. Click on the Supplementary Data Layers Tool drop-down arrow. 2. From the drop-down menu, place a check-mark next to each supplementary layer you wish to display on the chart. 3. Icons for supplementary data will appear on the chart wherever that data is available. Zoom In and Out Use the following methods to zoom in or out on the chart: • <+> and <-> keys on your keyboard or ToolBar • Click your mouse scroll button once and then scroll up or down with the mouse scroll button to zoom in or out. • Right-click on the chart window and select Other Charts from the popup menu to select a chart/scale. • Drag Zoom. Drag and drop the mouse diagonally across the screen to create a zoom-in field. Plan Your Route You can use the Extended Chart Information and Supplementary Data feature to plan your route and improve your knowledge about each port and location you travel to. Extended Chart Information contains specific port, marina, photo, safety and other data to improve your navigation experience. Supplementary Data and Extended Chart Information includes: • Display Ports and Marinas. When selected, turns on an icon on the chart wherever Port and Marina information is available. • Display Points of Interest. Displays local points of interest, such as museums, amusement parks, memorials, and so forth. • Display GMDSS Areas. Turns on a display of Global Maritime Distress Figure 5.1 - Extended Chart Information Window NOTE: This window can be resized to show larger images. To View Extended Chart Information 1. Turn on display of Supplementary Data. 2. Locate a Supplementary Data Layer icon on the chart and right-click on that icon. 3. Select Properties from the pop-up menu. 4. The Extended Chart Information window will open (Figure 5.1). Use this tabbed window to view all available data. Click on each tab to show photos, Port and Marina information, Chart Info and so forth. 5 - Getting Started Open Nobeltec Navigation Software • 19 Nobeltec® Navigation Software User’s Guide 5 - Getting Started 20 Once you have viewed the extended information for locations on your route, you can use that information to plan travel information with greater accuracy. Use the Console to check your instrument readings, verify conditions and plot your course. See Chapter 11 - Customizing PlanView for more information. Create a Route Check Weather for your Route 1. 2. 3. 4. 5. From an open chart, click the Route tool on the ToolBar, click the <F8> Hot Key or select Edit | New | Route from the main menu. Click on the chart to place the first waypoint (see Figure 5.2). As you move the cursor to the next position, a line is drawn from the previous waypoint to the cursor and range/bearing text is displayed. Click on each subsequent position until the route is completed. Double- or right- click on the last waypoint location or click <Esc>. Enter a route name or accept the default name (which is the date and time the route was created). The naming prompt feature can be disabled from the Misc. Tab of the Tools | Options dialog. Left-click to create the first waypoint. Click again to create the next waypoint Double-click left mouse button when finished. Figure 5.2 - Creating a Route Activate a Waypoint The first waypoint of a route is automatically activated when that route is activated, but you can also manually activate a different waypoint. To activate a different waypoint, right-click on that waypoint and select Activate. The Console The Console is a set of small display panels. Depending upon the instruments connected to your PC, you can have panels that display pieces of navigational information such as Speed Over Ground, Speed Over Water, Latitude and Longitude, Wind Speed, Wind Direction, Water Temperature and Depth (just to name a few). All weather data available through Nobeltec Navigation Software is produced by third parties and compiled using several reliable national and international sources. Weather Provider options are: • GRIB Weather • Weather Plus Pack containing Sirius and XM/WxWorx * • SkyMate Weather * * SkyMate, XM/WXWorx, and Sirius require that you have purchased and installed the appropriate satellite hardware for that product. When you change Weather Providers, it may take a few minutes before data from the new Weather Provider displays on-screen. To display weather data in Nobeltec Navigation Software: 1. Choose the weather provider you wish to use. 2. Download weather data onto your computer (via Web, satellite radio access, cell phone or e-mail attachment). 3. Configure and display the weather data. Once you have selected a Weather Provider and installed any appropriate hardware and software pertinent to that provider, use the Tools | Options | Weather Tab to establish settings specific to your selected weather provider. Use the ETA Calculator The ETA Calculator uses tide and current predictions to calculate best departure times, transit times, required speed and fuel consumption. In order for the ETA Calculator to work, tide and current stations must be attached to the various route legs in a created route. By default, Nobeltec Navigation Software will automatically attach the nearest tide and the nearest current station to each route leg. Because this is done automatically using the nearest stations, there may be other nearby stations that will have a stronger effect on your voyage and on the calculations. In this instance, you may want to manually attach a station to a route leg. 1. Turn on the current arrows and tide bars (see Chapter 14 - Tides and Currents). 2. Move the cursor over the station that you want to attach to the route leg. Drag and drop the station onto the nearest route leg. Chapter 5 - Getting Started 3. Once tide and current stations have been attached, the ETA Calculator can use this information to calculate your Best Departure and Transit Times as well as Speed for best fuel use/time planning and Fuel Consumption. For example, to calculate Transit Time: 1. Start the ETA Calculator by right-clicking on any route segment and click ETA Calculator from the pop-up menu. 2. Using the ETA Calculator dialog box, select Transit Time from the three available options and click Next. 3. Input estimated vessel speed for each waypoint. 4. After setting your estimated speed for each point, enter the waypoint number, date and time that you would like to arrive at the waypoint and click Compute Transit Time. 5. The EDT needed to arrive at the waypoint at your given date and time will appear in the ETA Calculator window. Figure 5.3 - ETA Calculator - Compute Transit Time See Chapter 27 - On The Water for practical navigation preparation and actual trip planning. 5 - Getting Started 4. A dotted line should appear between the tide or current station and the route leg (red dotted line for currents or blue dotted line for tides). Repeat as necessary for other legs of the route. 21 5 - Getting Started 22 Nobeltec® Navigation Software User’s Guide Chapter 6 - Basic Screens 6 - Basic Screens 23 This chapter provides an overview of the Nobeltec Navigation Software screens, features and dialogs, along with basic feature functionality. ToolBars, once displayed, can be picked up, dragged and dropped elsewhere onscreen to provide you with the most customized display possible. You can also use the ToolBar Options window to save ToolBar settings, allowing you to quickly switch between several various ToolBar configurations. Nobeltec provides two options for onscreen viewing: See Chapter 11 - Customizing PlanView for a full list of available ToolBars. PlanView. Nobeltec's standard user interface. Windows-style, multiple-paned view of navigation charts, ToolBars, etc. WARNING: Including too many ToolBars can clutter your screen and reduce your ability to quickly locate the appropriate tool for any given situation. NavView (Admiral MAX Pro Only). NavView is an alternative user interface that is ideal for touchscreens and multiple monitor environments. Console Display PlanView Primary Screen Elements The Title Bar (Figure 6.1) is the topmost part of the PlanView screen. Following the Nobeltec name is text containing the active chart number and native scale. The first bracket pair shows the zoom level and the apparent scale. The second bracket pair contains depth units and the chart name. Figure 6.1 - Title Bar Main Menu Nobeltec in PlanView functions like most Windows™ applications, using dropdown menus that provide various options. This row of drop-down menus is referred to as the Main Menu (Figure 6.2). Figure 6.2 - Main Menu ToolBars ToolBars are used to shortcut your connection to various functions within the program. In order to select which ToolBars and ToolBar buttons to display, select Tools | ToolBars from the main menu. Figure 6.3 - ToolBar Buttons Items to display on the Console are selected using Tools | Options | Console. Chart Window Pane This is the window that displays the chart, your vessel and objects such as marks and routes. Nobeltec Navigation Software ships with low-resolution planning/overview charts. To view harbor-level detail, you will need to purchase and install MAX Pro Chart Region Permits. The NavBar The NavBar is another available tool that can help you use common features of Nobeltec Navigation Software quickly and easily. The NavBar displays along the bottom of the PlanView screen and contains a series of tabs containing tools and data for some of the most frequently used or highestpriority options available, such as Man Overboard, Targets, Weather, etc. Info Tab The Info Tab on the NavBar contains two information panels: • Cursor position, giving you the Lat/Lon of the location your mouse is hovering over and the RNG and BRG to boat from the cursor location; and • Selected Object/Last Clicked Location, which gives you the Name, Lat/ Lon (if applicable) and other information about the last object you leftclicked on in the Chart window pane. 6 - Basic Screens Title Bar The Console opens on the right side of the screen by default. This display is made up of a series of panels containing specific navigation information, such as Lat/Lon, speed over ground, speed over water, etc. See Chapter 11 Customizing PlanView. Console panels can be resized and repositioned. You can also change the colors and size of the fonts to change the emphasis of certain panels. 24 Nobeltec® Navigation Software User’s Guide Title Bar Main Menu Close Chart Close Program ToolBars Compass Rose Waypoint Chart Title Bar 6 - Basic Screens Track Legend Screen Tip Boat Icon User Created Route Console Warning Indicators (View in the Status Messages field of the NavBar) NavBar Figure 6.4 - PlanView Screen Elements Chart Window Chapter 6 - Basic Screens Click the Extended Chart Info button to display a window containing static chart information, including photographs, boundaries, depth, port and harbour information and much more. MOB Tab Use the MOB (Man Overboard) Tab of the NavBar to immediately drop a Man Overboard icon on the Chart window pane and start tracking the location of that object. The MOB tab allows you to create a MOB icon, focus the chart on the MOB icon, clear the MOB icon or proceed to another MOB notice. Additionally, dynamic and static information about the MOB, such as Lat/Lon, distance from boat, distance from cursor and duration of the MOB alarm will display. 25 T&C (Tides & Currents) Tab The T&C Tab displays information that comes from the Tides & Currents standalone program. Tidal and current information that relates to your vessel, such as tide location and time, present tidal information, daily high and low, current location, current information at boat and daily ebb and flood data are available. NOTE: Use the Lock check-boxes to maintain data for the selected location as your boat changes position. Targets Tab Weather Tab Fields available include CPA, TCPA, RNG, BRG, COG, SOG, LAT and LON. The Weather Tab on the NavBar is where you can control certain features of Weather display, depending on the Weather Provider you selected from Tools | Options | Weather. Content of this tab changes depending on the provider selected. See Chapter 16 - Wind & Weather for more details about Weather. Search Tab Status Messages Tab NOTE: An object attribute is a detail about that object, such as location, color, characteristics, depth or height of the object, and so forth. This tab contains warning messages and information about your charts, hardware connectivity, network, etc. Status Messages can be exported to a log file to track specific events. NOTE: Target threats such as ARPA/MARPA and AIS targets, when detected, are sent to the Targets Tab, not the Status Messages panel. Active Mark Tab This tab displays all the pertinent information about the active Mark or Waypoint in a route that your vessel is currently steering toward. Fields available include Range and Bearing to Mark, SOG, COG, TTG, HDG, VMG-Wpt, XTE, ETA, CTS and the Time to Go (TTG), ETA and Distance to other Marks in the Route. NOTE: You must have an active Mark or Route to display data in this tab. You can search for any object using the text-based search field in the Search Tab of the NavBar. This search will return any object containing the Key Word, or any object attribute which contains that Key Word. The ability to search text allows you to plot courses with greater ease. You can quickly locate points of interest using Nobeltec Navigation Software's efficient search engine. The Search tool intelligently finds matches to the text you provide, such as tide and current stations not immediately seen on your charts. The searchable text field allows you to use Hot Keys, such as <Ctrl+C> or <Ctrl+Insert> to copy text; <Ctrl+V> or <Shift+Insert> to paste text; <Ctrl+Z> or <Alt+Backspace> to undo paste of text; <Ctrl+X> to cut text, etc. Select an item from the returned list and the corresponding chart will immediately open, with the requested location from the search returns highlighted. GPS/Trip Tab The GPS/Trip Tab on the NavBar displays information about GPS data, including odometer readings that provide specific numbers, such as distance 6 - Basic Screens NOTE: Use the <F4> Hot Key to instantly create a Man Overboard icon and alarm while underway. Use the Targets Tab on the PlanView NavBar to view additional information about a specific tracked target. Select from available Targets using the dropdown menu next to the Target name display; Find an available Target; Filter AIS Targets from being displayed; and Show or Hide Targets from displaying. 6 - Basic Screens 26 Nobeltec® Navigation Software User’s Guide travelled, to help you assess the progress of your trip. Information, fields and buttons on this tab include: • GPS Signal Strength. This diagram contains a relative sky map containing the approximate location of available satellites. Next to the diagram, up to sixteen GPS satellites can be displayed as white bars with the height of the bar representing the strength of signal. If the bar is labelled W, it is a WAAS (Wide Area Augmentation System) satellite. The relative height of the bars is displayed in front of a graph, indicating 0%, 25%, 50%, 75% or 100% signal strength. • Lat. Your vessel's latitude location. • Lon. Your vessel's longitude location. • GPS Status. This will show the status of received GPS information. Options are No GPS, GPS OK and WAAS OK. • Accuracy. Range 0.0-9.9. A lower number means greater accuracy. This data comes from transmitted Horizontal Dilution of Precision (HDOP) values (GSA NMEA sentence). • Resolution. Also called the 1-Sigma. This is the calculated accuracy of your precise location as provided by your GPS. This data comes from transmitted Horizontal Dilution of Precision (HDOP) values provided by satellites. A greater number of available satellites transmitting data means a higher degree of resolution. • Odometer. This is the total distance travelled while the Nobeltec Navigation Software has been running. • Trip Number drop-down list. This drop-down list contains Trip 1 and Trip 2 so you can track readings for each route. • Reset. Click this button to reset all of the selected trip's fields to zero. • Time Set: The date and time that the selected Trip started. • Duration. Hours, minutes and seconds the selected Trip has lasted. • Avg Speed. Average speed of your boat during the selected Trip. • Min. Speed. If the vessel is moving slower than 0.2 knots (Kts), distance travelled is not calculated. Chart Management Figure 6.5 - Chart Type Selection ToolBar Displaying Different Chart Types The chart window pane contains any type of chart data installed, including raster, vector, photo and 3D. To display different chart data types, click on the ToolBar button corresponding to the data you wish to see. Modifying MAX Pro Charts Customize the appearance of MAX Pro charts by turning on and off data layers. Click on the corresponding MAX Pro ToolBar button to change the displayed data (Figure 6.6). Figure 6.6 - MAX Pro Options ToolBar See Chapter 7 - Charts and Data for more information about chart management. The PlanBook The PlanBook is used to make precise estimates on arrival times, fuel consumption and other key issues that contribute to planning long trips. You can also use the PlanBook to organize data such as routes, marks, etc. The PlanBook (Figure 6.7) can be displayed next to a chart window. See Chapter 13 - PlanBook for more information on using the PlanBook. Displaying the PlanBook From the main menu, click on Tools | PlanBook or the PlanBook ToolBar. Features of the PlanBook include: • Import/Export: Used to access the Import/Export dialog. • Show All/Hide All: Used to show or hide all objects. Chapter 6 - Basic Screens The PlanBook displays the details about specific sets of data. It makes calculations based on user-defined criteria. Input departure time and speed for a route and it will display arrival times for each waypoint Displays a summary of the route selected from the list 27 Click here to open the ETA Calculator Select the Routes, Marks, Tracks or Boundaries Tabs to edit these data types Route Options are shown here The number of waypoints will be shown in the Detail column The Route List displays all current routes Click here to Import a route. Creates a New Route Reverses the order of the waypoints Click here to make a Copy of the route Click here to Delete the route. Click here to view the Click here to Export the route Properties of a route Figure 6.7 - PlanBook 6 - Basic Screens Secondary Tab displays Route Details Nobeltec® Navigation Software User’s Guide 28 • • • Properties: Displays the properties window for the selected object. Goto: Highlight an object to open a new chart window centered on this location. Delete: This will delete the selected object. Routes After you have created a route on the charts, use the Routes Tab of the PlanBook to set the speed of each route leg. This information, combined with Currents information, is how arrival time at each waypoint is calculated. 6 - Basic Screens The Routes Tab has two display modes: Route List and Route Details, accessible by clicking on the tabs in the center section of the Routes Tab. Selected routes are highlighted in yellow on the Routes Tab and Marks are highlighted in yellow on the Route Detail Tab. Start and End waypoints are shown in green and red; Layover waypoints are shown in blue. Tides and Currents Tides & Currents (Figure 6.10) is an integrated product linked directly into Nobeltec Navigation Software and used for all aspects of tide and current planning. Within the software, information displays directly on top of your chart. Tides and Currents comes standard with world wide tidal data and with enhanced tides and currents data for North America. Tide Bars. Right-click on a Tide Bar to open Tides & Currents. Current Arrows Layover waypoints are used in the Layover Time column to account for stopover time. To calculate, input the number of hours until planned departure. Marks Use the Marks Tab to make calculations between the boat and a single point. Tracks Figure 6.8 - Tides & Currents on a Chart Boundaries Tides & Currents contains nearly every conceivable tidal and current projection feature in an easy-to-use format, including: • Event Searching: minimum and maximum values in a range. • Custom Stations: Define and create your own custom stations based on stations that are nearby. • Calendars: Print customized weekly and monthly calendars. Use this Tab to view a list of boundary objects. You can delete and import or export from this Tab as well. Use the Tides and Currents ToolBar to set date and time for all projections. You can also sync Tide and Current display to the computer’s internal clock. This Tab displays current plotting and previous tracks. Use the Goto function to find old tracks or convert tracks into routes. The Tracks Tab is also where you can delete or edit tracks from previous voyages. Red dashed line shows current station is attached to the route. Figure 6.9 - A Current Station Attached to a Route Chapter 6 - Basic Screens Title Bar shows the name and type of station Click these buttons to search for a station Use menu options to access additional functions Click here to sync Tides & Currents clock with your computer Configure: Set your preferences Use these controls to scroll through days, month and years Daily high and low values for this station Weekly View Click here to create your own tide or current station 6 - Basic Screens Moon Phase, Moonrise and Moonset 29 Current Speed and Direction at Ebb and Flood Prediction Date Shown Here Hours are shown here Daylight hours are indicated by yellow, night is shown in gray Displays direction of Ebb and Flood Figure 6.10 - Tides and Currents Window Table displays tidal/current information in 15 Minute Intervals 30 Nobeltec® Navigation Software User’s Guide To open Tides and Currents: 1. Turn on current arrows by clicking on the Current Arrow ToolBar icon or right-clicking on the chart and selecting Tides and Currents | Current Arrows from the pop-up menu. 2. Right-click on the tide or current station for which you would like to view a graph. 3. From the pop-up menu, select View In Tides & Currents. 4. The Tides & Currents program will open and you should see a graph that covers a 24-hour period. 6 - Basic Screens ETA Calculator 3D Navigator Nobeltec's exclusive 3D Navigator allows you to view the ocean floor and land in clean, representational 3D graphics. Familiarize yourself with the navigational controls prior to using this feature. You can also use the mouse, keyboard or computer joystick to control movement in the 3D window. See Chapter 15 - 3D Navigator for more information about 3D navigation. WARNING: 3D bathymetric charts are navigational aids. While Jeppesen Marine commits to deliver the best elevation/depth data possible, errors in source material, data processing and 3D presentation may occur. It is advisable to always have official navigation charts as the primary means of navigation. 3D Navigator Modes Figure 6.12 - The ETA Calculator You can attach tide and current stations to a route and then use the ETA Calculator to help you make better ETA, ETD and speed calculations. Access the calculator by right-clicking on a route and clicking ETA Calculator. See Chapter 27 - On The Water for more information. Figure 6.13 - Center On Boat Mode When a 3D chart is open, you may keep the boat centered (Figure 6.13) or enter Explore Mode (Figure 6.14), which allows you to view all parts of the chart regardless of where the boat is. To switch between modes, right-click on the bathymetric chart and select the mode you want to work in. Chapter 6 - Basic Screens Click the 3D button to open a 3D window. This command automatically splits the screen and creates a 3D window covering half the workspace When the 3D window is selected many of the main ToolBar buttons are disabled because they do not function in the 3D window 31 3D Visible Range Marker shows the size of the 3D window on the 2D chart. As you zoom in or out on the 3D Navigator, this box will change size accordingly Change 3D Mode Change 3D Exaggeration 6 - Basic Screens Toggle 3D Depth Indicator Decrease 3D Boat Scale Increase 3D Boat Scale Boat Icon is shown in the center of the screen in Center on Boat mode Right mouse click on the 3D window to access additional commands Figure 6.11 - PlanView 3D Navigator Vector chart window 32 Nobeltec® Navigation Software User’s Guide NavInfo Window The NavInfo window is one of the tools Nobeltec Navigation Software provides for you to see specific sensor-based data in an at-a-glance format. Window layout and sub panel content are customizable, allowing you to display the data and calculated values of your choice. To open a NavInfo window in PlanView, click Window | NavInfo Window. 6 - Basic Screens Right-click in the 3D window to change your 3D Navigator Mode Figure 6.14 - Explore Mode 3D Navigator Controls on the ToolBar To access 3D Navigator controls on the ToolBar, click the 3D button. This will bring up the 3D Navigator tools on the ToolBar (Figure 6.15). The NavInfo window is sub-divided into content-specific sub panels. Each sub panel contains one type of information, such as Course Over Ground, Rate of Turn, etc, and can be customized as to data content, data layout, such as displaying numeric values or histograms, colors, and update frequency. NOTE: You must have connected the appropriate hardware to display specific data types in the NavInfo sub panels. For example, if you wish to display water temperature, you must have connected a temperature gauge to your computer and set up Nobeltec Navigation Software to receive data from that device. Figure 6.15 - 3D Navigator ToolBar Wind and Weather Weather data, wind and sea state can be displayed directly on top of your charts to aid navigation decisions. Weather is provided in GRIB, XM or Sirius format. XM and Sirius are part of the Weather Plus Pack. See Chapter 16 Wind & Weather for a full description of all Wind and Weather features. Figure 6.16 - NavInfo Window with Polar Display Chapter 6 - Basic Screens To Customize the NavInfo Window 1. 2. 3. 4. Open a NavInfo window (Window | NavInfo Window). Right-click on the NavInfo window and select Customize Layout from the pop-up menu. The NavInfo Wizard will open. Choose a vertical or horizontal orientation. Select the type of layout you want to assign to the window from the available configurations. When you select a layout, the window closes and the NavInfo window automatically updates. To Customize a NavInfo Sub panel 1. 3. 4. NavView (Admiral MAX Pro Only) Exclusive to Admiral MAX Pro, NavView offers many of the same features found in Nobeltec PlanView (Nobeltec's standard user interface), without relying on Windows-style screens, ToolBars, etc. While NavView only works in full screen mode, you can display multiple windows in that mode. To enter NavView, press the NavView ToolBar button, the <F9> Hot Key or click Window | Enter NavView. See Chapter 12 - NavView for a full description of NavView functionality. Primary Screen Elements NavView Menu NavView menu items are similar to those of PlanView. The main menu structure is described here (see Figure 6.17 for button location). • Center on Boat: Click this button to center perspective on vessel • Instant Waypoint: Click on this button and then on the screen to create a waypoint instantly • Objects: Click on this button, then on the sub-menu option and then onscreen to create one of these objects. Sub-menu options are: • Route • Mark • Event Mark • Range Bearing Line (RBL) • Line Boundary • Circle Boundary • Annotation • View: Sub-menu options are: • Zoom in • Zoom Out • View History • View Newer Data • Previous View • Next View • View Manager (monitor configuration window) 6 - Basic Screens 2. Right-click on any NavInfo window sub panel and select Customize Sub panel from the pop-up menu. The NavInfo Customize Sub panel window opens. Update the contents of the selected sub panel from this window. There are two main customizable components to a sub panel: Display Settings and Data Types. • Display Settings include Background Start Color, Background End Color, Font Color, Histogram Line Color, and Update Frequency (in seconds). • Data Types include all possible NavInfo data such as COG, SOG, wind angles, depth, etc. If a data type has not been assigned to a NavInfo Sub panel, the panel appears with the selected background colors only. Click OK when you have finished customizing the sub panel. 33 34 Nobeltec® Navigation Software User’s Guide 6 - Basic Screens Click on these menu buttons to effect the command on the button Click on the Tool button to replace the InfoBar with a ToolBar. InfoBar Click on the Info button to make the InfoBar appear and disappear Figure 6.17 - NavView Screen Elements The Back and Next buttons toggle through the InfoBar Panels Click the Menu button to hide or show the buttons on the right side of the screen Right Mouse Click Button (for touchscreen users) Chapter 6 - Basic Screens • • • • NOTE: The MOB button appears on every menu within NavView. InfoBar Buttons • Info: Reveals or hides the InfoBar at the bottom of the NavView window • Tool: Shows ToolBar buttons (similar to the available ToolBar buttons in PlanView) • Menu: Reveals or hides the right-hand menu • Right-click: Next action on screen is a right mouse click, rather than left mouse click. Used to reveal Right Mouse Menus. NavView ToolBar The ToolBar contains all the standard ToolBar buttons available in PlanView. • Click Tool to see available ToolBar options. • Click Next to display additional ToolBar buttons. NavView InfoBar The InfoBar is located along the bottom of the NavView screen. You can hide the InfoBar by clicking the Info button in the NavView ToolBar. The InfoBar provides information about your vessel's current location including Vessel Position, Screen Cursor position, Mark data, System Time, status of peripheral devices, Tides & Currents, Targets, Status Messages and, if you have the sensors connected, GPS, Water Temperature and Depth. Click Next or Back to scroll through the available InfoBars. Figure 6.18 - InfoBar and ToolBar To Use NavView 1. Use the NavView menu buttons to navigate through menu options. 2. Some menu buttons will lead to secondary menu buttons. 3. Click Back from any sub-menu to return to the main menu. To Return to PlanView • Click Back from any sub-menu, then click Exit | To PlanView. • Press <F9>. View Manager View Manager features are covered in greater detail in Chapter 12 - NavView. View Manager controls the how NavView content is displayed. Each monitor connected to Admiral MAX Pro can display a single type of content or be divided into window panes. View Manager can help you create new screen layouts containing multiple window panes. For example, if you have a single monitor and wish to see the 3D Navigator, Radar and a Chart on a single screen, View Manager helps you to set your view to this configuration. Save multiple layouts for each monitor and quickly progress through them by clicking <F6> or reverse-toggle by clicking <Shift+F6>. Follow the instructions below to create or edit NavView screen layouts. To Configure Views and Layouts in NavView 1. Click View from the main menu. 6 - Basic Screens • Vessel: Sub-menu options are: • Auto-Scroll (Boat, Predictor, Max Ahead, None) • Chart Orientation (Course Up, Leg Up, North Up) • Tracking • Range Circle • Boat Properties Charts: Sub-menu options are: • Chart Table • Outlines • Quilting • Tides (displays the tide stations) • Currents Other: Sub-menu options are: • GPS Transfer • Options (Tools | Options menu) • Colors (Day, Twilight, Night and Color Scheme) • Nav Objects (Import, Export, Save All) • Undo • Redo • Route Wizard Exit: Return to PlanView or close Nobeltec Navigation Software MOB: Sets Man Overboard mark at the vessel. 35 36 Nobeltec® Navigation Software User’s Guide 2. 3. Click View Manager. If there are multiple monitors, click on the enable or disable button for each monitor to enable or disable that monitor. Next, click on a monitor to view the Select and Configure Layout window. Select and Configure Layouts: Click Edit beneath any of the six monitor configurations to edit the existing layout or create a new layout. This opens the Select a Layout window. Select a Layout: Select a screen configuration from one of the six layout templates by clicking on it. This opens the Edit the Layout window. 4. 5. 6 - Basic Screens 6. Right-Click Mouse Menus Most screen objects have right-click mouse pop-up menus that provide tools specific to that object. Right mouse menus are available for items such as marks, routes, waypoints, the boat icon, ToolBars, console and charts. Use the <Application Key> (keyboard right-side next to <Ctrl>), if your keyboard is so equipped, to open the right-click menu. Figure 6.20 - Application Key Figure 6.19 - Edit the Layout 7. 8. 9. Edit the Layout: Selected pane is designated by a yellow border. As you click on a window type [Vector, Raster, Photo, 3D, Radar, Sounder, Video, NavInfo (1-4), Polar, Nobeltec Connect, PlanBook) the selected pane will automatically proceed to the next pane. Click Done when finished. Select the layout you created in the View Manager to display it. Chapter 7 - Charts and Data The Power of MAX Pro Charts Types of Charts MAX Pro Chart Options ToolBar VECTOR CHARTS are multi-layered informational charts that are easy-to-read and structured for an adjustable layout. This ToolBar controls the data that you wish to display. RASTER CHARTS are a facsimile of a paper chart, where text is embedded in the image. Re-sizing or rotating raster charts will result in a text distortion. AERIAL PHOTOGRAPHY are geo-referenced images that can be viewed like a navigation chart and used as additional aids to navigation. 3D or BATHYMETRIC CHARTS are elevation models of the surface of the Earth. Chart Scales Chart scales are expressed as a percentage of original chart size or to scale. You may zoom in or out either as a percentage of the area or in something called Apparent Scale (AS). AS is the scale visible at a given zoom level. For example, if a chart you are viewing at 100% has a natural scale of 1:10,000, AS remains 1:10,000 because your view is a 1:1 ratio. If you zoom out to 50%, AS becomes 1:20,000 because 1" onscreen is now double the mapped area. Chart Type Controls Figure 7.2 - MAX Pro Chart Options ToolBar Soundings Display. Displays depth soundings. Click this button to turn soundings On or Off. The <S> Hot Key toggles Soundings on and off. Lights and Buoys Display Levels. Changes how lights are viewed. Click the down arrow to reveal options: • Nav Aids Off. Removes all lights, buoys and markers from the charts. • Marker Only. Turns on navigation lights and graphical buoy icons but not their names or their light and sound characteristics. • Marker and Name. Turns on navigation lights and graphical buoy icons as well as their name, light and sound characteristics. Sector Lights show the area in which the light is visible. When chart data is installed you can switch between different types by clicking the Chart Type ToolBar (Figure 7.1). Figure 7.1 - Chart Type Selection ToolBar To close all charts and windows, use the <Ctrl+Shift+F4> Hot Key. To Change Depth/Length Units • • Change depth units on the MAX Pro charts to display fathoms, feet or meters. • 1. Click Tools | Options | Units. 2. Choose the depth/length units you wish to display. • • • Figure 7.3 - Sector Lights Sector Lights - Off. Turns off all Sector Lights. Sector Lights - Visible From Cursor. Only shows Sector Lights that are visible from the cursor's position on the chart. Sector Lights - Visible From Vessel. Only shows Sector Lights that are visible from the vessel's position on the chart. Sector Lights - All Visible. Turns on all Sector Lights. Display ECDIS Symbols. Displays ECDIS chart markings and symbols. Display NOAA Symbols. Displays NOAA chart markings and symbols. 7 - Charts & Data 7 - Charts and Data 37 7 - Charts & Data 38 Nobeltec® Navigation Software User’s Guide Land Features. On/off features such as bridges, names, towers, city outlines, buildings, etc. The <L> Hot Key toggles Land Features on and off. Contours. Isobaths and their coloring. Click on the down arrow to reveal more options. The <C> Hot Key toggles Contours on and off. • Contours Off. Turns off all Contours. • Show Chart Contours. Displays contours as delivered with your chart. • Show Custom Contours. Displays custom contours as established using Tools | Options | Contours. NOTE: There are also separate, unique Custom Contours and Contours options available when you purchase the Bathy Recorder Plus Pack. • Show Chart & Custom Contours. Displays both out-of-box and custom contours on the chart. • Bathymetry. Displays bathymetric data on the chart. This option is available if you purchased Bathy Recorder Plus Pack. When you select this option, other contours are turned off. Streets and Roads. Data layer of MAX Pro Charts which overlays street and road information. Detailed city information is available for each purchased region and Interstate and State highways are also available. Supplementary Data Layers Display. This tool controls Extended Chart Information layers. Click the down arrow to select from the list of available supplemental data, placing a check-mark next to the data you want to display: • Display Ports and Marinas. When selected, turns on an icon on the chart wherever Port and Marina information is available. • Display Points of Interest. Displays local points of interest, such as museums, amusement parks, memorials, and so forth. Photos Points of Interest Figure 7.4 - Chart Contours Warning • • • Contour Themes. Select from the list of available Themes, as determined using Tools | Options | Contours. This option is available if you purchased Bathy Recorder Plus Pack. Capture Bathy Recorder Data. Starts bathymetric capture when a Depth Sounder device is attached and configured. Configure Contours. Opens Tools | Options | Contours. Other Levels. Navigation and other chart information, such as channel names. The <O> Hot Key toggles Other Levels on and off. Ports and Marinas Figure 7.5 - Extended Chart Information Photos, Ports, and Points of Interest • • Display GMDSS Areas. Turns on a display of Global Maritime Distress and Safety System areas. Display Search and Rescue Regions. Places an icon on the chart wherever search and rescue regions are available. Locations that have Ports and Marina, photo or other data available will display an icon on the chart, as shown in Figures 7.5 and 7.6. Chapter 7 - Charts and Data 39 7 - Charts & Data GMDSS Area Search and Rescue Region Figure 7.6 - Extended Chart Information GMDSS Area and Search and Rescue Regions To Display Supplementary Data Layers 1. Click on the Supplementary Data Layers Tool drop-down arrow. 2. From the drop-down menu, place a check-mark next to each supplementary layer you wish to display on the chart. 3. Icons for supplementary data will appear on the chart wherever that data is available. To View Extended Chart Information 1. Turn on display of Supplementary Data. 2. Locate a Supplementary Data Layer icon on the chart and right-click on that icon. 3. Select Properties from the pop-up menu. 4. The Extended Chart Information window will open (Figure 7.7). Use this tabbed window to view all available data. Click on each tab to show photos, Port and Marina information, Chart Info and so forth. Figure 7.7 - Extended Chart Information Window NOTE: This window can be resized to show larger images. Shaded Relief. Can be turned on or off when bathymetric data is loaded. Click the down arrow to turn land or sea settings on or off and select color settings. The <Ctrl+R> Hot Key also toggles Shaded Relief on and off. The Chart Table The Chart Table is a chart storage repository - it is also where you select to manually install and uninstall individual charts and locate navigation objects. Use the Chart Table to open charts and change view settings of various chart objects, install and uninstall charts, data and Plus Packs, and to select charts shown in the quilted chart image. To open the Chart Table, click on the File | Chart Table menu, the Chart Table button on the default ToolBar, or the <Ctrl+O> Hot Key. To open the Chart Table: • Click the Chart Table button on the ToolBar or • Select File | Chart Table from the main menu. 40 Nobeltec® Navigation Software User’s Guide 7 - Charts & Data Click here to Open charts. The first folder provides a list of charts for your current position. Click the + sign for a complete list of all charts Click here to Install charts, data and Unlock Codes. Some chart types may originate from sources other than the Nobeltec Navigation software Click here to Uninstall charts. Use this feature to remove charts you do not intend to use and to save disc space Click here to Add or Remove raster charts from Quilting in circumstances where the charts are incompatible or redundant Details about a selected chart will display here. Use the scrollbar on the right to reveal additional information Click on the Objects Tab to change view settings and to create new object folders Type a chart name in the Search field and use the Previous and Next buttons to locate the name or similar names These check-boxes control how the chart will display when you open it. These are primarily raster chart features. Objects are grouped in folders containing similar items Click the check box to select which items display. To change settings for an entire folder, click the check box in front of the folder name. These commands change the settings for all objects in the folder Figure 7.8 - Chart Table and Objects Tab Chapter 7 - Charts and Data Opening Charts This tab allows you to open both vector and raster charts. Some of the features on this tab relate only to raster or vector charts, but not both. For example, QuickView, North Up and CrystalView only function with raster charts. Use the Search field to search all available charts for a specific chart. Chart List Chart Details Pane Creating New Folders 1. Click File | Chart Table | Objects or the Objects ToolBar icon. 2. Click the New Folder button. 3. Name the new folder. Dragging Objects Into a Folder 1. Click File | Chart Table | Objects or the Objects ToolBar icon. 2. Highlight the object(s) to move. 3. Click and drag the object(s) into the folder. The icon will momentarily change into a until you place it over the desired folder. Locating an Object 1. Click File | Chart Table and select the Objects Tab. 2. In the left menu, place a check-mark next to the data type you wish to view (such as Routes). The right window will display a list of all objects of that data type currently saved in the program. Figure 7.9 - Open Tab of the Chart Table Click on a folder to view objects of that type The Open Tab is divided into two main sections: • Chart List Pane which displays all folders containing installed charts. Typically there are two folders: Charts at Vessels Position and All Charts. Click on the + symbol to expand the folder. • Chart Details Pane: Displays location, technical details, boundaries and edition dates for any chart highlighted in the Chart List Pane. To open a chart, highlight it and double-click or click Open. Chart Objects Use the Objects Tab to control the display of various objects in the chart windows. To Show or Hide Objects On the Screen 1. Click File | Chart Table | Objects or the Objects ToolBar icon. 2. Click the check box next to the object type for which you wish change settings. When there is a check-mark next to the Object type, that type will display. 3. Click Done when you are finished. Figure 7.10 - Objects Tab of the Chart Table 3. Click on a specific object (such as "Route #12") in the right window to locate. Right-click on the object and select Locate This from the pop-up menu. The object will display in the center of the chart. To change the View Settings for Objects in the Chart Table: 1. Click File | Chart Table and select the Objects Tab. 2. In the left menu, expand the folder for the data type you wish to change the view settings for (see Figure 7.10). Place a check mark next to the item type or select All Visible to make data of that type visible. None Visible makes all data of that type invisible on the chart. 3. Click Done. 7 - Charts & Data You can open and locate charts by clicking the Open Tab or by zooming in on an area of interest. 41 7 - Charts & Data 42 Nobeltec® Navigation Software User’s Guide Install Closing Charts Use the Install Tab to install Plus Pack Unlock Codes, MAX Pro Charts, raster and photo charts, Extra Nav Data, and Perspective photos. See Chapter 2 Software, Chart and Data Installation for more information. You can close the chart by clicking the Close (X) button in the upper right corner of the chart window or by selecting File | Close Chart, File | Close All or File | Close All But Active. You can also close all windows by clicking the <Ctrl+Shift+F4> Hot Key. Uninstall You may also use the chart table to uninstall Plus Packs, MAX Pro charts, raster and photo charts, Extra Nav Data, and Perspective photos if you need to free up disk space on your computer. Region Permits for MAX Pro Charts are retained to reinstall the regions when necessary. See Chapter 2 Software, Chart and Data Installation for more information. Close Program Close Chart Chart Quilting Quilting is the seamless connection of one raster chart to another, unnoticeable onscreen (e.g. the charts are "quilted" together"). Nobeltec Navigation Software defaults to quilting raster charts of the same resolution and quality whenever possible. Use this Tab to choose which chart to "quilt" with the current raster chart onscreen from the selection of multiple raster charts. This may be necessary because of raster chart projection, raster chart skew angle or personal preference. For instance, if notes from one raster chart cover navigable water on another raster chart. Use the <Q> Hot Key to toggle Quilting on and off. To Remove Raster Charts from the Quilt 1. Click File | Chart Table and then click on the Quilting Tab. 2. From the list of raster charts on the left, click on the chart you want to remove from Quilting. If no charts are listed, no raster charts are installed. 3. Click Remove, then click OK. Removing Raster Charts From Quilting (From An Open Chart) Right-click on the raster chart to remove from the quilt. Select Remove "Chart Name" from the Quilt from the pop-up menu. Removing All Skewed Raster Charts From Quilting 1. Click File | Chart Table and then click on the Quilting Tab. 2. Below the list of charts that appear, click Remove All Skewed Charts. 3. Click Done. Figure 7.11 - Closing a Chart Window Chapter 8 - Basic Skills 43 8 - Basic Skills Navigating Charts This section shows you how to view and manipulate the chart window. It is essential to master these skills before proceeding to the following sections. Automatic Panning. Move the cursor to the edge of the chart to scroll across a chart. Drag cursor back to the middle to slow speed or release to stop scrolling. Chart Centering. Double-click while pointing at a location on the chart to center the chart at that position. Center on Boat Command. Quickly centers view on the boat position. Multiple Chart Windows Use the Copy Window command to display more than one chart window at a time. Click Window | Copy Window to copy the existing chart window. From the main menu, click on Window | Tile Vertically or Window | Tile Horizontally to automatically fit multiple chart windows into the workspace. Zooming/Overzooming Use the following methods to zoom in or out: • <+> and <-> keys on your keyboard or ToolBar • Click your mouse scroll button once and then scroll up or down with the mouse scroll button to zoom in or out. • Right-click on the chart window and select Other Charts from the popup menu to select a chart/scale. • Drag Zoom. Drag and drop the mouse diagonally across the screen to create a zoom-in field. WARNING: Nobeltec Navigation Software contains a safety feature called "Overzoom Notification". If a chart is displayed on the screen at a resolution far above or below its source scale vertical lines will display across the chart (see Figure 8.1). Figure 8.1 - Overzoom Feature Scrolling/Panning • • • Use the arrow keys on the keyboard. With the cursor at the edge of the chart, you should see a black arrow next to your cursor. Click and hold the left mouse button and move the black cursor towards the center of the screen to slow scroll speed. Use the <Page Up>, <Page Down>, <End> and <Home> Hot Keys to scroll the chart up, down, left and right respectively. Hand Panning. The Hand Panning Tool allows you to easily move the chart across the Chart window pane. When enabled, the cursor will change into a Hand icon and you will be able to "drag and drop" the chart easily. You can also turn on Hand Panning using the <B> Hot Key. Press the Hand Panning ToolBar button again, <B> or <Esc> to turn off Hand Panning. Autoscroll Modes Use Autoscroll to keep the vessel in the chart windows while underway. These options are available from the right-click pop-up menu or the View | Autoscroll menu. • No Autoscroll. Turns off Autoscroll. • Follow the Boat. Keeps boat centered in the chart window. • Follow the Predictor. Keeps predictor centered in the chart window. • Look-Ahead. Keeps the vessel image at the edge of the chart window, opposite the side from where you are travelling. 8 - Basic Skills Arrow Keys. If your keyboard has combined number pad/arrow keys, make sure that <NumLock> is off. Hold down <Ctrl+←↑→↓> (arrow keys) to pan the chart a very small amount or <←↑→↓> to pan a greater distance. 44 Nobeltec® Navigation Software User’s Guide Chart Orientation and Marking North Up Some raster charts are produced with orientation other than North Up. You can orient these charts by right-clicking the chart and selecting North Up. Use the <N> Hot Key to toggle North Up on and off. Course Up 8 - Basic Skills Rotates the chart to always display according to your heading, boat icon pointing up. Right-click on the chart and click Chart Orientation | Course Up from the pop-up menu, the <H> Hot Key or Course Up button on the ToolBar. Leg Up Rotates the chart to always display a vertical direct course to the Active Mark in a route, no matter what your actual boat heading. Set this orientation by right-clicking the chart and selecting Chart Orientation | Leg Up or View | Chart Orientation | Leg Up from the Main Menu. Bookmark Use the Bookmark feature to save a particular chart, scale or chart location and return to it with a single keystroke. To Set a Bookmark 1. Open the chart you want, select a scale and position on the chart. 2. Click Edit | Set Bookmark or click <Shift + F10>. To go to a Bookmark, click the <F10> Hot Key. Objects User-Created Objects You can place a number of icons or navigation objects on the chart at your specification. These include marks, waypoints, routes and more. Objects like Routes, Marks and Waypoints are used to navigate courses, plan trips and determine the optimal course to follow. Each object has specific characteristics, called Properties, that provide information about the object. Properties include the object name, icon, arrival circle, etc. All objects are created and manipulated in a similar way. Connected Objects Connected objects include: Instant Waypoint, Range and Bearing, Boundaries and Routes. Use Marks to connect these objects into a single object. The chart will scroll if a route extends beyond the chart window. If Quilting has been disabled, an adjacent chart will open as needed. This creates routes without interruption and with a close-up view. Use the <+> and <-> keys to zoom in or out. If Quilting is off, use <Ctrl> <+> and <-> to switch charts. Manipulating Objects on the Chart To Place an Object Determine the object to place: There are three ways to determine an object to place on the chart: • Click the object button (Mark, Annotation, etc).; • Right-click and select New | object name from the pop-up menu; or • Select Edit | New | object name from the main menu. To place the object determined in the previous step: 1. Select which object you are placing using one of the above-described methods. 2. Click on the chart where you would like to place the object. 3. When placing a Route, Closed or Line Boundary, continue clicking on the chart wherever you wish to include a waypoint or mark until you have created the entire route or boundary. 4. Click <Esc> to end the Route or Line Boundary. To Move an Object 1. Click on the object to move and hold down the left mouse button. 2. Drag and drop the object to a new location or right-click on the object and choose Properties to edit the Lat/Lon of the object. NOTE: You can also use the following Hot Keys to move an object you have clicked on in the Chart window pane: <Shift+↑> or <Shift+Page Up> moves the object up; <Shift+↓> or <Shift+Page Down> moves the object down; <Shift+←> or <Shift+End> moves the object left; <Shift+→> or <Shift+Home> moves the object right. To Delete an Object 1. Click once on the object you wish to delete. 2. Press <Delete> or select Edit | Delete. NOTE: Once you have placed, moved or deleted an object, select the next object on the chart by clicking the <Tab> Hot Key. Chapter 8 - Basic Skills 45 Marks Annotations Marks - A user-defined point on the chart that can be labeled and connected to other marks. The <F7> Hot Key to turns the cursor into cross hairs. Clicking at any point with the cross-hairs creates a mark. Annotations - An annotation is a Mark without an icon consisting of multiple lines of text displayed on the chart. Closed Boundary Route Mark Man Overboard Instant Waypoint Line Boundary Man Overboard Circle Boundary Figure 8.2 - Examples of User Created Objects Event Mark Event Mark - Event Mark marks the boat's current position. To create an Event Mark, select Edit | New | Event Mark from the main menu or press <F5>. An event mark will be automatically placed at the boat’s current position. Press and hold <Ctrl> while creating an Event Mark to add current depth to the name (if depth sounder is connected). To change the default Event Mark icon: 1. Select Tools | Options from the main menu. 2. Go to the Misc. Tab. 3. Select a new icon from the "Default Event Mark Icon" listbox. 4. Click OK. Instant Waypoint - Creates a simple route consisting of two waypoints from the boat's current position to a location you choose. 1. Click Instant Waypoint on the ToolBar or select Edit | New | Instant Waypoint from the main menu. A mark called "Origin" will be placed at the current boat position. 2. Left-click on the selected destination to activate the second mark. Range/Bearing Lines Range and Bearing - Boat to Point - Allows you to obtain range and bearing from the boat to another point on the chart. 1. Select Edit | New | Range/Bearing Line | Boat to Point from the main menu, the <F12> Hot Key or the Boat to Point button (if added to the ToolBar). 2. Click any point on the chart to view range and bearing to that point. Range and Bearing - Point to Point - Allows you to view the range and bearing between two points on the chart. 1. Select Edit | New | Range/Bearing Line | Point to Point from the main menu, the <Shift+F12> Hot Key or the Point to Point button (if added to the ToolBar). 2. Click on any chart point, drag your cursor to the second point and click 8 - Basic Skills Man Overboard - Assists in recording and navigating to a position. Man Overboard is a modified Mark but retains all normal Mark properties. 1. Click the Man Overboard button on the ToolBar or <F4>. 2. The chart will re-center and place the icon directly under the vessel. 3. The Man Overboard mark will become the active mark, with range and bearing information displayed on the console or NavBar. Nobeltec® Navigation Software User’s Guide 46 8 - Basic Skills again to create a Point to Point range/bearing line. Route Circle Boundary - Isolate and encircle a hazard or other area to avoid on the chart. These can be placed to completely surround any hazard. Routes - Routes consist of a series of waypoints. Use routes alone or in conjunction with an auto-pilot to increase navigation ease and safety. Boundary Circles can be used with the Alarms feature to alert you if your boat enters a circle. Boundary Circles can also be used as anchor alarms. To Create a Route 1. From an open chart, click the Route tool on the ToolBar, click the <F8> Hot Key or select Edit | New | Route from the main menu. 2. Click on the chart to place the first waypoint (see Figure 8.3). As you move the cursor to the next position, a line is drawn from the previous waypoint to the cursor and range/bearing text is displayed. 3. Click on each subsequent position until the route is completed. 4. Double- or right- click on the last waypoint location or click <Esc>. 5. Enter a route name or accept the default name (which is the date and time the route was created). The naming prompt feature can be disabled from the Misc. Tab of the Tools | Options dialog. Left-click to create the first waypoint. Click again to create the next waypoint Double-click left mouse button when finished. Figure 8.3 - Creating a Route To move a waypoint, click on the waypoint and drag and drop it to the desired location. Boundaries Boundaries mark an area that you want to avoid. An alarm will sound when the boat or its predictor line passes over them. Types of boundaries are: Circle Boundaries, Closed Boundaries and Line Boundaries. Once you have created a Boundary Circle click and drag the circle until the Boundary is the correct radius. Closed Boundary - a polygonal-shaped enclosed boundary Line Boundary - an irregularly-shaped open boundary line To Create a Closed or Line Boundary 1. From an open chart, click the Boundary tool or select Edit | New | Boundary | Type of Boundary from the main menu. 2. Click on the chart to place the first boundary point and then move and click the cursor on the next boundary point position. A line will be drawn between each point and range/bearing text displayed. 3. Repeat until the boundary is completed. 4. Double- or right-click on the last boundary point location. 5. Enter a boundary name or accept the default name (which is the date and time the boundary was created). The naming prompt feature can be disabled from the Misc. Tab of the Tools | Options dialog. Tracks Tracking - A Track is a graphical representation of the historical path of your vessel. It is made up of a series of track points connected by line segments whose length depends on the frequency of track recording. Track point recording can be modified using the Boat Properties menu, Track Tab. Track Colors can be modified with the Tools | Tracking | Track Line Coloring option. To turn tracking on or off, click on the Track button on the ToolBar, the <T> Hot Key or Tools | Tracking. Track Line Coloring (Admiral MAX Pro/Sailing Plus Pack Only) Tools | Track Line Coloring opens the track coloring dialog box. Track Coloring allows you to color the track line based on specific data types such Chapter 8 - Basic Skills as water temperature or depth. If you use this option, you must be receiving appropriate data from an NMEA device. For example, if you choose track based on depth, you will need to have a transducer sending depth data. • Use the drop-down menu to select a data type to track. • The color bar is segmented by dividers that indicate the number of Tracks created. • Left-click your mouse in the color bar to add a Track range divider. Right-click between two segments to change the color Click and drag the divider to adjust range settings 47 Track Line Legend (Admiral MAX Pro/Sailing Plus Pack Only) The Track Line Legend is an on-screen legend of existing track line colors, shown in the upper right-hand corner of the Chart window pane. This feature can be toggled on or off using Tools | Track Line Legend. Use the dropdown menu to select an item to track Left click on line to add dividers Figure 8.4 - Track Coloring Menu • • • • Drag the range divider back and forth to increase or decrease the number of tracks in that range. Drag the divider off of the dialog to remove it. Each color bar segment between dividers can be colored differently. To change the color of a segment, right-click on that segment and select a customized color from the provided swatch. Select a color by clicking on it and then click OK. Track Point Management (Admiral MAX Pro/Sailing Plus Pack Only) You should never exceed 10,000 saved track points, as files in excess of this size can slow system performance. At startup, if you have 5,000 or more track points, you will receive a warning message alerting you to potential system slowness. To change or select which data from your track to display: 1. Turn on Track Line Legend. 2. Right-click on the displayed legend. 3. Select from the displayed list. Saving Objects It is important to save all Objects you have created in order to keep them in your Route. To save all Nav Objects, click File | Save All. Changing the Appearance of Objects You can control how routes look on the screen. For example, you can hide range and bearing information, name individual waypoints and much more. The following are the most common route appearance changes. 8 - Basic Skills Figure 8.5 - Track Legend 48 Nobeltec® Navigation Software User’s Guide Show/Hide Mark Names Undo/Redo Function To display or hide a Mark name: 1. Open Tools | Options | Misc. 2. Select Yes or No from the Show Mark Names option (default is Yes). The Undo/Redo feature behaves similarly to other Windows™ functions, allowing you to reverse certain actions. 8 - Basic Skills Hide Range/Bearing Information 1. Right-click on any segment of the route between two waypoints. 2. From the pop-up menu, click the Hide Leg Range/Bearing command. To reverse an action, select Edit | Undo <Action Name>. To redo the action, select Edit | Redo <Action Name>. For example, if you have deleted or moved an object onscreen, use the Undo action to step back one action, replacing the deleted or moved object. You can also use the <Shift+R> Hot Key to toggle Leg Range Bearings on and off. NOTE: Undo and Redo functions are also available in the NavView | Other menu. Changing a Waypoint Icon WARNING: Some Undo/Redo actions may affect connected objects by breaking the links to or changing the settings of those objects. Each waypoint in a route has its own properties, such as the icon displayed. All of the properties for an individual waypoint can be edited. 1. Right-click on a waypoint and select Properties from the menu. 2. Click on the Icon Tab of the Properties dialog box. Scroll through the list and select a new icon. Changing the Color of a Route 1. 2. Right-click on any leg of the route and select Color from the menu. From the color palette, choose the color you want and click OK or Apply to change the route’s color. Locking Objects This feature secures any object you have placed and prevents accidental "nudging" or deletion. Locking Objects With Multiple Points This step locks an entire object. 1. With the object that you want to lock on the screen, right-click on the line between any two points. 2. From the pop-up menu, select Locking | Lock {Object Type}. Locking Single Point Objects To lock a single point in an object or group of linked objects: 1. With the object that you want to lock on the screen, right-click on the object and select Properties from the pop-up menu. 2. From the dialog box that appears, place a check mark in the box which says Lock. Chapter 9 - Advanced Routes 9 - Advanced Routes Routes and Waypoints 1. 2. 3. Activating a Route 4. You can have an unlimited number of routes, but only one Active Route at a given time. An active route displays as bright green (by default) and has a special priority in the navigation system. When a route is activated, the first waypoint also becomes active and blinks on the screen. 49 Select Tools | Options from the main menu. Go to the Misc. Tab. Locate Automatically Activate the Next WP Upon WP Arrival and select Yes. Click Set Default Waypoint Arrival Distance to set the waypoint arrival alarm radius and alarm type. This tool provides notification when your vessel comes within a specified distance from the next active waypoint. When your boat comes within a preset distance (called the Arrival Radius) from the active waypoint, the next waypoint will activate. You can also view onscreen information about the vessel’s approach to the active waypoint and forward that information to an auto-pilot. To activate a route: 1. Right-click on any segment of the route between two waypoints. 2. Click Activate from the pop-up menu. The route will turn green and the first waypoint will be activated. Figure 9.1 - Waypoint Arrival Alarm Settings Window TIP: Deactivate by selecting Deactivate or by activating another route. The first waypoint of a route is automatically activated when that route is activated, but you can also manually activate a different waypoint. To activate a different waypoint, right-click on that waypoint and select Activate. Waypoint Arrival When you are within a certain distance of the active waypoint, an arrival message displays and you are prompted to activate the next waypoint on the route. You may configure the software to automatically activate the next waypoint on a route (and direct your autopilot to turn your boat) without having this message appear. ATTENTION: Choosing the automatic waypoint selection feature will enable your autopilot to turn your boat and head it toward the next waypoint without any prompting or direction from you. THIS COULD BE VERY UNSAFE IF YOU ARE NOT PAYING CONSTANT, VIGILANT ATTENTION TO YOUR SURROUNDINGS. Choose this option ONLY if you are certain it is safe to travel between the waypoints in your presently selected route. To set up Automatic Waypoint Activation: TIP: To set the arrival alarm distance for the current waypoint, select Arrival Circle Radius from the waypoint right mouse menu. Setting a Waypoint Arrival Alarm 1. 2. 3. Click Edit | Boat Properties from the main menu. Go to the Alarm Tab. Place a check-mark in the check box next to Waypoint Arrival. 4. 5. Click to access the Settings dialog. Enter the distance from the current active waypoint at which you want the Waypoint Arrival Alarm to occur. This will change the default setting to the new distance, which affects every waypoint you create after the change. Select the radio button for the alarm setting of your choice. An alarm message box will still display even if the No Sound option is selected. Click OK. 6. 7. 9 - Advanced Routes Activating a Waypoint 50 Nobeltec® Navigation Software User’s Guide Splitting a Route Creating a Route From a Track One route may be split into two separate routes using the Split Route command. You may decide to break some long routes into smaller routes or incorporate alternate routes to the same destination. You can use previous trips to create new routes. 1. Right-click on a track to display the Track pop-up menu. 2. Select Create Route from Track. 3. Specify the track distance to use and click OK to create a new route. To split a Route: 1. Right-click on the segment of the route you would like to split. 2. Choose Split. The route will split into two routes. Joining Two Routes Use this feature to join two routes into one (essentially the opposite of Splitting a Route). You can join a route to either the start or the end of another route. To join two Routes together: 1. Right-click on any segment of the route between two waypoints. 2. Select Join from the pop-up menu, then choose the To Start of Another Route or To End of Another Route from the Join menu as appropriate. 3. The cursor will change. Click on the route you wish to append to. This will join the first and last waypoints of each route and all numbered waypoints will be renumbered sequentially. 9 - Advanced Routes Great Circle Route Builder A Great Circle Route is the shortest navigable distance between two points. Flat map projections warp the curved surface of the earth, which means that you cannot always perceive the shortest route to draw on your chart. Nobeltec Navigation Software contains a tool that can automatically generate a Great Circle Route between two user-specified points using one of three possible methods: • Specified number of waypoints; • Specified degrees of arc between waypoints; or • Specified degrees of longitude between waypoints. To create a Great Circle Route: 1. Select Edit | New | Great Circle Route from the main menu. 2. Select the first and last waypoints to be used from available Nav Objects. 3. Select the method for calculating the waypoints. 4. Click Create. Routes created with the Great Circle Route generator can be named and edited just like any other route. TIP: Even though the new route is created directly on top of the track, the track is still there - it is just covered up by the route. Remove From Route(s) Use this feature to remove a mark or waypoint from a route without deleting the mark itself. To remove a mark from a route: 1. Right-click on a mark you wish to remove. 2. Select Remove from Route(s) from the pop-up menu. The mark will be removed from all routes to which it is currently connected. Numbered waypoints will be renumbered accordingly. TIP: If removing a mark leaves a route with only one waypoint, the route will be deleted and the remaining waypoint will also be deleted unless its properties are set to Permanent. Deleting Routes and Waypoints You can delete individual waypoints and entire routes. To prevent accidental data loss, you will be asked to confirm each deletion. (This feature can be disabled on the Misc. Tab from Tools | Options). To delete a route: 1. Select the route by clicking on any segment of the route between two waypoints. A route is selected when a gray box surrounds it. 2. Right-click on the route and choose the Delete command from the popup menu or click <Delete>. To delete a waypoint: 1. Right-click on the waypoint and choose the Delete command from the pop-up menu or click <Delete>. Make sure to select only the waypoint, NOT the entire route. Chapter 9 - Advanced Routes 51 Adding New Waypoints to a Route Using Existing Marks During Route Creation There are two methods for adding new waypoints to existing routes: 1. Appending to a route will add waypoints to the beginning or end; 2. Inserting will add waypoints to the middle of a route. You can create a route from existing marks using the Route tool to connect existing marks and convert them into the waypoints of a route. To create a route from a series of existing marks: 1. Place Marks on your chart as desired using the Marks tool. 2. Using the Route tool from the ToolBar, click on the first mark. 3. A dialog will appear asking if you would like to place a new mark or use the existing mark. Click Yes to use the existing mark. 4. Repeat this step with the remaining marks, creating a route. To add new waypoints, access the Route menu by right-clicking on a Route - make sure to click on the route leg, not the waypoint. Appending Waypoints to a Route Appending to a route means adding new waypoints to its beginning or end. The first waypoint of a route is automatically numbered 001. New waypoints are added by default to the highest numbered waypoint, which is typically at the end of a route. To add a new waypoint to the beginning of a route, you must first use the Reverse command from the Route menu to reorder the waypoints. Reverse is also used when navigating with active routes. To add waypoints to the End of a route: 1. Right-click on any segment of the route between two waypoints - be sure to right-click on the route, not the waypoint. 2. Choose Append New Mark from the pop-up menu. 3. The cursor will change into the Route tool. Inserting Waypoints The Insert New Mark command is used to add new waypoints to the middle of a route. To add a waypoint to the middle of a route: 1. Right-click on the segment of the route between two waypoints at the point where you want to insert the new waypoint. 2. Choose Insert New Mark from the pop-up menu. A new waypoint will appear on the route line at precisely the point where you clicked. 3. Click-and-drag the new waypoint into the desired position. This feature allows marks to be shared between multiple routes, which is useful if you have several routes which end or begin in the same place. If you change the name or position of a shared mark, it will be changed for all routes. To share a waypoint between routes: 1. Create the first Route. 2. Begin creating the second Route. 3. When you get to the area that contains the mark to be shared, click on the existing mark from the first route. 4. When prompted, click Yes to use the existing mark. Reversing a Route The first waypoint of a route is automatically numbered 001 and waypoints increase in numerical order. To navigate a route in the opposite direction from which it was created, you must first reverse the order of the waypoints. To reverse the order of a route: 1. Right-click on any segment of the route between two waypoints - be sure to right-click on the route, not the waypoint. 2. Choose Reverse from the pop-up menu. Waypoint numbers will reverse order. Existing marks that have been used in another route and renamed keep their names when the route is reversed. Only waypoints with their original, automatically assigned numbers will be renumbered. 9 - Advanced Routes To insert new waypoints at the Beginning of a route: 1. Right-click on any segment of the route between two waypoints - be sure to right-click on the route, not the waypoint. 2. Choose Reverse from the pop-up menu. Waypoint numbers will reverse order. 3. Choose Append New Mark from the pop-up menu. 4. The cursor will change into the Route tool. 5. Add a waypoint to the Route. 6. When done, reverse the route again to restore it to its original order. Sharing Waypoints 52 Nobeltec® Navigation Software User’s Guide Route Wizard To Create a Depth-based Route Using the Route Wizard The Route Wizard automatically creates a route from a user selected origin to destination. You can set parameters such as depth, distance from land, minimum and maximum route leg lengths, etc. The Route Wizard requires 3D bathymetric or detailed vector data in order to automatically create a route. 1. Before you start using the Route Wizard for Depth Routing, it is important to note two things: • Start and end waypoint locations cannot be on land and must conform to the parameters that you set. For example, if you set the distance from land to 300 feet, the starting and ending waypoints must be at least 300 feet from shore. • If you click Use Pre-Existing Route Legs , the Route Wizard will attempt to create the route using parts or all of nearby routes. 9 - Advanced Routes Place your cursor here to learn more about the parameter settings Enter a waypoint prefix here Click here to restore the default settings Figure 9.2 - Route Wizard Parameters 2. Open the Route Wizard from Tools | Route Wizard or use the Route Wizard ToolBar button. When the Route Wizard is displayed, choose Depth Routing. NOTE: Depth Routing is the only option unless you have purchased the Sailing Plus Pack. 3. Click Next. 4. Set the Route Parameters. For information on each Parameter, roll your mouse over the Information Icon (Figure 9.2). Click Next. 5. Set a location for the starting waypoint in one of three ways: • Click on the chart at the starting location; • Enter a latitude & longitude; or • Click the drop-down menu and select an existing waypoint from the list. 6. After selecting the starting waypoint, click Next. 7. Set the location for the ending waypoint (see Step 5). When finished, click Next. 8. Select Search Grid Options. The Route Wizard performs its search based on a rectangular search grid that surrounds the Start and End points. Adjust the Length and Width settings to determine the geographical area and detail of the search, then click Create. 9. The Route Wizard will now attempt to find a pathway from the starting to ending waypoints. If it cannot find a pathway, the Route Wizard will prompt you to retry. 10. When a pathway has been established the Route Wizard will then optimize the Route. This may take several minutes. 11. When the Route wizard is finished you will see a list of the waypoints. You must review the route and place a checkmark in the I have reviewed the route and verified that it is safe for navigation field. 12. Click Finish to close the Route Wizard. Chapter 9 - Advanced Routes 53 To Create a Windvantage Weather Route Using the Route Wizard (Sailing Plus Pack Only) 1. 2. Open the Route Wizard from Tools | Route Wizard or use the Route Wizard ToolBar button. When the Route Wizard is displayed, choose Windvantage™ Weather Routing. NOTE: Weather Provider must be set to GRIB to use Windvantage™ Weather Routing. 3. Click Next. 4. Set the Route Parameters. For information on each Parameter, roll your mouse over the Information Icon (Figure 9.2). Click Next. 5. Load a GRIB Weather File and select a Polar File for your vessel, then click Next. 9 - Advanced Routes NOTE: For Weather Routing, your weather file must contain wind data within eight hours of your departure time. 6. Set a location for the starting waypoint in one of three ways: • Click on the chart at the starting location; • Enter a latitude & longitude; or • Click the drop-down menu and select an existing waypoint from the list. 7. After selecting the starting waypoint, click Next. 8. Set the location for the ending waypoint (see Step 6). When finished, click Next. 9. Select Search Grid Options. The Route Wizard performs its search based on a rectangular search grid that surrounds the Start and End points. Adjust the Length and Width settings to determine the geographical area and detail of the search, then click Create. 10. The Route Wizard will now attempt to find a pathway from the starting to ending waypoints. If it cannot find a pathway, the Route Wizard will prompt you to retry. 11. When a pathway has been established the Route Wizard will then optimize the Route. This may take several minutes. 12. When the Route wizard is finished you will see a list of the waypoints. You must review the route and place a checkmark in the I have reviewed the route and verified that it is safe for navigation field. 13. Click Finish to close the Route Wizard. 9 - Advanced Routes 54 Nobeltec® Navigation Software User’s Guide Chapter 10 - Properties & Options 10 - Properties & Options Properties Menus allow you to edit settings for nearly all of the objects in the software. Most Properties Menus operate similarly and are divided by topic Tabs where you may edit information. To open the Properties Menu for an object, right-click on that object and select Properties or click on the object and use the <Alt+Enter> Hot Key. Mark Properties Menu General Tab The General Tab contains general, editable information about an object. Use this tab to determine whether to display additional information about the Mark, such as the name or description. Description Tab Use this Tab to write a free-form description of an object. The New Attachment button allows you to attach a file to the object, such as a text file log, Word document, etc. To attach a document, click New Attachment, Browse to locate and Open the file, then click OK. Icon Tab 55 Click on the Range Circle Tab and put a mark in the check box labeled Display Range Circle(s) to enable range circles around the Mark or use the <R> Hot Key to toggle Range Circles on or off. This can be used for establishing boundaries and setting up the arrival circle radius around a mark as well. Weather Tab The Weather Tab provides non-editable weather information for the location of a mark or waypoint based on data from the selected Weather Provider. For more information on Weather and weather providers, please see Chapter 16 - Wind & Weather. Route Properties Menu The Route Properties Menu is nearly identical to the Mark Properties Menu, but only includes the General, Description and Range Circle Tabs. To open the Route Properties Menu, click on any route leg and select Properties. Be sure to right-click on the route, not the waypoint - clicking on a waypoint opens the properties menu for that waypoint. Boat Properties Menu The Boat Properties Menu allows you to adjust various aspects of your vessel and how it is displayed on the chart. Click on the Boat Properties ToolBar button, right-click on the vessel icon and select Properties from the pop-up menu or select Edit | Boat Properties from the Main Menu. Figure 10.1 - Mark Properties - Icon Tab Figure 10.2 - Boat Properties Menu Range Circle Tab Range Circles provide an easy, visual reference to distances around a mark. 10 - Properties & Options The Icon Tab helps you change the visible appearance of a given Mark, making it more easily identifiable on the chart. Using the Icon Tab, you can choose from a list of item-specific icons such as a dive symbol, a fishing icon, etc. 56 Nobeltec® Navigation Software User’s Guide General Tab The General Tab allows you to input the name of your vessel, set the bearing to true or magnetic and display a course predictor line, lock the vessel at current Lat/Lon coordinates and display a line to the active mark or waypoint. If no GPS is connected, input a set of Lat/Lon coordinates to move the boat to that location. If your Nobeltec Navigation Software is receiving GPS data, the boat will be automatically moved to the position indicated by the GPS. Deviation Table and Master Heading Correction This table provides a method for making adjustments to the input heading used, as well as a table for entering the vessel deviation (the impact of magnetic interference at specific degrees). To setup the deviation table: 1. Open the Boat Properties Menu. 2. Click the Deviation... button on the General tab to open the Compass Heading Corrections window. 3. Adjust deviation on a per-bearing basis by adding deviation amounts, which are the same amounts shown on a compass card and which may have been provided by your compass adjuster. 4. You can also add a Master Heading correction which will apply to all headings. Use this option to correct for a misaligned heading sensor. WARNING: Logfiles can be extremely large. You should periodically create a new, uniquely-named logfile and save your old logfile to a storage device or disc. Large logfiles can cause system and program slowness. Manual Logging To create a manual log entry: 1. Click New Log Entry. 2. In the box provided, enter the log entry and click OK. TIP: You can also make manual log entries by selecting Edit | New Log Entry from the Main Menu. Viewing Logfiles The View Log button opens the logfile that is listed in the directory next to the Browse button. To review a different logfile, Browse to that logfile folder and click Open then View Log again to review the logfile. TIP: You can also open the current logfile by selecting View | View Ship's Log from the Main Menu. Dead Reckoning Tab Log Tab This Tab contains a logbook feature for keeping accurate records of voyages. 10 - Properties & Options Automatic Logging In automatic mode, log entries are automatically created at a specified time interval. This automatic log records specific boat information, including date, time, Lat/Lon, Speed Over Ground (SOG), Course Over Ground (COG) and other available instrument data. The logfile is a Tab-delimited text file suitable for importing into a word document, spreadsheet or database. To enable automatic logging, place a check-mark in the Automatic Logging box and enter the period of minutes between log entries. To begin logging data, you must also create a new logfile. To create a new logfile: 1. Browse to the folder you wish to store your Logfile. 2. Input the new Logfile name. 3. Click Open to return to the Log Tab of the Boat Properties Menu. Figure 10.3 - Boat Properties - D.R. Tab Dead Reckoning (D.R). is a fallback method of navigation where known values are used in place of unknown values. It is used when GPS is unavailable or lost while at sea. Some of the features in Dead Reckoning are included for the purpose of learning and experimenting with the software when the computer is not connected to any navigation inputs. In this mode, you can simulate boat placement and movement on your home computer without a GPS connected. Chapter 10 - Properties & Options Dead Reckoning is enabled automatically whenever GPS input fails or is interrupted. The boat icon will then continue on its same speed and heading until input resumes. This feature can be disabled from the Tools | Options menu on the Misc. Tab. To enable Dead Reckoning manually: 1. Plot a check-mark in the check box next to Enable Dead Reckoning. If you have an active route, place a check-mark in the box next to Follow Active Route to have the boat icon follow that route. 2. Select the radio button next to the values you would like to calculate (Speed/Heading, Drift/Set or SOG/COG). 3. If not following an active route, enter the known or approximated values into the active text boxes (required for calculation). Calculating Speed and Heading for Dead Reckoning • If the GPS is connected, SOG and COG will be provided by the GPS and you can enter values for set and drift. 57 Before you can make edits to items in the Track Tab, turn on the tracking feature by placing a check-mark in the check box next to Enable Boat Track Recording or by clicking on the Tracking button on the ToolBar. Enable Boat Track Recording With Tracking activated, at least one Record By option must be selected: • Course Change - records a track segment every time your course changes by the specified number of degrees. Input this specification into the provided text box. This option is useful on trips where you wish to record only major course changes. The default setting is 15°. • Time - set the time interval that best meets your needs. The default time interval setting is 300 seconds (5 minutes). Calculating Set and Drift for Dead Reckoning • If the GPS is connected, but boat heading and speed instrumentation are not, COG and SOG will be displayed in their respective panels. • If there is GPS failure and Automatic Simulation is selected, previous values for SOG and COG will show in those fields. Input speed and heading into the text boxes to generate values for set and drift. Figure 10.4 - Boat Properties - Track Tab Calculating SOG and COG for Dead Reckoning Calculations for Speed Over Ground and Course Over Ground are important if you have no GPS or if it is not working. • If your GPS fails, the software may be set up to simulate boat movement according to the last recovered SOG and COG values. • If you have no GPS, follow the instructions for enabling Dead Reckoning, entering values for speed, heading, drift and set into the appropriate text boxes. WARNING: Setting Record By options to a small number (i.e. 1˚ of Course Change or every 10 seconds) will create a large number of track points. This increases overall file size and can slow software performance. Track Tab Enable Wake Tracks are a graphical representation of the historical path(s) of your vessel. They are made up of a series of track points connected by line segments whose length depends on the frequency of track point recording. You can configure the frequency of those track points using the Track Tab. When checked, the Enable Wake box limits the length of the track to a userspecified time integer (minimum value is 1 second). This is useful if you are travelling in a small area and the chart is cluttered with track lines. • Distance - records intervals of user-specified distance to produce an evenly segmented track. Input this specification into the provided text box. The default distance setting is 0.5 NM. 10 - Properties & Options 58 Nobeltec® Navigation Software User’s Guide Alarms Tab Boundary check box. Nobeltec Navigation Software allows you to set a number of Alarms, which can be used to alert the Captain of upcoming waypoints or hazards. Alarms are triggered when user-specified events occur or when selected values are reached. Alarm modes can be enabled by checking the appropriate boxes on the Alarms Tab. Alarms can be configured to sound continuously, singly or as no sound. Click the dotted button to the right of a selection to modify alarm parameters. Waypoint Arrival Alarm The Waypoint Arrival Alarm interfaces with active waypoints. By default, the software provides an audible alarm when your vessel is within a certain distance of your active waypoint. Turn off the alarm by removing the checkmark in front of the Waypoint Arrival option. Edit the arrival radius and sound settings by clicking on the button. 2. 3. Shallow Water Alarm The Shallow Water Alarm is triggered when the value supplied by a depth sounder is less than the user-specified minimum depth. This feature does not work if there are no depth inputs connected to the computer. To set a Shallow Water Alarm: 1. Place a check-mark in the Shallow Water check box. 2. 3. 4. 5. 6. 7. 10 - Properties & Options Figure 10.5 - Boat Properties - Alarm Tab Changes to the Waypoint Arrival distance after routes or marks have been created do not affect those objects. To change Waypoint Arrival distance for existing waypoints, change their Arrival Circle Radius (see Waypoint Arrival in Chapter 9 - Advanced Routes). Boundary Alarm(s) There are two types of Boundary Alarms: Boat Crosses Boundary and Predictor Crosses Boundary. To use the Predictor Crosses Boundary Alarm, you must first activate the Boat Predictor Line (see the Tools | Options | Targets Tab settings in this chapter). To set a Boundary Alarm: 1. Place a check-mark in the Boat Crosses Boundary or Predictor Crosses Click the button to open the Boundary Alarm Settings dialog box. Choose the type of alarm sound (No Sound, Sound Once or Sound Continuous) and then click OK. Click the button to open the Shallow Water Alarm Settings dialog box. Input the water depth that will trigger the alarm. Choose which value to base the alarm from (Water Depth, Depth Below Transducer or Depth Below Keel). Choose the type of alarm sound (No Sound, Sound Once or Sound Continuous). Set a Transducer Offset. This setting calculates the vertical distance from the surface of the water to the transducer’s installed location. Establishing your offset in this field allows Nobeltec Navigation Software to determine actual bottom depth to trigger the shallow water alarm. Click OK. Attention: Depth sounders may occasionally transmit false readings, showing a false "spike" in depth. Such spikes are easy for a human operator to discern and disregard. However, without a filtering program, your computer is unable to analyze these anomalies. Cross Track Error (XTE) Cross Track Error is the distance that the boat has deviated from the designated route. In certain areas, deviation from the route could put a vessel in danger. XTE readout is displayed on the Console in the Helmsman Display, the NavBar Active Mark Tab or in the InfoBar. In Figure 10.6, the blue area is the safe zone and the center line is the route line or heading. If the vessel icon moves outside of the user-specified blue area, the Cross Track Error Alarm will notify you that the vessel has gone too far off course. Chapter 10 - Properties & Options To set a Cross Track Error Alarm: 1. Place a check-mark in the Cross Track Error check box. 2. Click the dialog box. button to open the Cross Track Error Alarm Settings 59 Seetrac Alert If your STU is equipped with an Alert function, users of the STU can raise an audible alarm within Admiral MAX Pro by pressing and holding the Seetrac Alert Button. An alarm message will appear onscreen when that alert is received. The message reads "Tender ID has sounded an onboard alarm. BRG XX, distance XX". NOTE: Tender ID settings are configured using the Tender Directory from Tools | Options | Targets (see Chapter 24 - Tender Tracker). Click Acknowledge to close this message and turn off the alarm. Stats Tab Figure 10.6 - Helmsman Display 3. 4. Input a value for the amount of deviation from the planned course of travel at which you’d like the alarm to begin alerting you. Choose the type of alarm sound (No Sound, Sound Once or Sound Continuous) and then click OK. The Stats Tab is where you input specific information about your vessel. Within Admiral MAX Pro, you may also specify the location of the GPS on your vessel, which makes positioning the boat icon on the chart more accurate. Tender Alarms (Admiral MAX Pro Only) Tender Alarm If a Tender exits an established Guard Zone, a Tender Out of Range alarm will sound and a pop-up will appear onscreen. This alarm will clear once the Tender re-enters the Guard Zone or can be turned off manually. The range for a Tender Guard Zone is between .0001 and 1000 units of measurement. Figure 10.7 - Boat Properties - Stats Tab NOTE: All units of measure are adjustable from Tools | Options | Units. To create a Tender Guard Zone: 1. Place a check-mark in the Tender Alarm check box. Hover your mouse over the information icon about each setting. 2. 3. NOTE: Keel Offset, which is not displayed on this tab, is the distance from the bottom of the keel to the transducer. This distance is automatically calculated using your Transducer Offset (Tools | Options | Sounder | Transducer Offset) and Draft settings. 5. Display Tab The Display Tab is where you set the shape of the boat icon (Nobeltec Traditional or Rounded), as well as specifications for the vessel's heading line. 10 - Properties & Options 4. Click the button to open the Tender Alarm Settings window. Input a distance from the boat that you do not wish the Tender to exceed. This is a 360˚ radius around the vessel. Select how you wish the alarm to function if the Tender crosses the Guard Zone (No Sound, Sound Once or Sound Continuous). Click OK to close the Tender Alarm Settings window. to see more information 60 Nobeltec® Navigation Software User’s Guide Heading line length can be set to be Short, Medium or Long (to edge of screen) and you can also set how thick the heading line will appear. reported by your GPS device. Range Circle Tab • Range Circles display your range to any potentially dangerous obstacles. Use the Range Circle Tab to place range circles around your vessel, set the number of range circles, their radius, and line thickness and color. • Tools | Options Menu The Nobeltec Navigation Software Options menu can be accessed by selecting Tools | Options from the Main Menu or by using the Options ToolBar button. The Options menu provides access to a number of important settings. Ports: Configure Tab The Ports: Configure Tab of the Options menu is where you configure Input Ports and Autopilot/Output Ports. • • • NOTE: This option is unavailable on computers using Microsoft Vista. Detect GPS MOB and MOB Hardware: Used to detect NMEA sentences related to MOB coming from devices such as a GPS or other MOBspecific hardware you may have onboard. Log All Input and Log All Output: This tool is used for debugging and problem solving. Sometimes a Jeppesen Marine product support provider will ask you to record input or output for diagnostic purposes. Default Log location is \\Program Files\Nobeltec\Visual Series\COM1OUT.LOG. The log is reset when the application is restarted. Configure This Input Port...: Opens the COM Port Input Configuration dialog box. Configure All Output/Autopilot Ports...: Opens the Configure Output/ Autopilot Settings dialog box. GPS/Port Setup Wizard: Runs the GPS/Port Setup Wizard from within the program. Input Ports: Designates COM ports that will receive data from other devices. 10 - Properties & Options Output/Autopilot Ports: Designates COM ports to which data will be sent. From the COM Input Configuration window, you can include or exclude specific data sentences or entire device sentence streams. • Require Valid Checksums On All Sentences: If this option is enabled, Nobeltec Navigation Software will ignore any data that does not contain a valid checksum (used to validate incoming data). Equipment conforming to previous versions of NMEA 0183 specifications do not always use checksums in all data sentences. • Require Checksums To Be Valid if Present: If selected, Nobeltec Navigation Software validates sentences that contain checksums, but accepts sentences that do not contain checksums. • Report Checksum Discrepancies: If selected, Nobeltec Navigation Software alerts you if a checksum error is found. • Ignore Invalid GPS Position Data: If selected, Nobeltec Navigation Software ignores GPS data that is inconsistent with the NMEA 0183 standard. NOTE: AIS and GPS data streams should always be set up on separate ports. Failure to do so may result in Nobeltec Navigation Software losing the GPS data signal, thereby setting off alarms unrelated to actual threats. • Use GPS Time: When selected, program time conforms to the time Figure 10.8 - Incoming Data Display Window • View Data: Opens the Incoming Data Display window, showing that NNS is receiving data in real time. Data Output Nobeltec Navigation Software can output specific data sentences to a preselected list of hardware devices. Click Configure All Output/Autopilot Ports to open the Configure Output/Autopilot Settings dialog box. Sentences capable of output include Waypoint Arrival Data, Autopilot Data, Bearing, Heading, etc., as well as some custom sentences such as B&G® Polar Speed (if you have Sailing Plus Pack installed). Port Priorities Tab Port Priorities are used to resolve conflicts occurring when two or more devices send redundant information. Different position-indicating devices (GPS, LORAN, etc...) may send slightly variant Lat/Lon values. Without prioritized inputs, the boat icon repositions with each valid position string. Data from the highest-prioritized device is used first. If the primary device stops sending position information (for a user-specified period of time), the software automatically switches to the next prioritized device. If no valid position is received, it will switch to Dead Reckoning mode. Chapter 10 - Properties & Options To Add a Device to Port Priorities 1. Click Add... 2. From the Add Device window, select a COM Port, the Device type that is connected to that Port, the Data Type output by that device and a Time Out value for that device. 3. Click OK to add this device to your Port Priorities window. 4. Add all connected hardware devices in this manner. Multiple devices may be connected to the same COM Port if they transmit different data sentences. 5. When you have completed adding all devices, use the arrow keys on the Port Priorities tab to establish a hierarchy for the data from each device. Radar Tab To edit your radar settings, the radar (or dual radars, for Admiral MAX Pro users) you wish to interface with must be installed, powered on and connected to the network or PC. You also must have already run the Radar Setup Wizard to detect and name accessible radar units. Once your radar(s) are connected, set up and named, the Tools | Options menu Radar Tab will provide you with per-Radar settings options. WARNING: Use caution when using this feature as it could remove real radar echoes that could be collision threats. • Show Ghost Cursor - Shows a ghosted image of the mouse cursor in every chart window. Most typically this would be used when the radar display and a chart window are not in the same rotation angle so identifying targets is made simpler. Yes shows cursor location on inactive view. • Degree Values on Radar Rings - Show the degree values on your radar ring display. • Vessel Centric Bearings - This option lets you change how the angle of the Electronic Bearing Line is measured and displayed. The value set here is used in the InSight Radar window pane. Choose from Relative Clock Dial, Relative Degrees or Absolute Degrees. Determines how bearing is shown. • Radar Text Banner - This option changes how the radar information is displayed when overlaid on an electronic chart. There are three options, Boxed, Full and None. This option does not affect the display of the text itself only the background box. • Radar Resolution - This option is only available if you have certain versions of the Nobeltec digital radar. Further, the options included are based upon which Nobeltec digital radar you own. Click the down arrow to see what options are available for your radar model. While higher resolution provides an improved radar image, it generally consumes more memory. • Image Clipping - Some radars return the radar image in a square shape. This setting allows you to keep the radar image square or clip the corners to see a more standard circular radar image. Select a circle or square to display radar output (square setting provides somewhat broader radar scope). • Always Open Radar Window - Selects whether or not to open a radar display by default each time the program launches. Yes to open Radar View on startup, No to disable. • Full Screen NavView Radar Console (Admiral MAX Pro only) - In NavView, when the InSight radar is full screen, the Radar Console appears. This option determines where to place the console.: Left, Right or None. • Open Radar ToolBars with Radar Display - Yes for automatic launch of Radar ToolBars, No to disable. • Range Ring Color - Select a Range Ring Color. 10 - Properties & Options Use the Radar Selection field in the upper left-hand corner to highlight the name of the Radar you wish to configure, then use the option settings configure each Radar. Radar settings include: • Auto Range Links With - Auto Range keeps the InSight Radar window pane and chart window synchronized. As you zoom in or out on one of the display windows, the other matches the changes in range. Select Chart with Overlay or All Charts. • Chart w/ Radar Overlay Only: Changes the zoom or scale only of chart windows that have the radar overlay turned on, matching the radar range. • All Chart Windows: This option keeps all chart windows zoomed at the same range level. • Keep Range Setting - When checked, this feature remembers the tuning settings for Gain, Sea Clutter, etc. for each range. As you adjust the range, the InSight radar will revert to your last used tuning settings. Yes keeps current setting, No resumes defaults per session. • Suppress Echoes Around Boat (radius) - Resolves what is commonly referred to as Main Bang Suppression. This feature turns off all radar echoes around the boat within a certain radius of pixels. Select range to dampen radar echoes around your boat or No to disable. 61 62 • • Nobeltec® Navigation Software User’s Guide VRM/EBL Color - Select a VRM (Variable Range Marker)/EBL (Electronic Bearing Line) Color. Guard Zone Color - Select a Guard Zone Color. Weather Tab The Weather Tab is where you configure how weather graphics will appear when overlaid on the charts. Before using this tab, you must select a Weather Provider (see Chapter 16 - Wind & Weather). REMEMBER: You must purchase and install the correct weather hardware in order to display weather data from SkyMate, Sirius, or XM/WxWorx. The following are the options available from the Weather Tab: • Weather Provider - With Nobeltec's weather partnerships, you can receive weather updates from SkyMate, GRIB, Sirius or XM/WxWorx. NOTE: When you change Weather Providers, it may take a few minutes before data from the new Weather Provider displays on-screen. Figure 10.9 - Tools | Options - Radar Tab • • • 10 - Properties & Options • • • Radar Text Color - Select a Text Color. Automatic Double Speed- Defaults is "Disabled". You can select a SOG minimum at which the radar output speed will increase to double-time. When SOG drops below that rate for 8 seconds or more, radar output speed reverts to normal-time. Display Nav Objects in Radar View. When enabled, Nav Objects, such as Marks and Routes will display in the Radar View. Radar Coloring - The InSight radar allows you to change the colors of display elements to make objects more visible in different lighting situations or for viewing preference. To adjust your color settings, use the slider tabs to adjust the size of the color section. Once the slider tabs are in place, you can right-click in any color section to open the Color Selection dialog box and set your desired color settings. Choose either Single or Gradient coloring and select a color for up to 4 range settings of reception (Strong to Weak). Opacity - Select the opacity or transparency of objects detected by your radar and showing on the charts. Background - Select the background for your chart and radar. In use, you can toggle between radar units by right-clicking on the radar display and clicking Select Radar. WARNING: Not all of these options are available from all weather providers. • Connection - (Sirius) Select the type of connection you are using to receive Sirius data (Ethernet or COM Port). • Pressure - (GRIB) Barometric pressure can be displayed as contour lines with labels or as a color gradient. Options are Filled or Line. • Frequency - This refers to the number of barometric pressure Line contours that you want to show. Options are 2 Mb or 4 Mb. • Radar Opacity - (XM and Sirius) Radar weather overlay can be made more or less transparent with this setting. Options are 25%, 50%, 75% or 100%. • Satellite/Cloud Tops Opacity - Satellite (XM) or Cloud Tops (Sirius) overlay can be made more or less transparent with this setting. Options are 25%, 50%, 75% or 100%. • Wind - (GRIB and Sirius) Wind can be displayed as arrows or as wind barbs. Wind barbs are meteorologically correct wind symbols. Wind is coming from the cardinal direction of the line toward the tip. The feathers on the end signal the wind speed. • Current - (GRIB) Ocean Currents can be shown as Filled or Hollow Arrows. • Sea Surface Temperature - (GRIB) Can be shown as Line Contours (transparent contours with temperature labels) or as Filled Contours. Chapter 10 - Properties & Options • • • • Figure 10.10 - Tools | Options - Weather Tab Console Tab The Console Tab controls which information is displayed on the PlanView Console Display. The Console Display contains small information panels which can float or be docked in any position on the Console. Select which panels to display from Tools | Options | Console. To display a Console panel, place a check-mark in the check box next to the item in the Display on Console list. REMEMBER: You must also have the appropriate hardware for any hardware-related panels. For example, if you choose to display the Water Temperature panel, you must have an NMEA compatible water temperature sensor connected to the PC. • 63 panel in the Console Display (not Tools | Options | Console) and choose Change Font. You may also configure the Docked Panel Border, which controls how panel borders will appear onscreen: Raised, Sunken, Flat or No Border. The Default Configuration button resets all panels to the default settings. Changes you make will take effect once you click either OK or Apply. To move and dock panels on the Console, drag and drop the panel into place. To remove a panel, drag and drop the panel off of the Console, then close the panel using the "X" in the corner. This cannot be undone - you must re-establish that panel using Tools | Options | Console if you remove it. Units Tab Use the Units Tab to change the units of measurement for Speed, Depth/ Length, Liquid Volume, Distance and Temperature displayed in the software. Options are metric, nautical and U.S. units of measure, including Statute Miles for Distance. The Distance (Long Units/Short Units) setting is designed to aid with both long-range and short-range settings. From Tools | Options | Misc, select Yes from the Use Far Distancing option. Measurements, once set, are displayed throughout Nobeltec Navigation Software according to your preference. Misc. Tab • To configure the fonts for all panels, use the Set Fonts for ALL Panels buttons. To configure the font for an individual panel, right-click on that 10 - Properties & Options Figure 10.11 - Tools | Options - Console Tab The Misc. Tab of the Options Menu is where you configure usage settings. Options and brief description are listed below. For most of these settings, Yes means "activate" and No means "disable". Occasionally, there may be an alternate option such as High, Medium and Low. • Confirm Deleting Objects. Requests confirmation of each deletion. • Ask for Name of New Objects. Enables the naming prompt. • Automatically Turn on DR if No GPS. If the positioning devices fail, vessel icon will continue to move according to last known values. • Automatically Activate Next WP Upon WP Arrival. Automatically activates the next waypoint as you move within range. • Bring Nobeltec on Top When an Alarm is Triggered. This option will make Nobeltec the active window whenever an alarm event occurs. 64 • • • • • • • • • • • • • • • 10 - Properties & Options • • • • • • Nobeltec® Navigation Software User’s Guide Display Screen Tips on Charts. Turns on mouse hover Tool Tips. Vector Chart Symbol Format. Use this option to switch between ECDIS (Electronic Chart and Display System) styled marks or NOAA. Confirm Hiding Object. Enables a prompt before hiding an object. Show Cross-Hair When Creating Route. Displays extension lines while creating routes. Show Direction Arrows on New Objects. New routes that you create will have direction arrow on the route leg. Show Lat Lon as Default Mark Name. Displays Lat/Lon as Mark Name if Yes is selected. GoTo Lat Lon Adds a Mark. Automatically creates a mark at Lat/Lon if Yes is selected. Use Near/Far Distancing. Changes short distances (9 meters or less) to display as meters or yards (based on Distance Unit selected). Enable Virtual Keyboard. Virtual Keyboard will appear if you doubleclick in a lavender-colored text box. For users who do not have a keyboard at the helm. Popup Transparency. Sets the transparency level of any popup menu or dialog box. Choose from High, Medium or Low. Text Highlighting. Displays yellow region behind text onscreen. Rotate Range/Bearing Leg Text. Aligns text with the route leg. Object to Track in T&C NavBar. Select Vessel or the active Mark. Distance to Search for T&C Stations. Choose from 3, 10, 25 or 100 km. Display Currents Warning Dialog. Indicates whether or not a warning message appears when currents over 3 Kts are encountered while performing calculations in the ETA calculator. Show Distance Across Instead of Scale. Shows actual distance across the chart window. Reset MAX Pro Layers on Startup. Resets to defaults at each startup. NavView Snap Back Timer (Admiral MAX Pro only). Determines how long before NavView re-centers on the boat. NavView Menu Auto Hide (Admiral MAX Pro only). When enabled, determines the length of time until the menu buttons are hidden to enhance overall screen real estate. Enable Warning Indicator Flashing. Indicates whether or not the Warning Indicators will flash when an important event happens. Scaling User Nav Objects. Use this option to scale the user objects with • • • • • • • • the chart or to always draw them at full size. Show Mark Names. Enables or disables display of Mark Name on chart. Disallow Mark Text Dragging. Yes locks mark annotations, No unlocks. Always Lock New Marks. Yes to lock, No to disable. Always Start Program in NavView (Admiral MAX Pro only). Yes for NavView, No to disable. Show Overzoom Warning Lines. Yes to show lines, No to hide. Enable C-MAP Tides and Currents. When enabled, displays tidal and current data from C-MAP sources. This is in addition to the Jeppesen Marine Tides & Currents data available. Apparent Wind Angle (AWA). This is the way that the wind is impacting your ability to navigate, factoring in your speed, direction, currents, etc. Wind Angle can be displayed as either 0-180° Port /Starboard; or as 0359°. When using the Port/Starboard configuration, data is accompanied by a Red arrow for Port and a Green arrow for Starboard. Theoretical (True) Wind Angle (TWA). This is the actual data about wind without accounting for bearing, speed, etc. Wind Angle can be displayed as either 0-180° Port /Starboard; or as 0-359°. When using the Port/Starboard configuration, data is accompanied by a Red arrow for Port and a Green arrow for Starboard. Other Features of the Misc. Tab You can set the default waypoint arrival radius (initial default = 0.5 NM) for all waypoints using the Misc. Tab. To adjust this value, click on the Set Default Waypoint Arrival Distance button. A dialog box will appear requesting the new arrival radius. This performs the same function as the Waypoint Arrival Alarm (see Alarm Tab). You can choose default Mark, Event Mark and Route Mark icons from their respective drop-down lists; set default fonts for all objects; and set the chart scroll speed using the Set Chart Scroll Speed button. Colors Tab The Colors Tab allows the user to set default colors for inactive routes, the active route, tracks, boundaries, and range/bearing lines. To Change Default Line Colors 1. Click on the Colors Tab in the Tools | Options menu. 2. Next to the desired choice (i.e. routes, tracks, etc)., click the drop-down Chapter 10 - Properties & Options 3. 4. 65 arrow next to the menu item to display the default color palette. From the color palette, select a color. Click Apply to save all changes or OK to save and close this window. Nobeltec Navigation Software also allows you to change the display of depth soundings on MAX Pro vector charts based on a user defined range. The 3D Coloring section is where you establish how MAX Pro Charts display the depth at which your boat can safely navigate based on water draft, and the depth at which to draw contours for Shallow, Safe and Deep waters. 3D Coloring Settings The 3D color palette is re-calculated only when depth changes more than 10% or 10 <depth units> (whichever is greater). A Color Legend can be displayed in the upper right-hand corner of the 3D chart window pane. Choose to display or hide the Color Legend using the right-click pop-up menu in the Chart window pane. To change 3D depth colors and ranges: 1. To change the range values, click and drag the divider left or right to adjust the setting. Click and drag a divider off the color bar to remove it entirely. Place the divider back on the color bar by clicking anywhere between two dividers. 2. Right-click on the color region you wish to change. 3. In the color selection pop-up menu, select a color then click OK. 4. Repeat as desired for each range. 5. Click Apply to save all changes or OK to save and close this window. Audio Tab To configure an Audio Report: 1. Check the Enable Audio Reports box. 2. Input the time interval (in seconds) requested between report. 3. Select a Time Format for the Audio report (12 or 24 Hour Clock). 4. Place a check-mark next to each report type you would like to receive. 5. Select a Voice type from the drop-down menu and a voice speed from the speed slider bar. 6. Test the reports you have selected by clicking Test All. To test a single audio report, select the report type and then click Test This. 7. Click Apply to save all changes or OK to save and close this window. 3D/Bathy Tab The 3D/Bathy Tab controls 3D and Bathymetric (sea floor topography) window appearance. Options and a brief description are listed below. • General Travel/Animate Route Speed. Increase or decrease the panning and flying speed of the 3D window and animated Route (speed can also depend upon the speed of your computer processor). • Sky. Select Sky colors from Daylight, Twilight, Sunset or Disabled. • Water Style/Transparency. Select from various water layer options. • Terrain. Choose terrain rendering options (Grid, Array or Overlay). • Solid Terrain Color. Select the solid color filling in the wire grid. • Terrain Grid Color. Select the color of lines overlaid on the color array. • Boat Type. Select the vessel type to appear in the 3D window. 10 - Properties & Options Audio Reports provide periodic, verbal reports about any of the data types selected in this Tab. In order for Audio Reports to work, your PC must be equipped with a sound card and speakers. Additionally, devices that provide data, such as a depth sounder, must be installed correctly before you can hear data reports for that object. Figure 10.12 - Tools | Options - Audio Tab 66 • Nobeltec® Navigation Software User’s Guide Memory Usage. Choose between Minimum and Maximum. • • Figure 10.13 - Tools | Options - 3D/Bathy Tab • • 10 - Properties & Options • • • • Keel Marker. Select desired depth for the keel marker. • Keel Marker Color. Select the color of your keel marker. This is the color the keel marker appears when you are in a safe water depth. • Keel Marker Alarm Color. Select the color of your keel marker when it is too close to the terrain. • Alarm Depth Margin. Specifies the thickness of your keel marker as well as the depth to set off the keel marker alarm. Dynamically adjust colors in 3D. Yes to adjust colors for best view, No to disable. Show 3D Terrain Color Legend. Yes to display a color legend to the upper right of the 3D window, No to disable. Enable HW Acceleration. Yes to accelerate graphics, No to disable. Open/Close 3D ToolBars with 3D Window. Yes to open. Bathy Source Display 3D/Bathymap Data: Yes displays 3D highresolution bathymetric chart data in the 3D display window. No disables. NOTE: The following options only appear if you have purchased and unlocked Bathy Recorder. • Bathy Source Display Bathy Recorder Data: Yes displays your recorded data and uses that data to build 3D representation in the 3D display window, No disables. • • Bathy Recorder: Apply Tidal Offsets: This setting applies a tidal offset to your data, allowing for changes in currents and tides during recording. Default is Yes. If the option is set to Yes, when any depth data point is received by the 3D engine, the offset of the closest tidal station (as determined by settings in the NavBar | Tides & Currents tab) is applied to the depth. For example, if the Sounder or Depth Finder device reports depth at 12 feet and the closest tidal station shows a high tide at 4 feet, the actual depth is stored as 8 feet. If there is no tidal station within 50 nautical miles, no tidal station influence is considered. Bathy Recorder: Frequency of Data Collection: Use this setting to control how often Bathy Recorder will record a data point. Options are every meter, every 5 meters, every 10 meters, every 20 meters and every 50 meters. Default is every 5 meters. More frequent data collection results in larger Bathy Recorder files and higher detail. However, if performance of your computer becomes an issue, consider using a longer frequency. Bathy Recorder: Frequency of Screen Refresh: This drop-down list allows you to select how frequently the 3D window and chart window screens will have the bathymetric chart data refreshed. Options are once/second, every 5 seconds, every 10 seconds, every 15 seconds, every 30 seconds, every 60 seconds and at Startup only. Default is every 5 seconds. In cases where the computer system is already taxed, the frequency of screen refresh should be at longer intervals to prevent pauses in the system. Bathy Recorder: Transducer Cone Angle (50 kHz or 200 kHz): These options should be set to reflect the actual sonar transducer cone angle that is being used to provide the software with depth information, based on the frequency of your Transducer. This information transmits on a point-by-point basis the influence range of each recorded depth. Influence range is also a function of the depth. For example, in 100 m (328 feet) of water, a 45˚ cone angle will result in a range of influence of about 40 m (131 feet) around the collected sample, whereas a 6˚ cone angle would only have a 5 m (16 feet) range of influence. The minimum influence range is 1 m (3 feet), which means that in shallow water, a narrow cone angle may produce a wider impact than expected. For example, in 10 m (33 feet) of water, a 6˚ cone angle should have an influence range of 0.52 m (1.7 feet), but is rounded up to 1 m (3 feet). Jeppesen Marine highly recommends checking the documentation that came with your sounder/depth finder transducer to determine the correct transducer cone angle setting. Chapter 10 - Properties & Options • Options for this setting are: 6 Degrees, 9 Degrees, 12 Degrees, 15 Degrees, 22 Degrees or 45 Degrees. Default for a 200 kHz Transducer is 22 Degrees; default for a 50 kHz Transducer is 9 Degrees. Changes made to this option impacts only newly recorded data, not previously recorded data. Bathy Recorder: Depth when frequency changes (50 kHz or 200 kHz): Options are every 10 units, (based on Tools | Options | Units settings), from 30-500. When the established depth is crossed, the cone angle in use is changed. 67 pleasing, but can mask changes in depth outside the transducer cone and therefore should be used with caution. • Bathy Recorder: Show Raw Points on Chart Window: This option allows you to have Bathy Recorder data always rendered in black, rather than the color dictated by the Shaded Relief color scheme in the chart window. Yes turns on the display black-only bathymetric data points on your chart window, No defaults to the shaded relief color scheme. No is the default setting. NOTE: All units of measure are adjustable from Tools | Options | Units. • This feature permits you to see where you have and have not captured data. There is no harm in adding additional data to an area and, in fact, can improve your overall sea-floor map of any area over time. Bathy Recorder: Duplicate Data: This setting controls how Nobeltec Navigation Software handles overlapping Bathy Recorder samples. Options are Average Data Points or Use Newest Data Point. Average Data Points is the default setting and causes all overlapping data to impact the final depth value. Use Newest Data Point causes data from only the latest Bathy Recorder file to be used. Data from within the same file is always averaged. Depth Tab This tab is where you establish the safety depth at which your boat can pass. This setting is crucial to drawing safe depths on the Charts and using those settings to navigate shallow waters safely. Figure 10.14 - Transducer Cone Angle Differences • Options for this setting are: Standard (default), 2x, 4x, 8x and Maximum. WARNING: There may be a significant change in depth beyond the transducer cone angle that could prove materially hazardous. Increasing rendering exaggeration "fills in" more areas and may look more aesthetically Contours Tab Use this tab to create custom contour lines on land and/or water based on data from 3D sea floor topographic charts. This feature works best with MAX Pro Charts that contain Jeppesen Marine's high-resolution sea floor depth data. 10 - Properties & Options Bathy Recorder: Rendering Exaggeration: Normally, a sample has a range of influence dictated by the depth and the transducer cone angle. You can use this option to exaggerate that rendering to increase the range of influence of a Bathy Recorder sample. In essence, this setting causes your depth recording to draw with a wider or narrower calculation. Since this is a subjective setting, you are encouraged to experiment with the value to see what style and setting you prefer. Changes to this option impact both new and previously collected data. Click View Vessel Draft to establish or change your actual Draft, then set your Safety Depth unit to a depth you assess allows for reasonable fluctuations in draft and situational navigation. Remember that your keel depth may vary somewhat depending on the weight of cargo and number of passengers on board. 68 Nobeltec® Navigation Software User’s Guide 2. 3. 4. 5. line (5, 10 or 15 feet). Set the depth for the Second Contour line (15, 20 or 25 feet). Use the Gradual or Filled check boxes to make the color behavior gradient, to completely fill the contour with a single color, or both. Click OK to close the Options window. Click the down arrow next to the Depth Contours tool on the ToolBar and select Show Custom Contours to see your changes onscreen. Custom Contours Tab (Bathy Recorder Plus Pack Only) Figure 10.15 - Tools | Options | Contours Tab When you install Bathy Recorder Plus Pack: • The Contours Tab becomes the Custom Contours Tab. 10 - Properties & Options Custom Contour Options The Custom Contour Options section of the Tools | Options | Contours tab contains settings for establishing and shading Land contours. • Min is where you set the minimum land elevation from which contouring will begin. • Step is where you set the distance to place between contour lines. • Max is where you establish the maximum elevation of land contours to show on the chart. • The Color Strip to the right of the elevation settings is used to establish colors for specific elevations. • Height markers—the gray bars on the color strip—can be dragged back and forth to your specifications, affecting the Land Contour coloring for the range specified. Add height markers by left-clicking on the color strip. Drag a height marker off the strip to remove it. • To change a Land contour color, right-click on the color strip at the location where you want to change the color. A standard Color window opens, from which you may select a color for the range you selected in the color strip. • Use the Gradual or Filled check boxes to make the color behavior gradient, to completely fill the contour with a single color, or both. Water Contour Options Water Contour Options can be used to set up to two separate contours at specified depths. This tool gives you a sense of changing water depth as you navigate shallow waters. To set basic Water Contours: 1. In the Water Contours Options field, set the depth for the First Contour Figure 10.16 - Tools | Options | Custom Contours Tab • • • The original Contours Tab options are no longer available. Custom Contours now contains one default theme and six customizable contour themes. The Contour button drop-down menu on the ToolBar contains additional, custom contour information. Customized contour themes give you the ability to have clearly differentiated contours that are quickly visible on-screen at a glance for many more subtle depths and heights than the standard contours option provides. This feature is especially useful if there are multiple depths that you are fishing along, but wish to avoid cluttering your screen by displaying all of them at once. To begin customizing contour colors: 1. Select one of the Themes (1-6) from the Theme drop-down menu. 2. Select a Type from the Type drop-down menu. Chapter 10 - Properties & Options 3. 4. 5. 6. 7. Set your Minimum Land or Sea height. Set the distance, or "Step" you wish between contours. Set the Maximum depth for this contour. In the Color Strip, set your range colors and height marker placement. Use the Gradual or Filled check boxes to make the color behavior gradient, to completely fill the contour with a single color, or both. • Depths can be dragged back and forth to your specifications, affecting the coloring. 69 by these devices can be displayed on your vector charts with their pertinent information. Additionally, if a DSC radio is connected to your PC, you can track other vessels similarly equipped. Admiral MAX Pro users who own SeeTrac® Tender Tracking™ hardware can also purchase the Tender Tracker Plus Pack to track affiliate objects, such as jet skis or wave runners using Admiral MAX Pro software capabilities. Figure 10.18 - Tools | Options - Targets Tab Target Tracking Figure 10.17 - Custom Contours • • • • Color swatches allow you to quickly select a Start and End color for contour and the standard behavior of the color slider. You may select to fill the color or not and to make the color behavior gradient or not. Targets Tab If you have compatible ARPA/MARPA Radar(s) (Admiral MAX Pro only) or AIS device(s) connected to your PC via an NMEA connection, any target detected 10 - Properties & Options Click your mouse in the color strip to add a depth/height marker or drag the marker off-screen to remove it. Use your right mouse click to select a customized color from the provided swatches. Click Rename to change the name of your theme to one of your own choosing. Click Reset to Defaults to return all height and color values in the current theme to out-of-the-box settings. This does not change the Theme name back to the default name if you have renamed it. Setup specifications for detected targets on the Targets Tab. Options and a brief description are listed below. • Display ARPA Targets. (Admiral MAX Pro only) Yes displays ARPA targets coming from an external radar in standard NMEA format and No disables. • ARPA Targets Based On Magnetic. Choices for this option depend the type of heading sensor connected to your radar. For Magnetic heading sensors, select Yes. For True North sensors, select No. • Display DSC Targets. DSC-equipped marine radios provide vessel tracking for both DSC polling and distress calls. When you poll another boater who is also equipped with DSC technology for their position, Nobeltec Navigation Software will display their returned position information on the navigation chart, alerting you to their location. Yes displays DSC targets and No disables. • Target Name Settings. Determines how the target name will be displayed (Short Name, Full or None). Default setting is Short. • Display targets on radar display. Yes displays targets, No disables. • Display Predictors. When selected, this option will display a course 70 • • • • 10 - Properties & Options • Nobeltec® Navigation Software User’s Guide predictor line in minutes for all detected targets. Display Wakes. Similar to a predictor line, the Display Wakes option allows you to see a historical track of where the target has been. AIS/ARPA Target Timeouts. ARPA targets normally transmit reports every few seconds. Select how long an ARPA or AIS target will remain on your screen between reports. If the software does not receive a report during this set amount of time, it will be removed from the display. DSC Target Timeouts. DSC targets only transmit data when requested by another DSC-equipped marine radio. Select how long a DSC target will remain on your screen between reports. If the software does not receive a report during this set amount of time, that target will be removed from display. Target Threat Settings. Use this button to detect potential threats based on information received from ARPA, MARPA and AIS targets. If a target meets criteria for this setting, the target will render in red and a warning message will be shown. • Detect Threats. Check this box to look for threats, as determined by your CPA and TCPA settings. When there is no check-mark in this check box, the Alarm, CPA and TCPA options are disabled. • Audible Alarm When Threat Detected. Check this box to receive an audible alarm when CPA or TCPA meet safety zone criteria. • Closest Point of Approach (CPA) - Used to determine the safety zone area around your vessel - default is 0.5 NM. If a target enters into the area specified by this setting, it is considered a threat. • Time to Closest Point of Approach (TCPA) - Sets a threshold amount of time until the Closest Point of Approach. DSC Directory. The DSC directory (Figure 10.19) is where you can input the MMSI Number and a description (or name) of vessels polled with your DSC radio. The description you input will appear on your charts instead of the MMSI Number. These settings can be saved for future use. Figure 10.19 - DSC Directory • Enhanced AIS Filtering. AIS targets can be filtered for type, distance, moorage state, etc. The Targets NavBar, NavView Target ToolBar and Tools | Options | Targets all contain a link to open the AIS Filtering window. • Display AIS Targets. Controls whether any AIS targets are displayed in the Chart window pane or Targets NavBar. When unchecked, all subsequent options in this window are disabled. • Hide Targets Beyond. This option allows you to select a maximum distance range for detected AIS targets to display. Targets whose distance exceeds the selected setting will not display in the Chart window pane or Targets NavBar. Options are Do not hide, 5, 10, 20, 40, 60 or 80 units of measurement. Default is Do not Hide. NOTE: All subsequent AIS Filtering features are Admiral MAX Pro Only. • Only display targets in an AIS.TXT file. When selected, only targets whose MMSI numbers are listed in the AIS.TXT file located in C:\Program Files\Nobeltec\Visual Series are displayed. This setting enables you to track specific, known targets while ignoring unknown targets. • Only display targets that are not anchored, moored or aground. Removes targets from display whose reported status is anchored, moored or aground. If targets whose status is anchored, moored or aground are moving at 0.2 Kts or higher, their status is ignored and they will continue to display. Default setting for this option is Off. • Show AIS Base Stations. Select to display AIS Base Stations or deselect to hide. Default setting for this option is On. Chapter 10 - Properties & Options 71 GlassBridge Network Tab (Admiral MAX Pro Only) This Tab is used to configure your onboard network when using Admiral MAX Pro. See Chapter 18 - Networking for more information about GlassBridge Networks (GBN). NOTE: GlassBridge networking is only supported when networking between 'like' networking systems, such as Windows XP to Windows XP or Windows Vista to Windows Vista. Mixing of different operating systems (i.e., Windows XP and Windows Vista) on the same network is not supported. Figure 10.20 - AIS Filtering • • Show Specific Target Types. Select from the displayed list which Target types you wish to display in the Chart window pane or Targets NavBar. Targets whose type is not checked in this field will not display. Tender Directory. The Tender Directory manages all tenders (wave runners, jet skis, etc.) that are transmitting data to Nobeltec Navigation Software via a Seetrac® Tender Unit (STU). Use the Tender Directory to input the Tender ID, Description, Channel the Tender is broadcasting on and the duration for the Seetrac Base Unit to listen to that Channel. Up to 99 Tenders may be tracked at a given time. See Chapter 24 - Tender Tracker for more details. • Managed Mode. Place a check-mark in this check box to configure Channel and Duration settings. Advanced Networking Options • Server/Client. Select whether this computer is host or client. If client, you will need to browse for and select a server from other computers on this network. • Notify Clients. Place a check-mark in this box to notify clients on this network of changes made to the server settings. This setting is only available if this computer is the host. • Check Connection. Opens a dialog stating that the connection has been established or that it has failed. • Radar Sharing. If you are using an InSight Radar, in order to share radar data on the network, select Yes from the Radar Sharing dropdown menu. However, if you purchased a Nobeltec InSight® Radar 2 (IR2) or an InSight® Radar 2 - Black Box (IR2-BB®) and it is connected to your system, Radar data is shared on the network automatically. No additional GlassBridge Network configuration is necessary in order for this data to be propagated on the network. NOTE: InSight Radar users will need to run the Radar Wizard on each computer that needs to view radar. • Share Radar Targets. After acquiring MARPA Radar targets using Admiral MAX Pro, it is helpful to share these targets with the other computers on the GlassBridge Network. 10 - Properties & Options NOTE: Tender Tracker has two modes: Autonomous and Managed. Channel and Duration only function in Managed Mode. • Tender ID. Input the numeric value for the Tender you wish to track. • Description. Input a description of the Tender tracked on this channel. The description you input will appear on your charts if you select to display Target Names. • Channel (Managed Mode only). Select the channel this Tender is using to transmit data (1-17). Default is Channel 1. • Duration (Managed Mode only). Select a duration for this Tender's signal from the drop-down menu (0-30). Default is 5 seconds. Raw and Processed Data setup on the Data Sharing Tab help you configure GBN NMEA sharing. • Network Identity. The network ID will default to the name of the computer. • Accept Active Waypoints from other Computers. When you place a check-mark in this check box, each time another shared network computer creates or moves an active waypoint, this computer updates accordingly. 72 • Nobeltec® Navigation Software User’s Guide Sounder Sharing. If you have purchased and installed Nobeltec InSight Sounder™, you can share Sounder data to any computer connected to the GlassBridge Network. All systems attached to the GlassBridge Network will see all data sent on the network by the InSight Sounder. Therefore, any Sounder window open on any PC will mirror the Sounder window(s) on all other PCs on the network. In Live and Demo mode, all "pings" are shared across the network. In Playback mode, pings are not shared. InSight Sounder users not connected to Sounder via an RS-422 cable will need to run the GPS/Port Setup Wizard on each computer that needs to view Sounder data. Refer to the InSight Sounder User's Guide for further instructions on using the GPS/Port Setup Wizard. NOTE: The following Sounder settings are NOT shared across the network: Sounder COM port configuration, UDP port configuration, colors and all options set using the Tools | Options | Sounder Tab. EXCEPTION: Tools | Options | Sounder Tab: Transducer Offset, Temperature Calibration, Speed Calibration and 50 and 200 kHz Gain Calibration settings can be shared across the network. • Accept Nav Objects from Other Stations. Select whether to always accept Nav Objects created by other computers that share this network, or to prompt before accepting Nav Objects. Data Sharing Tab This Tab is used to determine how data (NMEA, Ockam® or B&G®) is shared between computers connected to a network using an Ethernet (TCP/IP), such as by the GlassBridge Network (see Chapter 18 - Networking). Figure 10.21 - Tools | Options - Data Sharing Tab Repeater Ports designate the COM ports that will be used to output or repeat all of the data that your software receives. Repeater ports should only be used to forward data to other devices. Use this setting to establish which COM Port is transmitting data to and receiving data from other networked computers. Sounder Tab If you have purchased a Nobeltec InSight Sounder and unlocked the Sounder features with the Sounder Unlock Code, an additional tab is displayed in the Tools | Options menu to adjust Sounder settings. For complete information regarding InSight Sounder, please refer to Chapter 21 - Sounder. • 10 - Properties & Options The two types of data that can be shared are Processed and Raw Data. Raw Data comes into the computer from any NMEA device. GPS position is an example of Raw NMEA Data. Processed Data is produced by the Admiral MAX Pro program. In a situation where you have more than one GPS connected to one of the computers on the network, typically port priorities are used to "prefer" one GPS over another. This official type of information about the vessel is referred to as Processed NMEA Data or the Nobeltec Packet. By default, Admiral MAX Pro will share Processed Data on the GlassBridge Network. By setting up Admiral MAX Pro in this way, you do not have to set a priority on each of the other computers on the network. • • • • • • NOTE: All units of measure are adjustable from Tools | Options | Units. Open Sounder Display at Startup – Indicates whether or not a Sounder Display should be created whenever Nobeltec Navigation Software is started. Default is Yes. Histogram Speed – Speed at which the sounder returns are scrolled across the screen. Default value is 1:1. Display A-Scope - Default is Yes. Display Depth Scale – Indicates whether or not depth numbers appear down the right side of the Sounder Display. Default is Yes. Display Bottom Line – Default is Yes Display Depth (Text) – Default is Medium. Display Boat Speed (Text) – When enabled, the speed of the vessel is displayed in the bottom left corner of the Sounder Display. Default is Medium. Chapter 10 - Properties & Options • • • Display Temperature (Text) – Default is Medium. Display Temperature Graph – When enabled, a moving indication of water temperature appears on the Sounder Display. Default is No. Display Tuning Indicators – Auto Gain, Auto Clutter and Auto Range indicators are drawn on the bottom of the screen, when enabled. Default is yes. • • • 73 Themes can be selected to have all Sounder settings display in complementary colors. The Bottom Line represents the calculated depth of the sea floor. The Shallow Water Indicator is represented by a solid line across the Sounder Display at the level where the Shallow Water Depth Alarm is set. Figure 10.22 - Tools | Options - Sounder Tab • • • • • • Figure 10.23 - Sounder Colors Window • • • • • The Use Sea Floor Color option can be set to Yes or No. If it is set to Yes, the Sea Floor color is used when drawing any returns beneath the bottom line. If it is set to No, the regular sounder return colors are used. The Text Color is used for any text that is represented in the Sounder Display. The Background Color is used to paint the background of the Sounder Display. The Highlight Color is used to outline the Text color, allowing the text to stand out better against all other colors in the sounder histogram. Temperature Color is used to paint the temperature graph. Sailing Tab (Plus Pack) If you have purchased and installed the Sailing Plus Pack for VNS MAX Pro and Admiral MAX Pro, an additional tab is displayed for adjusting Sailing settings. For a complete description of the Sailing Plus Pack, please refer to Chapter 23 - Sailing Plus Pack. 10 - Properties & Options • Show Ghost Cursor – When the mouse cursor is moved over a Sounder window, this causes the location of the Sounder returns to be indicated by crosshairs in any chart windows that are visible. Default is Yes. Open/Close Sounder ToolBars with Sounder Window – Causes the Sounder ToolBars to open/close when the Sounder Window is opened/ closed. Default is No. Display Shallow Water Alarm Indicator – Default is Yes. Transducer Offset – Use this field to indicate the vertical distance from the surface of the water to the transducer’s installed location. This distance is then used to calculate actual bottom depth and for monitoring the shallow water alarm. Transducer offset is required for use with DBT and DPT NMEA sentences only. Temperature & Speed Calibration – Both temperature and speed values may need calibration. Should you be suspicious that the temperature reported is off by a degree or two or that the indicated speed is too fast or slow, use these controls to adjust the end values. 50 kHz and 200 kHz Gain Calibration – Both of these controls are used to adjust the gain applied to each frequency. If you feel that one frequency or the other doesn’t have the appropriate level of gain, use these controls to calibrate accordingly. Colors - From the Tools | Options | Sounder tab, you can access the Sounder Colors dialog box: 74 Nobeltec® Navigation Software User’s Guide Tools | Options | Sailing provides you with options that determine which sailing information appears in the Chart window pane. • Display Apparent Wind Indicator. Options for this field include No, Small, Medium and Large. Large is twice the size of Medium and twice as far away. This indicator is updated every second. The indicator is a filled circle with the label "A" and an arrow pointing from the direction of the wind to the boat. The length of the arrow is proportional to wind speed. • Display True Wind Indicator. Options include No, Small, Medium and Large. Large is twice the size of Medium and twice as far away. This indicator is updated every second. The size of the vector is proportional to wind speed. The indicator is a filled circle with the label "T" and an arrow pointing from the direction of the wind to the boat. The length of the arrow is proportional to wind speed. • Display Recent True Wind Angles. When you select this option (Yes from the drop-down menu), segments between two concentric circles surround the boat to represent wind direction over the past 10 minutes. If the wind has been primarily from one direction over the past 10 minutes, the color of that segment is a darker shade. Segments that have not had the wind as frequently are a lighter color. Recent wind segments have some transparency to minimize clutter. • Display Lay Lines. These are the lay lines that toggle on and off from the active mark. • Display Lay Lines from Boat. This toggles the lay lines from the boat on and off. 10 - Properties & Options NOTE: Keep in mind these additional notes about lay lines: • Lay lines adjust each second. • Lay lines appear whenever there is an active mark. Figure 10.24 - Tools | Options - Sailing Tab • • • • • Display Average Lay Lines Seen. Use lay lines to verify trends in the wind that become apparent when you track them in the Chart window. As the wind shifts and your boat adjusts heading and course, the lay lines adjust accordingly. If you select this option, Nobeltec Navigation Software tracks the average lay line seen, for the active mark, for the past 10 minutes and displays this lay line (one for port tack and one for starboard tack), with less emphasis than the regular lay line. Color Settings. Set the colors for Apparent Wind Indicator, True Wind Indicator, Recent True Wind Angles, Lay Lines, Boat Lay Lines, and Average Lay Lines Seen. Display Time To Go (TTG) and Distance on Lay Lines. In Admiral MAX Pro only, this allows you to toggle on and off values that show the TTG and distance (in boat lengths) to the lay line. These values appear beginning at the point of intersection of the boat and mark lay lines. Time To Go Calculations. The default is Calculate Direct to Mark (Power). The other option is Calculate First Waypoint TTG Using Wind. Use Set & Drift in Sailing Calculations. When this field is set to Yes, Nobeltec Navigation Software calculates your lay lines using speed over water, wind angle and current. When set to No, current data is not included in these calculations. Polar Display Settings From the Tools | Options | Sailing tab, you can access the Polar Display Settings dialog box: • Units of Measure. The default setting for this option uses the current speed measurement unit selected using Tools | Options | Units. The other selection is Seconds per Nautical Mile. NOTE: All units of measure are adjustable from Tools | Options | Units. Chapter 10 - Properties & Options • • • • • Show Best Angles. This toggles the best upwind and downwind angles to display optimal VMG windward and leeward. These angles appear as red lines drawn from the origin of the polar to the farthest polar speed indicated. Fill Velocity Range. This setting determines whether the area from the polar boat speed line is filled. Figure 10.25 - Polar Display Settings - Display Settings tab • • Fill Color. This setting fills in the polar drawn on the Polar Display if the Fill Velocity Range selection is Yes. • Background Type. With this option you can customize the polar background. The choices include Grid, which shows the angles/boat speed circles as lines, Gradient, which fills in each speed range from the polar start color to the polar end color and Alternating, which alternates the polar start color and the polar end color from each speed range to the next. • Grid Color. This is the color of the grid. • Polar Start Color/Polar End Color. If using gradient or alternating, these are the colors from which the gradients or first alternating colors start or end in the velocity ranges or circles. Restore Defaults. Click this button to reset all display settings to the original, default settings that came with this Plus Pack. 10 - Properties & Options Goal: Percentage of target speed. Use this field to temporarily adjust target speed based on current conditions. This option is most beneficial if you have an inexperienced crew or modified sail confirmation and you wish to create realistic targets for performance. Real Time Data. Real Time Data options include: • Auto Record Real Time Data. When you place a check-mark in this check box, Nobeltec Navigation Software begins to collect data while underway for onscreen display. Real time data points are logged during auto record of TWS/TWD/BSP information. As you receive data for true wind speed, true wind direction and boat speed, the values are saved in a file that contains only the interpolated wind speed, the angle and the interpolated boat speed. Wind speed is rounded up or down to the nearest integer value (e.g. 1.5000 to 2.499 become 2) and the boat speed is proportionally lowered or raised. Real time data points will only appear on the polar if you select an individual wind speed in the Wind Speeds to Display field. If you clear this check box, no real time data is collected. • Interval. This field controls the interval at which current values are recorded. Selections include 1 second, 10 seconds, 30 seconds, 1 minute, 2 minutes, 5 minutes, 10 minutes and 30 minutes. The default setting is 1 minute. • Clear Real Time Data. Click this button to clear all real-time data. When you click this button a message appears asking if you want to continue. Click OK to clear all data or click Cancel to return to the Polar Display Settings window without clearing the data. Options. Options settings include: • Polar Line. The selected color is applied. Data points connect with a curved line that follows the expected interpolated boat speed at all angles. • Polar Data Points. The selected color is applied. • Current Situation Dot. This indicator is drawn if the polar diagram shows a polar line for the same wind speed (AWS) as the boat's current speed. • Real Time Data. This is the color of the real time data dots that are drawn periodically on the polar based on the Display Real Time Data settings. • Show Boat. This determines whether the boat and the current situation line and dot appears on the Polar display. 75 76 Nobeltec® Navigation Software User’s Guide 10 - Properties & Options Polar Values Tab Create and manage your polar diagrams using the Polar Values tab. Fields available on the Polar Values tab include: • Active Polar file name - The active polar file name appears. When you installed Nobeltec Navigation Software, no polar was selected, so the default Polar file name is "No file selected". The active polar filename is stored across sessions. • Polar Name - Type the name you want to associate with this polar. • Load Polar File - Click this button to browse to the folder where the polar file you want to load is located. In the folder named InstallLocation\Polars you will see stock polar files for common boats. The file type function searches for the Nobeltec polar extension (*.spp) but you can also select All Files (*.*), which allows you to open polar files from many sailing programs. When you select a file type designed for another sailing program, Nobeltec attempts to read the file. If the file cannot be read, a message appears stating this. • Save Polar - Click to save any changes that have been made. A message will ask "Do you want to save this polar?" Once saved, changes made cannot be undone. Click Yes to save changes or No to return to the main Polar Display Settings window without saving changes. • Save Polar As - Click to save the changes to a new polar file name. A Save As dialog opens with the My Polars folder as the default folder. You can, however, browse to any other location. • Save VMG Targets - Click this button to save the best upwind and downwind angles to a tab delimited text file. You can import this file into Excel or another program or print it to use as a reference on deck. • Edit Polar Data - You can select any wind speed that is stored in the polar file. By default, the lowest wind speed in the Polar File appears. Use the Add Wind and Delete Wind buttons to manage your polar data. There is no limit to the amount of wind speeds that can be stored in the polar file. Figure 10.26 - Polar Display Settings - Polar Values tab • Polar Values Grid. Use this grid to add, update or delete polar values. If all polar values are deleted, the corresponding wind speed will also be deleted. To add individual values, tab to the end of the row and a new row will appear. To delete an entry, select the row and press the <Delete> Hot Key or select the row and click the Delete Selected Row button. Video Tab Nobeltec Navigation Software offers support for onboard DirectXcompatible video cameras attached to your PC via USB port(s) or internal video hardware such as DVD players or other video feeds. Users can choose from all available, connected cameras using a drop-down menu. Video feeds can be interfaced with Nobeltec Navigation Software using a Video Multiplexer Card (PCI Card) or a USB converter device, however, best reception is provided when cameras are hooked directly to the computer. With streaming video feed, you can have up to four views of your immediate surroundings. Ideally, onboard cameras are designed for low-light and marine conditions. See your video camera User Guide to connect the video camera to your onboard PC. Nobeltec Navigation Software will recognize the video input device(s) automatically. Chapter 10 - Properties & Options 77 There are two ways to open the video window in PlanView: 1. Choose View | Video | Video Display; or 2. Choose Video Display Tool from Tools | ToolBars to leave the Video Display ToolBar button always available for use. NOTE: Video streams can be shown in one PlanView window at a time. Figure 10.27 - Camera/Video Configuration When a new Video display is created in PlanView, Nobeltec Navigation Software will select the first available video feed and store that video feed's settings as default. Up to four video displays are available when using NavView. When you configure your NavView layout, you can select the video button in the Edit Layout Settings (see Chapter 12 - NavView). Video Pause You can pause a video stream by clicking in the video display window and clicking <Enter>. This will pause the image indefinitely until <Enter> is pressed again. 10 - Properties & Options The Tools | Options | Video Tab is where you can name or re-name your streaming Video feed once the feed has been detected by you Nobeltec Navigation Software. To determine which video feed is available, right-click on the video display and select "Configuration" to open the Camera/Video Configuration window. 10 - Properties & Options 78 Nobeltec® Navigation Software User’s Guide Chapter 11 - Customizing PlanView 11 - Customizing PlanView want to display. Remove the check-mark to turn the Tool or ToolBar off. The list is alphabetical. The top ¼ of the list contains ToolBars; the bottom ¾ of the list are individual Tools. The two types are divided by a horizontal black line (see Figure 11.1). Click OK to complete your changes. Planview ToolBars and Console can be completely configured to your own preferences. If there are Tools that you don't use or that prohibit your ability to see more of the chart, you can turn them off. 3. The Difference Between a Tool and a ToolBar Changing ToolBar Button Size • • Tool: a single button located on the PlanView screen. ToolBar: a group of tools that have similar focus. For example, all of the buttons that operate MAX Pro Charts are located on one ToolBar called the MAX Pro Chart Options ToolBar. 1. 2. 3. 79 Select Tools | ToolBars from the Main Menu to open the ToolBar Options menu. On the right-hand side of the ToolBar Options menu, you will see a section labeled ToolBar Button Size (as shown in Figure 11.1) and three radio buttons with options for Small, Medium and Large. Click the radio button that corresponds to the size you want to use - default setting is Medium. Click OK. All the Tools and ToolBars that are currently docked or floating above your charts will switch to the new size. Because of the change in size, you may want to click and drag some of your tools to tighten up the spacing of the Tools and ToolBars. Moving Tools and ToolBars ToolBars can be placed or docked on any of the four sides of the program window. They can be dragged into a floating position over the main window. Figure 11.1 - ToolBar Options Menu Customizing the ToolBar To show or hide ToolBars (or individual Tools): 1. Select Tools | ToolBars from the Main Menu to open the ToolBar Options menu. 2. Place a check-mark next to the name of the Tool or ToolBar that you NOTE: Click on the Reset ToolBars to Default in the ToolBar Options Menu to start over. 11 - Customizing When you start Nobeltec Navigation Software for the first time, several default ToolBars are displayed. If your computer has a smaller screen, you may want to hide some of these or convert them into floating ToolBars to provide a wider area for the chart to be displayed. To move your Tools and ToolBars to a new position or to make them float over the main program window: 1. Move the cursor to any area of the ToolBar that is not a button. 2. Click and hold down the left mouse button. 3. Drag and drop the ToolBar to the desired position. The ToolBar changes to a vertical orientation when you dock it on either side of the window. If you drop the ToolBar on the chart window, it becomes a floating ToolBar. 4. Move all Tools and ToolBars as needed. 80 Nobeltec® Navigation Software User’s Guide 1. Click and hold your left mouse button here. Drag from the ToolBar AIS Targets: Show/Hide. Controls whether any AIS targets are displayed in the Chart window pane or Targets NavBar. Annotation. Create Annotation marks on your charts. Autoscroll - Follow Boat. When a GPS is connected and the vessel icon is moving in the chart window, this feature automatically scrolls the chart while keeping the vessel icon in the center of the screen. 2. To here 3. To here and then release the mouse button Autoscroll - Follow Predictor. While underway with a GPS connected, this feature automatically scrolls the chart while keeping the vessels Predictor Line in the center of the screen. (Predictor Line must be turned on in the Boat Properties menu). Autoscroll - Look Ahead. When a GPS is connected and the vessel icon is moving in the chart window, this feature automatically scrolls the chart while keeping the vessel icon at the lowermost point of the screen. Boat Properties. Opens the Boat Properties dialog. Figure 11.2 - Moving ToolBars 11 - Customizing ToolBar Buttons In addition to allowing you to select ToolBars, you can select the individual Tools to display on the ToolBar. The steps for displaying individual Tools on the Console are the same as for displaying the ToolBar. Listed below are the available tools and a brief description of their functionality. 3D Charts Display. Automatically tiles your chart window vertically and opens a 3D window next to your normal 2D chart. 3D Depth Indicator. Gives you the option to display the depth marker, keel marker, both or neither. This button toggles you through available selections. Cascade Windows. Cascades the open chart windows. Center On Boat. Centers the chart view on the boat position. Change 3D Exaggeration. Used to enhance the 3D image by over or under-exaggerating 3D data. Minor changes in elevation become visible in areas that might otherwise appear completely flat (or vice-versa). Change 3D Mode. Enables you to toggle between Center on Boat Mode and Explorer Mode while using the 3D Navigator. Chapter 11 - Customizing PlanView Installed Coverage. This button controls whether or not region outlines of installed charts are displayed. This feature is enabled by default. Chart Table. Opens the Chart Table dialog. The Chart Table dialog is used to open, install and uninstall charts, locate charts and geographic reference points. 81 Current Arrows. This button makes Current Arrows visible on the chart. Current Arrows make it easy to see the direction and speed of the currents. The bigger the arrow, the faster the current is moving. Decrease 3D Boat Scale. Makes the 3D vessel icon smaller. Disable Autoscroll. Disables any active Autoscroll mode. Circle Boundary. Used to create Boundary Circles. A Boundary Circle consists of series of marks enclosing an area. A Boundary Circle is used to mark a region and an alarm will play if you enter or leave the region. Boundary Circles can be used to mark a dangerous area, for example: around a rock. In this case the alarm will be set off if you enter the boundaried area. Event Mark. Creates Event Marks. An Event Mark is a mark placed at the location of the boat when you click this button. The default name is the date and time of creation. Circle boundary areas are displayed as a hatched-out field onscreen. Closed Boundary. Used to select the Closed Boundary Tool which is used to create a Polygonal Boundary on your chart. Boundaries are used together with alarms to warn you about potential dangers while navigating. Ghost Cursor. When multiple chart windows are open, the Ghost Cursor provides a second cursor that visually illustrates where the cursor is on each chart you have open. This is especially useful when using photo and vector charts together, as you can place your cursor on an object on the vector chart and see the corresponding location on the photo. Closed boundary areas are displayed as a hatched-out field onscreen. Context Help. Opens a PDF of the User's Guide (this document).. Contours Display. Toggles on or off the Depth Contours layer. Grid Display. This tool opens a plotting grid. You can use it like any other chart. Hand Panning. This tool allows you to easily move the chart across the Chart window pane. When enabled, the cursor will change into a Hand icon and you will be able to "drag and drop" the chart easily. Press the Hand Panning ToolBar button again, <B> or <Esc> to turn off Hand Panning. Increase 3D Boat Scale. Makes the 3D vessel icon larger. CrystalView. This button is used to enable the CrystalView feature which clarifies raster charts so that they are easier to read when zoomed out. 11 - Customizing Course Up. This tool enables (or disables) Course Up mode for the active chart window. Course Up rotates the chart image so that as your boat turns from one heading to another, the chart is always displayed with your heading and with the boat icon pointing up. The use of this feature, along with Range Circles, allows you to create a display which is similar to the display of your radar. Goto Lat/Lon. This tool allows you to input the latitude and longitude you want the chart centered on. 82 Nobeltec® Navigation Software User’s Guide Instant Waypoint. When the tool is selected, left clicking on a location will create an Instant Waypoint. An Instant Waypoint is actually a route consisting of only two waypoints: one at your boat present position and one at the position on which you clicked. It creates the route and activates the second waypoint. More Charts. Displays a menu of installed charts which are available for the current location. Native Up. When using raster charts, some charts maybe skewed. The Native Up Tool changes the rotation of the skewed chart so it is displayed like a non-skewed chart. Land Features. Toggles the land data layer. NavBar. Toggles the NavBar on and off. Larger Scale Chart. This button allows you to quickly select and open a larger scale (more detailed) chart at the vessels current Lat/Lon position. In Quilting mode, this button does not function Leg Range and Bearing. This turns the range and bearing labels of each route leg on and off. Lights and Buoys Display. Displays a list of options for displaying lights and buoys on charts. Line Boundary. Creates a Boundary Line. 11 - Customizing Load User Interface (UI). This button opens the Load User Interface dialog box which allows you to open a pre-saved layout of all the ToolBar buttons on your screen. Man Overboard. Immediately places a Man Overboard mark at the vessel’s present position. In addition, the Man Overboard mark is made active so that the Console panels will show range and bearing to the mark. Mark. Used to select the Mark Tool. The Mark Tool is used to create navigation marks on your chart. After selecting the Mark Tool, click on the chart to place a Mark. NavView. Opens NavView. New Log Entry. Used to add an entry to the ship’s log. Nobeltec Connect. External program window that allows you to connect to the SkyMate system, provided you have SkyMate hardware installed. Open New Photo Window. This button splits your screen into two vertical windows. A navigation photo appears on one side and the chart that was open prior to this tool being pressed will be open in the other. When the photo opens, it will match the zoom level and scale of the vector or raster chart on the opposite side of the window. Open Polar Display Window. Sailing Plus Pack only. Used to open and display the Polar Display Window. Open Polar Display Settings. Sailing Plus Pack only. Used to open and display the Polar Display Settings Window. Options. Used to open and display the Tools | Options menu. Chapter 11 - Customizing PlanView Other Features Display. This activates data layers contained on the charts. These data layers included features such as chart notes and place names. Photo Charts Display. This changes the active chart type shown in the chart window to a navigation photo. It also allows you to blend photos with vector charts. Change the opacity of photo overlay, choose the source of your photo charts (if Raster Plus Pack is installed), and choose whether to overlay photo charts on water or crop at the coastline using the drop-down menu. Place Name Search. Directs window and cursor focus to the Search Tab of the NavBar, where you can quickly locate objects and points of interest using Nobeltec's efficient search engine. PlanBook. This button opens the PlanBook which allows you to manually edit Routes, Marks, Boundaries and Tracks. Pointer. Restores the mouse cursor to the Pointer Tool which is used to select items for further operations. When you click on an item (such as a mark, waypoint, route or the boat) a gray rectangular border is drawn around that item indicating that it is the currently selected item. Print Preview. Use this command to display the active window as it would appear when printed. When you choose this command, the main window will be replaced with a print preview window in which the page will be displayed in its printed format. This allows you to see what the printed page will look like before you send the data to your printer. Quilting. This button controls the enabling and disabling of ChartQuilting. ChartQuilting is enabled by default. Radar Acquire Target. This button puts your cursor into Acquire Targets Mode (MARPA) for manually identifying radar targets. Radar Auto Gain. Click to let the software automatically strengthen or weaken image display. Radar Auto Range. When enabled, a change in radar range or chart zoom level automatically adjusts the corresponding range or zoom in the other window pane accordingly. Radar Auto SEA. Click to let the software automatically compensate for changing sea state during wind or swells by de-cluttering images displayed. Radar Chart Overlay. Turns radar/chart overlay on or off. Radar EBL. Sets a bearing line or pair of lines that originate from the center of the boat and remain constant as the boat moves. Radar Gain Down. Decreases the sensitivity of the radar, removing or lessening background noise. Radar Gain Up. Higher values increases sensitivity to radar returns, improving the display of weaker targets. Radar Guard Zones. Creates a customizable guard zone which acts as a shield to the vessel. If you receive a radar return inside the guard zone, an alarm will sound. 11 - Customizing Print. Use this command to print a chart section, float plan, tide graph or current graph. This command presents the Print dialog, where you may specify the range of pages to be printed, the number of copies, the destination printer and other printer configuration options. 83 84 Nobeltec® Navigation Software User’s Guide Radar Interference Rejection (IR). Reduces interference caused by radar units operating in the same frequency as your radar. Options are Off, 1 (weak), 2 (middle) and 3 (strong). The higher your IR, the less interference you will receive. However, stronger IR may cause you to miss weaker targets. Radar Pulse Length. Sets the length of time of each transmission of radar waves by the transceiver. Pulse lengths are pre-set for each range so you are not typically required to change this setting. of the range rings. Range Up increases the range of the radar, however, maximum range depends upon which radar model you own. Radar Rotation Speed. Toggles radar to operate at twice normal antenna rotation speed. Double speed is useful for high-speed vessels or when operating in tight navigation waterways. When operating at double speed, the radar is also refreshed at twice normal speed. Radar SEA Down. Decrease SEA to expand targets and verify that targets shown are not repeated or echoed. Radar Rain Down. Decreases Rain (weather and choppy water) filters. Radar Rain Up. Increases Rain (weather and choppy water) filters to help you see targets during storms. Radar Range: Bay. Click to set the range to 4 nm. Radar Range Down. Determines the size of the area represented in the Radar window pane from radar transmissions and the number and distance of the range rings. Range Down decreases the range of the radar, however, maximum range depends upon which radar model you own. Radar Range: Harbor. Click to set the range to 1 nm. 11 - Customizing Radar Range: Horizon. Click to set the range to 16 nm. Radar Range: Marina. Click to set the range to ¼ nm. Radar Range Rings. Toggles radar range rings on and off. These rings are at preset distances from the vessel based on the radar range. Radar Range Up. Determines the size of the area represented in the Radar window pane from radar transmissions and the number and distance Radar SEA Up. Increase SEA to filter out the echoes between rough seas and real targets. Radar Target Expansion. This setting enlarges targets for easier viewing. Radar Transmit/Standby. Starts or stops radar transmission. Radar VRM. Toggles on a range ring or series of rings that surround the boat and are used to measure distances to targets. Radar Window Pane. Opens or closes the radar window pane. Range Circle Toggle. Click this button to display Range Circles around the boat icon. Range Circles provide an easy, visual reference to distances around your boat. They are similar to the Range Circles that can be displayed by some radars. Range Circles are completely customizable and you can change the number of circles, range circle radius, range circle thickness and range circle color. Range/Bearing: Boat to Point. Creates a range/bearing line from the boat to a point. When you select this tool, a line will be drawn from the boat icon to the mouse cursor. Move to the position you want and click the left Chapter 11 - Customizing PlanView mouse button. A mark will be placed with a line drawn from the boat icon to the mark. The range and bearing from the boat icon to the mark will be displayed on the line. 85 Route Wizard. This button activates the Nobeltec Route Wizard. The Route Wizard lets you select a beginning and ending waypoint and then creates a new route based on a few user-defined criteria. Range/Bearing: Point to Point. Creates a range/bearing line between two points. Click to place the first mark, then click at a second location to place the second mark. A line is drawn between the marks and the range and bearing between the two marks will be displayed on the line. Save User Interface (UI). This button opens the Save User Interface dialog box which allows you to save the layout of all the ToolBar buttons on your screen. Raster Charts Display. This changes the active window chart type to raster charts. Screen Intensity Day/Dark. Used to activate Day/Dark colors (dimmed Normal). Rectangular Zoom. This tool allows you to zoom to a specific part of the chart. Click and hold the left mouse button on the chart where you want to zoom in. Then, drag the mouse cursor down and to the right. You will see a box drawn in the area you’re highlighting. This is the area of the chart that will be displayed. Reset Cross Track Error (XTE). This button resets the Cross Track Error to zero. This can be a useful tool when you exceed the Cross Track Error limit and decide on a new course to steer. Resetting the Cross Track Error will then give you a fresh start to your intended target. Route. The Route tool is used to create routes. To create a route, click to place the first and successive waypoints. To complete the route, double click as you place the last waypoint or press the <Esc> key. Screen Intensity Normal. Used to deactivate Night or Twilight Colors and return to the normal screen color intensity. Screen Intensity Twilight. Used to activate Twilight Colors. Shaded Relief Charts Display. Turns the Shaded Relief feature off and on. Use the small down arrow next to the button to select display and color options for both land and sea. Smaller Scale Chart. This button allows you to quickly select and open a smaller scale (less detailed) chart at the vessels current Lat/Lon position. In Quilting mode, this button does not function. (Only applicable to raster charts.) Sounder Auto Range. Enables an automatic Range finder that keeps the sea-floor within view. 11 - Customizing Right Mouse Button. This tool is designed to make using Nobeltec on a touchscreen monitor much easier. Most touchscreens react to a touch on the monitor in the same way as a left mouse click and do not provide an option for performing a right-click. By clicking the Right Mouse Button Tool, the next item you touch on the screen will be considered a right mouse click instead of a left mouse click. Screen Intensity Night. Used to activate Night Colors. 86 Nobeltec® Navigation Software User’s Guide Sounder Clutter. Clutter may be caused by debris, fish, or other causes. Decrease clutter by changing your Clutter filter setting. Sounder Decrease Range. Decreases depth detection maximum. Sounder Decrease Shift. Lowers amplification of Sounder returns. Sounder Display. Turns Sounder display On or Off. Sounder Frequency. Change frequency to 50 kHz, 200 kHz or concurrent, split view. Sounder Gain Down. Reduces detail and displays only strong Sounder returns. Sounder Gain Up. Adds more detail and feedback to Sounder returns. Sounder Increase Range. Increases depth detection maximum. 11 - Customizing Sounder Increase Shift. Increases amplification of Sounder returns to improve overall visibility. Soundings Display. This tool toggles Depth Soundings off and on. Streets and Roads. This turns on all the Streets and Roads data. Supplementary Data Layers Display. Choose from a list of supplemental data to display on the Chart. Tide Bars. Click to Display Tide Bar icons on the screen. Tile Windows Horizontally. Arranges the open windows into equallysized horizontal windows. Tile Windows Vertically. Arranges the open windows into equallysized vertical windows. Toggle Lay Lines. Sailing Plus Pack only. Gives you the option to display no lay lines or select from small, medium or large lay lines. Toggle Lay Lines from Boat. Sailing Plus Pack only. Gives you the option to display no lay lines from your boat or select from small, medium or large lay lines. Sounder Noise. The Noise filter reduces the possibility of interference from nearby echo sounders and electronic devices. Toggle Wind Arrows. Sailing Plus Pack only. Choose Apparent or True Wind Arrows, then select small, medium, large or no wind arrows. Clicking the button toggles through all settings. Sounder Operation. Sounder has three modes of operation: Cruising, Fishing and Manual. Toggle 3D Depth Indicator. Gives you the option to display the depth marker, keel marker, both or neither. Sounder Signal Level. The Signal Level filter provides a threshold for displaying Sounder returns, removing weaker returns from the display and specifying how strong the display return must be to appear onscreen. Tracking. Click this button to enable tracking of your boat. Tracking is the onscreen recording of your boat's previous movements. Chapter 11 - Customizing PlanView Abbreviation Function Abbreviation Function Vector Charts Display. This changes the active window chart type to vector charts. SOG Speed Over Ground <Boat Name> Vessel Icon's Lat/Lon COG Course Over Ground <Mark/WPT Name> Active Mark or Waypoint Name and Lat/Lon Video Display. Opens a Video display window, where you can display streaming camera feeds provided your onboard cameras are connected to Nobeltec Navigation Software. VMG-WPT Velocity Made Good - towards a Waypoint Cursor Position Lat/Lon at Cursor Location XTE Cross Track Error Clock Synchronized to PC Clock RNG Range to Active Waypoint Timer Count Down Timer 87 Weather Overlay. This quickly opens the NavBar to the Weather Tab so that weather predictions can be overlaid on your charts. BRG Bearing to Active Waypoint Graphic Helmsman Display GPS or DR Displays GPS or Dead Reckoning Location ETA/TTG Combined Estimated Time of Arrival and Time to Go Zoom In. Click this button to view a smaller area of the chart. CSR 3D DPT Displays 3D depth under Cursor VMG-WND Velocity Made Good towards Wind Zoom Out. Click this button to view a larger area of the chart. The Console The Console is a set of small display panels. Depending upon the instruments connected to your PC, you can have panels that display pieces of navigational information such as Speed Over Ground, Speed Over Water, Latitude and Longitude, Wind Speed, Wind Direction, Water Temperature and Depth (just to name a few). In addition to the configuration capabilities, the entire Console may be shown or hidden from view in the program window. To show or hide, select View | Console from the main menu. If the Console is being displayed on your screen, quickly remove it by right-clicking on the Console and selecting or de-selecting Console from the pop-up menu. Available Console Panels Set TWA True Wind Angle Drift POLBSP Sailing: Polar BSP BSP Boat Speed POLBSP% Sailing: Polar Performance Percentage HDG Heading LLTTG Sailing: Lay Line Time to Go TWS True Wind Speed LLDIST Sailing: Lay Line Distance TWD True Wind Direction UPVMG Sailing: Best Upwind Velocity Made Good Angle AWS Apparent Wind Speed LLVMGUPS Sailing: Best Upwind Velocity Made Good Heading to Starboard Lay Line AWA Apparent Wind Angle LLVMGUPP Sailing: Best Upwind Velocity Made Good Heading to Port Lay Line DPT Depth LLVMGDNS Sailing: Downwind Velocity Made Good Heading to Starboard Lay Line WTR Water Temperature LLVMGDNP Sailing: Downwind Velocity Made Good Heading to Port Lay Line DU Depth Units Heel Sailing: Heel RBC Range from Boat to Cursor Leeway Sailing: Leeway BBC Bearing from Boat to Cursor DBT Depth Below Transducer DBK Depth Below Keel Table 11.1 - Available Console Panels 11 - Customizing Table 11.1 contains all available panels in the Console. Although you may add any panel you wish to the Console, keep in mind that many of these require the corresponding NMEA-compatible instrument to be connected to the computer before data will appear in that panel. SET DFT 88 Nobeltec® Navigation Software User’s Guide Panel Properties Each Console panel properties that can be customized to suit your personal preferences. Customization options include: font style, font size, color and weight. In addition, panels may be aligned vertically or horizontally, with or without titles. Floating and Docked Console panels, when visible, may either be docked to one of the four sides of the window or they may be left floating. The panel will always stay on top of the other windows in the Nobeltec Navigation Software display. You may move or dock a floating panel by dragging and dropping it onto the Console. A docked Console panel may be made to float by dragging away from the docking area. The Helmsman Display This display shows the boat heading and position relative to your intended course. The small red line points toward course. The blue "highway" shows you how close you are to the cross track error limits in the Boat Properties Alarms Tab. Screen Intensity Display Modes When on the water at night, any light coming from inside your pilot house or helm station can reduce visibility. In order to increase visibility in moderate to dark lighting conditions (and reduce eye fatigue), Nobeltec Navigation Software includes three dim-light on-screen views that decrease the contrast and amount of light coming from your monitor: 11 - Customizing • Day/Dark dims the screen to allow for easier viewing of supplemental data, such as chart labels. • Night Vision turns the background near-black. • Twilight Vision changes the screen to dimmed intensity. Brightness and intensity are adjustable. NOTE: The screen intensity options may have an affect on all the software programs on your PC while they are activated. To activate the screen intensity modes: 1. Select View | Screen Intensity from the Main Menu, and then select Day/Dark, Twilight Colors or Night Colors. 2. When you are finished operating in one of the alternative screen intensity modes, select View | Screen Intensity | Normal to return the screen to the Normal intensity mode. NOTE: You can toggle through the different modes using the <Ctrl+I> hot key or you can add the Normal, Day/Dark, Twilight and Night display mode ToolBar buttons to the program ToolBar. To return to normal mode from Day/Dark, Twilight or Night display mode, click <I>. Help Tips Another feature that can be of tremendous value is called Tips. The Tips dialog box will appear each time you open Nobeltec Navigation Software. You can disable this feature by selecting Help | Tips from the Main Menu and clicking the check box in the lower left corner of the Tips dialog. Managing Windows Because you can open as many chart windows as you like, Nobeltec Navigation Software includes tools to help you manage how they are arranged on the screen. To close all open window panes, click <Ctrl+Shift+F4>. Window List Each time you open a new chart window, that chart is added to a list that appears on the bottom of the Window option on the Main Menu. To view a particular chart that is obscured by another chart, click on Window on the Main Menu and then on the name of the chart. Copy Window This command opens an additional chart window identical in scale and position to the active chart window. Tile Vertically/Horizontally These commands evenly divide the workspace and arrange the chart windows into vertically or horizontally oriented rectangles. Cascade Cascade resizes and positions the chart windows so that all title bars are visible. Chapter 11 - Customizing PlanView 89 Figure 11.4 - Tile Vertically, Tile Horizontally and Cascade Save and Load User Interface Commands You can create and save a number of different types of User Interfaces (UI) for different tasks. For example, you may want to create one UI that you use when fishing and another for a long voyage. Whenever you save a User Interface that you have created, all of the buttons and console panels will be saved. If anything changes on the UI, you can revert to the saved User Interface by using the Load UI command. To Save a User Interface that you have created: 1. Add or delete any ToolBars that you want to use or remove from the program ToolBar and Console. 2. When the ToolBar and Console are set up to your preference select File | User Interface | Save User Interface from the Main Menu. 3. A Save As browser window will open. Browse to the location you wish to store your UI. (Files are saved with extension .vui.) 4. Name your UI and click OK. 5. Repeat Steps 1-5 for any UI layouts you want to save. 11 - Customizing To Load a User Interface that you have previously saved: 1. Select File | User Interface | Load User Interface from the Main Menu. 2. An Open browser window will open. Browse to the location you stored the saved UI file (.vui), select the correct file, and click Open. 3. Nobeltec Navigation Software will change in appearance to conform to the saved UI layout. Any changes you make to that layout will not save unless you again Save the UI. 11 - Customizing 90 Nobeltec® Navigation Software User’s Guide Chapter 12 - NavView 12 - NavView (Admiral MAX Pro Only) • NavView is an alternative user interface offering nearly all of the same features found in PlanView. In addition to providing a maximum viewable area on the screen, NavView can operate in a multiple monitor environment and is ideal for touchscreens and rough water. To enter NavView, press <F9>, click Window | Enter NavView or the Enter NavView button on the ToolBar. To return to PlanView, press <F9> or Exit. • • • • • 91 View. Provides you with options for zooming in, zooming out, moving to the Next View and opening the View Manager. Vessel. Provides a menu for turning on one of the autoscroll modes, turning the chart to course up or leg up, activating tracking, adding range circle or accessing Boat Properties. Charts. Provides a set of menus for working with the Charts. Other. Access other, miscellaneous actions such as GPS transfer. Exit. Provides you with an option to exit Admiral MAX Pro (close the program entirely) or exit NavView and return to PlanView. MOB. Sets a Man Overboard mark directly beneath the vessel's current Lat/Lon. NavView is easy to navigate once you understand how the Menu Buttons function. 1. The blue buttons on the right side of the screen activate available menu options. 2. If there is a small arrow on a Menu Button, that button links to additional sub-menus. 3. Click Back to return to the main menu. You may need to click Back more than once if you are in a secondary sub-menu. Menu Button Auto Hide Figure 12.1 - NavView User Interface Mode Menu Buttons The list below describes the Menu Buttons that appear on the right hand side of the NavView window. Some buttons also have sub-menus. Click Back at any time to exit a sub-menu The NavView Menu Buttons are: • Center on Boat. Centers active chart window on the vessel icon. • Instant Waypoint. Creates a route with two waypoints; one at the vessel and the other where you click on the chart. • Objects. Lets you place an object, such as a mark, onscreen. Menu Buttons can be hidden to maximize screen space. To enable, choose a specified period of time from Tools | Options | Misc | NavView Menu Auto Hide (5 seconds, 30 seconds, 1 minute, or 5 minutes), or select No to disable. You can also display or hide the Menu Buttons at any time by clicking the Menu Tool Button. Tool Buttons The Tool Buttons are a group of six buttons in the lower right corner of NavView. Use these buttons to manipulate what is displayed in NavView and control the ToolBar and InfoBar. • Info. Click to display or hide the InfoBar. • Tool. Click to display or hide the available ToolBars: Chart Layers, Radar Controls, and Radar Tools. These ToolBars function precisely as they do in PlanView. • Menu. Click to display or hide the Menu Buttons. 12 - NavView Quick Tips 92 • • • Nobeltec® Navigation Software User’s Guide Back. Scrolls through available ToolBars or InfoBars. Next. Reverse scrolls through available ToolBars or InfoBars. Right Click. Once you click this button, your next mouse-click within the program will open the applicable right-click pop-up menu for the type of information displayed onscreen (Vector chart, Radar, and so on). 12 - NavView Figure 12.2 - Tool Buttons NavView InfoBar The InfoBar is located at the bottom of the NavView screen and is designed to display navigation information. Use the Back and Next buttons to toggle through the different information displays. Figure 12.3 - NavView InfoBar The following list describes information available on the InfoBar. • Vessel Position, Speed and Heading. Provides Vessel Lat/Lon, Speed Over Ground (SOG), Course Over Ground (COG) and Heading (HDG), Course to Steer (CTS), Heading (HDG), Water Temperature (WTR) and Depth (DPT). • Screen Cursor. Displays Lat/Lon of cursor and Range and Bearing from vessel to cursor. • Active Mark 1. Displays Range (RNG), Bearing (BRG), Estimated Time of Arrival (ETA) and Time to Go (TTG) for the active mark. By right-clicking on a waypoint and selecting Use for ETA/TTG Calculations you can display TTG/ETA for a waypoint other than the active. • Active Mark 2. Same as above but shows the Helmsman Display rather than TTG and ETA. • XTE/Helmsman Display. Range, Bearing and ETA to active waypoint along with the Helmsman Display and Cross Track Error (XTE). • Time and Status. Displays Date & Time along with the status of GPS signal, Tracking and Autopilot. • Tides & Currents. Shows tide and currents information for closest stations. • Weather. Shows weather conditions for your location, based on your selection of weather provider (see Chapter 16 - Wind and Weather). • GPS/Trip Tab. This tab displays information about current trip, including time trip commenced, duration, speed, distance and odometer distance. • Targets. Displays target information if available. • Status Messages. These are warning messages and information about various issues concerning your charts, GPS and networking. It is important to note that target threats such as ARPA/MARPA and AIS targets, when detected, are sent to the Targets panel and not the Status Messages panel. GPS/Trip Tab of the InfoBar The GPS/Trip tab of the NavView InfoBar is used to view information about the strength of satellite signals used by your GPS. You can also check odometer readings from this tab. Display the GPS/Trip tab using the Back and Next buttons to toggle through InfoBar options. Fields and buttons in this dialog include: • GPS Strength. Opens the GPS Strength window, which contains a diagram of a relative sky with the location of available satellites. • Trip Information. Data related to this Trip displays in the subsequent dynamic fields of this tab. Fields and buttons include: • Trip #. Displays your trip number (Trip #1 or Trip #2). • Distance. Total distance in units travelled during this Trip. • Time Set: The date and time that the selected Trip started. • Duration. Hours, minutes and seconds the selected Trip has lasted. • Avg Speed. Average speed of your boat during the selected Trip. • Min. Speed. If the vessel is moving slower than 0.2 Kts, distance travelled is not calculated. • Odometer. This is the total distance travelled while the Nobeltec Navigation Software has been running. • Reset. Click this button to reset all of the selected Trip's fields to zero. Chapter 12 - NavView 93 View Manager Figure 12.4 - GPS/Trip Info Bar GPS Strength Window This window (see Figure 12.5) contains the diagram of the available satellites positioned in the relative sky. The GPS Strength diagram is of a relative sky with the location of available satellites. Next to the diagram up to 16 GPS satellites can be displayed as white bars with the height of the bar representing the strength of signal. If the bar is labelled W, it is a WAAS (Wide Area Augmentation System) satellite. The View Manager controls the content of the NavView display layout (also called "View"). Each View can contain a single content type or be divided into multiple window panes, each containing a different content type. Use the View Manager templates to edit up to six Views. The <F6> Hot Key toggles through each View you have created. To create your own NavView screen layouts. 1. Click on the View button located on the Menu Bar. 2. Click the View Manager button. 12 - NavView Figure 12.6 - View Manager - Multiple Monitors 3. Figure 12.5 - GPS Signal Quality window On-Chart Warning Indicators On-Chart Warning Indicators are graphics displayed in the bottom left hand corner of the view window. When these are displayed, there are warning or status messages to read in the System Messages or Target panels. Warning Indicators flash to indicate a pending message. To view messages, double click on the Warning Indicator icon. 4. If multiple monitors are connected to the PC, you will see the dialog shown in Figure 12.6. If you are using multiple monitors, select to enable/disable monitors and then click on the monitor for which you would like to create a new layout. If you have one monitor, the first screen you will see is Figure 12.7. 94 Nobeltec® Navigation Software User’s Guide 7. window panes (see Figure 12.8). Click on the graphic that contains the number of panes to use in your new layout. Select the chart type to fill each pane. To fill the active pane (highlighted with a yellow border), make a selection from Vector, Raster, Photo, 3D, Radar, Sounder, Video, NavInfo 1-4, Nobeltec Connect, or PlanBook (see Figure 12.9). Repeat until all panes have been assigned a chart type. 12 - NavView NOTE: Certain types of data are only available to display in specific configurations. For example, PlanBook can only display in half-screen horizontal or full-screen layout. Figure 12.7 - View Manager - Select and Configure Layout 5. The Select and Configure Layout screen (Figure 12.7) allows you to configure each window pane layout for content type. To select a preexisting layout, click on the large white box containing a graphic. To edit or create a new layout, click the Edit button. Figure 12.9 - View Manager - Window Pane Types 8. 9. When finished, click Done. To view the layout you just created, click the View button, then View Manager and click on the graphic that contains your new layout. The NavView screen will change to display your layout. NavIn fo Figure 12.8 - View Manager - Creating and Editing a Layout 6. To modify or create a new layout, select a layout consisting of 1-4 Figure 12.10 displays the content available for the window panes in NavView. NavInfo presents the most important system data, such as Course Over Ground (COG), Speed Over Ground (SOG), GPS Data, etc, in a distinct information panel in large-font type. This content allows you to quickly check data provided by hardware sources, system feedback, etc. Chapter 12 - NavView 95 #1, NavInfo Panel #2, NavInfo Panel #3, NavInfo Panel #4, Video Window, Polar Window. NOTE: You must have connected the appropriate hardware to display specific data types in NavInfo. For example, if you wish to display water temperature, you must have connected a temperature gauge to your computer and set up Nobeltec Navigation Software to receive data from that device. To display NavInfo in NavView, you must set up a NavInfo layout using the View Manager or right-click on the current window and select Show in this pane a NavInfo Panel (1-4). 12 - NavView The NavInfo window is sub-divided into content-specific sub panels. Each sub panel contains one type of information, such as Course Over Ground, Rate of Turn, and so forth, and can be customized as to data content, data layout, such as displaying numeric values or histograms, colors, and update frequency. NavInfo Right-Click Options When you are using NavView with a NavInfo window open, you can rightclick on that window to open a context menu that contains the following options: • Customize Layout. Opens the Navinfo Wizard where you can configure your NavInfo panels for vertical or horizontal displays and numbers of sub panels for each display. • Customize Sub panel. Opens the NavInfo Customize Sub panel window where you can adjust the Display Settings, determine the Update Frequency and select the Data Types for the sub panel. • Zoom In. This option is active only in the strip chart of a nav panel and zooms in on the time line. • Zoom Out. This option is active only in the strip chart of a nav panel and zooms out on the time line. • View History. This option is active only in the strip chart of a nav panel and opens a display of the older data. • View Newer Data. This option is active only in the strip chart of a nav panel and opens a display of the older data. • Show in this pane a. This option changes the current NavView display to the selected option from the below list. • Chart Window. Chart window contains the following sub-menu items: MAX Pro Chart Window, Raster Chart Window, or Photo Chart Window; or • 3D Window, Radar Window, Sounder Window, NavInfo Panel Figure 12.10 - NavInfo Window Pane with Polar Display To Customize the NavInfo Window 1. 2. 3. 4. Create a View configuration using View Manager that displays a NavInfo window. NavView can display up to four NavInfo windows. Right-click on one of the NavInfo windows and select Customize Layout from the pop-up menu. Choose a vertical or horizontal orientation. Select the layout configuration to assign to the window pane. When you select the layout, the NavInfo Wizard closes and the panel automatically updates. See Figure 12.11. 12 - NavView 96 Nobeltec® Navigation Software User’s Guide Figure 12.11 - NavInfo Wizard - Select a Layout To Customize a NavInfo Sub panel 1. 2. 3. 4. Right-click on a NavInfo window pane sub panel and select Customize sub panel from the pop-up menu. The Customize Sub panel window opens and you can update the contents of the selected sub panel from this window. There are two main components to a sub panel that you can customize: Display Settings and Data Types: • Display Settings include Background Start Color, Background End Color, Font Color, Histogram Line Color, and Update Frequency (in seconds). • Data Types include all possible NavInfo data such as COG, SOG, wind angles, depth, etc. • You can also choose to apply the new settings to all sub panels by checking the Apply to all sub panels check box. If a data type has not been assigned to a NavInfo sub panel, the panel appears with the selected background colors only. Click OK when you have finished customizing the sub panel. Figure 12.12 - NavInfo Customize Sub Panel Strip Charts Some NavInfo sub panels are available to be viewed as a strip chart. These panels are marked with a small diamond in the lower left-hand corner. To toggle the current NavInfo sub panel between a data view and a strip chart view, double-click anywhere on the sub panel. To return to the regular Nav sub panel view, double-click on the strip chart. Tracking Data For Strip Charts You can store the data points you have selected for your NavInfo Panels for up to 48 hours in Admiral MAX Pro and 24 hours in VNS MAX Pro. This allows you to toggle to a strip chart at any point to see the most recent values. Saving Strip Chart Data Strip Chart data is retained upon shutdown. You can also save your Strip Chart data at any time by selecting File | Save All | Nav Objects. PlanBook PlanBook is available in NavView as one of your configurable windows. See Chapter 13 - PlanBook for details on how to use the PlanBook. Chapter 12 - NavView Switching Configurations To toggle between multiple NavView layouts, click on View. To proceed through each layout, click the Next View button or <F6> to toggle forward through all configured views. <Shift+F6> toggles in the reverse direction. Making Changes in NavView Admiral MAX Pro supports nearly all of the settings that are found in the PlanView display version of the software. You do not have to switch to PlanView mode in order to make detailed changes. The program options are accessible from NavView. Most program options are configured using the following methods. The Tools | Options dialog is covered in detail in Chapter 10 - Properties & Options. To access this menu: 1. Click the Other button on the main NavView menu. 2. Click the Options button and the Tools | Options dialog will appear. 3. When finished using the Tools | Options dialog, click OK. Menus You can change the look of NavView by turning items such as the Menu Buttons and the InfoBar on and off. When these items are hidden, the entire screen is dedicated to just the chart, providing you with a full screen view of your surroundings. To hide and display these items, use the following steps. 1. Click the Menu button in the lower right corner to hide and redisplay the Menu buttons. 2. Click the Info button and the InfoBar will be shown or hidden. 3. Click the Tool button to hide or show the Tool Bar. Right Mouse Menus The Right Mouse Menus still appear in NavView just as they would if you were operating in PlanView. If you are using a touchscreen monitor, you can use the Right-click Menu Button to perform right-clicks without a mouse. Multiple Monitor Support Many Windows® operating systems support more than one monitor. Nobeltec has optimized Admiral MAX Pro to take full advantage of multiple monitor configurations. However, in order to use the Multi Monitor function in Admiral MAX Pro, you must have an additional video card and monitor. If you are using Windows XP, some single video cards can even be treated as two. Check the documentation that came with your computer. Video Cards To set up your multi-monitor installation and configure your video cards: 1. Install additional video cards into your computer. 2. Open the windows control panel and select Display. 3. Click Settings and select Multiple Monitors. 4. Choose the resolution of the displays. Click OK when finished. Using Multiple Monitors When you are using multiple monitors, only one pane (or monitor) will have the focus. When a pane has focus, it is drawn with a yellow outline. All keyboard commands are sent to that pane. To move focus to another pane click on the pane you want to use. Screen Intensity Modes When on the water at night, any light coming from inside your pilot house or helm station can reduce visibility. In order to increase visibility in moderate to dark lighting conditions (and reduce eye fatigue), Nobeltec Navigation Software includes three dim-light on-screen views that decrease the contrast and amount of light coming from your monitor: • Day/Dark dims the screen to allow for easier viewing of supplemental data, such as chart labels. • Night Vision turns the background near-black. • Twilight Vision changes the screen to dimmed intensity. Brightness and intensity are adjustable. NOTE: Screen intensity options may have an affect on all the software programs on your PC while they are activated. To activate the screen intensity modes: 1. Select Other | Colors from the NavView main window, and then select Day, Day/Dark, Twilight Colors or Night Colors. 2. After the screen switches from Normal intensity to Day/Dark, Twilight or Night display mode, an Adjust Intensity window will open. Use the slider bar to adjust contrast. 3. To return to the default setting, select Other | Colors | Day to return the 12 - NavView The Tools | Options Dialog 97 98 Nobeltec® Navigation Software User’s Guide screen to the Normal intensity mode. 12 - NavView NOTE: You can toggle through the different modes using the <Ctrl+I> hot key. To return to normal mode from Day/Dark, Twilight or Night display mode, click <I>. Figure 12.13 - Adjust Intensity Slider Window Chapter 13 - PlanBook 13 - PlanBook The Routes Tab NOTE: Information in the PlanBook is based on the current date/time settings of your system clock. Predictions for a specific date must be manually input. Opening the PlanBook In PlanView, open the PlanBook by either clicking on the PlanBook tool on the ToolBar or by selecting Tools | PlanBook. In NavView, you must set up a PlanBook view using the View Manager (see Chapter 12 - NavView). Route Summary Route Details Tab. Click on this Tab to view waypoint information Figure 13.1 - PlanBook - Route Tab The Routes Tab of the PlanBook (see Figure 13.1) is a tool that can be used to create, edit and manipulate routes. In addition, it also allows you to obtain ETA's and print out reports. As shown in the image below, there are also two sub-Tabs: one that lists all of your routes, and another that provides details (or a list of the individual waypoints) for the selected route. Selecting a Route to Edit If you have an active route and enter the PlanBook, the active route's information will be shown on this Tab in the Route Summary pane. If a route is not active, then the route list will be sorted alphabetically and the information from the first route in the list will be displayed. To select a route: 1. Click on the PlanBook button on the ToolBar or Tools | PlanBook from the Main Menu to view the Routes Tab. 2. Click on the name of the route that you want to work with. 3. The information for this route should now be displayed in the Route Summary window above. 4. To edit individual waypoints, click on the Route Detail Tab. Setting the Boat Speed for the Entire Route Setting the boat speed is important when calculating an ETA for a route. To set the estimated speed for the entire route: 1. Click on the PlanBook button on the ToolBar or Tools | PlanBook from the Main Menu to view the Routes Tab. 2. Click on the name of the route that you want to work with. 3. Enter a boat speed in the Speed Over Ground (SOG) text box. 4. Click Apply to All Legs. Setting the Boat Speed for an Individual Leg There may be areas during your voyage where you will be travelling faster or slower than your average speed. To figure those instances into your ETA calculations, you will need to set the speed for an individual leg (the distance between two waypoints). To set the boat speed for an individual leg: 1. Click on the PlanBook button on the ToolBar or Tools | PlanBook from the Main Menu to view the Routes Tab. 2. Click on the name of the route that you want to work with. 3. Click on the Route Detail Tab. 13 - PlanBook The PlanBook is a tool used to help you manage Routes, Marks, Tracks and Boundaries, plan trips and estimate arrival times. See Figure 6.7 for a detailed overview of all PlanBook Tabs. Route List Tab. This shows all routes saved in your program 99 Nobeltec® Navigation Software User’s Guide 100 13 - PlanBook 4. 5. From the Route Detail Tab, in the column labeled Leg SOG, identify the first leg that you want to change, then click on the leg speed. A gray outline will surround the value. Press <Enter> and then change the value. You do not need to input units. Repeat for each leg speed you wish to change. Estimating Arrival Time Estimated Time of Arrival (ETA) is calculated based on the route segment lengths (legs) and the Speed Over Ground entered for each leg. Arrival time can start from the present time or from a user-specified time and date. To determine ETA based on a user specified time: 1. Click on the PlanBook button on the ToolBar or Tools | PlanBook from the Main Menu to view the Routes Tab. 2. Click on the name of the route that you want to work with. 3. In the Route Options field, input a departure date and time. 4. Click the Origin drop-down list and select the vessel or any of the previous 10 locations you have used as an origin. Or, click the "Select New Origin..." button to the right of the list. 5. Modify the Vessel SOG (Speed Over Ground) to reflect the speed of the vessel. Arrival date and time will be displayed in the Route Summary text field. New Route Along the bottom of the PlanBook is a row of buttons that allow you to perform various functions. The first button is labeled New Route, which allows you to manually input Lat/Lon coordinates to create a route. NOTE: It is easiest to use the Route tool. Use the New Route button only when you have a list of precise Lat/Lon coordinates to input. To create a new route using the PlanBook: 1. Click on PlanBook or select Tools | PlanBook from the Main Menu to view the Routes Tab. 2. With the Routes Tab open, click New.... 3. Input a name for the new route in the dialog box and click OK to open the Insert Waypoint window. Layovers During a long trip, you can establish a Layover for time spent anchored. Layovers are then calculated into your ETA's. To set a Layover: 1. Click on the PlanBook button or Tools | PlanBook from the Main Menu. From the Routes Tab, select the Route Detail Tab for a selected Route. 2. Select the leg of the route that will contain the layover. 3. In the Type column, click the down arrow and select Layover. To change a waypoint back to normal, click the down arrow and select Normal. 4. The Layover Time field for that leg will change from N/A to 0:00:00. Change the layover time by right-clicking on that field and selecting Edit Layover Time... Type in the length of your layover time based on total hours (36:45:00, for example, would be a 36 hour, 45 minute layover) and click Enter. Figure 13.2 - PlanBook - Insert Waypoint Window 4. 5. 6. Input your Lat/Lon coordinates, or, to use an existing waypoint, click the radio button labeled Select an Existing Waypoint and select from the list of available waypoints. Once information for the new waypoint has been input, click Insert Waypoint. Repeat for each waypoint in your new route. When finished entering all waypoints, click OK. Chapter 13 - PlanBook Adding a Waypoint to an Existing Route Editing Waypoints Most of the time, to edit a waypoint, you can find it on a chart, right-click and edit in the Properties menu. You can also use the PlanBook to edit routes manually. To edit a waypoint: 1. Click on PlanBook or select Tools | PlanBook from the Main Menu to view the Routes Tab. 2. Select the name of the route to edit. 3. From the Route Detail for... Tab, highlight the waypoint to edit. 4. Double-click the waypoint that you wish to change. The Properties window for that Mark will open. For cells that contain data such as Lat/Lon or speed, you may also click on the cell and press <Enter> to manually input a new value. 5. When finished, close the Properties dialog box. Deleting Routes and Waypoints The easiest way to delete an object is to right-click on the object and select Delete from the pop-up menu. You can also delete waypoints or an entire route from the Route Tab of the PlanBook. To delete a route: 2. 3. Click on PlanBook or select Tools | PlanBook from the Main Menu to view the Routes Tab. Select the name of the route to delete. With the route highlighted, click on the Delete button. To delete an individual waypoint: 1. Click on PlanBook or select Tools | PlanBook from the Main Menu to view the Routes Tab. 2. Select the name of the route to edit. 3. Click on the Route Detail for... Tab and highlight the waypoint that you want to delete. 4. At the bottom of the screen, click on the Delete button. Changing the Waypoint Order This is used to change the relative position of a waypoint in a route. Moving a waypoint in a route can be accomplished in the PlanBook by using the Move Up or Move Down buttons which are located along the bottom edge of the PlanBook under the Route Details Tab. 1. Click on PlanBook or select Tools | PlanBook from the Main Menu to view the Routes Tab. 2. Select the name of the route to edit. 3. Click on the Route Detail for... Tab and highlight the waypoint that you want to move. 4. Click the Move Up or Move Down button. 5. Repeat as needed for any waypoint that you want to move. Fuel Consumption The PlanBook can be used to calculate your projected fuel consumption for any route that you have created in your program. Just enter values for the rate of fuel consumption for your vessel at different speeds and the program will calculate the rest. Information regarding your vessel's fuel consumption rates are available from your boat manufacturer. To set fuel rates for a route: 1. Click on PlanBook or Tools | PlanBook from the Main Menu. 2. Click the Set Fuel Rates button. 3. The ETA Calculator - Set Fuel Use dialog box (see Figure 13.3) will appear. Click on the New button. 4. Another dialog box will appear. Enter as many estimated SOGs and their relative fuel rates for your vessel as you have available and click Add 13 - PlanBook To add a new waypoint to an existing route: 1. Click on PlanBook or select Tools | PlanBook from the Main Menu to view the Routes Tab. 2. Select the name of the route to edit. 3. From the Route Detail Tab, click the waypoint prior to or after the location of the new waypoint. 4. Click Insert After or Insert Before. The Insert Waypoint dialog will be displayed (see Figure 13.2). 5. Input the waypoint's Lat/Lon coordinates, or, to use an existing waypoint, click the radio button labeled Select an Existing Waypoint and select from the list of available waypoints. 6. Click Insert Waypoint. The waypoint will immediately be added to the route. All numbered waypoints listed after the new one will be renumbered according to their new place in the Route List. 7. Click OK to close the Insert Waypoint Window. 1. 101 13 - PlanBook 102 5. Nobeltec® Navigation Software User’s Guide Entry after entering each set of values. When finished, click OK which will return you to the ETA Calculator - Set Fuel Use dialog box. Click OK to return to the PlanBook. From the Route Tab in the PlanBook, select a route that you would like to view the Fuel Usage Rate for and click on the Update button next to the Route Summary pane. The Route Summary should appear and give you your Estimate Fuel Usage for the route you selected. 1. 2. 3. Click on the PlanBook button on the ToolBar or Tools | PlanBook from the Main Menu. Click on the Marks Tab. From the list of marks, double-click on the mark to be edited. The Mark properties dialog will appear. Edit the properties and then close the properties dialog box. To Delete a Mark 1. Click on the PlanBook button on the ToolBar or Tools | PlanBook from the Main Menu. Click on the Marks Tab. 2. Click on the mark to be deleted. 3. Click the Delete button which is located along the bottom edge of the PlanBook window. The mark is immediately removed from the program. Column Setup Button Figure 13.3 - ETA Calculator - Set Fuel Use Dialog Box The Marks Tab Using the Marks Tab of the PlanBook (see Figure 13.4), you can manage all the marks you have created. The Marks Tab allows you to edit or delete a mark and also calculate its range, bearing and ETA. Marks are listed alphabetically, so it is helpful to use similar names for marks you wish to group (Fishing Spot 1, Fishing Spot 2, etc).. Editing and Deleting Marks The easiest way to edit or delete objects is to find them on a chart, right-click and select Properties or Delete from the pop-up menu. However, you can edit and delete marks from within the PlanBook as well. To Edit the Properties of a Mark Figure 13.4 - PlanBook - Marks Tab Calculating Range and Bearing to Marks You can calculate the range and bearing to any position from the vessel or from a user-specified point using the PlanBook. To calculate range and bearing from a mark to your vessel: 1. Click on the PlanBook button on the ToolBar or Tools | PlanBook from the Main Menu. Click on the Marks Tab. 2. In the drop-down box next to Origin, select your vessel. If you have Chapter 13 - PlanBook To calculate range and bearing from a user-specified point to a mark: 1. Click on the PlanBook button on the ToolBar or Tools | PlanBook from the Main Menu. 2. Click on the Marks Tab. 3. Click on the Select New Origin button next to the Origin drop-down box. The Insert Waypoint window appears. 4. Input your Lat/Lon coordinates, or, to use an existing waypoint, click the radio button labeled Select an Existing Waypoint and select from the list of available waypoints. 4. Once information for the new origin has been input, click OK, which will return you to the Marks Tab of the PlanBook. The updated range and bearing information will be displayed in the Rng/Brg To column. The Tracks Tab The Tracks Tab of the PlanBook (see Figure 13.5) lists all the tracks you have created and allows you to edit each track by name and visibility settings. To edit track properties: 1. Click on the PlanBook button on the ToolBar or Tools | PlanBook from the Main Menu. 2. Click on the Tracks Tab. 3. Double-click on the track you wish to edit to open the Track properties dialog box. 4. You can edit the name of the track or add a description. 5. Click the small "X" in the upper right corner of the Properties dialog box to close it. Deleting Tracks When there are large volumes of tracks and individual track points within each track, your PC may begin to perform noticeably slower than normal. To avoid this, delete or export your tracks on a regular basis. You may want to backup your tracks prior to deleting them with the Import/Export function. Display Route Marks (Waypoints) The marks that make up a route (waypoints) can be displayed on the Marks Tab of the PlanBook. To have your waypoints listed along with your other marks, place a check-mark in the box next to the option labeled Display Route Marks. Once the waypoints are listed with your other marks, they can be edited or deleted just like any mark in the list. Figure 13.5 - PlanBook - Tracks Tab 13 - PlanBook 3. named your vessel in the Boat Properties menu, your vessel's name will appear in the drop-down box. If you have not, the default name of SS Nobeltec will appear. In the column labeled Rng/Brg To, you should now see the updated range and bearing for each mark in the program from the vessel's current position. 103 104 13 - PlanBook 1. 2. Nobeltec® Navigation Software User’s Guide Click on the PlanBook button on the ToolBar or Tools | PlanBook from the Main Menu. Click on the Tracks Tab. Click on the track that you would like to delete and then click the Delete Track button. Creating a Route from a Track Nobeltec Navigation Software has the ability to create a route from any track. This is done with the Create Route from Track button on the Tracks Tab of the PlanBook. This feature allows you to re-navigate a path you have followed before. To create a route from an existing track: 1. Click on the PlanBook button on the ToolBar or Tools | PlanBook from the Main Menu. Click on the Tracks Tab. 2. Select the track that you would like to convert into a route. 3. Click the Create Route from a Track button. 4. You will now need to enter a value into the Ignore Track Marks Closer Together Than XX Nautical Miles box. When you convert a track into a route, each track point could potentially be a waypoint. This setting will help eliminate an excessive number of waypoints. 5. Click OK. The Boundaries Tab The Boundaries Tab of the PlanBook (Figure 13.6) lists all boundaries you have drawn in your program. Boundaries are listed alphabetically. Using descriptive file names and giving alphabetically similar names to boundaries you wish to group together helps you locate them more easily in the PlanBook. The PlanBook also allows you to edit and delete boundaries. To edit Boundary properties: 1. Click on the PlanBook button on the ToolBar or Tools | PlanBook from the Main Menu. Click on the Boundaries Tab. 2. From the list, double-click on the boundary that you would like to edit. 3. The Boundary properties dialog box will appear. Edit the properties using the available Tabs from within the properties dialog box. 4. When finished, click the small "X" in the upper right corner of the properties dialog box to close it. To delete a boundary: 1. Click on the PlanBook button on the ToolBar or Tools | PlanBook from the Main Menu. Click on the Boundaries Tab. 2. Click on the boundary to delete from the list in the PlanBook. 3. Click on the Delete button. The boundary will immediately be deleted. 4. Repeat as necessary for each boundary that you wish to delete. NOTE: Only the boundary name, summary and visibility can be edited in the PlanBook. Changing Route Detail and Marks Tab Column Appearance Each of the Tabs in the PlanBook can be customized to your specifications. Each column under a given Tab contains a column header which lists the columns name. Between each of the column headers is a small vertical line which divides the columns. Place the mouse pointer over any of these lines and watch the pointer change into a vertical line bracketed by two small , you can drag arrows (see Figure 13.7). When the cursor looks like this the column divider to a new position, widening or narrowing the column. Figure 13.6 - PlanBook - Boundaries Tab Chapter 13 - PlanBook 1. 3. To adjust the column width, your cursor should appear like this 4. Figure 13.7 - Adjusting the Width of Column Headers Changing Visible Columns Use this feature to change which columns are displayed onscreen in the Route Detail and Marks tabs, and in what order they appear. 1. Open the PlanBook. 2. Click the Column Setup button in the lower right corner of the Routes | Route Detail or Marks tabs. The Column Setup window appears. The list on the left, "Shown", contains columns currently being displayed. The list on the right, "Not Shown", are columns not being displayed. 3. Select columns to add or remove. Click >> to remove a column or << to add a column. 4. Select a column in the Shown list and click Up or Down to change column order. 5. When finished, click OK. Importing and Exporting Data You can import and export data from the PlanBook or from the Nobeltec Navigation Software main menu. Both have the same effect and launch the same Import and Export dialog box. You can export data in two formats: Open Navigation Format (ONF) or Comma Separated Values (CSV). CSV is the best format to use when viewing data in a spreadsheet, ONF is a format that can be easily re-imported into Nobeltec Navigation Software. ONF can be used when saving route history that you intend to use at a later date and stores with a .txt extension. Importing and Exporting Data Using the PlanBook To import navigation object data: 5. 6. Click the PlanBook button on the ToolBar or Tools | PlanBook from the Main Menu. From the Routes or Marks Tab click the Import button to open the Import dialog box. Choose a data type (Routes, Marks, Tracks or Boundaries) to import. Browse... to the location of the stored navigation object data file and select the file you wish to import. Data from that file will appear in the navigation window. To import all navigation object data from the selected .txt file, click Import All. a. To import specific navigation objects, click the "+" sign to the left of the folder that contains the data you wish to import. b. Click on the individual item to import and then click the Import button. This must be repeated for each item. Click OK to close this window. Data you imported should be immediately available to view in the corresponding PlanBook tabs. To export navigation object data: 1. Click on the PlanBook button on the ToolBar or Tools | PlanBook from the Main Menu. 2. From any of the four Tabs in the PlanBook, click Export to open the Export dialog box. 3. In the right-hand Export File As: drop-down list, choose to export your file as a CSV or ONF file. 4. Browse... to the location where you wish to export your data and name the data file. ONF files will be saved with a .txt extension. 5. To export all of your data, click on Add All to Export List. a. To export a specific data type, first highlight the respective folder (Marks, Routes, Tracks, Boundaries or Range/Bearing Lines) for that type. Then click the "+" sign to the left of the folder you highlighted. b. Click on each object you wish to export and click Add to Export List. Files are added to the export file once you click OK. 6. To export all objects within a folder, click on each object type and then click Add to Export List. NOTE: If you click on Add All to Export List, all objects in every folder will be exported. 7. Click OK when finished. Data you exported is then saved to the .csv or .txt file you specified in Step 4. 13 - PlanBook 2. 105 13 - PlanBook 106 Nobeltec® Navigation Software User’s Guide Chapter 14 - Tides & Currents 14 - Tides & Currents Tides & Currents is a stand-alone application that provides tide and current prediction data to Nobeltec Navigation Software using ToolBar buttons or a pop-up menu. Tide and current predictions can be overlaid on top of your navigation system or used independently of VNS MAX Pro and Admiral MAX Pro to create detailed reports and research tide and current information for all the NOAA and CHS primary and secondary stations in the US and Canada. Displaying Tide Bars To display tide bars on top of your electronic chart, click Tide Bars on your program ToolBar, the <Shift+T> Hot Key or right-click on any chart and select Tides and Currents | Tides Bars from the pop-up menu. If you do not see any tide bar icons, there may not be any tidal stations in the area covered inside your chart window. If this is the case, zoom out until you are able to see the stations displayed in the chart window. Interpreting Tide Bars The tide bar icons on the chart display a quick indication of tide height based on the present system time on your PC. The blue section of the bar indicates tide height. The more blue that is visible, the higher the tide height will be. If you have the Display Screen Tips on Charts option turned on, you can place the cursor on any station to see the name of the station and its associated value (height). The Display Screen Tips on Charts option is on by default when the program is installed, but if you have turned it off, it can be turned on through the Options menu under the Misc. Tab. WARNING: Tide & Current stations are shown in the exact location NOAA’s data specifies, Lat/Lon coordinates of the stations rounded to the nearest minute. As a result some stations may appear on land. Displaying Current Arrows Displaying current arrows functions in the same manner as displaying tide bars. To display current arrows on top of your electronic chart, click on the Current Arrows tool on your program ToolBar, the <Shift+C> Hot Key or right-click on any chart and select Tides and Currents | Current Arrows from the pop-up menu. After activating the current arrows, you should see current arrow icons (as shown in Figure 14.1) on the chart. If you do not, there may be no current stations in the area currently displayed within the chart window. In this instance, zoom out until you are able to see the closest tide and current station(s). Interpreting Current Arrows Current Arrow Icons As shown in Figure 14.1, current icons appear as a transparent red arrow. The arrow points in the direction the current is moving based on the present system time on your PC. In addition, the size of the arrow serves as a visual indication of how strong or weak the current is. A large arrow indicates strong currents, whereas a small arrow indicates a weak or slow current. The numbers displayed with the current arrow is a current speed. Speed values are displayed as determined by your Tools | Options | Units settings. Figure 14.1 - Tide & Current Icons If you have the Display Screen Tips on Charts option turned on, place the cursor on any station to see the name of the station and its associated value (speed and direction). The Display Screen Tips on Charts option is on by default when the program is installed. 14 - Tides & Currents Tide Bar Icons 107 108 Nobeltec® Navigation Software User’s Guide Adjusting Arrow Size Change the Date Animate Stations If you boat in an area where there are a large number of current stations, the current arrows can at times overwhelm other information on the chart. In this instance, you may want to reduce the overall size of the current arrows. To reduce (or enlarge) the size of the current arrow icons: 1. Click on the Current Arrow tool on your ToolBar or right-click on the chart and select Tides and Currents | Current Arrows from the pop-up menu. 2. Right-click on any current arrow and select Adjust Arrow Scale from the pop-up menu. 3. Use the slider bar to either make the arrows larger or smaller. 4. When finished, click OK. Change the Time Figure 14.2 - Tide and Current Time ToolBar • NOTE: This option is only available for current arrows, not tide bars. 14 - Tides & Currents Tide and Current Time ToolBar When you turn on the tide and current overlay function in your software, the icons are displayed based on the system time of your PC. However, if you are planning a trip you might want to know what the tides and currents will be doing in the future. To perform this task, use the Tide and Current Time ToolBar. This ToolBar is not on the program ToolBar by default. To add it: 1. From the Main Menu, click on Tools | ToolBars. 2. Place a check-mark next to Tide and Current Time ToolBar. 3. Click OK. 4. The Tide and Current Time ToolBar will be "floating" on top of your Nobeltec program. You can then drag and drop the Tide and Current Time ToolBar anywhere on your ToolBar to dock it. Using the Tide and Current Time ToolBar Now that you have added the Tide and Current Time ToolBar to your program, you can adjust the prediction time to any point up to the year 2037. Figure 14.2 shows the various functions of the Tide and Current Time ToolBar. • Date. You can change the prediction date by clicking on the small arrow next to the date window. • Time. Use the up or down arrows to change the prediction time. Use PC's System Time • Animate. This button animates the tide bars and current arrows over a 24-hour period. Current arrows will get bigger and smaller and change directions as the current moves in and out. In addition, the blue section of the tide bars will also move up and down showing the high and low tides. Use PC's System Time. Placing a check-mark in the box next to this option sets the tide and current predictions to the time and date that is set on your PC, updating every fifteen (15) minutes. Displaying Tides and Currents Details Tides & Currents is a separate program that works in conjunction with Nobeltec Navigation Software. When you activate the tide and current icons, the tide bars and current arrows provide you with a visible representation of what the tides and currents are doing. You can also open up a detailed graph that shows statistical information over a 24-hour period. To open a graph for any tide or current station: 1. Turn on the current arrows by clicking on the Current Arrow tool on your ToolBar or right-clicking on the chart and selecting Tides and Currents | Current Arrows from the pop-up menu. 2. Right-click on the tide or current station for which you would like to view a graph. 3. From the pop-up menu, select View In Tides & Currents. 4. The Tides & Currents program will open (see Figure 14.3) and you should see a graph that covers a 24-hour period. The graph will contain several important pieces of information. Chapter 14 - Tides & Currents • • • • 109 Real Time. Opens a customizable bar that displays real time Tide or Current values for selected stations. Change. Changes the station being displayed (changes the station displayed in the current window instead of opening a new window). TideDef. Provides the ability to build custom Tide stations. CurrDef. Provides the ability to build custom Current stations. The Tides & Currents Graph The yellow background represents daylight hours (sunrise to sunset). Mean Lower Low Water (MLLW) and Mean Higher High Water (MHHW) or the Max Flood and Ebb values are displayed on the right side of the graph. The crossing lines on the graph show the corresponding time/height for tides or speed/direction for currents combination. You can click anywhere in the graph to see a new time/height. The graph will also show the Moon Phase and Moonset and Moonrise times as well as the daily high and low values. Weekly View and Daily Table Figure 14.3 - Tides & Currents Graph The Tides & Currents ToolBar Changing the Date Once the graph is open, you can change the prediction date by clicking on the PrevMnth, PrevDay, NextDay or NextMnth buttons on the ToolBar. To set a specific date, click on the SetDate button. NOTE: To return to the current day, click SetDate and then click OK. Multiple Windows in Tides and Currents Multiple tide and current windows can be open at the same time. Stations can be opened in a new window by clicking on the Tide or Current buttons on the ToolBar and selecting a station. 14 - Tides & Currents Tides and Currents has many advanced features that can be accessed through the ToolBar. Those features are explained and briefly described below. • Tide. Allows you to search for and open tide stations in addition to any open windows. • Current. Allows you to search for and open current stations in addition to any open windows. • Groups. Provides the ability to create customized folder(s) of tide or current stations. • Print. Opens the Print Options box with all print options available. • Quick Prn. Prints the current tide or tide station information. • Config. Opens the Tides and Currents Options box, allowing you to customize the program. • Help. Opens the Nobeltec Help file to the Tides and Currents section. • Nearest. Allows you to search for the nearest tide or current stations. • Event. Provides the ability to search for a Tide or Current station based on specific events such as specific heights or speeds, time of slack or changes, amount of swings, etc. • Export. Customize an export of Tide or Current information to a file. Two useful optional features on the graph are the Weekly View and the Daily Table. The Weekly View appears on the top of the daily graph and shows an overall picture of what the station looks like for an entire week. The Daily Table appears on the right hand side of the screen and lists the time/height (for tides) and speed/direction (for currents) values in fifteen minute intervals for the station you have selected. These features are not on the graph by default but can be activated by right-clicking anywhere on the graph and selecting them from the pop-up menu. They can be permanently added by using the Tide & Currents Options menu. 110 Nobeltec® Navigation Software User’s Guide Tides and Currents on the NavBar ETA Calculator The Tides and Currents as they relate to your vessel or a particular location can be displayed on the NavBar (see Figure 14.4). The NavBar is a tool that provides easy access to information such as tide and current predictions. The ETA Calculator uses tide and current predictions to calculate best departure times, transit times, required speed and fuel consumption. In order for the ETA Calculator to work, tide and current stations must be attached to the various route legs in a created route. Tide Information High/Low Tide Information Change Tidal Station Current Information Change Current Station Ebb/Flood Information 14 - Tides & Currents Figure 14.4 - Tides & Currents on the NavBar By default, Nobeltec Navigation Software will automatically attach the nearest tide and the nearest current station to each route leg. Because this is done automatically using the nearest stations, there may be other nearby stations that will have a stronger effect on your voyage and on the calculations. In this instance, you may want to manually attach a station to a route leg. 1. Turn on the current arrows and tide bars. 2. Move the cursor over the station that you want to attach to the route leg. Drag and drop the station onto the nearest route leg. 3. A dotted line (see Figure 14.5) should appear between the tide or current station and the route leg (red dotted line for currents or blue dotted line for tides). 4. Repeat as necessary for other legs of the route. Figure 14.5 - Tide and Current Stations Once all tide and current stations have been attached, the ETA Calculator is ready for use. Chapter 14 - Tides & Currents 111 Calculating Best Departure Time Calculating Transit Time ETA Calculation uses the tide and current information connected to your route to provide you the best and worst departure times as well as estimated fuel consumption. This tool calculates EDT when your intent is to arrive at a certain place at a certain time, factoring in obstacles and tides or currents. To calculate the Best Departure Time: 1. Start the ETA Calculator by right-clicking on any route segment and click ETA Calculator from the pop-up menu. 2. Using the ETA Calculator dialog box, select Best Departure Time from the three available options and click Next. 3. Input your estimated average vessel speed and the earliest and latest dates and times that you would like to depart. Click Compute Best Time. 4. The ETA Calculator will now compute your best and worst departure times and list them in the ETA Calculator window (see Figure 14.6). 5. If you are finished with the ETA Calculator, click Done. If you want to perform other calculations, click on Back. To calculate Transit Time: 1. Start the ETA Calculator by right-clicking on any route segment and click ETA Calculator from the pop-up menu. 2. Using the ETA Calculator dialog box, select Transit Time from the three available options and click Next. 3. Input estimated vessel speed for each waypoint. 4. After setting your estimated speed for each point, enter the waypoint number, date and time that you would like to arrive at the waypoint and click Compute Transit Time. 5. The EDT needed to arrive at the waypoint at your given date and time will appear in the ETA Calculator window. 14 - Tides & Currents Figure 14.7 - ETA Calculator - Compute Transit Time Figure 14.6 - ETA Calculator - Compute Best Departure Time 112 Nobeltec® Navigation Software User’s Guide Calculating Speed This option enables you to compute the speed required to arrive at a destination at a given date and time. This computation uses set and drift information to determine any benefit or hindrance from tides or currents. 14 - Tides & Currents To calculate Speed: 1. Start the ETA Calculator by right-clicking on any route segment and click ETA Calculator from the pop-up menu. 2. Using the ETA Calculator dialog box, select Speed from the three available options then click Next. 3. Input Start and End Date and Time. 4. Click Compute Required Speed. 5. The ETA Calculator will now compute the speed needed in order to arrive at the end of your route at the specified date and time (see Figure 14.8). Figure 14.8 - ETA Calculator - Speed Chapter 15 - 3D Navigator 15 - 3D Navigator 3D Bathymetric Charts 3D Bathymetric Charts are high-resolution sea-floor elevation data, spaced at regular intervals. These charts are part of the MAX Pro chart packages. Data points contain latitude, longitude and elevation. Nobeltec Navigation Software interprets this data and renders it into a 3D image, combining charts with a 3D view of the ocean floor and land. 113 The 3D ToolBar The 3D ToolBar provides you with easy access to controlling the look of the 3D Navigator window. A brief description of each button can be found below. Mode Enables you to toggle between Center on Boat Mode and Explorer Mode while using the 3D Navigator. Terrain Exaggeration Used to enhance the 3D image by over or under-exaggerating 3D data. Minor changes in elevation become visible in areas that might otherwise appear completely flat (or vice-versa). Depth Marker Gives you the option to display the depth marker, keel marker, both or neither. This button toggles you through available selections. Vessel Exaggeration Increases or decreases the size of the 3D boat icon. A scale of "1x" means that the boat is represented "to scale" relative to the surrounding area. Figure 15.1 - 3D Navigator Window Tiled with Vector Opening the 3D Navigator Window The 3D Navigator allows you to view the ocean floor and land in a graphic three-dimensional window. Use this window to gain a new perspective on fishing spots, navigation channels, harbor entrances and other interesting sea floor terrain. 3D Locator The 3D Locator is a green square that appears on your 2D chart windows and it shows the area represented in the 3D window. The gray arrow in the middle of the 3D Locator box shows the direction of the 3D view. Click and drag the 3D locator to change the view in the 3D window. (This automatically changes the 3D window to Explore Mode). The Status Bar The Status Bar provides elevation and depth information, the quality of the 3D data (high-res vs. low-res) and amount of exaggeration of the terrain and vessel. Font size of the Status Bar can be changed for easier onscreen viewing. 3D Color Legend A legend of depth color can be displayed on the 3D window pane. This legend shows the range of color changes as established by the user. 15 - 3D Navigator To open the 3D Navigator window: 1. Open Nobeltec Navigation Software. 2. Click on the Display 3D Charts button on the ToolBar or click View | Chart Display Types | Display 3D Charts from the Main Menu. 3. The first time you perform this action, a warning message appears. Click Continue to open 3D charts or Cancel to abort this procedure. 4. A 3D Chart window pane will open. Elements of the 3D Navigator Window 114 Nobeltec® Navigation Software User’s Guide Data Resolution Depth Indicator Refers to the resolution of the installed 3D data. In places where you have purchased vector charts, the resolution of 3D data may vary from about 1000m spacing to higher resolution data of about 30m spacing. 3D Navigator will choose the best available data for any viewpoint within the 3D view. A line from the vessel to the ocean floor providing a visual identification for depth. It can be turned on using the Depth Marker button on the 3D ToolBar. Screen Resolution 3D Navigator allows you to zoom in or out just as you would on a 2D chart. When you zoom out, the visible range becomes larger and the 3D grid (Screen Resolution) becomes more coarse. To change how the 3D chart appears, right-click in the 3D window and select Appearance | Terrain/Sky/Water. Use the available settings to change the appearance of the 3D window pane. TIP: Nobeltec Navigation Software can overlay charts or aerial imagery over terrain in the 3D window, creating a valuable and unique perspective. Predicted Depth At Boat Shaded Relief This value indicates the depth beneath the keel at vessels present location. Default value for keel depth is 0 feet. Set keel depth in the Boat Properties box on the Stats Tab. Depths reported by the 3D Navigator are estimated and less accurate than a properly tuned depth sounder. With Sounder connected, this value is shown red when it is less than the specified Alarm setting. Shaded relief is a 2 dimensional view of the 3D data. To turn Shaded Relief on and off, click on the Shaded Relief ToolBar button. Clicking on the small down arrow next to the Shaded Relief button presents advanced Shaded Relief options. Using these options, you can select to have Shaded Relief shown on land, water or both. In addition, you can also select to shade the details in color or gray scale. Track Line With Tracking on, 3D Navigator will represent the active track line in 3D form. Using the 3D Window Predictor Line Center On Boat Mode Displays where the boat will be at a future time. When the Predictor Line is displayed on the 2D chart, it also appears in the 3D Navigator window. This default viewing mode keeps the view in the 3D window always centered on your boat. You can change the viewpoint and increase or decrease the zoom level. Select Center on Boat Mode at any time by clicking on the Mode button on the 3D ToolBar. 3D Vessel The 3D boat icon is a central part of the 3D Navigator window. All of the visible objects and tools in the 3D window are associated with it. You can change the boat style from Tools | Options | 3D/Bathy. 15 - 3D Navigator Changing the 3D Landscape (Terrain, Sky and Water) Keel Marker The Keel Marker helps to display the vessel’s location on the 3D surface. The vessel icon can change size but the Keel Marker provides a true representation of the bottom of the vessel and a visual cue as to the bottom depth. The top of the Keel Marker is the actual keel depth. The bottom of the marker is the alarm zone area. Keel Marker settings can be adjusted from Tools | Options | 3D/Bathy. Chapter 15 - 3D Navigator Center On Boat Mode keeps the boat at the center of the view. The boat is visible at all times except when obscured by a land feature. Use the <+> and <–> The Up Arrow on the keys or tools on the keyboard rotates the images ToolBar or the <A> up from the horizon while and <Z> keys on the the Down Arrow has the keyboard to zoom in opposite effect. This changes and out. the Pitch of the 3D Window. 115 Zooming and Panning In Explore Mode You can Zoom In and Out using the buttons on the program ToolBar or the <+> and <-> keys. You can adjust the "camera" angle using the <A> and <Z> keys on your keyboard. In Explore Mode, however, you cannot change the pitch (vertical angle) of the 3D window for panning, therefore it is best to set pitch before switching modes. To set the pitch, use your Up and Down Arrows while in Center On Boat Mode. Once the 3D window is angled to your liking, use the Mode button on the 3D ToolBar to enter Explore Mode. Once you are in Explore Mode, the Right and Left Arrow keys allow you to rotate the 3D chart and the Up and Down Arrow keys move you forward and backward over the terrain. Explore Mode allows you to move anywhere inside of the 3D window similar to being in an airplane and flying over the terrain. The Up Arrow on the keyboard moves your forward and the Down Arrow moves you back in the opposite direction. Use the <+> and <–> keys or tools on the ToolBar to zoom in and out. Left and Right Arrows on the keyboard rotate the image around the vertical axis. Figure 15.2 - 3D Controls in Center on Boat Mode Zooming and Panning In Center On Boat Mode Explore Mode Explore mode allows you to view the entire 3D terrain, regardless of actual position. Select Explore Mode by clicking on the Mode button on the 3D ToolBar or Explore Mode from the right-click menu. Left and Right Arrows on the keyboard rotate the image around the vertical axis. Figure 15.3 - 3D Controls in the Explore Boat Mode NOTE: You can also use your mouse cursor to move over and pan the chart as well. 15 - 3D Navigator Zooming and panning when using Center On Boat Mode is similar to zooming in a normal 2D chart window. You can Zoom In and Out using the buttons on the program ToolBar, the <+> and <-> keys or <A> and <Z> keys on your keyboard. To pan, move the cursor to the edge of the 3D window. When you see a small arrow next to your normal cursor, click and hold down the left mouse button and move the cursor or arrow keys. 116 Nobeltec® Navigation Software User’s Guide BottomLock When enabled, BottomLock centers the 3D view (Center on Boat or Explore) closer to the ocean floor. When in Explore Mode with BottomLock engaged, your Explore vessel will become a submarine, allowing you to explore the nooks and depths of the ocean in greater detail. Select BottomLock by clicking on the Mode button on the 3D ToolBar or BottomLock from the right-click menu in the 3D window pane. Adjusting BottomLock Height Use BottomLock Height option on the right-click menu to set the depth at which to view the ocean floor. This option is limited by sea-floor depth. Favorite Boat/Explore Views Use this feature to save and retrieve custom 3D view settings. To save a favorite view, right-click on the 3D window and select Favorite Boat Views and then click on Add Current View. Enter a name so that you can retrieve it at a later time. Bathy Recorder Bathy Recorder, sold as a Plus Pack to VNS MAX Pro and Admiral MAX Pro, enables you to record sea floor topographic information using your Sounder/ Depth Finder device and to incorporate that data into your 3D display. 15 - 3D Navigator When you use the Bathy Recorder to customize your sea floor charts, those charts will constantly improve with repeat trips over the same areas, enabling you to have a perfect picture of important sea floor terrain, as well as your favorite fishing and diving spots. The data provided by your Bathy Recorder can be more specifically oriented to your needs than any chart you can purchase. And, with Jeppesen Marine's exclusive, high-quality 3D-rendering, the Nobeltec Bathy Recorder will give you an unparalleled 360˚ awareness of your environment. Bathy Recorder can give you specific contour lines that standard 3D charts available don't display, as well as complete control of the contour line display. Create your own custom contours to see the areas of sea-floor topography that are important to you. See Chapter 22 - Bathy Recorder for detailed information about the Bathy Recorder Plus Pack. Chapter 16 - Wind & Weather Nobeltec provides you with a number of options to display wind and weather data directly on top of your charts to aid in navigation decisions. Wind Provided that you have a wind sensor attached, you can use available wind data in your calculations. With Sailing Plus Pack, you can also display Wind data overlaid on your charts. • Apparent Wind. This is the way that the wind impacts your ability to navigate, factoring in speed, direction, currents, etc. • True Wind. Actual wind data without accounting for bearing, speed, etc. Both Apparent Wind and True Wind data can be viewed for Speed (AWS and TWS) and Angle (AWA and TWA). You can also view True Direction (TWD). Adjust AW and TW settings from Tools | Options | Sailing. • Speed (AWS/TWS): Units as selected from Tools | Options | Units. • Angle (AWA/TWA): Wind Angle can be displayed as either 0-180° Port or 0-180° Starboard; Red arrow for Port and a Green arrow for Starboard. • Direction (TWD): Wind Direction will display as Magnetic or True, depending on display settings you have established. • Velocity Made Good Towards Wind (VMG-WND). VMG is, essentially, your boat's velocity calculated against the direction of the wind. Using this calculation allows you to account for wind factors in your velocity display, speed and ETA calculations. WARNING: Wind data provided by Nobeltec Navigation Software is based on bearing and velocity. This data is referred to as "Velocity Made Good" (VMG ) data and cannot be thoroughly verified. Weather All weather data available through Nobeltec Navigation Software is produced by third parties and compiled using several reliable national and international sources. Weather Provider options are: • GRIB Weather • Weather Plus Pack containing Sirius and XM/WxWorx * • SkyMate Weather * * SkyMate, XM/WXWorx, and Sirius require that you have purchased and installed the appropriate satellite hardware for that product. When you change Weather Providers, it may take a few minutes before data from the new Weather Provider displays on-screen. NOTE: Weather data does not display over 3D charts. To display weather data in Nobeltec Navigation Software: 1. Choose the weather provider you wish to use. 2. Download weather data onto your computer (via Web, satellite radio access, cell phone or e-mail attachment). 3. Configure and display the weather data. NOTE: SkyMate, Sirius and XM/WxWorx Weather require you to have the appropriate hardware to view that data. For Admiral MAX Pro users, OCENS® WeatherNet ships with your software, ready for easy installation and use. To use the WeatherNet GRIB download service for weather overlay, you must subscribe to the OCENS® weather data service. Once you have selected a Weather Provider and installed any appropriate hardware and software pertinent to that provider, use the Tools | Options | Weather Tab to establish settings specific to your selected weather provider. Conditions At Cursor Tools | Options | Weather With weather features selected and turned on under the Weather Option section, move your cursor over the chart. The Condition At Cursor box will display the values for the prediction types that you have selected to view. Tools | Options | Weather is where you configure how weather graphics will appear when overlaid on the charts. Before using this tool, you must select a Weather Provider (GRIB, XM/WxWorx, SkyMate or Sirius). For XM/WxWorx, Sirius and GRIB weather, conditions at cursor will display up to four layers of information. Priority is Surface data (temp and pressure), Waves (height, period, direction), Visibility, Tropical and Radar. See Chapter 10 - Properties and Options for a full description of Weather Tab options and functionality. 16 - Wind & Weather 16 - Wind and Weather 117 118 Nobeltec® Navigation Software User’s Guide 16 - Wind & Weather GRIB Weather Data GRIB weather data is a highly compact format for data transfer. This format allows for a large amount of weather data to be transferred to your computer quickly without slowing system resources. Getting GRIB Weather Data (VNS MAX Pro and Admiral MAX Pro) GRIB Weather Data can be downloaded from multiple sources, some at no charge. You will need Internet access or another data access source such as e-mail or cell phone to receive GRIB (*.grb or bz2 format) files. 1. Save the GRIB file to a location on your hard drive. 2. Open the NavBar | Weather tab. 3. Click Browse to open a browser window and browse to the location you saved your GRIB (*.grb or bz2) file(s). 4. Click on the GRIB file you wish to display. 5. Click Open. 6. Weather data from that file will be immediately available to display on your charts. NOTE: See your WeatherNet Help file for more information about how to use WeatherNet. 6. Click Download to download the GRIB file to your hard drive. 7. Open the NavBar | Weather tab. 8. Click Browse to open a browser window and browse to the location you stored your WeatherNet GRIB (*.grb) file(s). 9. Click on the GRIB file you wish to display. 10. Click Open. 11. Weather data from that file will be immediately available to display on your charts. Current (Wave) Getting OCENS® WeatherNet Data (Admiral MAX Pro) Nobeltec Admiral MAX Pro ships with OCENS® WeatherNet™ ready for immediate install. OCENS® is a provider of highly compressed, optimized, downloadable weather data in GRIB format. Nobeltec partners with OCENS® to provide you this high-resolution global weather data displayed directly on top of your Nobeltec Navigation Software charts. To receive GRIB (*.grb or *.bz2 format) files from OCENS®, you must set up a subscription service account with them. 1. Follow instructions included in the WeatherNet program to register and subscribe to WeatherNet. Click Help from the WeatherNet program for in-depth instructions. At the time of setup, you will need to determine how you wish to receive data (via Internet or e-mail). WeatherNet is a separate program that runs on your desktop and downloads GRIB data efficiently to your PC. 2. Set GRIB as your provider in NNS using Tools | Options | Weather. 3. Open the NavBar | Weather tab. 4. Click on the OCENS® link to open WeatherNet. 5. Determine the region and data type you wish to download using WeatherNet. Surface Temp (filled contours) Surface Currents Wind Barb Figure 16.1 - Weather Elements On the Screen GRIB Weather Options NOTE: SkyMate options are edited using SkyMate Connect; XM/WxWorx layer options are controlled using the XM/WxWorx Weather Layers window; Sirius layer options are controlled using the Sirius Weather Layers window, which are accessible through the PlanView NavBar. After selecting GRIB as your weather provider, you may determine which weather layers you wish to overlay on your charts. Place a check-mark in the Weather Overlays check boxes on the Navbar | Weather tab to display or remove various weather features. Chapter 16 - Wind & Weather Figure 16.1 shows how these features might appear on your charts. • Pressure. This check box turns on barometric pressure contours. • Wind. This check box turns on or off the display of wind values. • Currents. These are ocean-based jet stream current predictions and should not be confused with the coastal and tidal currents contained in the Tides & Currents software program. • Precipitation. Radar images of coastal precipitation and weather. • Wave. Sea and wave height. • Temp. Course Sea Surface Temperature is shown as color contours so you can actually see the water temperature. GRIB Weather at Route (OCENS® WeatherNet / Admiral MAX Pro only) When GRIB is your selected weather provider, you may right-click on a route and choose Download GRIB Weather from the pop-up menu to instantly launch OCENS® WeatherNet with the region for download already configured. NOTE: If you have not yet installed OCENS® WeatherNet, the first time you select this option, you will need to run the OCENS® WeatherNet installer. Follow all onscreen instructions to complete this installation. Windvantage™ Weather Routing When GRIB is your selected weather provider, you can use the Windvantage Weather Routing option of the Route Wizard. See Chapter 9 - Advanced Routes and Chapter 23 - Sailing Plus Pack for more information. Weather Plus Pack The Weather Plus Pack provides real-time satellite data from XM or Sirius Weather satellites. In order to use the Weather Plus Pack, you must have an XM or Sirius-compatible satellite receiver connected to your computer and you must be subscribed to the Sirius or XM weather data service. These Weather providers stream a continuous weather feed that overlays real-time weather data on your Nobeltec Navigation Software, directly over your vector charts and planned routes XM Weather Data In order to use XM as your weather provider, you must have an XM-compatible satellite receiver connected to your computer and have purchased the Weather Plus Pack from Jeppesen Marine. Getting XM Weather Data XM weather data can be accessed only if you have connected your XM-compatible satellite receiver and purchased the Weather Plus Pack. 1. Open XMLink. 2. Weather files are automatically downloaded and stored. Nobeltec Navigation Software automatically recognizes XM/WxWorx files and will overlay them on your charts as long as XmLink is running. XM/WxWorx Weather Layers Once you have downloaded weather data from XM/WxWorx, you can control what available Weather data is displayed onscreen using the XM Weather Layers interface. 1. Open the NavBar | Weather tab. 2. Click Layers to open the XM Weather Layers window. 3. Select the Layers you wish to display on your charts. XM Weather Layers contain the following: • None. No base layer. • Radar. Radar data from XM is overlaid on the chart. A tooltip will display the dBZ of the echo, if >10 dBZ. • Surface. Shows surface pressure as contour lines and water temperature as a color graph; wind speed as arrows or barbs, depending on Tools | Options | Weather selection. • Waves. Wave period displays as contour lines. The wave height is displayed as a color graph; wave direction as arrows. 16 - Wind & Weather Listed below are the types of weather options available to overlay on your chart. If a field is "grayed out", that type of overlay is not available in the file you loaded. 119 16 - Wind & Weather 120 • • • • • • • Nobeltec® Navigation Software User’s Guide Visibility. Displays as contour lines. Fronts. Icons for high and low pressure centers, with lines for fronts. Satellite. Satellite view (clouds) are overlaid on the chart. Radar, Fronts. Combines radar and fronts display. Radar, Satellite. Combines radar and satellite display. Fronts, Satellite. Combines fronts and satellite display. Radar, Fronts, Satellite. Combines radar, fronts and satellite display. Additionally, you can use Marine Zone Forecasts to select a specific region to observe. Options include: • None. No Zones (default setting). • Coastal/Offshore. This setting displays coastline and near coastline inland water region forecasts. • High Seas. This displays deep-water marine forecasts. XM/WxWorx Weather Legend Click the Legend button on the NavBar | Weather tab to open a PDF containing a legend describing how XM Weather Layers appear onscreen. The XM Marine Statements and Warnings Click the Marine Statements and Warnings button on the NavBar | Weather tab to open a text file containing current warnings pertinent to your location. Sirius Weather Data In order to use Sirius as your weather provider, you must have a Siriuscompatible satellite receiver connected to your computer, you must be subscribed to the Sirius weather data service, and you must have purchased the Weather Plus Pack from Jeppesen Marine. Figure 16.2 - XM Weather Layers following additional layers can be combined with any of the previous. • Lightning Strikes. Displays as an icon at the Lat/Lon of the strike. • Tropical. Tropical storms overlaid on the chart. • Radar Coverage. Semi-transparent overlay of available radar coverage from XM. • Buoy Reports. When selected, buoy station icons can be right-clicked to display real-time, location-based information. • Storm Cells. Storm cells are an icon displayed with a forecasted predictor line. • City Forecast. Cities display as a three-letter city abbreviation within a blue oval. Right-click on the oval and select City Forecast from the popup menu to open the forecast dialog. CAUTION - ADVISORY ONLY: The weather information is subject to service interruptions and may contain errors or inaccuracies and consequently should not be relied upon exclusively. The service is provided as is. You are urged to check alternate weather information sources prior to making safety related decisions. You acknowledge and agree that you shall be solely responsible for use of the information and all decisions taken with respect thereto. By using this service, you release and waive any claims against Sirius Satellite Radio Inc., WSI, Navcast Incorporated, Jeppesen Marine, Inc., including its parent company and its affiliates wherever located with regard to this service. Getting Sirius Weather Data Sirius weather data can be accessed only if you have connected your Sirius compatible satellite receiver and purchased the Weather Plus Pack. 1. Open Sirius to commence feed. 2. Select Sirius as your Weather Provider from the Nobeltec Navigation Software Tools | Options | Weather tab. 3. Click Show Weather on the NavBar. 4. Weather data is are automatically downloaded and stored. Chapter 16 - Wind & Weather 121 Sirius Weather Layers Sirius Weather Layers contain the following: • None. No base layer. • US Radar. Radar data from Sirius is overlaid on the chart for US coverage. A tooltip will display the dBZ of the echo, if >5 dBZ. • Canadian Radar. Radar data from Sirius is overlaid on the chart for Canadian coverage. A tooltip will display the dBZ of the echo if it is between 0.21 and 200 mm/hr. The Canadian radar does not display precipitation information. • Fronts. Displays Icons for high and low pressure centers, with lines for fronts. • Sea Surface Temperature. Displays pressure centers in highs and lows and fronts. Black contour lines with the pressure values also appear. • Waves. Wave period displays as contour lines. The wave height is displayed as a color graph; wave direction as arrows. • Cloud Tops. These are displayed as shades of gray for cloud coverage on the chart: Lighter gray for high clouds, darker gray for low clouds. • Wind. Shows surface pressure as contour lines and water temperature as a color graph; wind speed as arrows or barbs, depending on Tools | Options | Weather selection. 16 - Wind & Weather Once you have downloaded weather data from Sirius, you can control what available Weather data is displayed onscreen using the Sirius Weather Layers interface. 1. Open the NavBar | Weather tab. 2. Click Layers to open the Sirius Weather Layers window. 3. Select the Layers you wish to display on your charts. Figure 16.3 - Sirius Weather Layers The following additional layers can be combined with any of the previous. • Lightning Strikes. Displays as an icon at the Lat/Lon of the strike. • City Forecast. Cities display as building icons. Right-click on an icon and select City Forecast from the pop-up menu to open the forecast dialog. • Buoy Reports. When selected, buoy station icons can be right-clicked to display real-time, location-based information. • Storm Cells. Storm Cells appear on the chart as magenta outlined squares. When you move the mouse pointer over the square, a pop-up window displays the storm cell ID, the observation time, the echo top and the movement, or direction and speed. • Storm Tracks. Displays historic, current and predicted locations of storms with swirls that are colored to represent intensity. Tool tips display information about the position. • Marine Watch Box. Marine Watch boxes appear as red boxes on the chart for areas that have severe weather warnings. To display the forecast for the area, click in the box; then right-click and select Marine Watch Box from the menu. Additionally, you can use Marine Zone Forecasts to select a specific region to observe. Options include: • None. No Zones (default setting). • Coastal/Offshore. This setting displays coastline and near coastline inland water region forecasts. • High Seas. This displays deep-water marine forecasts. • Marine Statements. When this option is selected red outlined areas that require a warning appear on the chart. 122 Nobeltec® Navigation Software User’s Guide 16 - Wind & Weather Sirius Weather Legend Click the Legend button on the NavBar | Weather tab to open a PDF containing a legend of how Sirius Weather Layers appear onscreen. Tropical Statements and Warnings Click the Tropical Statements and Warnings button on the NavBar | Weather tab to open a text file by zone containing current weather statements and warnings. SkyMate Weather Data In order to use SkyMate features, you must own SkyMate satellite hardware and have selected SkyMate Support during your initial Nobeltec Navigation Software installation. Learn more about SkyMate connectivity solutions at www.skymate.com. SkyMate features allow you to navigate your boat while remaining connected to e-mail, weather and many other off-shore satellite connectivity benefits. Select SkyMate During Installation Once SkyMate is installed, you still have the choice to switch to other weather providers available. Select which weather provider to use from the Tools | Options | Weather Tab. When SkyMate Weather is selected, the Weather menu bar will display SkyMate information. Refer to the SkyMate hardware installation documentation for connecting the SkyMate communicator to your PC and for using SkyMate weather options inside of the Nobeltec Connect window. Getting SkyMate Weather Data 1. Open the NavBar | Weather tab. 2. Click SkyMate Connect to open a SkyMate Connect window. 3. Follow the on-screen instructions to download SkyMate Weather or use other features provided by SkyMate. Chapter 16 - Wind & Weather Weather Date: This is the date to which the weather forecast applies Use these controls to change the date and time of the displayed weather 16 - Wind & Weather Weather ToolBar Button Click to display each desired overlay Figure 16.4 - Additional Weather Tools 123 Value at cursor for selected layers are shown here 16 - Wind & Weather 124 Nobeltec® Navigation Software User’s Guide Chapter 17 - Autopilot 2. 17 - Autopilot 125 Click the Configure Autopilot button. This will display the Configure Autopilot Settings shown in Figure 17.2. Interfacing autopilot with Nobeltec Navigation Software provides you with a number of time-saving and ease-of-use benefits, including easier route planning and more precise options and adjustments. Autopilot Connections Wiring GPS Ground Ground Transmit Transmit Receive Receive 17 - Autopilot Figure 17.1 shows a typical wiring diagram for a connection between your software, GPS and autopilot. To determine which wires are used for Transmit, Receive and Ground, please refer to your GPS and Autopilot User's Guides. For more information on wiring , please refer to Chapter 3 - Hardware Device Setup. PC Computer Port X Ground Autopilot Figure 17.2 - Configure Autopilot Settings Dialog Box Transmit Receive Figure 17.1 - GPS Connection with Autopilot Settings Each autopilot requires that certain, specific information be provided by the Nobeltec Navigation Software. Most autopilots follow the same basic principles of heading and cross track error. Autopilot tries to maintain a heading to a mark while maintaining a minimum Cross Track Error. Nobeltec Navigation Software contains a number of specific settings that have been created because not all autopilots work the same way. Consult your autopilot manual to verify what information the device needs. T o configure VNS MAX Pro or Admiral MAX Pro to work with your autopilot: 1. Click Tools | Options |Ports: Configure. Place a check-mark in the box next to the COM Port for your autopilot. 3. 4. 5. 6. 7. 8. In the Update Interval field, specify how often control data should be sent to the autopilot. Choose Magnetic or True for the bearings output and all other fields required for your autopilot (see your autopilot manual). Set the precision for the Bearing, Range and XTE. NOTE: Most autopilots use APB, BWC, VTG, WPL and XTE (see Chapter 4). Below the option labeled Talker Identification to Send to Autopilot, select how you want your program to identify itself to your autopilot. Click OK to save the settings. Test your autopilot and change the settings as needed. Once setup is complete, document the settings for future reference. Definitions Of Autopilot Setting Options • Update Interval. The default setting is one second. Few autopilots require more than a one second interval. 126 • • • • • 17 - Autopilot • Nobeltec® Navigation Software User’s Guide Bearing Output. The default value is Magnetic. Precision. A precision level of 1 means xx.x, a precision level of 2 means xx.xx, etc. NMEA protocol does not specify precision. Leading Zeros. This feature adds a zero to the front of heading. Sentence Selection. It is important to minimize selected options. The COM port can handle around 600 characters per second and can easily be overrun with too much data. Talker ID. Some older autopilots do not recognize the EC setting specified by NMEA 0183. In this case, you will need to select an identification acceptable to your autopilot. Send Bearing From Boat to Waypoint in Place of Origin to Destination. Verify in your autopilot manual. WARNING: This option should only be used with autopilots that do not correctly compute XTE and must always be pointed directly towards the waypoint. Using the Autopilot On the Water To test your autopilot before using it on a trip, find a safe place that is not in use and is approximately one square mile in size. How to Use the Autopilot - Active Mark 1. 2. 3. Create a Mark on the chart. Right-click on the Mark and select Activate. Nobeltec will set the origin to current location, the cross track error to zero and steer to the mark. When you arrive at the waypoint, it will be deactivated. How to Use the Autopilot - Active Route 1. 2. 3. Create a route in your test area. Right-click on any route leg and select Activate. This will automatically activate the route and first waypoint in the route. After activating the route, Nobeltec will direct the vessel along the route line. When the vessel reaches the first active waypoint, it will steer the vessel to the next waypoint and so on, until you reach the end of the route. Arrival Circle and Crossing the Perpendicular Waypoint arrival is an important feature when using your software with an autopilot. Nobeltec uses two items to determine if you have reached a waypoint: Arrival Circle and Crossing the Perpendicular. Nobeltec can switch from one waypoint to the next without a prompt or you can acknowledge an on-screen prompt for waypoint changes. This feature can be set using the Misc. Tab of the Tools | Options menu, Automatically Activate Next WP Upon WP Arrival. Setting Arrival Distance for Existing Marks To set the Waypoint Arrival Distance for existing marks and waypoints: 1. Right-click on a Mark or Waypoint and select Properties. 2. From the Properties dialog box, click on the Range Circle Tab. 3. At the bottom of the Range Circle Tab, you will see a box labeled Arrival Circle. You may change the default value (0.5 NM) by typing or using the up or down arrow keys. 4. Close the Properties dialog box. Changing the Default Arrival Distance To change the default Arrival Distance value for any new marks or waypoints that you create: 1. Select Tools | Options from the Main Menu or click the Options button on your ToolBar. Then select the Misc. Tab. 2. Click on Set Default Waypoint Arrival Distance. A small dialog box will open, allowing you to set a new Arrival Distance value. 3. Input a value, then click OK. 4. Click OK on the Options dialog box when you are finished. Chapter 18 - Networking 18 - Networking General Benefits you to set one computer as the Server. The computer that is specified as the Server is where all your routes, marks, tracks and other data are stored. As long as the other computers on your vessel are connected to the network, they can grab any data that is contained on the PC identified as the Server. Benefits of using a network on your vessel include:. • Improved Uptime/Redundancy. In case of computer failure, users can immediately switch to a different computer. • Less Wiring. A wireless or CAT-5 network can be used instead of wiring each NMEA producing device to each computer. • Redundance. Using a recommended network configuration, a redundant system can be installed in a very short time. NMEA Data Sharing NOTE: If Admiral MAX Pro is installed on multiple networked computers which use two different operating systems, Windows XP and Windows Vista, closing the XP version causes a firewall error message to appear on the Vista version: "some features of this program may be blocked". This should not impact actual performance. Click OK to continue. Sounder Sharing (GlassBridge Network Only) GlassBridge Network (Admiral MAX Pro Only) This chapter discusses the features of networking. Some of these features are specific to the GlassBridge Network only. Tools | Options GlassBridge Network Tab Use the Tools | Options | GlassBridge Network Tab to configure your onboard network when using Admiral MAX Pro. See Chapter 10 - Properties and Options for more information about the features of this tab. Shared Information Data Sharing Networking provides support for sharing navigation objects from one computer to the next. Create a route on one computer and move it to another without having to copy it onto a floppy drive or other portable media. When sharing data on a network, Nobeltec Navigation System allows In a networked configuration, NMEA data such as a GPS signal can easily be shared between computers. One computer might receive GPS and heading data while another is wired to receive depth or wind information. Regardless of where the instruments are located, this data can be shared across the network. Nobeltec Navigation Software receives NMEA data information into the COM port and can broadcast it onto the network. If you have purchased and installed a Nobeltec InSight Sounder, you can share Sounder data to any computer connected to the GlassBridge Network. Click Tools | Options | GlassBridge Network Tab to setup Sounder Sharing. All systems attached to the GlassBridge Network will see all data sent on the network by the InSight Sounder. Any Sounder window open on any networked PC will mirror the Sounder window on any other networked PC. Radar Sharing If you have purchased and installed a Nobeltec branded radar or radars, you can connect them to the network and all the computers connected can use a single radar image that you select. For example, you might have a Nobeltec radar on your vessel and three computers at different locations all on a network. All three computers would be able to display the radar information on their screen. Configurations of GlassBridge Networking The section below is devoted to two typical networking examples. Example 1 Example 1 is a typical installation that includes two semi-redundant computers. This particular configuration is easy to setup and use (see Figure 18.1). All NMEA devices are connected to PC1. The second computer serves as a backup computer. If the primary computer should fail for any reason, the secondary computer can replace the primary. The secondary computer can 18 - Networking Using Nobeltec's GlassBridge Network, you can connect two or more computers that have Admiral MAX Pro installed on a network in order to share data. Networking adds redundancy, enhanced performance and reliability. You can share data such as routes & marks, NMEA data, radar images and Sounder data from one computer to another. 127 128 Nobeltec® Navigation Software User’s Guide also share NMEA data and serve as a monitoring software station or planning station. In this example, the incoming NMEA data is shared. PC 1 PC 2 Figure 18.2 - GlassBridge Configuration - Example 2 Setting Up the GlassBridge Network 18 - Networking Figure 18.1 - GlassBridge Configuration - Example 1 Example 2 Example 2 is a more sophisticated network configuration than was shown in Example 1. In Example 2, the network includes at least three computers that are fully redundant. Each computer includes a copy of Admiral MAX Pro and a Hardware Key (see Figure 18.2). In Example 2, each computer shares charts over the network. Raster and photo charts must be installed on each computer manually. All NMEA data can be shared across the network. Since each computer has its own Hardware Key, NMEA-producing devices can be connected to any computer. This network configuration also allows for the sharing of Nav Objects. In order to share Nav Objects, one computer is identified as the Server. Data can be obtained by selecting File | Navigation Objects | Import Nav Objects from the Main Menu. This section covers how to setup each of the two previously described examples. It might be helpful to review Figure 18.1 (Example 1) and Figure 18.2 (Example 2). WARNING: If you are connecting your Admiral MAX Pro GlassBridge Network to an external network, it is strongly recommended that you implement your GlassBridge Network behind the protection of a router or firewall. NOTE: The external network should always be connected to the WAN port of your router or firewall. Setting Up Example 1 As described earlier, Example 1 includes two computers which are semiredundant. Follow the steps below to setup and configure a system like the one shown in Example 1. 1. Install Admiral MAX Pro and a Hardware Key on both computers. 2. Install all purchased charts on both computers. For information on installing charts, please refer to Chapter 2 - Software, Chart and Data Installation for more information. 3. Attach any navigation devices such as a GPS to computer PC1. 4. Connect the two computers to a hub or wireless network. Make sure Chapter 18 - Networking that the network supports TCP/IP networking. NOTE: For detailed network connection information, see your installer or documentation provided by the equipment manufacturer. Admiral MAX Pro uses an auto-detect feature to automatically broadcast the NMEA data and to automatically receive data that is detected on the network. Connect the two computers and Admiral MAX Pro will determine how to share the NMEA data that is available. If you want to explicitly configure data sharing options, then you can select/deselect the options as described in the section More Information About Data Sharing later in this chapter. Behavior of Example 1 This is a simple network installation. The main benefit is that the GPS Information is shared on the network and that the charts are also installed onto both computers. The vessel icon on PC2 will move on the screen based on the GPS input from the network. If there is ever a problem with the primary computer, you can easily swap the two computers. Setting Up Example 2 Setting Up the Navigation Inputs On the Client Computer Each computer that is directly connected to a NMEA producing device (GPS, etc) needs to be configured to receive this information. See Chapter 3 Hardware Device Setup for more information. Configuring the GlassBridge Network Options 1. Disconnect all the computers from the GlassBridge Network and then start each copy of Admiral MAX Pro. 2. Verify that each installation is working properly. After you are satisfied with each setup then proceed to the next step. 3. Physically connect all computers to the network. 4. Start with PC1. Click Tools | Options | GlassBridge Network. The network ID will default to the name of the computer. 5. Select your Advanced Networking Options such as Sharing, Server, and so forth. 6. Click Radar Sharing if appropriate. This setting must be selected on each Admiral MAX Pro installation that will share data. 7. Click Sounder Sharing if appropriate. This setting must be selected on each Admiral MAX Pro installation that will share data 8. Click Accept Nav Objects From Other Stations and choose either Prompt, to always be prompted before accepting, or Accept All to always accept. 9. Click OK when finished. 10. Repeat steps 4-10 for each additional computer. 11. Options will take effect the next time the program is started. Behavior of Example 2 This type of installation provides a redundant system that is powerful in a number of ways. As noted earlier, radar images are available on both computers (if connected). Navigational objects are easily shared between computers. If you use an A/B switch on the autopilot, a second computer can serve as the primary navigation station with ease. NOTE: For safety reasons, Admiral MAX Pro does not send autopilot sentences across the network. You must connect the autopilot directly via a COM port. This connection must be made from the computer that has the active route. 18 - Networking A fully redundant system requires at least three Admiral MAX Pro units and Hardware Keys (more may be added if desired). This installation takes advantage of all the features that the GlassBridge Network provides. To install and configure a system like the one shown in Example 2: 1. Install Admiral MAX Pro and a Hardware Key on each computer. 2. Install purchased charts on one of the computers. Later in the setup and operation you will have the opportunity to share the charts across the GlassBridge Network. 3. Install the raster and photo charts on each computer as desired. 4. Connect the GPS and other NMEA input devices to at least one of the computers. If desired, you can use an A/B box and connect the input to both computers. 5. Connect output cables, through an A/B box to the autopilot and any other device, as required. 6. Connect all computers to a hub, router or wireless network. Make sure that the network is setup to support TCP/IP networking. (Nobeltec recommends a router or switch capable of DHCP address service for the best performance). 129 130 Nobeltec® Navigation Software User’s Guide More Information About Data Sharing Data sharing is configured on the Tools | Options | Data Sharing Tab. The two types of data that can be shared are Processed and Raw Data. Raw Data comes into the computer from any NMEA device. Processed Data is produced in the Admiral MAX Pro program. GPS position is an example of Raw NMEA Data. If you have more than one GPS connected to one of the computers on the network, typically port priorities are used to "prefer" one GPS over another. This official type of information about the vessel is referred to as Processed NMEA Data or the Nobeltec Packet. Processed NMEA Data There are four options for configuring how Admiral MAX Pro handles Processed Data. 18 - Networking Auto Detect Mode: Auto Detect Mode automatically listens to the GlassBridge Network at startup to determine whether to send Processed NMEA Data to other computers or to listen. This decision is based on what network computers are currently doing and what navigation inputs are directly (physically) connected to the computer. This is the default setting. Send Processed NMEA: Requires Admiral MAX Pro to send Processed Data to the network. Listen for Processed NMEA: Explicitly listens to Processed Data. None: Select this option and no Processed Data is sent or retrieved. Raw NMEA Data Sharing Raw NMEA Data Sharing is used to send Raw Data to the network so that each computer on the network can receive all inputs (Raw Data). Send NMEA Data If there is an NMEA data source connected to the computer through a properly configured input COM port, this option will send data over the network, allowing other computers to access that data. Listen to NMEA Data Use this option to receive Raw NMEA Data from all other networked computers. NOTE: Nobeltec recommends using the processed NMEA data sharing. In cases where both Processed and Raw data is received by Admiral MAX Pro, Processed Data takes priority. It is more efficient and also reduces configuration issues. If you would like to share NMEA data that is not vessel related, such as AIS target information or external Radar targets, send raw NMEA data should be enabled. Advanced Networking Settings Advanced network features include radar and sounder sharing. Sharing Radar If you purchased a Nobeltec InSight Radar 2 (IR2) and it is connected to your system, the radar data is shared on the network automatically. No additional GlassBridge Network configuration is necessary in order for this data to be propagated on the network. However, if you have one of the first generation InSight Radars, to share radar data on the network, you will need to follow the instructions listed below. 1. Click Tools | Options | GlassBridge Network. 2. Select Yes or No from the Radar Sharing drop-down box. 3. Place a check-mark in this box if you wish to Share Radar Targets. 4. When finished, click OK. NOTE: InSight Radar users will need to run the Radar Wizard on each computer that needs to view radar. Refer to the Radar User's Guide for further instructions on using the Radar Wizard. Sharing Radar Targets After acquiring MARPA Radar targets using Nobeltec Admiral MAX Pro, it is helpful to share these targets with the other computers on the GlassBridge Network. To do this, click Tools | Options | GlassBridge Network and then click Share RADAR Targets. Any computer with this setting will share MARPA targets on the GlassBridge Network. NOTE: Computers that will receive the radar target data need to have the "Listen to NMEA Data" option turned on (check box) in the 'Data Sharing' tab under the 'Options' Menu. Sharing Sounder If you have purchased and installed a Nobeltec InSight Sounder™, you can share Sounder data to any computer connected to the GlassBridge Network. Click Tools | Options | GlassBridge Network Tab to setup Sounder Sharing. Chapter 18 - Networking NOTE: The following Sounder settings are NOT shared across the network: Sounder COM port configuration, UDP port configuration, colors and all options set using the Tools | Options | Sounder Tab. EXCEPTION: Tools | Options | Sounder Tab: Transducer Offset, Temperature Calibration, Speed Calibration and 50 and 200 kHz Gain Calibration settings can be shared across the network. Any networked computer can alter the Sounder controls. Sounder controls available to be manipulated by any computer attached to the GlassBridge Network include: Split type, Fish/Cruise/Manual, demo/live, range/autorange, shift, frequency, gain, clutter, signal level and noise. All systems attached to the GlassBridge Network will see all data sent on the network by the InSight Sounder. Any Sounder window open on any PC will mirror the Sounder window on all other PCs on the network. In Live and Demo mode, all "pings" are shared across the network. In Playback mode, pings are not shared. InSight Sounder users not connected to Sounder via an RS-422 cable will need to run the GPS/Port Setup Wizard on each computer that needs to view Sounder data. Refer to the InSight Sounder User's Guide for further instructions on using the GPS/Port Setup Wizard. When navigating, it is very useful to see the active waypoint on all computers on the GlassBridge Network. To share this information between computers, click Tools | Options and then select the GlassBridge Network Tab. Once the GlassBridge Network Tab options are on your screen, click Accept Active Waypoints from other Computers. Whenever another station creates or moves an active waypoint, this station will update accordingly. Troubleshooting 1. The following paragraphs contain a few standard troubleshooting tips for Networking. Since there is not one standard brand of networking equipment, keep available the User's Guides for your hub, switch or router. equipment does not have status lights, check the status indicator inside Windows). 3. Verify cable connectivity and power supplies. Test the Glass Bridge Network 1. Start Admiral MAX Pro. 2. Click Tools | Options and then the Glass Bridge Network Tab. 3. Click Check Connection. 4. If the computer is connected to the Glass Bridge Network, the system name column will be populated. If other computers on the network running Admiral MAX Pro, you will see them listed as well. Serial numbers and other fields will also be populated. How to Use the Glass Bridge Network Test Utility. This utility will test UDP (one of the networking protocols that is running behind the scenes). 1. This can be done with or without Admiral MAX Pro running. 2. Click Program Files | Nobeltec | Support Tools | Network Test Utility. 3. This utility can send and/or listen to UDP data which is the protocol Admiral MAX Pro uses to send and receive NMEA data. Run this tool on each computer without running Admiral MAX Pro or use both Admiral MAX Pro and the utility in combination. The utility will display data sent from Admiral MAX Pro as it receives it, both locally and across the network, allowing you to determine if the problem is related to the software or the hardware. Setting Up Chart Sharing on Multiple Computers Setting up an XP machine for networking: 1. Turn off firewall 2. Configure DCOM a. Run “MAX Pro Network Setup” (Networkconfig.exe). b. Press “Configure DCOM” button. Test the Cabling c. Confirm that you want to change the DCOM permission rights. 1. Start all of the computers on the network. d. Press “Apply” button. 2. Check status lights on the hub/switch/router for each computer. (If your e. Confirm that you want to change the state of your computer 18 - Networking Sharing Active Routes, Marks and Waypoints 131 132 3. Nobeltec® Navigation Software User’s Guide Turn off Simple File Sharing a. Open “My Computer” b. Under the Tools menu, choose Folder Options… c. Switch to the View tab. d. Under Advanced settings, scroll to the bottom and uncheck “Use simple file sharing (Recommended).” e. Select OK. Setting up a Vista Ultimate machine for networking: 1. Turn off firewall 2. Configure DCOM a. Run “MAX Pro Network Setup” (Networkconfig.exe). b. Press “Configure DCOM” button. c. Confirm that you want to change the DCOM permission rights. d. Press “Apply” button. e. Confirm that you want to change the state of your computer. 18 - Networking 3. Change Local Security Policy a. Run “Local Security Policy”. (In Control Panel, choose Administrative Tools, then choose Local Security Policy) b. Under Local Policies, select Security Options c. Change “Network access: Restrict anonymous access to Named Pipes and Shares” to disabled. 4. Confirm file sharing options a. From the start menu, right click “Network” and choose properties. b. In the Sharing and Discovery section, make sure the Network discovery and File sharing are turned on. c. Also in the Sharing and Discovery section, make sure that Password protected sharing is turned off. Chapter 19 - Target Tracking 19 - Target Tracking Nobeltec Navigation Software tracks five types of targets: • ARPA (Automatic Radar Plotting Aid) and MARPA (Mini Automatic Radar Plotting Aid) targets transmitted by your Radar (Admiral MAX Pro only). • AIS (Automatic Identification System) target tracking from a dedicated AIS receiver. • Digital Selective Calling (DSC) radio input. DSC transmissions display vessels similarly equipped with DSC radios in the immediate (20-mile radius) vicinity. • Seetrac® Tender Tracking™. This Plus Pack (Admiral MAX Pro only) provides up-to-the-minute target data about smaller affiliate watercraft (called "Tenders"), including smaller boats, jet skis, wave runners or even passengers carrying a wireless Seetrac Tender Unit (STU). This chapter is primarily devoted to AIS and DSC target tracking. See Chapter 20 - Radar for more in-depth ARPA/MARPA target tracking information and Chapter 24 - Tender Tracker for more information about Tenders. Targets Onscreen Target details can be displayed in the Targets tab of the PlanView NavBar or NavView InfoBar. When your Radar, AIS, DSC and Tender Tracker devices are connected to your computer and configured properly, these targets can also be displayed in the Chart window pane. There are three main components to target tracking in Nobeltec Navigation Software: • Onscreen representation of targets in the Chart and Radar (if selected) window panes. • Target data displayed in the Targets tab of the NavBar or InfoBar. • Configuration of target display using the Targets Tab of the Tools | Options menu. Prior to Setting Up Target Tracking In order to properly set up Target Tracking, you must first install all target tracking equipment. Target Tracking requires that target information is received from one or more of the following sources: • A GPS device (required for valid target data). • A Heading Sensor (required for valid Radar target data). • An AIS Transceiver/Receiver outputting valid AIS sentences to the computer. • A DSC radio outputting DSC sentences. • A Seetrac® Tender Tracking™ System Base Unit (SBU) transmitting Tender data to your computer. • Radar transmissions from either: • A Nobeltec InSight Radar 2 (IR2) connected to the computer. The IR2 is a radar specially designed by Nobeltec to send digital imagery directly to a personal computer through your computer’s Ethernet port; or • A Standard External Radar connected to a Nobeltec InSight™ Radar 2 - Black Box (IR2-BB™), which is in turn connected to your computer. The IR2-BB is a specially designed hardware component that converts the analog output from most existing, industrystandard radars into a digital stream that can be used by NNS. The benefit of this option is that it does not require a complete retrofit of your radar system. Connecting this device to your computer is accomplished through a standard USB port. 19 - Target Tracking Figure 19.1 - Targets as they Appear in the PlanView Chart Window Pane 133 134 Nobeltec® Navigation Software User’s Guide Setting Up Target Tracking Configuring Nobeltec Software to Receive AIS Data To set up Nobeltec Navigation Software to track targets: 1. Open Tools | Options | Targets (see Figure 19.2). 2. Click the down arrow next to Display ARPA Targets (Admiral MAX Pro only) in the upper portion of the dialog box and select Yes. 3. If you have a DSC radio connected, click the down arrow next to Display DSC Targets and select Yes. 4. Click Enhanced AIS Filtering... 5. From the AIS Filtering window, place a check-mark in the Display AIS Targets check box. 6. Click OK. 7. If you have purchased and installed the Tender Tracker Plus Pack, see Chapter 24 - Tender Tracker to set up Tender Target Tracking. 8. Click OK to close the Tools | Options window. 9. Click the NavBar | Targets Tab or InfoBar | Targets in NavView. 1. 2. 3. 4. 5. 6. 7. 8. 9. Open Tools | Options | Ports: Configure. In the Input Ports column, place a check-mark next to the COM Port to which your AIS device is connected. Click Configure This Input Port... Set the Port Speed (baud rate) to match the baud rate of your AIS device. This setting is device-specific, but 38400 is standard. Click OK to close the COM Port Input Configuration window. Click Apply. Click View Data to open the Incoming Data Display window and verify that your computer is receiving AIS data (you must be in a location where AIS data is available). All NMEA data currently being received by the computer will display in this window, including GPS and any other NMEA data output devices connected to your computer. AIS data is in the form of an AIVDM or AIVDO sentence. When you have finished, click Done. Click OK to close Tools | Options. Changing Target Appearance To display Wakes and Predictors: 1. Open Tools | Options | Targets. 2. Place a check-mark in the Display Predictors check box to show an extension line from the target to its projected trajectory. 3. 4. 5. 19 - Target Tracking Figure 19.2 - Tools | Options - Targets Tab 10. Click the down arrow on the target list to view all targets in the area. If no targets are listed, verify that the radar and AIS receiver are properly set up and configured to send data to the computer. 11. Targets will appear on the Chart window pane at their Lat/Lon. Select a target from the displayed Target list in the NavBar or InfoBar and click Find to center it on the chart. NOTE: The Display Predictors option does not apply to Tenders. Click Display Wakes to see how a target has moved over time. Click the small down arrow next to the Target Name Settings option to change the appearance of the target names (Full, Short or None). Click OK to complete these changes. NOTE: Tender Short and Full names are identical - either option displays the description of the Tender, as input into the Tender Directory. To change Tender Target colors: 1. From an open Chart window pane, right-click on the Tender. 2. Select Tender Color from the pop-up menu. 3. Select a color for this target from the color selector. 4. Click OK to complete these changes. Chapter 19 - Target Tracking 135 Using the DSC Directory The DSC directory in Tools | Options | Targets is where you input the MMSI Number and a description (or name) of vessels polled with your DSC radio. The names you input will appear on your charts instead of the MMSI Number. These settings can be saved for future use. Figure 19.4 - PlanView NavBar - Targets Tab Using the Tender Directory The Tender directory is where you input the Tender ID, Description, Channel the Tender is broadcasting on and the duration for the Seetrac Base Unit to listen to that Channel. The description you input will appear on your charts. These settings can be saved for future use. NOTE: Tender Tracker has two modes: Autonomous and Managed. Channel and Description function only in Managed Mode. Targets NavBar and Targets InfoBar Use the Targets Tab on the PlanView NavBar (Figure 19.4) or the Targets InfoBar in Admiral MAX Pro NavView (Figure 19.5) to view additional information about a specific tracked target. Select from available Targets using the drop-down menu next to the Target name display; Find an available Target; Filter AIS Targets; and Show All or Hide All Targets in NavView. Figure 19.5 - NavView InfoBar - Targets Locating a Target Onscreen To locate an active Target: 1. Open the NavBar or InfoBar Targets tab. 2. Locate the active Target you are searching for from the Targets dropdown menu. 3. Click Find to center that Target onscreen. NOTE: In PlanView, you can place a check-mark in the Lock check box to keep your chart centered on the selected Target. Information Listed on the NavBar and InfoBar • Enhanced AIS Filtering Figure 19.3 - Incoming Data Display Window You can filter AIS targets for type, distance, etc. When filtering is enabled, an onchart Warning Indicator lets you know that some or all AIS targets are currently hidden. Click Enhanced AIS Filtering from the Targets NavBar, NavView Target InfoBar or Tools | Options | Targets to 19 - Target Tracking • • • • • • • CPA - Closest Point of Approach. Predicted closest distance between your boat and the tracked target, based on both vessel's SOG and COG. TCPA - Time to Closest Point of Approach. Time remaining until CPA. RNG - Range. The distance between your vessel and the target. BRG - Bearing. The bearing to the target vessel. COG - Course Over Ground. The tracked target’s Course Over Ground. SOG - Speed Over Ground. The tracked target's Speed Over Ground. LAT - Latitude. The Latitude of the target vessel. LON - Longitude. The Longitude of the target vessel. 136 Nobeltec® Navigation Software User’s Guide open the AIS Filtering window, which contains the following options: • Display AIS Targets. Controls whether any AIS targets are displayed in the Chart window pane or Targets NavBar. When unchecked, all subsequent options in this window are disabled. • Hide Targets Beyond. This option allows you to select a maximum distance range for detected AIS targets to display. Targets whose distance exceeds the selected setting will not display in the Chart window pane or Targets NavBar. Options are Do not hide, 5, 10, 20, 40, 60 or 80 units of measurement. Default is Do not Hide. • NOTE: The following filtering features are Admiral MAX Pro only. Only display targets in an AIS.TXT file. When selected, only targets whose MMSI numbers are listed in the AIS.TXT file located in C:\Program Files\Nobeltec\Visual Series are displayed. This setting enables you to track specific, known targets while ignoring unknown targets. Figure 19.6 - AIS Filtering 19 - Target Tracking • • • Only display targets that are not anchored, moored or aground. Removes any targets from display whose reported status is anchored, moored or aground. If targets whose status is anchored, moored or aground are moving at 0.2 Kts or higher, their status is ignored and they will continue to display. Default setting for this option is Off. Show Specific Target Types. Select from the displayed list which Target types you wish to display in the Chart window pane or Targets NavBar. Targets whose type is not checked in this field will not display. Show AIS Base Stations. Place a check mark to display or hide shorebased AIS stations. Changing Alarm Settings Using Tools | Options | Targets, you can change the alarm settings for displayed targets. To change the alarm settings: 1. Click Tools | Options and then the Targets Tab. 2. Click Target Threat Settings. 3. Adjust the CPA (Closest Point of Approach). This is the distance from your vessel that a target may reach before a target is deemed a threat. 4. Set the TCPA (Time to Closest Point of Approach). This is the time remaining before the CPA is reached. Enter a value in seconds. 5. Click the Audible Alarm if desired. Nobeltec Navigation Software is designed to look for threats using a combination of CPA and TCPA as output by the GPS. For example, a vessel 1 NM away is not a threat if your threat CPA threshold is set to 0.05 NM. However, if you set threat TCPA to 3:00 minutes and the approaching vessel will be within 0.05 NM in that time window, Nobeltec Navigation Software will alert you to this threat. Chapter 19 - Target Tracking Target Symbols Symbol Topic Description Active State Vessel appears as a triangle or diamond oriented by heading or COG if heading is missing. If heading is available, heading line will be visible as a solid line. COG appears as a dashed line. Dash and space (- ) = one minute. Target Indicating Turn Active State True Scale Outline Active State Target Indicating Turn 137 How Targets Appear in NNS There are several types of targets. Their behavior dictates how they appear onscreen. It is important to recognize Target symbols and their meaning. TIP: If symbols appear in red, they pose a danger to your vessel based on CPA or TCPA as configured in Tools | Options | Targets. Vessel appears as a triangle with a flag of fixed length indicating turning path. At high zoom, the triangle may be replaced by a true scale outline of target vessel relative to your vessel's reference position oriented along your ship's heading. The cross hair indicates the AIS antenna position. Vessel appears as a triangle with a curved dashed line indicating intended turning path. Each dash and space (- ) = one minute. The vessel appears as a broken triangle oriented by heading or COG if heading is missing. If heading is available, heading line will be visible as a solid line. Active State Past Track Past track or path is indicated by a series of dots. Lost State Flashing triangle with bold solid cross indicates that no information for the target has been received and information is not available. Triangle oriented per last known value. Cross has fixed orientation. Naming Conventions for Targets When Nobeltec Navigation Software display targets information, sometimes names are not yet associated with the target. AIS, for example, transmits a target's positional information far more frequently than it sends name, cargo and destination type info. Long names can become an onscreen display problem. When target names are too long, Nobeltec Navigation Software can abbreviate the AIS targets name to A1 or A2 (for example). What Is AIS? The Automatic Identification System (AIS) is an initiative mandated by the International Maritime Organization (IMO), designed to reduce collisions at sea. Self-propelled vessels that measure 65 feet or greater in length, other than passenger and fishing vessels, in commercial service and on an international voyage, are required to have an AIS transmitter onboard. AIS received data, interfaced with Nobeltec Navigation Software, gives you the ability to add a mark onscreen for every significant ship within radio 19 - Target Tracking Active State Incomplete Data Figure 19.7 - Target Threat Settings 19 - Target Tracking 138 Nobeltec® Navigation Software User’s Guide range on your radar display and overlaid electronic charts. When you doubleclick on these marks, each ship's velocity vector (speed and heading), ship actual size, ship name, course and speed, classification, call sign, registration number and other information will display. Types of AIS Broadcasts Use this information to name any ship over VHF radiotelephone by name, rather than by more imprecise means such as "ship off my port bow"; dial that ship directly using GMDSS equipment; or send to (if you are equipped with a transponder) or receive from the ship short, safety-related e-mail messages. Class A Nobeltec Navigation Software recognizes the following AIS information types: Class A AIS units broadcast the following dynamic information every 2 to 10 seconds while underway and every 3 minutes while at anchor at a power level of 12.5 watts. The information broadcast includes: • Navigation status (as defined by the COLREGS) - Not only are "at anchor" and "under way using engine" currently defined, but "not under command" is also currently defined, among others. • Rate of Turn - Right or left, 0 to 720 degrees per minute (input from rate-of-turn indicator when present). • Speed Over Ground - 1/10 Kt resolution from 0 to 102 Kts. • Longitude and Latitude - 1/10 000 minute. • Course Over Ground - Relative to true north to 1/10th degree. • True Heading - 0 to 359 degrees derived from gyro input. • Time Stamp - The universal time to nearest second that this information was generated. Class A AIS units broadcast the following static information every 6 minutes: • MMSI Number - Vessel-specific unique identifier, links the data broadcast to the described vessel. Transmitted with every sentence. • IMO Number - Unique identification reference (related to ship’s construction). • Radio Call sign - International call sign assigned to vessel, often used on voice radio. • Name - Name of ship, 20 characters are provided. • Type of Ship/Cargo - See Table 20.1 • Dimensions of ship - To nearest meter. • Source - Reference point on ship from which position is calculated. • Draught of Ship - 1/10 meter to 25.5 meters (note "air-draught" is not provided). • Destination - 20 characters are provided (at Master’s discretion) • ETA - Estimated Time of Arrival at destination - month, day, hour and minute in UTC (at Master’s discretion). Chapter 19 - Target Tracking Class B Class B is nearly identical to Class A, but broadcasts dynamic information every 3 minutes when underway at a speed of less than 2 Kts and every 30 seconds at an underway speed of greater than 2 Kts. Static information is broadcast every 6 minutes on alternating channels. Class B is only required to receive (not transmit) text safety messages and other application identifiers/ binary messages. 139 Type of Ship/Cargo ID Short Label Long Label 0-9 Not in use 10-19 Future Use WIG Wing-In-Ground Craft Dynamic broadcasts include the following: • SOG - 1/10 Kt resolution from 0 to 102 Kts. • LAT/LON - 1/10 000 minute. • COG - Relative to true north to 1/10th degree. • True Heading - 0 to 359 degrees derived from gyro input. • Time Stamp - The universal time to nearest second that this information was generated. 21 WIG-DG-A Wing-In-Ground Craft – Carrying DG (Dangerous Goods), HS (Harmful Substances) or MP (Marine Pollutants) (category A) 22 WIG-DG-B Wing-In-Ground Craft – DG, HS, MP (B) 23 WIG-DG-B Wing-In-Ground Craft – DG, HS, MP (C) 24 WIG-DG-C Wing-In-Ground Craft – DG, HS, MP (D) 30 FISHING Fishing Static broadcasts include the following: • MMSI Number - Vessel-specific unique identifier, links the data broadcast to the described vessel. Transmitted with every sentence. • Radio call sign - International call sign assigned to vessel, often used on voice radio. • Name - Name of ship, 20 characters are provided. • Type of Ship/Cargo - See Table 20.1. • Dimensions of Ship - To nearest meter. • Source - Reference point on ship from which position is calculated. 31 TOWING Towing 32 TOW-LRG Towing – large size 33 DREDGE Dredging or underwater operations 34 DIVING Engaged in diving operations 35 MILITARY Engaged in military operations 36 SAILING Sailing 37 PLEASURE Pleasure Craft 40 HSC High Speed Craft 41 HSC-DG-A High Speed Craft – DG, HS, MP (A) 42 HSC-DG-B High Speed Craft – DG, HS, MP (B) 43 HSC-DG-C High Speed Craft – DG, HS, MP (C) 44 HSC-DG-D High Speed Craft – DG, HS, MP (D) 50 PILOT Pilot Boat 51 SAR Search and Rescue boat 52 TUG Tug 53 TENDER Port Tender 54 ANTI-POLLUT Boat with anti-pollution facilities or equipment AIS Base Station Shore-based station provides text messages, time-synchronization, meteorological or hydrological information, navigation information or position of other vessels. Normally reports every 10 seconds. On-shore Base Stations can be rendered in the Chart window pane. Right-click on any Base Station to display the Base Station Name, MMSI Number and Lat/Lon. Base Stations can be filtered from onchart display using AIS Target Filtering. Received Text Messages Text-based Safety Messages broadcast from an AIS Transmitter will be displayed in the Status Messages tab of the NavBar when your system is configured to receive AIS transmissions. A Warning Indicator will appear in the Chart window pane when a text message is received. 19 - Target Tracking 20 Nobeltec® Navigation Software User’s Guide 140 ID Short Label Long Label 55 LAW Law Enforcement 56 LOCAL Local Boat 57 LOCAL Local Boat 58 MEDICAL Medical transport 59 SHIP Ship 60 PASSENGER Passenger Ship 70 CARGO Cargo Ship 71 CARGO-DG-A Cargo Ship – DG, HS, MP (A) 72 CARGO-DG-B Cargo Ship – DG, HS, MP (B) 73 CARGO-DG-C Cargo Ship – DG, HS, MP (C) 74 CARGO-DG-D Cargo Ship – DG, HS, MP (D) 80 TANKER Tanker Ship 81 TANKER-DG-A Tanker Ship – DG, HS, MP (A) 82 TANKER-DG-B Tanker Ship – DG, HS, MP (B) 83 TANKER-DG-C Tanker Ship – DG, HS, MP (C) 84 TANKER-DG-D Tanker Ship – DG, HS, MP (D) 90 OTHER Other type of ship 91 OTHER-DG-A Other type of ship – DG, HS, MP (A) 92 OTHER-DG-B Other type of ship – DG, HS, MP (B) 93 OTHER-DG-C Other type of ship – DG, HS, MP (C) 94 OTHER-DG-D Other type of ship – DG, HS, MP (D) 19 - Target Tracking Table 19.1 - Types of Ship/Cargo Broadcast DSC-Equipped Marine Radio Support DSC-equipped marine radios provide vessel tracking for both DSC polling and distress calls. When you poll another boater who is also equipped with DSC technology for their position request, Nobeltec Navigation Software will display their returned information onscreen, alerting you to their location and direction. Your DSC radio must have a DSC NMEA out port and be configured to send NMEA data to the Nobeltec Navigation Software. Once the DSC radio is installed and sending NMEA data to NNS, position reports and distress calls can be plotted onscreen. Every vessel is assigned an MMSI Number (a unique, nine-digit identifier) for tracking using DSC. Numbers are assigned through the International Telecommunications Union. You can plot MMSI numbers polled from other vessels on your charts and save MMSI numbers for future recall. You can also associate a name with the MMSI number for easy on-chart identification. DSC radio-received distress calls are automatically plotted on your charts. You will see a pop-up message in the Nobeltec Navigation Software when you receive a distress call over your DSC-equipped marine radio. The DSC radio and your Nobeltec Navigation Software both require incoming GPS data in order to function. Additionally, Nobeltec Navigation Software needs to hear DSC sentences coming from the DSC radio. Occasionally, this may present challenges for installation, as most GPS units and DSC radios have a limited number of NMEA input/output connection wires exposed. Nobeltec recommends the use of a SeaLevel Serial-to-USB adapter to connect the GPS, the PC and the DSC radio. NOTE: It is highly recommended that a trained NMEA installer perform installation of these devices to avoid wiring problems. Once the DSC radio is installed and sending NMEA data, Nobeltec Navigation Software will detect the DSC radio and prompt for setup. Chapter 19 - Target Tracking 141 Tender Tracking A new feature of Nobeltec Navigation Software, sold as an upgrade to Admiral MAX Pro, is the ability to track small affiliate objects, called "Tenders", such as jet skis, wave runners or even individual passengers, using the Seetrac® Tender Tracking interface. Tenders can be tracked using your onscreen target tracking capabilities and can greatly improve security and safety of these affiliate vessels and objects. Unlocking Tender Tracker Once you purchase Nobeltec Tender Tracker Plus Pack, your Jeppesen Marine product distributor will provide you with an Unlock Code. This code will unlock the Tender Tracker Plus Pack features already embedded in Nobeltec Navigation Software. To use your Unlock Code to unlock Tender Tracker, follow the instructions in Chapter 2 - Installation. Upon installation of the Tender Tracker Unlock Code, all Tender Tracker functionality is available. However, you still need to direct Nobeltec Admiral MAX Pro to look for SBU output in order to recognize Tender Tracker data and display affiliate objects onscreen as secondary targets. See Chapter 24 - Tender Tracker for full details about and setup options for the Tender Tracker upgrade package features. 19 - Target Tracking 142 Nobeltec® Navigation Software User’s Guide 20 - Radar Usage 20 - Radar Usage How Does the IR2 Work? Radar Functionality Nobeltec Navigation Software combined with radar input can greatly improve your navigation capabilities. There are two options that allow you to interface radar technology with Nobeltec Navigation Software: • A Full Nobeltec InSight™ Radar 2 (IR2). A radar specially designed by Nobeltec to send digital imagery directly to a personal computer through your computer’s Ethernet port. or • Figure 20.1 - Diagram of IR2 Setup A Nobeltec InSight™ Radar 2 - Black Box (IR2-BB™). The IR2-BB is a specially designed hardware component that converts the analog output from most existing, industry-standard radars into a digital stream that can be used by Nobeltec Navigation Software. The benefit of this option is that it does not require a complete retrofit of your radar system. Connecting this device to your computer is accomplished through a standard USB port. Both of these options are described in full in this Radar Usage chapter. The InSight Radar 2 (IR2) What are the Benefits of Using an IR2? The IR2 Digital Radar connects to a personal computer through a standard Ethernet or network port. In most cases, it can also be connected to a network hub or router. For Network connections consult your Nobeltec IR2 Installation Guide. Important Notice Regarding 2kW Dome Models The Nobeltec IR2-2D20 (2kW Dome) varies slightly from other IR2 models. Although it is still a digital radar, it connects to the computer differently and does not have some of the same features as the other IR2 radars (see Figure 20.2). If the feature being described in this chapter is not available for the IR2-2D20, the term "4kW and Higher" will be listed next to that feature. The Nobeltec IR2 is a complete radar solution that sends radar output directly to one or more personal computers in a digital format. Most radars transmit information between the transceiver and a display unit in analog form only. NOTE: There are several IR2 models. This chapter discusses the most common usage of the IR2, with some footnotes for the 2kW Dome IR2, which varies from other IR2 models in behavior. Figure 20.2 - IR2-2D20 (2kW Dome) Setup Chapter 20 - Radar Usage InSight Radar Window Pane in Admiral MAX Pro NavView Figure 20.3 - Radar Overlay in Nobeltec Navigation Software 20 - Radar Usage InSight Radar Window Pane in PlanView 143 20 - Radar Usage 144 Nobeltec® Navigation Software User’s Guide The InSight Radar 2 - Black Box (IR2-BB) The InSight Radar Window Pane What is the IR2-BB? The InSight Radar window pane (see Figure 20.3) is used to view radar images within Nobeltec Navigation Software. This window pane can be resized and moved in PlanView mode and laid out in various configurations using the View Manager in NavView. The InSight Radar window pane contains a broad array of radar-specific features and controls. The InSight Radar 2 - Black Box (IR2-BB) is a specially designed hardware component that converts the analog output signal from many existing radars into a digital format usable by a personal computer. Over the past decades, little has changed with the way a radar antenna sends and receives radar microwaves. However, there have been significant advancements in the display and utility of the resulting image. Until now, boaters wanting to take advantage of these technological advancements had to replace their entire radar system even though the antenna was virtually unchanged. With the IR2-BB and Nobeltec Navigation Software, you can avoid the cost of a complete radar retro-fit and still get the significant advantages of combining radar data with your electronic charts. How Does the IR2-BB Work? The IR2-BB essentially "repeats" radar data from your traditional radar display to the personal computer. Depending on your radar make and model, tuning or other adjustments may be required to get the best radar image. An advantage to using Nobeltec Navigation Software radar display is that you can continue to use your existing radar display or plotter device for redundancy, comparison and safety. WARNING: The radar image on your plotter device may look slightly different than the image shown by Nobeltec Navigation Software. Opening the Radar Window Pane 1. 2. Launch Nobeltec Navigation Software. Select Radar | Radar Display or a. Click on the InSight Radar Window Pane ToolBar button. If your radar unit (and IR2-BB if applicable) is turned on and properly connected to the computer, the InSight Radar window pane automatically displays a radar image similar to that in Figure 20.3. Transmit/Standby Once your digital radar hardware is properly installed and powered on you can view radar image onscreen by opening an InSight Radar window pane. Click Radar Transmit/Standby to begin or stop radar transmission. NOTE: Placing the radar in Standby mode does not power off the radar, but does stop the transmission of radar data. Once the radar is fully powered, Nobeltec Navigation Software automatically displays incoming radar data and provides you with a range of tuning and control options. Radar Right-Click and Radar Menu (PlanView) The InSight Radar window pane can minimized, maximized and can share the screen with other window panes, such as a Chart window pane. You can close the InSight Radar window pane while the radar is still in operation. If you are overlaying the radar image on an electronic chart, the dedicated radar display is not required to be visible. As long as your Radar (and IR2-BB, when applicable) is powered on and connected, radar data will continue to transmit, even if you are not currently viewing it onscreen. If the guard zone is enabled, alarms will still be triggered and targets will continue to be tracked by the radar, even without an onscreen display. Figure 20.4 - Wiring of the IR2-BB Chapter 20 - Radar Usage Ghost Cursor Radar/Chart Overlay Overlay Radar Image on Chart: You can overlay the Radar image directly on top of the Chart window pane, aligning the Radar with the chart until all targets are displayed on the chart in their exact location. Radar overlay helps you navigate the chart better and the chart brings context to what can often be a confusing display of radar blobs. Clicking on the radar overlay button toggles radar overlay on and off. TIP: You can also turn Radar Overlay on by right-clicking on the chart and choosing Radar Overlay from the pop-up menu or by selecting Radar | Radar Overlay from the main menu. REMEMBER: The Auto Range feature keeps chart scale and radar range synchronized, making it easier to understand the radar in context with the chart. To adjust radar range, zoom in or out using any of the chart zoom tools. Routes, Marks and Boundaries in Radar Window When you select Display Nav Objects in Radar View, from the Tools | Options | Radar tab, existing Marks, Waypoints, Routes and Boundaries will display in the Radar Window, giving you a clearer sense of your location in relation to Radar objects. Figure 20.6 - Radar Nav Object Overlay ARPA & MARPA Figure 20.5 - Radar/Chart Overlay When radar overlay is on, important radar information is displayed in the corners of the Chart window pane. WARNING: Radar Overlay on your electronic charts requires a high speed and well-adjusted compass. Slight deviation errors are significantly magnified with radar overlay. Make sure that you have setup your radar and digital compass correctly. ARPA targets are those acquired automatically by the radar. MARPA targets are those you manually tell the radar to track. Both target types are displayed in the same way on the Chart window pane. ARPA/MARPA data from your radar can be delivered to Nobeltec Navigation Software through an NMEA data string (TTM or TLL). For users that have a Nobeltec InSight Radar (IR2) or the Nobeltec InSight Radar 2 Black Box, MARPA Targets can be acquired by right-clicking on the object in the Chart or Radar window pane and choosing Acquire This Target from the pop-up menu. 20 - Radar Usage When in multiple paned window mode, one way to compare the electronic chart and the radar is to use a function called Ghost Cursor. Ghost Cursor is enabled by selecting Yes from Tools | Options | Radar | Show Ghost Cursor. To show the Ghost Cursor, move your cursor over the Radar or Chart window pane. A "mimic" cursor will follow the primary cursor’s movements in the other window pane in the same relative position. Ghost Cursor is particularly useful when trying to understand more about certain radar targets. By hovering your cursor over the radar target in question, you can see its exact location on the chart. 145 146 Nobeltec® Navigation Software User’s Guide 20 - Radar Usage ARPA Radar Connection (Admiral MAX Pro Only) Nobeltec Admiral MAX Pro has the capability to display ARPA targets detected by any industry standard external radar, using an InSight Radar 2 Black Box (IR2-BB) to convert that analog output into digital NMEA sentences. Likewise, a Nobeltec IR2 Radar can transmit ARPA NMEA sentences directly to Admiral MAX Pro. 1. Connect a Heading Sensor and GPS to your computer via serial ports. 2. Connect the output cable from your IR2 radar to your PC through an Ethernet port or connect your external radar to an IR2-BB and connect the IR2-BB to your computer via an available USB port. 3. Place a check-mark in the Input Ports on the Ports check box (Configure Tab | Options) for the applicable COM port. The Radar Control ToolBar Auto Range Auto Gain Auto Sea Clutter Gain Up and Down Range Up and Down Rain Up and Down Sea Up and Down Radar Advanced ToolBar (Admiral MAX Pro Only) Acquire Target Admiral MAX Pro will display target data once the cables are correctly connected to the PC. Target speed and direction will also be displayed on the Chart window pane. NOTE: Connect both a radar and a heading sensor to your PC. Without a heading sensor, any ARPA data displayed in NNS may be inaccurate. Radar Rotation Speed* Nobeltec Radar Overlay and MARPA If you are using a Nobeltec Radar with Nobeltec Navigation Software, targets shown onscreen can be internally generated. NOTE: If you are using the IR2 2kW Dome model, the Advanced ToolBar is not available and will appear "grayed" out. How It Works Radar Tools ToolBar If you are using the Radar/Chart overlay feature and see a potential target on the Radar or Chart window pane, right-click the object and choose Acquire This Target from the pop-up menu. NNS will begin to gather information about this target and generate speed, course, CPA and TCPA information displayed on the Chart window pane in the same way as other target information. Transmit Radar Overlay IR Rejection Range Rings EBL Radar ToolBars There are three primary radar ToolBars and a number of secondary ToolBars organized in smaller subsets. ToolBars may appear horizontally or vertically by default, but can be manipulated onscreen to suit your personal layout configuration requirements. NOTE: To open non-default ToolBars, select Tools | ToolBars and place a check-mark next to any ToolBar you wish to see. Click Apply to retain changes. Open Radar Display Target Expansion VRM Guard Zone Pulse Length Chapter 20 - Radar Usage Initial Radar Setup After successfully installing the radar, transmit trigger delay should be reviewed and adjusted in order to compensate for cable transmission delays. Longer cables generally require a higher trigger delay setting. Setting the Transmit Trigger Delay: The transmit trigger delay (TxTrig) is a setting that, when configured incorrectly, can cause a donut-shaped ring to appear in the center of the radar image. Trigger delay should be initially set to reduce the size of the ring. Refinement of the Transmit Trigger is best viewed using radar overlay on the Chart window pane. In most cases, Transmit Trigger settings remain between 125 and 160. Figure 20.7 - Transmit Trigger Delay Settings - Appearance Changes as a breakwater or riverfront. These can appear deformed due to excessive or inadequate trigger delay. Properly setting the delay may require on-thewater tuning when looking at a straight object. Trigger delay adjustment removes deformations in the radar return as shown in Figure 20.7. To adjust the Transmit Trigger Delay setting: 1. Launch Nobeltec Navigation Software and open a Radar window pane. 2. Select Radar | Radar Initial Setup. 3. Radar image rotation and trigger delay initial settings should be: Transmit Trigger Delay=0; Radar Heading Line Rotation=0. Adjust these settings until you achieve a stable trigger delay setting. Sector Blanking: Sector blanking is a feature of the IR2 radars 4K (or greater). This feature is used to indicate a zone where the radar does not transmit a pulse. This is necessary if: • Two or more radars are mounted within each others beam; • There is a significant structure near the radar that causes strong returns, overwhelming the circuitry of the radar; or • You wish to prevent radiating a particular zone of the radar (for example, your radar is mounted low on the fly bridge). Turn Sector Blanking on by placing a check-mark in the Enable Sector Blanking check box, then input your Start and End Blanking Angles, which are determined clockwise using a 360° angle setting. For example, if you input 270° as your Start Angle and 90° as your End Angle, the pulse will not transmit (i.e. the sector will be "blank") from about 09:00 to 03:00. Adjusting the Radar Heading Line Rotation It is not always possible to install a radar so that the front of the radar is exactly parallel with the boat’s keel or center line. The Radar Heading Line adjustment can compensate for this discrepancy. This process allows you to align the radar transceiver with the center line of the boat and only needs to be set once. This is a different function than aligning your heading sensor, so please verify that you are adjusting the radar’s physical heading line to match the center line of your boat. Figure 20.8 - Radar Initial Setup Transmit Trigger Delay can also affect the radar image of a linear object such REMEMBER: You must have a heading sensor connected to your computer. Without a heading sensor, Nobeltec Navigation Software cannot align the image correctly onto the chart for radar overlay. To quickly verify 20 - Radar Usage Setting the Trigger Delay 147 148 Nobeltec® Navigation Software User’s Guide 20 - Radar Usage Heading data, add Heading Sensor data to the console by using the Tools | Options | Console feature. Although you may attempt to make the Radar Heading Line Rotation alignment using visual verification, it is far more reliable to perform this function using the radar overlay feature. If charted land does not appear to line up correctly with the radar output for the same land mass, use the rotate scroll bar to adjust the rotation angle until the overlaid image aligns correctly. To adjust Radar Heading Line Rotation: 1. Launch Nobeltec Navigation Software and open a Radar window pane. 2. Once a radar image is displaying, select Radar | Initial Radar Setup from the main menu to open the Radar Initial Setup window. 3. Use the Radar Heading Line Rotation up and down arrows or slider bar to line up the image. 4. Radar image rotation and trigger delay initial settings should be: Transmit Trigger Delay=0; Radar Heading Line Rotation=90. Adjust these settings until you achieve a stable Heading Line Rotation setting. improve the accuracy of incoming heading data and simplify the radar alignment process. REMEMBER: Aligning the radar with a chart is sometimes difficult. Even highly accurate charts are subject to the interpretation of navigable objects by that chart's cartographer. Radar images, however, are real-time transmissions of radar wave returns. You should expect that there may always be some level of disparity between the chart and the radar. Adjusting the Compass Master Heading Correction This process allows you to align the digital compass with the vessel center line. This is normally a one-time process that corrects the entire 360° radar output equally. REMEMBER: Radar Heading Line Rotation is a one-time setup. Heading line rotation should only be offset by +/- 10 degrees maximum. Once this setting is correct, it should not require adjustment. Alignment issues while underway are typically a function of compass deviation challenges. Compass Settings Getting the radar to properly align with the electronic chart requires two key software settings: Compass Master Heading Correction: In certain cases, it is not possible to install the digital compass exactly parallel with the vessel center line. This software setting allows an offset to be entered into Nobeltec Navigation Software to compensate for this occurrence. Compass Deviation: Magnetic compasses can give incorrect readings for many reasons. The most typical is magnetic interference on the boat. The engine block, a large anchor or chain and even electronics can create magnetic interference. Nobeltec Navigation Software allows you to make entries in a deviation table that tells the software how to adjust the incoming heading data to compensate for these local deviations. TIP: Using a Combination GPS/Heading sensor that determines heading based on dual GPS antennas (instead of magnetic influence) can significantly Figure 20.9 - Compass Heading Corrections To align the compass 1. Open Nobeltec Navigation Software 2. Click on the Boat Properties Tool or Right-click on the boat and choose Properties from the pop-up menu 3. The Boat Properties General tab shows how compass bearings are displayed (True or Magnetic) along with the magnetic variation at the boat location. Chapter 20 - Radar Usage 4. 5. 7. Creating a Compass Deviation Table Magnetic compasses can provide inaccurate information due to magnetic interference. Additionally, the level of heading inaccuracy can vary at each compass heading. To resolve this, NNS contains a Compass Deviation Table that allows you to enter compass correction values at 5° increments. Once you have resolved Compass Master Rotations, test the radar alignment at various headings to discover any onboard deviations. The easiest way to test alignment is navigate in a clear open area toward each heading for 5-10 minutes, correcting deviation using the Compass Deviation Table as you go. For example: 1. Steer to magnetic North, using NNS, a radar and a heading sensor. 2. Open a Chart window pane with radar overlay and observe how the Radar overlay lines up with the chart. If the radar does not line up correctly, use the Deviation Adjustment Tool to rotate the radar image to the chart. 3. Open the Boat Properties Menu. 4. From the General Tab of the Boat Properties Menu, click Deviation to open the Compass Heading Corrections window. 5. 6. 7. 8. Click Deviation Entry to open the Compass Deviation Adjustment tool. Incrementally adjust the New Deviation settings to line up the radar and chart images. Once the radar and chart images are lined up, click Add to add this value to the deviation table. Change boat headings and repeat the process until you feel confident that the radar image lines up with the chart at each heading. Setting IR2 Radar Presets (4kW Models and Above) The Auto Gain and Auto Sea functions allow for hands free operation of the radar. As with any other setting on the radar, these modes must be properly set up in order to operate correctly. There are several presets that affect the quality of the image. This section only reviews those that affect the performance of the radar while using the "auto" functions. The Radar Presets window is used for all preset controls (actual values may vary from those in Figure 20.11). Pressing OK applies and saves any changes you have made. Pressing Cancel eliminates any changes you have made and restores the settings prior to modification. Restore Defaults sets the values to out-of-the-box defaults. Figure 20.11 - Radar Presets Auto Tune Nobeltec radars are always in "Auto Tune" mode. To optimize the image, it is necessary to set the auto tune preset. Once established, you should not need to adjust the auto tune preset unless the image quality deteriorates. Generally, you should adjust the auto tune preset on average once a year to make sure you have the highest quality image. Figure 20.10 - Compass Deviation Adjustment Tool 20 - Radar Usage 6. Click Deviation to open the Compass Heading Corrections dialog. Determine the amount of offset and enter it into the Compass Heading Corrections window Master Correction field. Because the master value affects all degrees equally, make sure to enter that value before proceeding to the Compass Deviation Table. Click Deviation Entry to create a Compass Deviation Table. 149 20 - Radar Usage 150 Nobeltec® Navigation Software User’s Guide Follow these steps: 1. Select Adjust Radar Presets by right-clicking on the radar image window or select Radar | Radar Presets from the main menu. 2. Adjust the auto tune control down until you see the image start to deteriorate. Note the value of the setting. 3. Adjust the auto tune control up past the point where the image looks good until it starts to deteriorate. Take note of the setting value. 4. Set the controls at a point between the two extreme settings, where the quality of the image is at its best. Gain Use the Gain Up sensitivity of the radar. and Gain Down Sea Clutter (SEA) Use the Sea Up and Sea Down keys to reduce the effect of random echo returns from waves or rough water near the vessel. Sea Clutter is sometimes referred to as STC (Slow Time Constant) or just SEA. Reducing the on-screen clutter caused by the echoes of waves is accomplished by increasing the SEA value. Sea Clutter shows on your radar screen as a thick cluster of radar returns. Increasing the Slow Time Constant can help filter out the echoes between rough seas and real targets. controls to adjust the A higher gain value makes the radar more sensitive to radar returns, allowing it to display weaker targets. However, if the gain is set too high, the image might get overly cluttered with background noise and even strong returns could be hidden or masked. Conversely, a lower gain could cause weak echoes to be missed. Auto Gain (4kW and Higher IR2 Radars) Based on the Radar Presets, the Auto Gain function is designed for hands free operation of the radar. By setting the gain preset, the software preserves relative gain settings for every range level. The auto gain function automatically preserves the look of the image based on the auto gain preset. Adjust Auto Gain before adjusting the Auto Sea. Once the auto gain is set, it will be set for all ranges. To adjust the Auto Gain preset: 1. Click Auto Gain to turn on the Auto Gain function. 2. Select Adjust Radar Presets by right-clicking on the radar image window or select Radar | Radar Presets from the main menu. 3. Adjust the Auto Gain control down if the image looks too strong or up if the image looks too faint. 4. Click OK once the image appears as intensely as you prefer. Figure 20.12 - Sea Clutter Auto SEA (4kW and Higher IR2 Radars) Based on the Radar Presets, the Auto SEA function is designed for hands free operation of the radar. By setting the SEA preset (as described in the chapter titled Setting up the InSight Radar) the software adjusts to the changing weather conditions to maintain the radar quality. The effect of Auto SEA varies based upon range and conditions. The Auto Sea function adjusts the image to dynamically compensate for changing sea state due to wind or swells. The radar evaluates the type of echoes returned and applies Sea Clutter control from the center of the image outward. If the sea state increases due to apparent wind changes, more Sea Clutter control is automatically applied to the leeward side of the image to counteract wave chop on that side of the vessel. Auto Sea is a combination of two modes: Harbor Sea Clutter and Auto Sea Clutter control. When the range of the radar is less than 1 mile, Nobeltec Navigation Software automatically places the radar in the Harbor Sea Clutter mode; greater than 1 mile, the program switches to Auto Sea Clutter mode. Chapter 20 - Radar Usage 8. 9. Auto Sea Clutter applies to all ranges. However, Sea Clutter is applied based on the STC Curve profile, which generally has greater benefit in the areas closest to the vessel. STC Curve (IR2 Radars only) To adjust the Auto Sea Clutter Preset: 1. Set the radar range to 12nm and click Auto Sea to turn on that function. 2. Right-click on the Radar window pane and select Adjust Radar Presets from the pop-up window or select Radar | Adjust Radar Presets. 3. Set the Auto Sea preset to 10. Set the STC Curve preset to 4. 4. Click OK. 5. Manually adjust the gain until you get secondary echoes throughout the image (make sure your radar color selection allows you discern between strong and weak echoes). 6. Re-open the Adjust Radar Presets window. 7. Adjust the Auto Sea preset value up until most of the weak echoes for an 8nm radius are eliminated. 8. Click OK. 9. Adjust the radar range to 1.5nm and verify that strong echoes from nearby vessels or land are not eliminated. If land or vessel echoes are small or have been eliminated, follow the previous steps to decrease the Sea Clutter preset. To adjust the Harbor Sea Clutter Preset: 1. Set the radar range to 1nm and click Auto Sea to turn on that function. 2. Right-click on the Radar window pane and select Adjust Radar Presets from the pop-up window or select Radar | Adjust Radar Presets. 3. Set the Harbor Sea preset to 10. Set the STC Curve preset to 4. 4. Click OK. 5. Manually adjust the gain until you get secondary echoes throughout the image (make sure your radar color selection allows you discern between strong and weak echoes). 6. Re-open the Adjust Radar Presets window. 7. Adjust the Harbor Sea preset value up until most of the weak echoes are eliminated. Click OK. Adjust the radar range to 1/8nm and verify that strong echoes from nearby vessels or land are not eliminated. If land or vessel echoes are small or have been eliminated, follow the previous steps to decrease the Harbor Sea Clutter preset. The STC Curve function allows you to control all modes of the Sea Clutter profile of the radar. By default, the STC Curve profile is set to a value of 4. For most applications, there should be no need to change this setting. However, you may want to adjust this value to get a better application of Sea Clutter if the radar is mounted higher or lower than is typical. To adjust the STC Curve profile: 1. Set the radar range to 12nm. 2. Set Gain and Sea Clutter to manual settings. 3. When the STC curve profile is set to a lower number, sea clutter is applied in an area close to the vessel. Setting the curve profile to a higher number causes STC to be applied to more of the image. 4. Determine the desired setting for the STC curve profile and click OK. NOTE: If the STC curve profile is not set correctly, adjusting the sea clutter (manual or automatic) may not have the desired impact. If you notice that increasing the sea clutter control has no impact on the image, your STC curve profile is too low. On the other hand if you notice that echoes disappear too quickly, your STC profile may be too high. Range NOTE: Range buttons change the zoom for IR2-BB transmissions, but not actual range. Range buttons determine the size of the area represented in your InSight Radar window pane from IR2 transmissions. Range settings also determine the number and distance of the range rings. Click on the Range Up or Range Down buttons to increase or decrease the range of the radar. Maximum range depends upon which radar model you own. The Range setting is shown in the upper left hand corner of the InSight Radar window pane. When you change the range, it may take 1-2 seconds to update the radar display. 20 - Radar Usage Harbor Sea Clutter is applied in situation where Auto Sea Clutter control is less optimal, such as environments where strong echoes are returned from land or nearby buildings. Unlike Auto Sea Clutter mode, Harbor Sea Clutter does not dynamically adjust the Sea Clutter, but applies a static clutter value based on the Harbor Sea Clutter preset. 151 20 - Radar Usage 152 Nobeltec® Navigation Software User’s Guide Range (nm) ¹⁄₈ ¼ ½ ¾ 1 1½ 2 3 4 6 ¹⁄₁₆ ¹⁄₈ ¹⁄₈ ¼ ¼ ½ ½ 1 1 2 2 2 4 3 4 3 4 3 4 3 8 12 16 24 36 48 64 72 96 2 3 4 6 9 12 16 18 24 4 4 4 4 4 4 4 4 4 Ring Interval No. of Rings Range (nm) Ring Interval No. of Rings Auto Range Range Up and Down The Range Levels buttons are designed to give you the ability to range out or in to a given level with a single click. Depending on your radar type, these ranges may vary slightly. Range Level ¼ nm Table 20.1 - Range Scales in Nautical Miles TIP: When the InSight Radar window pane is the active window, you can also adjust radar range by clicking the Zoom buttons or the +/- keys. 1 nm Auto Range 4 nm Auto Range: This feature automatically adjusts the radar range to match the Chart window pane. This keeps the overlaid radar image consistently scaled and sized with the chart. When enabled, a change in radar range or chart zoom level adjusts the corresponding range or zoom in the other window pane accordingly. Radar Range ToolBars There are two additional Range ToolBars designed to give you greater flexibility and control. Auto Range Range Down Range Up Range Levels: Marina, Harbor, Bay & Horizon Approximate Range Level 16 nm Table 20.2 - Range Levels Rain The vertical beam width of the radar antenna allows you to see targets on the surface even when a ship is rolling. This feature, however, can have the side effect of confusing rain, snow or other conditions with real targets. Increasing the Rain value helps to discriminate between weather and solid returns. and Rain Down keys to reduce the effect of Use the Rain Up weather or other meteorological phenomenon on your radar image. Be careful not to increase the rain value too much as it can filter out real targets with the weather. Rain Clutter control is still effective when the Gain is lowered. Chapter 20 - Radar Usage 153 Check the range ring interval and guesstimate the distance of the target to the nearest ring. Interference Rejection (IR) Variable Range Marker (VRM) Radar Interference Rejection (IR): A setting that reduces the interference caused by radar signals from other radar units operating in the same frequency band as your radar. There are four IR options. Off, 1 (weak), 2 (middle) and 3 (strong). The higher you set IR, the less interference you will receive. In order to not miss weak targets, make sure to turn interference rejection off when no interference exists. A range ring or series of rings that surround the boat. VRM are normally used to measure distances to targets and center around the transmitted GPS position. Adjust VRM by grabbing one with the mouse cursor and dragging it to the desired radius. VRM range is displayed in the lower left hand corner of the InSight Radar window pane. Range and Bearing to Target The range and bearing to a target can be measured inside the Nobeltec application a number of ways, including using the range and bearing to the cursor as displayed in the Info tab of the NavBar at the bottom of the screen or by using the appropriate console panes as shown here. Bearing of Boat to Cursor (BBC) Range of Boat to Cursor (RBC) You can also measure range and bearing to a target using the three radar tools below. Range Rings This button toggles the radar range rings on and off. As described above in the Range section, these rings are at preset distances from the vessel based on the radar range. The distance between rings is shown in nautical miles and is found in the upper left hand corner of the radar display directly next to the Range setting. Radar Range of ¾ nm Range Ring Interval of ¼ nm To measure the range of a radar echo from the vessel, count the number of rings between the center of the display (where the vessel is) and the target. Figure 20.13 - Variable Range Marker Variable Range Marker distance from vessel Gain and Sea Clutter Indicators Electronic Bearing Line (EBL) A bearing line or pair of lines that originate from the center of the boat and remain constant as the boat moves. Use the EBL to measure the bearing from the boat’s position to a target. EBL are based on transmitted GPS position and are displayed relative to the boat heading. To adjust an EBL, click and drag it to the desired angle. The angle displays in degrees and is found in the lower right corner of the radar display. 20 - Radar Usage If you are using the 2kW Dome model, the Rain Up and Rain Down turn Rain Clutter on (Rain Up) and (Rain Down) off. Nobeltec® Navigation Software User’s Guide 20 - Radar Usage 154 Pulse length and Rotation Speed EBL in Clock degrees Relative degrees Orientation and Frequency Absolute degrees Guard Zones Radar Orientation (rotation) (4kW and Higher) One of the powerful InSight features is the ability to create fully customizable guard zones. This zone acts as a shield to the vessel. If the InSight Radar receives radar returns inside the guard zone, you will be notified with an alarm. Once a guard zone is created, you can click on any of the outer edges to change the size and shape of the guard zone in that direction. Click in the center to move the whole guard zone around the vessel. When radar echoes enter the guard zone, you are notified in the Status tab of the NavBar as seen here. TIP: Radar orientation and rotation settings require your computer to be receiving Heading Sensor data from your Heading Sensor. Figure 20.14 - Radar Echoes shown in Status Tab of NavBar WARNING: Neither guard zones nor any other part of the InSight Radar should be relied upon as the sole means for detecting collision possibilities. To improve the function of the guard zone, make sure your radar is properly adjusted to see targets inside the guard zone. Pulse Length (4kW and Higher) Pulse Length is the length of time of each transmission of radar waves by the transceiver. Typically a longer pulse length produces better long range target detection and a shorter pulse length is for better target range discrimination. The pulse length is shown in the upper right corner of the InSight Radar window pane. The pulse lengths are pre-set for each range so you are not typically required to change this setting. However, if you are not satisfied with the current pulse length setting, it is possible to toggle between the pulse lengths with this ToolBar button. You can rotate the InSight Radar window pane by using the Radar drop down menu or the right-click. In both cases, click on the option Radar Orientation and then on one of its sub-menu options. The current orientation is displayed in the upper right corner. Orientation options are: Head Up: Rotates the radar image such that the line connecting the center of the radar image to the top of the display is the vessel’s current heading. The radar is painted relative to your ship’s heading. North Up: Rotates the radar image so that North is always directly at the top of the radar display. In this case, the line connecting the center of the radar image to the top of the display is the North indicator. Course Up: This option rotates the radar image to the current Course Over Ground (COG). As your course changes, so does the radar display. COG is necessarily different than Heading in that your boat can be pitching and rolling creating sudden heading changes while COG remains consistent. Heading is typically delivered via a heading sensor while COG is a function of your GPS and track history. Leg Up: This option rotates the radar image to the intended course between your start point (or last waypoint) and the next waypoint in your route. Leg Up is useful when your ship is yawing excessively and the radar image is changing too much. This option only works when you have a activated route in a chart window. NOTE: When using the 2kW Dome, the only Radar Orientation available is Head Up. If the radar image is overlaid on an electronic chart, you can select any of the orientation modes listed above. Chapter 20 - Radar Usage Off-Centering the Radar (Shifting) (4kW and Higher IR2 and all IR2-BB radars) Click and Drag: With your mouse, click and drag on the vessel icon to re-center the image wherever desired. AutoScroll: Look Ahead: Clicking on this button does two things. First, it orients the radar image to Heads Up and then centers the radar image at the bottom of the radar display. This gives you the maximum view ahead. Recording the Radar Record/Playback Control: Nobeltec Navigation Software can record radar images from your voyage and play them back at a later time. Clicking on this button launches a dialog that looks like a VCR control: Figure 20.16 - Radar Record/Playback Play: This button launches a dialog where you can browse to pre-recorded radar files. Radar files are saved with a ".rad", ".ras" or ".rec" extension. Once located, the radar display plays the recordings back at real-time speeds. NOTE: Not all radars support the Record/Playback functions. Rewind: This rewinds the radar file that you are currently viewing. Pause: Pauses the radar file that you are currently viewing. Record: Begins recording radar data in real-time. When you click on this button, you will be prompted to designate the file name and location to store the radar recording on your hard drive or server. Stop: Stops radar file playback. Loop: Replays the selected radar playback file until you click Stop. WARNING: Recording radar files consumes large amounts of hard drive space in short periods. You may want to delete radar files or back them up once they are no longer needed. Figure 20.15 - Radar Look Ahead Mode Center on Boat: This button re-centers the radar image and performs the same command in a chart window. Radar image is off centered to the Look Ahead position. Notice that the heading line extends up on the image and the North indicator extends to the lower right side. Decluttering the Radar Declutter Hot Key: In the InSight Radar window pane or a chart window with Radar Overlay, press and hold down the space bar to clear the windows of any radar objects other than the radar return itself. This gives you a radar image free of all objects, including the range rings, the Variable Range Marker, etc. When finished, let up on the space bar and your radar image will return to normal. 20 - Radar Usage Your ship's position onscreen can be off-centered to provide greater radar range. You can control the positioning of the radar image inside the radar display in one of three ways: 155 156 Nobeltec® Navigation Software User’s Guide 20 - Radar Usage for low-light and other navigation-specific conditions, NavView can also function using touchscreen monitors. Buttons and menu entries are oversized and easy-to-read. While NavView has all of the commonly used features for navigation, it does not have some of the planning features used in PlanView. NavView’s Multiple Monitor Support One of the features of NavView is the ability to have a single computer drive more than one monitor. This is particularly useful when using integrated devices such as the InSight Radar. Hooking up multiple monitors allows you to show the InSight Radar on one screen as a dedicated radar while the other monitor(s) show other navigation data. Standard InSight Radar With Decluttering Figure 20.17 - Decluttering Comparison Re-sizing the Radar Image The InSight Radar window pane can be resized like any standard Window. In addition, the size of the radar image can be adjusted to fit the window pane or maximized so that the radar takes up more of the window space. Rightclick on the Radar window pane and choose either Fit or Clip. Figure 20.19 - Multiple Monitor Example A primary benefit of NavView is its use of screen real-estate. By eliminating the Windows ToolBars and other functions, your PC looks and operates more like a device-specific monitor than a PC. Full Screen Radar Console When the InSight Radar is being displayed as a full screen in NavView, a special Radar Console provides detailed navigation and radar information on either the right or left side of the screen (Figure 20.21). Fit Mode Clip Mode Figure 20.18 - Fit or Clip Comparison Admiral MAX Pro - Advanced Radar Features Admiral MAX Pro is designed specifically for the nautical market and is laid out onscreen in a look and feel called "NavView". Although it is designed The reported values in the Radar Console are affected by the settings in the Radar tab of the program Options. Changing the side of the Radar Console from left to right or turning it off altogether is also accomplished through the program Options. Chapter 20 - Radar Usage Full Screen InSight Radar in NavView with the Radar Console on the Left side. Figure 20.20 - Radar Onscreen 20 - Radar Usage Split Screen InSight Radar Window Pane with Chart Overlay in NavView. 157 Nobeltec® Navigation Software User’s Guide 20 - Radar Usage 158 The Vessel Vessel name Speed Heading Position The Radar Controls ToolBar in NavView controls the radar in the same way as the ToolBar of the same name in PlanView. The Cursor Bearing Range Position The Radar Tools ToolBar in NavView has a few extra radar tools that are used for Admiral MAX Pro features only. In addition to the main NavView ToolBars, Admiral MAX Pro has two additional ToolBar buttons: Selected Target Type (ARPA, MARPA) Name Range and Bearing Course Speed CPA and TCPA Radar Settings Gain Rain Sea Clutter Tune IR rejection Expand Targets Figure 20.21 - Full Screen Radar Console NavView ToolBars Double Speed (4kW and Higher): When connected to a 24 volt power source, the IR2 can operate at twice its normal antenna rotation speed. Double speed is useful for high-speed vessels or when operating in tight navigation waterways. By operating at double speed the radar is refreshed at twice normal speed. Acquire Targets Mode: This button puts your cursor into the acquire targets mode for manually identifying radar targets. This is discussed in greater detail below. Target Tracking The Admiral MAX Pro product has a built-in comprehensive target tracking system. Targets can be acquired one of three ways: AIS: Automatic Identification System is a system where vessels can broadcast position, course, speed, rate of turn and other useful information. It can be used to educate local traffic about the traffic conditions. Vessels of a certain size are required to broadcast the AIS signals, but anyone can listen. If your vessel is equipped with an AIS receiver or transceiver, Nobeltec Admiral MAX Pro picks up the incoming information and paints the targets on the chart. Radar ToolBars in NavView are similar to the ToolBars in the PlanView. However, Admiral MAX Pro provides some additional features. Each button on the NavView ToolBars function identically to the corresponding PlanView button. External Radar: Many external radars can acquire targets using either ARPA or MARPA. Most of these radars can also broadcast this data to Nobeltec using the NMEA standard sentences. When properly connected, Admiral MAX Pro paints these targets from external radars. If you are using the 2kW Dome model, please note that the Auto Sea, Auto Gain, Double Speed and Pulse Length tools are not available and the ToolBar buttons for those tools will be "grayed" out when you use that specific model. Point and Click (MARPA): Admiral MAX Pro can be used to easily acquire and track radar targets. Using the power of the PC and the mouse cursor, identifying and tracking targets is easier than ever. Chapter 20 - Radar Usage Point and Click Radar (MARPA) WARNING: No single navigational aid should be relied upon for the safety of vessel and crew. The captain has the responsibility to use all navigation aids to verify position. Electronic navigation aids are not a substitute for basic navigational principles and common sense. Properly tuning and adjusting your radar in changing conditions is critical for target tracking. MARPA target tracking requires accurate heading data. A poorly performing heading sensor makes target tracking impossible. For best performance, use a high speed GPS gyro compass and GPS. There are three ways to acquire MARPA targets using Nobeltec Navigation Software's exclusive Point and Click Radar: Double Click. In the InSight Radar window pane, simply move your mouse on top of the radar target that you wish to track and double click. Right-click. In the InSight Radar window pane, move your mouse on top of a radar target, right-click and select the option: Acquire this target. Acquire Mode. The Acquire mode changes the cursor to a dashed box. When in this mode, every left click, in the InSight Radar window pane and a chart window that has Radar Overlay, tells Nobeltec to track the radar object at the location you clicked. Once you’ve identified a target, the Nobeltec Navigation Software will process radar data for a few revolutions before displaying the tracked target. MARPA Symbology Nobeltec uses the IMO approved MARPA symbology. Symbol Figure 20.22 - MARPA Targets in Point and Click Radar REMEMBER: MARPA requires a well adjusted and properly setup digital compass. If using a magnetic compass, you will have to setup a deviation table to adjust the compass input for magnetic interferences on your boat. Acquiring MARPA Targets Acquiring MARPA targets in Nobeltec is simple. The first step is to identify the target that you wish to track. Description Meaning Dashed box Attempting to acquire target. Typically takes up to 7 full rotations. Green Circle with Vector Tracking target. Vector shows course and speed. Red Triangle with Vector (flashes red and yellow) Target is a threat because it is inside the alarm setting. Showing course and speed through the vector. Yellow Diamond Lost target. Attempting to reacquire. Downwardpointing Triangle Target is within Guard Zone. Table 20.3 - MARPA Symbols 20 - Radar Usage MARPA is an acronym for Mini Automated Radar Plotting Aid. Its primary purpose is for collision avoidance and target tracking. 159 Nobeltec® Navigation Software User’s Guide 20 - Radar Usage 160 The predictor line extending from the target symbol gives an estimate of target course and speed. The end of the predictor line shows the position where, barring changes, the target will be in a designated amount of time. TIP: If the MARPA target is lost, another feature of the Point and Click Radar is to use your mouse to drag the symbol back over the radar echo to help it re-acquire. You can also delete targets with the right-click. When a target is lost, color flashes between red and purple. Once a target has been acquired you can see it in the Radar Console as we saw earlier in the chapter or on the Targets tab of the NavBar as shown here. Figure 20.23 - Target Acquired shown in Targets Tab of NavBar The Targets tab of the NavBar shows all the targets that are being tracked, including AIS targets. Use the drop down box in its upper left corner to choose the target that you wish to view. The More Info section is used to display the extra information from AIS targets. Setting a Target Alarm The alarm settings are set based on the target's CPA and/or TCPA. By default the alarm settings are set to: CPA: ½ nm TCPA: 300 seconds. When a predicted CPA of any target becomes smaller than the CPA alarm or its predicted TCPA less than the TCPA alarm limit, an audio alarm sounds and the target displays as a red triangle with a red vector. To change the alarm settings go to the program options by clicking on the Options ToolBar button or through the menu system by clicking on the Tools drop down menu and then on Options. Now click on the Targets tab and change the Target Threat Criteria as desired. For more information on the Options, see the section later in this chapter. WARNING: The CPA/TCPA alarm should never be relied upon as the sole means for detecting the risk of collision. The navigator is responsible for using all means of threat detection, including visual observations. Target Tracking Terms and Acronyms Acronym Full Name Meaning CPA CPA is the closest distance that will Closest Point be achieved between your vessel of Approach and the tracked target based on your collective speed and direction. TCPA Time to The time it takes to reach the CPA. Closest Point Time is expressed in minutes. of Approach Rng Target Range The tracked target's range from your vessel. Brg Target Bearing The bearing of the target in True or Magnetic. CSE Target Course The tracked target's course. SPD Target Speed The tracked target's speed. Table 20.4 - Acronyms Radar Configuration Options Radar and Target tracking settings are controlled using a number of settings and features. One of the most essential ways to set up your radar is to use the Tools | Options | Radar or Targets tab. See Chapter 10 - Properties and Options for a full description of the contents and functions of these tabs. Understanding Radar The capability of a radar varies depending on where the radar is mounted, the radar's performance, weather conditions and the skill of the operator. How to Interpret the Radar Picture To interpret the radar picture, an operator should be familiar with the radar video presentation caused by the wanted and unwanted effects. For instance, radar images produced by bridges, sand beaches, waves and even a boat’s wake may all be represented differently than expected based on their visual appearance. Chapter 20 - Radar Usage 161 For correct interpretation of the radar picture, it is highly recommended that the operator practice using the radar in good weather conditions. 20 - Radar Usage Vector State Targets can be drawn onscreen displaying either True Vector State, where the vector depicts the target's true heading and velocity, or Relative Vector State, which depicts the target's immediate threat status. In Relative Vector State, a vector pointing toward the vessel indicates a collision threat. To temporarily display Relative Vector State, hold down the <V> Hot Key. Figure 20.26 - Typical Radar Picture 2. 3. Due to its proximity and size, the large boat returns a strong radar return that is similar to its actual profile. On the other hand, the small boat is painted as a small dot, because its reflection area is smaller. Also notice that the smaller boat's wake returns a large reflection. The hill on the starboard side of the vessel, because of its dense forest and hilly nature, returns large echoes, while the sandy beach to the port returns a weak radar image. The exception to the port side return is the windbreak forest which returns strong echoes because of its profile differences. False Echoes Figure 20.24 - True Vector State Figure 20.25 - Relative Vector State In Figure 20.24, the vector that is based on the actual heading and velocity of the target is displayed. In Figure 20.25, the vectors reflect the immediate threat status of the targets. Based on current conditions, the red target vector will cross the bow of your vessel within CPA/TCPA settings. Normal Echoes Figure 20.26 shows an example of a typical radar picture compared against a sample real-world scenario. There are a number of things to learn from this image regarding how a radar works. Here is a list of some important ones: 1. Buoy #1 is being blocked by the cape or hill and is not visible in the radar display. False echoes may appear according to surrounding circumstances. Examples of false echoes and causes of these echoes are described below. False echoes caused by reflection A close target may appear in two different directions. One is a real echo, while the other is a false one produced by reflected waves from structures near the radar antenna, such as a funnel, a mast, etc. If a large structure, like an iron bridge exists nearby, it can also create false echoes. False echoes caused by multiple reflection When your boat passes near a large boat, radio waves are repeatedly reflected between the two, causing several echoes at regular distances to appear in the same bearing. These false echoes produced by multiple reflection are called multiple echoes. In this case, the real target is the closest. Because multiple echoes soon disappear when your boat moves from the reflection target or the boat direction has changed, even if these multiple echoes are produced, the true image is easily detected. Nobeltec® Navigation Software User’s Guide 162 20 - Radar Usage Shadow and dead angle If the funnel, mast, post and other structure are located near a transceiver or if a tall obstacle is present, a shadow is produced from the rear of these structures. In extreme cases, no targets will appear in the shadow for a good distance. This range is called the dead range and the shadow can be produced entirely or partially. Since the dead angle due to the funnel, mast, etc. is detectable during the installation of the transceiver, it can be eliminated by changing the radar mounting position. False Echoes Caused by Side Lobes The radio waves used for radar are called microwaves and like light, they travel in straight lines. Microwaves have similar characteristics to light and images produced by microwaves on your radar screen are called the radar horizon. Since microwaves are longer than light in terms of wavelength, the radar horizon is farther away than the optical horizon by about 6% and from the physical horizon by about 15%. The radar horizon changes according to your radar transceiver height and target height. Radar Horizon and Natural Anomalies As temperature and humidity change in the air, the refractive index of radar radio waves change, consequently causing the detectable range of the radar to vary. This gives us a variation of detectable range due to a change in ambient conditions. Sub-refraction Figure 20.27 - False Echoes Caused by Side Lobes Figure 20.29 - Sub-Refraction The radiation beams emitted from the transceiver comprise side lobes in addition to the main lobe. Since the side lobe energy is very low, it does not affect distant targets. A false echo due to the side lobes is produced from a close-in target with strong reflections. A false echo caused by the side lobes appears as an arc. It is eliminated by slightly reducing the gain or by changing the FTC level. When cold air flows over the warm surface, the radar waves are curved upwards. This phenomenon is called sub-refraction. As a result, the detectable range of the radar is reduced. This occurs in polar regions or in warm currents where cold air from the polar regions flow into the sea. Radar Horizon Super-refraction Because light is generally refracted downward, we are able to see a slightly farther distance than the actual, physical horizon. This expanded perception is called the optical horizon, which is approximately 9% farther away than the physical horizon. Figure 20.30 - Super-Refraction Figure 20.28 - Radar Horizon When the air being warmed up inland flows in the cold sea, radio waves are curved downward. This is called super-refraction. In this case, the range of the radar increases. This phenomenon is produced in the warm coastal regions and becomes noticeable as the temperature difference becomes larger. Chapter 20 - Radar Usage 163 Transmission Pulse Width Ducting If air layers having a different temperature or different atmospheric pressures are produced alternately in the altitudes, a distant target exceeding the visible range of the radar is detectable. This phenomenon is caused when air layers having a different temperature contact each other. The radio waves are not refracted, but reflected on the boundary where the two layers differ. As a result, radio waves can be propagated farther that the curvature of the earth. The passage where the radio waves travel is called a 'duct'. The abnormal propagation of radio waves through this duct is called 'ducting'. Range Resolution Figure 20.33 - Range Resolution Minimum Detectable Range The minimum distance at which the radar can detect a target is called the Minimum Detectable Range. This minimum range varies depending on radar factors such as transmission pulse width, RF leakage time and height of the transceiver. The range resolution is defined as the minimum distance between two targets in the same bearing which are discriminated as two images in the radar picture. Bearing Resolution Height of Transceiver Figure 20.34 - Bearing Resolution Figure 20.32 - Height of Your Transceiver The height of your transceiver affects the short range target detection. If the transceiver is mounted at a relatively high level from the sea surface, the radar wave may skip closer targets causing the radar to fail in detection of these closer targets. The radar’s Vertical Beam Width is also involved, as shown in the figure above. A wider beam results in better short range detection, however, it also shortens the detectable range. Bearing resolution is defined as the minimum bearing where the two targets of the same distance are displayed separately as two independent images on the screen and is determined by the transceiver Horizontal Beam Width. Radar Troubleshooting Troubleshooting Direct Connections Test the Connection without the Radar Wizard If the Radar wizard is unable to see the IR2, try to locate the radar in another manner: 20 - Radar Usage Figure 20.31 - Ducting In most radar systems, including the Nobeltec Digital Radar, the radar transmission pulse width is automatically selected to short or long depending on the range scale. At a short range, a short pulse width is used to improve the close target detection as well as picture definition. At long ranges, a longer pulse width is used to achieve good long range performance. 164 20 - Radar Usage 1. 2. 3. 4. Nobeltec® Navigation Software User’s Guide Power the radar on and wait 1-2 full minutes for the radar to default to the correct IP address. Reboot your computer. Once the software and radar are functioning, select START | Run. In the field provided, type the following: Ping 192.168.0.1 –t 2. 3. 4. 5. 6. The Network Interface Card (NIC) software is installed correctly. The radar is powered on and has been for at least one minute. The LED lights on the RJ-45 connector for both the PC and the MDS box are illuminated and/or blinking. The left-most LED should remain solid, while the other LED may blink. Verify the IP address and Subnet mask are correct. If you are uncertain about the PC’s network configuration, please contact the network administrator or the NIC provider's technical support. Troubleshooting Network Connections Test the Connection without the Radar Wizard Figure 20.35 - Run Window 5. This ping function requests a return message from the radar. You should see the following: If the Radar wizard is unable to see the IR2, try to locate the radar in another manner: Power the radar on and wait 1-2 minutes for the radar to obtain an IP address from the Router/hub. The IP address assigned to the radar is dynamic and may change if the radar is powered off for a period of time or if the router/ hub is re-powered. The Router that Jeppesen Marine recommends you use allow you to view the DHCP table to obtain all the devices on the network. Using this tool for your Router, locate the IP address of the IR2 Radar. It will be in the list as: RadarSensor, as shown in Figures 20.37-8. Figure 20.36 - Ping Response 6. 7. Once the radar responds, close the Run window. If the ping request does not respond or gives the message "Hardware error", "Request timed out" or anything other than "Reply from 192.168.0.1:…"., there is something wrong with the connection. To troubleshoot the connection, check the following: 1. The PC and the IR2 Control box are connected with a crossover cable and not a straight through cable. Chapter 20 - Radar Usage 165 Figure 20.37 - RadarSensor With this particular Linksys router, type the IP address of the router into the Internet Explorer address field to get to its diagnostic pages. Clicking on the Status tab displays the image. The DHCP Clients table button shows the entire list of devices on the network. Figure 20.38 - DHCP Clients Table The RadarSensor is clearly identified with its accompanying IP address. "Ping" the radar as described previously. Once the radar responds, close the Run window. 20 - Radar Usage If the ping request does not respond or gives the message "Hardware error", "Request timed out" or anything other than "Reply from 192.168.0.1:…", there is something wrong with the connection. Check the following: 1. Verify that the IR2 works with the direct connect mode. This significantly reduces the possibility of failure in the IR2 Control box and focuses our attention on the network. 2. The PC and the radar are connected to a router/hub using straight through cables (hold connectors upside down side-by-side and verify that the color order is the same on both sides). 3. The Network Interface Card software is installed correctly. 4. The power to the radar has been "on" for at least one full minute. 5. The LED lights on the RJ-45 connector for both the PC and the MDS box are illuminated and/or blinking. The left most LED should remain solid, while the other LED may blink. 6. Verify the IP address and Subnet mask are obtained automatically. 7. If you are uncertain about network configuration, please contact the network administrator or the NIC provider's technical support. 166 Nobeltec® Navigation Software User’s Guide 20 - Radar Usage Frequently Asked Questions Q: I was tracking a target on my radar screen and it suddenly disappeared. What happened to it? A: One of the most critical pieces of data for target acquisition is a stable and correct heading value. MARPA or AIS targets are generally lost when the target is too small, returning too weak of an echo or the heading fluctuates too much. If you experience lost targets consistently, you can create a recording of your radar and send it to us for further troubleshooting. To record, right-click on the Radar display and select Record/Playback. The software will ask you for a file name. The extension for the existing IR2 radar is .RAD. Please zip your playback file and e-mail to support@ nobeltec.com with a description of your problem. Q: My radar image occasionally looks "smeared". What is causing this? A: Blurring of the radar image generally occurs due to one of two reasons: a. The PC is trying to perform too many computations at one time (Jeppesen recommends using a 1GHz system to prevent this). b. As the radar changes ranges, there is a transition between the previous pulse length the radar was using and the pulse length of the new range setting. The transition between these two causes the "smearing" to occur. Chapter 20 - Radar Usage 167 20 - Radar Usage 168 Nobeltec® Navigation Software User’s Guide 21 - Sounder Usage Starting the InSight Sounder 21 - Sounder 1. 2. Once you have unlocked the Sounder feature and used the GPS/ Port Setup Wizard to recognize the hardware, you can view Sounder using Nobeltec Navigation Software. Launch Nobeltec Navigation Software. Open a Sounder Display by clicking the Sounder ToolBar button or using the Sounder menu. Understanding the Sounder Display The InSight Sounder Display provides you with information in both text and graphic form. The display can be split or in full-screen mode. Sounder pings are represented over time, moving from right to left as the sea, lake or river floor appears beneath the transducer. In Figure 21.2, strongest returns are displayed in blue, weaker returns in red and orange and weakest returns in yellow. The sea floor is shown in brown and black and the bottom line is aqua. Color themes can be customized to suit your individual requirements. Sounder Menu Software ToolBar Sea Floor Depth Indicator Frequency Indicator Shallow Water Alarm Sounder ToolBar Depth Scale Bottom Line Indicator Temperature Graph Sea Floor A-Scope Temperature Temp and Speed Indicators Scale Figure 21.2 - InSight Sounder Display Fish Returns Figure 21.1 - Sounder Menu The first time the InSight Sounder is used, it will automatically enter Live Mode and start searching for depth information. Sounder settings are saved from usage to usage, so you may need to switch into Live Mode if you have moved your boat since last usage. As Sounder data is retrieved, the Sounder Display will be populated. On the right side of the screen, the A-scope displays the enlarged, newest Sounder returns. These magnified returns are also drawn in proportional scale, where strongest returns are also the widest. The Sounder Display also contains a number of text items, including Depth, Temperature, Speed, Frequency and automatic indicators. Most of these can be hidden to accommodate more Sounder information onscreen. Sounder Display can be controlled in three ways: using the Sounder ToolBars, the Sounder Menu and using the Right-click menu. Chapter 21 - Sounder 169 Sounder ToolBars The Sounder Menu The Sounder ToolBars allow you to use most of the features and configure your Sounder easily. The Sounder Menu can be accessed from the main program menu (see Figure 21.1). From the Sounder Menu, you can access features that are not included on the ToolBars. In addition, the Sounder Menu also allows you to display features such as the A-Scope, Bottom Line and Depth Scale. Sounder Display Auto Range Decrease Range Shift Down Operation Modes Operation Mode Increase Range More Gain Frequency Signal Level Clutter Noise The Right-Click Menu When you right-click your mouse in the Sounder window, a right-click pop-up menu appears onscreen and from this menu you can easily access Sounder Options, change your split screen settings, etc. Adjusting the Sounder Image Complete control of the display is a hallmark of Jeppesen Marine solutions. This section describes the most important methods for adjusting the way the sounder echoes are represented on-screen. With the Nobeltec InSight Sounder, you are free to fine tune the behavior of the black box and transducer in a number of ways to produce an image you find satisfying. Automatic operation modes are provided for ease-of-use and limit which adjustments can be made. However, in Manual Mode, you can adjust the Sounder image in a number of ways, using the Sounder Tuning ToolBar. If the Sounder Tuning ToolBar is not visible inside your software, enable it from the Sounder Menu. To load the Sounder Tuning ToolBar, click on Sounder | Display Sounder ToolBars. The Sounder Tuning ToolBar will be added to your view. Figure 21.3 - Sounder Right-Click Menu Gain The Gain Up and Gain Down buttons adjust the gain. Gain settings control the sensitivity of the transducer and black box when receiving Sounder 21 - Sounder Less Gain Shift Up The InSight Sounder has three modes of operation: Cruising, Fishing and Manual. The first time your Sounder is activated, it will automatically start in Cruising Mode. • Cruising Mode: An automatic mode designed to detect the bottom efficiently without user interaction. Less emphasis is given to fish detection in this mode and Gain and Clutter levels are also handled automatically. If you leave Sounder in this mode, it will search for the bottom indefinitely, displaying depth imagery in the display histogram. • Fishing Mode: Gain and clutter is automatically handled and tailored for fish detection under various conditions. Use this mode to search for big fish as well as bait fish with minimal interaction needed. • Manual Mode: For advanced users, Manual Mode provides complete control over all aspects of the depth sounder. You are free to modify Gain, Clutter, Signal Level and Noise filters to adjust the image. Nobeltec® Navigation Software User’s Guide 170 returns. High gain settings add more detail and feedback to the Sounder display while a low gain setting will only display the stronger returns. NOTE: To manually control Gain settings, you must be in Manual Mode. Clutter Clutter onscreen may be caused by debris in the water, small schools of fish or other hard-to-pinpoint causes. Occasionally this information cannot be removed by lowering your gain setting. The Clutter filter will allow you to display only stronger returns and improve image clarity and sharpness. Clutter settings range from Off (no filter) to 9 (weaker returns are filtered out). 21 - Sounder NOTE: To manually control Clutter settings, you must be in Manual Mode. Figure 21.4 - Sounder Colors Signal Level To preview changes as you are making them, click Apply. The Signal Level filter provides a threshold for displaying sounder returns. This filter removes weaker returns from the display (these can also be filtered further by adjusting Noise and Clutter). This filter specifies how strong the return for display must be to appear onscreen. Signal Level settings range from Off (no filter) to 5 (weaker returns are filtered out). NOTE: At any time, you can reset a theme to its default color values by clicking Reset Theme to Defaults. Noise The Noise filter reduces the possibility of interference from nearby echo sounders and electronic devices. This filter can be enabled or disabled. Colors Another key way to adjust Sounder display is to use customizable color schemes. Eight pre-configured color schemes are available from Tools | Options | Sounder tab. Press Colors to access the Sounder Colors dialog box. The Sounder Colors dialog box can be used to select any theme from the drop down box at the top or modify any theme to suit your own preferences. You can adjust the color of all sounder returns, add/remove/adjust color dividers, select the type of coloring method (Single/Solid/Gradient) and specify a wide range of colors for text, background, bottom line, etc. . Additional Color Options • Bottom Line represents the calculated depth of the sea floor. • Shallow Water Indicator is represented by a solid line across the Display at the level where the Shallow Water Depth Alarm is set. • The Use Sea Floor Color option can be set to Yes or No. If it is set to Yes, the Sea Floor color is used when drawing any returns beneath the bottom line. When set to No, the regular sounder return colors are used. • Text Color is applied to any text in the Sounder Display. • Background Color is applied to the background of the Sounder Display. • Highlight Color is used to outline Text, allowing the text to stand out against other colors in the display histogram. • Temperature Color is used to paint the temperature graph. Key Sounder Features Changing Frequencies The InSight Sounder can operate at either 50 kHz or 200 kHz frequency or at both frequencies concurrently using a split screen (Figure 21.5). In a zoomed view, the right side frequency is used. You can change the frequency with the Frequency button on the Sounder ToolBar, using the Sounder Menu or via the Sounder Display Right-Click Menu. Chapter 21 - Sounder 171 decrease the range by one setting (based on measurement preferences). The small down arrow next to each button brings up a list of available ranges, allowing you to instantly jump to a specific range. Current Sounder range can be seen by examining the depth scale to the right of the Sounder Display. Auto Range Figure 21.5 - Sounder Frequency Split Screen Auto-range feature enables an automatic range finder within the Nobeltec Navigation Software. In this mode, Sounder will automatically maintain a range that allows the sea-floor to be viewed. Enable Auto Range by clicking the Auto Range button on the Sounder ToolBar, which also enables the Increase Range and Decrease Range buttons. Click Auto Range again to turn off the automatic mode and enable the manual range buttons. 21 - Sounder The benefits of each frequency are described in Table 21.1. 50 kHz 200 kHz • Longer wavelength goes deeper, but with somewhat lower resolution. • Shorter wavelength provides a sharper picture, but can't go as deep. • Less resolution is better for detecting big fish, but may miss bait fish. • Finer resolution is better for finding smaller fish and viewing seafloor details. • Wider beam angle is better for seeing fish not directly under the transducer. • Narrow beam is more focused and reduces the influence of rough water. Figure 21.6 No Shift Applied Figure 21.7 Same Screen with Shift Applied Table 21.1 Frequency Comparison Adjusting the Range Increase Range Decrease Range Show List Of Ranges Range is maximum depth you determine that the InSight Sounder should display onscreen, plus any shift that is applied to the view. While the actual depth may exceed your settings, no data will be returned beyond this artificial limit. Range can be adjusted manually using the Increase Range and Decrease Range buttons. Single-clicking either button will increase or Auto Range Adjusting the Shift When the sea-floor depth exceeds a practical, maximum setting, expanding Range causes Sounder returns to become too small to view clearly. The Shift function narrows return to only a portion of Sounder data. To adjust the Shift, use the Shift Up and Shift Down buttons. 172 Nobeltec® Navigation Software User’s Guide changes. When in a Zoom Mode, a Zoom Bar will appear that indicates the portion of the regular view that is being enlarged. Use this split view to keep a close eye on the bottom. Shift Up Shift Down Split Views Zoom Factor 21 - Sounder The Split View function allows you to display multiple frequencies. Select a Split View from the Open Sounder Window button or from the Sounder menu. Available selections are Bottom Zoom, Custom Zoom, Bottom Lock, Sea Floor Discrimination and Dual Frequency. No Split returns the Sounder Display to a single frequency view without a split. Zoom Bar When a Split View is selected, any range or shift adjustment to the Sounder Display is applied to the side that has the "focus". The focus, represented by a yellow box drawn around the outside of the one side of the Split View or the other, indicates which side will receive ToolBar or menu commands. Figure 21.9 - Bottom Zoom Custom Zoom Focus (Yellow Line) Figure 21.8 - Split View Bottom Zoom With the Bottom Zoom selected, the Sounder Display is divided in half. The left side contains a Bottom Zoom display, while the right side continues to display the regular sounder data. Bottom Zoom causes the bottom, when it is found, to be drawn larger. You can select various ranges to display using the Range controls. The ability to shift the view is disabled, because this is done automatically to maintain the sea floor on-screen as the depth of the bottom A Custom Zoom split view is much like a Bottom Zoom; the Sounder Display is divided in half and the left side shows a magnified version of the sounder echoes. However, with a Custom Zoom, you are free to adjust both the Range and Shift of the zoomed view. The Zoom Bar is displayed on the A-Scope, indicating the portion of the regular view that is being enlarged. In Custom Zoom mode, this zoom bar can be "grabbed" with the mouse and can be dragged up or down, causing the Custom Zoom shift to be adjusted. A Custom Zoom is ideal when you would like to see additional data but intend to move the custom zoom around. Chapter 21 - Sounder 173 Sea Floor Discrimination The Sea Floor Discrimination split view is very similar to the Bottom Lock split view, in that the InSight Sounder automatically tracks the bottom. However, in this mode, much more of the sea floor is drawn and the sea floor is centered in the middle of the split view. Since some of the sound waves penetrate the sea floor before being returned, this Split View allows more of the returns beneath the sea floor to be seen. Weak returns often represent a soft sea floor, made up of sand, silt or seaweed. Stronger returns can mean a hard sea floor, made of rock or other hard material. Zoom Factor Dual Frequency The Dual Frequency split view simply allows both 50 kHz and 200 kHz sounder pings to be displayed at the same time. Shallow Water Alarm Figure 21.10 - Custom Zoom Bottom Lock The Bottom Lock split view presents an interesting view of the sounder returns. The sea floor is flattened in this view, allowing easy comprehension of how far a fish or other return is above the sea floor. A depth sounder is for many people a safety device. In new waters especially, having "eyes" under the vessel, in the form of a depth sounder, provide extra assurance for safe travel. The InSight Sounder’s shallow water alarm will sound whenever the bottom is detected as being shallower than where the alarm threshold is set. When the alarm is set, it can be viewed in the Sounder Display, as seen in the image below. Height Off Of Sea Floor Actual Sea Floor Fish Flattened Sea Floor Figure 21.12 - Shallow Water Alarm Settings To configure the shallow water alarm, right-click in the Sounder Display and select Shallow Water Alarm or select this item from the Sounder menu. The Shallow Water Alarm Settings dialog box is displayed and the alarm setting can be entered. To enable the alarm, simply right-click in the Sounder Display and select Enable Shallow Water Alarm. A check mark indicates that the Alarm is set. Figure 21.11 - Bottom Lock 21 - Sounder Zoom Bar 21 - Sounder 174 Nobeltec® Navigation Software User’s Guide Advanced Sounder Features Dropping A Mark or an Event Mark Temperature and Temperature Graph When GPS data is available, each Sounder echo is automatically associated with a GPS position. This means that you can find a return in the Sounder Display, drop a navigation mark, called an "Event Mark" and see that mark onchart as well as in the Sounder Display window. When you drop an Event Mark, the Event Mark icon is placed at the vessel's current location and a small white triangle is placed at the top of the Sounder Window to indicate the Event Mark's location relative to the boat icon. If your transducer is configured with a temperature sensor or another temperature sensor is configured to feed temperature information into Nobeltec Navigation Software, the temperature value can be displayed on the Sounder Display. There are two ways to temperature: • Temperature as Text. Use this option to simply display the current temperature in the units of measure you’ve selected. Units of measure can be selected from the Tools | Options | Units tab. • Temperature Graph. When enabled, a temperature scale will appear along with a moving graph line indicating the temperature and trending information. Use this option to track subtle changes in temperature. Temperature Scale Temperature Graph To add an Event Mark, right-click on the Chart Window and select New | Event Mark or add the Event Mark ToolBar button to your program ToolBar. Event Mark ToolBar Button Mark ToolBar Button Event Mark Indicator Mark Right-Click Menu Event Mark Figure 21.14 - Marks and Event Marks Temperature and Speed as Text Figure 21.13 - Temperature Graph You can also drop a Mark onchart. A Mark can be placed on any object displayed in the Sounder Window. In other words, a Mark is independent of the vessel's position. To place a Mark, select Mark from the program ToolBar and then click on the targeted object in the Sounder window. A Mark will appear onchart in the location you specified. Speed Through Water Display Instant Waypoint If your transducer is configured with a speed sensor or another speed sensor is installed and configured to transmit SOW information using NMEA 0183 sentences, this value can be viewed on the Sounder display as well. NOTE: Similar to the Event Mark, an Instant Waypoint cannot be added to the Sounder Display unless GPS information is being received by Nobeltec Chapter 21 - Sounder Navigation Software. Furthermore, the software must also be connected to an autopilot in order for autopilot commands to be sent. Occasionally, an echo shown in the Sounder Display will be interesting enough that you decide to return to that location. By adding an Instant Waypoint and selecting the returned target on the Sounder Display, an immediate command can be sent to the autopilot, directing the vessel back to that location. Use the Instant Waypoint button on the main ToolBar or select Instant Waypoint from the right-click menu on the Sounder Display, to create an Instant Waypoint. 175 Night and Twilight Mode Nobeltec Navigation Software is designed to be usable in low or dim light environments. This means that you can easily switch the Nobeltec Navigation Software into Night or Twilight modes using your mouse or a keyboard. To enter into one of these low light viewing modes, click on View | Screen Intensity and then Normal, Twilight Colors or Night Colors. To toggle through these selection using the keyboard, press CTRL-I. Demo Mode Instant Waypoint ToolBar Button Record and Playback Right-Click Menu The ability to record the sounder data to a file for later playback provides a great opportunity for "after trip" analysis. Examine the saved file to better understand interesting sea floor and bottom composition or analyze where fish were located in relation to thermoclines and structure. If GPS position data was available when the file was recorded, you can even drop marks on places of interest during playback review to facilitate future trip planning. Fast Forward Play Instant Waypoint Stop Figure 21.15 - Instant Waypoint Ghost Cursor When the InSight Sounder is used along with a GPS, your Nobeltec Navigation Software is able to associate each sounder ping with a specific Lat/Lon. This feature allows you to pinpoint exactly where a specific sounder ping was acquired by rolling the mouse over the Sounder Display. A "ghost" (or duplicate) image of the cursor will appear in any open Chart window pane, indicating where the sounder ping was taken. Enable this option from Tools | Options | Sounder. Rewind Record Auto Loop You can enable the Record/Playback controls by selecting Record/Playback Mode from the right-click menu or from the Sounder Menu. Much like DVD/ VCR controls, pressing the red record button will begin the recording after 21 - Sounder Demo Mode allows you to test many of the features of the InSight Sounder and familiarize yourself with that device’s operation. Right-click in the Sounder Display window and select Demo Mode to activate this feature. In Demo Mode, you view simulated sounder echoes while adjusting any of the Sounder controls. Exit Demo Mode by selecting Live Mode or Record/ Playback Mode. 176 Nobeltec® Navigation Software User’s Guide asking you to identify a file to save the data to. At any time, you can playback a file using the same control. Configuring the InSight Sounder 21 - Sounder The Nobeltec InSight Sounder allows you to configure and personalize a number of settings to create a display that is customized to your needs. While all colors and options have been given default values that are appropriate for most installations, you may find that your particular requirements aren't suited to the default settings. You can access configuration options by rightclicking in the Sounder Display and selecting Options or from the Main Menu by clicking on Tools | Options | Sounder. Sounder in NavView (Admiral MAX Pro Only) The InSight Sounder has been designed to work especially well inside the NavView interface mode. Using NavView, you can configure your InSight Sounder to fill an the entire screen or one of multiple window panes. In addition, you can create multiple Views, allowing you to step through chart, 3D, radar and sounder displays effortlessly. See Chapter 10 - Properties and Options for a full description of the options and functionality of the Tools | Options | Sounder tab. Sounder NMEA Data NMEA Data Input If you have external (non-Nobeltec) speed and/or temperature sensors and they produce NMEA 0183 data sentences, the data they produce is usually compatible with Nobeltec Navigation Software, just as data received from non-Nobeltec GPS or other NMEA sensors. Incoming data can be displayed on the Console and Sounder Display. NMEA Data Output To output NMEA 0183 data for speed, depth or water temperature to another device, you can configure an Output/Autopilot port to send this data. 1. Select Tools | Options | Ports: Configure. 2. Select the Output/Autopilot port you would like to enable, by placing a check-mark in the check box. 3. Click Configure All Output/Autopilot Ports. 4. On the Configure Output/Autopilot Settings dialog box, select the NMEA strings you would like to transmit. Recommended sentences are VHW (Water Speed and Heading), DPT (Depth), DBT (Depth Below Transducer) and MTW (Water Temperature). 5. Click OK to confirm your settings. 6. From the Ports: Configure tab, select View Data to see which data is being sent. Figure 21.16 - Sounder in NavView ToolBar in NavView All of the right-click menu items are available in the Sounder Display window in NavView. When focus is given to the Sounder Display, a Sounder ToolBar is available at the bottom of the screen (see Figure 21.16). Select Tool from the menu in the bottom right-hand corner of the screen to make the Sounder ToolBar appear. The right-facing chevron (arrow) indicates that additional buttons are available for this ToolBar. Sounder and Fishfinder Basics How It Works A Sounder is capable of producing electrical pulses, which the transducer converts into sound waves, sent downwards in a cone-shaped column. As the sound wave hits objects in the path of that column, such as fish, seaweed, debris, structures and eventually the sea floor, reflected sound waves are returned to the transducer. The transducer converts returning sound waves into electrical pulses that can be converted into a visual image of that column beneath your boat. Chapter 21 - Sounder The Nobeltec InSight Sounder converts the electrical pulse returned by the transducer into digital data that can be displayed on your computer screen, which provides you with a running display of the water, objects and sea floor beneath your boat. The strength of that reflected sound wave is also visible. Stronger returns, which may represent large fish or hard surfaces, can be represented in one set of colors, while weak returns from debris, small schools of fish and soft sea floor can be represented with other colors. 177 Impact of Beam Angle Transducers can produce the sound waves in differing cone shapes. A wide beam (up to 45 degrees) is useful in shallow water, because it allows for a wider area of coverage, though with decreased clarity. A narrow beam (approximately 5 to 16 degrees) is appropriate for deep water applications. In both cases, there are opportunities for "dead zones" that block out coverage. Frequency of Sound Waves The Information On Your Screen Figure 21.17 displays a sample image from a sounder/fishfinder that calls out the most notable elements. Stronger returns are represented with darker colors and weaker returns in lighter colors. Clutter Old Data Surface Noise Recent Data School of Fish Big Fish Brush Pile Bottom Figure 21.17 - Sounder Sample Wide Cone Angle Narrow Cone Angle Dead Zone (Targets Not Seen) Figure 21.18 - Transducer cone angle Strength of Electrical Pulse The transducer is triggered to send out sound waves by the InSight Sounder Black box. The strength of electrical pulse sent to the transducer by the black box is dependent on the electrical rating (in wattage) of the transducer as well as the material used in creating the element inside of the transducer. The 1kW transducers carried by Jeppesen Marine are 50x more sensitive at 50kHz and 13 times more sensitive at 200kHz, than 600W models. 21 - Sounder The frequency of the sound waves created by the transducer impacts the type of reflected returns. Higher frequency sound waves, such as 200 kHz, do not penetrate the water deeply, but they return greater detail from the items they contact. For this reason, the InSight Sounder in 200 kHz frequency is great for fish detection. However, transducers are rarely able to penetrate deeper than 600 feet in 200 kHz mode. Lower frequency sound waves behave in the opposite way. They offer much deeper depth penetration, but provide less detail from objects they contact. All transducers offered by Jeppesen Marine are dual frequency (50 kHz/200 kHz) . 178 Nobeltec® Navigation Software User’s Guide Troubleshooting Sounder 21 - Sounder No Sounder Echoes Appear On Your Screen Possible Cause Possible Solution Nobeltec Navigation Software is not Version 7.1 or later. Go to www.nobeltec.com/support to download the latest Service Pack or contact Jeppesen Marine to obtain an update CD. Sounder unlock code has not been entered. Go to www.nobeltec.com/services/voucher to enter your voucher number and receive your unlock code. Once you have the unlock code, follow the instructions for entering your unlock code in Chapter 2 of this guide. The SeaLevel USB/ RS-422 adapter is not installed properly in the device manager. Use the accompanying CD to reinstall SeaLevel drivers. Follow this guide for instructions on installing sea level devices. The Status LED on the black box is off. Check the fuses and the circuit breakers. Check power to the black box with a voltmeter. Also verify that the data cable between the computer and the black box is properly wired and connected. The Status LED on the black box is flashing green. The Nobeltec InSight Sounder and the Nobeltec Navigation Software are not communicating properly. Check the wiring of the data cable. The Status LED on the black box is red. There is a problem with the InSight Sounder. Please contact Technical Support. The Status LED on the black box is steady green. The Nobeltec InSight Sounder is communicating with your Nobeltec Navigation Software. You should now switch to an auto mode such as Fishing or Cruising. If limited echoes are displayed, operating in Manual mode may result in clear echoes not appearing until the Gain has been properly adjusted. Table 21.2 - No Sounder Image Cannot Click On the "Configure InSight Sounder" Option in the GPS/Port Setup Wizard Possible Cause Possible Solution The InSight Sounder product voucher has not been redeemed. Go to www.nobeltec.com/services/voucher to enter your voucher number and receive your unlock code. Once you have the unlock code, follow the instructions for entering your unlock code in Chapter 2 of this guide. The InSight Sounder unlock code was entered or written down incorrectly. Verify that all numbers and/or letters are correct by going to www.nobeltec.com/store or contacting Sales or Technical Support at (800) 598-4976. Be sure to have your serial number available when using either option. Click on Help | About Nobeltec on the main menu. Make sure that the serial number listed here is the same one that was used to redeem the product voucher. If a different serial number was used to redeem the product voucher, you will need to go through a process called a Hard Uninstall. If this is the case, DO NOT attempt to uninstall the software yourself. Instead, please contact the Technical Support Department at (800) 698-4976 and they will walk you through the special hard uninstall process. Nobeltec Navigation Software is not Version 7.1 or later. Go to www.nobeltec.com/support to download the latest Service Pack or contact Jeppesen Marine to obtain an update CD. Table 21.3 - Cannot Configure Sounder in GPS/Port Setup Wizard Chapter 21 - Sounder 179 GPS/Port Setup Wizard Does Not Detect Sounder Possible Solution The SeaLevel USB/RS-422 adapter is not installed properly in the device manager. Use the accompanying CD to reinstall SeaLevel drivers. The Status LED on the black box is off. Check the fuses and the circuit breakers. Check power to the black box with a voltmeter. Also verify that the data cable between the computer and the black box is properly wired and connected. The Status LED on the black box is flashing green. The Nobeltec InSight Sounder and the Nobeltec Navigation Software are not communicating properly. Check the wiring of the data cable. The Status LED on the black box is red. There is a problem with the InSight Sounder. Please contact Technical Support at (800) 598-4976. The Status LED on the black box is steady green. The Nobeltec InSight Sounder is communicating with your Nobeltec Navigation Software. You should check the transducer connector to ensure it is wired properly and check the transducer impedance with an ohmmeter. If these all appear to be in good order and the Sounder is still not detected, please contact Technical Support at (800) 598-4976. Table 21.4 - GPS/Port Setup Wizard Does not Detect Sounder These are the most common errors associated with the InSight Sounder. If you are experiencing an issue that is not addressed here, please contact Jeppesen Marine's Nobeltec Technical Support Team. 21 - Sounder Possible Cause 180 Nobeltec® Navigation Software User’s Guide 22 - Bathy Recorder The Nobeltec Bathy Recorder, sold as a Plus Pack to VNS MAX Pro and Admiral MAX Pro, enables you to record sea floor topographic information using your Sounder/Depth Finder device and to incorporate that data into your 3D display. When you use the Bathy Recorder to customize your sea floor charts, those charts will constantly improve with repeat trips over the same areas, enabling you to have a perfect picture of important sea floor terrain, as well as your favorite fishing and diving spots. The data provided by your Bathy Recorder can be more specifically oriented to your needs than any chart you can purchase. And, with Jeppesen Marine's exclusive, high-quality 3D-rendering, the Nobeltec Bathy Recorder will give you an unparalleled 360˚ awareness of your environment. Bathy Recorder can give you specific contour lines that standard 3D charts available don't display, as well as complete control of the contour line display. Create your own custom contours to see the areas of sea-floor topography that are important to you. 22 - Bathy Recorder Unlocking Bathy Recorder Plus Pack Your Bathy Recorder product distributor will either provide you with an Unlock Code or a Voucher, which can be redeemed online for an Unlock Code. No matter how you receive it, your Unlock Code is used to unlock the Bathy Recorder features already embedded in Nobeltec Navigation Software. Figure 22.1 - Startup Splash Screen with Bathy Recorder The Benefits of Bathy Recorder Terrain rendered using Bathy Recorder provides you with an awareness of depth, terrain values and possible hazards that standard high-resolution 3D cannot provide. Without Bathy Recorder, standard 3D chart terrain may not reveal significant sea floor detail. Upon installation of the Bathy Recorder Unlock Code, Nobeltec Navigation Software will recognize the Bathy Recorder and is now ready for immediate use to record and display sea floor data. To use your Unlock Code to unlock Bathy Recorder, follow the instructions on Chapter 2 - Installing Plus Pack Unlock Codes. Upon Install When you launch Nobeltec Navigation Software, the startup splash screen displays Bathy Recorder as one of the supplemental installed features. Figure 22.2 - High Resolution 3D Bathy Data Chapter 22 - Bathy Recorder Using Bathy Recorder data to supplement 3D bathymetric data, terrain samples gain a crispness and specific clarity with which other 3D charts cannot compete. 181 NOTE: In order to generate accurate bathymetric recordings, Bathy Recorder settings must allow for the waterline offset of the transducer. Using a Sounder or Depth Finder Bathy Recorder is designed for use with a Sounder or Depth Finder device that is connected to your onboard computer and can output NMEA 0183 depth data. When depth information is being received accurately by Nobeltec Navigation Software, the Console panel, on the right-hand side of the screen, will display Depth (Dpt) information. Figure 22.5 - Console Display with Depth Information Figure 22.3 - 3D Bathy Data Enhanced by Bathy Reorder Transducer Offset Settings Bathy Recorder Indicator Figure 22.4 - Shallow Water Alarm Settings - Transducer Offset Transducer Offset can be accessed using the Shallow Water Alarm Settings window, which is available either via Tools | Options | Sounder or via Sounder | Options and clicking the Transducer Offset... button in the lower left of the window. The Transducer Offset field must be set to > 0 (greater than 0) feet. Figure 22.6 - Enable Capture Data w/ Right Corner Indicator Whenever Bathy data is being recorded, a small indicator will appear in the upper right corner of the 3D window, indicating that the Capture Bathy Recorder Data option has been selected and that valid GPS and depth information is available. 22 - Bathy Recorder When using the Bathy Recorder, the Transducer Offset settings must be configured before any recordings can be made with the tool. TIP: Choppy seas impact performance. Jeppesen Marine recommends that you do not use Bathy Recorder when choppy seas may give you an inconsistent cone angle or if your boat is in a situation where the cone may not be consistently pointing downward. 182 Nobeltec® Navigation Software User’s Guide WARNING: Currently, Nobeltec Navigation Software tolerates a short loss in GPS and depth information. During this time, however, Bathy Recorder continues to record the last known good sample. This can result in erroneous depths being recorded during outages. Timeout occurs within 90 seconds. NNS will automatically disable recording if your boat remains stationary or hasn't moved more than 100 meters after 30 minutes of recording. Recording automatically resumes when the rate and distance of travel increases. Locating, Deleting and Saving Bathy Files Bathy Recorder files are stored on your hard drive and are named by date and your serial number (for example, 2006_256.9_13.####-######-##########.1.bth) These files are stored by default in \Program Files\Nobeltec\ Visual Series\Bathy Recorder Data\. Files can be deleted or shared. Daily batches of Bathy data files can be deleted at any time using the Tools | Bathy Recorder | Delete Bathy Recorder Data. This function only deletes a day or range of days (yesterday or prior) at a time (see Figure 22.7). 22 - Bathy Recorder Recorded bathymetric files can also be copied and shared with other users as you would share any other data file. You also have the option of deleting the Bathy Recorder data within any Circle or Closed Boundary on the Chart window pane. To delete data within a boundary object, right-click on the boundary object and select "Delete BR data in this boundary object" from the pop-up menu. This will delete all Bathy Recorder data, in all Bathy Recorder files, for the area enclosed by this boundary. Figure 22.7 - Delete Bathy Recorder Data Compressing Bathy Recorder Files Bathy Recorder files are typically large. A large number of uncompressed Bathy files can result in poor system performance of Nobeltec Navigation Software. Whenever you have 300 or more Bathy Recorder files stored, the Bathy Recorder engine will automatically compress and merge your Bathy Recorder files upon program shutdown. Tools | Bathy Recorder There is a Tools | Bathy Recorder menu created when you unlock Bathy Recorder, with the following options: • Capture Bathy Recorder Data: This option starts the recording process of bathymetric data being transmitted by your Sounder or Depth Finder device (see Figure 22.6). Throughout recording, the Bathy Recorder indicator will appear in the upper right-hand window of the 3D display. Nobeltec Navigation Software must be receiving both GPS position and depth information from a depth sounder before sea floor topographic data samplings are taken. You can verify that both data feeds are functioning using the console. NOTE: If GPS position and depth information are not available, an error message will be displayed in the NavBar Message Tab. • Configure Bathy Recorder: This allows you to change your Bathy Recorder default settings after setup. Clicking this option will open Tools | Options | 3D/Bathy. • Import Bathy Data: When selected, this option opens a standard browser window for you to locate appropriate Bathy data to import into the Bathy Recorder. Data must be in tab-delimited format and should include latitude, longitude and depth. When data is imported, the 3D display window, if open, changes to "Explore" mode and is centered upon the first data point in the imported file. • Import Existing Track Data: This allows you to convert saved boat track lines into Bathy Recorder data. Tracks can be easily created using Admiral MAX Pro or VNS MAX Pro. Track data can also be imported from an existing chart-plotter/Sounder onboard your vessel. • NOTE: You must have saved track data in order to perform this function. Delete Bathy Data: This opens a "Delete Bathy Recorder Data" dialog box where you may select to delete previously recorded bathymetric chart data by day or date range. This method removes an entire day or range of days of recorded data. Earliest files that can be deleted are yesterday's or prior. NOTE: You will be asked to confirm deletion after clicking the Delete button before the selected files are permanently removed. Chapter 22 - Bathy Recorder • 183 Demo Bathy Recorder: Simulates the effects of using Bathy Recorder with existing bathymetric information. When the simulation starts, Shaded Relief is enabled and the boat is set to follow a route. The simulation function takes bathymetric information from existing charts and applies current setup configurations, such as cone angle and rate of refresh. The 3D display shows this simulation until you select Demo Bathy Recorder again to turn off the demonstration. Typically, the simulation mode will create its own temporary route based on settings previously determined by Jeppesen Marine. However, if there is a route you wish to simulate, you can open that route in Nobeltec Navigation Software, rename the route "BR DEMO ROUTE". The next time you click Demo Bathy Recorder, the route you saved will be demonstrated in the 3D display. Tools | Options | 3D/Bathy Bathy Recorder settings can be controlled using the Tools | Options | 3D/ Bathy tab. See Chapter 10 - Properties & Options for Tools | Options | 3D/ Bathy tab settings. Custom Contours When the Bathy Recorder product is installed, custom contours become available. See Chapter 10 - Properties & Options for Tools | Options | Custom Contours tab settings. 22 - Bathy Recorder WARNING: For safety reasons, the demo feature does not work when receiving GPS information. If you attempt to use the Demo Bathy Recorder feature when GPS data is being received, a warning message will display and the demo will not start. • Display Bathy Data: When selected, this feature uses Bathy Recorder data to contribute to the overall Nobeltec bathymetric features shown on chart, including Shaded Relief, Custom Contours, 3D and Route Wizard. This data is also used to build the 3D representation in the 3D display window. See also the Tools | Options | 3D/Bathy | Bathy Recorder: Display Bathy Recorder Data option. Nobeltec® Navigation Software User’s Guide 184 23 - Sailing Plus Pack Term The Nobeltec Sailing Plus Pack is an upgrade package available for Jeppesen Marine's VNS MAX Pro and Nobeltec Admiral MAX Pro. Sailing Plus Pack Polars and resulting performance data help you make the best decisions on how to sail your boat. The Polars provided in this Plus Pack are delivered through a partnership with US Sailing® and are designed to provide you with that organization's high-quality official polar data. 23 - Sailing The standard Polars you receive with Sailing Plus Pack serve as excellent starting points. You can also request specific Polars based on your unique rig and hull configurations for a wide variety of boats by contacting US Sailing directly at 1-800-US-SAIL-1. Another great advantage of the Sailing Plus Pack is Windvantage™ Weather Routing. When you select Windvantage™ Weather Routing in the Route Wizard, the program automatically uses your boat's performance characteristics, which are stored in the polar files, plus a GRIB weather file (not provided by Jeppesen Marine) to create the best possible route. Terminology Target (Boat Speed) Definition For a given angle, this is the speed at which you should be gaining ground (BSP). Table 23.1 - Terminology Unlocking Sailing Plus Pack Once you purchase Nobeltec Sailing Plus Pack, your Jeppesen Marine product distributor will provide you with an Unlock Code. This Unlock Code is used to unlock the Sailing Plus Pack features already embedded in Nobeltec Navigation Software. To use your Unlock Code to unlock Sailing Plus Pack, follow the instructions in Chapter 2 - Installing Plus Pack Unlock Codes. The Polar Display Once the Sailing Plus Pack is unlocked, you can open the Polar Display window under Sailing | Polar Display. See Figure 23.1. The following are some key terms to help you understand Sailing Plus Pack: Term Definition Active Polar The collection of polar data that is currently selected for the boat. Lay Line An imaginary line indicating the optimal course to a windward or leeward mark on which a sailboat can sail directly to its target. Polars Polar lines comprise a graph of your target boat speed based on the True Wind Speed (TWS) and True Wind Angle (TWA). Polars are valuable inputs to tactical sailing calculations, such as lay lines. Polar Diagram The Polar Diagram represents the boat’s predicted or actual performance or progress into the wind (also known as VMG) given various angles of the wind in relation to the bow. Figure 23.1 - Polar Display Chapter 23 - Sailing To Open an Existing Polar 1. 2. 3. 4. 5. 6. Open Sailing | Polar Display… Click Settings in the Polar Display window. Click the Polar Values tab. Click Load Polar File... The Open dialog box will automatically filter for Nobeltec Polar (*.spp) files. Select the polar file and click Open to load it. Click OK; the Polar Display window opens. Polar Display Settings The Polar Display Settings window is where you can create and manage your polar diagrams using the Polar Values tab. Use the Display Settings tab to determine what objects to include on the diagram and their colors. See Chapter 10 - Properties & Options for more information on the Sailing tab fields. To open the Polar Display Settings: 1. From the Polar Display window, click Settings. 2. Open Tools | Options, | Sailing; then click the Polar Display Settings button. 3. Open Sailing | Polar Settings. 4. Click the Polar Settings button on the ToolBar. Display Settings Tab. The following settings are applied to the Polar Diagram itself. Fields available on the Display Settings tab include: • Units of Measure. The default setting for this option uses the current speed measurement unit selected using Tools | Options | Units. The other selection is Seconds per Nautical Mile. The Polar data is stored in Kts. When you select another unit, such as kph or mph, the data will display in that unit but continues to be stored in Kts. • • NOTE: All units of measure are adjustable from Tools | Options | Units. Goal: Percentage of target speed. Use this field to temporarily adjust target speed based on current conditions. Real Time Data. Real Time Data options include: • Auto Record Real Time Data. When you place a check-mark in this check box, NNS begins to collect data while underway and then manually build a polar from that data. Real time data points are logged during auto record of TWS/TWD/BSP information. As you receive data for true wind speed, true wind direction and boat speed, the values are saved in a file that contains only the interpolated wind speed, the angle and the interpolated boat speed. Wind speed is rounded up or down to the nearest integer value (e.g. 1.5000 to 2.499 become 2) and the boat speed is proportionally lowered or raised. Real time data points will only appear on the polar if you select an individual wind speed in the Wind Speeds to Display field. If you clear this check box, no real time data is collected and only saved data points are used. 23 - Sailing This window contains the following fields: • Name. The name of the active polar appears in the title bar of the polar display window. If no polar is selected, a message appears on the polar diagram stating this. • The wind speeds to display. Select the polar lines to appear on the diagram. The Kts per hour options include: • All • All Even Numbers • All Odd Numbers • 4, 6, 8, 10, 12, 16 and 20 (this is the default) • 5, 10, 15 and 20 • Each number that is stored in the polar. • Show Actual Wind Speed. Place a mark in this check box to display the actual wind speed instead of a wind speed selected from the Wind speeds to display drop-down list. The actual wind speed updates based on the Auto Record Real Time Data Interval setting in Polar Display Settings. • Lock Edit. Place a mark in this check box to prohibit on-screen editing to the current polar. • Boat speed at cursor. When you move the cursor around the polar diagram, the Boat Speed at Cursor box updates with the speed where your cursor is located. If you move the cursor outside of the polar, the value returns to "N/A". • Settings. Click this button to open the Polar Display Settings window. You can also open this window under the Sailing menu. 185 Nobeltec® Navigation Software User’s Guide 186 • • 23 - Sailing • Interval. This field controls the interval at which current values are recorded and the interval for displaying wind speeds. Selections include 1 second, 10 seconds, 30 seconds, 1 minute, 2 minutes, 5 minutes, 10 minutes and 30 minutes. The default setting is 1 minute. • Clear Real Time Data. Click this button to clear all data. When you click this button a message appears asking if you want to continue. You cannot Undo this action after you click the button.. Options. Options settings include: • Polar Line. The selected color is applied to the curved line that it follows. Data points connect with a curved line that follows the expected interpolated boat speed at all angles. • Polar Data Points. The selected color is applied to the data points. • Current Situation Dot. This indicator is drawn if the polar diagram shows a polar line for the same wind speed (AWS) as the boat's current speed. • Show Best Angles. This toggles the display of the optimum angles for best upwind and downwind VMG. • Fill Velocity Range. This setting determines whether the area from the polar boat speed line is filled. • Fill Color. This setting fills in the polar drawn on the Polar Display if the Fill Velocity Range selection is Yes. • Background Type. With this option you can customize the polar background. The choices include Grid, which shows the angles/boat speed circles as lines, Gradient, which fills in each speed range from the polar start color to the polar end color and Alternating, which alternates the polar start color and the polar end color from each speed range to the next. • Grid Color. This is the color of the grid. • Polar Start Color/Polar End Color. If using gradient or alternating, these are the colors from which the gradients or first alternating colors start or end in the velocity ranges or circles. Restore Defaults. Click this button to reset all display settings to the original, default settings that came with this Plus Pack. Polar Values Tab Figure 23.2 - Polar Display Settings - Display Settings tab • • Real Time Data. This is the color of the real time data dots that are drawn periodically on the polar based on the Display Real Time Data settings. Show Boat. This determines whether the boat and the current situation line and dot appears on the Polar display. Create and manage your polar diagrams using the Polar Values tab. When you make changes, the polar is automatically saved when you close the Polar Display Settings dialog, when you close the application and automatically every 10 minutes. It is always a good idea to back up your data before you make changes. Fields available on the Polar Values tab include: • Active Polar file name - The active polar file name appears. When you installed Nobeltec, no polar was selected, so the default Polar file name is "No Polar selected". The active polar filename is stored across sessions. • Polar Name - Type the name you want to associate with this polar. • Load Polar File - Click this button to browse to the folder where the polar file you want to load is located. In the folder named InstallLocation\Polars you will see stock polar files for common boats. The file type function searches for the Nobeltec polar extension (*.spp) but you can also select All Files (*.*), which allows you to open polar files from many sailing programs. When you select a file type designed for another sailing program, Nobeltec attempts to read the file. If the file cannot be read, a message appears stating this. • Save Polar - Click to save any changes that have been made. Chapter 23 - Sailing • • • • Managing Polar Files Editing a Polar File TIP: In order to enter Editing mode when using your mouse, you must select a single polar speed and unlock the polar file by ensuring the Lock Edit check box on the Polar Display is clear. There are several ways to edit a polar file: • Keyboard—In the Polar Display Settings window, Polar Values tab, add or delete wind speeds and polar values using the controls in the Edit polar data area. NOTE: Press <Tab> or click Add Row to add another angle/speed row to a particular wind speed. • Drag and Drop—Left-click on or near an existing polar point and drag the polar point to a different location on the polar diagram. If you drag one dot on top of another and release the mouse button, the two points become one. If you click on the diagram but not on or near a point, a new point is created. • Right click on or near an existing polar point to remove it from the polar diagram. Creating a New Polar File If a polar has not been loaded, the message NO POLAR SELECTED appears in the Polar Display diagram. To create a new polar, follow the instructions listed in Editing a Polar File, then save the data as an SPP polar file. You can also use the auto-record feature to determine your actuals and then edit your polar based on those results. Saving the Polar File Figure 23.3 - Polar Display Settings - Polar Values tab Once you edit a file, you can save under a new file name. 1. From the Polar Display window, click Settings. 2. Select the Polar Values tab. 3. Click Save Polar As... The Save As dialog opens. 4. Type a new name for the polar in the File name box. 5. Click Save to save the file. 6. Click OK to close the Polar Values tab. 23 - Sailing Save Polar As - Click to save the changes to a new polar file name. A Save As dialog opens with the Polars folder as the default folder. You can, however, browse to any other location. Save VMG Targets - Click this button to save the best upwind and downwind angles to a tab delimited text file. You can import this file into Excel or another program or print it to use as a reference on deck. Edit Polar Data - You can select any wind speed that is stored in the polar file. By default, the lowest wind speed in the Polar File appears. Use the Add Wind and Delete Wind buttons to manage your polar data. There is no limit to the amount of wind speeds that can be stored in the polar file. Polar Values Grid. Use this grid to add, update or delete polar values. If all polar values are deleted, the corresponding wind speed will also be deleted. To add individual values, tab to the end of the row and a new row will appear. To delete an entry, select the row and press the <Delete> Hot Key or select the row and click Delete Selected Row. 187 Nobeltec® Navigation Software User’s Guide 23 - Sailing 188 Lay Lines and On Screen Indicators Lay Line Calculation The Tools | Options | Sailing tab, provides a number of options that determine how sailing information is presented in the Chart window. These options include Apparent Wind Indicator, True Wind Indicator, Recent True Wind Angles, Lay Lines and Widest Lay Lines Seen. Apparent Wind Indicator is drawn on top of all other options. The average Lay line is based on the last 10 minutes of true wind speed and direction. Lay Line calculation relies on variables such as boat performance, hull design, sail configuration, weight and wind speeds. As a result, some boats are able to sail more efficiently upwind than others. To Configure Wind Indicators and Lay Lines 1. Select Options from the Sailing menu to open Tools | Options | Sailing. 2. From the available options, select the settings you want for wind indicator fields, lay line fields, colors, line widths, Time To Go, and so on. 3. Click OK to save your selections. For example, Figures 23.4 and 23.5 show the polars from two separate boats. The polar in Figure 23.4 shows a boat that points closer into the wind when wind speeds increase. Figure 23.5 shows a boat that must have an optimal windward angle of about 50° at low wind speeds and 45° as the wind speed increases. Downwind performances of each boat are similar, with best performance at 145° in low winds and 175° in higher wind speeds. NOTE: See Chapter 10 - Properties & Options for a full description of all fields in Tools | Options | Sailing. The following are the onscreen indicators and colors for Sailing options: Field Color Onscreen Indicator Apparent Wind Indicator Color Default Color: Black The Letter A True Wind Indicator Color: Default Color: Black The letter T Recent True Wind Default Color: Black Angles Line color Lay Lines Color: Default Color: Black Line color Boat Lay Lines Color Default Color: Gray Line color Average Lay Lines Seen Color Default Color: Navy Line color Table 23.2 - Sailing Display Onscreen Indicators Figure 23.4 - Polar Example #1 Figure 23.5 - Polar Example #2 Sailing Plus Pack Lay lines are calculated from the polar angles of your boat and drawn from the mark. Lay lines are also drawn from the boat to indicate most efficient tacking (see Figure 23.6). Chapter 23 - Sailing Lay line from the mark, representing the optimal tack to the mark 189 Figure 23.7 shows how a following a suggested Lay line might place you off course over time if you do not account for currents. Adding Set and Drift calculations (Tools | Options | Sailing | Use Set & Drift in Sailing Calculations) can improve your overall Lay line calculation and increase your accuracy (see Figure 23.8). Lay line from the boat representing optimal tack to the mark lay line 23 - Sailing Figure 23.6 - Lay Lines to a Windward Mark NOTE: If a polar is not loaded or if your boat's polar values cannot be read, a default tacking angle of 45° will display, serving as a point of reference for basic upwind and downwind sailing. Set and Drift Effect on Lay Lines Figure 23.8 - Lay Lines Adjusted to Account for Set and Drift Additional Features Ockam® and B&G® Instrument Support Sailing Plus Pack includes limited support for Ockam and B&G instruments. NOTE: A full list of Ockam and B&G Protocol sentences are listed in Chapter 4 - Configure Data Ports. Figure 23.7 - Lay Lines and the Impact of Set and Drift Currents can greatly impact a boat's ability to reach a Mark. Polar calculations only take into account Speed Over Water given wind angle and speed, but current information can play a crucial part in determining optimal lay lines. Listening for Ockam or B&G Protocols 1. Open Tools | Options | Ports: Configure. 2. In the Input Ports column, place a check-mark next to the COM Port the Ockam or B&G hardware is connected to. 3. Click Configure This Input Port... 4. In the COM[n] Input Configuration field, select B&G or Ockam from the Protocol drop-down list; then click OK. NOTE: To set your COM Port to read NMEA (this is the default), follow the same steps but select NMEA 0183 from the Protocol drop-down list. 190 Nobeltec® Navigation Software User’s Guide WARNING: Support for Ockam and B&G protocols has been tested on a limited basis. Use these options with caution and be prepared to rollback to NMEA if you are not receiving proper values using these protocols. Adding a Polar Diagram to NavView 23 - Sailing You can add a polar diagram to NavView using the View Manager. To Add a Polar Diagram to a NavView 1. Enter NavView by clicking the NavView button on the main ToolBar, by selecting Window | NavView or by pressing <F9>. 2. Select View. 3. Select View Manager. 4. Edit a view as you normally would (see Chapter 12 - NavView | View Manager for instructions) selecting Polar as one of the view options in the Edit the Layout window. NOTE: If you import a polar file from another program, Jeppesen Marine highly advises that you make a backup of that file first. Windvantage™ Weather Routing When you use the Windvantage™ Weather Routing feature to determine the most efficient route, the wizard relies on the predicted and current wind and weather data in addition to your boat’s performance characteristics, which are stored in the polar files. NOTE: To use the weather router feature you must have use the GRIB File option for the Weather Provider. This is found on the Weather tab under the Options window, which you can open under the Tools menu or by clicking the Options button on the toolbar. If another provider is selected, change it to GRIB File and then select a GRIB file on the Weather tab of the NavBar. See Chapter 9 - Advanced Routes for instructions on how to create a route using the Route Wizard and Windvantage Weather Routing. Chapter 23 - Sailing 191 23 - Sailing 192 Nobeltec® Navigation Software User’s Guide 24 - Tender Tracker 24 - Tender Tracker (Admiral MAX Pro) What is Tender Tracker? The Nobeltec Tender Tracker Plus Pack is as an upgrade package available to users of Admiral MAX Pro who are equipped with a Seetrac® Tender Tracking™ System. Seetrac's Tender Tracking System is a stand-alone radio frequency transmission system that can be interfaced with your computer through a standard COM port connection. When properly configured, Tender Tracker provides onscreen, up-to-the-minute target data about smaller affiliate watercraft (called "Tenders"), including smaller boats, jet skis, wave runners or even passengers carrying a wireless Seetrac Tender Unit (STU). Tenders can be viewed onscreen using your Admiral MAX Pro target tracking capabilities and can greatly improve security and safety of these affiliate vessels and objects, keeping you constantly aware of their movements. NOTE: Jeppesen Marine highly recommends that you use an approved Seetrac installer for Seetrac hardware installation. The Tender Tracking System consists of a Seetrac Base Unit (SBU) and up to 99 STUs, one installed on each affiliate Tender. Typically the operational range of the wireless STU is five NM, although a long-range system is also available. STU transmissions are only visible to the vessel containing the SBU for that Tender, not to other vessels within range. The SBU can be set to Autonomous or Managed Mode. In Autonomous Mode, Admiral MAX Pro will display STU signals as transmitted by the SBU. In Managed Mode, the SBU can be instructed to listen to STU channels for specific durations. STU transmissions include COG, SOG, Range and Bearing from the main vessel, CTS, Depth and Wind, all of which are displayed in the Targets tab of the InfoBar or NavBar. The Tender is displayed as a target in the Chart window pane using a diamond-shaped target icon (see Figure 24.1) and standard target behaviors. Unlocking Tender Tracker Once you purchase Nobeltec Tender Tracker Plus Pack, contact your Jeppesen Marine product distributor for an Unlock Code. This code will unlock the Tender Tracker Plus Pack features already embedded in Admiral MAX Pro. To use your Unlock Code to unlock Tender Tracker, follow the instructions on Chapter 2 - Installation. Setting Up Tender Tracker Upon installation of the Tender Tracker Unlock Code, all Tender Tracker functionality is available. However, you still need to direct Admiral MAX Pro to look for SBU output in order to recognize Tender Tracker data and display affiliate objects onscreen as secondary targets. To set up receipt of SBU data: 1. Open Tools | Options | Ports: Configure. 2. In the Input Ports column, place a check-mark next to the COM Port where the Seetrac Base Unit (SBU) is connected. 3. Click Configure This Input Port... 4. Change the Port Speed for the Seetrac COM Port to 9600 baud. 5. Click OK to close the COM Input Configuration window. NOTE: If you are using Managed Mode, continue with Steps 6-10. Place a check-mark next to the correct Output/Autopilot COM Port. Click Configure All Output/Autopilot Ports... In the Select the NMEA strings to send to the output/autopilot: field, place a check-mark next to Tender Tracker-Managed Mode. 9. Choose EC - Electronic Chart Display as the Talker identification. 10. Click OK to close the Configure Output/Autopilot Settings window. 11. Click OK to close the Tools | Options | Ports: Configure window. 6. 7. 8. Figure 24.1 - Tender Onscreen Example Chapter 24 - Tender Tracker Configuring the Tender Directory To set up the Tender Directory: 1. Open Tools | Options | Targets. 2. Click Tender Directory.... 3. Skip this step for Autonomous Mode. If you are using Managed Mode, from the Tender Directory window, place a check-mark in the Managed Mode check box. REMEMBER: SBU hardware must also be set to Managed Mode. carrying an STU device. Click OK to close the Tender Directory. To delete an STU from the Tender Directory: 1. Open Tools | Options | Targets. 2. Click Tender Directory.... 3. Click on the Tender ID you wish to delete and press the <Delete> key. 4. Click Yes to verify deletion. 5. Click OK to close the Tender Directory. Changing Target Appearance To display Wakes and change Target Name appearance (all Targets): 1. 2. 3. NOTE: The Display Predictors option does not apply to Tenders. Open Tools | Options | Targets. Click Display Wakes to see how a target has moved over time. Click the small down arrow next to the Target Name Settings option to change the appearance of the target names (Full, Short or None). NOTE: Tender Short and Full names are identical - either option displays the description of the Tender, as input into the Tender Directory. 4. Click OK to complete these changes. To change Tender Target colors: 1. From an open Chart window pane, right-click on the Tender. 2. Select Tender Color from the pop-up menu. 3. Select a color for this target from the color selector. 4. Click OK to complete these changes. Locating a Tender Onscreen Figure 24.2 - Tender Directory 4. 5. 6. In Slot 1, input the ID and Description of the first Tender. If you are in Managed Mode, input the Channel from which that STU is broadcasting and the Duration for the SBU to listen to this channel. In Autonomous Mode, Channel and Duration fields are "grayed out". Continue inputting information for all Tenders currently active and To locate an active Tender: 1. Open the NavBar or InfoBar Targets tab. 2. Locate the active Tender you are searching for from the Targets dropdown menu. 3. Click Find to center that Tender onscreen. NOTE: In PlanView, you can place a check-mark in the Lock check box to keep your chart centered on the selected Target. 24 - Tender Tracker Each STU has a unique ID Number that identifies it to the SBU. The STU can also have a designated channel that transmits data to the SBU if the SBU is in Managed Mode. Use the Tender Directory to provide a description for each STU based on ID Number. If you are using Managed Mode, use the Tender Directory to instruct the SBU to listen to each STU's designated channel for a specific period of time. 7. 193 Nobeltec® Navigation Software User’s Guide 194 24 - Tender Tracker Tender Tracker Alarms Seetrac Alert If your STU is equipped with an Alert function, users of the STU can raise an audible alarm within Admiral MAX Pro by pressing and holding the Seetrac Alert Button. An alarm message will appear onscreen when that alert is received. The message reads "Tender ID has sounded an onboard alarm. BRG XX, distance XX". Click Acknowledge to clear this alarm. "Tender Out of Range" Alarm If a Tender exits an established Tender Guard Zone, a Tender Out of Range alarm will sound and an alarm message will appear onscreen. This alarm will clear once the Tender re-enters the Guard Zone or can be turned off manually. Range for a Tender Guard Zone is between .0001 and 1000 units. NOTE: All units of measure are adjustable from Tools | Options | Units. To create a Tender Guard Zone: 1. Open the Boat Properties Alarms dialog box using Edit | Boat Properties or right-click on the Boat, select Properties from the pop-up menu; then select the Alarms tab. 2. Place a check-mark in the Tender Alarm check box. 3. 4. 5. 6. Click the button to open the Tender Alarm Settings window. Input a distance from the boat that you do not wish the Tender to exceed. This is a 360˚ radius around the vessel. Select how you wish the alarm to function if the Tender crosses the Guard Zone (No Sound, Sound Once or Sound Continuous). Click OK to close the Tender Alarm Settings window. Figure 24.3 - Tender Alarm Settings Chapter 24 - Tender Tracker 195 24 - Tender Tracker Chapter 25 - Printing 196 25 - Printing Print Wizard Nobeltec Navigation Software uses a Print Wizard to help you produce several different types of printouts. You can print sections of nautical charts to use as a visual reference or as part of a float plan. NOTE: For both Small Scale to Large Scale options, you may specify a scale range to start with and how many charts above that scale to print. • Chart Window. This prints the area covered inside of the chart window without allowing you to select any options. In other words, whatever features or layers appear on your chart, that is what will be printed. To print a chart using the Print Wizard: 1. Open the chart that you would like to print. 2. Pan and zoom to the desired location. 3. Click File | Print from the Main Menu or the <Ctrl+P> Hot Key. 4. In the Print Wizard choose the type of print you would like to make (from the four choices described above), then click Next. 5. If you selected any option other than Chart Window, you will see the Print Options dialog box as shown in Figure 25.1. Select all the options that you would like to appear on your print out and click Next. 6. Depending on your PC's system configuration, your printer's dialog box may appear. If it does, select the printer you would like to use and click OK. NOTE: With Raster charts, enabling CrystalView will improve the print quality when not printing in Proof mode. 25 - Printing There are several options for printing charts. They are: • Single Chart. This printing option provides you with an options menu (as seen in Figure 25.1) before printing. Using the options menu, you can select the layers you would like to have printed with the chart. • Small Scale to Large Scale One Chart Per Page. This prints several chart images that "zoom in" on the center of the chart window. • Small Scale to Large Scale Two Charts Per Page. Same as above except that there are two chart images per page. Figure 25.1 - Print Wizard - Print Options Dialog Box Printing Tides and Currents Information Nobeltec Navigation Software can print information about any of the tide or current stations displayed on a chart. When you want to print this information, the printing is actually done through the Tides & Currents program, which is a separate program from Nobeltec Navigation Software. To print tides or currents data: 1. Activate tide and current overlays by clicking on the Tide Bar button or Current Arrow button on the ToolBar. You can also turn these on by right-clicking on the chart and selecting Display Current Arrows or Display Tide Bars from the pop-up menu. 2. Right-click on the tide bar or current arrow for which you would like to print a report. 3. Click the View in Tides & Currents. This opens Tides & Currents and displays the tide or current station in a graphical format. 4. From the Tides & Currents program, click File | Print or click on the Print button for more printing options. To print the window as it appears, click File | Quick Print or click on the Quick Print button. 197 5. Using the Tides & Currents print options dialog box (see Figure 25.2), select how you would like your tide or current printout to appear. When finished, click the "X" button in the upper most right hand corner to close the Tides & Currents program window. 25 - Printing 6. Nobeltec® Navigation Software User’s Guide Figure 25.2 - Tides & Currents - Print Options Dialog Box Chapter 26 - Upload/Download 26 - Upload/Download Special Notice Regarding Data Backup Nobeltec makes a copy of your daily, user-created data. It saves the last five copies (1-5, 5 is always the oldest file) and stores them in the Backup directory which is, by default: C:\Program Files\Nobeltec\Software Name*\ Database\Backup\1.txt. If you accidentally delete data that was created in a previous Nobeltec session, you can reload it from one of these backup files. * Admiral MAX Pro or VNS MAX Pro How to Restore an Archived Backup 1. 2. 3. 4. 5. Upload/Download Basic Terms • • • Upload. This is the term that refers to sending information to the GPS from Nobeltec Navigation Software. Most GPS units support the transfer of routes, waypoints (or marks) and tracks. Download. This is the term that refers to receiving route, waypoint (or mark) and track information from the GPS. This should not be confused with the transfer of data such as Lat/Lon position or speed. GPS Transfer Wizard. This refers to the tool used to upload and download information between your GPS and the Nobeltec Navigation Software. Each GPS uses its own protocol for sending this information. Nobeltec supports most popular GPS units. NOTE: During Upload/Download, you must turn off the GPS for realtime navigation. Only one software application can access a COM port at a time. Wiring Your GPS For Upload/Download If you have not yet connected your GPS to your PC, please refer to Chapter 3 - Hardware Device Setup before continuing any further in this chapter. In addition, make sure that all three NMEA wires coming out of your GPS are connected to the three NMEA wires on the Nobeltec serial data cable. Proprietary Protocols Some GPS units require you to use their proprietary protocol to upload and download data. If you see a "time-out" error when trying to connect to your GPS unit in the upload/download function, you will most likely need to change the input/output (I/O) settings on your GPS before the unit will upload or download information. Refer to your GPS manual for instructions on changing the protocol and for the settings your GPS unit will require. Don’t forget to return the settings to their prior setting(s) when you return to the normal navigation mode. Uploading to a GPS 1. 2. 3. 4. 5. 6. Select File | Upload/Download to GPS to open the GPS Transfer Wizard. Select the brand/model that is connected to your computer from the provided list of GPS brand and model names. (Necessary the first time you use the GPS Transfer Wizard or if you have multiple GPS units attached to the PC). Click Next. Review connection information. Most units connect at 4800 baud. Check that the correct COM port is selected. Click Next. Choose one of the two function options that start with the word "Send" because you are sending information to the GPS. After making your selection, click Next. Choose the object(s) that you want to send to the GPS. To send multiple objects, hold down the <Ctrl> key while you click the selected objects. To select all objects, click the first object, hold down the <Shift> key while scrolling down, then click on the last object in the list. All objects should now be highlighted. When you have finished selecting objects to transfer, click Next. You may need to modify names of items sent to the GPS. Most GPS units can only handle a limited amount of text. Click on the Advanced button to change the names, then click Next. 26 - Upload/Download 6. NOTE: You cannot retrieve data older than 5 sessions without expert help. L aunch Nobeltec Navigation Software. Click on File | Navigation Objects | Import from Text File. Click Browse and browse to C:\Program Files\Nobeltec\Software Name*\Database\Backup\. Select 1.txt (the most recent file) and click Open. Verify the data by clicking the "+" next to any category and viewing the list of navigation objects. If the data is correct, it can now be imported. 198 Chapter 26 - Upload/Download 7. 8. 199 vary. Follow the onscreen instructions and click Next. The GPS Transfer Wizard will now begin downloading data from the GPS. You should see the progress bar and a summary of the data that is being received. When all data has been transferred, click Next. Close the GPS Transfer Wizard and open the PlanBook by clicking on the PlanBook tool on the ToolBar. The objects you selected to download should appear in the PlanBook. Setting the Computer Clock GPS requires a very accurate clock in order to work properly. Each GPS satellite contains its own atomic clock. Figure 26.1 - GPS Transfer Wizard - Function Selection Screen 7. Downloading from a GPS This is one way to back up information contained in the GPS unit. To download information from your GPS to the Nobeltec program: 1. Select File | Upload/Download to GPS to open the GPS Transfer Wizard. 2. Click Change to open a list of GPS brand and model names. Select the brand/model that is connected to your computer. (Necessary the first time you use the GPS Transfer Wizard or if you have multiple GPS units attached to the PC). Click Next. 3. Review connection information. Most units connect at 4800 baud. Check that the correct COM port is selected. Click Next. 4. Choose one of the two function options that start with the word "Get" because you are getting information from the GPS. After making your selection, click Next. 5. Follow the onscreen instructions to download specific objects or click Next to download all objects and continue. 6. Depending on what you selected to download, the next screen options NOTE: You must have Administrator rights to your computer in order to set the system clock. 26 - Upload/Download The GPS Transfer Wizard will now begin sending your data to the GPS. You should see the progress bar and a summary of the data that is being sent. When completed, click Next to finish. To set the computer clock using the GPS Transfer Wizard: 1. On the Main Menu, select File | Upload/Download to GPS. This will open the GPS Transfer Wizard. 2. Click Change to open a list of GPS brand and model names. Select the brand/model that is connected to your computer. (Necessary the first time you use the GPS Transfer Wizard or if you have multiple GPS units attached to the PC). Click Next. 3. Review connection information. Most units connect at 4800 baud. Check that the correct COM port is selected. Click Next. 4. Select Update System Time from GPS and click Next. 5. Using the drop-down menu, select the amount of time that your time zone is ahead or behind UTC (GMT). 6. Click Finish. Chapter 27 - On the Water 200 vessel icon should be on a chart at your boat's Lat/Lon position and the GPS panel on the Console should read GPS OK. This chapter puts all of the elements covered in the previous chapters together and gives a general overview of how most people use Nobeltec Navigation Software from day-to-day. When you are certain that you are getting a signal, let the GPS and your program run for ten or fifteen minutes at the dock to ensure that there are no interruptions to the GPS signal. Sea Trials Autopilot Test Before you start using Nobeltec on a regular basis it is a good idea to get out on the water and run some simple tests to make sure that all hardware is performing the way that it should. A sea trial does not take up a lot of time and will give you more confidence in your system. Listed below are some tests that you can perform to test your system. Autopilots are complex systems. Differences in settings and installation discrepancies can alter system performance. Rudder size, autopilot gain and heading sensor calibration and sensitivity all contribute to these differences. Turning On the System - Avoiding a Wayward Mouse TIP: If you are using Windows XP and have a GPS connected to a USB port using a Serial Port to USB Converter, then you may at some point experience a problem known as "wayward mouse". GPS and other equipment use a standard NMEA 0183 data sentence to communicate. When NMEA made this the standard data sentence for marine electronic equipment, the main type of port on a PC was a serial port. With the advent of Windows XP, most computer manufacturers began to discontinue the use of serial ports, replacing them with USB ports. Keyboards and mice on these systems plug into USB ports. Since the NMEA 0183 data sentence is not compatible with a USB port, the work around is to purchase a converter. If your GPS is turned on and is connected to a USB port, Windows XP, during the boot up process, may believe that your GPS is a mouse. When Windows Desktop appears, your mouse cursor will begin to bounce all over the screen. To avoid this problem, connect your GPS to the PC but leave the GPS powered off until boot up is complete. This prevents the wayward mouse problem in most cases. If you follow these steps and still see the mouse jumping on the screen, contact Nobeltec Technical Support. GPS Test Boot up your computer and start your Nobeltec Navigation program. Once the program is open, turn on your GPS and make sure that the program recognizes it as a GPS. Once the software recognizes the GPS signal, the Once your autopilot is setup and configured properly, find a safe, vessel-free area to perform this test. Create a route in your Nobeltec Navigation Software that consists of several route legs. Activate the route and accelerate the vessel to a safe but effective speed for completing the test. Initially, it is better to go slow and then speed up as you gain more confidence. Observe how the vessel travels from one waypoint to the next. Change the waypoint arrival notification as desired. You can choose to automatically activate the next waypoint or to receive a prompt in the Misc. Tab of the Tools | Options menu. As you travel along the route observe the steering behavior from one waypoint to the next. Does the autopilot under or over compensate? Adjust the autopilot gain if necessary. Heading Sensor Test If you plan to use an Autopilot or a Nobeltec InSight Radar, you should test the Heading Sensor. Head out on the water and try to find an area where your path will not be affected by the wind. Once you have located a suitable area, initialize your heading sensor. This usually involves turning the vessel 720° (360° twice) over a 2½ minute time period. To determine how to initialize your heading sensor, refer the User's Guide that came with the sensor. After the heading sensor has been initialized, create a route in Nobeltec that runs through your test area. Keep track of the heading from one end of the route to the other and note whether the heading is true or magnetic. Follow the route and compare the heading of the vessel to the heading sensor. Rotate the heading sensor so that there is little or no discrepancy between the route heading and the sensor heading. Turn the vessel around and head the opposite direction. The heading should be within 1 or 2 degrees of the route heading. 27 - On The Water 27 - On the Water Chapter 27 - On the Water 201 Create a Route Figure 27.1 - Heading Sensor Test Putting It All Together The following section describes in general how you would use all of the features and tools inside of your Nobeltec program to effectively complete a three day trip from Miami to the Bahamas and then back to Miami, through Fort Lauderdale. You can use this section to practice using your program or just read through it to gain a general understanding of trip planning using Nobeltec Navigation Software. For the purpose of this example, create a single route. Draw the route using the Route tool. When finished, name the route something appropriate like "Miami to Bahamas, May 2008". You can also name individual waypoints in the route. These could be named for key events such as snorkeling and diving spots or favorite fishing locations. In addition, name key waypoints along the way that mark stops in your trip such as Bimini, Freeport and Fort Lauderdale. After finishing the route, lock the route and waypoint(s) so that you don't accidentally delete or move any key route information. To lock the entire route (including all waypoints), right-click on any route leg and select Locking | Lock Route and Marks. If you decide to edit the route or a waypoint at a later time, repeat the step above but select Locking | Unlock Route and Marks. Check the Weather Make sure there are no weather conditions that will negatively affect the trip for a 10-day window. If you have purchased a Weather option, use the Weather tab on the NavBar to check the weather for the dates of your trip. It is wise to also check other sources of weather information such as NOAA. Figure 27.2 - Route Line for Sample Trip 27 - On The Water The vessel heading (HDG), route heading and course over ground (COG) should match. This trip requires you to create one big route or several smaller ones. You could create one big route that loops all the way around or individual routes that go from Miami to Bimini, Bimini to Freeport, Freeport to Fort Lauderdale and Fort Lauderdale to Miami. 27 - On The Water 202 Nobeltec® Navigation Software User’s Guide Calculate Your ETA Input into the PlanBook After you have planned the Route, right-click on the Route and select ETA Calculator from the pop-up menu. Use the ETA Calculator to automatically attach the current stations. Next, enter the fuel burn rates into the Estimate Fuel Usage window. Since this particular route will be used over several days, at this time use the ETA calculator to estimate fuel burn only. Click Best Departure Time and enter a vessel speed. For the purposes of this example, enter a speed of 12.0 Kts. The ETA calculator estimates that you will use 244 gallons at 12.0 Kts. The rest of the calculations will be completed in the PlanBook. Open the PlanBook and select the Route "Miami to Bahamas, May 2008". Click the Route Detail Tab for "Miami to Bahamas, May 2008". Next, enter a departure date of May 7, 2008 and a departure time of 7:40 am. In the Vessel SOG box, set the SOG to 12 Kts. After setting the departure date and time and entering the average speed, click on the appropriate waypoints and change them to Layover and enter a layover time. For this example, plan on spending one night each in Bimini, Freeport and Fort Lauderdale. In this case, a SOG of 12kts results in an arrival time of 11:30 in Bimini (see Figure 27.4). Change the Bimini waypoint into a Layover (Make sure the Layover column is displayed). Next, enter a layover of 20 hours, which results in departure the next morning of 7:30 am. After you have entered this information, click the Update button, to update the waypoints in the list. Repeat the layover process described above for the other waypoints which are Freeport and Fort Lauderdale. Figure 27.3 - ETA Calculator - Fuel Consumption Calculation Figure 27.4 - PlanBook - Calculating Layovers 27 - On The Water 203 Nobeltec® Navigation Software User’s Guide Printouts Arrival At Your First Destination After you have completed the route planning in the PlanBook, make some printouts of various points of interest along the route. Areas of interest might include departure and arrival points such as Miami, Bimini or Fort Lauderdale. When you arrive at the first destination, Bimini, turn off the tracking and disable the route. Since you plan to spend the night, you can either shut down Nobeltec or let it run during the night. One advantage to letting it run during the night is that if you are anchored offshore, you can create a boundary circle to alarm you if the vessel begins to drift. Upload the Route Sometimes it is a good idea to backup the route by uploading it to a GPS or plotter. In the event of computer failure, this will provide you with a backup that you can use to continue navigating along your pre-planned route. Commence Navigation Start your computer and your Nobeltec Navigation Software program and then power on the GPS. Set up the chart windows as desired. You might consider using two chart windows tiled vertically or horizontally, with one zoomed in on the chart and the other zoomed out to show a broader view of your surroundings in relation to your vessel. Activate the route by right-clicking on a route leg and selecting Activate from the pop-up menu. The first waypoint in the route should now be blinking which indicates that it is your active target. At this point, you could also turn on vessel tracking to record a path of your trip. This will leave a nice track line on the screen and give you a good representation of how well you are staying on course. Complete Your Voyage After spending the night in Bimini, continue on with your voyage and repeat the steps indicated in the sections entitled Commence Navigation and Arrival at Your First Destination. Inevitably, in a real world environment, you will make constant changes to your travel plans and may need to make edits to your route and waypoint. Although this section is intended to provide you with an example of how to use the program for voyaging purposes, there are many more features that are not covered in this example. As you continue to use the program, you will find that there are several ways to perform the same task. Your primary concern is to enjoy yourself and the ease of using Nobeltec Navigation Software and hardware. We hope that you continue to explore all the features that Nobeltec solutions offer. 204 Nobeltec® Navigation Software User’s Guide License & Warranty SOFTWARE LICENSE AGREEMENT & WARRANTY JEPPESEN MARINE ™ SOFTWARE LICENSE AGREEMENT PLEASE READ THIS LICENSE AGREEMENT (“AGREEMENT”) CAREFULLY IN ITS ENTIRETY BEFORE DOWNLOADING, INSTALLING, ACCESSING AND USING THIS SOFTWARE. THIS AGREEMENT IS LEGALLY BINDING UPON YOU (“You”) AND JEPPESEN MARINE, INC. (“Jeppesen”). BY OPENING THE SEALED PACKAGE, DOWNLOADING, INSTALLING, ACCESSING, OR USING THIS SOFTWARE, YOU ARE AGREEING TO EACH TERM OF THIS AGREEMENT INCLUDING THE RESTRICTIONS ON USE, LIMITED WARRANTY AND DISCLAIMER, AMONG OTHER THINGS. IF THE SOFTWARE IS TO BE USED ONBOARD A VESSEL AND YOU ARE NOT THE OWNER OF THE VESSEL AND/OR IF YOU ARE ACCEPTING THESE TERMS ON BEHALF OF ANOTHER PERSON OR LEGAL ENTITY, YOU REPRESENT THAT YOU HAVE THE AUTHORITY TO ENTER INTO THIS AGREEMENT ON THEIR BEHALF. THIS SOFTWARE IS FOR PRIVATE USE ONLY AND NOT FOR COMMERCIAL USE. WITHOUT PREJUDICE TO ANY OTHER LIMITATION OF LIABILITY SPECIFIED HEREINAFTER, JEPPESEN SHALL IN NO EVENT BE LIABLE FOR ANY LOSS OR DAMAGE ARISING FROM THE USE OF THE SOFTWARE FOR ANY BUSINESS ACTIVITY OF ANY NATURE WHATSOEVER. JEPPESEN RESERVES THE RIGHT TO CHANGE OR MODIFY ANY OF THE TERMS AND CONDITIONS OF THIS AGREEMENT AT ANY TIME WITHOUT NOTICE TO YOU. THE MOST CURRENT VERSION OF THE TERMS AND CONDITIONS CAN BE REVIEWED ON JEPPESEN’S WEBSITE AT WWW.NOBELTEC.COM. YOU SHOULD VISIT THE WEBSITE EVERY TIME AN UPDATE IS INSTALLED TO REVIEW THE TERMS AND CONDITIONS BECAUSE THEY ARE BINDING ON YOU. IN THE EVENT ANY OF THE TERMS AND CONDITIONS CONTAINED ON THE WEBSITE CONFLICT WITH THOSE YOU ACCEPTED UPON INSTALLATION OF THE SOFTWARE, THE TERMS AND CONDITIONS CONTAINED ON THE WEBSITE SHALL PREVAIL. ANY CHANGES OR MODIFICATIONS TO THE TERMS AND CONDITIONS WILL BE EFFECTIVE ON THE DATE THE CHANGE OR MODIFICATION IS MADE. YOUR USE OF THE SOFTWARE FOLLOWING THE DATE OF ANY CHANGES OR MODIFICATIONS WILL CONSTITUTE YOUR ACCEPTANCE OF THE TERMS AND CONDITIONS AS REVISED. IN THE EVENT OF ANY CONFLICT BETWEEN THE LICENSE IN THE SOFTWARE AND THE LICENSE PRINTED ON THE ENVELOPE OR JEWEL CASE IN WHICH THE CD-ROMS ARE DELIVERED, IF ANY, THE LICENSE IN THE SOFTWARE WILL GOVERN. IF YOU DO NOT AGREE WITH THESE TERMS AND CONDITIONS, PROMPTLY RETURN THE SOFTWARE AND ACCOMPANYING MATERIALS (INCLUDING THE DISK PACKAGE, PRINTED MATERIALS AND BINDERS OR OTHER CONTAINERS) TO THE PLACE WHERE YOU PURCHASED IT FOR A FULL REFUND. JEPPESEN SOFTWARE COMES WITH A 30-DAY MONEY BACK GUARANTEE IF PURCHASED DIRECTLY FROM JEPPESEN. AN RMA NUMBER MUST ACCOMPANY ALL RETURNED PRODUCTS. PLEASE CONTACT JEPPESEN AT 503-579-1414 AND ASK FOR CUSTOMER SERVICE IN ORDER TO OBTAIN AN RMA IF THE NEED ARISES. JEPPESEN SOFTWARE PURCHASED FROM A DEALER MUST BE RETURNED TO THAT DEALER FOR A REFUND OR EXCHANGE, BASED UPON THE DEALER’S RETURN POLICY. JEPPESEN RESERVES THE RIGHT TO REFUSE REFUNDS ON ANY OR ALL JEPPESEN PRODUCTS. AS A PARTY TO THIS LICENSE AGREEMENT, YOU AGREE TO THE FOLLOWING TERMS AND CONDITIONS: 1. SOFTWARE. As used in this Agreement, the term "Software" means, collectively: (i) the software You are currently loading (ii) all the contents of the disk(s), CD-ROM(s) or other media with which this Agreement is provided, including the object code form of the Software delivered via a CD-ROM, electronic mail, or Web page (iii) digital images, stock photographs, clip art, or other artistic works and all data, protocols, links, articles, logos graphic or video messages and all information, text, software, music, sound, graphics or other materials made available through the Software, whether publicly posted or privately transmitted (iv) related explanatory written materials and any other possible documentation related Software License & Warranty 205 License & Warranty thereto; (v) fonts, and (vi) upgrades, modified versions, updates, additions, and copies of the Software, if any, licensed to you by Jeppesen under this Agreement. 2. OWNERSHIP RIGHTS. Jeppesen and/or its authorized third party licensors shall retain all rights, title and interest in the copyrights, patents, trade secrets, trademarks, service marks, design rights, proprietary information rights and other intellectual property rights in the Software as may exist anywhere in the world. This license shall not be considered a “sale” of the Software. Jeppesen’s Software is protected by copyright. To the fullest extent permitted by law, such protected works may not be copied, reproduced, translated, modified, adapted, reversed-engineered, decompiled, stored in a retrieval system, or retransmitted in whole or in part, in any form or by any means. You acknowledge that you do not acquire any ownership rights related to the Software and that you may not resell the Software or any part of it. This Agreement does not grant you any rights in connection with any trademarks or service marks of Jeppesen. All rights not expressly granted are reserved by Jeppesen and/or its authorized third party licensors. 3. GRANT OF LICENSE. Jeppesen hereby grants to You a non-transferable, personal, non-exclusive right, so long as You comply with the terms and conditions of this Agreement, to use the Software and any upgrades thereto only for Your benefit on a single computer. The Software may be installed on a maximum of three (3) of Your own personal computers or one handheld personal computer; provided, however it may only be used on one single computer at a time. The Software is “in use” on a computer when it is loaded into temporary memory (i.e. RAM) of a computer. Jeppesen expressly reserves any and all rights that it may have in or to the Software which are not expressly licensed by Jeppesen to You hereunder. You may either (a) make one copy of the Software solely for backup or archival purposes, or (b) transfer the Software to a single hard disk provided You keep the original solely for backup or archival purposes. You acknowledge that Jeppesen has copyrights and other proprietary rights in and to the Software and You therefore agree to reproduce Jeppesen’s copyright notice on each copy of the Software which You shall create. Notwithstanding the foregoing paragraph, You may use the Tides and Current Software in support of other third parties as well as for Your own benefit. 4. SPECIAL NETWORKING LICENSE: Except as otherwise described, You must individually purchase the Software for each individual computer on a network running the Software and therefore have a unique serial number or hardware security dongle (“dongle”) for each computer in a networked environment. 5. OTHER RESTRICTIONS. Except for the initial loading of the Software or for archival or backup purposes as set forth herein, You shall not (a) copy, duplicate, reproduce or publish the Software; (b) electronically transfer the Software to multiple computers over a network; (c) distribute copies of the Software to others by any means whatsoever; (d) modify, adapt, translate, reverse engineer, disassemble or decompile the Software in any way or create derivative works (i.e. works which include or are derived from any portion of the Software) based on the Software; (e) modify, adapt, translate, or create derivative works based on the printed, electronic or written materials; (f) assign, rent, exchange, lend, lease or sublease the Software; or (g) sell or transfer the Software. In no event shall You make any use of the Software for commercial purposes, it being understood that Your sole rights with respect to the Software shall be to use the Software for Your own benefit and not for the benefit of any third party, except as otherwise provided herein. 6. DURATION AND TERMINATION. The license granted herein, is effective unless rejected or until terminated. You may reject or terminate it at any time by destroying the Software together with all copies, updates, upgrades and merged portions in any form, which are in your possession or control. It will also terminate upon conditions set forth elsewhere in this Agreement or if you fail to comply with any term or condition of this Agreement. You agree upon termination, cancellation, suspension or expiration of this Agreement for any reason and by either party, to cease all use of the Software and to destroy the Software together with all copies, updates, upgrades, and merged portions in any form. YOU AGREE THAT ANY BREACH OF THIS AGREEMENT BY YOU REPRESENTS A MATERIAL BREACH AND ENTITLES JEPPESEN TO IMMEDIATELY REVOKE THE LICENSE UNDER THIS AGREEMENT AND TERMINATE THE AGREEMENT. 7. WARNING REGARDING NAVIGATIONAL USE. The Software utilizes digital chart data and electronic information from the various marine electronic instrumentation on-board the vessel. YOU SHALL COMPLY WITH AND TAKE INTO CONSIDERATION JEPPESEN’S WARNING. NAUTICAL NAVIGATION, INCLUDING BUT NOT LIMITED TO NAVIGATION WITH 3-DIMENSIONAL VIEWS OF THE OCEAN AND LAND ELEVATION TOPOGRAPHY, IS AN INHERENTLY DANGEROUS UNDERTAKING AND SHOULD ONLY BE ENGAGED IN BY PERSONS TRAINED AND EXPERIENCED IN NAUTICAL NAVIGATION. THIS SOFTWARE IS INTENDED FOR USE ONLY License & Warranty 206 Nobeltec® Navigation Software User’s Guide BY PERSONS TRAINED IN NAUTICAL NAVIGATION AND ONLY AS A NAVIGATIONAL AID, NOT AS THE SOLE METHOD OF NAVIGATION. THE DATA ARE AUXILIARY MEANS FOR NAVIGATION AND CAN IN NO WAY REPLACE THE END USER’S NAVIGATING EXPERIENCE AND DILIGENCE. NAUTICAL NAVIGATION, INCLUDING BUT NOT LIMITED TO NAVIGATION WITH 3-DIMENSIONAL VIEWS OF THE OCEAN AND LAND ELEVATION TOPOGRAPHY, IS AN INHERENTLY DANGEROUS UNDERTAKING AND SHOULD ONLY BE ENGAGED IN BY PERSONS TRAINED AND EXPERIENCED IN NAUTICAL NAVIGATION. TO THE EXTENT YOU HAVE ACQUIRED A “ONE OFF” LICENSE TO USE THE DATA, YOU ACKNOWLEDGE THAT SUCH DATA ARE CHANGING RAPIDLY, AND THAT NAUTICAL NAVIGATION UNDERTAKEN WITH THE AID OF SUCH DATA INCREASES THE INHERENT DANGER OF SUCH NAVIGATION. THE DATA MAY NOT CONTAIN ALL NAUTICAL NAVIGATION DATA EXISTING WORLDWIDE AND YOU SHOULD MAKE NO ASSUMPTION OTHERWISE. UNLESS OTHERWISE CLEARLY STATED, THE DATA SHOULD ONLY BE USED AS AN AID TO NAVIGATION. THE DATA IS DESIGNED TO FACILITATE THE USE OF OFFICIAL GOVERNMENT CHARTS, NOT TO REPLACE THEM. ONLY OFFICIAL GOVERNMENT CHARTS AND NOTICES TO MARINERS CONTAIN THE CURRENT INFORMATION NEEDED FOR SAFE NAVIGATION. THE DATA IS DERIVED, IN PART, FROM MATERIAL PROVIDED WITH THE PERMISSION OF VARIOUS NATIONAL HYDROGRAPHIC OFFICES AND OTHER THIRD PARTIES (THE “LICENSORS”). JEPPESEN IS AN AUTHORISED USER AND LICENSEE OF SELECTED DATA PRODUCTS UNDER SEPARATE AGREEMENTS WITH THE LICENSORS. ALL RIGHTS ARE RESERVED BY THE RESPECTIVE LICENSORS AND COPYRIGHT RESTRICTIONS APPLY. THE INFORMATION MAY NOT BE MODIFIED OR EXPLOITED BY REVERSE ENGINEERING OF FORMATS AND ENCRYPTION OR COPIED, REPRODUCED, TRANSLATED, OR REDUCED TO ANY ELECTRONIC MEDIUM OR MACHINE READABLE FORM, IN WHOLE OR PART. NO LICENSOR HAS VERIFIED THE DATA AND NO LICENSOR ACCEPTS ANY LIABILITY FOR THE ACCURACY OF REPRODUCTION OR FOR ANY MODIFICATIONS THAT MAY HAVE BEEN MADE TO THE INFORMATION SUPPLIED. FURTHERMORE, NO LICENSOR WARRANTS THAT THE DATA MEETS ANY REGULATIONS AS AN APPROPRIATE PRODUCT FOR NAVIGATION OR THAT IT CONTAINS THE LATEST HYDROGRAPHIC INFORMATION AVAILABLE. ELECTRONIC CHARTS ARE AN AID TO NAVIGATION DESIGNED TO FACILITATE THE USE OF OFFICIAL GOVERNMENT CHARTS, NOT REPLACE THEM. NEW CHARTS OR NOTICE TO MARINERS CORRECTIONS WILL RENDER THIS PRODUCT OBSOLETE AND INACCURATE. UPDATES MAY BE AVAILABLE FROM JEPPESEN. ALWAYS REMEMBER THAT THESE ELECTRONIC CHARTS ARE INADEQUATE AS A PRIMARY MEANS OF NAVIGATION, AND SHOULD BE USED ONLY AS SUPPLEMENTS TO OFFICIAL GOVERNMENT CHARTS AND TRADITIONAL NAVIGATION METHODS, UNLESS OTHERWISE SPECIFIED BY NATIONAL MARITIME AUTHORITIES. ONLY OFFICIAL GOVERNMENT CHARTS AND NOTICES TO MARINERS CONTAIN ALL INFORMATION NEEDED FOR THE SAFETY OF NAVIGATION AND, AS ALWAYS, THE CAPTAIN IS RESPONSIBLE FOR THEIR PROPER USE. Warranty 8. LIMITED WARRANTY AND DISCLAIMER. If the Software is delivered on media, Jeppesen warrants that the media on which this Software is recorded is free from defects in materials and workmanship under normal use and operation. This limited warranty is effective for a period of sixty (60) days following Your receipt of the Software. The limited warranty provided herein is made to You if You (a) are registered with Jeppesen as a user of this Software, (b) have fully paid the required license fee, (c) have fully complied with the terms of this Agreement, and (d) are the original licensed end-user. No warranty is made to any other person or entity. To the maximum extent permitted by applicable law, the Software is delivered “as is,” and is not guaranteed to be free from errors or defects. Jeppesen does not warrant that the Software is error free, that it will perform without interruption or that it is compatible with products manufactured by any person or entity other than Jeppesen. The Software utilizes digital chart data and electronic information from the various marine electronic Software License & Warranty 207 License & Warranty instrumentation on-board the vessel, which may contain errors. Jeppesen does not warrant the accuracy of such information, and You are advised that errors in such information may cause the Software to give inaccurate readings. You assume all risk as to their performance. EXCEPT FOR THE LIMITED WARRANTY REGARDING THE MEDIA AND TO THE MAXIMUM EXTENT PERMITTED BY APPLICABLE LAW, JEPPESEN MAKES NO EXPRESS OR IMPLIED WARRANTY, AND DISCLAIMS ANY LIABILITY FOR THE SOFTWARE, INCLUDING BUT NOT LIMITED TO, ANY EXPRESS OR IMPLIED WARRANTY OF MERCHANTABILITY OR FITNESS FOR A PARTICULAR PURPOSE. SOME COUNTRIES/STATES/JURISDICTIONS DO NOT ALLOW LIMITATIONS ON THE LENGTH OF IMPLIED WARRANTIES, SO THE ABOVE EXCLUSION MAY NOT APPLY TO YOU. THE LIMITED WARRANTIES AND OTHER OBLIGATIONS AND LIABILITIES OF JEPPESEN, AND YOUR REMEDIES SET FORTH IN THIS AGREEMENT, ARE EXCLUSIVE AND IN SUBSTITUTION FOR ANY OTHER RIGHTS, CLAIMS AND REMEDIES YOU WOULD OTHERWISE HAVE AGAINST JEPPESEN WITH RESPECT TO THE SOFTWARE PROVIDED HEREUNDER. 9. REMEDIES. During the warranty period set forth herein, Jeppesen will replace any media which proves defective in materials or workmanship , without charge, on an exchange basis. This is Jeppesen’s entire liability and Your sole and exclusive remedy. This remedy shall not apply if the media on which the Software is stored has been damaged by negligence, accident, improper or unreasonable use, or by any other cause, unrelated to defective material or workmanship. If You have a warranty claim, You must contact the Jeppesen customer services department during the warranty period. You will be provided with a return authorization number and an address for returning the defective media for replacement. You must return the defective media post-paid, postmarked within the warranty period stated above. You must either insure the defective media being returned or assume the risk of loss or damage in transit. Any claim under the above warranty must include a copy of Your receipt or invoice or other proof of the date of delivery. No warranty claims will be honored which are made after the expiration of the warranty period. 10. LIMITATION OF LIABILITY. TO THE MAXIMUM EXTENT PERMITTED BY APPLICABLE IN NO EVENT WILL JEPPESEN OR ITS THIRD PARTY LICENSORS BE LIABLE TO YOU OR TO ANY THIRD PARTY FOR DIRECT, SPECIAL, INCIDENTAL, INDIRECT, CONSEQUENTIAL, PUNITIVE, EXEMPLARY OR OTHER DAMAGES OF ANY NATURE WHATSOEVER (INCLUDING BUT NOT LIMITED TO LOSS OF USE, REVENUE, PROFIT, DATA, PROPERTY DAMAGE OR INJURY) WHETHER SUCH LIABILITY IS ASSERTED ON THE BASIS OF CONTRACT, WARRANTY, CONTRIBUTION, STRICT LIABILITY, TORT OR OTHER THEORY ARISING OUT OF THIS AGREEMENT OR THE USE OF OR INABILITY TO USE THE SOFTWARE OR ANY OTHER LEGAL THEORIES, EVEN IF JEPPESEN HAS BEEN ADVISED OF THE POSSIBILITY OF SUCH DAMAGES. BECAUSE SOME COUNTRIES/STATES/ JURISDICTIONS DO NOT ALLOW THE EXCLUSION OF LIABILITY BUT MAY ALLOW LIABILITY TO BE LIMITED, JEPPESEN'S ENTIRE LIABILITY UNDER ANY PROVISION OF THIS AGREEMENT SHALL IN SUCH CASE BE LIMITED TO THE AMOUNT ACTUALLY PAID BY YOU FOR THE SOFTWARE LICENSE. . If an arbitration panel or court of competent jurisdiction determines that relevant laws in force may imply warranties and liabilities which cannot be excluded or limited or which can only partly be excluded or limited, then the limit on Jeppesen’s liability set forth in this Section shall apply to the fullest extent permitted by law. If Jeppesen cannot exclude or limit a warranty or liability implied by law, this Agreement shall be read and construed subject to such provisions of law. 11. INDEMNIFICATION. You will indemnify and hold harmless Jeppesen and its third party licensors from and against all claims and liabilities (including claims by third parties), and costs and expenses (including attorneys’ fees), incident thereto or incident to successfully establishing the right to indemnification, for injury to or death of any person or persons, including Your employees but not employees of Jeppesen, or for loss of or damage to any property, including any vessel or cargo, arising out of or in any way relating to (a) Your breach of any of the terms and conditions of this License Agreement and (b) Your use of the Software provided hereunder, whether or not arising in tort or occasioned by the negligence of Jeppesen. Your obligations under this indemnity will survive the termination of this License Agreement. 12. EXPORT COMPLIANCE. You shall be responsible for Your compliance with any applicable export control restrictions, laws and regulations as may be modified from time to time, imposed by the governments of the U.S. and, if applicable, other countries. You shall not attempt to, or knowingly export or re-export the Software covered under this Agreement to any country, or national thereof, prohibited from obtaining such Software, either directly or indirectly. You shall, at Your sole cost and expense, obtain and maintain in effect all permits, licenses and other consents necessary to conduct Your respective activities hereunder. License & Warranty 208 Nobeltec® Navigation Software User’s Guide 13. ASSIGNMENT. Jeppesen may assign and transfer all its rights and obligations under the Agreement to any third party. 14. GOVERNING LAW AND ARBITRATION. This Agreement shall be governed by and construed in accordance with the laws of the State of Oregon, USA, without regard to its conflicts of laws provisions. To the maximum extent permitted by applicable law, all disputes arising from or related to this Agreement shall be settled by a single arbitrator appointed by the Chamber of Commerce of the place in which the Software has been purchased. The arbitration shall apply ICC procedural rules and the substantive law of the State of Oregon, USA, to the extent permitted. The arbitration language shall be English. 15. ENTIRE AGREEMENT. This Agreement contains the entire understanding of the parties hereto relating to the subject matter hereof. No waiver or modification of any of the terms hereof by You shall be valid unless agreed to by Jeppesen in writing signed by Jeppesen and You. No waiver of any breach shall be deemed a waiver of any subsequent breach. If any provision of this Agreement is held to be invalid or unenforceable, the remaining provisions shall not be affected. Software License & Warranty 209 PLEASE READ THIS ENTIRE DATA LICENSE AGREEMENT (“AGREEMENT”) CAREFULLY IN ITS ENTIRETY BEFORE DOWNLOADING, INSTALLING, ACCESSING AND USING THIS DATA. THIS AGREEMENT IS LEGALLY BINDING UPON YOU (“You”) AND JEPPESEN ITALIA S.R.L. WHO ENTERS INTO THIS AGREEMENT ON BEHALF OF ITSELF AND IT’S JEPPESEN AFFILIATES WHEREVER LOCATED (hereinafter collectively referred to as “Jeppesen”). BY OPENING THE SEALED PACKAGE, DOWNLOADING, INSTALLING, ACCESSING, OR USING THIS DATA, YOU ARE AGREEING TO EACH TERM OF THIS AGREEMENT INCLUDING THE RESTRICTIONS ON USE, LIMITED WARRANTY AND DISCLAIMER, AMONG OTHER THINGS. IF YOU ARE ACCEPTING THESE TERMS ON BEHALF OF ANOTHER PERSON, YOU REPRESENT THAT YOU HAVE THE AUTHORITY TO ENTER INTO THIS AGREEMENT ON THEIR BEHALF. IF YOU DO NOT AGREE WITH THESE TERMS AND CONDITIONS, PROMPTLY RETURN THE DATAAND ACCOMPANYING MATERIALS TO THE PLACE WHERE YOU PURCHASED IT. ALL DATA SALES ARE NON-REFUNDABLE ONCE YOU HAVE ACCEPTED THIS AGREEMENT AND USED THE DATA OR, IF APPLICABLE, THE DATA PERMIT IS GENERATED. DONGLE EXCHANGES REQUIRE THE DONGLE TO BE RETURNED BEFORE A NEW DONGLE CAN BE ISSUED. AS A PARTY TO THIS AGREEMENT, YOU AGREE TO THE FOLLOWING TERMS AND CONDITIONS: All (a) data including but not limited to, digital charts and any other supplemental information whether intended to aid navigation or not, and any updates thereof (collectively “Data”), (b) delivery and/or installation media such as cartridges, CDs, or DVDs, and any other accompanying materials (“Media”), (c) access control device(s) (“Dongle(s)” or “Hardware Key(s)”), and the HASP key embedded in the Dongle(s) or Hardware Key(s) needed to activate the data (Media and Dongles or Hardware Keys shall be collectively referred to as “Materials”) and (d) update services (“Services”) supplied to You by Jeppesen under this Agreement shall be subject to the terms and conditions of this Agreement. The terms and conditions set out in this Agreement supersede all other documents concerning the Data, Materials and Services, including previous versions of this Agreement. 1. OWNERSHIP AND COPYRIGHT. Jeppesen and/or its third party licensors shall retain all rights, title and interest in the copyrights, database rights and other neighboring rights, patents, trade secrets, trademarks, service marks, design rights, proprietary information rights and other intellectual property rights as may exist anywhere in the world in the Data. The Data and certain Materials may be protected by copyright, database rights and other neighboring rights. To the maximum extent permitted by applicable law, such protected works may not be copied, reproduced, translated, modified, adapted, reversed-engineered, decompiled, stored in a retrieval system, or retransmitted in whole or in part, in any form or by any means. This Agreement does not grant you any rights in connection with any trademarks or service marks of Jeppesen. All rights not expressly granted are reserved by Jeppesen and/or its authorized third party licensors. 2. LICENSE. The Data You are about to load is licensed, not sold, either on a single usage or limited networking basis in a navigation system. Jeppesen grants to You the non-transferable, personal, non-exclusive right, so long as You comply with the terms and conditions of this Agreement, to use the Data, Materials and Services only for Your benefit solely as a navigational aid (i.e., a supplement to official navigation information and traditional navigation techniques), and not as the sole or primary method of navigation. License & Warranty JEPPESEN DATA LICENSE AGREEMENT Nobeltec® Navigation Software User’s Guide The term of the license may either be a time limited license or an unlimited license based on the specific product You have acquired. The validity of the license depends on Your compliance with the terms and conditions set forth in this Agreement. Data License Agreement 3. RESTRICTIONS ON USE. THE DATA AND OTHER THINGS PROVIDED HEREUNDER ARE FOR PRIVATE USE ONLY AND NOT FOR COMMERCIAL USE. Except (i) as otherwise expressly authorized herein or (ii) as expressly allowed by mandatory applicable law, or (iii) for the initial loading and other operations necessary for legal utilization of the Data, You may NOT (a) copy, duplicate, reproduce or publish the Data or the Materials or any of their contents; (b) electronically transfer the Data or the contents of the Materials to multiple computers for concurrent use over a network; (c) distribute copies of the Data or the Materials to others by any means whatsoever; (d) in whole or in part change, modify, adapt, translate, reverse engineer, disassemble or decompile the Data or the Materials or create derivative works based on the Data or the Materials; (e) assign, rent, exchange, lend, lease or sublease the Data or the Materials or any copies thereof; or (f) sell or transfer the Data or the Materials or any copies thereof; or (g) bundle, re-package, or include the Data or the Materials with any software in any way. Any unauthorized reproduction, use, or transfer of the Data or the Materials may be a crime and may subject You to damages and attorneys’ fees. 4. TERMINATION. Without prejudice to any other rights governed by this Agreement, the license to use the Data and the Materials and any right to receive Services granted under this Agreement will automatically terminate if you fail to comply with any term of this Agreement or if you fail to comply with any mandatory law applicable to Your use of the Data. In such event, you will not be entitled to reimbursement of any fees already paid to Jeppesen, but You will be liable for payment of any amounts due to Jeppesen. 5. WARNING. YOU ACKNOWLEDGE, SHALL COMPLY WITH, AND TAKE INTO CONSIDERATION THE FOLLOWING WARNINGS FROM JEPPESEN: NAUTICAL NAVIGATION IS AN INHERENTLY DANGEROUS ACTIVITY AND SHOULD ONLY BE ENGAGED IN BY PERSONS WITH ADEQUATE TRAINING AND EXPERIENCE. ONLY UP-TO-DATE OFFICIAL GOVERNMENT CHARTS AND NOTICES TO MARINERS CONTAIN ALL INFORMATION NEEDED FOR THE SAFETY OF NAVIGATION AND, AS ALWAYS, THE CAPTAIN IS RESPONSIBLE FOR THEIR PROPER USE AND AWARENESS OF CURRENT CONDITIONS. UNLESS OTHERWISE SPECIFIED BY NATIONAL MARITIME AUTHORITIES, THE DATA LICENSED HEREUNDER IS INADEQUATE AS A PRIMARY MEANS OF NAVIGATION, AND SHOULD BE USED ONLY AS A SUPPLEMENT TO OFFICIAL GOVERNMENT CHARTS AND TRADITIONAL NAVIGATION METHODS. NEW CHARTS OR NOTICE TO MARINERS CORRECTIONS WILL RENDER THE DATA OBSOLETE AND INACCURATE. UPDATES MAY BE AVAILABLE FROM JEPPESEN. Data License Agreement THE DATA MAY NOT CONTAIN ALL NAUTICAL NAVIGATION DATA EXISTING WORLDWIDE AND YOU SHOULD MAKE NO ASSUMPTION OTHERWISE. THE DATA IS DERIVED, IN PART, FROM MATERIAL PROVIDED WITH THE PERMISSION OF VARIOUS NATIONAL HYDROGRAPHIC OFFICES AND OTHER THIRD PARTY SOURCES (THE “LICENSORS”). JEPPESEN IS AN AUTHORISED USER AND LICENSEE OF SELECTED DATA PRODUCTS UNDER SEPARATE AGREEMENTS WITH THE LICENSORS. ALL RIGHTS ARE RESERVED BY THE RESPECTIVE LICENSORS AND COPYRIGHT RESTRICTIONS APPLY. THE INFORMATION MAY NOT BE MODIFIED OR EXPLOITED BY REVERSE ENGINEERING OF FORMATS AND ENCRYPTION OR COPIED, REPRODUCED, TRANSLATED, OR REDUCED TO ANY ELECTRONIC MEDIUM OR MACHINE READABLE FORM, IN WHOLE OR PART. INFORMATION ABOUT THE SOURCE OF A SPECIFIC CHART MAY BE VIEWED BY CHOOSING “INFORMATION OF CHARTS / DATA SOURCE” IN THE NAVIGATION SYSTEM. JEPPESEN MAY UNDER NO CIRCUMSTANCES BE HELD LIABLE FOR DEFECTS DUE TO INCORRECT OR MISSING INFORMATION FROM THESE HYDROGRAPHIC OFFICES OR OTHER THIRD PARTY SOURCES. 6. LIMITED WARRANTY AND DISCLAIMER. To the maximum extent permitted by applicable law, the following provisions apply: Jeppesen warrants that the Media, if any, on which the Data is recorded and delivered are free from defects in materials and workmanship under normal use and operation. This limited warranty is effective for a period of sixty (60) days following your receipt of such Media. The limited warranty provided herein is made to You if You (a) have fully paid the required license fee for use of the Data, (b) have fully complied with the terms of this Agreement, and (c) are the original licensed end-user. No warranty is made to any other person or entity. During the warranty period set forth above, Jeppesen will replace any Media which proves defective in materials or workmanship, without charge, on an exchange basis. This is Jeppesen’s entire liability and your sole and exclusive remedy. This remedy shall not apply if the Media on which the Data is stored has been damaged by negligence, accident, improper or unreasonable use, or by any other cause unrelated to defective material or workmanship. WITHOUT PREJUDICE TO ANY OTHER LIMITATION OF LIABILITY SPECIFIED HEREINAFTER, JEPPESEN SHALL IN NO EVENT BE LIABLE FOR ANY LOSS OR DAMAGE ARISING FROM THE USE OF THE DATA OR OTHER THINGS PROVIDED HEREUNDER FOR ANY BUSINESS ACTIVITY OF ANY NATURE WHATSOEVER. THE DATA IS PROVIDED “AS IS” WITHOUT WARRANTY OF ANY KIND. YOU ACKNOWLEDGE THAT THE DATA IS OF A GENERAL NATURE, AND THAT IT MAY NOT BE DESIGNED FOR, ADEQUATE TO, OR CONFORM TO YOUR SPECIFIC NEEDS AND/OR PURPOSES, NOR THAT IT CONFORMS WITH SPECIFIC SAFETY REQUIREMENTS OR GOVERNMENTAL STANDARDS OR REGULATIONS IN YOUR COUNTRY. JEPPESEN MAKES NO EXPRESS OR IMPLIED WARRANTY, AND DISCLAIMS ANY LIABILITY FOR THE DATA, THE ACCURACY OF THE DATA SOURCE MATERIAL, AND ANY NONCONFORMANCE OR DEFECT IN THE DESIGN, ADEQUACY, ACCURACY, RELIABILITY, SAFETY OR CONFORMANCE WITH ANY Data License Agreement NO LICENSOR HAS VERIFIED THE DATA AND NO LICENSOR ACCEPTS ANY LIABILITY FOR THE ACCURACY OF REPRODUCTION OR FOR ANY MODIFICATIONS THAT MAY HAVE BEEN MADE TO THE INFORMATION SUPPLIED. FURTHERMORE, NO LICENSOR WARRANTS THAT THE DATA MEETS ANY REGULATIONS AS AN APPROPRIATE PRODUCT FOR NAVIGATION OR THAT IT CONTAINS THE LATEST HYDROGRAPHIC INFORMATION AVAILABLE. Nobeltec® Navigation Software User’s Guide GOVERNMENT STANDARDS OR REGULATIONS OF SUCH DATA, INCLUDING, BUT NOT LIMITED TO, ANY EXPRESS OR IMPLIED WARRANTY OF MERCHANTABILITY OR FITNESS FOR A PARTICULAR PURPOSE. THE LIMITED WARRANTIES AND OTHER OBLIGATIONS AND LIABILITIES OF JEPPESEN, AND YOUR REMEDIES SET FORTH IN THIS AGREEMENT, ARE EXCLUSIVE AND IN SUBSTITUTION FOR ANY OTHER RIGHTS, CLAIMS AND REMEDIES YOU WOULD OTHERWISE HAVE AGAINST JEPPESEN WITH RESPECT TO THE DATA, THE MATERIALS AND THE SERVICES PROVIDED HEREUNDER. Notwithstanding the exclusion of warranty for the Data, should You encounter any problems with the Data or find a suspected error, You should report such problem or suspected error to Jeppesen as soon as reasonably possible. Data License Agreement 7. LIMITATION OF LIABILITY. TO THE MAXIMUM EXTENT PERMITTED BY APPLICABLE LAW: IN NO EVENT SHALL JEPPESEN OR ITS THIRD PARTY LICENSORS BE LIABLE TO YOU OR TO ANY THIRD PARTY FOR ANY DIRECT, SPECIAL, INCIDENTAL, INDIRECT, CONSEQUENTIAL, PUNITIVE, EXEMPLARY OR OTHER DAMAGES OF ANY NATURE WHATSOEVER (INCLUDING BUT NOT LIMITED TO LOSS OF USE, REVENUE, PROFIT, DATA, PROPERTY DAMAGE OR INJURY) WHETHER SUCH LIABILITY IS ASSERTED ON THE BASIS OF CONTRACT, WARRANTY, CONTRIBUTION, STRICT LIABILITY, TORT OR OTHER THEORY ARISING OUT OF THIS AGREEMENT OR THE USE OF OR INABILITY TO USE THE DATA, MATERIALS OR SERVICES PROVIDED HEREUNDER OR ANY OTHER LEGAL THEORIES, EVEN IF JEPPESEN HAS BEEN ADVISED OF THE POSSIBILITY OF SUCH DAMAGES. IN ANY CASE, JEPPESEN'S ENTIRE LIABILITY UNDER ANY PROVISION OF THIS AGREEMENT SHALL BE LIMITED TO THE AMOUNT ACTUALLY PAID BY YOU FOR THE DATA DURING THE LATEST TWELVE (12) CALENDAR MONTHS. If an arbitration panel or court of competent jurisdiction determines that relevant laws in force may imply warranties and liabilities which cannot be excluded or limited or which can only partly be excluded or limited, then the limit on Jeppesen’s liability set forth in this Section shall apply to the fullest extent permitted by law. If Jeppesen cannot exclude or limit a warranty or liability implied by law, this Agreement shall be read and construed subject to such provisions of law. 8. INDEMNIFICATION. To the maximum extent permitted by applicable law, You will indemnify and hold harmless Jeppesen and its third party licensors from and against all claims and liabilities (including claims by third parties including but not limited to vessel owners, operators or managers), and costs and expenses (including attorneys’ fees), incident thereto or incident to successfully establishing the right to indemnification, for injury to or death of any person or persons, including Your employees but not employees of Jeppesen, or for loss of or damage to any property, including any vessel and cargo, arising out of Your use of the Data provided hereunder, whether or not arising in tort or occasioned by the negligence of Jeppesen. Your obligations under this indemnity will survive the termination of this Agreement. 9. EXPORT COMPLIANCE. You shall be responsible for Your compliance with any applicable export control restrictions, laws and regulations as may be modified from time to time, imposed by the governments of the U.S. and, if applicable, other countries. You shall not attempt to, or knowingly export or re-export and Data, Materials or Services covered under this Agreement to any country, or national thereof, prohibited from obtaining such Data, Materials or Services, either directly or indirectly. You shall, at Your sole cost and expense, obtain and maintain in effect all permits, licenses and other consents necessary to conduct Your respective activities hereunder. 10. ASSIGNMENT. Jeppesen may assign and transfer all its rights and obligations under the Agreement to any third party. Data License Agreement 11. GOVERNING LAW AND ARBITRATION. This Agreement shall be governed by and construed in accordance with the laws of the Italy, without regard to its conflicts of laws provisions. To the maximum extent permitted by applicable law, any dispute, controversy or claim arising out of or relating to this Agreement or breach thereof, shall be finally settled under the Rules of Conciliation and Arbitration of the International Chamber of Commerce by one or more arbitrators appointed in accordance with the said Rules. The place of arbitration shall be Milan, Italy. The language of arbitration shall be English. This arbitration clause shall not deprive any of the parties from seeking interim injunctive relief in national courts of competent jurisdiction. 12. AMENDMENTS. Jeppesen reserves the right to change or modify any of the terms and conditions of this Agreement at any time without notice to You. Any changes or modifications to the terms and conditions will be effective on the date the change or modification is made, and will be provided to You with the next Data update for Your acceptance prior to downloading, installing, accessing or using the updated Data. 13. GENERAL. If you have any questions concerning this Agreement, including warranty service, you should contact the Jeppesen office nearest you (see www.c-map.com soon to be www.jeppesen.com). You may also contact the following directly: Europe Jeppesen Italia S.r.l, Via Caboto 9, 54033 Marina di Carrara (MS), Italy +39 0585 79471 The Americas Jeppesen Marine, Inc., 133 Falmouth Road, Mashpee, Massachusetts 02649 USA,+1 508 477 8010 Australasia Jeppesen Marine Australia (Pty) Ltd, Unit 1, 41-43 Higginbotham Road, P. O. Box 342, Gladesville NSW 2111 Australia, +61 2 9808 6200 If any provision of this Agreement is held to be void, invalid or unenforceable, the remaining provisions shall not be affected. YOU HEREBY ACKNOWLEDGE THAT YOU HAVE READ THIS AGREEMENT, UNDERSTOOD IT, AND AGREE TO BE BOUND BY ITS TERMS AND CONDITIONS. YOU FURTHER AGREE THAT IT IS THE COMPLETE AND EXCLUSIVE STATEMENT OF THE AGREEMENT BETWEEN YOU AND JEPPESEN, WHICH SUPERSEDES ANY PROPOSAL OR PRIOR AGREEMENT, ORAL OR WRITTEN AND ANY OTHER COMMUNICATIONS BETWEEN YOU AND JEPPESEN RELATING TO THE SUBJECT MATTER OF THIS AGREEMENT. V01 effective June 5, 2008 Data License Agreement Failure or neglect by either party to enforce at any time any of the provisions of this Agreement shall not be construed or deemed to be a waiver of that party's rights under this Agreement. 214 Nobeltec® Navigation Software User’s Guide Glossary Active (route, mark, etc). An active route or mark is that from which various data, such as ETA, range and bearing are calculated with respect to the vessel. If autopilot is enabled, it will steer toward an active mark and will proceed along an active route. Aft Means "towards the stern of the boat" Aids to Navigation Automatic Identification System (AIS) AIS provides a means of broadcasting digitally navigation information including ship position/speed/heading/dimension/name/destination/ ROT, aids to navigation, base station reports and more. Created by the IMO and sanctioned by the U.S. Coast Guard for ship monitoring and collision avoidance. It is used by ship traffic monitoring and control locations throughout the world to improve situational awareness and help prevent collisions at sea. Automatic Radar Plotting Aid (ARPA) Air Draft The functionality entailing the detection of moving targets and calculating their speed and course. Used to automatically detect radar targets and output to other devices, ARPA is a collision avoidance system. The maximum height of a ship. Autopilot AIS A self-steering device which attaches to a ship’s steering mechanism to control the ship’s bearing. Usually pertains to buoys, ranges and the like. See Automatic Identification System. ARPA See Automatic Radar Plotting Aid. Annotation A navigation object composed entirely of text. Its purpose is to place descriptions or other information on specific areas of a chart. AutoScroll This feature allows you to more easily create routes and boundaries which exceed the parameters of the view window. As you come to the edge of the view window while creating or dragging objects, the chart will scroll automatically in the proper direction. AWD Apparent Wind Direction (AWD) See Apparent Wind Direction. On-board wind direction measurements - the AWD - may not be the same as the True/Theoretical Direction (TWD). Nobeltec Navigation Software derives TWD from AWD by taking any bearing deviation into account. AWS Apparent Wind Speed (AWS) When the vessel is in motion, on-board wind speed measurements - the AWS - will differ from stationary measurements (True/Theoretical Speed or TWS). TWS is derived from AWS by taking the vessel’s motion into account. See Apparent Wind Speed. Azimuth Azimuth of a body is the arc of the horizon intercepted between the North or South point and the foot of the vertical circle passing through the body. It is reckoned in degrees from either the North or South point clockwise entirely around the Horizon. (source: Our Restless Tides). Bathymetric Measurement of the depth, contours and slopes of the floor of a body of water (sea, lake, ocean or river), obtained through topographic charting. Glossary & Index Beam Chart Ship width. Nautical term for maps used in nautical navigation that show the depth of waters as well as land boundaries and other obstructions. Charts may be paper or electronic and electronic charts may be of raster or vector type. Bearing (BRG) The angle between the direction of the boat and the reference direction expressed in degrees, with a notation of True or Magnetic Variation (T or M). Due north corresponds to 0 degrees, east to 90, south to 180 and west to 270. For compass bearings, the reference direction is magnetic North. For true bearings the reference direction is true North. Glossary & Index 215 Chart Permit/Unlock Code Chart Permits unlock a Chart region, Unlock Codes unlock supplemental features. Each permit/code is made up of 20 digits laid out in the following convention: 12345-12345-12345-12345 Bearing from Boat to Cursor (BBC) Closest Point of Approach (CPA) This data is an aid in route making and planning. BBC is expressed in degrees, with a notation of True or Magnetic Variation. Predicted closest point a maneuvering boat will get relative to any target, moving or otherwise., located at a point on the relative movement line perpendicular to the reference ship. The minimum horizontal distance between two craft during a close proximity encounter. Boat Speed The speed of the boat relative to the water. Bookmark A saved combination of chart selection, zoom level and position on the chart. Created with the Set Bookmark command, it may be returned to at any time with the Goto Bookmark command. Boundary A line created by the user. This software can be configured so that when the vessel or its predictor line crosses a boundary, an alarm will be triggered. Bow The front of a ship Broadcast Notice to Mariner (BNM) Cartesian Coordinates Also known as "Rectangular Coordinates". A two-dimensional plane contains an x-axis and a y-axis. Negative x coordinates lay to the left of the y-axis and positive x-coordinates to the right. Negative y coordinates lay below the xaxis and positive above the x-axis. Nobeltec Navigation Software’ treatment of the x-axis does not always conform to Cartesian coordinates. See Course Over Ground. COM Port The interface through which Nobeltec Navigation Software and your PC can communicate with peripherals. Visual series support 32 COM Ports. Compass Rose An image, overlaid on the chart, which displays both magnetic and true compass directions. Console A collection of optionally selected and configured panels which display various vital information. This information is continually updated. Course The direction a boat is being steered. Course Over Ground (COG) Is the track of the ship over the ground and is based on position changes. Course To Steer (CTS) Real time calculation of the ideal bearing the navigator should steer the boat towards to reach the next active waypoint. Glossary & Index See Notice to Mariners (NTM). COG 216 Nobeltec® Navigation Software User’s Guide CPA Digital Selective Calling (DSC) See Closest Point of Approach A type of VHF radio that allows boats to contact other, similarly equipped boats using that boat’s MMSI Number. DSC allows two radios to communicate selectively with each other while excluding other receivers from using the signal. DSC can report position information. Cross Track Error (XTE) The distance of a perpendicular line drawn from the ship to an active route leg. Determines how much the ship is straying from the course of a Route. Current The flow of water characterized by direction and speed. Current speed and direction may change with the tide. See also Ebb Current and Flood Current. Data Sentence The unit of information sent between peripherals and Visual Series, conforming to the NMEA 0183 specification. Datum Setting Nobeltec Navigation Software assumes that the GPS will be outputting data at the WGS84 Datum. The setting is configured in the GPS. See Hardware Key. Draft The extent to which a boat protrudes into water. The draft of a boat may vary due to changes in weight and changes in water salinity. Drift The cumulative effect of wind and current on the ship. DSC See Digital Selective Calling. Ebb Current (Ebb) Dead Reckoning Movement of tidal current away from shore or down a tidal river or estuary. A method of navigation where known values (position, course, speed, time and distance to travel) are used to calculate unknown values. Values such as set and drift can also be incorporated. Electronic Chart Display and Information System (ECDIS) Depth Sounder See Sounder. Deviation Glossary & Index Dongle Changes in the magnetic field due to the ferrous composition of surrounding objects affecting the measured direction of magnetic North. Deviation is measured as the angular difference in direction between the actual magnetic heading and the compass heading. DGPS (Differential GPS) A network of 60 radio beacons in conjunction with a GPS that sends correction information used to reduce positional error to the 1-3 meter range. A hardware/software/data marine navigation system that meets the specifications of the International Hydrographic Organization (IHO). An ECDIS is the only electronic system allowed to replace paper charts under the International Convention for the Safety of Life at Sea (SOLAS). Electronic Chart System (ECS) A system comprised of: 1. navigation software 2. navigation data 3. system hardware An ECS is any combination of hardware and software that displays marine charts electronically. The term ECS is used specifically when ECDIS specifications are not met by the software/hardware system. Electronic Navigation Chart (ENC) An electronic data file containing information that could be used to display a chart. Glossary & Index 217 Estimated Time of Arrival (ETA) GRIB (GRIdded Binary) The calculated arrival time to an active mark or waypoint, assuming no change in present course and speed or weather conditions. This time is based on computer clock time. For greatest accuracy, make sure computer clock is synchronized with real time. A general purpose, bit-oriented data exchange format, GRIB is an efficient vehicle for transmitting large volumes of gridded data over highspeed telecommunication lines using modern protocols. GRIB weather communicates large weather data files efficiently. Fish Finder Hardware Key See Sounder. Flood Current (Flood) Small hardware device that unlocks Admiral MAX Pro, VNS MAX Pro, and international chart capabilities. Replaces the use of a Serial Number. The movement of tidal current up the shore or up a tidal river or estuary. Heading Geo-Reference The direction the ship is oriented. To establish the relationship between page coordinates on a planar map and real-world coordinates. GlassBridge Network (GBN) A group of computers that are combined together to share data between the computers. This feature is only available in Admiral MAX Pro. Helmsman Display Also known as a highway or horizon display. It graphically shows the user where the active leg and XTE limits are in relation to their position. High Water (HW) The maximum height reached by a rising tide. Global Positioning System (GPS) (modified) Higher High Water (HHW) A worldwide radio-navigation system developed by the US. Department of Defense. In addition to military purposes it is widely used in marine, terrestrial navigation and location based services. Uses stationary satellites or a surface signal to locate the ship with a very high degree of accuracy. The term GPS is frequently used to refer to GPS receivers. The highest of the high water (or single high water) of any specified tidal day due to the declinational effects of the Mood and the Sun. GPS See Global Positioning System. A Great Circle is the shortest distance between two points on a spheroid. A great circle is formed at the edge of a plane crossing through the center of a sphere. Unlike Rhumb Lines, great circles generally do not have constant bearing (the equator and the meridians are prominent exceptions). The highest of the low water of any specified tidal day do to the declinational effects of the Moon and the Sun. Hub Any waypoint that serves as a juncture for two or more routes. Hydrographic Office A governmental organization that supports safety in navigation and issues official nautical charts. HyperTerminal Greenwich Meridian A program included in Windows which tests COM ports. See Prime Meridian. International Hydrographic Organization (IHO) An intergovernmental organization that supports safety in navigation, the protection of the marine environment and uniformity in nautical charts, including the ECDIS standards. Glossary & Index Great Circle Higher Low Water (HLW) 218 Nobeltec® Navigation Software User’s Guide Knot (Kt) Lower Low Water (LLW) A speed unit of one international nautical mile (18520.0 meters or 6,076.11549 international feet) per hour. The lowest of the low waters (or single low water) of any specified tidal day due to the declinational effects of the Moon and Sun. Latitude Magnetic Variation The designation for angles measuring how far North or how far South a position is. Value range is from 90ºS to 0º at the equator to 90ºN. Latitude values are represented by the Greek letter lambda (λ). The degree to which the magnetic north differs from the true north. This data is available from the Compass Rose on a chart. Lat/Lon Mark that can be placed on a digital chart to indicate emergency location. NNS will track that location to aid in returning the boat to MOB coordinates. Leg Maritime Mobile Service Identity (MMSI) The segment of a route between two waypoints. Log MMSI Numbers are a series of nine digits transmitted over a DSC radio path in order to uniquely identify ship stations, ship earth stations, coast stations, coast earth stations and group calls. These identities can be used by telephone and telex subscribers connected to the general telecommunications network principally to call ships automatically. A record of the ship’s movements and a place for manual text entries. Mark Longitude In general, any created object on a chart (routes and boundaries are composed of marks). Specifically, marks are objects created using the Mark tool and can be displayed as a number of different icons. A mark may have a name, annotative information and an icon. See Notice to Mariners (NTM). The designation for angles measuring how far West or how far East a position is. Value range is from 180ºE to 180ºW. Values of longitude are represented with the Greek letter phi (φ). LORAN (LOng Range Aid to Navigation) LORAN is a terrestrial-based navigation system using the time interval between radio signals to determine the position of the receiver. LORAN was popular with marine navigation prior to the existence of GPS. The current version of LORAN in use is LORAN-C. LORAN fails under different conditions than GPS, arguably making it a complementary radio-navigation system. Low Water MARPA See Mini Automatic Radar Plotting Aid. Mean High Water (MHW) A tidal datum. The average of the higher high water heights observed over the National Tidal Datum Epoch. Mean Higher High Water (MHHW) The minimum height reached by a falling tide. A tidal datum. The average of all the high water heights of each tidal day observed over the National Tidal Datum Epoch. Lower High Water (LHW) Mean Low Water (MLW) The lowest of the high waters of any specified tidal day due to the declinational effects of the Moon and the Sun. A tidal datum. The average of all the low water heights observed over the National Tidal Datum Epoch. Glossary & Index Any object’s position, expressed in Latitude and Longitude. Local Notice to Mariner (LNM) Glossary & Index Man Overboard (MOB) Glossary & Index 219 Mean Lower Low Water (MLLW) Native Scale A tidal datum. The average of the lower low water height of each tidal day observed over the National Tidal Datum Epoch. The original scale of a paper chart from which an electronic chart is derived. (Also known as Source Scale). Mercator Projection Neap Tides The Mercator projection is a conformal projection devised by Gerhardus Mercator in 1569. Similar to a cylindrical projection in that the horizontal and vertical distances are stretched towards the poles. Unlike the cylindrical projection the vertical and horizontal stretching of the chart preserves shape and direction. Due to increasing distortion towards the poles Mercator charts are not very useful for representing cartographic information towards the poles. Neap tides are especially weak tides with a decreased range. They occur when the gravitational forces of the Moon and the Sun are perpendicular to one another (with respect to the Earth). Neap tides occur during quarter moons. Lines of latitude and longitude are straight lines on the Mercator projection. The name of the network to which the computer is currently connected. On Mercator charts, rhumb lines can be drawn as straight lines because the Mercator projection preserves bearing. NMEA Mini Automatic Radar Plotting Aid (MARPA) NMEA 0183 A feature of contemporary radars that greatly enhances their ability to track targets, lock on, estimate closest point of approach, calculate the target’s true speed and course and output this information to other devices. NMEA 0183 defines the electrical interface and data protocol for communications between marine instrumentation. Many times referred to as "NMEA" in the context of marine instrumentation communications. MMSI NMEA 2000 See Maritime Mobile Service Identity. This standard contains the requirements for a serial data communications network to inter-connect marine electronic equipment on ships. It is multimaster and self configuring and there is no central network controller. Equipment designed to this standard will have the ability to share data, including commands and status with other compatible equipment over a single channel. (source: http://www.nmea.org/pub/2000/) MOB See Man Overboard. National Marine Electronics Association (NMEA) Computers directly connected to NMEA producing devices (GPS, heading sensor, etc). receive raw NMEA data. This data conforms to the NMEA 0183 (3.01) specification. See also NMEA 0183 and NMEA 2000. Network Identity See National Marine Electronics Association. NOAA (National Oceanic and Atmospheric Administration) NOAA is a federal agency focused on the conditions of the oceans and the atmosphere. NOAA supplies navigation chart information for the coastal U.S. and the Great Lakes region. Notice to Mariners (NTM) A means for disseminating information concerning aids and hazards to navigation and other marine information of interest to mariners. These notices are essential to all navigators for the purpose of keeping charts, light lists, coast pilots and other nautical publications up-to-date. Official agencies in many countries publish these advisories. Glossary & Index This organization has determined a standard, 0183, to which all data transmission to and from marine peripherals must conform. The NMEA issues standards for interfacing marine electronics devices. Pronounced "nee-ma". Not to be confused with NEMA (National Electrical Manufacturers Association). See Tidal Currents. 220 Nobeltec® Navigation Software User’s Guide Depending on the source, these may have varied names, such as Local Notice to Mariners (LNM), Broadcast Notice to Mariners (BNM), and so forth. Pan Will clearly show the program title (Admiral MAX Pro, VNS MAX Pro, or Tides & Currents), product version and build number. To move the view window over the chart. (Also called Scrolling). RADAR (RAdio Distancing And Ranging) Panel An individual, movable display of specific information. Microwave pulses used to detect objects (usually metallic) based on wave reflection. Photo Chart Radio Technical Commission for Maritime Services (RTCM) A raster chart containing photographic chart imagery. In the United States, the Federal Communications Commission (FCC) and U.S. Coast Guard use RTCM standards to specify radar systems, Emergency Position Indicating Radio Beacons and the basic version of Digital Selective Calling (DSC) radios. PlanBook A text-based route planning and creation tool included in Nobeltec Navigation Software. Range Polyconic Projection The distance between two specified points, usually the ship and a mark. The polyconic projection involves projecting the surface of the Earth onto a series of cones situated with their apexes over the poles. Range from Boat to Cursor (RBC) Port Port designates the left side of a boat as seen standing on the deck facing toward the bow. Port side is indicated with a red light. Predictor A line displayed in front of the vessel showing where the boat will be after a specified period of time, assuming no intervening heading or speed changes. Prime Meridian Glossary & Index Program DVD The meridian of longitude which passes through the original site of the Royal Observatory in Greenwich and used as the origin of Longitude. Also known as the Greenwich Meridian. Processed NMEA Sharing (The Nobeltec Packet) Once Admiral MAX Pro has received raw NMEA data and configured COM port priorities, the official status and position (COG, SOG, LAT, LON, etc). of the vessel can be determined using the GlassBridge data-sharing features. This preferred data can be shared with other copies of Admiral MAX Pro on the GlassBridge Network. By default Admiral MAX Pro is configured to share processed NMEA data. The distance between the ship icon and cursor. Raster Chart Charts where the chart information is stored as a rasterized image. Examples are raster charts are Raster Plus (RPL), BSB and GeoTIFF. Rasters are the scanned images of the original paper chart. Rate Of Turn (ROT) The speed at which heading is changing. Quick Sync A Nobeltec/C-MAP online service to dynamically update charts. During your subscription period you may use the Quick Sync update service to add all needed Notice To Mariner (NTM) advisories to your charts. Repeater A feature used to output all incoming NMEA data to other devices. Glossary & Index 221 Rhumb Line Sounder (also known as Fish Finder or Depth Sounder) A Rhumb Line is a line of constant bearing. Unlike great circles, rhumb lines are usually not the shortest path between two points on a sphere. Part of the utility of rhumb lines is that they can be drawn as straight lines on Mercator projections. Rhumb lines have the advantage of being easy to navigate because they follow a constant bearing. The parallels of the earth are examples of rhumb lines. Rhumb lines are undefined values at the poles. A Sounder uses ultrasonic pulses to detect the distance to the sea floor, calculating the time interval between signal transmission and the detected reflected signal. A rhumb line of sufficient length will usually tend to spiral around the earth towards a pole forming a loxodrome. Such spiraling rhumb lines will form a logarithmic spiral on a polar stereographic projection. Speed Over Ground (SOG) SOW See Speed Over Water. ROT SOG is the actual, fixed, geographic speed of a ship over the earth’s surface. It is essentially the Speed Over Water (SOW), plus the cumulative effect of wind and current. See Rate Of Turn. Speed Over Water (SOW) Route Sometimes called Speed Through Water (STW), SOW is the relative speed of the vessel over water surface. See also Speed Over Ground (SOG). Desired path of travel, created on a chart or grid and consisting of starting, ending and any number of interim waypoints. Nobeltec Navigation Software can instruct a properly connected autopilot to steer along the path of a Route. Starboard Starboard designates the right side of the boat as seen standing on the deck facing toward the bow. Starboard side is indicated with a green light. Scroll Stern To move different parts of a long list into view, using the arrow buttons or scroll bar. Also, scroll is often used as a synonym for pan. The rear of a ship. Serial Number Sometimes referred to as the Hardware Key Number, the Serial Number is a software identification number that also serves as a customer's Nobeltec ID. Set Slack Water (Slack) A route which serves as an alternative to a section of another route. Target In nautical terminology, a target is generally an obstacle or object in or near the water to avoid for the purpose of safe navigation. Target Threat The state of a tidal current when its speed is hear zero, especially the moment when a current changes direction and its speed is zero. Nobeltec Navigation Software is capable of detecting targets that are too close to your ship. When you establish a boundary around your ship, a target that encroaches that boundary is considered a Target Threat. SOG TCPA See Speed Over Ground. See Time to Closest Point of Approach. Sonar (SOund Navigation And Ranging) Thumbnail/QuickView The usage of ultrasonic pulses to detect submersed objects by their reflection. A small preview image of an entire chart, also called a QuickView, displayed in the Chart Table dialog to aid you in choosing the correct chart. Raster only. Glossary & Index The cumulative effect of wind and current on the direction of a ship. Subroute 222 Nobeltec® Navigation Software User’s Guide Tidal Currents United States Coast Guard (USCG) Tidal currents (a horizontal motion) are a result of the rise and fall of the water level due to tides (a vertical motion). The effects of tidal currents on the movement of water in and out of bays and harbors can be substantial. The Coast Guard enforces federal laws related to smuggling, ship safety, port security, spillage, pollution and other marine environmental protection issues. The Coast Guard also maintains ships and other vessels, aircraft and communications facilities for search and rescue missions. USCG maintains a network of aids to navigation; including lighthouses, buoys, icebreakers and radio devices See Neap Tides. Tide The change in ocean levels due to gravitational influences external to the Earth. Formulas for calculating tides can be found in tide and current tables provided by NOAA and the British Admiralty. The explanation of how tides work was first proposed by Isaac Newton in 1687 in his Philosophiae Naturalis Principia Mathematica. Universal Transverse Mercator Projection (UTM) Time to Closest Point of Approach (TCPA) The UTM segments the earth into 60 six degrees of longitude wide zones where the cylinder is oriented along the central meridian of a zone. The zones extend from 84ºN to 80ºS. The sixty zones start 180 degrees east and proceed eastward. The usage of zones allows the UTM projection to be used over the entirety of the Earth while minimizing distortion towards the poles. This is the time remaining until the closest point of approach of a target. ToolBar A collection of shortcut buttons grouped in a logical manner; Nobeltec Navigation Software ToolBars are independently movable and dockable. Unlock Code Track See Chart Permit. An onscreen and/or logged record of a ship’s previous movements. Variable Range Marker (VRM) Time To Go (TTG) Term describing a circle around the boat. When enabled, the VRM can be manually manipulated to change the radius. The amount of time estimated until the ship reaches an active mark, assuming no intervening change in course or speed. Displayed in hours and minutes. Glossary & Index UTM is similar to the Mercator projection except the projecting cylinder is mapped transverse to the meridians and the Mercator projection used is a secant variation where the map scale to nominal scale is 0.9996. Variation True/Theoretical Wind Direction (TWD) Also known as Magnetic Variation and Declination. The angular difference in direction between true North and magnetic North. See Apparent Wind Direction (AWD). Vector Chart True/Theoretical Wind Speed (TWS) A chart where chart information is stored in terms of points, lines and polygons. NCX, TX-97 and S-57 charts are vector chart formats. See Apparent Wind Speed (AWS). TTG See Time To Go. United States Army Corps of Engineers (USACE) The USACE is responsible for investigating, developing and maintaining national water and related environmental resources. USACE is also a provider of inland waterway charts. Velocity Made Good (VMG) The speed at which the boat is moving towards its intended destination, regardless of the ship’s direction. Glossary & Index Vertical Datum Zoom For marine applications, a base elevation used as a reference from which to reckon heights or depths. It is called a tidal datum when defined in terms of a certain phase of the tide. Tidal datums are local datums and should not be extended into areas which have differing hydrographic characteristics without substantiating measurements. In order that they may be recovered when needed, such datums are referenced to fixed points known as bench marks. (source: Our Restless Tides). To change the apparent scale of a chart in the view window. 223 View Locator A red, rectangular outline in the QuickView Window which represents that area of the chart visible in the main view window. View Manager Screen layout tool that allows you to determine which hardware products and features of Nobeltec Navigation Software you wish to display onscreen. VMG See Velocity Made Good. VRM See Variable Range Marker. WAAS See Wide Area Augmentation System. Waypoint A mark of which routes are made. The ship, when following a route, steers by successive waypoints. A system of ground stations providing GPS signal correction information. WAAS-capable GPS receivers can have position accuracy closer than three meters 95% of the time. XM/WxWorx XM is a satellite provider who streams radio content. www.xmradio.com. WxWorx provides a weather feed over the XM network, enabling marine customers to see weather data in a WxWorx application overlaid inside NNS. XTE See Cross Track Error. Glossary & Index Wide Area Augmentation System (WAAS) Glossary & Index 224 Nobeltec® Navigation Software User’s Guide Glossary & Index Index Symbols 3D 3D Navigator 31 Center on Boat Mode 115 Data Resolution 114 Explore Mode 115 Vessel 114 A AIS 137 AIS Broadcasts 138 AIS Symbols 137 Incoming Data Display 60, 134 Target Filtering 135 Annotation 80, 135 ARPA 133, 137 MARPA Symbology 158 B Bathy Recorder 179, 183, 191 Transducer Offset Settings 180 Bookmark 44 Boundaries 47 Boundary Circles 46 C Cascade 80, 88 Center On Boat 80 Center on Boat 19, 43 Charts 37 Aerial Imagery 37 Chart Management 26 Chart Type Controls 37 ECDIS 38 NOAA 38 Scales 37 Types of Charts 37 Chart Outlines (see Installed Coverage) Chart Table 39, 81 Chart Objects 41 Chart Quilting 42 Chart Up or Chart Down 85 Checksums 60 Circle Boundary 81 Circle Boundary Tool 81 Closed Boundary Closed Boundary Tool 81 Compass Heading Corrections 56 Computer Clock 198 Connections 125 Autopilot 125 Settings 125 Wiring 125 Console Docked 88 Helmsman Display 88 Panels 87 Context Sensitive Help 81 Copy Window 88 Glossary & Index Automatic Dead Reckoning 56 Autopilot 125, 126, 199 Active Route 126 Arrival Circle 126 configure 125 Leading Zeros 126 Sentence Selection 126 Talker ID 126 Test 199 Autoscroll 43 Follow Boat 80 Follow Predictor 80 Look Ahead 80 225 Nobeltec® Navigation Software User’s Guide 226 Course Up 44, 81 Course Up Tool 81 Crossing the perpendicular 126 Cross Track Error 58, 193 CrystalView 81 CrystalView Tool 81 Current Arrows Tool 81 Customizing Nobeltec 79 D Data 37 Data Backup 197 Dead Reckoning 56 Deviation Table 56 Download 197 DSC-Enabled Marine Radio DSC Directory 70, 135 E Estimating Arrival Time 100 ETA Calculator 31 Exporting 105 F Glossary & Index Fishfinder. See Sounder Fuel Consumption 101 G Ghost Cursor Ghost Cursor Tool 81 GlassBridge Network Advanced Networking Settings 130 Benefits 127 Configuring 129 Data Sharing 127, 129 Listen to NMEA Data 130 Overview 127 Radar Sharing 127 Raw NMEA Sharing 130 Routes & Marks Home 130 Send NMEAData 130 Setting up 128 Tools | Options | Data Sharing 72 GPS 199 Electrical Connection 9 GPS / Port Setup Wizard 11 GPS Hardware Setup 9 NMEA Support 14 Great Circle Route 50 H Hand Panning 43 Heading Sensor 199 Helmsman Display 59, 206 Help Tips 88 I InSight Radar 2 (IR2) 141 InSight Radar 2 - Black Box (IR2-BB) 141, 143 IR2-BB 143 Installation Installing Charts 4, 6 Installing New Chart Permits and Product Unlock Codes 6 Installing Non-Nobeltec Branded Charts 6 Installed Coverage 81 J K Keel Offset 59 L Layovers 100 Leg Range and Bearing Toggle 82 Lights and Buoys Display Tool 82 Line Boundary Tool 82 Glossary & Index M Man Overboard 25, 45 Man Overboard Tool 82 Marks 82, 126 Autopilot - Active Mark 126 Mark Tool 82 MARPA 144, 145 MARPA Symbology 158 Master Heading Correction 56 Multiple Monitor Support 97 My Nobeltec Program & Chart Information 222 N NavBar 110 NavBar Tool 82 NavInfo 32 NavView Making Changes 97 Options Dialog 97 View Manager 93 O Objects Annotations 45 Boundaries 47 Boundary Circles 46 Man Overboard 45 Marks 45 Routes 46 Tracking 46 Waypoints 45 Options 83 Other Features Display Tool 83 Output Ports 60 Overzooming 43 P Passport World Charts 37 PlanBook 99, 201 Editing and Deleting Waypoints 100, 101 Estimating Arrival Time 100 Fuel Consumption 101 Layovers 100 Managing the PlanBook 26 New Route 100 PlanView 23 Basic Screens 23 PlanView Screen Elements 24 The PlanBook 26 Pointer 83 Polar Display. See Sailing Plus Pack Print 83 Printing Printing Tides and Currents Information 195 Printouts 202 Properties 55, 57 Alarm Properties 58 Automatic Dead Reckoning 56 Boat Properties 55, 76 Description 55 General Boat 56 Icon Properties Page 55 Set and Drift Calculation 57 Track Properties 57 Q Quilting 83, 84 Glossary & Index New Log Entries 82 New Route 100 New Waypoint 100 NMEA Support 14 North Up Tool 44 Notice To Mariner 7 227 Nobeltec® Navigation Software User’s Guide 228 R S Radar 141, 143, 167 Sailing Plus Pack 183 B&G 16, 188 Lay Lines 187 NavView 189 Ockam 17, 188 Polar Display 183 Compass Deviation Table 148 Heading Line Rotation 146 Initial Radar Setup 146 MARPA Symbology 158 Radar Configuration 159 Radar Presets 148 Radar Setup Wizard 11 Radar Toolbars 144 Radar Troubleshooting 163 Radar Window 143 Understanding Radar 159 Glossary & Index Range Circle Toggle 84 Quick Sync 7 Repeater Ports 72 Right Mouse Button Right Mouse Menus 36 Routes 46, 49, 104, 200 activate a route 49 Advanced 49 Append 51 Creating a Route from a Track 104 Deleting 50 Great Circle 50 Joining 50 Remove 50 Reversing a Route 51 Route from a Track 50 Route Wizard 52 Setting a Waypoint Arrival Alarm 49 Sharing Waypoints 51 Splitting 50 Uploading 202 Using Existing Marks 51 Polar Display Settings 184 Polar Values 185 Terminology 183 Unlocking 183 Screen Intensity Night Tool 85 Scrolling / Panning 43 Autoscroll 43 Hand Panning 43 Search 25 Sea Trials 199 Serial Number My Nobeltec Program & Chart Information 222 Set and Drift Calculation 57 Setting the computer clock 198 Software License Agreement 3 Sounder 167 Adjusting Sounder Image 168 Configuring the InSight Sounder 174 Fishfinder Basics 175 Sounder Features 169 Sounder in NavView 175 Sounder NMEA Data 175 Sounder Usage 167 Troubleshooting Sounder 176 Status Messages 25, 48 Glossary & Index T Targets in Admiral 134 Alarm Settings 136 U Upload 197 Uploading 202 Uploading to a GPS 197 Upload / Download 197 V Video 76 View Manager 35, 93 W warning indicators 93 Water Depth 58, 193 Waypoint 45 Weather Data 117 GRIB 32 Nobeltec Weather Data 119 Weather Overlay 87 Wind 117 Window List 88 X XTE 58 Y Z Zooming / Overzooming 43 Glossary & Index Naming Conventions 137 Target Threat Settings 70 Tender Tracker 191 Configuring 192 Tender Tracker Alarms 193 Unlocking 191 Tides and Currents 108, 195 Changing the Date 109 ETA Calculator 31 Graph 109 Printing 195 Using Tides and Currents 28 Tile Horizontally 88 Tile Vertically 88 Toolbars 79 Buttons 80 Tools | Options 60 3D 65 Audio 65 Colors 65 Console 63 Misc. 64 Ports: Configure 60 Sounder 72 Units of Measure 63 Video 76 Tracking Targets 133 Tracks 28, 46, 57, 103 Track Line Coloring 47 Track Line Legend 47 Troubleshooting 131 229 Product Feature Hand Panning Tool GPS Satellite Strength/Trip Odometer NavBar Free GRIB Overlay Nobeltec Tides & Currents™ ETA Calculator Integrating Tides Nobeltec Route Wizard PlanBook Nobeltec Radar Support Nobeltec Sounder Support Nobeltec Sailing Plus Pack Support with Windvantage™ Weather Routing Nobeltec Bathy Recorder™ Plus Pack Support Video Camera Support Weather Plus Pack Support Tender Tracker Plus Pack Support OCENS® WeatherNet Pre-Installed Enhanced AIS Filtering Dual Radar Support Track Line Coloring GlassBridge Network Support Multi-Monitor Support NavView Interface NavView Auto Hide Customizable Vessel Sizing ARPA Support for External Radars MARPA Target Tracking GRIB Weather Animation Customizable NavInfo Panels VNS MAX Pro Admiral MAX Pro 4 Panels 1 Panel Product Features This product features table compares some of the key features of Admiral MAX Pro and VNS MAX Pro. Use this table to determine if a feature is available in the product you are using. * Both products include real-time tracking, autopilot interface, GPS upload/download, quilting for seamless charts, Quick Sync, unlimited routes/marks/waypoints and 3D Navigator. Additional common features include AIS and DSC support, Video Camera support, Garmin USB GPS support, boundaries & alarms, Nobeltec Raster Plus Pack Support, course up/north up chart rotation and much more. * Product features are subject to change. Hot Keys Unless otherwise noted, a Hot Key will only function on the corresponding window pane or object when that window pane or object has focus. Program Component Hot Key Copy (Text Only) <Ctrl+Insert> Copy (Text Only) <Ctrl+V> Paste (Text Only) <Shift+Insert> Paste (Text Only) <Ctrl+X> Cut (Text Only) <Ctrl+Y> Redo <Ctrl+Z> Undo <I> General Application <Ctrl+P> Opens the Print Wizard <F1> Opens PDF of User's Guide (this document) <F4> Places a MOB mark beneath Boat Lat/ Lon. Opens vector chart if one is not currently open. <Ctrl+Shift+F4> <F6> <Shift+F6> PlanBook Return to Day Mode Twilight/Night/Day Mode toggle Close all open windows (PlanView only) Cycle to next view Cycle to previous view <F9> Toggle between PlanView and NavView <F9> Enter NavView <F1> Opens PDF of User's Guide (this document) Hot Key Function Scroll chart in arrow direction <Ctrl+↑> <Ctrl+↓> <Ctrl+←> <Ctrl+→> Limited scroll in arrow direction <Shift+↑> <Shift+↓> <Shift+←> <Shift+→> Drag selected object <Shift+Page Up> <Shift+Page Down> Drag selected object <Shift+End> <Shift+Home> Undo (Text Only) <Ctrl+I> Hot Key <↑> <↓> <←> <→> Hot Key Function <Ctrl+C> <Alt+Backspace> Program Component <Page Up> Chart Window Scrolls chart up and right <Page Down> Scrolls chart down and right <End> Scrolls chart down and left <Home> <Tab> <Shift+Tab> <Delete> <Application Key> j Scrolls chart up and left Select next object in the Chart Window Use next radar Delete selected object Show right-click Context Menu for selected object <F2> Centers Chart Window on boat <Ctrl+F2> Center on Boat - Course Up/Max Ahead <F3> Toggle Radar Overlay On/Off <F4> Creates MOB mark beneath boat Lat/Lon <F5> New event mark beneath boat <F7> Creates New Mark cross-hairs Program Component Hot Key <F8> New Route <F10> Goto Bookmark <Shift+F10> Program Component Radar Standby/Transmit <F12> Range Bearing Line - Boat to Point <Shift+F12> Range Bearing Line - Point to Point <Alt+Enter> Opens the Properties Menu for object with focus <Ctrl+A> Set Anti-aliasing - Crystal View (Raster charts only) Hot Key <Ctrl+U> Set Bookmark <F11> Chart Window (cont). 3D View Hot Key Function Opens SkyMate window (usable only when SkyMate has been selected as your weather provider) <+> Zoom In <-> Zoom Out <Esc> Cancel tool (route, boundary, etc). <Space Bar> Hold this key down to temporarily clear all vector chart data layers < ↑> <↓> <←> <→> Rotate chart in arrow direction <B> Turns Hand Panning On/Off <C> Toggle contours <F5> New Event Mark at boat Toggle Current Arrows <F5> New Event Mark at boat Enter Fleet Manager <F7> New Mark at cursor <Shift+C> <Ctrl+Shift+F> Chart Window (cont). Hot Key Function Sounder <I> Next screen mode color <G> Toggles Chart Grid on and off <H> Heading Up <L> Toggle land features <+> Decrease range (zoom in) <N> North Up <-> Increase range (zoom out) <O> Toggle vector other layers <Ctrl+O> Opens the Chart Table <Ctrl+P> Opens the Print Wizard <Q> Toggle Quilting <R> Toggle Range Rings on/off <Shift+R> Toggle Leg Range Bearings <Ctrl+R> Toggle Relief <S> Toggle Soundings <T> Toggle Tracking <Shift+T> Toggle Tide Bars <Esc> <Space Bar> <Esc> Radar View <Shift+Tab> <Ctrl+Shift+F> End tool Declutter view End current tool, back to mouse pointer Next Radar Open Fleet Tracking dialog <F2> Re-center Radar <F6> Cycle NavView layout <F11> Radar Standby/Transmit Nobeltec User's Guide My Nobeltec Program & Chart Information Region # Registered Owner Program Serial Number Product Version # Chart Permit (Unlock Code) MAX Pro Database # Call Jeppesen Marine at 800-946-2877 to order! Nobeltec Navigation InSight Radar 2 - Black Box The IR2– Black Box™ (IR2-BB™) is a black box technology for "tapping" into the data signal of preexisting radar. By interfacing existing radar with the IR2-BB, radar images can be viewed right on top of electronic charts and work seamlessly with Admiral MAX Pro and VNS MAX Pro. Brings Older Radars Back to Life – the IR2-BB provides boaters with an existing radar the opportunity to update to the latest radar display technology. Radar Made Safe, Easy and Effective – Important navigation information available from a single source: anti-collision information from your radar and navigation information from Nobeltec Navigation Software. *The IR2-BB must be installed by a qualified marine electronics installer; installing this product may void your radar’s warranty. Contact your Nobeltec dealer or Jeppesen Marine for more details. Nobeltec Product Part # InSight Radar 2 - Black Box RHBXX00002 InSight Sounder Whether using for safety or fishing, the InSight Sounder delivers superior performance and features for the integrated PC navigation system. It provides exceptional target and bottom detail and a wealth of standard and advanced features such as dual frequencies, temperature display and range, gain and shift settings. The InSight Sounder integrates with VNS MAX Pro and Admiral MAX Pro to create a complete sounder/ chart plotter solution. When used with either of these programs, you can view your chart and sounding information in SplitScreen™ mode or in a single dedicated window. The InSight Sounder also offers unlimited custom color schemes, night and twilight vision support and a shallow water alarm. Nobeltec Product Part # InSight Sounder RHSXX00003 Additional product information inside front cover! RSUMX00001 © July 2008. Jeppesen Marine, Inc. All rights reserved. REV 001 OCENS® WeatherNet is a trademark of Ocean and Coastal Environmental Sensing, Inc. and is used by permission. Trademarks are property of their respective owners.