1
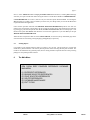
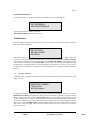
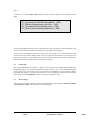
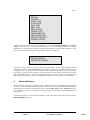
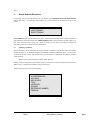
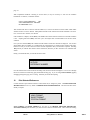
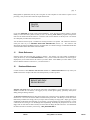
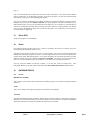
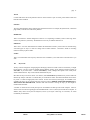
ODA CORAL REEF FISHERIES
REFERENCE DATABASE
USER MANUAL
Fish Management Science Programme
Overseas Development Administration
MRAG Ltd
March 1992
CONTENTS
1
Overview
2
2 System Requirements
2
3 Installation
2
4 Getting Started
3
5 The User Interface
3
5.1
5.2
5.3
5.4
Menu Option Selection
Dialouge Boxes
Forms
Printing Reports
3
3
4
5
6
The Main Menu
5
7
Edit Reference
5
7.1
7.2
7.3
Choosing a Reference
Citation Page
Key Word Page
6
7
7
8
Add New Reference
8
9
Browse Selected References
8
9.1
Specifying a Condition
9
10
Print Selected References
11
11
Delete References
12
12
Database Maintenance
12
13
Exit to DOS
13
14
Errors
13
15
Database Fields
13
15.1 Citation
13
15.2 Key Words
14
page 2
MRAG
ODA_REEF User Manual
MRAG
ODA_REEF User Manual
1
Overview
ODA_REEF is a database for storing and organising references concerning coral reef fisheries around the world. It
offers facilities for adding, editing, printing and deleting selected references. In addition to a citation, fields are
provided for your own notes, and standardised key words to aid selecting references. ODA_REEF is provided with
355 references, which are not exhaustive, but are intended only to start up the database. It has been designed so
that additional references can be added and it can be personalised by the user, with as great a flexibility built into
the framework. The database application is written in R:BASE Runtime software (R:BASE Runtime is a registered
trademark of MICRORIM Inc.). There is also a review of coral reef fisheries which accompanies the database.
2
System Requirements
ODA_REEF requires the following :#IBM PC or 100% compatible microcomputer with at least a 80286 processor
#640K random access memory (RAM) with 465K RAM available for the database
software
#A hard disk and a floppy disk drive. A total of 5 MB available on the hard disk. The
database and associated software uses 3 MB.
#DOS 3.1 or later
#A CGA, EGA or VGA compatible screen with either monochrome or colour.
3
#
Any line printer will suffice for printing
#
A mouse may be used for selecting menu options
Installation
The database has to be installed on a hard disk drive. Using the DOS MkDir command make a directory on the hard
disk drive in which to put the ODA_REEF database (e.g. at the DOS prompt type 'MD \reef' [ENTER]).
Put Disk 1 into a floppy drive and change the current drive status of the machine to that drive (e.g. if the floppy
disk is in drive A: use the Dos command A: [ENTER]; an A:> prompt will appear on the screen).
Type INSTAL and the name of the hard disk directory to receive the database. Using the above example the DOS
command would be:
A:>instal c:\reef [ENTER]
The installation program will run automatically and will prompt you on the screen when the disks in the floppy
drive have to be replaced. When the installation program has finished the database is then ready for use.
MRAG
ODA_REEF User Manual
MRAG
page 2
4
Getting Started
Use the DOS 'CD' command to change the directory to where ODA_REEF is stored. For example if ODA_REEF is
in the directory C:\REEF then type 'CD C:\REEF' and press [ENTER]. Type 'ODA_REEF' and press [ENTER].
After a few seconds the opening screen and main menu will appear.
5
The User Interface
5.1
Menu Option Selection
When a menu is active, a horizontal solid bar highlights the current option. To move this bar, use either the up
arrow key [UP] or down arrow key [DOWN], or single click on the left-hand mouse button. Pressing [UP] at the
top of the menu moves the highlight to the bottom. Conversely pressing [DOWN] when at the bottom of the menu
returns the highlight to the top. To select the highlighted option either press the [ENTER] key or single click the
left-hand mouse button over the already highlighted option. As a short cut, for the main menu press the number
associated with the required option (e.g. '5' for (5) DATABASE MAINTENANCE) or for pop-up menus the first
letter (e.g. 'E' for Edit existing reference) to move the highlight bar to that option. If more than one option starts
with the same letter, then successive presses of that letter will move the highlight bar between those options. In all
except the main menu the [ESC] key will abort the current menu choices and return you to a previous level of the
menu.
5.2
Dialogue Boxes
At various times ODA_REEF will prompt you to enter information in a dialogue box. This may be to identify a
particular reference you wish to edit, for instance, by supplying an author's name. Simply type the desired
information in the line provided, ignoring upper and lower case since the program does not distinguish between
them. [UP], [DOWN], [LEFT], [RIGHT], [DEL] and [BACKSPACE] keys can be used to edit what you have
typed. Once you have finished entering information, press the [ENTER] key. The [ESC] key can be used to
escape from the dialogue box and abort the current option.
5.3
Forms
When entering a new reference, editing an old one or just browsing through the contents of the database, the
information is presented on the screen as a form with a menu bar at the top. In all cases the [ALT] key moves you
between the contents of the form and the menu bar. For example, when editing reference citation pressing [ALT]
will move the cursor to the first option of the menu bar. If you then wish to continue editing the citation, pressing
[ALT] again will return the cursor to the form.
When adding and editing, the forms are used to type information in free format. The current active position on the
form is shown by the highlighted field. Pressing the [ENTER] or [TAB] key will move the cursor position forward
to the next field. [SHIFT][TAB] will move the cursor to the previous field on the form.
To edit or add to any field, place the cursor in the right location using the arrow keys and type. Use the [DEL] and
[BACKSPACE] keys to edit what you typed in the normal way. To change from overwrite to insert mode, and vice
versa, press the [INS] key. In insert mode the cursor will appear as a flashing block, whereas in overwrite mode it
will be a flashing line under the character which will be replaced.
The menu options available in the forms vary slightly depending on whether you are adding, editing or browsing
through a reference.
When in ADD REFERENCE (see section 8) the menu bar at the top of the form has contains options;
Add/Discard, Go To and Exit. Any additions to the database have to be explicitly saved before exiting from the
MRAG
ODA_REEF User Manual
MRAG
page 3
form (i.e. select Add/Discard which will highlight Add Row and Exit from the menu). Selecting Exit at this stage
will cause you to quit from the form without saving the reference. The Go To is redundant in ADD REFERENCE.
In EDIT REFERENCE (see section 7) there are only two menu bar options: Go To and Exit. On selecting the
Exit option there is a prompt to ask you whether you wish to save your changes when you exit. The Go To function
is again redundant in this application.
If the selection procedure followed under BROWSE SELECTED REFERENCES produces more than one
reference, the next reference in the sequence may be accessed by pressing the key [F8] and the previous reference
by pressing [F7]. The menu bar options under Go To, Next Row and Previous Row, also serves this purpose. Note
that the menu option Next Section under Go To is not used in this application. If you select Exit you will quit
BROWSE SELECTED REFERENCES.
Where the form occupies more than one screen (LONG FORMAT; see section 9) the top and bottom pages of the
current reference are accessed by pressing the [PgUp] and [PgDn] keys respectively.
5.4
Printing Reports
It is possible to print selected references either on a printer or to a text file. The file name for a text file must
include drive, path and filename. This file may then be printed at a later date using the DOS print command. The
text file is not formatted for any particular printer, but it is usually possible to import the file into a word processing
package if a more pleasing format is desired.
6
The Main Menu
ODA CORAL REEF FISHERIES REFERENCE DATABASE
MAIN MENU
(1)
(2)
(3)
(4)
(5)
(6)
ENTER/EDIT REFERENCES
BROWSE SELECTED REFERENCES
PRINT SELECTED REFERENCES
DELETE REFERENCES
DATABASE MAINTENANCE
EXIT TO DOS
MRAG
ODA_REEF User Manual
MRAG
page 4
MRAG
ODA_REEF User Manual
MRAG
page 5
ENTER/EDIT REFERENCES
On selecting this option, you must choose whether to edit an old reference or to add a new one.
EDIT REFERENCE
ADD NEW REFERENCE
Again select from the menu which you wish to do.
ADD NEW REFERENCE is described in section 8.
7Edit Reference
Select this option to change any part of a reference. Next you must choose which parts of the reference you wish to
edit. There are three alternatives.
EDIT CITATION
EDIT KEY WORDS
EDIT BOTH
References are split into
two pages: citation and
key words. If you wish to edit any of the fields: authors, year, title, source or notes, select the EDIT CITATION.
If you wish to edit the key words or add to the content notes select EDIT KEY WORDS. To edit fields in both the
citation and key word sections, choose the EDIT BOTH. With this option you will be given the opportunity to edit
the citation first. On exiting the citation, you will automatically be put into the key word section. Once you have
decided what part of the reference you will edit, you must select the reference. The database fields are described in
section 15.
7.1
Choosing a Reference
The database requires information to identify the reference you want. It has three ways to find the reference. These
appear in a menu.
REFERENCE NUMBER =
TITLE contains
AUTHOR contains
For each of the selections, a dialogue box appears requesting information to identify the reference. If you select
REFERENCE NUMBER =, the dialogue box asks for the reference number. This must be an integer and must
identify a reference that exists. Selecting TITLE contains allows you to type into the dialogue box any text that
you may find in the title of a reference. The database then searches all references for titles which contain that text.
The reference number, title and year are then displayed in a menu allowing you to select a particular reference.
Similarly, if you select AUTHOR contains, you must type in the surname of an author of the reference you wish to
edit. Again, a menu will appear with the reference number, authors and year, from which you can select the
reference you require.
MRAG
ODA_REEF User Manual
MRAG
page 6
For instance, if you choose TITLE contains and type 'moresby' into the dialogue box, the following menu will
appear.
46__Economics of the Port Moresby artisanal .. (1986)
45__Effects of fishing pressure on the fish .. (1986)
44__Fish yields of the Port Moresby barrier .. (1986)
43__Study of the Port Moresby artisanal reef.. (1986)
Just move the highlight using the arrow keys in the normal way to select the reference, and press [ENTER]. Once
you have selected the reference, then the citation page or key word page will be displayed.
The text typed in the dialogue box need not be a whole word. For example, if you type 'Fish' all references that
contain the words 'Fish' 'Fishes' 'Fishing' 'Fishery' and so on in the title will be selected. If you wish to be more
specific, typing 'Fishery' will only produce those references with the word 'Fishery' in the title. The dialogue box
also ignores character case, so that 'FISH', 'Fish' and 'fish' are equivalent.
7.2
Citation Page
This uses the FORMS format (see section 5.3). Simply use the arrow keys to move through the text, and the [TAB]
and [SHIFT][TAB] to move forwards and backwards through the fields. Once you have finished editing press
[ALT] or [ESC] to get to the menu bar at the top of the screen, and select Exit. If you have made any changes,
ODA_REEF asks whether you wish to save them, otherwise you are automatically returned to the first edit menu
unless you have selected EDIT BOTH, in which case you go on to edit the key words.
7.3
Key Word Page
This page allows you to add or delete key words from the list below, as well as change the SPECIFIC TARGET
and the CONTENT NOTES. The menu of key word fields will appear.
MRAG
ODA_REEF User Manual
MRAG
page 7
REGION
COUNTRY
STUDY TYPE
STUDY DATA
DATA TYPE
REEF TYPE
REEF STATUS
FISHERY TYPE
FISHING METHOD
MAIN TARGET GRP
SPECIFIC TARGETS
CONTENT NOTES
Choose the field you wish to edit, and press [ENTER]. If you choose SPECIFIC TARGETS or CONTENT
NOTES you will be given a box to correct or add what you wish. Use the standard editing keys, and press
[ENTER] when you have finished. Otherwise you must indicate whether you wish to add or delete a key word.
The key words already present are displayed at the bottom of the screen to help you.
ADD KEY WORDS
DELETE KEY WORDS
Once you have made a choice, a menu of the relevant key words appears. The key words are supplied with the
database and, with the exception of COUNTRY, cannot be added to (see section 15.2). When you select a key word
a tick appears next to it. If you have chosen to add key words, tick all those you wish to add and exit by pressing
the key [F2]. If you have chosen to delete key words, tick all those you wish to delete and exit again by pressing
[F2]. The modified set of key words will be displayed at the base of the screen. If at any time you decide not to
make any changes, press [ESC]. The key words will not be changed, and you return to the key word field menu.
8
Add New Reference
Select this option to add references into the data base. A blank citation screen will immediately appear, which you
can fill in, using all the facilities described for FORMS (section 5.3). When you press [ENTER] on the last field
(NOTES) the cursor will move to the menu bar at the top. Select Add Row & Exit from the Add/Discard option, if
you wish to keep the reference. If you decide not to add the reference to your database, select Exit from the menu
bar to discard it.
If you keep the reference, you will be asked to add the key words. The interface will be exactly the same as for the
EDIT KEYWORDS (section 7.3).
MRAG
ODA_REEF User Manual
MRAG
page 8
9
Browse Selected References
If you simply want to look at the references on your database choose BROWSE SELECTED REFERENCES
from the main menu. You must then decide whether you want the references to be displayed in long or short
format.
LONG FORMAT
SHORT FORMAT
LONG FORMAT displays all information in two pages. The first page contains the citation and notes. The second
page holds the key words and content notes. SHORT FORMAT displays only the reference number, authors, year,
title, source and keywords all on one page. Select the format you wish and you will then be prompted for
information to select the set of references from the database.
9.1
Specifying a Condition
Sub-sets of references can be obtained by specifying a condition. a condition is specified by a subject, the condition
and then the object e.g. AUTHOR (the subject) CONTAINS (the condition) SMITH (the object). In order to view
all references that have recently been entered where one of the authors is called Smith, the following condition
would be entered:
'authors contains 'smith' and reference number greater than 350'.
Defining conditions using the reference number in this way will allow you to choose references which have been
added recently. Constructing the condition is entirely menu driven.
The first menu asks for the subject of the condition.
ALL REFERENCES
AUTHORS
KEY WORDS
TITLE
HARDCOPY
SOURCE
REFERENCE NUMBER
ORIGINAL
MRAG
ODA_REEF User Manual
MRAG
page 9
If you choose the reference number, the following menu will appear which defines the condition itself.
> GREATER THAN
< LESS THAN
= EQUALS
>= GREATER THAN OR EQUAL
<= LESS THAN OR EQUAL
<> NOT EQUAL
For all other subject options the following conditions apply.
CONTAINS
= EQUAL
NOT CONTAINS
<> NOT EQUAL
CONTAINS will select all references where the subject field includes somewhere the object text, regardless of
anything else in that field. NOT CONTAINS will choose references where the subject field is not empty, but also
does not contain the object text. = EQUAL will only select references if the object text you provide exactly fits the
subject field, including spaces and punctuation. Conversely, <> NOT EQUAL will choose all references where
the subject field is not empty and the object text does not match the subject field exactly.
Next the database will ask for the object of the condition. You must supply a number if the subject is the reference
number, otherwise you must type a word with which the chosen field will be compared. In the example, the object
of the first condition is 'smith' and for the second condition is '350'. Note that it does not matter whether characters
are typed in lower or upper case. Press [ENTER] when you have supplied an appropriate number or word and the
following menu will be displayed.
AND
OR
AND NOT
OR NOT
(Done)
These options allow you build individual conditions into complicated criteria for selection. The logic works the
same way as you would say the condition. If two statements are joined together by AND, both must be true for a
particular reference for it to be selected. OR joining two statements requires only that one of the statements is true
for a reference to be selected. The NOT before a statement reverses it. If it is true for a reference, the NOT makes it
false. The best way to become familiar with these conditions is to practice defining them for selecting references
and checking that the references you get are those you expected. The NOT, AND, and OR are worked out strictly
in that order.
MRAG
ODA_REEF User Manual
MRAG
page 10
With complicated conditions consisting of several criteria, it may be necessary to work out the condition
beforehand. For instance, a condition could be:
reference number EQUALS 45
OR
author CONTAINS 'smith' AND NOT
title CONTAINS 'review'
This condition will select a reference with the number 45, as well as all references with an author called 'Smith'
which do not have 'review' in the title. ODA_REEF with look at each reference and test this statement to see if it is
true. If it is true for a reference, it is selected.
If the condition is complete, choose (Done). The database then selects all those references for which the condition
is true. Anything other than (Done) will return you to the subject menu to build another level into the current
condition.
Once you have selected (Done) the condition and the number of references selected are displayed. You are then
asked whether this is acceptable. If a condition has not worked properly, it usually becomes evident at this stage,
because too many or too few references will be selected compared to what you would have expected. Selecting
YES presents you with the first reference in the selected list, otherwise you have to define a new condition from
scratch.
Finally you must decide how you want the list to be sorted.
AUTHOR
REFERENCE NUMBER
Once the references have been sorted into ascending order, the first in the list is displayed. You can move through
the list of references forwards using [F8] and backwards using [F7]. If you are using LONG FORMAT, [PgDn]
and [PgUp] change the page you are viewing. Note that you cannot edit anything.
10
Print Selected References
Use this selection to print references either to a DOS ASCII file, or straight to a printer. The PRINT SELECTED
REFERENCES menus are very similar to BROWSE SELECTED REFERENCES. The first menu asks for the
format you require.
LONG FORMAT
SHORT FORMAT
CITATION FORMAT
LONG FORMAT and SHORT FORMAT are the same as for BROWSE SELECTED REFERENCES.
CITATION FORMAT prints the author, year, title and source fields in condensed form. This is useful for building
MRAG
ODA_REEF User Manual
MRAG
page 11
bibliographies for publications, but may take a long time on some computers as each reference requires a lot of
processing. Next you must select where the output should be sent.
PRINTER
TEXT FILE
If you select PRINTER, the output will be printed immediately. It may be better to send the output to a text file
initially to ensure that what is printed is what you want. On selecting TEXT FILE the program will request the
name of a file which will hold the references. Note that it will overwrite that file if it already exists. The text file
can subsequently be edited with a word processor.
You will then be asked to specify a condition for selecting references to be printed. The condition is defined in
exactly the same way as in BROWSE SELECTED REFERENCES (section 9.1). The references will
subsequently be printed in alphabetical order by the author field. It is therefore strongly recommended that the first
word in the author field is the surname of the first author.
11
Delete References
Select this option from the main menu to delete a reference. The reference you wish to delete is identified in
exactly the same way as for the EDIT REFERENCE. Once you have selected the reference, the citation page is
displayed and you are asked if this is the reference you wish to delete. Select YES if you wish to delete it. Note
that once deleted a reference is lost forever - you cannot retrieve it.
12
Database Maintenance
Use this selection to either BACKUP AND PACK the database or to RELOAD BACKUP if for any reason your
database has become corrupted. The menu asks which operation you wish to perform.
BACKUP AND PACK
RELOAD BACKUP
BACKUP AND PACK makes sure the internal construction of the database is correct and makes a copy of you
database to another drive or directory. We suggest you carry out this option regularly, particularly when you are
adding, editing or deleting references.
The BACKUP AND PACK option has three stages which occur in sequence. First it checks the current database for
internal errors. If no errors are found it makes an R:Base backup of the data. This backup is not the same as the
DOS backup command. We strongly advise you keep at least one backup on a floppy disk. Simply give the path
and filename of the backup when prompted. If, for instance, you wish to backup on a floppy disk in drive A, insert
a disk into the drive, and type 'A:' in the dialogue box and [ENTER]. The backup may be spread over one or more
floppy disks. If more than one disk is needed you will be asked to change the disks in the drive. You should label
the disks in the order in which they were used e.g. 'ODA_REEF.BKP Disk 1'
MRAG
ODA_REEF User Manual
MRAG
page 12
After a successful backup the procedure packs the data to release unused space. This ensures that the database
takes up as little space on your hard disk as possible. If you choose this option you must not touch the keyboard
while packing is in progress as this might damage the database.
If any errors are found in the database prior to making the backup and packing the database a warning message is
displayed and you are advised to RELOAD BACKUP. This option prompts for the path and filename for your
backup and then asks you to put your first backup disk in the floppy drive. If your backup is on the hard disk you
will still be prompted about inserting diks into floppy drives just continue by pressing [ENTER]. Note that the
current version of the database is deleted when you use the reload option. We would advise you to keep at least
one recent backup on floppy disks.
13
Exit to DOS
Always use this option to exit the database.
14
Errors
Error messages appear at the base of the screen. Usually you are asked to press any key to continue, and you are
returned to the point immediately before the error.
Catastrophic errors have been found to occur rarely on some computers. This is due to the machine hardware and
R:BASE, and unfortunately is beyond our control. You will recognise that this has occurred on your machine if the
program aborts and the DOS prompt appears. If you suspect the problem lies with the program being corrupted,
install the program files again as described in GETTING STARTED. This problem is an inconvenience only,
since in no way will it affect the integrity of the database, so you will not lose any completed references.
If for any reason the database is destroyed, corrupted or you lose data, reload your backup files. If the
ODA_REEF database is corrupted, reload it as described under DATABASE MAINTENANCE in this manual.
15
DATABASE FIELDS
15.1
Citation
REFERENCE NUMBER
This is unique for each reference and is maintained by the database program. It is useful for identifying individual
references.
YEAR
This is only an integer of four digits indicating the year the reference was published.
AUTHOR
This field holds the author(s) name and initials. While it can be typed in any format we suggest that you attempt to
standardise your format when making new entries to the database. Note that references are printed in alphabetical
order based on this field, so the first word should be the surname of the first author.
MRAG
ODA_REEF User Manual
MRAG
page 13
TITLE
Use this field for the title of the particular reference. If the reference is part of a book, put the editor's names and
book title in the SOURCE.
SOURCE
The source field should be used to indicate where to find the reference. For example, the journal name, volume and
page number, or the title of a book and its publisher.
HARDCOPY
This is a text field of 1 character designed to contain 'Y' or 'N' depending on whether you have a hard copy of the
reference in question in your library. The database is sent out to you with this field set to 'N'
ORIGINAL
This is also a 'Y'/'N' text field which shows whether the information in the Key word section was entered having
viewed the paper or only as a result of it being cited in another reference. This field is useful for recording
references which you plan to obtain.
NOTES
This is a text field which will accept any characters and is available to you to make notes on the reference as you
wish.
15.2
Key Words
The key words are designed to aid grouping and classifying references to make it easier to locate those you might
be interested in. The key words are supplied with the database and may not be changed, with the exception of
COUNTRY. If you choose Other.... from the COUNTRY key words, a dialogue box requests a new country name
which is added to the list. Key words cannot be deleted from any list.
More than one key word can be chosen. For instance, under STUDY DATA a publication may involve field work
followed by analysis of the data. To indicate this you would choose DATA ANALYSIS and FIELD STUDY as the
key words. If a field is inappropriate, leave it blank. If all or most of the keywords apply, use GLOBAL if it is
available, and when you are selecting references using keywords in BROWSE SELECTED REFERENCES or
PRINT SELECTED REFERENCES, remember that some references covering the topic you need might be
included under GLOBAL.
A number of references have already been put into the database and these provide useful examples. However
where we have not seen the original paper (the field ORIGINAL is set to 'N') the keywords will not be complete. In
addition, many choices of keyword are subjective, and so if you acquire a hard copy of a reference, we would
recommend you check these.
MRAG
ODA_REEF User Manual
MRAG
page 14
The following key words are available under their appropriate subject.
REGION
ATLANTIC
S.E. ASIA
GLOBAL
AUSTRALASIA
INDIAN OCEAN
CARIBBEAN
RED SEA
PACIFIC
GULF
Antigua
Belize
Cayman Is.
Cook Is
French Polynesia
Haiti
Jamaica
Kiribati
Malaysia
Mauritius
Netherlands Antilles
Australia
Bermuda
GULF refers to the Arabian Gulf.
COUNTRY
American Samoa
Bahamas
Brazil
Chagos
Denmark
Guam
India
Johnston Atoll
Lesser Antilles
Mariana Archipelago
Mexico
New Caledonia
Anguilla
Barbados
British Virgin Is.
Colombia
Djibouti
Cuba
Indonesia
Kenya
Madagascar
Marianas
Micronesia
Northern Marianas
Other.....
(Allows you to enter your own country name)
Papua New Guinea
Rodrigues
Sri Lanka
Tokelau
US Virgin Islands
Philippines
Samoa
St Vincent
Tonga
USA
Puerto Rico
Seychelles
Tanzania
Turks and Caicos
Vanuatu
Reunion
Solomon Islands
Thailand
Tuvalu
Western Samoa
FISHERIES
MANAGEMENT
SOCIO-ECONOMIC
Cuba
Global
Hawaii
Japan
Korea
Maldives
STUDY TYPE
ECOLOGICAL
These key words are designed to group references based on their subject. For instance, the FISHERIES key word
allows you to keep references directly relevant to fisheries separate. For instance, there are many ecological and
management studies, which may not mention fisheries, but still may be important in understanding coral reef
fisheries.
STUDY DATA
DATA ANALYSIS
DESCRIPTIVE
FIELD STUDY
REVIEW THEORETICAL
This field classifies references on the type of information they contain. For instance, a study may be based on field
work, reviews of other work, descriptions of fisheries or be purely theoretical.
MRAG
ODA_REEF User Manual
MRAG
page 15
DATA TYPE
CATCH/CPUE
YIELD PER RECRUIT
LENGTH/WEIGHT
MIGRATION
GROWTH
PRODUCTIVITY
MORTALITY
The DATA TYPE gives more detailed information about the data used and the study undertaken. For instance, a
yield-per-recruit stock assessment might be based upon length frequency data, for which the appropriate keywords
would be YIELD PER RECRUIT and LENGTH/WEIGHT. By far the commonest keyword in this field will be
CATCH/CPUE which covers references containing information on catch, CPUE or yield per unit area of reef.
MIGRATION should refer to all references on fish movement (e.g. tagging experiments) Finally PRODUCTIVITY
can be used to identify references concerned with reef productivity and trophic compartments (e.g. the ECOPATH
model).
REEF TYPE
ATOLL
FRINGING
SEA GRASS BEDS
ARTIFICIAL
PATCH
BARRIER
LAGOON
GLOBAL
BANK
REEF FLAT
UNMANAGED
UNDAMAGED
EXPLOITED
ISOLATED
UNEXPLOITED
SANCTUARY
REEF STATUS
MANAGED
DAMAGED
ISOLATED indicates that the reef is far away from any human habitation, which may explain the lack of
management, exploitation and damage. SANCTUARY can be used to indicate a study concerned with any type of
reserve or zonation.
FISHERY TYPE
ARTISANAL
GLOBAL
COMMERCIAL
RECREATIONAL
SUBSISTENCE
This field can be used to classify fisheries in a study based on the economics of their operation. The classification
between ARTISANAL and COMMERCIAL is somewhat subjective. In general ARTISANAL should be used to
indicate fisheries which use low technology equipment and are more labour intensive than COMMERCIAL
fisheries. There are no industrial fisheries which operate directly on reefs (e.g. trawlers).
FISHING METHOD
TRAPS
SET NET
SEINE
POTS
CAST NET
GATHERING
POISON
HOOK/LINE
SCUBA
DYNAMITE
TROLL
LONGLINE
SNORKEL
SPEAR/HARPOON
DRIVE FISHING GLOBAL
CRUSTACEANS
GLOBAL
MOLLUSCS
MAIN TARGET GRP
FINFISH
TUNA BAITFISH
OTHER INVERTEBRATES AQUARIUM FISH
MRAG
ODA_REEF User Manual
MRAG
page 16
SPECIFIC TARGETS
This text field allows you to describe in more detail the target species discussed in the reference.
CONTENT NOTES
This text field is useful for recording a summary of the reference.
MRAG
ODA_REEF User Manual
MRAG