1
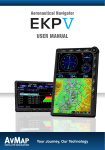
Aeronautical Navigator AvMap EKPV
Cartographic data loaded in the EKP V can
differ from reality. The pilot in command
assumes total responsibility and risk
associated with the use of this device and
remains solely responsible for flying in safe
conditions.
AvMap disclaims any liability deriving from
an improper use of the device, in a way that
may violate the flight and navigation rules,
regulations and safety.
IV. Unit setup
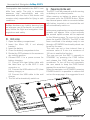
1. Open the battery compartment
2. Insert the Micro SD, if not already
inserted
3. Insert the battery
4. Close the battery compartment door
5. Rotate the GPS antenna to the maximum
sky visibility position.
6. Connect EKP V to a power source for
battery charging:
6.1 Connect the cigar lighter cable with
the label face up to the EKP V side
connector, or
6.2 Connect the USB cable to a PC (slow
battery charge), or
6.3 Connect the USB cable to the wall
charger.
7. The unit will automatically switch on.
V. Powering Up the unit
The EKP V can be powered up both running
on battery or on external power.
When running on battery to power up the
unit press once the POWER button. When
the external power cable is connected either
with battery inserted or not inserted the unit
will automatically switch on.
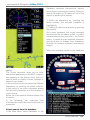
In the power up phase two consecutive splash
screens will appear. After a few seconds
the second splash screen will be replaced
by the Warning page. To move to the map
press the joystick (ENTER). The EKP V has
been conceived to be always ready to use
through a STANDBY functionality which can
be set by the user.
The user can set a time interval from a
minimum value of 5 min to a maximum of
120 min to enable the function.
The user can put the EKP V manually in
STANDBY by pressing the PWR button
and release the PWR button before the
countdown. To turn off the unit completely
the user needs to keep the PWR button
pressed for more then 3 seconds
When the navigator is in STANDBY, pressing
POWER button it is possible to resume the
unit on the map page. It is suggested to not
Quick Manual - 5