1
User’s Guide
TM5000 Series
Notebook Computers
9805807-0001
August 1995
Copyright (©) 1995 Texas Instruments Incorporated
All Rights Reserved — Printed in U.S.A.
TravelMate 5000 Series Notebook Computer
User’s Guide
TI Part No. 9805807-0001
Original Issue: August 1995
Changes may be made periodically to the information in
this publication. Such changes will be incorporated in
new editions of this manual.
Record the serial number, purchase date, and model
number in the spaces provided below. The serial
number and model number are recorded on the label
affixed to the case. All correspondence concerning your
unit should include the serial number, model number,
and date of purchase.
No part of this publication may be reproduced, stored in
a retrieval system, or transmitted, in any form or by any
means, electronic, mechanical, photocopy, recording, or
otherwise, without the prior written permission of Texas
Instruments Incorporated.
TravelMate and BatteryPro are trademarks of Texas Instruments
Incorporated. The icons in the Windows Notebook and Startup
groups are copyrighted by Texas Instruments Incorporated.
TranXit is a trademark of Puma Technology.
Phoenix is a trademark of Phoenix Technologies Limited.
IBM, OS/2, AT PS/2, and VGA are trademarks of International
Business Machines Corporation.
Microsoft and MS-DOS are registered trademarks and Windows and
Xenix are trademarks of the Microsoft Corporation.
Ethernet is a registered trademark of Xerox Corporation.
NetWare is a registered trademark of Novell, Inc.
UNIX is a registered trademark of American Telephone and
Telegraph.
SimulSCAN is a trademark of Cirrus Logic, Inc.
FCC Notice
This device has been tested and found to comply with the limits
for a Class B digital device pursuant to Part 15 of the FCC Rules.
These limits are designed to provide reasonable protection against
harmful interference in a residential installation. This device
generates, uses, and can radiate radio frequency energy and, if
not installed and used in accordance with the instructions, may
cause harmful interference to radio communications.
However, there is no guarantee that interference will not occur in
a particular installation. If this device does cause harmful
interference to radio or television reception, which can be
determined by turning the device off and on, the user is
encouraged to try to correct the interference by one or more of the
following measures:
Reorient or relocate the receiving antenna
Increase the separation between the device and receiver
Connect the device into an outlet on a circuit different from
that to which the receiver is connected
Consult the dealer or an experienced radio/television
technician for help
Notice: Shielded Cables
All connections to other computing devices must be made using
shielded cables to maintain compliance with FCC regulations.
Notice: Peripheral Devices
Only peripherals (input/output devices, terminals, printers, etc.)
certified to comply with the Class B limits may be attached to this
equipment. Operation with non-certified peripherals is likely to
result in interference to radio and TV reception.
Caution
Changes or modifications not expressly approved by the
manufacturer could void the user’s authority, which is granted by
the Federal Communications Commission, to operate this
computer.
Use Conditions
This part complies with Part 15 of the FCC Rules. Operation is
subject to the following two conditions: (1) this device may not
cause harmful interference, and (2) this device must accept any
interference received, including interference that may cause
undesired operation.
Notice: Canadian Users
This Class B digital apparatus meets all requirements of the
Canadian Interference-Causing Equipment Regulations.
Remarque à l’intention des utilisateurs canadiens
Cet appareil numérique de la classe B respecte toutes les
exigences du Règlement sur le matériel brouilleur du Canada.
Contents
Contents
Preface
Chapter 1 Before You Begin
Creating Backup Diskettes .................................1-2
System Files Recovery Diskette ..........................1-3
Features.............................................................1-4
Environment ......................................................1-6
Usage.................................................................1-7
Standby and Suspend ........................................1-9
Safety Ring.......................................................1-10
Rear Port Covers ..............................................1-11
Using the AC Adapter .......................................1-13
Introduction to the PCI Bus..............................1-15
Chapter 2 Using Your Computer
Starting the Computer .......................................2-2
Brightness .........................................................2-3
Eject Buttons .....................................................2-4
Using LED Indicators .........................................2-6
Using the Pointing Device.................................2-10
Volume Control ................................................2-11
Using Disk Drives ............................................2-12
Memory............................................................2-14
Using the Keyboard ..........................................2-15
Using the Internal Numeric Keypad ..................2-17
Using Connectors and Ports .............................2-19
Internal Speaker and Microphone ....................2-23
Chapter 3 Using Battery Power
Guidelines for Battery Use..................................3-2
Switching to Battery Power.................................3-3
Responding to Low Battery Conditions ...............3-4
Checking the Battery Charge..............................3-7
v
Contents
Standby and Suspend ........................................3-8
Battery LEDs .....................................................3-9
Inserting the Battery Pack ................................3-11
Removing the Battery Pack...............................3-12
Charging the Battery ........................................3-13
Utilities ............................................................3-14
Caring for Your Battery ....................................3-15
Chapter 4 Options
AC Adapter ........................................................4-2
PCMCIA .............................................................4-3
Numeric Keypad.................................................4-6
Using External Monitors ....................................4-7
Memory..............................................................4-8
Microphone and Headphone Kit .........................4-9
SIR Options......................................................4-10
Misc. Options ...................................................4-12
Chapter 5 Using Software
Using Supplied Software ....................................5-2
Getting Online Help............................................5-3
Guidelines for Installing Applications .................5-4
Custom Windows Utilities ..................................5-6
Using a Password...............................................5-9
Using Sound ....................................................5-11
Chapter 6 Important Information
Tips for the Traveler ...........................................6-2
What to Take When Traveling.............................6-4
Packing the Computer and Accessories ..............6-5
Using a Mouse ...................................................6-6
Using an External Keyboard...............................6-7
Adjusting Pointer Speed .....................................6-8
vi
Contents
Chapter 7 Care and Troubleshooting
Cleaning the Computer ......................................7-2
Troubleshooting Tips .........................................7-3
Startup Error Messages......................................7-4
Recovering from a Configuration Loss.................7-6
Appendix A Where to Get Help
Index
vii
Preface
This manual describes features of the Texas
Instruments TravelMate 5000 Series of
notebook computers. The TM5000 Series
computers are similar in appearance and
incorporate such features as PCMCIA, internal
pointing device, infrared interface, and 16-bit
sound.
The TravelMate 5000 Series of computers are not
only suitable for travel purposes, but can also be
used in office environment when connected to a
docking station. The docking station turns your
notebook into a desktop workstation by allowing
you to connect an ergonomically compliant
keyboard, mouse and VGA monitor (not supplied
with the system).
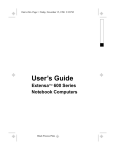
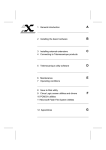
The following figure displays a TM5000 Series
computer.
TravelMate 5000 Series computer
This manual should answer most of the
questions you have about the day-to-day
ix
Preface
operation of your TM5000 Series notebook
computer.
Use the Quick Start instructions that came with
your computer to get your computer running for
the first time.
Use the online TM5000 Series User’s Reference
Guide to answer questions about your computer
that are not answered in this manual.
Use the Phoenix SmartShelf on-line
documentation for information on MS-DOS ® 6.2
and Windows for Workgroups 3.11.
This User’s Guide and the TM5000 Series User’s
Reference Guide are provided online for your
conenience.
You should also take advantage of the online
help files that are available with almost all of the
programs shipped with your computer.
We hope you enjoy your TravelMate computer.
With proper care, your computer will provide you
with years of productive service.
x
1
Before You Begin
After completing procedures in the Quick Start
instructions, read this chapter to learn about
important functions of your computer. Some,
such as Creating Backup Diskettes, should be
performed as soon as possible after the purchase
of your computer.
Contents
Creating Backup Diskettes .................................1-2
System Files Recovery Diskette ..........................1-3
Features.............................................................1-4
Environment ......................................................1-6
Usage.................................................................1-7
Standby and Suspend ........................................1-9
Safety Ring.......................................................1-10
Rear Port Covers ..............................................1-11
Using the AC Adapter .......................................1-13
Introduction to the PCI Bus..............................1-15
1-1
Creating Backup Diskettes
Creating Backup Diskettes
You should create your backup system diskettes
as soon as possible after purchasing your
notebook.
There are two methods for creating backup
system diskettes:
n
1-2
❑
Use the DiskMaker utility from Windows.
To use this utility, double-click on the
DiskMaker icon in the TravelMate Notebook
Center Group. The number of diskettes
required to back up each area is indicated
by the number of selections on each tab
page. Use these selections to complete the
system backup. Insert diskettes as
necessary.
❑
Select the System Maintenance and Backup
option from the Startup Menu and follow
instructions on the screen.
Note: If you don’t want to use the backup process,
you may order operating system diskettes by
referring to the Backup Diskette Flier that came in
the documentation set.
System Files Recovery Diskette
System Files Recovery Diskette
You are provided a System Files Recovery
diskette with your computer. This is a bootable
diskette with backup software and enables you to
restore minimum system files. For further
information, refer to Quick Start instructions or
the online TM5000 Series User’s Reference Guide.
1-3
Features
Features
The following table displays TM5000 Series
standard features:
1-4
TM5000
TM5000SE
PCI Architecture
Yes
Yes
Memory
8-MB (70 ns DRAM)
8-MB (70 ns DRAM)
Video Memory
2 MB
1 MB
Graphics Accelerator Yes
Yes
Displays
10.4" TFT
10.5" DualScan
Passive Matrix
9.5" TFT
Sound
16-Bit
None
PCMCIA
Two type I or II or
one type III
Two type I or II or
one type III
PCI Bus
Yes
Yes
MIDI Bus
Yes
Yes
Serial Port
Yes
Yes
Parallel Port
Yes
Yes
SIR
Yes
No
External Keyboard
Port
Yes
Yes
External PS/2
Mouse Port
Yes
Yes
External PS/2
Yes
Numeric Keypad Port
Yes
Features
TM5000
TM5000SE
Hard Drive
524-Million Byte
(500 MB) or
810-Million Byte
(772 MB) on
VL Local Bus
524-Million Byte
(500 MB)
Internal Pointing
Device
Yes
Yes
1-5
Environment
Environment
This section provides information on the
optimum operating environment for your
TM5000 Series notebook computer:
Temperature
Operating:
Storage:
50o to 95o F
(10o C to 35o C)
-4o to 140o F
(-20o C to +60o C)
Relative Humidity (Noncondensing)
Operating:
20% to 80%
Storage:
10% to 90%
Shock:
Operating:
Storage:
Vibration:
Operating:
Maximum 6g pulse in X,
Y, and Z orientations
Maximum 60g pulse in X,
Y, and Z orientations
Sinusoidal 5 to 20 Hz
limited to 0.0244 inch
peak-to-peak maximum
displacement
0.5g, 20 to 400 Hz
Storage:
Sinusoidal 5 to 20 Hz
limited to 0.244 inch
peak-to-peak maximum
displacement
5.0g, 20 to 400Hz
1-6
Usage
❑
❑
Never pick up or carry your unit by the LCD.
Never use the computer in harsh
environments where it could be subjected to
rapid temperature changes and excessive
dust.
❑
Never expose the computer to excessive
vibration.
❑
Never expose the hard disk or floppies to
strong magnetic fields, such as those
generated by audio system speakers or
telephone handsets.
❑
Be sure the wall outlet supplies the voltage
required by the AC Adapter. Check the labels
on the bottom of the computer case and on
the AC Adapter.
❑
Avoid leaving your computer in storage for
more than seven months without a charged
battery if the computer is not connected to
the AC Adapter. The battery that maintains
the configuration, time, and date will
discharge.
❑
To avoid overheating the computer, never
place anything on top of the computer when
it is recharging or operating.
❑
Before moving an active computer, press the
Suspend button to put the computer into
sleep mode and close the display (see
Standby and Suspend in the next section).
❑
Do not try to force the cover beyond its fully
opened position—about 180 degrees.
Usage
1-7
Usage
Caution: In the rare event that you should see
or smell anything that indicates overheating
(smoke or a strange smell):
c
1. Turn the power to the off (s) position.
2. Disconnect the AC Adapter from the power
source.
3. Remove battery pack(s).
4. Contact your Texas Instruments dealer.
1-8
Standby and Suspend
Standby and Suspend
Standby and Suspend modes may be used to put
your computer to "sleep" whenever it is not
actively being used. These two modes assist in
saving battery power and allow you to make
some hardware configuration changes without
turning the computer off.
To enter the Standby mode, press Fn-F4
(Standby). This puts your computer into a light
sleep and saves battery power. To come out of
Standby, press any key.
To enter the Suspend mode, press the Suspend
button on your computer. This puts your
computer into a deep sleep, and saves more
battery power. To return from Suspend mode,
press any key.
n
Note: Returning from Suspend may take a few
seconds longer than Standby.
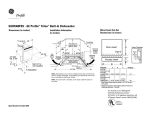
Suspend
Button
Suspend button
1-9
Safety Ring
Safety Ring
Your TM5000 Series computer comes with a
safety ring. To physically secure your computer,
complete the following steps:
1. Insert a thin, sharp instrument into the space
on the right side of the computer just above
area displaying a lock.
Release Metal
Safety Ring
Metal Safety
Ring
2. Carefully push out the metal safety ring.
3. Use a cable to connect the safety ring to a
secure source.
1-10
Rear Port Covers
Rear Port Covers
The ports on the rear of the TM5000 Series
computer are protected by plastic covers. To
open these covers, press the button.
Push Button to
Open
Opening the rear port covers
When the notebook is in storage or not in use,
you may close the rear port covers by pressing
each downward until they click into place.
1-11
Rear Port Covers
Push Doors to
Close
Closing rear port covers
1-12
Using the AC Adapter
Using the AC Adapter
DC Connector
AC Adapter
Male Plug
Female
Connector
AC Adapter
AC
Adapter
c
Charges the internal battery pack(s) and
operates the computer on AC power
whether or not a battery pack is installed.
The AC adapter can be operated anywhere
between 100 - 240 volts AC and has a
detachable AC power cord.
Caution: Use only the AC Adapter supplied with
your computer. Another adapter may damage
your computer.
To connect the AC adapter, complete the
following steps:
1. Connect the female connector of the AC cord to
the inlet on the AC Adapter.
1-13
Using the AC Adapter
2. Plug the DC connector into the matching jack on
the left rear panel of the computer.
3. Plug the male end of the AC cord into a wall
receptacle using the correct voltage.
4. Turn the computer on or press any key if your
system is in sleep mode.
1-14
Introduction to the PCI Bus
Introduction to the PCI Bus
The Peripheral Component Interconnect (PCI)
bus provides a solution to I/O bottlenecks on
Pentium processors. While this technology is
available on many desktops, Texas Instruments
is one of the first to offer PCI architecture at the
notebook level. The following are some other of
the features of your PCI bus:
❑
Bus speeds up to 33 MHz and high transfer
rates. This allows for faster running
applications.
❑
Video runs off the internal PCI bus allowing
for superior graphics performance.
❑
High end processing speeds offer growth
protection for your system.
❑
Your system processor operates quickly and
independently of the PCI Bus.
For further information on the PCI bus, refer to
your online TM5000 Series User’s Reference
Guide.
1-15
2
Using Your Computer
Before beginning this chapter, ensure you have
read and understood Chapter 1. Chapter 2
describes how to start and use your TM5000
Series computer.
Contents
Starting the Computer .......................................2-2
Brightness .........................................................2-3
Eject Buttons .....................................................2-4
Using LED Indicators .........................................2-6
Using the Pointing Device.................................2-10
Volume Control ................................................2-11
Using Disk Drives ............................................2-12
Hard Disk Guidelines ..................................2-12
Floppy Drive Guidelines...............................2-12
Memory............................................................2-14
Using the Keyboard ..........................................2-15
Single Keys..................................................2-15
Labeled Combination Keys...........................2-15
Unlabeled Combination Keys .......................2-16
Using the Internal Numeric Keypad ..................2-17
NumLk On ..................................................2-17
NumLk Blinking ..........................................2-18
NumLk Off ..................................................2-18
Using Connectors and Ports .............................2-19
Internal Speaker and Microphone ....................2-23
2-1
Starting the Computer
Starting the Computer
Power
Switch
Power switch
Power
switch
2-2
Turns the computer on and off for both AC
and battery operation. With the power
switch in the off (s) position, the battery
continues to charge; however, all computer
functions cease.
Brightness
Brightness
Brightness
Control
Brightness
Brightness
Control
n
Adjusts the brightness of the illuminated
screen. Moving the control up increases
the brightness of the display and moving
the control down decreases the brightness
of the display. The brighter the screen, the
more power is used during battery
operation.
Note: Some TM5000 Series models may have a
second slide control that is used for contrast
control.
2-3
Eject Buttons
Eject Buttons
There are four eject buttons on TM5000 Series
computers. They include:
❑
Two for each PCMCIA card (if two type II
cards are installed). Moving the PCMCIA
eject button to the left ejects the PCMCIA
card from the top (using the left button) or
bottom (using the right button) of the
PCMCIA slot.
❑
Two for the two battery packs. Moving the
battery eject button to the left releases the
left (using the left button) or right (using
the right button) battery from its
compartment.
Left PCMCIA
Eject Button
Right PCMCIA
Eject Button
PCMCIA eject buttons
2-4
Eject Buttons
Right
Battery
Eject
Button
Left
Battery
Eject
Button
Battery eject
2-5
Using LED Indicators
Using LED Indicators
There are several LED indicators on TM5000
Series notebook computers. These indicators
reflect the status of certain functions as you are
using the system. This section discusses LED
indicators for TM5000 Series computers in
further detail.
Power
Low
Battery
Top LEDs
2-6
Power
Indicator
Lights green when power is turned on to
the notebook computer. If the Suspend
button is pressed, the PWR LED turns
amber to indicate Suspend mode.
Low
Battery
Red (flashing) - indicates a low battery
condition.
Using LED Indicators
Battery
LEDs (left)
Battery
Battery
Status (left) LEDs (right)
Turbo
Battery
Status
(right)
Hard Disk
Indicator
Floppy
Disk
Indicator
Front LEDs
Battery
There are four LEDs on the front of each
battery compartment. These indicate the
remaining battery charge from low (first
LED on left) to high (fourth LED from left).
Red indicates nearly depleted battery. If
battery LEDs are not lit, press the Battery
Status button.
Battery
Status
This is not an LED indicator; however, if the
LEDs are dark, pressing the battery status
button lights them to display the current
battery charge.
Turbo
Lights when the CPU is set to high speed.
Hard Disk
Indicator
(HDD)
Lights when the computer writes to or
reads from the hard disk.
2-7
Using LED Indicators
Floppy
Disk
Indicator
(FDD)
Lights when the CPU writes to or reads
from the floppy drive.
c
Caution: Never remove a floppy from the
drive while the Floppy Disk indicator is
on. You could destroy data and damage
the drive. Do not use the floppy disk
drive when you are experiencing low
battery conditions.
Scroll
Lock
Num
Lock
Cap
Lock
2-8
CAP Lock
Indicator
(CAP)
Lit when the caps lock function is toggled
on using the CAPS LOCK key.
NumLk
Indicator
(NUM)
Lit or blinking when the embedded numeric
keypad is toggled on using the NUMLK key.
See Using the Numeric Keypad later in this
section for further details.
Using LED Indicators
SCROLL
LOCK
Indicator
(SCR)
Lit when the scroll lock function is toggled
on using the ScrLk key.
2-9
Using the Pointing Device
Using the Pointing Device
The embedded pointing device offers a unique
and efficient way of pointing and selecting in a
Windows environment. The following figure
displays the embedded pointing device.
The Point
Left Button
Right Button
The Point resembles a pencil eraser and is
touch-sensitive. To move your cursor, place your
finger on The Point and push in the direction you
want your cursor to go. The harder you push, the
faster the cursor moves.
Once your cursor is in the proper place and you
want to select, use the left button to click or
double click just as you would a mouse.
n
2-10
Note: You may also connect an external PS/2 or
serial mouse to your computer. See Using
Connectors and Ports later in this chapter.
Volume Control
Volume Control
To control speaker volume, use the following key
combinations:
❑
Ctrl-Alt-D - decreases the speaker volume
❑
Ctrl-Alt-U - increases the speaker volume.
To control microphone volume, use Pocket Mixer,
refer to Chapter 5 of this manual. For more
detailed information, refer to your TM5000 Series
User’s Reference Guide.
n
Note: To prevent feedback from the internal
microphone and speaker, select Mute from Pocket
Mixer.
This feature is not available with TM5020SE
models.
c
Caution: Avoid loud volume levels when using
the headset to avoid possible hearing loss.
2-11
Using Disk Drives
Using Disk Drives
Hard Disk
The TM5000 Series notebook comes with a
524-million byte (500 MB) or 810-million
byte (772 MB) replaceable 2.5 inch hard
drive. The hard disk is formatted and
loaded with software during manufacture.
Do not format the hard disk.
Floppy
Drive
The floppy drive can read from and write to
formatted 3.5-inch, double-sided,
high-density (2HD), 1.44 MB floppies and to
lower capacity, 720 KB, double-density
(2DD) floppies.
The floppy drive does not function at low
speed with the OS/2 or Xenix operating
systems.
Hard Disk Guidelines
If you format the hard disk, all data on the hard
disk will be erased.
Do not move the computer when the HDD
indicator is on. Press Suspend to spin the hard
drive down and put the computer into a sleep
mode before moving the computer.
c
Caution: If the hard disk is damaged, you can
lose data. To reduce the impact of data loss,
back up the data to floppies frequently.
Floppy Drive Guidelines
Failure to observe the following precautions can
damage both the floppy drive and the data on the
floppy:
2-12
Using Disk Drives
❑
Insert the floppy into the floppy drive slot
with the label side up and the
metal-shutter end first. Gently push the
floppy into the floppy drive slot until the
floppy clicks into place.
❑
To remove a floppy, press the eject button
until the floppy pops out.
❑
Never remove a floppy while the indicator
on the floppy drive is on.
❑
Never force open the access shutter on a
floppy.
❑
Always remove a floppy from the floppy
drive before turning off the computer.
❑
Never transport the computer with a floppy
in the floppy drive. Doing so can damage
the drive head.
❑
If a floppy appears to be damaged, try to
make a copy of it, and immediately discard
it.
❑
Keep all floppies when not in use in a disk
storage box to protect them from damage or
loss.
❑
Do not use the floppy disk drive when you
are experiencing low battery conditions.
2-13
Memory
Memory
Your computer is equipped with 8 MB of random
access memory (RAM). Memory expansion can be
accomplished by upgrading from 8 MB of
memory to up to 32 MB of memory. Refer to
Chapter 4, Options, to the online TM5000 Series
User’s Reference Guide, or to the installation
instructions that come with optional memory for
further information.
c
2-14
Caution: TI does not warrant the use of non-TI
memory. TI will not be held responsible for
problems or degradation of performance
incurred by using any memory other than TI
memory described in this document.
Using the Keyboard
Using the Keyboard
The computer has many special keys, but most
of them depend on an application for their
functionality. The following keys have special
functions at the command level of MS-DOS and
within many programs.
Single Keys
Pause
Stops a command or application; primarily
used to stop the screen from scrolling;
pressing any other key resumes the
execution of the command or application
Suspend
Suspends processing and puts the
computer in a deep sleep mode. This saves
more power than Standby (Fn-F4). To
wake the computer, press any key.
Labeled Combination Keys
Shift-Prt Sc
Sends the contents of the screen to the
printer port; prints only text characters
unless you have run the GRAPHICS.COM
utility to enable printing graphics
Ctrl-Pause
(Break)
Terminates the current command or
application
Fn-Esc
(Setup)
Loads the DOS-based Setup
CtrlSuspend
Turns off low battery audible alarm
Fn-F4
Puts the computer into a light (Standby)
mode. Less power is saved with this option
than with the Suspend mode. To wake the
computer, press any key.
2-15
Using the Keyboard
Unlabeled Combination Keys
Ctrl-P
Sets the computer to echo keystrokes to the
printer; prints a line when you press Enter;
continues until you press Ctrl-P again
Ctrl-Alt-Esc Loads the ROM-based Setup program
Ctrl-Alt-Del Terminates all programs, reloads MS-DOS
and executes the AUTOEXEC file; also called
“warm start” or “warm boot”
2-16
Ctrl-Alt-↓
Decreases CPU speed from high to low
Ctrl-Alt-↑
Increases CPU speed from low to high
Ctrl-Alt-D
decreases the speaker volume
Ctrl-Alt-U
increases the speaker volume.
Using the Internal
Numeric Keypad
The keyboard has an embedded keypad that
provides the same functions as the discrete
numeric keypad on an AT enhanced keyboard.
The embedded numeric keypad keys shown in
the following figure generate AT-keypad
characters and functions when pressed in
conjunction with NumLk and Fn.
The embedded numeric keypad has three modes
you can enter by toggling NumLk (FN-ScrLk) as
signaled by the NumLk indicator: on, blinking, or
off.
NumLk On
When the NumLk indicator is on, pressing Fn
with a key generates the characters shown in the
following figure.
{
[
NumLk On
2-17
Using the Internal
Numeric Keypad
NumLk Blinking
When the NumLk indicator is blinking—caused
by pressing the NumLk key while the NumLk
indicator is illuminated—the embedded numeric
keypad becomes a temporary numeric keypad
that does not require pressing any other key. This
mode is particularly useful when you have to
enter many numbers. If you press and hold Fn in
this mode, the keypad keys generate their
normal characters.
NumLk Off
NumLk Off
When the NumLk indicator is off, the keyboard
acts as normal.
2-18
Using Connectors and Ports
Using Connectors and Ports
This section provides a description of connectors
and ports on the rear and right side panel of the
TM5000 Series notebook computer.
c
Caution: Turn off the computer before
connecting external devices.
Rear ports
1
SIR
The serial infrared (SIR) port allows you to
connect serial devices (such as another
IRDA-compliant computer) without the use
of a cord or cable. (Not available with
TM5020SE models.)
2
PCMCIA
The PCMCIA slot supports two Type I or II
or one Type III PCMCIA cards. Included
with your notebook is the Phoenix PCMCIA
PhoenixCARD Manager Plus software and
associated User’s Manual (TI Part Number
9791792-0001). This software package
provides the necessary configuration and
driver support for installing PCMCIA option
2-19
Using Connectors and Ports
cards.
For further information on the PCMCIA
option, refer to Chapter 4, Options.
2-20
3
Parallel
(25-pin)
Connects to a parallel printer or other
device that uses a standard parallel
interface. EPP/ECP compatible.
4
Serial
(9-pin)
Connects to external devices such as a
serial printer. 16550 UART.
5
External
Monitor
(15-pin)
Connects to an external analog VGA monitor
6
PCI Bus
Processor-direct I/O for lightning fast
throughput
Using Connectors and Ports
Side ports
7
In
Connects to miscellaneous sound input
devices such as a radio or CD player. (Not
available with TM5020SE models.)
8
Out
Connects to miscellaneous sound output
devices such as a headphones or speakers.
(Not available with TM5020SE models.)
9
DC In
Connects the AC Adapter output connector
to this jack to recharge the battery and
supply ac power to the computer.
c
Caution: Use only the supplied AC
Adapter with your computer. Other
adapters can cause serious damage to
the electronic circuits.
2-21
Using Connectors and Ports
2-22
10 PS/2
Connects to an external PS/2 keyboard,
PS/2 Numeric Keypad, or a PS/2 mouse
may be connected to this port. If you are
connecting a 101-type keyboard, a 101 to
PS/2 keyboard adapter must be purchased.
11 MIC
Connects to external microphone. (Not
available with TM5020SE models.)
Internal Speaker
and Microphone
The TM5000 notebook computer comes with an
internal speaker and microphone. (This feature
is not available on TM5020SE models.) These
features give direct sound generation and
recording capability in the system. The following
figure displays the output location of the internal
speakers and microphone.
Microphone
Speaker
Internal speaker and microphone
You have the option of opening or shutting the
microphone door on the outside cover. To open
the microphone door, push the latch button to
the right. To close the door, push the latch to
the left.
2-23
Internal Speakers
and Microphone
Microphone
Latch
2-24
3
Using Battery Power
The primary difference between using battery
power and AC power is the limited time you can
operate under battery power before you must
recharge.
This chapter covers charging the battery and
maximizing the time between charges and
assumes that you installed and charged the
battery as directed in the Quick Start instructions.
Contents
Guidelines for Battery Use..................................3-2
Switching to Battery Power.................................3-3
Responding to Low Battery Conditions ...............3-4
Checking Battery Charge....................................3-7
Standby and Suspend ........................................3-8
Battery LEDs .....................................................3-9
Inserting the Battery Pack ................................3-11
Removing the Battery Pack...............................3-12
Charging the Battery ........................................3-13
Utilities ............................................................3-14
Battery Status .............................................3-14
BatteryPro APM Help ...................................3-14
Battery Tips ................................................3-14
Caring for Your Battery ....................................3-15
3-1
Guidelines for Battery Use
Guidelines for Battery Use
c
Caution: Never dispose of exhausted batteries
in a fire.
The battery should be handled carefully to
ensure maximum life. In particular:
❑
Do not drop the battery or subject it to
shocks.
❑
Do not expose the battery to moisture,
chemicals, or temperature extremes.
❑
Do not short the battery leads or connect
the battery with the wrong polarity.
❑
Charge the battery after several days of
disuse to keep it fully charged. If your
computer is idle for an extended period of
time, charge the battery every three months.
❑
Never use the battery to power other
products.
❑
The battery pack has thermal fuses to
prevent unsafe computer operation. The
computer may not operate on battery power
after storage in a very warm place until the
thermal fuses cool.
❑
The battery and its case are built as one
unit; do not try to open the battery case.
Your computer comes with two Lithium-ION
battery packs (or one on the TM5020SE models).
Keeping an extra, fully-charged battery pack on
hand can extend the time you can operate your
computer. TM5000 Series computers allow you
to replace depleted batteries with charged
batteries when the computer still in operational
mode (hot pluggable).
3-2
Switching to Battery Power
Switching to Battery Power
This procedure should only be done if your
batteries currently have charge remaining. To
determine the current charge state of the battery,
press and hold the battery status button on the
front of the battery pack.
The Lithium-ION battery packs are
"hot-pluggable". To use battery power, install
batteries as described in Inserting the Battery
Pack later in this section. Your computer will
automatically switch to AC power whenever an
AC adapter is plugged into the notebook. At this
time, your batteries will automatically be
recharged.
Hint
To maintain a full charge on your battery,
always reconnect the computer to the AC
Adapter as soon as possible after battery
operations.
3-3
Responding to
Low Battery Conditions
When the battery has 5% to 10% of its charge
remaining, the Low Battery indicator at the top
of the keyboard flashes red. The LED on the front
of the battery pack that is closest to the left
turns red as your battery nears complete
discharge.
When the Low Battery LED starts to flash, you
typically have about 2–10 minutes remaining
before the computer starts to shut down to a
deep sleep state. The time remaining depends on
the battery, the computer, and the activity it is
performing. Experience will teach you the
amount of time to expect with the applications
you use.
The following actions can maximize the time
before the battery is depleted and minimize the
effect of losing power:
❑
Turn the screen brightness control to the
lowest possible setting.
❑
❑
Press Ctrl-Alt-↓ to reduce the CPU speed.
❑
3-4
Save your work in progress to minimize the
danger of losing data.
If you are using a RAM disk, save the
contents of the RAM disk to the hard disk.
Responding to
Low Battery Conditions
❑
If you are in Windows, double-click on the
Shutdown icon to exit all active
applications as well as Windows.
❑
Press Fn-F4 or Suspend to put the
computer into sleep mode whenever you are
not actively using the computer.
❑
Turn off the computer if it does not need to
be active.
When the computer first shuts down, it goes into
a deep sleep mode for about five minutes. During
this time, you can replace fully-charged batteries
one at a time and then resume from the deep
sleep mode or connect AC power.
3-5
Responding to Low Battery
Conditions
Hint
The computer has two ways to give you
advanced warning that the battery is nearing
depletion.
As the charge in the battery is reduced,
peak power loads, such as disk accesses,
can cause the Low Battery indicator to
indicate low battery power for short
periods of time.
In Windows, double-clicking on the
Battery Status icon in the TravelMate
Notebook Center Group displays an
estimate of the percentage of charge
remaining in the battery.
3-6
Checking Battery Charge
Checking Battery Charge
When you receive new batteries, ensure they are
fully charged. To check the charge of any
Lithium-ION battery, press the battery status
button on the front of the battery pack. The
LEDs indicate the current charge. For more
information, refer to Battery LEDs and Charging
the Battery later in this document.
3-7
Standby and Suspend
Standby and Suspend
Standby and Suspend are the two methods for
putting your computer to "sleep." This can save
battery power when you are not actively using
your computer. Refer to Chapter 1 for detailed
information on these functions.
Caution: Using the Suspend/Standby modes
for too long can discharge the battery to the
c
3-8
point that it can no longer power both
the LCD and the hard disk. If this occurs, your
computer will not come out of Standby mode
and you must recharge your battery, plug in
the AC power adapter, or replace one of the
batteries with a charged battery.
Battery LEDs
Battery LEDs
If both battery packs are installed in the
computer, they deplete in parallel. When the
battery charge gets low, the Low Battery
indicator (located above the power switch on the
keyboard) flashes red. When the batteries are
extremely low, the unit automatically goes into
sleep mode for several minutes. During this
time, you can replace the batteries one at a time.
To do this, press Suspend. After inserting the
charged battery, press any key to resume at the
point where the sleep mode was initiated.
There is also a row of four LEDs on the front of
each battery pack. During charge, these LEDs
indicate the following battery states:
❑
n
The percentage of power in each battery. If
all four LEDs light, the battery is at least
76% charged. If the battery is removed, the
LEDs remain lit for several seconds before
turning off (to save the battery charge).
After reaching 100% charge, the battery
LEDs will then turn off.
Note: If you want to check the charge of any
Lithium-ION battery after the LEDs have turned
off, press the battery status button to the right of
the LEDs on the battery pack and they will light
momentarily. Ensure that you have pressed the
battery status button to get the current battery
charge reading before referring to the following list.
3-9
Battery LEDs
How Many LEDs Lit? What Color?
Percent Charged
1
Red
0 to 10%
1
Green
11 to 25%
2
Green
26 to 50%
3
Green
51 to 75%
4
Green
76 to 100%
❑
n
3-10
Low battery state. Press the Battery Status
button to view LEDs. Battery Status only
displays the LEDs for a short period, so you
may need to press the button again if the
LEDs go dark. As the battery discharges,
LEDs turn off one at a time from right to
left until the battery is almost depleted. At
that time, the last green LED turns off and
a red LED comes on.
Note: If the notebook is left on with no AC adapter
plugged in, the batteries may deplete to the point
where the LEDs will not turn on when the Battery
Status button is pressed or when the AC adapter is
plugged in. To restore the batteries, plug in the AC
adapter and press each Battery Status button until
the red LED comes on. Recharge the batteries
normally.
Inserting the Battery Pack
Inserting the Battery Pack
To install the battery pack into TravelMate
TM5000 Series computers, turn the battery so
that the rounded corners along the length of the
battery match the rounded corners of the battery
slots. The LEDs must be facing outward. Insert
the battery until it clicks and locks into place.
Inserting the battery
3-11
Removing the Battery Pack
Removing the Battery Pack
To remove a battery pack, complete the following
steps:
1. Slide the left eject button on the top of the
notebook to the left to release the left battery.
Slide the right eject button to the left to release
the right battery.
Releasing the battery
2.
3-12
Slide the battery out.
Charging the Battery
Charging the Battery
This section covers how to charge your battery in
the notebook computer.
c
Caution: Never recharge the battery
differently from the procedures described in
this document.
To recharge your batteries in the notebook,
complete the following steps:
1. Install the battery pack in your computer (if not
already installed).
2. Connect the AC Adapter.
3. Leave the AC Adapter connected for at least 90
minutes after the battery LEDs turn off.
n
Note: The batteries will charge much faster (by
several hours) if charging with the notebook
powered off.
4. To maintain a full charge, leave the computer
connected to the AC Adapter except when
transporting the computer.
A fully-depleted battery charges in about six
hours with the power switch to the notebook
turned off. If power to the notebook is left on,
you must charge the batteries overnight.
3-13
Utilities
Battery Status
Utilities
Double-click on the Battery Status icon in the
TravelMate Notebook Center group to display the
battery level icon at the bottom of your screen.
To view the Battery Level Settings, single click on
the icon to display the menu and select
Settings... .
This window displays the approximate charge left
in your computer based on user-specified
settings. At this point, you may modify the
following parameters:
❑
The position of your Battery Level window
or Battery Level icon
❑
The elapsed time (in seconds) before the
Battery Level dialog box reappears
automatically on your screen
❑
Minimizing the application
BatteryPro APM Help
This utility provides information on Texas
Instruments BatteryPro Power Management
software and Microsoft Advanced Power
Management (APM) software. Double-click on
this icon in the TravelMate Notebook Center
group to display information about the
battery-savings software in your computer.
Battery Tips
Double-click on this icon in the TravelMate
Notebook Center group for information about
actions you can take to maximize the life of a
battery charge.
3-14
Caring for Your Battery
Caring for Your Battery
The following operating tips for your notebook
can help you prolong the life of a battery charge:
❑
Keep the LCD at the lowest comfortable
brightness level. Reducing brightness even
a small amount can significantly reduce
power consumption and increase operating
time.
❑
Press FN-F4 or Suspend whenever you are
not actively using the computer. Press any
key to resume normal operation.
❑
Press Suspend after writing to the hard
disk to stop the disk rotation. Then return
to operation by pressing any key.
❑
Use the Power Savings items in Setup to
turn off the LCD when not in use and to
ensure that the hard disk is not powered
for longer periods than necessary.
❑
You can choose between two CPU speeds:
high and low. The computer uses less
power at lower CPU speeds. When using an
application that is not CPU-intensive (for
example, many word processing programs),
press Ctrl-Alt-↓ to reduce the CPU speed.
To increase the speed again, press
Ctrl-Alt-↑. This speed control feature is
not available in the Windows environment
or on most models that use a memory
manager. When high speed is selected, the
Turbo LED is lit.
You can minimize the number of times the
computer needs to access the hard disk by
using disk caches or RAM disks.
❑
❑
Disconnect or turn off external options that
you are not using.
3-15
Caring for Your Battery
3-16
❑
Use one of the Setup programs to disable
ports you are not using.
❑
Use only Texas Instruments options, which
are designed to operate with the least
possible energy consumption. Third-party
options, such as RAM, and mouse devices,
can drain the battery more quickly.
❑
Run the computer with the AC Adapter
connected when using external devices,
such as an external keyboard.
❑
Increase the BatteryPro power savings to
level 7 using the SETPOWER utility or the
Power Level utility in Windows TISetup.
4
Options
This chapter provides information on Options
available for use with your TM5000 Series
computer. For further information on options,
please refer to the installation instructions that
come with the specific option or to the online
TM5000 Series User’s Reference Guide.
This section includes information on the
following options:
❑
❑
❑
❑
❑
❑
❑
❑
AC Adapter
PCMCIA
PS/2 Numeric Keypad
External Monitor
Memory
Microphone/Headphone Kit
SIR Options
Miscellaneous Options
Contents
AC Adapter ........................................................4-2
PCMCIA .............................................................4-3
Numeric Keypad.................................................4-6
Using External Monitors ....................................4-7
Memory..............................................................4-8
Microphone and Headphone Kit .........................4-9
SIR Options......................................................4-10
Misc. Options ...................................................4-12
4-1
AC Adapter
AC Adapter
The AC adapter charges the internal battery
packs and operates the computer on AC power
whether or not a battery pack is installed. The
AC adapter can be operated anywhere between
100 - 240 volts AC and has a detachable AC
power cord.
c
Caution: Use only the AC adapter recommended
in this document (TI Part No. 9786094-0001).
Another adapter may damage your computer.
DC
connector
Plug
AC
adapter
Female
connector
AC Adapter
To install your AC adapter, refer to Chapter 1 of
this guide, to instructions in the online TM5000
Series User’s Reference Guide, or the Installation
Instructions that came with your AC adapter (TI
Part No. 9786281-0001).
4-2
PCMCIA
PCMCIA
PCMCIA option cards are used for:
❑
communication connection (data
send/receive/fax/voice modem with
XJACK®)
❑
network connection
The TM5000 Series computer supports two type I
or type II or one Type III PCMCIA option card.
To insert new PCMCIA cards, you must first open
the door to the PCMCIA slot(s) and then insert
the card.
PCMCIA Door
4-3
PCMCIA
Inserting the PCMCIA card
The following PCMCIA cards are available from TI:
❑
PCMCIA 14.4 KB data/send/receive/fax/
voice modem with XJACK®
❑
❑
PCMCIA Token Ring Card
❑
PCMCIA Ethernet 10BaseT Twisted Pair
Card
PCMCIA Ethernet 10Base2 Thin Coax Card
To install your PCMCIA option card(s), refer to
instructions in the online TM5000 Series User’s
Reference Guide, the Installation Instructions (TI
Part No. 9798097-0001) that came with your
PCMCIA card, and the Phoenix PCMCIA User’s
Guide supplied with your notebook. For an
updated list of available PCMCIA cards, call
1-800-TI-TEXAS.
4-4
PCMCIA
To eject your PCMCIA option card(s), slide the left
(for the top PCMCIA slot) or right (for the bottom
PCMCIA slot) PCMCIA buttons to the left.
Left PCMCIA
Button
Right PCMCIA
Button
PCMCIA eject buttons
4-5
Numeric Keypad
Numeric Keypad
The optional PS/2 Numeric Keypad (TI Part No.
258131-0001) can be used instead of the
internal numeric keypad.
PS/2 Numeric Keypad
To use the PS/2 numeric keypad, turn the
notebook off. Plug the keypad’s cable connector
into the computer’s PS/2 (Mouse/Keyboard)
connector located on the left side of the computer
(see Connector’s and Ports in Chapter 2).
For further information on the PS/2 Numeric
Keypad, refer to instructions in the online
TM5000 Series User’s Reference Guide or the
Installation Instructions that came with your
keypad (TI Part No. 2581382-0001).
4-6
Using External Monitors
Using External Monitors
You can also connect the computer to external
monitors, many of which can display resolutions
higher than 640 x 480.
When the external monitor is configured for 640
× 480 × 65K VGA, however, the computer can
display on the LCD at the same time as the
external monitor. This feature is called
SimulSCAN and is enabled in the System Setup
using the VGA utility, the SIM.BAT batch file, or
the WinMode Windows utility located in the
TravelMate Notebook Center Group. These
utilities are described in the online TM5000
Series User’s Reference Guide.
While SimulScan is in effect, the LCD screen may
display characters less brightly than when the
computer is displaying only on the LCD screen.
Hint
(For models other than TM5020SE.) When the
computer is connected to an external monitor,
you can use the computer with the cover closed.
Use Setup to change Closed Cover Action to
Auto Standby and Cover Alarm to Off. For
further information, see the online TM5000
Series User’s Reference Guide.
4-7
Memory
Memory
Your computer is equipped with 8 MB of random
access memory (RAM). You can increase memory
by installing one of the RAM options:
❑
8 MB RAM Expansion Board (TI Part No.
9798816-0001). This expands RAM from 8
MB to 16 MB.
❑
16 MB RAM Expansion Board (TI Part No.
9798816-0002). This expands RAM from 8
MB to 24 MB.
❑
8-MB Add-On Memory Expansion (TI Part
No. 9698816-0003) - allows further
memory expansion by attaching an
additional memory card onto an existing
8 MB or 16 MB memory expansion board
(described above).
For further information on memory, refer to the
online TM5000 Series User’s Reference Guide or
the Installation Instructions (TI Part No.
9786283-0001) that came with your optional
memory.
c
4-8
Caution: TI does not warrant the use of non-TI
memory. TI will not be held responsible for
problems, degradation of performance, or
damage incurred by using any memory other
than TI memory described in this document.
Microphone and
Headphone Kit
If you have a TM5000 notebook, your computer
comes preconfigured with software that supports
the optional external microphone and
headphone. You can order this option by calling
1-800-TI-TEXAS and asking for TI Part Number
9793399. To plug in your microphone, insert the
plug into the Mic port on your notebook. Insert
the headphone into the Audio Out port on your
notebook.
n
Note: This feature is not available on TM5020SE
models.
c
Caution: High volume levels may cause hearing
damage.
Headphone
Connection
Microphone
Connection
External microphone and headphone connections
4-9
SIR Options
SIR Options
The Serial Infrared (SIR) port offers wireless
communication with other TM5000 notebooks or
with a variety of IRDA-compliant devices made by
other manufacturers. Ensure that the third-party
manufacturer supplies you with the appropriate
SIR drivers before attempting connection.
n
Note: This feature is not available on TM5020SE
models.
To use the SIR port, align the SIR ports of the
two devices making sure that the distance
separating them is between six inches and one
meter.
Using an SIR option
After the devices are aligned, you must use the
TranXit software (located in the Windows
TravelMate Notebook Center Group) to complete
the SIR communication process. For further
information, refer to the TranXit Quick Reference
4-10
SIR Options
Guide or the online TM5000 Series User’s
Reference Guide that came with your computer.
4-11
Misc. Options
Misc. Options
There are additional options available for use
with your TM5000 Series computer. These
include:
Batteries
You can purchase spare batteries (TI Part
Number 9786247-0001) for your TM5000
Series computer. For information on
Lithium-ION batteries, refer to Chapter 3,
Using Battery Power.
Carrying
Case
Helps protect the computer and accessories
during transport. Three carrying cases are
available:
Leather Portfolio (TI Part No.
2567028-0001) - carries only the
notebook computer.
Deluxe Carrying Case (TI Part No.
2568069-0001) - carries the notebook
computer and several smaller
accessories (such as the AC adapter,
floppy disks, etc.).
Executive Brief Case (TI Part No.
9793372-0001) - a larger carrying case
that carries the notebook, external
docking system, and various smaller
accessories.
PS/2
Mouse
4-12
TM5000 Series series computers come with
a built in pointing device. You can also use
an external mouse by connecting it to the
PS/2 keyboard port or to the 9-pin serial
port. See Using Connectors and Ports later
in this chapter for more details.
Misc. Options
Printers
You can connect almost any parallel printer
to the parallel port or a serial printer to the
serial port. Texas Instruments makes a
variety of laser and ink jet printers you can
use with your computer.
4-13
5
Using Software
This chapter describes the software supplied
with the computer and how to configure
application software to run on the computer.
Contents
Using Supplied Software ....................................5-2
Getting Online Help............................................5-3
Windows help ................................................5-3
MS-DOS Help ................................................5-3
TravelMate Utilities Help ...............................5-3
Guidelines for Installing Applications .................5-4
Adjusting the Software for the Computer .......5-4
Configuring the Computer for the Software ....5-5
Custom Windows Utilities ..................................5-6
Using a Password...............................................5-9
Using Sound ....................................................5-11
DOS Utilities ...............................................5-11
Windows Utilities.........................................5-13
5-1
Using Supplied Software
Using Supplied Software
Your computer is shipped with the following
software installed on the hard disk:
❑
❑
❑
❑
❑
❑
❑
MS-DOS, Version 6.22 or latest version
Microsoft Windows for Workgroups Version
3.11 or latest version
Power-saving utilities
PCMCIA card and socket services
VGA external monitor utilities
Sound utility (Not available on TM5020SE
models)
Games Demonstrations
The operation of this software is described fully
in the following online documents using Phoenix
SmartShelf:
❑
❑
MS-DOS User’s Guide and Reference
Microsoft Windows for Workgroups User’s
Guide
Further printed instructions are given in the
online TM5000 Series User’s Reference Guide.
5-2
Getting Online Help
Getting Online Help
The following sections discuss help for your
software.
Windows Help
To obtain Windows help, press F1 or Alt-H from
the Windows menu or from within the program.
You can also double-click on the Readme First,
Battips, and BatteryPro APM icons in the
TravelMate Notebook Center Group for
information about utility programs and
power-saving options.
MS-DOS Help
For general help with MS-DOS commands, type
HELP at the MS-DOS C:\> prompt, and press Enter.
For additional details on a specific MS-DOS
command, at the MS-DOS C:\> prompt type HELP
plus a command name. For example, HELP COPY
displays a half screen of information about the
COPY command.
TravelMate Utilities Help
For help with the functions of DOS-based
BatteryPro and other utility software, type NBHELP
at the MS-DOS C:\> prompt, and press Enter. You
may also choose TI Utilities from the TravelMate
Notebook Center group in Windows. For help
with VGA.EXE , type VGAHELP at the MS-DOS C:\>
prompt, and press Enter. For further
information, refer to the online TM5000 Series
User’s Reference Guide.
For online help, Phoenix SmartShelf provides
complete MS-DOS and Windows documentation.
5-3
Guidelines for Installing
Applications
Adjusting the Software for the
Computer
Your computer can execute almost all
applications written to execute on AT computers.
When installing software, you may need to
provide the following information to the
installation program:
5-4
Display
The LCD has an 80-column by 25-line
display with 640 x 480 (VGA) resolution.
When installing an application, select the
highest-resolution configuration that both
the program and the computer can support.
If you are using the computer with a
high-resolution external monitor, you can
select a higher resolution than 640 x 480
depending on the model of your computer,
but this configuration does not work on the
internal LCD .
Keyboard
The computer keyboard emulates all
functions of an IBM AT-101 enhanced
keyboard. When installing an application,
select the IBM 101 or AT enhanced keyboard
configuration.
Mouse
If you are using the built-in pointing device
or an external PS/ 2 mouse, select the
Microsoft or IBM PS/2 mouse.
Guidelines for Installing
Applications
Configuring the Computer for the
Software
Some programs require you to modify the way
the computer operates to ensure compatibility.
Processing Some older applications cannot execute at
the higher speeds available with the
Speed
computer. If the user’s manual for the
program indicates a maximum processing
speed, press Ctrl-Alt-↓ to reduce the CPU to
the required speed, or you can include the
SPEED utility as part of a batch file that
runs the program. Not available on some
models that use a memory manager or that
operate within the Windows environment.
RAM
Your computer has 8 MB of memory. This is
sufficient to run most software. For
improved operation, you may want to
install additional RAM (refer to Chapter 4 for
information on ugrading your memory).
Internal
Cache
Some applications may require the internal
cache to be disabled in the system Setup
menu.
AUTOEXEC.
BAT
and
CONFIG.
SYS
Files
If your application requires additions or
changes to the AUTOEXEC.BAT or CONFIG.SYS
files, consider the consequences that may
result from changes or deletions to this file.
Backups of these files are on the System
Files Recovery diskette that came with your
system. You should read about and
understand the files before changing them.
5-5
Custom Windows Utilities
Custom Windows Utilities
TravelMate 5000 has Windows-based utilities
described in the following table. For detailed
information, use the Windows help files or the
online User’s Reference Guide.
5-6
Icon
Location
Function
Shutdown
TravelMate
Notebook
Center
Group
Saves files, closes applications
(if enabled) and exits Windows
faster than the standard
Windows exiting procedure
without loss of data.
Drop N’
Go
TravelMate
Notebook
Center
Group
Sets up applications to appear
as icons on the Windows
display; also allows you to run
the programs by dragging a
filename from the File
Manager and “dropping” it on
the icon.
LFM
TravelMate
Notebook
Center
Group
Laptop File Manager—a
DOS-level utility to manage
files and directories.
Battery
Status
TravelMate
Notebook
Center
Group
Displays the approximate
charge remaining in the
battery and lets you configure
display settings.
BatteryPro
APM Help
TravelMate
Notebook
Center
Group
Provides help for power-saving
utilities.
Battery
Saving
Tips
TravelMate
Notebook
Center
Group
Suggests ways to conserve
battery power.
Custom Windows Utilities
Icon
Location
Function
IntelliPoint
Controls
Intellipoint
Group
Controls the mouse.
WinMode
TravelMate
Notebook
Center
Group
Defines monitor information.
WinDith
TravelMate
Notebook
Center
Group
Smoothes shades on the LCD
panel when enabled.
DiskMaker
TravelMate
Notebook
Center
Group
Provides a system backup
utility.
PC-Doctor TravelMate
Diagnostics Notebook
Center
Group
Runs system diagnostics.
PCMWin
TravelMate
Notebook
Center
Group
This is the information and
configuration utility for
PCMPlus.
SmartShelf
Documents Provides online DOS and
Group
Windows for Workgroups
information.
Documents Provides online information
TM5000
for the TM5000 Series
Series User’s Group
notebook.
Guide
Documents Provides information on the
TM5000
TM5000 Series notebook that
Series User’s Group
is more detailed than the
Reference
User’s Guide.
Guide
5-7
Custom Windows Utilities
n
5-8
Icon
Location
Phoenix
Card
Manager
TranXit
Documents Provides online information on
Group
PCMCIA operations.
Function
TranXit
Group
Runs like File Manager and
allows you to connect to the
SIR port. (Not available on
TM5020SE models.)
TI Setup
TravelMate
Notebook
Center
Group
Customizes the configuration
of your TM5000 Series
notebook.
TI Utilities
Help
TravelMate
Notebook
Center
Group
Provides additional
information on utilities
available with your TM5000
Series notebook.
Sysedit
TravelMate
Notebook
Center
Group
Allows you to edit system files.
Note: Utilities that were added after the hardcopy
of this book went to print have been added to the
online TM5000 Series User’s Reference Guide that
came with your system.
Using a Password
Using a Password
You may set a password from the Setup Menu in
DOS. To set a password, complete the following
steps:
1. Enter the Setup menu by pressing Ctrl-Alt-Esc.
2. From the Setup Menu, press Tab until you reach
the Password field.
3. Press the left or right arrow key.
A Modify Password box appears and prompts
you to type in a new password.
4. Enter a new password of up to seven characters
and press Enter.
You are asked to verify the password by
retyping it.
5. Retype the password and press Enter.
The password is set to Enabled and you will be
prompted for the password every time you
reboot the system. You have three tries to
enter the correct password on powerup before
the system halts and you have to shut down.
6. To save your changes, press Esc-F4.
5-9
Using a Password
c
5-10
Caution: If you forget the system password, you
will not be able to use your computer. To regain
access, you must send your computer to the
Texas Instruments manufacturing facility in
Temple, Texas; this service is not covered by
warranty.
Using Sound
Using Sound
Sound support has been pre-installed on your
TravelMate 5000 system. There are both DOS
and Windows sound controls. This section is an
overview of the the Sound utilities for your
system. To learn more about Sound, refer to the
online TravelMate 5000 Series User’s Reference
Guide or online help.
n
Note: Not available on TM5020SE models.
Several Sound utilities come packaged with your
notebook software. These utilities include:
❑
❑
DOS Utilities
❑
DOS Mixer
❑
Playfile
❑
Recfile
Windows Utilities
❑
Pocket Recorder
❑
Object Linking and Embedding (OLE)
❑
Pocket Mixer
❑
Pocket CD
This section describes these utilities in further
detail.
DOS Utilities
This section contains information on DOS
utilities that support sound on your TM5000
notebook computer.
5-11
Using Sound
DOS Mixer
The DOS Mixer allows you to adjust the volume
controls and balance for individual mixer
channels and selected record source when not in
a Windows environment. To start DOS Mixer,
complete the following steps:
1. Go to the Jazz directory (C:\JAZZ) and type
JAZZMIX
or
JAZZTSR - so that you can automatically call up
DOS MIXER by pressing the left and right shift
keys simultaneously.
2. Press Enter.
Playfile
Playfile is a DOS-based utility used to play back
*.VOC and *.WAV sound files.
To use Playfile, type:
PLAYFILE
at the DOS prompt in the JAZZ directory.
Recfile
Recfile is a DOS-based utility used to record
*.VOC and *.WAV sound files.
5-12
Using Sound
To use Recfile, type:
RECFILE
at the DOS prompt in the JAZZ directory.
Windows Utilities
This section contains information on Windows
utilities that support sound on your TM5000
notebook computer.
Pocket Recorder
Pocket Recorder is a Windows application for
recording waveform data. Pocket Recorder can
splice and blend files together for interesting
audio effects.
With Pocket Recorder’s compression and
decompression feature, you can record and play
back sound files at higher audio frequencies
using a fraction of the memory space.
To start Pocket Recorder, double click on the
Pocket Recorder icon in the JAZZ group.
n
Note: When recording using the internal
microphone, select Mute within Pocket Mixer prior
to recording to eliminate feedback from the
internal speaker.
Using OLE with Pocket Recorder
Object linking and embedding (OLE) is a
Windows system that allows applications to
transfer and share data by establishing a
common link between them. The application
5-13
Using Sound
requesting data is called a client while the
application providing data is called the server.
OLE clients include Cardfile and Write. OLE
servers include Pocket Recorder, Excel, and
Sound Recorder.
A useful application for OLE would be sending a
personal message through E-mail and having the
recipient click on the embedded icon to hear your
voice message.
Pocket Mixer
Pocket Mixer is a Windows based application that
allows you to:
❑
❑
❑
❑
❑
❑
control master volume
control volume levels and balance of
individual input sources
select a record source
edit waveform files
playback from other sources
record new tracks
A common use of the Pocket Mixer is in recording
voice annotation and placing them within other
documents. You cannot use the Pocket Mixer to
record a voice annotation over CD audio, for
example. The Pocket Mixer allows you to select
the recording source. You can adjust the
recording level by using the slider in the Master
volume knob.
5-14
Using Sound
To start Pocket Mixer, double click on the Pocket
Mixer icon in the JAZZ group.
Pocket CD
Pocket CD is a Windows based application that
lets you play audio compact disks if you have a
CD-ROM drive attached to your system. Pocket
CD has controls similar to those used by the CD
audio player you may have in your home
entertainment center. Pocket CD can play back
music CDs as either an icon or as a maximized
window.
If you minimize or close Pocket CD, the CD-ROM
reader continues playing until you eject the disk.
Pocket CD lets you select the order of songs you
want to play with the default of sequential play.
5-15
6
Important Information
This chapter helps you prepare for traveling with
your computer, using external devices, and
adjusting the Point.
Contents
Tips for the Traveler ...........................................6-2
What to Take When Traveling.............................6-4
Packing the Computer and Accessories ..............6-5
Using a Mouse ...................................................6-6
Using an External Keyboard...............................6-7
Adjusting Pointer Speed ....................................6-8
6-1
Tips for the Traveler
Tips for the Traveler
Your TravelMate Computer is a precision
instrument containing many sensitive
components. It should be handled with care.
Here are some suggestions for traveling:
6-2
❑
Never expose the computer to excessive
vibration.
❑
Do not check the computer as baggage;
take the computer as carry-on luggage if
traveling by air.
❑
Do not put the computer through a security
X-ray machine or a metal detector; have the
computer inspected by hand. Be sure the
computer is loaded with a charged battery
in case airport security requires you to turn
on the computer.
❑
If you are traveling internationally, carry a
proof of purchase with you in case you
need to show it to customs officials.
❑
Avoid placing the computer where it can be
stepped on or knocked around.
❑
Disconnect all peripherals before packing
the computer.
❑
Transport the computer with the display
closed and the power off.
Tips for the Traveler
❑
Changes in temperature and humidity can
cause condensation. Allow the computer to
return to room temperature, and inspect
the LCD for condensation before turning on
the computer. If the temperature change is
greater than 18° F (10° C), allow the
computer to come to room temperature
slowly. If possible, leave the computer for
30 minutes in an environment with a
temperature between outside and room
temperatures.
❑
Always carry the computer in a protective
case.
Cautions:
c
When packing the computer, do not pack items
next to its top cover. Too much pressure
against the top cover can damage the LCD.
Do not travel with a floppy in the floppy drive.
This can damage the drive head.
6-3
What to Take When Traveling
What to Take When Traveling
If you plan to use your computer when traveling,
you should consider taking the following items:
❑
❑
❑
❑
❑
❑
❑
❑
6-4
This manual
AC Adapter
Power cords and adapters for the AC
Adapter and peripherals appropriate for the
countries to which you will be traveling
Fully-charged spare Battery Pack
Optional battery charger and accompanying
AC adapters and power cords
System Files Recovery diskette
Backup diskettes (see Chapter 1).
Additional printer driver files if you plan to
use another printer
❑
Quick Reference Cards for the programs
you will be using
❑
You can order MS-DOS, Windows, and
other essential programs by filling out the
fulfillment card provided by Phoenix that
came with your notebook.
Packing the Computer
and Accessories
1. Turn off the computer. Disconnect the AC
Adapter from the computer and from the AC
outlet.
2. Close and latch the display.
3. Tie up cables using twist ties or rubber bands.
4. Enclose peripherals in plastic bags.
5. Place computer, peripherals, documentation,
and floppies in a carrying case. If you do not
have a carrying case, put the computer in a
briefcase you plan to carry and the other
supplies in luggage you plan to check.
6-5
Using a Mouse
Using a Mouse
Although TravelMate 5000 Series computers
come with a pointing device already installed,
you may use an external PS/2 or serial mouse.
1. Turn off the computer.
n
Note: If you connect the mouse to the computer
while power is on, press Ctrl-Alt-Del (warm start), or
cycle power so the computer can detect the presence
of the mouse.
2. Attach the six-pin Mini-Din connector to the
PS/2 connector on the left side of the
computer or connect the serial mouse to the
9-pin serial port on the back of the notebook.
If desired, you may also use a serial infrared
mouse.
3. Reconnect the AC Adapter, and turn on the
computer.
6-6
Using an External Keyboard
Using an External Keyboard
If desired, you may connect any IBM-compatible
external PS/2 keyboard. If you are using a 101
keyboard, a 101 to PS/2 adapter must first be
purchased. To connect the keyboard, complete
the following steps:
1. Turn off the computer.
n
Note: If you connect the PS/2 keyboard to the
computer while power is on, press Ctrl-Alt-Del
(warm start), or cycle power so the computer can
detect the presence of the keyboard.
2. Attach the six-pin Mini-Din connector to the
Keyboard/Mouse connector on the left side of
the TM5000.
3. Reconnect the AC Adapter, and turn on the
computer.
6-7
Adjusting Pointer Speed
Adjusting Pointer Speed
You can also adjust the pointer speed and button
sensitivity, which is the time the pointer image
reacts to your manual commands.
❑
❑
Within Windows, select IntelliPoint Controls
from the IntelliPoint group. Adjust the
settings to customize the pointer speed.
For non-Windows applications, use the
MS-DOS MOUSE program to set the speed.
6-8
7
Care and Troubleshooting
This chapter tells you how to clean your
computer safely and solve operational problems.
Contents
Cleaning the Computer ......................................7-2
Troubleshooting Tips .........................................7-3
Startup Error Messages......................................7-4
Recovering from a Configuration Loss.................7-6
7-1
Cleaning the Computer
Cleaning the Computer
Regularly take the time to check your computer
and clean the screen, keyboard, and case to
ensure trouble-free computing.
c
Caution: Never use alcohol, benzine, thinner, or
other strong chemical agents that could
damage the computer’s case, and never apply
liquid directly to the computer, only to a clean
cloth. Never spray cleaning fluid or any liquid
directly onto the case or screen.
Keep the case of the computer free of dust. Apply
a small amount of mild liquid cleaner to a dry,
lint-free cloth, and wipe the case with the cloth.
The surface of the screen is covered with a
protective plastic film that may become smeared
and accumulate dust during use. Avoid touching
the screen with your fingers.
Clean the screen regularly by applying a small
amount of a diluted neutral detergent to a dry,
lint-free cloth. Gently rub the surface of the
screen with the cloth.
7-2
Troubleshooting Tips
Troubleshooting Tips
Computer does not
come on when
power switch is in
the On position
Low battery; use AC Adapter and
recharge battery.
Ensure AC Adapter cable and power
cord are securely connected.
Connect AC Adapter to another outlet.
Eject batteries. Unplug the AC. Then,
plug AC back in and insert batteries.
Computer power is
on but screen is
blank
Adjust contrast switch.
Adjust brightness switch
Press any key to take the computer out
of Suspend or Standby mode.
Computer set for external monitor; cycle
power or use VGA/LCD command.
Special functions
(Setup, Alt-Ctrl-Esc,
Alt-Ctrl-↓, etc.) do
not work
Application is overriding computer BIOS
interrupts; notify your application
provider.
Computer model does not support
special function, for example, some
models do not support Alt-Ctrl-↓.
Computer
indicates an error
at start-up
Turn the computer off; wait several
seconds; then turn the computer on
again. If error persists, check list of
error messages for corrective action.
Press Ctrl-Alt-ESC to ensure all settings
are correct.
Feedback
When recording using the internal
microphone, select Mute within Pocket
Mixer prior to recording to eliminate
feedback from the internal speaker.
7-3
Startup Error Messages
Startup Error Messages
Diskette drive 0
failure
Press Ctrl-Alt-Esc to ensure that the
drive type is set correctly in Setup
(should be 3.5 inch, 1.44 MB).
Diskette read
failure - press F1 to
retry boot
Floppy defective or unformatted; insert a
different floppy and press F1.
Fixed disk failure
Turn the computer off; wait several
seconds; then turn the computer on
again.
Press Ctrl-Alt-Esc to ensure hard disk
type is correct in Setup (should be the
default for the internal hard disk).
Fixed disk read
failure - press F1 to
retry boot
Press Ctrl-Alt-Esc to ensure hard disk
type is correct in Setup (should be the
default for the internal hard disk).
Invalid
Configuration
Information
Defaults in Setup may have changed.
Enter Setup and press Esc-F5 to reset
defaults. Then press Esc-F4 to save
and reboot.
Battery that maintains configuration
has failed; follow procedure in this
chapter to restore configuration.
Keyboard
clock/data line
failure
Ensure external keyboard connected
correctly.
Replace external keyboard.
Keyboard stuck
key failure
Press jammed key to unstick it
Ensure no keys pressed during
computer startup.
Missing operating
system
7-4
Press Ctrl-Alt-Esc to ensure the hard
disk is defined correctly in Setup.
Reboot using the System Files Recovery
diskette.
Startup Error Messages
No boot device
available - press F1
to retry boot
Press F1 to try loading MS-DOS again.
Replace the floppy if you are loading
MS-DOS from a floppy.
Press Ctrl-Alt-Esc to ensure that the
drive type is set correctly in Setup.
No boot sector on
fixed disk - Press F1
to retry boot
Press F1 to try loading MS-DOS from the
hard disk again.
Load MS-DOS from a floppy, and try to
display a directory of drive C. If you
cannot display a directory, the hard disk
may need to be reformatted.
c
Caution: Reformatting erases all of the
data on the hard disk. Reformat your
hard disk only as a last resort.
Non-System disk or
disk error. Replace
and press any key
when ready
Eject floppy from floppy drive, and press
a key to load MS-DOS from the hard disk.
Insert a floppy containing MS-DOS in the
floppy drive, and press a key.
Press Ctrl-Alt-Esc to ensure that the
drive type is set correctly in Setup.
Time-of-day not set
The battery sustaining the system
configuration has failed. Follow the
procedure in this chapter to restore the
configuration.
7-5
Recovering from
a Configuration Loss
In the unlikely event that the battery sustaining
the configuration memory becomes depleted or
for any other reason the configuration memory
becomes corrupted, you must restore the
configuration to restore operations.
1. Turn on the computer. A message similar to the
following appears:
Invalid Configuration Information
- Press Enter to run SET_UP
- Press the F1 key to continue
2. Press Enter. The first Setup screen appears.
3. Press Esc then F5 to set the configuration to
its default values.
4. Check the date and time, and change them if
they are wrong.
5. Press Esc then F4 to save your settings and
restart the computer.
The computer can now operate, but you may
need to make a few more changes to return the
configuration to its previous values:
❑
❑
7-6
Modifying power-savings settings
Defining the startup condition of the
keyboard and screen
Recovering from
a Configuration Loss
❑
Defining how the serial ports communicate
To make these additional changes, you can:
❑
Press Fn-Esc (Setup) to run the DOS-based
Setup program
❑
Click on the TI Setup icon in Windows to
run Windows-based Setup
❑
Restore a saved configuration using the
SETCMOS utility
Hints
Install a fully charged Battery Pack, or leave the
AC Adapter connected to the computer for at
least 48 hours to fully charge the battery that
sustains the configuration memory.
Use the SETCMOS utility to save time when
restoring the configuration. When your computer
is configured the way you want, save the
configuration in a file. If you should need to
restore the system, you can do so easily with a
single command. Refer to the online User’s
Reference Guide or type NBHELP at the DOS
prompt for instructions on SETCMOS.
7-7
A
Where To Get Help
Texas Instruments and your Texas Instruments authorized
reseller want you to succeed with your TI product. If you are
in the United States or Canada and have questions about or
operating difficulties with your TI product, follow these
steps to get support. If you are outside the United States or
Canada, contact one of the numbers listed in the back of
this appendix.
1.
Call your dealer.
Your dealer should be the first person you call when you
have questions or difficulties. Your dealer is familiar with
your system requirements and should be able to provide
you with the needed information or service.
2.
Call the appropriate TI number.
Customer Satisfaction Line
1-800-TI-TEXAS
(FAX 817-774-6660)
(TDD 817-774-6582)
Call the TI Customer Satisfaction Line (CSL) with service,
warranty, service contracts, or product support questions.
Hours of operation are 7:00 am to 10:00 pm Central
Standard Time, Monday through Friday.
Please have the following information available when calling
or faxing:
•
•
•
Name, address, daytime phone number
Product model
Brief description of the symptoms being observed
(include the software application you are using)
A-1
Where To Get Help
Call TI Express to order options
Where To Get Help
In the U.S. and Canada
1-800-TI-TEXAS
FAX: 1-800-443-2984
For all other locations, dial direct:
1-817-774-6969
FAX: 1-817-774-6869
TI Express hours of operation are 8:00 am to 6:00 pm
Central Standard Time, Monday through Friday.
For information about other
TI products, call the Customer
Response Line
In the U.S. and Canada
1-800-336-5236
For all other locations
1-214-995-6611
If you have a question about any other TI product, the
Customer Response Center can put you in touch with the
right person.
A-2
Worldwide Sales Offices
Australia Texas Instruments
Australia Ltd.
Canada Texas Instruments
Incorporated
6-10 Talavera Road
North Ryde, NSW 2113
Tel: (02) 878-9000
Fax: (02) 805-1186
41 Shelley Road
Richmond Hill
Ontario L4C 564
Tel: (416) 884-9181
Fax: (416) 770-2285
Royal Domain Centre
14th Floor
380 St. Kilda Road
Melbourne, VIC. 3004
Tel: (03) 696-1211
Fax: (03) 696-4446
Belgique/Belgium S.A. Texas
Instruments Belgium N.V.
11, Avenue Jules Bordetlaan 11,
1140 Bruxelles/Brussel
Tel: (02) 242 30 80
Telex: 61161 TEXBEL
Amsterdamseweg, 204
1182 HL AMSTELVEEN
Tel: (051) 3049292
Fax: (052) 3049360
Brasil Texas Instrumentos
Electronicos Do Brasil Ltda
Av. Eng. Luiz Carlos Berrini
1461, 11And 04571
Sao Paulo
Tel: 55-11-535-5133
Fax: 55-11-533-0544
Danmark Texas Instruments
A/S
Borupvang 2D
DK-2750 Ballerup
Tel: 44 68 74 00
Fax: 44 68 64 00
Deutschland Texas
Instruments Deutschland
GmbH.
Haggertystraße 1
85356 Freising
Tel: (08161) 80 49 57
Fax: (08161) 80 49 58
Eire Texas Instruments
Ireland Ltd
7/8 Harcourt Street
Dublin 2
Tel: 01 781677
Worldwide Sales Offices
A-3
Worldwide Sales Offices
Espana Texas Instruments
España S.A.
Hong Kong Texas
Instruments
c/ Gobelas, 43
Urbanización La Florida
Ctra de la Coruña Km. 14
28023 Madrid
Tel: (1) 207 70 60
Telex: 32634
Hong Kong Ltd.
15/F, Tower 2, The Gateway
25-27 Canton Road
Kowloon, Hong Kong
Tel: (852) 9567288
Fax: (852) 9561078
C/Diputación, 279-3-5
08007 Barcelona
Tel: (3) 317 91 80
Fax: (3) 301 84 61
Telex: 50436
Italia Texas Instruments Italia
S.p.A.
France Texas Instruments
France Produits de
Productivité Personnelle
8-10 Avenue Morane Saulnier,
B.P. 67
78141 Vélizy Villacoublay cedex
Tel: (1) 30 70 11 81
Fax: (1) 30 70 10 78
Holland S.A. Texas
Instruments Belgium B.V.
11, Avenue Jules Bordetlaan 11,
1140 Bruxelles/Brussel
Tel: (02) 242 30 80
Telex: 61161 TEXBEL
Amsterdamseweg, 204
1182 HL Amstelveen
Tel: (051) 3049292
Fax: (052) 3049360
A-4
Centro Direzionale Colleoni
System Division Palazzo
Perseo-Via Paracelso, 12
PPP Division
20041 Agrate Brianza (Mi)
Tel: (039) 6322332
Fax: (039) 652206
Viale Castello della Magliana, 38
00148 Roma
Tel: 06-6572651
Fax: 06-6570447
Korea Texas Instruments
Supply Company Korea
Branch
3rd Floor, Saman Building
678-39, Yuksam-Dong,
Gangnam-Ku,
Seoul, Korea (ZIP Code 135)
Tel: (02) 551 2800
Worldwide Sales Offices
Latin America Region Texas
Instruments
Norge Texas
InstrumentsNorge A/S
P.O. Box 149149, MS 2223
Austin, Texas 78714-9149
U.S.A.
Tel: (512) 250-4051
Fax: (512) 250-7456
PB 106 - Refstad (Sinsenveien 53)
0513 Oslo 5
Tel: (02) 155090
Malaysia Texas Instruments
Malaysia Sdn Bhd - Asia
Pacific Division
100 Jalan Tun Perak
Lot 36-1, Menara Maybank
50050 Kuala Lumpur
Tel: 03-2306001
Fax: 03-2306605
Österreich Texas
Instruments G.m.b.H.
Laxenburgerstraße 52
A-1100 Wien
Tel: 01/604 19 31
Fax: 01/604 19 31 85
Schweiz/Suisse Texas
Instruments (Switzerland)
Mexico Texas Instruments de
Mexico
AG Bernstraße 388
CH-8953 Dietikon
Tel: 01/745 58 32
Fax: 01/742 06 16
S.A. de C.V. Alfonso Reyes
115 Col Hipodromo Condesa
06170 Mexico D.F.
Tel: 525-515-6081
Fax: 525-515-4178
Route de la Chocolatière 3
CH-1026 Echandens-Denges
Tel: 021/701 53 54
Fax: 021/702 24 94
Middle-East and Africa
Texas Instruments Italia S.p.A.
Centro Direzionale Colleoni
System Division Palazzo
Perseo-Via Paracelso, 12
PPP Division
20041 Agrate Brianza (Mi)
Tel: (039) 6322332
Fax: (039) 652206
Singapore Texas Instruments
Singapore (PTE) Ltd.
PPPD-Asia Pacific Region
990, Bendemeer Road,
Singapore 1233
Republic of Singapore
Tel: 65-3907174/65-3907080/
65-3907175/65-3907010
Fax: 65-3907060
A-5
Worldwide Sales Offices
Suomi Finland Texas
Instruments OY
United Kingdom Texas
Instruments Ltd.
Tekniikatie 12
SF-02150
Espoo, Finland
Tel: (90) 435 42033
Fax: (90) 467 323
Manton Lane,
Bedford, England MK41 7PA
Tel: (0234) 270111
Fax: (0234) 223572
Sverige Texas Instruments
International Trade
Corporation
(Sverigefilialen)
Box 30
S-164 93 Kista Isafjordsgatan 7
Tel: (08) 752 58 00
Fax: (08) 751 97 15
Taiwan Texas Instruments
Supply Company Taiwan
Branch
903, 9F, Bank Tower,
205, Tung Hua N. Road
Taipei, Taiwan, R.O.C.
Tel: (02) 713 9311
A-6
United States of America
Texas Instruments
Incorporated
MS 3236
5701 Airport Road
Temple, Texas 76503 U.S.A.
Tel: 817-771-5856
Index
Index
system files recovery ....... 1-3
A
DiskMaker .................. 1-2, 5-7
AC Adapter ............... 1-13, 4-2
Display........................ 1-4, 5-4
AUTOEXEC.BAT ....... 2-16, 5-5
DOS Mixer ....................... 5-12
Batteries...........................4-12
Drop N’ Go ......................... 5-6
charging........................3-13
E
inserting........................3-11
leds ......................... 2-7, 3-9
Eject Buttons
low battery .............. 2-6, 3-4
pcmcia............................ 2-4
removing .......................3-11
battery..................... 2-4, 2-5
saving tips.......................5-6
status.... 2-7, 3-10, 3-14, 5-6
B
BatteryPro APM Help 3-14, 5-6
Battery Tips......................3-14
Brightness ..........................2-3
C
Cache .................................5-5
CAP Lock ............................2-8
Carrying Case...................4-12
CONFIG.SYS.......................5-5
Configuration Loss..............7-6
D
Disk Drives............... 2-12, 7-4
Diskette(s)
backup............................1-2
drive..............................2-12
F
Floppy Disk (see Diskette(s))
G
Games ............................... 5-2
Graphics Accelerator .......... 1-4
H
Hard Disk ..........1-5, 2-12, 2-7
Headphone......................... 4-9
Help ................................... 5-2
BatteryPro APM ..... 3-14, 5-6
MS-DOS ......................... 5-3
TravelMate utilities .. 5-3, 5-8
Windows......................... 5-3
K
Keyboard.....1-4, 2-15, 5-4, 7-4
echo keystrokes ............ 2-16
external .......................... 6-7
led...................................2-8
Index 1
Index
labeled combination
keys............................2-15
Mouse ................................ 5-4
single keys ....................2-15
port ................................ 1-4
unlabeled combination
keys............................2-16
L
Laptop File Manager ...........5-6
LEDs
battery ............................2-7
cap lock ..........................2-8
hard disk ........................2-7
low battery ......................2-6
num lock.........................2-8
power ..............................2-6
IntelliPoint ...................... 5-7
PS/2...................... 4-12, 6-6
MS-DOS.................... 5-3, 5-11
N
Numeric Keypad......................
external ................... 1-4, 4-6
internal ........................ 2-17
Num Lock .......................... 2-8
blinking ........................ 2-18
off ................................. 2-18
on ................................. 2-17
scroll lock........................2-9
O
turbo...............................2-7
OLE ................................. 5-14
M
P
Manuals .............................5-7
Parallel Port .............. 1-4, 2-20
Memory .................... 1-4, 2-14
Password............................ 5-9
add-on ............................4-8
Pause ............................... 2-15
8-mb ...............................4-8
PC-Doctor .......................... 5-7
16-mb .............................4-8
PCI...................1-4, 1-15, 2-20
RAM................................5-5
PCMCIA .............1-4, 2-20, 4-3
video ...............................1-4
card and socket services . 5-2
Microphone
ejecting ........................... 4-5
external...........................4-9
inserting ......................... 4-4
internal .........................2-23
PCMWin ............................. 5-7
MIDI ...................................1-4
Phoenix Card Manager ....... 5-8
Monitors .............................4-7
Playfile ............................. 5-12
2 Index
Index
Pocket
Scroll Lock ......................... 2-9
cd..................................5-15
Serial Port ................. 1-4, 2-20
mixer ............................5-14
Setup
recorder ........................5-13
DOS-based ................... 2-15
Pointing Device ......... 1-5, 2-10
ROM-based................... 2-16
Port(s)...............................2-19
Shutdown .......................... 5-6
covers ...........................1-11
SIR..........1-4, 2-19, 2-20, 4-10
keyboard .........................1-4
Software
mic................................2-22
adjusting ........................ 5-4
mouse .............................1-4
SmartShelf ......................... 5-7
numeric keypad ..............1-4
Sound ................................ 1-4
parallel.................. 1-4, 2-20
16-bit ............................. 1-4
PCI................................2-20
DOS utilities ................. 5-11
pcmcia ..........................2-20
in.................................. 2-21
PS/2 ..................... 2-22, 4-6
out................................ 2-21
serial..................... 1-4, 2-20
using ............................ 5-11
SIR............... 1-4, 2-20, 4-10
utilities ........................... 5-2
sound............................2-21
volume.......................... 2-11
VGA ..............................2-20
Speaker...................................
Power ......................................
in ..................................2-21
leds .................................2-6
internal ........................ 2-23
Speed
CPU .......2-16, 3-4, 3-15, 5-5
savings............................5-2
pointer............................ 6-8
switch .............................2-2
Standby .............1-9, 2-15, 3-8
Printer ..............................4-13
Suspend......1-9, 2-15, 3-5, 3-8
R
Sysedit ............................... 5-8
Recfile...............................5-12
System
cleaning.......................... 7-2
S
environment ................... 1-4
Safety Ring .......................1-10
files recovery diskette...... 1-3
Index 3
Index
maintenance and
backup .........................1-2
V
packing ...........................6-5
VGA .......................... 2-20, 5-2
service............................ A-1
Video.................................. 1-4
starting ...........................2-2
Volume.................... 2-11, 2-16
startup error messages....7-4
W
traveling with ..................6-2
WinDith ............................. 5-7
troubleshooting ...............7-3
usage ..............................1-7
System Files Recovery
Diskette ...........................1-3
T
TranXit..................... 4-11, 5-8
4 Index
Windows
help ......................... 5-2, 5-3
sound utilities............... 5-13
Windows for Workgroups5-2
WinMode ............................ 5-7