Download Ithaca POSjet InkJet Printer
Transcript
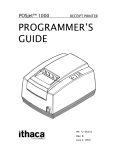
POSjet™ 1000
RECEIPT PRINTER
REV A
March 2000
WARNING:
To prevent fire or shock hazard, do not
expose this printer to rain or moisture.
Disclaimer
Information in this publication is subject to change without notice. However, as product
improvements become available, TransAct Technologies Incorporated will make every
effort to provide updated information for the products described in this publication.
TransAct cannot guarantee that changes in software and equipment made by other
manufacturers, and referred to in this publication, do not affect the applicability of
the information in this publication.
Copyright
© 2000 TransAct Technologies Inc.
All rights reserved.
Revision A
Printed in USA.
No part of this publication may be reproduced, stored in a retrieval system, or transmitted,
in any form or by any means, mechanical, photocopying, recording, or otherwise, without
the prior written permission of TransAct Technologies Inc.
Trademarks
Ithaca and PcOS are registered trademarks of TransAct Technologies Inc. Epson is a registered
trademark of Seiko Epson Corporation. Axiohm is a registered trademark of Dardell Technologies.
IBM is a registered trademark of the International Business Machines Corporation. HP is a registered
trademark of the Hewlett Packard Company. Patents Pending.
Federal Communications Commission
Radio Frequency Interference Statement
The POSjet™ 1000 Printer complies with the limits for a Class A computing device in accordance
with the specifications in Part 15 of FCC rules. These regulations are designed to minimize radio
frequency interference during installation; however, there is no guarantee that radio or television
interference will not occur during any particular installation. Interference can be determined
by turning the equipment off and on while the radio or television is on. If the printer causes
interference to radio or television reception, try to correct the interference by one or more
of the following measures:
•
Reorient the radio or television receiving antenna
•
Relocate the printer with respect to the receiver
•
Plug the printer and receiver into different circuits
If necessary, the user should consult their dealer or an experienced radio/television technician
for additional suggestions. The user may find the following booklet prepared by the Federal
Communications Commission helpful: How to Identify and Resolve Radio/TV Interference
Problems.
This booklet is available from the US Government Printing Office, Washington, DC 20402.
Ask for stock number 004-000-00345-4.
Canadian Department of Communications Radio Interference Statement
The POSjet 1000 Printer does not exceed Class A limits for radio noise emissions from
digital apparatus set out in the Radio Interference Regulations of the Canadian Department
of Communications.
UL, C-UL, TUV, CE Statement
TransAct’s POSjet 1000 Printers are UL and C-UL Listed, TUV Certified, and carry the CE Mark.
i
Table of Contents
Rev A
TABLE OF CONTENTS
ABOUT THE POSjet™1000 PRINTER
1
About this Operator’s Guide.................................................................... 1
Who should read this book? .....................................................................................1
What is covered in this book? ..................................................................................1
Where can you find more information?.....................................................................2
Contacting TransAct’s Ithaca Facility ..................................................... 2
Warranty Information.............................................................................. 3
Options....................................................................................................................3
Shipping Printers.....................................................................................................3
Service Information .................................................................................................3
Ordering Supplies .................................................................................... 4
Paper.......................................................................................................................4
Ink Cartridges..........................................................................................................5
Cables .....................................................................................................................5
Description of the POSjet™ 1000 Printer ................................................. 6
Standard Features ....................................................................................................7
Optional Features ....................................................................................................8
Reliability ...............................................................................................................8
SETTING UP THE PRINTER
9
Unpacking the Printer ............................................................................ 10
Check that All Items are Present ............................................................................11
Choosing a Location for the Printer....................................................... 11
Dimensions ...........................................................................................................12
ii
Ithaca POSjet™ 1000 Operator’s Guide
REV A
Weight ..................................................................................................................12
Environmental Conditions .....................................................................................13
Connecting the AC Power Cord............................................................. 14
Connecting the DC Power Source.......................................................... 15
Using the Cable Strain Restraints .......................................................... 15
Installing New Ink Cartridge(s) ............................................................. 16
Using Ink Cartridges..............................................................................................17
Care of Ink Cartridges............................................................................................17
Loading Paper ........................................................................................ 18
Installing a New Paper Roll Insta-Load™ .............................................................18
Operating the Keypad............................................................................ 19
Indicator Lights .....................................................................................................19
Buttons..................................................................................................................21
Testing the Printer.................................................................................. 23
Placing the Printer In Self-test Mode......................................................................24
Test Options ..........................................................................................................25
Exiting Self-Test Mode..........................................................................................25
Connecting the Cables............................................................................ 26
Connecting the Communication Cable ...................................................................26
Cash Drawer Drivers ............................................................................. 27
Connecting the Cash Drawer Cables ......................................................................27
Setup Checklist....................................................................................... 28
TROUBLESHOOTING
29
General Maintenance Procedures .......................................................... 30
Cleaning The Printer .............................................................................................30
Correcting Common Problems............................................................... 30
Missing Dots In Characters....................................................................................30
Ink Cartridge Status............................................................................... 31
Determining Ink Cartridge Status...........................................................................31
Understanding Fault Indicators Primary Fault Indicator Light .............................32
Rev A
APPENDIX
Table of Contents
iii
34
Serial Cable ............................................................................................ 34
Cable Requirements ..............................................................................................34
RS-232C Communication ......................................................................................34
Pin Assignments for Serial Printer Connector.........................................................35
Pin Assignments for Parallel Printer Connector......................................................35
Pin Assignments for Cash Drawer Connector .........................................................36
Serial Cable Configurations ...................................................................................37
Parallel Cable ......................................................................................... 39
Cable Requirements ..............................................................................................39
Pin Assignments ....................................................................................................39
INDEX
41
iv
Ithaca POSjet™ 1000 Operator’s Guide
REV A
About the POSjet™ 1000 Printer
REV A
1
ABOUT THE POSjet™1000
PRINTER
ABOUT THIS OPERATOR’S GUIDE
WHO SHOULD READ THIS BOOK?
This book is intended for new and experienced operators. If you are
going to set up, use, or maintain a POSjet™ 1000 Printer with any
point-of-sale system, then this book will assist you.
WHAT IS COVERED IN THIS BOOK?
This book only covers the POSjet™ 1000 Printer, not the entire point-of-sale
system, but it will tell you all you need to know about using the printer properly.
You will learn what supplies you need to order, how to set up
and test the printer, and how to do the common tasks listed here:
•
Change paper
•
Change the ink cartridge
•
Correct common problems
•
Clean the printer
This book also provides some general and technical information about the
printer, so you will know what its features are, how reliable it is, and what
its printing capabilities are.
2
Ithaca POSjet™ 1000 Operator’s Guide
REV A
WHERE CAN YOU FIND MORE INFORMATION?
A Programmer’s Guide is available if you need to know how to program
a point-of-sale terminal or a personal computer to work with the printer.
It describes the commands the printer recognizes to perform its functions.
A Maintenance Manual is also available. It shows how to repair the POSjet™
1000 Printer and lists the replacement parts. The Maintenance Manual is
intended for trained, service technicians.
CONTACTING TRANSACT’S ITHACA FACILITY
Contact TransAct’s Ithaca facility for general information about the
POSjet™ 1000 Printer and how it works with your system. The Sales and
Technical Support Departments will be able to help you with most of your
questions. Call the Technical Support Department to receive technical support;
order documentation; receive additional information about the POSjet™ 1000;
or send in a printer for service. To order supplies; receive information about
other Ithaca products; or obtain information about your warranty, contact the
Sales Department. To receive information on International distribution, look on
our web site at www.transact-tech.com
You may reach both the Sales and Technical Support Departments
at the following address and telephone or fax numbers:
TransAct Technologies Incorporated
Ithaca Facility
20 Bomax Drive
Ithaca, NY 14850 USA
Telephone
Main fax
Sales fax
Technical Support fax
Web site
(877) 7ithaca or (607) 257-8901
(607) 257-8922
(607) 257-3868
(607) 257-3911
http://www.transact-tech.com
About the POSjet™ 1000 Printer
REV A
3
WARRANTY INFORMATION
OPTIONS
TransAct’s POSjet™ 1000 Printers come with a standard 24-month warranty
covering both parts and labor that commences upon shipment from factory.
An optional warranty, covering both parts and labor for an additional 12
months, may be purchased separately.
For more information concerning the warranty options, please contact the
Sales Department at TransAct’s Ithaca facility. See “Contacting
TransAct’s Ithaca Facility” on page 2.
SHIPPING PRINTERS
Never ship a printer by any means with a print cartridge installed.
The pressure variations can cause the cartridge to become unprimed
and/or purge. If you are going to ship a printer, remove and discard the
print cartridge or cartridges.
SERVICE INFORMATION
TransAct has a full service organization to meet your printer service and
repair requirements. If your printer needs service, please directly contact the
Technical Support Department for a return authorization. See “Contacting
TransAct’s Ithaca Facility” on page 2.
TransAct offers the following service programs to meet your needs:
•
•
•
•
Extended Warranties
Depot Repairs
Maintenance Contracts
Internet Support
4
Ithaca POSjet™ 1000 Operator’s Guide
REV A
ORDERING SUPPLIES
Your POSjet supplies can be ordered easily direct from TransAct via our
website (www.transact-tech.com) or our telephone number (within the US toll
free: (877) 7ithaca). (other inquires: (607) 257-8901). When calling by phone,
please ask for the Sales Department. See “Contacting TransAct’s Ithaca
Facility” on page 2 for more details.
The following items may be ordered:
•
Receipt paper
•
Ink cartridges
•
Cables
PAPER
Receipt Paper
Type
Dimensions
Stock
Number
1 Roll
Large
single-ply
Width:
Diameter:
Length:
Thickness:
3.0 inches (76 mm)
4.0 inches (102 mm)
330 feet (100 m)
0.003-0.0035 inches
(0.076-0.089 mm)
98-02021
25 Roll Case
25 rolls
single-ply
Width:
Diameter:
Length:
Thickness:
3.0 inches (76 mm)
4.0 inches (102 mm)
330 feet (100 m)
0.003-0.0035 inches
(0.076-0.089 mm)
98-02022
About the POSjet™ 1000 Printer
REV A
INK CARTRIDGES
3 Pack Cartridges
Supplier
Stock Number
3 Pack Black
Transact’s Ithaca Facility
100-02347
3 Pack Red
Transact’s Ithaca Facility
100-02349
6 Pack Cartridges
Supplier
Stock Number
6 Pack Black
Transact’s Ithaca Facility
100-02348
6 Pack Red
Transact’s Ithaca Facility
100-02350
New Ink Cartridges can be ordered from HP at www.hp-pos.com
CABLES
Cables
Stock Number
110V Power Cable (USA)
98-02174
220V Power Cable (Australia)
98-02178
230V Power Cable (International)
98-02175
230V Power Cable (IND/South Africa)
98-02179
240V Power Cable (UK)
98-02176
Parallel Communication Cable
25 PIN Parallel Cable (Straight thru)
36 PIN Parallel Cable (Centronics type)
253-9800007
253-9800002
Serial Communication Cable
PC, 9-pin Female to 9-pin Female
PC, 9-pin Female to 25-pin Female
10-2020
10-2021
Domestic and International power cables available.
Call for more information.
5
6
Ithaca POSjet™ 1000 Operator’s Guide
REV A
DESCRIPTION OF THE POSjet™ 1000 PRINTER
Model PJ1000 Inkjet Receipt Printer
The POSjet™ 1000 printer is a stand-alone,
40 column, high-speed inkjet receipt printer.
About the POSjet™ 1000 Printer
REV A
STANDARD FEATURES
The following features are common to the
entire POSjet™ 1000 family of printers.
•
Up to 12 lines per second at 10 characters per line
•
5.0 inches per second paper slew speed
•
2.5-inch print zone
•
One color printing
•
Latch-in ink cartridge
•
Dual cash drawer drivers with status (Single Modular)
•
Centronics parallel or serial RS-232C interface
•
Configurable receiver buffer
•
Custom logo graphic print buffer
in nonvolatile memory
•
Insta-Load™ paper loading capability
•
PowerPocket™ (External power supply
that can be housed inside printer)
•
Self diagnostics
•
Set up and configuration utility program
•
Characters per inch (cpi) selections of 13, 14.8, and 17.3
•
Three print fonts - Draft, Large Draft, and Near Letter Quality (NLQ)
•
Selectable printing features of bold, italic, size
scaling and/or rotated (four 90° rotations)
7
8
Ithaca POSjet™ 1000 Operator’s Guide
REV A
OPTIONAL FEATURES
The optional features either replace a standard feature or enhance
the operation of the printer. All optional features are installed at
the factory and must be selected when the printer is ordered.
•
Autocutter (partial cut)
•
Two color printing
•
USB interface
•
Adjustable paper low sensor
•
Kitchen buzzer
•
Mean time between failures: (without cartridge)
30,000 hours
•
Average cartridge life (16 dots/character)
6.0 million characters
96 million drops
•
Autocutter option (partial cut)
1 million cuts
•
Mean time to repair
15 minutes
RELIABILITY
All information based on HP test data.
Setting Up the Printer
Revision A
SETTING UP THE PRINTER
By following the instructions in this chapter, the POSjet™ 1000 Printer
should be ready to hook up to your system in just a few minutes.
Here is a list of what is covered in this chapter:
•
Unpacking the printer
•
Choosing a location for the printer
•
Checking environmental conditions and airflow
•
Connecting the power cord
•
Using the cable strain restraints
•
Installing a new ink cartridge
•
Replacing ink cartridges
•
Loading paper
•
Operating the keypad
•
Buttons
•
Testing the printer
•
Connecting the communication
and cash drawer cables
9
10 Ithaca POSjet™ 1000 Operator’s Guide
REV A
UNPACKING THE PRINTER
Before removing the printer, examine
the outside of the box for signs of
damage. If any damage has occurred
to the box, carefully examine the
printer and accessories before
setting up the printer. Report all
evidence of damage or abuse to
your dealer and shipper.
Be sure to save the
box and packing
materials in case
you need to send
the printer in for
service. Transact
Technologies is
not responsible
for damaged return
items that are not
packaged in original
shipping material.
1. Open the box.
2. Carefully lift the printer out of box.
Set it on a sturdy, flat surface.
3. Separate the printer from the packing material.
Simply reverse these steps if you need to
repack the printer to send in for service.
(You will not need to repack the supplies).
4. Check the printer for any signs of damage.
If the printer or any parts are damaged,
report it to your dealer and shipper immediately.
Setting Up the Printer 11
Revision A
CHECK THAT ALL ITEMS ARE PRESENT
The following items are packed in the box and supplies envelope.
If any items are missing, contact your dealer, or if you purchased the
printer directly from TransAct, contact the Sales Department. Please
refer to “Contacting TransAct’s Ithaca Facility” on page 2.
•
Printer
•
AC power cord (with optional power supply)
•
Ink cartridge(s)
•
Paper roll (located under the paper cover)
•
PowerPocket™ power supply unit (if ordered)
CHOOSING A LOCATION FOR THE PRINTER
The POSjet™ 1000 Printer is designed to be placed on point-of-sale terminals,
counter tops, or any other flat, stable surface that can support
the weight of the printer (about 6 pounds or 2.7 kg). Please refer to the
dimensions when selecting the best possible location. Be aware that the
environmental conditions of the location where you place the printer will have
an affect on the printer’s performance and longevity. Generally,
the environment in any store is suitable for operating the printer.
12 Ithaca POSjet™ 1000 Operator’s Guide
REV A
DIMENSIONS
D
W
H
Max Dimensions
inches
millimeters
Without Knife
With Knife
W
D
H
W
D
H
6.75”
9.75”
5.34”
6.75”
9.75”
5.81”
171.45
247.65
135.64
171.45
247.65
147.57
WEIGHT
Approximate weight
6 lbs (2.7 kg)
Shipping weight
8 lbs (3.6 kg)
Setting Up the Printer 13
Revision A
ENVIRONMENTAL CONDITIONS
The printer will run its best when stored and operated in an environment
that meets the following temperature and humidity conditions:
Temperature
Operating: 0° to 40°C
Extended operating: 0° to 45°C
Storage: -10° to 60°C *
Shipping: -40° to 70°C *
Relative Humidity
Operating: 10% to 90% (noncondensing)
Storage: 10% to 90% (noncondensing)
Shipping: 5% to 90% (noncondensing)
* Exposure to high or low temperatures for periods of greater
than 48 hours will lead to significantly reduced cartridge life.
14 Ithaca POSjet™ 1000 Operator’s Guide
REV A
CONNECTING THE AC POWER CORD
(with optional power supply)
1. Locate the power cord and connect it to the power socket
located on the back of the printer and the external AC power.
2. Route power cord as shown in above diagram so that the
cord restraints will protect against accidental unplugging
of the printer.
3. Turn on the printer (if not on already).
Note: The printer takes about 1.5 seconds to begin operation.
TransAct recommends that the printer should not be
removed from its power source without first turning
the printer off. Use the power button located on the
front of the printer cabinet to turn the printer off.
Setting Up the Printer 15
Revision A
CONNECTING THE DC POWER SOURCE
(external)
1. With printer upside-down,
route the cord through the
right strain relief.
2. Look for the plug in receptor
on the side of the power
source compartment. Attach
the power cord to the printer
using this receptor.
USING THE CABLE STRAIN RESTRAINTS
Cable strain restraints have been developed to protect against
accidental unplugging of the printer while it is in use.
Be sure to properly route the communications cable using
the restraints provided on the back of the printer.
16 Ithaca POSjet™ 1000 Operator’s Guide
REV A
INSTALLING NEW INK CARTRIDGE(S)
Note:
Be sure to turn on the printer before attempting
to install or replace ink cartridges.
1.
Remove new ink cartridge from sealed pouch.
1
(Hold cartridge by round plastic tab
to avoid contamination.)
2. Remove Mylar tape from face of new cartridge.
2
Caution:
Do not touch ink
cartridge’s metallic
connector surface
with your fingers.
Doing so will
contaminate the
connector and
produce bad
print quality.
3
3. Open front cover of printer (Opening
front cover automatically opens paper
cover at the same time).
4. Pull down blue cartridge latch/latches.
5.
Take out old ink cartridge(s). Place
new cartridge(s) into carriage. Hold
plastic tab to ensure clean installation.
Black cartridges go into left carriage.
Color cartridges go into right carriage.
(tab faces to front of printer.)
6. Close blue latch/latches.
7. Close front cover of printer.
Note: If you are installing the printer, an ink
cartridge or cartridges can be found in the
pouch that shipped with your printer.
4
5a-remove
5b-replace with
old cartridge
new cartridge
6
Revision A
Setting Up the Printer 17
USING INK CARTRIDGES
If a single cartridge printer is configured for dual operation, the printer
will not function if the second cartridge is not installed.
If a dual cartridge printer is configured for black-only operation, the dual
wiper mechanism will not function. If only a single cartridge is installed in
a dual cartridge carriage, the printer must be configured "Black - None".
It is not possible to configure the printer to operate with two black cartridges.
If a second black cartridge is installed, the printer will not maintain it, and the
cartridge will dry out and become unusable.
Do not store a spare cartridge in the second position. To place a cartridge in
the second position, it must be unsealed. However, once the seal is broken,
the cartridge begins drying.
CARE OF INK CARTRIDGES
Print cartridges should be stored in the sealed HP packaging. Once a print
cartridge is unsealed, it should be placed in an operating printer. If a printer is
taken out of service, the print cartridge should be removed and discarded.
18 Ithaca POSjet™ 1000 Operator’s Guide
REV A
LOADING PAPER
INSTALLING A NEW PAPER ROLL Insta-Load™
Before you attempt to load the
paper roll make sure that the printer
is plugged in and that the power
indicator light is green.
1
Note: If this is a new installation,
a small receipt roll is supplied
with the printer.
1. Open front cover of printer. Opening the
front cover will automatically open the rear
cover to the paper roll compartment.
2
2. Insert the new paper roll so that the paper
unwinds from the bottom and rests on the top
of the front cover. (Make sure paper is to the
top front edge of the front cover.)
This is done to give the printer enough
room to complete the automatic loading
process and prepare for operation.
3. Close the rear paper roll compartment cover.
The printer will automatically load the paper
through the feeding mechanism.
If the paper does not feed, repeat the steps.
3
Setting Up the Printer 19
Revision A
OPERATING THE KEYPAD
The keypad contains two buttons and five (LED) indicator lights.
Take a few minutes to become familiar with the keypad, so you
will be prepared if something unexpected happens.
INDICATOR LIGHTS
The five (LED)
indicator lights are:
Power
Error
Paper
Left cartridge
Right cartridge
Power Indicator Light (LED)
The power indicator light becomes active when the printer is in operation
mode. If the power indicator light blinks in conjunction with the error
indicator, the printer is experiencing some type of non-recoverable error.
Error Indicator Light (LED)
The error indicator light becomes active when the printer is experiencing some
type of error. If the power indicator is lit (not blinking), the error is generally
recoverable without data loss. If the power indicator is blinking,
a non-recoverable error has occurred. Refer to the Troubleshooting section
for description of error codes. If the error is not operator recoverable,
a power cycle may correct the problem. If a power cycle does not correct
the fault, the printer will have to be serviced.
20 Ithaca POSjet™ 1000 Operator’s Guide
REV A
Paper Indicator Light (LED)
The paper indicator light signals the paper status. If the printer is equipped
with a paper low option, the paper indicator will blink when the paper
is low. The low sensor is adjustable, and the amount of paper remaining
is dependent on the adjustment.
If the paper indicator is lit with the error indicator, the printer is
out of paper. The printer will stop printing and wait for the paper
to be changed.
Cartridge Indicator Lights (LED)
The printer has two print cartridge indicators that signal the print cartridge
status. The right indicator is for the right cartridge and the left indicator
for the left cartridge. If the printer is a single color printer, the left cartridge
indicator will be used. In most cases, the left cartridge is black, and the
right is a highlight color.
Cartridge low on ink (1 blink, pause) ________________________
Cartridge removed (Blinking, error)
__________________
Note: If both cartridges are low, the NEW CARTRIDGE button only needs
to be pressed once; however, both cartridges must be changed. For more
information on how the indicator lights work with the New Cartridge
button, refer to “Buttons” on page 21.
Setting Up the Printer 21
Revision A
BUTTONS
Power Button
Use the Power Button to
turn the printer on and off.
TransAct strongly recommends that
the printer should always remain
connected to a power source.
When the printer is turned on the power indicator light will change
to green. The operational state of the POSjet™ can be determined
by looking at the power indicator light (LED).
Line Feed Button
The Line Feed button will feed one line of paper if
pressed momentarily or slew paper if pressed and held.
New Cartridge Button
The New Cartridge button has been designed to work with the left
and right Cartridge Indicator Lights (LED), in a way that allows an
operator to monitor and replace cartridge(s) as ink levels become low.
Operator’s will receive input from the indicator lights and will then
use the New Cartridge button to communicate ink cartridge changes
to the printer.
Although the New Cartridge button functions primarily
as a means for ink cartridge changes, it is also used to
perform a variety of other functions. The following is a
complete listing of the New Cartridge Button’s functions:
22 Ithaca POSjet™ 1000 Operator’s Guide
REV A
New Cartridge Button’s functions
TransAct does not recommend replacing a spent
cartridge with anything but a new ink cartridge that
is approved and compatible with the POSjet 1000.
•
Removes Ink Low Warnings after New Ink Cartridge Installation
As ink is used from the cartridge(s) it is monitored by the printer.
When ink is low, the indicator lights for the left or right cartridge
will change to an orange color. These indicator lights have been
programmed to continue to blink until you have installed a new
ink cartridge and pushed the New Cartridge button.
- After replacing the low cartridge(s) with new cartridge(s),
pressing the New Cartridge button will remove the ink low
warning light on the indicators.
- Pressing the New Cartridge button without changing the cartridge
will not remove the ink low warning but will still print the ink status.
- If a cartridge is replaced with a used cartridge, the New Cartridge
button SHOULD NOT BE PRESSED. The cartridge low indicator
will continue to be displayed until a new (full) cartridge is installed
and the New Cartridge button is pressed. If the New Cartridge
button is pressed with a used cartridge in place, the printer will
reset the ink level counter. Due to undetermined ink levels in the
used cartridge, the printer’s counter will not be able to define the
amount that the cartridge is actually holding.
•
Prints Ink Cartridge Status
Pressing and releasing the New Cartridge button at any time
will make the POSjet printout each cartridge’s ink level status.
•
Places Printer in Self-Test Mode
The new Cartridge button may be used to enter the testing
options of the POSjet. The testing process is covered
in more detail on pages 24 and 25.)
•
Changes and Saves Options in Configuration Mode
(The New Cartridge button may be used to select options,
change settings, and navigate through the configuration menu.
Setting Up the Printer 23
Revision A
TESTING THE PRINTER
You can test the printer to ensure that it is running properly. The following
sample displays what a printout of the test will look like. Testing patterns vary
depending on the printer model and the character set selected when
the printer was ordered. Run the test after loading the paper, but before
connecting it to a host system. If the characters do not print properly, or if
ink is smudged on the paper, check to make sure the paper and ink cartridge
are installed correctly. If you are still having problems, refer to
“Troubleshooting” on page 26.
If the printer is still not working correctly after consulting page 26, contact the
Technical Support Department at TransAct. For more information, see
“Contacting TransAct’s Ithaca Facility” on page 2.
24 Ithaca POSjet™ 1000 Operator’s Guide
REV A
PLACING THE PRINTER IN SELF-TEST MODE
1. Load paper (refer to page 17 “Loading Paper”).
2. Unplug the power cord from the back of the printer.
(check to see that the POWER button is turned on.)
3. Press and hold the “NEW CARTRIDGE” button while
plugging the power cord back into the printer. Continue
to hold until the red error indicator light begins to blink.
4. Let go of the “New Cartridge” button.
If the self-test menu is incomplete or does not look at all like the sample,
contact the Technical Support Department at TransAct. Please refer to
“Contacting TransAct’s Ithaca Facility” on page 2.
Current Test
option is displayed.
in this area. Pressing
and holding the
NEW CARTRIDGE
button will allow
you to access
different option
test options.
Be careful not to
hold the button
too long. Doing so
will let you cycle
through the test
options quickly.
This could make it
easy to go too far
down the list of
options.
To actually perform
the desired test, press
and release the NEW
CARTRIDGE button.
Always look in this
area on the receipt
for directions on
how to use the
NEW CARTRIDGE
button to access
the different
testing options.
Setting Up the Printer 25
Revision A
TEST OPTIONS
Test options can be accessed sequentially
by using the “NEW CARTRIDGE” button.
1. Press and hold the “NEW CARTRIDGE” button
until the name of the desired test option prints.
(you are now ready to perform the specific
option that just printed.)
2. To perform the selected test, press and
release the “NEW CARTRIDGE” button.
The following categories are a list of the
tests available on the POSjet™ 1000 printer.
TEST-Receipt
TEST-Graphics
TEST-Print Specs
TEST-Pyramid
TEST-Burnin
TEST-Bar Codes
TEST-Rolling ASCII
EXITING SELF-TEST MODE
You can exit the self-test mode at anytime by
pressing the power button on the front of the printer.
26 Ithaca POSjet™ 1000 Operator’s Guide
REV A
CONNECTING THE CABLES
CONNECTING THE COMMUNICATION CABLE
Depending on the interface your system uses, either connect the serial or
parallel communication cable to the appropriate connector on the back of
the printer. Cables are provided by your dealer or system installer. If cables
are unavailable, contact TransAct. See “Contacting TransAct’s Ithaca
Facility” on page 2.
Serial Cable
1. Turn off the printer and host
system or personal computer.
2. Connect the 9/25-pin serial interface
cable to the connector located on
the back of the printer. Refer to
the Appendix for information on
the serial cable requirements.
3. Tighten the two mounting screws
on each side of the cable connector.
Parallel Cable
1. Turn off the printer and host
system or personal computer.
2. Connect the 25/36-pin parallel
interface cable to the connector located
on the back of the printer. Refer to the
Appendix for information on the
parallel cable requirements.
3. Tighten the two mounting screws
on each side of the cable connector (25
pin only). Or, engage the locking clips
(36 pin only).
Setting Up the Printer 27
Revision A
CASH DRAWER DRIVERS
The POSjet™ 1000 Printer supports dual cash drawers with status.
The cash drawer will be configured for one of three configurations.
CONNECTING THE CASH DRAWER CABLES
1. Turn off the printer.
2. Connect the cash drawer cable to the connector located on the back
of the printer. Adapters are available for connecting cash drawers
equipped with BNC style connectors. The standard is a modular,
telephone style connector. Adapters work only with Ithaca configured
cash drawers.
Additional adapters can be acquired by contacting the Technical
Support Department at TransAct. See “Contacting TransAct’s Ithaca
Facility” on page 2.
28 Ithaca POSjet™ 1000 Operator’s Guide
SETUP CHECKLIST
Did you follow all of the steps to set up the
printer? Here they are again for you to check.
q
Unpacking the printer
q
Choosing a location for the printer
q
Checking environmental conditions and airflow
q
Connecting the power cord
q
Using the cable strain restraints
q
Installing a new ink cartridge
q
Replacing ink cartridges
q
Loading paper
q
Operating the keypad
q
Buttons
q
Testing the printer
q
Connecting the communication
and cash drawer cables
REV A
Operating the Printer 29
TROUBLESHOOTING
After the printer has been setup and connected to a system, it should not
need any further attention with the exception of general maintenance.
However, if you are experiencing problems with your printer, please read
through the following categories for information that will prove helpful in
targeting the exact nature of your problem. If this information fails to assist
you in solving your problems, it will serve as a basic reference when talking
to a TransAct Technical Support Specialist.
General Maintenance Procedures
•
Cleaning the printer
Correcting Common Problems
•
Missing dots in characters
•
Ink Cartridge Status (Ink Low)
•
Understanding fault indicators
•
Error indicator reference chart
30 Ithaca POSjet™ 1000 Operator’s Guide
REV A
GENERAL MAINTENANCE PROCEDURES
CLEANING THE PRINTER
Cleaning the printer occasionally and keeping it well
maintained will help it to last longer and run better.
Apply a common cleaner such as Fantastik® or Formula 409® to a
damp cloth and gently wipe the surface of the printer and keypad.
Caution:
Do not use rubbing alcohol or any other cleaner on the
internal parts of the printer, as some parts may crack or
break. The internal parts of the printer do not require
lubrication or routine maintenance.
CORRECTING COMMON PROBLEMS
MISSING DOTS IN CHARACTERS
If printed characters start to miss dots, press the new cartridge button.
This will start the printer’s automatic ink cartridge cleaning function.
If this does not correct the problem, repeat this process 2-3 more times.
If the characters still appear to be missing dots, replace the ink cartridge.
If, after the new ink cartridge has been installed, the dots still appear to be
missing call a Transact Technical Support Technician. See “Contacting
TransAct’s Ithaca Facility” on page 2.
Operating the Printer 31
INK CARTRIDGE STATUS
Installation Specifics and Recommendations
•
After replacing the low cartridge(s) with new cartridge(s),
pressing the New Cartridge button will remove the ink low
warning light on the indicators.
•
Pressing the New Cartridge button without changing the cartridge
will not remove the ink low warning but will still print the ink status.
•
If a cartridge is replaced with a used cartridge, the New Cartridge
button SHOULD NOT BE PRESSED. The cartridge low indicator
will continue to be displayed until a new (full) cartridge is installed
and the New Cartridge button is pressed.
•
The POSjet is designed to read only full cartridges. Using used
cartridges will negate the printer’s ability to monitor ink consumption
rates effectively. If the New Cartridge button is pressed with a newly
inserted used cartridge in place, the printer will reset the ink level
counter. Due to undetermined ink levelsin the used cartridge, the
printer’s counter will not be able to define the amount that the
cartridge is actually holding.
•
TransAct does not recommend replacing a spent cartridge with
anything but a new ink cartridge that is approved and compatible
with the POSjet 1000. TransAct recommends that used cartridges
be discarded immediately after they are removed from the printer.
Always replace with new ink cartridges.
DETERMINING INK CARTRIDGE STATUS
Light Indicator Sequences:
Use this table to determine
the status of the cartridges.
Keypad Indicator Status
Power
LED
Error
LED
Paper
LED
Left
Cartridge
LED
Right
Cartridge
LED
Right Cartridge Low
ON
OFF
OFF
OFF
1 Blink
Left Cartridge Low
ON
OFF
OFF
1 Blink
OFF
Both Cartridges Low
ON
OFF
OFF
1 Blink
1 Blink
Left Cartridge Removed
ON
ON
OFF
ON
OFF
Right Cartridge Removed
ON
ON
OFF
OFF
ON
32 Ithaca POSjet™ 1000 Operator’s Guide
REV A
UNDERSTANDING FAULT INDICATORS
Primary Fault Indicator Light
The error indicator is the primary fault indicator. It will always
be on or blinking if a fault has occurred. Three types of faults exist:
•
Recoverable faults like paper out or cover open
•
Semi-recoverable faults like head jam
•
Non-recoverable faults like component failure
Indicator blink patterns
The following examples show indicator light blinking patterns.
The table on the next page lists the combination of lights and
blinking patterns used to alert the operator of specific error types.
If (while in normal operation) the power indicator is lit and the error indicator is
blinking, a minor error occurred. The error indicator will indicate the error by
blinking a pattern as follows. Turning the printer off and on by pressing the
power button will restart the printer. If the power indicator blinks and the error
indicator is off, then the printer is being held in RESET by the host.
1 Blink (1 blink, pause)
_________________
_
Recoverable
EXAMPLE:
(paper out/cover open)
2 Blink (2 blinks, pause) ______________
__ _
Semi-recoverable
EXAMPLE:
(head jam)
Non-recoverable Fault
If, (while in normal operation) the power indicator blinks and the
error indicator is lit, then a non-recoverable error has occurred.
3 Blink (3 blinks pause) __________
EXAMPLE:
(component failure)
____
_
Non-recoverable
Operating the Printer 33
ERROR INDICATOR CHART
The following information will assist you in determining specific problems and the respective
error light sequences that have been integrated into the POSjet’s keypad. These error messages
have been built to help you see when the printer needs general maintenance as well as determine
if the problem is one that may produce information loss. This table also displays the extent
to which errors will affect the recoverability of information being processed at the time when
printing was disrupted. Each of the multiple blink/combined error light messages have been
recorded here for your reference.
General problems: Use this table to determine problem type.
Error Type
Recovery
Power LED
Error LED
Paper LED
Left
Cartridge
Right
Cartridge
Cover Open
Full
ON
ON
Off
Off
Off
Out of Paper
Full
ON
ON
ON
Off
Off
Paper Low
Status
ON
OFF
Blink
Off
Off
Right Cartridge Low
Status
ON
OFF
OFF
OFF
1 Blink
Left Cartridge Low
Status
ON
OFF
OFF
1 Blink
OFF
Both Cartridges Low
Status
ON
OFF
OFF
1 Blink
1 Blink
Left Cartridge
Removed
Full
ON
ON
OFF
ON
OFF
Right Cartridge
Removed
Full
ON
ON
OFF
OFF
ON
Serious problems: Contact Technical Support for assistance.
(877) 7ithaca or (607) 257-8901
Error Type
Recovery
Power LED
Error LED
Paper LED
Left
Cartridge
Right
Cartridge
Carriage Jam
Semi
1 Blink
ON
OFF
OFF
OFF
Configuration Error
Semi
2 Blinks
ON
OFF
OFF
OFF
Statistics Update Error
Semi
3 Blinks
ON
OFF
OFF
OFF
Internal Software Error
Semi
4 Blinks
ON
OFF
OFF
OFF
Knife Jam
Semi
5 Blinks
ON
OFF
OFF
OFF
User Store Defective
Semi
6 Blinks
ON
OFF
OFF
OFF
Flash Write Error
Semi
7 Blinks
ON
OFF
OFF
OFF
Fully-recoverable (Full)
A fully-recoverable error will
restart printing exactly where
it stopped when the error
occurred. Printing will resume
after error has been properly
addressed.
Fully-recoverable (Status)
A status recoverable
error is very similar to
a fully-recoverable error.
Additionally, status is used
to display when the printer
consumables may need
replacing.
Semi-recoverable (Semi)
A semi-recoverable error is
determined by whether or not
the printer has to be shut off
and turned back on while
attending to the problem.
The amount of information
lost is dependent on the type
of error and the state of the
information being processed.
34 Ithaca POSjet™ 1000 Operator’s Guide
REV A
APPENDIX
SERIAL CABLE
CABLE REQUIREMENTS
The POSjet™ 1000 Printer requires an RS-232C shielded cable, no
more than 50 feet long. The cable must be UL and CSA approved.
RS-232C COMMUNICATION
The RS-232C interface uses the following protocol
and communication characteristics:
•
Up to 19.2 K baud
•
Up to 6K buffer
•
Ready/Busy or XON/XOFF Protocol
•
Communication Diagnostic Mode
Appendix 35
PIN ASSIGNMENTS FOR SERIAL PRINTER CONNECTOR
9-pin
25-pin
Signal
Description
Pin 1
Pin 22
DCD
Data Carrier Detect
Pin 2
Pin 3
RX
Receive Data
Pin 3
Pin 2
TX
Transmit Data
Pin 4
Pin 20
DTR
Data Terminal Ready
Pin 5
Pin 7
GND
Signal Ground
Pin 6
Pin 6
DSR
Data Set Ready
Pin 7
Pin 4
RTS
Request to Send
Pin 8
Pin 5
CTS
Clear to Send
Pin 9
Pin 22
SSD
Secondary Data
PIN ASSIGNMENTS FOR PARALLEL PRINTER CONNECTOR
25-pin
Connector
36-pin Connector
Signal
Description
Direction
Pin 1
Pin 1
STROBE
Clock data to printer
Host to Printer
Pins 2-9
Pins 2-9
D0 - D7
Data
Host to Printer
Pin 10
Pin 10
ACK\
Printer accepted data
Printer to Host
Pin 11
Pin 11
BUSY
Printer busy
Printer to Host
Pin 12
Pin 12
PE
Paper Out/Status
Printer to Host
Pin 13
Pin 13
SLCT
Printer selected
Printer to Host
Pin 14
Pin 14
AUTOFD
Autofeed paper
Host to Printer
Pin 15
Pin 32
FAULT\
Printer error
Printer to Host
Pin 16
Pin 31
INIT\
Initialize printer
Host to Printer
Pin 17
Pin 36
SLIN
Select printer
Host to Printer
Pin 17
FG
Frame ground
Printer to Host
-
Pin 18
+5V
Peripheral logic high
Printer to Host
Pins 18-25
Pins 16, 19-30
GND
Ground
36 Ithaca POSjet™ 1000 Operator’s Guide
REV A
PIN ASSIGNMENTS FOR CASH DRAWER CONNECTOR
Ithaca
1
2
pin 1
pin 2
pin 3
pin 4
pin 5
pin 6
Epson
3
4
5
6
CD2CD1 Sense
Ground
CD Drive + (+24V)
CD1Not Connected
1
2
pin 1
pin 2
pin 3
pin 4
pin 5
pin 6
Star
3
4
5
6
Not Connected
CD1CD1 Sense
CD Drive + (+24V)
CD2Ground
1
2
pin 1
pin 2
pin 3
pin 4
pin 5
pin 6
3
4
5
6
Not Connected
CD1CD Drive + (+24V)
CD Drive + (+24V)
CD2CD1 Sense
Appendix 37
SERIAL CABLE CONFIGURATIONS
The following cable configurations
are for different host requirements.
Serial PC to POSjet™ 1000 Printer
TransAct’s part number 10-2020, 9-pin to 9-pin female cable,
should be used to connect POSjet™ 1000 Printers to personal
computers or PS/2’s with 9-pin serial ports.
Nine-pin
Female
PC
DTR
DSR
DCD
TXD
RXD
GND
RTS
CTS
PN 10-2020
Nine-pin
Female
Printer
DTR
DSR
DCD
TXD
RXD
GND
RTS
CTS
4
6
1
3
2
5
7
8
4
6
1
3
2
5
7
8
Serial AT to POSjet™ 1000 Printer
TransAct’s part number 10-2021, 9-pin to 25-pin female
cable, should be used to connect POSjet 1000 Printers
to personal computers or PS/2’s with 25-pin serial ports.
Twenty-f ive- pin
Female
PC
DTR 20
DSR 6
DCD 8
TXD
2
RXD 3
GND 7
RTS
4
5
CTS
PN 10-2021
Nine-pin
Female
Printer
DTR
DSR
DCD
TXD
RXD
GND
RTS
CTS
4
6
1
3
2
5
7
8
38 Ithaca POSjet™ 1000 Operator’s Guide
REV A
Serial AUX. to POSjet™ 1000 Printer
TransAct’s part number 10-2022, 25-pin Male to 9-pin female
cable, should be used to connect POSjet 1000 Printers
to AUX ports on terminals with 25-pin serial ports.
Twenty -f ive- pin
Male
AUX
DTR 20
DSR
6
DCD 8
TXD
2
RXD
3
GND 7
RTS
4
5
CTS
PN 10-2022
Nine-pin
Female
Printer
DTR
DSR
DCD
TXD
RXD
GND
RTS
CTS
4
6
1
3
2
5
7
8
Appendix 39
PARALLEL CABLE
CABLE REQUIREMENTS
The POSjet™ 1000 Printer requires a 25-pin male D-shell connector at the
printer. To connect the printer to most personal computers, use TransAct’s part
number 253-9800007, 25-pin male to 25-pin male parallel interconnect cable.
PIN ASSIGNMENTS
Pin(s)
Description
Direction
PIN 1
Clock data to printer
Host to Printer
PIN 2-9
Data
Host to Printer
PIN 10
Printer accepted data
Printer to Host
PIN 11
Printer busy
Printer to Host
PIN 12
Paper out/status
Printer to Host
PIN 13
Printer selected
Printer to Host
PIN 14
Autofeed paper
Host to Printer
PIN 15
Printer error
Printer to Host
PIN 16
Initialize printer
Host to Printer
PIN 17
Frame ground
Printer to Host
PIN 18-25
Ground
Index 41
INDEX
airflow around printer, 13
Button
new cartridge, 21
cables
connecting, 26
ordering, 5
reliefs, 15
cash drawer cable
connecting, 26
cash drawer connector
pin assignments, 27
character pitch, 8
character set
sample printout, 23
cleaning, 30
Common Problems
Correcting, 30
Configuration
Accessing Mode, 33
contacting TransAct’s Ithaca Facility, 2
dimensions of printer, 12
environment of printer, 13
features, 7
options, 8
Standard, 7
indicator lights, 19
Indicators
fault, 32
ink cartridge
installing, 16
Ink cartridges
ordering, 5
keypad
indicator lights, 19
LED indicator
cartridge left, 20
cartridge right, 20
error, 19
paper, 20
power, 19
Operator controls
new cartridge button, 21
options, 8
ordering supplies, 4
paper
loading, 18
ordering, 4
parallel cable
connecting, 26
requirements, 39
parallel cable connector
pin assignments, 39
pin assignments
cash drawer connector, 27
parallel cable connector, 39
serial cable connector, 35
pitch, 8
power cord
connecting, 14
print characteristics, 8
printer
cleaning, 30
dimensions, 12
environment, 13
features, 7
options, 8
reliability, 8
repacking, 10
testing, 23
unpacking, 10
42 POSjet 1000 Operator’s Guide
weight, 12
reliability, 8
repacking the printer, 10
RS-232C communication, 34
serial cable
configurations, 37
requirements, 34
serial cable connector
pin assignments, 35
service information, 3
supplies, 4
PN: 12-02308
cables, 5
ink cartridges, 5
paper, 4
test printout, 23
testing the printer, 23
TransAct Technologies
contacting, 2
troubleshooting, 30
unpacking the printer, 10
warranty, 3
weight of printer, 12
Rev A
03/00


