1
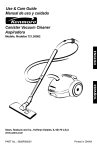
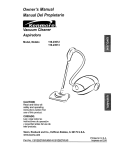
Owner'sManual
ManualDelPropietario
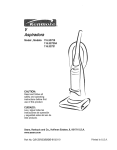
VacuumCleaner
Aspiradora
Model, Modelo
116.35912
116.35913
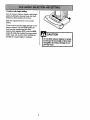
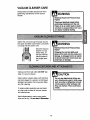
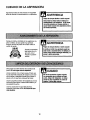
CAUTION:
Read and follow all
safety and operating
instructions before first
use of this product.
CUIDADO:
Lea y sigue todas las
instrucciones de operaci6n
y seguddad antes del uso de
este producto.
Sears, Roebuck and Co., Hoffman Estates, IL 60179 U.S.A.
www.sears.corn
Part No. COlZCHEO_UO_-KC_IZCHEZ_UO
Printed in Mexico
Impreso en Mexico
VacuumingTips ....................
Performance/Safety Features ..........
Before Using Your New
Vacuum Cleaner .....................
2
Kenmore Vacuum Cleaner Warranty .... 2
Important Safety Instructions ...........
3
Parts and Features ...................
4
Assembly Instructions ...............
5-6
Operating Instructions .................
Cord Release .......................
Releasing the Handle .................
Touch Control ......................
Gentle Sweep Function ................
Pile Height Selection and Setting ........
Attachments .....................
Attachment Use Table ...............
Vacuum Cleaner Care ...............
vacuumCleanerStorage .............
11
12
t3
13
Cleaning Exterior and Attachments ......
Dust Bin Cleaning ..................
Primary Filter Removal and Cleaning . 15,
Motor Safety Filter Cleaning ...........
Exhaust Filter Replacement ............
Light Bulb Replacement ..............
Agitator Cleaning ...................
Clog Removal .....................
6
6
7
7
7
8
9-10
11
Troubleshooting .....................
13
14
16
16
17
18
19
19
,,€,ssJslarK_
Or Service,..
2o
back page
Please read this guide. It will help you assemble and operate your new Kenmore vacuum
cleaner in the safest and most effective way.
For more information about vacuum cleaner care and operation, call your nearest Sears store.
You will need the complete model and serial numbers when requesting information. Your vacuum cleaners model and serial numbers are located on the Model and Serial Number Plate,
Use the space below to record the model number and serial number of your new Kenmore
vacuum cleaner.
Model No.
Serial No.
Date of Purchase
Keep this book and your sales check (receipt) in a safe place for future reference.
LIMITED ONE YEAR FULL WARRANTY ON KENMORE VACUUM CLEANER
This warranty is for one year from the date of purchase, and includes only private household
vacuum cleaner use. During the warranty year, when this vacuum cleaner is operated and
maintained according to the owner's manual instructions,Sears will repair any defects in
material or workmanshipfree of charge.
This warranty excludes vacuum cleaner bags, belts, light bulbs, and filters, whichare
expendable parts and become worn during normal use.
For warranty service, retum this vacuum cleaner to the nearest Sears Service Canter in the
United States.
This warranty applies only while this product is in use in the United States. This warranty gives
you specific legal rights, and you may also have other rights which vary from state to state.
Seam, Roebuck and Co., D/817 WA, Hoffman Estates, IL 60179
2
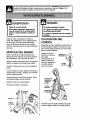
WARNING: Your
.fe ,,,mpor
,ou°.
n,persons
Tor. uco
tho
,°,of
fire, electrical
shock, injury
to
or damage
when usm.ogyour vacuum cleaner, follow basic safety precautions including the following:
Read all instructions in this manual before
assembling or using your vacuum cleaner.
Keep hair, loose clothing, fingers, and all
parts of body away from openings and
moving parts.
Use your cleaner only as described in this
manual. Use only with Sears recommended attachments.
Turn off all controls before unplugging.
Use extra care when cleaning on stairs.
Disconnect electrical supply before servicing or cleaning out the brush area. Failure
to do so could result in electrical shock or
the brush suddenly starting.
Do not put on chairs, tables, etc. Keep on
floor.
Do not use cleaner to pick up flammable
or combustible liquids (gasoline, cleaning
fluid, perfumes, etc.), or use in areas
where they may be present. The fumes
from these substances can create a fire
hazard or explosion.
Do not leave cleaner when plugged in.
Unplug from outlet when not in use and
before performing maintenance.
To reduce the risk of electrical shock - Do
not use outdoors or on wet surfaces.
Do not pick up anything that is burning or
smoking, such as cigarettes, matches, or
hot ashes.
Do not allow to be used as a toy. Close
attention is necessary when used by or
near children.
Do not use cleaner without dust bin and/or
filters in place.
Do not use with a damaged cord or plug. If
cleaner is not working as it should, has
been dropped, damaged, left outdoors, or
dropped in water, return it to a Sears
Service Center.
Always clean the dust bin after vacuuming
carpet cleaners or freshener, powders, and
fine dust. These products clog the filters,
reduce airflow and can cause damage to
the cleaner. Failure to clean the dust bin
could cause permanent damage to the
cleaner.
Do not pull or carry by cord, use cord as a
handle, close a door on cord, or pull cord
around sharp edges or corners. Do not run
cleaner over cord. Keep cord away from
heated surfaces.
Do not use the cleaner to pick up sharp
hard objects, small toys, pins, paper clips,
etc. They may damage the cleaner or dust
bin.
Do net unplug by pulling on cord. To
unplug, grasp the plug, not the cord.
Unplug before connecting Handi-mate Jr.®
De not handle plug or cleaner with wet
hands.
You are responsible for making sure that
your vacuum cleaner is not used by anyone unable to operate it properly.
Do not put any objects into openings.
Do not use with any opening blocked; keep
free of dust, lint, hair, and anything that
may reduce air flow.
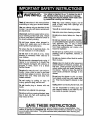
SAVE THESE INSTRUCTIONS
Proper assembly and safe use of your vacuum cleaner are your respons b t es Your
cleaner is intended for Household use. Read this Owner's Manual carefully for important
use and safety information. This guide contains safety statements under warning and
caution symbols.
3
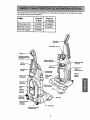
It is important to know your vacuum cleaner's parts and features to assure its proper and safe
use. Review these before using your vacuum cleaner.
Pa_ No.
In U.S.
Item
Pa_ No.
In Canada
Headlight Bulb
20-5248
20-5248
Exhaust Filter
20-86889
20-86889C
Primary Filter
20-82912
Touch ¸
Control
Upper Cord Hook
Dust Bin
Release
Handle
Brush
Filter Cover
(Filter Inside)
Carrying
Upper Hose
Hoo,
Extension
Hos
Release
Furniture
Guard
Nozzle
Release
Pedal
Extension Hose
Release Lever
Wand Holder
Motor Protector
(Behind Hose)
4
Igiven. WARNING statements alert you to such dangers as fire, electric shock, burns_
Please
pay special
to these
hazard alert boxes,
any instructions
land
personal
injury.attention
CAUTION
statements
you to and
suchfollow
dangerous
personallI
_
linjuryand/or property damage.
I
Electrical Shock Hazard
Do not over tighten,
Do not plug intothe electricalsupply
untilthe assembly is complete. Failure
to do so could result in electrical shock
or inju_.
Over tighteningcould strip the handle screw hole.
Do not operate the vacuum cleaner
without the screw in place.
Before assembling the vacuum cleaner,
check the PACKING LIST on the cover of
the separate REPAIR PARTS LIST. Use
this list to verify that you have received all
the components of your new Kenmore
vacuum cleaner.
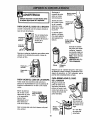
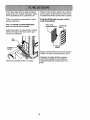
CORD ASSEMBLY
Make sure the quick release upper cord
hook is in the upright position. Remove
the wire tie from the power cord.
Make sure the
power cord is
placed into the locking notch on the
body as shown. This
helps keep the
power cord out from
under the vacuum
cleaner agitator.
HANDLE ASSEMBLY
Remove the handle screw from the body
of the vacuum.
Remove the combination brush from the
handle to expose the handle mounting hole.
Position the handle assembly as shown in
the illustration below.
Notch
Power
When installing the handle, firmly press
the handle onto the body. Secure with
handle screw provided.
Begin to tighten the screw with your fingers. It may be necessary to adjust the
handle slightly.
Release
Cord Hook
Using a screwdriver, tighten handle screw.
Reinstall combination
brush,
Cord
Plug
Carrying
Electrical
Connection
Handle_
Assembly
Handle
Screw
Wrap the power cord around the quick
release cord hook and the carrying handle.
Lock the power cord plug onto the power
cord.
5
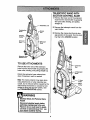
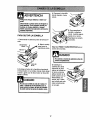
TELESCOPIC WAND
PLACEMENT
HANDI-MATE JR.@
For operation of Handi=Mate
Jr.®
Handi-Mate Jr.®
see separate
Owner's Manual.
Place the telescopic wand in the wand
holder. Place the crevice tool in the top of
the telescopic wand.
Tool
Handi-Mate
Storage
TO INSERT HANDI-MATE
JR ®
Place Handi-Mate Jr.®into the storage
compartment.
Rotate the Handi-Mate
Wand
Jr._ back until it
snaps into place.
TO REMOVE
HANOI-MATE
Wand
Holder
JR. °
Rotate Handi-Mate Jr.®out of the storage
compartment.
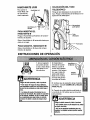
OPERATING INSTRUCTIONS
1. Turn the quick
release upper
cord hook to
either side and
down to release
the power cord.
2. Detach the
Lockingpower cord plug
Notch
from the power cord
and pull the cord off
the quick release
upper cord hook.
Power
Be sure the power
cord is still locked
into the locking notch of the upper cord
hook.
• To reduce the risk of electric shock,
this vacuum deener has a polarized
plug (one blade is wider than the
other).
• The Plug will fit in a polarized outlet
only one way. If the plug does not fit
fully in the outlet, reverse the plug. If it
still does not fit, contact a qualified
technician to install the proper ouUet.
Do not change the plug in any way.
3. Plug the polarized power cord into a 120
Volt outlet located near the floor.
4. To replace cord, turn upper cord hook to
the up position, then wrap cord.
Personal Injury and Product Damage
Hazard
• DO NOT place hands or feet under
the unit at any time.
• DO NOT use outlets above courttens. Damage from cord to Items in
surrounding area could occur.
Release the handle by pressing down on
the handle release pedal with your foot and
pulling back and down on the handle with
your hand.
\
Note: The agitator does not rotate when the
vacuum cleaner is in the upright position.
OFF - Turns OFF the vacuum cleaner
(suction) motor.
CARPET - Turns ON the vacuum cleaner
motor to HIGH suction level and the agitator motor to HIGH speed level for cleaning
of most carpets and rugs.
GENTLE - Turns ON the vacuum cleaner
motor to HIGH suction level and the agitator motor to LOW speed level for gentle
cleaning of most delicate carpets.
MOTOR FUNCTION
FLOOR - Turns ON the vacuum cleaner
motor to HIGH suction level and turns OFF
the agitator motor for cleaning of bare
floors.
2.
Your Kenmore Vacuum features a two (2)
speed, direct drive agitator for cleaning a
variety of floor surfaces. Please review the
table below before using your vacuum.
1
Do not use the CARPET
setting (high
speed) for cleaning berber style carpet.
The high agitator speed could damage
the carpet or cause excessive carpet
wear.
Touch
Conb'ol
Button
Vacuum Cleaner
(Su_on) Motor
Agitator
Motor
OFF
CARPET
GENTLE
FLOOR
OFF
HIGH
HIGH
HIGH
OFF
HIGH
LOW
OFF
Use the GENTLE setting (low speed)
ONLY for berber or delicate pile carpeting. The agitator may slow down or stop
on thick carpeting, area rugs or throw
rugs. If agitator stops and does not
restart, See page 12, AGITATOR
MOTOR OVERLOAD PROTECTOR of
the owners manual.
J
The FLOOR setting may be used for all
indoor bare floors including
linoleum, slate etc.
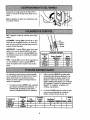
Touch Control
Setting
Carpet ;1)
Gentle 2)
Floor(3)
Agitator
Speed
High
Low
Bare
Roor
Off
v'
Commemial
or Low Pile
V'
Berber
or Delicate
Carpet
v'
7
Plush
IS'
wood, tile,
Shag
v'
Area
Rug
V'
Toselecta pileheightsetting:
Turn off vacuum cleaner. Select a pile height
setting by tiltingthe cleaner back untilfront
wheels are lifted slightly off the floor.
Slide the adjustment lever to the correct
setting.
There are four (4) pile height settings on the
vacuum cleaner. Use the LOW setting for
most low-pile carpets and bare floor
cleaning (with agitator OFF), and the HIGH
setting for high-pile carpets like shag carpet,
scatter rugs, etc. Use the other settings as
needed for carpet heights in between.
CAUTION
Do not allow vacuum cleaner to remain
in one spotfor any lengthof time when
the agitator Is tuming, Damage to carpet may occur.
8
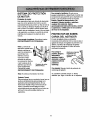
TELESCOPIC WAND WITH
SUCTION CONTROL SLIDE
1. Remove the lower end of the extension
hose from the wand holder by grasping
the hose collar,twisting,and pulling
straightup.
e Jr,®
2. Remove the telescopic wand from the
wand holder.
Brush
Tool
3. Remove the crevice toolfrom its storage position in the wand. Turn the locking ring to the UNLOCK position.
Carrying
Hendk
Extension
Wand
Extension Hose
Release Lever
TO USE ATTACHMENTS
Crevice
Remove the lowerend of the extension
hose from the wand holder by graspingthe
hose collar, twisting, and pulling straight up.
II
Tool
Wand
Rotate the extension hose release lever
down if maximum reach is needed.
Note: The motor protector may open when
using attachments or when cleaning new
carpet, due to reduced airflow caused by the
attachments themselves or caused by new
carpet lint filling the dust bin quickly. See
the TROUBLESHOOTING
section.
Collar
Wand
Holder
Electrical Shock And Personal Injury
Hazard
Disconnect electrical supply before
performingmaintenance to the unit.
Failure to do so could result in electrical shock or personal injuryfrom vac.
uum cleaner suddenly starting,
9
TO OPERATE SUCTION
CONTROL SLIDE
Extend the wand to its full length. Turn the
locking ring to the LOOK position. Attach the
extension wand onto the open end of the
hose.
Telescopic Wand
When using attachments for cleaning
draperies, small rugs with low pile and other
delicate items, twist the suction control slide
to the open position. This slide is located on
the telescopic wand, close to the hose.
This will reduce suction for ease of cleaning.
_l°lock
"_
su_
Note: Return
con/n_/
Ude
suction control
slide to the closed
position for normal
cleaning.
Upl_r
Wand
Align the tabs on the extension wand with
the "J" slots in the hose. Push the wand into
the hose and twist to the right to lock.
To achieve maximum reach with the attachments, add the crevice tool to the end of the
wand by inserting
CAUTION
and twisting slightly.
When using attachments, be careful not
to overextend the stretch hose when
reaching.Trying to reach beyond the
hose stret""'_h
capabilitycould cause the
vacuum cleaner to tip over.
TO STORE ATTACHMENTS
Remove the combination brush. Snap into
appropriate storage location.
Hose
Remove crevice tool from the wand by twisting. Lay aside.
Remove the telescopic
wand from the hose.
Twist the wand to the left and pull from the
hose end.
",2
Unlock the wand by turning the wand locking
ring to the UNLOCK position.
Slide the lower wand into the upper wand.
Turn the wand locking ring to the LOCK position.
Place the crevice tool down into the compressed wand. Place the telescopic
the wand holder
Attach combination brush directly to the wand.
wand in
Brush---_
Combination [f_,
•
II.
!
•
CAUTION
DO NOT pull the vacuum cleaner
around the room by the hose. Property
damage or personal injury could result.
See ATTACHMENT USE TABLE for combination brush usage.
10
CLEANING AREA
A'I-FACHMENT
Furniture*
COMBINATION BRUSH
Handi-Mate Jr.@
,plicable
_1,
v'
antes de exa-
W_d_
is
i/
,/
i/
*Always clean attachments before using on fabrics.
v' = Applicable
WARNING
Personal Injury Hazard
DO NOT set the vacuum cleaner on
stairs. It may fall, causing personal injury
or property damage.
Stairs
de limpieza,
;tosde flujo de
Stairs
v'
Carpet edges
Guide either side or the front of the nozzle along a baseboard.
la escalera.
ersonaio
Drapes*
v'
CREVICE TOOL
Plu-edes
Between
Cushions*
Set handle in full upright position. Agitator
stops rotating. Use the crevice tool, combination brush or Handi-Mate Jr.®.
For best cleaning results, keep the airflow
passage clear.
Unit Tipping
When using the attachments keep the
extension hose release lever in the locked
Unplug the vacuum cleaner from the outlet
before checking.
position when possible. This helps to keep
the vacuum cleaner from tipping over
when stretching the hose. If additional
hose is needed then unlock the release
lever and pull out additional hose. Use
caution not to tip over vacuum cleaner.
11
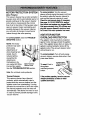
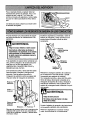
MOTOR PROTECTION SYSTEM
Motor Protector
This vacuum cleaner has a motor protector
by-pass valve which automatically opens to
provide cooling air to the vacuum cleaner
motor when a clog prevents the normal
flow of air to the motor. If the by_pass valve
opens to prevent motor overheating and
possible damage to the vacuum cleaner,
you will notice a change of sound as air
rushes through the valve opening.
To correct problem: See the TROUBLESHOOTING section.
NOTE: The motor
protector may open
when using
attachments or
when cleaning new
carpet, due to
reduced airflow
caused by the
attachments
themselves or by
new carpet lint filling
MotorProtector
the dust bin quickly.
(BehindHose)
See the TROUBLESHOOTING section.
To correct problem: Turn the vacuum
cleaner off and unplug the power cord from
the outlet to allow the vacuum cleaner to
cool and the thermal protector to reset.
Check for and remove dogs, if necessary.
See page 19, CLOG REMOVAL section.
Also check and replace any dogged filters.
Wait approximately thirty (30) minutes and
plug the vacuum cleaner In and tum back
on to see if the motor protector has reset.
AGITATOR MOTOR
OVERLOAD PROTECTOR
The agitator motor has built-in protection
against motor damage should the agitator
jam. If the agitator slows down or stops, the
agitator overload protector shuts off the
agitator motor.The vacuum cleaner motor
will continue to run.
To correct problem: Turn off and unplug
vacuum cleaner, remove obstruction, then
press reset button.
To reset: Push in
Agitator Motor
Overload Reset
the agitator
overload protector
button.
Note: Do not block motor protector.
Thermal Protector
This vacuum cleaner has a thermal
protector, which automatically trips to
protect both the vacuum cleaner and the
agitator motor from overheating. If a clog
prevents the normal flow of air to the motor,
the thermal protector turns the motor off
automatically. This allows the motor to cool
in order to prevent possible damage to the
vacuum cleaner.
If the problem persists, have the vacuum
cleaner serviced by a Sears or other
qualified technician.
12
VACUUMCLEANERCARE
!
Always follow all safety precautions when
performing maintenance to the vacuum
cleaner.
v
WARNING
ElectricalShock And Personal Injury
Hazard
Disconnect electrical supplybefore
performing maintenance to the unit.
Failure to do so could resultIn electrical shock or personal injuryfrom vacuum cleaner suddenly starting.
Gather the cord and wrap it loosely around
the upper and lower cord hooks. Lock power
cord plug onto the power cord.
41|
|1
WARNING
-'lectricalShockAnd PersonalInjury
Hazard
Store the vacuum
cleaner in a dry,
indoor area, on
the floor with the
handle locked in
the upright position.
Wrapping the cord too tightly puts
stress on the cord and can cause cord
damage. A damaged cord is an electrical shock hazard and could cause personal Injuryor damage.
Unplug cord from wall outlet. DO NOT drip
water on vacuum cleaner.
Clean exterior using a clean, soft cloth that
Do not use attachments if they are
wet. Attachments used In dirty areas,
such as under a refrigerator, should
not be used on other surfaces until
they are washed. They could leave
made.
has been dipped in a solution of mild liquid
detergent and water, then wrung dry. Wipe
dry after cleaning.
To reduce static electricity and dust buildup, wipe outer surface of vacuum cleaner
and attachments.
Wash attachments in warm soapy water,
rinse and air dry. Do not dean in dishwasher.
13
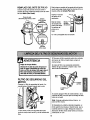
E
Hold dust bin
over a trash container.
WARNING
Always unplug power cord from electrical outlet before performing any service on vacuum.
TO REMOVE DUST BIN
Lift dust bin handle located at the top of
the dust bin.
Handle
Pull the handle up
and lift dust bin up
and out of the vacuum cleaner.
Dust Bin
Press the dust
bin door release
button downward to release
the door.
Door
Release
Button
The door will
swing open and
the debris will
fall into the trash
container.
Shake the dust
bin to release
Dust
Bin
and debris
ment.
Emptying
Door
that might hang in the filter ele-
Note: See PRIMARY FILTER REMOVAL
AND CLEANING section.
Remove any clogs that might be located in
the suction port or filter port area.
After the dust bin is
empty of debris,
firmly close the
door. Make sure
you hear a "click"
sound to indicate
that the door is fully
latched.
Filter Pot
Door
TO EMPTY DUST BIN
Before removing debris from dust bin it is a
good idea to move the dust bin filter cleaning lever back and forth several times.
Moving the lever
back and forth
loosens the dust
and debris that
has attached
itself to the filter
element inside
the dust bin.
TO REPLACE
DUST BIN
Place dust bin back
into vacuum cleaner
by insertingthe bottom first and tilting
back with the dust bin
handle raised.
Dust BIn_.
Filter
Cleaning
Lever
Door
Latch
_
Lower the dust
bin handle to
lock dust bin in
Dust Bin Handle
Rotate dust bin handle to the vertical position.
14
noticeable
should
be heard.
Remove primary
filter by turning
it counterclockwise and pulling
out (See arrows
on bottom of filter), Rinse with
water only as
needed, do not
use any detergent or soap.
Electdcal Shock And Personal Injury
Hazard
Unplug power cord from electrical outlet. Do not operate the vacuum cleaner
withoutthe pdmary or exhaust filters.
Be sure the filters are properly installed
to prevent motor failure and or electrical shock.
PRIMARY FILTER
Allow the filter to dry for 24 hours
before putting it back into the vacuum,
Check primary filter frequently and clean
when dirty.
When cleaning the filter no longer
restores vacuum suctionto full power you
need to replace the filter.
TO REMOVE PRIMARY FILTER
Remove the dust bin assembly as outlined
in the DUST BIN CLEANING section.
Note: See PARTS AND FEATURES
for the filter number.
Make sure dust bin is free of debris before
removing lid and filter. Rotate dust bin lid
assembly counterclockwise as indicated on
the lid and lift off.
Turn This Direction
To Open For Emptying
Dust Bin
Lid
TO REPLACE
PRIMARY
FILTER
To replace filter, insert it over cleaning
cams as far as it will go. Make sure rubber
seal at top of filter is flush against filter supporter, turn filter clockwise to secure into
place.
Closed
(For Use)
Note: Under normal use and care, your filter can be expected to last up to 5 years.
Rubber
Cams
Open
(For Emptying)
Filter.
Dust Bin,
Lid
While holding dust bin lid over a trash container grasp primary filter, rotate counterclockwise and lift off.
Re-assemble dust bin lid to dust bin. Insert
into cleaner and secure with dust bin handle.
Clean primary filter by gently tapping over a
trash container. Tap on several sides to
ensure best cleaning.
15
TO REPLACE DUST BIN LID
Replace dust bin lid assembly by placing
back on dust bin with marks on the lid
aligned as shown under Open (For
EmpO#ng) on the back of the dust bin.
Turn This Dire€lion
To Close For Use
Rotate clockwise while pressing downward
so marks align as shown above C/osed
(For Use),
Insert dust bin
into cleaner.
Open
(For Emptying)
Lower the dust
bin handle to
lock dust bin in
place.
Handle
A noticeable
"click" should
be heard.
Closed
(For Use)
1, To remove motor safety filter lift filter
release handle upward and rotate the filter
cover out,
ElectricalShock Hazard
2. Remove filter by pressing on the sides of
the filter frame and pulling out at the same
time.
Unplug power cord from electrical outlet. Do not operate the vacuum cleaner withoutthe motor safety filter. Be
sure the filter is dry and properly
ir_-talledto prevent motor failure and/or
electrical shock.
Frame
MOTOR SAFETY FILTER
Check motor safety filter frequently and clean
when dirty.
Cover
Tabs
3. Clean filter if necessary by placing it under
running water wait until dry before replacing.
4. When putting the filter back into the filter
cover, listen for the filter assembly to snap
into place.
I
S.
/
Note: Push only on frame, not filter itself.
Release
Handle
5. Replace cover by fitting bottom tabs into
slots and rotating into compartment. Push
filter release handle down until you hear a
noticeable "click",
<
16
The HEPAexhaustfilter mustbe replaced
when dirty. It shouldbe replacedregularly
dependingon use conditions.
Place new filter cartridge into cover making
sure that airflow arrow on side of cartridge
points into cover.
The fitter CANNOT be washed as it will
lose its dust trapping ability.
The foam seal of the filter should be
placed against the vacuum cleaner body.
Note: See PARTS AND FEATURES
for the exhaust filter number.
Seal Against
Vacuum Cleaner
E.xhaus!
Filter
Remove exhaust filter cover by pressing
the release tab on the cover and rotating
out from vacuum.
"Exhaust
Filter
FllIer
Cover"
Replace the exhaust filter cover by placing
bottom tabs in slots and rotating in until
cover snaps into place.
Remove the filter cartridge from cover.
17
4. Remove the light
bulb by pulling
straight out.
Electrical Shock Or Personal Injury
Hazard
Disconnect electrical supply before
performing maintenance to the unit.
Failure to do so could result in
electrical shock or personal injury
from the vacuum cleaner suddenly
starting.
5. TO replace the
light bulb carefully
insert fully into slot.
TO REMOVE LIGHT BULB
1. Disconnect power cord from electrical
outlet.
Note: See PARTS AND FEATURES for
bulb number.
2. Press handle release
Rat
Screwdriver
!
pedal and lay
vacuum cleaner back.
Headlight
Lens
CAUTION
Do not plug in or turn on untilthe vacuum cleaner is completely reassem.
bled.
3. Pry light
lens out at slot
in rear as
shown on both
sides. Rotate
6. To replace light
lens, place tab at
front of lens into
slot. Rotate lens
down and firmly
snap into place.
lens up and lift
off.
CAUTION
Do not use a bulb rated over 9W (13V).
During extended use, heat from the bulb
could overheat surroundingplastic
parts.
18
To maintain efficient cleaning, the agitator
must be kept free of carpet fiber, string, or
hair build-up. After every 7 to 10 uses,
unplug and turn vacuum cleaner over and
check agitator for fiber and hair build-up.
Use scissors to remove any build-up entangled around the agitator.
Always follow all safety precautions when
performing maintenance to the vacuum
cleaner.
Plug in the vacuum cleaner and turn it on.
Stretch the extension hose to maximum
length and then allow the hose to return to
its natural length.
ElectricalShockOr Personal Injury
Hazard
Hosa
Storage
Disconnect electrical supply before
performing maintenance to the unit.
Failure to do so could result in elsotrical shock or personal injury from
vacuum cleaner suddenly starling.
/_
If the vacuum cleaner does not seem to have
adequate suction, first check if the dust bin is
full or if a filter is clogged. See DUST BIN
CLEANING and FILTER REPLACEMENT,
_
sition
Original
Hoaa----_
\
Collar
Re-insert the hose into the opening on the
body from which it was removed. Press firmly
to assure connection. Rotate hose release
lever clockwise to the locked position,
If the dust bin and filter areas are free of
clogs, check the extension hose. Rotate the
extension hose release lever counterclockwise to release extension hose,
If the dust bin and filter areas and the hose
areas are free of clogs, disconnect the nozzle hose from the wand holder and check the
Extension
nozzle for clogging.
Wand
Hose
Collar
WARNING
Extension Hose
Release Lever
Nozzle
Hose
Remove the lower end of the extension
Clean the agitator according to the instructions in the AGITATOR CLEANING section.
Return the vacuum cleaner to the upright
position before plugging into an electrical
outlet.
hose
from the wand holder by grasping the hose
collar, twisting, and pulling straight up.
19
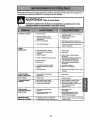
Review this table to find do-it-yourself solutions for minor performance problems. Any service
needed, other than maintenance described in this Owner's Manual, should be performed by a
Sears or other qualified service agent.
_:.:..._.-
.
_
.7:. _. _._.:
Vacuum cleaner
won't tun.
1. Unplugged at wall outlet.
2, Tripped circuit breaker/blown fuse
1. Plug in firmly,select the desired setting on the touch control,
2. Reset dmuit breaker or replace fuse.
at householdservice panel.
3. Thermal protectortripped.
4. Defective wall outlet.
Pc_rjobofdirt
pick*up.
I, Fullor cloggeddust bin.
2. Wrong pile height setting.
3. Worn agitator.
4. Clogged nozzle.
5, Clogged hose.
6, Hole in hose.
3. Allowvacuumcleaner to cool, then
reset thermal protector.
4. Check w_tha good appliance/lamp,
have properly s_rviced.
1. Empty dust bin.
2. Adjustsetting.
3. Take to yournearest Sears
Service Center.
4. Check CLOG REMOVAL.
5. Check for clogs.
6, Take to yournearest Sears
Service Center.
7. Hose not inserted fully.
8. Motor protectionsystem activated.
7. Insert hose fully.
& Check for clogs.
(change of sound)
g. Dirty filters,
g. Change filters.
Vacuum Cleaner picksup
moveab_ rugsor
pushes too hard,
1. Wrong pile height setting.
1. Adjust setting.
Lightwon't work.
1. Burned out lightbulb.
1. Change light bulb.
Agltafordoes notturn.
1. Handle in full upright position.
1. Move handle from upright position.
2. AgitatorOverload tripped.
3. Thermal protector tripped.
2. Reset Agitator Overload.
3. Allow vacuum to cool, then reset
thermal protector.
Ainlow restricted
with attachmentuse.
Sound changes.
1. Attachment use restrictsair flow.
1. Check ATTACHMENTS for fuzz, lint.
pet hair or other debds.
2. Check CLOG REMOVAL and clean
hose,
D_ffleultyadjustingpile
height set6ng
1. Vacuum cleaner not in properupright
position.
2. New carpet fuzz clogged air palh.
2O
1. Place vacuum cleaner in the locked
uprightposition,tiltthe vacuumback
slightlyand adjust pile height,
Carecteriisticas de
Antes de usarsu aspiradora nueva .......
1
rendimiento/seguridad...............
11-12
GaranUade la aspiradorade Kenmore..... 1
Culdado de la aspiradora ...............
12
Instmccionesimportantesde
Atmacenarniento
de
la
aspiradora
........
12
seguddad .............................
2
Limpieza
del
exterior
y
de
los
accesodos
...
12
Piezasy caracterfsticasde aspiradora
Limpiando el cubo de la basura ..........
13
vertical
................................
3
Primary filter removal and cleaning .......
14
Instrucciones de ensamblamiento .......
4-5
Instrucciones
de operad6n ...............
5
Liberaci6n
delcord6nelectrico
..........5
Desprendimiento
delmango ..............6
Pulsador
de Control....................
6
GentleSweep Function
..................
6
Ajuste
y selecci6n
de nivel
de pelode la
alfombra............................
7
Accesorios.........................
8-9
Cuadro de use de los accesorios .........
10
Sugerenciaspara aspirar ...............
10
Motor safetyfi_terc[eaning...............
Filtro de escape ......................
Cambio de la bombilla .................
1.5
16
17
Umpieza del agitador ..................
C6mo eliminar los residuos de basura
en los conductos .....................
18
18
Reconocimiento de problemas ...........19
Informaci6n de assistancia
o 8ervicio
......................
back page
Pot favorlea esta guia que le ayudara a assemblary operar su aspiradoranuevade Kenmore en una manera
m_.ssegura y efectiva.
Para mas informaci6n acerca del cuidadoy operaci6nde esta aspirador, tiame a su tienda Sears mas cercana.
Cuando prequnte pot informaci6n usted necisitard el n_mero ¢ompletode serie y modelo de la aspiradora que
estan en la placa de los nOmeros de modelo y aerie.
Use el espaciode abajo para registrar el nBmerode modelo y serie de su nuevaaspiradora de Kenmore.
Nt_merode Model0
NSmero de Serie
Fecha de Compra
Matenga este libro y su reciboen un lugar seguropara referenciasfuturas.
GARANTI'ALIMITADA DE UN A_IODE LA ASPIRADORAKENMORE
Esta garantiaes pot un aRodesde la fechade compra, e incluye solamente el uso de la aspiradoraen
hogares privados. Durante el aSo de garantia, cuando la aspiradora es operada y mantenida de acuerdo al
manual de instrucciones del dueSo,Sears reparar_,cualquierdefecto en materiales o labricacibn libre de cargo.
Esta garantia excluye las bolsas de coleccibn, correas, lamparillas, y filtros, las cuales son partes gastables que
se detedoran con el uso normal.
Para el servlclode garantfa,retome esta asp|mdoraal Centto de ServlcloSears m_s cercanoen los Estados
Unidos.
Esta garantiase aplica solamentemientras este productoestd en uso en los Estados Unidos.Esta garantiale
da a usted derechos legates especificos, y usted puede tener tambi_n otros derechos los cuales varian de
estado a estado.
Seam, Roebuckand Co., D/817 WA, Hoffman Estates,IL 60179
Su seguddad
se muy Impodante
paranos_e. Pararedudrel
c_sdesegu_ad,ern el_
Lea redes les instruccionesen este manualantes
de armar o usar su aspiradora,
Apagueredeslos controlesantes de desenchufar.
Use cuidadoextra cuandolimpie escaleras. No
Use suaspiradorasolamentecomese describe
en este manuel. Use solarnente con los
acceserios Sears recomendados.
la pongasobre sillas,mesas, etc. Mant_ngala
sobre el piso.
Deseonectele fuente de electricidadantes de
hacer el servicioo limpiarel area del cepillo.La
falla de haceresto puede resultaren cheque
el_ctricoo en el sObitoarranquedel cepillo.
NOuse la aspiradora para levantarliquidos
No deje la aspiradoracuandoest_ enchufada.
Desenchufe del tomacorrientecuando no est_l
en use y antes de hacer el servicio.
puedanestar presentes.Los vaporesde estas
inftamableso combustibles (gesolina, fluido de
limpiar,perfumes,etc.), o la useen _lreasdonde
substanciaspuedencrear un peligro de
incendio o explosi6n.
Pare reducir el riesgo de cheque el_ctrico o No la
use afuera o sobre superficiesmojadas.
No levante nada que estd ardiendo o echando
humo, tel come cigardllos,f0sforos, o cenizas
calientes.
No permltaque se la use come un juguete.Gran
atenci6n es necesaria cuandoes useda per o
cerca de niOos.
NOuse la aspiradora sin el canesto del polvo
No la use con un cord6no ficha daOados.Si la
aspiradorano es_ trabajando come debe, se la
ha dejado caer, daOado,dejada atuera, o
volteada en el agua, retbrnela a un Centre de
Servicio Sears.
y/o fittros en su lugar.
Siempre limpieel canastodel polvo despu_s
de limpiarta alfombra, limpiadoreso
refrescantes, pelves,y polvo fine. Estos
No la tire o arrastredel cordon, use el cord6n
come una manija, cierre una puertasobreel
cordon,o tire del cordon alrededor de bordes
afilados o esquinas. No pase la aspiradora sobre
el cord6n. Mantenga el cord6n lejos de
superficies calientes.
productosobstruyen los fiitros, reducen la
oircutaci6n del aire y puedencausar daOo ala
aspiradora. La falla en limpiar el canasto de la
basura puede causerdaOo permanentea Is
No desenchufe tirando del cordon. Pare
desenchufar, tome la ficha, no el cordon.
aspiradora.
No tome la ficha o la aspiradora con las manes
mojadas.
duros afilados,pequeOos juguetes,alfileres,
No ponga ningl_nobjeto en las aberfuras.
aspiradora o el canasto de la basura.
No use la aspiradora pare levantarobjetos
sujetapapeles,etc. EIIos pueden daOarla
NOla use con ninguna abertura bloqueada;
mant_ngala libre de polvo, hilachas,pelo,y
cualquier cosa que pueda reducir la circulaciOn
del aire.
Desenchufe antes de conectarel Handi-mate
Jr.®
Ustedes responsable de estar segurode que su
Mantengalos cabellos, ropas sueltas, dedos, y
redeslas partes del cuerpo lejos de aberturas y
partes movibles.
aspiradorano es usadaper alguienincapaz de
operarla correctamente.
GUARDE ESTAS INSTRUCClONES
El armado y use segurode su aspirsdorason su responsabilidad. Esta aspiradoraha side diseOada
exclusivamentepare oso domestico. La aspiradora deber._aimacenarse en un lugar seco yen el interior.
Lea este Manual Gel propietario detenidamente, pues contianeintormaci6n importante sobre seguridady
use. Esta guia contiene informaci6n sobre seguridad debajo de simbolos de advertiencia o cuidado.
2
Es importanteconcer Jaspiezas y caracterfsticas de su aspiradora para asegurar su uso adecuado y seguro.
Examinelas antes de usar su aspiradora.
Objeto
Pieza N°
en EUA
Pieza N°
en Canadd
Bolsa pars polvo
20-50690
20-50690C
Bombilla de farol
20-5248
20-5248C
Filtro de escape
20-86889
Pulsador
de control
Mango
SujetadorsupeHor
del_eracidnrdplda
Manila canasto
del polvo
eldctrico
ela
basura
(flltro adentro)
sacudir
Filtro de
escape
(dentro)
transportar
a_ura
expansible
Filtro
Cubierta
del fllro
(adentro)
/Protecfor
meubles
Pedal
fiberscibn
delmango
Palanca escap_
manguera
extensi6n
'Porte.tubo
Protector de motor
(Behind Hose)
3
de
I
alertar_ con el poligros de fuego, ehoques electricos, quemadas y lesiones. Cuidado: Este
informaci6n
le alertara
a peligros
come
lesiones
y daSosdde
propiedad.
Pot
favor ponga
atenci6n
especiala
estas
instrucciones
adas.
Advertencia:Este informaciSn le
Pellgm do choque eldctrlco
No apdete demasiado el tomillo,
No conecte la aspiradora hasta que termine de armada. De Io contrario podrfa
causar un choque el6ctrico o Iosl6n corporal.
Si Io aprieta demasiado podrfa arruinar
los orificios pare el tomillo.
I
No opere la 8spiradora sin tenor instalado
el tomillo,
COLOCACI6N
CORDON
Antes de armar la aspiradora, cheque la
LISTA DE EMBALAJE en la ¢ubierta separada de la Lista de Partes para Reparaci6n.
Use esta lista para verificar que ha recibido
todos las componentes de su nueva aspiradora
Kenmore.
DEL
Aseg0rese de que el sujetador superior del cord6n de liberaci6n r_[pida se encuentre en posicibn vertical. Quite el alambre con el que estd
atado el cordSn el_trico.
MONTAJE DEL MANGO
Asegure el cordbn
Quite el tornillo del mango Iocalizado justo
debajo del borde superior de la parte posterior
de la aspiradora, ver ilustraci6n de arriba.
eldctrico en la ranura
de la base
presiondndolo en el
gancho superior de
liberaciSn r,_pida para
el cordSn el_ctrico
Saque el cepillo combinacibn de la manija para
exponer el agujero de montaje de la manija.
I
Hendidura--_
de fljacidn (_ "_
Cord6n
elecb'}co-._
como se muestra.
Coloque el mango como se ve en el diagrama
abajo,
Cuando instale la manija, apriete firmemente la
manija sobre el cuerpo. Asegure con el tornillo
para la manija provisto.
Empiecea apretar el tornillo con los dedos. Quiz_i
sea necesario ajustar un poco el mango.
Sujetador de
Apriete el tornillo con un destornillador.
rapida del
cord6n
Reinstale el cepillo combinaciSn.
Cord6n
electrico
Conexl6n
el_ctrica
Torniflo
Arrolle el cord6n de poder alrededor del gancho
de soltar _pido el cordSny la manija de Ilevar.
del mango
4
\
HANDI-MATE JR.@
Para operar el
Handi-Mate Jr.@
vet manual del
Handi.MateJr.@
/
dueffo aeparado.
_ [ _,_
COLOCACI6N DEL TUBO
TELESC6PICO
Ponga el tubo telescbpico en el soporte del
tubo. Ponga la herramienta de hendiduras en el
dpice del tubo telescSpico.
_.__
para taplces
I1PARA INSERTAR EL
HANDI-MATE ®
Tubo
tlesc6pico
Ponga el Handi-Mate Jr.® adentro del compartimiento de depbsito.
Rote el Handi-Mate Jr. ® hacia atrds hasta que
calce en su lugar.
Po_e.lubo
PAPA SACAR EL HANDI-MATE ®
Rote el Handi-Mate Jr. ® afuera del compartimiento de dep6sito.
INSTRUCCIONES DE OPERACI6N
1. Gire el sujetador
del cordbn de lado
a lado y hacia abajo
para liberar el cordbn el_ctrico.
Paligrode lesidn pemonaly dafloal producto
• Para reducirel desgode choqueeldctdco,
esta aspimderacuentacon una da_a poladzada (uno de los contactoses mdsanohoque el
otto),
• La clavijas61opuede Introdudrse de una
rnaneraan el enchufe.SI la davlja no cabe blen
en el enchufe,Invi6rtala. Si a_n no cabe, Ilame
a un electricistapare que Instaleun enchufe
correcto.No altere la clavljade ningunamanera.
2. Desprenda el
enchufe del cord6n
eldctrico y quite el
cordon del sujetador
superior. Est(_ seguro
de que el cable de
_oder estd todavla
fijado en la muesca
de traba del gancho
de arriba del cord6n,
de fijaci6n
Cord6n
3. Verifique que la aspiradora tenga instalada
una bolsa. Consulte CAMBIO DE LA BOLSA
PAPA POLVO.
4. Conecte el cord6n eldctrico polarizado en
un enchufe de 120 voltios que se encuentre
cerca del piso,
Paligrode lesi6npersonaly dafioal producto
• NO PONGA manosni pies debajode la unidad
en ningr3nmomento.
• NO uselos enchufesIocalizadessobrelos
musbles.Losobjetoscercanospodli"a.q
resunar
dat_os.
Desprenda el mango pisando el pedal de Iiberaci6n y tiranda del mango haoia abajo con la
mano.
\
Nora: El agitador no girard si la aspiradora estd
en posici6n vertical.
\
OFF - Apaga el motor de sucoidn de la aspiradora.
ALFOMBRA - Prende (ON) el motor de la aspiradora al nivel de ALTA succi6n y el motor agitador al nivel de ALTA velocidad para limpiar la
mayoria de las alfombras.
f
MODERADO - Prende (ON) el motor de la aspiradora a un nivel de succi6n ALTO y el motor
del agitador a un nivel de velocidad BAJO para
una limpieza suave de las alfombras y tapetes
m=Ssdelicados.
Pulsador
de
Control
OFF
CARPET
GENTLE
FLOOR
Su Aspiradora nueva Kenmore esta equipada
con un agitador de acci6n directa con 2 velocidades para timpiar una variedad de pisos.
Revise por favor la gr_fica de abajo antes de
utilizar su Aspiradora.
,
No utilice la funci6n CARPET (alta velocidad)
para limpiar su alfombra tipo Berdberes, La
velocidad alta del agitador puede daSar o
causar un desgaste excesivo a su alfombra.
Ve/odded
Pulsadorde
Control
c rpet(U
GenUe (2_
Root(3)
de
.
FLOOR
MOTOR
Motor (Succl6n)
Asplradera
APAGA
ALTO
ALTO
ALTO
,,"
o eerd_
cort_
Ba/a
e,"
6
Motor
Agi_der
APAGA
ALTO
BAJO
OFF
UUlice la funci6n GENTLE (velocidad baja)
_]nicamente para alfombras Berdberes o de
cerdas delicadas. El agitador puede ir mas
despacio o detenerse en Areas de cerdas
largas o tapetes. (Vea pdgina 12 en el Manual
del Propietario "Protector de Sobrecarga del
Agitador" si el agitador se detiene y no
comienza nuevamente.)
La funci6n FLOOR puede ser usada en interiores con pisos descubiertos,incluyendo
madera, mosaico, lin61eo,pizarra, etc.
Comerda/
Piso
agitador _qcublerto
Apagado
OFF
_
FUNCION
PISO - Prende (ON) el motor de la aspiradora a
un nivel ALTO de succibn y apaga (OFF) el
motor del agitador para limpiar el piso descubierto.
"L
_
/Yeas
Berdberes
con
o derK_lasAfelpadeGruesa tapete
.,"
v"
Paraselecclonar
unaJuste
de niveldepelode
laalfombra:
Apague la aspiradora. Seleccione un nivel de
ajuste inclinando la aspiradora hacia atr_,s
hasta que las ruedas delanteras est_n un poco
despegadas del piso,
Deslice la palanca de ajuste de nivel de pelo
de la alfombra a la posicibn deseada.
Hay cuatro (4) posiciones de ajuste de altura
en la aspiradora, Use la posici6n LOW para la
mayofia de atfombras y suelos lisos (con el
agitador OFF), y la posicibn HIGH para alfombras de fibras largas o abundosas, tapetes
pequefios, etc, Utilice los otros ajustes como
sea necesario para las diferentes alturas de la
alfombra.
CUIDADO
No deje permanecerla aspiradomen un solo
lugarduranteningfintie'nix)cuando et agitadot estd _.
Se puede dafiar la alfombra.
7
TUBOTELESC6PICO CON
CONTROLDE ASPIRACI6N
1. Remueva el extremo inferior de la manguera
de extensiSn del soporte del tubo tomando
del cuello de la manguera, rotando y tirando
derecho hacia arriba.
HandI-Ma ta Jr.®
Cepiflo para
2. Saque el tubo telescbpico de su lugar de alma
cenamiento.
-,_____._
--Herramlenta
3. Remueva la herramienta de hendiduras de
su posicibn de depSsito enel tubo. Rote el
anillocierre a la posici6n ABRIR
(UNLOCK).
paretapicea
$acudir
_
Mango pare" E _
,-Tubo
ta_sc6pico
Palanca escape
)
manguera extensl6n
PARA USAR ACCESORIOS
Saque el extremo inferior de la manguera de
extensi6ndel soporte del tube tomando el cuello
de la manguera, haci_ndola girar, y tirando dercho hacia arriba.
pare tapices
telescdpico
Rote hacia abajo la palanca de soltarla
manguera de extensi6n si necesita rndximo
aicance.
1. Cueflo
manguera
Note: La v_,lvulade desviaciSn puede estar abierta
mientras se usan los accesorios o pare limpiar una
alfombra nueva a causa de un flujo reducido de aire
pot los accesodos mismos o pot la peluse de la
alfombra que Ilene la bolsa rapidamente. Consulte el
cuadro RECONOCIMIENTO DE PROBLEMAS.
Peligrode choque eldctricoo lesi6n corporal
Desconecte la unidadantes de Ilmpiada o
darle servlclo.De Io contrattopodda produclme un choque eldctrlcoo causer lesk_n
corporal sl la asplradora arranca de manera
imprevlsta.
8
Despliegueel tubo compietamente.Gire el aro de
bloqueo del tube hasta la posici6n LOCK,
Instale el tubo de extensi6n en el extremo abierto de
la rnanguera.
Tubo
_'_._
Deslizador
PAPAOPERAREL DESLIZADOR
DE CONTROL DE ASPIPACION
Tubo telesc6pico
Cuando use accesorios para lirnpiarcortinas,
tapetespequefiosde pelocortoy otrosart=culos
delicados, gireel deslizadorde controlde aspiraci6n
a la posiciSnabierta. Estoreducirdla potenciade
aspiraci6npara facilitar la limpieza.
Este selector se encuentra en el tubotelesc6pico,
cerCa de la manguera.
Destlzadot
de control
Alinee las pestafias del tubo de extension con las
ranuras en forrna de "J" de la manguera. Ernpuje el
tubo dentro de la manguera y gire hacia la derecha
para bloquearlo.
Para obtenerla m_ima Iongitudcon los accesorios,
instale la herrarnienta para hendiduras en el extremo
del tubo. Para hacerlo, introd_zcala en el tuboy girela
un poco.
Nora:Coloque el
deslizador de
controlde
aspiraci6n a la
posici6ncerrada
para la lirnpieza
normal.
CUIDADO
Cuandouse los accesodoe,tongacuidadode
no estirardemasiadola mangueraexpansible
leJos.Sl _ata de
Io debide, podrfa
causarque la aspiradorase venga abajo.
ALMACENAJEDE LOS
ACCESORIOS
Retire el cepillopara sacudir o el cepillopara
cornbinaci6n.Col6quelos firmernenteen su lugar de
almacenamiento correspondiente.
Retirela herramientapara hendiduras del tubo
girdndola. P6ngala a un lado.
expansible
Deslizador
de aspiraci6n
levantada
Retire el tubo de extensi6n de la rnanguera.Gire el
tubohacia la izquierday tire del extremede la
manguera.
Desbloquee el tubo girando el aro de bloqueo
hasta la posici6nUNLOCK.
Desliceel tubo inferiordentrodel tubosuperior.
Gire el aro de bloqueo del tuboa la posici6n
LOCK.
telscdpico
para
Introduzca la herrarnientapara hendiduras dentro
del tubocornprimido.Instale bienen suposici6n de
almacenarniento.
tapices
Ajuste el cepillo cornbinacibn directamente a la
vara.
Asegdrese de que la unidadestd apagada. Inserte
nuevamente la rnanguera cornpletamentedentro de
la abertura ubicada en la parte inferior de la
aspiradora, de donde la sac6 inicialrnente.
Cepillo--_
Ceplllo para
_'j
"
"
. I_
sacudir cepilJ
para combinaci6n
Vea la TABLA USO ACCESORIO para uso del
cepillo combinaci6n,
!
CUIDADO
NO tire de la aspiradom pot la mangueraen
la habitaci6n.Podrfanocurdrdar3osa suspertenendas.
AREA A UMPIAR
ACCESORIO
HERRAMIENTA PAPA
HENDIDURAS
_
is
CEPILLO PApA
COMBINACION
i/
Handi-Mate Jr.®
Entre
Mue "
_
_
jir "
Escalones
v'
v'
v'
is
• Siemprelimpietosaccesorios
antesde usarsabretelas.
Odllasde alfombras
Guie unode los costadoso la parte anteriorde la
boquilla a Io largo del borde de la pared.
V' = Aplicable
ADVERTENCIA
Pellgmde led6npemonal
Escaleras
Ponga la manija en la posici6n vertical completa. El agitador para de rotar. Use la hermmienta para hendiduras, cepillo combinaci6n
o Handi-Mate Jr. ®
Para obtener los mejores resultados de limpieza,
mantengadesbloqueados los conductosde flujo de
aire,
Volcando la Unldad
Cuando use los accesorios mantenga la palanca de soltar la manguera de extensi6n en la
posici6n cerrada cuando sea posible, Esto
ayuda a mantener la aspiradora sin caerse
cuando se estira la manguera. Si se necesita
manguera adicional entonces abra la palanca
de soltar y saque manguera adicional. Use
precaucibn para no voltear la aspiradora,
Desconectela aspiradoradel enchufeantesde examinarla..
lO
SISTEMA DE PROTECTI6N
DE MOTOR
Protector de motor
Esta aspiradora tiene una vdlvula de desviaci6n
que sirve como protector de motor y se abre
automaticamente para proveer un flujo de aire al
motor cuando un bloqueo impida que circule el
aire al motor. Si se abre la va.lvula bypass para
impedir que se recaliente el motor y que se daSe
a la aspiradora, se notara un cambio de sonido
mientras el aire paea pot la abertura de la
vdlvula.
Pare correglr el problema: Consulte el cuadro
RECONOCIMIENTO DE PROBLEMAS.
Nora: La v_lvula de
desviaci6n puede estar
abierta mientras se
usan los accesorios o
para limpiar una
alfombra nueva a
Pare cormglr el problema: Si esto ocurre,
apague la aspiradora y desenchufe el cord6n del
tomacorriente para permitir que la aspiradora se
enfrie y que el protector termal se reajuste.
Busque y saque las obstrucciones, si es
necesarlo. Examine tambi_n y reemplace
cualquier filtm obstruido. Espere
aproximadamente trelnta (30) mlnutos y enchufe
la aspiradora y voltdela 10amvet si el protector
del motor se ha reajustado.
PROTECTOR DE SOBRECARGA DEL AGITADOR
El motor del agitador tiene una protecci6n
incorporadacontra daSo del motor en casode que el
agitador se tranque.Si el agitador se ponelento o se
detiene, el protector de sobrecarga del agitador
apaga el motor del agitador. El motor de succi6n
continuar_,funcionando.
Para cormglrel
problema:Apagu6y
desconect6la
Bot6n para reajustar
el protector se
sobrecargadel
f_
causa de un flujo
reducido de aire pot
los accesorios mismos
o por la pelusa de la
Protector de motor
alfombra que Ilene la
(Behind Hose)
bolsa rapidamente.
Consulte el cuadro
RECONOCIMIENTO DE PROBLEMAS.
asplmdora,
nmplela
Nora: No obstruye el protector de motor.
Si et problema persiste, busque un t_cnico
calificadoque haga el servioio de la aspiradora.
obstrucdg_,y despu&s
presioneel botdndel
protectorde
sobrecarga.
Pare reaJustar:.
Empujeel bot6n de pmteccic_n
de
sobrecargadet agitador.
Protector Termal
Esta aspiradora tiene un protector termal que se
ajusta automdticamente para proteger a la
aspiradora del sobrecalentamiento. Si una
obstrucci6n impide el flujo normal de aire al
motor, el protector termal apaga el motor
autom&ticamente para permitir que el motor se
enfrfe a fin de evitar posibles daSos a la
aspiradora.
11
CUIDADO DE LA ASPIRADORA
Siga siempretodas las instruccionesde seguridad
antes de efectuar el mantenimiento a su aspiradora.
Peligrode d'mlUe _
o tesi_ coqx_'al
Desconectela unldadantes de efectuar el
mantentmlentoa su aspiradora, De Io contrario podffaprodudrseun choqueel6ctricoo
causer lesion corporal sl la aspiradoraarranca
de maneraIrnprev_a,
Recoja el cordbn y enrr611elo
en los sujetadoressuperior e inferior, sin que quede muy apretado.
Asegure la ficha de poder del cordbn sobre el
cordbn de poder.
Petigrode choqueet_,dco o lesioncorporal
SI enrollael cord6nmuy apretadopueclatensarlo muchoy causadedafios. De dafiame, el
cord6npoddacausar descargasel6ctrlcasy lesione_o _
personates.
Guarde la aspiradora
baio techo en un lugar seco, con el
mango en posici6n
vertical.
Desconecte el cord6nel_ctricode la clavijade la
pared. NO rocfeagua sobrela asplradora.
CUIDADO
Limpieel exterior conun traposuavey limpio, que
ha sido exprimido despu_s de rernojar en una soluci6n de ague y detergente Ifquido ligero. Seque el
exteriorcon un trapo seco despu_s de limpiar.
No use los accesor_ d estan mojedos.
Los accesodosque se uUlicenen _.reas
suclas,deb_o del refrigerador,no deben
usarse en otrassuperficiessin antesser
lavado_. Podrfan de_ rnarcas.
Umpie la supefficieexterior del receptdculoy do los
accesodos pare reducir la electricidadest_ticay la
acumulaci6n de polvo.
Lave los accesoriosen agua tibiajabonosa,
enjuaguey deje secar al aire. No los lave on lavadorade platos.
12
E
Sostenga el
canasto de polvo
sobre un recipiente de basura,
ADVERTENCIA
Siempredesconanteet cord_ 61ectdcoantes
de reparar algunaparte de la asplradora.
Apriete el bot6n
de soltar la puerta del canasto
del polvo hacia
abajo para soltar
la puerta.
PAPA SACAR EL CUBO DE LA BASURA
Levante la manija del cubode la basura ubicada al
tope del cubo de la basura.
La puerta girard
abierta y el desecho caerd adentro
del recipiente de
basura.
Tire la manija hacia
Cerrojode
cubo d
basura
arriba y levante el
canasto de basura y
afuera de la
Manija canasto
del polvo
Pue_a racer
canas_
polo
Bot6t
puerta canasto
del polvo
aspimdora,
Cubo de
la basura
Sacuda el canasto
del polvo para soltar
cualquier desecho
que pueda colgar en
el elemento del filtro.
Not,a: Ver la secci6n
REMOOI6N Y
UMPIEZA DEL FILTRO PRIMARIO,
Remueva cualquiar obstdculo qua pudiera estar
ubicado en la entrada de succi6n o drea de
entrada al filtro,
Puerta
succi6n
Despuds que el canasto del polvo estd vacfo
de desecho, cierre la puerta firmemente, EstO
seguro de escuchar un "clic"indicando que la
puerta estd completamente cerrada.
filtro
PAPAREEMPLAZARELCUBO
PAPA VACIAR EL CUBO DE LA BASUPA
DE LA BASUPA
Antes vaciar los escombros del cubo de la
basura es recomendable el usar la palanca de
limpieza movidndola de un lade a otro varias
veces.
Mover la palanca
de un lado a otto
desprende el polvo
y los escombros
que se haya
depositado en el
filtro dentro del
cubo de la basura,
Picaporte
puerta
Ponga el canasto del
polvo de vuelta en la
aspiradora insertando
primero el fondo _ inclinando hacia arras con la
manija del canasto del
polvo levantada.
Palanca limpiar
filtro canasto--_
polvo
Manija
carlasto
Gire la manija del cubo de la basura a la posi*
ci6n vertical.
del polovo
Baje la manija
del canasto del
polvo para trabar
el canasto en su
lugar.
Un "clic" fdcil
de notarserd
I escuchado.
13
Remueva el fil-
Tapa del
ubo de
basura
tro pdmario
rotando contrario a las
Peligrode choque ek_ldco
Leva
agujas del reloj
y tirando hacia
afuera (Ver fiechas al fondo del flltro),
Enjuague con agua
sotaroente como sea
Desenchufeel cable de poderdel tomacordente, No opere la limpiadomsin el flltroprirnadoo el filtrode escape. Est6 seguro que el
flltrosest6 instaledopropiamentepata pmvenirfella del motory/o sacudidaeldctdca,
necesario, no use ning6n
detergente o jabbn.
FILTRO PRIMARIO
Chequesel filtroprimariofrecuentemsnty Ifmpielo
cuandoest_ sucio.
Deje secar el filtro por 24 horas antes de colocarlo nuevamente en la aspiradora.
PARA SACAR EL FILTRO PRIMARIO
Remueva el canasto de basura y el roontaje de la
tapa del canasto de basura como se explica en la
secci6n LIMPIEZA DEL CANASTO DE BASURA.
Cuando la liropieza del filtro ya no restaura la
succion al vacfo a su poder total, usted necesita reeroplazar el filtro.
Est_ seguro de que el canasto del polvo estd
libre de desecho antes de sacar la tapa y filtro.
Nora: Vet PARTES Y CARACTER[STICAS
Tome en esta direcci6n
para abrir y vaciar
para el nt_merodel filtro,
PAPA REEMPLAZAR EL FILTRO
Cerrado
(Para usar)
PRIMARIO
Para reemplazar el filtro,insdrtelo sobre las levas
de limpieza tan leios como vaya, Est_ seguro
que el sello de goma al tope del filtro est_ nivelado contra el soporte del filtro, tome el filtro
como las agujas del reloj para asegurarlo en su
lugar.
Se//o
Ilmpleza
Abierto
(Para vaciar)
Rote el montaje de la tapa del canasto del polvo
en sentido contrarioalas agujas del reloj come
indisado en la tapa y lev_.ntela.
$oporte
Tapa del
filtro
Mientras sostienela tapa del canasto del polvo
sobro un recipientsde basura tome el filtro pdmario, r6telo en sentido contrario alas agujas
del reloj y leva.ntelo.
Nora: Bajo uso y cuidado normal, su filtro
puede Ilegar a durar hasta 5 aSos.
Limpie el filtro primario golpedndolo suavemente
sobre el recipiente de basura. Golpee sobre varios lados para asegurar la mejor limpieza.
Vuelva a montar la tapa del coropartim{ento
del polvo para sacar el polvo del compartimiento. Inserte en ross limpio y seguro con el
cierre del ¢ompartiroiento del polvo.
14
REMPLAZO DEL BOTE DE POLVO
Coloque la tape detcanasto de basurasobreel
canastode basura.Alinee las marcascomo se muestra b_.joAb/erto(Pare Vaciar).
Tome en esta
direcci6n para cerrar y usar
Abierto
(Pare vaclar)
Rote la tapa en sentidode las agujasdel reloj presionando hacia abajo haste alinear las marcas comose
muestra arriba de Cenado (Pate U,sar).
Inserte et canasto
del polvo en la
aspiradora.
Baje la manija
Manija
del canasto del
canasto
polvo para trabar del polovo
el canasto del
polvo en su
lugar.
Un "clic" perceptible serd escuchado.
Cerrado
(Pare usar)
2. Remueva el filtro apretando sobre los costados
del marco del filtro y tirando hacia afuera al
mismo tiempo,
Peligrode choqueekY=ttico
3. Limpie el filtro si es necesario poni_ndolo
debajo de agua corriente y espere a que estd
seco antes de reemplazar.
Desenchufeel cable de poder del tomacorriente. No operela limpiadomsin el fdtro pdmado o el filtrode escape. Est6 seguroqua el
flltros estd instaladoproplamento pate prevenirfalla del motory/o sacuQr_Ja
ekY_tca.
filtro
FILTRO DE SEGURIDAD DEL
MOTOR
del filtro
Chequee el filtro de seguridad del motor frecuentemente y limpielo cuando est_ sucio.
rondo
4. Cuando ponga el filtro de vuelta adentro de la
cubierta del filtro, escuche que el montaje del filtro
calce en su lugar.
Note: Empuje solamente sobre el marco, no
sobre el filtro mismo.
flltro
5. Reemplace la cubierta calzando leng=3etas al
fondo adentro de ranuras y rotando haste que le
cubierta calce en su lugar. Empuje la manija de
liberaci6n del filtro hacia abajo hasta que escuche
claramente un "clic".
1. Para sacar el filtro de seguridad del motor
sueite la manija hacia arriba y rote la cubierta del
filtro.
15
El filtro del escape HEPA se debe reemplazar
cuando este sucio. Se debe reemplazar regularmente dependiendo de las condiciones uso.
Ponga el nuevo cartucho adentro de la cubierta
estando seguro de que la flecha de flujo de aire
al costado del cartucho apunta hacia la cubierta.
El filtro no se puede lavar puss perderi& su capacidad para atrapar polvo.
El seUo gds del filtrodebe ser puesto corttnl el
cuerpo de la aspjradora.
Nota: Ver PARTES Y CARACTER[STICAS
para el nSmero del filtro de escape.
Sello contra
cuerpo asplradora
Cubierta del
Apdete hacia adentro en cada lado de la cubierta
del filtro de escape y tfrela hacia afuera para
remover de la aspiradora,
Hale
aqul _
L--Filtrode
escape
Empuje solamente sobre el marco del cartucho
del filtro, no sobre el material del fiitro mismo.
Reemplace la cubierta del filtm de escape
poniendolas leng,',etas en las hendiduras y
empujando hasta que la cubierta calza en su
lugar.
Remueva el cartucho del filtro de escape.
16
!
4. Remueva la bombilla
tirando derecho hacia
afuera.
r,f l ADVERTENCIA
Pellgm de choque eldctrico o lesidn cotpond
Desconecte la unided antes de limplada o
(lade eervicio. De Io contrado podrfa pmducirse un choque el6ctdco o causer
lesi6n corporal sl la aspiradora arranca de
manera Imprevista.
5. Pare reemplazar la
bombilla cuidadosamente ins_rtela seguramente en la ranura.
PAPA QUITAR LA BOMBILLA
Reemplace la cubierta
de la lente.
1. Desconecte el cable de poder del tomacorriente.
2. Baje la manija
pare poner la
aspiradora plane.
Desarmador
Note: Mire PIEZAS Y CARACTERISTICAS para el
numero de la bombilla.
Ranura
ecte o encendela aspiredoraantesde I
CUIDADO
completarnente,
Lenta de
1,1luz
6. Substituyala
cubierta de la lente
insertando la parte
inferior de la lente en
la ranura, entonces
apliqu_ presi6n en la
parte superior con un
destornillador. Un
sonido =pop" indica
que la lente es_ colocada correctamente
3. Extraiga el lente de la hendidura insertando
el desarmador en la rendija, empuje hacia abajo
el lente y girelo con el desa mador en diracci6n
hacia la unidad.
CUIDADO
No use una bombillade rndsde 9 wtios (13
volts). Cuandose use la aspiradorapot un
largoperiodode t_empo,el cslorde la bombtlla puedecalentarlas partes de plastJcocerca.
en su lugar.
17
Para un aspirado eficiente, el agitador deber ser
mantenido libre de fibras de alfombra, hilos, o acumulaciSn de pelo.Luegode 7 a 10 uses,desenchufey d6 vueltaa ta aspiradora y revise el agitadorpars ver si tiene acumulacionde hilos, fibras o
pelo.
Use tijeraspara sacar cuslquieracumulaciSn atorada alrededor del agitador.
Proceda siempre con precaueiones de seguridad antes de efectuar el mantenirniento a su
aspiradora.
Enchufe la aspiradora y enciendala. Estire al
mdximo la manguera y luego permita que se
encoja hasta su tamaSo normal de almacenamiento.
Peligrode chequeell_dco o lesiOncorporaJ
Desconectela unldadantes de efectuatel
rnantenimiento
a suaspiradora.De Io contrario
pedalsprodudrse un cheque el6ctricoo causer lesiOncorporalsi la sspiradoraarrancade
mm'emimprevist_
original depdsito
merJguera
Si la aspiradora no parece tener suficiente succibn, primero chequee si el canasto del polvo
est,. fleno o si el filtro estd tapado. Ver
LIMPIEZA DEL CANASTO DEL POLVO y
REEMPLAZO DEL FILTRO.
expansible
manguera
Si el canasto del polvo y &reas del filtro est,-'-'-Sn
libres de trabas, chequee la manguera de
extensibn. Rote la palanca de soltar la
manguera de extensi6n contra las agujas del
reloj pars soltar la manguera de extensi6n.
Reinserte la manguera adentro de la abertura
en el cuerpo de la cual fue sacada. Apriete
firmemente para asegurar la conexibn,
Si el canaasto del polvo y dreas del filtro est_n
libres de trabas, desconecte la boquilla de la
manguera del soporte de la vara y ehequee la
boquilla per obst_culos. Gire la palanca de liberaci6n de la manguera hacia la derecha a la posici6n cerrada.
:ii
Cueflo
m
ADVERTENClA
mangu_ra
Peligrode lesionpersonal
debaJode la unldad,
Palanca
mangue_
extens_n
escape
--_
Remueva el extremo inferior de la manguera de
extensibn del soporte de la vara tomando del
euello de la manguera, rotando, y tirando darecho hacia arriba.
Limpie el agitador de acuerdo a tas instruciones
en la secci6n LIMPIEZA DEL AGITADOR.
Retorne la aspiradora a la posicibn vertical
antes de enchufarla en un tomacodente.
18
Revise este recuadro para encontrar solucionesa problemas que puede corregirustedmismo.Cualquier otro
serviciodebe ser realizadopot SEARS u otroagente de serviciocalificado.
La mplfaden_ rioer,de_
1. Est_desoonectada.
o Cortacitcuitos
botadoo fusible
qsemadeen el tab_erode servicJo
de la residencia.
3, Protectorle_melacliv_do.
4, Torna-con'iente
delectuseo.
1. Conectebien,seleccione la funcion deseade
en el controlmanual.
2. Restablezseel cortac_cuitos
o
cambiee_fusible.
3. Desconectela aspiradomy permita quese
enfri_,el protector16rrnico
se activarap_r si sol_
4. pru_beloconottoaparato/ lampara, h_alo
reperarapropiademente.
Noupm
so_ad_at_ne_e.
I. 8oLsaparapalvoIlena o atascada.
2. Ajusteinsorrectode rib:elde pelode
la alfombra.
1. Gamblela bolsa,
3. Agitadordespestade.
3` Acudael Centrode Servloio de Sears
ce¢cano.
4. Rev_ COM6 ELIMINARLOSRESIDUOS
DE BASURAEN LOS CONDUCTOS.
5. LimpJela manguerade obstrucelones.
9. Acudael Cent¢ode Serviciode Sears
rn_scercano.
4. Boqunla,o sujetaderde fa bolsa,atascada.
5. M_guera atasoade.
8. Manguerarola.
7. La manguerano est_bien_nsertada.
3, ActJvac_ del sistemade protecti6n
del moto_
9. Filtrosde seguddad.
Ajusteincorrsoto
de nivel de pe!o
de la allombra.
2. Ajusteel nivel.
7, Insertebienla rnangsera.
8, Determineel exlstsobl_ueos.
9, Cambieel fiitrode protecck_n
al motor y e_flltro
del escape.
1.
Ajuste el r_iveL
La luzrm_lon_
1. Bombillaundlde,
1, Cambiela bombil[a.
El_
del_itado_
noEmc_',a
1. Mangoesta en posJci6nver_..al.
_. Sobrecargade_agilador_ivada.
3. Protsolortermioodesectivade.
t. Mue_ el mangode la posicidn_rtL--al.
2. Aeajuste la sobrsoargadel agitador,
3, Desoonedela aspiradoray permitaque se
enfri_,e_protectort_rmicose
solivata pot si solo.
Et usode los ac_esorioslim_ el
flujode aire.
2, La pelusade unaal/ombranueva
obstruyeelpesode aL,e.
1, ReviseUSO DE LOS
ACCESORtOS
2. ReviseCOMO EUMINARLOS RESIDUOS DE BASURAEN LOS CONDUCTOSy ]impiela manguera.
1. La asp_dora noesta en completarnente
1. Coloquela aspiradoraen la posici_ verticallija
en poelcionve_caL
Cambtode_r'4do.
Di_ultadparaaju_arla
a_tura
depd,odelaalfgm_a,
inctinelaligeramentey _jusle la altuta de pelo.
19
Your Home
For repair - in your home - of all major brand appliances,
lawn and garden equipment, or heating and cooling systems,
no matter who made it, no matter who sold itl
For the replacement parts, accessories and
owner's manuals that you need to do-it-yourself.
For Sears professional installation of home appliances
and items like garage door openers and water heaters.
1-800-4-MY-HOME _
Anytime, day or night
(1-800-469-4663)
(U.S.A. and Canada)
www,sears.com
www.sears.ca
Our Home
For repair of carry-in products like vacuums, lawn equipment,
and electronics, call or go on-line for the nearest
Sears Parts and Repair Center.
1-800-488-1222
Anytime,day ornight(U.S.A.only)
www, sears,com
To purchase a protection agreement (U.S.A.)
i::iii:::i;i::_!i_:i!i
or maintenance agreement (Canada) on a product serviced by Sears:
_i_!_!iii!iil;_ii:,ii
1-800-827-6655
ii:i!iiiii!ii!i!_
(U.S.A.)
1-800-361-6665
(Canada)
...............................................................................................................................................................................................................
Para pedir servicio de reparacibn
i:.::_..
1-888-SU-HOGAR s_
Au Canada pour service en franc..ais:
1-800-LE,.,FOYERMc
(1-800-533-6937)
www.sears.ca
© Sears, Roebuck and Co.
® Registered Trademark / _u Trademark / s_ Service Mark of Sears, Roebuck and Co.
® Mama Registracla / "ruMama de F_brica / s_ Marca de Servicio de Sears, Roebuck and Co.
_c Marque de commerce / ao Marque d_pos_e de Sears, Roebuck and Co.