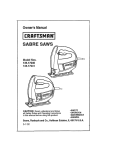
1
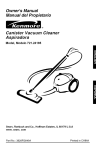
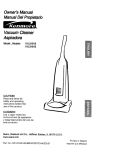
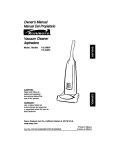
Owner's Manual
Manual Del Propietario
Vacuum Cleaner
Aspiradora
Model, Modelo
116.34728
116.34729
CAUTION:
Read and follow all
safety and operating
instructions beforefirst
use of this product.
CUIDADO:
Lea y siguatodas las
instrucciones
de operaci6n
y seguridadantesdel usode
este producto.
Sears, Roebuck and Co., Hoffman Estates, IL 60179 U.S.A.
www.sears.com
Part No. C01ZCKPO_UOO-KCO1ZCKPZOU_
Impreso en Mexico
Printed in Mexico
Before Using Your New Vacuum
Cleaner ...........................
Kenmore Vacuum Cleaner Warranty
Important Safety Instructions .......
Parts and Features ................
Assembly
Instructions
...........
2
.2
3
4
5-6
Operating Instructions
.............
Getting Started ....................
Pile Height Selection and Setting ......
On/Off Switch .....................
Variable Power Control ..............
Releasing the Handle ...............
Carpet/Bare Floor Selector ...........
Attachments ......................
Attachment Use Chart .............
6
6
7
7
8
8
8
9
10
Vacuuming Tips ..................
Performance Features .............
Vacuum Cleaner
Care .............
10
11
13
Vacuum Cleaner Storage ...........
13
Cleaning Exterior and Attachments .... 13
Dust Bin Cleaning ..............
14-15
Filter Screen Cleaning .............
15
Filter Changing/Cleaning ...........
16
Belt Changing and Agitator Cleaning .17-19
Clog Removal ....................
20
Light Bulb Changing ...............
21
TroubleshooUng
..................
22
Requesting service
......
(back page)
Please read this guide. It will help you assemble and operate your new Kenmore vacuum
cleaner in the safest and most effective way.
For more information about vacuum cleaner care and operation, call your nearest Sears store.
You will need the complete model and serial numbers when requesting information.Your
vacuum cleaner's model and serial numbers are located on the Model and Serial Number
Plate.
Use the space below to record the model number and serial number of your new Kenmore
vacuum cleaner.
Model No.
Serial No.
Date of Purchase
Keep this book and your sales check (receipt) in a safe place for future reference.
LIMITED ONEYEARWARRANTY
ON KENMOREVACUUM
CLEANER
This warranty is for one year from the date of purchase, and includes only private household
vacuum cleaner use. During the warranty year, when this vacuum cleaner is operated and
maintained according to the owner's manual instructions, Sears will repair any defects in
material or workmanship free of charge.
This warranty excludes vacuum bags, belts, light bulbs, and filters, which are expendable parts
and become worn during normal use.
For warranty service, return this vacuum cleaner to the nearest Sears Service Center in
the United States.
This warranty applies only while this product is in use in the United States. This warranty gives
you specific legal rights, and you may also have other rights which vary from state to state.
Sears, Roebuck and Co., DI817 WA, Hoffman Estates, IL 60179
2
WARNING
Your saf=t-y is important to us.To reduce the risk of
fire, electrical shock, injury to persons or damage
when using your vacuum cleaner, follow basic
safety precautions including the following:
Read all Instructions in this manual before
assembling or using your vacuum cleaner.
Use your vacuum cleaner only as
described in this manual. Use only with
Sears recommended attachments.
Disconnect electrical supply before servicing or cleaning out the brush area.
Failure to do so could result in electrical
shock or injury from moving parts.
Do not leave the vacuum cleaner when
plugged in. Unplug from outlet when not
in use and before servicing.
To reduce the risk of electrical shock - Do
not use outdoors or on wet surfaces.
Do not allow to be used as a toy. Close
attention is necessary when used by or
near children.
Turn off all controls before unplugging.
Use extra care when cleaning on stairs.
Do not rest vacuum cleaner on steps. Do
not put on chairs, tables, etc. Keep on
floor.
Do not use vacuum cleaner to pick up
flammable or combustible liquids (gasoline, cleaning fluid, perfumes, etc.), or use
in areas where they may be present. The
fumes from these substances can create
a fire hazard or explosion.
Do not pick up anything that is burning or
smoking, such as cigarettes, matches, or
hot ashes.
Do not use vacuum cleaner without dust
bag and/or filters in place.
Do not use with a damaged cord or plug.
If vacuum cleaner is not working as it
should, has been dropped, damaged, left
outdoors, or dropped in water, return it to
a Sears Service Center.
Always change the dust bag after vacuuming carpet cleaners or freshener, powders, and fine dust. These products clog
the bag, reduce airflow and can cause the
bag to burst. Failure to change the bag
promptly could cause permanent damage
to the vacuum cleaner.
Do not pull or carry by cord, use cord as
a handle, close a door on cord, or pull
cord around sharp edges or corners. Do
not run vacuum cleaner over cord. Keep
cord away from heated surfaces.
Do not use the vacuum cleaner to pick up
sharp hard objects, small toys, pins, paper
clips, etc. They may damage the vacuum
cleaner or dust bag.
Do not unplug by pulling on cord. To
unplug, grasp the plug, not the cord.
Unplug before connecting Handi-mate Jr.
(if applicable). Keep hands away from bristles when unit is on.
Do not handle plug or vacuum cleaner with
wet hands.
Do not put any objects into openings.
Do not use with any opening blocked;
keep free of dust, lint, hair, and anything
that may reduce air flow.
Keep hair, loose clothing, fingers, and all
parts of body away from openings and
moving parts.
You are responsible for making sure that
your vacuum cleaner is not used by anyone unable to operate it properly.
Do not extend the stretch hose, extension
hose or hose combination beyond its
reach. Doing so can cause the vacuum
cleaner to tip and may cause personal
injury or property damage.
SAVE THESE INSTRUCTIONS
Proper assembly and safe use of your vacuum cleaner are your responsibilities. Your vacuum cleaner is intended for Household use. Read this Owner's Manual carefully for important use and safety information. This guide contains safety statements under warning and
caution symbols.
Item
Part No.
In U.S.
Part No.
In Canada
Exhaust Filter
20-86889
20-86889C
Primary Filter
20-82720
20-82720
Headlight Bulb
20-5248
20-40300
Belt
20-5275
20-40096
It is important to know your vacuum
cleaner's parts and features to assure
its proper and safe use. Review these
before using your vacuum cleaner.
Handle
On/Off
Switch
cord
Extension
Handi-Mate Jr.®
Crevice
Wand
Release
Upper
Cord
Hook
Head
Variable
Cord
Hook
Wand
Combination
Exhaust Filter
(Filter inside)
Dirt
Sensor
Release
Handle
Adjustment
Lever
Furniture
Guard
Dust Bin PottJ
Dirt Sensor Optics
(inside)
Handle
Release
Pedal
Protector
Model!Serial
Number Label
Lower
Hose
4
_
IPlease pay special attention to these hazard alert boxes, and follow any instructionsI
Igiven. WARNING statements alert you to such dangers as tire, electric shock, burns I
land personal injury. CAUTION statements alert you to such dangers as personalI
linjury
and/or property damage.
I
WARNING
Electrical Shock Hazard
Do not overtighten.
Do not plug into the electrical supply until the assembly is complete.
Failure to do so could result in electrical shock or injury.
Overtightening
screw holes.
could strip the
Do not operate the vacuum
cleaner without the screws in
place.
Before assembling the vacuum cleaner,
check the PACKING LIST on the cover of
the separate Repair Parts List. Use this
list to verify that you have received all the
components of your new Kenmore vacuum cleaner.
CORD ASSEMBLY
Make sure the quick release upper cord
hook is in the upright position. Remove
the wire tie from the power cord.
Lock the power cord
into the locking
notch base by
pressing it into the
quick release upper
cord hook as shown.
This helps keep the
power cord out from
under the vacuum
Remove tape from dust bin release handle.
HANDLE ASSEMBLY
Remove the two (2) handle screws located
in the body.
cleaner agitator.
Handle
Screw
Power
I_
C 7A
I
Quick Release
Power
Hook
Lower
Note: Do Not
Remove Tape
Hook
Position the handle as shown in the illustration below.
When installing the handle, firmly press the
handle onto the body. Secure with handle
screws provided.
Wrap the power cord around the upper and
lower cord hooks and lock the power cord
plug onto the power cord.
5
EXTENSION HOSE ASSEMBLY
t. Connect extension hose to the wand
holder by twisting and pushing down
over the wand holder to assure a good
connection,
2. Connect the extension hose by aligning the =J" slot with raised tabs. Push
downward and rotate clockwise to lock
in place.
HoMer
For use of extension wand and hose see
ATTACHMENTS section.
Tab
Remove the Handi-Mate
Jr. ® from the
plastic bag and insert Handi-Mate Jr. ®
into the vacuum cleaner as shown, then
close the Handi-Mate
Jr. ® storage cover.
HandI-Mate Jr.®
Storage Cover
OPERATING INSTRUCTIONS
1. Turn the quick
release upper cord
hook to either side
and down to
release the power
cord.
This plug will fit in a polarized outlet only one way. If the plug does
not fit fully in the outlet, reverse the
plug. If it still does not fit, contact a
qualified technician to install the
proper outlet. Do not change the
plug in any way.
2. Release the power cord plug from the
power cord and pull the cord off the quick
release upper cord hook. Be sure the power
cord is still locked into the locking notch on
the upper cord hook.
3. Plug the polarized power cord into a 120
Volt outlet located near the floor.
4. To replace cord, turn upper hook counterclockwise pointing up, then wrap cord.
To reduce the risk of electric shock,
this vacuum cleaner has a polarized
plug, (one blade is wider than the
other.)
Personal Injury and Product Damage
Hazard
• DO NOT plug in if switch is in the
ON position. Personal injury or damage could result.
• DO NOT use outlets above counters. Damage from cord to items in
surrounding area could occur.
6
To select a pile height setting:
Turn off vacuum cleaner. Select a pile
height setting by tilting the vacuum cleaner back until front wheels are lifted slightly
off the floor.
Slide the adjustment lever to the correct
setting.
SUGGESTED
PILE HEIGHT SETTINGS
You may need to raise the height to make
some jobs easier, such as scatter rugs
and longer pile carpets. Suggested settings are:
WARNING
HIGH: shag carpet, long pile, plush, scatter rugs.
MED: medium to long pile.
LOW: short to medium pile.
EX LOW: very low pile and bare floors.
To start the vacuum cleaner, slide the
ONIOFF switch from the OFF position to the
ON position. To stop the vacuum cleaner,
slide the ON/OFF switch to the OFF position.
ON
Selector
Window
This vacuum cleaner is equipped with a
variable power control which will allow you
to select any cleaning power from tow to
high.
Set to LOW suction power for delicate
fabrics such as draperies. Set to MAX or
full power for more conventional carpet or
bare floor cleaning.
To set to MAX suction power, move the
control knob fully to the right.
Low Suction
Power
Variable
Control
For deep cleaning set the power control to
MAX.
Release the handle by pressing down on
the handle release pedal with your foot
and pulling back and down on the handle
with your hand.
Bare floor setting: Slide the carpet/bare
floor selector all the way back and down
toward the bottomof the nozzle until it locks
CAUTION
into place.
In this position the brush assembly does not
revolve. This setting should be used for
cleaning hardwood and tile floors and when
any attachments (tools) are used.
Carpet setting: Slide the selector all the
way forward and up to the carpet position.
In this position the brush assembly will turn.
When carpets are being cleaned the selector should be in this position.
Attention: Refer to your carpet manufacturers cleaning recommendations. Some
more delicate carpets may require that they
be vacuumed with the agitator turned off, to
prevent carpet damage.
NOTE: For longer belt life, turn vacuum off
before moving selector. Failure to do so can
cause the belt to rub on the selector shaft
and may result in the belt becoming hot and
creating a burning rubber smell.
Floor Selector
To Bare Floor
Position
Position
z
To achieve maximum reach with the attachments, add the crevice tool to the end of the
wand by inserting and twisting slightly.
Handi.Mate
Jr.(
When using attachments, be careful
not to overextend the stretch hose
Combination
Tool
when reaching. Trying to reach
beyond the hose stretch
could cause the vacuum cleaner
to tip over.
Wand
Handi-Mate Jr.®
For operation of Handi-Mate
Jr.® sea separate owne
_------------------_
manual
Identifyeach of the attachments shown above.
TO STORE ATTACHMENTS
Remove combination brush from wand or
Remove the upper end of the hose that is
attached to the wand holder by grasping the
hose collar, twisting and pulling straight out.
The attachments can now be added to the
hose.
Note: The motor protector may open
when using attachments or when cleaning
new carpet, due to reduced airflow by the
attachments themselves or by new carpet
lint filling the dust bin quickly. See the
TROUBLESHOOTING
table.
Note: When using attachments make
sure the vacuum cleaner is in the upright
position and the Carpet] Bare Floor selector is in the BARE FLOOR position.
hose. Snap into appropdato storage location.
Remove crevice tool from the wand by twisting. Place in end of wand.
Reattach the extension hose to the wand
holder and place wand in slot on front of
wand holder.
Reinsert HandiMate Jr.® into
the vacuum
cleaner as
shown then
close the HandiMate Jr.® storage cover.
Electrical Shock And Personal Injury
Hazard
Disconnect
electrical supply
before servicing or cleaning the
unit. Failure to do so could result
in electrical
shock or personal
Injury from vacuum cleaner suddenly starting.
Handi-Mate
Jr.®
Handi-Mate Jr.®
Storage Cover
CAUTION
Attachments used in dirty areas,
such as under refrigerator, should
not be used on other surfaces until
they are washed.They
could leave
marks.
Between
ATTACHMENTS
CREVICE TOOL
COMBINATION
Handi-Mate
BRUSH
Jr. ®
FurnRure*
Cushions*
4
4
4
4
*Alwaysclean attachmentsbeforeusingon fabrics.
Drapes*
Stairs
Walls
4
4
,f
,f
4
= Applicable
Carpet edges
Guide either side or the front of the noz-
For best cleaning results, keep the airflow
passage clear.
zle along a baseboard. The full width agitator brushes help remove dirt at carpet
edges.
Stairs
ug the vacuum
__CAUTION
Set handle in full upright position. Set the
CarpetJ Bare Floor selector to BARE
FLOOR when using attachments to prevent possible floor damage. Use the
crevice tool or combo brush.
cleaner from the
t before checking.
WARNING
Personal Injury Hazard
Do not place the vacuum cleaner
on the stairs. If may fall causing,
personal injury or property
damage.
10
I
MOTOR PROTECTOR
MOTOR PROTECTION
SYSTEM
This vacuum cleaner is also equipped with
a motor protector by-pass valve which
automatically opens to provide cooling air
to the motor when a clog prevents the
normal flow of air to the motor. If the bypass valve opens to prevent motor
overheating and possible damage to the
vacuum cleaner, you will notice a
change of sound as air rushes
through the valve opening.
Thermal Protector
This vacuum cleaner has a thermal
protector which automatically trips to
protect the vacuum from overheating. If a
clog prevents the normal flow of air to the
motor, the thermal protector turns the
motor off automatically. This allows the
motor to cool in order to prevent possible
damage to the vacuum cleaner.
To correct problem: If this occurs, turn
the vacuum cleaner off and unplug the
power cord from the outlet to allow the
vacuum cleaner to cool and the thermal
protector to reset. Check for and remove
clogs, if necessary. Also check and
cleanlreplace any clogged filters.Wait
approximately thirty (30) minutes and
plug the vacuum cleaner In and turn
back on to see if the motor protector
has reset. The motor protector will not
reset if the vacuum cleaner is not
turned off even if the vacuum cleaner
has cooled down.
Motor
Protector
Note: Do not block motor protector.
To correct problem:
SHOOTING table.
See the TROUBLE-
Note: The motor protector may open
when using attachments or when cleaning
new carpet, due to reduced airflow caused
by the attachments themselves or by new
carpet lint filling the dust bin quickly. See
the TROUBLESHOOTING
table.
11
DIRT SENSOR
TO CLEAN
The electronic dirt sensor is a feature
which will detect particles as they pass
The dirt sensor optics consist of two optic
cells located inside the dust bin port
assembly. Occasionally, it may become
necessary to clean the two optic cells to
assure maximum performance.
through the vacuum cleaner.
DIRT
SENSOR
OPTICS
Clean optic cells:
• When the red light stays on
continuously.
• When dirt or dust adheres to the optic
cells.
• Whenever the dust bin is cleaned.
Dirt--_
Sensor
The dirt sensor indicator is located on the
front of the vacuum cleaner as illustrated.
To clean the dirt sensor optics, remove
Dust Bin as outlined in the (Dust Bin
Cleaning section).
A red light indicates dirt is being picked up
by the vacuum cleaner.
With the dust bin removed you can insert a
cloth into the dust bin port opening.
OPERATION
Optic
Cells
(inside
As you vacuum, the red indicator light will
come on and stay on as long as the sensor
detects a high concentration of particles
passing through the vacuum cleaner.
Port
Electrical Shock And Personal
Injury Hazard
Disconnect electrical supply before
servicing or cleaning the unit.
Failure to do so could result in
electrical shock or personal injury
from vacuum cleaner suddenly
starting.
Wipe the optic cells with a soft, dry cloth.
Never use cleaners or liquids as they can
help speed the recoating of the optic cells
and make it necessary to clean them much
sooner than normal.
12
VACUUM CLEANER CARE
Always follow all safety precautions when
cleaning and servicing the vacuum
cleaner.
Efectrlcal Shock And Personal Injury
Hazard
Disconnect efectrlcal supply before
performing maintenance to the unit.
Failure to do so could result In electr[cal shock or pemonal injury from
vacuum cleaner suddenly starting.
Gather the cord and wrap it loosely around
the upper and lower cord hooks.
WARNING
Store the vacuum
cleaner in a dry,
indoor area, on
the floor with the
handle locked in
the upright
position.
Electrical Shock And Personal Injury
Hazard
Wrapping the cord too tightly puts
stress on the cord and can cause
cord damage. A damaged cord is an
electrical shock hazard and could
cause personal injury or damage.
Unplug cord from wall outlet. DO NOT drip
water on vacuum cleaner.
Clean exterior using a clean, soft cloth that
has been dipped in a solution of mild liquid
detergent and water, then wrung dry. Wipe
dry after cleaning.
Do not use attachments if they are
wet. Attachments used in dirty
areas, such as under a refrigerator,
should not be used on other
To reduce static electricity and dust buildup, wipe outer surface of vacuum cleaner
and attachments.
surfaces until they are washed.
They could leave marks.
Wash attachments in warm soapy water,
rinse and air dry. DO NOT clean in dishwasher.
13
Always empty the dust bin when dirt
level reaches the "MAXIMUM FILU' line.
TO EMPTY DUST BIN
Hold dust bin over a trash container. Lift
TO REMOVE DUST BIN
dust bin lid directly off the dust bin.
Dust Bin
Lid
Electrical Shock And Personal Injury
Hazard
Always unplug power cord from electrical outlet before performing any
maintenance on vacuum cleaner,
Dust Bin
Dust Bin
Pour dust bin contents
into a trash container.
Raise the dust bin latch. Grasp the handle
located at the side. Lift up and out to
remove dust bin from vacuum cleaner.
clogs
that might
Removeany
be located in the
dust bin port or
Finer
Screen__
the filter screen.
!
_,_
_ k
/_L.1
I[ ..,(.(ZL..._-,-.-""_
TO CLEAN FILTER
See Filter Changing/Cleaning
section.
Filter
' ., CAUTION
Do not use dust bin handle to carry
unit.
Do not carry dust bin by dust bin lid.
Every time dust
bin is removed,
rotate cleaning
knob on top of
dust bin until filter is clean to
maintain cleaning
performance.
Cleaning
Knob __
14
TO REPLACE
Place dust bin into vacuum cleaner
DUST BIN
Secure dust bin into place by closing the
dust bin latch.
Dust Bin
LId_
Dust Bin-Dust Bin
Replace dust bin lid assembly by placing
back on dust bin as shown,
Remove the dust bin as outlined in the
DUST BIN CLEANING section.
Check filter screen frequently and clean when
dirty.
To clean filter screen,
wipe screen with a dry
cloth.
Filter
Screen
15
EXHAUST FILTER
HEPA
Electrical
The exhaust filter must be replaced when
dirty. It should be replaced regularly
depending on use conditions.
Shock Hazard
Unplug power cord from electrical
outlet. Do not operate the vacuum
cleaner without the primary or
exhaust filters. Be sure the filters
are properly installed to prevent
motor fadure and/or electrical shock.
The filter CANNOT be washed as it will
lose its dust trapping ability.
Note: See PARTS AND FEATURES
the filter number.
PRIMARY FILTER
Check primary filter frequently and clean
when dirty.
Remove filter cover by pulling out at the top
of the exhaust filter cover.
TO REMOVE PRIMARY FILTER
I I!
Remove the dust bin and dust bin lid
assembly as outlined in the DUST BIN
CLEANING section.
While holding
pdmary filter
over a trash container grasp filter,
rotate and lift off.
for
ClHning Cam
Slot
Filter
Clean primary filLocking
Tab
tar by gently tapFilter Cover
ping over a trash
container. Tap on several sides to ensure
best cleaning. Rinse with water only as
needed, do not use any detergent or soap.
Allow the filter to dry for 24 hours before
putting it back into the vacuum cleaner.
Remove the exhaust filter cartridge.
When cleaning the filter no longer restores
vacuum suction to full power you need to
replace the filter.
Exhaust
Filter Seal
Note: See PARTS AND FEATURES
for the filter number.
TO REPLACE PRIMARY FILTER
With slot side on
filter towards the
filter cover slide
cleaning cam
inside opening,
rotate filter clockwise until slots lock
onto tabs in cover.
Cleaning
Cam
Slot
Filter
Push only on filter cartridge frame, not on
filter material itself. The foam seal of the
filter should be placed against the vacuum cleaner body
Locking Tab
Filter Cover
Note: Under normal use and care, your filter can be expected to last up to 5 years.
Replace the exhaust filter cover by placing
bottom tabs in slots and pushing in until
cover snaps into place.
Re-assemble dust bin lid to dust bin. Insert
into vacuum cleaner and secure with dust
bin latch.
16
Locate the two latches and the two locking tabs which secure the base plate.
WARNING
To remove the base plate, press the two
latches inward.
Electrical Shock Or Personal Injury
Hazard
Disconnect electrical supply before
servicing or cleaning the unlL
Failure to do so could result in
electdcal shock or personal injury
from vacuum cleaner suddenly
starting.
CLEANING
Push in on the locking tabs toward the
center of the vacuum cleaner.
Rotate the base plate away from the
nozzle housing. The sides of the base
plate need to be pulled slightly outward to clear the wheels.
AGITATOR
The agitator and belt are now
exposed. Carefully remove any residue
that may exist in the belt area.
Motor
Shaft
Assembly
To clean agitator turn vacuum cleaner
over, cut off any carpet pile and lint
entangled around agitator with a pair of
scissors in the slots provided.
Frequently check and remove hair, string
and lint build-up in the brush area. If
build-up becomes excessive, follow the
steps below.
TO REMOVE
If the belt is still attached to the motor
shaft, there will be tension on the agitator.
If the belt is not broken, remove it from
the motor shaft before lifting the agitator.
BELT
Disconnect power cord from electrical
outlet, and place on paper to protect the
floor surface. Place vacuum cleaner in
the full upright posiiton.
Carefully lift the one end of the agitator
and then lift the other end.
Turn the unit over so the agitator and
base plate are facing upward.
Personal Injury Hazard
Be careful when removing the agitator as the belt tension is high.
Failure to do so could result in
personal injury from the agitator
releasing quickly and snapping
awa_
- Locking
Lockin
Tabs
17
TO CLEAN AGITATOR
BELT ROUTING
NOTE: In order to keep cleaning efficiency
high and to prevent damage to your vacuum
cleaner, the a aitator must be cleaned everv
time the belt is chanoed.
Correct Routing of Belt
(Selector
I.,
The agitator must also be cleaned according to the following schedule:
Vacuum Use
Clean Aaitator
HEAVY (used dally)
every week
MODERATE -
every month
I aeft
/ .J,J._,lj )Carpet/Bare
Agft=_r"--
/
u;_,
Clrpe#Bere Floor
Seleclor Shaft
Incorrect
(used 2-3 times/week)
LIGHT -
In CerpetP___)
ShaR
Routing of Belt
(Belt on Seleclor
Shaf_
every 2 months
(used 1 time/week)
.J
Remove any dirt or debris in the belt path
area or in the agitator area.
Agitator
Motor
Shaft
Carpet/Bare Floor
Selector Shaft
TO REPLACE BELT
Make sure that the carpet/bare floor selector is in the carpet position.
Loop the new belt on the motor shaft.
Incorrect
Routing
of Belt
(Selector In Bare Floor Position)
NOTE: See PARTS AND FEATURES for
belt number.
/ _.\
/
,
Carpet/Bare
Floor Pedal
Loop the end of the new belt on the agitator.
Agitator
Belt
Carpel/Bare Floor
Selector
Shaft
-Belt
Press firmly, checking to see that each end
is completely inserted.
Motor
Shaft
Floor Selector
Shaft
Belt Groove
I
Align the square extension on each end cap
with the slots in the frame of the nozzle.
NOTE: Care must be taken due to the belt
tension during reassembly.
Agitator Assembly
Check to see that the belt is centered in the
belt groove. Turn the agitator with your fingers to see that it turns freely.
18
To re-attach the base plate, insert the tabs
into the slots along the front edge of the
base. Place the vacuum cleaner in full
upright position. Lower the base plate to its
original position.
.Locking
Tabs
A gentle pull outward may assist in reassembly.
m
Press the base plate down until the two
locking tabs snap into place.
Tabs
As the base is lowered the inner areas will
brush against the dust compartment wheels.
Slide the right latch to the right and the left
latch to the left to secure.
Return the vacuum cleaner to the upright
position before plugging into the electrical
outlet
19
I!
Alwaysfollow all safety precautionswhen
cleaningand servicingthe vacuumcleaner.
Re-connect the extension hose to the dust
bin port assembly. Plug in the vacuum
;leaner and turn it on. Stretch the hose to
maximum length and then allow the hose to
return to its storage length.
Turn the unit off and unplug the unit.
Electrical Shock Or Personal Injury
Hazard
Disconnect electrical supply before
servicing or cleaning the unit. Failure
to do so could result in electrical
shock or personal injury from vacuum cleaner suddenly starting.
Remove dust bin and check dust bin port
and secondary filter for clogs. If the dust bin
and tilter areas and the hose areas are free
of clogs, check the nozzle area. To check this
area, see the section on AGITATOR CLEANING.
If the vacuum cleaner does not seem to have
adequate suction, first check if the dust bin is
full or if a tilter is clogged. See DUST BIN
CLEANING and FILTER CHANGING.
Secondary
If the dust bin and tilter areas are free of
clogs, check the hose area. Remove extension hose by grasping the hose collar, twisting, and pulling straight off.
i
Port
Return the vacuum cleaner to the upright
position before plugging into an electrical
i
Personal Injury Hazard
DO NOT place hands or feet underneath the unit at any time. The agitator will be revolving rapidly when the
vacuum cleaner is turned on and is
in the carpet setting.
Visually inspect the hose and the base area
into which the hose is connected.
Remove any visible clog.
2O
To replace the
light bulb carefully insert securely
into slot. Replace
lens cover.
Electrical Shock Or Personal Injury
Hazard
Disconnect electrical supply before
performing maintenance or cleaning
the unit. Failure to do so could result
in electrlcal shock or personal Injury
from vacuum cleaner suddenly
starting.
Replace lens cover by inserting bottom tab
of lens into slots then applying pressure to
top tabs with a screwdriver.
TO REMOVE LIGHT BULB
Disconnect power cord from electrical
outlet. Lower handle to lay vacuum cleaner fiat.
Pry out light lens at slots by inserting
screwdriver into slot, pushing down on the
lens and rotating the screwdriver handle
toward unit.
A "popping" sound indicates lens is snapped
properly in place.
Flat
Note: See PARTS AND FEATURES for
bulb number.
!
r ., CAUTION
Do not plug in or turn on until the
vacuum cleaner is completely
reassembled.
CAUTION
Do not use a bulb rated over 9W
(13V). During extended use, heat from
the bulb could overheat surrounding
plastic parts.
Remove the light
bulb by pulling
straight out.
21
TROUBLESHOOTING
Review this table to find do-it-yourself solutions for minor performance problems. Any other
service needed, should be performed by a Sears or other qualified service agent.
Vacuum Cleaner
won't run.
1. Unpluggedat wall outlet.
2. Trippedcircuitbreaker/blownfuse
at householdservicepanel.
3, On/Offswitchnot set to On position
4. Thermal protector tripped,
1. Plug in firmly, push On/Off switch to On
2. Reset circUit breaker or replace
fuse.
3. Push On/Off switch to On position,
4. Unplug vacuum cleaner, allow to cool
and thermal protector will reset itself.
Poor job of dirt
pick-up.
1. Fullor cloggeddust bin.
2. Wrongpile heightsetting.
3. Wornagitator.
4. Cloggednozzle.
5. Cloggedhose.
6. Holein hose,
7. Hose notinsertedfully
8. Motorprotectionsystemactivated,
9. Dirtyfilters.
1. Emptydustbin.
2. Adjustsetting.
3. Taketo yournearest Sears
ServiceCenter,
4. Check CLOG REMOVAL.
5. Checkfor clogs.
6. Taketo your nearestSears
ServiceCenter.
7. Checkhoseconnection
fi. Checkfor clogs.
9. Changeprimaryfilterand
exhuastfilter.
Vacuum Cleaner picks up
moveable rugs or
pushes too hard.
1. Wrong pile height setting.
1. Adjust setting.
Light won't work.
1. Burned out light bulb.
1. Change light bulb,
Agitator does not turn.
1. Carpet/Bare floor selector in Bare Floor
2. Broken belt.
1. Move selector to the Carpet position.
2. Replace belt.
Air flow restricted
with attachment use.
I.
1. Check ATTACHMENTS.
Sound changes.
2. New carpet fuzz clogged air path.
2. Check CLOG REMOVAL and clean
hose.
Dirt Sensor, some
models, will not work.
1. Dirty optic cells.
1. Clean optic cells.
Attachment use restricts air flow.
22
Antes de usar su asplradora nueva .....
1
Garantia de la espiradora de Kenmore ... 1
Instmcclones importantes de
segurldad ............................
2
Caracteristicas de la asplradora ........
3
Instrucciones de ensamble ...........
4-5
Instrucciones de operaci6n ............
6
Parecomenzar........................
6
a_te y seleccibnde nhtelde pelode la
mbra ............................
5
Interruptorde encendido/apagado.......
7
Desprendk_iento
del mango ..............
6
Selectorde pisoscon alfornbray sinalfombra.7
Accesorios...........................
8
Cuadrode usode losaccesorios..........
9
Sugorencias
para aspirer ................
9
Caracter(sticas
de rendimiento...........
10
Culdado de la asplradora ..............
12
Almacenamiento
de la asplradora ........
12
Limpiezadel exteriory de los accesorios... 12
Limpiezadel la cubode la basura.........
13
Limpiezadelfltttosecundario ............
14
Camblo/limpieza
de lasfiltros ...........
15
Remplacement
de la courroieet
nettoyagede I'agitateur ..............
16-18
Cbmoeliminarlos residuosde basupa
enlos conductos .....................
19
Cambiode la bombilla.................
20
Reconocimiento de problemas .........
tnformac|6n de assistancia
o servlclo ..................
21
(back page)
Por favor lea esta guia que le ayudara a ensamblar y operar su aspiradora nueva de Kenmore on una manera
rods sagupay efectiva.
Papamas informacibn
acercadel cuidadoy operacibndeesta aspiradora,llamaa su tJendaSearsmas cercana. Cuandoprequnteporinformacibn
ustednecesitarael n_merocompletode seriey modelodela aspiPadoraque est_ colocadoen laplaca de los n_merosde modeloy serie.
Useel espaciode abajopaparegistPar
el nt_mero
de modeloy aerieparesu nuevaaspiradoradeKenmore.
N0merode Modelo
NOmerode Serie
Fechade Comppa
Matenga estetibroy sureciboen un |ugarseguroparareterenciasfutures.
GARANTiA LIMITADA DE UN A_IO DE LA ASPIRADORA KENMORE
Estagarantlaes porunaSodesdela facha de compra,e induye solamenteel usode la aspipadora
en
hogapasprivados.Duranteel aSodegapantia,cuandola aspiradoraes operaday manfanidade acuerdoal
manualdeinstruccionesdel dueho,Searsrepararbcualquierdefectoen mateflales o fabricacibn
]ibrede cargo.
Esta garantia excluye las bolsas de colecci6n, correas, lamparillas,y filtros,las cuales son partes gastab]esque
se deterioran con el uso normal.
Para el servicJo de garantia, retorne esta aspiradora al Centro de Servicio Sears m_s cercano en los
Estados Unidos.
Esta garantia se aplica solamente mientras este productoest& en uso en los Estados Unidos. Esta garantia le
da a usted derechos legales especificos, y usted puede tenet tambien otros derechos los cuales varian de
estado a estado.
Sears, Roebuck and Co., D/817 WA, Hoffman Estates, IL 60179
t
A JJ"_l_
__
'
Importantepars nosotros,
s,c.
Leaestemanualantesdearmaro utilizarsu
aspiradom.
UsesuaspiradoraQnicamenteen laforma
desc,rita
eneste manual.Use Onicamentecon
accesoriosmcomendadosporSears.
Parereducirel riesgode choquael6ctrico,nouse
suaspiradoraal airs librani sobresuperficies
mojadas.
Desconectela fuente deelectriddadantesde
darservicioo limpiar.De Io contrariopodda
causarun choqueel_ctricoo lesibncorporal.
Siempredebeapagarsuaspiradoraantesde
desconectada.
No desconectela aspiradoratirandodel cordbn
el_ctrico.Parsdesconectarla,
jale el enchute,no
el cord6n.
No usela aspiradorasi el cordbno el enchufe
est_ da_do. Si la aspiradorano est_
funcionandoadecuadamente
o sise hadejado
caer,est_daSada,se ha dejadoexpuestaa la
tntemperie
o se ha dejadocaeren agua,devu_lvalaa un Centre/Departamente
de serviciode
Sears.
No jale ni transportela aspiradoraporel cord6n;
no useelcord6ncomo mango;no cierrepuertas
sobreel cord6n;nojale el cord6nsobrerebordes
agudosni esquinas.No passla aspiradorasobre
el cordon.Mantengael cord6nalejadodesuperficiescalientes.
No abandonelaaspiradoracuandoest_conectada.Descon6ctela
cuandono la est6 usandoy
antesde darleservicio.
No permitaque sea utilizadacomo juguete.Se
requiemtenetmayorcuidadocuandosea
utilizadaen la pmximidaddenitroso pornifios.
No toquelaaspiradorani el enchufeconlas
manosmojadas.
El cepillo agitador puede an-ancar nuevamente de pronto, desconecte de la fuente de
poder antes de hacer el servicio.
No coloque objetos en las aberturas.
trlco, lesion corporalo dafiosal uUilzarsu asplradora_act,s de acuerdocon precaudones
b:tslcasdo asguddad, entre elias:
No utilicela aspimdorasialgunaaberturaest_
bloqueada;maot6ngalafibrede polvo,pelusa,
cabellosy cualquieracosaque podriedisminuir
el fiujode airs.
Mantengael cabello,topssuelta,dsdosy todas
laspartesdel cuerpoalejadosde lasaberturasy
piezas rnec_nicas.
No usela aspiradorasintenerinstaladoelo cubo
de la basuray/o losflltros.
Umple slempre el cubode la basumdespu6s
de aspirarla alfombmlimpiadores
o refrescantes, polvos y dep_sitesfinos.Estospmductos
tapanlos filtros,reducenel flujode airsy pueden
causardafioa la aspimdora.
No usela aspiradoraparalevantarobjetosagudos,juguetespeque_s, alfileres,sujetapapeles,
etc.Podriandattarla aspiradora
o elcubode la
basura.
No levanteningunacosaqua se est_quemando
o emitiendohumo,comacigarrillos,
cerifioso
cenizascalientes.
No usela aspiradoraparaaspirarliquidos
inflamables
o combustibles
(gasolina,liquidos
para limpieza,perfumes,etc.)ni la useen
lugaresdonde_stespodrienestarpresentes.Los
vaporesde estassustancias
puedencrearun
peligmde incendioo explosi6n.
Tsngacuidadoespecialal utilizarla aspimdom
en escalones.No la coloquesobresillas,mesas,
etc.Mant_ngalaenel piso.
Usted es responsable
de asegurarque suaspiradorano sea utilizadapor ningunapersonaque no
pueda manejarlacormctamente.
No extienda la manguera de estirar, manguerade
extensi6n o combinaci6nde manguera mds all_
de su alcance. Hacer esto puede causar que ta
aspiradora se de vuelta y pueda causar lesiones
personales o dafio a la pmpiedad.
GUARDE ESTAS INSTRUCClONES
El armado y uso seguro de su aspiradora son su responsabilidad.Esta aspiradora ha sido disefiada
exciusivamente para uso dom_stico. La aspiradora debera almacenarse en un lugar seco yen el interior.
Lea este Manual del propietariodetenidamente, pues contiene informacibn importante sobre seguridad y
uso. Esta quia contiene informaci6n sobre seguridad debajo de simbolos de advertiencia cuidado.
Pieza N°
en EUA
Objeto
Pieza N°
en Canad&
Filtrode escape
20-86889
20-86889C
Primary Filter
20-82720
20-82720
Bombillade farol
20-5248
20-40300
Correa
20-5275
20-40096
Es imporlanteconocerlaspiezasy caracterlsticasde su aspimdorapara asegurarsu
usaadecuadoy seguro. Examinelasantes
de usarsuaspiradora.
Mango
Interrupter
_
anguera
Herramienla
HandI-Mate Jr.® --_
pare taplces _
de Ilberacl6n
Tubo--_
Control de----velocldad|
ComparUmiento
inferior para
el cord6n
_
"_
T
variable I
Cepillo de la
€omblnacldn
\
Po_e-tubo--_
Nitro de escape
(cubierta interior
del filtro)
Indicador de
polvo
__/
Cubo de la
basura
_
_rol
--
(filtro adentro)
Protector de -meubles
Pue_a canaslo J
de basura/Sensor
6ptlcodebasura
_dentro)
Selector de pisos
con alfombra y
sin alfombra
Pedal de -liberaci6n
del mango
Boquilla
Protectror
demeter
Manguera
Porfavorpongaatend6nespeciala estasinskucdonesdadas. Advertencla:Esteinfarmaci6n
le
lalertar_conel poligrosde fuego,choqueselectricos,quemadasy lesiones.Culdado: Este
linfarlaci6n le alertaraa peligroscomo lesionesy dar_os
de propiedad.
Peligrode choque el6ctrico
No aprlete deroasiadoel tornillo,
No conectela asplradora hastaqua termine de armada.De Io contradopodria
causar un choqueel6ctrico o lesi6n corporal.
Si In aprietademasiado podrla arruinarlos
orlflclos para el tornlllo.
No opere la asplradorasin tener Inetalado
el tomlllo.
Antesde armarla aspiradora,chequela LISTA DE
EMBALAJEen la cubiertaseparadade la Lista de
PartesparaReparacibn.Useesta listapara verificar que ha recibidotodosios componentesde su
nuevaaspiradoraKenroore.
COLOCACION DEL CORDON
Aseg_resede queel sujetadorsuperiordel cord6n
de liberacibnr&pidase encuentreen posicibnvertical. Quiteel alambrecon el que est_atadoelcord6n
el_ctrico.
Quitecinta de la cubiertadel filtroy picaportede
caj6nde polvo.
Asegureel cord6n
el_ctrico en la ranura
de la base
presion_ndolo
en el
ganchosuperiorde
liberaci6nr_pidapara
el cord6n el6ctrico
como se muestra.
MONTAJE DEL MANGO
Saque los dos (2)tornillos de la manija ubicados en el cuerpo.
\
de fijacl6n
Cord6n
Tornillo
Tornillo
*------del
mango
Sujetador de
Cord6n
rapida del
cord6n
Conexl6n
el_ctrica
I
_Nota
Cinta
: No quita cinta.
Compartimlento
inferior para
el cord6n
Posicione la manija como se muestra en la ilustraci6n m_s abajo.
Enrolle el cord6nelectrico alrededorde los sujetadotes superior y inferiory presionela ranuradel
enchufe sobre el cord6n.
Cuando instaJe la manija, apriete firmemente
la manija en el cuerpo. Aseg_rela con los
tornillos provistos.
4
ENSAMBLE DE LA
MANGUERA
1.
Conecte la manguera de extensi6n en el
tubo empujando y gir_ndola sobre el tubo
pare asegurar una buena conexi6n.
2. Conecte la manguera de extensibn alienando los ganchos con las ranuras en forma
de "J".Empuje hacia abajo y glrela ala
derecha para asegurarla en su sito.
Para como user el tube y la manguera vea la
seccibn"ACCESORIOS'.
tubo
Lenguetm "
lerantade
Saque el Handi-Mate Jr. de la bolsa plbstica e
ins_rtelo en la aspiradora como se muestra,
entonces cierre la cubierta del contenedor del
Handi-Mate Jr.
HandI-Mate Jr.®
HandI-Mato Jr.®
Storage Cover
INSTRUCCIONES DE OPERACION
1. Gireel sujetadordel cord6nde
ladoa ladoy
haciaabajopare
liberarel cord6n
el_ctrico.
2. Desprendael enchufedel cord6nel_ctricoy quite
el cord6ndel sujetadorsuperior.Compruebeque el
cordbnel6ctricosiguefljadoen la ranurade bloqueo
del sujetadorsuperior,
3. Conecte el cordbn el_ctrico polarizado en un
enchufe de 120 vollJosque se encuentrecerca del piso.
ENCIA
La clavijas61opuedelntroducirsede una
manera en el enchufe. Si la clav|ja no
cabe bien en el enchufa, Invl_rtala. Si
at_nno cabe, llama a un electricistapara
que instale un enchufe correcto. No
altere la clavijade ningunamanera.
ADVERTENCIA
4. Pare reemplazar el cordbn,tome el gancho de
arriba las agujas del reloj apuntando hacia arriba,
entonces arrolle el cord6n.
Peligro de Lesiones Personales y Da_o al
Producto
E
r. ' ADVERTENCIA
• NO enchufe si la Ilave est& en la posici6n ON. Lesiones personales o daSo
pueden resultar.
Para reducir el riesgo de choque el_ctrico,
esta aspiradora ¢uenta con una clavija
polarizada, uno de los contactos as m=ts
ancho que el otro.
• NO use tomacorrlentes sobre el
mostrador. Pueden ocurrir da_os dab|dos
al cord6n a objetos en el _trea airededor.
Para seleccionar un ajuste de nivel de pelo de la
alfombra:
Apaguela aspiradora.
Seleccioneunnivelde ajuste
incti_ando
la aspiradorahada atr_ bastso,ue las
ruedasdelanterasest_nun pocodespegadasdel
piso.
Desliceta palar_ca
de ajuste de nivel
de pelode ta
alfombraa la posicibndeseada.
SUGERENCIASDE AJUSTE DE NIVELDE PELO
DE LA ALFOMSRA
Parsquese le facilitenalgunastareasde Iimpieza,
comoporejemplotapetesy alfombrasde pelolargo,
p_edeque sea neceeadoelevarel ajustede nivel
de pelo de la alfombra.Los ajustessugeridosson
los suguientes.
HIGH:pelo_spem y lanudo,pelolargo,fetpa, alfombraso tapete$irregulares.
Pellgm de lesl6n personal
MED: pelomedianoo pocolargo.
LOW: pelocortoo mediano.
NO PONGAlas manos o los pies debajo de
la aspiradoracuando eatablede la ssleccl6n de plsossin alfombra hastale selecci6n de nivelde pelo de la alfombra. El
agitadorg|ra rapidementecuandoIs espiradora est=_encendiday est_ en la selecci6n de plsos con alfombra.
EX LOW: pelomuy corto.
MONTADO EN EL MANGO
Parsarrancarla aspiradom,desliceel interruptor
de
enc_ndido/apagado
dela posici6nOFF a Is posici6n
ON. Paradetenerla,coloqueel interruptor
en la posicibnOFF.
!
CUIDADO
No deje permanecerla aspiradoraen un
solo lugar durante ningt_ntiempo euando
II el agltadorest_ rotando.Se puededeRarla
alfombrs.
Nora:Esteinterruptor
operasolamenteel motor de
succi6n.Parsque el agitadorgirs,el selector
encendido/apagado
del agitadordebeestaren
posici6nencendidoy el asa debesacarsede la
posic_6nvertical
ON
_
selector
Esta aspiradora est_ equipada con un control
variable de poder el cual le permitirdseleccionar
cualquier poder de limpieza desde bajo hasta
alto,
%
Ponga poder de Succibn BAJO para telas
delicadas como cortinas. Ponga MAX o poder
total para m_s convencionales limpiezas de
alfombrassobre el piso
It
Para usar poder de Succi6n TOTAL o poder
total mueva la perillade control completamente
a la derecha.
Para limpieza profunda fijar el control variable
de succibn en MAX,
I
Desprendael mangopisandoel pedalde liberaci6n
y tiredel mangohaciaabajoconla mano.
Nota: Elagitadorno girar_si la aspiradoraest_en
posicibnvertical.
Para de secclonarel ajustede piso descubierto:
Oprimael bot6nde selecci6nhastaarrasy debajo
de la boquillahastaquese sientaasegurado.
CUIDADO
Enesta posici6n el agitadorno da vuiltas.Estaposicibndebe estarusadapara limpiamiento
de pisode
maderay mosaicoy cuandose usan algunos
atachamiento$(herramientas).
No deje permanecer la asplradora en un
solo lugar durante ning_ln Uempo cuando
el agitador estb rotando. Se puede dafiar
la alfombra.
Selecci6n de pisos con alfombra: Oprime el boton
completamenta hasta el frente y por arriba basra
la posicibnde pisoscon alfombra
Nota: Para la vida m_s larga de la correa, apague
la aspiradora antes de mover el selector. Si usted
no Io hace de esta manera, puede causar qua la
correa frota el eje dei selector y puede calentar y
causar que se queme la correa que causeria un olor
quemado.
En esta posicibnel agitadorda vueitas.Cuandose
limpiaaifombras,el selectortieneque estaren esta
pisos
con alfombra y
sin alfombra
poslclon.
Atenci6n: Refi_rase alas recomendaciones del fabricante para ]impiar su alfombra. AJgunas alfombras
m&s delicadas pueden requerirel usode la aspiradora con el agitador desconectado para prevenir
que la alfombra sea clafiada.
ta la posiciOn
de pisos sin
alfombra
le posiciSn
de plsos con
alfombra
7
CUIDADO
;,tenga culdado de
boextender an exceso la manguera de
extensl6n.Tratendo de alcanzar m_ts atilt
de la capacided de estirar la maguera
puede causar qua la asplradora se d6
vuelte.
Handi-Mate Jr.®
Para operaciOnde Handi-Mate
Jr.® vet manual separadopara
dueOos.
PARA GUARDAR LOS
ACCESORIOS
Saque el cepillodel polvo o cepillocombinack_n.
C_,lcetoen el lugar apropiado de almacenaje.
Saque la punta para grietas de la extension
rotbndola. DOjelaaparte.
IdenUfique
cadaunode losaccesoriosmostradosa
continuation.
Saque la extensionde la manguera. D6 vuelta la
extensionhacia la izquierday tirela hacia afuera
del extremode la manguera.
Abra la extensiondandovuelta el anillode cierre
a la posiciOnABRIR.
Quiteel fin superiorde la mangueraqua es conectada a el tubatelescbpico
agarrandoel cuellode
manguera,tuercey estiraderechofuera. LasflJacionesahorase puedena_adira la manguera,
Deslicela extensioninferioradentrode la extensionsuperior.D6 vuelta el anillode cierrede la
extensiona la posicibnCERRAR.
Nota: La v:_lvula
de desviaciOnpuedeestarabierta
mientrasse usanlos accesorioso paralimpiaruna
alfombranuevaa causade un t_ujoreducidode sire
parlos accesoriosmismoso
parla pelusade la alfombraque Ilenela balsarapidamente.Consulteel cuadroRECONOC|MIENTO
DE PROBLEMAS.
Ponga la punta para grietas adentrode la extensi0n comprimida.C_lcela en el lugar apropiado
de almacenaje.
!
ADVERTENClA
Peligro de choque el_ctrico o lesion corporal
Desconecte la unidad antes de limpiada o
darle servicio. De Io contrario podria producirse un choque el_cttico o causar lesion
corporal si la aspiradora arranca de manera
impreviste.
Alinee las lengLietas en la vara de extension con
las ranuras "J" en la manguera. Empuje la extension adentro de la manguera y d_la vuelta hacia
la derecha para fijarla. Para obtener m&ximo
alcance con los accesorios, agregue la punta
para hendiduras al final de la extension y rbtela
suavemente.
Reinsertela HandiMate Jr.® an la aspiradoracoma se
muestra y entonces
cierreta cubierta de
guardarla HandiMate Jr.®
Handi-Mate Jr.®
Handi-Mate Jr.®
Storage Cover
!
CUIDADO
Aseguresede limpiar los accesorios
despu_sde utJlizariosen treas sucias,
debajo del refrigerador,antes de usarios
en arras superficies,ya qua podrlandejar
marcas.
Entre
HerramJenta
Herramienta
hendiduras
coijines*
4
4
4
4
Cortlnas*
Escalones
Paredes
4
4
4
4
4
para
Cepillo para combinaci6n
Handi-Mate
Muebles*
Jr. ®
* Siemprelimpie losaccasoriosantes de usar sobretelas.
Orillas de alfombras.
Gule uno de los costados o ia parte anterior
de la boquilla a Io largo del borde de la pared.
Los cepillos largos ayudan a aspirar la tierra
en las orillas de las alfombras.
Escalones
Coloqueel mangoen la posici6nvertical.Muevael
selectorde pisocon alfombrasy sinalfombrasa la
posicibnsin albrnbras.Usela herramientapara
hendiduras
o el cepilloparatelas. Coloqueel interruptordeencendidolapagado
en ON.
ADVERTENCIA
Peligro de lesibn personal
No coloque el limpiador en las
escaleras. Si se cae, podria causar
lesi6n personal o da_o a la propiedad.
_f = Aplicable
Para obtener los mejores resultadosde limpieza, mantenga desbloqueadoslos conductos
de flujo de airs.
conecte la asplradora
eCUIDADO
s de examlnarla.
del enchufe
J
SISTEMA DE PROTECTI6N
DE MOTOR
PROTECTOR
DE MOTOR
Esta aspiradora tiene una v_lvula de
desviacibn que sirve como protectorde motor
que se abre automaticamentepara proveer un
flujo de aire al motor cuando una obstruccibn
impida que clrcule el aim al motor.Si se abre la
v_lvula bypass pare impedirque se recaliente
el motor y que no hags daf_oa la aspiradora,
se notari_ un cambiode sonido mientraset aire
por la abertura de la v&lvula.
Protector Termal
Esta aspiradora tiene un protectortermal que
se ajusta autom_ticamente para protegerala
aspiradora del sobrecalentamiento.Si una
obstruccibnimpide e| flujo normal de aire al
motor,el protectortermal apaga el motor
autom&ticamentepara permiUrque el motorse
enfrie a fin de evitar posiblesda_os ala
aspiradora.Durante este tiempo la luz
delantera se mantiene prendida.
Nota: No
obstruye el
protector
de motor.
Pare corregir el problems'. Si esto ocurre,
apague la aspiradora y desenchufe el cordbn
del tomacorriente para permitirque le
aspiradora se enfrie y que el protectortermal
se reajuste. Busque y saquelas
obstrucclones, sl es necesarlo. Examine
tambi_n y reemplace/llmple cualquler flltro
obstruido. Espere aproximadamente treinta
(30) minutos y enchufe la aspiradora y
volt6ela pare ver si el protector del motor se
ha reajustado. El protector del motor no se
reajustar_ si no se ha apagado la aspiradora
aun cuando la aspiradora se haya enfriado,
Protecto_
de motor
Para correglr el problema: Consulteel cuadro
RECONOClMIENTO DE PROBLEMAS.
Nota: La v&lvulade desviacibnpuede estar
abierta mientrasse usan los accesoriosopara
limpiar una alfombra nueva a causa de un flujo
reducidode aire por los accesoriosmismos o
por la pe|usa de la alfombraque _lene la cubo
de la basura rapidamente. Consulteel cuadro
RECONOCIMIENTO DE PROBLEMAS.
10
INDICADOR DE POLVO
PARA LIMPIAR LA OPTICA
El indicadorde polvoy el indicadorde sensibilidad
est_nIocalizadosenla partsdelanterade la cubierta
de)indicador.
DEL SENSOR
DE BASURA
La 6pUcadel sensor de basura consistede dos
c61ulas6pticas ubicadas adentro del montaje
de la puerta del recipientede basura.
Elindicadorel6ctricode polvoes unacaracteristica
que identifica
el pol_,omientrasque pasapotla aspiradom.
Ocasionalmente,puede ser necesario limpiar
las dos c_lulas 6pticas para asegurar mdximo
funcionamlento.
Limple c_lulas 6pticas:
• Cuando la Iuz roja queda prendida
conUnuamente.
• Cuando basura o polvo se adhiere a las
c61ulas6pticas.
• Cuando se limpia la taza del polvo.
Indlcador de
polvo
Para limpiarla 6ptica del sensor de basura,
saque el Recipientede Basura como se detalla
en la seccibnLimpieza del Recipiente de
Basura.
La luzrojaindicaque la aspiradoraaspirael polvo.
La luzverdeindicaque la mayorladel polveya esta
aspiradaporla aspiradora.
OPERACION
Con el recipientede basura sacado usted
puede insertar un parle en la abertura de la
puerta del recipientede basura.
AI pasar la aspiradora, la luz roja del indicador
de polvo enciende y sigue encendida mientras
que el indicadoridentificauna concentraci6n
alta de polvo pasando por la aspiradora,
Cdlula
6ptica
ADVERTENClA
(en
Peligro de cheque el6ctrlco o lesi6n corporal
Desconecte la unldad antes de limpiarla
o darle servicio. De Io contrario podria
producirse un cheque el6¢trico o csusar
lesi6n corporal si la aspiradora arranca
de manera impreviata,
Recipiente
de Basura
Frote las c61ulas 6pticas con un paso suave
y seco.
Nunca use limpiadores o liquidos porque
estos pueden ayudar a recubrir las c61ulas
6pticas y hacer necesario limpiarlas mucho
antes que normalmente.
11
Sigasiempre
todas
lasinstrucciones
deseguridad
allimpiar
ydarleservicio
a suaspiradora.
Paligro de choqua al6ctdco o lesi6n corporal
Desconecte la unldad antes de Ilreplada o
darle servldo. De Io ¢ontrarlo podrla produ€lrse un choque el6ctrlco o causar lesl6n
corporal si |a aspiradora arranca de reanera
Impravlsta.
|_
1
=l
;7 ---
--
_
........
Recojael cordbny enrrbtlelo
en lossujetadores
superiore inferior,sin que quede reuy apretado.
Guardela aspiradora
bajotechoen un lugar
seco,conel mango
en posici6nvertical
Pellgm de choque el6ctricoo lasl6ncorporal
Si anrolla el cord6n reuy apretado puede
tensarlo mucho y causarle de_os. De da_arse, el cord6n podrJa causar descargas el_ctricas y lesiones o da_os personales.
Desconecte
el cordonel_ctricode la clavijade la
pared. NO rocie agua sobre la aspiradora.
CUIDADO
Limpieel exteriorcon untraposuavey limpio,qua
hasidoexprimidodespu_sde rereojarenuna solucibnde aguay detergenteliquidoligero.Sequeel
exteriorconun traposecodespu_sde lirepiar.
No use los accesorlos ell estan
reojados. Los accesorios que se utilicen
en _reas suclas, debajo del refrigerador,
no deben usarse en otraa superficies
sin antes ser lavados. Podrian dejar
rearcas.
Lirepiela superficie exterior del recept_culo y de los
accesoriospara reducir la electricidad est_tica y la
acumulacibnde polvo.
Lavelosaccesoriosen aguatibiajabonosa,
enjuaguey deje secaral aire.No los laveen lavadorade platos.
12
Slempre
vacieel cubodebaeuracuandoel
nlveldebasuraalcanzalaIlnea"MAXLLENO".
PARA VACIAR EL CUBO DE BASURA
Levante la tapa del cubode basuradirectmente
afuera de la taza de basura.
Pellgro de choque el6ctrico o lesi6n corporal
Tapa del
cubo de-_
basura
Desconecte la unldad antes de Ilmpiarla
o darle servlclo. De Io contrarlo podrla
produclrse un choque el6ctrlco o causar
lesi6n €orporal el la asplradora arranca
de manera imprevlsta.
PARA SACAR EL CUBO DE BASURA
Levanteel
cerrojodel CerroJo
de
cubo de
canasto de basura
basuray
saque el
cube
basura
Agarradera .
tomando de cubode
de la
basura
manijaubicadaaE
tope del canastode
basura.
Saque
cualquier
Mafia _
obst_culo
secundarla
que pudiera
estar ubica- Puertodel_
do a la
compartlmlento
Vacie el contenido del
cube de basura en el
basurero.
canastode
entrada del _
basurao el
filtrosecundario.
PARA LIMPIAR EL FILTRO
Vea el Filtroque Cambia/Limpiar
CUIDADO
Tapa de
No use la agarradera del cubo de
basura para cargar la unidad.
No carge el cubo de basura por la
tapa.
Cada vez que se saca
el canasto de
bastJra,
perilla
rote la
fimpiador_
de limpieza
al tope
del canasto
basura
basra
est_ limpio para
la funci6n
de
cle
que el filtro
mantener
timpieza.
13
REMPLAZO DEL BOTE DE POLVO
Tapa del cubo
Cerrojode
basura
Pongael canastode basuraadentrode la aspiradora.
Tapa de -basura
Asegureel canastode basuraen su lugarcerrando el cerrojodel canasto de basura.
Reemplaceel montajede la tapa del canastode
basuraponi6ndolade vuelta sobreel canastode
basuracomo se muesb'a.
Revisarfrecuentemente el flltrosecundadoy
lirnpiarlocuandoest6 sucio.
Remuevael cubopara basuracomoen la ilustracibnen la seccibnde LIMPIEZA DEL CUBO
PAPA BASURA.
Para limpiarla cubiertadel filtro,limpielacon un
traposeco.
NOTA: La cubierta del filtro es removible,
Reernplaceel cubode basuracomo en la ilustraci6nen la secci6nde LIMPIEZA DEL CUBO
PARABASURA.
Mafia
secundaria
14
FILTRO DE ESCAPE
!RTENCIA
HEPA
Elfiltrode escapedebeser reemplazadocuando
est_sucio.Debieraser reemplazadomgularmente
dependiendode las condiciones
de uso.
Pellgrode choque el6ctrlco
Desenchufeel cable de poderdel tomacordents. No operela Iimpiadorasin el flltro
pdmado o el flltro de escape.Eat6 segum
que el filtros eat6 Instaladoproplamente
para prevenlrfalla del motorylo sacudida
el6ctrica.
El filtrono se puedelavarpuesperderi_su capacidad paraatraparpolvo.
Nora: Ver PARTES Y CARACTER_STICAS
para el n_mero del filtro de escape.
FILTRO PRIMARIO
Aprieta hacia adentroen cada tado de la cub_erta
del filtrode escapey tirela hacia afuera para
removerde la aspiradora.
Chequeset flitroprimariotrecuentement
y timpielo
cuandoest6 sucio,
PAPASACAR EL FILTROPRIMARIO
Remuevael canastode basuray el montaje de la
tapa del canastode basuracomo se explicaen la
seccibnLIMPIEZA DEL CANASTO DE
BASURA.
Tome el filtro,
rbteloy levdntelo
hacia afuera.
Limpie el filtro
primario
golpedndolo
gentilmente
sobre un contanedor de
Hale aqui
Cublerta de
filCro de_
sallda
Leva Iimpiadora
Lenguatas
inferiores
Leng_eta de engrane
Tapa del fl|tro
basura. Golpee sobre varios lados para asegurar
la mejor limpieza, Enjuague con agua solamente
como sea necesario.
Remueva el cartucho del filtro de escape.
Cuandola limpiezadel filtroya no restaura la
succi6nal vacio a su poder total,usted necesita
reemptazarel filtro.
Sello gris de
filtro de salida
Nora: Ver PARTES Y CARACTERJSTICAS
para el n,',merodet filtro de escape.
PARA
REEMPLAZAR EL
FILTRO
PRIMARIO
Leva
limpiadora
Ranur=
Filtro de
satida
Filtro
Empuje solamente sobre el marco del cartucho
del flltro, no sobre el material del filtro mismo.
Reemplacoel fitLengiJeta de engrane
tmy r6telo
Tapadel filtro
basraque las
ranuras¢ierren conlas leng0etassn la cubJerta.
El selJo gris del filtro debe ser puesto contra el
cusrpo de la aspiradora.
Reemplacela cubierta der filtro de escape
poniendolas leng0etas en las hendiduras y
empujandohasta que la cubiertacalza en su
lugar.
Nota: Bajo uso y cuidado normal, su filtro puede Ile.
gar a durar hasta 3 aSos.
Vuelva a montar la tapa del compartimiento del
polvo para sacar el polvo del compartimiento.
Inserte en rods limpio y seguro con el cierre def
compartimiento del polvo.
15
Ubique los dos pestillosy las dos lengLletasde
cierre que aseguran la placa de base.
Para sacar la placa de base, apriete los dos
pestllloshacia adentro.
Pellgrode choqueel6cbico o lesl6n corporat
Apriete hacia adentm sobre las leng(Jetasde
cierm hacia el centro de la aspiradora.
Desconecte la unldad antes de limpiarla o
derla servlcio. De Io contrario podria pmdu€lrse an choque el6ctrico o causar lesl6n
corporal st la aspiradora arranca de manera
Imprevlsta.
Tire la placa de base lejos del alojamientode la
boquilla. Los costadosde la placa de base
necesitanser tirados iigeramentehacia afuera
para qua pasen las ruedas.
LIMPIEZA DEL AGITADOR
F_je de bansmlsi6n
del motor
Para limpiarel agitador apague la aspirado
corte cualquier acumulacibn de pelusa y
alfombras alrrededordel agitador con un par de
tijeras a trav_s de las ranuras provistas.
El agitador y la correa est_n ahora expuestos.
Cuidadosamente remueva cualquier residue
qua pueda exisUren el area de la correa.
Si la correa est&todavia agarrada al eje del
motor, habra tensibn sobre el agitador. Si la
correa no esta rota, remu6vala del eje del
motorantes de levantar el agitador.
Quite el pelo, la secuencia, la pelusa y la otra
ruina del mezclador.
PARA SACAR LA CORREA
Desconecte el cord6n de poder del temacorriente, y pbngalo sobre papal para proteger la
superficiedel piso. Ponga la aspiradora en la
posici_nvertical,
Pesflllo$
Cuidadosamente levante un extremo del
agitadory entonces levante el otro extremo.
ADVERTENClA
--
Peligro de lesi6n personal
Tenga cuidado al quitar el cepillo cilindrico,
la tensi6n de la correa es grande, Si no tiene precaacion podria sufrir una lesibn personal si el cepillc se libera r_pidamente y
sale disparado.
segurldad
De vuelta la unidad de modo que el agitador
la placa de base miren hacia arriba.
y
16
LIMPIEZA
CORREA SOBRE LA RANURA GUIA
DEL AGITADOR
Nota: Para mantener una alta eficiencia de
limpieza y evitar el daf_oala aspiradora, hay
que limpiarel agitador cada vez que se cambia
la correa.
Co, Tea Estd Centrada
Sobre la Ranura Guia
(Selector de plsos con y sln alfombra
este ell M poslcl6n de ptsos con alfombra)
Tambi6n hay que limpiarel agitadorsegt3nel
siguientehoratio:
El uso de la
asplradora
Limpie el
agitador
Frecuente (usada dirariamente)
cada semana
Moderado (usada 2 o 3 veces
por semana)
cada rues
F-Jedel selector de
F-jede
pisos con y sln
transmisi6n
elfombra
del motor
Correa No Estd Centrada
Sobre la Ranura Gula
(Correa aldrededor del eJedel selector
de plsos con y sin alfombra)
_-
LIgero cada 2 meses
(usada 1 vez pot semana)
Agitad
f_
q
braysln
Ejede
Retire todo indicio de basura o suciedad de la
zona de la correa y del agitador.
PARA CAMBIAR
Selector
de
p_?s
t •
,Oi
F.]e€l_ sel_lor
de pisos con y
transmisidn
del motor
sin alfombra
LA CORREA
Asegurase que el selector de pisos con y sin
alfombra este en la posicibnde pisos con
alfombra. Coloque la nueva correa alrededor
del eje de transmisibn del motor.
Correa No Est_ Centrada
Sobre la Ranura Guia
(El selector deplsos
con y sin elfombra
este en la posici6n de pisos sin a/fombra)
Selector
Agitador
Correa /" _
,
Eje de
transmtsl6n
del motor
de
pisos con
alfombra y
"_,
sin elfombra
_'e del selector
de pisos con
y sin affombra
Haga presi6n firmemente, asegurdndosede
que hayan entrado bien ambos extremos.
transmisi6n
del motor
pisos
con alfombra y
Polea pare
correa
sin affombra
I
Note: Consulte las PIEZAS Y
CARACTERJSTICAS
correa.
para determinar el N°. de
Ensarte la correa nueva sobre el agitador.
Alinee la extension cuadrade de eada tapa con
las ranuras de la estructura de la boquilla.
Agitador
Nota: Debido a la tensi6n de la correa, debe
actuar con cuidadoal instatada.
AsegOrese de que la correa est6 centrada
sobre la ranura gula, Gire el agitador con los
dedos pare asegurarse de que gire libremente.
17
Parareinstalar
laplacadela base,insertelas
cuatropestat_as
dentrodelascuatroranuras
ubicadas
a Iolargodelbordefrontal de la base.
- LengOetas de
Coloque la aspiradora en la posicibnvertical.
segurtdad
Precione la base del plato para abajo hasta que
las leng0etas de seguridad est_n en su lugar.
LengfJetas/
Ranuras
Coloque la plata de la base en su posici6n original.
Daslize el pesUllode la izquierda a la izquierda
y el pestilloderecho a la darecha para qua
estan saguros.
Coloque la aspiradoraen la posicibnvertical
antes de conectarla en el anchufe.
Cuando este bajando la base, la parte interior
va a rozar contra las ruedas. Si ud, le hala un
poco afuera le ayudara a resamblarlo.
18
Procoda
siempre
conprecauciones
deseguridad
al
Ilmpiar
ydarservlclo
laaspiradora.
Reconectela manguerade extensibn al montaje
de la puertadel canasto de basura.Enchufela
aspiradoray _hela a andar. Estirela mangueraa
la Iongitudmtxima y retbrnelaa la Iongitudde
almacenaje.
Pellgro
dechoque
el6ctrlco
o lesi6ncorporal
Desconecte
launldad
antesdelimpiada
o
dadeservlclo.
DeIocontrario
podrlaproducirseunchoque
el6ctrlco
ocauaar
]esi6n
corporal
ellaasplradora
arranca
demanera
imprevista.
Apague la unidad y descon6ctela.
Malla
secundaria .
Siconsideraque la aspiradorano aspirabien
aseg,',reseprimemde que la bolsano est_ Ilenay de
que elflltrono est6atascado.ConsultelasinstruccionessobreCAMBIODE LA BOLSAPAPAPOLVOy
LIMPIEZADES FILTROS.
Si laszonasdel filtroy la cubede la basura no est_n
atascadas,examinelazonade la rnanguera.
Retireel
extremoinferiorde la mangueraexpansibledela aspiradoratomtndolaporel collar y tirandode hacia
arriba.
Puerto del
compartlmlento
del polvo
Remuevael canastode basura y chequeela
puerta y filtro secundarioper obst_culos.Si el
canastode basuray treas de filtradoytreas de la
mangueraesttn libresde obsttculos,chequeeel
brea de la boquUla.Para chequear esta trea, vea
la seccibnsobre LIMPIEZA DEL AGITADOR.
Retornela aspiradoraa la posicibn verticalantes
de enchufarlaen un tomacoriente.
Peligrode lesi6n personal
NO coloquenunca las manos ni los pies
debajode la unidad. El agitadordart
vueltas r_,pidamentecuandala aspiradora
est_ encendiday estt en la posici6n"carpet setting"(con alfombra).
Examine visualmente la zona de la base donde se
inserta la manguera.
Retire cualquier material bloqueante.
19
=CUIDADO
;,'r',,ro
0,°boq°a,"o
o'--i0°
'coor-
aria completamants.
Desconecte la unldad antes de Ilmplarla
o darle sarvlcio. De Io contrarlo podr|a
producirse un choque el6ctrico o causar
fesi6n corporal si la aspiradora arranca
de manera Imprevlsta.
Para reemplazar
la bombilla
cuidadosamente
ins_rtelaseguramenteen la
ranura.
Reemplacela
cubierta de la
lente.
PARA QUITAR LA BOMBILLA
Desconecteel cable de poder del tomacorriente.
Baje la manijapara ponerla aspiradoraplana.
Desarmador
Lente de la
luz
'_ _
cubiertade la
lente insertandola
parfe inferiorde ta
lente en la ranura,
_
Substituyala
entoncesapliqu_
presibnen la parts
superiorcon un
destornillador.Un sonido=pop" indicaque la
lente est& colocadacorrectamenteen su lugar.
_,
Exkaiga el lenfe de la hendidurainsertandoel
desarmadoren la rendija,empuje hacia abajoel
lente y girelocon el desa rnadoren diraccibn
hacia la unidad.
Nora: MirePIEZASY CARACTERISTICASparael
numerode la bombilla.
CUIDADO
No use una bombilla de mrs de 9 vatios
(13 volts). Cuando se use la aspiradora
por un largo periodo de tiempo, el calor de
la bombilla puede calentar las partes de
plasUco cerca.
Remuevala bombilla tirandoderecho
hacia afuera.
nacre o ancendeIs asplradoraantes
!
20
RECONOCIMIENTO
DE PROBLEMAS
Reviseesterecuadropara encontrarsolucionesa problemasque puedecorregirustedmismo.Cualquierotto
serviciodebeser realizadoporSEARSu otroagentede serviciocafificado.
La asplradora no funclona,
, No asl_a tatisfactor_meltte.
1. Est;t desconectada,
1. Conecte bien, optima selec_ de
er_endido/apagado a b posi_n ON.
2. Cortadrcuitosbotadoo fusiblequemadoen
eltablerode servidode k=residenoa.
2, Restabbzca d cor_tos
cambie d fu_.
3. _rr_ptzx de srt.,endid_ap_adono
est_en la posicibn
ON.
4. protectort_micoactivado.
_,. Co_
o
_ _B_r,_ de=_c_dU_apagado
en la posici_ ON.
4. Reajuste el protector t_rrnlco,
1. C,_o de _ _
ttenoo atascado.
1. Cubode k=ba_,.=aP_.
2. AjusteIncormcto
de n_l de peb de la alfombra. 2. Aju_teel ntvel.
3. Agitadordesgastado.
4, Boquifla,
o portfllode cubode la basura
atascada.
5. Mangueraatascado.
3. Cambieel agitador
4, RavbeCOM6ELIMINAR
LOSRESDUOSDE
BASURA
ENLOS_.
6. Manguerarata.
7. Correatota.
5, UmpiarbJbO
parala mugre.
6, Camb_ela manguera,
7. Cambleb correa,
9. Activ_i6ndel sisternade prolecci6n
del motor.
l.. Insewtebk_ _ r_J_a
9. Determinesi existenb_oqueos.
La aspimdora levanta tapetes
o es dif_[[ de er_pujar.
1. Ajuste incorreclo de n_ve_de polo de la a_ombra.
I.
La luz no funciona,
1. Bombilla fundida
1. Cambie la bombilla.
Elensambledelagitador
no gira
1. Selectorencendido/apagadodelagitador
en posid6n OF_
2. Correa rota,
1, Pongaelselectorenposici_nON,
Ajuste et nivel.
2. Camb_e la conea.
RestrictiOn del flujo de el
1, El uso de los accesorios lirnitael flujo de aire,
1. Revlse
USODELOSACCE_
uso d_ los ac,c_sork=$.
Cambio de sonldo,
2, La petusa de una atloml_ranoeva
obsb'uye el paso de aire.
2. ReviseCOMOELtMII,)AR
LOSRES)DL_OS
Indicador de po_vo, algunos
mode_os, no funcJona.
1. Celdas bptJcasest_n sucias.
1. Limpie las celdas bpticas.
21
DEBASURAEN LOSCONDUCTOS
y limpiela manguera.
iiiiiiii)_ii!iiiii_iL!
_¸
i_i!!!_ii
:_i:i¸
1_123_
,'_
t_lald_.,,43om
_
¢_r_O__ $ A. o_in