1
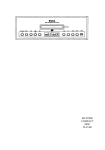
User Guide
CD6
CD Player and DAC
H I G H
D E F I N I T I O N®
2
Contents
Preface 3
Illustrations 4
Warnings 5
Installation
In your System 6
Connections 7 - 8
Operation
Power-up Procedure 9
Front Panel Control Functions 10
Remote Control Functions 11 - 13
CD Door Functions/Warnings 13
Software Installation
Windows 14 - 16
Mac OS X 17 - 19
Using the DAC Control Panel 20
Setting the Sample Rate or Native Mode in Windows 21 - 22
Setting Native Mode in Mac OS X 23
Getting the Most out of your CD9 23
S/PDIF, USB 2.0 HS and Music Management 23 - 24
Maintenance
Servicing 25
Cleaning 25
Disposal and Recycling Guidelines 25
Limited Warranty 26
FCC Rules 27
Specifications 28
Preface
Thank you for selecting the CD6 as part of your music
listening system. The engineers and designers at Audio
Research have spent countless hours of listening and
testing to create a CD player of the highest caliber for
music reproduction. The CD6 has been designed to
provide you many years of playback.
Please take a few minutes to read through this guide
to help you better understand and optimize your new
CD player. If you have any questions regarding the
operational functions, contact your dealer or distributor
for assistance.
Sit back and enjoy your new CD player and the
enhancements it will bring to your system. The CD6 will
bring new life to your digital music collection.
Happy listening!
3
4
Illustrations
Front Panel
192
CD
FAST
176.4
RCA
SLOW
96
USB
UPSAMPLE
88.2
TOS 1
POWER
48
TOS 2
44.1
POWER
PREV
PLAY
NEXT
PAUSE
STOP
INPUT
MODEL CD6 HIGH DEFINITION ®
DIGITAL CD PLAYER
Rear Panel
MODEL CD6
CAUTION
DIGITAL CD PLAYER
DIGITAL INPUTS
FOR CONTINUED PROTECTION AGAINST
FIRE HAZARD REPLACE FUSE ONLY
WITH SAME TYPE AND RATING
IR INPUT
PLYMOUTH, MINNESOTA
MADE IN U.S.A.
TOS 2
USB
RCA
CAUTION
RISK OF ELECTRIC SHOCK
DO NOT OPEN
TOS 1
SERIAL
DIGITAL OUTPUTS
RIGHT
LEFT
WARNING
TO PREVENT FIRE AND SHOCK HAZARD, DO NOT
EXPOSE THIS DEVICE TO RAIN OR MOISTURE.
UNIT MUST BE OPERATED IN A HORIZONTAL POSITION.
-DO NOT OPERATE WITH COVERS REMOVEDUNIT CONTAINS VOLTAGES WHICH MAY BE HAZARDOUS.
BALANCED
SE
SE
!
BALANCED
BNC
AES/EBU
ANALOG OUTPUTS
Remote
REPEAT
CD6
1
2
3
4
5
6
7
8
SCAN
9
SHUF
0
UPSAMPLE
PLAY
INPUT
FILTER
STOP
DSP DN
PAUSE
DSP UP
TIME
PROG
A/B
VOLTS
25W MAX
50/60HZ
~
Warnings
To prevent fire, or shock hazard, do not expose your CD6 to rain or moisture.
This unit contains voltages which can cause serious injury or death. Do
not operate with cover removed. Refer servicing to your authorized Audio
Research dealer or other qualified personnel.
The detachable power cord on your CD6 is equipped with a heavy gauge,
3-conductor cable and a standard three-prong grounding plug. For absolute
protection, do not defeat the ground power plug. This provides power line
grounding of the CD6 chassis to provide absolute protection from electrical
shock.
For continued protection against fire hazard, replace the fuse only with the
same type and rating as specified at the fuse holder.
Do not operate the CD6 player without the supplied CD6 clamp installed
on the CD. Gently place clamp on disc to prevent damaging the spindle
mechanism.
Whenever the CD6 power is on, the door covering the drive mechanism/
tray area should remain fully closed after inserting or removing a CD.
Following this procedure will maintain proper ventilation and also minimize
dust intrusion on the lens and drive mechanism.
The appliance coupler at the rear of this unit must be accessible for
emergency power disconnect.
A note about packaging...
Save all packaging in a dry place away from fire hazard. Your CD6 compact
disc player is a precision electronic instrument and should be properly
cartoned any time shipment is made. You may not have occasion to return
your unit to the factory for service, but if that should prove necessary, or
other occasion requiring shipment occurs, the original packaging will protect
your CD6 from unnecessary damage or delay.
5
6
Installation
In your System
While the CD6 does not dissipate an unusual amount of heat, it is important
that it be provided with reasonable airflow to assure long, trouble-free
operation. In addition, the following installation guidelines will help insure
maximum sonic performance as well as reliable service.
Upright and level horizontal mounting is mandatory, preferably on solid,
non-resonant shelving. Allow sufficient space for convection cooling. Do
not block the ventilation holes when the unit is turned on.
Do not stack the CD6 on top of another component: not only could this
cause overheating, but hum may be introduced into the system.
Do not place any objects on top of the CD6; its suspension feet are tuned
for the specific weight of the CD6.
Do not place or operate your CD6 on a soft or irregular surface such as a
rug. This can prevent proper leveling and restrict ventilation.
Do not operate your CD6 without the top and bottom covers installed.
These are required both for safety as well as shielding from interference.
If side-by-side mounting with other equipment is employed, place the CD6
to the left of the other chassis, so as to provide maximum spacing between
the transformers of the CD6 and the other component.
Connections
Digital Connections
The CD6 offers four digital inputs, and two standard digital output options.
Which option is best for your system will depend on your personal listening
preference, the nature of your system installation requirements, and the
options allowed by your external digital processor, if one is used.
WARNING: The digital outputs supply only a digital signal and should
therefore only be connected to an input which is suitable for this signal.
Never connect either of these digital outputs to a non-digital input of a
preamplifier (such as those labeled CD, AUX, PHONO, TAPE, etc.) or to a
power amplifier. To do so is to risk damage to your system and may void
any or all warranties involved.
7
8
Connections
Digital Inputs
Toslink (2): Connect to a transport, computer or other device equipped
with Toslink (optical) digital output. Press the INPUT button until the ‘Toslink
1’ or ‘Toslink 2’ LED is illuminated.
USB: Connect to a Windows-based PC or Mac computer for music
playback from your computer. Press the INPUT button until the ‘USB’
LED is illumindated. Note: you must install the software on the included
CD (also downloadable from www.audioresearch.com/downloads.html) to
utilize the USB connection.
RCA: Connect to a transport or other device equipped with an RCA digital
output. Press the INPUT button until the ‘RCA’ LED is illuminated.
Digital Outputs
BNC: Use 75-ohm impedance coaxial cable with locking BNC-type
connectors. An RCA/BNC adaptor is also supplied.
AES/EBU: For connection to digital processors having the AES/EBUStandard interface.
Analog Outputs
Single-Ended (RCA): For connection to the inputs of a line-level preamplifier
or integrated amplifier.
Balanced (XLR): For connection to the balanced inputs of a line-level
preamplifier.
Operation
Power-up Procedure
Once plugged into the power receptacle, push the front panel Power switch
to turn on the CD6. The central green front panel power LED will glow dimly
for about a 40 second circuit warm-up interval with the output automatically
muted. When the LED glows brightly, the CD6 is ready for operation.
Once powered up and operational, with the CD door fully closed, the unit
will default to the operate setting (display, transport and front panel controls
are activated). The CD6 reaches its full sonic potential from “cold” in a
reasonably short time period. it’s recommended that it be powered off for
any extended time it is not in use.
Shut-Down
Set preamplifier Mute switch to “Mute” position.
Press CD6 front panel Power switch to turn unit off.
9
10
Operation
Front Panel Control Functions
POWER: The Power switch turns the CD6 completely on for operation
(indicated by the LED being brightly lit), each time preceded by a warmup interval of about 40 seconds when the LED is dim and the output is
automatically muted. Press power switch again to turn CD6 off-indicated
by unlit LED.
PREV: Selects the previous track to play. Continue pressing to cycle
backward through previous tracks. (Track number will appear on display.)
PLAY: Starts play. CD door must first be fully closed. Begins to play first
track unless another is selected. Restarts track if pressed during play.
(Track number and elapsed track time appear on display.)
NEXT: Selects the next track to play. Continue pressing to cycle forward
through tracks. (Track number will appear on display.)
PAUSE: Interrupts play (display will read “PAUSE”). Release PAUSE by
pressing it a second time to resume playing disc.
STOP: Stops play. (Number of tracks and total disc track time appear on
display.)
INPUT: Selects between the CD player and digital inputs on the rear panel.
Pressing the Input button repeatedly will cycle through all the inputs.
Note: Play, Pause, Stop, Previous and Next only function when using the
CD player.
Operation
Remote Control Functions
The remote control unit includes all of the above described CD6 front panel
control functions plus the following additional functions. (Functions in [ ]
indicate labeling abbreviations appearing on remote control unit.)
0-9 BUTTONS: Pressing numbered button(s) corresponding to the disc
track number will advance disc to desired track. Also used to select tracks
when compiling a custom disc playback program (see PROGRAM function
description below).
SCAN: With a stopped CD and the CD door closed, press SCAN and the
first 10 seconds of each track will be played in sequence. (“SCAN” will light
up on display, then 10 seconds are counted out next to each track number.)
To hear a track in full that the player is presently scanning, press SCAN
button again which will cancel SCAN function.
SHUFFLE [SHUF]: Toggles between Shuffle play (random playback order)
and normal play (sequential playback). SHUFFLE appears in the display
window when random playback is selected.
REPEAT [REP]: Press REPEAT once to repeat the entire disc continuously
(“REPEAT” appears in display window). Press REPEAT once more to
continuously repeat the track now playing (“REPEAT 1” appears in display
window). Press REPEAT once again to discontinue repeat mode.
UPSAMPLE: Select between native sampling rate playback and integer
upsampling. 44.1 kHz and 88.2 kHz sampling frequencies are upsampled
to 176.4 kHz, whereas 48 kHz and 96 kHz frequencies are upsampled to
192 kHz. An LED will indicate which sampling frequency is selected. Note:
When using the USB input, upsampling is available only to 88.2 kHz or 96
kHz.
FILTER: Select between Fast and Slow digital filters. Pressing FILTER will
toggle between the two options, and will be indicated by an LED next to the
selected filter name.
11
12
Operation
Remote Control Functions continued
INPUT: Select between CD playback and the digital inputs on the rear
panel (2 Toslink, USB, RCA). Pressing INPUT toggles through the different
inputs, and the selected input will be indicated by an LED next to the input
name. Note: display window is illuminated only during CD playback.
PROGRAM [PROG]: Allows compiling a custom track selection and
playback order of up to 20 tracks on a disc. With the player in STOP
mode, enter the desired first track number and then press the PROGRAM
button. The word “PROGRAM” will light and the display will show the total
number of tracks programmed and total programmed time. If a second
track selection is entered, the word “PROGRAM” flashes, indicating that
other track(s) have already been stored in the program memory. Press the
PROGRAM button to save the second track selection. Repeat procedure
to program additional tracks as desired. This programming procedure, with
readout of the cumulative total number of programmed tracks and total
programming time (including time between tracks), works for any of the first
13 numbered tracks on a disc. You may program track numbers higher
than 13, but from then on no track time information will appear on the
display. To preview a program before playing it, press PLAY and then use
the NEXT and PREV buttons to cycle through track selections. Pressing
PLAY will begin playing program. Pressing STOP once will stop program
play. Pressing PLAY again will resume play from beginning of program. To
cancel program, press STOP twice.
TIME: Pressing and releasing TIME repeatedly will cycle through the
following information on the display: current track time elapsed (default
setting initially seen on display), total disc time elapsed, and total disc time
remaining.
DISPLAY DOWN/DISPLAY UP [DSPDN/DSPUP]: Decreases/Increases
display intensity, offering four levels of brightness as well as display off.
Operation
Remote Control Functions continued
A/B: Press the A/B button once while music is playing, then press it again;
the musical passage in the interval between pressing the button is then
repeated in a loop until pressing the A/B button once again to discontinue
it. Display reads “A—B” to show activation. Note: you must discontinue
the A/B loop before pressing PLAY to resume normal playback. Pressing
and holding this button down will fast search backward through the track
that is playing until it is released. Rate of search accelerates as button is
held down.
CD Door Functions/Warnings
Do not attempt to play a CD without first installing the supplied CD6
magnetic disc clamp on the CD. Use only the supplied CD6 clamp in your
CD6 player.
CD door must be fully closed for the CD6 to operate.
If the CD door is closed without a CD in the player and the CD6 is powered
up, the display will read “NO DISC”.
If a CD is inserted (label side up) in the CD6, the CD door is fully closed and
the CD6 is powered up, the CD will spin for a few seconds while the track
information is accessed. The number of tracks and total disc time will then
be displayed, indicating the CD is ready to play.
Keep the CD door closed when the CD6 is turned off and not in use to keep
dust out of the lens and drive area.
When the CD6 power is on, keep the CD door fully closed (except to change
CDs) to to prevent dust from collecting on the tray and lens.
13
14
Software Installation
Windows PC Software Installation Instructions
Installation of the DAC USB Audio Device drivers is only necessary if you
intend to use the USB 2.0 HS input on your CD6. Software installation is
not necessary if you only intend to use the two Toslink or RCA inputs.
Place the installation disk you received with your CD6 into your computer
and double click the SETUP icon. The disk should auto load and start the
install function; follow the on screen prompts as you install the DAC USB
Audio device drivers.
Press NEXT when the WELCOME window appears.
Software Installation
When asked to accept or decline the License Agreement; check the
ACCEPT box and press NEXT.
The installer will automatically place the HD Audio Device Drivers in your
Program files. Press the INSTALL button to continue.
In several spots the computer may prompt you to “Install, Continue or Don’t
Install” the HD Audio Drivers. Select “allow, continue or Install this driver
software anyway” each time you are prompted.
You will be informed when the installation has completed successfully; press
NEXT to continue.
15
16
Software Installation
At the end of the installation the install program will ask you to disconnect
and reconnect your CD6 to the computer via the USB port and turn it on.
On Vista and Windows 7, Windows will detect the new CD6 hardware and
load on the new drivers automatically; on XP, Windows will pop-up with a
NEW HARDWARE FOUND panel; follow the Windows prompt instructions
and your new CD6 HD audio device drivers will install. The install prompts
will occur twice before the install is complete. Now you can press FINISH
and the installation will be complete. Normally restarting your PC at this
point is not required but If you do not see the “CD6 OUT 1/2” listed in the
SOUND panel after installation you should do a restart of your PC.
Software Installation
Mac Software Installation Instructions
Installation of the DAC USB Audio Device drivers is only necessary if you
intend to use the USB 2.0 HS input on your CD6. Software installation is
not necessary if you only intend to use the two Toslink or RCA inputs.
Place the installation disk you received with the CD6 into your Mac computer
and open the install file on your desktop. Click on the ‘DAC INSTALL CD’
folder, and then select the folder for the appropriate operating system for
your computer. Open the appropriate .dmg file, and then open the file
‘Audio Research DAC.mpkg’.
Follow the on screen prompts as you install the DAC HD Audio device
drivers. Press the CONTINUE button when you see the Welcome panel.
When the installer asks you if you want to do a Standard install, press the
INSTALL button.
17
18
Software Installation
At the completion of the install you should see the INSTALL SUCCEEDED
panel. Press the CLOSE button and the installation will be complete.
Restart your Mac to complete the installation.
After installation, go to your DOCK and click on the SYSTEM PERFERENCES
and click on SOUND. Make sure AUDIO RESEARCH CORP DAC has
been selected. If not, go into the SOUND panel and click on the AUDIO
RESEARCH CORP DAC name and close out the panel. Remember, to
see the DAC name in the SOUND panel you must have the CD6 ON and
connected to the USB port. You are now ready to call up iTunes or any
other music management program and enjoy your CD6.
Software Installation
Setting the Sampling Rate in Mac OS X
Now go into the FINDER then GO then UTILITIES and select AUDIO MIDI
SETUP. Once in the Audio MIDI Setup panel click on the PROPERTIES
FOR: selection box and select AUDIO RESEARCH CORP DAC. Then do
the same for the SYSTEM OUTPUT: and DEFAULT OUTPUT: selection
boxes. Remember, to see the CD6 name in the Audio MIDI Setup panel
you must have the CD6 ON and connected to the USB port.
Next go into the AUDIO OUTPUT section of the panel and select the desired
FORMAT (SAMPLE RATE) from the list; 44100, 48000, 88200, 96000,
176400, 192000.0Hz. Also, 2ch-24bit should be showing in the window to
the right. If you plan to play mostly 44.1 ripped CD’s then select 44.1, 88.2
or 176.4kHz. This will select the correct Master Oscillator in the Reference
DAC for CD’s.
19
20
Software Installation
Using the DAC Control Panel
In Windows when you installed the DAC USB software an icon for the DAC
HD Audio Device control panel was placed in your computer’s input tray.
Double click the icon and select one of the 6 sample rates listed, 44.1, 48,
88.2, 96, 176.4 or 192kHz; then press Apply and then close the window
by clicking the X in the upper right corner of the window. The only time you
need to go back to this window is when you want to change the sample
rate mode. Also, as long as the CD6 is connected to your computer when
you turn it on, the last sample rate you selected will be resent to the CD6.
Remember, whenever you want to change the Sample Rate you must exit
the music management program you are using, call up the CD6 control
panel, make the Sample Rate change, and recall your music management
program and start playing music.
The Mac OS does not allow change of the Sample Rate by the hardware
ASIO driver. With the Mac the AUDIO MIDI SETUP Utility has control over
the sample rate sent to the CD6. Remember, the CD6 defaults to Native
mode so it will always lock on and indicate whatever sample rate is being
sent by the computer. See the Mac installation instructions for details.
Software Installation
Setting the Sampling Rate or Native Mode in Windows
If your music server or music management software does not allow you
to connect to the CD6 HD Audio Device drivers directly you can easily tell
Windows Vista or Windows 7 operating systems to honor Native mode for
your music file. While in Vista or Windows 7 call up the Windows control
panel and select the Sound panel. You should see the DAC Device driver
in the list of playback devices. Select the DAC driver and press the SET
DEFAULT button near the bottom of the panel, then double click the DAC
picture in the panel and go to the next figure. If you do not see the DAC
OUT 1/2 listed in the sound panel after installation, first make sure your CD6
is connected to your PC via a high quality USB cable and plugged into an
appropriate AC outlet. If that has been done and you still do not see the
DAC listed in the SOUND panel, you should do a restart of the PC.
Once you have double clicked the DAC driver and pressed the ADVANCED
button you will see the Exclusive Mode properties. If the “Allow application
to take exclusive control of the device” is selected then the “DAC Control
Panel” will select the sample rate.
21
22
Software Installation
Otherwise, for NATIVE MODE, “uncheck” the “Allow application to take
exclusive control of this device”, press APPLY, then close the window. Now
whatever sample rate your music was stored at will be sent to the CD6. If
this step does not allow your music management software to take control
of the sample rate being sent to the CD6 you should simply use the DAC
control panel to set the CD6 sample rate to that of the music you are playing.
Software Installation
Setting Native Mode in Mac OS X
Mac OS X does not allow the music manager, such as iTunes or SongBird
to change the Sample Rate on a song by song basis. For example, if you
set the sample rate of the DAC driver in the AUDIO MIDI SETUP panel to
176400.0Hz then iTunes will up-sample a 44.1 CD to 176.4kHz and send it
to the CD6; the 176.4 LED will be lit. To play a 44.1 CD at 44.1kHz, simply
set the sample rate in the Audio MIDI Setup Utility to 44100.0kHz. See
section SETTING THE SAMPLE RATE ON MAC OS X: for details.
To play your music in bit perfect mode at its native Sample Rate you will
need to purchase and install software from a third party such as Pure
Music®, Pure Vinyl® or Amarra®. These software packages provide bit
perfect music transfer to the CD6 and allow the native sample rate to be
sent to the CD6 on a song by song basis.
Getting the most out of your CD6
The CD6 has many new features that can be enhanced when used with
some of the top MUSIC MANAGEMENT software packages and computer
to S/PDIF conversion hardware. Please take a moment to read through this
section and see if you’re getting the most out of your CD6 setup.
S/PDIF, USB 2.0 HS and Music Management
The CD6 was designed to provide your high-end audio system with bit
perfect 24 bit audio at sample rates not possible from a CD or SACD player.
Red Book CD’s are recorded at 16 bits, 44.1kHz sample rates; your CD6 is
capable of playing back digital music recorded at 24bits and sample rates
up to 192kHz. With your CD6 you can:
Take the S/PDIF output from your current CD or DVD player and enjoy
the sonic benefits of the Quad DAC architecture, low jitter dual master
oscillators and high bandwidth solid state differential amplifiers while playing
your favorite CD’s.
It is also possible to take the S/PDIF output from many of the multiroom
home audio systems that are on the market. AppleTV®, Sonos® and many
others provide wired/wireless multiroom music management systems that
have S/PDIF outputs that work well with the CD6.
23
24
Software Installation
If you want to play back S/PDIF music at a higher resolution and sample
rate, you can assemble a HD music server computer system. Your Audio
Dealer or the HRx web site at www.referencerecordings.com/HRxSETUPS.
asp can give you ideas on how to construct a high resolution music server
that will provide an S/PDIF signal to the CD6.
If you desire to play high resolution music files via the USB 2.0 HS interface
to the CD6, all you do is connect your computer to the CD6 via a good
quality high speed USB 2.0 (480Mbps) cable and install the CD6 HD Audio
Device drivers. Once connected you are ready to sit back and enjoy your
favorite tunes.
A large part of the digital music experience is managing and organizing your
music for fast and accurate playback through the CD6 to your audio system.
There are several software music managers available to enhance your
music experience; on PC’s, J Rivers Media Center®, Mediamonkey® and
FooBar® are three that provide the ability to connect to the CD6’s HD Audio
Device drivers for bit perfect music playback in its Native mode. Others such
as iTunes®, SongBird® and Windows Media Player® are excellent media
managers that will play your music through the “Windows Sound Control”
interface. To assure bit perfect data transfer with these music managers
follow the instructions in the “SETTING THE SAMPLE RATE OR NATIVE
MODE” section. The resources at http://www.computeraudiophile.com/
and other digital music web sites can help you select a media manager and
provide other information aimed at enhancing your music enjoyment.
Maintenance
Servicing
CAUTION: Your CD6 contains sufficient levels of voltage and current to be
lethal. Do not tamper with a component or parts inside the unit. Refer any
needed service to your authorized Audio Research dealer or other qualified
technician. Should service be necessary, please contact your Audio
Research dealer, or Audio Research Customer Service (763) 577-9700.
about fuse replacement
The CD6 has two fuses; both are located towards the back of the chassis
on the left. One fuse is accessible with the removal of the top cover, and
the other with the removal of the bottom panel. See specifications for
information on fuse types.
Cleaning
To maintain the visual appearance of your CD6, occasionally wipe the front
panel and top cover surfaces with a soft damp (not wet) cloth to remove
dust. A mild, non-alkaline soap solution may be used to remove fingerprints
or similar smudges. Cleaners containing abrasives should not be used as
they will damage the brushed grain of the front panel finish, as well as the
LED display window. A dry 2-inch pure bristle paint brush works well to
remove dust from bevels, reliefs and switches. The CD6 CD compartment
may be gently dusted: carefully avoid touching the laser assembly area to
prevent possible damage.
Disposal and Recycling Guidelines
To dispose of this electronic product, do not place in landfill. In accordance
with the European Union Waste Electrical and Electronic Equipment (WEEE)
directive effective August 2005, this product may contain regulated materials
which upon disposal require special reuse and recycling processing.
Please contact your dealer or importing distributor for instructions on
proper disposal of this product in your country. Or, contact Audio Research
Corporation (763-577-9700) for the name of your importing distributor and
how to contact them. Packing and shipping materials may be disposed of
in a normal manner.
25
26
Limited Warranty
Audio Research Corporation products are covered by a 3-Year Limited
Warranty, or a 90-Day Limited Warranty on vacuum tubes. This Limited
Warranty initiates from the date of purchase, and is limited to the original
purchaser, or in the case of demonstration equipment, limited to the balance
of warranty remaining after original shipment to the retailer or importer.
In the United States, the specific terms, conditions and remedies for fulfillment
of this Limited Warranty are listed on the warranty card accompanying the
product in its shipping carton, or may be obtained from the authorized retailer
or from the Audio Research Customer Service Department. Outside the
United States, the authorized importing retailer or distributor has accepted
the responsibility for warranty of Audio Research products sold by them. The
specific terms and remedies for fulfillment of the Limited Warranty may vary
from country to country. Warranty service should normally be obtained from
the importing retailer or distributor from whom the product was purchased.
In the unlikely event that technical service beyond the ability of the importer
is required, Audio Research will fulfill the terms and conditions of the Limited
Warranty. Such product must be returned at the purchaser’s expense to
the Audio Research factory, along with a photocopy of the dated purchase
receipt for the product, a written description of the problem(s) encountered,
and any information necessary for return shipment. The cost of return
shipment is the responsibility of the purchaser.
FCC Rules
NOTE: This equipment has been tested and found to comply with the
limits for a Class B digital device, pursuant to Part 15 of the FCC Rules.
These limits are designed to provide reasonable protection against harmful
interference in a residential installation. This equipment generates, uses
and can radiate radio frequency energy and, if not installed and used in
accordance with the instructions, may cause harmful interference to radio
communications. However, there is no guarantee that interference will
not occur in a particular installation. If this equipment does cause harmful
interference to radio or television reception, which can be determined by
turning the equipment off and on, the user is encouraged to try to correct
the interference by one or more of the following measures:
Reorient or relocate the receiving antenna.
Use interconnect cables of no more then one meter in length.
Increase the separation between the equipment and receiver.
Connect the equipment into an outlet on a circuit different from that to
which the receiver is connected.
Consult the dealer or an experienced radio/TV technician for help.
27
28
Specifications
Frequency Response: +0-3dB, 3Hz to 96kHz at rated output. 0.15dB 20Hz to 20kHz. (Balanced, 200k ohms load)@ 192kHz
sample rate.
Distortion: THD+N Less than .004% at 2V RMS BAL output.
Signal-Noise-Ratio: 110dB
Dynamic Range (AES17): 111dB
IMD (SMPTE): .003%
RMS Noise level: -95dBV (20-20kHz)
Gain: 16.5dB Balanced, 8.3dB SE.
Input Impedance: Digital: 75 ohms RCA, OPT 660nm TOSLink fiber 44.1 to 96kHz.
Output Impedance: 500 ohms Balanced, 250 ohms SE Main (2), 20K ohms minimum load and 2000pF maximum capacitance.
Output Polarity: Non-inverting.
Max. Output: At 0.0dB input, 5V RMS into 200K ohm balanced load.
Digital Sample Rates: 24 bits @ 44.1kHz to 192kHz, SPDIF and USB 2.0 HS.
Upsampling: Select upsampling or Native mode; CD, RCA, TOS upsample to 176.4 or 192kHz. USB upsamples to 88.2 or
96kHz.
Master Oscillator: 22.579mHz ±20Hz for 44.1, 88.2 & 176.4kHz. 24.576mHz ±20Hz for 48, 96 & 192kHz.
Intrinsic Jitter: <10ps
Outputs Digital: XLR Balanced AES/EBU 110-ohms 4V P-P, BNC coax SPDIF 75-ohms 0.7V P-P.
Channel Separation: 103dB @ 1kHz.
Push buttons: Power, Previous, Stop, Pause, Play, Next, Input.
Signal Format (disc): Sample freq. 44.1kHz, Quantization bit; 16bit linear/channel, Channel bit rate; 4.3218Mb/sec, Channel
modulation code; EFM (8-14 modulation), Error Correction; CIRC.
Drive Mechanism (Top Load): Wow & Flutter; Unmeasureable (Quartz stability); Discs; Accepts 5” (12cm) and 3” (8cm) sizes.
Optical pickup: Type; 3-beam LDGU (Laser Diode & Grating Unit), with holographic diffraction light pen, Laser; GaAlAs
semiconductor, 780nm, 0.5mW max. output, Servo; Digitally-controlled low inertia linear positioning actuator.
Jitter reduction: High-stability crystal-controlled re-clocking for all outputs.
Display: Six-digit vacuum fluorescent with optical filter; LED display; CD, USB, RCA, TOS1, TOS2, Fast, Slow, Upsample, Power,
44.1, 48, 88.2, 96, 176.4, 192kHz.
Remote Buttons: Repeat track/disc, 0-9 digit entry keys, Scan ten seconds each track, Pause program, Stop program, Play,
Shuffle tracks, Program enters selection on program list, Time elapsed, remaining track, remaining disc, A/B repeat segment,
Filter select, Input select, Pause, Play, Skip>, Skip<, FF, FR, Upsample/Native mode, DSP-DN, DSP-UP.
Power Requirements: 105-125VAC 60Hz (210-250VAC 50/60Hz) 120 watts maximum. Sleep mode 1 watts maximum.
Fuses: 2A fuse slo-blo (120V) / T1A (220-240V); AGC 1/4A fuse (120V) / T125mA fuse (220-240V)
Dimensions: Width 19” (48 cm)
Height 5.25” (13.4 cm) (standard rack panel)
Depth 12.25” (31 cm)
Handles extend 1.50” (3.8 cm) forward of the front panel.
Weight: 25.9 lbs. (11.8 kg) Net; 34 lbs. (15.5 kg) Shipping.
This unit is RoHS compliant
H I G H
D E F I N I T I O N®
Specifications subject to change without notice.
©2013 Audio Research Corporation.