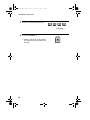
1
FO-4700/FO-5700
MODEL
FO-4700
FO-5700
FACSIMILE
FACSIMILE
OPERATION MANUAL
1.
2.
3.
4.
5.
6.
7.
8.
9.
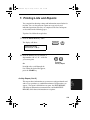
Installation
Sending Documents
Receiving Documents
Making Copies
Special Functions
Option Settings
Printing Reports and Lists
Maintenance
Troubleshooting
all-FO4700.book
Page 1
Friday, October 8, 1999
11:10 AM
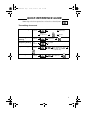
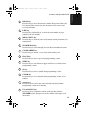
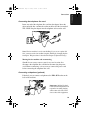
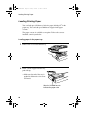
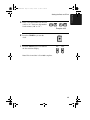
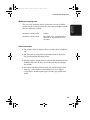
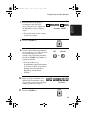
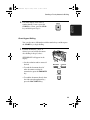
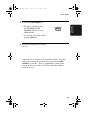
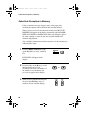
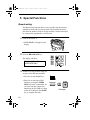
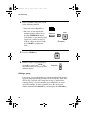
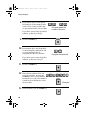
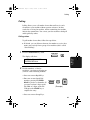
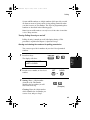
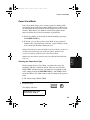
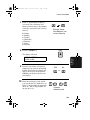
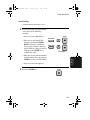
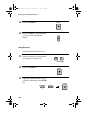
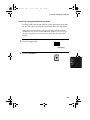
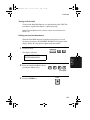
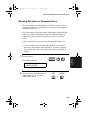
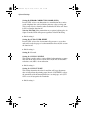
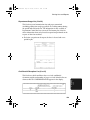
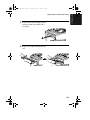
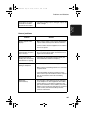
QUICK REFERENCE GUIDE
Note: Steps which are optional are enclosed in a dotted frame:
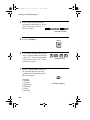
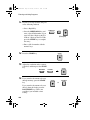
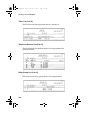
RESOLUTION
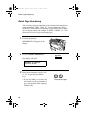
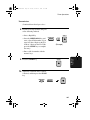
Transmitting documents
Normal Dialling
Load
document
RESOLUTION
press SPEAKER
Dial (press
numeric keys)
START
Wait for
reception tone
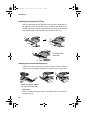
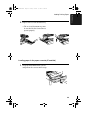
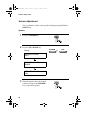
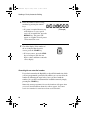
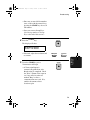
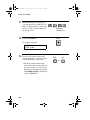
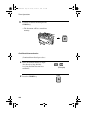
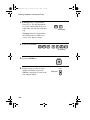
Direct Keypad
Dialling
Load
document
Rapid Key Dialling
Load
document
Speed Dialling
Load
document
RESOLUTION
RESOLUTION
RESOLUTION
Hang up
Dial (press
numeric keys)
Press Rapid
Key
SPEED DIAL
START
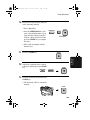
Redialling
Load
document
RESOLUTION
START
REDIAL
Enter Speed Dial number
(press numeric keys, - if less
than 3 digits, press START
to complete entry)
Wait for
reception tone
START
1
all-FO4700.book
Page 2
Friday, October 8, 1999
11:10 AM
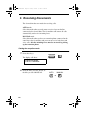
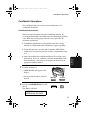
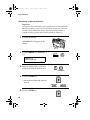
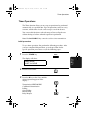
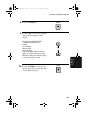
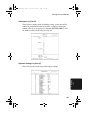
Introduction
Welcome, and thank you for choosing a Sharp facsimile machine! The
features and specifications of your new Sharp fax machine are shown
below.
Automatic dialling
Rapid Key Dialling: 48 numbers
Speed Dialling:
FO-4700: 75 numbers
FO-5700: 100 numbers
Memory size*
1 MB (approx. 56 pages with ECM off)
Modem speed
FO-4700: 14,400 bps (max.)
FO-5700: 33,600 bps (max.)
Automatic fallback to lower speeds.
Transmission time*
FO-4700: Approx. 6 seconds
FO-5700: Approx. 2 seconds
Toner cartridge yield
(4% page coverage, A4
paper)
Initial starter cartridge (included with fax
machine): Approx. 3000 pages
Replacement cartridge (FO-47DC):
Approx. 6000 pages
Drum cartridge yield
Initial starter cartridge (included with fax
machine): 20,000 pages (ave.)
Replacement cartridge (FO-47DR): 20,000
pages (ave.)
Resolution
Horizontal: 8 pels/mm
Vertical:
Standard: 3.85 lines/mm
Fine /Halftone: 7.7 lines/mm
Super fine: 15.4 lines mm
Note: This fascismile machine is Year 2000 compliant.
*Based on ITU-T Test Chart #1 at standard resolution in Sharp special mode,
excluding time for protocol signals (i.e., ITU-T phase C time only).
2
all-FO4700.book
Page 3
Friday, October 8, 1999
11:10 AM
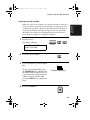
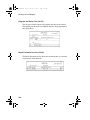
Automatic document
feeder
50 pages max. (A4 paper)
Paper capacity
250 sheets (500-sheet cassette available as
option)
Compression scheme
MMR, MR, MH, Sharp (H2)
(FO-5700: Also supports JBIG)
Halftone (greyscale)
64 levels
Applicable telephone line Public switched telephone network
Compatibility
ITU-T (CCITT) G3 mode
Printing resolution
Horizontal: 16 lines/mm
Vertical: 15.4 lines/mm
PC Printing: 600 dpi
Input document size
Automatic feeding:
Width: 148 to 256 mm
Length: 128 to 364 mm
Manual feeding:
Width: 148 to 279 mm
Length: 128 to 432 mm
Effective Scanning width 210 mm max.
Effective Printing width
203 mm max.
Reception modes
Auto/Manual
Instascan speed
30 ppm (A4 paper)
Full Dual Access
Yes
Copy function
Single/Multi/Sort (99 copies/page)
Power requirements
230 - 240 V AC, 50 Hz
Operating temperature
10 - 30°C
Humidity
20 to 85% RH
3
all-FO4700.book
Page 4
Friday, October 8, 1999
11:10 AM
Power consumption
Standby: 10 W
Maximum: 740 W
Dimensions
Width: 460 mm
Depth: 385 mm
Height: 270 mm
Weight
Approx. 12.6 kg
As a part of our policy of continuous improvement, SHARP reserves the right to
make design and specification changes for product improvement without prior notice.
The performance specification figures indicated are nominal values of production
units. There may be some deviations from these values in individual units.
Important safety information
Be sure to save these instructions!
• For your safety, if any of your equipment is not operating properly
or should any physical damage occur to the equipment where internal parts may become exposed, the equipment should be immediately disconnected from the phone line and then the power line and
returned to a SHARP authorised Service Centre for inspection,
repair, or disposal.
• In Australia, installing or modifying telephone lines should only be
done by an ACA licensed serviceman. In New Zealand, installing or
modifying telephone lines should be done in accordance with Telecom wiring practices.
4
all-FO4700.book
Page 5
Friday, October 8, 1999
11:10 AM
When using your fascimile equipment, basic safety precautions
should always be followed to reduce the risk of fire, electric shock
and injury to persons, including the following:
• Do not disassemble this machine or attempt any procedures not
described in this manual. Refer all servicing to qualified service
personnel.
• This machine must only be connected to a 230-240 V, 50 Hz,
earthed (3-prong) outlet. Connecting it to any other kind of outlet
will damage the machine.
• Do not install or use the machine near water, or when you are wet.
For example, do not use the machine near a bath tub, wash bowl,
kitchen sink or laundry tub, in a wet basement, or near a swimming
pool. Take care not to spill any liquids on the machine.
• Use only the power cord provided with the facsimile machine. Do
not use an AC extension cord.
• Unplug the machine from the telephone socket and then the power
outlet and consult a qualified service representative if any of the following situations occur:
- Liquid has been spilled into the machine or the machine has been
exposed to rain or water.
- The machine produces odors, smoke, or unusual noises.
- The power cord is frayed or damaged.
- The machine has been dropped or the housing damaged.
• Do not allow anything to rest on the power cord, and do not install
the machine where people may walk on the power cord.
• Never insert objects of any kind into slots or openings on the
machine. This could create a risk of fire or electric shock. If an
object falls into the machine that you cannot safely remove, unplug
the machine and consult a qualified service representative.
• Do not place this machine on an unstable cart, stand or table. The
machine could be seriously damaged if it falls.
5
all-FO4700.book
Page 6
Friday, October 8, 1999
11:10 AM
• Avoid using a telephone (other than a cordless type) during an electrical storm. There may be a remote risk of electric shock from
lightning.
• Do not use a telephone to report a gas leak in the vicinity of the
leak.
• The socket-outlet must be installed near the equipment and must be
easily accessible.
Important:
• This facsimile machine is designed to operate in Australia and New
Zealand only.
• This facsimile machine is not designed for use on a line which has
call waiting, call forwarding, or certain other special services
offered by your telephone company. If you attempt to use the fax
machine on a telephone line using any of these services, you may
experience errors during transmission and reception of facsimile
messages.
• This facsimile machine is not compatible with digital telephone systems.
Caution!!
• This is a Class A product. In a domestic environment this product
may cause radio interference in which case the user may be required
to take adequate measures.
6
all-FO4700.book
Page 7
Friday, October 8, 1999
11:10 AM
WARNING NOTICE: NO calls can be made to or from this fax
during a mains power failure.
WARNING: Australian Communications Authority (ACA)
regulations state that no unauthorised changes or modifications to this
equipment are permitted.
Note: Complies with ACA and NZ TELECOM standard AS/
NZS3548 regarding emission of electromagnetic interference.
These limits are designed to provide reasonable protection against
interference in an installation. This equipment generates, uses and can
radiate radio frequency energy and, if not installed and used in
accordance with the instructions, may cause interference. However,
there is no guarantee that interference will not occur in a particular
installation.
If this equipment does cause interference to radio or television
reception, which can be determined by turning the equipment off and
on, the user is encouraged to try to correct the interference by one or
more of the following measures:
• Reorient or relocate the receiving antenna.
• Increase the separation between the equipment and the receiver.
• Connect the equipment to an outlet on a different circuit to that
which the receiver is connected.
• Consult the dealer or an experienced radio/TV technician for help.
For Australia: The Ringer Equivalence Number (REN) for this
equipment is written on the back of the machine.The sum of all the
Ringer Equivalence Numbers (REN's) on your telephone line should
not exceed 3 to assure correct service from your telephone company.
7
all-FO4700.book
Page 8
Friday, October 8, 1999
11:10 AM
Important Notice For New Zealand Users
Please note:
The grant of a Telepermit for any item of terminal equipment
indicates only that Telecom has accepted that the item complies with
the minimum conditions for connection to its network.
It indicates no endorsement of the product by Telecom, nor does it
provide any sort of warranty. Above all, it provides no assurance that
any item will work correctly in all respects with another item of
Telepermitted equipment of a different make or model, nor does it
imply that any product is compatible with all of Telecom's network
services.
This equipment is not capable, under all operating conditions, of
correct operation at the higher speeds for which it is designed.
Telecom will accept no responsibility should difficulties arise in such
circumstances.
This equipment shall not be set up to make automatic calls to the
Telecom '111' Emergency Service.
To avoid telephone charges for local calls, be sure to store numbers
"without" area code in your rapid or speed dial locations.
This equipment may not provide for the effective hand-over of a call
to another device connected to the same line.
Not all standard telephones and answering machines will respond to
imcoming ringing when connected to the extenison socket of the
equipment.
8
all-FO4700.book
Page 9
Friday, October 8, 1999
11:10 AM
Table of Contents
QUICK REFERENCE GUIDE . . . . . . . . . . . . . . . . . . . . . . . . . . 1
Introduction . . . . . . . . . . . . . . . . . . . . . . . . . . . . . . . . . . . . . . . 2
Important safety information . . . . . . . . . . . . . . . . . . . . . . . . . . . . . 4
Important Notice For New Zealand Users . . . . . . . . . . . . . . . . . . . 8
Table of Contents . . . . . . . . . . . . . . . . . . . . . . . . . . . . . . . . . . 9
1. Installation. . . . . . . . . . . . . . . . . . . . . . . . . . . . . . . . . . . . . 11
Unpacking Checklist . . . . . . . . . . . . . . . . . . . . . . . . . . . . . . . . . .
A Look at the Operation Panel . . . . . . . . . . . . . . . . . . . . . . . . . .
Connections . . . . . . . . . . . . . . . . . . . . . . . . . . . . . . . . . . . . . . . .
Installing the Print Cartridges . . . . . . . . . . . . . . . . . . . . . . . . . . .
Loading Printing Paper . . . . . . . . . . . . . . . . . . . . . . . . . . . . . . . .
Entering Your Name and Fax Number . . . . . . . . . . . . . . . . . . . .
Setting the Date and Time. . . . . . . . . . . . . . . . . . . . . . . . . . . . . .
Volume Adjustment . . . . . . . . . . . . . . . . . . . . . . . . . . . . . . . . . . .
11
12
18
23
28
31
34
36
2. Sending Documents. . . . . . . . . . . . . . . . . . . . . . . . . . . . . 38
Transmittable Documents . . . . . . . . . . . . . . . . . . . . . . . . . . . . . .
Loading the Document . . . . . . . . . . . . . . . . . . . . . . . . . . . . . . . .
Adjusting the Resolution and Contrast . . . . . . . . . . . . . . . . . . . .
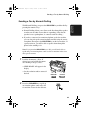
Sending a Fax by Normal Dialling . . . . . . . . . . . . . . . . . . . . . . . .
Programming Auto-Dial Numbers . . . . . . . . . . . . . . . . . . . . . . . .
Sending a Fax by Automatic Dialling. . . . . . . . . . . . . . . . . . . . . .
Cover Sheet . . . . . . . . . . . . . . . . . . . . . . . . . . . . . . . . . . . . . . . .
Batch Page Numbering . . . . . . . . . . . . . . . . . . . . . . . . . . . . . . . .
38
40
41
43
45
51
62
64
3. Receiving Documents . . . . . . . . . . . . . . . . . . . . . . . . . . . 66
Using AUTO Reception Mode . . . . . . . . . . . . . . . . . . . . . . . . . . . 67
Using MANUAL Reception Mode . . . . . . . . . . . . . . . . . . . . . . . . 67
Substitute Reception to Memory . . . . . . . . . . . . . . . . . . . . . . . . . 68
9
all-FO4700.book
Page 10 Friday, October 8, 1999
11:10 AM
Table of Contents
4. Making Copies. . . . . . . . . . . . . . . . . . . . . . . . . . . . . . . . . . 69
5. Special Functions . . . . . . . . . . . . . . . . . . . . . . . . . . . . . . . 72
Broadcasting . . . . . . . . . . . . . . . . . . . . . . . . . . . . . . . . . . . . . . . . 72
Confidential Operations . . . . . . . . . . . . . . . . . . . . . . . . . . . . . . . . 77
Relay Request . . . . . . . . . . . . . . . . . . . . . . . . . . . . . . . . . . . . . . . 83
Polling . . . . . . . . . . . . . . . . . . . . . . . . . . . . . . . . . . . . . . . . . . . . . 91
Power Save Mode . . . . . . . . . . . . . . . . . . . . . . . . . . . . . . . . . . . . 99
Timer Operations . . . . . . . . . . . . . . . . . . . . . . . . . . . . . . . . . . . . 105
Batch Transmission . . . . . . . . . . . . . . . . . . . . . . . . . . . . . . . . . . 116
Entering and Using Programs . . . . . . . . . . . . . . . . . . . . . . . . . . 119
Duplex Scanning for Two-sided Documents . . . . . . . . . . . . . . . 134
Print Hold . . . . . . . . . . . . . . . . . . . . . . . . . . . . . . . . . . . . . . . . . . 136
Department Control . . . . . . . . . . . . . . . . . . . . . . . . . . . . . . . . . . 138
Blocking Reception of Unwanted Faxes . . . . . . . . . . . . . . . . . . 141
6. Optional Settings . . . . . . . . . . . . . . . . . . . . . . . . . . . . . . 143
7. Printing Lists and Reports . . . . . . . . . . . . . . . . . . . . . . . 153
8. Maintenance . . . . . . . . . . . . . . . . . . . . . . . . . . . . . . . . . . 161
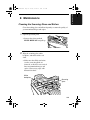
Cleaning the Scanning Glass and Rollers . . . . . . . . . . . . . . . . . 161
The Housing . . . . . . . . . . . . . . . . . . . . . . . . . . . . . . . . . . . . . . . 162
Replacing the Verification Stamp. . . . . . . . . . . . . . . . . . . . . . . . 162
9. Troubleshooting . . . . . . . . . . . . . . . . . . . . . . . . . . . . . . . 164
Problems and Solutions . . . . . . . . . . . . . . . . . . . . . . . . . . . . . . . 164
Messages and Signals. . . . . . . . . . . . . . . . . . . . . . . . . . . . . . . . 168
Clearing Paper Jams . . . . . . . . . . . . . . . . . . . . . . . . . . . . . . . . . 171
Index . . . . . . . . . . . . . . . . . . . . . . . . . . . . . . . . . . . . . . . . . . . 175
10
Page 11 Friday, October 8, 1999
11:10 AM
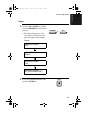
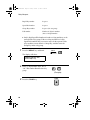
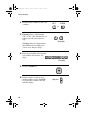
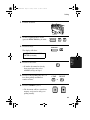
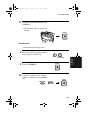
1. Installation
all-FO4700.book
1. Installation
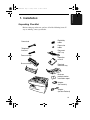
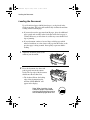
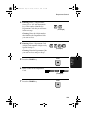
Unpacking Checklist
Before setting up, make sure you have all of the following items. If
any are missing, contact your dealer.
Power lead
Rapid Key
labels
Paper size
labels
Telephone
line cord
Document
OUT tray
Toner cartridge
Operation
manual
Drum cartridge
Received
document tray
Business
products dealer
installation report
Adapter
(for Australia)
Adapter
(for New Zealand)
11
all-FO4700.book
Page 12 Friday, October 8, 1999
11:10 AM
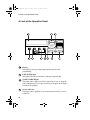
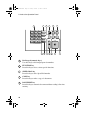
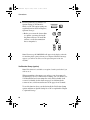
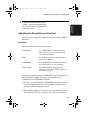
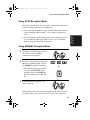
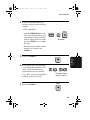
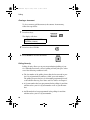
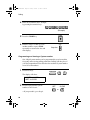
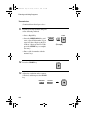
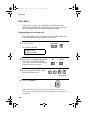
A Look at the Operation Panel
A Look at the Operation Panel
1
2
LINE IN USE
STATUS CHECK
CHANGEOVER
3
STANDARD
FINE
SUPER FINE
HALF TONE
POWER SAVE
4
5
6
7
8
9
RESOLUTION
10
1
Display
This displays messages and prompts during operation and
programming.
2
LINE IN USE light
This lights when the fax machine is using the telephone line.
3
STATUS CHECK light
This lights when a paper size error or paper jam occurs, or when the
print compartment cover is open. A message will appear in the display
to indicate the problem.
4
Service indicator
This lights when a problem occurs which must be fixed by a service
technician.
12
Page 13 Friday, October 8, 1999
11:10 AM
A Look at the Operation Panel
5
Paper out indicator
This lights when the fax machine is out of paper, or when the received
document tray is not properly installed. If the machine has a paper
cassette, the indicator blinks when one of the paper sources (tray or
cassette) is out of paper, and lights steadily when all sources are out of
paper.
6
Toner cartridge indicator
This blinks when the toner cartridge nears empty, and lights steadily
when the toner cartridge needs replacement.
7
Drum cartridge indicator
This blinks when the drum cartridge nears the end of its life, and
lights steadily when the drum cartridge needs replacement.
8
CHANGEOVER key
Two types of information appear in the display: prompts related to
operations you are performing, and information about how the fax is
using the telephone line (transmitting, receiving, etc.). Press this key
to switch between the two types of information.
9
POWER SAVE key
Press this key to turn on Power Save Mode, or set the Power Save
Mode timer if TIMER has been selected with Option Setting 34
(Power Save Mode).
10
RESOLUTION key
Press this key to adjust the resolution before sending or copying a
document.
13
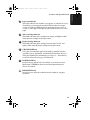
1. Installation
all-FO4700.book
all-FO4700.book
Page 14 Friday, October 8, 1999
11:10 AM
A Look at the Operation Panel
11
02
03
04
05
06
07
A
B
C
D
E
F
G
H
09
10
11
12
13
14
15
16
I
J
K
L
M
N
O
P
17
18
19
20
21
22
23
24
Q
R
S
T
U
V
W
X
25
26
27
28
29
30
31
32
Y
Z
SPACE
11
12
13
SHIFT
14
SP
15
16
17
18
19
34
35
36
37
38
39
A
B
C
D
E
F
G
H
41
42
43
44
45
46
47
48
I
J
K
L
M
N
O
P
CONTRAST PAGE COUNTER CONFIDENTIAL TIMER
R
S
T
RELAY
U
LIFE
V
40
Rapid Key
overlay up
MEM.STATUS SEARCH DIAL
W
X
DOWN
COVER SHEET
Y
Rapid Key
overlay down
CLEAR
33
Q
20
08
01
UP
Z
SPACE
SHIFT
SP
CLEAR
21
22
23
24
25
26
11
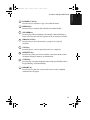
Rapid Dial Keys
Press one of these keys to dial a fax number automatically. (Note that
you must attach the Rapid Key labels.)
12
CONTRAST key
Press this key to adjust the contrast before sending or copying a
document.
13
PAGE COUNTER key
Press this key to include a slash and the total number of pages after
each page number on the pages of a transmitted document.
14
CONFIDENTIAL key
Press this key to send or print out a confidential document.
15
TIMER key
Press this key to set an operation to be performed automatically at a
later time.
14
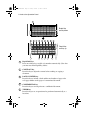
Page 15 Friday, October 8, 1999
11:10 AM
A Look at the Operation Panel
16
RELAY key
Press this key to send a document to another Sharp fax machine and
have that machine in turn relay the document to one or more end
receiving machines.
17
LIFE key
Press this key, followed by 1, to check the total number of pages
printed by the fax machine.
18
MEM. STATUS key
Press this key to check the status of documents waiting in memory for
transmission.
19
SEARCH DIAL key
Press this key to search through your auto dial fax numbers by name.
20
COVER SHEET key
Press this key to include a cover sheet when sending a fax.
21
SPACE key
Press this key to enter a space when programming a name.
22
SHIFT key
Press this key to switch between upper and lower case letters when
programming a name.
23
SP key
Press this key to enter a symbol when programming a name.
24
CLEAR key
Press this key to clear a mistake when programming a name or fax
number.
25
Arrow keys
Press these keys to move the cursor forward or backward when
programming a name or fax number.
26
UP and DOWN keys
Press these keys to adjust the volume of the speaker when the
SPEAKER key has been pressed, or the volume of the ringer at all
other times.
15
1. Installation
all-FO4700.book
all-FO4700.book
Page 16 Friday, October 8, 1999
11:10 AM
A Look at the Operation Panel
27
28
ABC
1
GHI
4
PQRS
7
2
JKL
5
TUV
8
DEF
29 30
FUNCTION
COPY
31
32
DOCUMENT DUPLEX SCAN
3
MNO
SPEED DIAL
BROADCAST PRIORITY
6
WXYZ
REPORT
REDIAL
9
SPEAKER
STOP
START
0
33 34 35 36 37
38
39
27
Dial keypad (numeric keys)
Use these keys to dial and program fax numbers.
28
FUNCTION key
Press this key to select various special functions.
29
SPEED DIAL key
Press this key to dial a Speed Dial number.
30
COPY key
Press this key to make a copy of a document.
31
DOCUMENT key
Press this key to transmit a document without reading it first into
memory.
16
Page 17 Friday, October 8, 1999
11:10 AM
A Look at the Operation Panel
32
DUPLEX SCAN key
Press this key to transmit or copy a two-sided document.
33
REDIAL key
Press this key to automatically redial the last number dialed.
34
SPEAKER key
Press this key when transmitting a document by Normal Dialing to
listen to the line and verify the response of the receiving fax machine.
35
BROADCAST key
Press this key to send a document to a group of receiving fax
machines.
36
STOP key
Press this key to cancel an operation before it is completed.
37
PRIORITY key
Press this key when you need to transmit a document ahead of other
documents waiting in memory for transmission.
38
START key
Press this key to begin transmission when using Speed Dialing, Direct
Keypad Dialing, or Normal Dialing.
39
REPORT key
Press this key to print out a report on the most recently completed
transmission or reception.
17
1. Installation
all-FO4700.book
all-FO4700.book
Page 18 Friday, October 8, 1999
11:10 AM
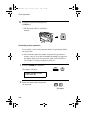
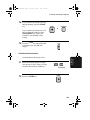
Connections
Connections
Points to keep in mind when setting up
♦ Do not place the machine in direct sunlight.
♦ Do not place the machine near heaters or air conditioners.
♦ Keep dust away from the machine.
♦ Install the machine on a level surface.
Connecting the power cord
Connect the female end of the power lead to the fax machine as
shown. Insert the male end into a 230-240 V, 50 Hz, earthed (3-prong)
AC outlet.
♦ Caution: When disconnecting the fax, unplug the telephone line
cord before unplugging the power lead.
Press the power
switch to turn on
the power.
Note: If your area experiences a high incidence of lightning or power
surges, we recommend that you install surge protectors for the power and
telephone lines. Surge protectors can be purchased at most telephone specialty stores.
18
Page 19 Friday, October 8, 1999
11:10 AM
Connections
Connecting the telephone line cord
Insert one end of the telephone line cord into the adapter. Insert the
other end of the line cord into the socket on the back of the fax marked
TEL. LINE. Plug the adapter into the telephone socket on the wall.
Note: The fax machine is set for tone dialling. If you are on a pulse dial
line, you must set the fax machine for pulse dialling by changing Option
Setting 22. This procedure is described in Chapter 6, Optional Settings.
Moving the fax machine and reconnecting
Should it be necessary to move your fax to a new location, first
disconnect the telephone line cord before disconnecting the power
cord. When reconnecting, it is necessary to connect the power cord
before connecting the telephone line cord.
Connecting a telephone (optional)
If desired, you can connect a telephone to the TEL. SET socket on the
back of the machine.
Important: In New Zealand,
not all standard telephones will
respond to incoming ringing
when connected to the extension socket of the equipment.
19
1. Installation
all-FO4700.book
all-FO4700.book
Page 20 Friday, October 8, 1999
11:10 AM
Connections
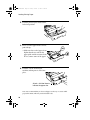
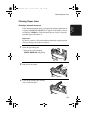
Attaching the document OUT tray
Insert the protrusion on the right side of the machine into the hole in
the right side of the document OUT tray as shown, then bend the tray
slightly and insert so that the protrusion on the left side of the machine
goes into the hole on the left side of the document OUT tray.
Pull out the tray
extension.
Attaching the received document tray
Slide the received document tray into the machine as shown. When it
stops, lift the end slightly and push in so that the tray locks into place.
Make sure the left edge of
the tray fits into the slot.
Important!
The received document tray must be attached for the fax machine to
operate properly.
20
Page 21 Friday, October 8, 1999
11:10 AM
Connections
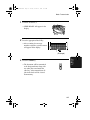
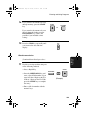
Connection to a computer (option)
Note: This function is available as an option. If you wish to use it, consult
your dealer to have the PC interface board installed.
If desired, you can connect the fax machine to the parallel port of any
compatible computer. Once you have installed the provided printer
software in your computer, you will be able to use the fax machine as
a laser printer for your computer.
Important: Use only an IEEE P1284 parallel cable to connect the fax
machine to your computer. We recommend a shielded cable no longer
than 2 m.
1
Make sure your computer and the fax
machine are both turned off.
2
Connect one end of the cable to the
port on the fax machine. Snap the
clips on each side of the port onto the
cable connector to secure it.
3
Connect the other end of the cable to
the parallel port on the back of your
computer.
POWER
Turn
off
21
1. Installation
all-FO4700.book
all-FO4700.book
Page 22 Friday, October 8, 1999
11:10 AM
Connections
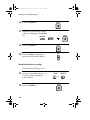
4
Press the panel keys as shown to set
Option Setting 31 (PC Interface
Mode) to ON. (The option settings are
explained in more detail in Chapter 6,
Optional Settings.)
• Before you can use the fax machine
as a printer, you must also install
the printer software. To install the
software, see the documentation
that accompanies it.
FUNCTION
4
1
3
1
STOP
STOP
Note: The message PC PRINTING will appear in the display when the
fax machine prints a print job from your computer. While this message
appears, you will not be able to use the operation panel of the fax
machine.
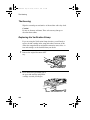
Verification Stamp (option)
Note: This function is available as an option. Consult your dealer if you
wish to use it.
When transmitting a document, you can have your fax stamp each
document page as it is scanned. After scanning, you can check to see
if all documents have been stamped to verify that no double feeds
occurred. (A double feed is when two pages are fed through the
scanner at once, which means that one of the pages is not scanned.)
To use this function, have your dealer install the Verification Stamp
option, and then set Option Setting 29 to ON as explained in Chapter
6, Optional Settings.
22
Page 23 Friday, October 8, 1999
11:10 AM
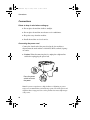
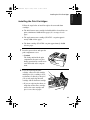
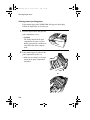
Installing the Print Cartridges
Installing the Print Cartridges
Follow the steps below to install or replace the toner and drum
cartridges.
♦ The initial starter toner cartridge included with the fax machine can
print a minimum of 3000 A4-size pages (4% coverage of each
page).
♦ The replacement toner cartridge (FO-47DC) can print approximately 6000 A4-size pages.
♦ The drum cartridge (FO-47DR) can print approximately 20,000
A4-size pages.
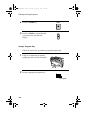
1
Press the green release and open the
print compartment cover.
• Caution!
The fusing unit inside the print
compartment becomes very hot
during operation. Be careful not to
touch the inside of the compartment.
2
If you are replacing the toner
cartridge, remove the old cartridge
and dispose of it according to local
regulations. Go directly to Step 6 if
you are only replacing the toner
cartridge and not the drum cartridge.
• If you are replacing the drum cartridge but not the toner cartridge,
remove the toner cartridge and
place it on a sheet of paper.
23
1. Installation
all-FO4700.book
all-FO4700.book
Page 24 Friday, October 8, 1999
11:10 AM
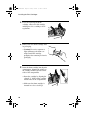
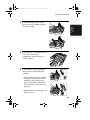
Installing the Print Cartridges
3
If you are replacing the drum
cartridge, remove the old cartridge
and dispose of it according to local
regulations.
4
Remove the new drum cartridge from
its packaging.
• Caution! Excessive exposure to
light will damage the drum cartridge. Install the cartridge
promptly after removing it from its
packaging.
5
Insert the drum cartridge into the print
compartment, aligning the guides on
the cartridge with the grooves on the
sides of the compartment.
• Insert the cartridge by aligning the
colored “1” labels on the cartridge
and the sides of the compartment.
• Make sure the drum cartridge is
inserted in as far as it will go.
24
Blue
Green
Page 25 Friday, October 8, 1999
11:10 AM
Installing the Print Cartridges
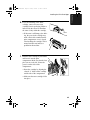
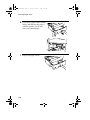
6
If you are installing a new toner
cartridge, remove the new toner
cartridge from its packaging. Shake as
indicated by the arrows to distribute
the toner evenly within the cartridge.
• If the toner is still lumpy after shaking, the gears in the cartridge may
make a noticeable sound when the
print compartment cover is closed
after installing the cartridge. This is
normal and does not indicate a
problem in the machine.
7
Hold the toner cartridge by the handle
and lower it into the print
compartment. Make sure that the four
pins (two on each side) fit into the
grooves on the sides of the
compartment.
Blue
Green
• Insert the cartridge by aligning the
colored “2” labels on the cartridge
and the side of the compartment
• Make sure the toner cartridge clicks
into place.
25
1. Installation
all-FO4700.book
all-FO4700.book
Page 26 Friday, October 8, 1999
11:10 AM
Installing the Print Cartridges
8
Close the print compartment cover.
• Press down on the dot markings at
the left edge to make sure the cover
is completely closed.
9
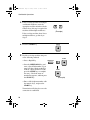
Reset the toner counter by pressing
the LIFE key (flip up the Rapid Key
overlay), 2, and the START key.
START
LIFE
V
10
Reset the drum counter by pressing
the LIFE key (flip up the Rapid Key
overlay), 3, and the START key.
2
START
LIFE
V
3
Note: The print compartment cover may become noticeably warm if a
large number of pages are successively printed. This is normal and does
not indicate a problem in the machine.
26
Page 27 Friday, October 8, 1999
11:10 AM
Installing the Print Cartridges
When to replace the toner cartridge
When the toner cartridge nears empty (about 100 pages can still be
printed), the toner cartridge indicator on the operation panel will
blink. When the toner cartridge is empty, the toner cartridge indicator
will light steadily and REPLACE TONER will appear in the display.
Printing will no longer be possible. Use the following replacement
toner cartridge:
Sharp FO-47ND toner cartridge
When to replace the drum cartridge
When the drum cartridge nears the end of its life, the drum cartridge
indicator on the operation panel will blink. When the drum cartridge
life is over, the drum cartridge indicator will light steadily and DRUM
LIFE OVER will appear in the display. Use the following replacement
drum cartridge:
Sharp FO-47DC drum cartridge
27
1. Installation
all-FO4700.book
all-FO4700.book
Page 28 Friday, October 8, 1999
11:10 AM
Loading Printing Paper
Loading Printing Paper
You can load up to 250 sheets of A4-size paper (60-80 g/m2) in the
paper tray. You can load up to 500 sheets of paper in the paper
cassette.
The paper cassette is available as an option. To have the cassette
installed, consult your dealer.
Loading paper in the paper tray
1
Remove the received document tray.
2
Insert a stack of paper into the tray,
print side up.
• Make sure the end of the tray is
pushed in. Otherwise a size error
will result.
Attach a A4 label here to
indicate the paper size.
28
Page 29 Friday, October 8, 1999
11:10 AM
Loading Printing Paper
3
Replace the received document tray.
• The received document tray must
be attached for the fax machine to
operate properly.
Loading paper in the paper cassette (if installed)
1
Grasp the hand-hold on the cassette
and pull out the cassette until it stops.
29
1. Installation
all-FO4700.book
all-FO4700.book
Page 30 Friday, October 8, 1999
11:10 AM
Loading Printing Paper
2
Push the pressure plate down until it
locks into position.
3
Place a stack of paper in the cassette,
print side up.
• Make sure the stack of paper is not
higher than the two tabs on the
paper guide and the two metal tabs.
If it is, remove some of the paper.
4
Push the cassette back into the
machine, making sure it clicks into
place.
Attach a A4 label here to
indicate the paper size.
Note: We recommend that you do not add paper to the tray or cassette while
paper still remains. This may result in double feeds.
30
Page 31 Friday, October 8, 1999
11:10 AM
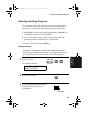
Entering Your Name and Fax Number
Entering Your Name and Fax Number
Before you can begin using the fax machine, you must program your
name and fax number. Once you program this information, it will
appear automatically at the top of each fax page you send.
Note: Make sure the display shows the date and time before beginning a
programming operation. If the display shows the telephone line status,
press the CHANGEOVER key to switch to the date and time.
1
Press these keys:
FUNCTION
3
The display will show:
3:ENTRY MODE
ENTER #(1-9,*,#)
2
Press the 3 key.
3
The display will show:
3:OWN PASSCODE SET
ENTER FAX #
3
Enter your fax number (max. of 20
digits) by pressing the numeric keys.
• To insert a space between digits,
press the # key.
3
1
2
4
4
1
1
(Example)
• To clear a mistake, press the STOP
key.
31
1. Installation
all-FO4700.book
all-FO4700.book
Page 32 Friday, October 8, 1999
11:10 AM
Entering Your Name and Fax Number
4
Press the START key.
START
The display will show:
ENTER SENDER’S NAME
5
Flip the Rapid Key overlay down (if it
is up), and enter your name by
pressing the appropriate letter keys as
shown below. (Max. of 24
characters.)
A
B
C
D
E
F
G
H
I
J
K
L
M
N
O
P
Q
R
S
T
U
V
W
X
Y
Z
SPACE
SHIFT
Example: SHARP =
S
H
SP
CLEAR
A
R
P
♦ Press the SPACE key to enter a space. To change case, press the
SHIFT key.
♦ To clear a mistake, press the CLEAR key.
♦ To enter a number as part of a name, press the appropriate numeric
key. To select one of the following special symbols, press the SP
key one or more times: !"#$%&’()*+,-/:;<=>?[¥]^_'{|}→←@. At
the end of the symbol list, characters particular to the language used
in the display will appear.
32
Page 33 Friday, October 8, 1999
11:10 AM
Entering Your Name and Fax Number
6
Press the START key.
START
The display will show:
4:DATE &TIME SET MODE
PRESS START KEY
7
Press the STOP key twice to return to
the date and time display.
STOP
STOP
33
1. Installation
all-FO4700.book
all-FO4700.book
Page 34 Friday, October 8, 1999
11:10 AM
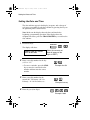
Setting the Date and Time
Setting the Date and Time
The date and time appear in the display, in reports, and at the top of
each page you transmit. Set the date and time by pressing the keys on
the operation panel as shown below.
Note: Make sure the display shows the date and time before
beginning a programming operation. If the display shows the
telephone line status, press the CHANGEOVER key to switch to the
date and time.
1
Press these keys:
FUNCTION
4
3
The display will show:
4:DATE&TIME SET MODE
DATE 06-08-1999
2
(Note: the currently set
date will appear to the
right of “DATE”)
Enter a two-digit number for the day
(“01” to “31”).
0
• To correct a mistake, press the STOP
key to move the cursor back to the
mistake and then enter the correct
number.
3
5
Example: the 5th
Enter a two-digit number for the
month (“01” for January, “02” for
February, “12” for December, etc.).
0
1
Example: January
4
Enter the year (four digits).
1
9
9
9
Example: 1999
34
Page 35 Friday, October 8, 1999
11:10 AM
Setting the Date and Time
5
Enter a two-digit number for the hour
(“00” to “23”) and a two-digit number
for the minute (“00” to “59”).
6
Press the START key to start the
clock.
7
Press the STOP key twice to return to
the date and time display.
0
9
5
2
Example: 9:25
START
STOP
STOP
Note: This fax machine is Year 2000 compliant.
35
1. Installation
all-FO4700.book
all-FO4700.book
Page 36 Friday, October 8, 1999
11:10 AM
Volume Adjustment
Volume Adjustment
You can adjust the volume of the speaker and ringer using the UP and
DOWN keys.
Speaker
1
Press the SPEAKER key.
2
Press the UP or DOWN key.
Display:
SPEAKER
DOWN
or
SPEAKER VOLUME
HIGH
SPEAKER VOLUME
MIDDLE
SPEAKER VOLUME
LOW
3
36
When the display shows the desired
volume level, press the SPEAKER
key to turn off the speaker.
SPEAKER
UP
Page 37 Friday, October 8, 1999
11:10 AM
Volume Adjustment
Ringer
1
Press the UP or DOWN key. (Make
sure the SPEAKER key has not been
pressed.)
• The ringer will ring once at the
selected level, then the date and
time will reappear in the display.
DOWN
or
UP
Display:
4:RINGER VOLUME
HIGH
4:RINGER VOLUME
MIDDLE
4:RINGER VOLUME
LOW
4:RINGER VOLUME
OFF OK?(PRESS START)
2
If you selected RINGER OFF: OK?,
press the START key.
START
37
1. Installation
all-FO4700.book
all-FO4700.book
Page 38 Friday, October 8, 1999
11:10 AM
2. Sending Documents
Transmittable Documents
Size and weight
The size and weight of documents that you can load in the document
feeder depend on whether you load one page at a time or several pages
at once.
Loading one page at a time:
Minimum
size
11"
(279 mm)
5.8"
(148 mm)
Maximum
size
5.0"
(128 mm)
Minimum
weight
17"
(432 mm)
Maximum
weight
14 lbs.
(52 g/m²)
36 lbs.
(157 g/m²)
Loading several pages at once:
Minimum
size
5.8"
(148 mm)
Maximum
size
10.1"
(256 mm)
5.0"
(128 mm)
Minimum
weight
38
14 lbs.
(52 g/m²)
14.3"
(364 mm)
Maximum
weight
20 lbs.
(80 g/m²)
all-FO4700.book
Page 39 Friday, October 8, 1999
11:10 AM
Transmittable Documents
The area of the document that the fax machine can scan is slightly
smaller than the actual document size. Any letters or graphics outside
this area will not be scanned.
Maximum scanning width:
210 mm
Maximum scanning length:
The length of the document minus 4
mm from the top and bottom of the
document.
Other restrictions
♦ The scanner cannot recognise yellow, greenish yellow, or light blue
ink.
♦ Ink, glue, and correcting fluid on documents must be dry before
they pass through the document feeder.
♦ All clips, staples, and pins must be removed from documents before
loading in the feeder. If these are not removed, they may damage
the machine.
♦ Documents which are patched, taped, torn, smaller than the minimum size, carbon backed, easily smudged, or have a slippery
coated surface should be photocopied, and the copy loaded in the
feeder.
39
2. Sending
Documents
Maximum scanning area
all-FO4700.book
Page 40 Friday, October 8, 1999
11:10 AM
Loading the Document
Loading the Document
Up to 50 A4-sized pages (20 B4-sized pages) can be placed in the
feeder at one time. The pages will automatically feed into the machine
starting from the bottom page.
♦ If you need to send or copy more than 50 pages, place the additional
pages gently and carefully in the feeder just before the last page is
scanned. Do not try to force them in, as this may cause double-feeding or jamming.
♦ If your document consists of several large or thick pages which
must be loaded one at a time, insert each page into the feeder as the
previous page is being scanned. Insert gently to prevent doublefeeding.
1
Adjust the document guides to the
width of your document.
2
Place the document face down and
push it gently into the document
feeder. The top edge of the document
should enter the machine first.
• The feeder will draw the leading
edge of the document into the
machine. SEND READY will
appear in the display.
Note: When inserting a large
number of pages in the feeder,
slant the front end of the stack so
that the bottom pages enter first.
40
all-FO4700.book
Page 41 Friday, October 8, 1999
11:10 AM
Adjusting the Resolution and Contrast
Adjust the resolution and/or contrast
settings (if desired) and then dial the
receiving machine as explained in the
following sections.
2. Sending
Documents
3
Adjusting the Resolution and Contrast
If desired, you can adjust the resolution and contrast before sending a
document.
Resolution
The fax machine has four resolution settings:
STANDARD
Use STANDARD for ordinary documents.
This setting gives you the fastest and most
economical transmission.
FINE
Use FINE for documents containing small
letters or fine drawings.
SUPER FINE
Use SUPER FINE for documents containing
very small letters or very fine drawings.
HALF TONE
Use HALF TONE for photographs and
illustrations. The original will be reproduced
in 64 shades of grey.
The default resolution setting is STANDARD. If you don’t adjust the
resolution before sending a document, the fax machine will
automatically use STANDARD resolution.
♦ In order to transmit in FINE or SUPER FINE resolution, the receiving fax machine must also have that resolution. If it doesn’t, the
next best available setting will be used.
♦ The resolution settings are only effective for transmitting and copying a document. They are not effective for receiving a document.
41
all-FO4700.book
Page 42 Friday, October 8, 1999
11:10 AM
Adjusting the Resolution and Contrast
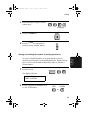
To adjust the resolution setting, press the RESOLUTION key one or
more times until the indicator light next to the desired setting comes
on.
STANDARD
FINE
RESOLUTION
SUPER FINE
HALF TONE
RESOLUTION
Contrast
The fax machine has three contrast settings:
AUTO
Use AUTO for normal documents.
DARK
Use DARK for faint documents.
LIGHT
Use LIGHT for documents with a dark
background.
The default setting is AUTO.
To adjust the contrast, flip up the Rapid Key overlay (if necessary)
and press the CONTRAST key until the desired setting appears in the
display.
( AUTO)
M:00% SEND READY
CONTRAST
Q
( DARK)
M:00% SEND READY
(LIGHT)
M:00% SEND READY
42
all-FO4700.book
Page 43 Friday, October 8, 1999
11:10 AM
Sending a Fax by Normal Dialling
With Normal Dialling, you press the SPEAKER key and then dial by
pressing the numeric keys.
♦ Normal Dialling allows you to listen to the line through the speaker
to make sure the other fax machine is responding. (Note that the
speaker is not a speakerphone; it cannot be used for talking.)
♦ If you have connected an extension telephone to the fax machine,
you can also pick up the extension phone and dial using the externsion phone (do not press the SPEAKER key on the fax machine). If
a person answers, you will be able to speak to them through the
phone before sending a fax.
Note: If you press the SPEAKER key to dial, you will not be able to
speak using an extension phone connect to the fax machine in the event
that a person answers.
1
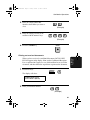
Load the document(s). (Note: If
desired, you can load the document
after dialling in Step 3, below.)
• SEND READY will appear in the
display.
• Set the resolution and/or contrast if
desired.
RESOLUTION
CONTRAST
Q
2
Press the SPEAKER key or pick up
an extension phone connected to the
fax machine. Listen for the dial tone.
SPEAKER
43
2. Sending
Documents
Sending a Fax by Normal Dialling
all-FO4700.book
Page 44 Friday, October 8, 1999
11:10 AM
Sending a Fax by Normal Dialling
3
If you pressed the SPEAKER key,
dial the number of the receiving
machine by pressing the numeric
keys on the fax machine.
3
1
2
4
4
1
1
(Example)
If you are using an extension phone,
dial using the keypad on the extension
phone.
4
Wait for the connection. When you
hear a fax tone, press the START key
on the fax machine.
START
• If a person answers and you are
using an extension phone, ask them
to press their Start key. When you
hear the fax tone, press the START
key on your fax machine.
Using the REDIAL key
You can press the REDIAL key to redial the last number dialled. To
send a document, press the START key when you hear the fax tone
after the connection is made. Note that the speaker is automatically
activated when you press the REDIAL key.
44
all-FO4700.book
Page 45 Friday, October 8, 1999
11:10 AM
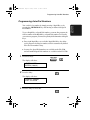
Programming Auto-Dial Numbers
You can dial a fax number by simply pressing a Rapid Key, or by
pressing the SPEED DIAL key and entering an abbreviated Speed
Dial number.
To use a Rapid Key or Speed Dial number, you must first program the
full fax number in the Rapid Key or Speed Dial number. It is usually
convenient to program your most frequently dialled numbers in Rapid
Keys.
♦ Forty-eight Rapid Keys are available. Rapid Dial Keys also allow
you to program a backup fax number, which is automatically dialled
if the first fax number is busy.
♦ Seventy-five Speed Dial numbers are available on the FO-4700,
and one hundred Speed Dial numbers are available on the FO-5700.
1
Press these keys:
FUNCTION
The display will show:
3
3:ENTRY MODE
ENTER #(1-9,*,#)
2
Press the 1 key.
1
The display will show:
1:FAX/TEL. # MODE
1=SET, 2=CLEAR
3
Press the 1 key to select SET.
1
45
2. Sending
Documents
Programming Auto-Dial Numbers
all-FO4700.book
Page 46 Friday, October 8, 1999
11:10 AM
Programming Auto-Dial Numbers
4
To program a Rapid Key number,
press a Rapid Key (to select Rapid
Keys 33 through 48, flip up the Rapid
Key overlay).
2
B
Example: Rapid Key 2
To program a Speed Dial number,
press the SPEED DIAL key and then
enter a number from “1” to “75” on
the FO-4700, or “1” to “100” on the
FO-5700. (If you enter less than two
digits on the FO-4700, or three digits
on the FO-5700, press the START
key to complete the entry.)
5
Enter the fax number by pressing the
numeric keys (max. of 34 digits
including pauses).
• To clear a mistake, press the
CLEAR key.
or
START
SPEED DIAL
1
Speed Dial 1
3
1
2
4
4
(Example)
• If a pause is required between any
of the digits to access a special
service or an outside line, press the
REDIAL key (two seconds per
pause). The pause will appear as a
hyphen. Several pauses can be
entered in a row.
6
46
Press the START key.
1
START
1
all-FO4700.book
Page 47 Friday, October 8, 1999
11:10 AM
Programming Auto-Dial Numbers
Enter the name of the party by
S
pressing the letter entry keys
(max.of 20 characters). (Make sure
the Rapid Key overlay is flipped
down.)
H
A
R
P
2. Sending
Documents
7
Example: SHARP
• If you don’t want to enter a name,
go directly to Step 8.
8
Press the START key.
9
Press 1 if the number programmed is
an area code or access code to be used
for Chain Dialling (see Chain
Dialling at the end of this procedure).
Press 2 (or START) if the number is a
regular fax number.
START
SET
CANCEL
1
or
2
• If you pressed 1 or are
programming a Speed Dial number,
go to Step 14. (Note: A backup fax
number cannot be entered in a
Rapid Key used for Chain
Dialling.)
10
11
Enter a backup fax number to be
dialled if the first number is busy.
(If you don’t want to enter a backup
number, go directly to Step 13.)
Press the START key.
3
1
2
4
4
1
1
(Example)
START
47
all-FO4700.book
Page 48 Friday, October 8, 1999
11:10 AM
Programming Auto-Dial Numbers
12
Enter a name for the backup fax
number. (If you don’t want to
S
enter a name, go directly to
Step 13.)
H
A
R
P
2
Example: SHARP2
13
Press the START key.
14
Return to Step 4 to program another
number, or press the STOP key
repeatedly to return to the date and
time display.
START
STOP
Step 4 or
• If you programmed a Rapid Key
number, you can write the name of
the party on the label above the
Rapid Key.
Chain Diaing for area and access codes
You can also program an area code or access code in a Rapid Key or
Speed Dial number using the above programming procedure. In Step
9, press 1 to set the number as a Chain Dialling number.
After you dial an area code or access code using a Rapid Key or Speed
Dial number set for Chain Dialling, the fax machine will wait for you
to dial the remainder of the number (you can dial the remainder of the
number by pressing a Rapid Key, by pressing the Speed Dial key and
entering a Speed Dial number, or by pressing numeric keys). Note that
the remainder of the number should not be set as a Chain Dial number
if programmed in a Rapid Key or Speed Dial number.
♦ The maximum number of digits that can be dialled at one time by
Chain Dialling is 50.
48
all-FO4700.book
Page 49 Friday, October 8, 1999
11:10 AM
Programming Auto-Dial Numbers
Note: You cannot clear a number if it is used in a program or timer operation, if it is used to specify the relay fax machine in a relay group, or if it
is included in a Group Key. First clear the number from the operation or
group, then perform the following clearing procedure. To check where
the number is used, print out the Program/Group List, the Timer List,
and/or the Relay Group List as explained in Chapter 7.
1
Press these keys:
FUNCTION
3
The display will show:
1
1:FAX/TEL. # MODE
1=SET, 2=CLEAR
2
Press 2 to select CLEAR.
3
To clear a Rapid Key, press the Rapid
Key.
2
2
B
To clear a Speed Dial number, press
the SPEED DIAL key and then enter
the number with the numeric keys. (If
you enter less than 2 digits on the FO4700, or 3 digits on the FO-5700,
press the START key to complete the
entry.)
4
Press the START key.
Example: Rapid Key 2
START
49
2. Sending
Documents
Clearing auto-dial numbers
all-FO4700.book
Page 50 Friday, October 8, 1999
11:10 AM
Programming Auto-Dial Numbers
5
Return to Step 3 to clear another
number, or press the STOP key
repeatedly to return to the date and
time display.
STOP
Step 4 or
Making changes
To make changes in a number previously stored, repeat the
programming procedure. Select the Rapid Key or Speed Dial number
for which you want to make changes in Step 4, and then change the
number(s) and/or name(s) when they appear in the display (Steps 5, 7,
10 and 12).
50
all-FO4700.book
Page 51 Friday, October 8, 1999
11:10 AM
Sending a Fax by Automatic Dialling
Sending a Fax by Automatic Dialling
2. Sending
Documents
Dual Access
The fax machine features full dual access, which means that you can
load a document and dial by automatic dialling even when the fax
machine is occupied with another operation. After you dial, your
document will be immediately scanned into memory and then
transmitted once all previously set operations have been completed.
If more than one document has been scanned into memory for
transmission, the documents will be transmitted in the order in which
they were scanned. If you have an urgent transmission and do not
want to wait until previously scanned documents are transmitted, you
can press the PRIORITY key after loading your document. Your
document will be transmitted immediately after the current document
has completed transmission.
If you don’t want the document to be transmitted from memory, you
can press the DOCUMENT key after loading the document. In this
case, the document will not be scanned until all previously set
operations are completed and the connection to the receiving party is
established. (To transmit the document ahead of any documents
waiting in memory for transmission, press the PRIORITY key.)
♦ The fax machine can hold approximately 56 pages of average content in memory when Option Setting 9, Error Correction Mode, is
turned off. Less pages can be held if any were scanned using fine or
halftone resolution, or when Option Setting 9 is turned on.
♦ The amount of memory currently occupied appears as a percentage
("M:00%") in the display.
51
all-FO4700.book
Page 52 Friday, October 8, 1999
11:10 AM
Sending a Fax by Automatic Dialling
If the memory becomes full...
If the memory becomes full while a document is being scanned,
MEMORY FULL will appear in the display. If Option Setting 23
(Quick On-line) is set to YES, scanning will automatically resume
when memory becomes free again as pages are transmitted. (Note:
Quick On-Line is initially set to YES at the factory. To change the
setting, see Chapter 6, Optional Settings.)
If Quick On-Line is set to NO, MEMORY FULL ERROR will appear
in the display. Press the START key or the STOP key as follows:
♦ Press the START key if you want to transmit the pages which have
been stored up to that point in memory. The remaining pages will be
ejected from the feeder. After transmission, the memory will be
cleared and you can transmit the remaining pages. You will also
need to transmit the page which was being scanned when the memory filled up.
♦ Press the STOP key if you want to cancel the entire transmission.
If you do not press the START key or the STOP key within one
minute, the transmission will be cancelled and the pages already
scanned cleared from memory. You will need to retransmit all pages
of the document.
52
all-FO4700.book
Page 53 Friday, October 8, 1999
11:10 AM
Sending a Fax by Automatic Dialling
If the number you want to dial has been programmed in a Rapid Key,
you can dial it by pressing the Rapid Key.
1
Load the document(s).
SEND READY will appear in the
display.
• Set the resolution and/or contrast if
desired.
• To send the document ahead of
other documents waiting for
transmission, press the PRIORITY
key.
• To send the document directly from
the feeder (not through memory),
press the DOCUMENT key.
2
RESOLUTION
CONTRAST
Q
PRIORITY
DOCUMENT
Press the appropriate Rapid Key.
• The name of the receiving party
will appear in the display. If no
name was stored, the fax number
will appear. (If the name or number
is incorrect, press the STOP key.)
2
B
Example: Rapid Key 2
• The document will be
automatically transmitted once the
connection is established.
53
2. Sending
Documents
Rapid Key Dialling
all-FO4700.book
Page 54 Friday, October 8, 1999
11:10 AM
Sending a Fax by Automatic Dialling
Speed Dialling
If the number you want to dial has been programmed in a Speed Dial
number, you can dial it by pressing the SPEED DIAL key and then
entering the Speed Dial number.
1
Load the document(s).
SEND READY will appear in the
display.
• Set the resolution and/or contrast if
desired.
• To send the document ahead of
other documents waiting for
transmission, press the PRIORITY
key.
RESOLUTION
Q
PRIORITY
• To send the document directly from
the feeder (not through memory),
press the DOCUMENT key.
2
Press the SPEED DIAL key and then
enter the Speed Dial number by
pressing the numeric keys.
• If you enter less than 2 digits for the
Speed Dial number on the FO4700, or 3 digits on the FO-5700,
press the START key to complete
the entry.
54
CONTRAST
DOCUMENT
SPEED DIAL
1
Example: Speed Dial 1
all-FO4700.book
Page 55 Friday, October 8, 1999
11:10 AM
Sending a Fax by Automatic Dialling
Check the display. If the name or
number shown is correct, press the
START key. (If not, press the STOP
key and then repeat Step 2.)
START
2. Sending
Documents
3
Direct Keypad Dialling
You can also enter a full number with the number keys and then press
the START key to begin dialling.
1
Load the document(s). (Note: If
desired, you can load the document
after dialling in Step 2, below.)
SEND READY will appear in the
display.
• Set the resolution and/or contrast if
desired.
• To send the document ahead of
other documents waiting for
transmission, press the PRIORITY
key.
RESOLUTION
CONTRAST
Q
PRIORITY
DOCUMENT
• To send the document directly from
the feeder (not through memory),
press the DOCUMENT key.
55
all-FO4700.book
Page 56 Friday, October 8, 1999
11:10 AM
Sending a Fax by Automatic Dialling
2
Enter the number of the receiving
machine by pressing the numeric
keys.
• If a pause is required between any
of the digits to access a special
service or an outside line, press the
REDIAL key. The pause will
appear as a hyphen. Several pauses
can be entered in a row.
3
Check the display. If the number of
the receiving machine shown is
correct, press the START key.
3
1
2
4
4
1
1
(Example)
START
• If it is not correct, press the STOP
key to backspace and clear one
digit at a time, and then re-enter the
correct digit(s).
Searching for an auto-dial number
If you don’t remember the Rapid Key or Speed Dial number in which
you have programmed a particular fax number, you can search for the
number by following the steps below. Once you have found the
number, you can dial it and transmit the loaded document by simply
pressing the START key.
Note: Only names programmed for auto-dial numbers will appear when
you search; the full numbers themselves will not appear. You cannot
search for a number if a name has not been associated with it.
56
all-FO4700.book
Page 57 Friday, October 8, 1999
11:10 AM
Sending a Fax by Automatic Dialling
1
Load the document(s).
2. Sending
Documents
SEND READY will appear in the
display.
• Set the resolution and/or contrast if
desired.
RESOLUTION
CONTRAST
Q
2
3
Press the SEARCH DIAL key (flip
up the Rapid Key overlay).
Enter the first letter of the stored
name by pressing the appropriate
letter entry key.
• If you don’t remember the first
letter, go to Step 4 (you will scroll
through the list from the
beginning).
4
Press either arrow key to scroll
through the names. Stop when the
desired name appears in the display.
SEARCH DIAL
X
A
Example: A
or
• If no numbers have been stored
under the entered letter or you have
reached the end of the list, NOT
FOUND will appear.
57
all-FO4700.book
Page 58 Friday, October 8, 1999
11:10 AM
Sending a Fax by Automatic Dialling
5
Press the START key. The document
will be automatically transmitted
once the connection is established.
START
Chain Dialling
An auto-dial number set for Chain Dialling can be combined with
another auto-dial number or digits entered manually with the numeric
keys to dial one phone number up to 50 digits long. The following are
some examples of how this can be done:
♦ Press appropriate Rapid Keys in the proper order. For example,
press Rapid Key 01 (set for Chain Dialling), then Rapid Key 02 (not
set for Chain Dialling).
♦ Press a Rapid Key (set for Chain Dialling) and then manually enter
a number by pressing appropriate numeric keys. Press the START
key after the final numeric key to begin transmission.
Checking the telephone line status
The display normally shows the date and time and prompts related to
operations you are performing. To check and see what number the fax
machine is currently calling or transmitting to, or what number the fax
machine is currently receiving a document from (if this information is
available), press the CHANGEOVER key. Information on the
current call will appear in the display. To switch back to the date and
time display, press the CHANGEOVER key again.
To cancel a fax transmission or reception
To cancel a fax transmission or reception which is currently in
progress, press the CHANGEOVER key so that the status of the
transmission or reception appears in the display, and then press the
STOP key.
58
all-FO4700.book
Page 59 Friday, October 8, 1999
11:10 AM
Sending a Fax by Automatic Dialling
If you use automatic dialling (including Direct Keypad Dialling) and
the line is busy, the fax machine will automatically redial the number.
The fax machine is set at the factory to make 2 redialling attempts at
intervals of 5 minutes.
To stop automatic redialling, press the CHANGEOVER key to show
the telephone line status in the display (make sure that RECALL
MODE appears on the top line of the display and the number of the
receiving party appears on the bottom line to the right), and then press
the STOP key.
Memory Retransmission
If a line error or power failure occurs during any type of memory
transmission, your fax will automatically redial the number and
attempt to complete the transmission. Retransmission will begin from
the page which was being transmitted when the error occurred.
The fax machine will make 2 attempts at retransmission at an interval
of 5 minutes.
♦ To stop retransmission, press the CHANGEOVER key to show the
telephone line status in the display (make sure that RETRY MODE
appears on the top line of the display and the number of the receiving party appears on the bottom line to the right), and then press the
STOP key.
♦ The numbering of pages retransmitted will begin from "1" again.
♦ If an error or power failure occurs during transmission of a cover
sheet, retransmission will not take place.
59
2. Sending
Documents
Automatic redialling
all-FO4700.book
Page 60 Friday, October 8, 1999
11:10 AM
Sending a Fax by Automatic Dialling
Checking documents in memory
To display information on documents that are waiting in memory for
transmission, follow the steps below. You can also cancel a
transmission with this procedure.
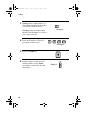
1
Press the MEM. STATUS key (flip
up the Rapid Key overlay) and then 2.
MEM.STATUS
W
2
TX STATUS will appear in the
display.
2
3
Press the # key or the * key to scroll
through the list of transmissions. The
name (or number) of each receiving
party will appear in the display,
together with the 3-digit memory
number assigned to the transmission.
To cancel a transmission, press the
CLEAR key and then the START
key while the transmission appears in
the display.
When you have finished checking the
list, press the STOP key twice to
return to the date and time display.
or
STOP
STOP
Note: To print out a list of the documents waiting in memory for transmission, press the MEM. STATUS key and then the 5 key.
60
all-FO4700.book
Page 61 Friday, October 8, 1999
11:10 AM
Sending a Fax by Automatic Dialling
If you know the memory number assigned to a memory transmission,
you can cancel it with the following procedure. (If you don’t know the
memory number, use the preceding procedure.)
1
Press the MEM. STATUS key (flip
up the Rapid Key overlay) and then 4.
MEM.STATUS
W
4
The display will show:
4:MESSAGE CLEAR
ENTER MESSAGE #
2
Enter the 3-digit memory number
assigned to the transmission you want
to cancel.
0
0
1
(Example)
3
Press the START key to cancel the
transmission.
START
61
2. Sending
Documents
To cancel a memory transmission
all-FO4700.book
Page 62 Friday, October 8, 1999
11:10 AM
Cover Sheet
Cover Sheet
You can have the fax machine generate a cover sheet and send it as the
last page of your fax transmission. The cover sheet includes the date
and time, the receiver’s name and number if a Rapid Key or Speed
Dial number is used, the sender’s name and number, and the total
number of pages.
♦ Your name and number must be programmed in order for them to
appear on the cover sheet. (See Entering Your Name and Fax Number in Chapter 1.)
♦ To have the recipient’s name appear, you must use a Rapid Key or
Speed Dial number with the name programmed.
♦ Cover Sheet cannot be selected when you use the Relay Request
function.
(Example)
1
Load the document(s).
SEND READY will appear in the
display.
62
all-FO4700.book
Page 63 Friday, October 8, 1999
11:10 AM
Cover Sheet
Press the COVER SHEET key.
• The display will briefly show
COVER SHEET MODE
ENTERED and then revert to
SEND READY.
2. Sending
Documents
2
COVER SHEET
Y
• To cancel the cover sheet selection,
press the STOP key.
3
Dial the receiving party and transmit
the fax.
If desired, you can set your fax to automatically send a cover sheet
with every transmission (you do not have to press the COVER
SHEET key each time). This is accomplished by setting Option
Setting 10 (Auto Cover Sheet) to YES as explained in Chapter 6,
Optional Settings.
63
all-FO4700.book
Page 64 Friday, October 8, 1999
11:10 AM
Batch Page Numbering
Batch Page Numbering
You can change the page numbering of the transmitted document from
simple numbering ("P.01", "P.02", etc.) to batch numbering, which
means that a slash and the total number of pages being sent are added
after each page number (for example, "P. 01/05", "P.02/05", etc.). This
allows the receiver to check for missing pages.
1
Load the document(s).
SEND READY will appear in the
display.
2
Press the PAGE COUNTER key.
PAGE COUNTER
R
The display will show:
ENTER # OF PAGE(S)
ENTER # (01-99)
3
Enter the total number of pages (“01”
to “99”) by pressing the numeric
keys.
• If you are sending a cover sheet, do
not include it in the total number of
pages (the number will be adjusted
automatically).
64
0
8
Example: 8 pages
all-FO4700.book
Page 65 Friday, October 8, 1999
11:10 AM
Batch Page Numbering
Dial the receiving machine and
transmit the document.
2. Sending
Documents
4
Comments:
♦ If you need to cancel a batch number entry, remove the document
from the feeder or press the STOP key.
♦ If the number of pages actually transmitted does not coincide with
the batch number entered, the alarm will sound and PAGE COUNT
ERROR will appear in the display. PAGE E. will also appear in the
NOTE column of the Transaction Report if printed.
65
all-FO4700.book
Page 66 Friday, October 8, 1999
11:10 AM
3. Receiving Documents
The fax machine has two modes for receiving calls:
AUTO mode:
Select this mode when you only want to receive faxes on the line
connected to the fax machine. The fax machine will answer all calls
automatically and receive incoming faxes.
MANUAL mode:
Select this mode when you have an extension phone connected to the
same line as the fax machine and you want to receive both faxes and
voice calls. All calls, including faxes, must be answered by picking
up the extension phone.
Setting the reception mode
1
Press these keys:
FUNCTION
The display will show:
1
1:RECEIVE MODE
1=AUTO, 2=MANUAL
2
Press the 1 key to select AUTO, or
the 2 key to select MANUAL.
AUTO
1
66
MANUAL
or
2
all-FO4700.book
Page 67 Friday, October 8, 1999
11:10 AM
Using AUTO Reception Mode
Using AUTO Reception Mode
In AUTO reception mode, the fax machine automatically answers all
calls on two rings and receives incoming faxes.
♦ If you pick up an extension phone before the fax machine answers,
you can talk to the other party and/or receive a fax as explained
below in Using MANUAL Reception Mode.
Using MANUAL Reception Mode
1
When the fax machine rings, answer
the call on an extension phone
connected to the same line.
2
If you hear a fax tone, press 5, *, and
* on the telephone keypad, or press
the START key on the fax machine.
• If the other party first speaks with
you, press the START key after
speaking. (Press your START key
before the sender presses their Start
key.)
3
5
or
START
When RECEIVING appears in the
display, hang up.
Note: In New Zealand, not all standard telephones will respond to incoming ringing when connected to the extension socket of the equipment.
67
3. Receiving
Documents
♦ You can change the number of rings on which the machine answers
calls by changing Option Setting 2. (See Chapter 6, Optional Settings.)
all-FO4700.book
Page 68 Friday, October 8, 1999
11:10 AM
Substitute Reception to Memory
Substitute Reception to Memory
If the fax machine runs out of paper, toner, or the paper jams,
incoming documents will be automatically stored in memory.
When you have received a document in memory, FAX RCVD IN
MEMORY will appear in the display, alternating with NO PAPER,
REPLACE TONER, or PAPER JAM. When you add paper, replace
the toner cartridge, or clear the jam, the stored documents will
automatically print out.
You can display information on the documents received to memory by
following these steps:
1
Press the MEM. STATUS key (flip
up the Rapid Key overlay) and the 3
key.
MEM.STATUS
W
3
RX STATUS will appear in the
display.
2
3
68
Press the # key or the * key to scroll
through the list of received
documents. The name (or number) of
the sender of each document will
successively appear in the display.
When you have finished checking the
list, press the STOP key twice to
return to the date and time display.
or
STOP
STOP
all-FO4700.book
Page 69 Friday, October 8, 1999
11:10 AM
4. Making Copies
Your fax machine can also be used to make copies. Single and
multiple copies (up to 99 per original) can be made, enabling the fax
machine to double as an office copier.
♦ You can perform all steps of a copy operation even when the fax
machine is busy printing other copy jobs, or when it is printing a
received document after the line has been disconnected. Your copy
job will be automatically stored in memory and then printed when
all previous printing jobs are completed.
1
4. Making
Copies
♦ The default resolution for copying is FINE. If desired, you can
change the default resolution to SUPER FINE by changing Option
Setting 32 (see Chapter 6, Optional Settings).
Load the document.
• SEND READY will appear in the
display.
• If desired, adjust the resolution and/
or contrast.
RESOLUTION
CONTRAST
Q
2
Press the COPY key.
COPY
The display will show:
COPY MODE
ENTER #(01-99)
01
• If you are only making a single
copy of the original (or of each
original), press the START key.
Copying will begin.
69
all-FO4700.book
Page 70 Friday, October 8, 1999
11:10 AM
Making Copies
3
Enter the desired number of copies
per original with the numeric keys.
0
• If the desired number of copies is
from 1 to 9, enter “0” first.
3
Example: Three
copies per original
• The display will show:
MULTI/SORT COPY MODE
1=MULTI, 2=SORT
4
Press 1 (MULTI) if you do not want
the copies sorted, or 2 (SORT) if you
want the copies sorted.
MULTI
SORT
1
or
2
• Copying will begin.
Example of three copies
each of three originals
A
70
B
C
A
B C
A
C
Originals
Not sorted (MULTI COPY)
Sorted (SORT COPY)
A
B
B
C
A
A
A
B
B
B
C
C C
all-FO4700.book
Page 71 Friday, October 8, 1999
11:10 AM
Making Copies
Checking copy jobs in memory
You can display the status of copy jobs in memory by following the
steps below. You can also cancel copy jobs with this procedure.
1
Press the MEM. STATUS key (flip
up the Rapid Key overlay) and then
the 1 key.
MEM.STATUS
W
1
2
3
Press the # key or the * key to scroll
through the list of copy jobs. The time
the original was scanned into memory
will appear in the display, together
with the 3-digit memory number
assigned to the job. To cancel a copy
job, press the CLEAR key and then
the START key while the copy job
appears in the display.
When you have finished checking the
list, press the STOP key twice to
return to the date and time display.
4. Making
Copies
COPY STATUS will appear in the
display.
or
STOP
STOP
71
all-FO4700.book
Page 72 Friday, October 8, 1999
11:10 AM
5. Special Functions
Broadcasting
The Broadcasting function allows you to send the same document to
multiple locations with just one operation. First load the document,
then enter the numbers of the receiving machines. The document will
be automatically transmitted to each location.
1
Load the document (s).
• SEND READY will appear in the
display.
2
Press the BROADCAST key.
FUNCTION
The display will show:
COPY
DOCUMENT DUPLEX SCAN
SPEED DIAL
BROADCAST
PRIORITY
REPORT
REDIAL
BROADCAST MODE
ENTER STATION #
3
STOP
START
Dial the receiving machines using one
or more of the following methods:
• Press one or more Rapid Keys.
• Enter one or more Speed Dial
numbers, pressing the SPEED
DIAL key before each number. (If
you enter less than 2 digits for a
number on the FO-4700, or 3 digits
on the FO-5700, press the START
key to complete the entry.)
72
SPEAKER
2
B
START
SPEED DIAL
1
(Example)
all-FO4700.book
Page 73 Friday, October 8, 1999
11:10 AM
Broadcasting
• Enter one or more full fax numbers
(max. of 20) with the numeric keys,
pressing the START key after each
full number.
• Press one or more Group Keys.
(See Storing numbers in Group
Keys at the end of this section.)
4
Press the START key.
START
The display will show:
BROADCAST MODE
SELECT THE MODE
5
Press the START key twice.
Transmission will begin.
RESOLUTION
CONTRAST
Q
5. Special
Functions
• If desired, adjust the resolution and/
or contrast.
START
• A Transaction Report is
automatically printed out after
Broadcasting is completed. Check
the "Note" column of the report to
see if any of the locations are
marked "Busy" or have a
communication error code. If so,
send the document to those
locations again.
73
all-FO4700.book
Page 74 Friday, October 8, 1999
11:10 AM
Broadcasting
Broadcasting using a Group Key
If the fax machines to which you want to broadcast have all been
programmed into one Group Key (see Storing numbers in Group Keys
which follows), you can perform the broadcasting operation using the
following simplified procedure:
1
Load the document(s).
• SEND READY will appear in the
display.
• If desired, adjust the resolution and/
or contrast.
RESOLUTION
CONTRAST
Q
2
Press the appropriate Group Key.
Transmission will begin.
01
02
03
04
06
05
07
08
A
B
C
D
E
F
G
H
09
10
11
12
13
14
15
16
I
J
K
L
M
N
O
P
17
18
19
20
21
22
23
24
Q
R
S
T
U
V
W
X
25
26
27
28
29
30
31
32
Y
Z
SPACE
SHIFT
SP
CLEAR
(Example)
74
all-FO4700.book
Page 75 Friday, October 8, 1999
11:10 AM
Broadcasting
Storing numbers in Group Keys
Group Keys allow you to dial a group of fax numbers by simply
pressing the appropriate Group Key once. To store a group of numbers
in a Group Key, follow the steps below.
♦ Any Rapid Key that is not already programmed as a Rapid Key or a
Program Key can be used as a Group Key.
♦ Up to 122 numbers can be stored in one Group Key on the FO4700, or 147 numbers on the FO-5700.
♦ Only Rapid Key and Speed Dial numbers (excluding numbers set
for Chain Dialling) can be stored in a Group Key. Full numbers cannot be stored.
1
Press these keys.
FUNCTION
7
2
5. Special
Functions
The display will show:
2:GROUP ENTRY MODE
1=SET, 2=CLEAR
2
3
Press 1 (SET) to program a Group
Key, or 2 (CLEAR) to clear a Group
Key.
Press any Rapid Key not already
programmed to select it as a Group
Key.
If you are clearing a Group Key, press
it and go to Step 5.
SET
CLEAR
1
01
02
2
or
03
04
06
05
07
08
A
B
C
D
E
F
G
H
09
10
11
12
13
14
15
16
I
J
K
L
M
N
O
P
17
18
19
20
21
22
23
24
Q
R
S
T
U
V
W
X
25
26
27
28
29
30
31
32
Y
Z
SPACE
SHIFT
SP
CLEAR
(Example)
75
all-FO4700.book
Page 76 Friday, October 8, 1999
11:10 AM
Broadcasting
4
Enter fax numbers using one or both
of the following methods:
• Press one or more Rapid Keys.
• Enter one or more Speed Dial
numbers with the numeric keys,
pressing SPEED DIAL before
each number (if you enter less than
2 digits for a number on the FO4700, or 3 digits on the FO-5700,
press START to complete the
entry).
5
Press the START key.
6
Return to Step 3 to program another
Group Key, or press the STOP key
repeatedly until you return to the date
and time display.
2
B
START
SPEED DIAL
1
(Example)
START
STOP
Step 3 or
Editing a group
If necessary, you can add numbers to or delete numbers from group by
repeating the programming procedure for the Group Key. Press 1 for
SET in Step 2 and select the Group Key in Step 3. Add or delete
numbers in Step 4. To add a number, press a Rapid Key or enter a
Speed Dial number. To delete a number, move the cursor to the
number with the UP or DOWN key and then press the CLEAR key.
76
all-FO4700.book
Page 77 Friday, October 8, 1999
11:10 AM
Confidential Operations
Confidential Operations
The Confidential function can be used to transmit and receive
confidential documents.
Confidential transmission
When you send a document using the Confidential function, the
receiving machine holds it in memory instead of immediately printing
it out. When the receiving party enters the correct passcode, the
document is printed out.
♦ Confidential transmission is only possible when the receiving
machine is a Sharp model with confidential reception capability.
♦ To use this function, your name and fax number (OWN PASSCODE) must be entered in your fax machine as explained in Chapter 1.
1
5. Special
Functions
♦ Some fax machines have multiple mailboxes for receiving confidential faxes. If you are sending to a machine with multiple confidential mailboxes, contact the receiving party in advance for the
appropriate mailbox number.
Load the document (s).
• SEND READY will appear in the
display.
• Set the resolution and/or contrast if
desired.
RESOLUTION
CONTRAST
Q
2
Press the CONFIDENTIAL key and
then 1.
The display will show:
CONFIDENTIAL
S
1
1:CONF. TX
ENTER BOX # OR START
77
all-FO4700.book
Page 78 Friday, October 8, 1999
11:10 AM
Confidential Operations
3
If the receiving machine has multiple
confidential mailboxes, enter the
appropriate mailbox number with the
numeric keys (this step is required for
machines with multiple mailboxes).
0
1
(Example)
If the receiving machine doesn’t have
multiple mailboxes, go directly to
Step 4.
4
Press the START key.
5
Dial the receiving machine using one
of the following methods:
• Press a Rapid Key.
• Press the SPEED DIAL key and
enter a Speed Dial number (if you
enter less than 2 digits on the FO4700, or 3 digits on the FO-5700,
press the START key to complete
the entry). Check the name or
number that appears, and then press
the START key.
• Enter a full telephone number with
the numeric keys, and press the
START key.
Transmission will take place once the
connection is established.
78
START
START
SPEED DIAL
1
START
(Example)
all-FO4700.book
Page 79 Friday, October 8, 1999
11:10 AM
Confidential Operations
Confidential reception
When another fax machine sends you a document by confidential
transmission, your fax machine holds it in memory instead of
immediately printing it out. The document cannot be printed out until
you enter the correct passcode.
Your fax has 10 "mailboxes" in which confidential documents can be
received. Each mailbox has its own passcode, allowing up to 10
different people or groups to each receive their own confidential
documents. The mailboxes are identified by 2-digit numbers.
Programming the confidential passcode
.
To receive a confidential
document, you must first program a 2-digit
mailbox number and a 4-digit passcode.
1
Press the CONFIDENTIAL Key and
then 3.
CONFIDENTIAL
S
5. Special
Functions
Note: Be sure to inform the transmitting party of your 2-digit mailbox
number in advance. The transmitting party will need this number to send
you confidential faxes.
3
The display will show:
3:CONF. CODE SET
ENTER BOX # (00-99)
2
Enter a 2-digit number (from "00" to
"99") by pressing the numeric keys.
This number identifies the mailbox.
0
1
(Example)
79
all-FO4700.book
Page 80 Friday, October 8, 1999
11:10 AM
Confidential Operations
3
Enter the 4-digit passcode with the
numeric keys.
0
1
3
2
(Example)
4
Press the START key.
5
Enter a name for the mailbox by
S
pressing the letter entry keys (make
sure the Rapid Key overlay is down).
6
Press the START key.
START
H
A
R
P
Example: SHARP
START
Note: After entering the passcode, your fax will print it out for your
records. If you forget the passcode and have kept no record, contact your
Sharp dealer.
Clearing the passcode
1
Press the CONFIDENTIAL Key and
then 4.
The display will show:
4:CONF. CODE CLEAR
ENTER BOX # (00-99)
80
CONFIDENTIAL
S
4
all-FO4700.book
Page 81 Friday, October 8, 1999
11:10 AM
Confidential Operations
2
3
Enter the 2-digit number that
identifies the mailbox you want to
clear.
Enter the 4-digit passcode of the
mailbox with the numeric keys.
0
1
(Example)
0
1
2
3
(Example)
4
Press the START key.
START
When you have received a confidential document, RCVD CONF.
FAX will appear in the display. Print out the Confidential Reception
List as explained in Chapter 6 to see which mailbox has received the
document, and then follow the steps below to print out the document.
1
Press these keys:
CONFIDENTIAL
S
2
The display will show:
2:CONF. DATA PRINT
ENTER BOX # (00-99)
2
Enter your mailbox number.
0
1
(Example)
81
5. Special
Functions
Printing out received documents
all-FO4700.book
Page 82 Friday, October 8, 1999
11:10 AM
Confidential Operations
3
Enter your confidential passcode.
1
0
2
(Example)
4
Press the START key.
• Printing will begin. After printing,
the document will be erased from
memory.
82
START
3
all-FO4700.book
Page 83 Friday, October 8, 1999
11:10 AM
Relay Request
Relay Request
Relay Request allows you to send a document to another fax machine
and have that fax machine in turn broadcast the document to a group
of other fax machines. This function is useful when the relay fax
machine is closer to the end fax machines than your fax machine, as it
reduces telephone line costs.
Important:
Relay Request can only be used if the intermediate relay machine is a
Sharp machine having the Relay Broadcast function.
Storing a relay group
♦ Fax numbers of the end receiving machines can be entered as Rapid
Key numbers, Speed Dial numbers, and/or Group Key numbers if
they have been programmed as such in the relay machine (not in
your fax machine). Check with the operator of the relay machine for
these numbers.
♦ The total number of end receiving machines which can be entered
varies with the model used as the intermediate relay machine.
Check with the operator of the relay machine to find out how many
receiving machines can be entered.
♦ A maximum of 400 digit spaces are available in your fax machine’s
memory for storing the numbers of end receiving machines. The
number of spaces occupied by each number depends on what kind
of number it is:
83
5. Special
Functions
To make a relay request, you must first store a relay group. This
consists of the fax number of the intermediate relay machine and the
fax numbers of the end receiving machines. Up to 10 different relay
groups can be stored.
all-FO4700.book
Page 84 Friday, October 8, 1999
11:10 AM
Relay Request
Rapid Key number
4 spaces
Speed Dial number
2 spaces
Group Key number
4 spaces (for one group)
Full number
Number of digits in number
(max. of 30 per number)
♦ Only 2-digit Speed Dial numbers for end receiving machines can be
entered in the relay group. If the receiving machine has 3-digit
Speed Dial numbers that you want to enter, ask the operator of the
relay machine to store them in a Group Key, and then enter the
Group Key in the relay group.
1
Press the RELAY key and then 2.
RELAY
U
2
The display will show:
2:RELAY GROUP SET
ENTER #(01-10)
2
Enter a 2-digit number from “01” to
“10”. This number identifies the relay
group.
0
1
(Example)
3
84
Press the START key.
START
all-FO4700.book
Page 85 Friday, October 8, 1999
11:10 AM
Relay Request
4
Enter the fax number of the relay
machine using one of the following
methods:
• Press a Rapid Key.
START
• Press the SPEED DIAL key and
enter a Speed Dial number (if you
enter less than 2 digits on the FO4700, or 3 digits on the FO-5700,
press the START key to complete
the entry).
SPEED DIAL
1
(Example)
• Enter the full
. fax number with the
numeric keys, and press the
START key.
Press the START key.
6
Press numeric keys (not Rapid Keys)
to enter Rapid Key numbers for the
end receiving machines that are
programmed in the relay machine.
If you don’t want to enter Rapid Key
numbers, go directly to Step 7.
7
Press the START key.
START
5. Special
Functions
5
0
1
3
3
Example: Rapid
Keys 01 and 33
START
85
all-FO4700.book
Page 86 Friday, October 8, 1999
11:10 AM
Relay Request
8
Press numeric keys to enter Speed
Dial numbers (2-digit numbers only)
for the end receiving machines that
are programmed in the relay machine.
1
0
3
2
Example: Speed Dial
numbers 10 and 23
If you don’t want to enter Speed Dial
numbers, go directly to Step 9.
9
10
START
Press the START key.
Press numeric keys (not Group Keys)
to enter Group Key numbers for end
receiving machines that are
programmed in the relay machine.
0
3
Example: Group Key 30
If you don’t want to enter Group Key
numbers, go directly to Step 11.
11
Press the START key.
12
Enter full fax numbers of the end
3
receiving machines, pressing the
START key after each fax number.
Include the area code if the number is
outside the local dialling area of the
relay machine.
13
86
When finished, press the START key.
START
1
2
4
4
1
1
START
(Example)
START
all-FO4700.book
Page 87 Friday, October 8, 1999
11:10 AM
Relay Request
13
Return to Step 2 to enter another relay
group, or press STOP repeatedly to
return to the date and time display.
STOP
Step 2 or
Clearing a relay group
To clear a relay group, you need to know the 2-digit number that
identifies it. You can check the number by printing out the Relay
Group List as explained in Chapter 7.
1
Press the RELAY key and then 3.
The display will show:
RELAY
U
3
2
Enter the 2-digit number that
identifies the group you want to clear.
0
5. Special
Functions
3:RELAY GROUP CLEAR
ENTER # (01-10)
1
(Example)
3
Press the START key.
4
Return to Step 2 to clear another relay
group, or press STOP repeatedly to
return to the date and time display.
START
STOP
Step 2 or
87
all-FO4700.book
Page 88 Friday, October 8, 1999
11:10 AM
Relay Request
Requesting a relay transmission
Important:
To request a relay transmission, your fax number must be entered into the
Relay Passcode List of the relay fax machine by the operator of that fax
machine. (Your number must also be entered in your fax machine as
explained in Entering Your Name and Fax Number in Chapter 1.)
1
Load the document(s).
SEND READY will appear in the
display.
2
Press the RELAY key and then the 1
key.
RELAY
U
1
1:RELAY TX
ENTER # (01-10)
3
Enter the 2-digit number of the relay
group by pressing the numeric keys.
0
1
(Example)
4
Press the START key.
START
• Adjust the resolution and contrast if
desired.
RESOLUTION
CONTRAST
Q
5
88
Press the START key.
START
all-FO4700.book
Page 89 Friday, October 8, 1999
11:10 AM
Relay Request
6
Press the START key to send the
document through memory, or the
DOCUMENT key to send the
document directly from the feeder.
START
DOCUMENT
or
Relay Broadcast
The fax machine can also act as a relay station. It will receive a
document from a fax machine requesting a relay transmission, and
automatically broadcast it to the stations that the requesting machine
specifies.
To enable a fax machine to request a relay transmission, you must first
enter its fax number in the Relay Passcode List. Follow the steps
below to enter or clear a fax number.
5. Special
Functions
♦ When your fax receives a relay request from another fax machine,
RCVD RELAY REQUEST will appear in the display.
♦ To clear a fax number from the Relay Passcode List, you need to
know the 2-digit number which identifies it. You can check this
number by printing out the Passcode List (see Chapter 7).
1
Press these keys:
The display will show:
RELAY
U
4
4:RELAY PASSCODE
1=SET, 2=CLEAR
89
all-FO4700.book
Page 90 Friday, October 8, 1999
11:10 AM
Relay Request
2
Press 1 to enter a number, or 2 to clear
a number.
SET
CLEAR
1
3
Entering: Enter a 2-digit number
("01" to "10"). This identifies the fax
number you will enter in the next
step.
2
or
0
1
(Example)
Clearing: Enter the 2-digit number
that identifies the fax number you
want to clear, and go to Step 5.
4
Enter the fax number of the machine
to be added to the list (max. 20
digits).
3
1
2
4
4
1
(Example)
90
5
Press the START key.
6
Return to Step 3 to enter or clear
another number, or press the STOP
key repeatedly to return to the date
and time display.
START
STOP
Step 3 or
1
all-FO4700.book
Page 91 Friday, October 8, 1999
11:10 AM
Polling
Polling
Polling allows you to call another fax machine and have it send a
document to your machine without operator assistance. In other
words, the receiving fax machine, not the transmitting fax machine,
initiates the transmission. You can use your fax machine to both poll
and be polled by others.
Polling others
To poll another fax machine, follow the steps below.
♦ If desired, you can dial more than one fax number to receive documents consecutively from a group of fax machines (this is called
"Serial Polling").
1
Press the FUNCTION key and 8.
FUNCTION
8
5. Special
Functions
The display will show:
8:SERIAL POLL. MODE
ENTER STATION #
2
Dial the number(s) of the fax
machine(s) you want to poll using one
(or more) of the following methods:
• Press one or more Rapid Keys.
• Enter one or more Speed Dial
numbers, pressing the SPEED
DIAL key before each number. (If
you enter less than 2 digits on the
FO-4700, or 3 digits on the FO5700, press the START key to
complete the entry.)
START
SPEED DIAL
1
(Example)
• Press one or more Group Keys.
91
all-FO4700.book
Page 92 Friday, October 8, 1999
11:10 AM
Polling
• Enter one or more full fax numbers
with the numeric keys, pressing the
START key after each full number.
3
Press the START key. Reception will
begin.
START
Serial Polling using a Group Key
If the fax machines you want to poll have all been programmed into
one Group Key, you can poll them by simply pressing that Group Key.
(The procedure for programming Group Keys is explained in
Broadcasting in this chapter.)
♦ Make sure no documents are in the feeder before you press the
Group Key.
Being polled (Memory polling)
To let another fax machine poll your fax machine, you must first store
the document(s) in memory using the following procedure.
Transmission will take place when the other fax machine calls your
fax machine and activates polling. You can choose whether to allow
polling only once, or an unlimited number of times. In the latter case,
your fax machine can be used as an electronic "bulletin board".
♦ Multiple documents can be stored for memory polling. To add a
document to others already stored, simply repeating the storing procedure (note that if Department Control is activated, documents
cannot be added by a department other than that which stored the
first document). When polling is initiated, the polling machine will
receive all documents stored.
♦ If you allow polling only once, the document(s) will be automatically cleared from memory after polling. If you allow polling an
unlimited number of times, the document will remain in memory
until you clear it as explained in the following section, Clearing a
document.
92
all-FO4700.book
Page 93 Friday, October 8, 1999
11:10 AM
Polling
1
Load the document.
2
Set the reception mode to AUTO
(press the FUNCTION key, 1 and 1).
3
.
Press these keys:
FUNCTION
1
FUNCTION
The display will show:
1
9
4
Press 1 to select SET.
1
• If another document has already
been stored, press 1 to select
APPEND, and go to Step 6.
5
6
5. Special
Functions
9:MEMORY POLL MODE
ENTER #(1-2,*,#)
Press 1 to allow polling only once, or
2 to allow polling an unlimited
number of times.
Press the START key twice.
1 TIME
1
START
REPEAT
or
2
START
• The document will be scanned into
memory, and your fax will go on
polling standby.
93
all-FO4700.book
Page 94 Friday, October 8, 1999
11:10 AM
Polling
Clearing a document
To clear a memory poll document (or documents) from memory,
follow the steps below:
1
Press these keys:
FUNCTION
The display will show:
9
9:MEMORY POLL MODE
ENTER #(1-2,*,#)
2
Press 2 to select CLEAR.
3
Press START to clear the documents.
2
START
Polling Security
Polling Security allows you to prevent unauthorized polling of your
fax. When this function is activated, polling will only take place when
one of the following conditions is met:
♦ The fax number of the polling fax machine has been stored in your
fax’s list of permitted fax numbers (called "passcode numbers").
The polling fax must also have its fax number programmed in itself,
as described in Entering Your Name and Fax Number in Chapter 1.
♦ A System number has been programmed in the polling fax machine
which matches your fax’s System number or one of your ID numbers.
♦ An ID number has been programmed in the polling fax machine
which matches your fax’s System number.
94
all-FO4700.book
Page 95 Friday, October 8, 1999
11:10 AM
Polling
System and ID numbers are 4-digit numbers which provide you with
an alternate means of giving and receiving polling permission when
you don’t want to use fax numbers. The steps for programming these
numbers are described in the following pages.
Note: System and ID numbers can only be used if the other fax machine
is also a Sharp machine.
Turning Polling Security on and off
Polling Security is turned on or off with Option Setting 8. This
procedure is explained in Chapter 6, Optional Settings.
Storing and clearing fax numbers for polling permission
You can store up to 10 fax numbers in your fax’s list of permitted
numbers.
1
Press these keys:
FUNCTION
3
2
5. Special
Functions
The display will show:
2:PASSCODE # MODE
1=SET, 2=CLEAR
2
3
Press 1 to set a number, or 2 to clear a
number..
Storing: Enter a 2-digit number
(from 01 to 10).This number
identifies the fax number you will
enter in the next step.
SET
1
CLEAR
2
or
0
1
(Example)
Clearing: Enter the 2-digit number
which identifies the fax number you
want to clear, and go to Step 5.
95
all-FO4700.book
Page 96 Friday, October 8, 1999
11:10 AM
Polling
4
Enter the fax number (max. 20 digits)
by pressing the numeric keys.
3
1
2
4
1
4
1
(Example)
5
Press the START key.
6
Return to Step 3 to enter (or clear)
another number, or press STOP
repeatedly to return to the date and
time display.
START
STOP
Step 3 or
Programming and clearing a System number
One 4-digit System number can be programmed in your fax machine
for giving and receiving polling permission. Polling will take place if
your System number matches the other fax machine’s System number
or one of its ID numbers.
1
Press these keys:
FUNCTION
7
3
The display will show:
7:SYSTEM # MODE
1=SET, 2=CLEAR
2
Press 1 to program the System
number, or 2 to clear it.
• If you pressed 2, go to Step 4.
96
SET
1
CLEAR
or
2
all-FO4700.book
Page 97 Friday, October 8, 1999
11:10 AM
Polling
3
Enter the number (4 digits) with the
numeric keys.
1
0
4
3
(Example)
4
Press the START key.
5
Press the STOP key repeatedly to
return to the date and time display.
START
STOP
Up to five 4-digit ID numbers can be programmed in your fax
machine for giving and receiving polling permission. Polling will take
place if one of your ID numbers matches the other fax machine’s
System number.
1
Press these keys:
FUNCTION
6
3
The display will show:
6:ID # MODE
1=SET, 2=CLEAR
2
Press 1 to program an ID number, or 2
to clear an ID number.
SET
1
CLEAR
or
2
97
5. Special
Functions
Storing and clearing ID numbers for polling permission
all-FO4700.book
Page 98 Friday, October 8, 1999
11:10 AM
Polling
3
Storing: Enter a number from 1 to 5.
This number identifies the ID number
you will enter in the next step.
1
(Example)
Clearing: Enter the number which
identifies the ID number you want to
clear, and go to Step 5.
4
Enter the ID number (4 digits) by
pressing the numeric keys.
1
0
4
3
(Example)
98
5
Press the START key.
6
Return to Step 3 to enter (or clear)
another number, or press STOP
repeatedly to return to the date and
time display.
START
STOP
Step 3 or
all-FO4700.book
Page 99 Friday, October 8, 1999
11:10 AM
Power Save Mode
Power Save Mode
Power Save Mode allows you to conserve power by turning off the
laser printer heater in the fax machine. While Power Save Mode is on,
the laser printer heater remains off and incoming faxes are received to
memory. When Power Save Mode is turned off, the printer heater
turns on and the faxes received to memory are printed out.
♦ Power Save Mode can be turned on and off manually by pressing
the POWER SAVE key.
♦ If desired, you can also set Power Save Mode to turn on and off
automatically at specified times of the day, on specified days of the
week, and on specified dates during the year.
Note: Power Save Mode cannot be turned on when the Print Hold function is on.
Selecting the Power Save Type
Before turning on Power Save Mode, you will need to select the
method by which it is turned on and off. There are two selections:
REAL TIME, which means that you turn Power Save Mode on and
off by simply pressing the POWER SAVE key, and TIMER, which
means that Power Save Mode turns on and off automatically at preset
times.
♦ The initial setting is REAL TIME.
1
Press these keys:
FUNCTION
4
The display will show:
4:OPTIONAL SETTING
ENTER #(01-34,*,#)
99
5. Special
Functions
Note: If the memory becomes full while Power Save Mode is on, the fax
machine will automatically turn on the laser printer, print the faxes
received to memory, and then return to Power Save Mode.
all-FO4700.book
Page 100 Friday, October 8, 1999
11:10 AM
Power Save Mode
2
Enter 34 by pressing the numeric
keys.
4
3
The display will show:
34:POWER SAVE TYPE
1=REAL TIME, 2=TIMER
3
Press 1 to select REAL TIME, or 2 to
select TIMER.
Note: Power Save Type cannot be
selected if Power Save Mode is on.
To turn off Power Save Mode, simply press the Power Save key once.
REAL TIME
1
4
Press the STOP key twice to return to
the date and time display.
STOP
or
TIMER
2
STOP
Turning on Power Save Mode when REAL TIME is selected
To turn on Power Save Mode when REAL TIME is selected, simply
press the POWER SAVE key. POWER SAVE MODE will appear in
the display.
POWER SAVE MODE
ON
POWER SAVE
POWER SAVE MODE
To turn off Power Save Mode, press the POWER SAVE key once
again. POWER SAVE MODE OFF will appear briefly, followed by
the normal date and time display.
100
all-FO4700.book
Page 101 Friday, October 8, 1999
11:10 AM
Power Save Mode
Turning on Power Save Mode when TIMER is selected
When TIMER is selected, Power Save Mode turns on and off
automatically at the times you specify. Follow the steps below to set
the on and off times.
1
Press the POWER SAVE key.
POWER SAVE
The display will show:
POWER SAVE MODE
1=TIMER ON, 2=SET
2
Press 2 to select SET.
2
3
Enter the time you want Power Save
Mode to turn on every day (START
TIME). Enter two digits for the hour
(00 to 23) and two digits for the
minute (00 to 59).
5. Special
Functions
• Note: If you have already entered
the timer settings and simply wish
to turn on the timer, press 1
(TIMER ON).
1
7
0
0
Example: 17:00
101
all-FO4700.book
Page 102 Friday, October 8, 1999
11:10 AM
Power Save Mode
4
5
Enter the time you want Power Save
Mode to turn off every day (END
TIME). Enter two digits for the hour
(00 to 23) and two digits for the
minute (00 to 59).
0
0
8
0
Example: 8:00
Press the START key.
START
Note: The above daily time settings
will be in effect every day and are
required. The following WEEKEND
and PERIOD settings are optional,
and are used to set additional weekly
and yearly time periods that Power
Save Mode will turn on.
The display will show:
WEEKEND SETTING
1=YES, 2=NO
6
102
Press 1 if you want to set a day or
days of the week (such as the
weekend) that you want Power Save
Mode to turn on. If not, press 2 and go
to Step 7.
YES
1
NO
or
2
all-FO4700.book
Page 103 Friday, October 8, 1999
11:10 AM
Power Save Mode
7
Enter a 1-digit number for the day
each week you want Power Save
Mode to turn on, and a 1-digit number
for the day after which you want it to
turn off:
6
Example: Power
Save Mode will turn
on from Saturday
0: Sunday
1: Monday
2: Tuesday
3: Wednesday
4: Thursday
5: Friday
6: Saturday
8
0
Press the START key.
START
The display will show:
9
10
5. Special
Functions
PERIOD SETTING
1=YES, 2=NO
Press 1 if you want to set a period
during the year (such as an extended
holiday) that Power Save Mode will
turn on. If not, press 2 and then the
STOP key to return to the date and
time display.
Enter the starting day of the period
you want Power Save Mode to be on.
Enter a 2-digit number for the month
(01 to 12), and a 2-digit number for
the day (01 to 31).
YES
1
1
2
NO
or
2
2
4
Example:
December 24th
103
all-FO4700.book
Page 104 Friday, October 8, 1999
11:10 AM
Power Save Mode
11
12
Enter the ending day of the period
you want Power Save Mode to be on.
Enter a 2-digit number for the month
(01 to 12), and a 2-digit number for
the day (01 to 31).
0
1
0
1
Example:
January 1st
Press the START key.
START
The display will show:
TIMER ON?
1=YES, 2=NO
13
Press 1 if you want to activate the
timer immediately, or 2 if you want to
activate the timer at a later time.
• The timer settings will not take
effect until you activate the timer. If
you select 2 (NO), you can activate
the timer at a later time by pressing
the POWER SAVE key and then 1
to select TIMER ON.
104
YES
1
NO
or
2
all-FO4700.book
Page 105 Friday, October 8, 1999
11:10 AM
Timer Operations
Timer Operations
The Timer function allows you to set up an operation to be performed
automatically at a specified time. Up to 48 operations can be set at any
one time, and the time of each can be set up to a week in advance.
You can use this function to take advantage of lower off-peak rates
without having to be there when the operation is performed.
Note: The DOCUMENT key cannot be used for a timer transmission.
Initial procedure
To set a timer operation, first perform the following procedure. After
you have completed this procedure, go to the procedure for the
specific operation you want to set (see the following pages).
1
Press the TIMER key.
TIMER
T
5. Special
Functions
The display will show:
TIMER MODE
1=SET, 2=CLEAR
2
Press 1 to select SET.
3
Press the * key or the # key until the
desired operation appears in the
display.
1
Transmission (SEND MODE)
Confidential transmission
Polling
Serial Polling
Broadcasting
Relay Request
105
all-FO4700.book
Page 106 Friday, October 8, 1999
11:10 AM
Timer Operations
4
Press the START key.
5
Enter a two-digit number for the hour
(“00” to “23”) and a two-digit number
for the minute (“00” to “59”).
6
106
0
9
2
Example: 9:25
Enter a 1-digit number for the day of
the operation (skip this step if the
operation will be performed within
the next 24 hours):
0: Sunday
1: Monday
2: Tuesday
3: Wednesday
4: Thursday
5: Friday
6: Saturday
7
START
Press the START key and go to the
specific procedure for your operation
(see the following pages).
1
Example: Monday
START
5
all-FO4700.book
Page 107 Friday, October 8, 1999
11:10 AM
Timer Operations
Transmission
(Continued from Initial procedure.)
8
Dial the receiving machine using one
of the following methods:
• Press a Rapid Key.
START
• Press the SPEED DIAL key and
enter a Speed Dial number (if you
enter less than 2 digits on the FO4700, or 3 digits on the FO-5700,
press the START
key to complete
.
the entry).
SPEED DIAL
1
(Example)
9
10
Press the START key.
5. Special
Functions
• Enter a full fax number with the
numeric keys.
START
Adjust the resolution and or contrast
if desired, and then press the START
key.
START
RESOLUTION
CONTRAST
Q
107
all-FO4700.book
Page 108 Friday, October 8, 1999
11:10 AM
Timer Operations
11
Load the document and then press the
START key.
• The document will be scanned into
memory.
START
Confidential transmission
(Continued from Initial procedure.)
8
9
108
Enter the mailbox number (2 digits).
(Go directly to Step 10 if the
receiving machine does not have
mailboxes.)
Press the START key.
0
1
(Example)
START
all-FO4700.book
Page 109 Friday, October 8, 1999
11:10 AM
Timer Operations
10
Dial the receiving machine using one
of the following methods:
• Press a Rapid Key.
START
• Press the SPEED DIAL key and
enter a Speed Dial number (if you
enter less than 2 digits on the FO4700, or 3 digits on the FO-5700,
press the START key to complete
the entry).
SPEED DIAL
1
(Example)
• Enter a full fax number with the
numeric keys.
11
Press the START key.
12
Adjust the resolution and or contrast
if desired, and then press the START
key.
RESOLUTION
5. Special
Functions
START
START
CONTRAST
Q
13
Load the document and then press the
START key.
• The document will be scanned into
memory.
START
109
all-FO4700.book
Page 110 Friday, October 8, 1999
11:10 AM
Timer Operations
Polling
(Continued from Initial procedure.)
8
Dial the machine to be polled using
one of the following methods:
• Press a Rapid Key.
• Press the SPEED DIAL key and
enter a Speed Dial number (if you
enter less than 2 digits on the FO4700, or 3 digits on the FO-5700,
press the START key to complete
the entry).
START
SPEED DIAL
1
(Example)
• Enter a full fax number with the
numeric keys.
9
110
Press the START key.
START
all-FO4700.book
Page 111 Friday, October 8, 1999
11:10 AM
Timer Operations
Serial Polling
(Continued from Initial procedure.)
8
Dial the machines to be polled using
one or more of the following
methods:
• Press one or more Rapid Keys.
• Enter one or more Speed Dial
numbers, pressing the SPEED
DIAL key before each number.
(If you enter less than 2 digits on
the FO-4700, or 3 digits on the FO5700, press the START key to
complete the entry.)
START
SPEED DIAL
1
START
SPEED DIAL
2
(Example)
5. Special
Functions
• Enter one or more full fax numbers
with the numeric keys, pressing the
START key after each full number.
• Press one or more Group Keys.
9
Press the START key.
START
111
all-FO4700.book
Page 112 Friday, October 8, 1999
11:10 AM
Timer Operations
Broadcasting
(Continued from Initial procedure.)
8
Dial the receiving machines using one
or more of the following methods:
• Press one or more Rapid Keys.
• Enter one or more Speed Dial
numbers, pressing the SPEED
DIAL key before each number.
(If you enter less than 2 digits on
the FO-4700, or 3 digits on the FO5700, press the START key to
complete the entry.)
START
SPEED DIAL
1
START
SPEED DIAL
2
(Example)
• Enter one or more full fax numbers
with the numeric keys, pressing the
START key after each full number.
• Press one or more Group Keys.
9
10
START
Press the START key.
Adjust the resolution and or contrast
if desired, and then press the START
key.
RESOLUTION
START
CONTRAST
Q
112
all-FO4700.book
Page 113 Friday, October 8, 1999
11:10 AM
Timer Operations
11
Load the document and then press the
START key.
• The document will be scanned into
memory.
START
Relay Request
(Continued from Initial procedure.)
8
Enter the 2-digit relay group number
by pressing the numeric keys.
0
1
9
10
5. Special
Functions
(Example)
START
Press the START key.
Adjust the resolution and or contrast
if desired, and then press the START
key.
RESOLUTION
START
CONTRAST
Q
113
all-FO4700.book
Page 114 Friday, October 8, 1999
11:10 AM
Timer Operations
11
Load the document and then press the
START key.
• The document will be scanned into
memory.
START
Cancelling a timer operation
If you need to cancel a timer operation before it is performed, follow
the steps below.
♦ You will need to know the number assigned to the operation in
order to cancel it. If you don’t remember the number (it appears in
the display when you set the operation), print out the Timer List.
(See Chapter 7, Printing Out Reports and Lists.)
1
Press the TIMER key and then 2.
The display will show:
TIMER
T
2
2:TIMER COMM. CLEAR
ENTER #(01-48)
2
Enter the 2-digit number assigned to
the operation.
0
1
(Example)
114
all-FO4700.book
Page 115 Friday, October 8, 1999
11:10 AM
Timer Operations
Press the START key.
4
Press the STOP key repeatedly until
you return to the date and time
display.
START
STOP
5. Special
Functions
3
115
all-FO4700.book
Page 116 Friday, October 8, 1999
11:10 AM
Batch Transmission
Batch Transmission
Batch transmission allows you to store a number of documents in
memory for automatic transmission to one location at a set time. If
you often send documents to a particular location, this function helps
reduce telephone line costs by allowing you to conveniently send
multiple documents on one connection.
Programming a Batch Key
To perform a batch transmission, you must first program the number
of the receiving machine and the time of transmission into a Batch
Key. Any Rapid Key which has not already been programmed can be
used as a Batch Key.
If you specify a day-of-the-week in your program, the transmission
will be performed every week on that day. If you do not specify a dayof-the-week, the transmission will be performed every day.
To program a Batch Key, follow the procedure for entering programs
explained in Entering and Using Programs in this chapter. In Step 10
of the initial prodedure, select “Batch transmission”.
Clearing a Batch Key
To clear a Batch Key, follow the procedure explained in Clearing a
Program Key in Entering and Using Programs in this chapter.
Storing documents for transmission
Up to 56 jobs (a job can consist of multiple pages) can be held in
memory for batch transmissions at any one time, regardless of the
number of Batch Keys used. When you store a document, it is given a
message number to distinguish it from other documents sent in the
same batch.
♦ If no documents have been stored under a Batch Key when the time
for transmission arrives, transmission will not take place.
116
all-FO4700.book
Page 117 Friday, October 8, 1999
11:10 AM
Batch Transmission
1
Load the document (s).
• SEND READY will appear in the
display.
2
Press the appropriate Batch Key.
• After scanning, the message
number assigned to your document
will appear in the display.
01
02
03
06
05
04
07
08
A
B
C
D
E
F
G
H
09
10
11
12
13
14
15
16
I
J
K
L
M
N
O
P
17
18
19
20
21
22
23
24
Q
R
S
T
U
V
W
X
25
26
27
28
29
30
31
32
Y
Z
SPACE
SHIFT
SP
CLEAR
3
5. Special
Functions
(Example)
Press the STOP key.
• The document will be transmitted
at the designated time along with
any other jobs stored under the
same key. After transmission, all
jobs in the batch will be cleared
from memory.
STOP
117
all-FO4700.book
Page 118 Friday, October 8, 1999
11:10 AM
Batch Transmission
Canceling a document stored for batch transmission
If necessary, you can cancel a document stored for a batch
transmission before transmission takes place. To do so, you will need
to know the message number assigned to the document.
♦ If you don’t remember the message number, print out the Batch
Transmission List (see Batch Transmission List in Chapter 7).
1
Press the Batch Key in which the
document you want to clear has been
stored.
• Make sure .no documents are in the
feeder.
02
01
04
03
07
06
05
08
A
B
C
D
E
F
G
H
09
10
11
12
13
14
15
16
I
J
K
L
M
N
O
P
17
18
19
20
21
22
23
24
Q
R
S
T
U
V
W
X
25
26
27
28
29
30
31
32
Y
Z
SPACE
SHIFT
SP
CLEAR
(Example)
2
Enter the 3-digit message number
assigned to the document.
0
0
1
(Example)
3
118
Press the START key.
START
all-FO4700.book
Page 119 Friday, October 8, 1999
11:10 AM
Entering and Using Programs
Entering and Using Programs
If you frequently perform the same operation involving the same party,
you can program all the steps of the operation into one Program Key.
This allows you to perform the operation by simply pressing that key.
♦ Any Rapid Key which is not already programmed as a Rapid Key or
a Group Key can be used as a Program Key.
♦ You can also include a timer setting in the program to have the
operation performed automatically at a selected time.
♦ To clear a mistake, press the STOP key.
Initial procedure
1
Press these keys:
FUNCTION
7
5. Special
Functions
To program a Program Key, first perform the following procedure.
After you have completed this procedure, go to the procedure for the
specific operation you want to program (see the following pages).
1
The display will show:
1:PROGRAM ENTRY MODE
1=SET, 2=CLEAR
2
Press 1 to select SET.
3
Select a Program Key by pressing any
Rapid Key that has not yet been
programmed.
1
2
B
(Example)
119
all-FO4700.book
Page 120 Friday, October 8, 1999
11:10 AM
Entering and Using Programs
4
Enter a name for the program by
pressing the letter entry keys. (If you
don’t want to enter a name, go
S
directly to Step 5.)
H
A
R
P
Example: SHARP
5
Press the START key.
START
6
7
If you want to include a timer setting,
enter a two-digit number for the hour
(“00” to “23”) and a two-digit number
for the minute (“00” to “59”). (If not,
go directly to Step 9.)
Enter a 1-digit number for the day of
the operation (skip this step if the
operation will be performed within
the next 24 hours):
0: Sunday
1: Monday
2: Tuesday
3: Wednesday
4: Thursday
5: Friday
6: Saturday
120
0
9
2
Example: 9:25
1
Example: Monday
5
all-FO4700.book
Page 121 Friday, October 8, 1999
11:10 AM
Entering and Using Programs
8
Press the START key.
9
Press the * key or the # key until the
desired operation appears in the
display.
START
10
5. Special
Functions
Transmission (SEND MODE)
Confidential transmission
Polling
Serial Polling
Broadcasting
Relay Request
Batch transmission (this will only
appear if a timer setting was made)
Memory Polling (this will not appear
if a timer setting was made)
Press the START key and go to the
specific procedure for your operation
(see the following pages).
START
121
all-FO4700.book
Page 122 Friday, October 8, 1999
11:10 AM
Entering and Using Programs
Transmission
(Continued from Initial procedure.)
11
Dial the receiving machine using one
of the following methods:
• Press a Rapid Key.
START
• Press the SPEED DIAL key and
enter a Speed Dial number (if you
enter less than 2 digits on the FO4700, or 3 digits on the FO-5700,
press the START
key to complete
.
the entry).
SPEED DIAL
1
(Example)
• Enter a full fax number with the
numeric keys.
12
Press the START key.
13
Adjust the resolution and or contrast
if desired, and then press the START
key.
START
START
RESOLUTION
CONTRAST
Q
122
all-FO4700.book
Page 123 Friday, October 8, 1999
11:10 AM
Entering and Using Programs
14
If you want the document to be sent
through memory, press the START
key.
START
DOCUMENT
or
If you want the document to be sent
directly from the feeder, press the
DOCUMENT key. (This is not
possible if you included a timer
setting.)
15
Press the STOP key repeatedly until
you return to the date and time
display.
STOP
Confidential transmission
11
12
Enter the mailbox number (2 digits).
(Go directly to Step 2 if the receiving
machine does not have mailboxes.)
Press the START key.
0
5. Special
Functions
(Continued from Initial procedure.)
1
(Example)
START
123
all-FO4700.book
Page 124 Friday, October 8, 1999
11:10 AM
Entering and Using Programs
13
Dial the receiving machine using one
of the following methods:
• Press a Rapid Key.
START
• Press the SPEED DIAL key and
enter a Speed Dial number (if you
enter less than 2 digits on the FO4700, or 3 digits on the FO-5700,
press the START key to complete
the entry).
SPEED DIAL
1
(Example)
• Enter a full fax number with the
numeric keys.
14
Press the START key.
15
Adjust the resolution and or contrast
if desired, and then press the START
key.
START
RESOLUTION
START
CONTRAST
Q
16
If you want the document to be sent
through memory, press the START
key.
If you want the document to be sent
directly from the feeder, press the
DOCUMENT key. (This is not
possible if you included a timer
setting.)
124
START
DOCUMENT
or
all-FO4700.book
Page 125 Friday, October 8, 1999
11:10 AM
Entering and Using Programs
17
Press the STOP key repeatedly until
you return to the date and time
display.
STOP
Polling
(Continued from Initial procedure.)
11
Dial the machine to be polled using
one of the following methods:
• Press a Rapid Key.
START
1
(Example)
5. Special
Functions
• Press the SPEED DIAL key and
enter a Speed Dial number (if you
enter less than 2 digits on the FO4700, or 3 digits on the FO-5700,
press the START key to complete
the entry).
SPEED DIAL
• Enter a full fax number with the
numeric keys.
12
Press the START key.
13
Press the STOP key repeatedly until
you return to the date and time
display.
START
STOP
125
all-FO4700.book
Page 126 Friday, October 8, 1999
11:10 AM
Entering and Using Programs
Serial Polling
(Continued from Initial procedure.)
11
Dial the machines to be polled using
one or more of the following
methods:
• Press one or more Rapid Keys.
• Enter one or more Speed Dial
numbers, pressing the SPEED
DIAL key before each number.
(If you enter less than 2 digits on
the FO-4700, or 3 digits on the FO5700, press the START key to
complete the entry.)
START
SPEED DIAL
1
START
SPEED DIAL
2
(Example)
• Enter one or more full fax numbers
with the numeric keys, pressing the
START key after each full number.
• Press one or more Group Keys.
12
Press the START key.
13
Press the STOP key repeatedly until
you return to the date and time
display.
126
START
STOP
all-FO4700.book
Page 127 Friday, October 8, 1999
11:10 AM
Entering and Using Programs
Broadcasting
(Continued from Initial procedure.)
11
Dial the receiving machines using one
or more of the following methods:
• Press one or more Rapid Keys.
• Enter one or more Speed Dial
numbers, pressing the SPEED
DIAL key before each number.
(If you enter less than 2 digits on
the FO-4700, or 3 digits on the FO5700, press the START key to
complete the entry.)
START
SPEED DIAL
1
START
SPEED DIAL
2
(Example)
5. Special
Functions
• Enter one or more full fax numbers
with the numeric keys, pressing the
START key after each full number.
• Press one or more Group Keys.
12
Press the START key.
13
Adjust the resolution and or contrast
if desired, and then press the START
key.
START
RESOLUTION
START
CONTRAST
Q
127
all-FO4700.book
Page 128 Friday, October 8, 1999
11:10 AM
Entering and Using Programs
14
Press the START key
15
Press the STOP key repeatedly until
you return to the date and time
display.
START
STOP
Relay Request
(Continued from Initial procedure.)
11
Enter the 2-digit relay group number
by pressing the numeric keys.
0
1
(Example)
12
Press the START key.
13
Adjust the resolution and or contrast
if desired, and then press the START
key.
START
RESOLUTION
START
CONTRAST
Q
128
all-FO4700.book
Page 129 Friday, October 8, 1999
11:10 AM
Entering and Using Programs
14
If you want the document to be sent
through memory, press the START
key.
START
DOCUMENT
or
If you want the document to be sent
directly from the feeder, press the
DOCUMENT key. (This is not
possible if you included a timer
setting.)
15
Press the STOP key repeatedly until
you return to the date and time
display.
STOP
Batch transmission
11
5. Special
Functions
(Continued from Initial procedure.)
Dial the receiving machine using one
of the following methods:
• Press a Rapid Key.
• Press the SPEED DIAL key and
enter a Speed Dial number (if you
enter less than 2 digits on the FO4700, or 3 digits on the FO-5700,
press the START key to complete
the entry).
START
SPEED DIAL
1
(Example)
• Enter a full fax number with the
numeric keys.
129
all-FO4700.book
Page 130 Friday, October 8, 1999
11:10 AM
Entering and Using Programs
12
Press the START key.
13
Adjust the resolution and or contrast
if desired, and then press the START
key.
START
RESOLUTION
START
CONTRAST
Q
14
Press the START key
15
Press the STOP key repeatedly to
return to the date and time display.
START
STOP
Being Polled (Memory polling)
(Continued from Initial procedure.)
11
12
130
Press 1 to allow polling only once, or
2 to allow polling an unlimited
number of times.
Press the START key.
1 TIME
1
REPEAT
or
START
2
all-FO4700.book
Page 131 Friday, October 8, 1999
11:10 AM
Entering and Using Programs
13
Adjust the resolution and or contrast
if desired, and then press the START
key.
RESOLUTION
START
CONTRAST
Q
14
Press the START key
15
Press the STOP key repeatedly until
you return to the date and time
display.
START
STOP
5. Special
Functions
Clearing a Program Key
To clear a Program Key, follow these steps:
1
Press these keys:
FUNCTION
7
The display will show:
1
1:PROGRAM ENTRY MODE
1=SET, 2=CLEAR
2
Press 2 to select CLEAR.
3
Press the Program Key you want to
clear.
2
2
B
(Example)
131
all-FO4700.book
Page 132 Friday, October 8, 1999
11:10 AM
Entering and Using Programs
4
Press the START key.
5
Press the STOP key repeatedly until
you return to the date and time
display.
START
STOP
Using a Program Key
Follow the steps below to perform a programmed operation.
1
If this is a transmission or memory
polling operation, load the document.
2
Press the appropriate Program Key.
2
B
(Example)
132
all-FO4700.book
Page 133 Friday, October 8, 1999
11:10 AM
Entering and Using Programs
Canceling a programmed timer operation
If a Program Key has been pressed for a timer operation and you need
to cancel the operation before it is performed, follow the steps below.
Note: This procedure will not work for a document stored for a batch
transmission. To cancel a batch transmission operation, see Canceling a
document stored for batch transmission in Batch Transmission in this
chapter.
1
Press the Program Key.
2
B
(Example)
Press the START key.
START
5. Special
Functions
2
133
all-FO4700.book
Page 134 Friday, October 8, 1999
11:10 AM
Duplex Scanning for Two-sided Documents
Duplex Scanning for Two-sided Documents
To transmit or copy documents which have printing or graphics on
both sides of the page or pages, use Duplex Scanning. With this
function, you simply feed the document (all pages) through the
machine once, turn the stack of pages over, and feed it through again.
♦ The machine will automatically sort the pages into the correct order
(front of 1st page, back of 1st page, front of 2nd page, back of 2nd
page, etc.).
♦ Duplex Scanning can be used for copying (single copies and sorted
multiple copies only) and any type of transmission from memory.
♦ Note that any blank sides must be included when scanning the
pages (if the number of pages is not equal each time the machine
scans the stack, an error will result). The blank sides will not, however, be printed out.
1
Load the document (s).
• Make sure the page(s) are front face
down, with the first page on the
bottom.
• SEND READY will appear in the
display.
2
Press the DUPLEX SCAN key and
then the START key.
DUPLEX SCAN
134
START
all-FO4700.book
Page 135 Friday, October 8, 1999
11:10 AM
Duplex Scanning for Two-sided Documents
Perform all steps of the desired copy
or memory transmission.
4
When all pages of the document have
been scanned, turn the stack over (do
not change the page order) and load it
again.
5
Press the START key.
START
5. Special
Functions
3
135
all-FO4700.book
Page 136 Friday, October 8, 1999
11:10 AM
Print Hold
Print Hold
If desired, you can have the fax hold all received documents in
memory instead of immediately printing them out. When you enter
the correct Print Hold code, the documents will print out.
Programming the Print Hold code
To use Print Hold, you must first program a 4-digit Print Hold code.
Follow the steps below to program or clear the code.
1
Press these keys:
FUNCTION
6
The display will show:
6:PRINT HOLD
ENTER #(1-3,*,#)
2
3
Press 2 key to program the Print Hold
code, or 3 to clear the Print Hold
code. (Note: To clear the code, Option
Setting 30 must be set to NO.)
Enter the 4-digit Print Hold code by
pressing the numeric keys.
SET
2
3
CLEAR
3
or
2
4
5
(Example)
4
Press the START key.
START
Note: After entering the passcode, your fax will print it out for your
records. If you forget the passcode and have kept no record, contact your
Sharp dealer.
136
all-FO4700.book
Page 137 Friday, October 8, 1999
11:10 AM
Print Hold
Turning on Print Hold
To turn on the Print Hold function, set Option Setting 30 to YES. This
procedure is explained in Chapter 6, Optional Settings.
Note: The Print Hold function cannot be turned on when Power Save
Mode is on.
Printing out received documents
When the Print Hold function is turned on and you have received
documents in memory, RCVD PRINT HOLD FAX will appear in the
display. Follow the steps below to print out the documents:
1
Press these keys:
FUNCTION
The display will show:
6
1
4
5
2
Enter the 4-digit Print Hold code by
pressing the numeric keys.
5. Special
Functions
1:HOLD DATA PRINT
ENTER PASSCODE #
3
2
(Example)
3
Press the START key.
START
137
all-FO4700.book
Page 138 Friday, October 8, 1999
11:10 AM
Department Control
Department Control
Department Control is used to limit use of the fax machine to
authorised users. When it is activated, a department code must be
entered before an operation can be performed.
♦ Department Control can only be activated by your Sharp dealer. If
you want to use this function, contact your dealer.
♦ Department Control allows you to track the number of pages transmitted as well as the transmission time for each authorised department or person. See Department Usage List in Chapter 7.
Entering Department Codes
Up to 30 different Department Codes can be entered to allow access to
the fax machine. Transmitted pages and transmission time will be kept
track of separately for each code. After you enter a code, inform the
appropriate group or individual.
♦ A name must be entered for each code. Only the name, not the code,
will appear on the Department Usage List.
♦ Be sure to keep a record of each code and name. If you misplace the
record, contact your dealer.
1
Press these keys:
FUNCTION
The display will show:
9
3
9:DEPT. CODE MODE
1=SET, 2=CLEAR
2
138
Press 1 to program a Department
Code, or 2 to clear a Department
Code.
SET
1
CLEAR
or
2
all-FO4700.book
Page 139 Friday, October 8, 1999
11:10 AM
Department Control
3
Entering: Enter a 2-digit number
from “01” to “30” with the numeric
keys. This number identifies the
Department Code that you will enter
in the next step.
0
1
(Example)
Clearing: Enter the 2-digit number
that identifies the Department Code
you want to clear.
4
Entering: Enter a Department Code
(4 digits or the number of digits set by
Option Setting 27).
5
5
0
1
(Example)
Clearing: Enter the Department Code
you want to clear, and go to Step 7.
Press the START key.
6
Enter a name for the Department
Code.
START
S
H
A
5. Special
Functions
5
R
P
(Example)
7
Press the START key.
START
139
all-FO4700.book
Page 140 Friday, October 8, 1999
11:10 AM
Department Control
8
Return to Step 3 to enter (or clear)
another Department Code, or press
the STOP key one or more times until
you return to the date and time
display.
STOP
Step 3 or
Accessing the machine
When Department Control is activated, you must enter your
Department Code before performing an operation.
Note: You do not have to enter a Department Code to receive faxes manually (by picking up an extension phone connected to the same line and
pressing the START key on the fax machine).
Enter your Department Code by
pressing the numeric keys, and then
perform the desired operation.
• If you do not begin the operation
within one minute after entering the
code, the fax will return to
controlled access mode.
140
5
5
0
(Example)
1
all-FO4700.book
Page 141 Friday, October 8, 1999
11:10 AM
Blocking Reception of Unwanted Faxes
Blocking Reception of Unwanted Faxes
The Anti Junk Fax function allows you to block reception of faxes
from parties which you specify. This saves paper by not printing out
unwanted "junk" faxes.
To use this function, first turn it on by setting Option Setting 20 (AntiJunk Fax) to YES as explained in Chapter 6, and then enter the fax
numbers from which you do not want to receive faxes as shown
below.
♦ Up to 50 numbers can be entered in the Anti Junk Number List.
♦ To clear a number from the Anti Junk Number List, you need to
know the 2-digit number which identifies it. If you have forgotten
this number, print out the Anti Junk Number List as explained in
Chapter 7.
Press these keys:
FUNCTION
The display will show:
8
3
5. Special
Functions
1
8:STORE JUNK FAX #
1=SET, 2=CLEAR
2
Press 1 to enter a number in the Anti
Junk Number List, or 2 to clear a
number from the list.
SET
1
CLEAR
or
2
141
all-FO4700.book
Page 142 Friday, October 8, 1999
11:10 AM
Blocking Reception of Unwanted Faxes
3
Entering: Enter a 2-digit number
from “01” to “50” with the numeric
keys. This number identifies the fax
number that you will enter in the next
step.
0
1
(Example)
Clearing: Enter the 2-digit number
that identifies the fax number you
want to clear, and go to Step 5.
4
Enter the fax number.
3
2
4
5
0
5
(Example)
5
Press the START key.
6
Return to Step 3 to enter (or clear)
another fax number, or press the
STOP key repeatedly to return to the
date and time display.
142
START
STOP
Step 3 or
1
all-FO4700.book
Page 143 Friday, October 8, 1999
11:10 AM
6. Optional Settings
The option settings let you customise the fax machine to better suit
your needs.
An initial setting has been made for each option at the factory. To
change a setting, follow the steps below to access the option, and then
change the setting as explained in the option setting list that follows.
1
Press the FUNCTION key and 4.
The display will show:
FUNCTION
4
4:OPTIONAL SETTING
ENTER #(01-34,*,#)
2
Press the numeric keys to enter the 2digit number (“01” to “34”) of the
option setting you want to set.
Or
0
1
Example:
Option Setting 1
3
6. Optional
Settings
Press * or # to scroll through the
option settings. When the desired
option setting appears, press the
START key.
Enter a selection for the option setting
by pressing the numeric keys. See the
list that follows for an explanation of
each of the option settings.
143
all-FO4700.book
Page 144 Friday, October 8, 1999
11:10 AM
Optional Settings
4
After entering a selection, the
subsequent option setting will appear
in the display. To return to the date
and time display, press the STOP key
twice.
STOP
STOP
Option Settings
Setting 01: FINE RESOLUTION PRIORITY
This option sets the default resolution (the resolution used if a setting
is not made with the RESOLUTION key) for transmitting
documents. Press 1 (YES) to set the default resolution to FINE, or 2
(NO) to set it to STANDARD.
♦ Initial setting: 2
Setting 02: NUMBER OF RINGS AUTO RECEPTION
This sets the number of rings the fax machine waits before answering
an incoming call in AUTO receive mode. Enter any number from 2 to
4, or enter 0 to have the fax machine answer without ringing.
♦ Initial setting: 2
Setting 03: NUMBER OF RINGS MANUAL RECEPTION
You can also have the fax machine automatically answer a call after a
certain number of rings in MANUAL reception mode. To turn on this
function, enter the desired number of rings (any number from 2 to 4).
To turn off the function, enter 0.
♦ Initial setting: 0 (off)
144
all-FO4700.book
Page 145 Friday, October 8, 1999
11:10 AM
Optional Settings
Setting 04: AUTO LISTING
Press 1 (YES) to have the fax machine automatically print an Activity
Report once every 30 send/receive operations. (The report can still be
printed on demand at any time.) Press 2 (NO) to turn the function off.
♦ Initial setting: 2
Setting 05: TRANSACTION REPORT PRINT SELECTION
This sets the condition for printing out a Transaction Report. Enter a
number from 1 to 5 as follows:
1 (ERROR/TIMER
MEMORY):
A report will be printed after an error,
timer operation, or memory operation
.
2 (SEND ONLY)
A report will be printed only after a
transmission
3 (ALWAYS PRINTS)
A report will be printed after each
transmission, reception, or error
4 (NEVER PRINTS)
A report will never be printed.
5 (ERROR ONLY)
A report will be printed only after an error
occurs
♦ Initial setting: 5
6. Option
Settings
Setting 06: Not used
Setting 07: Not used
Setting 08: SECURITY SELECTION
Press 1 (ON) to turn polling security on, or 2 (OFF) to turn it off.
♦ Initial setting: 1
145
all-FO4700.book
Page 146 Friday, October 8, 1999
11:10 AM
Optional Settings
Setting 09: ERROR CORRECTION MODE (ECM)
Press 1 (YES) to have any distortions in a transmission due to noise
on the telephone line corrected before print-out at the receiving end.
This is only effective when the other machine has ECM as well. Press
2 (NO) to turn the function off.
Note for FO-5700: If the transmission or reception is taking place in
Super G3 mode, ECM will operate regardless of the ECM setting.
♦ Initial setting: 1
Setting 10: AUTO COVER SHEET
Press 1 (YES) to have the fax automatically generate a cover sheet
and send it as the last page of each transmission. Press 2 (NO) to turn
the function off.
♦ Initial setting: 2
Setting 11: Not used.
Setting 12: COPY SCANNING
This setting is used to reduce copies slightly before printing to ensure
that data on the edges are not cut off. Press 1 (AUTO) for automatic
reduction, or 2 (100%) for no reduction.
♦ Initial setting: 2
Setting 13: COPY CUT-OFF
This setting determines how the fax machine will copy documents
that are longer than the printing paper. Press 1 (CONTINUE) to have
the remainder of the document printed on a second page, or 2 (CUTOFF) to cut off (not print) the remainder.
♦ Initial setting: 2
146
all-FO4700.book
Page 147 Friday, October 8, 1999
11:10 AM
Optional Settings
Setting 14: RECEIVE REDUCE
This setting is used to reduce received documents slightly before
printing to ensure that data on the edges are not cut off. Press 1
(AUTO) for automatic reduction, or 2 (100%) for no reduction.
♦ Initial setting: 1
Setting 15: IMAGE MEMORY PRINT
Press 1 (YES) to include a copy of part of the first page of the
transmitted document on the Transaction Report. Press 2 (NO) to turn
the function off. This setting is only effective when transmitting from
memory.
♦ Initial setting: 1
Press 2 if you want the fax machine to automatically select the
printing paper source (tray or cassette) according to the size of each
page received or copied. (If a document consists of multiple pages of
different sizes, each page will be printed on the paper that best
matches its size.)
Press 3 if you want to set a fixed order of priority for the paper
sources. When the 1ST PRIORITY setting appears, press 1 to have
paper always drawn from the tray regardless of the size of the received
or copied document, or 2 to have paper always drawn from the
cassette. When the 2ND PRIORITY setting appears, press 1 to have
paper drawn from the other source in the event that the “1st priority”
source runs out of paper, or 2 (NONE) to have the incoming fax
received to memory.
This setting will only appear if your dealer has installed the paper
cassette option and Option Setting 33 (Seperate Mode) is turned off.
♦ Initial setting: 1
147
6. Option
Settings
Setting 16: CASSETTE SELECTION
Press 1 if you want the fax machine to automatically select the
printing paper source (tray or cassette) according to the size of the
first page of the document received or copied. (If the document
consists of multiple pages of different sizes, all pages will be printed
on the same size of paper based on the size of the first page.)
all-FO4700.book
Page 148 Friday, October 8, 1999
11:10 AM
Optional Settings
Setting 17: Not used.
Setting 18: Not used.
Setting 19: HEATER MODE
To conserve power, you can turn off the laser printer heater in your fax
machine. When this is done, the heater will turn on automatically
when you receive a document (there will be a slight delay before
printing while the heater warms up) and turn off when printing is
completed. Press 2 to turn off the heater, or 1 to keep it on.
♦ Initial setting: 2
Setting 20: ANTI-JUNK FAX
Press 1 to block reception from fax numbers entered in the Anti Junk
Fax List. Press 2 to allow reception from all numbers.
♦ Initial setting: 2
Setting 21: ALARM VOLUME
This sets the volume of the beep sound that alerts you to error
conditions and informs you that operations have been completed.
Press 1 for HIGH, 2 for LOW, or 3 for OFF.
♦ Initial setting: 2
Setting 22: DIAL MODE
This sets the dial mode. Press 1 if you are on a tone dial line, or 2 if
you are on a pulse dial line.
Note: For all units installed in New Zealand, Select 1 for tone dialling.
The pulse setting 2 will not operate correctly and must not be used.
♦ Initial setting: 1
148
all-FO4700.book
Page 149 Friday, October 8, 1999
11:10 AM
Optional Settings
Setting 23: QUICK ON-LINE
When you transmit a multi-page document, this setting determines
whether the fax machine will dial the receiving party and begin
transmitting while scanning is still in progress, or wait until all pages
have been scanned before dialling. Press 1 to have the fax machine
dial and begin transmission while scanning is still in progress, or 2 to
have the fax machine wait until all pages have been scanned.
♦ Initial setting: 1
Setting 24: MULTI TTI
If you are using Department Control, you can press 1 to have the
department name (the name associated with the department code
entered by an operator to access the fax) appear at the top of each
transmitted document. This will appear in place of the name entered
in Entering Your Name and Fax Number in Chapter 1. Press 2 to turn
Multi TTI off (the sender’s name entered in Chapter 1 will appear).
♦ Initial setting: 2
Setting 25: BEEP LENGTH
This sets the duration of the beep that signals the end of transmission,
reception, or copying. Press 1 for 3 seconds, 2 for 1 second, or 3 for
no beep.
6. Option
Settings
♦ Initial setting: 1
Setting 27: DEPARTMENT CODE DIGITS
This setting allows you to change the number of digits used for
Department Codes. Enter any number from 3 to 9.
♦ Initial setting: 4
149
all-FO4700.book
Page 150 Friday, October 8, 1999
11:10 AM
Optional Settings
Setting 28: DISTINCTIVE RING
If you subscribe to a distinctive ring service from your telephone
company (Fax Duet in Australia or FaxAbility in New Zealand), press
1 to turn on the Distinctive Ring function. When your fax number is
dialled, your fax machine will signal the call with a special ringing
sound, then answer automatically and begin reception after the
number of rings set with Option Setting 2 (the factory setting is 2
rings). When your voice number is dialled, the fax machine will signal
the call with the normal ringing sound to let you know that you must
answer personally on an extension phone connected to the same line.
Note that the distinctive ring function must be used with the reception
mode set to AUTO. If you do not wish to use this function, press 2 to
turn it off.
♦ Initial setting: 2
Setting 29: VERIFICATION STAMP
Press 1 if you want the fax machine to stamp each original document
page as it is scanned. After scanning, you can check to see if all pages
have been stamped to verify that no double feeds occurred. Press 2 to
turn the function off.
Note: To use this function, your dealer must install the Verification
Stamp option.
♦ Initial setting: 2
Setting 30: PRINT HOLD
Press 1 if you want the fax machine to hold received documents in
memory instead of immediately printing them out (note that you must
first enter a Print Hold passcode as explained in Print Hold in Chapter
5). To turn off the Print Hold function, press 2, enter the 4-digit Print
Hold passcode, and then press START.
♦ Initial setting: 2
150
all-FO4700.book
Page 151 Friday, October 8, 1999
11:10 AM
Optional Settings
Setting 31: PC INTERFACE MODE
If you have connected the fax machine to a computer, press 1 to turn
on PC Interface mode. Press 2 to turn off PC Interface mode.
Note: This setting will only appear if your dealer has installed the PC
interface option.
♦ Initial setting: 1
Setting 32: COPY RESOLUTION
Use this setting to select the default copying resolution (the resolution
used for copying if a setting is not made with the RESOLUTION
key). Press 1 (S-FINE) to set the default resolution to SUPER FINE,
or 2 to set it to FINE.
Setting 33: SEPARATE MODE
If desired, you can have the fax draw a sheet of paper from the paper
tray after each fax reception. By loading colored (or large) paper in
the paper tray, each colored sheet drawn will act as a separator that
makes it easy to distinguish where one multi-page document ends and
another begins. A Transaction Report printed after a reception will
also be printed from the paper tray to act as a separator sheet. Press 1
to turn on this function (be sure to load appropriate paper in the paper
tray), or 2 to turn it off. (Note that this function will not operate for
copy jobs and print jobs from a computer. Also, the function will turn
off automatically if the paper tray runs out of paper.)
This setting will only appear if your dealer has installed the paper cassette option.
♦ Initial setting: 2
Note: If you turn off the Separate Mode setting, Option Setting 16 will
subsequently appear in the display to allow you make an appropriate setting for cassette selection. If you don’t make a selection, 1:AUTO
SELECTION will be automatically selected.
151
6. Option
Settings
♦ Initial setting: 2
all-FO4700.book
Page 152 Friday, October 8, 1999
11:10 AM
Optional Settings
Setting 34: POWER SAVE TYPE
This option sets the method for turning on Power Save Mode. Press 1
to select REAL TIME (turn Power Save Mode on and off by pressing
the POWER SAVE key), or 2 to select TIMER (automatic on and off
at preset times). For more detailed information, see Power Save Mode
in Chapter 5.
♦ Initial setting: 1
152
all-FO4700.book
Page 153 Friday, October 8, 1999
11:10 AM
7. Printing Lists and Reports
You can print lists showing settings and information entered in the fax
machine. You can also print out reports on recent activity and
individual operations after they are completed. The lists and reports
are described on the following pages.
To print a list, follow the steps below.
1
Press the FUNCTION key and 2.
The display will show:
FUNCTION
2
2:LISTING MODE
ENTER #(01-11,*,#)
2
Press the numeric keys to enter the 2digit number (“01” to “11”) of the list
you want to print.
Or
0
1
Example:
Activity Report
Press * or # to scroll through the
lists. When the desired list appears,
press the START key.
This report shows information on your most recently performed send
and receive operations (a combined maximum of 30 operations can
appear). The report is divided into two parts: the SEND REPORT,
which shows information on transmissions, and the RECEIVE
REPORT, which shows information on receptions.
153
7. Printing
Lists
Activity Report (List 01)
all-FO4700.book
Page 154 Friday, October 8, 1999
11:10 AM
Printing Lists and Reports
♦ If Option Setting 4 (Auto Listing) is set to YES, a report will be
automatically printed out whenever information on 30 operations
has accumulated. (A report can still be printed on demand at any
time.)
♦ All information is erased after a report is printed out. If automatic
print-out is turned off and the report is not printed manually for 30
operations, the information on the oldest operation will be overwritten each time a new operation is performed.
Explanation of headings
SENDER/
RECEIVER
The name or fax number of the other machine involved in
the transaction. If that machine does not have an ID
function, the communication mode will appear (for
example, "G3").
START
The time at which transmission/reception started.
TX/RX TIME Total time taken for transmission/reception.
PAGES
Number of pages transmitted/received.
TYPE
CONF. TX - A confidential operation was performed.
RELAY TX - A relay operation was performed.
(T) - A timer operation was performed.
(D) - The document was sent directly from the feeder, not
from memory.
154
all-FO4700.book
Page 155 Friday, October 8, 1999
11:10 AM
Printing Lists and Reports
(One of the following notes will appear under NOTE in the
report to indicate whether the transaction was successful,
and if not, the reason for the failure.)
NOTE
OK - Transmission/reception was successful.
P.FAIL - A power failure prevented the transaction.
JAM - The printing paper or document jammed, preventing
the transaction.
BUSY - The fax was not sent because the line was busy.
CANCEL - The transaction was cancelled because the
STOP key was pressed, no document was in the feeder, or
the other machine requested transmission using a function
which your fax machine does not have.
CANCEL 3 - (Used for confidential transmission only)
A confidential transmission was cancelled because the
receiving machine does not have a confidential function, a
confidential passcode is not programmed in the receiving
machine, its memory is full, or it is not a Sharp model.
CANCEL 4 - (Used for confidential transmission only)
A confidential ransmission was cancelled because an
incorrect mailbox number was entered for a fax machine
with confidential mailboxes, or the other machine’s memory
is full.
CANCEL 5 - (Used for relay request only)
A relay request was not successful because the machine to
which the request was made has no relay function, it is not a
Sharp model, or its memory was full.
CANCEL 6 - (Used for relay request only)
A relay request was not successful because your machine’s
fax number has not been entered into the relay machine’s list
of permitted numbers, an automatic dialling number not
stored in the relay machine was specified, or your fax
number has not been entered in your machine as explained
in Chapter 1.
155
7. Printing
Lists
.
COM.E-0 to COM.E-31 - A telephone line error prevented
the transaction. See Line Error in Problems and Solutions in
Chapter 9.
all-FO4700.book
Page 156 Friday, October 8, 1999
11:10 AM
Printing Lists and Reports
Timer List (List 02)
This list shows the timer operations that are currently set.
Telephone Number List (List 03)
This list shows the fax numbers that have been programmed for
automatic dialling.
Relay Group List (List 04)
This list shows the relay groups that have been programmed.
156
all-FO4700.book
Page 157 Friday, October 8, 1999
11:10 AM
Printing Lists and Reports
Passcode List (List 05)
This list shows settings made for polling security, your name and fax
number as programmed in the fax machine, a sample of the header
printed at the top of every page you transmit (HEADER PRINT), and
the numbers entered in the relay passcode list.
Optional Setting List (List 06)
7. Printing
Lists
This list shows the current status of the option settings.
157
all-FO4700.book
Page 158 Friday, October 8, 1999
11:10 AM
Printing Lists and Reports
Program and Group List (List 07)
The top part of this list shows the programs that have been entered.
The bottom part shows the fax numbers that have been programmed
into Group Keys.
Batch Transmission List (List 08)
The Batch Transmission List shows the documents that are currently
stored for batch transmission.
158
all-FO4700.book
Page 159 Friday, October 8, 1999
11:10 AM
Printing Lists and Reports
Department Usage List (List 09)
This list shows total transmission time and pages transmitted
(including polling time and pages polled) for each department during
the period indicated on the list. The information is only available if
Department Control has been activated. The bottom part of the list
shows information about relay broadcast operations performed on the
request of other fax machines.
♦ Each time you print out the report, the data is cleared and a new
period begins.
Confidential Reception List (List 10)
7. Printing
Lists
This list shows which mailboxes have received confidential
documents and the total number of pages received. Print this list out
whenever RCVD CONFIDENTIAL RX appears in the display.
159
all-FO4700.book
Page 160 Friday, October 8, 1999
11:10 AM
Printing Lists and Reports
Anti Junk Number List (List 11)
This list shows the fax numbers from which reception is not allowed.
Transaction Report
This report is printed out automatically after an operation is
completed to allow you to check the result. The fax machine is set at
the factory to print out the report only when an error occurs. If
desired, you can change the setting to have it printed out under a
variety of other conditions. See Option Setting 5 (Print Selection) in
Chapter 6.
♦ You can also print out the Transaction Report on demand by pressing the REPORT key after the operation is completed.
♦ The same headings appear in the Transaction Report as in the
Activity Report. See Activity Report in this chapter for an explanation of the headings.
♦ The top part of the first page of the document will also appear
below the report if the document was sent from memory. If confidentiality is required, you can prevent printing of the top part of the
document by setting Option Setting 15 (Image Memory Print) to
NO.
160
Page 161 Friday, October 8, 1999
11:10 AM
8. Maintenance
all-FO4700.book
8. Maintenance
Cleaning the Scanning Glass and Rollers
Clean the reading glass and rollers frequently to ensure the quality of
your transmitted images and copies.
1
Open the operation panel.
• Squeeze the release marked
PANEL RELEASE and pull up.
2
Wipe the scanning glass, white
backplate, and rollers with a soft
cloth.
• Make sure that all dirt and stains
(such as correcting fluid) are
removed, as dirt will cause vertical
lines on transmitted images and
copies. (If necessary, wipe with
denatured alcohol.)
White
backplate
Scanning
glass
161
all-FO4700.book
Page 162 Friday, October 8, 1999
11:10 AM
The Housing
The Housing
Wipe the external parts and surface of the machine with a dry cloth.
Caution!
Do not use benzene or thinner. These solvents may damage or
discolour the machine.
Replacing the Verification Stamp
If you are using the Verification Stamp function, you will need to
replace the ink cartridge in the stamp unit when it runs out of ink
(when the stamped mark on original documents becomes faint). A
new ink cartridge can be obtained from your dealer.
1
Remove the original document OUT
tray.
2
Press down on the protruding tab of
the green ink cartridge and pull the
cartridge out with your fingers.
162
Page 163 Friday, October 8, 1999
11:10 AM
Replacing the Verification Stamp
3
Insert the new ink cartridge into the
machine (make sure that the tab is
facing out).
4
Replace the original document OUT
tray.
163
8. Maintenance
all-FO4700.book
all-FO4700.book
Page 164 Friday, October 8, 1999
11:10 AM
9. Troubleshooting
Problems and Solutions
Line error
Problem
LINE ERROR appears in
the display, and/or a
transaction report is
printed out with COM. Eand a number from 0 to 31
in the NOTE column.
Solution
Try the transaction again. If the error persists, check
the following:
• Check the connection. The cord from the TEL.
LINE socket to the wall socket should be no longer
than two meters.
• Make sure there are no modem devices sharing the
same telephone line.
• Check with the other party to make sure their fax
machine is functioning properly.
• Have your telephone line checked for line noise.
• Try connecting the fax machine to a different
telephone line.
• If the problem still occurs, your fax machine may
need service.
164
all-FO4700.book
Page 165 Friday, October 8, 1999
11:10 AM
Problems and Solutions
Problem
Dialling is not possible.
Solution
• Make sure the power lead is properly plugged into
a power outlet.
• Make sure that the telephone line is properly
connected to both the TEL. LINE socket and the
wall socket.
• Make sure that the fax machine is set to the correct
dialling mode for your telephone line. See Option
Setting 22 in Chapter 6.
The power is on, but no
transmission takes place.
• Make sure that the receiving machine has paper.
• Make sure that the telephone line cord is plugged
into the TEL. LINE socket, and not the TEL. SET
socket.
• If the receiving machine is in manual mode with no
attendant, reception will not be possible.
• If the receiving machine is not a Sharp model,
make sure it is G3 compatible.
• Check the display for error messages.
• Press the SPEAKER key and check for a dial tone.
Nothing is printed at the
receiving end.
• Make sure that the document for transmission is
placed face down in the feeder.
A distorted image is
received at the other end.
• If ECM mode (Option Setting 9) is turned off, noise
on the telephone line may cause distortion. Try
sending the document again.
• Make a copy of the document on your fax machine.
If the copy is also distorted, your fax machine may
need service.
165
9. Troubleshooting
Dialling and transmission problems
all-FO4700.book
Page 166 Friday, October 8, 1999
11:10 AM
Problems and Solutions
Reception and copying problems
Problem
Solution
The fax machine doesn’t
receive documents
automatically.
• Make sure that the reception mode is set to AUTO.
The power is on, but no
reception takes place.
• Make sure that the wall socket is connected to the
TEL. LINE socket, and not the TEL. SET socket.
The printing paper comes
out blank when you try to
receive a document.
• Make sure that the document is loaded properly in
the feeder of the transmitting machine. Make a
copy or print a report to confirm the printing ability
of your machine.
The received document is
faint.
• Ask the other party to send higher contrast
documents. If the contrast is still too low, your fax
machine may need service. Make a copy or print a
report to check your machine’s printing ability.
• The toner cartridge may need replacement.
Received images are
distorted.
• If ECM mode (Option Setting 9) is turned off, noise
on the telephone line may cause distortion. Have
the other party try sending the document again.
• If the other machine has ECM mode, make sure
this feature is turned on in both fax machines (see
Option Setting 9).
• Make a copy or print a report on your fax machine.
If the copy or report is also distorted, your fax
machine may need service.
• The drum cartridge may be damaged. Try a new
drum cartridge.
The quality of copies is
poor and/or black spots
appear.
166
• Any dirt or material on the scanning glass will
cause spots to appear on copies and transmitted
faxes. Clean the scanning glass as explained in
Chapter 8.
all-FO4700.book
Page 167 Friday, October 8, 1999
11:10 AM
Problems and Solutions
• The drum cartridge may be damaged. Replace the
drum cartridge.
9. Troubleshooting
Dots appear at regular
intervals on received
documents and copies.
General problems
Problem
Nothing appears in the
display.
Solution
• Make sure the power cord is properly plugged into
a power outlet and the power switch is turned on.
• Connect another electrical appliance to the outlet to
see if it has power.
The machine does not
respond when you press
any of its keys.
• If a beep sound is not made when you press the
keys, turn off the power switch and then turn it on
again several seconds later.
Automatic document
feeding does not work for
transmission or copying.
• Check the size and weight of the document (see
Transmittable Documents in Chapter 2).
No reception occurs when
polling is attempted.
• Make sure you have not run out of paper.
• Make sure the transmitting machine is in automatic
reception mode.
• If the transmitting machine has polling security,
make sure that your fax number has been entered
both in your machine and in the transmitting
machine.
Bell Tinkle
(New Zealand)
• The operation of this equipment on the same line
as the telephone or other equipment with audible
warning devices or automatic ring detectors will
give rise to bell tinkle or noise and may cause false
tripping of the ring detector. Should such a problem
occur, contact your authorised Sharp Service
Centre for information.
167
all-FO4700.book
Page 168 Friday, October 8, 1999
11:10 AM
Messages and Signals
Messages and Signals
Display messages
CHECK TRAY/CASSETTE
This indicates that a paper jam has occurred in the
tray or cassette, or that the cassette is not
installed properly.
CONF REFUSED
A confidential transmission has been denied
because you entered an incorrect mailbox number
for a machine with mailboxes.
CONF. RX ERROR
Confidential reception was cancelled because the
mailbox number specified by the transmitting
machine is not programmed in your fax machine.
CHECK COVER OR DRUM
The operation panel is open or the drum cartridge
has not been installed. Close the cover or install
the drum cartridge.
DRUM LIFE OVER
The drum cartridge must be replaced.
FAX RCVD IN MEMORY
A fax has been received in memory because the
toner cartridge needs replacement, you have run
out of printing paper, or the paper is jammed. The
fax will automatically print out when the problem is
fixed.
FUNCTION MODE
The FUNCTION key has been pressed.
LINE ERROR
Transmission or reception was not successful.
Press STOP to clear the message and then try
again. If the error persists, see Line Error in
Problems and Solutions in this chapter.
MEMORY FULL ERROR
An internal memory error occurred. You may need
to resend one or more pages of the document
being transmitted when the error occurred.
MEMORY FULL ERROR
START=OK,STOP=CANCEL
The memory is full (this message appears when
Option Setting 23, Quick On-line, is set to NO).
Press the START key to send only the pages
already scanned, or the STOP key to cancel the
entire transmission.
168
all-FO4700.book
Page 169 Friday, October 8, 1999
11:10 AM
NO CONF. FUNC
Confidential transmission was cancelled because
the receiving machine does not have a
confidential function, a confidential passcode is
not programmed in it, its memory is full, or it is not
a Sharp model.
NO PAPER
This message will be followed by one of the paper
sources in parentheses, and informs you that the
paper source is out of paper. If no paper source is
indicated, both paper sources are out of paper.
NO RELAY FUNC
A relay request has been denied because the
other machine does not have a relay broadcast
function, its memory is full, or it is not a Sharp
machine.
ONHOOK DIAL MODE
The SPEAKER key has been pressed and the fax
machine is waiting for you to dial.
PAPER JAM
The printing paper is jammed. See the following
section, Clearing Paper Jams.
POWER SAVE MODE
Power Save Mode is on. See Power Save Mode in
Chapter 5.
RCVD CONF. FAX
A confidential fax has been received in memory.
Print the fax as explained in Confidential
Operations in Chapter 5.
RCVD PRINT HOLD FAX
The Print Hold function has been turned on and
you have received one or more faxes in memory.
Print out the faxes as explained in Print Hold in
Chapter 5.
RCVD RELAY REQUEST
Your fax machine has received a Relay Broadcast
request and is transmitting the requested
document to the end receiving machines. See
Relay Broadcast in Relay Request in Chapter 5.
169
9. Troubleshooting
Messages and Signals
all-FO4700.book
Page 170 Friday, October 8, 1999
11:10 AM
Messages and Signals
RELAY REFUSED
A relay request has been denied because your fax
number has not been entered in the relay
machine’s list of permitted numbers, an auto dial
number not programmed in the relay machine was
specified, or your fax number has not been
programmed in your machine.
REMOVE ORIGINAL(S)
The original document is jammed. See the
following section, Clearing Paper Jams.
SIZE ERROR
This message will be followed by one of the paper
sources in parentheses, and informs you that the
paper loaded in that source is not all the same
size.
REPLACE TONER
The toner cartridge must be replaced.
RX DOCUMENT TRAY OFF
The received document tray is not attached.
Attach it as explained in Connections in Chapter 1
(the tray must be attached for the fax machine to
operate properly.)
WAITING<MEMORY FULL>
The memory has become full and scanning has
stopped during scanning of a multi-page
document. Scanning will automatically resume
when sufficient memory becomes free (for
example, after several pages are transmitted).
Audible signals
Continuous tone
3 seconds
Indicates the end of transmission,
reception, or copying.
Intermittent tone
(3 beeps)
5 seconds
(1 second on, 1
second off)
Indicates incomplete transmission,
reception, or copying.
Rapid intermittent
tone
35 seconds
(0.7 seconds on,
0.3 seconds off)
Indicates that an extension phone
connected to the fax is off hook.
170
all-FO4700.book
Page 171 Friday, October 8, 1999
11:10 AM
Clearing Paper Jams
Clearing Paper Jams
If the original document doesn’t feed properly during transmission or
copying, or REMOVE ORIGINAL(S) appears in the display, first try
pressing the START key. If the document doesn’t feed out, open the
operation panel and remove it.
Important:
Do not try to remove a document without opening the operation panel.
This may damage the feeder mechanism.
1
Open the operation panel.
• Squeeze the release marked
PANEL RELEASE and pull up.
2
Remove the document.
3
Close the operation panel, making
sure it clicks into place.
171
9. Troubleshooting
Clearing a jammed document
all-FO4700.book
Page 172 Friday, October 8, 1999
11:10 AM
Clearing Paper Jams
Clearing jammed printing paper
If the printing paper jams, PAPER JAM will appear in the display.
Follow the steps below to clear the jam.
1
Press the green release and open the
print compartment cover.
• Caution!
The fusing unit inside the print
compartment becomes very hot
during operation. Be careful not to
touch the inside of the compartment.
2
If the jammed paper is visible in the
print compartment, pull it out.
• Make sure no torn pieces of paper
remain in the print compartment
and rollers.
or
172
all-FO4700.book
Page 173 Friday, October 8, 1999
11:10 AM
3
If the jammed paper isn’t visible,
remove the toner cartridge and then
the drum cartridge.
4
Open the black cover (hinged on the
left) at the bottom of the
compartment. If jammed paper is
visible, remove it.
5
Close the black cover. Reinsert the
drum cartridge and then the toner
cartridge.
9. Troubleshooting
Clearing Paper Jams
Blue
Green
• Insert the drum cartridge and toner
cartridge by aligning the colored
numbers on the cartridges with
their corresponding colored numbers on the sides of the print compartment.
Blue
Green
• When finished, close the print compartment cover.
173
all-FO4700.book
Page 174 Friday, October 8, 1999
11:10 AM
Clearing Paper Jams
6
If you have a paper cassette and the
display still indicates that paper is
jammed, open the cassette and
remove the jammed paper.
7
Replace the paper cassette.
174
all-FO4700.book
Page 175 Friday, October 8, 1999
11:10 AM
Index
A
Activity Report, 153
Auto Listing, 145
Alarm volume, 149
Anti Junk Fax, 141, 148
Anti Junk Number List, 160
Audible signals, 170
Auto Cover Sheet, 146
Auto reception mode, 66, 67
Auto-dial numbers, programming, 45
B
Batch page numbering, 64
Batch transmission, 116 - 118
Batch Transmission List, 158
Beep length, 150
Broadcasting, 72 - 74
C
Cancelling a fax, 58, 61
Cassette Selection, 147
Chain Dialling, 48, 58
Changeover key, 58
Computer, connecting to, 21
Confidential operations, 77 - 82
Confidential Reception List, 159
Contrast, 42
Contrast key, 42
Copies, making, 69
Copy Cut-off, 146
Copy resolution, 151
Copying Scanning, 146
Cover Sheet, 62
Auto Cover Sheet, 146
D
Date, setting, 34
Department Code Digits, 150
Department Control, 138 - 140
Department Usage List, 159
Dial mode, 149
Dialling
Chain, 48, 58
Direct Keypad, 55
Normal, 43
Rapid Key, 53
Speed, 54
Direct Keypad Dialling, 55
Distinctive Ring, 150
Document feeder, 40
Document guides, 40
Document key, 51
Document restrictions, 39
Document sizes, 38, 164
Document, maximum scanning area, 39
Drum cartridge
Installing and replacing, 23 - 27
Drum cartridge indicator, 27
Duplex Scanning, 134
E
Error Correction Mode (ECM), 146
F
Fax Ability (Distinctive Ring), 150
Fax Duet(Distinctive Ring), 150
Fine Resolution Priority, 144
G
Group Keys, 75
- 76
H
Halftone setting, 41
Heater mode, 148
Housing, cleaning, 162
175
all-FO4700.book
Page 176 Friday, October 8, 1999
11:10 AM
Index
I
Image Memory Print, 147
J
Jams, clearing, 171
- 174
L
Letters, entering, 32
Line error, 164
LINE IN USE light, 12
Loading the document, 40
M
Manual reception mode, 66, 67
Memory
Checking documents in, 60, 68
Sending faxes from, 51
Substitute reception to, 68
Memory retransmission, 59
Multi TTI, 149
N
Normal Dialling, 43
Number of rings in AUTO reception, 144
Number of rings in manual reception,
144
O
Optional Setting List, 157
P
Page Counter key, 64
Page numbering, batch, 64
Paper jams, clearing, 171 - 174
Paper, loading, 28
Passcode List, 157
Pauses in automatic dialling, 46
PC Interface Mode, 151
Polling, 91 - 98
176
Security Selection, 145
Power Save Mode, 99 - 104
Print Hold, 136 - 137, 151
Priority key, 51
Program and Group List, 158
Programs, 119 - 133
Q
Quick On-line, 149
R
Rapid Key Dialling, 53
Recall Interval, 145
Receive Reduce, 147
Reception mode
Auto, 66, 67
Manual, 66, 67
Setting, 66
Redial key, 44
Redialling, 44, 59
Relay Broadcast, 89
Relay Group List, 156
Relay Request, 83 - 88
Resolution, 41
Resolution key, 42
Retransmission interval, 148
Retransmission times, 148
Ringer volume, 37
S
Scanning glass, cleaning, 161
Search Dial, 56
Seperate Mode, 151
Speaker volume, 36
Speed Dialling, 54
STATUS CHECK light, 12
T
TEL. SET socket, 19
Telephone
all-FO4700.book
Page 177 Friday, October 8, 1999
11:10 AM
Index
Connecting, 19
Telephone line cord, 19
Telephone line status, checking, 58
Telephone Number List, 156
Time, setting, 34
Timer, 105
Timer List, 156
Toner cartridge
Installing and replacing, 23 - 27
Toner cartridge indicator, 27
Transaction Report, 160
Print Selection, 145
V
Verification Stamp, 22, 150
Replacing, 162
177
all-FO4700.book
178
Page 178 Friday, October 8, 1999
11:10 AM
all-FO4700.book
179
Page 179 Friday, October 8, 1999
11:10 AM
all-FO4700.book
180
Page 180 Friday, October 8, 1999
11:10 AM
Warranty.fm Page 27 Thursday, October 7, 1999
6:52 PM
WARRANTY
Facsimile Products
Congratulations on Your Purchase!
This Sharp product is warranted against manufacturing defects for a period of twelve (12) months from
the date of original purchase.
In the event of any defect arising in the equipment during the warranty period, such repairs should only
be carried out by the Dealer from which the unit was originally purchased or a Service Centre approved
by Sharp to service this type of equipment. These repairs would be carried out at no charge to the
owner, subject to the conditions specified herein.
The owner is responsible for any transportation and insurance costs if the product has to be returned
for repair.
This warranty does not extend to accessories or defects or injuries caused by or resulting from causes
not attributable to faulty parts or the manufacture of the product, including but not limited to, defect or
injury caused by or resulting from misuse, abuse, neglect, accidental damage, improper voltage, liquid
spillage, vermin infestation, software, use of consumables other than those approved by Sharp, or any
alterations made to the product which are not authorised by Sharp.
Please retain your sales documentation, as this should be produced to validate a warranty claim.
This warranty is in addition to and in no way limits, varies or excludes any express and implied rights
and remedies under any relevant legislation in the country of sale. However, to the extent permitted by
such legislation, Sharp excludes any liability for any indirect or consequential damages arising from the
purchase or use of the product.
To the extent permitted by law, Sharp excludes all implied warranties and conditions and where the
product is one that is not normally required for personal, domestic or household use, Sharp limits its
liability to the repair or replacement (at Sharp's option) of materials or workmanship which are found by
Sharp to be defective.
For your reference, please enter the particulars of your purchase below and retain, with your purchase
documentation.
Model No.
Serial No.
Date of Purchase
Place of Purchase
SPform046 (2Sept97)
FOR LOCATION ENQUIRIES WITHIN
FOR THE SERVICING OF PRODUCTS
AUSTRALIA
PURCHASED IN
REGARDING YOUR LOCAL
SHARP APPROVED SERVICE CENTRE
NEW ZEALAND
CALL THE
SHARP SERVICE REFERRAL CENTRE
FREECALL: 1 800 807 820
FACSIMILE: (02) 9672 1210
DURING NORMAL BUSINESS HOURS
SHARP CORPORATION OF AUSTRALIA PTY. LIMITED
A.C.N. 003 039 405
1 Huntingwood Drive, Huntingwood NSW 2148
CONTACT YOUR SELLING DEALER/RETAILER
OR FOR REFERRAL TO A
SERVICE CENTRE,
CALL SHARP CUSTOMER SERVICES
TELEPHONE: 09 634 2059
FACSIMILE: 09 636 6972
SHARP CORPORATION OF NEW ZEALAND LIMITED
Cnr Mahunga Drive & Hastie Avenue,
Mangere, AUCKLAND
Important Notice: This warranty applies only to products sold in Australia & New Zealand
back.fm
Page 27 Tuesday, October 12, 1999
9:00 AM
SHARP CORPORATION OF AUSTRALIA PTY.LTD.
A.C.N. 003 039 4051
Huntingwood Drive, Huntingwood, Blacktown, N.S.W., 2148
SHARP CORPORATION OF NEW ZEALAND LIMITED.
Cnr Mahunga Drive & Hastie Ave. Mangere Bridge, Auckland
New Zealand
SHARP CORPORATION
PRINTED IN THAILAND
(TINSE4067XHZZ)