1
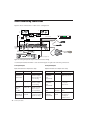
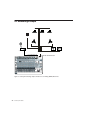
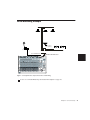
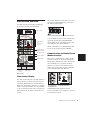
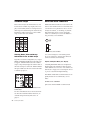
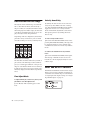
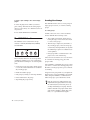
Preamp Connections
For manageability, route each preamp output to
its corresponding input number on a Pro Tools
audio interface.
For more flexibility, connect these preamps to a
patch bay instead of directly “hard-wiring”
preamp channels to Pro Tools audio interface
channels.
To connect an instrument-level signal:
1 Turn the level control all the way down
(counter-clockwise) as a safety precaution.
2 Connect your Instrument source to the unbalanced 1/4-inch input jack on the rear of Control|24 labeled DI 1 or DI 2.
3 Push the Source switch until the Instrument
LED lights.
4 Adjust the level control.
To connect Control|24 preamp output to
Pro Tools:
1 Connect a 25-pin D-Sub connector harness to
one of the two LINE OUT TO PRO TOOLS (either 1–8 or 9–16) connectors on the rear panel
of Control|24.
2 Connect the breakout cable for each preamp
channel to the corresponding input on your
Pro Tools audio interface, or to the appropriate
inputs on your patch bay.
To connect a line-level signal:
1 Turn the level control all the way down
(counter-clockwise) as a safety precaution.
2 Connect your line-level source to the bal-
anced 1/4-inch input jack on the rear of Control|24 that corresponds to your preamp
number (1–16).
DI inputs are only provided on preamp
channels 1 and 2.
Phantom power is switchable in banks of eight
microphone preamps. Turn off phantom power
before connecting or disconnecting any microphones, and consult manufacturer’s documentation for condenser microphones.
It is possible (although unlikely) that phantom power can damage certain kinds of ribbon or dynamic microphones, and should
always be used with care on any condenser
microphone that requires it.
To connect a microphone-level signal:
1 Turn the level control all the way down
(counter-clockwise) as a safety precaution.
2 Make sure phantom power is not on.
3 Press the Source switch until the Line LED
3 Connect your microphone or microphone-
lights.
level source to the balanced XLR input on the
rear of Control|24 that corresponds to your
preamp number (1–16).
4 Adjust the level control.
4 If using phantom powered microphones,
push the 48v POWER switch on the rear of Control|24 for the bank of preamps you are using
(either 1–8 or 9–16).
5 Push the Source switch until the MIC LED
lights.
6 Adjust the level control.
22
Control|24 Guide