1
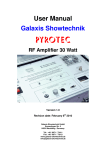
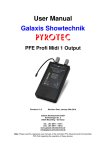
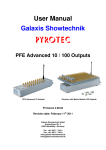
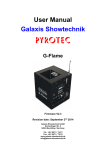
User Manual
Galaxis Showtechnik
PYROTEC
PFE Profi Audio
approved for flash memory cards with 64, 128, 256, 512 and 1024 MB
Firmware 2.71e
Revision date: February 5th 2014
Galaxis Showtechnik GmbH
Emmertinger Str. 2
D-84524 Neuötting
Telefon: +49 / 8671 / 73411
Telefax: +49 / 8671 / 73513
www.galaxis-showtechnik.de
[email protected]
-2-
Table of Contents:
Page
1. Illustration
2. Description of indicators and control elements
3. Information regarding the firmware version
4. Applications
5. Introduction and preliminary remarks
6. Saving music on the flash memory card
7. Installing and operating the "Project Maker"
8. Switching on the PFE Profi Audio, Operating time
9. Receiving mode
10. Menu
11. Display of radio interferences
12. Display of the results of the radio range test
13. Connecting the PFE Profi Audio to a PA system
14. Operation of a headphone
15. Operation of speakers
16. Using the delay function
17. Playing back the audio track
18. Radio commands "Pause" und "Resume Play"
19. The output of time code signals (SMPTE)
20. Teach-in of the system ID
21. Technical data / specifications
-3-
4
5
6
6
7
8
9
12
13
13
16
16
16
16
17
17
20
21
22
22
23
-4-
Front view, rear view, top view, showing display and control elements
2. Description of indicators and control elements
1
Magnetic sensor "Down"
By pointing to this area with the magnetic pen the
parameter in the display will be decreased or
changed. If you point on this field for a longer time
the parameter will decrease automatically.
2
LC-Display
Displays the current information.
3
Magnetic sensor "Up"
By pointing to this area with the magnetic pen the
parameter in the display will be increased or
changed. If you point on this field for a longer time
the parameter will decrease automatically.
4
Magnetic sensor "Mode"
By pointing to this area for some time, you will
enter the menu. If you point to this field for a
longer time, you will step through the different
menu items automatically. At the end you will
return to the receiving mode again.
5
"Ladebuchse"
Connect the charging unit here.
6
Eject button
Eject button for flash memory card.
7
Slot for Compact Flash Card The flash memory card is being inserted into this
slot. When inserting the card the electric contacts
of the card have to face towards the device and
the sticker on the card (sticker with information
about the memory size on the card) has to face
upwards.
8
"Headphone"
Connect a headphone here.
9
10
"Speaker L"
"Speaker R"
Speaker output for the direct use of a pair of
speakers. L = left channel, R = right channel
11
12
13
14
"Line L" RCA
"Line R" RCA
"Line L" XLR
"Line R" XLR
Line output;
L = left channel, R = right channel
Connect your amplifier here.
You can choose between RCA connectors and
XLR connectors. RCA connectors are typically
used for hi-fi applications whereas
XLR connectors are a commonly used for PA.
15
"Betrieb"
Power; Key switch to turn the device on or off.
16
Display "Akku leer / Laden"
Display for accumulator;
The display shines red if the accumulator is low
(30% or less).
The display shines green if the accumulator is
being charged.
17
"Antenne"
The antenna is connected here.
-5-
3. Information regarding the firmware version
The firmware of the PFE Profi Audio has been developed as follows:
Version 2.0d:
First version which was delivered to customers.
With version 2.6d:
Adjustments regarding the compatibility to the controllers.
With version 2.7d:
Adjustments regarding a new internal component. Required because
a component has been discontinued.
With version 2.71d:
- Implementation of the radio commands "Pause" and "Resume Play"
- The parameters volume and delay can only be changed while the device is playing back the audio
track if the test channel has been fired.
- In order to play back the music for a fireworks display you should always use the start channel.
Otherwise timing errors can occur when the pause function is used.
- New menu item: "Radio Channel". So far, it was possible to change the radio channel by switching
on the device while all three magnetic sensors, "Up", "Down" and "Mode", have been activated. This
function has been removed hereby. Instead a menu item has been inserted.
- The teach-in to the PFC Advanced has been improved. After sending the command "Transmit
System ID", now you have a time frame of two seconds to activate "Up". Until now the device ignored
the command "Transmit System ID" if the transmitted system ID was identical to the system ID in the
memory of the device. Now the device responds also to an identical system ID in order that the user
is not confused if the device does not respond to the command.
4. Applications
The PFE Profi Audio is the right choice to supply a stereo audio signal of supreme audio quality
(unpacked CD quality) to a music synchronized fireworks display.
The PFE Profi Audio does not use any data compression. When using most of the common data
compression techniques (e.g. MP3) acoustic quality losses are unavoidable and the poor quality is
obvious not only for professionals. Data compression techniques (e.g. MP3) usually reduce the
dynamic range and the surround sound of the music which is the main reason why it should not be
used by professionals in the entertainment industry. Furthermore MP3 decoder add a significant noise
figure to the audio signal.
It does not make any difference to you if your program for firing the fireworks is computer based (using
the Galaxis PYROTEC Composer) or you are using a conventional technique. At the beginning of your
fireworks display you simply start the PFE Profi Audio by a radio command.
The advantages are apparent:
- You do not have to worry any longer about starting the CD player and the transmitter exactly at the
same moment. Imprecise count downs to press the two buttons of the transmitter and the CD player
at the same time will not be necessary any more.
- The PFE Profi Audio is playing the music absolutely precise. Even expensive high-end CD players
are imprecise which can result in timing differences between the fireworks display and the music
being played. Differences of some seconds can possibly occur in only a few minutes of playing.
- The PFE Profi Audio is playing the music from a flash memory card. A flash memory card is
vibration-proof, dust-proof, scratch-proof, resistant to heat and cold and even moisture-proof. All
these factors mentioned above could lead to serious problems when using a conventional CD player
for your music synchronized fireworks displays.
-6-
- You may use as many PFE Profi Audio at the same time as you want and you can use them as a
source of a stereo audio signal at every place. Isolated applications are possible without restrictions.
E.g. music on ships with spectators aboard or loudspeakers on different attractions in a theme park
or on a fair ground. If you are using active loudspeakers no additional devices like mixers or
amplifiers are necessary.
- The integrated delay function enables you to adjust the audio signal precisely to the different
acoustic delays (as a result of the speed of sound) without having to use expensive and complex
delay line solutions.
- The adjustment of the delay parameter can be done dynamically – while the device is playing back
the audio track. This helps you to easily find the right setting and to optimize the music performance
within a single test run.
With firmware version 2.71e or later the delay parameter can only be adjusted while the device is
playing if the test channel has been fired.
- Compared to conventional delay lines the PFE Profi Audio can even work with negative delays.
By doing so the overall timing error caused by the speed of sound can be reduced by 50% and it is
even possible to deliver sound to a special group, like the jury of a fireworks festival, with no acoustic
delay at all.
- When using the PFE Profi Audio running long cables is not necessary any more. Short cables help
to maximize the sound quality because long cable runs can lead to a loss of qualtity. Note: The music
itself is not being transmitted by radio – only the start signal is transmitted via radio.
- To play more than two audio tracks at the same time it is possible to use more than one PFE Profi
Audio and starting them simultaneously. If necessary e.g. surround sound applications can easily be
achieved.
- Instead of music it is possible to deliver time code - like SMPTE - to other applications or systems in
order to synchronize these with the pyrotechnical performance.
5. Introduction and preliminary remarks
For a better understanding of this operation manual an explanation to some terms and proper
nouns will be given:
A "wave file" (*.WAV) is an audio file. It contains unpacked (uncompressed) audio information. There
is a number of different wave files and they vary in quality (mono/stereo, sampling rate, bits per
sample). For all products of Galaxis you should only use wave files with the following specifications:
Stereo (2 channels), sampling rate 44,100 Hz (44.1 kHz), 16 Bits per sample and per channel.
These parameters are the specifications for CD quality. Other wave files that are not complying with
this specification can not be used for this application or might cause various failures.
The "Galaxis Composer" is a software application which has been developed to create the script for
music synchronized fireworks displays on the computer.
A "GPF file" (*.GPF) is a file which has been generated by the "Galaxis Composer". The GPF file
contains audio data. GPF is the abbreviation for "Galaxis Project File". The PFE Profi Audio is
exclusively playing GPF files.
A "ZIP file" (*.ZIP) is a file which contains packed (i.e. compressed) data and is usually called an
®
"archive". The widely used software WinZip can be used to unpack (extract / unzip) this file.
In this operation manual the word "flash memory card" or "memory card" or "card" always refers to
®
CompactFlash cards of type 1. These flash memory cards are frequently being used for digital
photography and do have the best capacity/price ratio (price per MB memory) compared to other flash
memory cards.
-7-
Guideline: 1 minute of music requires approximately 10 MB of memory on the card.
®
Notes regarding the trade marks " ":
®
®
CF , CompactFlash are trademarks or registered trademarks in the USA and / or other countries of
TM
the CompactFlash Association. CompactFlash is a trademark of the SanDisk Corporation.
®
®
®
Microsoft , Windows , Explorer are trademarks or registered trademarks in the USA and / or other
®
countries of the Microsoft Corporation. PCMCIA is a trademark or registered trademark in the USA
®
and / or other countries of the PCMCIA Corporation. WinZip is a trademark or registered trademark in
the USA and / or other countries of WinZip Computing, Inc.
All product names and brand names that have not been mentioned above possibly are trademarks or
registered trademarks of the owners.
Notes regarding the software:
You can download the required software "Project Maker" free of charge from our website. You may
install and run this software on as many computers as you like. In addition you are allowed to pass on
this software to any third party, e.g. when you rent out or lend your equipment to someone.
6. Saving music on the flash memory card
Besides the flash memory card you will need a card drive. You can order the card drive at Galaxis
Showtechnik or buy it from a computer shop. Usually these devices are to be connected to the USB
port of your computer. There are also desktop computers with an internal flash card drive. In case you
®
use a notebook you can connect the flash memory cards to the PCMCIA -slot by using an adapter.
Note: If you are using the flash memory card for the first time it is sometimes necessary to format the
card first with FAT16. For any detailed information about formatting the flash memory card please read
the user manual of your operating system.
Install the card drive first. Follow the steps of the operation manual which should have been provided
by the manufacturer of your card drive.
On a CD which is customary in trade, music is being saved in a digital standard. This standard is
called "RAW format" and can be read by nearly every computer's disc drive.
On a PC music is usually being processed and saved as a wave file. Many CD burners provide a
software application that converts RAW files into wave files.
In case that you do not have such a software to convert RAW files into wave files you may use the
freeware program "CDex". You can download this software from the internet. When you download our
software "Galaxis Projekt Maker" (see below) you will also find the program "Cdex" in the ZIP archive.
Follow the instruction given by the software "Cdex". Note: In this context we would like to point out that
that Galaxis Showtechnik is not liable for any software application from a third party.
After you have saved a wave file of your choice on the hard disc of your computer, you can edit the
music using an appropriate software. A large numbers of software applications are being provided on
the internet to edit music files.
Finally you will have to convert the wave file to a GPF file because the audio receiver can only play
back files of this type. To do so download this software from our website and install it on your PC.
Detailed information regarding this is provided in the section "Installing and operating the Project
Maker".
You need one flash memory card (containing the correct GPF file) for every PFE Profi Audio that you
use.
-8-
Attention: Different flash memory cards often vary in speed in which they can provide data. During
our test period we discovered a few cards that were too slow for this application. Please check before
using the cards for your fireworks display if the cards are suitable for this application. You do not have
to worry about this problem if you are ordering your flash memory card at Galaxis Showtechnik. We
will provide you a flash memory card which is suitable for this application.
Please check prior to every use if the music file is being played back completely and failure-free from
the card because also your PC might have saved a defective file to your flash memory card.
7. Installing and operating the "Project Maker"
You need the Project Maker which is a relatively small program to convert wave files into GPF files.
The PFE Profi Audio only accepts GPF files.
To install the Project Maker please follow these instructions:
- Download the Project Maker from our homepage.
- Unpack the ZIP file.
- Close all other applications.
- Start the file setup.exe.
- The setup assistant will guide you through the installation.
Attention: Please do not change the location in which the different components are being installed.
Use the drives and directories suggested by the installation program.
-9-
After starting the Project Maker the following window appears:
To generate a GPF file please follow these instructions:
Mouse-click on button #1 (Wave-File). A pop-up window will open and you can select a wave file. The
selected File will only be read and remains totally unchanged. Please confirm your selection by
clicking on "Open File". The window then closes automatically.
Field #2 shows the access path (location where the file has been saved to) and the name of the file.
Field #8 shows the size of the chosen file.
If a sound card is installed on your PC press button #5 (Play) to do a short test run and to listen to the
wave file. Button #6 (Pause) is pause and #7 (Stop) stops the playback of the music.
Please choose the access path and the name for the GPF file which is to be created. To do so please
click on #3 (Project-File) and a pop-up window will immediately appear. Please select the location and
the name for the file and then click on "Save File". The window is closing now. Field #4 now shows the
chosen path and the file name. We recommend that you save the new GPF file to the hard drive of
your computer at first.
- 10 -
Please choose a name for your project and enter the name in the box #9 (Project Name). The project
name, not the file name, will later be shown in the display of the PFE Profi Audio. If no project name
has been chosen so far, "unknown" will be displayed. Mouse-click in the field to activate the cursor
and type in the desired project name.
Once you have are finished with your entries click on button #11 (Start) to start the calculation process
which converts your wave file into a new GPF file. While the calculation is in progress "Compiling
Project File" is being shown in field #10 and the mouse pointer changes into an hourglass. When the
conversion is finished "completed" is being displayed in field #10. The time which is needed to convert
the file depends on the size of the wave file and the computing power of your PC.
This process has to be carried out only once for every project – independent from the number of flash
memory cards that have to be written.
Right after the conversion of the wave file into a GPF file has been finished the new GPF file is ready
to be saved to the flash memory card.
To save the GPF file on flash memory card please click on button #12 (Project-File). A pop-up window
will open and you can select a GPF file. Please confirm your selection by clicking on "Open File" and
the pop-up window will close automatically. Field #13 shows the access path (location where the file
has been saved) and the name of the chosen GPF file. Additional information about the size of the file
is being shown in field #14.
Note: The size of a GPF file is always a bit larger than the size of the wave file from which the GPF file
has been generated. The difference is usually approx. 1.4 MB.
Now you have to choose the target drive for the writing process of the GPF file. In our case the target
®
®
drive is the CompactFlash read/write drive. Please make sure the CompactFlash read/write drive
has been installed correctly and is connected to your PC. Insert the memory card into the slot.
To show a summary of all drives which are installed on your PC please click on the triangular arrow on
®
button #15 (CF-Drive). Please choose the CompactFlash read/write drive in this selection.
Field #16 shows you the free disk space which is available on the memory card. It is normal that the
disk space which is available on the card is a bit less than the value which is written on the card.
If there are already files or folders stored on the data medium, they are being shown in field #18
(Content of drive). In order to delete all these files and folders on the flash memory card click on
button #19 (Clear Compact Flash Card). If you want to save the data content please back them up
before clearing the flash memory card! To make sure that no data which is important to you is lost
accidentally you once again have to confirm your intention to delete all data on the flash memory card.
Click on button #20 (Save Project File to CF Card) to copy the GPF file to the flash memory card. The
following error messages can occur:
- If a card with less then 64 MB or with more than 1024 MB memory capacity has been inserted the
program informs you that this flash memory card can not be used.
- In case that the flash memory card already contains files or folders the program informs you that the
card has to be deleted prior to the writing process. This is necessary because of technical reasons.
- If the memory capacity of the card is smaller than the capacity which is needed for the writing
process there will be an error message and the process is being cancelled.
As soon as the data is being copied to the flash memory card, "writing project file" is being displayed in
field #17. This process is in progress until "completed" is being displayed here. The duration of this
process depends on the computing capacity of your PC and on the speed of the interfaces.
When "completed" is being displayed you should wait approx. 15 seconds before you remove the card
to make sure that the card is no longer being accessed. If your card drive is equipped with an access
LED you wait until this indicator is no longer active and wait 15 seconds in addition before you remove
the card.
- 11 -
You can copy the GPF file to as many flash memory cards as you need one after the other. Simply
®
replace the flash memory card in the slot of the CompactFlash read/write drive and click on button
#20 (Save Project File to CF Card) again. Please make sure that you still have selected the
®
CompactFlash read/write drive as your target drive.
With the help of this program, a GPF file that has been saved to your computer's hard drive, can be
copied to your flash memory cards any time you like – again and again.
A mouse-click on button #21 (Info) will show you the contact information and the software version.
To close the Project Maker please click on button #22 (Close).
Attention: Only use the Project Maker to write GPF files to your flash memory card. If you try to copy
®
®
®
the GPF files to your flash memory card using other programs (e.g. Microsoft Windows Explorer )
some very important requests are not being made. Be aware that using other programs than the
Project Maker might possibly cause problems and flawless playback of the file is in question.
Note: If you want to copy a GPF file to your flash memory card without the converting process from a
wave file into a GPF file (i.e. in case that you have already converted the wave file into a GPF file
earlier and the GPF file is stored on your PC) simply start the Project Maker and select the file that you
want to copy by clicking on button #12 (Project File). That followed please follow the familiar steps to
copy the file to flash memory card.
8. Switching on the PFE Profi Audio, Operating time
Turn the key switch to switch on the PFE Profi Audio.
The following will be displayed in succession:
Start screen.
Product name and software version.
Only if there is a flash memory card with a valid GPF file inside the slot of the PFE Profi Audio, the
name of the project will now be shown on the display for a few seconds:
The name that you have chosen for your project will be shown in the bottom
line of the display (first twelve characters only).
After that the device will automatically enter the receiving mode and the standard display will appear.
The maximum operation time is depending on the hardware version. The following values can be
expected with the old hardware version: In receiving mode the operating time of the PFE Profi Audio is
limited to approx. 6 hours. When the audio track is played back the power consumption increases. If
the device is playing back permanently the operating time is reduced to approx. 3 hours. If
loudspeakers are used in addition the operating time is reduced even more – depending on the power
delivered to the loudspeakers. If the maximum output power of the PFE Profi Audio is being used the
operating time is reduced to a little less than one hour. With the new hardware version (older devices
can be upgraded anytime) the operation time is doubled: Approx. 12h in receiving mode, approx. 6h
when playing back and approx 2h with maximum speaker output power.
If the battery becomes discharged below 30% or less the LED "Akku leer / Laden" is illuminated in red
color. This is how all of our products indicate a low battery status. If the device is operating in the play
mode or in the menu mode, no battery warning is being showed. Deep discharges (i.e. total
discharges) that might possibly occur are being counted and the number of deep discharges is being
displayed the time you switch on the device.
- 12 -
9. Receiving mode
Depending on your prior choice in the menu (Up/Down =) either the setting "Delay" or the setting
"Volume" is being displayed here:
Delay:
With the magnetic sensors "Up" and "Down" on the front panel of the device
the delay (delay value) can be varied between -999 and +999 meters. The
chosen value will be stored in the memory of the PFE Profi Audio and will be
available again after the next start-up even if the device has been switched off.
or
Volume:
Using the magnetic sensors "Up" and "Down" on the front panel of the device
the volume of the headphone output or respectively the loudspeaker output
can be varied. Your setting for the volume will be stored in the memory of the
device and will be available again after the next start-up even if the device has
been switched off.
To show you that the device is in receiving mode the vertical bar in the upper right corner of the
display is moving back and forth.
"C:/" in the upper left corner of the display indicates that there is no card in the slot of the card drive or
that no valid GPF file has been found on the card.
If a valid GPF file has been detected on the flash memory card, "C:OK" is being displayed in the upper
left corner of the display. The music can only be started by radio command if "C:OK" is being
displayed.
If the device is in receiving mode, the project name is being displayed as soon as you insert a flash
memory card with a valid GPF file into the slot:
The name that you have chosen for your project will be shown in the lower line
of the display (first twelve characters only).
Once you remove the flash memory card again, the display will switch from "C:OK" to "C:\".
"STOP" in the lower left corner of the display indicates that the device is currently not playing back.
10. Menu
The descriptions below are based on the assumption that there is no memory card inside the drive of
the PFE Profi Audio and that the device is not being charged at the moment.
If you activate "Mode" with the magnetic pen you will enter the menu. With every activation of "Mode"
you will proceed to the next menu item.
The menu items accumulator capacity, accumulator power, radio channel (with version 2.71 or later)
interfering signal, the last result of the radio range test and loudspeaker on / off are being shown one
after another. You already know these menu items from the transmitter PFS Profi or the controller
PFC Advanced and the Advanced receivers. For further information regarding these menu items
please see the operation manuals of the other devices.
Note: The menu item "loudspeaker on / off" is only regarding to the beep signals that are used to
acoustically confirm the settings that you choose. Choose "off" to disable the beeps – the music output
is not affected in any way. Vice versa you will not hear the beep signals in the audio signal if you
choose loudspeaker "on".
- 13 -
Note: With version 2.71 the menu item "Radio Channel" is included in the menu. With older versions
this menu item was invoked by switching on the device while all three magnetic sensors "Up", "Down"
and "Mode" have been activated.
By activating "Mode" you will proceed to this menu item and you will see e.g. this setting being
displayed:
Here you will be able to change the delay time once you are in the receiving
mode. With "Up" and "Down" you can change the delay, which is the relative
time difference between the start time of the (e.g.) music fireworks and the
individual start time of this device. With version 2.71 the delay setting can only
be changed while the device is playing back the audio track if the test channel
has been fired.
"Up" or "Down" changes the parameter and you will see the following display:
Here you can change the setting for the volume with "Up" and "Down" of the
speaker output and for the headphone output as soon as you are in the
receiving mode. With version 2.71 the delay setting can only be changed while
the device is playing back the audio track if the test channel has been fired.
For further information regarding the functions mentioned above, please see the chapters "Receiving
mode", "Operation of a headphone", "Operation of speakers" and "Using the delay function".
Note: In the following text and on the display of the PFE Profi Audio "CH" is the abbreviation for
"Channel".
By activating mode you proceed to the next menu item:
Here you can choose with "Up" and "Down" if the programmed channels for the
start of the audio signal should be deleted or remain in the memory and if the
setting for the delay should be set back to 0 meters or remain in the memory.
In this case "Clear" has been chosen. If you confirm the choice with "Mode",
the values of the parameters will be deleted.
At the end of the menu you can program the start channel and the test channel.
If one of the two programmed channels is fired the PFE Profi Audio starts to play the music.
The difference between the start channel and the test channel described in detail:
Start channel: If the start channel is fired the audio receiver begins with playing back the audio track.
The device stops not before at the end of the audio file, even if you disarm the firing mode in the
meantime (emergency-off). It is not possible to change the values of the parameters delay and volume
while the device is playing back in order to respond to the radio command "Pause" without any timing
error. Always use the start channel and not the test channel if the device is used for a show. If you
want to stop the play mode you can fire the test channel afterwards and then disable the firing mode.
Test channel: The function is the same as it is with the start channel but the device stops playing back
the audio track as soon as you disarm the firing mode. This function is quite useful if you do a sound
check. After firing the test channel the values of the parameters delay and volume can be changed
while the device is playing back the audio track.
The ideal setting for the delay parameter can be found fast and easily by changing the delay value
while the device is playing back the audio track (dynamic adjustment). Due to the fact that the device
needs to continuously check the magnetic sensors it can happen that the command "Pause" is
executed with a certain time lag. This can lead to timing errors and due to that you should use the test
channel only for sound checks and not for the final show.
- 14 -
The following will be displayed for example:
No start channel has been programmed yet or the start channel has been
deleted with the function mentioned above (CH+Delay: Clear).
You can choose a channel with "Up" and "Down". Alternatively you can program the start channel via
radio transmission, using the radio range test function of the PFS Profi or the remote programming
function in the manual firing mode of the PFC Advanced.
Channel 1 has been assigned as start channel.
This is probably the most common setting.
An activation of mode "Mode" leads you to the next menu item with the parameter test channel.
E.g. the following will be shown in the display:
No test channel has been assigned yet or the previously programmed test
channel has been deleted with the function mentioned above (CH+Delay:
Clear).
Channel 999 has been assigned as test channel. Channel 999 is a good
choice for the test channel to start a sound check without firing a channel
which is also programmed for the firing of pyrotechnics.
With a final activation of "Mode" the device is saving all parameters and the changes you have made
become operative. Then the device is entering receiving mode.
Note: If there is a flash memory card with a valid project file inside the drive of the PFE Profi Audio the
name of the project is being displayed again as soon as you leave the menu.
While the device is being charged the menu items accumulator capacity and accumulator power are
not available. Instead of those you will see the following being displayed in the menu:
You can proceed in the menu by activating "Mode".
If a flash memory card with a valid GPF file has been detected in the drive of the PFE Profi Audio you
can choose to play the music at the beginning of the menu:
You can start to play back the file by activating "Up" or "Down". With "Mode"
you will enter the next menu item.
"Test run" has been activated. A counter in the upper left corner is counting the
time since the start of the audio file in minutes and seconds. The device will
enter the next menu item automatically at the end of the file or if you activate
"Mode".
You can control the play back of the audio file with "Up" and "Down":
You can switch to fast forward by activating "Up". When fast-forward is
switched on, the two arrows in the lower right corner are flashing.
"Down" switches pause on or off. This function has nothing to do with the radio
command "Pause". Here the pause function is stopping the play back of the
audio file while the device is in the menu item "Play File? (Test Run)"
As long as pause is active "PAUSE" is being displayed. During pause the
sensors "Mode" and "Up" are inactive and touching them with the magnetic
pen is without any effect.
- 15 -
11. Display of radio interferences
The PFE Profi Audio is monitoring the radio channel on which it is receiving regarding radio
interferences. If an increased radio interference level has been detected the following warning is being
displayed:
"RI" is flashing in the middle of the upper line of the display. At the same time
the backlight of the display is flashing. Please read the operating manual of the
standard receivers regarding possible causes for radio interference and how to
deal with it.
12. Display of the results of the radio range test
Similar to all the other types of receivers that we manufacture we recommend to do a radio range test
prior to every usage. Once you have started the radio range test you will see e.g. the following being
displayed:
For further information regarding the radio range test and about how to
improve radio range please read the concerning chapters in the operation
manual of the standard receivers. After the radio range test the project name is
being displayed again.
13. Connecting the PFE Profi Audio to a PA system
You should use the "Line" outputs to connect the PFE Profi Audio to a PA system. The signal level of
these output signals is according to the standard and can not be varied. The distortion factor is
extremely low on these outputs.
In the case that you need an output with an adjustable volume for the signal (e.g. if you use active
loudspeakers and the volume of the music can not be adjusted) you can use the output for the
headphone, too. Be aware that if you use the headphone output the maximum level of the signal is
much higher than the standard level. Please begin with the lowest volume setting and increase the
volume carefully until the desired level is reached. Also the distortion factor is higher on these outputs
compared to the line outputs.
Make sure that prior to switching the PFE Profi Audio on or off and prior to connecting or
disconnecting any plugs the volume of your amplifier has been turned to 0 to avoid that noise
becomes audible.
14. Operation of a headphone
Plug the headphone's plug into the headphone jack of the PFE Profi Audio. When you buy the PFE
Profi Audio an appropriate headphone is being included in the delivery.
You can adjust the volume for the headphone with "Up" and "Down" In the receiving mode provided
that you have chosen "Up / Down = Volume" prior in the menu. Otherwise the previously chosen
volume setting (setting from the last use) is active and can not be changed. While the device is playing
back the audio track the parameter volume can only be changed if the test channel has been fired.
You will find further information regarding this in the section "Menu, The difference between the start
channel and the test channel described in detail".
A bar displays the setting of the volume. To change the volume please point the magnetic pen to the
sensor areas "Up" or "Down" for a few moments. The volume is turned up or down automatically if the
- 16 -
magnetic pen remains on the sensor area longer until the maximum or minimum value is reached. You
will hear short beep for every step.
15. Operation of speakers
Loudspeakers can be connected directly to the loudspeaker outputs (2x 3.5 mm Mono jacks). The
minimum impedance for the speakers is 4 Ohm.
The volume of the loudspeaker outputs can be adjusted similarly to the headphone output.
As soon as a headphone is being connected to the headphone output the loudspeaker outputs are
being switched off automatically.
The output is 2 watt sinus per channel. This is enough for a reasonable audio performance for a small
audience (some persons standing next to the speakers). The direct connection of speakers to the PFE
Profi Audio has only been designed for the purpose of test runs and to monitor the performance during
the use of the device.
16. Using the delay function
The delay function is a valuable instrument to compensate acoustic delays. This is most important if
loudspeakers on different locations are used at the same time so that the audience can hear the
signals of two or more loudspeakers that are standing at different distances.
Acoustic signals travel at a speed of approximately 340 meters per second (i.e. acoustic velocity). This
can easily cause significant time lags. The objective is that an acoustic signal which is being sent out
from a number of loudspeakers on different locations reaches the audience at exactly the same time in
order to avoid unwanted echo effects.
The PFE Profi Audio enables you to adjust to the different acoustic delays very precisely (i.e. with a
precision of 1 meter). The output controller is calculating the delay for every moment and is
consequently playing back the music earlier or later – depending on the calculated time difference.
To adjust the delay please choose "Up/Down = Delay" in the menu. Otherwise the delay value can not
be changed and the lastly used value is present (setting from the last time the device was used).
- 17 -
If we assume that you are planning a music synchronized fireworks display the following arrangement
could be ideal for you:
If you are using the delay function you always have to program the distance from the PFE Profi Audio
to the zero line in meters. If you enter e.g. "+340m" the device will start to play the music one second
later. If you enter e.g. "-680m" the music starts to play two seconds earlier.
If the delay function of the PFE Profi Audio is used there is no need for conventional delay lines in the
signal path of the PA system at all in many cases. With the conventional solution only positive delays
can be realized. With the PFE Profi Audio also negative delays can be programmed and by doing so
the absolute timing error, which is caused by the acoustic velocity, can be reduced by 50%. When it
comes to music synchronized shows which are choreographed very precisely it makes a big difference
if the spectators in the first and in the last row watch the display with a timing error of 1.0 or only 0.5
seconds.
To synchronize the fireworks display as well as possible to your music locate the theoretical zero line
in the area with the largest number of spectators. For a fireworks competition it is making sense to
locate the theoretical zero line where the jury will be. It absolutely making sense to use positive and
negative delays when you operate the PFE Profi Audio. This enables you to significantly reduce the
maximum delay to the zero line (e.g. use -300m and +300m instead of +0m and +600m).
- 18 -
For the example shown above the following setting would be perfect:
Loudspeaker #1 left and loudspeaker #1 right: -150m
Loudspeaker #2 left and loudspeaker #2 right: +150m.
We recommend that you should always do a sound check in order to test if all the settings work
perfectly fine in your application before firing the show.
Note: You can change the delay parameter while the device is playing, too (with version 2.71 only if
the test channel has been fired). This way you can determine the perfect setting simply by listening to
the music. As soon as you release "Up" or "Down" the new setting becomes valid.
If you change the delay setting significantly (steps of more than 10 or even 100 meters) you will hear a
short jump in the music as soon as you remove the pen.
Attention: If you do not want to use the delay function always make sure that a delay of "+000m" is
programmed in order to avoid any unwanted acoustic delays. The fact that no delay is being shown in
the display does not necessarily mean that no acoustic delay is programmed. The programmed delay
value is only being displayed if you have selected "Up/Down = Delay" in the menu!
In addition the delay function can be used to eliminate the time lag caused by acoustic delays in
general.
In the next example the acoustic source (i.e. the speakers) is located on a river bank and the audience
is standing at the opposite side:
In this example a delay of "-200m" should be used.
- 19 -
Depending on the delay that you have programmed the device begins to play back the music at
different points in time. If the delay that you have chosen is positive (e.g. +120m) the device starts to
play with a relatively longer or shorter lasting pause and as a result of that the music starts to play a bit
later. During the pause the level of the acoustic signal is zero and for that purpose a short pause has
been added by the Project Maker when the project file has been created. If you enter a negative delay
(e.g. -140m) the device has to begin to play earlier. This means that the device has to start more or
less in the middle of the audio track.
To make sure that the music is not being cut off if you use negative delays, we recommend that you
put a pause of three seconds at the beginning of your wave file. You can use a large number of
different software applications for this kind of modification. Obviously the wave file that includes the
short pause has to be also the basis for your firing script. In general it might be a good idea to include
a short pause of e.g. 10 seconds at the beginning of every wave file. This short pause enables you to
stop the performance at the beginning of the project if unexpected problems occur - and no one will
notice.
One of the most outstanding features of the PFE Profi Audio is its ability to use already existing PAs
and speaker systems of any kind for your music fireworks. At nearly every imaginable event with
already existing loudspeakers (e.g. at fun fairs, fairground rides, roller coasters, etc.) music fireworks
can easily be arranged without having to set up additional loudspeakers. Simply hand out a PFE Profi
Audio to every person who runs a fair ride with a reasonable speaker system. Comparable to a CD
player the PFE Profi Audio can easily be connected to the mixer of the relevant audio systems.
Possible echoes can be compensated by doing a sound check and using the delay function. Shortly
before the show the staff of the fairground rides only has to select the PFE Profi as audio source on
their mixing desk.
17. Playing back the audio track
If you switch the transmitter to firing mode and if the PFE Profi Audio has previously detected a valid
GPF file on the flash memory card the display illumination of the PFE Profi Audio is being switched on
and the following message is displayed for example:
The symbol "<!>" in the upper right corner of the display should inform staff
members, if present, that the playing back of the audio track will be started
soon. As long as you remain in the firing mode and as long as the test channel
or start channel has not been fired the device remains in this condition.
In this condition possible activations of the sensors by the magnetic pen are automatically being
ignored. In case that you disarm the firing mode without having started the music the device switches
off the display illumination again and the signs of the receiving mode will appear in the upper right
corner of the display.
Once you fire the channel that you have selected earlier in the menu to be the start channel or the test
channel, the device starts to play the music, provided that a valid GPF file has been detected on the
flash memory card in the slot.
- 20 -
Next the following message is being displayed for example:
The GPF file has been recognized. The device has started to play. In the upper
right corner of the display there is a counter that counts the minutes and
seconds that have already been played back. A delay of "+150m" has been
set. This is the equivalent to the time an acoustic signal takes to travel 150m.
The device stops to play at the end of the music or if the device is being switched off.
If you switch off the firing mode on the transmitter the music only stops if you have fired the test
channel before.
Note: In the case that start channel and test channel are identical the music stops if you switch off the
firing mode on the transmitter.
Note: If you want to stop the music via radio transmission even after the start channel has been fired
simply fire the test channel and then disarm the firing mode.
18. Radio commands "Pause" und "Resume Play"
This function requires firmware version 2.71 or later in the Audio receiver and firmware version 2.7c or
later in the controller PFC Advanced.
The intended usage of these radio commands is to pause with playing back the music and with firing
the cues during a music synchronized fireworks display in order to wait some time until the smoke has
vanished.
Attention! If you want use this function it is very important that you have started the playing
mode with the start channel and not with the test channel. Otherwise timing errors can occur if
this function is utilized.
You will find the "Pause" function in the automatic firing mode of the PFC.
First we assume that the device is playing back the file because the start
channel has been fired. You will see for example this being displayed.
The user has pressed the "Pause" button once and the button has been
released again. By doing so the controller has sent the radio command
"Pause" and the PFE Profi Audio has received this. The device stopped the
play mode immediately until the command "Resume Play" is received.
The pause condition has been released at the controller by pressing the
"Pause" button again. The command "Resume Play" has been sent by the
controller and the PFE Profi Audio received this. The device continues to play
back the file. The automatic firing mode of the PFC and the audio receiver are
still synchronous.
The pause function can be used again and again one after another. The timing error will be extremely
small if the PFE Profi Audio has been started with the start channel and not with the test channel (the
error is less than 1.6 ms after 20x Pause / Resume Play).
Note: Pay attention that you press the pause button again if you want to resume and not the
fire button! With the fire button you will fire the next cue and you will lose synchrony between
the PFC and the PFE Profi Audio.
- 21 -
19. The output of time code signals (SMPTE)
You can also use the PFE Profi Audio to provide time code signals for other applications or systems.
It is possible to play the music on one of the two stereo channels and the time code signal on the other
as well.
If you are using the Galaxis Composer software the provided operation manual explains which
settings are necessary to make sure that the audio tracks are being processed correctly when an AVE
file is being created. This is absolutely necessary to ensure that the audio information is being
displayed on the screen as a meaningful curve. In this context this manual will also explain why the
Composer needs to create an AVE file.
If you want to play back time code we strongly recommend to generate the necessary wave file with
the Composer. The user manual of the controller PFC Advanced describes in detail what has to be
minded when time code should be utilized.
20. Teach-in of the system ID
A teach-in of the device can be done with every PFC Advanced. The teach-in is for example
necessary if you lend or rent out the PFE Profi to another user or if you want to split your existing firing
system into several systems in order to perform several shows on locations which are not far away
from each other.
Follow these steps to teach-in the device:
- Switch on your controller PFC Advanced and if necessary choose the desired system code in the
menu item "System ID Management" which is ranging from 1 to 5. Every system has been
programmed to a customer specific system ID which can be differentiated into five sub system codes.
So system code 1 of customer A is not the same as system code 1 of customer B.
- Leave this menu item and invoke the menu item "Transmit System ID".
- Switch on the PFE Profi Audio and wait until the device reaches the receiving mode.
- Press the touch button "Transmit System ID" on the screen of the PFC.
- Activate "Up" on the PFE Profi Audio within two seconds after sending the teach-in command.
- If the PFE Profi Audio has received the command it will do a reset and start again.
- Now you should do a test if the PFE Profi Audio responds to the commands of the PFC with the
system ID which has been selected before e.g. by starting the play function remotely or by
performing a range test.
- 22 -
21. Technical data / specifications
Radio transmission method
Transfer method
Temperature range
Humidity
Dimensions
Net weight
Power supply
Battery charger
Operating time
Range
Included in delivery
Data medium
Sampling rate
Audio channels
Bits per channel and sample
Number of digital-analogue
converters
Timing deviation in percent
Timing deviation as an absolute
value
Frequency response at the line
output
Noise at the line output
Distortion at the line output at full
modulation
Impedance of the line output
Maximum power per loudspeaker
output
Distortion at the loudspeaker
output (@1 kHz, @1 Watt)
Allowable impedance of the
headphone
Allowable impedance of the
loudspeakers
FM narrow band, wavelength 70 cm, 32 different frequencies,
receiver type: double-superheterodyne
PCM, approximately 2,000 bps
-20 to +70°C;
Best storage temperature for maximum battery lifetime:
+10 to +20°C
10 to 90% rH (no condensation)
103-74-210 mm
1.400 kg
12V, 2 Ah, sealed lead acid type rechargeable battery
PYROTEC Battery charger, for specifications see standard
devices
Old hardware version:
Receive mode only: 6 h,
PLAY (no use of the speakers): 3 h,
PLAY (including the use of the speakers): depending on the
volume 1 - 3 h
New hardware version or after hardware upgrade:
Receive mode only: 12 h,
PLAY (no use of the speakers): 6 h,
PLAY (including the use of the speakers): depending on the
volume 2 - 6 h
With standard antenna: 200 m,
With Superscan 71: 800 m
1 Standard antenna
2 Keys
1 PYROTEC Battery Charger
1 Stereo headphone (3.5 mm stereo jack)
1 Operation manual "PFE Profi Audio"
®
CompactFlash memory card type 1,
Minimum memory capacity: 64 MB,
Maximum memory capacity: 1024 MB
(approval of operation for larger memory capacities will follow)
44,100 Hz
2 (stereo or mono + time code)
16
2 (due to that no increased noise level occurs compared to
systems with only a single digital-analogue converter; single
digital-analogue converter systems cause unwanted noise
when switching between channels 44,100 times per second)
maximum +/- 0.003 %
maximum 0.11 seconds per 60 minute play
20 – 20,000 Hz +/- 0.5 dB
12 µV
0.008 %
10 kOhm
2 Watt RMS
0.22 %
>= 25 Ohm
>= 4 Ohm
- 23 -
Todo:
- kein ":" nach Headline OK
- Anführungsstriche anpassen, alle doppelt und gerade OK
- Nummerierung durchgehen OK
- Bezüge? Siehe rot markierter Text
- Rechtschreibung, unterlinierter Text OK
- ganzer Text Schwarz OK
- Inhaltsverzeichnis neu erstellen OK
- Formatieren, wie bei PFE Adv. OK
Umbrüche: OK
Headlines mit 14F: OK
Hinweis/Achtung 10F, Rest 10, keine Schraffur: OK
- Seiteneinteilung vornehmen OK
- Seitenzahlen im Inhaltsverzeichnis eintragen
- PDF erstellen
- Dateien auf den Server kopieren
- 24 -