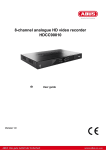
1
L.I.F.E. PROFESSIONAL Release 8 Harmonic Energetic Technologies LLC User Manual Presents TM The L.I.F.E. System Living Information Forms Energy Copyright 2001 – 2013 Table of Contents Topic Page # Welcome, Mission Statement, About Program & Quick Start…………….. 1-A, B, C, D Login, Password & Navigation Panel…………………………………….. 2-A Demographics Profile……………………………………………………… 3-A, B Lifestyle & Calibration Panel.…………………………………………….. 4-A, B History Profile…………………………………………………………….. 5-A Reactivity Test Panel ……………….…………………………………….. 6-A, B, C Wellness Information Panel………………………………………………. 7-A, B Auto Program & Susceptibility Index………………………..…………… 8-A, B Spinal & Dermatome Profile.…………………………………………....... 9-A, B Color, Aura & Chakra Profile……………………………………………... 10-A, B Neuro-Emotional Profile …………………………………………………. 11-A, B Meridian Profile…………………………………….……………………… 12-A, B Rife-like Auto Assess & Feedback……………………………………....... 13-A, B Chromosome, Gene & Cell-Com.…………………………………………. 14-A, B Organ-Specific Sarcodes..………………………………………………… 15-A Muscles, Cartilage & Ligaments … ………………………………………16-A, B Circulatory & Heart Profile ……………………………………………… 17-A, B Respiratory Profile ………………………………………………………. 18-A, B Digestive Profile …………………………………………………………. 19-A, B Nerve Profile …………………………………………………………….. 20-A, B Bone Profile ……………………………………………………………… 21-A, B Lymph Profile …………………………………………………………… 22-A, B Ear & Eye Profile ………………………………………………………... 23-A, B Sinus, Throat & Mouth Profile ………………………………………… 24-A, B Sport Profile/Injury & Trauma …………………………………………… 25-A, B Dental Profile ……………………………………………………………. 26-A, B, C Allergy Profile …………………………………………………………… 27-A, B, C Homeopathic Profile …………………………………………………….. 28-A, B, C Nutritional Profile ……………………………………………………….. 29-A, B Emotional Transformation & Timeline Profile …………………………. 30-A, B Hormone Profile …………………………………………………………. 31-A, B Brain Profile ……………………………………………………………… 32-A, B, C Cosmetic Profile …………………………………………………………. 33-A, B Detox & Multiple Stress Profile ………………………………………… 34-A, B Miasms & Anti-Aging Profile …………………………………………… 35-A, B Pets/Animals Profile …………………………………………………….. 36-A, B Timed, Bio-Specific Profiles ……………………………………………. 37-A, B Dimensional Transformation/Past Life Portal ………………………….. 38-A, B Iridology Profile ………………………………………………………… 39-A, B Bio-Feedback Profile ……………………………………………………. 40-A, B System Specifications …………………………………………………… 41-A, B This manual is a copyrighted publication of Harmonic Energetic Technologies, LLC Copyright 2001-2013 Welcome & Mission Statement The Mission of Harmonic Energetic Technologies is to produce the finest biofeedback, relaxation management instrument possible. Every component of the L.I.F.E. System has been compiled with the greatest degree of competency and integrity. Professionals and others interested in the exciting world of biofeedback and relaxation management may use the system as a bridge to aiding the body’s own relaxation mechanisms. Harmonic Energetic Technologies is dedicated to providing technical assistance, Internet web support and professional training. Please Note: Questions, comments, suggestions and corrections are always welcome. Visit our web-site at: www.lifesysteminternational.com About This Program The L.I.F.E. System software is protected by copyright and may not be duplicated, or copied, in any form, without written permission from Harmonic Energetic Technologies, LLC. Each licensee may load the software into three different computers, obtaining a separate activation code for each computer. 1-A The L.I.F.E. System is a biofeedback, relaxation management instrument, using both light and sound (in the form of musical tones). No information should be construed as a medical claim or representation that this product is intended for use in the diagnosis, cure, mitigation, treatment, and prevention of disease or any other medical condition. A biofeedback, relaxation and stress management device records subtle, “reactive,” informational potentials provided by the client during the assessment procedure. The computer evaluates such responses, then challenges the body with that information by feeding it back to the client. This process assists the body’s own relaxation and stress management mechanisms by encouraging a sense of wellness, balance and harmony. The interface box and harness are not intended for use on clients with pacemakers or other electrical devices. Disconnecting the interface box and utilizing the “Metaspace” mode may facilitate those clients with such special needs. For proper functioning of the software, the interface box will need to be plugged into the computer from time to time. When it's needed, you will prompted by the software. Limb Harness Placement The 4 limb harness bands may be applied to ANY wrist or ankle. Each band contains a single L.E.D. (light emitting diode). The L.E.D. for the wrist should face inward at the center of interior portion of the wrist. Ankle band L.E.D.’s may be placed at any desirable position. Head Harness Placement Cable & Box Connections Attach the USB interface cable, the 9-pin head harness cable and the 9-pin limb harness cable to the back of the L.I.F.E. System box. Attach the other end of the USB interface cable to the back of your computer, ONLY AFTER THE SOFTWARE HAS BEEN INSTALLED, OR YOU ARE INSTRUCTED TO DO SO DURING THE SOFTWARE INSTALLATION PROCESS. 1-B Wrap snugly around head, with the 8 conductive vinyl strips and 4 L.E.D.’s (light emitting diodes) in contact with the forehead. The red light emitting diode should be placed on the LEFT side of the forehead. Secure at the back of the head with Velcro enclosure. Quick-Start Summary Please Note: The L.I.F.E. System software is a copyrighted program that is owned by Harmonic Energetic Technologies LLC and is licensed to the initial user under the terms and conditions specified in the Warranty, Sale and Software Installation Agreements. Resale to another party may incur a re-licensing fee, at the discretion of the software manufacturer. Prior to utilizing the system for the first time you must obtain a one-time activation code from your distributor or customer service representative, listed in the back of this manual. When using a laptop computer, it is suggested that you leave it plugged into the wall while using the L.I.F.E. System. The battery only feature of laptop computers prolongs the time it takes to process information during certain functions. A typical combined assessment and feedback procedure should last approximately 1 hour, dependent upon: 1: the client interview, 2: type of information provided by the client, 3: the Reactivity assessment, and 4: subsequent feedback procedures. The following typical protocol is suggested: Step 1: Open the program and click Continue upon opening the initial panel. This will bring you to the Navigation page. Next, type your password into the Login field. Then click To Demographics on the Navigation panel. Click New Client then Enter Name, Address, Phone number etc. and any other appropriate information you may wish to enter about your client. Click Save All before leaving. Step 2: Proceed to the Lifestyle Profile, and enter the client’s numerical responses, based upon each of the 20 questions posed. Do not enter percentages or letters, only numbers. Step 3: Proceed to the History Profile by recording, checking and entering information into all appropriate fields. Now return to Lifestyle Profile. Step 4: Attach the head harness and the wrist & ankle straps to the client. Then click Calibration. Upon completion, proceed to step 5. Step 5: Click To Reactivity Test to initiate activation of the assessment process. This test is used to evaluate responses relevant to possible indications of stress and muscle tension. Click the “Test Potential” button to begin the process. Following an approximate 4 to 7 minute test, the most significant results and indications for relaxation feedback will be displayed in descending numerical order from top to bottom. A bar graph is also used to graphically display a significant response. These results may then be used as a guide for considering subsequent feedback procedures. A response of 75% or greater (on the graph), or 1500+ (in the numerical, “Significance” column), is considered appropriate for applying a feedback procedure. You may then select any item in the matrix by clicking and highlighting it then clicking either the 5 Second Auto or Feedback–30 Seconds button. An additional option would be to set the timer for the desired feedback duration, from 1 to 30 minutes, then select either the Harness or Metaspace option. 1-C Step 6: When you have completed all desired functions, proceed to the Wellness Info panel. Click on the red Wellness Info button, and select the Susceptibility option to assess possible additional stress responses pertaining to more generalized organs and systems. Click Test Potential button to start test. Evaluate the three suggestions highlighted in red, yellow or blue and apply feedback if desired. Then, return to the Wellness Info page. Step 7: Based upon the information provided by all of the previous factors, the practitioner will go to Wellness Info to choose and apply the specific feedback procedures as indicated. Typical feedback procedures range from one to three minutes, or more, dependent upon individual assessment needs. Step 8: Upon completion of feedback, results may be assessed through a brief, final interview with the client, to determine his/her sense of wellness and relaxation/stress reduction levels. Subsequent visits may be determined and scheduled in accord with the client’s personal and/or projected sense of well-being, as well as the practitioner’s observation. 1-D Login, Password & Navigation Upon entering the Password, Login & Navigation page you will need to enter the password you were assigned when you purchased the L.I.F.E. System (typically the number 1) into the “Password” field. It is not necessary to change the “Name” field. It is recommended that you leave the words “LifeSystem” in that field. If you choose to make changes to either the Password or Name fields please Harmonic Energetic Technologies technical support for instructions. Technical support will guide you through the process of using the “Change Password” and “Hint” buttons. The “Test Harness” button allows you the option of testing the functionality of your harness system. Make sure that both the Head and the Limb harnesses are properly affixed to the back of the L.I.F.E. System interface box. Click the “Test Harness” button and the four lights on the Head harness, and the four lights on the Limb harness will illuminate and blink. In addition, four of the red lights on the right side of the L.I.F.E. System box will illuminate and blink. The other four lights will not blink at this time. Following the entry of you password, you will need to proceed to the “Demographics” page by clicking the navigation button on the bar at the top of the screen. Please Note: You MUST proceed to the Navigation screen and enter a client prior to any Testing or Feedback procedures. The Reactivity Test, Lifestyle and History and Exit buttons may be used as needed. 2-A Demographics The Demographics screen contains all the appropriate and pertinent information pertaining to your client. Click the New Client button at the top left of the screen. To ensure proper functioning of the device enter the last name, first name, gender of the person or pet, home address, city, state, zip/postal code, date, telephone number, country, birth date and birthplace. All other fields including the e-mail address, work or company name, title, work address, work phone and country are desirable, but NOT ESSENTIAL. To delete a client, simply highlight the name in the client list, then click the Rem. Client button on the left, and SAVE ALL. To delete a visit for a particular client, highlight a date in the Previous Visits list and click Remove Visit. NOTE: you must click Save All at the left of the screen following any entry. If you wish to add a visit for an existing client, highlight the client’s name in the client list, then click the Follow-up Visit button. A current date will be added to that client’s record. Inserting a Personal Affirmation and a picture of your client IS HIGHLY RECOMMENDED. The personal affirmation may be typed into the box under Client Affirmation. It will automatically be stored with the rest of the information you enter into this panel upon clicking the Save button. The affirmation may be changed on subsequent visits. If the client supplies you with a picture it must be stored in the 3-A Patient Pictures file of the program and may be imported from a digital camera (recommended), CD, flash card or other image source. It is recommended that the practitioner purchase an inexpensive Digital camera, which can be utilized with a laptop or desktop computer for this purpose. It is not recommended that you use images transferred via the Internet as they may contain viruses. BE CERTAIN ABOUT THE INTEGRITY OF THE SOURCE PICTURE. Click on the Save All button after entering the necessary demographic information. This will preserve and store the entries you have made. If you make ANY changes to the demographic data during subsequent sessions, be sure to save them before leaving. The Restore Data button allows you to store and retrieve all your patient files in a backup folder in the event of a computer failure. The Print Visit button allows you to select a date in the Previous Visits box and print the Main Reactivity Test that was stored for that visit. If you are returning to the Demographic panel in order to select a previous client and you ARE NOT making any demographic changes or other entries, click and highlight the client’s name in the alphabetical client list, then click the Follow-up Visit button, which will enable a new date and history index for an existing client. Next, proceed to the Lifestyle Profile panel. Summary of Features: Enter demographic data for a new client Insert a personal affirmation and a picture of your client Save pertinent data for each new client Click the Follow-up Visit button for a returning client Print Main Reactivity Tests from here if appropriate Go to “Lifestyle Profile” page 3-B Lifestyle & Calibration Profile If you have already completed the Demographic screen, you will notice the name of your client appears in a field at the upper left corner of the Lifestyle Profile. Interview the client, using the questions supplied, and enter an appropriate number in each of the boxes. Do not enter zeros, letters or % signs in any of the fields, just numerals. Make sure that the “Save” button is clicked following completion. Questions posed in this panel are generic and do not represent a medical profile. The information is gathered in order to help the client and the practitioner understand what processes inhibit the client’s overall well-being or lifestyle. Information should be reviewed with the client on subsequent visits to ascertain whether that individual is striving to make changes that will influence his/her state of relaxation/wellness. Information from this profile will be saved to a dated file that is linked to the Previous Visits box above. Clicking on a date in the Previous Visits box displays data for the selected visit. At this time, place the head and limb harnesses into position on your client, unless you are using the Metaspace function. WARNING: YOU MUST USE THE METASPACE FUNCTION FOR CLIENTS WITH PACEMAKERS. DO NOT USE THE HARNESS SYSTEM. 4-A You may now proceed with the Quad-mode Entrainment Calibration process. Make sure that you have attached the head and limb harnesses, then click the red Start Calibration button. Calibration attunes the individual by creating a link between the individual and the L.I.F.E. System. Calibration is an automated procedure that usually takes less than a minute to complete. Prior to leaving the Lifestyle Panel, do not forget to click the Save button to store the information from this page into the Client’s Previous Visits history shown above. At this time you may return to the Demographic Profile, only if you forgot to add something to that screen. Make your changes, be sure to click save, and then return again to the Lifestyle Profile. It is RECOMMENDED that you proceed to the optional panel called the History Profile, particularly for first time clients. The History Profile provides a further and more in-depth view of what the client may be experiencing. Although you may go directly to the Wellness Info (that is the red button found on the Reactivity page) to begin working with your client, it is HIGHLY RECOMMENDED that you proceed, next, to the Reactivity Test panel prior to using the Wellness Info. Summary of Features: Interview client and place a number from 1 to 10 in each box Complete Calibration Option: Return to “Demographic Profile,” only if necessary, to make any changes Option: Go to “History Profile” (this is the next recommended step) Click “Save” to store information in Client’s Previous Visits history. Go directly to the “Reactivity Test” panel 4-B History Profile The History Profile contains six panels. Each panel displays generic information that may or may not pertain to your client. Check the appropriate boxes and/or enter text where indicated. Click the Save button prior to closing and all information will automatically be stored within the Demographic Profile history for future reference. When you have finished, click the Lifestyle Profile button at the lower right portion of the screen and you will be returned to that panel. Summary of Features: Check any appropriate boxes in “History Profile” Check any appropriate boxes in “Toxic Exposures” Check any appropriate boxes in “Major Diseases” Check any appropriate boxes in “Medications” Describe any appropriate boxes in “Types of Stress” List any “Inherited Disorders” Click the “Save” button prior to closing, to store information in Demographics Click “Lifestyle Profile” button to return to that panel. Proceed to Reactivity Test. 5-A Reactivity Test Profile The Reactivity Test Profile is considered one of the most important aspects of the L.I.F.E. System and contains a multiplicity of functions. The primary function is to obtain an informational biofeedback stress response. Ask the client to relax and remain quiet and still while reactivity test is being performed. Start by clicking the orange Test Potential button to initiate the automated reactivity process. The test will take between four and seven minutes to complete, during which time, the client’s response to thousands of substances will be assessed. Click Save upon completion to store the test. To view a previously stored test, just click on a date in the Previous Visits box and then click the brown Restore button. Each item in the matrix will produce a graphic, referred to as a “Fractal Image.” The fractal represents the energetic signature of that substance in graphic form. Fractals are powerful representations of the energetic pattern. The information provided, in the form of numerical percentages, bar graphs and subsequent descriptors, provides clues to those areas which produced a stress response and may require relaxation management. Since Biofeedback or Stress Management technicians DO NOT use this instrument to diagnose, treat or prescribe for disease, the information should be evaluated carefully and does not in any way represent the presence of any mental or physical illness. The reactivity response ONLY takes into consideration the possibility of susceptibility, weakness, exposure, or pre-disposition to a certain stress factor or wellness inhibitor 6-A associated with the indicated item. PLEASE REMEMBER: only duly qualified and licensed health care practitioners may make assumptions relative to specific disorders or medical conditions. Following the reactivity test, you have several options. You may highlight any item in the test matrix and click the button entitled 5 Second Auto or click the button entitled Feedback-30 Seconds. You may also set the timer, for a more lengthy feedback process. To obtain more precise information regarding a single entry, highlight any item in the matrix and click the button called Check Single Item. A numerical percentage will appear in the box next to the button. A response above 75% may be considered significant, as it is desirable to have a response potential of 75% or below for this specific test. At the top right of the screen are 39 (or more) color-coded category buttons. Each of these buttons represents a specific group test of items. Click any one of these “Category” buttons to review the items within that category and the related reactivity value that was generated during the test process. You may use either the button entitled 5 Second Auto or Feedback-30 Seconds. to provide feedback to any category item. Please Note: Clicking the ALL button, located at the lower right corner of the category tabs group, will return the screen to the main test matrix. If you wish to create a PERSONAL item matrix for future assessment and feedback purposes, you may do so by typing the name of the desired item into the Item Name field, then placing the desired item onto the test tray, located on the top of the interface box, then clicking the Import button. The item will automatically be imported into your PERSONAL database, assigned an energetic signature, and included in the PERSONAL matrix. You may also Export, Sort or Clear any of the items entered. These items will be stored as a part of your PERSONAL matrix. They will not be included in the main matrix. You may run a test on your PERSONAL items by clicking the red TEST button. Notice the timer at the top right portion of the screen. You will find this feature on every panel throughout the L.I.F.E. System. The default setting on the timer is always 3minutes. You may use the scroll feature to select any amount of time, up to 30 minutes. Located on the timer graphic you will find two red buttons, which allow for switching from Harness to Metaspace mode. If you select “0” on the timer while in Metaspace mode, you will override the timing mechanism and the system will continue to run until you click the Stop Feedback button. This feature is available throughout the entire program. As you continue through the program, you will notice that each screen has a Stop Feedback feature. Please Note: Any time the Metaspace mode is selected on the timer, throughout the entire program, the lights will NOT be activated on the box. The % Rectified field on the timer displays the approximate energetic response of the client, relative to the feedback process. A score of 85% or above is satisfactory. One final feature is the highly useful Search function. Type the name of any item or condition into the field provided, click the search button, and all the items in the matrix containing information regarding your item, will appear in the window. Scroll these items to evaluate and make any selection you wish. Apply feedback if applicable. Click the Clear button before making another entry. 6-B Reminder: You may interrupt feedback at any time by clicking the Stop Feedback button. You may also return to the main Wellness Info at any time by clicking the Wellness Info button. Summary of Features: Click Test Potential and wait for test to be completed. Click Save-Yes, when complete to store the test To view a previously stored test click on date in Previous Visits, then Restore Select an item and Click “Apply Feedback 5 sec” or “Apply Feedback 3 min” Option: Click any category button at the top right, make a selection from the matrix and apply feedback for 5 sec., 30 sec., or set timer, if appropriate. Add items to Personal Matrix by typing in “Enter Item Name”, then “Start Import” Notice ability to switch from Harness to Metaspace on timer Notice ability to change timing for feedback Notice “Stop Feedback” Use “% Rectification field” to determine effect of feedback, using 85% or above as satisfactory Click the “Save” button prior to closing to store test Clicking the “All” button returns to the main test matrix after using category tabs Click “Wellness Info.” 6-C Wellness Info & Function Panel DO NOT USE THE HARNESS AND THE INTERFACE BOX ON CLIENTS WITH PACEMAKERS OR OTHER MEDICAL IMPLANT DEVICES OR COMPONENTS. The Wellness Info page provides a user-friendly index and access to all programs and settings within the L.I.F.E. System. To activate the system for the first time, you will need to obtain an activation code Harmonic Energetic Technologies support staff, prior to proceeding. Following this, your password must be entered into the Navigation page. If you are loading the program on more than one computer, you will need an activation code for each computer. This procedure will need to be implemented only once for each computer. Each licensee will be limited to software installation on three computers. Function settings such as EMR Protection, or viewing and editing Affirmations may be modified from this panel. While you may change the EMR setting, it is strongly recommended that you use the default setting, which allows for fulltime EMR protection. The Wellness Info page contains an access button to the Affirmations/Prayer file Access. This file contains universal, non-denominational affirmations written by Harmonic Energetic Technologies staff. These affirmations remain active during the entire course of 7-A program activity. You may edit, add to, or remove any prayers in the folder by simply clicking on the red View/Edit Prayers button. Both the system default affirmations and your own additions may run at the same time. There are no hidden or subliminal messages in the default Affirmations/Prayer program. In order to view client information, you must click on the Demographics button located on the bar at the top of the Wellness Info screen. Please Note: In order to enter a NEW client you must first close the program and proceed to the Demographics page. YOU WILL RETURN TO THE “WELLNESS INFO” PANEL EACH TIME YOU MAKE A NEW PROGRAM SELECTION. When you choose to leave an active program panel, click the “WELLNESS INFO” button on that screen and you will return to this window, enabling you to make another selection. Should you choose to leave the entire program and return to the Windows Desktop, click the Exit button. YOU MUST EXIT AND REOPEN THE PROGRAM EACH TIME YOU WORK WITH A NEW OR EXISTING CLIENT. Summary of Features: Add, delete or edit “Prayers/Affirmations” Turn on/off “EMR protection” Go to “Lifestyle Profile” Go to “Demographics” 7-B Auto Programs Index & Susceptibility Index The Susceptibility Index & Auto Programs Index panel provides two functions. First, click the Test Potential button on the bar at the top of the screen. This activates a reactivity process pertinent to the thirty-two items listed in the susceptibility index. The three highest values will appear color coded to indicate the greatest degree of response and the highest probability of energy field imbalance. Red is the highest value, then yellow, and finally blue. The resulting scores allow for a more focused, stress response and subsequent feedback possibilities. While FEEDBACK PROCEDURES CANNOT BE APPLIED FROM THIS PANEL, it helps to point the operator in the right direction. Secondly, there are a number of Auto-Focus Programs that may be accessed from this panel by clicking on any of the small buttons provided along the left side of the screen. Auto-focus programs include: Cell-Com, Rife-like, Meridian, Spinal, NEP, Chakra/Color programs. Instructions for each of these programs are found in this manual immediately following this page. You may choose to go to any of the auto-focus programs or return to the Wellness Info panel to choose other possibilities. 8-A Summary of Features: Click “Test potential” to guide program decisions Select any “Auto Program” that may be appropriate Option: Return to the “Wellness Info” 8-B Spinal & Dermatome Profile This panel provides insight into the energetic integrity of the spine. Select the Test Potential button to begin the reactivity process. Three colored markers will appear next to the vertebrae denoting the client’s highest responses, with red as highest, then yellow and finally blue. Click the Auto Feedback button to begin the automated feedback procedure to the highest or red item ONLY. To initiate the feedback process to the top three items, set the timer to the desired length, click either the red Metaspace or Harness button to start, and the program will automatically divide the time allotted and apply feedback to each of the three items in succession. Continue with feedback until rectification reaches 85% or more. (The number of repetitions will vary with each individual). Feedback may be applied to any individual vertebra by clicking on that vertebra, setting the time or using the three-minute default, and selecting either the Metaspace or Harness mode to start feedback. Again, desired rectification is 85% or more. Clicking Stop Feedback will interrupt feedback process. You may access the Neural-emotional Program (N.E.P.) from this panel by clicking that button at the lower right of the panel. After clicking the Test Potential button in the NEP Profile, you may return to the Spinal Profile in order to view the influence the client’s emotions have upon the spine. To open and view the dermatome panel, click the red 9-A button next to Dermatomes. This will open a panel showing specific areas of the skin that provide sensory input via spinal nerves or the 5th Cranial Nerve. To apply feedback to any of these Dermatomes, set the timer, click the colored button representing that area of choice, then select either the red Harness or Metaspace button to activate the process. By clicking on either the red Anatomical or Bio-Specific button at the top left of the page, a list or table of items will appear. You may select and highlight any one of these items and apply feedback by utilizing the timer in the standard manner. The item selected will have information provided in the Description field, offering a further understanding of the client’s energetic profile. When all balancing is complete, return to the Spinal panel or the Wellness Info. Summary of Features: Click “Test Potential” to gain a reactivity reading of the spine Select “Auto Feedback” Begin balancing of single items by setting timer Continue until rectification reaches 85% or more Option: Select a “Dermatome” for balancing, set timer and apply feedback Option: Use “Stop Feedback” at any time Option: Go to “Link to N.E.P.” Option: Discover a primary “Anatomical” concern and select feedback Option: Discover a primary “Bio-Specific” concern and select feedback Option: Click on “2 Min Special” for visualization stimulation on healthy organ. 9-B Color, Chakra & Aura Profile As indicated by the title, there are three main functions performed from this panel. To use the Color Profile as a feedback modality, click the Test Color button located on bar at the top of the screen. Upon completion, the program will display, in the Color Profile box, the color most likely to have a profound feedback influence on the client. To give that color’s feedback signature to the client, select the appropriate options on the timer, located at the lower left side of the page. You have the option to change the time or switch to Harness or Metaspace. Default settings are for 3 minutes. The % Rectified window should be 85 or above. As a technician, you may drape the client in that color for the session, or recommend that the client wear that color for a period of time between appointments. To run the Chakra Profile, click the Test Chakra button located on the bar at the top of the screen. Upon completion, the program will display three, color values in the circular graphics surrounding the central charka graphic. The top three values will be identified in red, yellow and blue respectively. To initiate the feedback process to the top three items, set the timer to the desired length, click either the red Metaspace or Harness button to start, and the program will automatically divide the time allotted and apply feedback to each of the three items in succession. 10-A As with the color program, you may change the length of time and mode of delivery. If you wish to balance just one Chakra click on the white rectangular button within the specific charka, and adjust the timer as needed. The % Rectified window should be 85 or above for either method of balancing. To start the Aura Profile simply click Test Aura button at the left of the screen. The test results will be displayed in approximately 1-1/2 minutes. To evaluate the meaning of the rendered colors and their position within the graphic, please read the brief descriptions provided by clicking the Aura Color Info button. For more in depth evaluation please read one of the many books that have been written on the subject of Aura interpretation. For each of the programs, you may interrupt feedback at any time by clicking the Stop Feedback button. Return to the main program screen when finished, by clicking the Wellness Info button. Summary of Features: Select one of the following: For Color balancing Click “Test Color” button Review color presented in the Color Profile box To start color balancing, make appropriate selections on timer o Option: Change the default timer of 3 minutes o Option: Change mode of delivery For Chakra balancing Click “Test Chakra” button Review red, yellow & blue reactivity indicators of the charkas in circles around the central charka image To start charka balancing of three top chakras, make selections on timer For any program you may use the “Stop Feedback” button Return to the “Wellness Info” screen when completed o Option: Balance a single charka by first clicking the rectangular button, then making appropriate selections on timer For Aura balancing Click “Test Aura” button Review the “Aura Color Info” for interpretation Click “Wellness Info” button when finished 10-B Neuro-Emotional Profile (N.E.P.) This panel provided a sub-conscious link to a number of core emotional issues. To begin the evaluation process, click the Test Potential button. Upon completion, color values of red, yellow and blue will be displayed next to the three most reactive items. To initiate the feedback process to the top three items, set the timer to the desired length, click either the red Metaspace or Harness button to start, and the program will automatically divide the time allotted and apply feedback to each of the three items in succession. Otherwise the program will utilize the default time of 3 minutes. If you wish to apply feedback to any specific item, select that item by clicking on it, adjusting the timer to the desired settings and then clicking either Metaspace or Harness. You may use the question fields at the top right of the screen to ascertain the client’s involvement regarding certain issues. Clicking the Link To Spinal button will transfers you back to the Spinal Profile panel. The Spinal panel also provides a transfer button back to the N.E.P. Profile panel. Utilizing the Spinal panel at this time may help to determine where emotional issues are stored in the body. Simply click the Test Potential button in the Spinal panel, provide direction toward a possible solution then set the timer to the desired setting and click on either “Harness” or “Metaspace.” Please remember that setting the timer to “0” and 11-A choosing “Metaspace”, the program will run indefinitely until you select Stop Feedback. This feature exists in all panels. To use the Unconscious Self-Evaluation Hint, click the red Test button provided at the upper left of the window. A hint, relative to the client’s sub-conscious choice appears in the window, providing direction toward a possible solution. You may apply feedback for this issue by setting the timer in the standard manner. When finished, simply return to the Wellness Info for subsequent choices. Summary of Features: Click “Test Potential” Evaluate the top three findings Continue until rectification is 75% or above Option: Use the questions in the upper right section to assist in understanding the emotions you may wish to balance Option: Click “Link To Spinal” to determine where the emotion may be blocking the flow of energy in the spine Set the timer or use the 3 minute default Select either the “Metaspace” or Harness” mode o Option: You may Stop Feedback at any time o Option: Click the red button in the window under the “unconscious SelfEvaluation Hint” for finding information that may lead to a possible solution. When finished, Click on “Wellness Info” 11-B Meridian Profile This panel provides insight into the energetic integrity of the body’s meridian system. Click the Test System button at the top center of the panel. The program will assess the relative stress potentials of the 14 basic meridian pathways. The three most reactive items will be indicated by color values, with red as highest, then yellow, and finally blue. To initiate the feedback process to the top three items, set the timer to the desired length, click either the red Metaspace or Harness button to start, and the program will automatically divide the time allotted and apply feedback to each of the three items in succession. Selecting the Auto Feedback button near the top center of the panel will activate an auto feedback process pertaining to the highest or red item ONLY. Click any one of the six buttons next in the Quadrant Feedback panel to generate a feedback response for the selected quadrant. Set the timer for the desired duration and click either Metaspace or Harness. (Note that you may stop feedback at any time by clicking on the Stop Feedback button at the bottom left). Select Reset following the use of the Quadrant Feedback feature. You may select any individual meridian group for feedback , other than the ones chosen by the computer, by clicking on the button next to the desired item. You may then set the timer in the standard manner to proceed with feedback. A third option exists within the framework of this panel. An oval window, located at the 12-A bottom right of the screen contains all of the known Chinese acupuncture points. You may click on the Test Points button to initiate a reactivity process relative to all the individual points in the table. Upon completion of the assessment process, three color values will be displayed denoting those items demonstrating the highest reactivity values. To initiate the feedback process to the top three items, set the timer to the desired length and the program will automatically divide the time allotted and apply feedback to each of the three items in succession. Set the timer then click either the Metaspace or Harness button to begin the feedback process. In addition you may choose to apply feedback to any single point you wish, by clicking and highlighting the item, and then applying feedback by selecting the timer and pressing either “Metaspace” or “Harness.” You will also notice that a detailed description of each point appears in the text window just below the graphic of Acu-Man. Return to the Wellness Info to select another Auto Program or make another program selection. Summary of Features: Click Test System to check integrity of the meridian system Select Auto Feedback to begin the energetic balancing Option: Select one of six quadrants for feedback. Select Reset upon completion o Select time o Option: Switch between Metaspace and Harness o Option: Stop Feedback any time desired Option: Select individual Chinese acupuncture point for feedback or choose Test Points, set timer and apply feedback o Highlight desired acupuncture point o Select time o Option: Switch between Metaspace and Harness o Option: Stop feedback any time desired Return to Wellness Info 12-B Auto Assess & Feedback This panel provides auto assessment and feedback for twenty major organs. Click on the Test Potential button to begin the energetic evaluation process. The three organs demonstrating the highest reactivity values will be highlighted in red, yellow and blue respectively. Click the Auto Feedback button and the energetic resolution process is enacted. A % Complete bar graph at the top right of the page will let you know the progress of completion. A %Rectified score of 85% or greater is deemed sufficient in order to bring harmonic balance. The auto feedback process may be repeated ONLY ONCE. If the rectified score does not exceed 85% or greater, or if it drops upon repeating, you must wait until the next visit to initiate the process again. When completed return to the Wellness Info Summary of Features: Click “Test Potential” Click “Auto Feedback” Option: Use “Stop Feedback” at any time 13-A Chromosome, Gene & Cell-Com Profile This panel combines a number of features including Chromosome and Gene feedback, as well as the use of Automated Cell-Com like programs. For Chromosome feedback, select All Chromosomes then click the Auto Feedback-3min button to initiate a 3-Minute feedback process on any single item you select. Or, select any Chromosome by scrolling through the table, highlighting an item in the list, setting the timer, then clicking on either the Metaspace or the Harness button. For Gene feedback, select All Genes then click the Auto Feedback-3min button to initiate a 3-Minute feedback process on any single item you select. Or, select any Gene by scrolling through the table, highlighting an item in the list, setting the timer, then clicking on either the Metaspace or the Harness button. By clicking the red Start Feedback button on the circular Auto Cell-Com, Feedback Panel the program will begin a reactivity process, which will suggest three feedback processes. Upon completion of the assessment process, three color values will be displayed denoting those items demonstrating the highest reactivity values. To initiate the feedback process to the top three items, set the timer to the desired length, click either the red Metaspace or Harness button to start, and the program will automatically divide the time allotted and apply feedback to each of the three items in succession. Click either the Metaspace or Harness button to begin the feedback process. 14-A Upon clicking the 3 Min. Auto Feedback button the program will automatically administer a feedback process to the item highlighted in the list. Or you may scroll through the table to make an individual selection of your choice. Simply highlight the chosen item, set the timer to the desired length and choose either Metaspace or Harness to deliver feedback. As with all programs, you may use the Stop Feedback button at any time. When finished, click the Wellness Info button. Summary of Features: Balance one or all chromosomes using “Auto Feedback” or setting timer Balance one or all genes using “Auto Feedback” or setting timer To use “Tri-Vector Cell-Com” feature, click “Auto Select & Feedback” button o Option: Change the default timer o Make an individual selection in any of the three tables o Option: Switch between “Metaspace” and “Harness” 14-B Organ Specific Sarcodes This panel provides feedback options for 43 different organs. They have been prepared using the Homeopathic signature of each organ represented in the matrix. Click the button next to the organ or function you wish to address in either of the blue, green, red or purple panels. You may select and balance ONLY ONE ORGAN AT A TIME. However, you may check as many Add Additional Feedback items as you wish. They are located in the blue box at the bottom center of the panel. To begin the feedback process, select the desired time or use the 3-minute default. The timer may be set to a maximum of 30 minutes in the Harness mode. While in the Metaspace mode the timer may be set to either a prescribed time or “0” for an unlimited duration. Click the Stop Feedback button to discontinue feedback. Return to the Wellness Info for another choice. Summary of Features: Click on the desired organ Click on the “Add Additional Feedback” Set time or leave at the 3 minute default Check either Metaspace or Harness mode 15-A Muscles, Cartilage & Ligaments The functions associated with this page are similar to nine other panels that include the Circulatory, Respiratory, Digestive, Sinuses, Nerves, Lymph, Ears & Eyes, Dental and Bone Profiles. Each panel contains two feedback procedures with the Exception of the Circulatory & Heart Profile and the Muscles, Cartilage & Ligaments Profile. Two features are located in the rectangular panel at the middle of the screen. The left portion of the panel contains four of the most commonly occurring Bio-Specific conditions associated with Muscles, Cartilage & Ligaments. Click on one or all of the items under Select Bio Specific items. The right portion of the rectangular panel contains items that Add Emphasis to the feedback and balancing process. You may check one or all four items for emphasis. To begin balancing, select the appropriate time, or use the 3Minute default, and then click on either the Metaspace or Harness button to start. You may stop feedback at anytime by clicking the Stop Feedback button. In the lower left corner of the Muscles, Cartilage & Ligaments Profile is an rectangular graphic that contains a scrollable list of Bio-Specific and Anatomical items. Click the red Bio-Specific Stress button to find an expanded list of items that are specific to the Muscles, Cartilage & Ligaments Profile. Click the red Anatomical button to switch to an 16-A expanded list of anatomical parts associated with the Muscles, Cartilage & Ligaments Profile. You may apply feedback to any item you select, in either of the lists, by highlighting the item desired, setting the timer to the desired length (unless you use the 3minute default setting) then clicking either the red Metaspace or Harness button to enable the feedback process. Upon choosing any item in the Bio-Specific Stress or Anatomical List, an educational description of that item appears in the text box directly above. At the lower right of this panel, you see an additional feature called Select Quadrant. By selecting a specific quadrant, you will include the combined anatomical components relative to that particular area of the body. To apply feedback, click the button next to the chosen quadrant, set desired time and start by clicking Metaspace or Harness. You may stop feedback at any time by clicking the Stop Feedback button. In addition to features mentioned, you will see that eight transfer buttons are located in the upper central portion of the screen. Clicking a Transfer button enables quick access to a different panel without the necessity of returning the Wellness Info. Summary of Features: Click “Select Bio-specific” items in the rectangular box Click “Add Emphasis” items in the rectangular box To begin feedback, select time (or use the 3 minute default) and click “Metaspace” or “Harness” to start the feedback For an expanded view of functions go the rectangular image at the lower left o Click “Bio Specific Stress” or “Anatomical” o Highlight a single item and read about it in the dialog box above o To begin feedback with single items, select time (or use the 3 minute default) and click “Metaspace” or “Harness” to start the feedback Go to the lower right to a feature called “Select Quadrant” o Select desired quadrant o To begin feedback, select time (or use the 3 minute default) and click “Metaspace” or “Harness” to start the feedback Option: Stop feedback at any time by clicking “Stop Feedback” Option: Use transfer buttons to go to other programs in this grouping Option: Click on “2 Min Special” for visualization stimulation on healthy organ. Option: Return to the “Wellness Info” 16-B Circulatory & Heart Profile The functions associated with this page are similar to nine other panels that include Muscles, Cartilage & Ligaments, Respiratory, Digestive, Sinuses, Nerves, Lymph, Ears & Eyes, Dental and Bone Profiles. Each panel contains two feedback procedures with the Exception of the Circulatory & Heart Profile and the Muscles, Cartilage & Ligaments Profile. Two features are located in the rectangular panel at the middle right of the screen. The left portion of the panel contains four of the most commonly occurring Bio-Specific items associated with Circulatory & Heart Profile. Click on one or all of the items under Select Bio Specific items. The right portion of the rectangular panel contains items that Add Emphasis to the balancing and feedback process. You may select one or all items for emphasis. To initiate feedback, select the time or use the 3-Minute default, and click on either the Metaspace or Harness button to start. At the lower left of the Circulatory & Heart Profile panel is a rectangular graphic that contains a scrollable list of Bio-Specific and Anatomical items. Click the red BioSpecific Stress button to find an expanded list of conditions that are specific to the Circulatory & Heart Profile. Click the red Anatomical button to switch to an expanded list of anatomical parts associated with the Circulatory & Heart Profile. You may apply feedback to any item you select, in either of the lists by highlighting the item desired, 17-A setting the timer to the desired length (unless you use the 3-minute default setting) then clicking either the red Metaspace or Harness button to enable the feedback process. Upon choosing any item in the Bio-Specific Stress or anatomical List, an educational description of that item appears in the text box directly above. In the upper right of this panel, you see an additional feature called Valves & Conduction. Click the red Test Potential button to initiate a reactivity test that will provide a status assessment, showing the top three items highlighted in red , yellow and blue. To initiate the feedback process to the top three items, set the timer to the desired length and the program will automatically divide the time allotted and apply feedback to each of the three items in succession. Or you may choose to apply feedback to a single item by highlighting the chosen valve, set the timer (or use the 3-minute default), and clicking on Metaspace or Harness to start the procedure. You may stop feedback at anytime by clicking the Stop Feedback button. In addition to features mentioned, you will see that eight transfer buttons are located in the upper central portion of the screen. Clicking a Transfer button enables quick access to a different panel without the necessity of returning to the Wellness Info. Summary of Features: Click “Select Bio-specific” items from the rectangular box Click “Add Emphasis” items from the rectangular box To begin feedback, select time (or use the 3 minute default) and click “Metaspace” or “Harness” to start the feedback For an expanded view of functions go to the image at the left o Click “Bio Specific Stress” or “Anatomical” o Highlight a single item and read about it in the dialog box to the right o To begin feedback with single items, select time (or use the 3 minute default) and click “Metaspace” or “Harness” to start the feedback Stop feedback at any time by clicking “Stop Feedback” Go to the box at middle left of screen and click on Valves & conduction. Click on Test Potential to obtain a reactivity assessment o To begin feedback with single items, select time (or use the 3 minute default) and click “Metaspace” or “Harness” to start the feedback Option: Use transfer buttons to go to other programs in this grouping Option: Click on “2 Min Special” for visualization stimulation on healthy organ. Option: Return to the “Wellness Info” 17-B Respiratory Profile The functions associated with this page are similar to nine other panels that include Muscles, Cartilage & Ligaments, Digestive, Circulatory, Sinuses, Nerves, Lymph, Ears & Eyes, Dental and Bone Profiles. Each panel contains two feedback procedures with the Exception of the Circulatory & Heart Profile and the Muscles, Cartilage & Ligaments Profile. Two features are located in the rectangular panel at the middle right of the screen. The left portion of the panel contains four of the most commonly occurring Bio-Specific conditions associated with the Respiratory Profile. Click on one or all of the items under Select Bio Specific items. The right portion of the rectangular panel contains items that Add Emphasis to the balancing and feedback process. You may select one or all items for emphasis. To begin balancing, select the time or use the 3-minute default, and click on either the Metaspace or Harness button to start. You may stop feedback at anytime by clicking the Stop Feedback button. 18-A In the lower left corner of the Respiratory Profile is a graphic that contains a scrollable list of Bio-Specific and Anatomical items. Click the Bio-Specific Stress button to find an expanded list of conditions that are specific to the Respiratory Profile. Click the Anatomical button to switch to an expanded list of anatomical parts associated with the Respiratory Profile. You may apply feedback to any item you select, in either of the lists by highlighting the item desired, setting the timer to the desired length (unless you use the 3-minute default setting) then clicking either the red Metaspace or Harness button to enable the feedback process. Upon choosing any item in the Bio-Specific Stress or Anatomical list, an educational description of that item appears in the text box directly above. In addition to features mentioned, you will see that eight transfer buttons are located in the upper left central portion of the screen. Clicking a Transfer button enables quick access to a different panel without the necessity of returning the Wellness Info. Summary of Features: Click “Select Bio-specific” items from the rectangular box Click “Add Emphasis” items from the rectangular box To begin feedback, select time (or use the 3 minute default) and click “Metaspace” or “Harness” to start the feedback For an expanded view of functions go the image in the lower left o Click “Bio Specific Stress” or “Anatomical” o Highlight a single item and read about it in the dialog box above o To begin feedback with single items, select time (or use the 3 minute default) and click “Metaspace” or “Harness” to start the feedback Option: Stop feedback at any time by clicking “Stop Feedback” Option: Use transfer buttons to go to other programs in this grouping Option: Click on “2 Min Special” for visualization stimulation on healthy organ. Option: Return to the “Wellness Info” 18-B Digestive Profile The functions associated with this page are similar to nine other panels that include Muscles, Cartilage & Ligaments, Circulatory, Respiratory, Sinuses, Nerves, Lymph, Ears & Eyes, Dental and Bone Profiles. Each panel contains two feedback procedures with the Exception of the Circulatory & Heart Profile and the Muscles, Cartilage & Ligaments Profile. Two features are located in the rectangular panel at the middle right of the screen. The left portion of the panel contains four of the most commonly occurring Bio-Specific conditions associated with the Digestive Profile. Click on one or all of the items under Select Bio Specific items. The right portion of the rectangular panel contains items that Add Emphasis to the balancing and feedback process. You may select one or all items for emphasis. To begin feedback, select the time or use the 3-minute default, and click on either the Metaspace or Harness button to start. You may stop feedback at anytime by clicking the Stop Feedback button. 19-A In the lower right corner of the Digestive Profile is a graphic that contains a scrollable list of Bio-Specific and Anatomical items. Click the red Bio-Specific Stress button to find an expanded list of conditions that are specific to the Digestive Profile. Click the Anatomical button to switch to an expanded list of anatomical parts associated with the Digestive Profile. You may apply feedback to any item you select, in either of the lists by highlighting the item desired, setting the timer to the desired length (unless you use the 3minute default setting) then clicking either the red Metaspace or Harness button to enable the feedback process. Upon choosing any item in the Bio-Specific Stress or Anatomical list, an educational description of that item appears in the text box directly above. In addition to features mentioned, you will see that eight transfer buttons are located in the upper central portion of the screen. Clicking a Transfer button enables quick access to a different panel without the necessity of returning the Wellness Info. Summary of Features: Click “Select Bio-specific” items from the rectangular box Click “Add Emphasis” items from the rectangular box To begin feedback, select time (or use the 3 minute default) and click “Metaspace” or “Harness” to start the feedback For an expanded view of functions go the oval image in the lower left o Click “Bio Specific Stress” or “Anatomical” o Highlight a single item and read about it in the dialog box at right o To begin feedback with single items, select time (or use the 3 minute default) and click “Metaspace” or “Harness” to start the feedback Option: Stop feedback at any time by clicking “Stop Feedback” Option: Use transfer buttons to go to other programs in this grouping Option: Return to the “Wellness Info” 19-B Nerve Profile The functions associated with this page are similar to nine other panels that include Muscles, Cartilage & Ligaments, Respiratory, Circulatory, Digestive, Sinuses, Lymph, Ears & Eyes, Dental and Bone Profiles. Each panel contains two feedback procedures with the Exception of the Circulatory & Heart Profile and the Muscles, Cartilage & Ligaments Profile. Two features are located in the rectangular panel at the middle right of the screen. The left portion of the panel contains four of the most commonly occurring Bio-Specific conditions associated with the Nerve Profile. Click on one or all of the items under Select Bio Specific items. The right portion of the rectangular panel contains items that Add Emphasis to the balancing and feedback process. You may select one or all items for emphasis. To begin feedback, select the time or use the 3-minute default, and click on either the Metaspace or Harness button to start. You may stop feedback at anytime by clicking the Stop Feedback button. 20-A In the lower left corner of the Nerve Profile is an graphic that contains a scrollable list of Bio-Specific and Anatomical items. Click the Bio-Specific Stress button to find an expanded list of conditions that are specific to the Nerve Profile. Click the Anatomical button to switch to an expanded list of anatomical parts associated with the Nerve Profile. You may apply feedback to any item you select, in either of the lists by highlighting the item desired, setting the timer to the desired length (unless you use the 3-minute default setting) then clicking either the red Metaspace or Harness button to enable the feedback process. Upon choosing any item in the Bio-Specific Stress or Anatomical List, an educational description of that item appears in the text box directly to the right. In addition to features mentioned, you will see that eight transfer buttons are located in the upper left central portion of the screen. Clicking a Transfer button enables quick access to a different panel without the necessity of returning the Wellness Info. Summary of Features: Click “Select Bio-specific” items from the rectangular box Click “Add Emphasis” items from the rectangular box To begin feedback, select time (or use the 3 minute default) and click “Metaspace” or “Harness” to start the feedback For an expanded view of functions go the image in the lower left o Click “Bio Specific Stress” or “Anatomical” o Highlight a single item and read about it in the dialog box at right o To begin feedback with single items, select time (or use the 3 minute default) and click “Metaspace” or “Harness” to start the feedback Option: Stop feedback at any time by clicking “Stop Feedback” Option: Use transfer buttons to go to other programs in this grouping Option: Click on “2 Min Special” for visualization stimulation on healthy organ. Option: Return to the “Wellness Info” 20-B Bone Profile The functions associated with this page are similar to nine other panels that include Muscles, Cartilage & Ligaments, the Circulatory, Respiratory, Digestive, Nerve, Sinus, Lymph, Dental and Ears & Eyes Profiles. Each panel contains two feedback procedures with the Exception of the Circulatory & Heart Profile and the Muscles, Cartilage & Ligaments Profile. Two features are located in the rectangular panel at the lower left of the screen. The middle right portion of the panel contains four of the most commonly occurring BioSpecific conditions associated with the Bone Profile. Click on one or all of the items under Select Bio Specific items. The right portion of the rectangular panel contains items that Add Emphasis to the balancing and feedback process. You may select one or all items for emphasis. To begin feedback, select the time or use the 3-minute default, and click on either the Metaspace or Harness button to start. You may stop feedback at anytime by clicking the Stop Feedback button. 21-A In the lower right corner of the Bone Profile is a graphic that contains a scrollable list of Bio-Specific and Anatomical items. Click the Bio-Specific Stress button to find an expanded list of conditions that are specific to the Bone Profile. Click the Anatomical button to switch to an expanded list of anatomical parts associated with the Bone Profile. You may apply feedback to any item you select, in either of the lists by highlighting the item desired, setting the timer to the desired length (unless you use the 3-minute default setting) then clicking either the red Metaspace or Harness button to enable the feedback process. Upon choosing any item in the Bio-Specific Stress or Anatomical list, an educational description of that item appears in the text box directly to the left. In addition to features mentioned, you will see that eight transfer buttons are located in the upper central portion of the screen. Clicking a Transfer button enables quick access to a different panel without the necessity of returning the Wellness Info. Summary of Features: Click “Select Bio-specific” items from the rectangular box Click “Add Emphasis” items from the rectangular box To begin feedback, select time (or use the 3 minute default) and click “Metaspace” or “Harness” to start the feedback For an expanded view of functions go the image at the lower right o Click “Bio Specific Stress” or “Anatomical” o Highlight a single item and read about it in the dialog box at left o To begin feedback with single items, select time (or use the 3 minute default) and click “Metaspace” or “Harness” to start the feedback Option: Stop feedback at any time by clicking “Stop Feedback” Option: Use transfer buttons to go to other programs in this grouping Option: Return to the “Wellness Info” 21-B Lymph Profile The functions associated with this page are similar to nine other panels that include Muscles, Cartilage & Ligaments, the Circulatory, Respiratory, Digestive, Nerve, Bone, Sinus, Dental and Ears & Eyes Profiles. Each panel contains two feedback procedures with the Exception of the Circulatory & Heart Profile and the Muscles, Cartilage & Ligaments Profile. Two features are located in the rectangular panel at the middle right of the screen. The left portion of the panel contains four of the most commonly occurring Bio-Specific conditions associated with the Lymph Profile. Click on one or all of the items under Select Bio Specific items. The right portion of the rectangular panel contains items that Add Emphasis to the balancing and feedback process. You may select one or all items for emphasis. To begin feedback, select the time or use the 3-minute default, and click on either the Metaspace or Harness button to start. You may stop feedback at anytime by clicking the Stop Feedback button. 22-A In the lower left corner of the Lymph Profile is a graphic that contains a scrollable list of Bio-Specific and Anatomical items. Click the Bio-Specific Stress button to find an expanded list of conditions that are specific to the Lymph Profile. Click the Anatomical button to switch to an expanded list of anatomical parts associated with the Lymph Profile. You may apply feedback to any item you select, in either of the lists by highlighting the item desired, setting the timer to the desired length (unless you use the 3minute default setting) then clicking either the red Metaspace or Harness button to enable the feedback process. Upon choosing any item in the Bio-Specific Stress or Anatomical list, an educational description of that item appears in the text box directly above. In addition to features mentioned, you will see that eight transfer buttons are located in the upper central portion of the screen. Clicking a Transfer button enables quick access to a different panel without the necessity of returning the Wellness Info. Summary of Features: Click “Select Bio-specific” items from the rectangular box Click “Add Emphasis” items from the rectangular box To begin feedback, select time (or use the 3 minute default) and click “Metaspace” or “Harness” to start the feedback For an expanded view of functions go the image in the lower left o Click “Bio Specific Stress” or “Anatomical” o Highlight a single item and read about it in the dialog box at right o To begin feedback with single items, select time (or use the 3 minute default) and click “Metaspace” or “Harness” to start the feedback Option: Stop feedback at any time by clicking “Stop Feedback” Option: Use transfer buttons to go to other programs in this grouping Option: Click on “2 Min Special” for visualization stimulation on healthy organ. Option: Return to the “Wellness Info” 22-B Ears & Eyes Profile The functions associated with this page are similar to nine other panels that include Muscles, Cartilage & Ligaments, the Circulatory, Respiratory, Digestive, Nerve, Bone, Lymph, Dental and Sinus Profiles. Each panel contains two feedback procedures with the Exception of the Circulatory & Heart Profile and the Muscles, Cartilage & Ligaments Profile. Two features are located in the rectangular panel at the middle right of the screen. The left portion of the panel contains four of the most commonly occurring Bio-Specific conditions associated with the Ears & Eyes Profile. Click on one or all of the items under Select Bio Specific items. The right portion of the rectangular panel contains items that Add Emphasis to the balancing and feedback process. You may select one or all items for emphasis. To begin feedback, select the time or use the 3-minute default, and click on either the Metaspace or Harness button to start. You may stop feedback at anytime by clicking the Stop Feedback button. 23-A In the lower left corner of the Ears & Eyes Profile is a graphic that contains a scrollable list of Bio-Specific and Anatomical items. Click the Bio-Specific Stress button to find an expanded list of conditions that are specific to the Ears & Eyes Profile. Click the Anatomical button to switch to an expanded list of anatomical parts associated with the Ears & Eyes Profile. You may apply feedback to any item you select, in either of the lists by highlighting the item desired, setting the timer to the desired length (unless you use the 3-minute default setting) then clicking either the red Metaspace or Harness button to enable the feedback process. Upon choosing any item in the Bio-Specific Stress or Anatomical list, an educational description of that item appears in the text box directly above. In addition to features mentioned, you will see that eight transfer buttons are located in the upper left central portion of the screen. Clicking a Transfer button enables quick access to a different panel without the necessity of returning the Wellness Info. Summary of Features: Click “Select Bio-specific” items from the rectangular box Click “Add Emphasis” items from the rectangular box To begin feedback, select time (or use the 3 minute default) and click “Metaspace” or “Harness” to start the feedback For an expanded view of functions go the oval image in the lower left o Click “Bio Specific Stress” or “Anatomical” o Highlight a single item and read about it in the dialog box at right o To begin feedback with single items, select time (or use the 3 minute default) and click “Metaspace” or “Harness” to start the feedback Option: Stop feedback at any time by clicking “Stop Feedback” Option: Use transfer buttons to go to other programs in this grouping Option: Return to the “Wellness Info” 23-B Sinus, Throat & Mouth Profile The functions associated with this page are similar to nine other panels that include Muscles, Cartilage & Ligaments, the Circulatory, Respiratory, Digestive, Nerve, Bone, Lymph, Dental and Ears & Eyes Profiles. Each panel contains two feedback procedures with the Exception of the Circulatory & Heart Profile and the Muscles, Cartilage & Ligaments Profile. Two features are located in the rectangular panel at the lower left of the screen. The middle right portion of the panel contains four of the most commonly occurring BioSpecific conditions associated with the Sinus Profile. Click on one or all of the items under Select Bio Specific items. The right portion of the rectangular panel contains items that Add Emphasis to the balancing and feedback process. You may select one or all items for emphasis. To begin feedback, select the time or use the 3-minute default, and click on either the Metaspace or Harness button to start. You may stop feedback at anytime by clicking the Stop Feedback button. 24-A In the lower left corner of the Sinus Profile is a graphic that contains a scrollable list of Bio-Specific and Anatomical items. Click the Bio-Specific Stress button to find an expanded list of conditions that are specific to the Sinus Profile. Click the Anatomical button to switch to an expanded list of anatomical parts associated with the Sinus Profile. You may apply feedback to any item you select, in either of the lists by highlighting the item desired, setting the timer to the desired length (unless you use the 3-minute default setting) then clicking either the red Metaspace or Harness button to enable the feedback process. Upon choosing any item in the Bio-Specific Stress or Anatomical list, an educational description of that item appears in the text box directly above. In addition to features mentioned, you will see that eight transfer buttons are located in the upper central portion of the screen. Clicking a Transfer button enables quick access to a different panel without the necessity of returning the Wellness Info. Summary of Features: Click “Select Bio-specific” items from the rectangular box Click “Add Emphasis” items from the rectangular box To begin feedback, select time (or use the 3 minute default) and click “Metaspace” or “Harness” to start the feedback For an expanded view of functions go the oval image in the lower right o Click “Bio Specific Stress” or “Anatomical” o Highlight a single item and read about it in the dialog box at the right o To begin feedback with single items, select time (or use the 3 minute default) and click “Metaspace” or “Harness” to start the feedback Option: Stop feedback at any time by clicking “Stop Feedback” Option: Use transfer buttons to go to other programs in this grouping Option: Click on “2 Min Special” for visualization stimulation on healthy organ. Option: Return to the “Wellness Info” 24-B Sport Profile-Injury & Trauma The Sport Profile contains several blue rectangular boxes. In the rectangular panel at the middle left of the screen are two features associated with the Sport Profile. The left portion contains four of the most commonly occurring Bio-Specific conditions associated with the Sport Profile. You may check and balance these items ONE AT A TIME. The right portion of the rectangular panel contains four Add Emphasis boxes, any or all of which may be checked. Set the time or use the 3-minute default and click Metaspace or Harness buttons to start. You may stop feedback at any time by clicking the Stop Feedback button. In the lower left corner of this screen is a rectangular graphic that contains a list of Sport Related Hormones. You may select any item you wish by clicking the button next to the item. By clicking the red button at the bottom of the list you will initiate an automatic 1minute feedback procedure. For longer feedback, set the timer to the desired time (or use the 3-mnute default setting), and then click the Harness or Metaspace button to begin feedback. You may stop feedback at any time by clicking the Stop Feedback button. 25-A The Injury & Trauma program contains 12 features located at the lower right portion of the screen. You may select ONLY one feature at a time. You may also use the Add Emphasis boxes, any or all of which may be checked. Set the time or use the 3-minute default and click Metaspace or Harness buttons to start. You may stop feedback at any time by clicking the Stop Feedback button. When you have completed programs, return to the main Wellness Info by clicking the Wellness Info button. Summary of Features: For the Sport Profile program Select one “Bio Specific” option at a time Select one or more items from the “Add Emphasis” Box Change the time or use the 3-minute default Click “Harness” or “Metaspace” to start o Option: you may stop feedback by clicking the “Stop Feedback” button For the Hormone Feedback program Select one “Hormone Feedback” option at a time Click the red button to start a 1-minute “Auto Feedback” o Option: Change the time or use the 3-minute default o Option: Click “Harness” or “Metaspace” to start o Option: you may stop feedback by clicking the “Stop Feedback” button For the Injury & Trauma program Select one Injury & Trauma item at a time o Option: Select one or more items from the “Add Emphasis” Box Change the time or use the 3-minute default Click “Harness” or “Metaspace” to start o Option: you may stop feedback by clicking the “Stop Feedback” button 25-B Dental Profile The Dental Profile contains four features that may be completed in any order. Dental Materials: At the lower right corner is a window containing a list of both Dental Adhesives/Filling Materials as well as a list of Bio-Specific conditions. You may alternate your view of these lists by clicking on either of the red buttons entitled Dental Materials or Bio-Specific Stress. To perform a reactivity test related to the Dental Materials, first click Dental Materials then the Gold Test Dental button. The three highest reactivity values will be displayed with their numeric values highlighted in red, yellow and blue respectively. To initiate the feedback process to the top three items, set the timer to the desired length, click either the red Metaspace or Harness button to start, and the program will automatically divide the time allotted and apply feedback to each of the three items in succession. To apply feedback to ONE ITEM AT A TIME, highlight a single item, and then select the Auto Feedback button next to the list to perform an automatic 1-minute, quick feedback procedure. For a longer feedback procedure, select the desired length of time (or leave the 3-minute default setting), and then click either Harness or Metaspace button to initiate 26-A feedback. To stop feedback, click on the Stop Feedback button. To perform a reactivity test related to the Bio-Specific Stress, first click Dental Disorders then the Gold Test Dental button. The three highest reactivity values will be displayed with their numeric values highlighted in red, yellow and blue respectively. To initiate the feedback process to the top three items, set the timer to the desired length and the program will automatically divide the time allotted and apply feedback to each of the three items in succession. To apply feedback to ONE ITEM AT A TIME, highlight a single item, and then select the red Auto Feedback button below the list to perform an automatic 1-minute, quick feedback procedure. For a longer feedback procedure, select the desired length of time (or leave the 3-minute default setting), and then click either Harness or Metaspace button to initiate feedback. To stop feedback, click on the Stop Feedback button. The rectangular panel at the lower left of the screen contains two more features associated with the Dental Profile. The left portion on the rectangle contains four of the most commonly occurring Bio-Specific conditions associated with the Dental Profile. You may balance these items one at a time by clicking the radio button next to the desired item. You may then select one or all of the items in the Add Emphasis box. Select the desired length of time (or leave the 3-minute default setting), and then click either Harness or Metaspace button to initiate feedback. To stop feedback, click on the Stop Feedback button. TMJ Profile: The upper right corner provides a panel containing seven acupuncture points, specifically related to the relief of TMJ. Click the 3-min Auto TMJ Feedback button to apply feedback. You may also select one or all of the items in the Add Emphasis box. To stop feedback, click on the Stop Feedback button. Tooth Profile: In the middle left is a graphic of the mouth that allows an energetic reactivity test relative to each tooth. Click the Test Teeth button to activate the test. The highest reactivity values will be displayed with their numerical values and highlighted in red, yellow and blue respectively. To initiate the feedback process to the top three items, set the timer to the desired length and the program will automatically divide the time allotted and apply feedback to each of the three items in succession. To apply feedback select the desired length of time (or leave the 3-minute default setting), and then click either Harness or Metaspace button to initiate feedback. To stop feedback, click on the Stop Feedback button. When you have completed the Dental Profile, click on the Wellness Info for additional programs. Summary of Features: To perform a reactivity test related to the Dental Materials Click “Dental Materials” then the red “Test Potential” button. To apply 1 minute auto feedback to ONE ITEM AT A TIME, highlight a single item, and then click the red “Auto Feedback” button o Option: Select the desired length of time (or leave the 3-minute default setting), o Option: Click either Harness or Metaspace button to initiate feedback. o Option: To stop feedback, click on the “Stop Feedback” button 26-B To perform a reactivity test related to the Bio-Specific Stress Click “Bio-Specific Stress” then the “Test Dental” button. To apply 1 minute auto feedback to ONE ITEM AT A TIME, highlight a single item, and then select the red “Auto Feedback” button o Option: Select the desired length of time (or leave the 3-minute default setting) o Option: Click either Harness or Metaspace button to initiate feedback o Option: To stop feedback, click on the Stop Feedback button. To work with the TMJ Profile Select one item at a time and click on the “3-min Auto TMJ Feedback” o Option: Select one or all of the items in the “Add Emphasis” box. o Option: Select the desired length of time (or leave the 3-minute default setting) o Option: Click either “Harness” or “Metaspace” button to initiate feedback. o Option: To stop feedback, click on the “Stop Feedback” button. To work with the Tooth Profile Click the Gold “Test Teeth” button to activate the test. To apply feedback select the desired length of time (or leave the 3-minute default setting) Click either “Harness” or “Metaspace” button to initiate feedback. o Option: To stop feedback, click on the “Stop Feedback” button. 26-C Allergy Profile The Allergy Profile screen contains several important features. The middle left corner of the screen provides a view of the main allergy reactivity items. Several hundred, preprogrammed items appear in this scrollable list. Click on the Gold Test Potential button to perform a reactivity test. The three highest reactivity values will be displayed along with their numerical values and highlighted in red, yellow and blue respectively. To initiate the feedback process to the top three items, set the timer to the desired length, click either the Metaspace or Harness button to start, and the program will automatically divide the time allotted and apply feedback to each of the three items in succession. To apply feedback, to the highest item displayed in red, select the 3-Min. Auto Feedback button to perform a 3-minute quick feedback procedure. For a longer feedback procedure, set the timer to the desired feedback length (or leave the 3-minute default setting) and then click Harness or Metaspace to initiate feedback. To stop feedback, click the Stop Feedback button. At the far middle right is a rectangular graphic containing additional feedback items. Place a check in any or all of the boxes found in the Add Additional Feedback panel. Each item that is checked will add 15 seconds to the overall feedback process. To stop feedback, click the Stop Feedback button. 27-A Importing From Test Tray To import a specific substance you must enter the item name in the Enter Item Name field, then click the Import button. This activates the stainless steel tray on top of the interface box, encodes the item and automatically adds that item to the personal matrix. To apply feedback, select the item, set the timer to the desired feedback time (or leave the 3-minute default setting) and then click either the Harness or Metaspace button to initiate feedback. You may interrupt feedback by clicking the Stop Feedback button. Exporting From The Personal Matrix To export a specific substance you must select an item in the personal matrix, then click on the Export button to send the selected item to the tray. Return to the main menu by clicking the Wellness Info button. Summary of Features: The Allergy Profile Click on the Gold “Test Potential” button to perform a reactivity test. To apply 3- minute feedback on a select single item, click the red “Auto Feedback” o Option: For longer feedback set the timer to the desired feedback length (or leave the 3-minute default setting) o Option: Click Harness or Metaspace to initiate feedback. o Option: To stop feedback, click the Stop Feedback button. Add Additional Feedback Place a check in any or all of the boxes found in the “Add Additional Feedback panel.” To perform a 3-minute feedback procedure, click the red “Auto Feedback” button o Option: For a longer feedback procedure set the timer to the desired feedback length (or leave the 3-minute default setting o Option: Click “Harness” or “Metaspace” to initiate feedback. o Option: To stop feedback, click the Stop Feedback button. To Import An Item To import an item, type in a name of an item you wish to add in the white field next to the “Enter Item Name” Click the red Import button and you will be able to encode and add that item to the personal matrix. To apply corrective feedback, select the timer and set to the appropriate time (or leave the 3-minute default setting) Option: Click either the “Harness” or “Metaspace” button to initiate feedback. You may interrupt feedback by clicking the “Stop Feedback” button. 27-B Note that you may Sort, Export or Clear any item in the Import panel. Please note that you may access the on screen manual at any time by clicking the About Panel button. 27-C Homeopathic Profile Homeopathic Reactivity Test And Feedback Procedure In the left central portion of the screen is a rectangular graphic containing a scrollable list of all pre-programmed Homeopathic remedies from A to Z. To initiate a test click the gold Test Potential button on the bar at the top of the screen. The three highest reactivity values will be displayed and highlighted in red, yellow and blue respectively. To initiate the feedback process to the top three items, set the timer to the desired length, click either the Metaspace or Harness button to start, and the program will automatically divide the time allotted and apply feedback to each of the three items in succession. If you click the Auto Feedback button you will initiate feedback to the red item ONLY. Or, you may also select any INDIVIDUAL item by highlighting it, then set the timer to the desired feedback length (or leave the 3-minute default setting), and click either the Harness or Metaspace button to initiate feedback. The % Rectified results are displayed in the timer. An 85% or greater rectification is satisfactory. You may repeat the process up to 3 times in a single session, to achieve the desired result. If the desired result is not achieved, schedule an additional appointment within one week. You may also stop feedback by clicking the Stop Feedback button. Check Constitutional Remedy Click the Check for Constitutional Remedy button. A suggested remedy will appear 28-A in the white field. To check for potency, click the Check for Potency button. A result will appear in the white field. You have the option of providing feedback by setting the timer (or leave the 3-minute default setting), then clicking either the Harness or Metaspace button to initiate feedback. Exporting A Remedy To The Tray From Personal Database List At the center right of the screen, select the name of any remedy that you have previously imported into your personal data base list. Enter a potency, from the drop-down list into the Enter Potency field. Make sure that you have highlighted the item that you want to export, then click the Export button. That signature will energetically charge the water or alcohol medium you have placed on the tray. Importing A Remedy From The Tray To Personal Database List Enter the name of the remedy you have placed on the tray in the Enter Name field provided near the center right of the screen. Enter a potency, from the drop-down list into the Enter Potency field. Click the red Import button to activate the procedure. The item you entered will automatically appear in your personal database list. When you have completed this program, return to the main Wellness Info by clicking the Wellness Info button. Summary of Features: Homeopathic Reactivity Test To test a single item, click the red “Test Potential” button near the top of the green rectangle. Select an item by highlighting it, and then click the red “Auto Feedback” button to perform a brief automatic 1-minute quick feedback procedure. Option: For longer feedback, set the timer to the desired feedback length (or leave the 3-minute default setting) Option: Click either the “Harness” or “Metaspace” button to initiate feedback. You may repeat the process up to 5 times in a single session You may also stop feedback by clicking the “Stop Feedback” button. Check Constitutional Remedy Click the red “Check for Constitutional Remedy” button. To check for potency, click the red “Check for Potency” button. To apply feedback, click the red “1-Min Feedback” o Option: Select desired time(or leave the 3-minute default setting) o Option: Click either the “Harness” or “Metaspace” button to initiate feedback. Exporting a Remedy to the Tray Select a remedy from the Personal database list” Enter the potency in the “Enter Potency” field. Click the “Export” button to charge the median on the tray. 28-B Importing a Remedy from the Tray Enter the name of the remedy you have placed on the tray in the “Enter Name” field” Click the “Import” button to activate the procedure. 28-C Nutritional Profile Nutritional Reactivity Test Click one of the three Test Potential buttons located at the upper right portion of the screen to begin a reactivity process for the group of nutrients selected: Vitamins, Minerals or Amino Acids. YOU MAY TEST ONLY ONE GROUP AT A TIME. When complete, the chosen group will display the three highest reactivity values in red, yellow and blue respectively. To initiate the feedback process to the top three items, set the timer to the desired length, click either the red Metaspace or Harness button to start, and the program will automatically divide the time allotted and apply feedback to each of the three items in succession. After completing the three reactivity tests you may proceed to click on any single item in the three panels. A description of that item will appear in the dialog box in the center of the page. Applying Additional Feedback You may apply feedback to any SINGLE item or nutrient you select in each of the three panels. Click the button next to the item chosen, set the timer, or use the 3-minute default, then click either the Metaspace or Harness button to begin feedback. You may stop feedback by clicking the Stop Feedback button. 29-A Testing an Item on the Tray Place a substance on the stainless steel plate on top of the interface box, then click the Test Tray Item button located in the middle right of the screen. In the white box below the button you will see a numerical reactivity value on a scale from 1 to 100. A value above 75% indicates a significant need. Testing an Organ for a Specific Nutrient Need Type the name of an organ in the white field in the lower right of the screen. Then type the name of a nutrient in the Nutrient field. Click the red Test Energetic Imbalance button and a numerical percent of need between 1 and 100 will provided in the % field box. A value above 75% indicates a significant need. When finished, return to the main Wellness Info by clicking the Wellness Info button. Summary of Features: Nutritional Reactivity Test Click the “Test Potential” button located at the upper right portion of the screen. Each group will display the three highest reactivity values in red, yellow and blue respectively. Click on a single item in any of the three panels to read a description of that item Review the numerical reactivity value on the timer Applying Feedback Click the button next to the item chosen, set the timer or use the 3-minute default Click either the “Metaspace” or “Harness” button to begin feedback. o Option: Stop feedback by clicking the “Stop Feedback” button. Testing an Item on the Tray Place a substance on the stainless steel plate on top of the interface box Click the red “Test Tray Item” button located in the middle left of the screen. Review numerical reactivity value on the timer Testing an Organ for a Specific Nutrient Need Type the name of an organ in the white “Organ” field in the lower right of the screen. Type the name of a nutrient in the Nutrient field. Click red “Test For Energetic Imbalance” button to review numerical reactivity value in the % field. 29-B Emotional Transformation & Timeline Pathway Choices: In the right upper and right lower sections of this screen are four scrollable boxes labeled Emotional Stress, Conflict Stress, Relationship Stress and Age Stress Timeline. Following an interview with your client, select ONE of the appropriate Pathway Choices in the upper left panel. Set Parameters & Current Age: Check one of the three parameter boxes, selecting from Highest Reaction, Top 3 Reactions or Top Ten Reactions. If you are testing the Age Stress Timeline you must enter the age of the client in the field provided. Start the Assessment Test: After selecting a Pathway Choice, Setting A Parameter option and typing in the current age, click the red Start Assessment button. Results will appear in the respective window for the option you selected. The three highest reactivity values will be shown as red, yellow and blue respectively. Make a Feedback Choice: Following your assessment, select one of the nine options in the Check a Feedback Choice section located in the lower left panel. When you make a choice you will notice that a list of items relative to your selection will appear in the 30-A Choose a Solution window. (The solution options will change in relationship to your feedback choice.) Choose a Solution & Start Feedback: Once your solution options appear in the window, you may select a solution from the list. Highlight a solution option, set the timer for the desired length (or use the 3 minute default) and click either the red Metaspace or Harness button to start feedback. You may interrupt feedback by clicking the Stop Feedback button. A % Rectified value will appear in the timer box. A value of 85% or greater is considered satisfactory. You may return to the main program list by clicking the Wellness Info button at any time. Summary of Features: Select one or more “Pathway Choices” following an interview with your client Click one or more of the appropriate “Pathway Choices” Check one of the four “Parameter boxes” Enter the age of the client in the field provided. Click the “Start Assessment” button. Select one of the nine options in the “Check a Feedback Choice” “Choose a Solution” by highlighting a solution option Set the timer for the desired length (or use the 3 minute default) Click either the red “Metaspace” or “Harness” button to start feedback. Option: You may interrupt feedback by clicking the “Stop Feedback” button. 30-B Hormone Profile This panel provides energetic reactivity testing and feedback for essential Male and Female hormones. Several different features are available. Hormone Reactivity Testing & Feedback: To initiate reactivity testing for a female, click the gold button titled Test Female located on the bar at the a upper portion of the screen. To initiate reactivity testing for a male client, click the gold button titled Test Male located on the bar at the a upper portion of the screen. Depending on which gender you have selected, the corresponding screen with the top three reactivity values will be indicated by red, yellow and blue respectively. To initiate the feedback process to the top three items, set the timer to the desired length, click either the Metaspace or Harness button to start, and the program will automatically divide the time allotted and apply feedback to each of the three items in succession. To interrupt feedback, click the Stop Feedback button. A % Rectified field will be displayed in the timer panel. Individual Female or Male Selections: Use the Female Hormone Balance or the Male Hormone Balance panel to provide a quick option for applying feedback without the use of reactivity testing. Select one item at a time. Set the timer or use the 3-minute default, 31-A then click either the red Metaspace or Harness button to start. To interrupt feedback, click the Stop Feedback button. Ovarian & Prostate Stimulation: The Ovarian Stim and Prostate Stim panels are provided on either side of the screen. Click the button to initiate a 3-minute auto feedback. You may return to the main program list by clicking the Wellness Info button at any time. Summary of Features: Reactivity Testing To initiate Reactivity Testing for a female, click the gold button titled “Test Female” To initiate Reactivity Testing for a male client, click the gold button titled “Test Male” To begin feedback, highlight a chosen item, set the timer or use the 3-minute default, then click either the “Metaspace” or “Harness” button to start. o Option: To interrupt feedback, click the “Stop Feedback” button. Balance Female or Male Hormones Balance Female or Male Hormones by clicking next to the desired hormone o Option: Set the time or use the 3-minute default o Option: Click either the red “Metaspace” or “Harness” button to start. o Option: To interrupt feedback, click the “Stop Feedback” button. Ovarian Stim or Prostate Stim For Ovarian Stim or Prostate Stim, Click the red “3 minute Auto Feedback” button. o Option: Set the timer or use the 3-minute default o Option: Click either the red “Metaspace” or “Harness” button to start. o Option: To interrupt feedback, click the “Stop Feedback” button. 31-B Brain Profile Brain Wave Tuning: The Brain Wave Tuning program is located in the rectangular panel at the left of the screen. To initiate the energetic reactivity process, click on the gold Test Waves button. Upon completion, the results will be displayed in the two fields located at the bottom of this panel. The most reactive brain component will be displayed in the Item field. The client’s reactivity response will be shown in the Reaction field. A response of 50% or greater may indicate an imbalance. A higher number represents a greater imbalance. To apply feedback, click on the lavender button next to the item you wish to address. Set the timer to the desired length of time (or use the 3-minute default). Click either the Metaspace or Harness button to start the process. You may interrupt feedback by clicking the Stop Feedback button. Upon completion, check the % Rectified field located on the timer. A reading of 85% or greater is desirable. Bio-Specific & Anatomical Panel: Located in the lower right corner is a rectangular graphic that contains a scrollable list of both Bio-Specific and Anatomical items. Click the Bio-Specific Stress button to see a list of items that are specific to the system. Click the Anatomical button to view a list of anatomical parts associated with the system. By clicking on an item from either list, you will see a description of that condition in a dialog box to the left of the list. To apply feedback, click on an item to highlight it, set the timer to the desired length of time (unless you use the 3-minute default setting) and then 32-A click either the Metaspace or Harness button to start. You may interrupt feedback by clicking the Stop Feedback button. ADD & ADHD Test: Located in the same rectangular panel as the timer, is the ADD & ADHD assessment. Click on the gold Test ADD ADHD button to activate the energetic evaluation. Reactivity results will be displayed in the two small fields to the right of the panel. A response of 50% or greater may indicate an imbalance. A higher number represents a greater imbalance. Feedback may be applied by clicking and highlighting either ADD or ADHD in the scrollable table. Then set the timer to the desired duration and click either Metaspace or Harness to initiate feedback. Left Brain – Right Brain Harmonic Balance: The Left Brain – Right Brain – Harmonic Balance located in the upper right of the screen offers both testing and feedback features. To initiate the energetic testing process, click the red Test Balance button. Upon completion of the test, you may facilitate the balancing process by clicking button below the fields entitled, Apply Feedback Until All Bars Meet in the Middle. This may take several repetitions. After the fifth try, the program will not respond and you must wait for a future session. You may return to the main Wellness Info by clicking the Wellness Info button at any time. Summary of Features: Brain Wave Tuning: To initiate the energetic reactivity process, click on the gold “Test Wave” button. o The most reactive brain component will be displayed in the “Item” field. o The client’s reactivity response will be shown in the “Reaction” field. To apply feedback click on the lavender button next to the item you wish to address. Set the timer to the desired length of time (or use the 3-minute default). Click either the red “Metaspace” or “Harness” button to start the process. Stop feedback by clicking the “Stop Feedback” button. Bio-Specific & Anatomical Panel: Click the “Bio-Specific Stress” button to see a list of conditions that are specific to the system. Click the “Anatomical” button to see a list of anatomical parts associated with the system. To apply feedback, click on an item to highlight it, set the timer to the desired length of time (unless you use the 3-minute default setting) and then click either the red “Metaspace” or “Harness” button to start. You may interrupt feedback by clicking the “Stop Feedback” button. ADD & ADHD Test: Click on the gold “Test ADD ADHD” button to activate the energetic evaluation. Reactivity results will be displayed in the two small fields to the right of the panel. 32-B Left Brain – Right Brain Harmonic Balance: To initiate the energetic testing process, click the red “Test Potential” button. To facilitate the balance process click the red button below the fields, entitled “Apply Feedback Until All Bars Meet in the Middle.” Repeat up to five times then discontinue. 32-C Cosmetic Profile Weight Control: This function is located at the bottom portion of the screen. To begin using this feature, click the Weight Control button on the panel. Set the timer to the desired length (unless you are using the 3-minute default) and then click either the Metaspace or Harness button to start the feedback process. Warts & Moles, Thinning Hair, Total Face Toning, Cellulite, Skin Detox, and Skin Lesions: You may provide feedback for each of these six features, one at a time, by clicking the small radio button within the circular graphic that identifies each item. Set the timer to the desired length (unless you are using the 3-minute default) and then click either the red Metaspace or Harness button to start the feedback process. You may interrupt feedback by clicking the Stop Feedback button at any time. Summary of Features: Weight Control: Click the button on the small blue oval panel. Set the timer to the desired length (unless you are using the 3-minute default) Click either the red Metaspace or Harness button to start the feedback process. 33-A Stop feedback at any time by clicking the Stop Feedback button Warts & Moles: Click the small radio button within the circular graphic Set the timer to the desired length (unless you are using the 3-minute default) Click either the red Metaspace or Harness button to start the feedback process. Stop feedback at any time by clicking the Stop Feedback button Thinning Hair: Click the button within the graphic Set the timer to the desired length (unless you are using the 3-minute default) Click either the red Metaspace or Harness button to start the feedback process. Stop feedback at any time by clicking the Stop Feedback button Total Face toning: Click the button within the graphic Set the timer to the desired length (unless you are using the 3-minute default) Click either the red Metaspace or Harness button to start the feedback process. Stop feedback at any time by clicking the Stop Feedback button Cellulite: Click the button within the graphic Set the timer to the desired length (unless you are using the 3-minute default) Click either the red Metaspace or Harness button to start the feedback process. Stop feedback at any time by clicking the Stop Feedback button Skin Detox: Click the button within the graphic Set the timer to the desired length (unless you are using the 3-minute default) Click either the red Metaspace or Harness button to start the feedback process. Stop feedback at any time by clicking the Stop Feedback button Skin Lesions: Click the button within the graphic Set the timer to the desired length (unless you are using the 3-minute default) Click either the red Metaspace or Harness button to start the feedback process. Stop feedback at any time by clicking the Stop Feedback button 33-B Detox & Multiple Stress Profile Full Body Detox: To begin the Full Body Detox feedback process, click on the 5 Minute Auto-Feedback button on the panel at top right of the screen. This will initiate an automated 5-minute process. A progress bar on the same panel will indicate when the process is complete. Typically this should be used only once per visit. Test Environment, Test Pathogens and Test Personal: These features are found on the rectangular graphic at the top right of the screen. Click the button next to any one of the three categories, to begin the assessment process. Upon completion, the three highest, most reactive items, within the selected panel will be displayed in red, yellow and blue respectively. To initiate the feedback process to the top three items, set the timer to the desired length, click either the Metaspace or Harness button to start, and the program will automatically divide the time allotted and apply feedback to each of the three items in succession. You may interrupt feedback at any time by clicking the Stop Feedback button. Additional Timed Feedback: You may apply feedback to any SINGLE item you choose in any of the three lists, by selecting one item at a time. Click the button next to the item chosen, then set the timer to the desired length (unless you choose to use the 3-minute 34-A default setting). Click either the red Metaspace or Harness button to enable the feedback process. You may interrupt feedback at any time by clicking the Stop Feedback button. You may return to the main program list at any time by clicking the Wellness Info button Summary of Features: Full Body Detox: Click on the 5-Min. Auto Detox button on the rectangular panel near the top right of the screen. o This will initiate an automated 5-minute process. A progress bar on the same panel will indicate when the process is complete. o This may be used only once per visit. Test Environmental, Test Pathogens, Test Personal: Click the Test button next to any one of these categories to begin the assessment process. The three highest and most reactive items, within the selected panel, will be displayed. Set the timer for the desired duration, and then click either Metaspace or Harness. You may interrupt feedback at any time by clicking the “Stop Feedback” button. Additional Timed Feedback: You may apply feedback to any single item you choose in any of the three category lists, selecting only one item at a time. Click the button next to the item desired Set the timer to the desired length (unless you choose to use the 3-minute default) Click either thes “Metaspace” or “Harness” button to enable the feedback You may interrupt feedback at any time by clicking the “Stop Feedback” button. 34-B Miasms & Anti-Aging This panel contains a number of features associated with the way in which the human body is conditioned to respond to Miasms and various age related stress factors. (Miasms are energetic tracings carried on the DNA that are related to pre-disposition factors). Miasmic Factors, Stress Factors and Age Response Panel: These are the three panels situated at the center of the screen. Click the Test button below any one of the three test choices to initiate the reactivity test. Upon completion of the process, three color-coded indicators, red, yellow and blue, will appear. The item with the highest reactivity response will be highlighted in red. Scores above 50% represent a greater degree of energetic imbalance. To initiate the feedback process to the top three items, set the timer to the desired length, click either the Metaspace or Harness button to start, and the program will automatically divide the time allotted and apply feedback to each of the three items in succession. You may discontinue feedback by clicking the Stop Feedback button at any time. In addition, you may apply feedback to any single item but, only three times per visit. General Factors: Twelve components are represented in the General Factors Test. To use this feature click the button just below the rectangular General Factors graphic. 35-A At the conclusion of your test, three color-coded indicators, red, yellow and blue, will appear. The item with the highest reactivity response will be highlighted in red. A Score of 50% or higher represents a greater degree of energetic imbalance. To initiate the feedback process to the top three items, set the timer to the desired length, click either the Metaspace or Harness button to start, and the program will automatically divide the time allotted and apply feedback to each of the three items in succession. You may discontinue feedback by clicking the Stop Feedback button at any time. In addition you may apply feedback to a single item by clicking on the item, setting the timer, then clicking either the Harness or Metaspace button. You may return to the main program list at any time by clicking the Wellness Info button. Summary of Features: Miasmic Factors, Stress Factors and Age Response Panel: Click the “Test” button below any one of the categories you wish to test in order to initiate an energetic reactivity test. Upon completion of the reactivity process, red, yellow and blue color-coded indicators will appear in the selected category. Following the test, set the timer for the desired length (unless you use the 3minute default setting). Click either the Metaspace or Harness button to begin the feedback process. Single Item Feedback: For single item feedback, set the timer to the desired length (unless you use the 3minute default setting) Click either the “Metaspace” or “Harness” button to begin feedback. You may apply feedback to a single item only three times per each visit. o Option: You may discontinue feedback by clicking the “Stop Feedback” button. General Factors Test: Click the “General Test” button for the General Factors panel, located just below the graphic. Upon completion of the reactivity process, red, yellow and blue color-coded indicators will appear. Red represents the highest reactivity response. Following the test set the timer for the desired length (unless you use the 3-minute default setting) Click either the “Metaspace” or “Harness” button to begin feedback. For single item feedback, set the timer to the desired length (unless you use the 3minute default setting) Click either the “Metaspace” or “Harness” button to begin feedback. You may apply feedback to a single item only three times per visit. o Option: You may discontinue feedback by clicking the “Stop Feedback” button. 35-B Pet/Animal Profile Type of Animal/Pet: To begin using this program, place a checkmark in one of the boxes next to the type of pet or animal you are balancing. The conditions that are specific to the type of pet you have chosen will appear in the Specific Selections area. Specific Selections: There are a number of conditions pertinent to the pet or animal that appear in the Specific Selections panel. Scroll to the bio-specific item that is appropriate and highlight your selection. Click the red button to the right of the panel to initiate a 1minute auto-feedback procedure. For extended feedback, set the timer for the desired length (unless you choose to use the 3-minute default setting). Click either the Metaspace or Harness button to start feedback. You may discontinue feedback, at any time, by clicking the Stop Feedback button. You may balance only one item at a time. The right portion of the rectangular graphic contains four selections that include the addon features of: Inflammation, Infection, Degeneration and Pain. Any or all of these items may be selected along with any single feedback item of choice. 36-A You may return to the main program list at any time by clicking Wellness Info. Summary of Features: Make a selection next to the type of animal to be evaluated Scroll through the “Specific Selections” box and highlight your selection o Option: Select any or all of the four Inflammation, Infection, Degeneration or Pain options Click the red button to the right of the panel to initiate a 1-minute auto-feedback procedure. For extended feedback, click set the timer to the desired length (unless you choose to use the 3-minute default setting) Click either the “Metaspace” or “Harness” button to start feedback. o Option: You may discontinue feedback by clicking the ‘Stop Feedback” button. 36-B Timed-Specific Panel The Timed/Specific Panel is one of the most important panels in the L.I.F.E. System. Over 1,200 specific items are represented, along with their feedback signatures. You will also note that a number of other concurrent features are available as well. Selecting An Item: Items in the main selection matrix are listed alphabetically. Simply scroll to the appropriate item, then click and highlight that item. Next, set the timer for the appropriate duration (unless you use the 3-minute default setting). Click either the Metaspace or Harness button to start the feedback process. Adding Emphasis: You may check any or all of the four items in the Add Emphasis graphic at the upper left of the panel. These items will add a unique feedback signature and function concurrent with the item you selected from the main matrix. Each item you select will add 15 seconds to the feedback process. Release Effects Of: You may also check any or all of the four items listed in the Release Effects Of graphic. These items will add a unique feedback signature and function concurrent with the condition you selected from the main matrix. Each item you select will add 15 seconds to the feedback process. 37-A Insert Additional Factors: This function allows for the insertion of Hololinguistic Information. The term Hololinguistic refers to the subtle, but powerful influence of words. Simply type a short description into each of the appropriate fields. As feedback is initiated, the influence of that information reinforces the therapy. Parasympathic & Sympathetic: By clicking the red button in the small rectangular graphic next to either of these items, a 3-Minute feedback is initiated. Manual Signal Generator: The manual signal generator allows for the insertion of feedback signals of your personal choice. However it is important that you have the correct information available to you from a reliable source, in order to use this function. If not, it is advisable to use the pre-programmed items in the list provided. You will note that you may enter just a Start signal or a Start and Finish signal in order to provide a sweep. The most common selection would be to enter a Frequency Sweep by providing both the Start and Finish Signals. Following insertion of the numerical values in the appropriate fields, the timer would be set for the desired duration and then either the Harness or Metaspace button would be selected. Storing And Administering Additional Signals: The upper portion of the main selection panel allows for the individual storing of single, sweep type, and/or decimal type signals. Simply click the New button, enter an Item Name, a Description and then enter as many as six semi-colon separated signals as you desire. Click the Save button, then set the timer to the desired length. Each semi-colon separated signal will be delivered in succession, until complete. Summary of Features: Selecting A Condition: Click and highlight any item in the main matrix, set the timer and choose either Metaspace or Harness. Add Emphasis: Check any one or all four items in the Add Emphasis graphic, these are automatically added to the feedback process. Release Effects Of: Check any one or all four items in the Add Emphasis graphic, these are automatically added to the feedback process. Insert Additional Factors: Allows for the insertion of Hololinguistic text, which adds the power of the word to the therapy. Parasympathetic & Sympathetic: Clicking the red button in the small rectangular graphic next to either of these items, a 3-Minute feedback is initiated. May be used only once per session. Manual Signal Generator: The Manual Signal Generator allows for the insertion of energetic signals of your personal choice. Please use only if reliable data is available Storing and Administering Additional Signals: Simply click the New button, enter an Item Name, a Description, enter up to six semi-colon separated signals, click Save, set timer, select Harness or Metaspace 37-B Dimensional Transformation Past Life Portal: To begin using this feature, click the Past Life Portal button located at the upper left of the screen. Doing so will generate information into the five following category fields: Release Conflict, Profession probability, Continent Probability, Year, and Gender. Upon completion, review the response in the Release Conflict field. It will suggest a possible mental or emotional plane conflict that may be associated with the particular past life indication. It may also provide a clue to a particular imbalance we may be experiencing at this present time. By clicking the red button next to the Release Conflict field, you will generate a 3-minute feedback procedure, which is designed to relieve the energetic stress potentials associated with the indicated conflict. Check the % Rectified field to evaluate progress. A percentage of 85% or greater is desirable. You may make only three attempts at resolution per visit. 38-A Transcendence Program: To use this feature, click the START button located on the bar at the upper right part of the screen. This will initiate an automatic 3-minute program that progresses through the twelve dimensions represented on the screen. To stop feedback at any time, click the Stop Feedback button at any time. It is suggested that you activate this program only once per visit. You may return to the main program list at any time by clicking the Wellness Info. Summary of Features: Past Life Portal: Click the “Past Life Portal” Test button located in the upper left corner of the screen. Doing so will generate information into the five following category fields: “Release Conflict,” “Profession probability,” “Continent Probability,” “Year,” and “Gender.” Upon completion, check the response in the “Release Conflict” field. Click the red button next to the “Release Conflict” field to generate a l-minute feedback procedure Check the “% Rectified” field to evaluate progress. Transcendence Program: Click the “START Transcendence Program button on bar at top of window” This will initiate an automatic 3-minute Metaspace program O Option: To stop feedback at any time, click the “Stop Feedback” button 38-B Iridology Profile Test Potential, Left & Right Eyes: The Iridology panel is divided into two sections. You will notice, that for ease of use, the standard Iridology graphics that show the left eye on the right and visa versa, have been reversed. The left graphic represents the client’s left eye, and the right graphic represents the client’s right eye. Select either the left or right option on the Change Table graphic in the middle of the screen. Then click the gold Test Potential button on the bar at the top of the screen, you will activate the test for the eye that you selected. Three items representing the highest degree of reactivity will be highlighted in red, yellow and blue respectively. Applying Feedback: To initiate the feedback process to the top three items, set the timer to the desired length, click either the Metaspace or Harness button to start, and the program will automatically divide the time allotted and apply feedback to each of the three items in succession. Additionally, you may select any SINGLE item, by highlighting it within the database list and then setting the timer in the above manner. You may stop feedback at any time by clicking the Stop Feedback button at any time. You may add additional emphasis by selecting one or all of the options in the rectangular graphic entitled: Inflammation, Infection, Degeneration, or Pain. 39-A You may return to the main program list at any time by clicking the Wellness Info button. Summary of Features: To test potential of either eye, click either the “Left” or “Right” button in the blue Change Table rectangular graphic To apply feedback, set the timer or use the 3-minute default. Click either “Metaspace” or “Harness” to begin feedback To apply feedback to single items, highlight the item in the list, set the timer or use the 3-minute default. Click either “Metaspace” or “Harness” to begin feedback To stop feedback at any time, click the “Stop Feedback” button You may add additional emphasis by selecting one or all of the “Inflammation,” “Infection,” “Degeneration” or “Pain” options 39-B Bio-Feedback Profile There are five program categories represented in the Biofeedback Profile. These include Mental/Emotional, Organs, Condition Specific, Bio-signature and Gemstone programs. Mental/Emotional, Organs or Condition Specific: Start by clicking one of the following buttons: Mental/Emotional, Organ Specific, or Condition Specific, located at the right lower part of the screen. After making one category selection, you will notice that a list of related items appears in a scrollable window or table just above your selection. Scroll through the alphabetized list until you locate an appropriate item, and then highlight that selection. Set your timer, and select either Harness or Metaspace to start feedback. Bio-Signature Program: Click the green Bio-signature button on the bar at the top of the screen to initiate the start of the program. You will notice that the picture of the client (if it was inserted into the Demographic Panel) will appear behind the individual organs as they rotate. The picture of the individual is being influenced by the energy of the Biosignature that is superimposed on the picture of each organ during the feedback process. The process will run for approximately 1-minute or until you click the Stop Feedback button. 40-A Gemstone Program: Click the gold Test Gemstones button to initiate a reactivity test of nearly 100 gemstones. Upon completion, the test will reveal the three highest responses in red, yellow and blue. To initiate the feedback process to the top three items, set the timer to the desired length, click either the Metaspace or Harness button to start, and the program will automatically divide the time allotted and apply feedback to each of the three items in succession. To apply feedback to a SINGLE item, simply set the timer to the desired length (unless you are using the 3-minute default), make a selection from any one of the tables and click either the Metaspace or Harness button to initiate the feedback. You may stop feedback by clicking the Stop Feedback button at any time. You may return to the main program list at any time, by clicking the Wellness Info button. Summary of Features: Select one of the following: “Mental/Emotional”, “Organ Specific” or “Condition Specific” buttons Review the scrollable list, then highlight the most desirable item To apply feedback, set the timer to the desired length (unless you are using the 3minute default) Click either the “Metaspace” or “Harness” button to initiate the feedback. o Option: You may stop feedback by clicking the Stop Feedback button. 40-B System Specifications The L.I.F.E. System is a complete unit containing a Program CD, interface box, head and limb harnesses, and a USB cable that connects the interface box to the computer. The L.I.F.E. system software is fully Windows 8, Windows 7, Windows Vista, and Windows XP compatible and are the required operating systems. A Pentium 4, AMD or equivalent processor, operating at 1.5 Ghz or greater, containing a minimum 1 gigabyte of RAM and ample hard drive capacity is recommended. A USB port is essential. Although Celeron, Duron and Centrino processors may be functional they are not recommended, since they are extremely slow processors. The program is written to operate at 1024 X 768 screen resolution. If using a laptop, a 15” screen, or larger, is highly advantageous. The L.I.F.E. System is a biofeedback/relaxation management device. All hardware and software components are warranted for one full year against manufacturing defects. Tech support will be provided, free of charge, for 90 days following delivery. Such support will pertain to L.I.F.E. System hardware or software problems only. It does not include support relevant to training issues, use or setup of your computer system, Microsoft Widows operating systems, scanners or other unrelated issues. Please Note: You must contact your distributor/trainer for setup and use of the L.I.F.E. System software. Software upgrades will be released subject to a $50.00 manufacturing, shipping and handling fee, which may vary somewhat in the future. (Major upgrades may incur a higher fee) The software will be upgraded periodically with new and innovative features. Hardware upgrades may require either a flat-rate or pro-rated fee, to be determined by Harmonic Energetic Technologies. All of the program tables, items and/or substances, encoded within the software have been independently developed or purchased by this company or are otherwise public domain. The reactivity process, entrainment loop, feedback and safety mechanisms used within the L.I.F.E. System are exclusive and proprietary. Answers to A Few Commonly Asked Questions Yes, the signature of any external item may be imported into the Personal Substance table, Allergy table, Vitamin/Mineral table or Homeopathic matrix from the tray situated on top of the interface device. Yes, the L.I.F.E. system does provide a distance feedback mode called “Metaspace” for use with all modalities, as well as the typical harness interface connection. No, the L.I.F.E. system software will NOT operate through any other interface box. Nor will other software programs function through the L.I.F.E. system device. Yes, the L.I.F.E. system does provide an “entrainment or auto-monitoring loop” associated with all its assessment and feedback modalities. 41-A Yes, the System provides built-in EMR (Electro-Magnetic Radiation) program which may be activated by the technician. Yes, the L.I.F.E. System provides well over 100 channels of information and uses proprietary tri-vector technology and reactivity processes. Please understand that technical information surrounding this process will not be revealed by the manufacturer. Yes, the L.I.F.E. System interface box does provide the latest safety isolation components. Batteries are NOT necessary for the use of the L.I.F.E. System Interface box. Power is received from the computer by way of the supplied USB cable. Yes, a worldwide system of support and training facilitators is available. An internationally available Web site is also available. Harmonic Energetic Technologies is offering its unequaled, Harmonic Energetic Balancing Program (H.E.B. II), 24/7 Affirmation/Prayer Program as an optional feature. Please contact one of our many sales distributors for more information. For a complete listing of sales distributors near you, please visit our website at: www.lifesysteminternational.com Thousands of client’s may be entered into the database and receive simultaneous feedback through the use of “Metaspace” technology. It is highly recommended that similar programs, or those requiring a user code that, locks onto the hard drive, should not be loaded onto the same computer. All other commonly used commercial software programs are perfectly compatible and acceptable. Technical Support, Customer And Educational Services The L.I.F.E. System hardware and software are warranted for one full year following the date of purchase. Please do not tamper with or open the interface box. Please Note: The interface box has been provided with an internal security seal. If the device has been opened and the seal broken, the warranty will not be honored. For Customer Service, please contact your local distributor/broker. For Technical Support, please contact your local distributor/broker. For Educational Information, please call C.I.H.S. at (905)864-8694. Our sincerest thanks and gratitude, Harmonic Energetic Technologies LLC 41-B