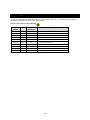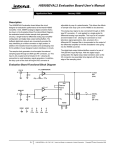
1
523-0005-010
HD Exporter User’s Manual
Software Release 2.3.3
P/N 202200-4
LCD ON/OFF
EXIT
UP
DOWN
MENU
POWER
06G070
COPYRIGHTED© 2007 BY
CONTINENTAL ELECTRONICS
4212 S. BUCKNER BLVD.
DALLAS, TEXAS 75227
(214) 381-7161 [email protected] FAX: (214) 381-4949
ISSUED – 23 JANUARY 2007
Copyright © iBiquity Digital Corporation.
All rights reserved.
The contents of this publication may not be reproduced in any media without the express written
permission of iBiquity Digital Corporation.
TRADEMARKS
The iBiquity Digital logo and “iBiquity Digital” are registered trademarks of iBiquity Digital Corporation.
“iBiquity”, “HD Radio”, “HD BML”, “HDC”, and the HD Radio logo are trademarks of iBiquity Digital
Corporation.
All other trademarks, whether claimed or registered, are the exclusive property of their respective owners.
iBiquity Digital Corporation
8865 Stanford Boulevard
Suite 202
Columbia, MD 21045
410–872–1530 (Phone)
410–872–1531 (FAX)
[email protected]
Table of Contents
Contents
1
2
3
4
5
6
7
SCOPE ..............................................................................................................................................................1
1.1 Manual Overview ......................................................................................................................................1
1.2 Screen Navigation......................................................................................................................................1
GENERAL INFORMATION..............................................................................................................................1
2.1 Physical Description ..................................................................................................................................1
2.2 Operating Characteristics ..........................................................................................................................1
INSTALLATION ................................................................................................................................................1
3.1 Unpacking And Inspection ........................................................................................................................1
3.2 Rack Mounting ..........................................................................................................................................2
HD EXPORTER CONNECTIONS....................................................................................................................4
4.1 HD Exporter Interface Requirements ........................................................................................................4
4.2 Interface Description .................................................................................................................................6
4.3 HD Exporter Front Panel Controls and Indicators.....................................................................................7
ABBREVIATIONS AND CONVENTIONS.......................................................................................................8
5.1 Abbreviations and Acronyms ....................................................................................................................8
5.2 Presentation Conventions ..........................................................................................................................8
HD EXPORTER OPERATING PROCEDURES..............................................................................................9
6.1 Startup .......................................................................................................................................................9
6.1.1
Startup Non-Embedded .........................................................................................................................9
6.1.2
Startup Embedded ...............................................................................................................................10
6.2 Audio Diversity Blend Delay Adjustment...............................................................................................10
6.3 Log Levels ...............................................................................................................................................10
6.4 Shutdown Procedure Non-embedded ......................................................................................................11
6.5 Shutdown Procedure Embedded..............................................................................................................11
6.6 Remote GUI Control ...............................................................................................................................11
6.7 Console User Interface ............................................................................................................................16
FRONT PANEL DESCRIPTION ....................................................................................................................17
7.1 Graphical User Interface Display/Indicator Definitions ..........................................................................18
7.1.1
G1 Exporter Platform Indicator...........................................................................................................19
7.1.2
Station Call Sign..................................................................................................................................20
7.1.3
Band ....................................................................................................................................................23
7.1.4
Status Upper Section (Main Screen Upper Right)...............................................................................23
7.1.5
Status Lower Section (Main Screen Upper Right) ..............................................................................23
7.1.6
Date and Time .....................................................................................................................................24
7.1.7
Exporter Status Bottom Right .............................................................................................................25
7.2 System Tab Control Buttons....................................................................................................................25
7.2.1
Shutdown.............................................................................................................................................25
7.2.2
Configuration ......................................................................................................................................26
i
7.2.3
Versions...............................................................................................................................................29
7.2.4
Configure Password ............................................................................................................................31
7.2.5
Command ............................................................................................................................................31
7.2.6
GPS Data.............................................................................................................................................37
7.2.7
Local Time ..........................................................................................................................................39
7.3 Log Tab Control Buttons.........................................................................................................................39
7.3.1
Levels ..................................................................................................................................................40
7.3.2
Parameters ...........................................................................................................................................41
7.3.3
System Status ......................................................................................................................................43
7.4 Platform Tab Control Buttons .................................................................................................................43
7.4.1
Exciter Link (E2X) Config..................................................................................................................44
7.4.2
Exciter (E2X) Link Status ...................................................................................................................45
7.4.3
Exporter I2E Link Status.....................................................................................................................47
7.5 Station Tab Control Buttons ....................................................................................................................49
7.5.1
Station Information Schedule..............................................................................................................49
7.5.2
Station Information .............................................................................................................................51
7.5.3
Station Default PAD............................................................................................................................51
7.5.4
Station Program Control......................................................................................................................55
7.6 Audio Tab Control Buttons .....................................................................................................................55
7.6.1
Audio Levels .......................................................................................................................................56
7.6.2
Analog Audio Diversity ......................................................................................................................57
7.6.3
Audio Bypass ......................................................................................................................................59
7.6.4
Audio Blend Control ...........................................................................................................................59
7.6.5
Audio Level Control............................................................................................................................59
7.7 Utility Tab Control Buttons .....................................................................................................................60
7.7.1
Screen Resize ......................................................................................................................................60
7.7.2
Fonts....................................................................................................................................................62
7.7.3
Virtual Chat.........................................................................................................................................63
7.7.4
Activity Monitor..................................................................................................................................64
7.7.5
Up Time ..............................................................................................................................................64
7.7.6
Restart X Window Server....................................................................................................................65
8 MAINTENANCE..............................................................................................................................................66
9 PARTS LISTS .................................................................................................................................................66
9.1 Introduction .............................................................................................................................................66
9.2 Index Of Parts Lists .................................................................................................................................66
9.3 Reference Designations (REF DES)........................................................................................................66
9.4 Quantity ...................................................................................................................................................66
9.5 Cage Code ...............................................................................................................................................66
9.6 Part Number.............................................................................................................................................66
9.7 Description ..............................................................................................................................................66
9.8 Illustrations ..............................................................................................................................................67
10 DRAWINGS.....................................................................................................................................................76
ii
List of Figures
Figure 4-1 HD Exporter Connection Diagram........................................................................................................5
Figure 4-2 HD Exporter Rear Panel........................................................................................................................5
Figure 4-3 HD Exporter Front Panel.......................................................................................................................6
Figure 6-1 Exporter Shutdown Control Screen.....................................................................................................11
Figure 6-2 Linuxconf Main Screen.......................................................................................................................12
Figure 6-3 Linuxconf Networking Screen ............................................................................................................12
Figure 6-4 Linuxconf IP Setup Screen..................................................................................................................13
Figure 6-5 Linuxconf Routing and Gateways Screen ...........................................................................................13
Figure 6-6 Linuxconf 2nd Page Routing and Gateways.........................................................................................14
Figure 6-7 Linuxconf Default Gateway Setup ......................................................................................................14
Figure 6-8 Linuxconf Final Config Screen ...........................................................................................................15
Figure 6-9 VNC Authentication Screen................................................................................................................15
Figure 6-10 Remote HD Exporter Main Menu Access Screen .............................................................................16
Figure 7-1 Exporter GUI Interface System Tab.....................................................................................................18
Figure 7-2 Exporter GUI Activity Monitor............................................................................................................19
Figure 7-3 Version Properties Screen ....................................................................................................................20
Figure 7-4 Station Information Screen..................................................................................................................20
Figure 7-5 Numeric Keyboard ..............................................................................................................................21
Figure 7-6 Universal Call Sign and Station Slogans..............................................................................................22
Figure 7-7 Alphanumeric Keyboard .....................................................................................................................23
Figure 7-8 Local Time Insertion Screen ................................................................................................................24
Figure 7-9 System Status Log Screen ....................................................................................................................25
Figure 7-10 Exporter Shutdown Control Screen...................................................................................................26
Figure 7-11 System Configuration Screens ...........................................................................................................28
Figure 7-12 Channel Configuration Screen ...........................................................................................................29
Figure 7-13 Versions Screen..................................................................................................................................30
Figure 7-14 Versions More Screen ........................................................................................................................30
Figure 7-15 Password Screen.................................................................................................................................31
Figure 7-16 System Command Screen...................................................................................................................32
Figure 7-17 Command Results Display .................................................................................................................33
Figure 7-18 Browse Screen....................................................................................................................................33
Figure 7-19 Virtual Keyboard................................................................................................................................34
Figure 7-20 Xterm Window...................................................................................................................................34
Figure 7-21 Gvim Editor........................................................................................................................................34
Figure 7-22 Linuxconf Screen ...............................................................................................................................35
Figure 7-23 Graphical Calculator Screen...............................................................................................................35
Figure 7-24 Top Display Screen ............................................................................................................................36
Figure 7-25 ifconfig Screen ...................................................................................................................................36
Figure 7-26 Dialog setemb Screen.........................................................................................................................37
Figure 7-27 Dialog setdev Screen..........................................................................................................................37
Figure 7-28 GPS Data Screen ...............................................................................................................................38
Figure 7-29 System Reset Warning Screen ..........................................................................................................38
iii
Figure 7-30 Exporter GUI Interface Log Tab .......................................................................................................39
Figure 7-31 Log Level Screen ...............................................................................................................................41
Figure 7-32 Select Level Screen ............................................................................................................................41
Figure 7-33 Log Parameters Screen.......................................................................................................................43
Figure 7-34 Exporter GUI Interface Platform Tab................................................................................................44
Figure 7-35 E2X Configuration Menu...................................................................................................................45
Figure 7-36 E2X Link Status Window ..................................................................................................................46
Figure 7-37 Setting the message buffer size. .........................................................................................................47
Figure 7-38 EL Activity Monitor Screen ...............................................................................................................48
Figure 7-39 Exporter GUI Interface Station Tab ..................................................................................................49
Figure 7-40 Station Information Schedule Screen ................................................................................................50
Figure 7-41 Station Information Payload Selection...............................................................................................50
Figure 7-42 Incompatible payload option warning message..................................................................................51
Figure 7-43 Station Default PAD (General Tab) ...................................................................................................51
Figure 7-44 Station Default PAD (Comment Tab) ................................................................................................52
Figure 7-45 Station Default PAD (Commercial Tab) ............................................................................................53
Figure 7-46 Station Default PAD (Last Message Sent Tab) ..................................................................................53
Figure 7-47 PAD Information Sent acknowledgement message. .........................................................................54
Figure 7-48 PAD Configuration update acknowledgement. ..................................................................................54
Figure 7-49 MPS PAD Control screen. .................................................................................................................55
Figure 7-50 Station Program Control screen .........................................................................................................55
Figure 7-51 Exporter GUI Interface Audio Tab....................................................................................................56
Figure 7-52 Audio Levels Screen .........................................................................................................................57
Figure 7-53 Analog Audio DiversityScreen .........................................................................................................58
Figure 7-54 Exporter GUI Interface Utility Tab ...................................................................................................60
Figure 7-55 Screen Resize Screen .........................................................................................................................61
Figure 7-56 Screen Size Test Screen .....................................................................................................................61
Figure 7-57 Apply Reboot Screen .........................................................................................................................62
Figure 7-58 System Fonts Screen ..........................................................................................................................62
Figure 7-59 Pick a Font Screen.............................................................................................................................63
Figure 7-60 Virtual Chat Screen ...........................................................................................................................64
Figure 7-61 Up Time Information Screen..............................................................................................................65
List of Tables
Table 4-1 Interface Description. .............................................................................................................................6
Table 7-1 GPS Cabling Delays .............................................................................................................................38
Table 9-1 Index of Parts Lists in Ref. Des. Order.................................................................................................67
Table 10-1 Index of Drawings in Numerical Order. .............................................................................................76
iv
1 Scope
1.1 Manual Overview
This manual provides information required to install, operate and maintain the Continental Electronics
HD Exporter. Included are descriptions of all screens, controls, indicators, external connections, operating
procedures, and software upgrades for the HD Exporter.
1.2 Screen Navigation
Control and status indication is accomplished through the use of an LCD monitor. The Main screen,
Figure 7-1, is displayed upon startup. Navigation to sub-screens is accomplished by using the
keyboard/touch pad located in the pullout drawer under the LCD monitor. Control of the LCD monitor is
accomplished using the buttons on the right side of the screen as described in Paragraph 4.3.
2 General Information
2.1 Physical Description
The HD Exporter assembly is housed in a standard 19-inch rack mounted industrial computer chassis. It
measures 19 in. (48.26 cm) wide, 7 in. (17.78 cm) high and 18.9 in. (48 cm) deep, and weighs
approximately 45 pounds (20.4 kg). In addition, the chassis requires a 7-inch panel space.
A 6.4-inch liquid crystal display (LCD) monitor is mounted on the left side of the front panel. On the
right side is a hinged, lockable access door behind which is the unit on/off power switch, a 3-1/2-inch
floppy drive and a 52X CD-ROM drive.
2.2 Operating Characteristics
The following operating characteristics apply to the HD Exporter.
Temperature: +32 EF (0 EC) to +122 EF (50 EC)
Humidity: Up to 95% relative humidity, non-condensing
3 Installation
3.1 Unpacking And Inspection
Remove the HD Exporter from its shipping crate and packing material. Remove top cover by removing
the retaining screws. Inspect the unit for loose screws and fasteners. Ensure that all circuit cards are
properly seated, and cable and wiring connections are tight. Replace top cover and tighten retaining
screws when inspection is complete. If any item is damaged in transit, note the damage on the shipping
documents and immediately file a freight claim. All boxes and packing material should be retained for the
freight inspector.
Refer to wirelist WL200000-4 that follows Section 3 for all internal interface connections and to facilitate
reconnection of loose cabling/wiring.
1
3.2 Rack Mounting
WARNING: The HD Exporter weighs approximately 45 pounds (20.4 kg). Use two people to mount
the unit to the rack. Failure to comply may result in injury to personnel.
CAUTION: Ensure cooling air inlet/outlet openings are not obstructed when the HD Exporter is in
operation. The air inlet opening is on the top panel. The air outlet openings are on the rear panel.
Maintain 1U (1.75") of space above top panel. Failure to comply may result in equipment
overheating.
NOTE: The HD Exporter should be mounted in the rack at or near eye level for optimum display
viewing. Allow adequate space behind the rear panel for cable connections.
While Person A supports the HD Exporter at the desired mounting height, Person B should install and
tighten the four front panel mounting screws.
INTRA-UNIT WIRING LIST
WIRELIST NO:WL202200-4
WIRE
NO
WIRE
SIZE or
TYPE
DATE: 9/26/6
ECN NO:
REV: -
ASSY NO: 202200-4
PL NO: PL202200-4
SCHEMATIC: 202201-4
REVISED: 2006/11/21
FROM
W1
W2
NOT USED
NOT-USED
W3
W4
W5
W6
W7
W8
W9
W10
W11
W12
NOT USED
Coaxial
A10CP4-'10MHz'
Coaxial
A8-J22 (SMA)
Coaxial
Rear Panel -'GPS
ANT'
Coaxial
A3-10MHz
Coaxial
A3-1PPS
Coaxial
A8-J14
NOT USED
NOT USED
Ribbon
A3-SERIAL PORT
W13
W14
PS2
PS2
W15
W16
W17
PS2
A1-KEYBOARD
NOT USED
IDC 40
A1-IDE2
(ribbon)
A1-MOUSE
W13 & W15
TO
WIRE
LENG REMARKS
TH
A8-J16
W39C-P2
A3-GPS ANT
2.5 FT
1.5 FT CEC P/N 426-7039-040
2 FT
A8-J6
A8-J5
A10CP6-'1PPS'
1.5 FT
1.5 FT
2.5 FT
A1-COM1
2 FT
W14
PC CHASSIS-PS2
1 FT
1 FT
W14
1 FT
A7-IDE
GPS DATA
202207-1
CEC P/N
SUPPLIED WITH CHASSIS - 'Y'
Cable
SUPPLIED WITH
MOTHERBOARD
2
INTRA-UNIT WIRING LIST
WIRELIST NO:WL202200-4
WIRE
NO
WIRE
SIZE or
TYPE
ECN NO:
REV: -
ASSY NO: 202200-4
PL NO: PL202200-4
SCHEMATIC: 202201-4
REVISED: 2006/11/21
FROM
W18
CAT5
W19
18 AWG
W20
W21
NOT USED
VGA
A1-VGA PORT
W22
22 AWG
A10CP9'ETHERNET'
A8-J18
W22-P1
W22-P2
W23
A1-IDE1
W24
IDC 40
(ribbon)
18 AWG
W25
18 AWG
A9 - POWER
W26
Audio
A10 -'DIGITAL
INPUT'
W27
NOT-USED
W39
W39A
W39B
W39C
DATE: 9/26/6
A7 - POWER
W39-P1
W39A-P3
W39B-3
W39B-2
W39B-1
W39C-P2
A1J17 - FRONT PANEL CONNECTOR
18 AWG TP A1J17-5
18 AWG TP A1J17-3
18 AWG TP A1J17-8
18 AWG TP A1J17-10
18 AWG TP A1J17-7
TO
A1-LAN
WIRE
LENG REMARKS
TH
1 FT
ATX POWER SUPPLY P16
PC CHASSIS - VGA
PORT
A3-POWER
P/O CHASSIS POWER SUPPLY
1 FT
SUPPLIED WITH CHASSIS
4 in
GPS POWER
202206-1
ATX POWER SUPPLY - 4 in
P15
A9-IDE
ATX POWER SUPPLY P7
ATX POWER SUPPLY P8
A8-J7
CEC P/N
SUPPLIED WITH
MOTHERBOARD
P/O CHASSIS POWER SUPPLY
P/O CHASSIS POWER SUPPLY
CEC P/N 202227-1
A6
A8-J10
A10CP2-3
A10CP2-2
A10CP2-1
W5-BNC
CEC 202243-1
SEE NOTES 1 & 2
CHASSIS 'LAN'-BLK
WIRE
CHASSIS 'LAN'-RED
WIRE
CHASSIS 'POWER SW'RED
CHASSIS 'POWER SW'BLK
CHASSIS 'RESET SW'GRN
HD ACCESS LIGHT, supplied
w/chassis
HD ACCESS LIGHT, supplied
w/chassis
ATX POWER SW, supplied
w/chassis
ATX POWER SW, supplied
w/chassis
RESET SWITCH, supplied
w/chassis
3
INTRA-UNIT WIRING LIST
WIRELIST NO:WL202200-4
WIRE
NO
WIRE
SIZE or
TYPE
DATE: 9/26/6
ECN NO:
REV: -
ASSY NO: 202200-4
PL NO: PL202200-4
SCHEMATIC: 202201-4
REVISED: 2006/11/21
FROM
18 AWG TP A1J17-9
MOTHERBOARD(A1) POWER
A1-20PIN MAIN
POWER
A1-4PIN +12V
POWER
A10B1 FAN
ASSEMBLY
A10B1 P/O A10B1 A10B1P1
TO
WIRE
LENG REMARKS
TH
CHASSIS 'RESET SW'WHT
RESET SWITCH, supplied
w/chassis
ATX POWER SUPPLY P1
ATX POWER SUPPLY P2
P/O CHASSIS POWER SUPPLY
ATX POWER SUPPLY P12
B1 POWER
1
P/O CHASSIS POWER SUPPLY
CEC P/N 202213-
NOTES:
NOTE 1: W2 must be assembled during the final assembly stage of the HD Exporter/Signal Generator System.
NOTE 2: W39 is supplied with A6(the audio card). The XLR(M) on W39 must be cut and the loose wires soldered
to A10CP2 per wirelist.
4 HD Exporter Connections
This section contains a description of the HD Exporter and provides diagrams and instructions for
connection in a broadcast system.
4.1 HD Exporter Interface Requirements
Figure 4-1 is the HD Exporter connection diagram showing the connections between the HD Exporter and
external equipment. Figure 4-2 shows the HD Exporter rear panel configuration; Figure 4-3 shows HD
Exporter front panel controls and indicators. Connect the signal and power cables to the rear panel. The
HD Exporter contains a power supply which operates on any voltage from 95 - 264 Vac and any
frequency from 47 – 63 Hz.
4
Figure 4-1 HD Exporter Connection Diagram
Figure 4-2 HD Exporter Rear Panel
5
Figure 4-3 HD Exporter Front Panel
4.2 Interface Description
Table 4-1contains a listing and description of the IBOC FM interface connections, including connector
type.
Table 4-1 Interface Description.
Function
Input/Output
Description
Connector
1 PPS
10 MHz
GPS ANT
Output
Output
Input
BNC Female
BNC Female
TNC Female
Digital
Input
Monitor
Ethernet
LVDS
I/Q
Telco
Mouse
Keyboard
AC Pwr
Input
TTL level
+5 dBm
Power is supplied to the antenna from the center conductor
of the coaxial cable. This connection must be made with a
single cable and not through any other devices such as an
amplifier or splitter/combiner
AES/EBU Audio
AES/EBU Audio
100 MHz Network Connection
XLR Female
RJ45 Female
RJ45 Female
Output
Input/Output
Not Used
Not Used
Not Used
Not Used
Input
XLR Male
RJ11 Female
PS2
PS2
Automatically switchable: 94 - 264 Vac
6
4.3 HD Exporter Front Panel Controls and Indicators
The HD Exporter has five buttons and one indicator on the front panel display to control the screen
information. The buttons and the indicator are labeled as follows:
Control/Indicator
LCD ON/OFF Button
EXIT Button
UP Button
DOWN Button
MENU Button
POWER LED
Function
Applies power to and turns off LCD monitor.
Exits from menu or slide bar. Also press button again to enter menu
selection.
Adjust the value up of slide bar or press to select up slide bar.
Adjust the value down of slide bar or press to select down slide bar.
1. Press to enter menu for function selection.
2. When repeatedly pressing this button, it will sequentially open on-screen
display (OSD) window page-1 and then page-2.
3. On/Off function changing on slide bar.
4. Select slide bar and press menu button. You can see it turn Red and
then you can use UP/DOWN buttons for setting value.
Lights Green when power is applied to LCD monitor.
Also included on the front panel are three status indicators and one switch beside the access door and two
switches behind the access door. Only one of the indicators and the two switches behind the access door
are used. Their functions are as follows:
Control/Indicator
Hard Drive LED
Power Switch
Reset Switch
Temperature and Fan
LED, and Buzzer Off
Switch
Function
Indicator flashes when the hard drive is accessed during read/write
operations.
Located behind access door. Applies power to and turns off HD Exporter.
Located behind access door. Resets processor circuits (soft reboot).
Not Used.
7
5 Abbreviations and Conventions
5.1 Abbreviations and Acronyms
AES/EBU
ALFN
AM
BER
CD
CD/ROM
DUN
FCC
FM
GPS
GUI
IBOC
L1
LED
LVDS
MF
MPA
MP1–MP7
MS1–MS4
PAR
RF
RLS
SIS
VHF
Audio Engineers Society/European Broadcast Union
Absolute L1 Frame Number
Amplitude Modulation
Bit Error Rate
Compact Disk
CD/Read Only Memory
Dial-Up Networking
Federal Communications Commission
Frequency Modulation
Global Positioning System
Graphical User Interface
In-band On-channel
Layer 1
Light Emitting Diode
Low Voltage Differential Signal
Medium Frequency
Main Program Audio
Primary Service Modes 1 through 7
Secondary Service Modes 1 through 4
Peak-to-Average Ratio
Radio Frequency
Radio Link Service
Station Identification Service
Very High Frequency
5.2 Presentation Conventions
Unless otherwise noted, the following conventions apply to this document:
•
•
•
•
•
•
•
•
Information enclosed in braces { } is either unavailable at the present time or subject to change.
All vectors are indexed starting with 0.
The element of a vector with the lowest index is considered to be first.
In drawings and tables, the leftmost bit is considered to occur first.
Bit 0 of a byte or word is considered the least significant bit.
In representations of binary numbers, the least significant bit is on the right.
When presenting the dimensions of a matrix, the number of rows is given first (e.g., an n x m
matrix has n rows and m columns).
In timing diagrams, earliest time is on the left.
8
6 HD Exporter Operating Procedures
This section contains HD Exporter operating procedures.
6.1 Startup
Startup can be executed as embedded or non-embedded. The non-embedded startup requires manual
entering of system configuration information from the keyboard, as described in Paragraph 6.1.1. To
have the HD Exporter run the latest software upon power up with no user intervention, use embedded
startup as described in Paragraph 6.1.2. Perform the appropriate startup procedure to initialize the HD
Exporter.
NOTE: Paragraph 6.1.1 or 6.1.2 must be executed immediately after an OS upgrade for proper
operation. All Set commands must be executed as Root user to have effect.
6.1.1 Startup Non-Embedded
Perform the following procedures to initialize the HD Exporter in non-embedded mode:
Set primary power on the HD Exporter to On.
If the unit is in the embedded mode, open an xterm window and type the following:
For general non-embedded operation
setdev
Press Return
To Set the IP address to 10.10.10.10
setaway
Press Return
To set local network settings for MD type
setmode MD
Press Return
Or to set local network settings for NJ type
setmode NJ
Press Return
The unit must be rebooted for the change to take effect. Once the system boots up completely, login as
root with the appropriate password.
Type:
start
Press Return
The following information is displayed:
/usr/dab
run ./init_loader.x ...
Executing Kernel: 2.4.20
Available baselines
0) /usr/dab/irss-1.4.4
Kernel (built from)
2.4.20 (default)
Type:
0 and press Enter
The unit initializes and the main menu is displayed. The system is ready for operation.
9
6.1.2 Startup Embedded
Perform the following procedures to initialize the HD Exporter in embedded mode.
Set primary power on the HD Exporter to On.
To set for embedded operation
setemb
Press Return
To Set the IP address to 10.10.10.10
setaway
Press Return
To set local settings for MD type
setmode MD
Press Return
Or to set local settings for NJ type
setmode NJ
Press Return
The unit must be rebooted for the change to take effect.
Press Return the default program is run without login on subsequent start-up.
6.2 Audio Diversity Blend Delay Adjustment
Not Used.
6.3 Log Levels
To set the hard-drive logging level, select Levels from the Log Tab main menu. The screen in Figure
7-31 is displayed. To set the logging level for an individual process, set the Log Level to a value 0
through 7 (0=Off, 7=Max). To set the description associated with the screen logging (not to a file) of
each process, increase the number under the Verbose Level column (0=Off, 7=Max) to the appropriate
level. This sets the Log Level stored in file /mnt/data/irss.log. This file is archived to a date associated
file ex: /mnt/data/03-02-03/irss02:33:00.log.
The size and number of these files can be set by editing /usr/dab/irss-1.4.4/cfg/com/logx.cfg
Excerpt from logx.cfg
logFilePath=".";
logFileName="irss";
logAsciiFileSize=%d : 10000000;
logBinFileSize=%d : 209715200;
logSentCycleFlag=%d : 0;
logArchiveDay=%d : 2;
logArchFileCount=%d : 5;
To increase the size of each file, change logAsciiFileSize.
To increase the number of days to hold data files, change logArchiveDay.
To increase the number of files stored each day, change logArchFileCount.
Exercise caution when setting these file sizes and log levels: excessive data can lead to a full disk.
10
6.4 Shutdown Procedure Non-embedded
Select Shutdown.
If power is to be removed, type halt. This will stop the OS. Wait until OK is displayed to turn power off.
If the OS is to be restarted, type reboot. The unit reboots to the login prompt.
If the application is to be restarted, type: start to restart the program.
6.5
Shutdown Procedure Embedded
Select Shutdown.
If power is to be removed, select Shutdown and press OK. This will halt the OS. Wait until the display
indicates OK to power down.
If the OS is to be restarted, select OS Restart and press OK. The system will reboot back to the default
program.
If the application is to be exited and restarted, select Restart and press OK to exit and rerun the program.
6.6 Remote GUI Control
When the HD Exporter operating system is running, control can be remotely established using a standard
web browser such as Internet Explorer. A network connection to the Exporter must be established by
Ethernet.
Network setup for the Exporter
1. Press the ShutDown button on the Main Exporter screen. The following screen will open after typing
in the Password.
Figure 6-1 Exporter Shutdown Control Screen
11
2. Select Console and press OK. Irss will shut down and you will get a Linux prompt. Log in as “root”
and use “password” as the password. At the # prompt, type “linuxconf”. The Linuxconf main screen
will display.
Figure 6-2 Linuxconf Main Screen
3.
Press Enter on the keyboard. The following screen will display.
Figure 6-3 Linuxconf Networking Screen
12
4.
Press Enter on the keyboard. The following screen will display.
Figure 6-4 Linuxconf IP Setup Screen
5. Arrow down on the keyboard to the IP Address and type in the IP Address to be assigned to this unit.
6. Press TAB to Accept and then Enter on the keyboard. The following screen will display.
Figure 6-5 Linuxconf Routing and Gateways Screen
13
7. Arrow down to Routing and gateways.
8. Press Enter. The following screen will display.
Figure 6-6 Linuxconf 2nd Page Routing and Gateways
9.
Press Enter on the keyboard.
Figure 6-7 Linuxconf Default Gateway Setup
10. Type in the Default Gateway.
11. Press Tab to Accept.
14
Figure 6-8 Linuxconf Final Config Screen
12. Press Tab twice to highlight Do It. Press enter.
13. The root # prompt will appear at the bottom of the screen under the Linuxconf window. Type
“shutdown –r now” and press Enter. The Exporter will shut down all the way and reboot.
14. This completes the Network setup for the Exporter.
After a network connection is established, type the IP address or machine name in the Address field of a
web browser. The VNC Authentication screen, Figure 6-9, will then be displayed.
Figure 6-9 VNC Authentication Screen
Type “password” for the password and select OK. The Remote HD Exporter Main Menu is displayed in
the web-browser as shown in Figure 6-10. The HD Exporter can now be controlled from the remote
location, just as if you were at the console, without limitation.
Note: Any number of connections to the same HD Exporter is permitted (i.e. there is no lock-out for
multiple users).
15
Figure 6-10 Remote HD Exporter Main Menu Access Screen
Access any X-windows applications and/or a console by using the System Command function, see
Paragraph 7.2.5.
6.7 Console User Interface
All the capabilities of the HD Exporter can be invoked through the Console User Interface for the HD
Exporter, cuitx.x. For complete use and syntax go to the proper directory and view the help file:
cd /usr/dab/irss-1.6.0/bin/tx
./cuitx.x –h | more
Press the space bar to walk through the file.
Additionally, any cuitx function can be set on a schedule utilizing the cronx feature. The following is an
example of a script, tgldab.sh, that toggles the digital carriers on/off:
16
#read the dab state and write it to the variable flag
flag =`./cuitx.x –getL1Stat | grep “digital carrier control” | awk ‘{ print $5 }’`
#toggle the dab state, if on turn dab off if dab off turn it on.
If [ “$flag” == “ON” ]
then
./cuitx.x –dab 0
else
./cuitx.x –dab 1
fi
This script can be invoked on a schedule by executing the following command.
./cronx.x ./tgldab.sh 10
This will execute the script ./tgldab.sh every 10 seconds. When you no longer want the script to run type:
q to quit.
NOTE: You must type “q” to quit. Do not press ctl-c. This will cause errors on the HD Exporter
display.
7 Front Panel Description
Front panel descriptions are divided into two categories: Display/Indicator Definitions and Control
Buttons for the HD Exporter.
In all windows the following general rules apply:
•
•
•
•
•
•
•
•
Read-only fields have a light blue background
Read/write fields have a blue-green background
On data entry screens the Cancel button will not make any entered data permanent. Any screen
with a Cancel button will also have an OK button that can be used to make data permanent.
On data entry screens the Close button only closes the window. Any data that has been specified
is already permanent because it was registered as entered.
On Numeric keyboard screens the valid range of data will be displayed.
Failures that need attention are displayed in RED.
Warnings are displayed in Yellow.
Normal status information is displayed in Green.
17
7.1 Graphical User Interface Display/Indicator Definitions
Figure 7-1 Exporter GUI Interface System Tab is the graphical user interface (GUI) Main Menu, as
configured upon startup. Descriptions of display/indicator fields accessible from this screen are provided
in the following subparagraphs.
Figure 7-2 is the Activity Monitor screen: This screen is displayed if no GUI interaction is detected for
greater than 1 minute.
The first four LEDs depict the status of the four AES audio ports, Analog Audio Input, Analog Audio
Output, Digital Audio Input, and Monitor Audio Output. These lights will blink from black to green as
long as there is audio on each port. If silence is detected the light will remain black.
The Analog Input and Digital Input Fault LEDs should remain black during normal operation. If the AES
stream at either port is not detected the LED will turn Red indicating the Fault.
The Exporter Link activity LED does not apply to the HD Exporter.
Figure 7-1 Exporter GUI Interface System Tab
18
Version 2.3.3
Figure 7-2 Exporter GUI Activity Monitor
7.1.1 G1 Exporter Platform Indicator
This identifies the present system platform. When selected, a platform menu is displayed as shown in
Figure 7-3.
NOTE: The platform selected must be compatible with the hardware in use or errors will occur.
DO NOT change the Exporter platform. The G1 Exporter is the only platform supported in the 202200-4
configuration.
19
Figure 7-3 Version Properties Screen
7.1.2 Station Call Sign
The Station Call Sign indicator displays the call sign being transmitted with the digital data. When
selected, the Station Information screen (Figure 7-4) is displayed.
The Station Information screen is subdivided into 4 group boxes: Station Identification, Call Sign, Station
Slogan, and Station Message.
Figure 7-4 Station Information Screen
20
7.1.2.1
7.1.2.1.1
Station Identification
Country Code
The Country Code tab, when selected, displays a Numeric Keyboard screen similar to Figure 7-5. To
change the Country Code, enter the desired Country Code using the number keys. Press Enter to
establish the new Country Code and return to the Station Information screen.
7.1.2.1.2
FCC ID
The (Federal Communications Commission) FCC ID field, when selected, displays a Numeric Keyboard
screen (Figure 7-5). To change the FCC ID, enter the desired FCC ID using the number keys. Press
Enter to establish the new FCC ID and return to the Station Information screen.
Figure 7-5 Numeric Keyboard
7.1.2.2
Call Sign
There are 2, mutually exclusive, methods for transmitting a station’s call signs: Standard & Universal.
7.1.2.2.1
Standard
NOTE: The Standard Call Sign field is limited to four characters; all characters MUST be upper case.
The Standard Call Sign field, when selected, displays a Alphanumeric Keyboard screen similar to Figure
7-7. To change the Standard Call Sign, enter the desired letters. Selecting shift, type the desired fourcharacter Call Sign using the character keys. Press Enter to establish the new call sign and return to the
Station Information screen.
7.1.2.2.2
Universal
If a station’s call sign is longer than 4 characters, or contains international symbols, the Universal Call
sign should be used. The Universal Call Sign supports 4 different character sets: RBDS/RDS E.1,
RBDS/RDS E.2, RBDS/RDS E.3, and Unicode. Use the drop down box (as shown in Figure 7-6) to
select the desired character set. The Universal Call Sign field, when selected, displays an Alphanumeric
Keyboard screen similar to Figure 7-7. To change the Universal Call Sign, enter the desired letters. Press
Enter to establish the new call sign and return to the Station Information screen. If “Append Band” is
selected (checked), the current frequency band will be appended to the Universal Call Sign that is
displayed at the receiver.
21
7.1.2.3
Station Slogan
There are 2 methods for transmitting a Station Slogan: Standard & Universal. Unlike the Call Sign, both
methods can be transmitted simultaneously. However, if they are transmitted simultaneously, the entries
must be identical. If “Enable both standard and universal formats” is selected (checked) then the
Universal Station Slogan entry is grayed out and displays the contents of the Standard Slogan.
7.1.2.4
Standard Station Slogan
NOTE: The Standard Station Slogan field is limited to 56 characters.
The Standard Station Slogan tab, when selected, displays a Alphanumeric Keyboard screen, similar to
Figure 7-7. To change the Standard Station Slogan, enter the characters using the Alphanumeric
Keyboard. Press Enter to establish the new Standard Station Slogan and return to the Station Information
screen.
Figure 7-6 Universal Call Sign and Station Slogans
7.1.2.4.1
Universal Station Slogan
If a station’s slogan is longer than 56 characters, or contains international symbols, the Universal Station
Slogan should be used. The Universal Station Slogan supports 4 different character sets: RBDS/RDS E.1,
RBDS/RDS E.2, RBDS/RDS E.3, and Unicode. Use the drop down box (as shown in Figure 7-6) to
select the desired character set. The Universal Station Slogan tab, when selected, displays an
Alphanumeric Keyboard screen similar to Figure 7-7. To change the Universal Station Slogan, enter the
desired characters and press Enter to establish the new slogan and return to the Station Information
screen.
22
7.1.2.5
Station Message
The Station Message field is used to transmit messages other than the call sign or station slogan. The
Station Message field supports 4 different character sets: RBDS/RDS E.1, RBDS/RDS E.2, RBDS/RDS
E.3, and Unicode. Use the drop down box (as shown in Figure 7-6) to select the desired character set.
The Station Message field, when selected, displays an Alphanumeric Keyboard screen similar to Figure
7-7. To change the Station Message, enter the desired characters and press Enter to establish the new
Station Message and return to the Station Information screen.
Check the “High Priority” box to indicate to receivers that current message has a high priority.
Figure 7-7 Alphanumeric Keyboard
7.1.3 Band
The main menu frequency band indicator displays the HD Exporter waveform selection: AM or FM.
7.1.4 Status Upper Section (Main Screen Upper Right)
The upper section displays current HD Exporter state. Either Operational in Green or Non-Operational in
Red.
7.1.5 Status Lower Section (Main Screen Upper Right)
The lower section displays current HD Exporter Alarm state. Either No Alarm in Green or Alarm in Red.
The Alarm can be cleared by selecting this area.
23
7.1.6 Date and Time
Date and time displayed are local time. To obtain the Global Positioning System (GPS) and use it for
display in the lower-left corner of the main menu, see Sync Local Time below. If the GPS is not
connected to an antenna with access to GPS data, this window will display a time/date of 00:00:00 Jan 6,
1980 and increment from that time until the system attains GPS time lock.
When selected, the Local Time insertion screen is displayed, Figure 7-8. This screen allows manual entry
of local time.
Figure 7-8 Local Time Insertion Screen
Enable DST if checked will use daylight savings time.
Select Sync Local Time to synchronize the system time to the GPS time.
24
7.1.7 Exporter Status Bottom Right
7.1.7.1
Status Section
The status section displays current exporter status. Error conditions are displayed in red and warning
conditions are displayed in green. Select this area or the System Status Log button to view the status
history as shown in Figure 7-9.
As seen in Figure 7-9, several warnings appear. The first and second indicate that the GPS is not time
locked. The GPS antenna should be check for proper view of the sky. At times it will take time for lock
to be acquired so you may have to wait for GPS lock.
Figure 7-9 System Status Log Screen
7.2 System Tab Control Buttons
Figure 7-1 shows the GUI main menu System Tab screen: this screen is displayed upon startup.
Descriptions of control buttons displayed on the System Tab of this screen are provided in the following
subparagraphs.
7.2.1 Shutdown
The Shutdown control screen, Figure 7-10, is used to shutdown the exporter.
If power is to be removed, select Shutdown and press OK. This will halt the OS. Wait until the display
indicates OK to power down.
If the OS is to be restarted, select OS Restart and press OK. The system will reboot back to the default
program.
If the application is to be exited and restarted, select Restart and press OK to exit and rerun the program.
25
If the application is to be exited and a console session started, select Console and press OK to exit and
start the session.
NOTE: See Paragraph 6.4 and/or 6.5 for detailed shutdown options.
Figure 7-10 Exporter Shutdown Control Screen
7.2.2 Configuration
The System Configuration button provides access to the system configuration screen, Figure 7-11.
7.2.2.1
Config Channel
To configure the rate of the logical channels select Config Channel. When selected, the Channel
Configuration screen will be displayed, Figure 7-12.
7.2.2.2
Channel Configuration
The Channel Configuration screen is used to set the amount of bandwidth given to each service available;
Audio, Station information, or Data. These settings are repeated for all logical channels available:
Channel 1 – P1
Channel 2 – P2
Channel 3 – P3
Channel 4 - SIS
7.2.2.3
Current Mode
Current Mode displays the layer 2 current configuration setting.
7.2.2.4
Total Size (bytes)
The Characteristics group box displays the size of the logical channel PDU, the rate at which the PDU is
sent, and the bandwidth (or average rate) of the PDU for each logical channel.
7.2.2.5
Obtain Data Externally
The Partitioning group box displays information pertaining to how each logical channel is partitioned
between Main Program Audio (MPA), fixed data and opportunistic data.
26
MPA Size allows the selection of the amount of bytes to be used for the Main Program Audio (MPA).
The user can either enter the value or use the Up and Down buttons to change the default value.
NOTE: Lowering this number from it’s maximum value can have deleterious effects on Audio quality.
When MPA Size is lowered from the maximum (default), the remaining bytes (Size – MPA Size) can be
allocated to Fixed or Opportunistic data. Initially, all extra bytes are assigned to Opportunistic data unless
the “Enable Opp” check box is not selected.
The Obtain Data Externally button should be unselected. See an iBiquity Digital representative for use.
7.2.2.6
Previous
Select Previous Page to scroll through all logical channels.
7.2.2.7
Next
Select Next Page to scroll through all logical channels.
7.2.2.8
Save Config
Selecting Save Config will create a file of the current system mode configuration files (freq, analog
delay…).
7.2.2.9
System Configuration Value
Select the number adjacent to Enter Item No. for selected configuration. When selected, the Numeric
Keyboard screen, Figure 7-5, is displayed. To change the configuration value, enter the desired
configuration value using the number keys. Press Enter to establish the new configuration. When a
selection is made, the user is prompted to restart the system. See Figure 7-11 for available choices.
There are 3 System Configuration Values that are labeled as ‘Dynamic’:
24 FM MP1-MP3 Dynamic
25 FM MP5 Dynamic
26 FM MP6 Dynamic
These System Configuration Values allow the channel bandwidth and/or mode characteristics to be
updated without requiring a reboot of the exciter.
NOTE: Only shaded selections are available. All non-shaded configurations have not been fully
verified and are for internal test only, use at your own risk. The non-shaded configurations will
require the user to enter a password for access.
7.2.2.10 Restart Options
Selecting Save Current Configuration upon restart, from this screen only, the current system mode
configuration files will be saved for use upon startup.
Selecting Load Default Configuration will use the default configuration values when restarted, from this
screen only.
Selecting Reboot the Exporter over the Exporter Link will send a message to the Exporter to reboot when
restarted, from this screen only.
7.2.2.11 Restart
Selecting Restart will restart the system. Selecting Cancel will exit this window.
27
Figure 7-11 System Configuration Screens
28
Figure 7-12 Channel Configuration Screen
7.2.3 Versions
When selected, a display of the present software/firmware/Motherboard configuration will be shown,
Figure 7-13. This information will not be valid until after the system has indicated it is Operational.
29
Figure 7-13 Versions Screen
To view additional detailed information, select the More button and Figure 7-14 is displayed.
Figure 7-14 Versions More Screen
30
7.2.4 Configure Password
When selected the user will be prompted to enter the present password to gain access to the password
configure screen, Figure 7-15.
Figure 7-15 Password Screen
The new password can now be entered. Confirm the new password by entering it again in the Retype
Password area.
Timeout in seconds value denotes how long, after entering a valid password, you have unlimited access
before you are again prompted to enter the password again. If the checkbox is unchecked the access time
has no limit and is valid until changed or the exporter is rebooted.
7.2.5 Command
The System Command screen, Figure 7-16, is displayed when selected.
7.2.5.1
Command/Results
To execute a linux system command (ls, pwd …), enter the command here. The results of the command
can be displayed immediately by placing a check mark in the Display Results box. The results can also
go to a file as defined by the file name in the Results/Output File: line. To execute the command select
Execute.
If the Display Results option is selected, Figure 7-17 will now be displayed. Select Cancel to return to the
Receiver Submenu screen.
7.2.5.2
Browse
This button can be selected to choose a file/directory (for execution or results storage). Figure 7-18 will
appear. Press OK to enter the selection and return to the System Command screen.
7.2.5.3
Common Applications Display Virtual Keyboard
This button, if selected will display a virtual keyboard (Figure 7-19) on the display when the common
application is run.
31
Figure 7-16 System Command Screen
7.2.5.4
Common Applications Xterm
This button, if selected, will display an Xterm Window, (Figure 7-20). The user can now type
commands. When done, the user types exit and presses return to close the window and return to the
System Command window.
32
Figure 7-17 Command Results Display
Figure 7-18 Browse Screen
33
Figure 7-19 Virtual Keyboard
Figure 7-20 Xterm Window
7.2.5.5
Common Applications gvim
This button, if selected, will display a Graphical Text Editor (Figure 7-21). The user can now call up a
file to edit. When done, select file/exit to return to the System Command screen.
Figure 7-21 Gvim Editor
7.2.5.6
Common Applications linuxconf
This button, if selected, will display a graphical linux configuration application (Figure 7-22). The user
can now configure the system as desired. When done, select Quit to return to the System Command
screen.
34
Figure 7-22 Linuxconf Screen
7.2.5.7
Common Applications gcalc
This button, if selected, will display a graphical calculator application (Figure 7-23). The calculator is
now displayed. Select file/exit to return to the System command screen.
Figure 7-23 Graphical Calculator Screen
7.2.5.8
Common Applications Top
This button, if selected, will display a summary of the processor usage (Figure 7-24). This display is
continually updated, when done press q to quit.
35
Figure 7-24 Top Display Screen
7.2.5.9
Common Applications ifconfig
This button, if selected, will display a summary of the processor network configuration (Figure 7-25).
Press close to quit and return to the System Command window.
Figure 7-25 ifconfig Screen
7.2.5.10 Common Applications setemb
This button, if selected, will set the system to embedded mode. Press close to quit and return to the
System Command window. The system is now in Embedded mode. See Paragraph 6.1 Startup for
embedded mode operation description.
36
Figure 7-26 Dialog setemb Screen
7.2.5.11 Common Applications setdev
This button, if selected, will set the system to development mode. Press close to quit and return to the
System Command window. The system is now in Development mode. See Paragraph 6.1 Startup for
development mode operation description.
Figure 7-27 Dialog setdev Screen
7.2.6 GPS Data
The GPS Data button, when selected, displays the GPS Data screen shown in Figure 7-28. This screen
displays GPS Version, status, and allows setting of the GPS values.
If the GPS mode is in the Not Locked mode (no antenna attached), all the position information can be
edited. This information will not be used for transmission unless the system is reset. If the information is
changed, a system reset warning screen, Figure 7-29, will be displayed as a reminder.
37
Figure 7-28 GPS Data Screen
Figure 7-29 System Reset Warning Screen
7.2.6.1
GPS Antenna Delay
This variable is based on GPS cable type and length. Delay values for recommended cable types are
listed in Table 7-1 GPS Cabling Delays.
Table 7-1 GPS Cabling Delays
Cable Type
Delay Value
Belden 9311 (RG-58)
Belden 8267 (RG-213)
Belden 9104 (RG-59)
Belden 9913 (RG-8)
4.36 ns/m (1.33 ns/ft)
4.99 ns/m (1.52 ns/ft)
4.00 ns/m (1.22 ns/ft)
3.90 ns/m (1.19 ns/ft)
38
To determine the proper delay value, multiply the delay value from Table 7-1 by the length of cable used.
For example, if the antenna system includes 50 ft of RG-58 cable, the total cable delay is:
50 ft x 1.33 ns/ft = 66.5 ns
When entering the data round the value to the nearest nanosecond (ns).
When Antenna Delay is selected, Figure 7-28, the Numeric Keyboard screen is displayed, Figure 7-5. To
change the delay value, enter the desired delay value using the number keys. Press Enter to establish the
new delay value and return to the GPS Data screen.
7.2.7 Local Time
See Paragraph 7.1.6.
7.3 Log Tab Control Buttons
Figure 7-30 shows the GUI main screen Log Tab. Descriptions of control buttons displayed on the Log
Tab of this screen are provided in the following subparagraphs.
Version 2.3.3
Figure 7-30 Exporter GUI Interface Log Tab
39
7.3.1 Levels
Select Levels from the Log Tab main menu, to view and update log level information. The Log Levels
screen, Figure 7-31, is displayed. To set the logging level for an individual process, set the Log Level to a
value 0 through 7 (0=Off, 7=Max). To set the description associated with the screen logging of each
process (not to a file), increase the number under the Verbose Level column (0=Off, 7=Max) to the
appropriate level. This sets the logging stored in file /mnt/data/irss.log. This file is archived to a dateassociated file. For example: /mnt/data/02-19-03/irss02:33:00.log.
7.3.1.1
Previous Page
Select Previous Page to scroll backward through exporter processes.
7.3.1.2
Next Page
Select Next Page to scroll forward through exporter processes.
7.3.1.3
All Log Levels
To set the log level to the same value for all processes, select All Log Levels. Figure 7-32 is displayed.
Select the level desired for all processes and press Close to enter the new values.
This will log all data with a log level of the selected value or lower.
7.3.1.4
All Verbose Levels
To set the verbose level to the same value for all processes, select All Verbose Levels to display the
screen shown in Figure 7-32. Select the desired level and click Close to activate the new level.
This will print all data with a verbose level of the selected value or lower.
7.3.1.5
Exclusive Level
Exclusive Level, when selected will only print data that is the same level as the level selected (not lower
or higher).
40
Figure 7-31 Log Level Screen
Figure 7-32 Select Level Screen
7.3.2 Parameters
Select Parameters from the Log main menu. The Log Parameters screen (Figure 7-33) is displayed. This
screen will display the present logging utilization and allow for the setting of warning parameters.
41
7.3.2.1
Warning Message Rate
When Warning Message Rate is selected, the Numeric Keyboard screen is displayed (Figure 7-5). To set
how often the user is warned that the maximum log rates have been exceeded, enter the desired time in
seconds. Press enter to use the new value and return to the Log Parameters screen.
7.3.2.2
Window Size (sec):
When Window Size is selected, the Numeric Keyboard screen is displayed (Figure 7-5). To set the
duration over which the logging rate is calculated, enter the desired time in seconds. Press enter to use
the new value and return to the Log Parameters screen.
7.3.2.3
ASCII Log Rate (bytes/sec):
ASCII Log Rate displays the instantaneous amount of ASCII logging.
7.3.2.4
ASCII Log Utilization:
ASCII Log Utilization displays the instantaneous amount of ASCII logging represented as a percentage of
the maximum rate.
7.3.2.5
ASCII Log Max Rate:
When Max ASCII Log Rate is selected, the Numeric Keyboard screen is displayed (Figure 7-5). To set
the log rate for which, if exceeded, a warning will be issued, enter the desired rate. Press enter to use the
new value and return to the Log Parameters screen.
7.3.2.6
Binary Log Rate (bytes/sec):
Binary Log Rate displays the instantaneous amount of Binary logging.
7.3.2.7
Binary Log Utilization:
Binary Log Utilization displays the instantaneous amount of Binary logging represented as a percentage
of the Maximum rate.
7.3.2.8
Binary Log Max Rate:
When Max Binary Log Rate is selected, the Numeric Keyboard screen is displayed (Figure 7-5). To set
the log rate for which, if exceeded, a warning will be issued, enter the desired rate. Press enter to use the
new value and return to the Log Parameters screen.
7.3.2.9
Start Archive
When Start Archive is selected, all log files in the /mnt/data path along with any core files in the bin/tx
path will be collected and placed in the specified archived file.
42
Figure 7-33 Log Parameters Screen
7.3.3 System Status
See Paragraph 7.1.7.1.
7.4 Platform Tab Control Buttons
Figure 7-34 shows the GUI main screen Platform Tab. Descriptions of control buttons displayed on the
Platform Tab of this screen are provided in the following subparagraphs.
43
Figure 7-34 Exporter GUI Interface Platform Tab
7.4.1 Exciter Link (E2X) Config
When the Exciter Link Config button is pressed, the window shown in Figure 7-35 is displayed. This
window is divided into 4 group boxes: Protocol, IP Address, MAC Address, and Exciter Reset Delay.
44
Figure 7-35 E2X Configuration Menu
7.4.1.1
Protocol
The two choices for the communications protocol between the Exporter and Exgine are Uni-directional
(UDP/IP) and Bi-directional (TCP/IP).
7.4.1.2
IP Address
Use the numerical touch pad to enter the IP address of the Exgine subsystem.
7.4.1.3
MAC Address
For true uni-directional links the IP address must be resolved in the Exporter ARP table. First select the
enable box and then enter the MAC address of the Exgine subsystem.
7.4.1.4
Exciter Reset Delay
The Exgine subsystem must be started and waiting for messages from the Exporter before the Exporter
can begin sending data. To guarantee this condition is established, the Exporter will wait a set amount of
time after a restart command is issued to restart itself. This time is configurable using the Exciter Reset
Delay.
7.4.2 Exciter (E2X) Link Status
The Exciter Link Status window provides information on the status of the E2X link. The Status window is
sub-divided into 3 major areas: Statistics, Bits per Second, and History.
45
Figure 7-36 E2X Link Status Window
7.4.2.1
Statistics
This portion of the window provides statistics on the number of messages sent, the number of messages
that failed to send, the number of messages received correctly, the number of messages that failed to be
received, the number of messages received with CRC errors, and the number of messages received out of
order. For the Exporter, only the Sent Message Pass/Fail Count has any meaning. The Received Message
statistics and the CRC Error and mismatch counts are zero by default, since the Exporter is not receiving
any messages.
These counts can be reset by pressing the “Reset” Button within the group box.
7.4.2.2
Bits Per Second
This area presents a bar graph of the bandwidth usage. Both the instantaneous bit-rate and the long-term
average bit-rate is displayed. The reset button should be pressed before using this display.
7.4.2.3
History
The history portion of the window provides scrolling details of each message sent across the E2X link.
Again, the Sequence Mismatch and CRC errors do not have any relevance on the transmit side of the link.
These are more appropriate on the Exgine side. To freeze the scrolling and examine individual messages
more closely, check the “Freeze” box. When this box is checked, the “Configure Buffer” and “Save”
buttons will be activated.
When the “Configure Buffer” button is selected, the window shown in Figure 7-37 appears. Use this to
set the number of messages to be saved to file. Use the “Save” button to choose a location and file name
for the message buffer.
46
Figure 7-37 Setting the message buffer size.
7.4.3 Exporter I2E Link Status
The Exporter Link Status window provides status for Exporter Link (I2E) activities, Figure 7-38.
47
Figure 7-38 EL Activity Monitor Screen
7.4.3.1
Channel Statistics
The Channel Statistic Panel is a static list consisting of five columns with 12 rows. On every command
response, this panel will be updated by replacement of the entire panel. The columns are Channel, Repeat,
Synchronize, Number of Messages to send and Number of messages dropped. The rows show all
channels from channel zero to channel eleven. Channel zero to nine represents logical channel one to nine
of the layer one modem. Channel ten is the ancillary channel and channel eleven is the opportunistic
channel.
7.4.3.2
Indication History
The Indication History Panel is an additive scrolling list consisting of six columns. On every command
response, new statistics are added by appending. These columns are Channel, ALFN, BC, Response,
Drops and Time. The Channel column shows the channel id and has a value of zero to eleven. The ALFN
column shows the absolute frame number for the message to be sent and has a non-negative value. The
BC column shows the block count for the message to be sent and has a value of zero to fifteen. The
Response column shows the type of response from EL and has value of Data, Empty or Repeat. The value
Data indicates a new data response from the channel message queue. The value of empty indicates an
empty data response. The value Repeat indicates a repeat data response from the last data response. The
Drops column shows number of messages that are being dropped from the channel message queue prior
to the data response. Message drops could only happened if the channel is set to synchronize. The Time
column shows when an indication is received.
48
7.4.3.3
Data Message History
The Data Message Receiving History Panel is an additive scrolling list containing six columns. On every
command response, new history is added by appending. The columns are Channel, Control, Size, ALFN,
BC and Time. The Channel column shows the channel id. The Control column shows the control
parameter. They are Empty, Repeat, No Repeat, Flush, Synchronize and Non-synchronize. The Size
column shows the size of the message. The ALFN shows the absolute frame number of that message and
the BC column shows the block count of that message. The Time column shows the time the message is
received.
7.5 Station Tab Control Buttons
Figure 7-39 shows the GUI main screen Station Tab. Descriptions of control buttons displayed on the
Station Tab of this screen are provided in the following subparagraphs.
Version 2.3.3
STATION
Figure 7-39 Exporter GUI Interface Station Tab
7.5.1 Station Information Schedule
The Station Information Schedule, Figure 7-40, is displayed when selected from the main menu.
Select the block and payload to be changed, select the payload option desired, and press OK to enter the
new settings and return to the main menu.
49
Figure 7-40 Station Information Schedule Screen
Care must be taken when selecting payload options as some options are not compatible with other
options. For example Slogan Universal requires both payloads, so Payload 2 must be left blank. If an
incompatible payload is selected a warning message similar to Figure 7-42 will be displayed.
Figure 7-41 Station Information Payload Selection
50
Figure 7-42 Incompatible payload option warning message.
7.5.2 Station Information
See Paragraph 7.1.2.
7.5.3 Station Default PAD
The Station’s default PAD information, Figure 7-43, is displayed when selected from the Station main
menu. This menu has four tabs: General, Comment, Commercial, and Last Message Sent. Each tab is
described in turn.
7.5.3.1
General
Use this tab shown in Figure 7-43 to enter the Title, Artist, Album, and Genre information by selecting
the desired field and using the alphanumeric keyboard similar to the one in Figure 7-7. To include this
information as part of the PAD message make sure the “Enable” box is checked. Clearing the Enable box
will exclude this information from being sent.
Note: Even though Genre is a text field, the user should select one of the types defined in the IDS
standard, if possible.
Figure 7-43 Station Default PAD (General Tab)
51
7.5.3.2
Comment
Use this tab shown in Figure 7-44 to enter the Comment Title and Comment Description information by
selecting the desired field and using the alphanumeric keyboard similar to the one in Figure 7-7. To
include this information as part of the PAD message make sure the “Enable” box is checked. Clearing the
Enable box will exclude this information from being sent.
Figure 7-44 Station Default PAD (Comment Tab)
7.5.3.3
Commercial
Use this tab shown in Figure 7-45 to enter the Commercial information by selecting the desired field and
using the alphanumeric keyboard similar to the one in Figure 7-7. To include this information as part of
the PAD message make sure the “Enable” box is checked. Clearing the Enable box will exclude this
information from being sent.
52
Figure 7-45 Station Default PAD (Commercial Tab)
7.5.3.4
Last Message Sent
Use this tab, shown in Figure 7-46 , to view the last message sent in ID3 format.
Figure 7-46 Station Default PAD (Last Message Sent Tab)
53
In addition to the four tabs, the Station Default PAD screen also has four buttons: Send, Update,
Advanced, and Cancel.
7.5.3.5
Send
When pressed, the current information in the General, Comment and Commercial screens, if enabled, will
be queued for transmission as indicated by the screen shown in Figure 7-47.
Figure 7-47 PAD Information Sent acknowledgement message.
7.5.3.6
Update
When pressed, the current information in the General, Comment, and Commercial screens is saved as part
of the default configuration for that Service Mode as indicated by the acknowledgement message shown
in Figure 7-48.
Figure 7-48 PAD Configuration update acknowledgement.
7.5.3.7
Advanced
When pressed the screen shown in Figure 7-49 is displayed. This screen sets the various parameters used
to control the PAD generation tool. Select the desired option and press OK for the selection to take place
or press Restore Default to return to the default settings. Pressing Cancel will return to the Station Default
PAD screen with no changes.
54
Figure 7-49 MPS PAD Control screen.
7.5.3.8
Cancel
Use Cancel to return to the main Station screen.
7.5.4 Station Program Control
The station’s programming genre selection, Figure 7-50, is displayed when the Select Station Program
Control is selected.
Figure 7-50 Station Program Control screen
This menu allows the user to send a genre type embedded in the main program audio bit-stream. Once
“Enable” is checked, the genre information will be sent as part of the main program audio bit-stream. The
change the genre, use the pull down menu and select the genre type most appropriate.
7.6 Audio Tab Control Buttons
Figure 7-51 shows the GUI main screen Audio Tab. Descriptions of control buttons displayed on the
Audio Tab of this screen are provided in the following subparagraphs.
55
Version 2.3.3
Figure 7-51 Exporter GUI Interface Audio Tab
7.6.1 Audio Levels
This button, if selected, will display a dynamic Audio Levels screen, Figure 7-52.
7.6.1.1
Range (dB)
Select this option to change the Minimum value (left most value of audio bars) of the audio Bar graph.
The Numeric Keyboard (Figure 7-5) is displayed. To change the Range, in dB down from Full Scale,
enter the new value using the number keys.
7.6.1.2
Average (sec)
Select this option to change the time over which the average of audio power is taken to be displayed as
the green portion of the audio Bar graph. The Numeric Keyboard (Figure 7-5) is displayed. To change
the average time, enter the new value using the number keys.
NOTE: If this number is larger than the peak and/or peak hold numbers they will be changed to equal
the Average time.
7.6.1.3
Peak (sec)
Select this option to change the time over which the peak of audio power is taken to be displayed as the
Yellow portion of the audio Bar graph. The Numeric Keyboard (Figure 7-5) is displayed. To change the
Peak time, enter the new value using the number keys.
NOTE: If this number is larger than the peak hold number it will be changed to equal the Peak time.
56
7.6.1.4
Peak Hold (sec)
Select this option to change the time over which the peak of audio power is taken to be displayed as the
Red portion of the audio Bar graph. The Numeric Keyboard (Figure 7-5) is displayed. To change the
Peak Hold time, enter the new value using the number keys.
Figure 7-52 Audio Levels Screen
7.6.2 Analog Audio Diversity
This button, if selected, will display the Analog Audio Diversity Screen, Figure 7-53.
57
Figure 7-53 Analog Audio DiversityScreen
7.6.2.1
Delay
Not Used.
7.6.2.2
Increment
Not Used.
7.6.2.3
Delay in seconds
Not Used.
7.6.2.4
Current Delay in seconds
Not Used.
7.6.2.5
Automatic Adjustment Ramp Up
Not Used.
7.6.2.6
Automatic Adjustment Ramp Down
Not Used.
7.6.2.7
Rate
Not Used.
58
7.6.2.8
Audio Monitor
Not Used.
7.6.2.9
Audio Diversity Delay Status
Not Used.
7.6.2.10 Audio Card 0 Input Level
The Audio Card 0 Input Level indicator displays activity on the audio card 0 input path.
7.6.2.11 Audio Card 0 Output Level
The Audio Card 0 Output Level indicator displays activity on the audio card 0 output path.
7.6.2.12 Audio Card 1 Input Level
Not Used.
7.6.2.13 Audio Card 1 Output Level
Not Used.
7.6.3 Audio Bypass
Not Functional.
7.6.4 Audio Blend Control
Not Functional.
7.6.5 Audio Level Control
The exciter can transmit control information to the receiver to indicate adjustments between the analog
and digital audio. When selected a numeric keyboard screen similar to Figure 7-5 is displayed. To
change the recommended level adjustment, enter the desired value using the number keys. Press “Enter”
to establish the new value and return to the Audio screen.
59
7.7 Utility Tab Control Buttons
Figure 7-54 Exporter GUI Interface Utility Tab shows the GUI main screen Utility Tab. Descriptions of
control buttons displayed on the Utility Tab of this screen are provided in the following subparagraphs.
Version 2.3.3
Figure 7-54 Exporter GUI Interface Utility Tab
7.7.1 Screen Resize
The Screen Resize window allows the user to change the dimensions of the display, Figure 7-55.
7.7.1.1
Width Value
This displays the present value of the screen width. This can be raised or lowered using the + or –
buttons.
7.7.1.2
Height Value
This displays the present value of the screen height. This can be raised or lowered using the + or –
buttons.
7.7.1.3
Test
When selected, Test will display a test screen, Figure 7-56. Verify that the entire border is visible and
select OK when complete.
60
Figure 7-55 Screen Resize Screen
Figure 7-56 Screen Size Test Screen
7.7.1.4
Default Size
When selected, both the height and the width values will be reset to default settings.
7.7.1.5
Apply
When selected, the user will be prompted to reboot the system to make use of the new screen settings,
Figure 7-57. Selecting Yes will proceed with the reboot and NO will cancel the action and return to the
Exporter Main screen.
61
Figure 7-57 Apply Reboot Screen
7.7.1.6
Cancel
When selected, the user will be returned to the Exporter Main screen.
7.7.2 Fonts
This button, if selected, will display a System Fonts screen, Figure 7-58.
Figure 7-58 System Fonts Screen
The upper section if selected allows the user to select the font used on all small data presentation areas,
Figure 7-59.
The lower section if selected allows the user to select the font used on all large data presentation areas,
Figure 7-59.
62
Figure 7-59 Pick a Font Screen
7.7.3 Virtual Chat
The Virtual Chat Screen, Figure 7-60, allows direct communication between two users logged in to the
same exciter. If a user is at the exciter and a second user has logged in remotely, see Paragraph 6.6, using
Virtual Chat they can communicate directly. By entering the information to be sent in the bottom window
and pressing Send, the message will be relayed to the other user. All communications will be displayed
in the upper window.
63
Figure 7-60 Virtual Chat Screen
7.7.4 Activity Monitor
See Paragraph 7.1.
7.7.5 Up Time
When selected, the screen shown in Figure 7-61 displays information about the length of time the exciter
has been operational. Two columns are displayed: Calendar Time and Elapsed Time. Calendar Time
represents the date and time the last event occurred. The Elapsed Time displays the total time in years,
days, minutes, and seconds from the last event.
The events displayed are:
1. OS Start – The last time the OS was restarted.
2. System Start – The last time the application was started.
3. Last System Shut-down – The last time the system was shutdown.
4. Last System Error – The last time a warning or system error occurred.
64
Figure 7-61 Up Time Information Screen.
7.7.6 Restart X Window Server
There may be times when the X Window Server portion of the Linux OS fails and the GUI becomes
responsive only during mouse movements. In order to resolve this situation without rebooting the system,
use the X Window Server Restart button. This will stop and start the X Window Server portion of the OS
without affecting system operation.
65
8 Maintenance
No preventive maintenance is required. No internal corrective maintenance (repair or replacement) is
authorized. If the HD Exporter fails to operate in a normal manner, return unit to Continental Electronics
for repair.
9 Parts Lists
9.1 Introduction
This section contains a list of repairable/replaceable electrical and mechanical parts for the HD Exporter.
9.2 Index Of Parts Lists
Table 9-1 is an index of parts lists listed in reference designator order. The parts lists are arranged in
ascending numerical order following the top-level parts list, 202200-4. Paragraphs 9.3 through 9.7
describe the five columns in the parts lists.
9.3 Reference Designations (REF DES)
This column contains the reference designators of parts that have been assigned on schematics or wiring
diagrams, and/or index numbers for parts which have not been assigned reference designators. When a
reference designator within a series of designators has not been assigned a part number, the unassigned
reference designator will be omitted from the list.
9.4 Quantity
This column contains the quantity of each component or assembly used in the major subassembly.
9.5 Cage Code
The Commercial and Government Entity (CAGE) code is a five-character alphanumeric code assigned to
the manufacturer of the assembly or component.
9.6 Part Number
Continental Electronics specification or drawing control numbers for each item in the parts lists are listed
in this column. An asterisk preceding a part number indicates a separate parts list exists for that item.
Separate parts lists have been included for all maintenance significant items.
9.7 Description
The identifying noun or item name followed by a brief description such as size, color, rating or special
characteristics will be listed in this column. The description for electrical/electronic parts includes the
application ratings and tolerances.
66
9.8 Illustrations
Parts listed in the REF DES column are located on assembly drawings. The assembly drawings are
located in Section 10. When a replaceable item is hidden from view, a dotted leader line is used to show
the item’s location.
Table 9-1 Index of Parts Lists in Ref. Des. Order.
Ref. Des.
–
A1
A8
A10
W12
W22
W26
W39
Description/Title
HD Exporter
Motherboard Assembly
CCA, GPS Clock Distribution
Rear Panel Assembly
Cable Assy, GPS Data (W12)
Cable Assy, GPS Pwr (W22)
Cable Assy, HD AES Input
Cable Assy, HD AES
Part No.
202200-4
202208-1
202223-2
202217-2
202207-1
202206-1
202227-1
202243-1
Rev.
–
–
A
–
–
–
–
–
PL202200-4
HD EXPORTER
Rev. –
Ref. Des. Qty
Cage
Part No.
Description
0
0
52151 202200
HD EXPORTER/SIGNAL GENERATOR
1
0
52151 202200
HD EXPORTER/SIGNAL GENERATOR
2
1
52151 109-9032-210
CHASSIS,RACK MOUNT:4U-19" KB W/TOUCH PAD/LCD
MONITOR,24" SLIDES
3
1
*202202-1
CHASSIS,HD EXPORTER/SIGNAL GENERATOR
4
0
202201
SCHEMATIC DIAGRAM,HD EXPORTER/SIGNAL
GENERATOR
5
1
52151 202225-1
PLATE,COMPONENT
6
2
52151 191-0034-070
POST,ELEC-MECH EQUIP MALE/FEM 1/4" HEX,6-32 THD
EACH END,1-1/2"LG,ALUM
7
0
072-0178-010
SOFTWARE,HD EXPORTER/SIGNAL GENERATOR,PN
202200-1
8
0
52151 NOT-USED
NOT-USED
9
1
52151 015-9942-020
ACCESSORY,LANYARD,TYPE EYE EACH END,8" LG
10
4
52151 191-0017-230
POST,ELECTRICAL-MECHANICAL EQUIPMENT: FEMALE,
1/4 HEX,6-32 UNC X 1-1/2,ALUMINUM,GOLD IRIDITE
11
1
52151 202221-1
OVERLAY,HD EXPORTER
12
22
96906 MS51957-28
SCREW,MACHINE:6-32UNC-2A X 3/8,PAN HEAD,CRES
CROSS RECESSED
13
35
96906 MS15795-805
WASHER,FLAT:0.156 ID,0.312 OD,0.035 THK,CRES
14
35
96906 MS35338-136
WASHER,LOCK:#6 NOM ID,SPRING,HELICAL,300 CRES
0.250"OD,0.148"ID,0.031"TK,PASSVTD,REGULAR SERIES
15
11
96906 MS51957-30
SCREW,MACHINE:6-32UNC-2A X 1/2,PAN HEAD,CRES
CROSS RECESSED
16
6
96906 MS35649-264
NUT,PLAIN,HEXAGON:6-32UNC-2B,CRES,PASSIVATED
17
0
52151 WL202200-4
INTRA-UNIT WIRING LIST, HD EXPORTER/SIGNAL
GENERATOR
18
0
52151 NOT-USED
NOT-USED
19
1
*202211-1
BRACKET,SUPPORT
20
1
52151 202228-1
SUPPORT,CIRCUIT BOARD
21
4
52151 190-5019-010
SPACER,SLEEVE:ROUND,1/4 OD,0.140 ID,1/8 LG,
ALUMINUM,GOLD IRIDITE PLATED
67
PL202200-4
HD EXPORTER
Rev. –
Ref. Des. Qty
Cage
Part No.
Description
22
0
52151 NOT-USED
NOT-USED
23
1
52151 *202220-1
INSTALLATION KIT,HD EXPORTER
24
0
52151 651-9084
TEST SPEC FOR EXPORTER (202200-4) SOFTWARE
INSTALLATION AND SYSTEM TEST
A1
1
*202208-1
MOTHERBOARD ASSEMBLY
A2
0
52151 NOT-USED
NOT-USED
A3
1
52151 270-3429-010
GPS TIME/FREQUENCY REFERENCE:12VDC,10MHZ
CLOCK
A4
0
52151 NOT-USED
NOT-USED
A5
0
52151 NOT-USED
NOT-USED
A6
1
52151 109-9070-010
CIRCUIT CARD ASSY:DIGITAL AUDIO INTERFACE,24
BIT96KHZ ADAT + WORD CLOCK
A7
1
52151 109-0702-200
DISK DR,CD-ROM,52X,ATAPI/IDE BLACK BEZEL
A8
1
52151 *202223-2
CCA,GPS CLOCK DISTRIBUTION
A9
1
52151 109-0702-190
DISK DR,40GB,3.5",7200RPM,IDE
A10
1
*202217-2
REAR PANEL ASSEMBLY
AT1
1
52151 713-5009-040
DUMMYLOAD,ELECTRICAL,50OHMS 1/4 WATT,SMA
CONNECT OR,DC-12GHZ
W1
0
52151 NOT-USED
NOT-USED
W2
0
52151 NOT-USED
NOT-USED
W3
0
52151 REFERENCE
Reference
W4
1
52151 426-7039-070
CABLE ASSY,RG-174,50OHM COAX SMA MALE-BNC
MALE,LG:2.5 FT
W5
1
52151 426-7039-040
CABLE ASSY,RG 174,50OHM COAX SMA MALE-BNC
MALE,LENGTH:1.5 FT
W6
0
52151 REFERENCE
Reference
W7
1
52151 426-7039-060
CABLE ASSY,RG-174,50OHM COAX SMA MALE-SMA
MALE,LG:1.5 FT
W8
1
52151 426-7039-060
CABLE ASSY,RG-174,50OHM COAX SMA MALE-SMA
MALE,LG:1.5 FT
W9
1
52151 426-7039-070
CABLE ASSY,RG-174,50OHM COAX SMA MALE-BNC
MALE,LG:2.5 FT
W10
0
52151 NOT-USED
NOT-USED
W11
0
52151 NOT-USED
NOT-USED
W12
1
*202207-1
CABLE ASSY,GPS DATA (W12)
W13
1
52151 426-7038-040
CABLE ASSY,SPEC PURPOSE MINI DIN6 MALE TO MINI
DIN6 MALE,1 FT
W14
0
52151 REFERENCE
Reference
W15
1
52151 426-7038-040
CABLE ASSY,SPEC PURPOSE
MINI DIN6 MALE TO MINI DIN6 MALE,1 FT
W16
0
52151 NOT-USED
NOT-USED
W17
0
52151 REFERENCE
Reference
W18
1
52151 426-7021-130
CBL ASSY,CAT 5E,PATCH CORD,1FT W/RJ45/RJ45
CONNECTORS
W19
0
52151 REFERENCE
Reference
W20
0
52151 NOT-USED
NOT-USED
W21
0
52151 REFERENCE
Reference
W22
1
*202206-1
CABLE ASSY,GPS PWR (W22)
W23
0
52151 REFERENCE
Reference
W24
0
52151 REFERENCE
Reference
W25
0
52151 REFERENCE
Reference
68
PL202200-4
HD EXPORTER
Rev. –
Ref. Des. Qty
Cage
Part No.
Description
W26
1
52151 *202227-1
CABLE ASSY,HD AES INPUT
W27
0
52151 NOT-USED
NOT-USED
W39
1
52151 *202243-1
CABLE ASSEMBLY
PL202206-1
CABLE ASSY,GPS PWR (W22) Rev. –
Ref. Des. Qty
Cage
Part No.
Description
2
2
52151 372-9843-010
CONTACT,ELECTRICAL:CRIMP TYPE PIN
CONTACT,BRASS24-18AWG WIRE SIZE,13AMP,PRE-TIN
3
0
52151 372-9783-070
CONTACT,ELECTRICAL:FEMALE TERMINAL,CRIMP
TYPE18-24AWG,BRASS,GOLD-TIN
4
0.50
52151 439-7067-000
WIRE,ELECTRICAL:22 AWG,600 VOLT,BLACK,PVC
5
0.50
52151 439-7073-000
WIRE,ELECTRICAL:22 AWG,600 VOLT,YELLOW,PVC
P1
0
52151 372-9723-110
CONNECTOR HOUSING,PLUG,ELECTRICAL:3
CAVITY,SINGLE ROW,W/LATCH,FEMALE
P2
1
52151 361-5101-050
CONNECTOR,ELEC,4 CKT MATENLOCK PIN
HOUSING,0.200(5.00) CENTERLINE SPACE
PL202207-1
CABLE ASSY,GPS DATA (W12)
Rev. –
Ref. Des. Qty
Cage
Part No.
Description
2
1
52151 426-7019-350
CBL ASSY,SP,ELEC,D-SUB RIBBN SINGLE ENDED,9
PIN,6FT
3
1
52151 139-8075-010
CLAMP,CABLE,ELECTRICAL CONNECTOR:STRAIN
RELIEF FOR D SUB RIBBON CONNECTOR,9 CONTACT
SIZE,ST STEEL
P2
1
52151 371-7241-030
CONNECTOR,RECPT,ELEC,D-SUB FEMALE,9 PIN,IDC
TERMINATION
PL202208-1
MOTHERBOARD ASSEMBLY
Rev. Ref. Des.
Qty
Cage
Part No.
Description
2
1
52151
109-9068-050
CIRCUIT CARD ASSY:MOTHERBOARD,W/FIVE PCI
SLOTS SUPPORTS INTEL PENTIUM 4 AND CELERON
PROCESSORS
3
1
52151
109-9068-030
MICROCIRCUIT,DIGITAL:PENTIUM 4,3GHZ
PROCESSOR
4
1
52151
109-9068-040
HEAT SINK & FAN ASSY:USED W/P4 478 FMB2,12V,0.4A
5
1
52151
351-5513-040
DDR,SDRAM,MEM MOD,512MB,UDIMM
184PIN,2.5V,64MX64,200MHZ
PL202217-2
REAR PANEL ASSEMBLY
Rev. –
Ref. Des. Qty
Cage
Part No.
Description
0
0
52151 202217
REAR PANEL ASSEMBLY
2
1
*202203-1
PANEL,REAR,HD EXPORTER/SIGNAL GENERATOR
3
1
*202204-1
HINGE,HD EXPORTER/SIGNAL GENERATOR
4
11
96906 MS51957-30
SCREW,MACHINE:6-32UNC-2A X 1/2,PAN HEAD,CRES
CROSS RECESSED
5
11
96906 MS35649-264 NUT,PLAIN,HEXAGON:6-32UNC-2B,CRES,PASSIVATED
6
11
96906 MS15795-805 WASHER,FLAT:0.156 ID,0.312 OD,0.035 THK,CRES
69
PL202217-2
REAR PANEL ASSEMBLY
Rev. –
Ref. Des. Qty
Cage
Part No.
Description
7
11
96906 MS35338-136 WASHER,LOCK:#6 NOM ID,SPRING,HELICAL,300
CRES0.250"OD,0.148"ID,0.031"TK,PASSVTD,REGULAR
SERIES
8
2
52151 009-5191-020 FAN FINGER GUARD
9
4
96906 MS24693-C4
SCREW,MACHINE:4-40UNC-2A X 3/8,FLAT HEAD,CSK100
DEG CROSS RECESSED,CRES
10
2
96906 MS51957-15
SCREW,MACHINE:4-40UNC-2A X 3/8,PAN HEAD,CRES
CROSS RECESSED
11
6
96906 MS15795-803 WASHER,FLAT:0.125 ID,0.250 OD,0.022 THK,CRES
12
6
96906 MS35338-135 WASHER,LOCK:#4 NOM ID,SPRING,HELICAL,300
CRES0.209"OD,0.120"ID,0.025"TK,PASSVTD,REGULAR
SERIES
13
6
96906 MS35649-244 NUT,PLAIN,HEXAGON:4-40UNC-2B,CRES,PASSIVATED
14
2
52151 015-9914-010 INSERT,ELECTRICAL CONNECTOR:DOUBLE 'D'
PLASTIC0.500" DIA
B1
1
*202213-1
FAN ASSEMBLY
CP1
1
52151 360-5022-110 CON1,COUPLER,FEEDTHRU,RJ45 CAT5E,PANEL MOUNT
CP2
1
52151 371-7242-040 CONNECTOR,CABLE,XLR M,3 PIN FLANGED PANEL
MOUNT
CP3
1
52151 371-7242-030 CONNECTOR,CABLE,XLR F,3 PIN FLANGED PANEL
MOUNT
CP4
1
52151 124-6000-350 ADAPTER, CONNECTOR: SERIES BNC, TEFLON
DIELECTRIC, FEMALE-FEMALE
CP5
0
52151 NOT-USED
NOT-USED
CP6
1
52151 124-6000-350 ADAPTER, CONNECTOR: SERIES BNC, TEFLON
DIELECTRIC, FEMALE-FEMALE
CP7
0
52151 NOT-USED
NOT-USED
CP8
0
52151 NOT-USED
NOT-USED
CP9
1
52151 360-5022-110 CON1,COUPLER,FEEDTHRU,RJ45 CAT5E,PANEL MOUNT
CP10
1
52151 360-5022-130 CON1,COUPLER,RJ11,6X4 MODULAR,PANEL MOUNT
PL202223-2
CCA, GPS CLOCK DISTRIBUTION
Rev. A
Ref. Des. Qty
Cage
Part No.
Description
1
0
52151
202223
CCA,GPS CLOCK DISTRIBUTION
2
1
52151
202222-1
PRINTED WIRING BOARD,GPS CLOCK DISTRIBIUTION
3
0
52151
202224
SCHEMATIC DIAGRAM, GPS CLOCK DISTRIBUTION
4
0
52151
651-9087
TEST SPEC: FOR 202223-1/2 GPS CLOCK DISTRIBUTION
CCA
C1
1
52151
913-7143-595 CAPACITOR,FIXED,CERAMIC:0.1UF,+/-10%,50WVDC,CHIP
TYPE,SURF MT,EIA SZ 0805
C2
0
52151
NOT-USED NOT-USED
C3
1
52151
913-7143-650 CAPACITOR,FIXED,CERAMIC:0.01 UF,+-10%,50
WVDC,CHIP TYPE,X7R TEMP CHAR,WRPRND TERM,SURF
MT,EIA SZ 1206
C4
1
52151
184-9624-040 CAPACITOR,FIXED,ELECTROLYTIC:10UF,25VDC CHIP
TYPE,SURFACE MT
C5
1
52151
184-9624-040 CAPACITOR,FIXED,ELECTROLYTIC:10UF,25VDC
CHIP TYPE,SURFACE MT
C6
1
52151
913-7106-060 CAPACITOR,FIXED,CERAMIC:100000PF,+-10%,50 WVDC
CHIP
70
PL202223-2
CCA, GPS CLOCK DISTRIBUTION
Rev. A
Ref. Des. Qty
Cage
Part No.
Description
C7
1
52151
913-7143-650 CAPACITOR,FIXED,CERAMIC:0.01 UF,+-10%,50
WVDC,CHIP TYPE,X7R TEMP CHAR,WRPRND TERM,SURF
MT,EIA SZ 1206
C8
1
52151
913-7143-770 CAPACITOR,FIXED,CERAMIC:0.1UF,+-10%,50WVDC,CHIP
TYPE,SURF MT,X7R TEMP CHAR,WRPRND TERM,EIA SZ
1206
C10
1
52151
913-7143-650 CAPACITOR,FIXED,CERAMIC:0.01 UF,+-10%,50
WVDC,CHIP TYPE,X7R TEMP CHAR,WRPRND TERM,SURF
MT,EIA SZ 1206
C11
1
52151
913-7143-595 CAPACITOR,FIXED,CERAMIC:0.1UF,+/-10%,50WVDC,CHIP
TYPE,SURF MT,EIA SZ 0805
C12
0
52151
NOT-USED NOT-USED
C13
1
52151
913-7143-650 CAPACITOR,FIXED,CERAMIC:0.01 UF,+-10%,50
WVDC,CHIP TYPE,X7R TEMP CHAR,WRPRND TERM,SURF
MT,EIA SZ 1206
C14
1
52151
913-7143-650 CAPACITOR,FIXED,CERAMIC:0.01 UF,+-10%,50
WVDC,CHIP TYPE,X7R TEMP CHAR,WRPRND TERM,SURF
MT,EIA SZ 1206
C15
1
52151
913-7143-770 CAPACITOR,FIXED,CERAMIC:0.1UF,+-10%,50WVDC,CHIP
TYPE,SURF MT,X7R TEMP CHAR,WRPRND TERM,EIA SZ
1206
C16
1
52151
913-7143-380 CAPACITOR,FIXED,CERAMIC:1000PF,+-10%,50WVDC,CHIP
TYPE,SURF MT,X7R TEMP CHAR,WRPRND TERM,EIA SZ
0805
C17
0
52151
NOT-USED NOT-USED
C18
0
52151
NOT-USED NOT-USED
C19
1
52151
913-7143-650 CAPACITOR,FIXED,CERAMIC:0.01 UF,+-10%,50
WVDC,CHIP TYPE,X7R TEMP CHAR,WRPRND TERM,SURF
MT,EIA SZ 1206
C20
1
52151
913-7143-650 CAPACITOR,FIXED,CERAMIC:0.01 UF,+-10%,50
WVDC,CHIP TYPE,X7R TEMP CHAR,WRPRND TERM,SURF
MT,EIA SZ 1206
C21
1
52151
913-7143-770 CAPACITOR,FIXED,CERAMIC:0.1UF,+-10%,50WVDC,CHIP
TYPE,SURF MT,X7R TEMP CHAR,WRPRND TERM,EIA SZ
1206
C22
0
52151
NOT-USED NOT-USED
C23
1
52151
913-7143-820 CAPACITOR,FIXED,CERAMIC,.33UF +-10%,25V,SMT 0805
C24
1
52151
913-7143-460 CAPACITOR,FIXED,CERAMIC:4700PF,+-10%,50WVDC,CHIP
TYPE,SURF MT,X7R TEMP CHAR,WRPRND TERM,EIA SZ
0805
C25
0
52151
NOT-USED NOT-USED
C26
0
52151
NOT-USED NOT-USED
C27
1
52151
913-7143-650 CAPACITOR,FIXED,CERAMIC:0.01 UF,+-10%,50
WVDC,CHIP TYPE,X7R TEMP CHAR,WRPRND TERM,SURF
MT,EIA SZ 1206
C28
1
52151
913-7143-650 CAPACITOR,FIXED,CERAMIC:0.01 UF,+-10%,50
WVDC,CHIP TYPE,X7R TEMP CHAR,WRPRND TERM,SURF
MT,EIA SZ 1206
C29
1
52151
184-9624-040 CAPACITOR,FIXED,ELECTROLYTIC:10UF,25VDC CHIP
TYPE,SURFACE MT
71
PL202223-2
CCA, GPS CLOCK DISTRIBUTION
Rev. A
Ref. Des. Qty
Cage
Part No.
Description
C30
1
52151
913-7143-650 CAPACITOR,FIXED,CERAMIC:0.01 UF,+-10%,50
WVDC,CHIP TYPE,X7R TEMP CHAR,WRPRND TERM,SURF
MT,EIA SZ 1206
C31
1
52151
913-7143-650 CAPACITOR,FIXED,CERAMIC:0.01 UF,+-10%,50
WVDC,CHIP TYPE,X7R TEMP CHAR,WRPRND TERM,SURF
MT,EIA SZ 1206
C32
1
52151
913-7143-650 CAPACITOR,FIXED,CERAMIC:0.01 UF,+-10%,50
WVDC,CHIP TYPE,X7R TEMP CHAR,WRPRND TERM,SURF
MT,EIA SZ 1206
C33
1
52151
913-7143-650 CAPACITOR,FIXED,CERAMIC:0.01 UF,+-10%,50
WVDC,CHIP TYPE,X7R TEMP CHAR,WRPRND TERM,SURF
MT,EIA SZ 1206
C34
0
52151
184-9616-160 CAPACITOR,FIXED,TANTALUM 220UF,+/-10%,6V,CHIP
TYPE,SMT,LOW ESR
D1
1
52151
353-5354-010 SEMICONDUCTOR DEVICE,DIODE:SILICON,HOT
CARRIER,30V PRV,SCHOTTKY BARRIERTYPE,SURFACE
MT,3 PIN SOT PKG
DS1
1
52151
262-5037-060 LIGHT,INDICATOR:GREEN LED,30MA,75MW,2.1 VOLTS
DS2
1
52151
262-5037-060 LIGHT,INDICATOR:GREEN LED,30MA,75MW,2.1 VOLTS
J1
1
52151
372-9604-250 CONNECTOR;PIN HEADER,3 PIN,ELECTRICAL,PC MOUNT
SNGL ROW,0.100"CENTERS,0.025"SQ PIN,GOLD FINISH
J2
1
52151
372-9604-250 CONNECTOR;PIN HEADER,3 PIN,ELECTRICAL,PC MOUNT
SNGL ROW,0.100"CENTERS,0.025"SQ PIN,GOLD FINISH
J3
0
52151
NOT-USED NOT-USED
J4
0
52151
NOT-USED NOT-USED
J5
1
52151
372-9677-030 CONN,RECT,SMA PCB MOUNT JACK
J6
1
52151
372-9677-030 CONN,RECT,SMA PCB MOUNT JACK
J7
1
52151
372-9641-020 CONNECTOR,RECEPTACLE,ELECTRICAL:3 CIRCUITS2.5
AMPERES
J8
0
52151
NOT-USED NOT-USED
J9
0
52151
NOT-USED NOT-USED
J10
1
52151
372-9641-020 CONNECTOR,RECEPTACLE,ELECTRICAL:3 CIRCUITS2.5
AMPERES
J11
0
52151
NOT-USED NOT-USED
J12
0
52151
NOT-USED NOT-USED
J13
0
52151
NOT-USED NOT-USED
J14
1
52151
372-9677-030 CONN,RECT,SMA PCB MOUNT JACK
J15
0
52151
NOT-USED NOT-USED
J16
1
52151
372-9677-030 CONN,RECT,SMA PCB MOUNT JACK
J17
1
52151
372-9677-030 CONN,RECT,SMA PCB MOUNT JACK
J18
1
52151
363-2004-020 CONNECTOR,BODY,PLUG,ELECTRICAL:4 PIN DISK DRIVE
POWER,PWB MOUNT,STRAIGHT,NYLON
J19
1
52151
372-9677-030 CONN,RECT,SMA PCB MOUNT JACK
J20
1
52151
372-9677-030 CONN,RECT,SMA PCB MOUNT JACK
J21
0
52151
NOT-USED NOT-USED
J22
1
52151
372-9677-030 CONN,RECT,SMA PCB MOUNT JACK
K1
0
52151
NOT-USED NOT-USED
L1
1
52151
288-4062-010 BEAD,FERRITE,200MA,0.5 OHM@DC 600 OHM @ 100
MHZ,0603,SMT PKG
L2
0
52151
NOT-USED NOT-USED
P1
1
52151
372-9604-150 CONNECTOR,JUMPER:2-CIRCUIT
72
PL202223-2
CCA, GPS CLOCK DISTRIBUTION
Rev. A
Ref. Des. Qty
Cage
Part No.
Description
P2
1
52151
372-9604-150 CONNECTOR,JUMPER:2-CIRCUIT
P3
0
52151
NOT-USED NOT-USED
P4
0
52151
NOT-USED NOT-USED
Q1
1
52151
352-5104-030 TRANSISTOR:SILICON,PNP,200MADC,40V C-E,350MW,
250MHZ PLASTIC SOT-23 SURFACE MT PKG
Q2
1
52151
352-5104-030 TRANSISTOR:SILICON,PNP,200MADC,40V C-E,350MW,
250MHZ PLASTIC SOT-23 SURFACE MT PKG
Q3
1
52151
352-5204-010 TRANSISTOR:TMOS,FET,DRAIN-SOURCE=60VDC,
280MADC SOT-23 SURFACE MT PKG
R1
0
52151
NOT-USED NOT-USED
R2
1
52151
724-5057-000 RESISTOR,FIXED,FILM:0 OHM,+-1%,1/4 WATT @70 DEG C
1/32W @ 125C,THICK FILM CHIP TYPE,TC=100PPM/DEG C
R3
1
52151
724-5057-000 RESISTOR,FIXED,FILM:0 OHM,+-1%,1/4 WATT @70 DEG C
1/32W @ 125C,THICK FILM CHIP TYPE,TC=100PPM/DEG C
R4
1
52151
724-5057-050 RESISTOR,FIXED,FILM:110 OHM,+-1%,1/4 WATT @ 70C
1/32W @ 125C,THICK FILM CHIP TYPE,TC=100PPM/DEG C
R5
0
52151
NOT-USED NOT-USED
R6
1
52151
724-5057-155 RESISTOR,FIXED,FILM:1000 OHM,+/-1%,1/4 WATT @70C
THICK FILM CHIP TYPE,TC=100 PPM
R7
1
52151
724-5057-155 RESISTOR,FIXED,FILM:1000 OHM,+/-1%,1/4 WATT @70C
THICK FILM CHIP TYPE,TC=100 PPM
R8
1
52151
724-5057-155 RESISTOR,FIXED,FILM:1000 OHM,+/-1%,1/4 WATT @70C
THICK FILM CHIP TYPE,TC=100 PPM
R9
1
52151
724-5057-155 RESISTOR,FIXED,FILM:1000 OHM,+/-1%,1/4 WATT @70C
THICK FILM CHIP TYPE,TC=100 PPM
R10
1
52151
724-5057-365 RESISTOR,FIXED,FILM:47.5K OHM,+/-1%,1/4 WATT @70C
THICK FILM CHIP TYPE,TC=100 PPM
R11
1
52151
724-5057-050 RESISTOR,FIXED,FILM:110 OHM,+-1%,1/4 WATT @ 70C
1/32W @ 125C,THICK FILM CHIP TYPE,TC=100PPM/DEG C
R12
0
52151
NOT-USED NOT-USED
R13
0
52151
NOT-USED NOT-USED
R14
1
52151
724-5057-680 RESISTOR,FIXED,FILM:40.2 OHM,+-1%,1/4 WATT @ 70 C
1/32W @ 125C,THICK FILM CHIP TYPE,TC=100PPM/DEG C
R15
1
52151
724-5077-328 RESISTOR,FIXED,FILM:499 OHM,+/-0.1%,0.25WATT@70C
THICK FILM CHIP TYPE,TC=25PPM
R16
1
52151
724-5077-290 RESISTOR,FIXED,FILM:316 OHM,+/-0.1%,.25W @70C THICK
FILM CHIP TYPE,TC=25PPM
R17
1
52151
724-5057-680 RESISTOR,FIXED,FILM:40.2 OHM,+-1%,1/4 WATT @ 70 C
1/32W @ 125C,THICK FILM CHIP TYPE,TC=100PPM/DEG C
R18
1
52151
724-5057-002 RESISTOR,FIXED,FILM:12.1 OHM,+/-1%,1/4 WATT @70C
DEG C
R19
1
52151
724-5030-120 RESISTOR,FIXED,1/8W,5%, 1.6KOHM,SMT 0805 PKG
R20
1
52151
724-5057-365 RESISTOR,FIXED,FILM:47.5K OHM,+/-1%,1/4 WATT @70C
THICK FILM CHIP TYPE,TC=100 PPM
R21
0
52151
NOT-USED NOT-USED
R22
0
52151
NOT-USED NOT-USED
R23
1
52151
724-5057-155 RESISTOR,FIXED,FILM:1000 OHM,+/-1%,1/4 WATT @70C
THICK FILM CHIP TYPE,TC=100 PPM
R24
1
52151
724-5057-286 RESISTOR,FIXED,FILM:12.4K OHM,+/-1%,1/4 WATT @70C
THICK FILM CHIP TYPE,TC=100 PPM
R25
1
52151
724-5057-365 RESISTOR,FIXED,FILM:47.5K OHM,+/-1%,1/4 WATT @70C
THICK FILM CHIP TYPE,TC=100 PPM
73
PL202223-2
CCA, GPS CLOCK DISTRIBUTION
Rev. A
Ref. Des. Qty
Cage
Part No.
Description
R26
0
52151
NOT-USED NOT-USED
R27
1
52151
724-5057-275 RESISTOR,FIXED,FILM:10K OHM,+/-1%,1/4 WATT @70C
THICK FILM CHIP TYPE,TC=100 PPM
R28
1
52151
724-5057-565 RESISTOR,FIXED,FILM:49.9 OHM,+/-1%,1/4 WATT @70C
THICK FILM CHIP TYPE,TC=100 PPM
R29
1
52151
724-5057-010 RESISTOR,FIXED,FILM:51.1 OHM,+-1%,1/4 WATT @ 70C
1/32W @ 125C,THICK FILM CHIP TYPE,TC=100PPM/DEG C
R30
1
52151
724-5057-010 RESISTOR,FIXED,FILM:51.1 OHM,+-1%,1/4 WATT @ 70C
1/32W @ 125C,THICK FILM CHIP TYPE,TC=100PPM/DEG C
R31
1
52151
724-5057-010 RESISTOR,FIXED,FILM:51.1 OHM,+-1%,1/4 WATT @ 70C
1/32W @ 125C,THICK FILM CHIP TYPE,TC=100PPM/DEG C
R32
1
52151
724-5057-010 RESISTOR,FIXED,FILM:51.1 OHM,+-1%,1/4 WATT @ 70C
1/32W @ 125C,THICK FILM CHIP TYPE,TC=100PPM/DEG C
R33
0
52151
NOT-USED NOT-USED
R34
1
52151
724-5057-175 RESISTOR,FIXED,FILM:1500 OHM,+-1%,1/4 WATT @ 70C
1/32W @ 125C,THICK FILM CHIP TYPE,TC=100PPM/DEG C
R35
1
52151
724-5057-175 RESISTOR,FIXED,FILM:1500 OHM,+-1%,1/4 WATT @ 70C
1/32W @ 125C,THICK FILM CHIP TYPE,TC=100PPM/DEG C
R36
1
52151
724-5057-175 RESISTOR,FIXED,FILM:1500 OHM,+-1%,1/4 WATT @ 70C
1/32W @ 125C,THICK FILM CHIP TYPE,TC=100PPM/DEG C
R37
1
52151
724-5057-175 RESISTOR,FIXED,FILM:1500 OHM,+-1%,1/4 WATT @ 70C
1/32W @ 125C,THICK FILM CHIP TYPE,TC=100PPM/DEG C
R38
1
52151
724-5057-540 RESISTOR,FIXED,FILM:1M OHM,+-1%,1/4 WATT @ 70C
1/32W @ 125C,THICK FILM CHIP TYPE,TC=100PPM/DEG C
T1
1
52151
667-4020-010 TRANSFORMER,DIGITAL/AUDIO INTERFACE,225MH,1:1
TURNS RATIO, 8-PIN SMT
T2
1
52151
667-4020-010 TRANSFORMER,DIGITAL/AUDIO INTERFACE,225MH,1:1
TURNS RATIO,8-PIN SMT
T3
0
52151
NOT-USED NOT-USED
T4
0
52151
NOT-USED NOT-USED
TP1
1
52151
372-9828-010 CONNECTOR,ELECTRICAL,TEST POINT:RED,PWB LOOP
TP2
1
52151
372-9828-010 CONNECTOR,ELECTRICAL,TEST POINT:RED,PWB LOOP
U1
1
52151
351-5050-030 MICROCIRCUIT,DIGITAL:CLOCK DRIVER,MINIMUM
SKEW 1 INPUT TO 4 OUTPUTS,300PS SKEW,3V VCC,8-PIN
SOIC
U2
1
52151 * 202229-1
MICROCIRCUIT,DIGITAL: PROGRAMMED
U3
1
52151
351-5487-010 MICROCIRCUIT,DIGITAL:PROCESSORSUPERVISORY
CIRCUIT 5-PIN,SOP PKG,SURFACE MT
U4
1
52151
351-5079-060 MICROCIRCUIT,DIGITAL,2-BIT DUAL-SUPPLY BUS
TRANSCEIVER,8-PIN SSOP SMT,1.65V TO 5.5V SUPPLY
RANGE
U5
1
52151
351-5398-100 MICROCIRCUIT,DIGITAL,CMOS DIGITAL AUDIO
SAMPLE RATE CONVERTER SMT,20-PIN,PLASTIC SOIC
PKG
U6
0
52151
NOT-USED NOT-USED
U7
1
52151 * 202229-2
MICROCIRCUIT,DIGITAL: PROGRAMMED
U8
1
52151
351-5079-060 MICROCIRCUIT,DIGITAL,2-BIT DUAL-SUPPLY BUS
TRANSCEIVER,8-PIN SSOP SMT,1.65V TO 5.5V SUPPLY
RANGE
U9
1
52151
351-5487-045 MICROCIRCUIT,PROCESSOR SUPERVISORY,ACTIVE
LOW RESET,3.3V OPN 200MS TIME DELAY
74
PL202223-2
CCA, GPS CLOCK DISTRIBUTION
Rev. A
Ref. Des. Qty
Cage
Part No.
Description
U10
1
52151
351-1122-020 MICROCIRCUIT,LINEAR:QUAD COMPARATOR,LOW
OFFSET LOW POWER,SURFACE MT,14 PIN PLASTIC SO14
DIP PKG
U11
1
52151
351-5248-040 MICROCIRCUIT,DIGITAL,DUAL 4-BIT BINARY
COUNTER,SMT,SO14 PKG
U12
1
52151
351-5492-020 MICROCIRCUIT,AMPLIFIER,FAST VOLTAGE-OUT DC
440MHZ,95DB LOGARITHMIC 8-PIN MSOP PKG
U13
1
52151
351-5050-030 MICROCIRCUIT,DIGITAL:CLOCK DRIVER,MINIMUM
SKEW 1 INPUT TO 4 OUTPUTS,300PS SKEW,3V VCC,8-PIN
SOIC
VR1
1
52151
351-5227-030 MICROCIRCUIT, LINEAR:VOLTAGE
REGULATOR,+3.3V,1.5A LOW DROPOUT,LOW NOISE,5PIN
Z1
1
52151
379-5042-010 DIVIDER,POWER,RADIO FREQUENCY:2 WAY 5-500MHZ,50
OHM,1 WATT,0 DEG,SURFACE MOUNT
Z2
1
52151
379-5042-010 DIVIDER,POWER,RADIO FREQUENCY:2 WAY 5-500MHZ,50
OHM,1 WATT,0 DEG,SURFACE MOUNT
PL202227-1
CABLE ASSY,HD AES INPUT Rev. –
Ref. Des. Qty
Cage
Part No.
Description
2
2
52151 424-3040-020
CABLE,SPECIAL PURPOSE,ELECTRICAL:DIGITAL AUDIO
CABLE,2 CONDUCTOR,24AWG,COPPER,PVC JACKET
3
3
52151 372-9783-060
CONTACT,ELECTRICAL:FEMALE TERMINAL,CRIMP
TYPE22-30AWG,BRASS,GOLD-TIN
P1
1
52151 371-7242-030
CONNECTOR,CABLE,XLR F,3 PIN FLANGED PANEL
MOUNT
P2
1
52151 372-9723-140
CONNECTOR HOUSING,RECEPTACLE,ELECTRICAL:3
CAVITY1 ROW,W/LATCH,FEMALE
PL202243-1
CABLE ASSEMBLY
Rev. –
Ref. Des. Qty
Cage
Part No.
Description
2
3
52151 372-9783-060
CONTACT,ELECTRICAL:FEMALE TERMINAL,CRIMP
TYPE22-30AWG,BRASS,GOLD-TIN
3
3
52151 152-8034-010
SPLICE,CONDUCTOR:SHIELD TERMINATION,SOLDER
TYPE HT-SHRNK INSUL,0.030"/0.060" CABLE JACKET OD
4
1
52151 424-3040-020
CABLE,SPECIAL PURPOSE,ELECTRICAL:DIGITAL AUDIO
CABLE,2 CONDUCTOR,24AWG,COPPER,PVC JACKET
P1
0
52151 REFERENCE
Reference
P2
0
52151 REFERENCE
Reference
P3
1
52151 372-9723-140
CONNECTOR HOUSING,RECEPTACLE,ELECTRICAL:3
CAVITY 1 ROW,W/LATCH,FEMALE
75
10 Drawings
An index of assembly and schematic diagrams is provided in Table 10-1. The drawings are arranged in
ascending numerical order at the back of the manual.
Table 10-1 Index of Drawings in Numerical Order.
Drawing
Number
Rev
202200
202201
202206
202207
202208
202217
202223
202224
202227
202243
G
D
A
–
–
C
–
A
–
–
Reference
Designator
–
–
W22
W12
A1
A10
A8
A8
W26
W39
DrawingTitle
HD Exporter/Signal Generator
HD Exporter/Signal Generator Schematic
Cable Assy, GPS Pwr (W22)
Cable Assy, GPS Data (W12)
Motherboard Assembly
Rear Panel Assembly
CCA, GPS Clock Distribution
GPS Clock Distribution Schematic
Cable Assy
Cable Assy, HD AES
76